Introduction
What else can we say about the latest vFlyteAir Cirrus SR20 X-Plane 10 model?
Quite simply – extraordinary 3D aircraft modeling. It’s really 3D modeling at a high level. And not only does the the 3D modeling looks gorgeous, also the included liveries and then in particular the unbelievable eye for tiny details. As known from previous vFlyteAir models, decals are razor sharp and not only from a distance, but also when zoomed in. Although this Cirrus model doesn’t have a weathered look or that’s at least my first impression, they do offer some dirty grease or oil spots at certain places. Anyway, I’m looking forward with this Cirrus SR20 exploration.
Some Real Cirrus SR20 Background
Yes, I know …. perhaps you don’t like this section, but it’s worth to briefly highlight this remarkable aircraft from Cirrus Aircraft. Check out this …..
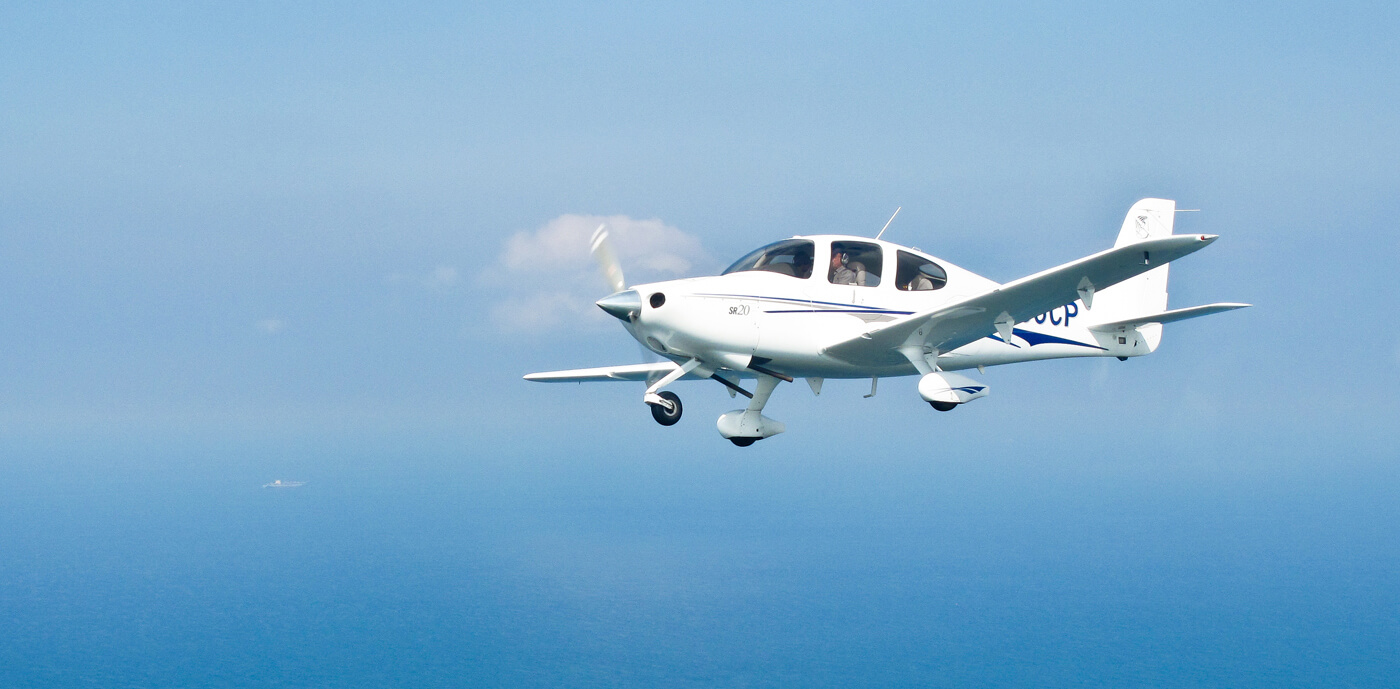
The SR20 was the first production general aviation aircraft equipped with a parachute to lower the airplane safely to the ground after a loss of control, structural failure or mid-air collision. It was also the first manufactured aircraft with all-composite construction, flat-panel avionics and side-yoke flight controls.
The SR20 was first flown on 21 March 1995 with FAA certification on 23 October 1998. At the time of the airplane’s release, the general aviation industry was struggling; the SR20 was the first of its kind to earn FAA Part 23 certification in several years. Over a thousand SR20s have been sold since deliveries began in 1999. As of June 2015, more than 6,000 Cirrus aircraft had been delivered, something that no other aviation company has done for decades.

Photo’s courtesy of Cirrus Aircraft.
One of the major selling points for the SR20 is its Cirrus Perspective avionics suite (by Garmin) with dual 10-inch (250 mm) or 12-inch (300 mm) screens: one primary flight display (PFD) and one multi-function display (MFD). This provides all standard communication, navigation (GPS and conventional VHF), and surveillance (Mode S transponder) functions. Other avionics features include in-flight weather information and TCAS-like traffic information.
SR20s made from 1999 to 2003 were equipped with traditional analog instruments and a 10″ MFD. In July 2003, Cirrus made PFDs standard on their SR-series, pioneering the use of glass cockpits in the light aircraft general aviation industry.
The SR20, like the faster SR22, is equipped with the Cirrus Airframe Parachute System, a large parachute that can be deployed in an emergency to lower the entire aircraft to the ground safely. As of 2015, the SR-series has deployed the system 53 times carrying 107 survivors (courtesy of WikipediA).
It’s only an extraction of what can be found at the dedicated WikipediA Cirrus SR20 web page, but it’s also worth, when you have the time and interest, to check out the Cirrus Aircraft website.
A typical Walk-Around Check
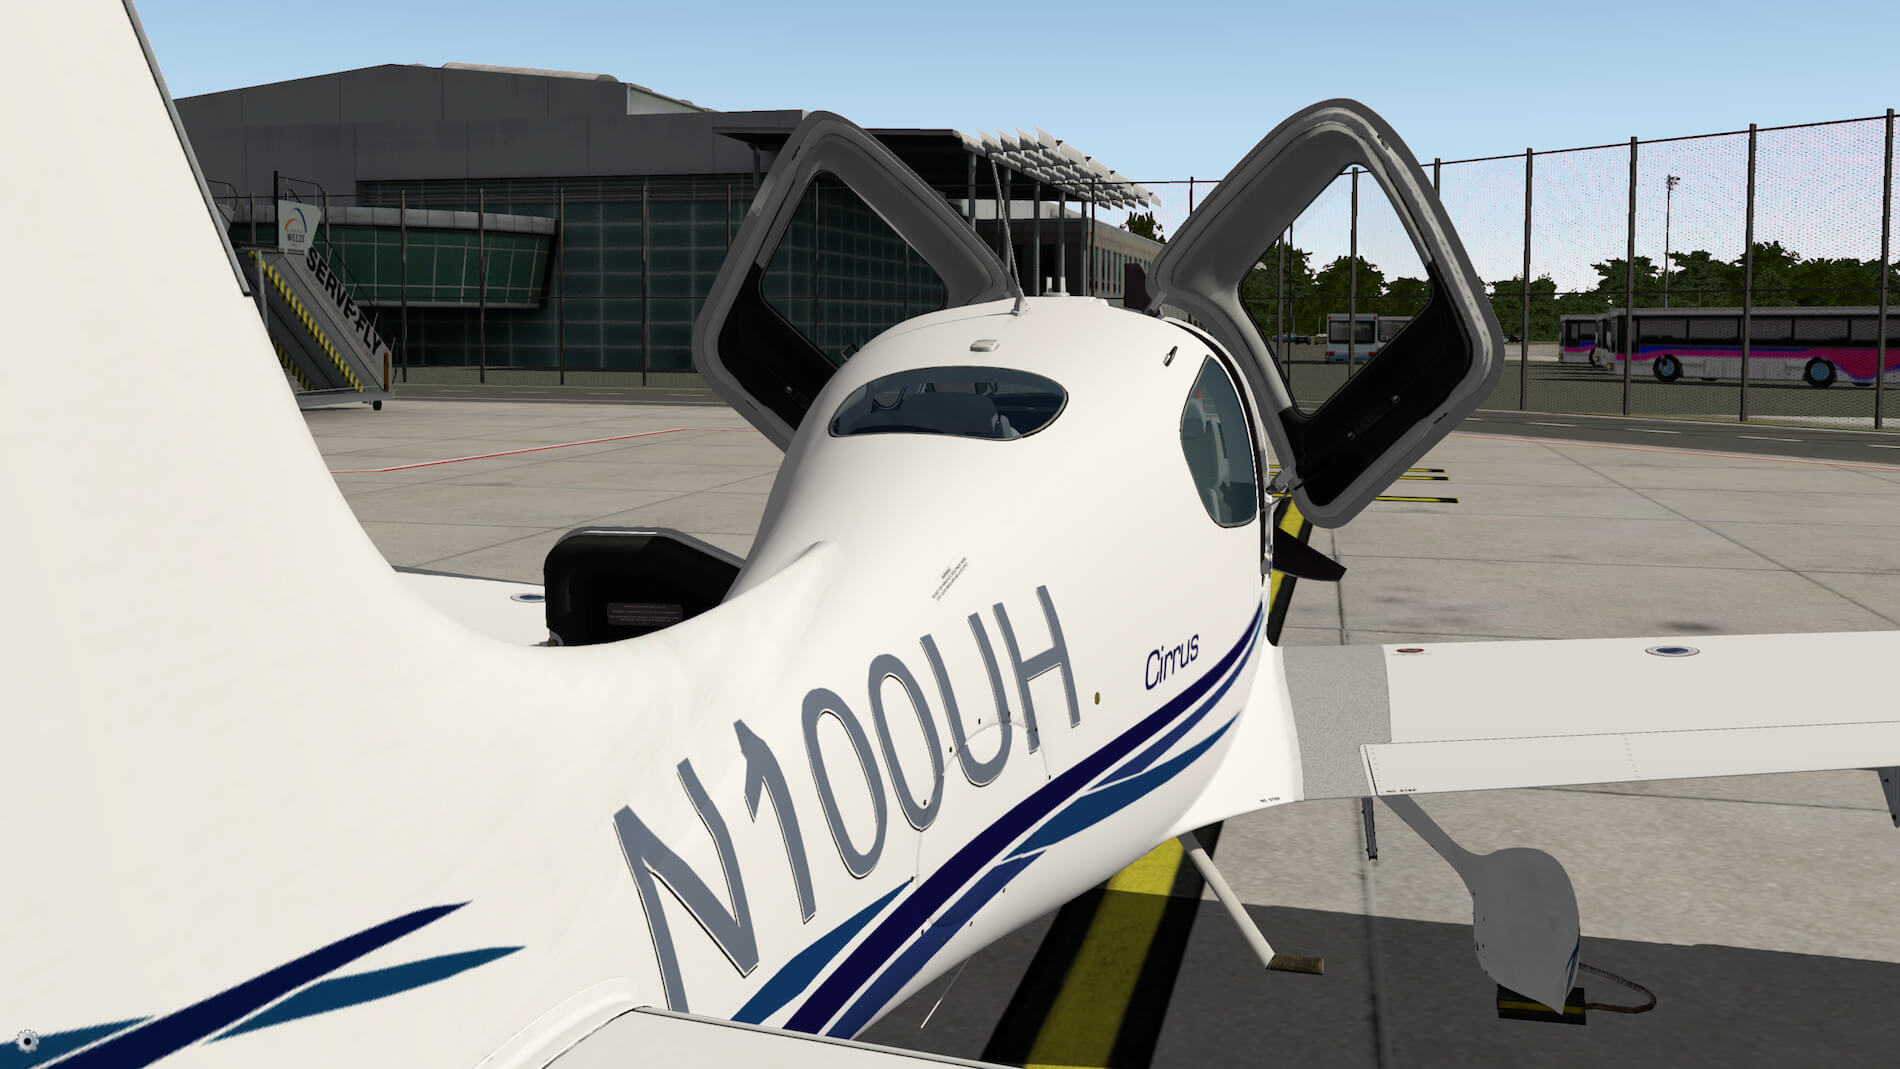
A typical … no, it won’t be a typical check since there’s so much to see at the outside. To get access to several areas, you can use the vFlyteAir icon – looks like a gear – on the left hand bottom side of the X-Plane screen. Click it and open/close the pilot-, passenger- and cargo doors. Once you’ve done this, it’s time to see “how it’s made”.
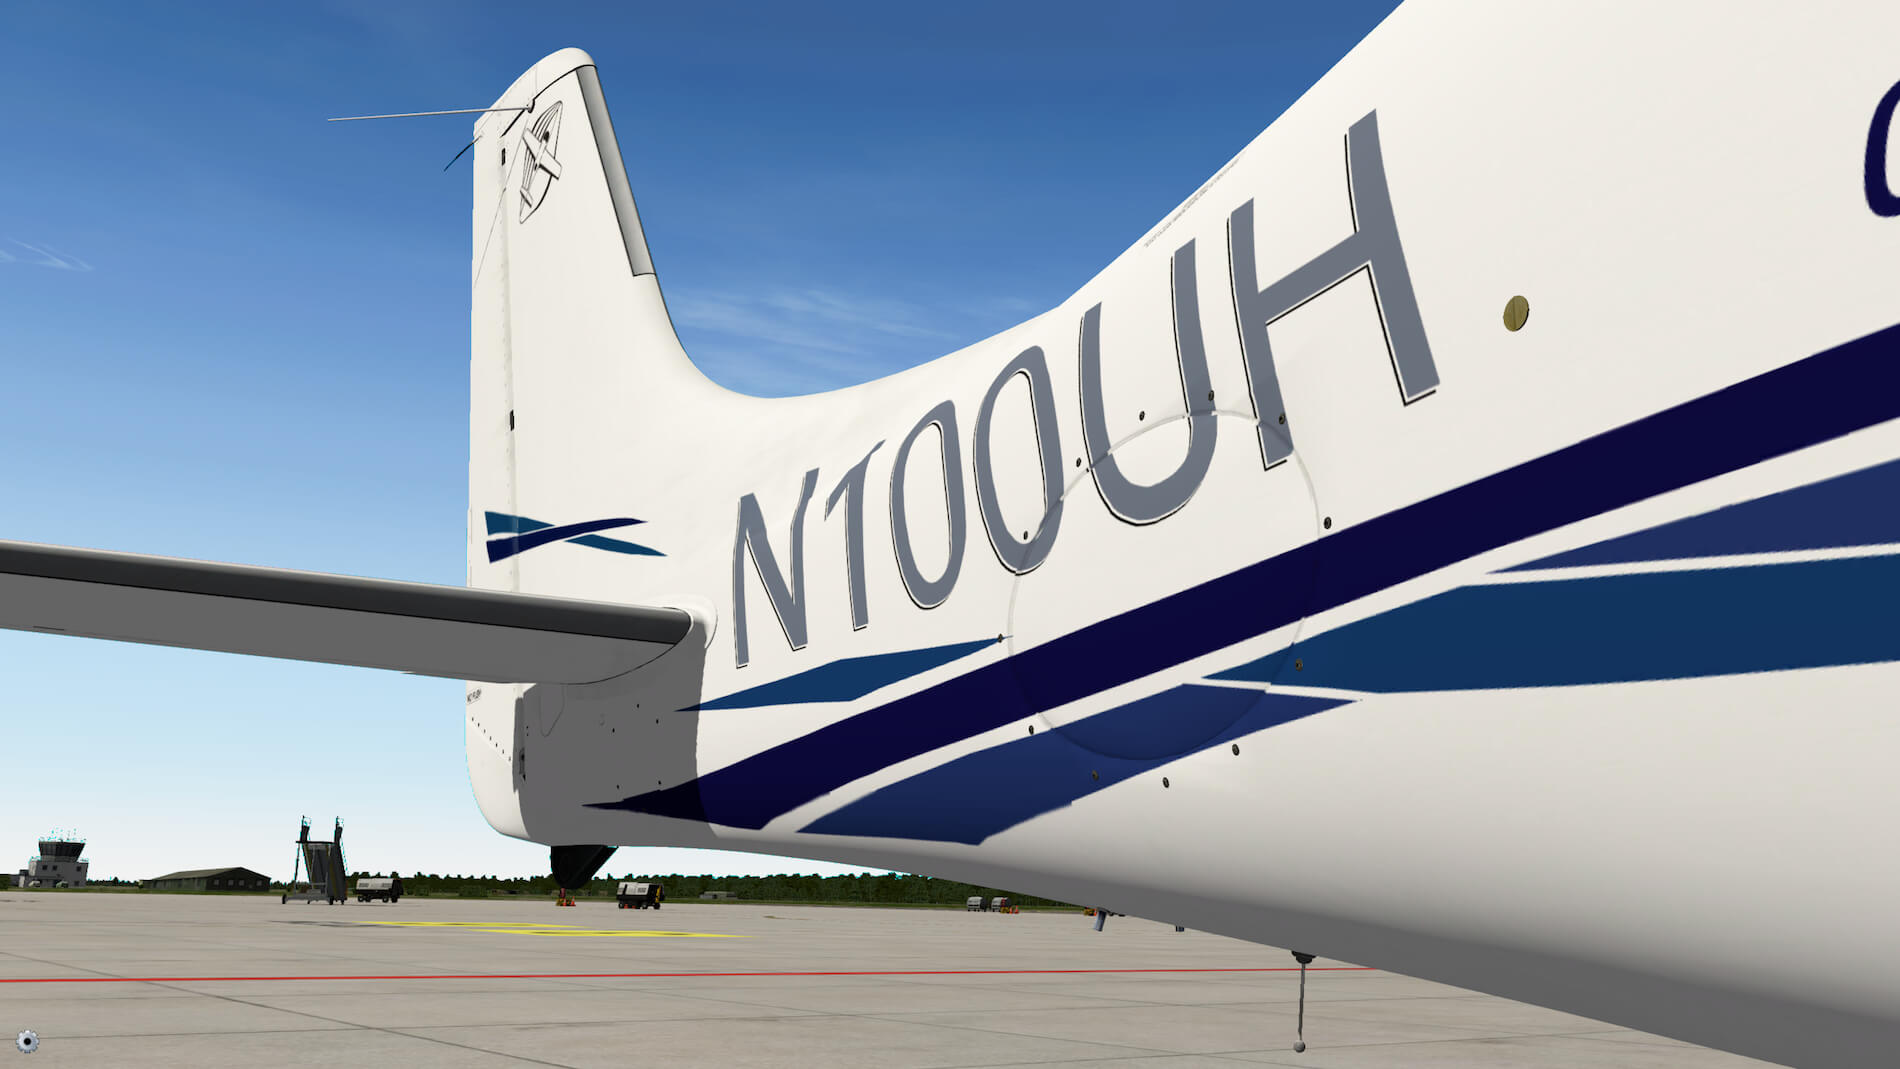
Wherever you start exploring the external modeling, you’ll be surprised with the extraordinary details that has bene modeled by vFlyteAir. Along with many other X-Plane GA developers, vFlyteAir has reached also a high level of quality GA aircraft. When it comes to 3D aircraft modeling including the finishing touch, I think it’s worth to say that they offer top notch aircraft, in particular the one in this impression, the Cirrus SR20. That together with a bunch – 13 in total – of liveries and I’m ready to explore. By the way, I’m pleased to say that all the included liveries do belong to a Cirrus SR20 aircraft thus non of them are fake paintings. Some simmers will say … “why the heck does it make a difference” while others will be happy that real registrations are used. Just that you know!
vFlyteAir Gear
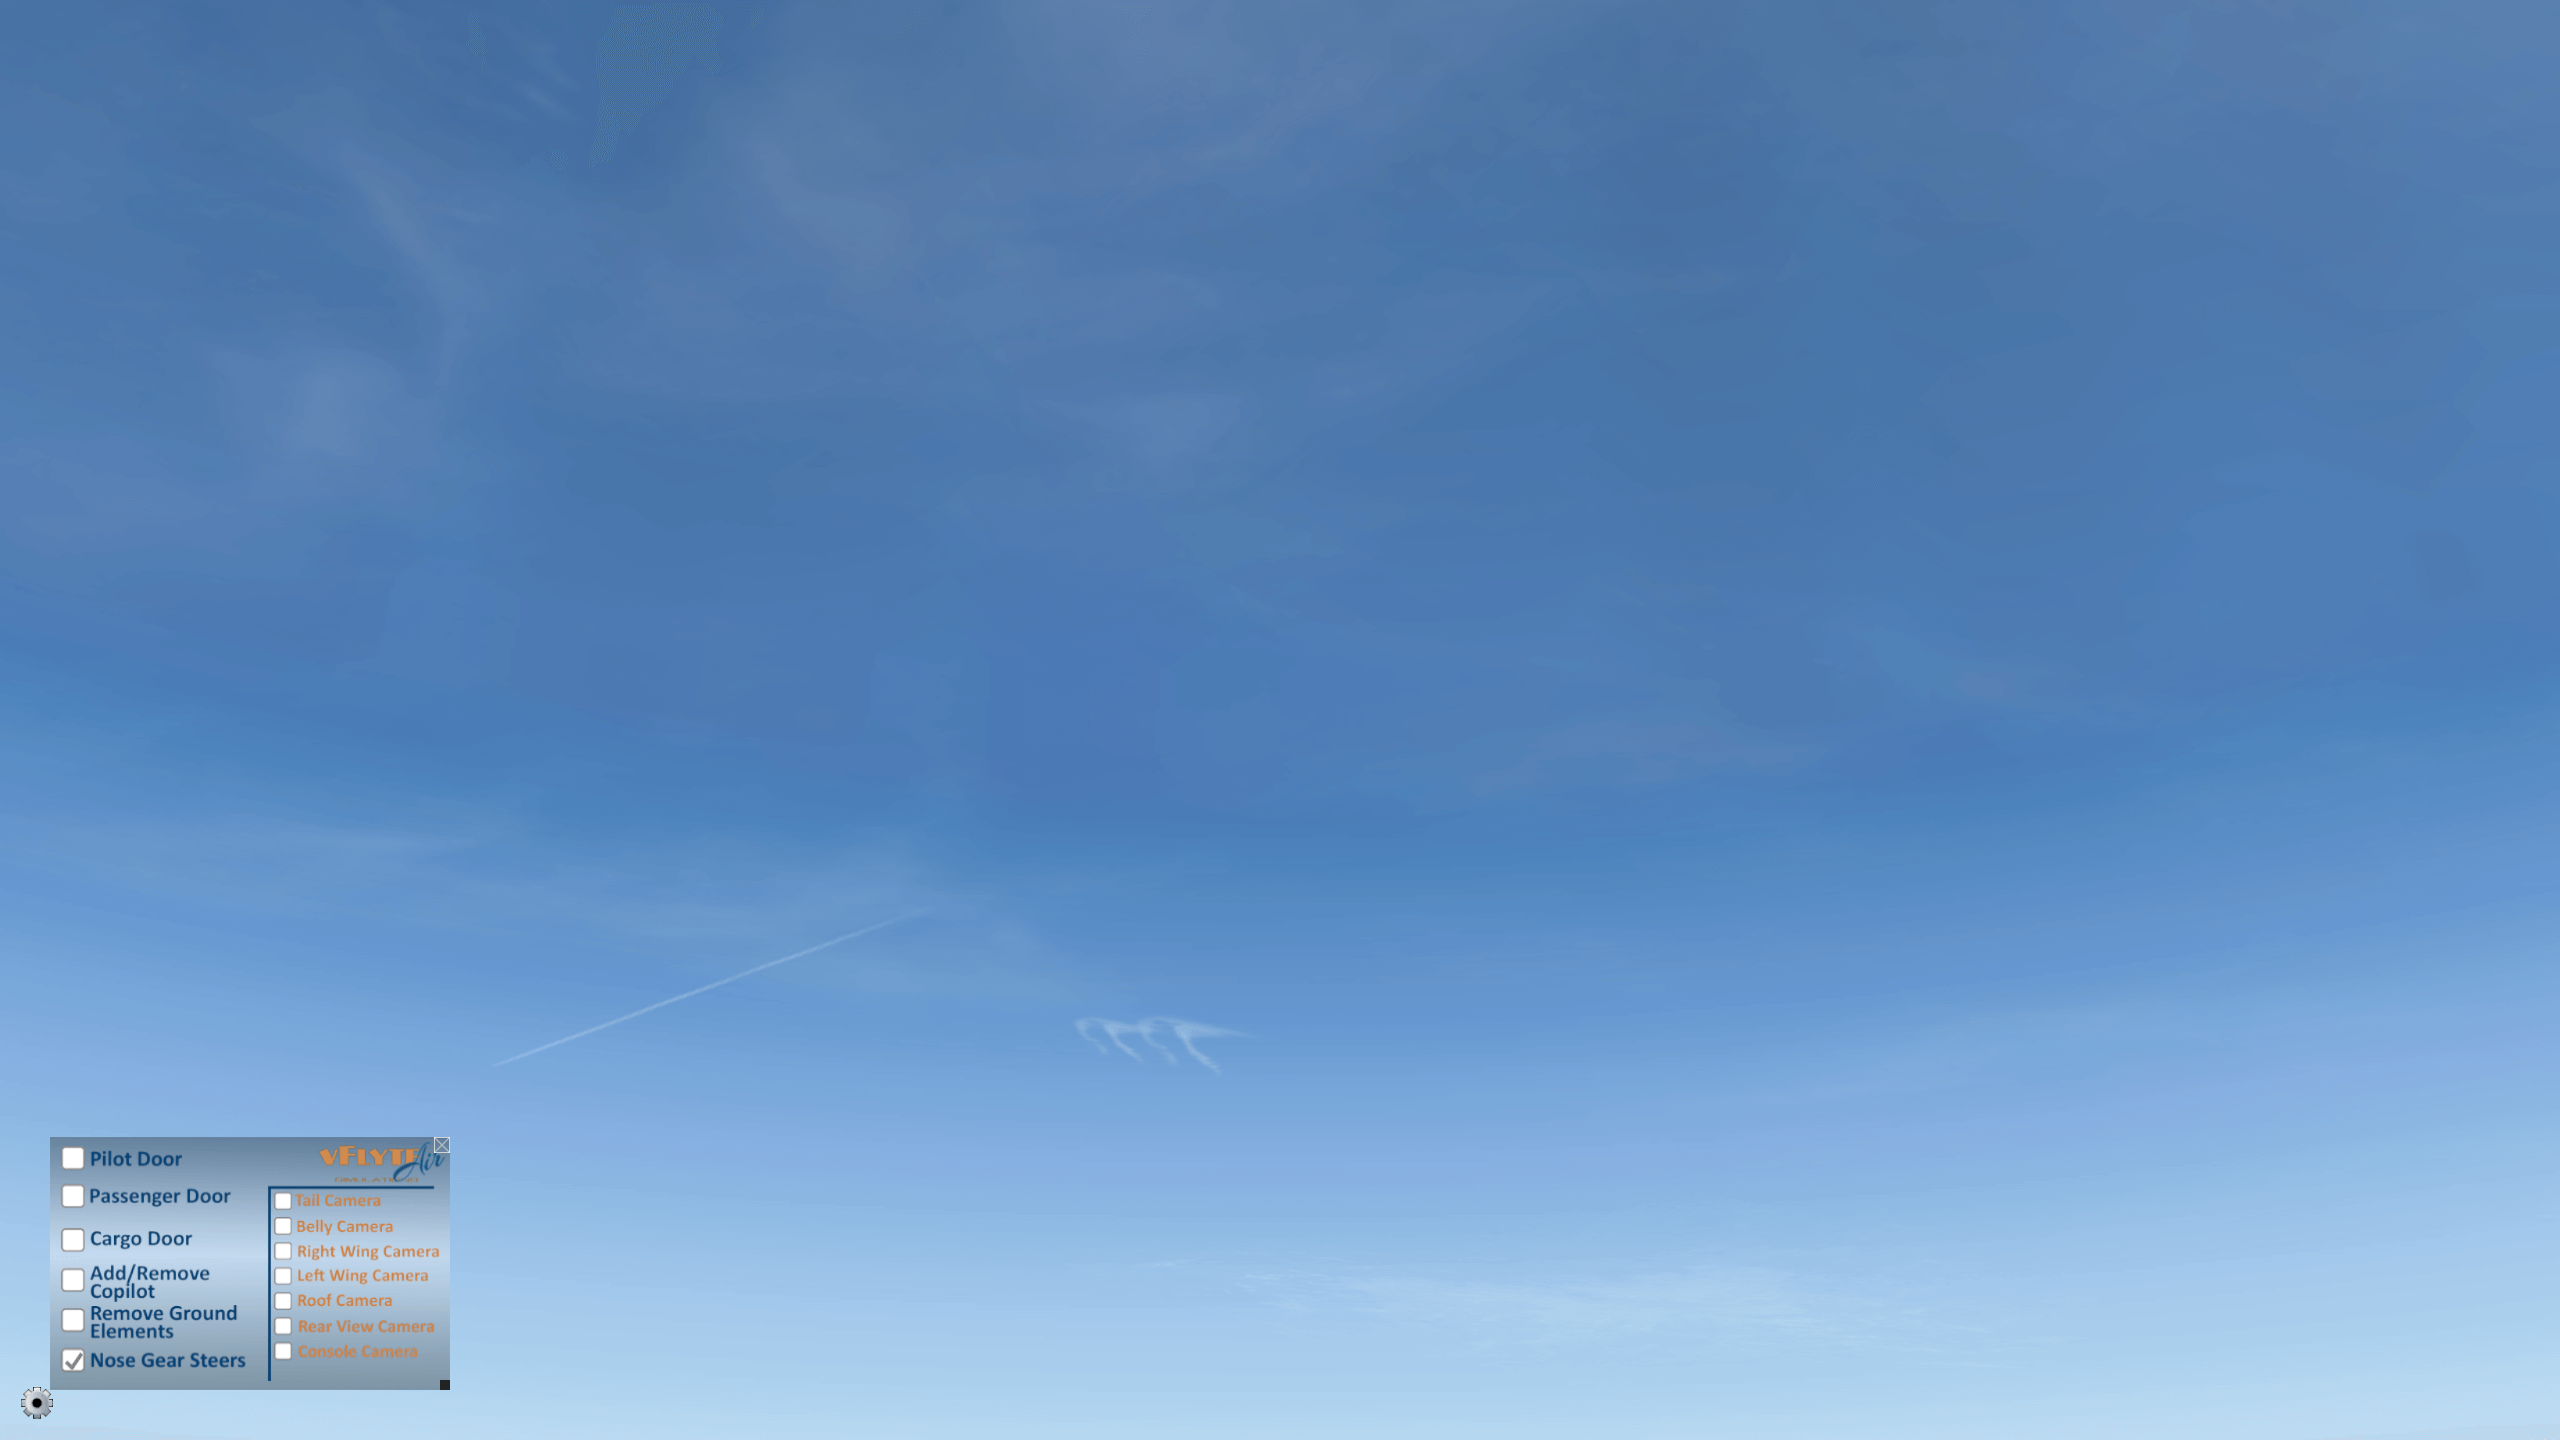
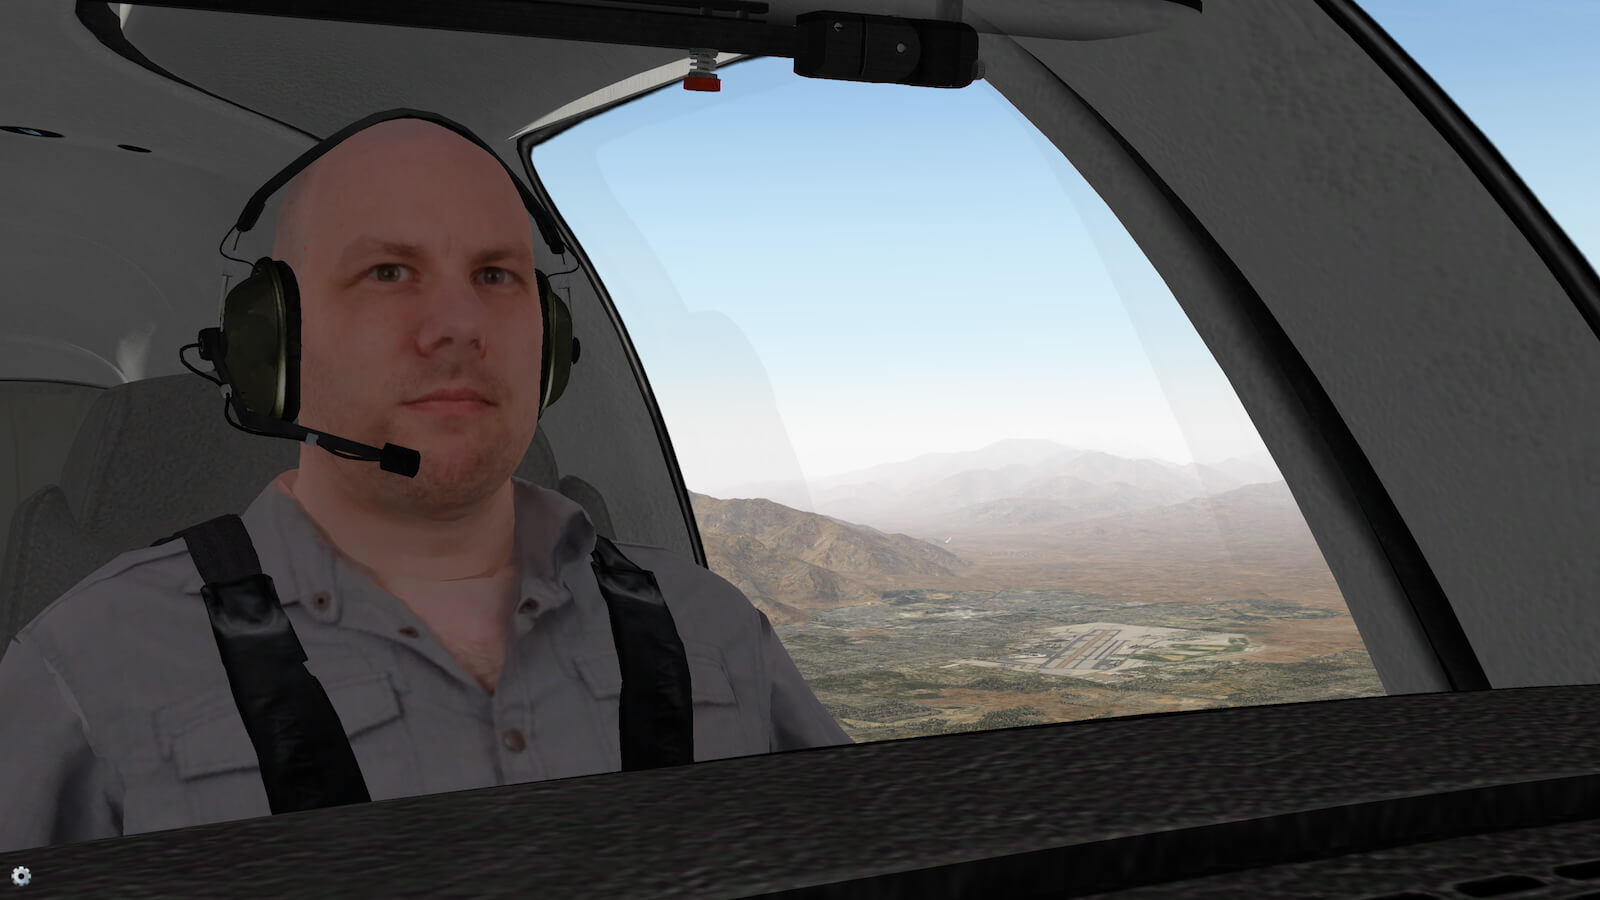
What’s that … a vFlyteAir gear? Yes, your right. At the left hand side near the bottom you’ll find a small gear icon which represent additional features. Click the gear icon and a popup window appears. It’s divided into two section; blue text is related to aircraft features like opening/closing doors, removing ground elements, adding a co-pilot and locking the nose wheel steering. The second section with the orange text offers preset internal and external views.


Visual External Check
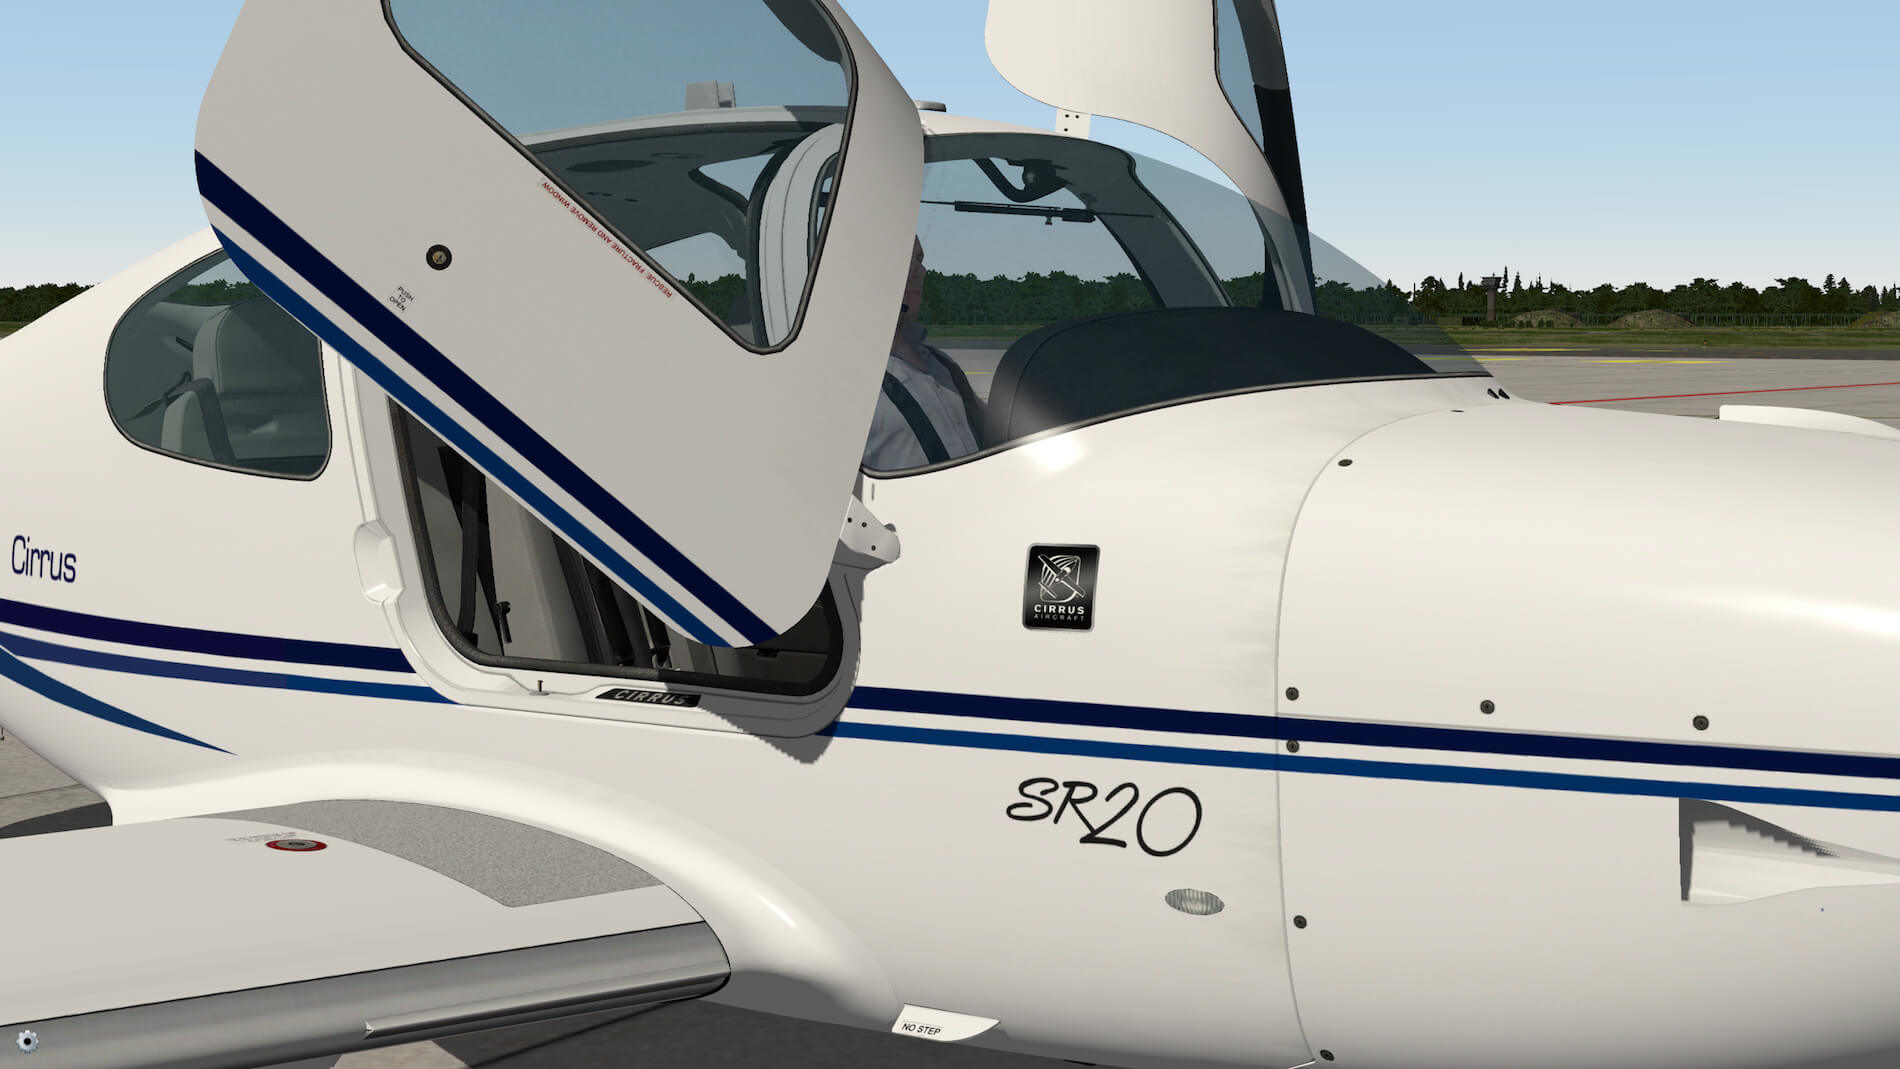
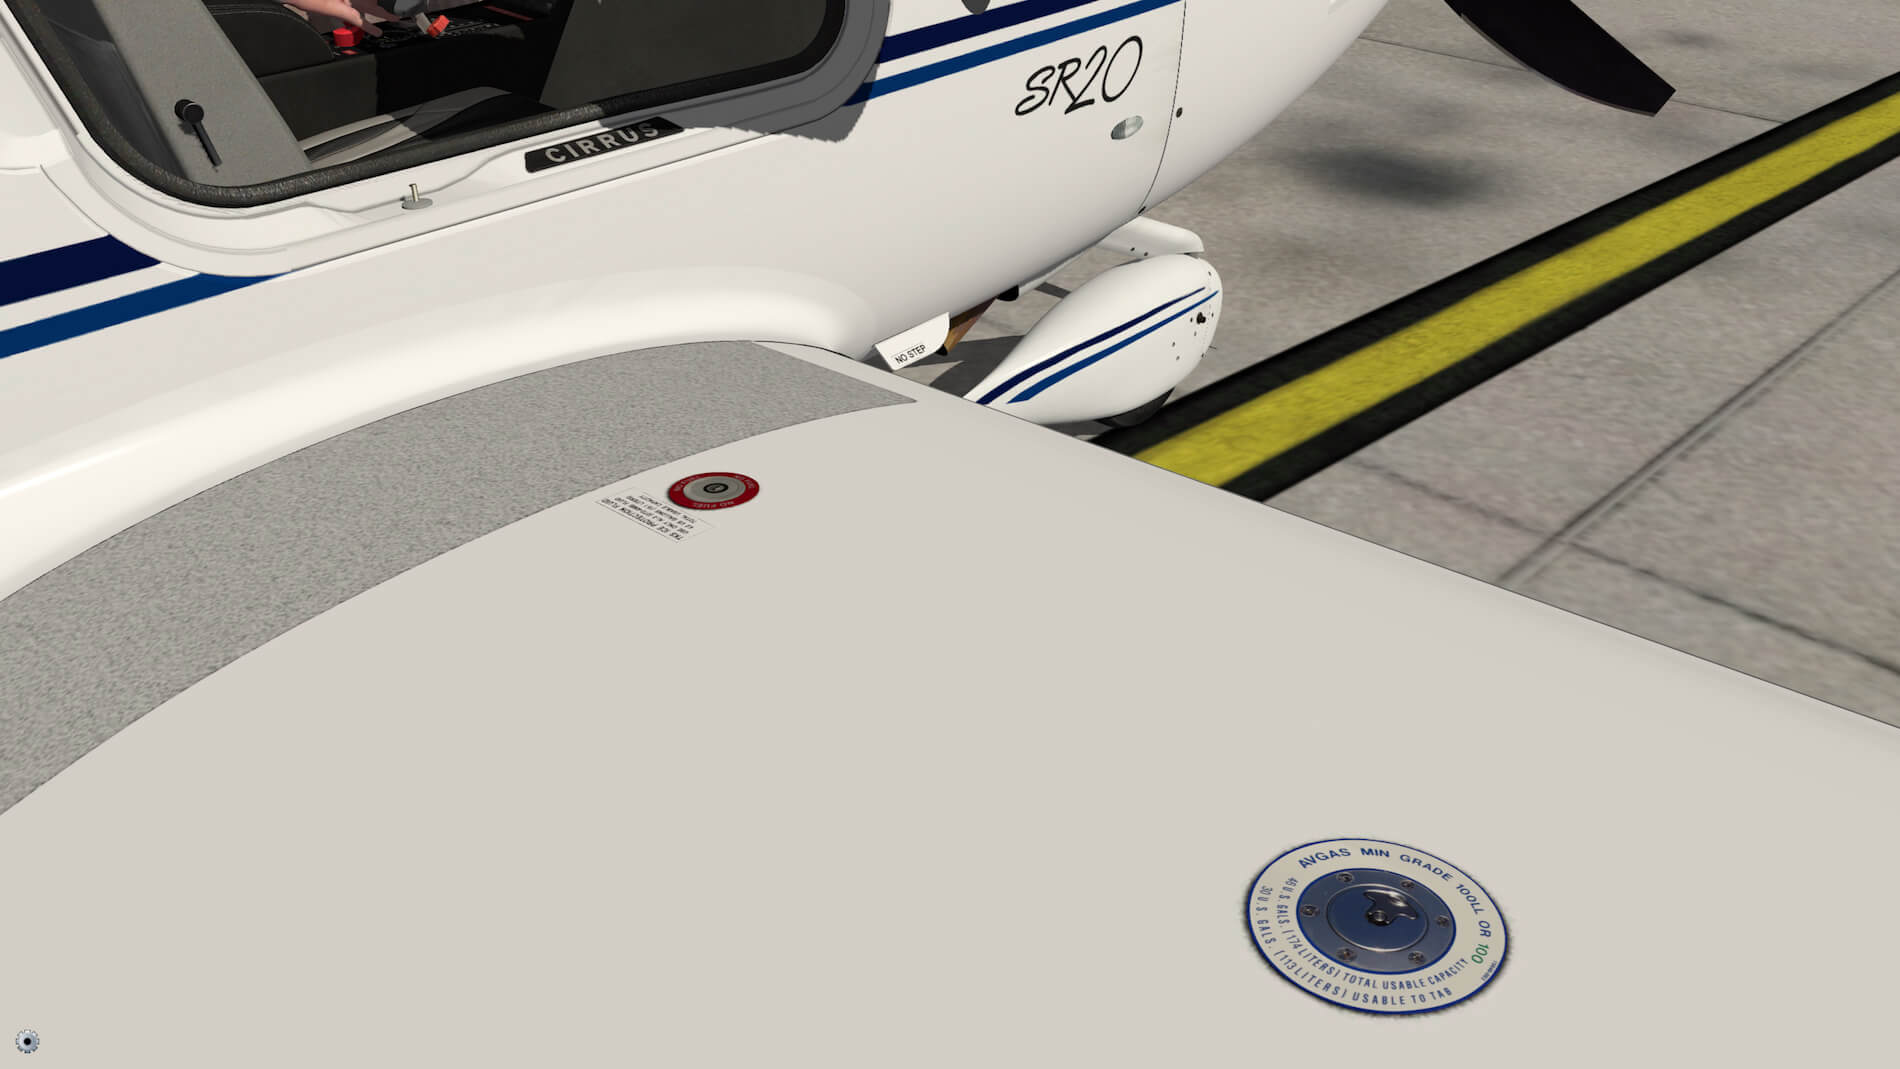
With all doors open, it’s time to see what you get, and believe me, it’s a gorgeous model. The pilot and passenger door don’t open in the normal way. It has something of what you find in extremely expensive sports cars. Although not every panel is simulated for opening/closing, the aircraft comes 3 movable doors. Further on, NML (Normal Mapping) files are included which are responsible for the necessary 3D effect. Although the spinner cone isn’t shiny, the Hartzell propeller blade decals, engine cowling, the EXTERNAL POWER 28V panel with decal and quick fasteners, engine front cylinders, the razor sharp spinner screws, and so on are. It’s all gorgeous and all modeled with great precision. It’s really a pleasure to see this kind of high quality modeling! Normally I won’t bother with this, but perhaps an idea for vFlyteAir to be included with the next update, please add a 28V GPU (Ground power Unit) to the simulation. Since the aircraft is equipped with such a possibility, it could increase the realism even more.
The nose landing gear or more correctly, the fixed forward facing strut with the completely covered nose wheel fairing may look weird, no, it’s weird, but it’s modeled with many tiny details. Although different in look and feel, the main wheels are basically of the same idea and modeled with the same precision as the nose wheel assembly. By the way, I’m impressed about the many decals mounted at the fuselage, wing etc. They are razor sharp and therefore a pleasure to see that such sharp text on the aircraft is possible.
While looking to the right hand wing leading edge I spot the STALL warning indicator and see again something else which was also applicable for the propeller spinner …. the area around the STALL warning indicator should be in my humble opinion polished stainless steel however, it doesn’t offer that shiny look you would normally expect of polished stainless steel. Anyway, not a big issue, but worth to report this “thought” to vFlyteAir. Work in progress! By the way, the stainless steel spinner cone isn’t always shiny. Some of the included liveries have white spinner cones like the SR20s with aircraft registration F-HKCM, I-SRIT, D-EIMS and the house vFlyteAir painting.


Although the aircraft doesn’t offer much weathering, double checking this “thought” with real photos reveals that the real models are mostly privately owned. That said, they are kept as new, of course, as far as possible. Known from previous vFlyteAir models, are the skin mounted decals. They are always sharp, no, razor sharp and when zoom in you can always read what it is, where it is for or what kind of caution or warning it is.
While typing this sentence, I’m inspecting the rudder structure of one of the included liveries (N100UH), I see the many hinges and screws. Strange, but some screws are razor sharp while others which are along the leading edge of the rudder, are blurry. No idea why this is, so time to inform vFlyteAir about this and see if there’s a special reason for. But no worries. It still is and stays very nice and what I do is zooming in on every detail. Perhaps, when you already own the aircraft, you’ve never noticed this!
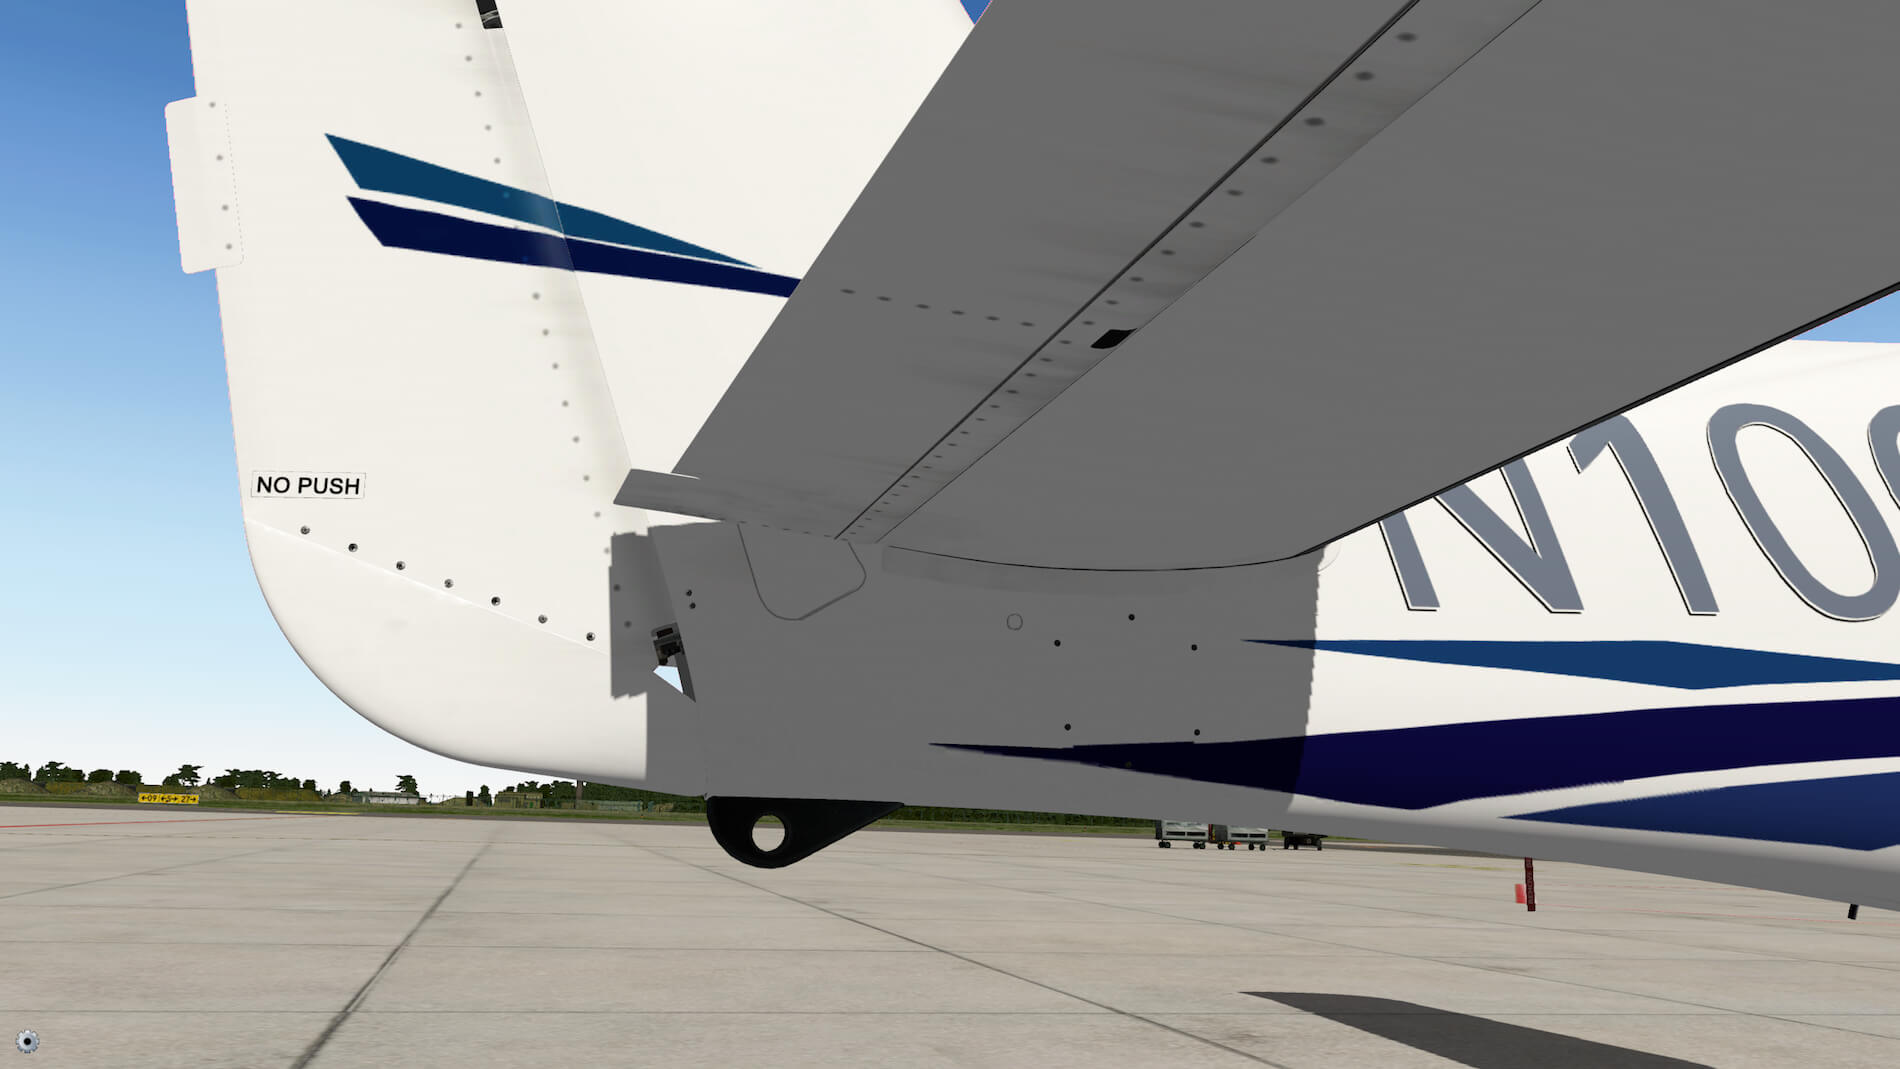


And, as with previous vFlyteAir models too; check when you have the time the stainless steel identification plate underneath the left hand horizontal stabilizer against the fuselage. Great to see so many tiny details!
Cockpit Check and …….
What to do?
The best way to understand the SR20 is to read the manuals, do the cockpit preparations and off you go, but I think there’s a little more between the look and feel of the 3D cockpit and flying around with it.
First of all; according to vFlyteAir “the modeled SR20 is equipped with avionics systems which resemble the look and feel of the real aircraft’s “Perspective” system. “Perspective” is based on the Garmin G1000. Although we don’t strive for a true simulation of the avionics, we took care for many details. Many features of the real Perspective G1000 system are modeled in the vFlyteAir version, but some are omitted or not implemented.”
Manuals
Although you would expect an aircraft where you jump in, switch on electrical power, start the engine and fly away, it’s perhaps an idea to check out the provided manuals. I could give you a link to the official Garmin G1000 manual, but as stated above, this Garmin instrument isn’t modeled as it is in real and on the other hand, the provided SR20 Avionics Acrobat file offers enough details of what is then modeled. I think this included manual is a better option to go for. The SR20 Manual covers basically the whole aircraft including the simulated aircraft systems, lighting, parachute system, liveries and performance charts. It’s not an in-depth manual of how to control and operate everything in the 3D cockpit. For that you need to read the avionics and tutorial manuals.
Those two Acrobat files cover everything that you need to fly the aircraft. How real it flies, no idea since I’ve never flown in a real Cirrus SR20 and besides that, suppose I have, flying on a computer is always difficult than in reality or a simulator with motion. Although I’m pleased with the included tutorial, page 4 explains what kind and type of flight plan you can expect while page 5 explains how to enter it, but the text doesn’t say anything if the flight plan formats a “txt” or “.fms” extension and if you can load prepared flight plans by yourself. But I’ll try to find that out and add that in this impression when needed of course.
Cockpit Preparations
Let’s make it myself easy and let’s go for the tutorial flight and thus the preparations that are needed to fly away. But, there’s a big but …. please, you need to read the avionics manual before or together with the tutorial document. The tutorial document doesn’t explain how and where to find things. That’s part of the avionics manual and doing it only with the tutorial document will make you cry since it assumes that you’ve read the basic PFD and MFD manual.
At page 5 of the tutorial document I can’t say anything details on how to enter the flight plan step-by-step, but while fiddling around, I got the impression that you’re not able to load a prepared X-Plane default “fms” file. My fault, you can, but probably not how you expect. On the right hand side of the MFD you’ll see to so called SD cards. The lower one is to save you manually created flight plan while the upper SD card is to load a “fms” extension flight plan.
So you can create for example via Online Flight Planner your flight plan with the “fms” extension or you can use SimBrief but since Simbrief uses the Navigraph AIRAC’s, you need an account with Navigraph otherwise you can’t use the latest AIRAC cycles for your flight plan, if you had that in mind to do so. Or you can enter the flight plan manually as described in the tutorial although I think that that one-page description how to do it, is a little too short. I can imagine that some simmers do not quite understand how to handle when the first waypoint, in this case a VORTAC (a tactical military VOR station), is inserted. You could say, read the avionics manual before, but that’s too easy in my opinion!
In-between intermezzo.
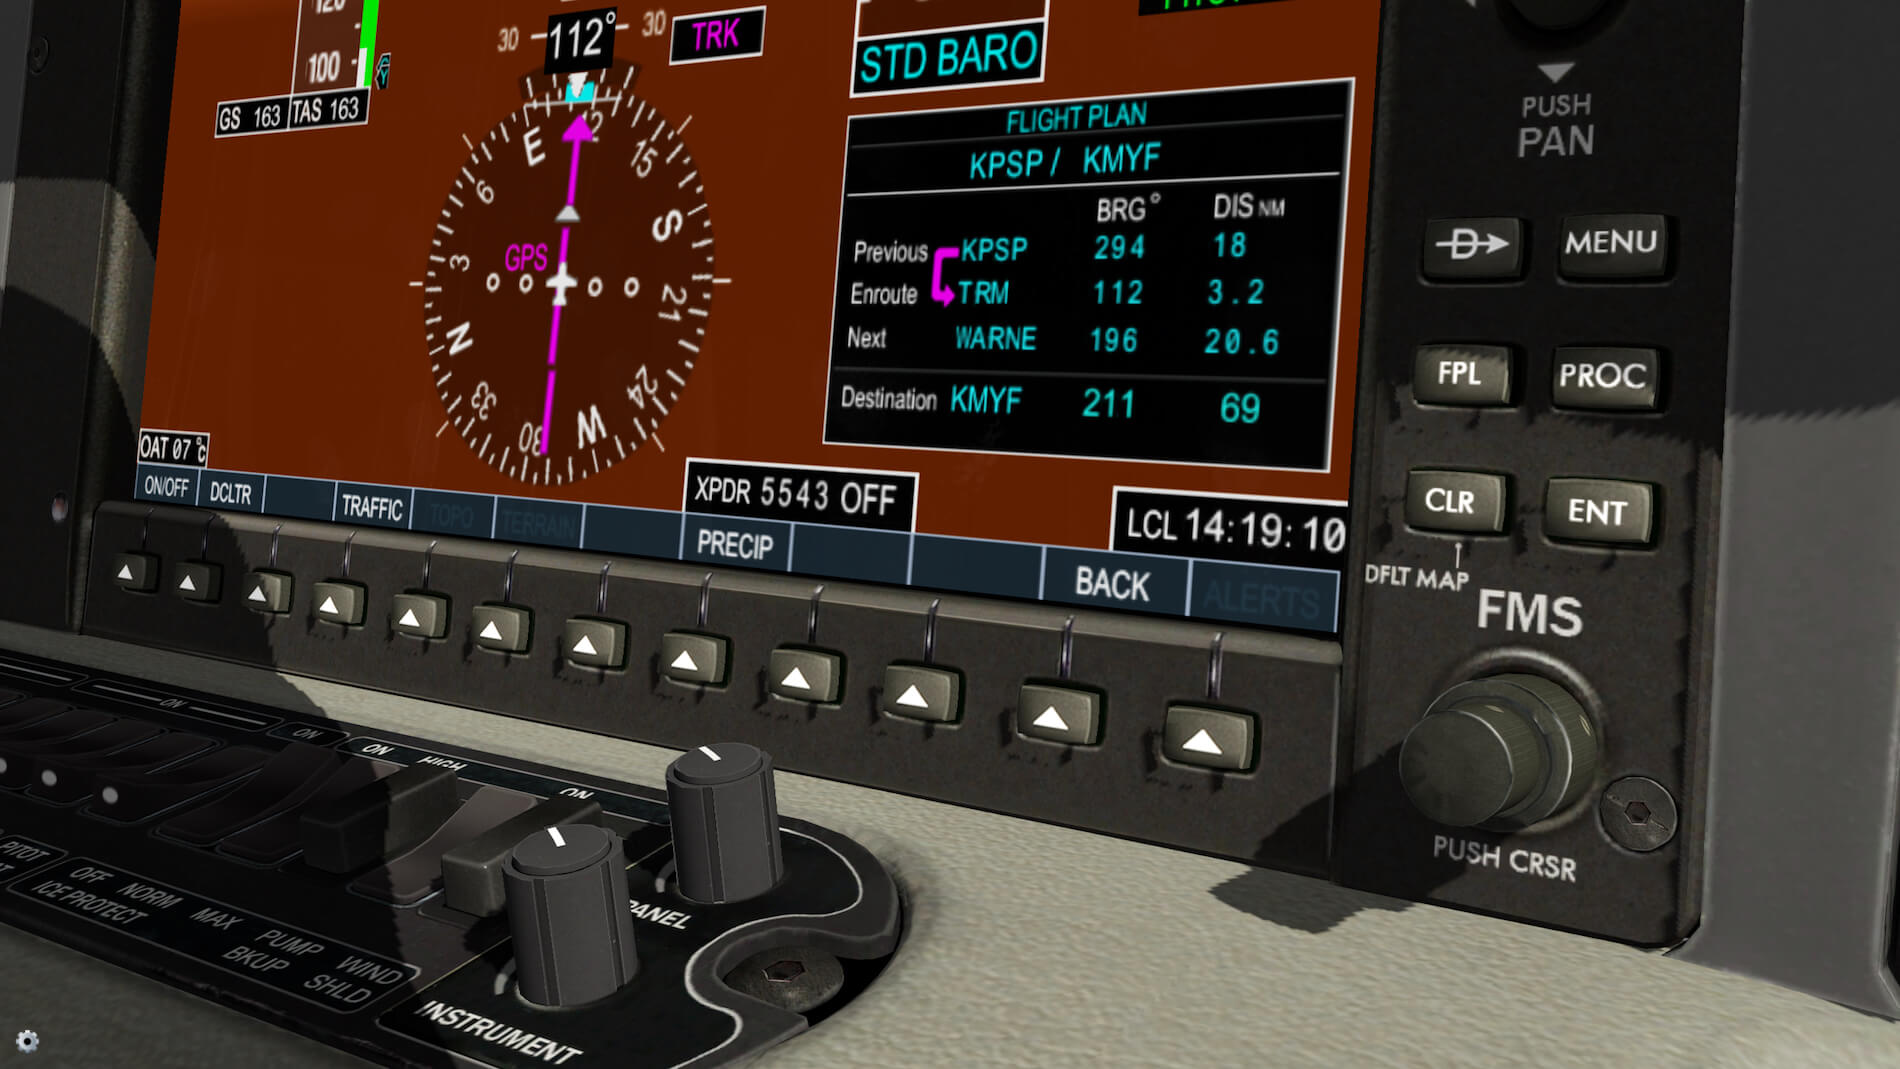
There are a couple of things you need to keep in mind when using the tutorial. The MFD offers you also “charts”. A very handy option, but since the tutorial flight is from KPSP (Palm Springs) to KMYF (San Diego Montgomery Field) it would have been a great idea when vFlyteAir had also included those charts however, the included charts are all from KDLH (Duluth International Airport) and although this is the home base of Cirrus Airport Corporation, I sincerely hope that with the next package update, the KPSP and KMYF charts will be include too. By the way, when you can’t wait for this, download the KPSP and KMYF charts for free from the FAA, find out what you need, arrange them to the format that’s needed and load them into the Cirrus SR20 folder. More details how to do this can be found in the avionics manual page 25.
For the steps to follow, you could rely entirely on the tutorial, but I think a good and thorough combination if using the non interactive checklist. I say on purpose non interactive since it doesn’t check the actual item to do. Example; I’ve selected the FLAPS to 50 percent and used ENT (enter) to affirm the “CHECKLIST: BEFORE TAXI | FLAPS … UP (0 PERCENT”, which turned green and ticked however, the FLAPS aren’t in the right position according to the checklist. Just keep that in mind when using the onboard checklist. The advantage of using the checklist is that you never forget something and before you know, you ready for taxi and takeoff.
Taxi, takeoff, climb, cruise
When you’re ready with all the previous preparations, it’s time to move on. When I’m in the air, I’ll offer you some more in-depth information about how this 3D cockpit looks like.
Taxing the SR20 is not difficult. You’ve got good external views and the Cirrus starts moving when applying some throttle. When you retard the throttle back, within some moments, the Cirrus stops by itself, which is expected. I made it easy for myself by using the same runway as in the tutorial, runway 13L. Taking off is, as always with single propeller aircraft, not easy. You need to keep it on the center line which isn’t always easy when there’s side wind. Once in the air, it feels like an easy bird, but I’ve got no idea how real it flies thus how real the flight characteristics are. And that feeling goes away the moment you select the Auto Pilot. Is there a need for it? No, not really. The Cirrus is an easy aircraft to fly by hand, but of course, you need to use the trims else you’re too much busy with the aircraft and less enjoying your flight or inspecting the 3D cockpit.
And … what about … the 3D cockpit?
The 3D modeling is in general always gorgeous. This is not only the case with the external view, but also with the 3D cockpit. Whether you like the clean cockpit with the 2 big DU’s is an matter of taste, but you can’t argue about the used textures and the way they are made. I personally would love have seen some reflection on the DU’s as well as the option to illuminate cockpit window reflection, at least, for some less powerful computers that old setting would be welcome. None of these options are available. Perhaps with the next update?
Ok, back to the 3D cockpit details.
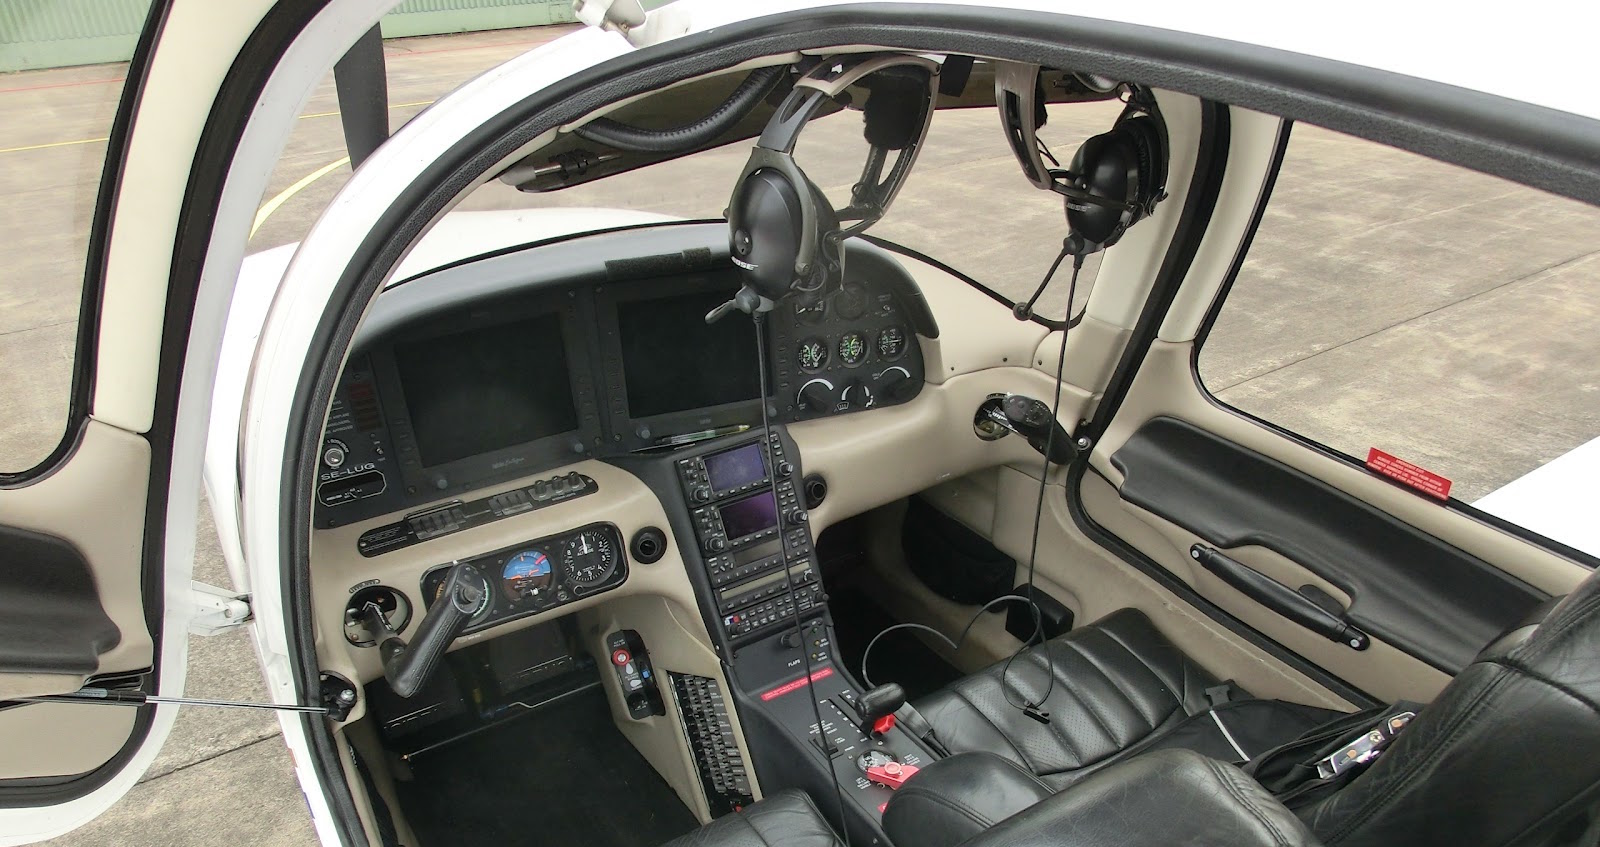
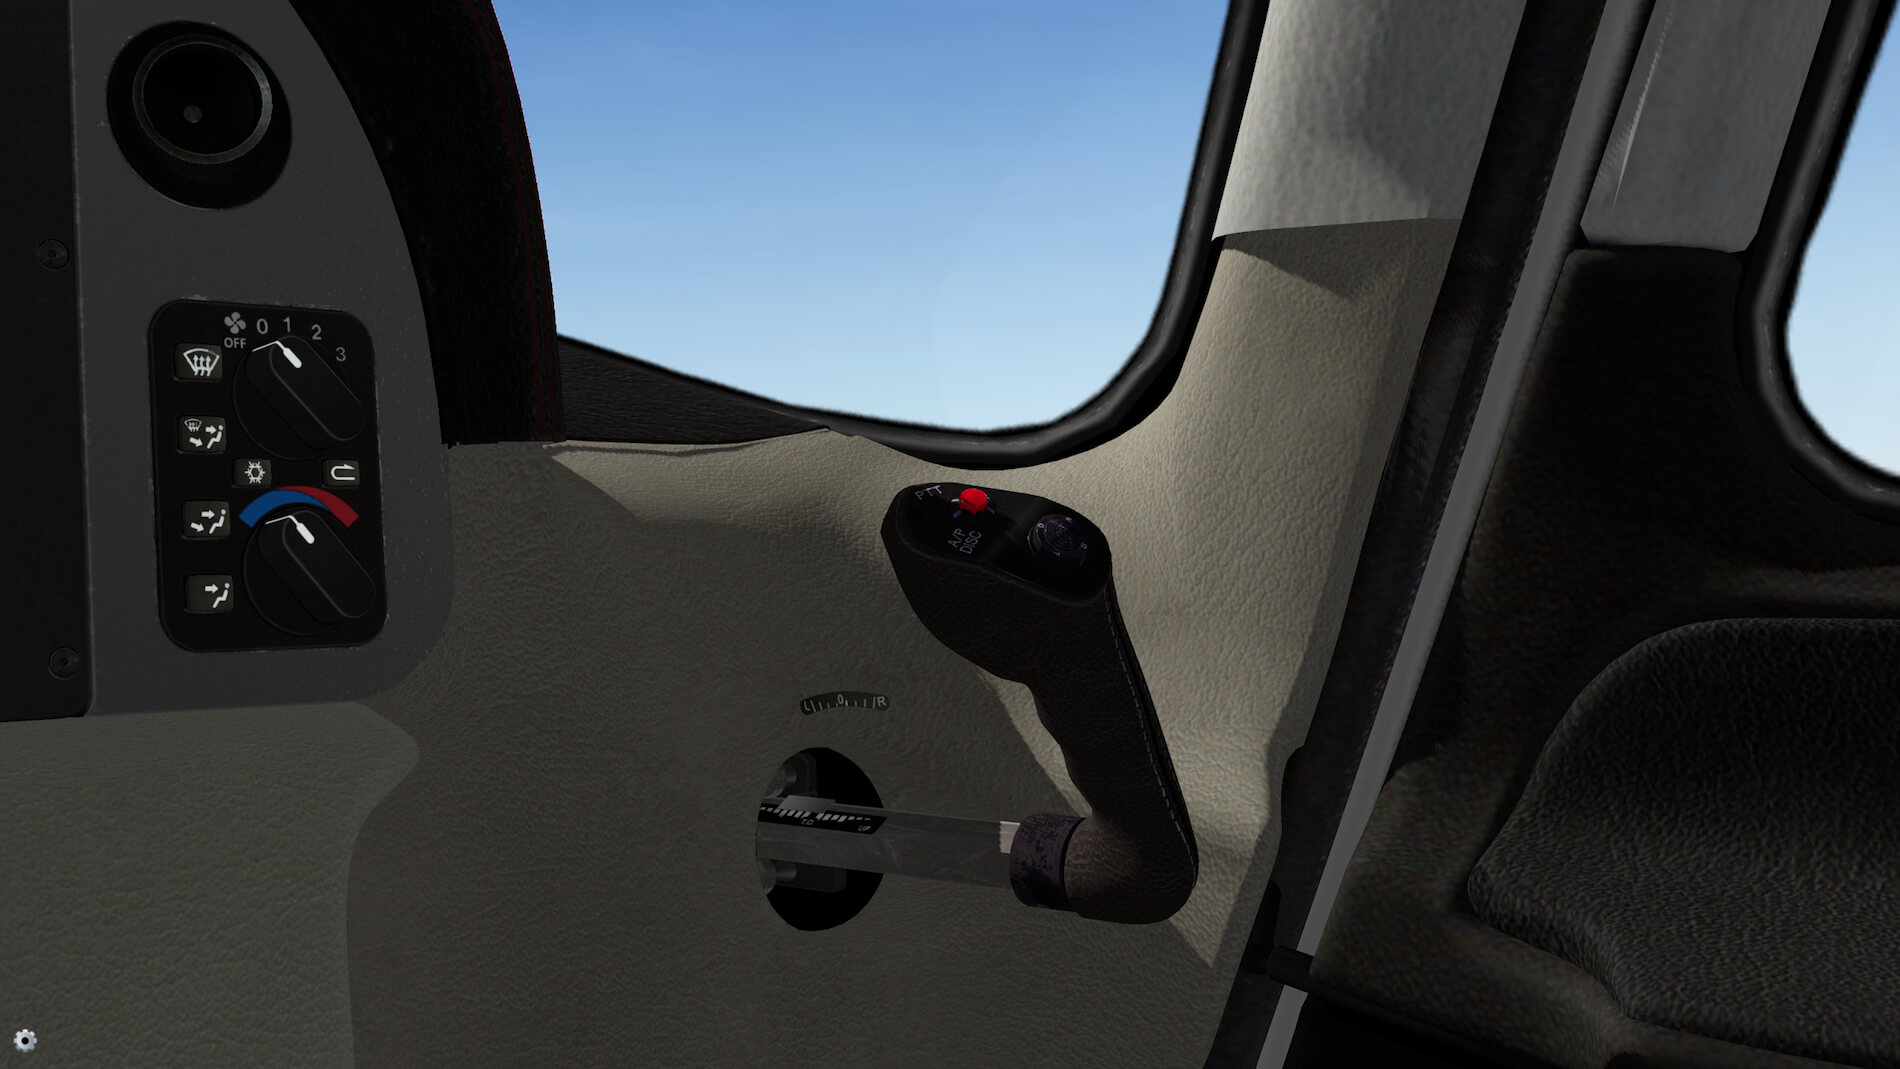
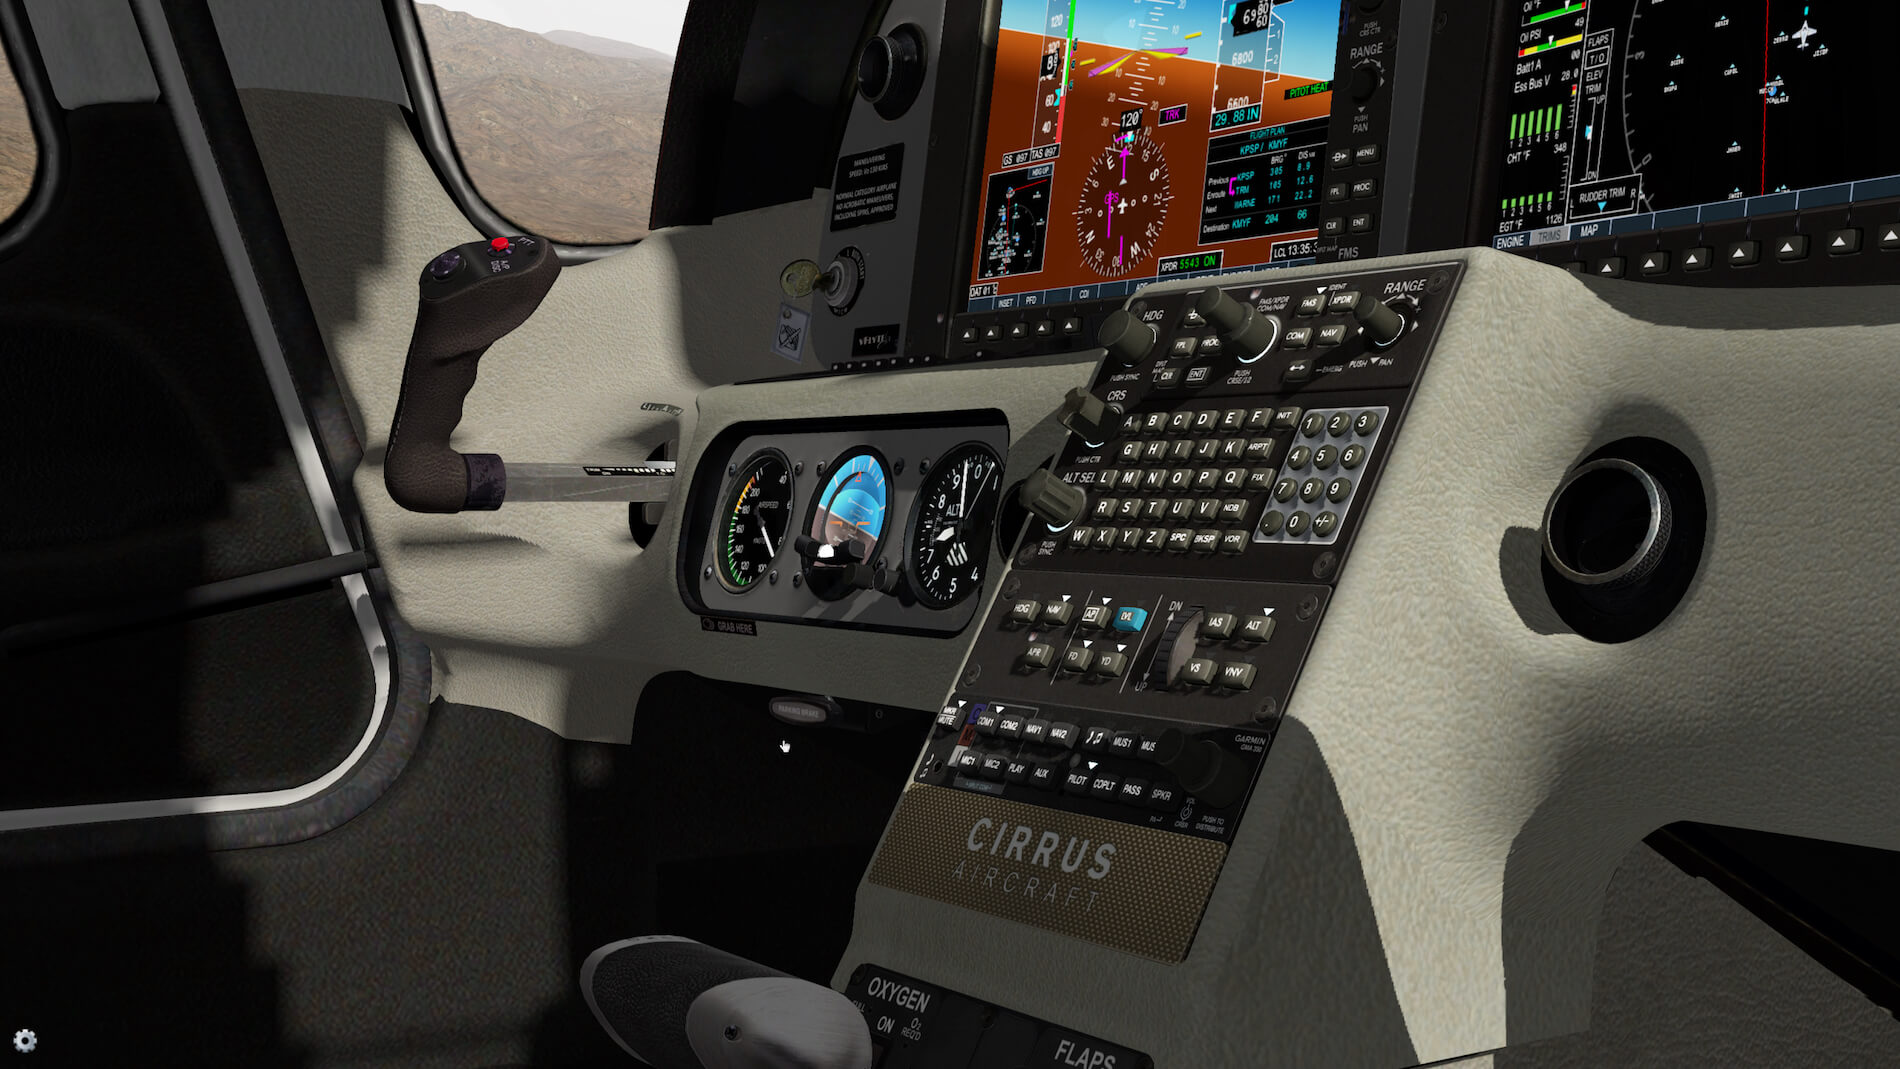
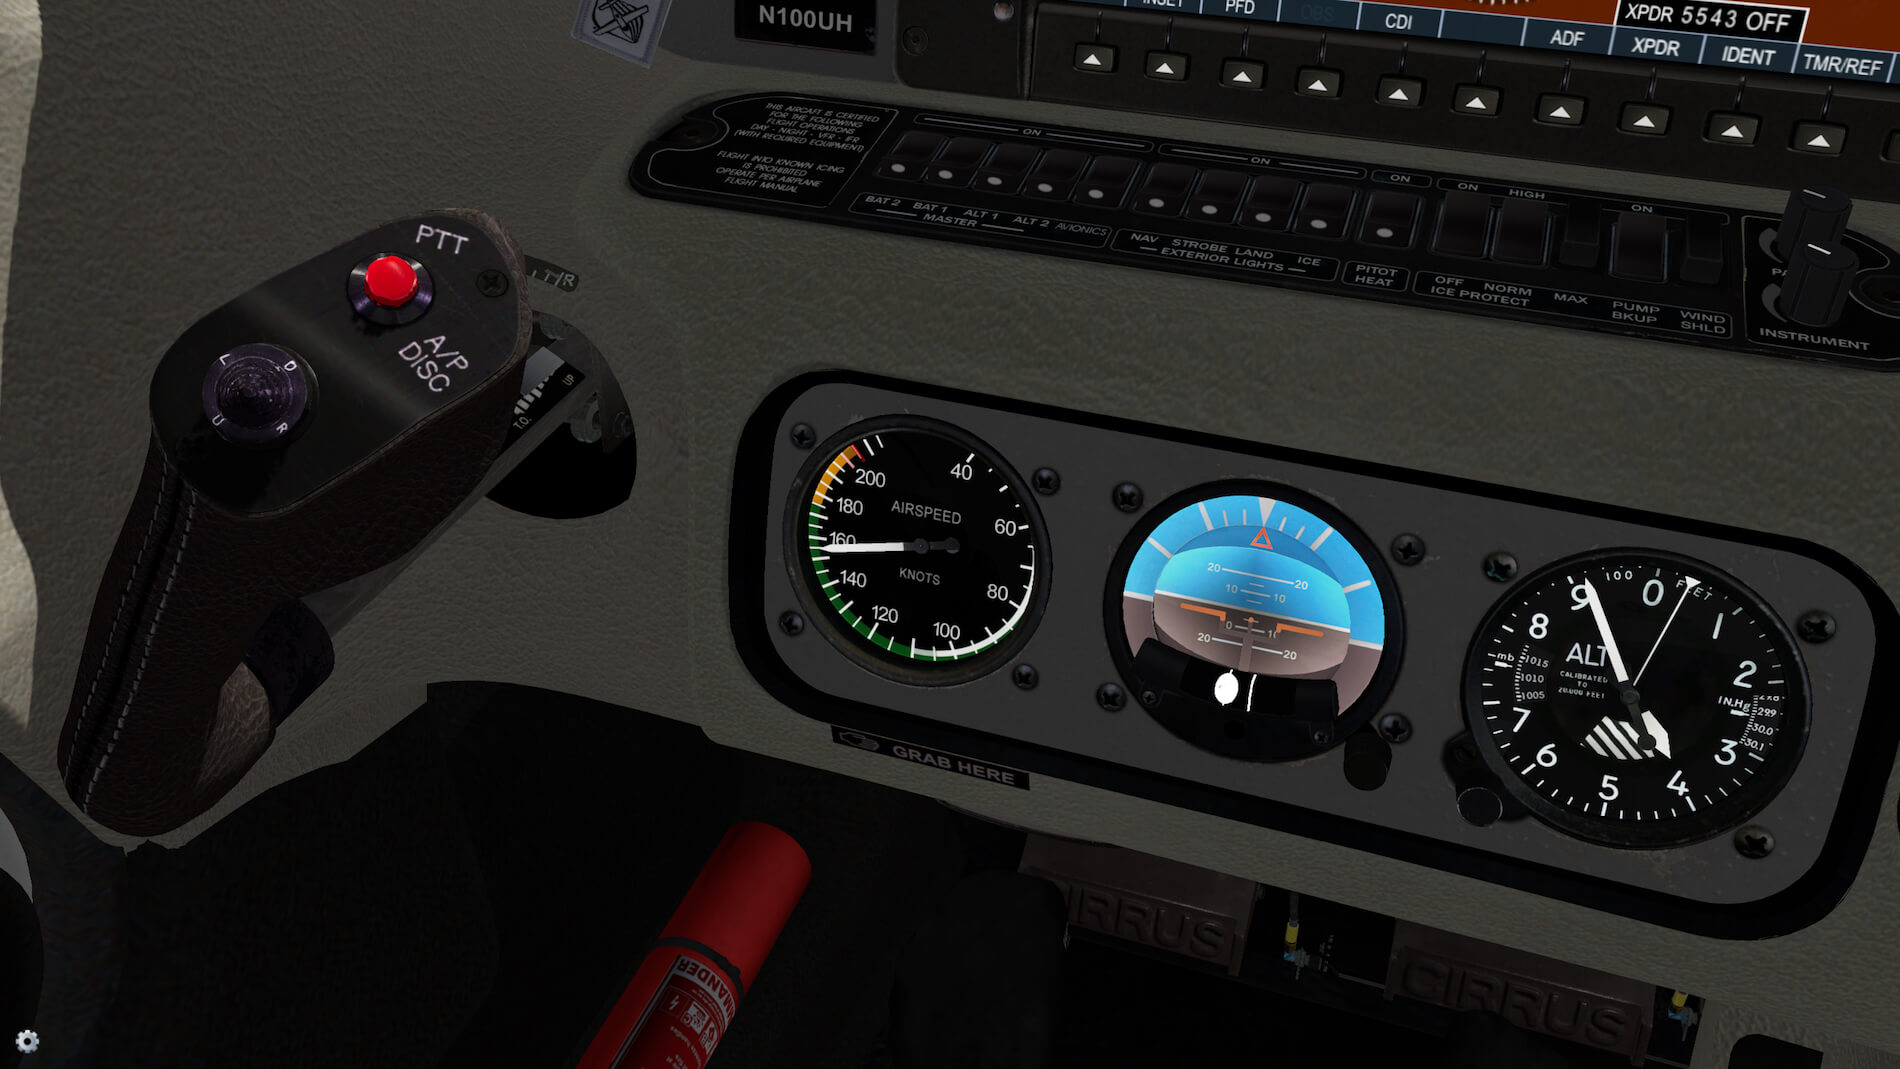
It is and stays a clean cockpit which means that except for 3 old fashioned instruments – IAS, horizon and Altimeter – everything is digital stuff. Ok, there are some switches on the left hand side, a mid console with controls, a temperature control panel on the right side but that’s it basically. Oh yeah, the total different way of controlling the aircraft. No columns, no electronic FBW side sticks, but control levers that stick out of the instrument panel on each side. Does it look weird? Oh, that depends ….. when you’re not used to this, it looks odd, but I can imagine that it flies great and because of this design, it creates a clean cockpit. I think in reality, all the sidewalls, ceiling panels, console walls are all made of plastic or perhaps even covered with leather.
No, that’s not the case, but to compensate, it’s in real nice looking plastic. That said, that’s what I see in this modeled Cirrus. Nicely modeled and realistic looking side-and/or ceiling panels. Hardly any scratch or weathering .. ok, I can live with this since most of these are privately owned, but hold on, are there no Cirrus SR20 models operating for flying schools? If it’s true, then some weathering and scratches would be welcome. Is it only me who prefers that …. Yes, I know, it’s my thought.


Oops, I dropped my pencil on the ground. Oh, where is it. Ah, there, near the rudder and brake pedals. Wow, that looks awesome. No doubt about that. I’ve got the impression that the pedals are covered with photo real material else it’s a great Photoshop modeler and painter and besides that, I see all tiny details like the brake hydraulic lines which are not just a simple line. Further on, I’m pleased to see that there’s not only great 3D modeling, but the overall look and feel of the 3D cockpit gives you a realistic feeling when flying around with the SR20. The pilots and passenger seats are covered with leather, without doubt very well done as well as the glareshield cover as I may call it. It seems to me that this glareshield is also covered with photo real leather. Perfect!


And what about the DU’s?
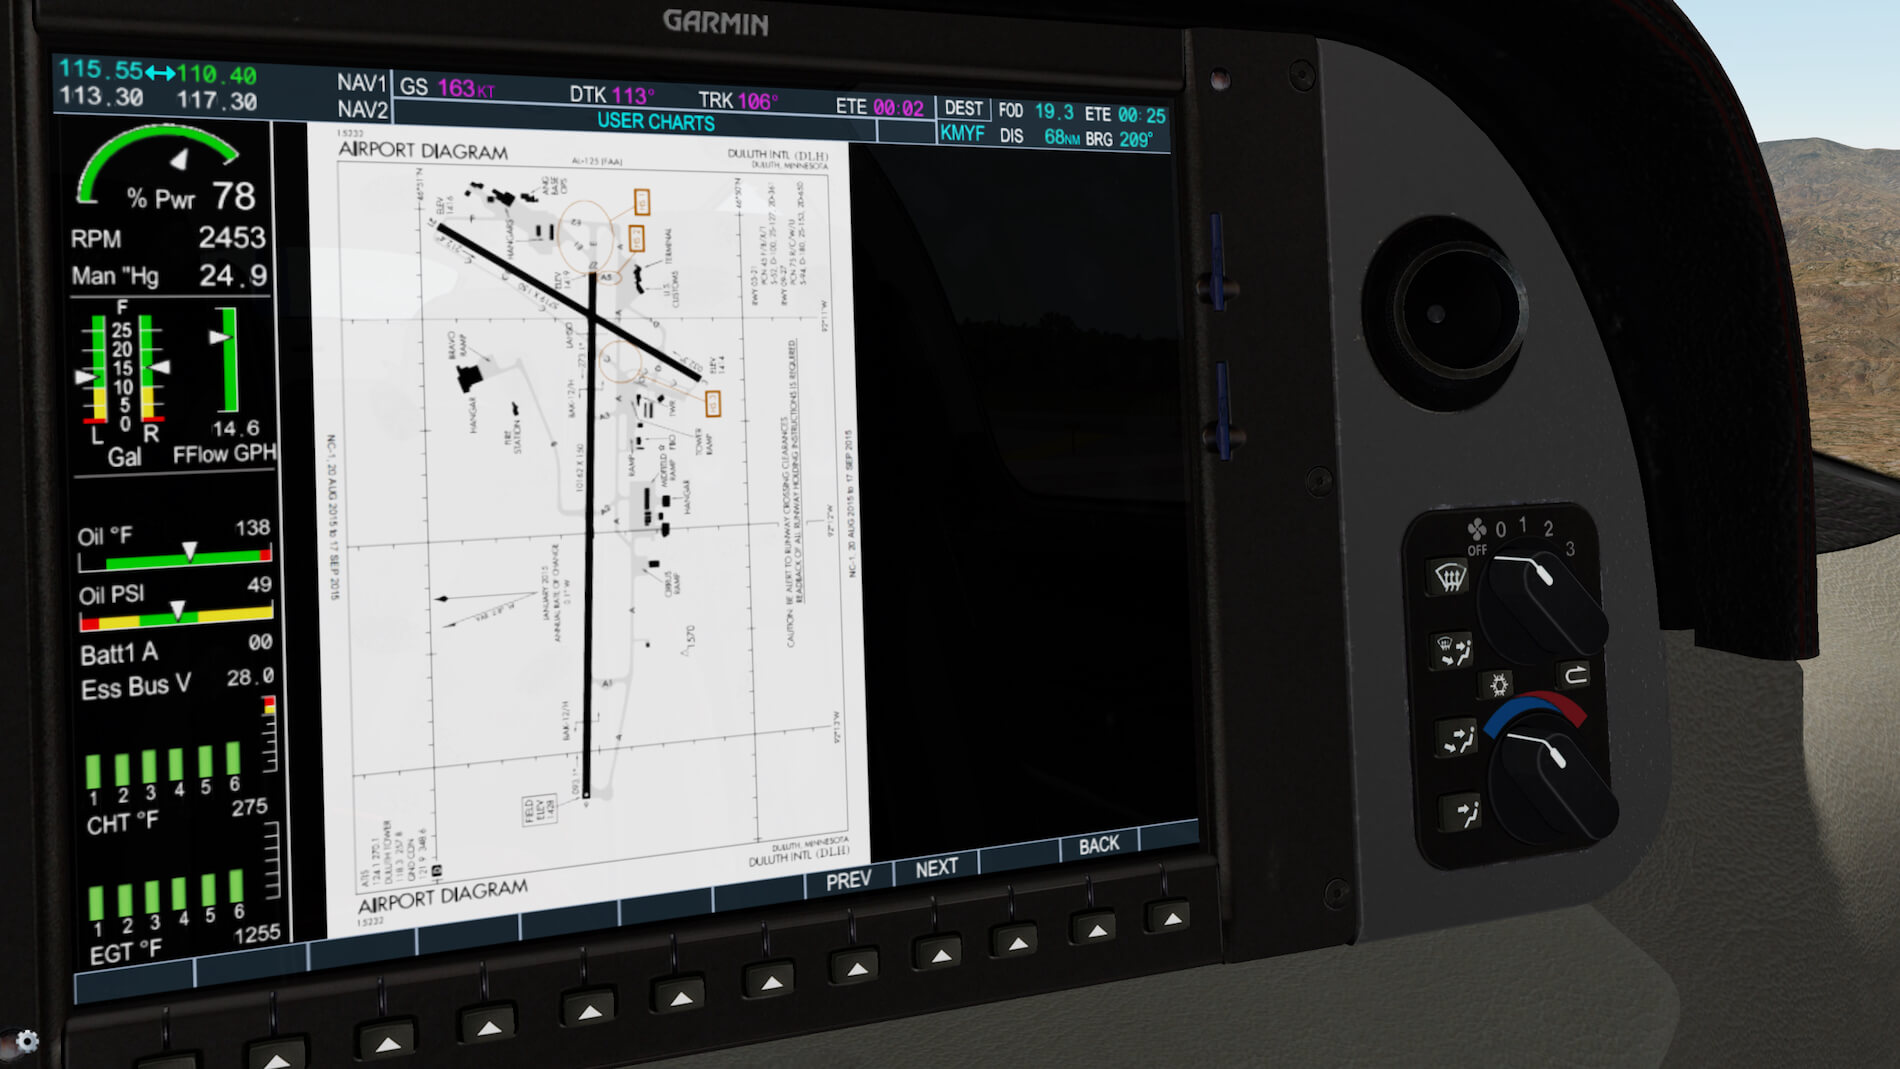
As I wrote before, these huge two DU’s don’t offer you all the ins and outs of the real G1000’s. If you’re looking for that, you need to go to Carenado. As for the vFlyteAir Cirrus SR20 they are OK although I find the MFD Flight Plan popup not as sharp as expected and, even a bigger issue for me, when using the MFD in combination with the flight plan, I hardly can read the waypoints along your route. Not because those waypoint identifications are blurry, but because it’s so tiny. The only way to read the waypoints is to zoom in far enough and then still, the font size seems to me very small, a little too small.
Not sure if this can be changed to a larger font, but to me it too small. It is indeed strange since the engine indications on the left hand size of the MFD or full screen engines indications, that’s sharp and much larger font too. Whatever the reason is, perhaps it’s just me, it’s something that can be checked by vFlyteAir and perhaps a larger font can be implemented for these waypoints.
But it’s worth to say that the 3D cockpit modeling with textures is a success. The only note I have is that a little more weathering and/or scratches on panels or instruments, would give the Cirrus SR20 just a little bit extra.
And … what about … the Garmin Avionics Suite?
I could write so many things about these two DUs and this is already what I did in the previous section, but all the explanations and possible screens are well described in the avionics manual. So the best way is to print this manual and when the SR20 is flying on the AP, fiddle around with all the options. One thing, when you check the real DUs versus the modeled ones, is that the MFD doesn’t show you a real ground map of the area you’re flying in. You never know if vFlyteAir will implement this in the future. For now, it feels good although some screen fonts could be sharper in my humble opinion.


Back to cruise
Yes, we’re still flying around with the AP connected and following the flight plan. The flight plan popup window on the MFD isn’t really necessary since the moment you’ve entered it. When you leave it in view, you’ll miss some information on the MFD since it covers a part of the DU and when you want to see the flight plan listing, you can also get a popup window on the PFD. This is even better since it’s shows you real time waypoint to waypoint movement. I think it’s time to play a little bit with the SR20 like doing some unusual flight attitudes like slow flights with/without flaps, steep turns, pre-stall and perhaps even an actual power ON/OFF stall. Let’s see if it’s possible to keep the Cirrus in the air. Shouldn’t be too complicated, but by trying I’ll know.


When trimming the aircraft, you should, if not yet done, only assign trims to the pitch and yaw axis. Roll trim works fine with the Cirrus SR20 however, the real aircraft doesn’t have aileron or roll trim. Just to keep you sharp!
A steep turn is always fun to do, in reality, in my Cessna C152, it was too, but you want to look everywhere on your instruments while it better to remember the heading you started with and while starting the turn, just look outside and try to focus on the horizon … is it moving UP or DOWN or does it feel that you’re able to keep the horizon in the middle. Of course, you need to swing the Cirrus to a 45 degrees turn, but then the angle you see in front of you, is the one you focus on. Got that? Thus there’s no need to constantly monitor the instruments for roll and pitch since that will become a mesh. Perhaps not on the simulator, but in real it does.
A slow flight with or without flaps is easy. Just control the aircraft in such a way that it doesn’t drop out of the sky. There’s no need to go to the maximum. Easy – as expected. It takes some time to let the SR20 stabilize with/without flaps, but once she is, for example with flaps fully extended, I could maintain a IAS of approximately 60-63 knots, full pitch trim UP and so much power applied, just enough to keep the SR20 at the same altitude.
From this aircraft configuration, full flaps, it a short step to a POWER OFF STALL, but the problem is, I can’t get the SR20 in a stall condition. Even when I tried a POWER ON STALL, I didn’t get in into this situation. To be more precise, I can’t even get it in a pre-stall condition. This is something I need to check with vFlyteAir since, perhaps you can remember that, on the right hand wing leading edge, logically, there’s a pre-stall indicator so I guess that it should be able to simulate a pre-stall. Check the Internet and found this YouTube movie and yes, it will stall as expected.
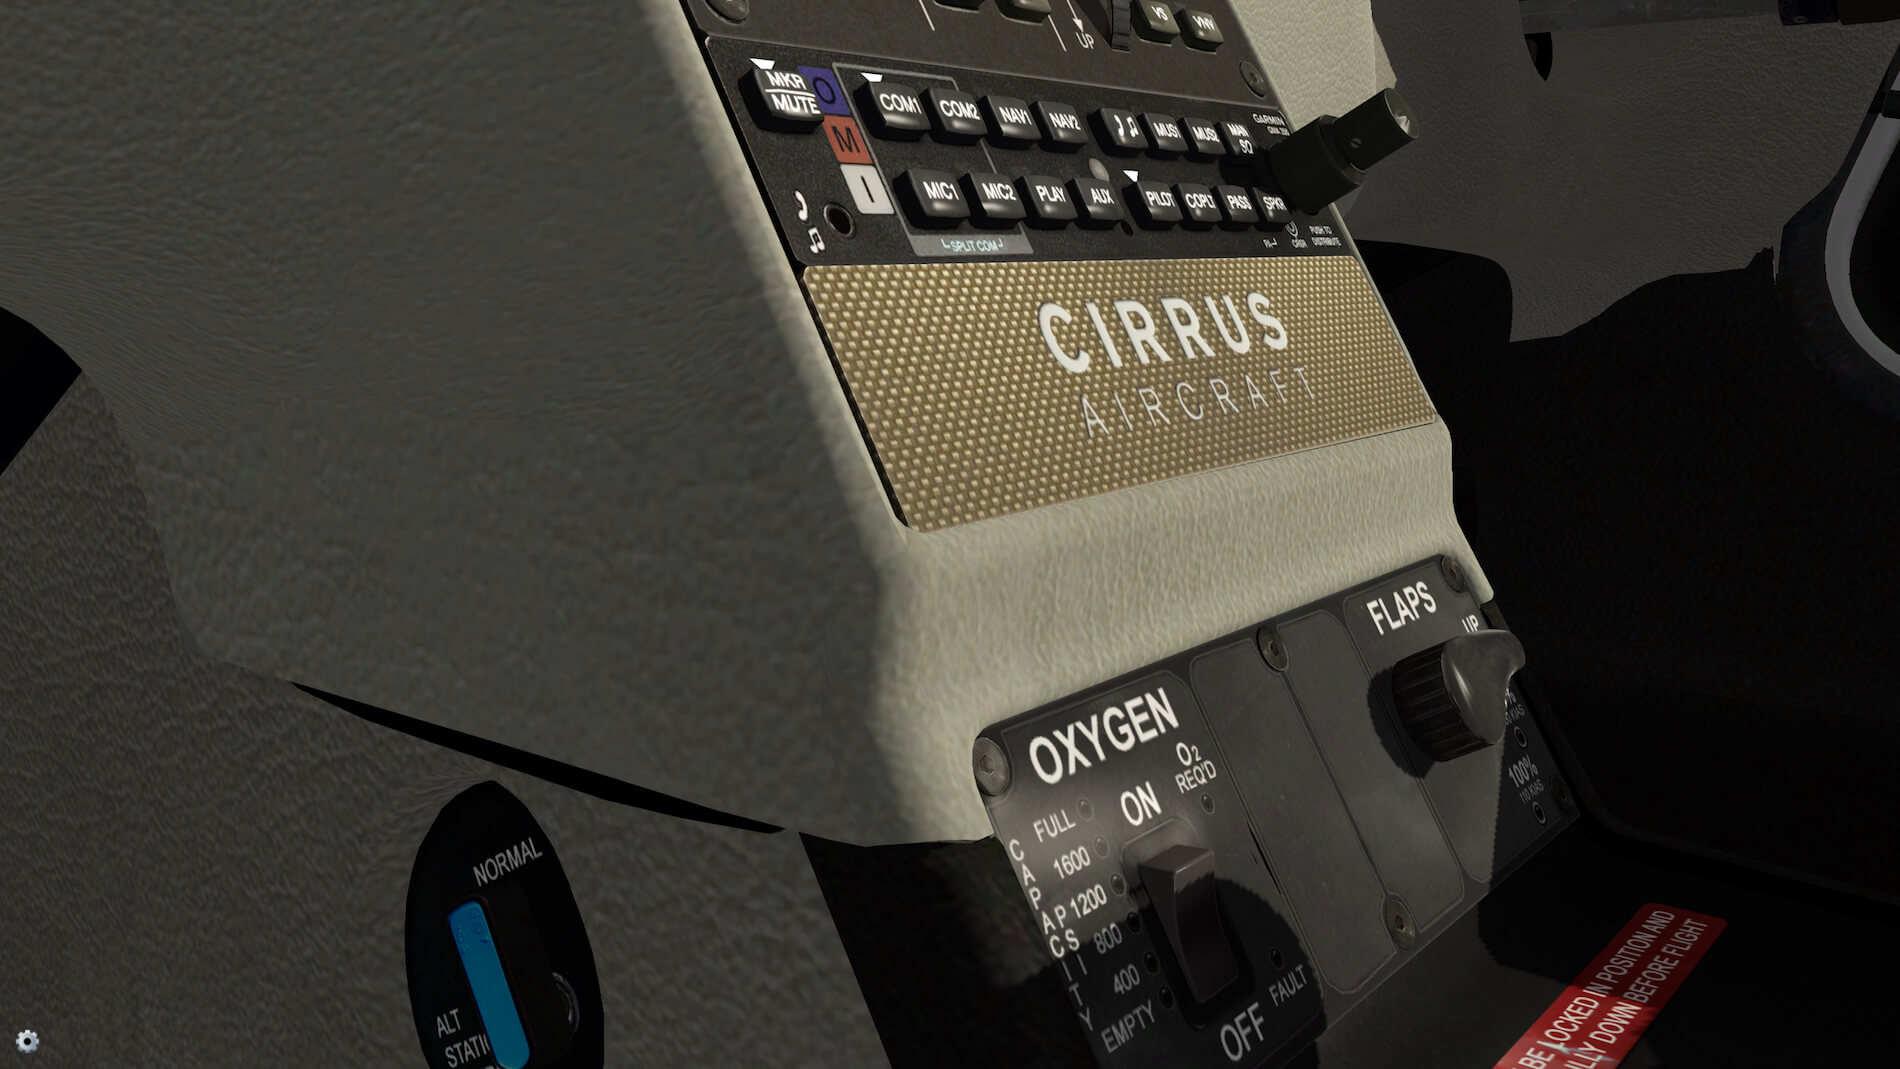
By the way, don’t forget to think about your FUEL TANK selector valve. I tried to find it in the manual, but couldn’t to therefore …. Click the LEFT (RIGHT) 28 U.S. GALLONS USEABLE text and the valve flips to the other tank. Clicking the LIFT BUTTON FOR OFF POSTION shut off the fuel supply so this isn’t a good idea during flight.
Descent, Approach and Landing
You can make it as complex as you want, but believe me, the Cirrus SR20 flies like an eagle. And that means, it’s such an easy aircraft to handle and although there’s an APR (approach) AP option for an automatic ILS landing, you can easily do it by hand. You can keep the FD in view, but even that isn’t necessary. Of course, you haven’t got a complex FMS and therefore you need to calculate when you want to descent to pickup the ILS or if you go for a manual landing, see at which altitude the VFR pattern is. Either way, so easy to handle.
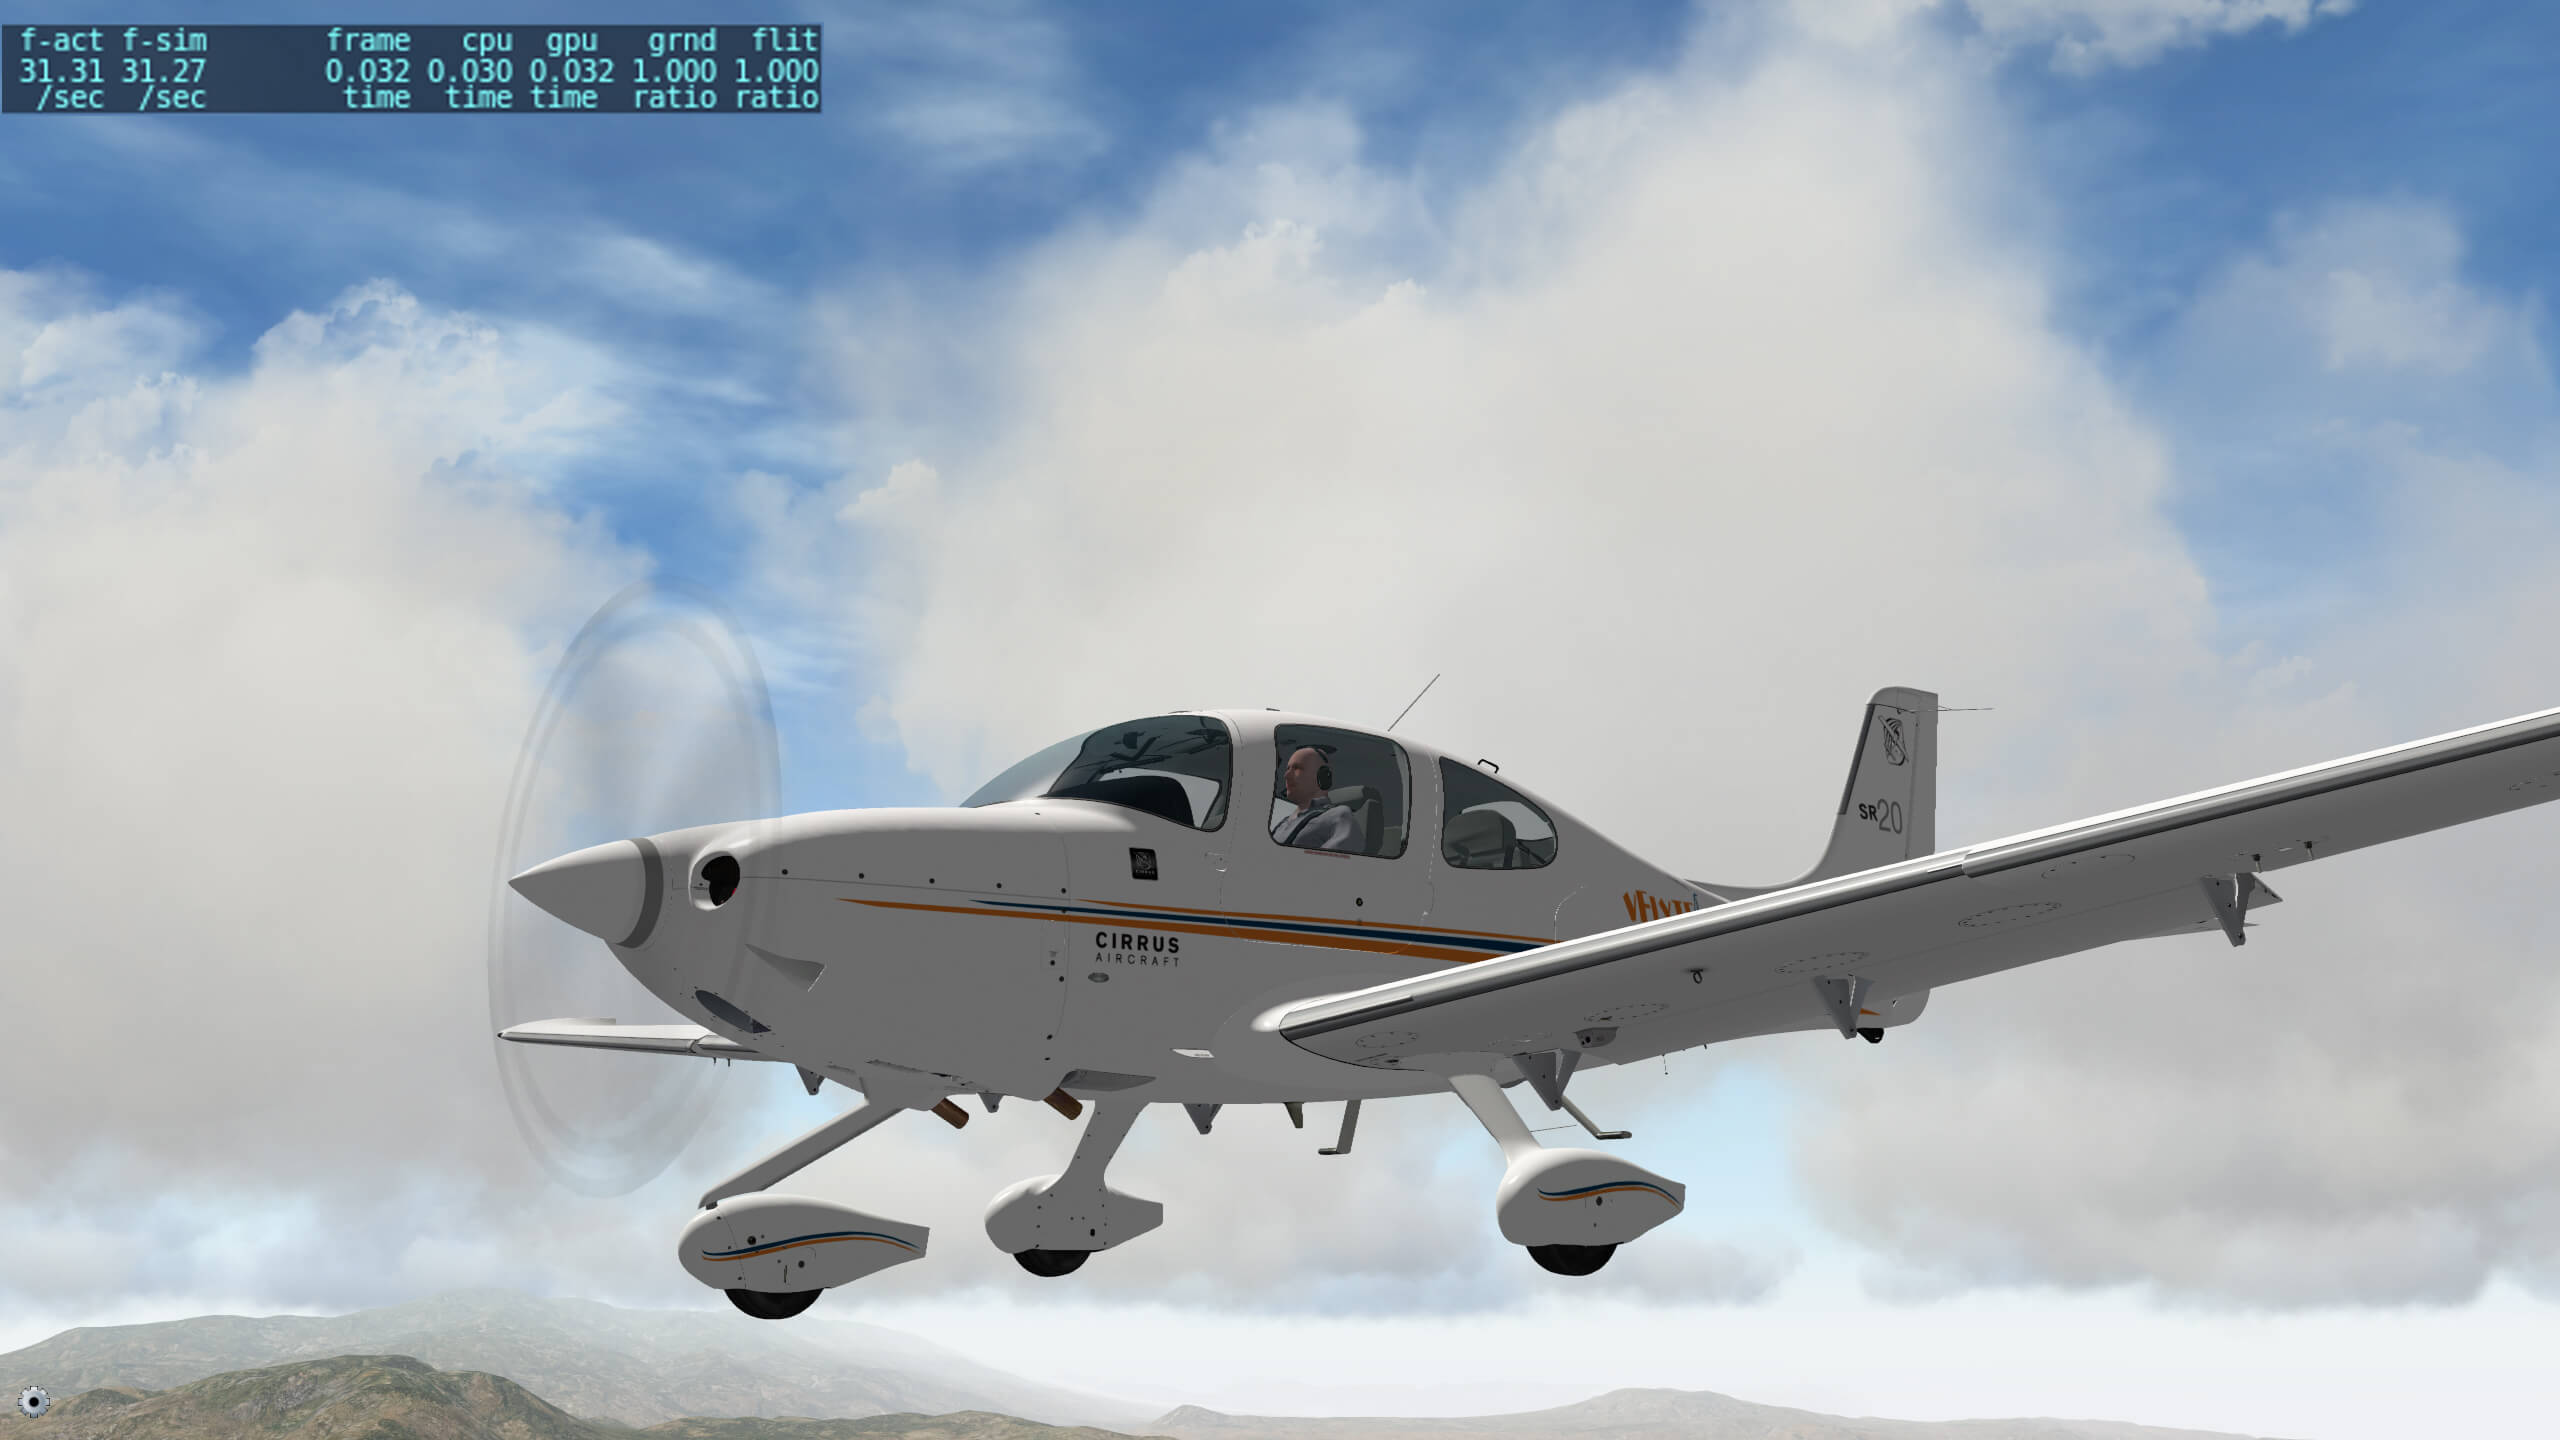
And … what about … FPS?
Yes, that needs to be answered too. Frame rates (FPS), that’s not really a problem although I’ve got no idea what your PC or Mac specifications are. As you all know, the actual frame rates depend on so many other factors then only X-Plane and besides that, X-Plane settings are crucial too. Your hardware – PC or Mac with MB (Mother Board) CPU and graphics adapter or like me on an iMac with a mobile graphical GPU, are crucial as well as the amount of memory and the speed of the memory. Then you have the choice of having an ordinary hard disk or, much more expensive, a SSD. As far as my knowledge goes, the hard disk or SSD doesn’t boost your frame rates however, loading time of scenery textures is much faster. Anyway, then the actual frame rates depend on your monitor screen size or do you run it full screen or in windowed mode. This makes a big difference and although Apple offers Mac simmers also an iMac with a 5K screen, beautiful, but my personal feeling is that it’s not the ideal size for using it in combination with X-Plane.
And finally, you’ve got the Rendering Options settings in X-Plane itself. They can make or break the actual performance and therefore, it is always handy when a developer tells you on which systems a scenery or aircraft has been developed. And based on their PC or Mac it would help when a rendering options screenshot is added of that machine. Then you know a little bit more what to expect on your PC or Mac.
It is and remains a difficult issue …. what should I do, what is acceptable … do I need to buy another CPU and/or MB, a new generation GPU or just another PC or MAC?
OK, now back to the vFlyteAir SR20 FPS performance.
Are you happy with 20, 25, 30 or even higher frame rates? All is possible but it depends on where you are and if SkyMAXX Pro 3.x is active or not. SkyMAXX Pro may be improved a lot in respect to frame rate impact, but it still influences the frame rates. Anyway, with a complex airport you can reach 20 or slightly higher frame rates. In the air, depending on real weather or a large amount of clouds, it can drop again to 20, but with lesser clouds it’s no problem to get 30 FPS. Half way the following screenshots I’ve added clouds. The FPS impact can be seen down below this “X-Plane weather” screenshot.


Emergency “controlled” fallout
Huh …… emergency controlled fallout …..what when you’re flying and for some reason the aircraft becomes dead or you’re totally out of fuel. The latter sounds weird, but believe me, it still happens with aircraft. You can hardly believe it, but yes, it’s still on the number 10 list!
Anyway, let me first give you an idea what and how the Cirrus Airframe Parachute System (CAPS) is and what is can do for you … a safe landing?
The following paragraph is directly taken from the vFlyteAir manual section 5 “Cirrus Airframe Parachute System”. The Cirrus Airframe Parachute System (CAPS) is a safety system built-in Cirrus aircraft such as the SR20.
If a pilot faces an emergency situation so severe that the aircraft remains uncontrollable, the pilot can pull a CAPS lever on top of the cabin. Immediately, a parachute will unfold. The pilot stops the engine, cuts off fuel and waits while the parachute brings the aircraft slowly down. At the ground, the pilot activates the ELT emergency signal, leaves the aircraft and waits for rescue. More than 107 lives have been saved up to now thanks to CAPS.


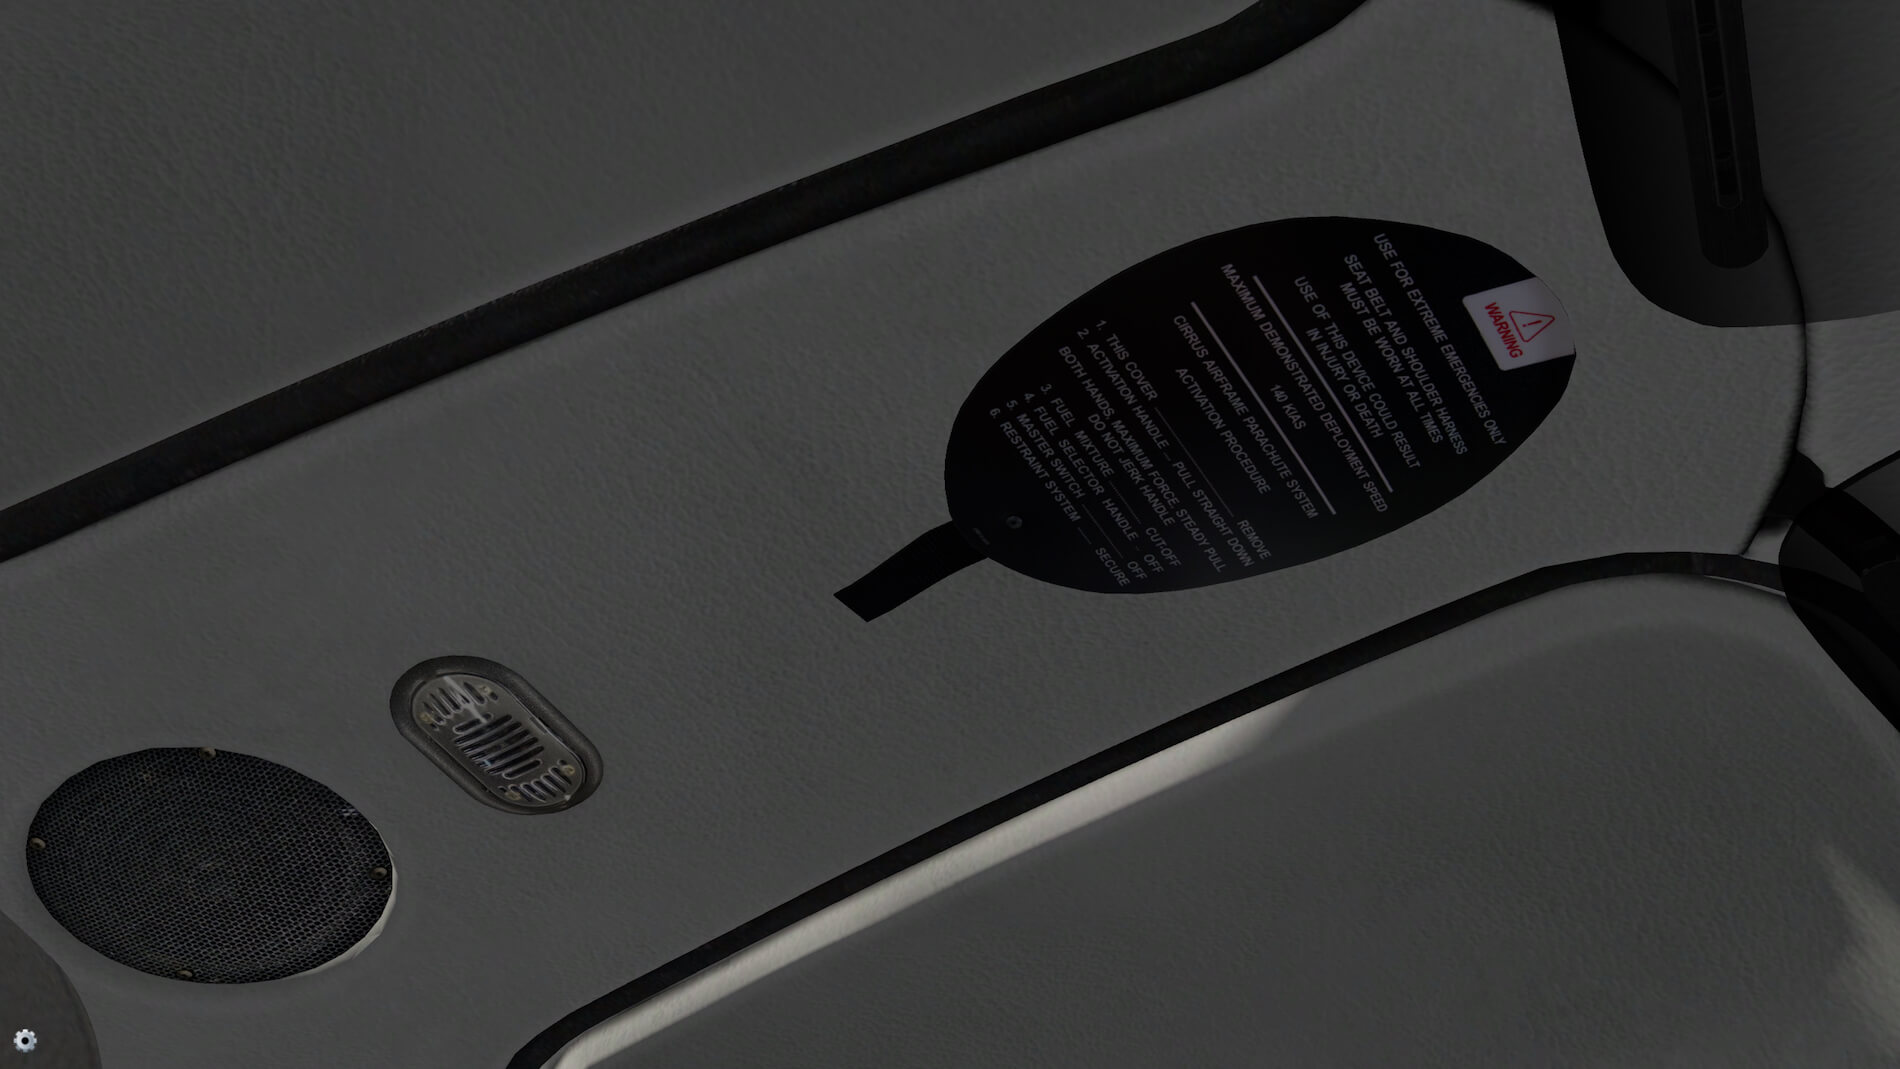
The vFlyteAir SR20 simulates a simplified version of CAPS, only requiring one click. The CAPS lever is stored behind a coverage at the bulkhead, above your head. Click that coverage to remove it and to pull the lever.
And yes, as described in the manual, it works so easy. Click the black cover in the middle of the ceiling, cover disappears, click the handle and CAPS comes out. As you can see on the last screenshot, “the” panel that covers the chute is gone while the chute has been deployed. Nice system and nice modeled!
Cirrus SR20 sound?
Real sound is not as easy as it is. Yes, when you have the aircraft in your backyard or living close to an airport where you’ve spotted a real Cirrus SR20, then recording it is suddenly much easier however, what when you live far away of an airport or that there’s no Cirrus SR20 at all. The engine may be a piston engine and you’ll be lucky when you find the same engine mounted in another aircraft. Sound is sound in that case although the aircraft type is different. Ok, long story short … I listened to many YouTube Cirrus SR20 movies and some where useful, others not.
I couldn’t come to the conclusion if the added vFlyteAir sound is taken from a real Cirrus SR20 or, as said before, from the same engine installed in another aircraft. But the overall sound doesn’t feel bad. You can hear a kind of similarity between the included sound files and the real engine sound found on YouTube and perhaps the included sound files are as real as it gets. There are, normally, other sounds included like for stall, flaps, landing gear etc. As mentioned and tested before, I wasn’t able to get the modeled SR20 into a stall so I wasn’t able check the aural STALL sound. I moved the flap switch to the 50- and 100 percent, but didn’t hear anything. It could be of course that it’s fully electrical, but then still you should hear something. Anyway, the most dominant sound in this SR20 is of course the engine and many other sound aren’t there. Oops, Auto Pilot disconnect!
Summary
A slightly, no, a much longer impression then expected, but never mind. I did it with pleasure and it took more time then I initially thought. I don’t know why, but I needed to find the right words for the G1000 Cirrus Perspective avionics suite and how to approach this. In respect to the 3D aircraft modeling as well as the 3D cockpit, I didn’t expect any problems. These are already of high quality with an eye for tiny details. With the recent release of the Carenado CT182T G1000, accurate and high Garmin rendition has been lifted to an extreme high level.
That said, other developers either don’t want to model this depth of G1000 or they simple can’t. The vFlyteAir G1000 avionics suite comes with, as stated by vFlyteAir “we don’t strive for a true simulation of the avionics, we took care of many details.” I think they succeeded in this, what else can I say, but in my humble opinion it would be a good idea when the MFD screen and text could be better. I mentioned in the impression already about the very small fonts that are used for the waypoints, but it does have, when zoomed in on the main MFD screen, fonts that could be sharper except for the engine indications.
The tutorial could be a good help for those who need a guide to start with although reading the avionics Acrobat file is an absolute must. But personally, I would love to see certain tutorial sections are expanded more then they are now. I mentioned earlier the limited page 5 regarding how to enter waypoints. The problem is always … some need it, some don’t like it, while for some a tutorial is a must to understand the operation and functionality of the aircraft and its systems. Because of the many features, the avionics manual is far from perfect, but adding some of those paragraphs related to the PFD and MFD as well as the AP and control panel, would lift the overall quality of the tutorial.
I sincerely hope, to complete the tutorial, that vFlyteAir will add ground movement charts and other related charts of Palm Springs and San Diego Montgomery Field into the MFD. It’s nice to see that charts of Duluth International Airport are included to promote the home base of Cirrus Aviation, but I don’t really see why and whom will use them. Good, just a suggestion!
I used for this impression no add-on airport sceneries, but you can download from X-Plane.Org Palm Springs International from gpb500.
More information about the vFlyteAir Cirrus SR20 can be found at the dedicated Aerosoft eShop web page or the X-Plane.Org page. The Cirrus SR20 cost 24,00 Euro without tax and, is it worth it? It’s another modern GA aircraft from vFlyteAir and a quite interesting one, but I do hope that some issues and suggestions are implemented with future updates.
Oh yes, there’s so much to find on the Internet that deals with the cirrus SR20, in particular at YouTube. For example, check out this solo flight movie with a modern cockpit, the same as modeled by vFlyteAir. The following YouTube link shows you a pre STALL. Monitor also the STALL red message on the PFD as well as the aural STALL.
Feel free to contact me if you’ve got additional questions related to this impression. You can reach me via email Angelique.van.Campen@gmail.com.
With Greetings,
Angelique van Campen
| Add-on: | Payware vFlyteAir Cirrus SR20 |
|---|---|
| Publisher | Developer: | X-Plane.Org | Aerosoft | vFlyteAir |
| Description: | Realistic rendition of the Cirrus SR20 version 1.1 |
| Software Source / Size: | Download / Approximately 435MB (unzipped) |
| Reviewed by: | Angelique van Campen |
| Published: | January 27th 2016 |
| Hardware specifications: | - iMac 27″ 3.5Ghz Late 2013 - Intel i7 3.5Ghz / 3.9Ghz during Boost Mode - NVIDIA GeForce GTX 780M 4096 MB - 32 GB 1600 MHz DDR3 - 1 internal 1TB SSD (El Capitan 10.11.4) - 3 external 1TB SSDs - Saitek Pro Flight System |
| Software specifications: | - El Capitan (10.11.4) | Yosemite (10.10.5) | Mavericks (10.9.5) - Windows 10 Professional - X-Plane 10.45c | X-Plane 10.45m |
0 Comments