A vFlyteAir C150 Floridian Challenge
Introduction
I think I’ve written many reviews related to Cessna C150 aircraft models from Carenado, Just Flight and now from vFlyteAir. I’m also aware of the modified for X-Plane 11 Nhadrian C152 which is based and needed on the originally Carenado and modified for X-Plane 11. Only problem is that the update package is only for Windows users and as you might know, I’m a macOS simmer. Although I have on my iMac also VMWare with Windows 10 as virtual machine, I should be able to execute the files to make the original Carenado transformed into the Nhadrian C152, but till now I didn’t had the time to do so. Perhaps that challenge will come at a later time.
But here we are, a fresh and brand new looking C150 Commuter aircraft from vFlyteAir. But what is different between the C150 Commuter, the C152 and I’m also aware of a C152 Acrobat version. Lets check that out first.
C150, C150 Acrobat, C150 Commuter and C152
A bit of history is welcome, right?
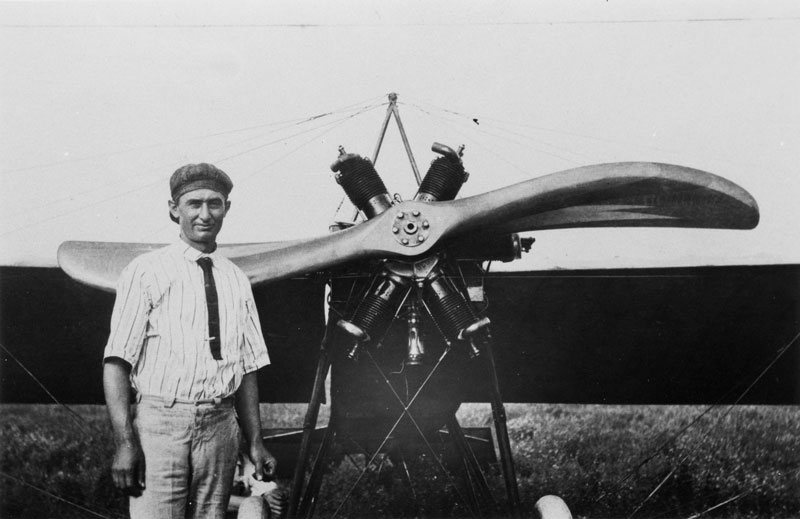
It actually all started with Clyde Cessna who built his first plane in 1911. It took up till 1946 before something extraordinary happend. According to Pilotfriend.com “Cessna or at that time also known the Cessna Aircraft Company began is first production of two seat light planes in 1946 with the model 120 which had an all aluminium fuselage and fabric covered wings. This was followed by a nearly identical model 140, with aluminium clad wings. More than 7,000 model 120-140’s were sold. Cessna stopped production of the 140 in 1951 in order to focus on four seat aircraft.” (Courtesy of Pilotfriend.Com)
Pilotfriend continues “In 1957 the company decided there was a market for a tri geared version of the Model 140. Following their standard tailwheel/tricycle naming convention, Cessna named the new airplane the Cessna 142. Six days later, for reasons now unknown, it was renamed it the Cessna 150. A total of 683 C150’s were built between 1957 and 1959, all were sold as 1959 model.”
Wikipedia adds the following “The first model year of the Cessna 150 carried no suffix letter. It was available as the “150” or the upgraded “Commuter”. The engine was a 100 horsepower (75 kW) Continental O-200, the gross weight was 1,500 lb (680 kg) and flaps were actuated manually with a lever between the seats. Production commenced late in 1958 as the 1959 model year. The cost was US$6,995 for the Standard Model 150, $7,940 for the Trainer and $8,545 for the Commuter. The 1960 model introduced a 35-ampere generator on the Commuter.”
“The 150 standard engine is a four cylinder 100 horsepower Continental model 0-200. During it’s 18 year production history there were many changes to the 150 airframe and configuration. In 1970 Cessna introduced the model 150 “Aerobat” which became very popular in the Aerobatic training market, and remains a popular sport airplane.”
“In 1978 Cessna introduced a revised model, the 152, with a 110 horsepower Lycoming 0-235 engine. The Lycoming was chosen to make the 152 more tolerant of the newer High Lead 100LL octane fuel, as well as provide a long overdue increase in horsepower. The cabin was also widened slightly to make room for the increased girth of late 20th century pilots.”
What’s the Plan?
VFR Flight Planning
There’s no need for me to discuss the installation process, how to update the vFlyteAir model, the included documentation, how it all looks on the inside and outside. That’s already discussed in detail by Andy. You can read Andy’s adventure via this review link.
On the other hand, I will try to reproduce one of my C152 flights in Florida, but this time using the vFlyteAir C150 Commuter. It was actually during a Winter holiday where we stayed in a nearby motel of KEVB (New Smyrna Beach). The plan was to cross Florida, departing from KEVB and heading for Ocala International Airport-Jim Taylor Field and from here at a heading of 270 degrees to Cedar Key or actually, to the airfield Lewis (KCDK). A bit long trip, leaning is needed, but it’s possible and else on the way back you can always stop at one of the fields on the mainland ro refuel. By the way, the round trip is approximately 250 NM.

Flying in a straight line from KEVB to KCDK is within X-Plane 11 possible, but in real you can forget that unless you’re looking for problems. When you climb out from KEVB, you’re not allowed without communication to climb higher then 1200 feet since you’re underneath the outer ring/circle of DAYTONA Class C. Since I flew this under VFR conditions, I used the road on the map from where it was allowed to climb. Then you can fly in a straight line on a heading of 270 degrees to DELAND-Taylor (KDED).

After you overfly KDED or see it from a distance, we can’t fly on the same heading to Ocala since there are three restricted areas on our route namely R-2910 A, R-2910 B and R-2910 C. Not a big deal I would say. We only need to adjust a bit our route. The best and easiest way is to fly towards LEESBURG INTL (KLEE).
Assuming I’ve reach approximately 2500 feet cruising altitude (VFR cruising altitudes 180-359 EVEN+500′ while on a HDG of 360-179 ODD+500′) and keeping in mind that I follow the “152” rule. This means that I have to maintain a cloud clearance as follows; 500′ below me, 1000′ above me and 2000′ horizontal from me. When I keep this 152 rule in mind, I can or in case you fly this stretch yourself with real weather, even fly at a higher altitude. Flying higher is cheaper, but that’s for these kind of flights not so important. What’s important is the visibility. When you fly at an altitude of 3500 versus 6500 feet that makes a hell of a difference with your external view and it helps tuning to a VOR station too.
There’s not really a need to overfly KLEE since you can also use as guides the lakes around Leesburg. From here we can fly to Ocala, with or without the help of VOR although we’re flying under VFR conditions, there’s not really a need to use any beacon. Overflying Ocala means that I need to change my heading to 270 degrees. I’m then flying towards the Waccasassa Bay and when I follow the coast I reach in a straight line KCDK.
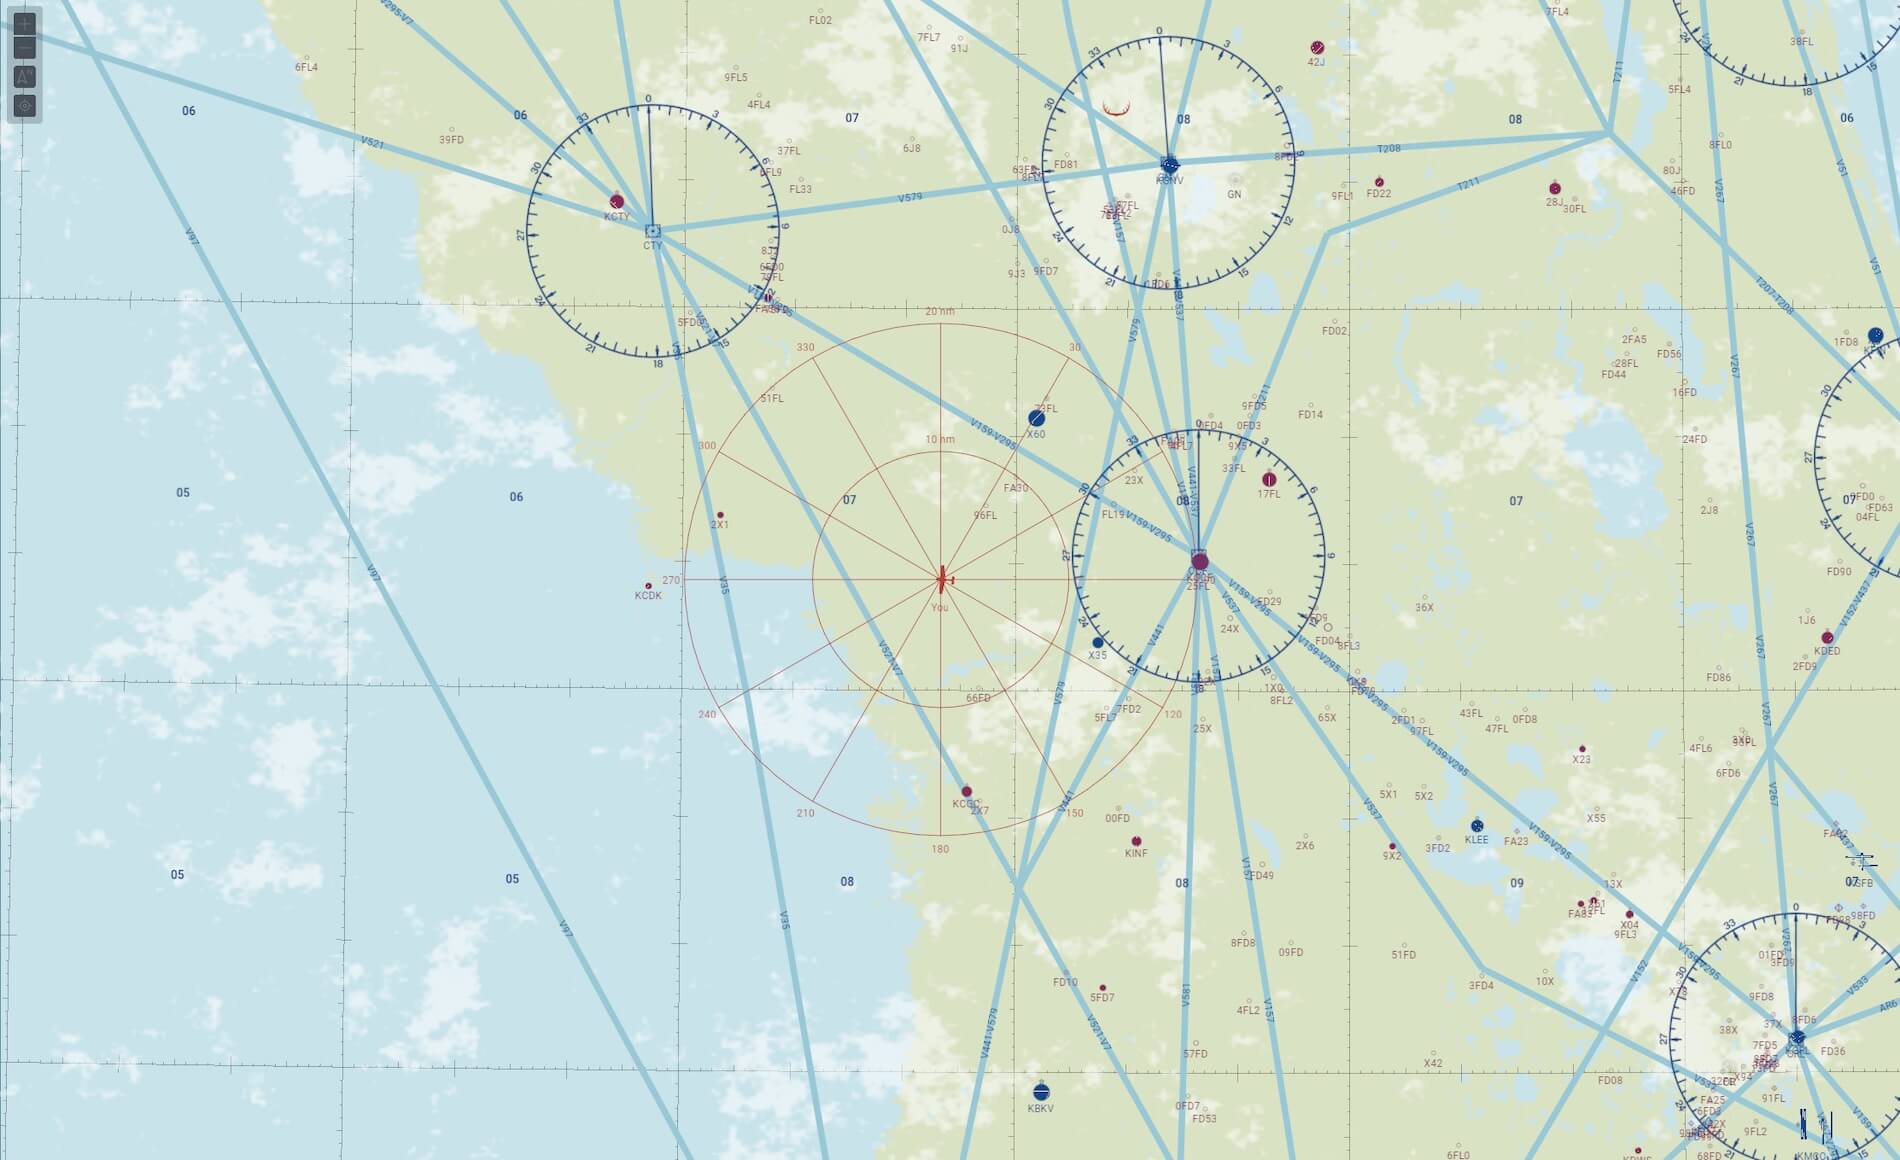
See the SkyVector charts below to rehears what I’ve written in the previous paragraphs.
I’m not 100 percent sure right now, but it could be that you need these days a navigation device like a Garmin GNS430 or 530 or equivalent equipment on-board. In that case it’s all a bit easier. In the way I described it, it was the way I planned this route. On the other hand, planning a VFR route like this one could still start with the sectional chart of Jacksonville.
Preparations | Fuel, GS and TH
The amount of fuel is one of those preparations. You need enough fuel with you for the trip, for the taxi, in case you need to divert, but at International Flight Training we always filled the C152 up to the maximum. And I can tell you that this is also needed for a planned cross country trip like this, calculated or not.
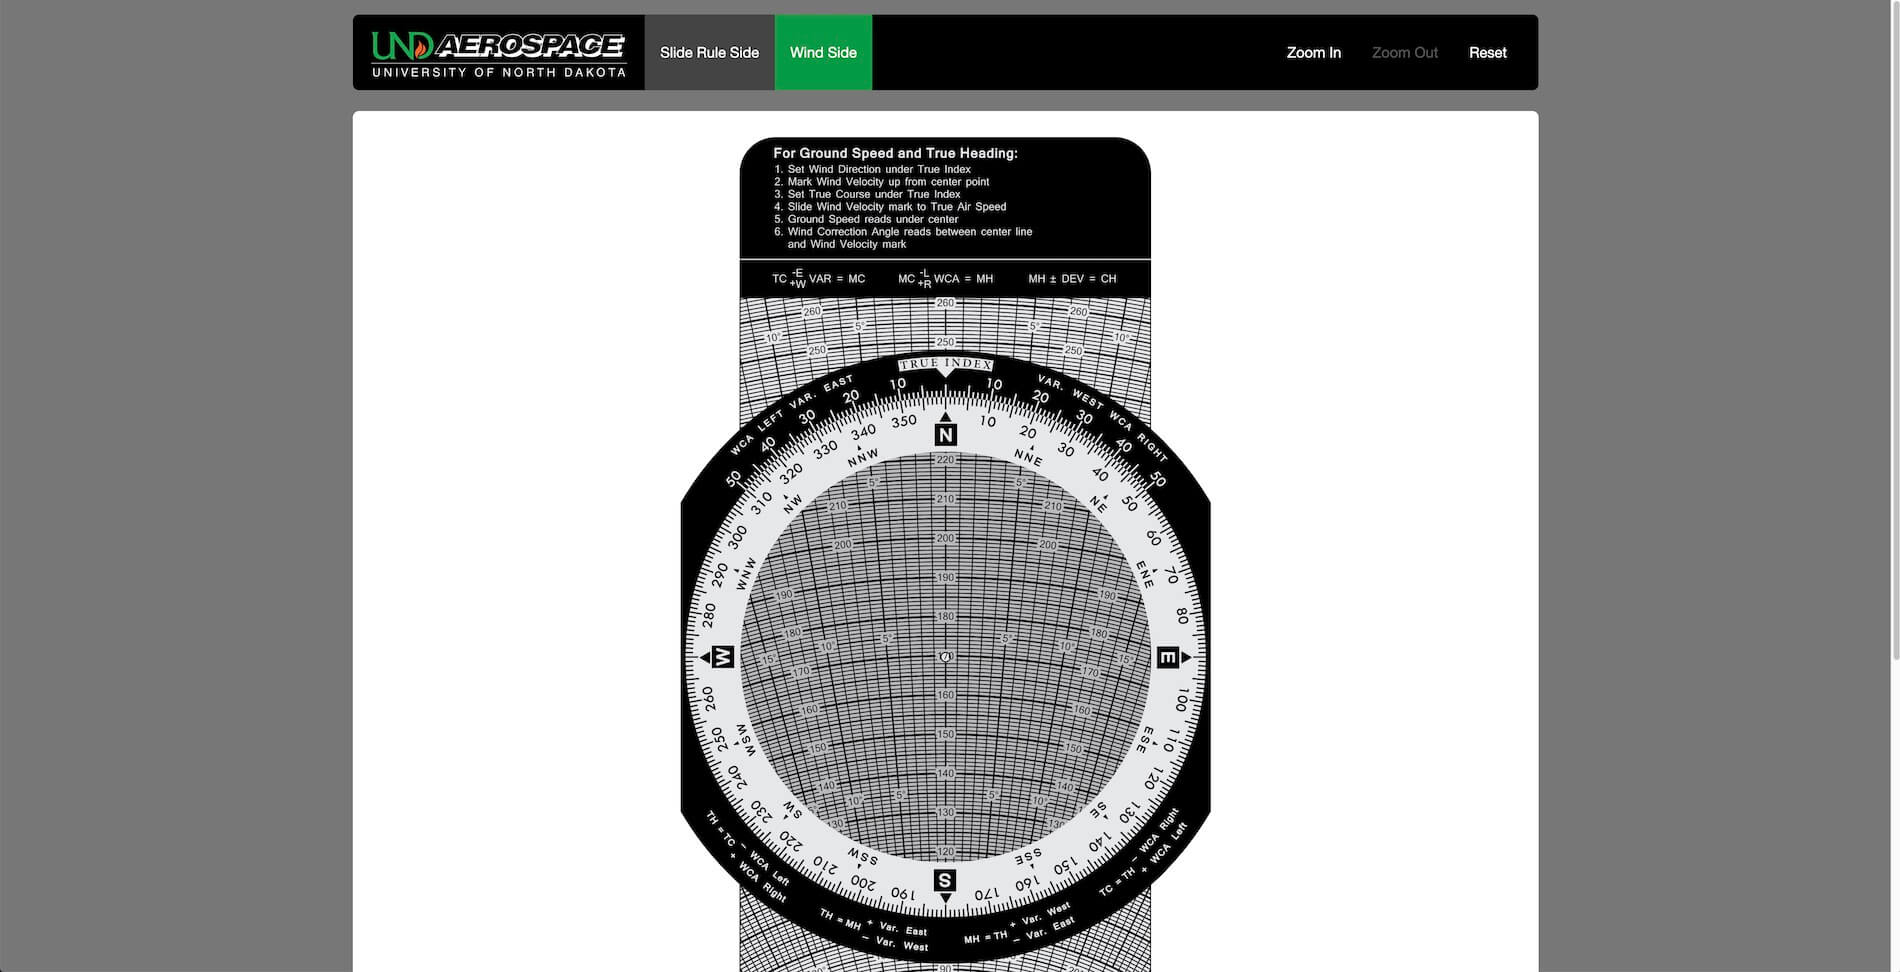
Another item we need to calculate is the Ground Speed (GS) and True Heading (TH). Of course, I could do this virtual flight under CAVOK conditions which is the easiest way to do for this review, but some words about how to calculate GS and TH isn’t such a bad idea. In real I used for this and also ordered by my flight instructor, the original E6-B Flight Computer. Using an electronic device to calculate these values is of course another and more convenient and easier option, but in those days I didn’t had one – I was still learning and trying to get my PPL – and what said before, my instructor wanted me to learn it this way. You agree with it or not.
An E6-B X-Plane Flight Computer version isn’t included in the vFlyteAir C150 Commuter. It is however, included in the Nhadrian C152 package, but that doesn’t help me, so I need to find another way and lucky, there are many freeware E6-B available on the Web unless you own yourself a mechanical E6-B, then there’s no need to search for E6-Bs on the Web.
Let me first offer you some online E-6B flight computers and/or manual:
- University of North Dakota (UND) Aerospace
– Private Pilot Study. Note; this URL shows you the front of the E6-B. When you add behind the URL back like this “http://www.privatepilotstudy.com/e6b/back”
– E6BX.Com
– ASA E6-B Instructions
Some words about the offered links. The E6-B online flight computer from University of North Dakota (UND) Aerospace is the most realistic one that represents for the fully 100 percent the mechanical E6-B. It is dedicated made and used by this flight school for their students.
The website E6BX.Com does not only offer E6-B calculations but a bit more. You can request the weather report METAR and TAF. In our case this will be KEVB but this results in no report since KEVB still doesn’t offer any reports. Therefore, and as I did in then, you request KDAB which is the nearby Daytona Beach airport. But it not only gives you the METAR and TAF, you can also decode the message thus it tells you what everything means. Very handy! Further on, it also offers a navigation log, but I haven’t seen an option to print it. And finally, the website also offers other calculations to do and last but not least, the E6BX app is also available as a pay-ware app for iOS and Android.

And this is only an example of what’s available. There’s so much more. You can seek on your Smartphone or on your tablet for apps which are in most cases not for free. You can also do a search on Youtube how to use the E6-B. One nice and informative E6-B video example is this URL. With the help of an example, the E6-B instructor explains how to get the GS and TH.
Preparations | Weight and Balance
Lucky that vFlyteAir included the original manual (C-150L-1972-OwnersManual_NotForRealFlight Acrobat file) in the C150 Commuter package. Lucky because you need to figure out if the total weight of the aircraft with everything you take with you on this cross country trip – baggage, amount of fuel for the VFR trip and a passenger perhaps – is within limits. Then, when you know the total weight and the moment, you can check if this is within the acceptable Center of Gravity Moment Envelope” as it is officially called. You can find this information starting on page 44 till and including 48.
Out of experience I know that when I had my PPL lessons and I had to do flights on my own, I knew that I was within the graph representing the CoG moment envelope, but as we all know, it’s not much work/time to figure out if you’re save or not.
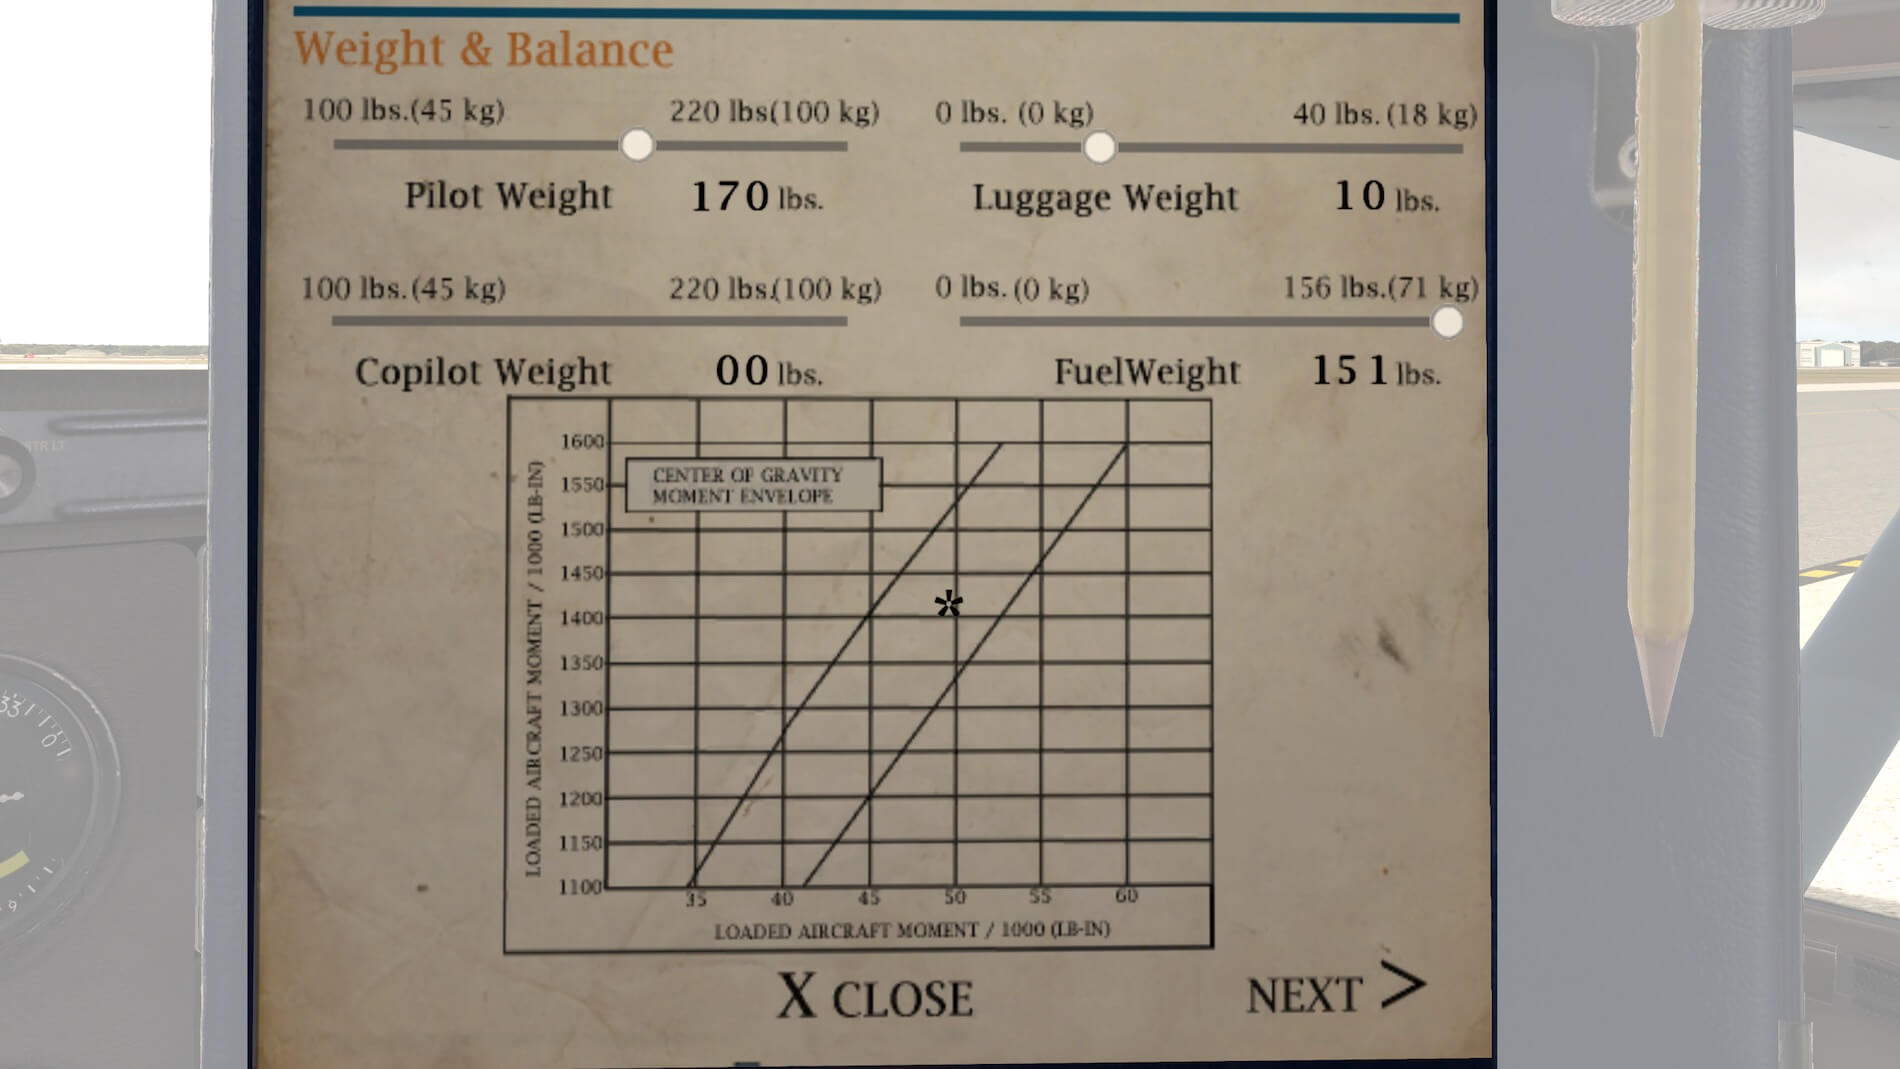
As stated on page 46, it shows you a sample airplane with values versus “your” airplane thus the vFlyteAir C150 Commuter. Since I don’t know if the vFlyteAir has any changes noted on form FAA-337, I assume for now that the modeled vFlyteAir has the same values for licensed empty weight as the sample model. When you prefer to sit in the cockpit and do all the weight and balance calculations, you can do that via the vFlyteAir kneeboard. This time the graph is interactive which means that any weight changes you make are immediately shown in the CoG moment envelope and right away you see if you’re still in the acceptable area.
Preparations | Walk-Around Check
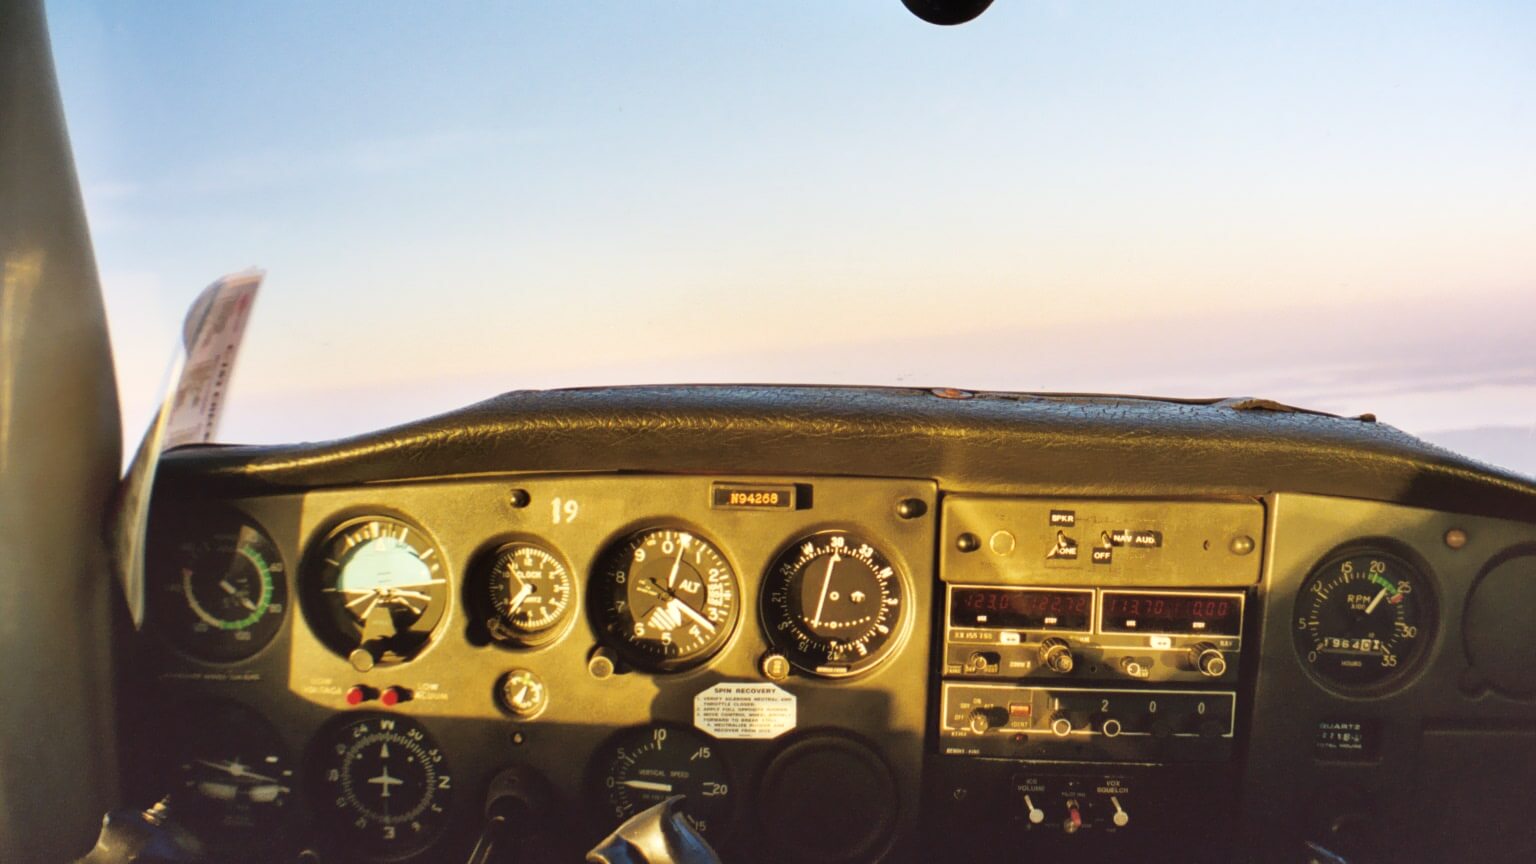
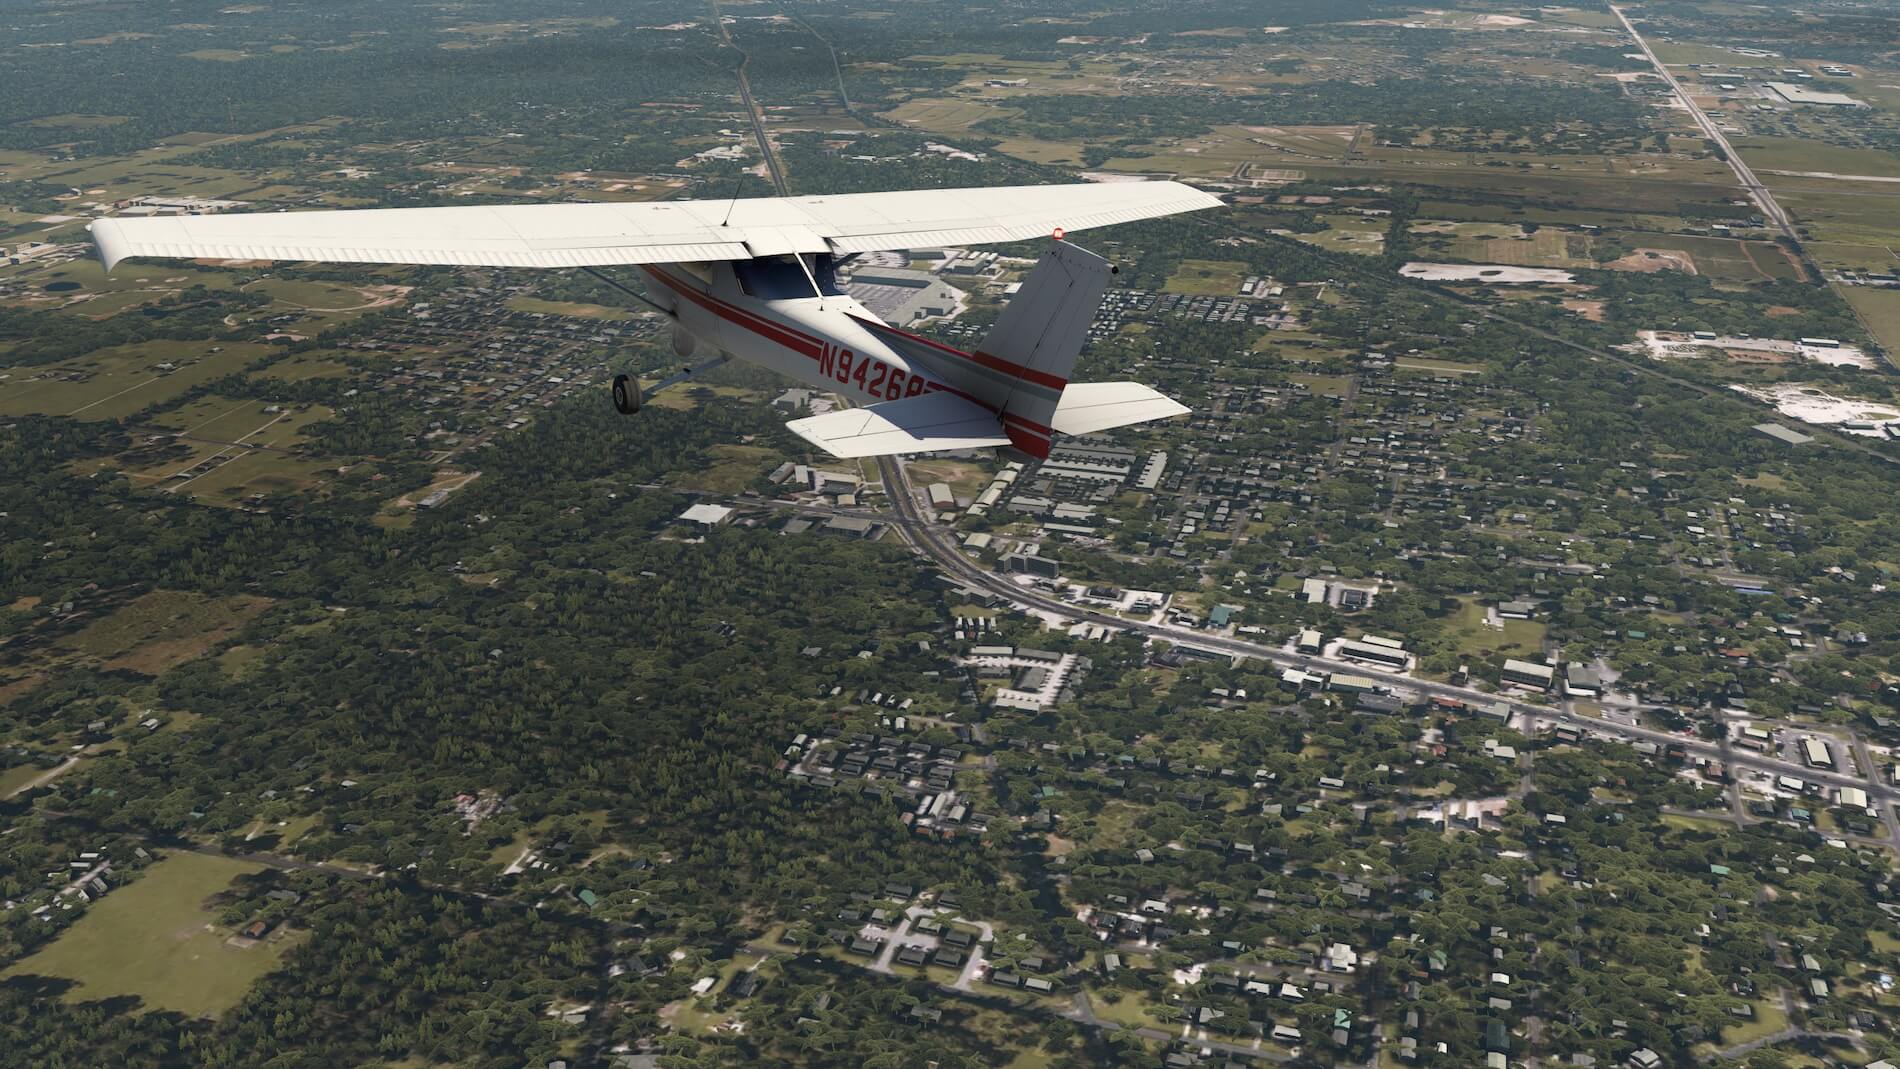
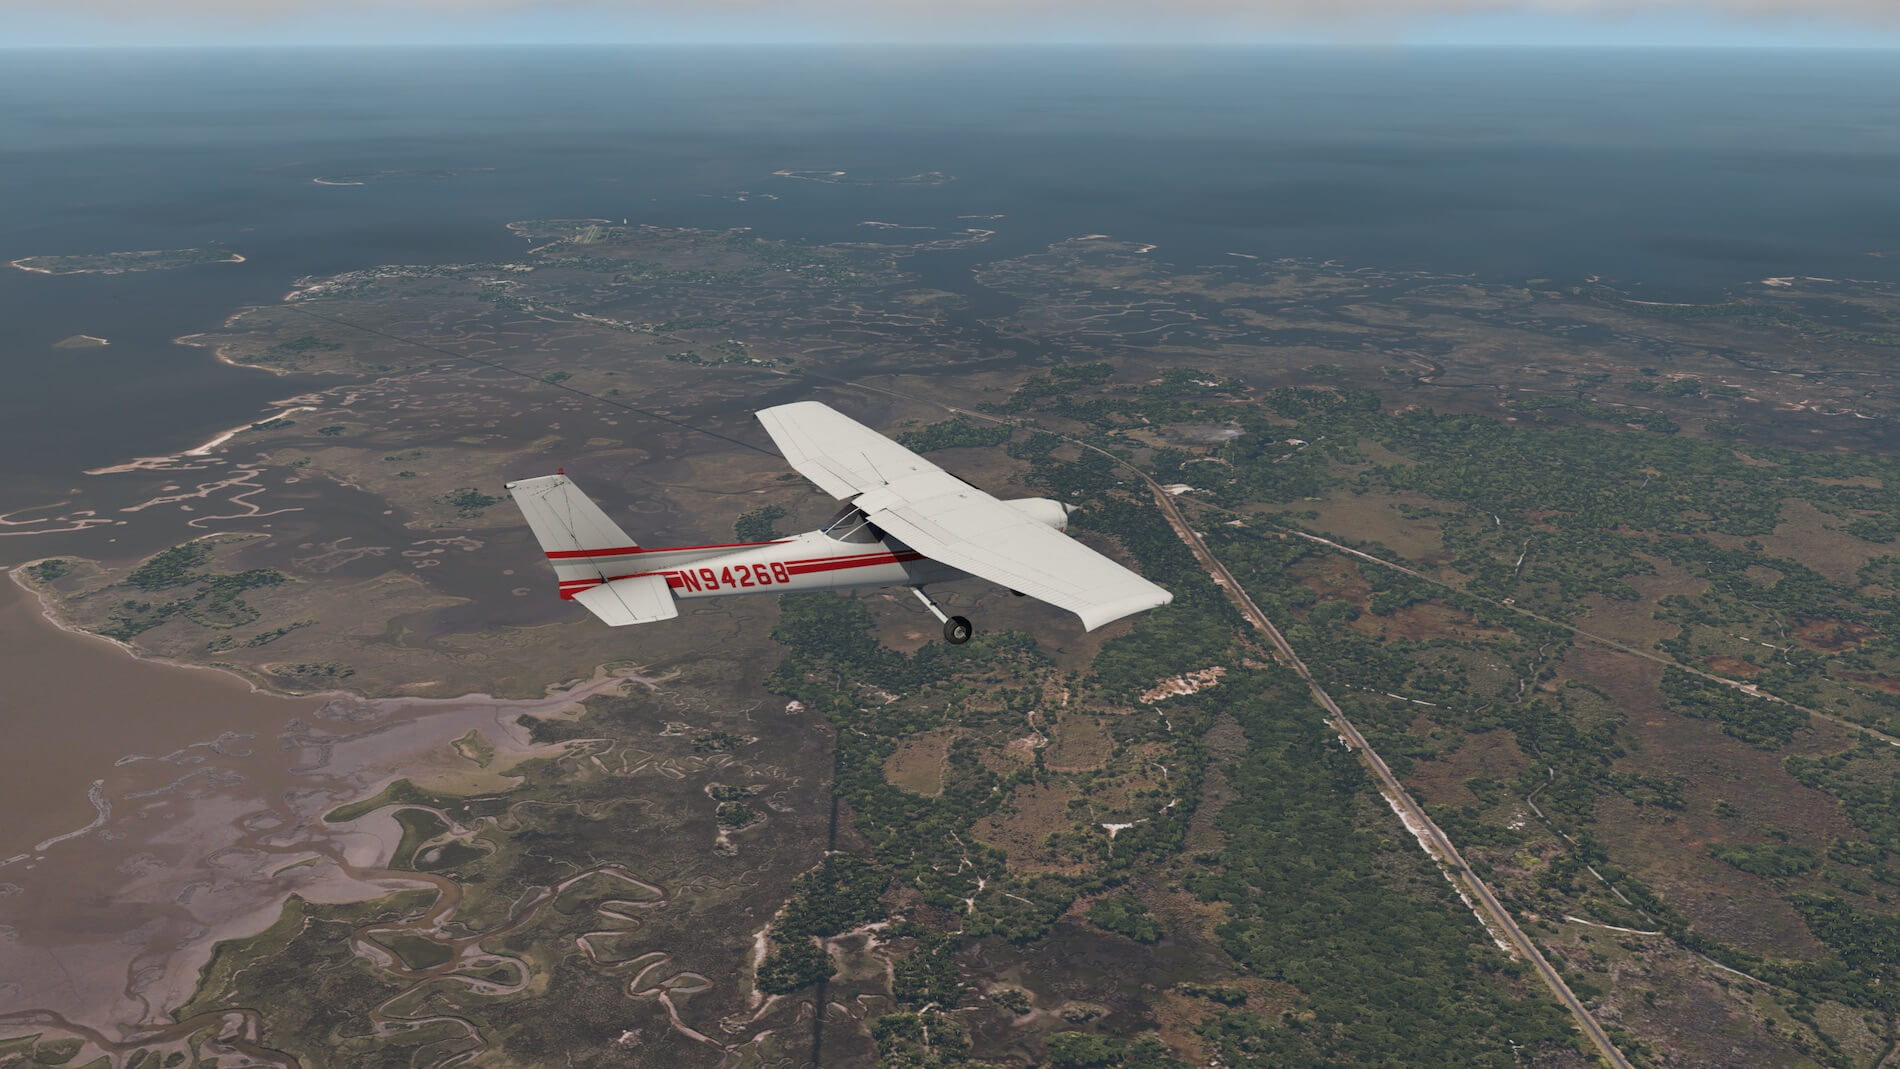
I do my N94268 walk-around in a way I want it, but it’s also worth to check the user manual starting with page 17. On purpose I mention my real aircraft registration from then; N94268. Walker from vFlyteAir painted for me this livery on special request. It was my baby those weeks and I still love it although I don’t fly anymore. With the N94268 livery loaded, I’m going to do fly this cross country flight.
Oops, back to my walk-around check.
When you and I follow the steps in the user manual, you’re guided to the external of the Cessna and allows you to do the walk-around check. Do I need to do this again since Andy did it in his review? A thorough check I won’t do, but I will give you my impression, only because I did my PPL lessons in this Cessna aircraft model.
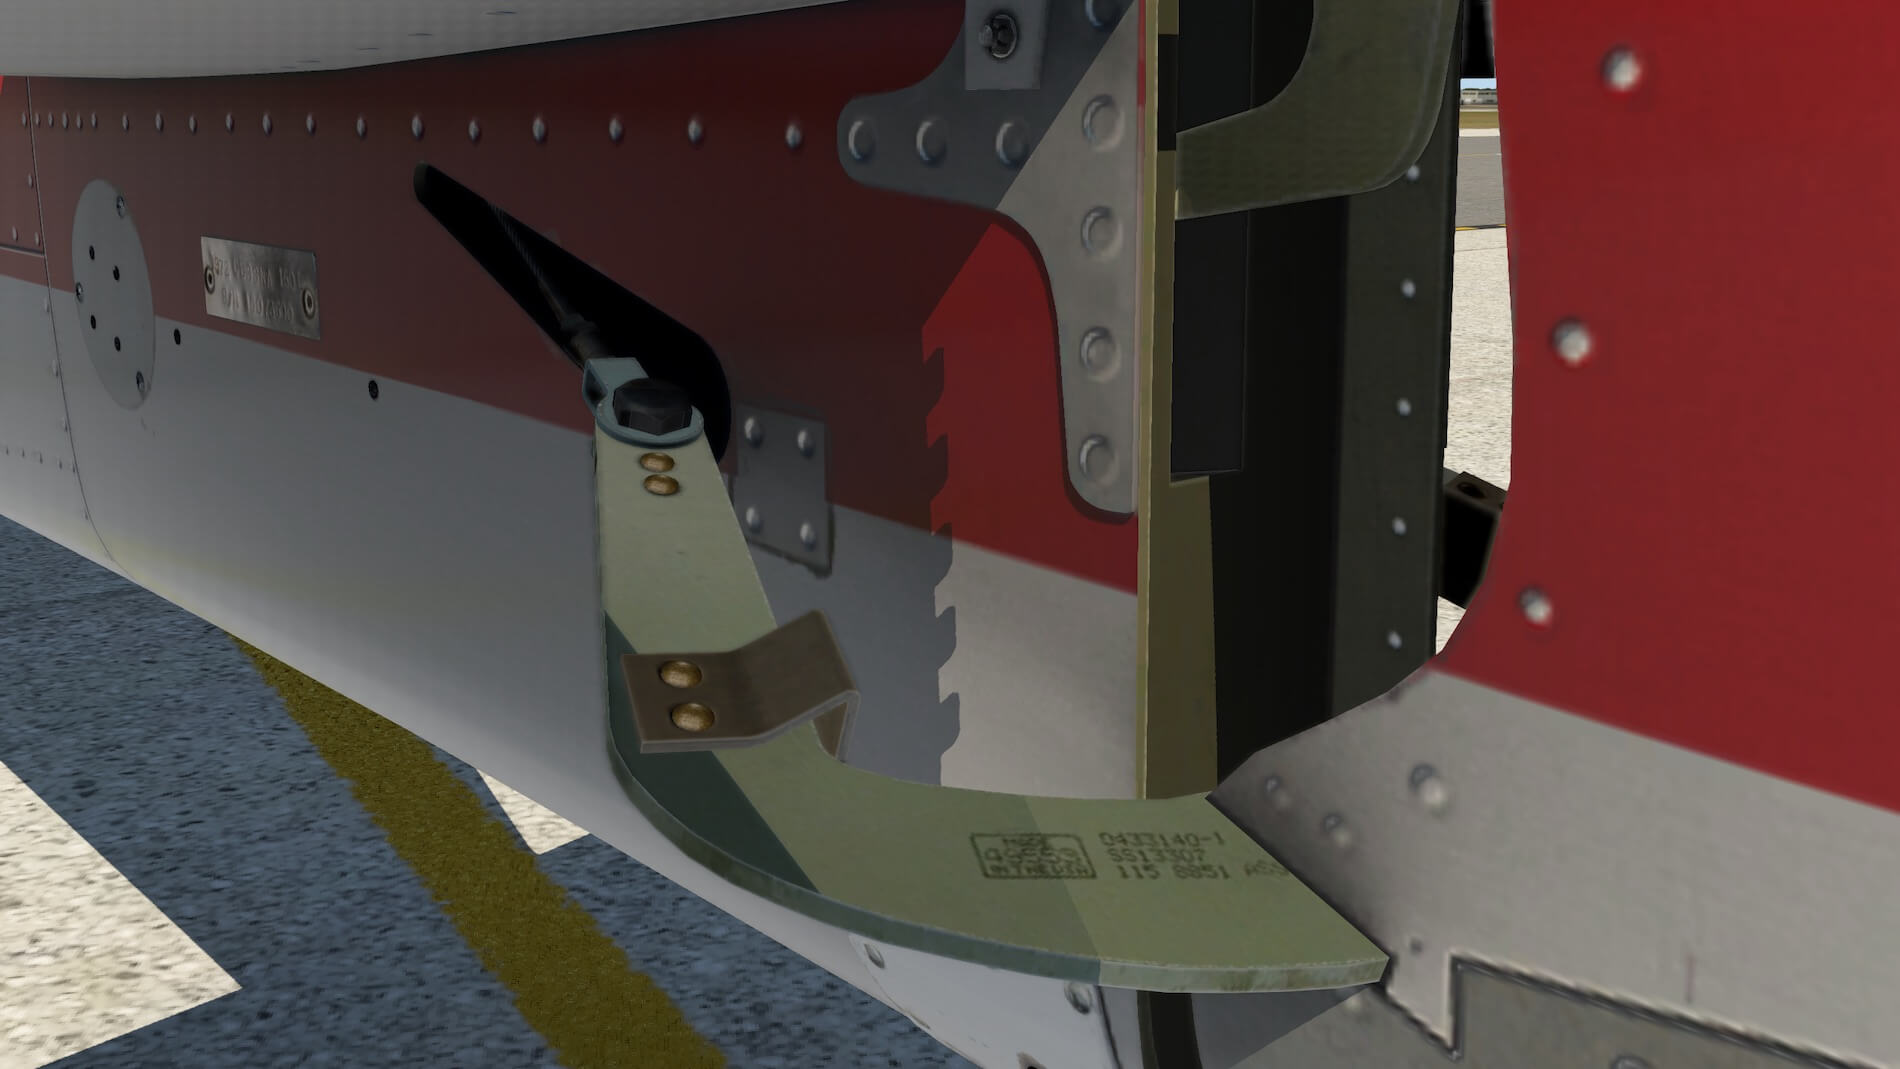
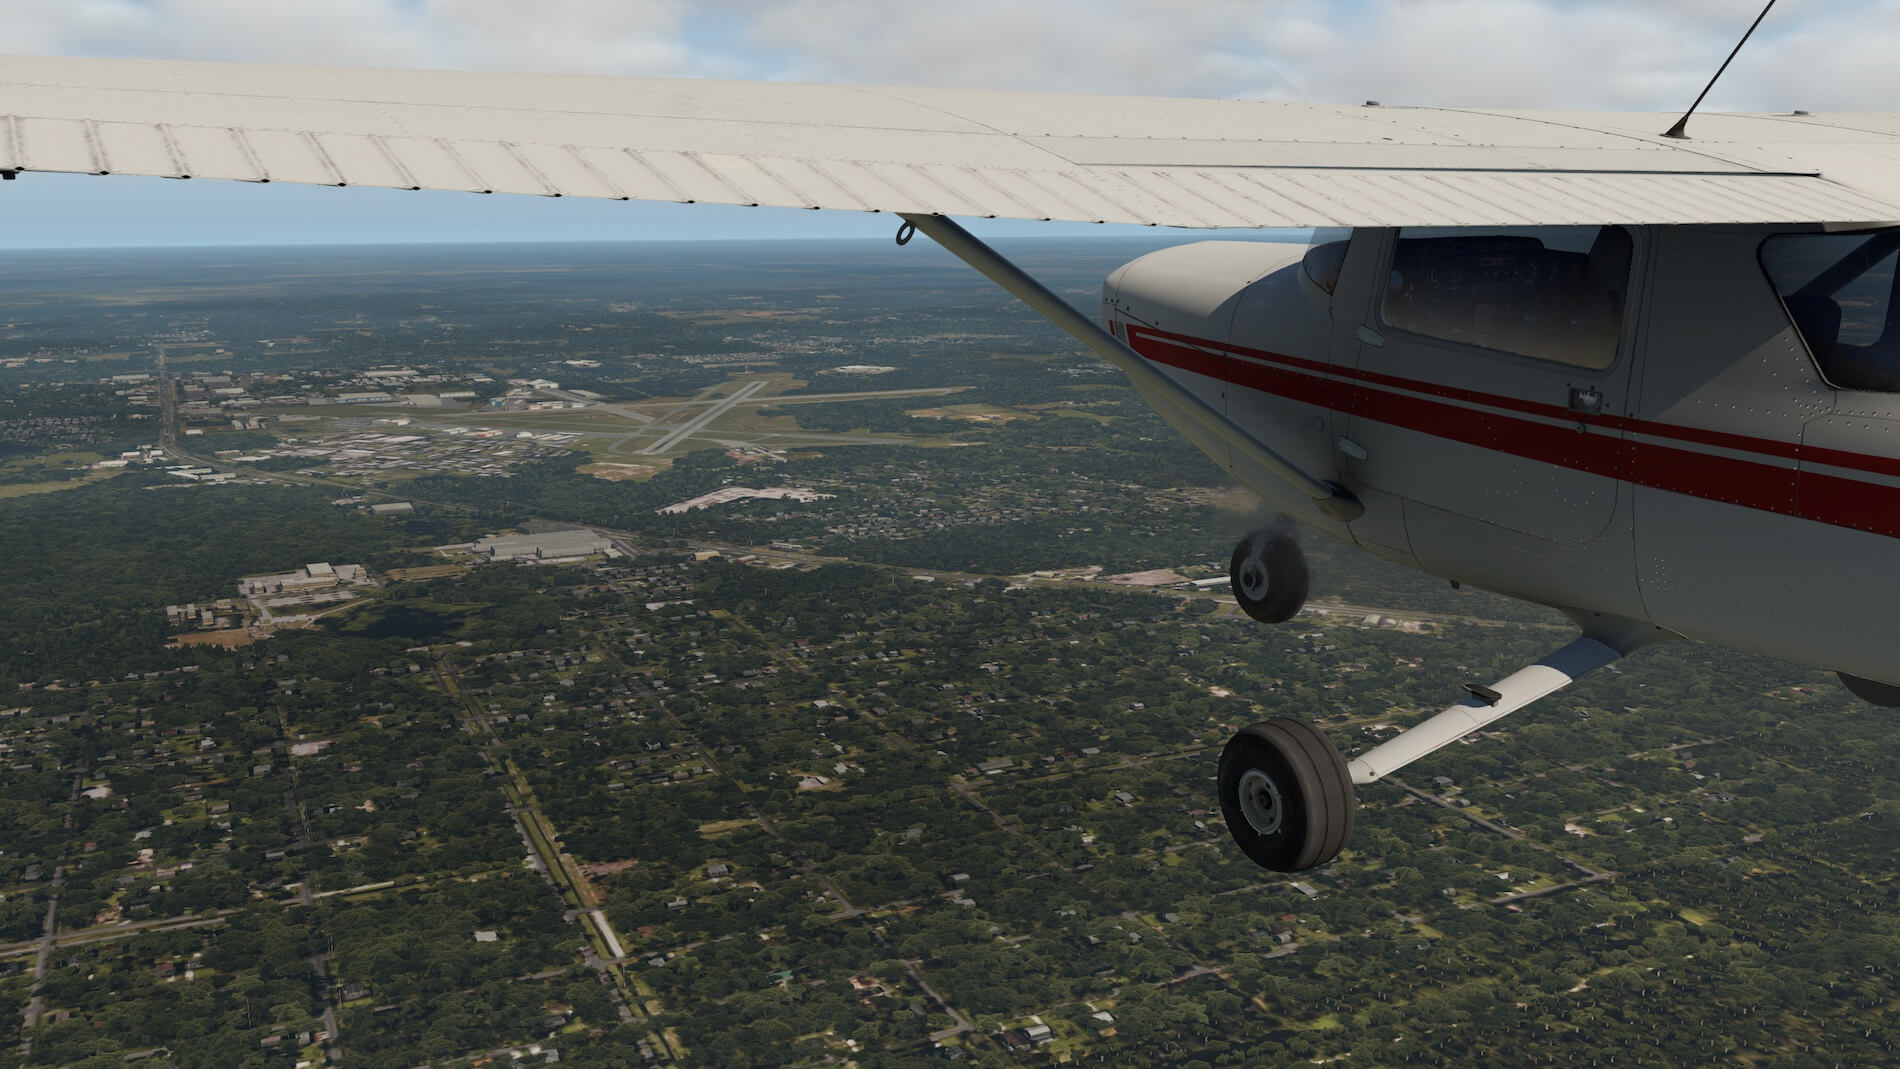
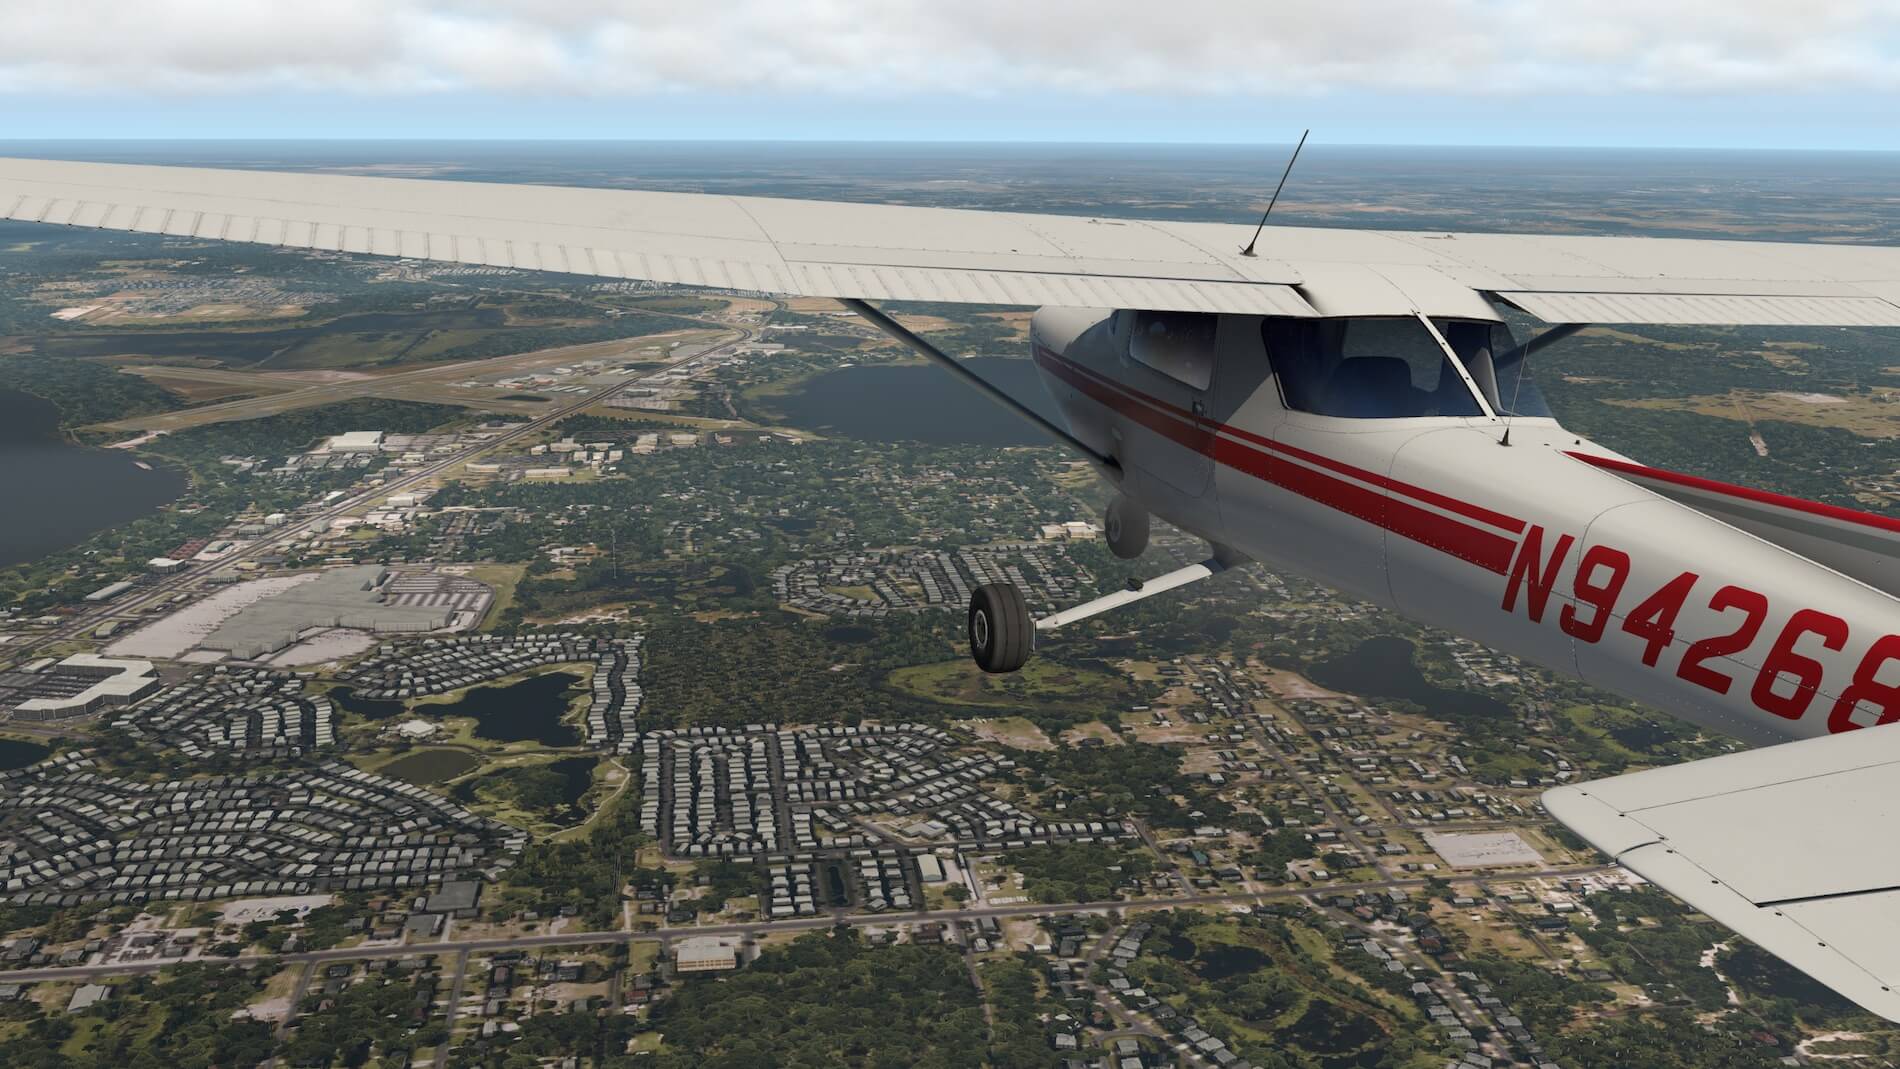
I’m in one words impressed by the model. The overall looks like a Cessna C150, but that’s not what I mean. The model offers so many tiny details, it’s amazing. Let me give you on example; the tail of the Cessna and then in particular the control rods, cables, linkages, stainless steel ID plate. It looks so real. It’s so well modeled with many eyes for all those tiny details.

Next example; the main wheel assembly. The tire manufacture is perfectly readable. Ok, that’s perhaps not shocking, but the brake assy and retainer plate are gorgeous. So realistic I’ve not seen before!
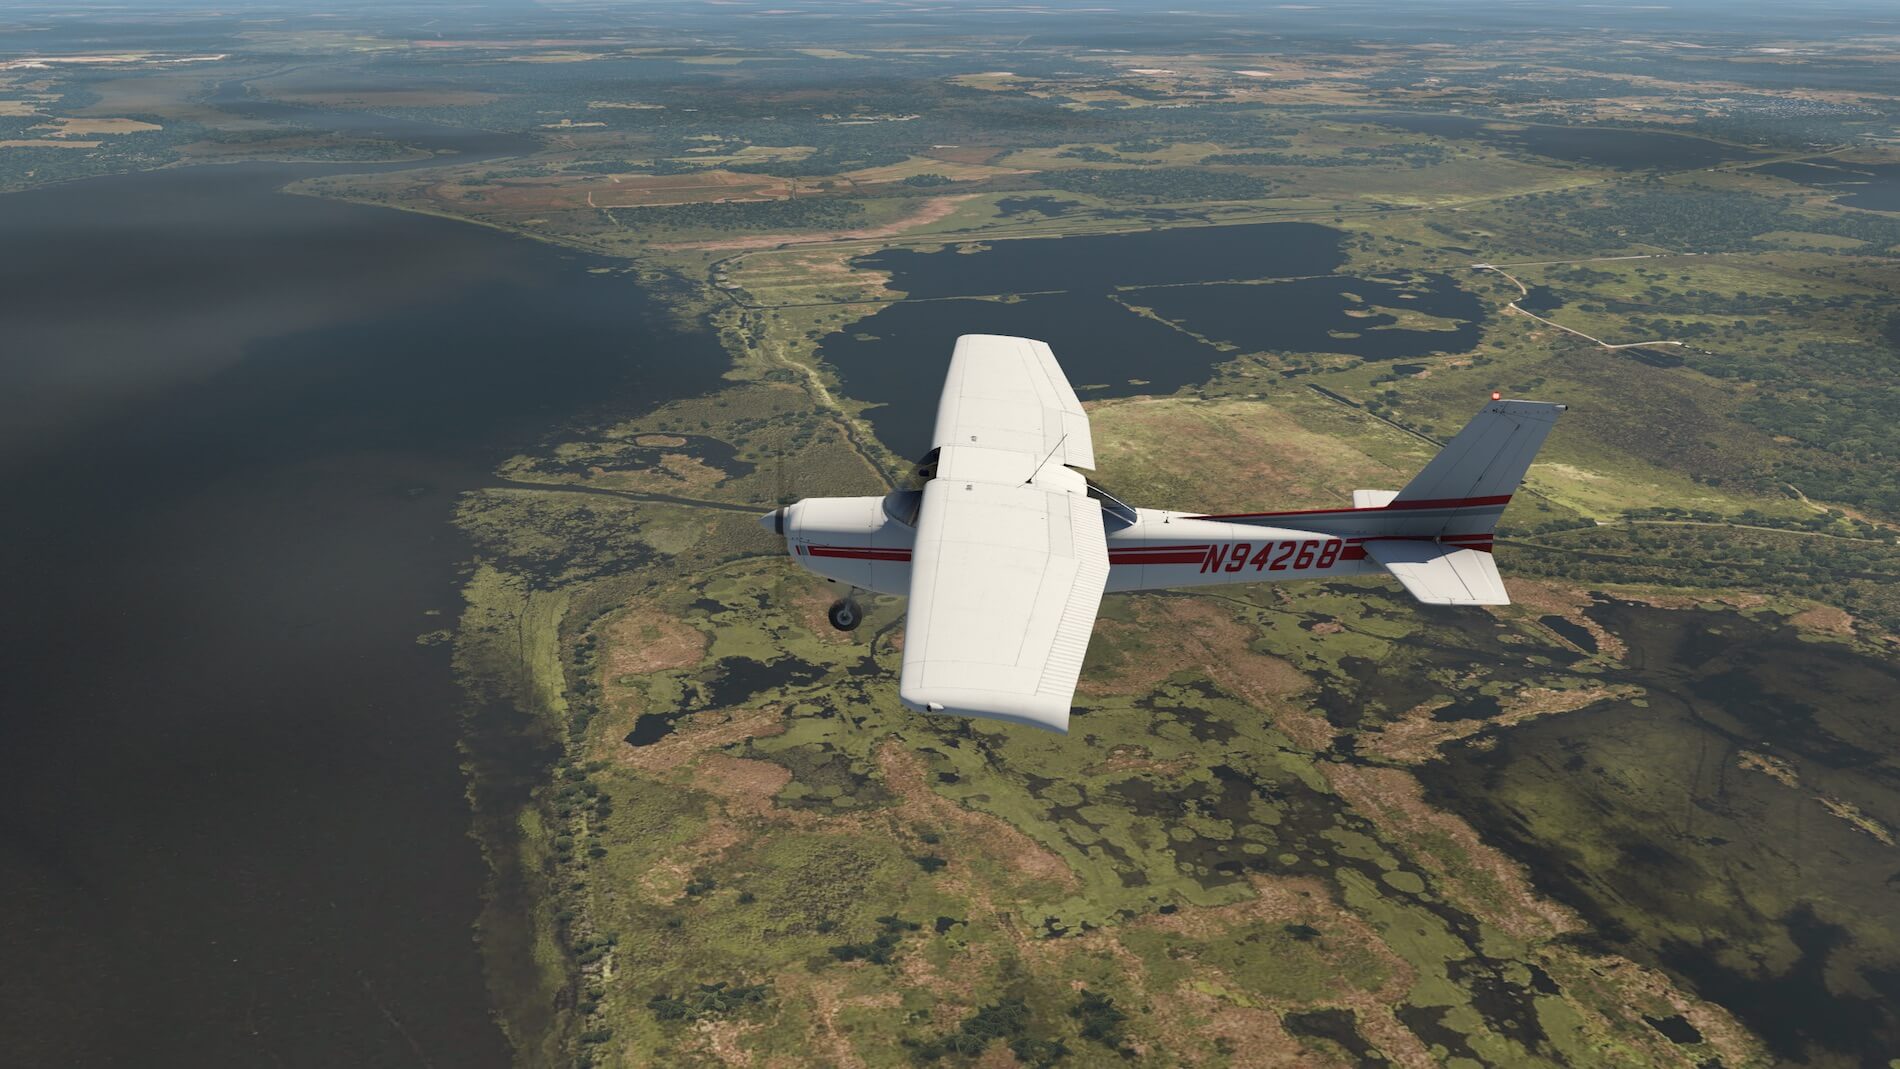
This is more or less the same for the nose wheel assy. The strut that holds the tire is for sure covered with photoreal textures or vFlyteAir has a great paint artist in house who can paint this as if it’s real. But it doesn’t end with this. The tire itself is round and the rim is so nicely modeled. Weird isn’t it .. the tire is round or not? Yes, a real tire is round but in X-Plane it’s not so normal. The more lines are used to create a circle, the more polygones are used and at the end this will cost frame rates. Anyway, it looks great and lets not forget the nose gear strut with steering damper and linkages.


One last example and that’s measuring the fuel level. You need to check at each wing the real fuel level. That said, when you follow the external kneeboard steps, at step 6 you need to do this fuel level check. Click the fuel cap which opens and a dipstick comes out showing you the fuel quality in this wing. In my case it shows 13 which is correct. A filled fuel tank can hold 13 gallons of useable fuel.
Also worth to highlight is the decal next of the fuel cap. My goodness, I can read it. When you zoom in, you can read it without any limitations. I just did this level check at the left-hand wing. The simulation isn’t applicable for the right-hand fuel filler cap. Perhaps, may be perhaps this will be implemented in a later update. If vFlyterAir decides at a later time to add this additional animation, then that would be great.
I continue with the vFlyteAir walk-around checks and reached item 7b “check stall warning vent for stoppage”. I found the stall warning, but what I miss is the small stainless steel stall plate which should be there. Perhaps this is a bit too deep to find this, but I’ll contact Walker and let him know. After I’ve reached item 8 and checked for free aileron movement, I click once more the “Next” on the kneeboard and I’m back in the cockpit with my “trainer” cockpit.
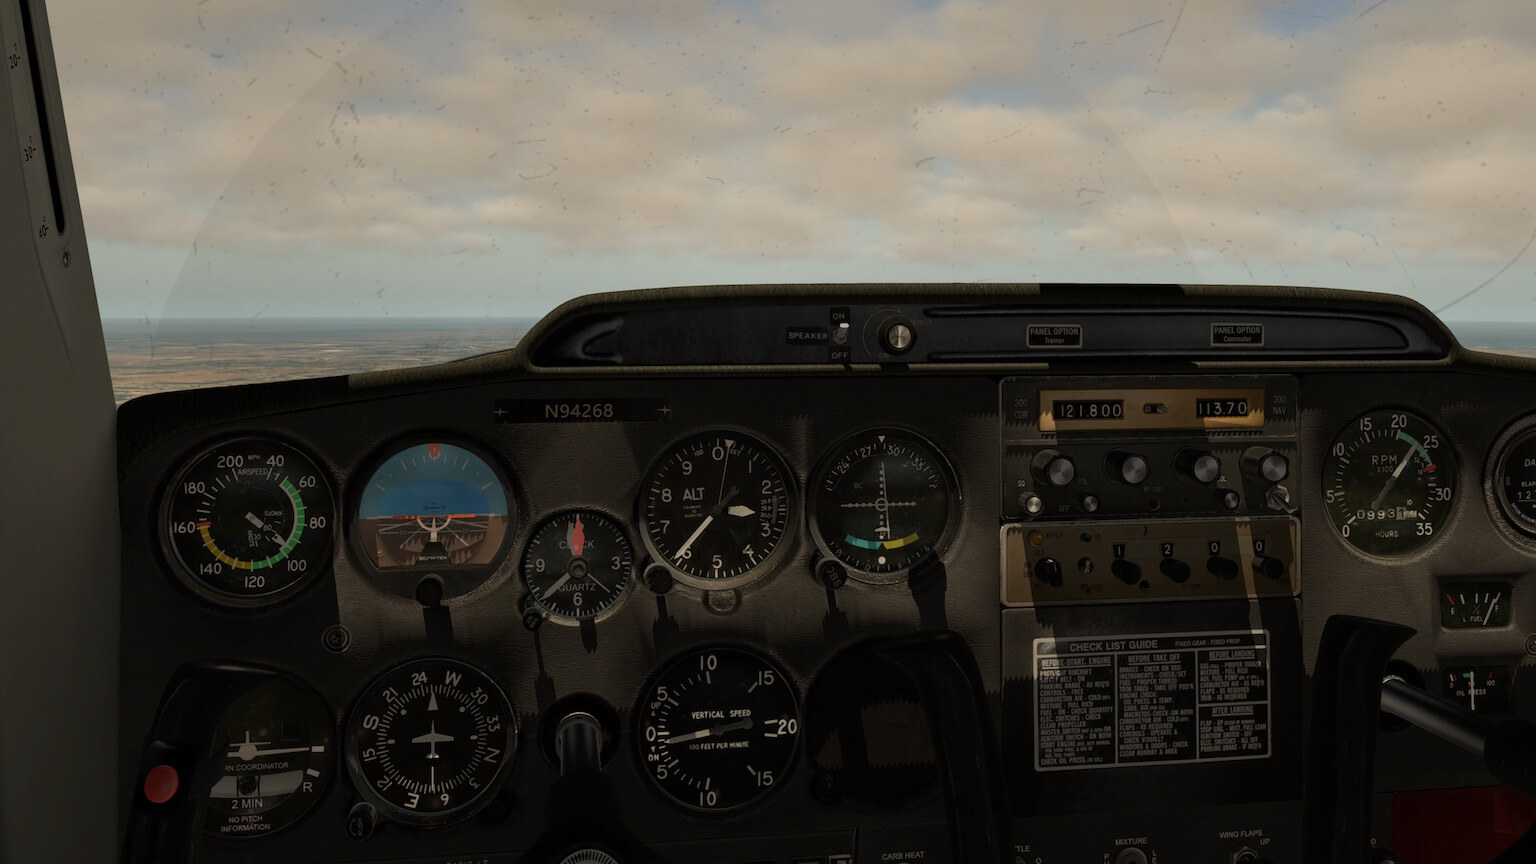
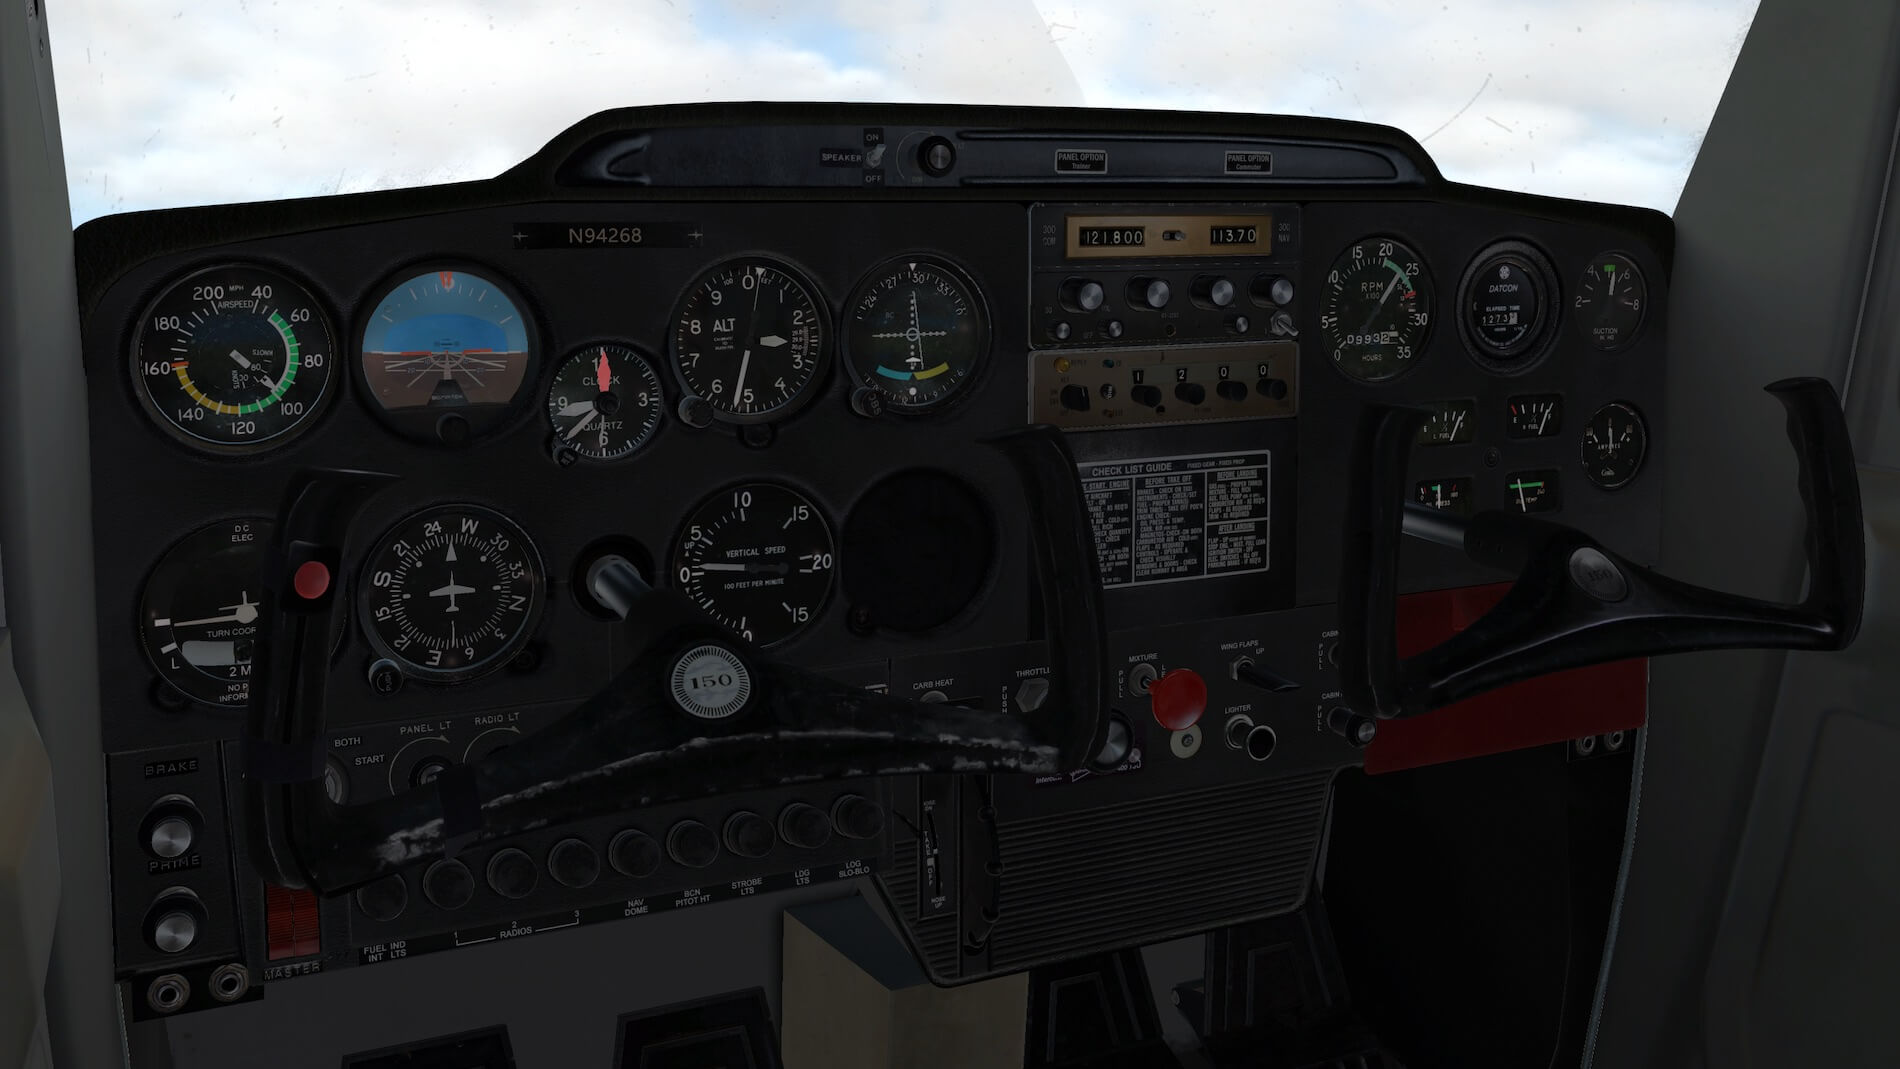
Preparations | “Trainer” Cockpit
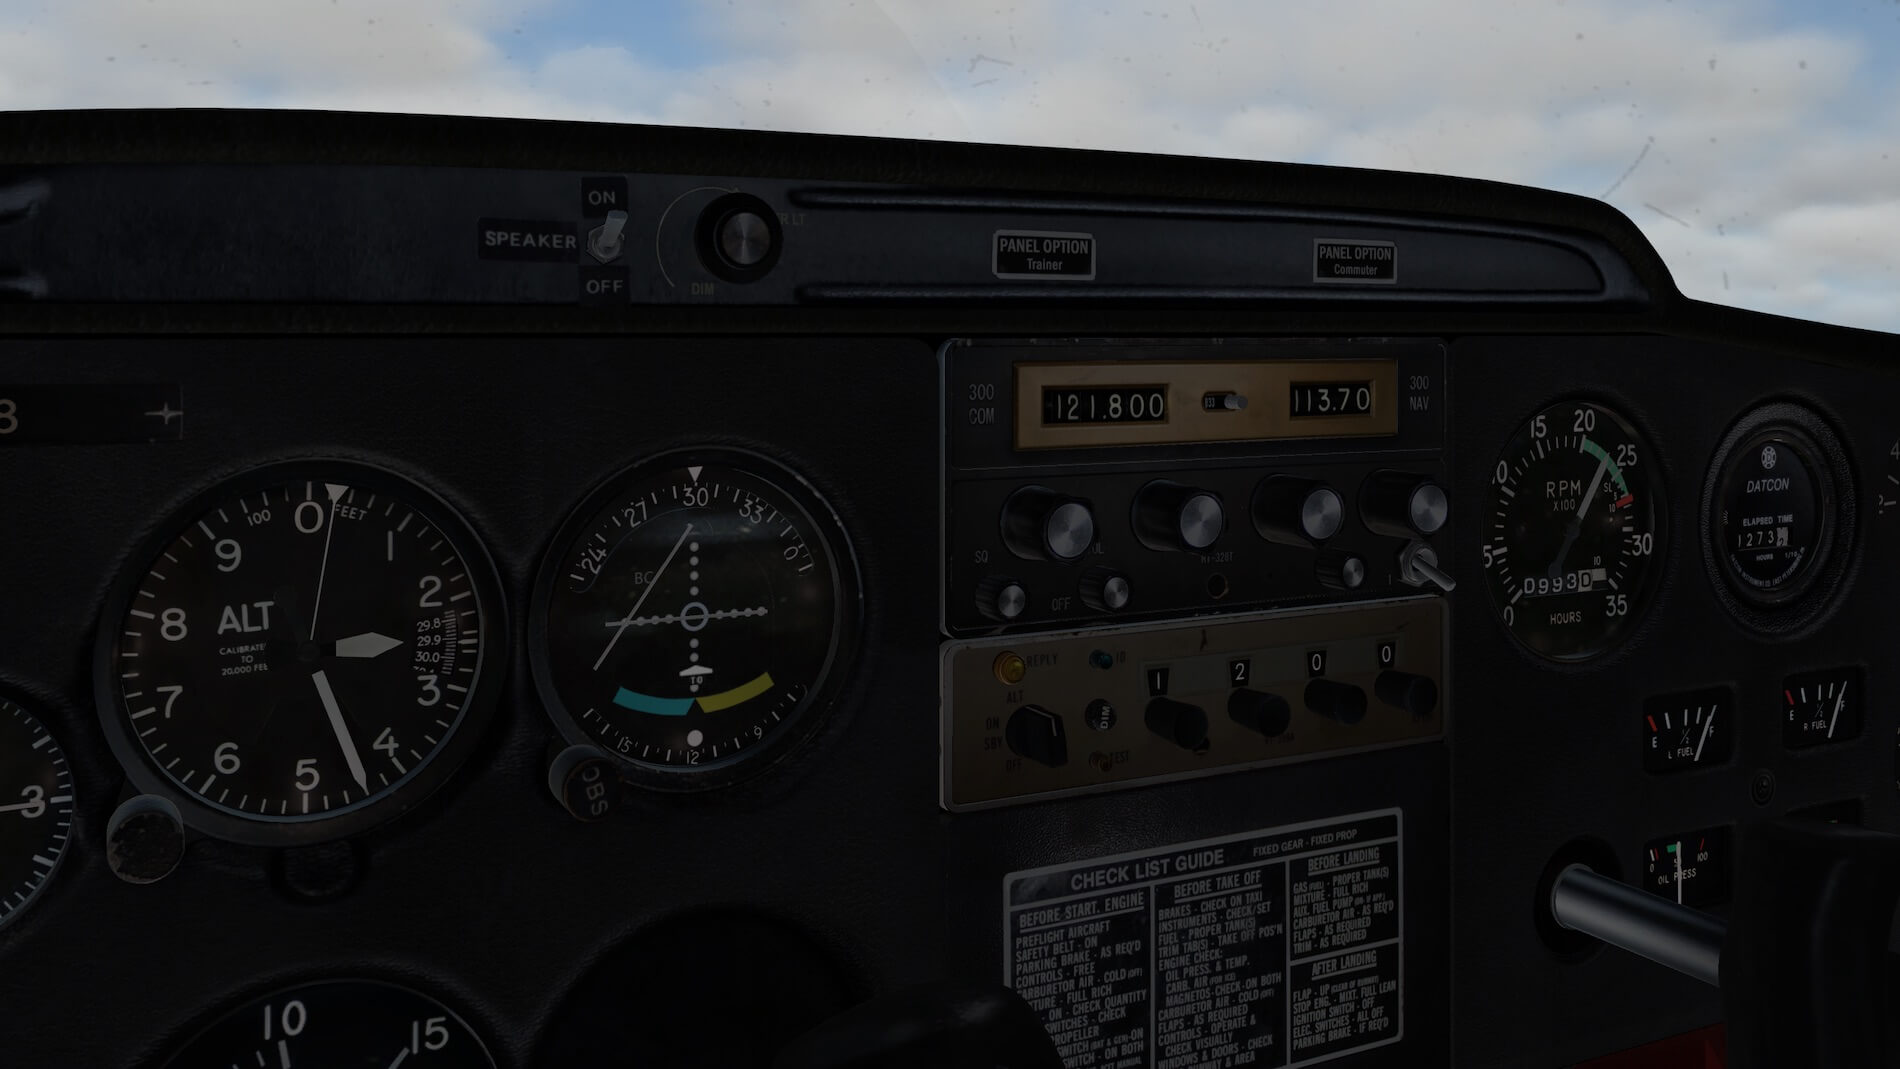
My N94268 cockpit layout wasn’t really like the vFlyteAir trainer layout, but I had one OBS while the Commuter model has two, that’s why I go for the trainer instrument panel. A couple of words about CDI and OBS. A standalone CDI (Course Deviation Indicator) is an instrument that shows your deviation from a VOR radial that is selected using the OBS (Omnibearing Selector) knob located on the instrument itself.
I’ve decided to follow the vFlyteAir procedure “use custom engine start”. By doing this, I need to follow all the steps including keeping in mind a hot or cold day for using primer in the way it should be. As long as you follow the steps as described on the kneeboard for this startup procedure, you’re able to start the engine. The additional checklist steps on the kneeboard are all easy to do although I still have my IFT checklist which is a bit longer, but on the other hand, you always have the C150 booklet that gives you also the steps to do. Time to go I would say, right?
The Cross Country Flight
First stretch : KEVB (New Smyrna Beach) – KDED (De Land)
I’m sure you’re now aware that my cross country flight goes from KEVB to KCDK. Knowing that, I’m at the point using real weather or creating the weather myself. Normally I would say immediately .. real weather, but this could mean that the visibility is low, that I can’t climb to 2500 feet or even higher which will ruen my VFR plan. That said, I’ve decided to add some cloud layers myself with a visibility of 45 NM. I will add some wind too since this is quite normal for this area.
And, some implemented wind in X-Plane is needed else it feels for me that I’m then flying in an environment that more or less unrealistic. I can tell you, with no wind implemented, that the modeled C150 flies way too stable. Ok, a no wind condition in and around KEVB is always possible, but I wonder if there are days with no wind!
When I flew during my PPL period the C152 it felt like an unstable aircraft which wasn’t the case, but it felt like that. It’s a relatively light aircraft and bumps and winds constantly bring the C152 out of balance. In other words, I was always busy with pitch trimming or keeping it at my intended heading/track. Oh yeah, that’s another thing to remind you; the C150 Commuter only has a PITCH trim, no rudder nor aileron trim.
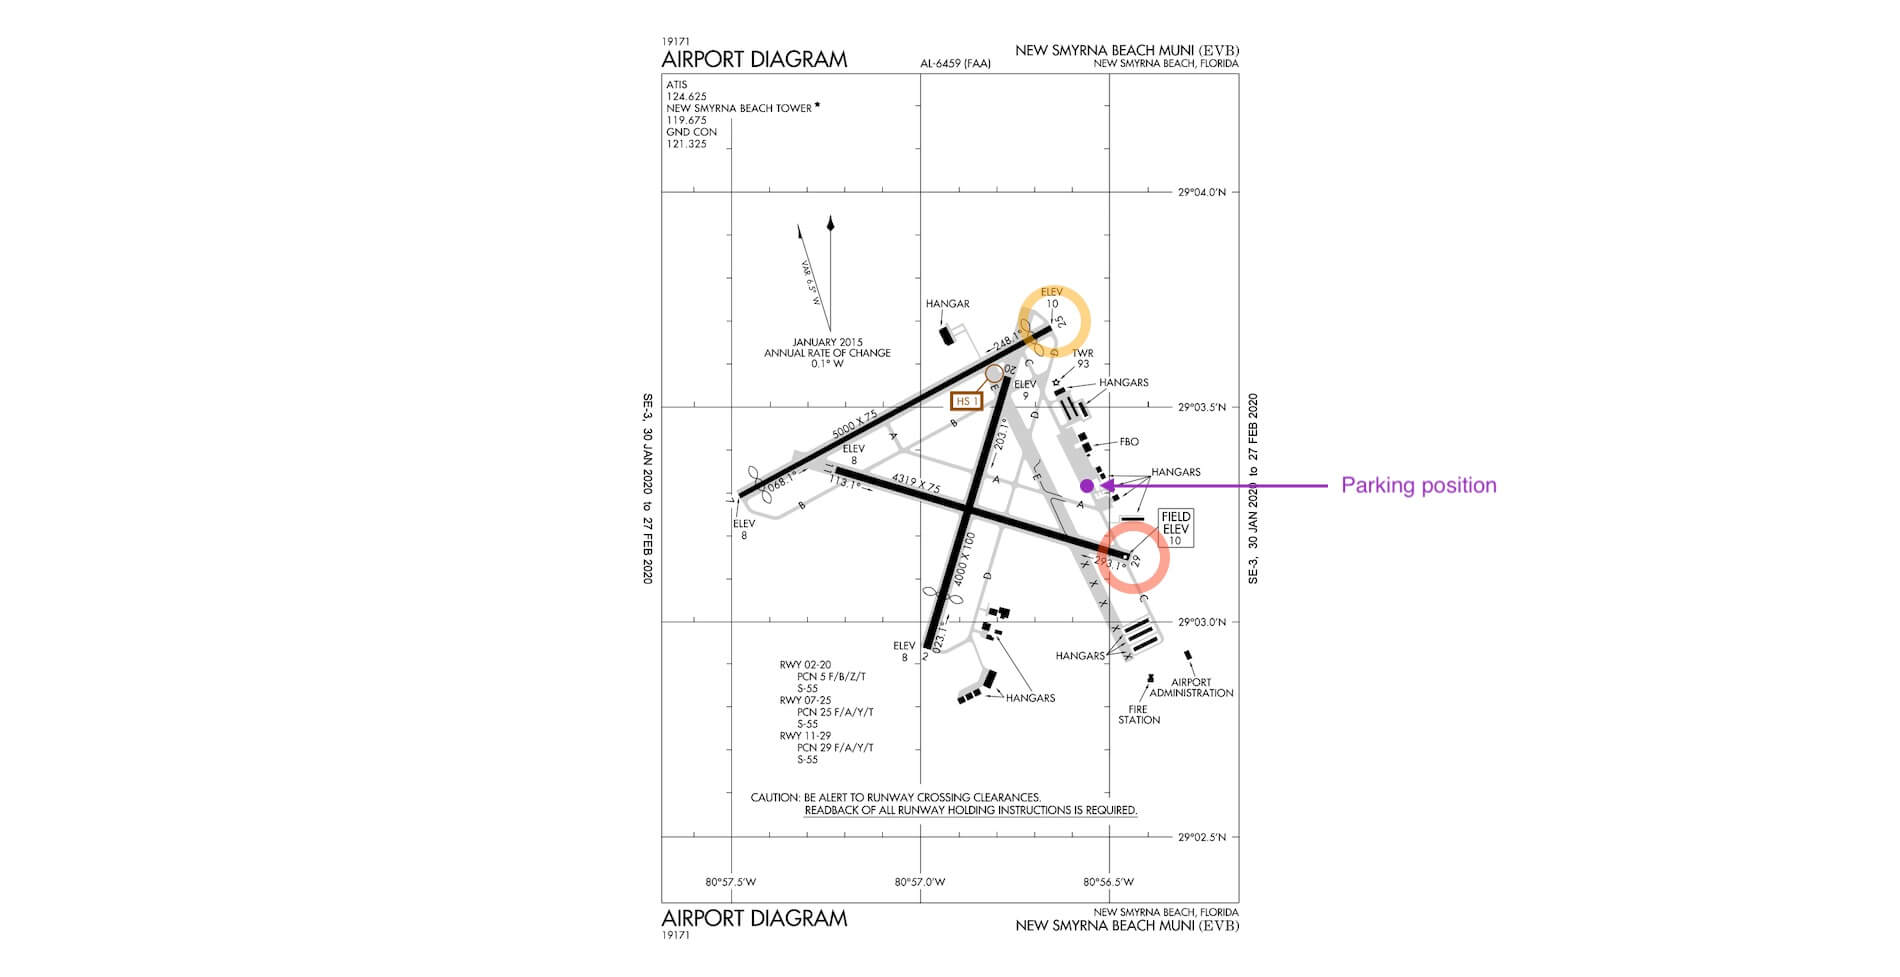
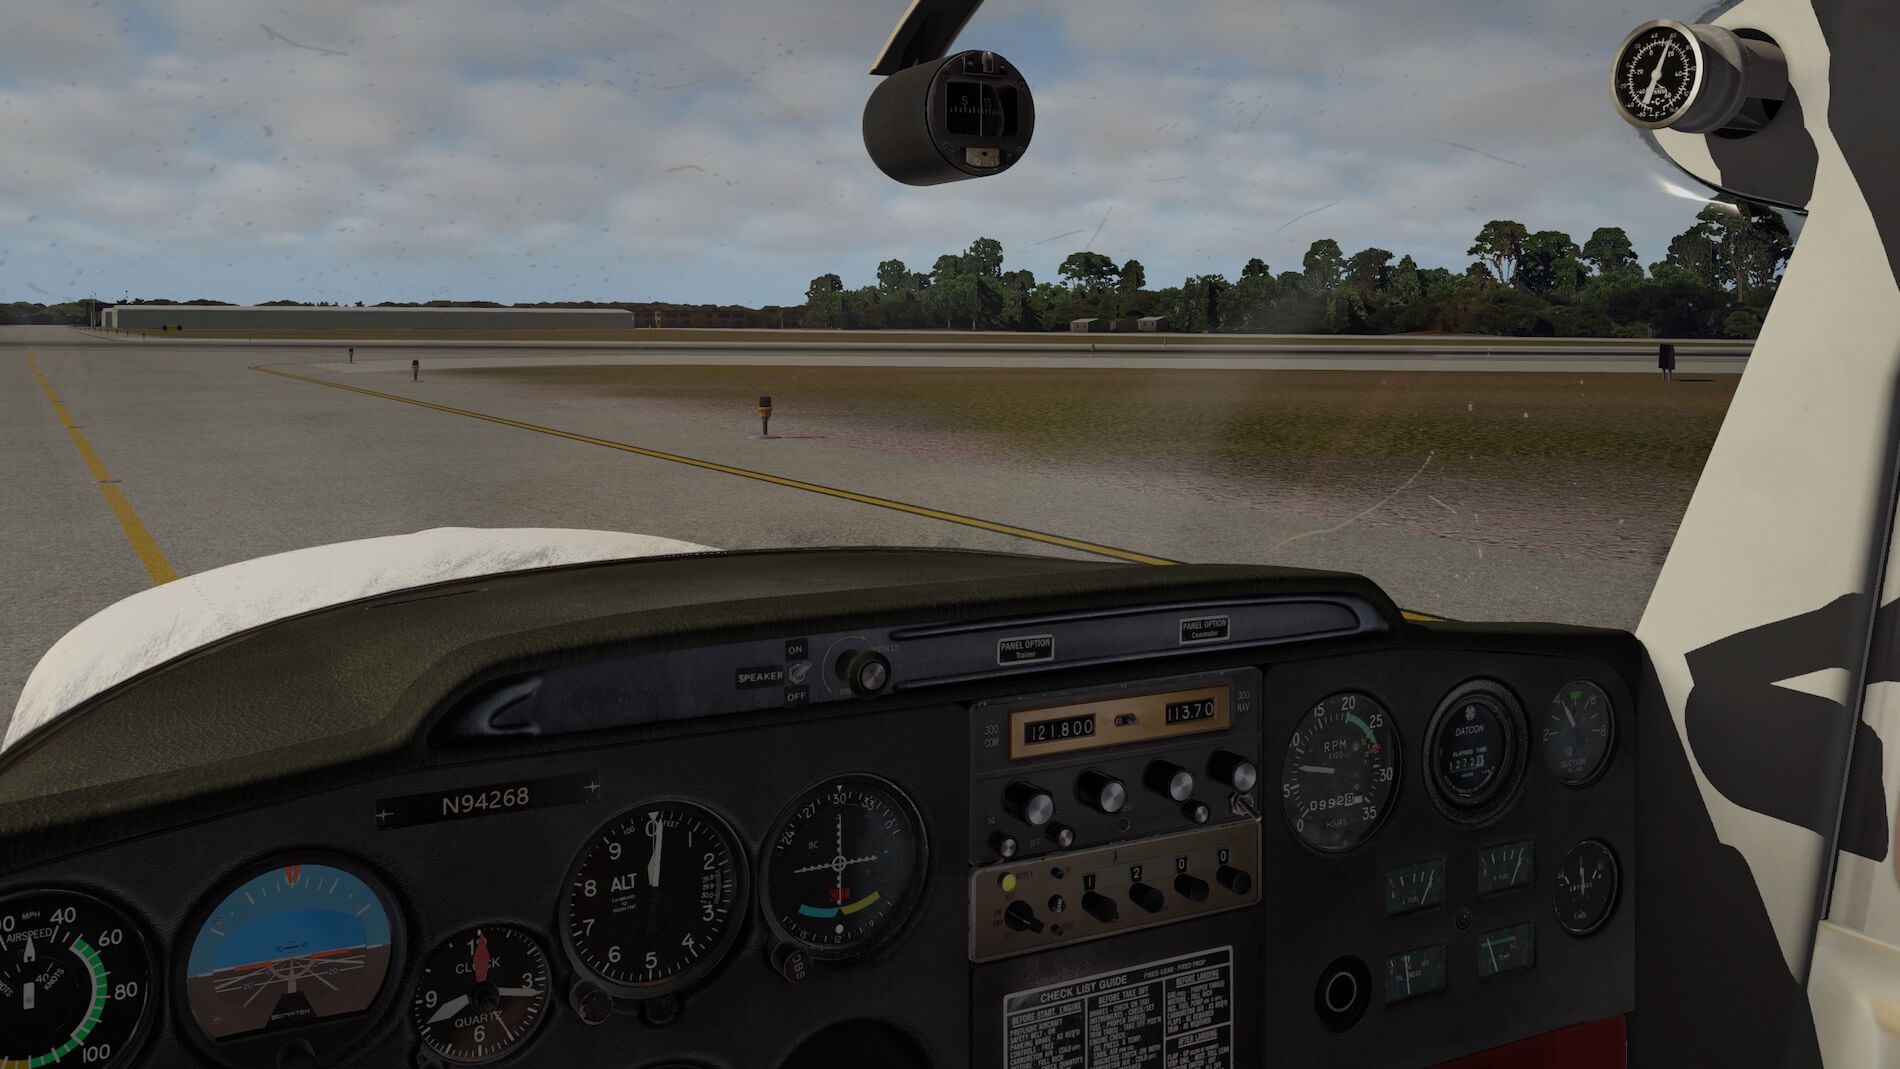
Anyway, as described in the previous section, engine is running, time to taxi to runway 29. It all depends on the wind direction of course, but that was not really a problem those days as well as it is today, February 15th 2020. Taxi from the virtual IFT (International Flight Training) hangar/office was and still is a short distance. Once and a while we also went for runway 25 which means a bit further away from our parking position.
Just before reaching runway 29, I do the magneto check and follow the other steps in the checklist. It’s not much you have to do, but each step is important and so easy to forget.
I check my kneeboard once more; rehearsal ….. lift the nose wheel at or around 55-60 MPH, climb out with 70-80 MPH. Follow runway HDG of 290, passing 400-500 feet with a V/S (vertical speed) of 500 feet/min, then turn to a HDG of 270. Climb out till 1000 feet till either I cross the 2nd highway or I just wait till I’ve almost reached KDED.
OK, ready to go for the takeoff?
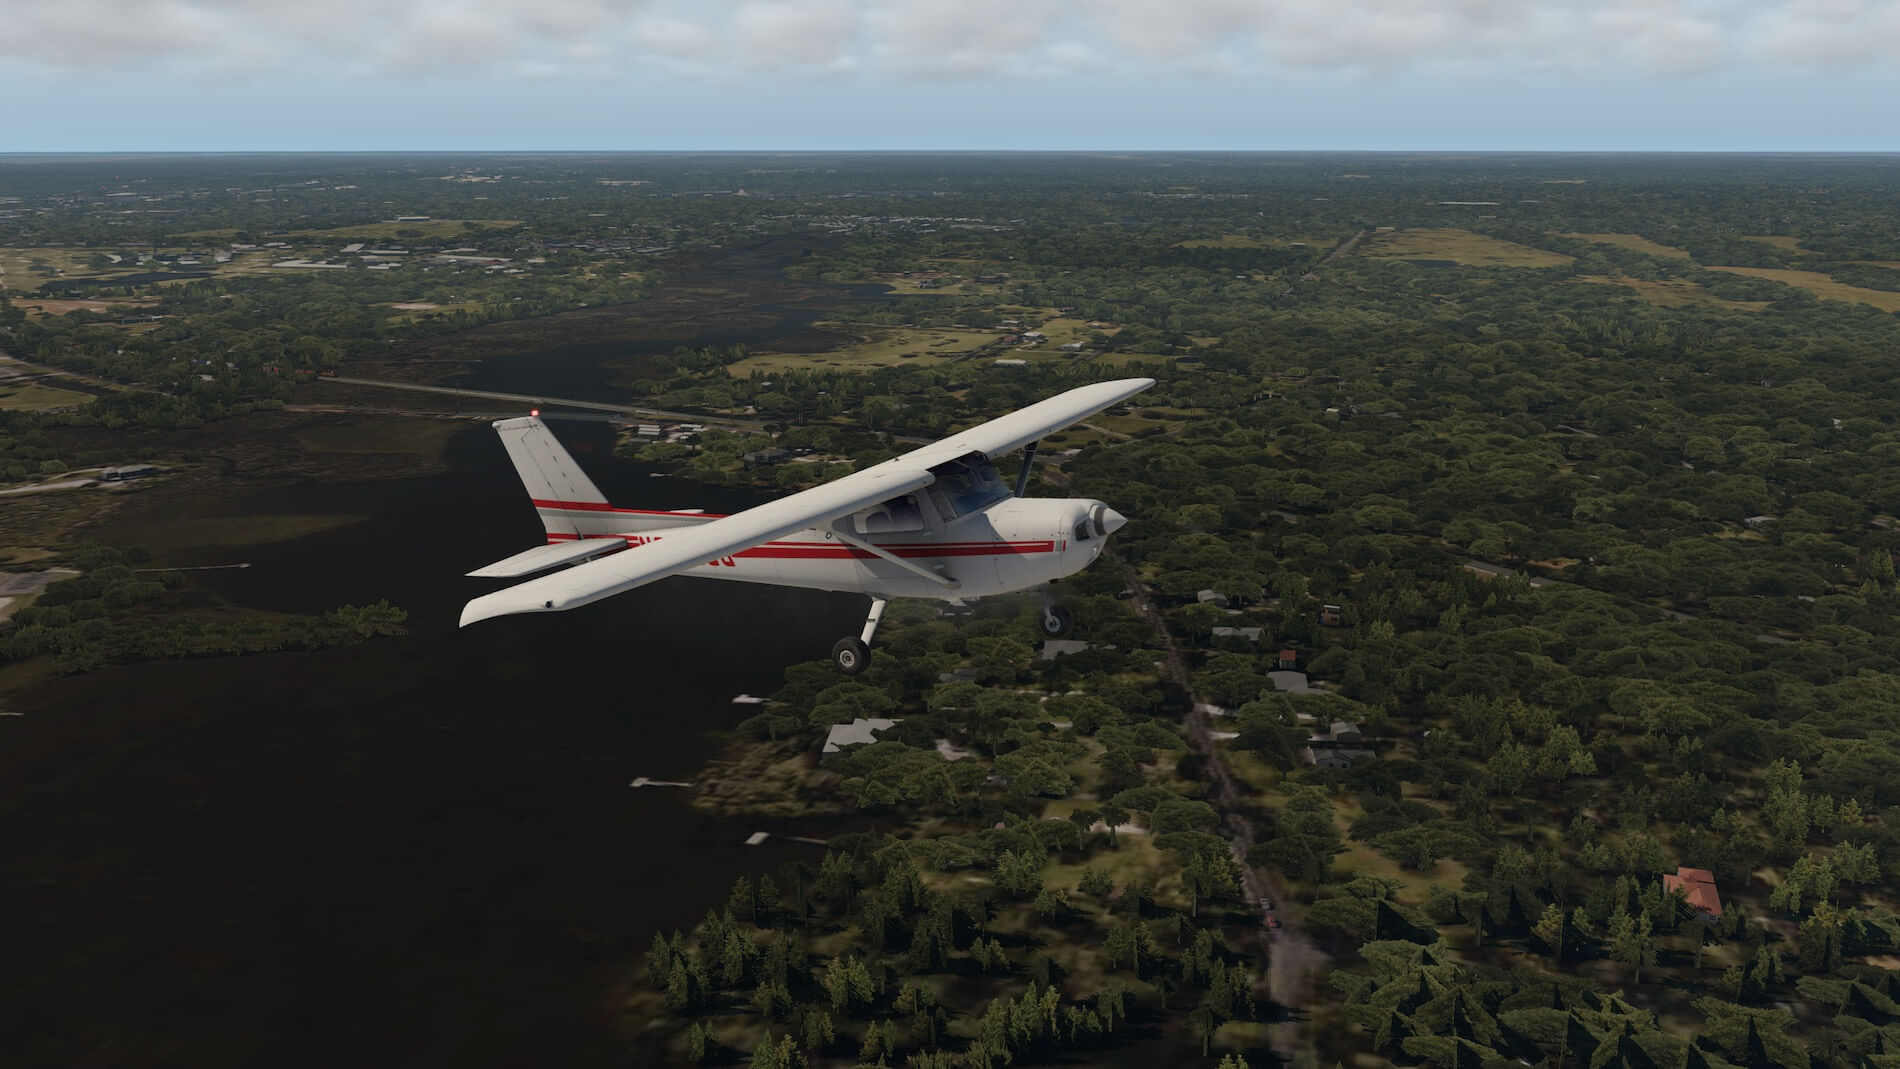
I give full power, and it’s as I can remember from then, it’s not easy to keep the C150 on the center line while accelerating. At lift off, with the wind I had set, it feels like then and this means you need to keep your mind and hands on the controls. And this is controlling pitch and roll. It seems the C150 is going everywhere and although this sounds not good, it behaves perfectly realistic. These things you don’t forget so easily. The C150/C52 is light, and just a playball in the sky. With clouds around me, swamps below me, sun is shining, and the wind, it’s not easy to keep the C150 on the intended track which was runway HDG.

Once the C150 Commuter has reached 1000 feet, I can trim for pitch. And no, although it’s an option for the vFlyteAir C150, I have no Auto Pilot, how basic it is, there’s nothing. Only me, my PITCH trim and keeping the right track.
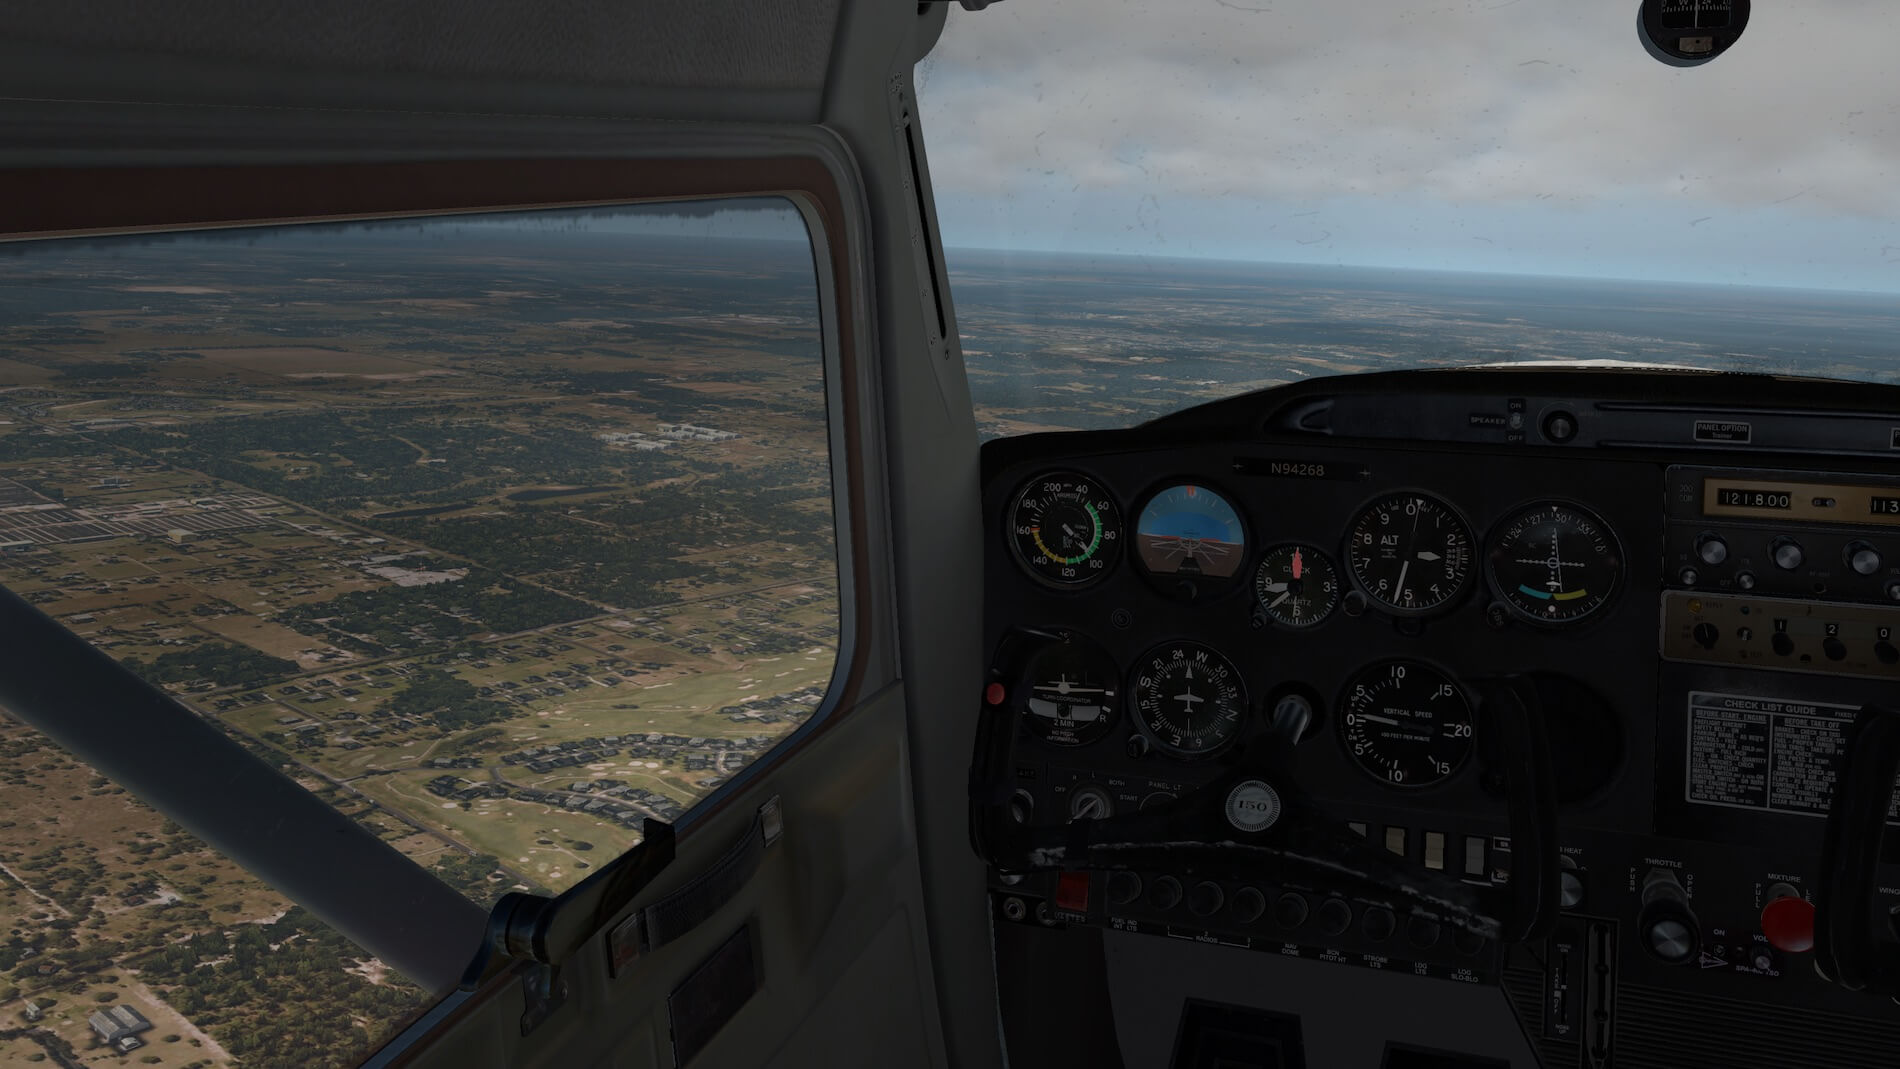
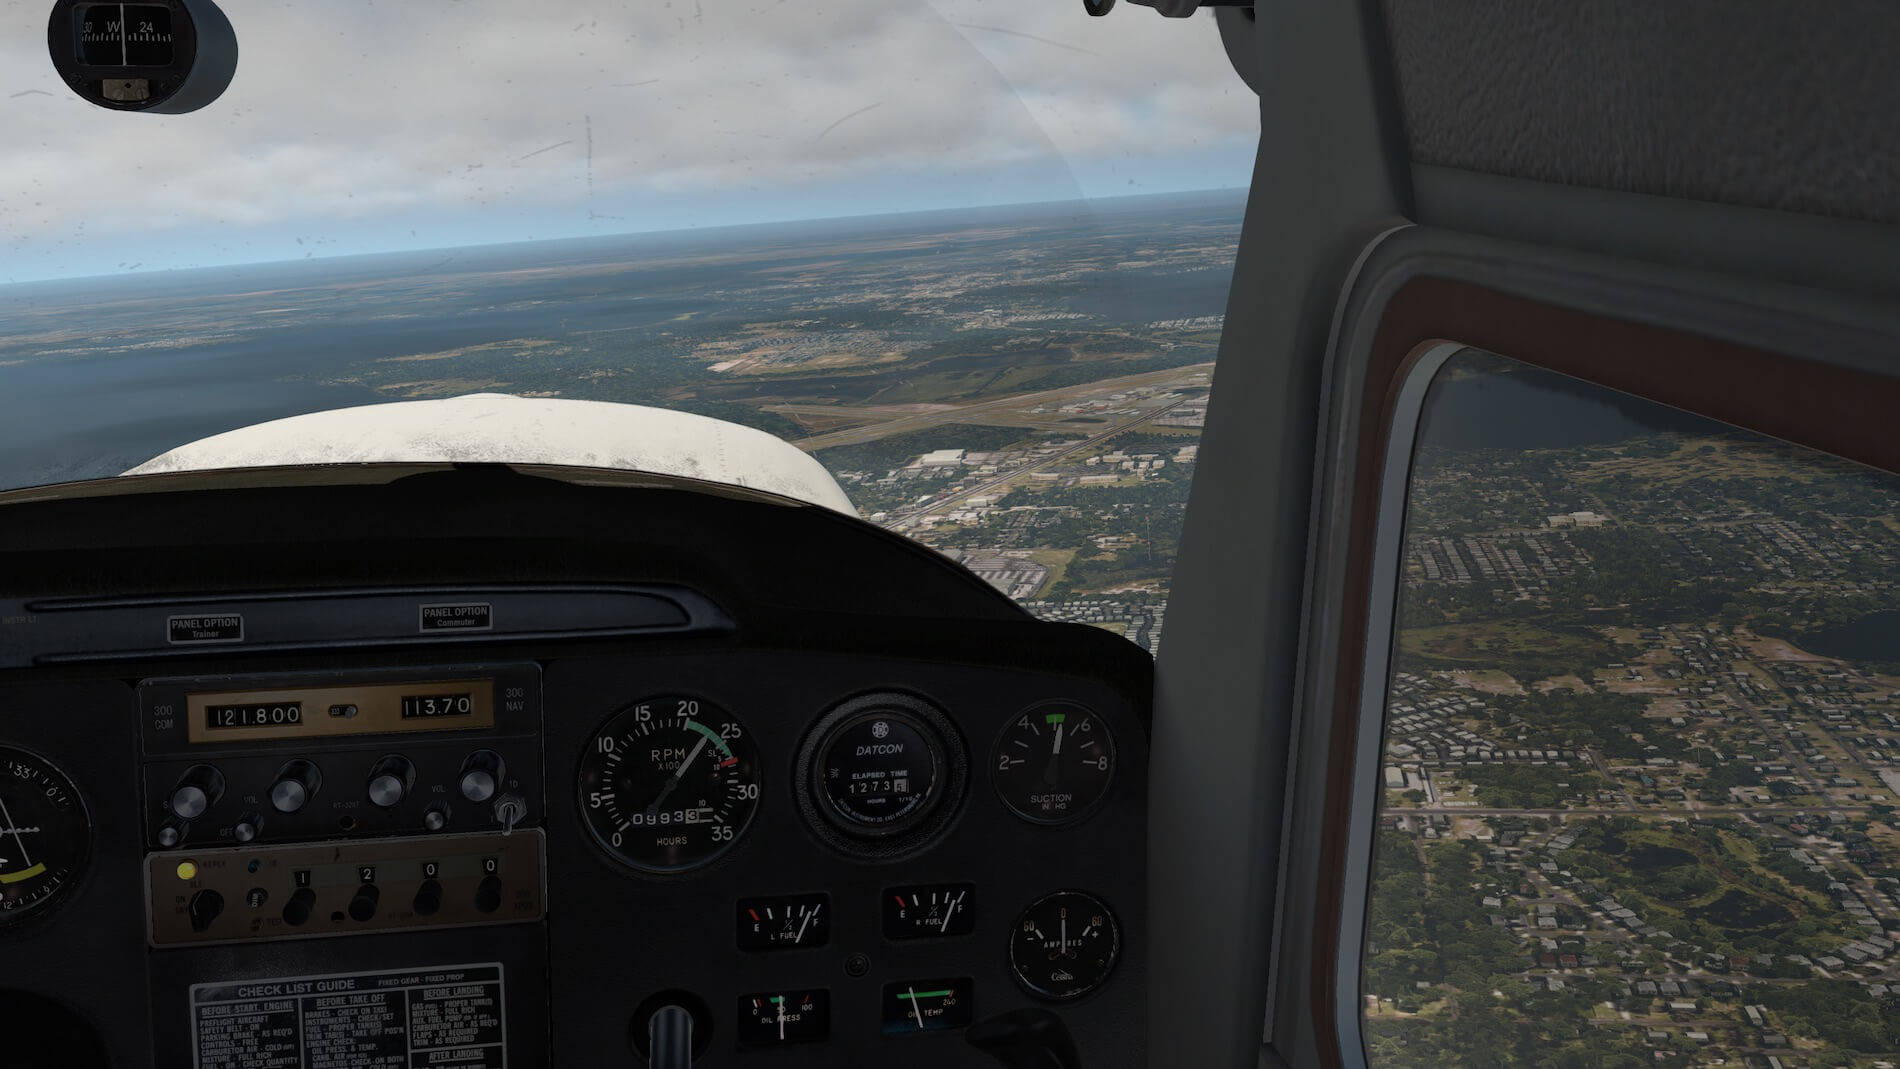
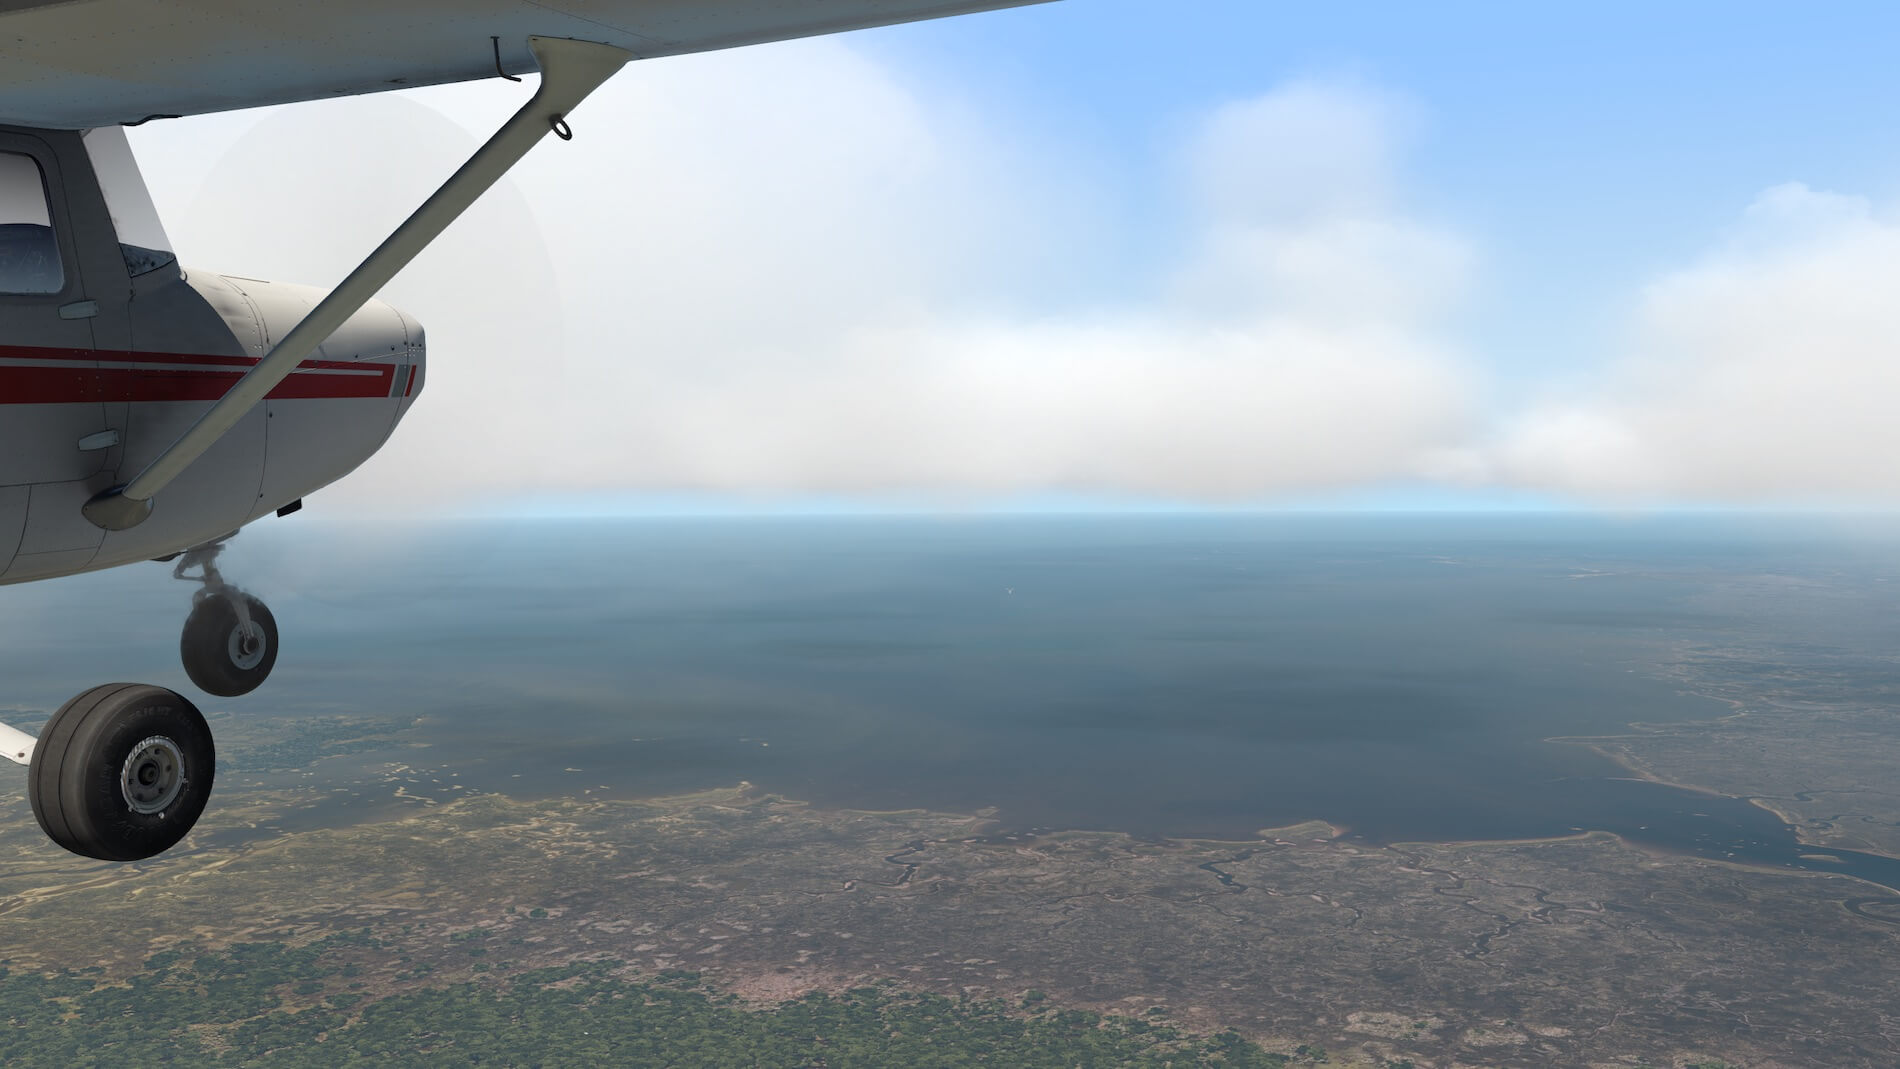
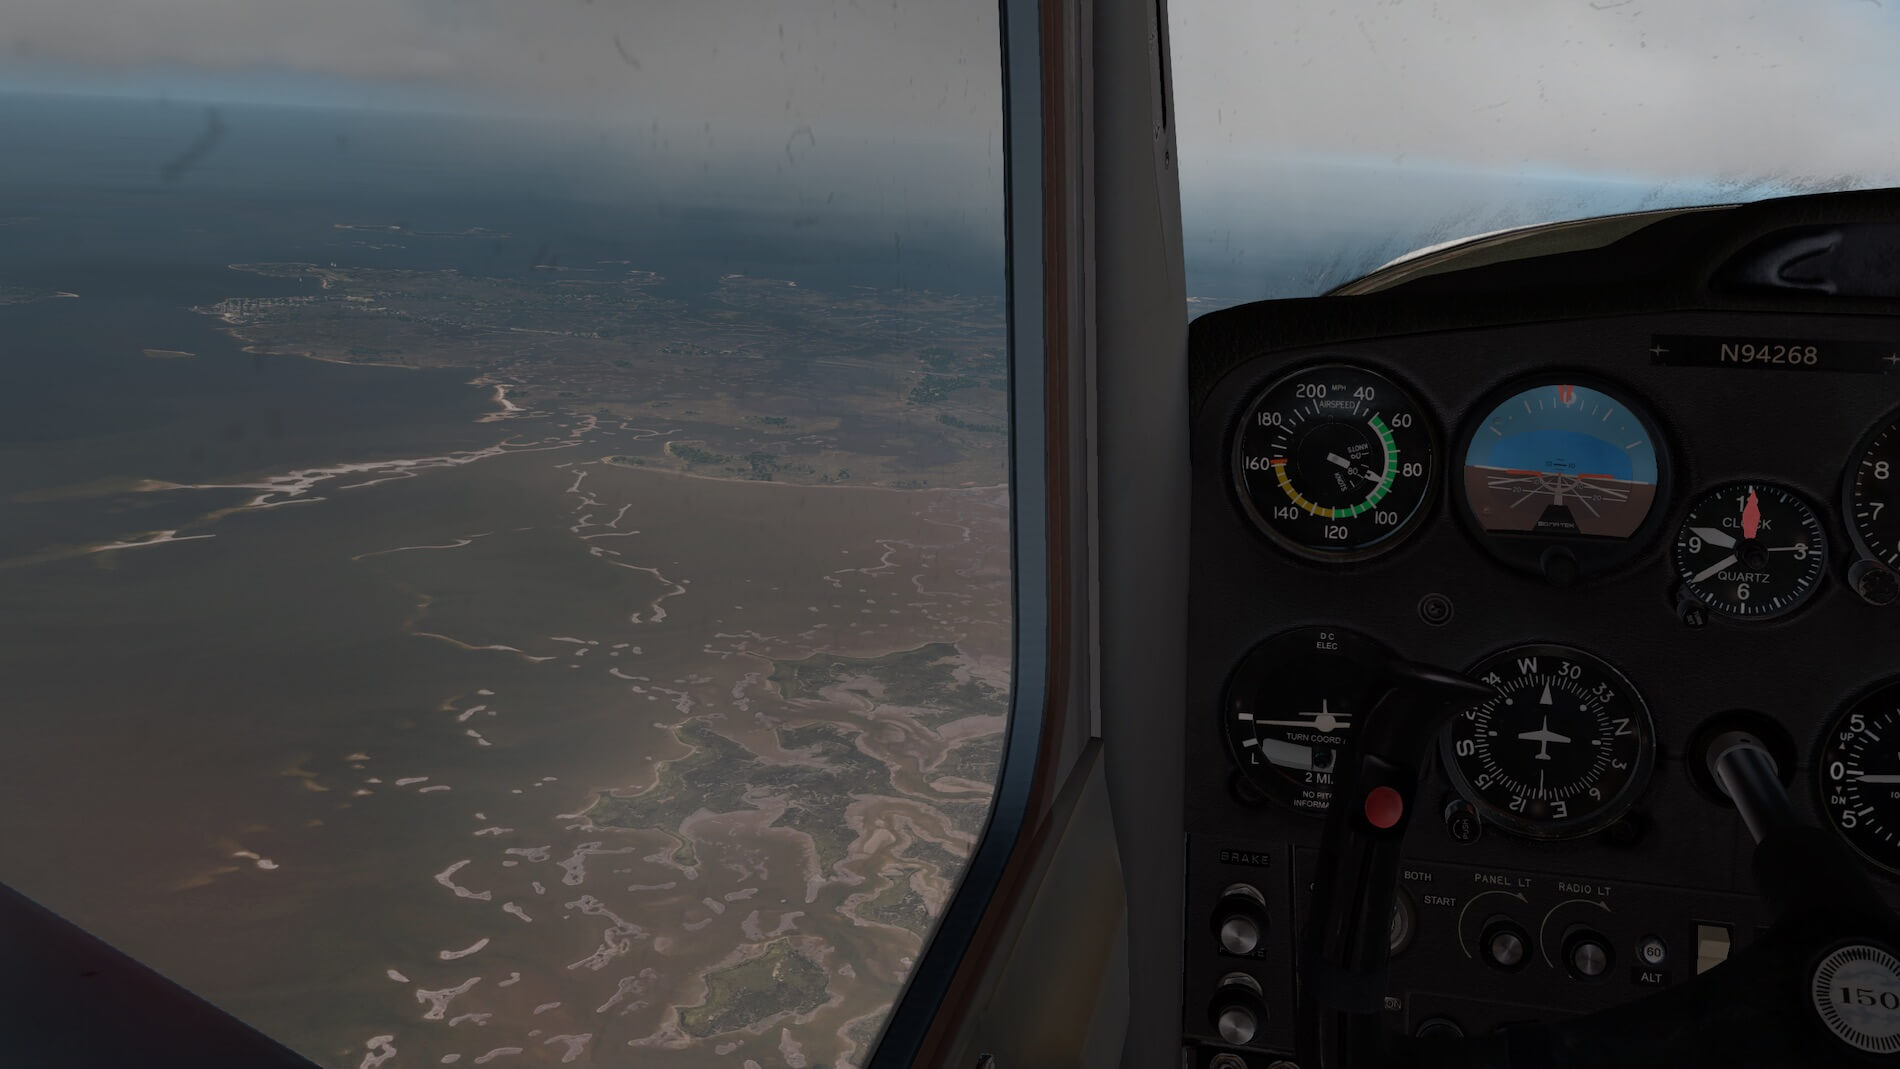
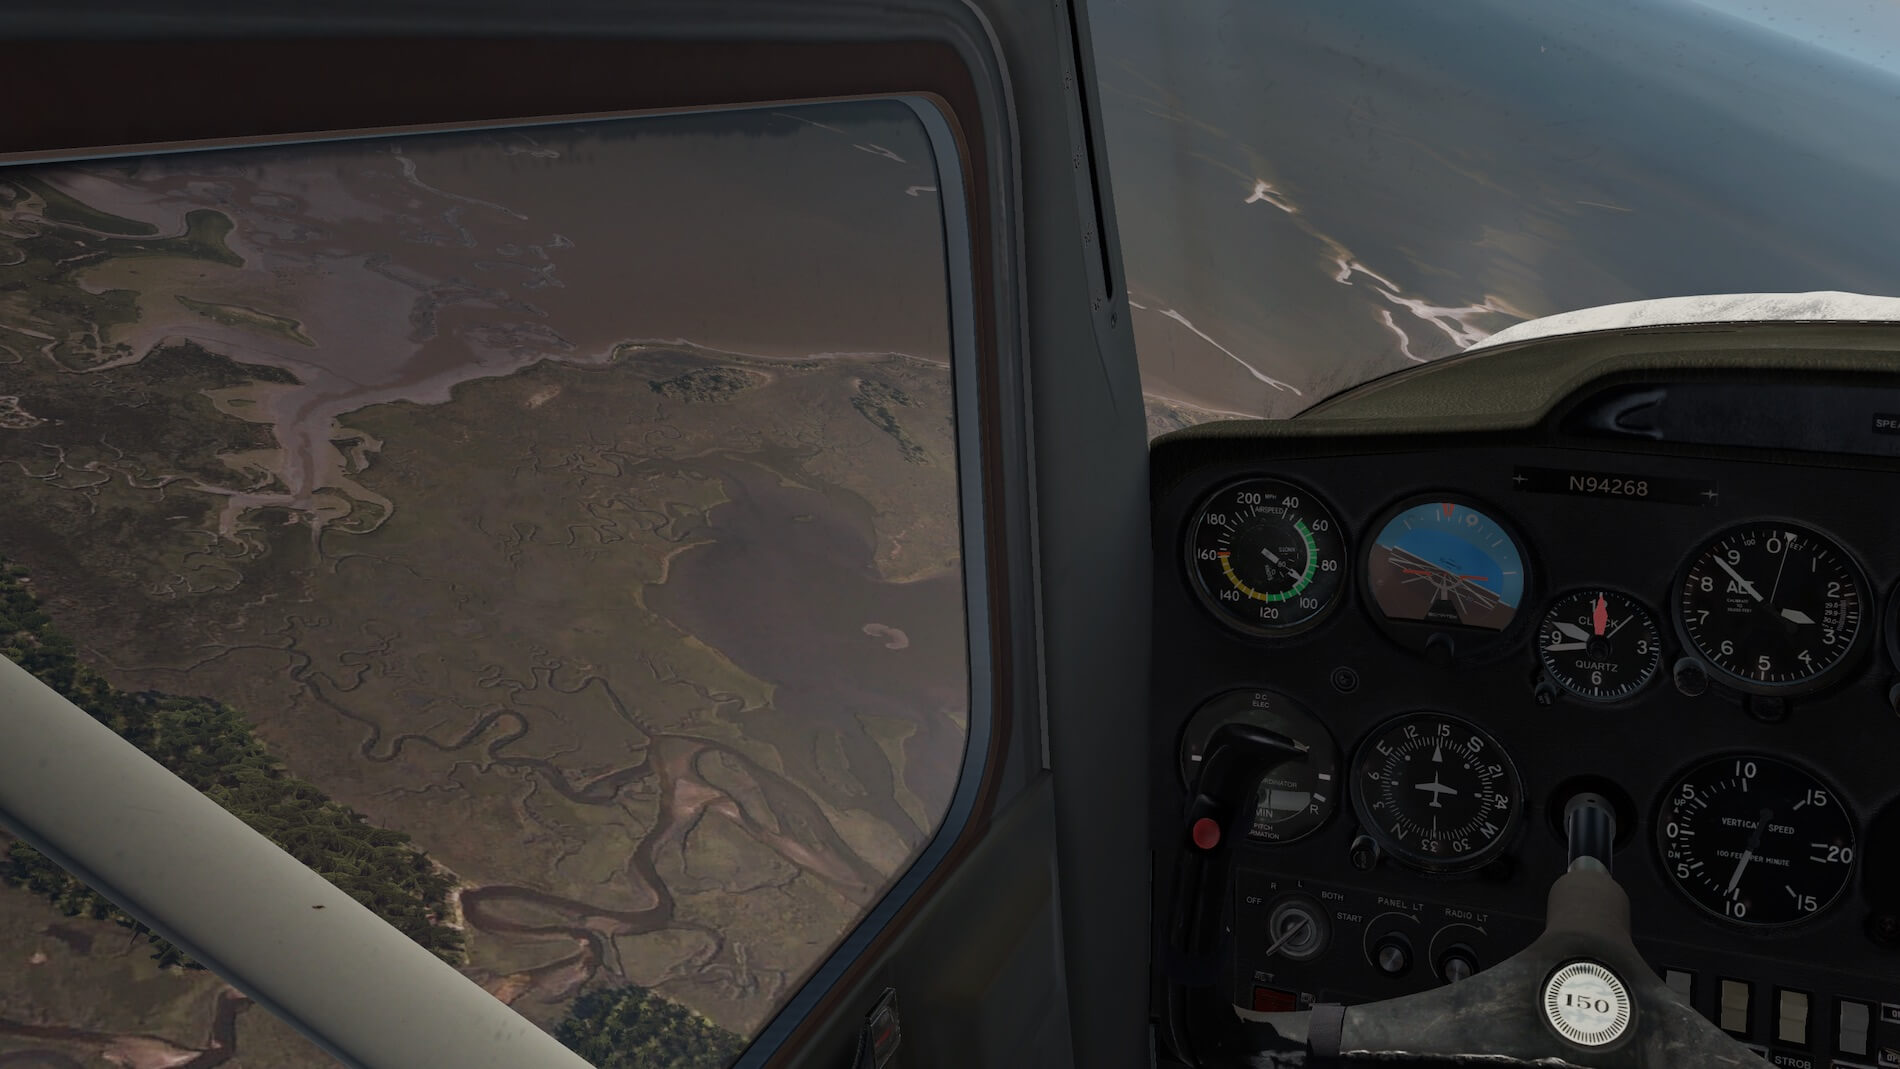
Down below I see Florida as it should be. Down below I have installed Orbx TrueEarth Florida HD. This means a gorgeous ortho scenery with an ultra high quality, razor sharp textures and that at our first levelled off altitude of 1000 feet. Ok, it will be even better when I’ve reached an altitude of 2500 feet, but even now at 1000 feet I’m already impressed. The same as what I’ve seen with TrueEarth Britain North, it’s not only high quality ortho textures, it’s also the blending, the additional dedicated in house made objects, the TrueColour implementation for the first time (only applicable for TrueEarth Florida). I did try for this vFlyteAir C150 cross country flight also with other freeware ortho packages, but non of them can compete with this. Awesome experience I would say and yes, it’s not cheap, but it’s worth it!
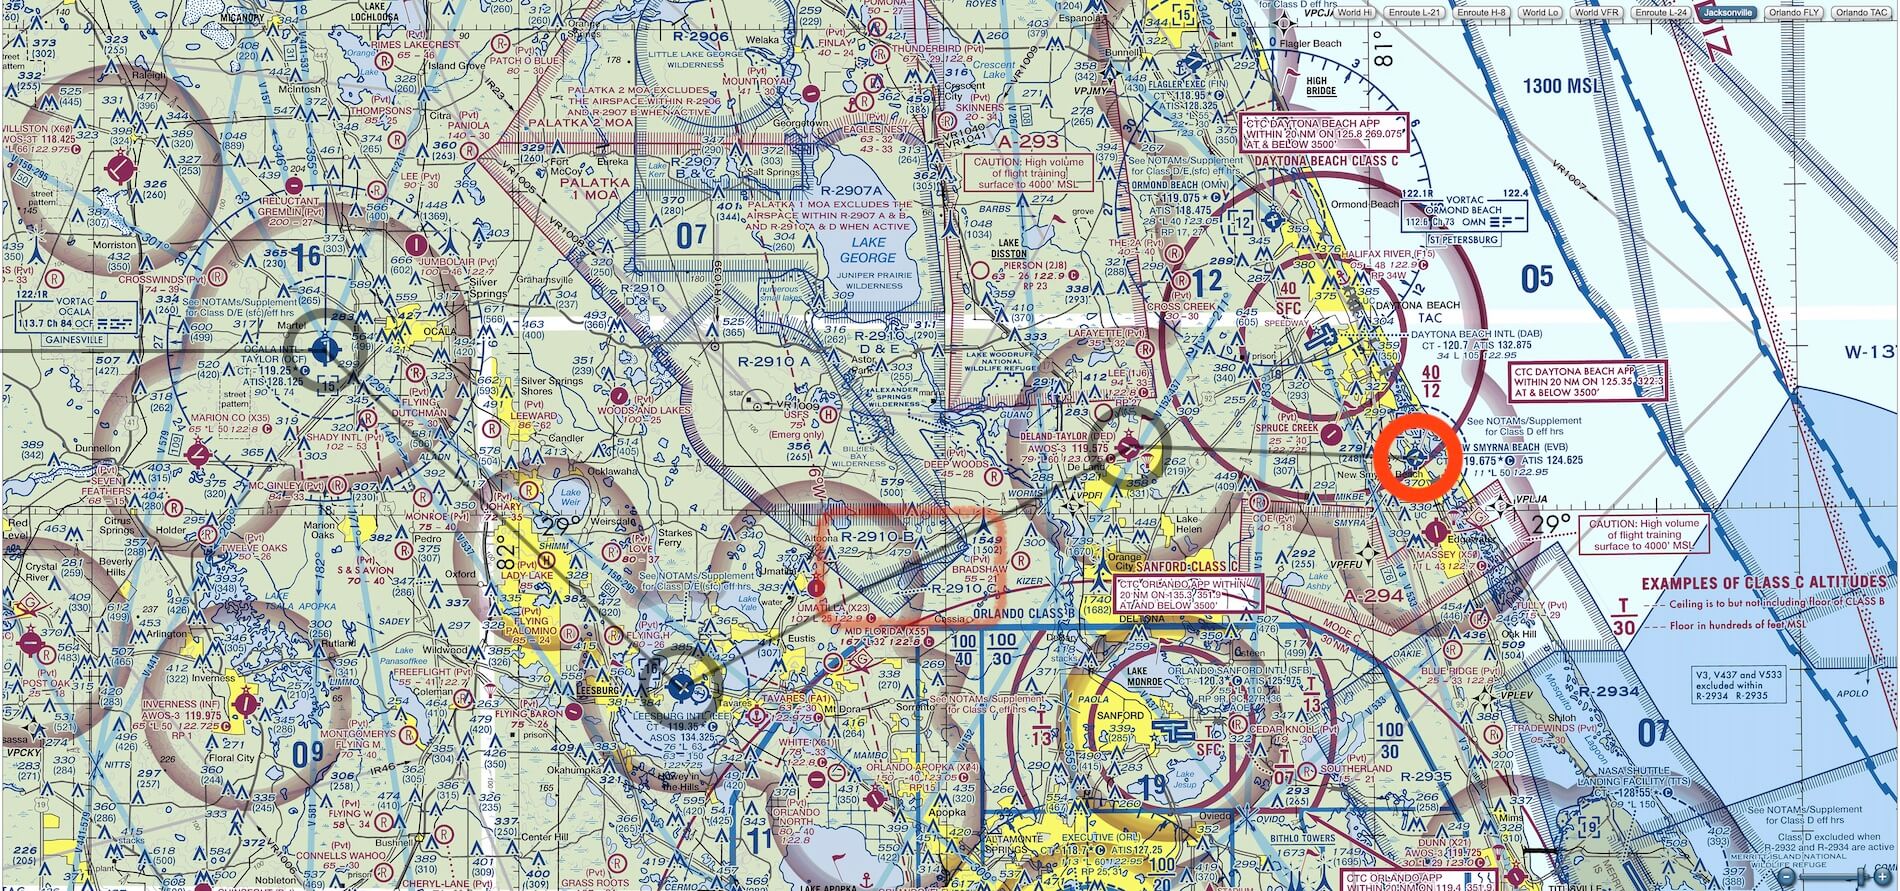
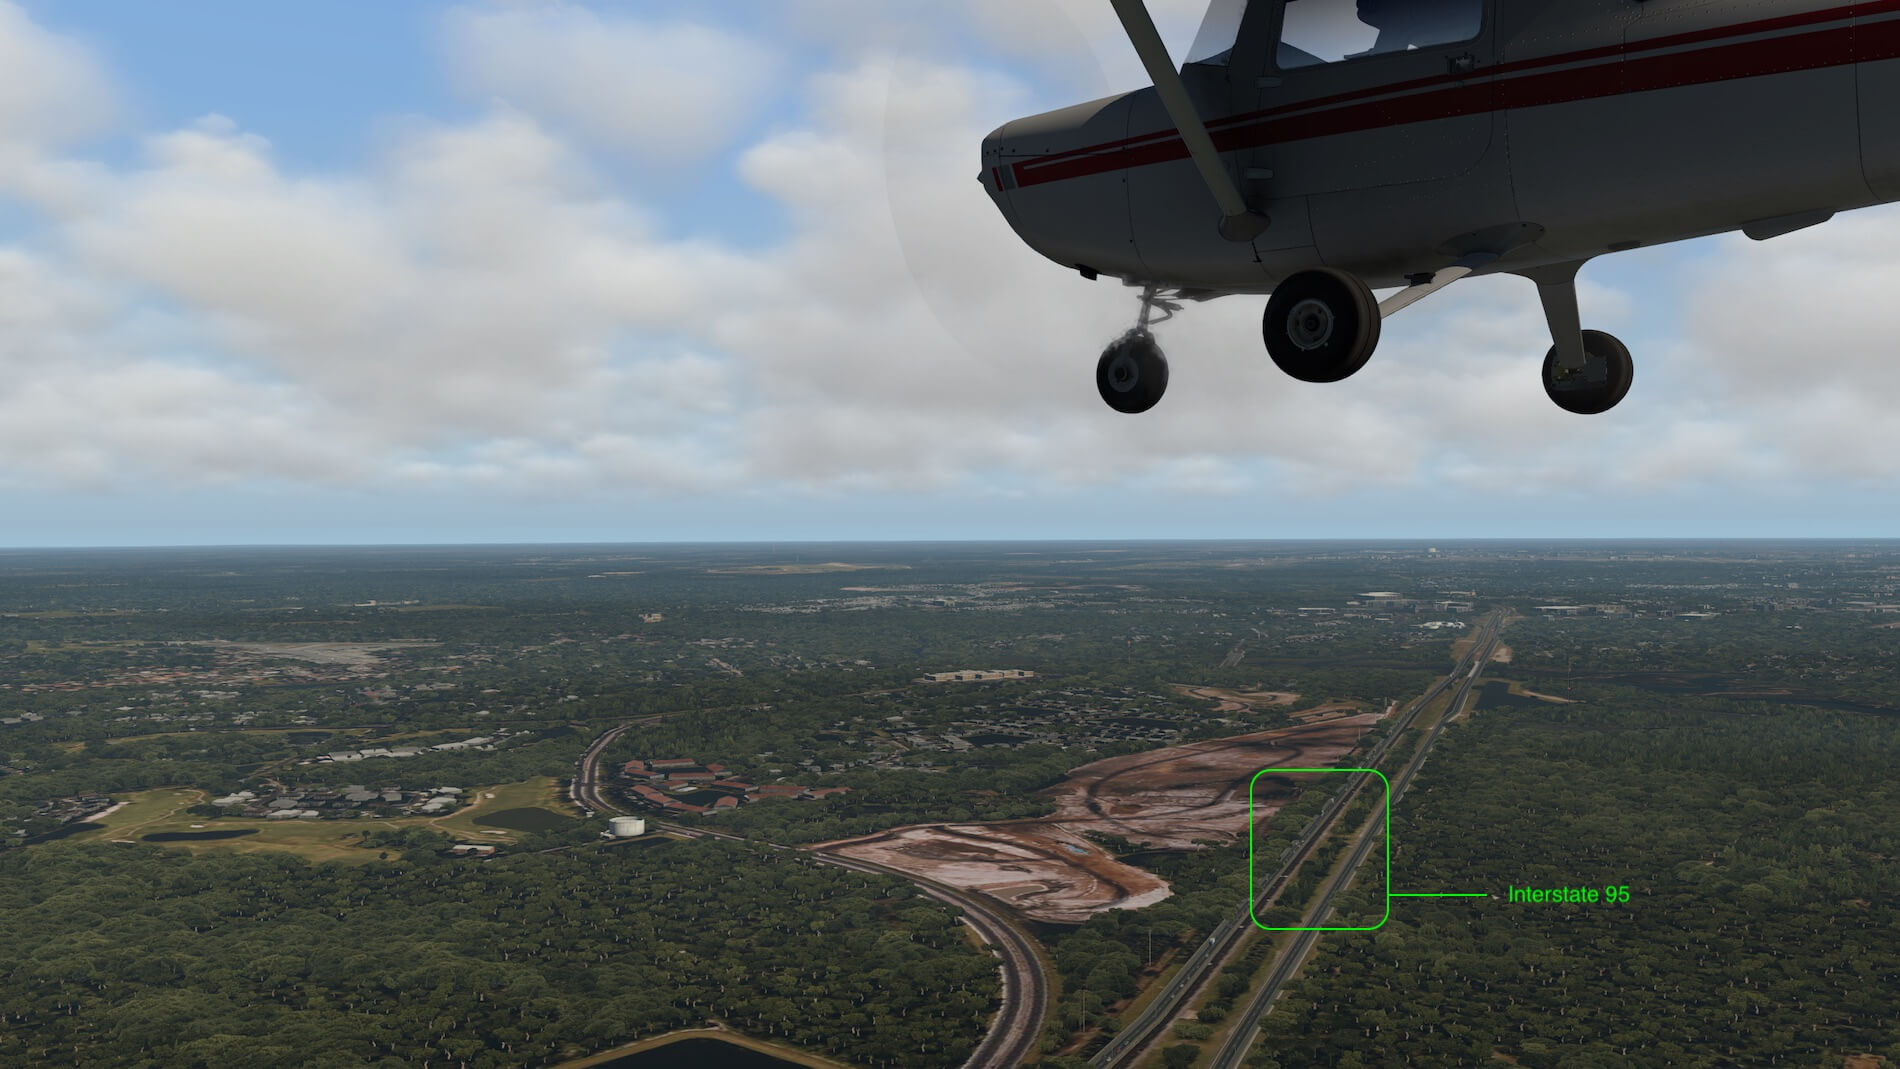
As you may have noticed, officially I could level of at 1200 feet (remember, KDAB outer ring ranges from 40/12), but to be on the save side I stay for a while at 1000 feet. As you can see on the next chart, when I cross Interstate 4, I’m allowed to climb to 2500 feet. Just to clarify; I was if I wanted to, able to climb before any easier to 2500 feet but then I needed to contact KDAB to get their approval nad perhaps I need to set a given squawk code which is now set to 1200 for VFR flights.


From this altitude and with the high quality Orbx ortho scenery below me, it’s very easy to see De Land ahead of me and right of it KDED. It’s time to turn towards KLEE and see if we can keep track with some landmarks.
Next stretch : KDED (De Land) – KLEE (Leesburg)
Without any other equipment on board then what this trainer model offers, you need to follow the map closely. And of course in our virtual X-Plane world there are many possibilities to have a moving map on another monitor or when you have macOS Catalina, to be able to transport a map to your iPad. I didn’t had that possibility those days, and this X-Plane 11 vFlyteAir C150 cross country flight won’t offer you that option either. In other words, we follow the sectional map and see if we can find any landmarks or other obstacles that are guides to help me to KLEE and the lakes around Leesburg. I think you got it already … many lakes ….!
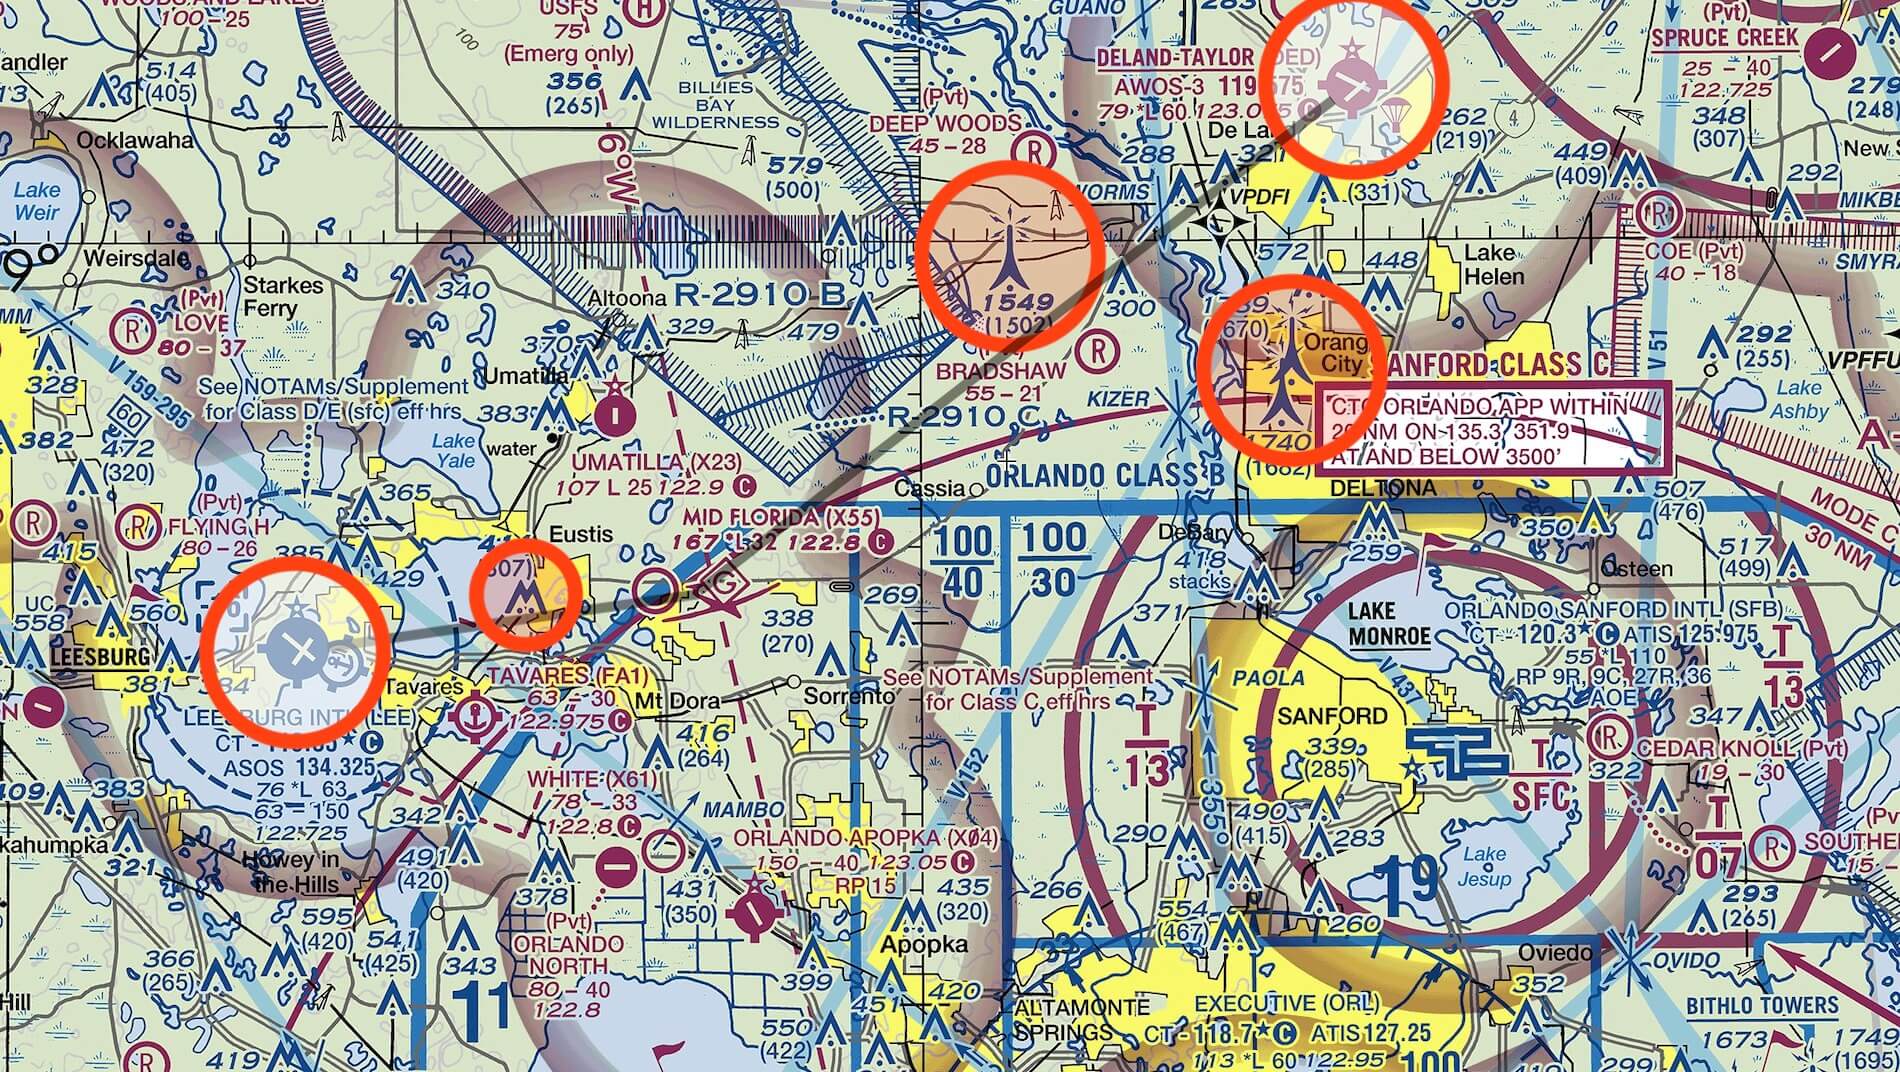

As you can see on the KDED to KLEE screenshot, there are a couple of obstructions that will work as references for our cross country flight. I could if I want add NDB Sandford (SFB 408 Khz), but the ADF doesn’t has DME indication, so that’s doesn’t really help me much. Then I could go for Orlando VORTAC (ORL 112.20), but then I’m already very close to KLEE. By the way, in case you aren’t aware what a VORTAC is …. a VORTAC stands for VHF omnidirectional range (VOR) beacon and a tactical air navigation system (TACAN) beacon.
No, then and now I only use the indicated obstructions which are clearly visible and, of course not unimportant, well modeled in the Orbx ortho scenery. I hope you see that too in the sectional chart; I can’t fly in a straight line to KLEE since I’m crossing then restricted area R-2910 C, as mentioned before.
Once I reach or see the cities Eustis and Mt Dora, I can fly straight to KLEE, but the moment I see Eustis below me, there’s not really a need anymore to fly first to KLEE and then to Ocala. When I’ve Eustis below me, I could if I want follow the OBS heading and bringing me straight to Ocala. Right? It saves a lot of additional fuel!
Being on this altitude gives me a great external view. The clouds are still above me and although I have the necessary shadows on the ground due to these clouds, I can recognise every thing I see on the sectional map and what I see in the simulator. This is only possible with good and realistic ortho textures on the ground and of course, the necessary modeled objects like in my case I need to find these marked obstructions to find my way. And lucky for me, they are modeled. Awesome experience.
It’s a long stretch from De Land to Leesburg. It takes a relatively long time before I see the lakes around Eustis, Mt Dora and Leesburg. Before that I seen many forests which, depending on the weather conditions, don’t make it easy to concentrate in what I see .. is it a forest or is it a lake. Anyway, the created weather is moderate so first I lean the engine, then I set the pitch trim and to keep on track, I need to correct that with the ailerons. It’s possible this way although many simmers would like to have an Auto Pilot, even though this may be a very basic AP. I don’t have and I don’t want an AP in my vFlyteAir, so simple is that!

While I’m enjoying the modeled aircraft, I’m also enjoying the wonderful Floridian landscape below me. That this Orbx HD scenery will have an impact on your frame rates, that’s for sure with sooooo many additional objects and my high rendering settings, but it is really worth it. In the mean time I’m approaching Eustis and I see down below me the road that goes to Eustis. This means there’s no longer a need to fly towards KLEE, but let’s continue for a while. We have enough fuel on board and not much is spend by these additional miles we fly.
KLEE is not a small airport but there’s no NDB or VOR (VORTAC), but that’s the same for Sanford although they have a NDB but not even a VOR (VORTAC). Weird when I think about it. From this altitude it’s easy to spot KLEE and I could if I want make a touch and go. No, lets not do that. That will cost too much fuel.
Next stretch : KLEE (Leesburg) – KOCF (Ocala)
With the OBS set for Ocala VORTAC, I make it myself very easy. On the other hand, I have some means of navigation equipment onboard, so why would I now use it, right? But suppose the OBS isn’t working, then flying VFR and using landmarks is also for this stretch easy. In-between Leesburg and Ocala is the 441 and 301, but also the cities Summerfield and Belleview. You can’t miss these cities which is the same for Lake Weir. And it’s easy .. as long as you keep lake Weir right of you, you’re OK unless you’d decide before reaching Eustis to turn towards Ocala, then you can overfly lake Weir as you can see on the map with the black dotted line.
When you decide to follow the straight black line thus passing more or less over Leesburg, you not only have the cities below you but also notice the obstructions I marked on the map. Keep these on the left of you, the lake Weir on the right and you fly straight to Ocala.
When I still fly at my cruising altitude of 2500 feet, it’s also easy, unless weather conditions are worse, to see Ocala and the airport. When we’re approaching Ocala, there’s no need for me to overfly Ocala International Airport. When I see the airport in front of me, I can already set a HDG of 270 that points me to Waccassassa Bay.


I decide to fly to Leesburg and then heading for Ocala. This gives me also the chance to see how the lakes look like and how many objects can be found in and around Leesburg and yes, I can tell you, gorgeously made. But this review deals with the vFlyteAir C150, so lets talk about that one. I mentioned it before that I’m pleased with the way it’s modeled. Not only the 3D shape but also the used textures and the finishing touch. It really gives me the feeling that a lot of effort and time is put into this model.
And yes, I know, some simmers will say .. “logically, it’s a small aircraft so it’s not really a problem to model this tiny aircraft” right? I have my doubts. Yes, it’s true that the smaller the model, then less polygons are needed to model it or not? That depends on the accuracy of round parts like the wheel I mentioned before. Ok, this C150 Commuter doesn’t have complex navigation systems, but still, it needs to fly as real as it gets and that’s not so easy as said.
While I’m now on a HDG of 220-225 for Ocala, I’m still wondering why the map compartment cover is red. I’m thinking over and over how it was in mine C152. I’m not sure for 100 percent, but I don’t believe it was red. It was just the same colour as far as I can remember as the rest of the lower panel. Anyway, I need to live with it since with Affinity Photo for macOS I’m not able to modify/import the C150_panel_pedals_yokes.dds file to recolour it.
The rest of the modeled vFlyteAir tiny cockpit looks familiar to me although many panel configurations did or still do exist these days. Even mine C152 N94268 still flies around. Not near KEVB, not owned anymore by IFT, but by Christiansen Aviation Inc. , Wilmington Delaware, US. Back to the aircraft and how it’s going. The environmental conditions are as they say “good”, but I constantly need to make corrections. The pitch is ok, but the HDG or the track is another issue. This is very good and realistic and well modeled! Then we’ve said it all, right?


I still know it as the day from yesterday that the C152 and also this model constantly need your attention. You can’t relax unless there’s no wind, but that’s only theoretical. To me, Florida may be the Sunshine State, but wind, there’s always wind! Wind or no wind, flying at 2500 feet gives me a great view of the landscape below. I’ve passed lake Weir, I noticed the obstructions on the left and Ocala is ahead of me. Before reaching Ocala, I no longer need the Ocala VORTAC or perhaps I do. More about that later. It’s time for me last stretch to Cedar Key.
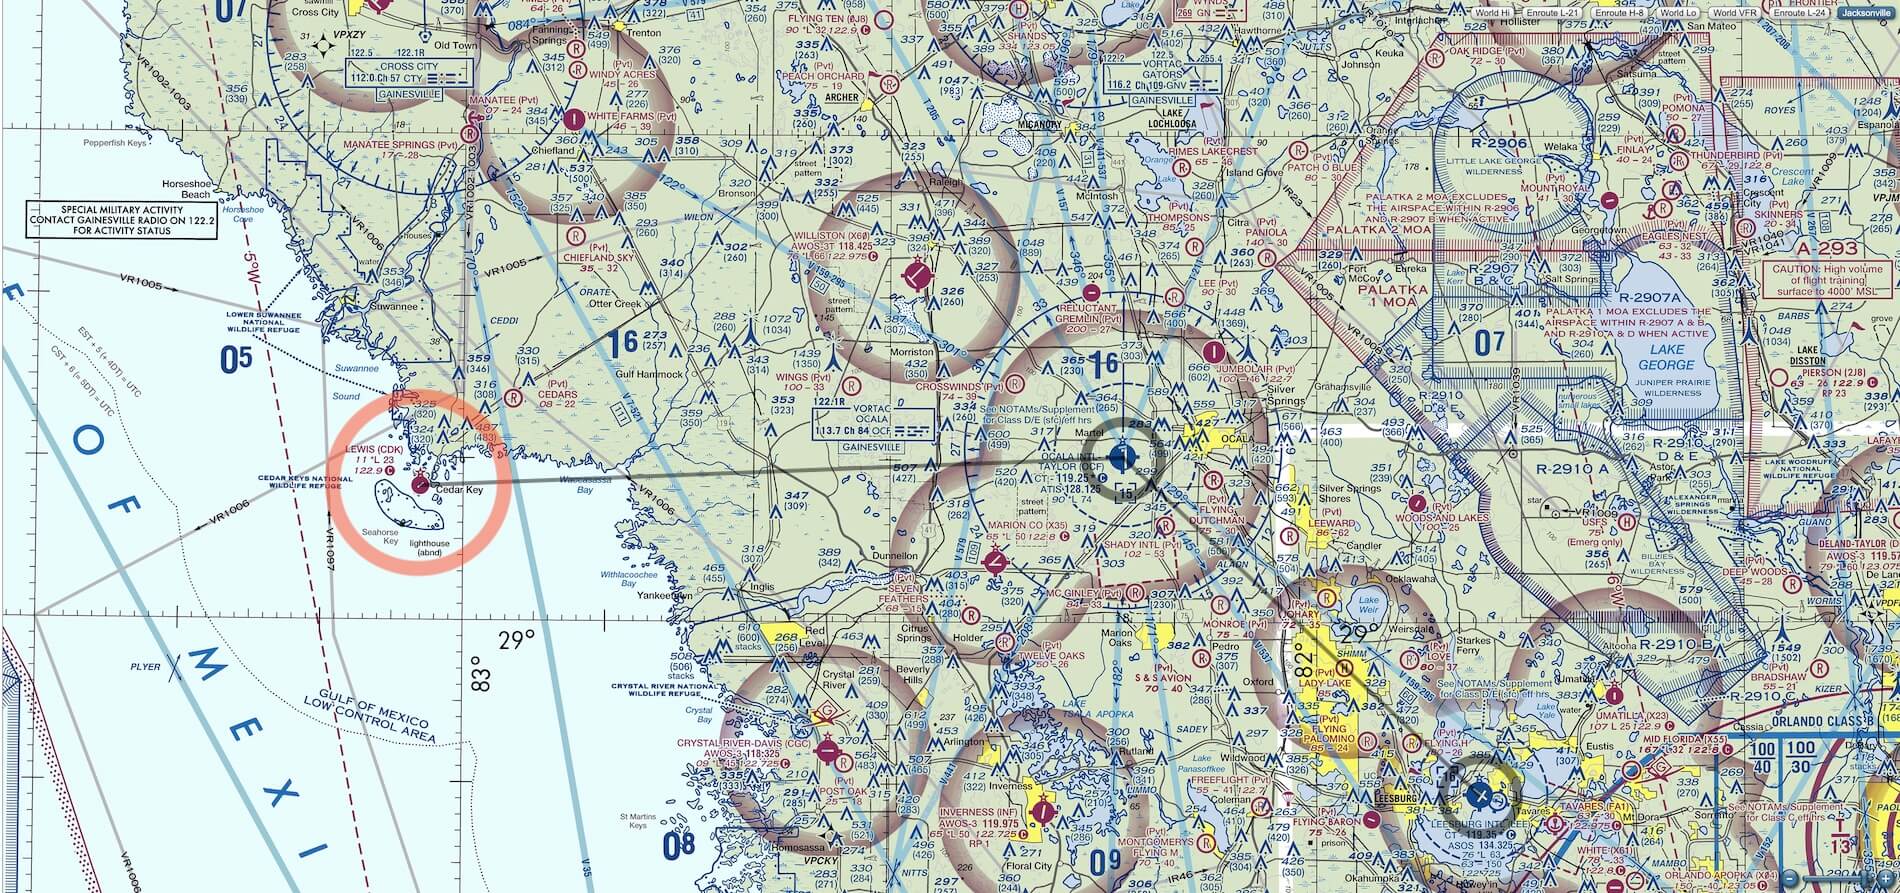
Last stretch : KOCF (Ocala) – KCDK (Lewis)
It doesn’t much differ if I fly over Ocala airport or as previously said, that I turn before reaching the airport to a HDG of 270, in the direction of Waccassassa Bay. Then, wen going for the last option, I will see where I reach the bay. What ever happens and where we reach the bay, with such a small aircraft we need to fly overland. One thing I know is that I will cross highway 19, so another landmark to monitor while flying. By the way, further south as you can see on the SkyVector screenshot, I marked another interesting and easy to see from this distance a power plant.
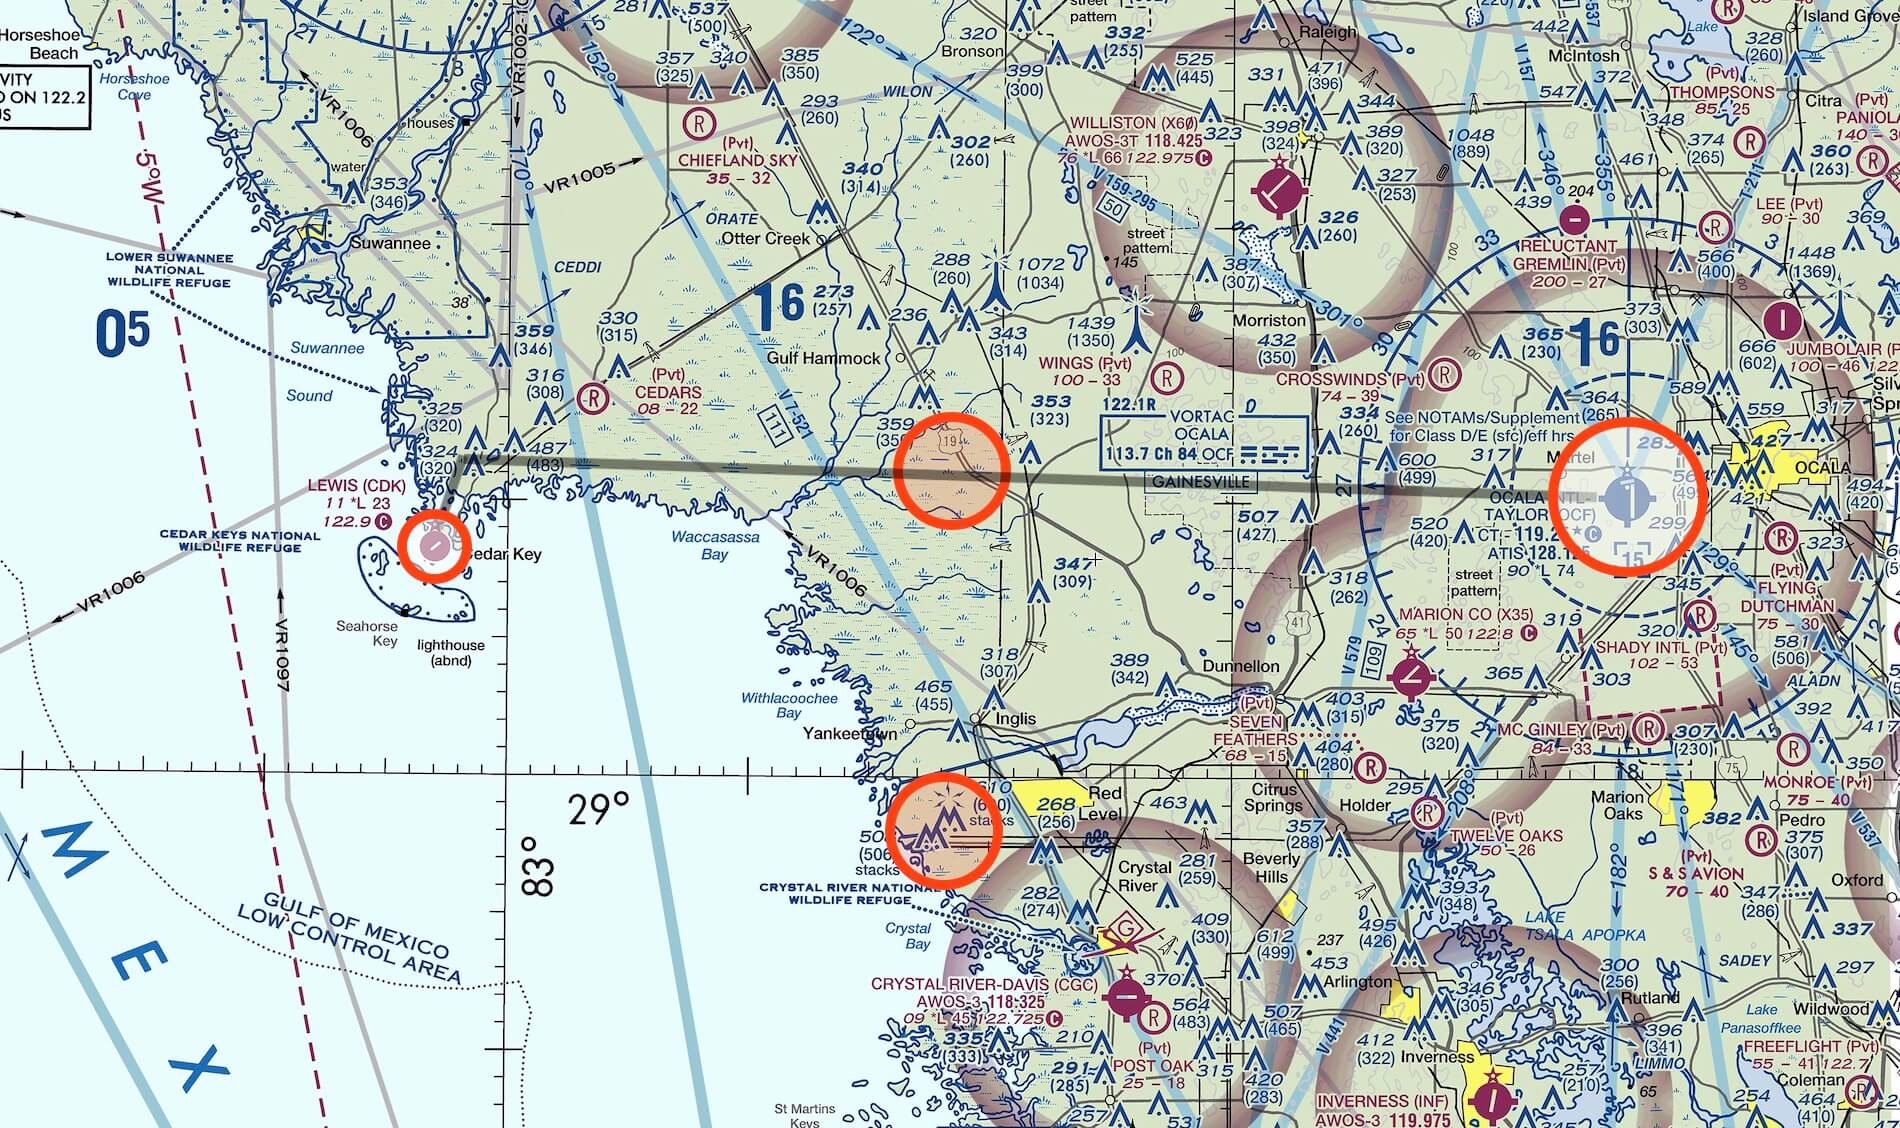


When you and I reach the Waccassassa Bay, it’s actually not a good idea to fly over the bay to Cedar Key. Imagine, something happens while flying at 2500 feet …. suppose the engine stops? The POH tells us then that the glide angle doesn’t help me any further. Therefore I’m flying too low, even when I decide to fly over the swamp. And although the POH gives instructions how to make a ditching, that’s not what I want with my vFlyteAir C150.
So what I decide to do when flying away from Ocala – it’s now handy to use the OBS in the other way around – as I also did in real, to climb out to around 4500 feet. I know, and also in real, this will cost me additional fuel, but it gives a more comfortable feeling then staying at 2500 feet. The C150 is doing a great job. I’m pleased with the overall cockpit after at least 2 hours virtually sitting in this tiny aircraft. I don’t feel this time it’s a tiny cockpit, but I real I felt it when I did this flight with Ingrid, my living partner.
Because I’m at 4500 feet, I can, in combination with the awesome Orbx Florida ortho scenery, see what I saw that day too, Cedar Key and Lewis from a far distance. The area around Cedar Key – remember, Cedar Key is a small village just around the corner of the airfield Lewis – is actually a reserve and flying above it is not allowed. So the plan is when I’m close enough to Lewis to circle down to 1500-1000 feet. Then making my final turn for runway 5 but final changes can be made depending on the wind. Circling down is fun and the modeled C150 behaves as expected. I’m not sure if the circling down already belongs to the DESCENT checklist so I have a look at the vFlyteAir kneeboard. What’s on my IFT paper the descent item section is on the vFlyteAir kneeboard the BEFORE LANDING. After checking this difference I can confirm that the kneeboard information is the same as in. the C150 POH.


What said before, I level off at approximately 1000 feet. The wind direction hasn’t change so I go for runway 5. I fly parallel to the runway, descent a bit more, check quickly the kneeboard and decide to extend the flaps. The runway isn’t that long and besides that, both sides of the runway are water. So when I do something wrong, I end at the other end of the runway in water. And, I can remember that very well from then, the airfield has no taxiway. That said, landing on runway 5 means that I miss the small platform which is located at that side. The only way to come to this parking location is to taxi back via the runway or use the grass strip along it.
The whole idea of this small airfield is that you’re picked up by a truck and they drive you to Cedar Key where you can drink and eat something. After a comfortable break, they bring you back to your aircraft, and off you go. Yer, yes, I know, this cross country adventure is only a one way trip to KCDK, but I’m quite sure when you try this flight too, you’ll now how to fly back to New Smyrna Beach. Good luck and enjoy!
At the end … the Summary
This Floridian cross country flight was fun. I had the possibility to check the vFlyteAir C150 Commuter myself and I’m so pleased with it. I don’t give you any advice or what else would help if the vFlyteAir C150 Commuter is better then the Just Flight C150 or the free update for the X-Plane 10 Carenado C152 with the Nhadrian C152 package (package only exe file for Windows).
That was never my goal. My goal with this review was to check the modeled vFlyteAir C150 Commuter with my own eyes and how all was modeled and how it was flying, in particular during a cross country like this one. That all together was a pleasure for me since I really could reproduce in combination with Orbx HD Florida on one of my real long PPL flights from KEVB.
Do I have some suggestions for vFlyteAir? It would be great if Walker is also able/willing to add the virtual E6-B to the aircraft. I know Walker, I know vFlyteAir that whenever there’s a need for, an update will be released. Updates are by the way monitored by the STMA updater. In other words, whenever vFlyteAir releases an update, STMA will tell you to update the aircraft.
You can check out the dedicated vFlyteAir web page for more information or have a look at the dedicated X-Plane.Org store page.
Last but not least …. I would like to thank Walker for painting for me my original IFT N94268 livery. Further on, for this vFlyteAir cross country flight I used the following add-ons:
– vFlyteAir C150 Commuter (logically)
– Orbx TrueEarth Florida HD
– AlpilotX.net Mesh Scenery HD
– FlyWithLua NG for X-Plane 11
– FlyAGI Tweak Utility 1.12b
– SlewMode Plugin 1.0.5
– Scenery Animation Manager (SAM) 2.0.3
Feel free to contact me if you’ve got additional questions related to this impression. You can reach me via email Angelique.van.Campen@gmail.com or to Angelique@X-Plained.com.
With Greetings,
Angelique van Campen
| Add-on: | Payware vFlyteAir |
|---|---|
| Publisher | Developer: | X-Plane.Org | vFlyteAir |
| Description: | Realistic rendition of the Cessna C150 Commuter |
| Software Source / Size: | Download / Approximately 2.83GB (unzipped) |
| Reviewed by: | Angelique van Campen |
| Published: | February 17th 2020 |
| Hardware specifications: | - iMac Pro - Intel 3GHz Intel Xeon W / 4.5Ghz - Radeon Pro Vega 64 16368 MB - 64 GB 2666 MHz DDR4 - 1 internal shared 1TB SSD (Big Sur 11.x) - 1 internal shared 1TB SSD (Bootcamp Windows 10) - 1 external 2TB LaCie Rugged Pro SSD (Big Sur 11.x) - Saitek Pro Flight System X-52 Pro and X-56 Rhino - Honeycomb Alpha Flight Controls - Honeycomb Bravo Throttle Quadrant |
| Software specifications: | - macOS Big Sur (10.15.x) - X-Plane 11.5x |
0 Comments