Aerobask’s Flag Ship .. the EMB-505 Phenom 300
Introduction
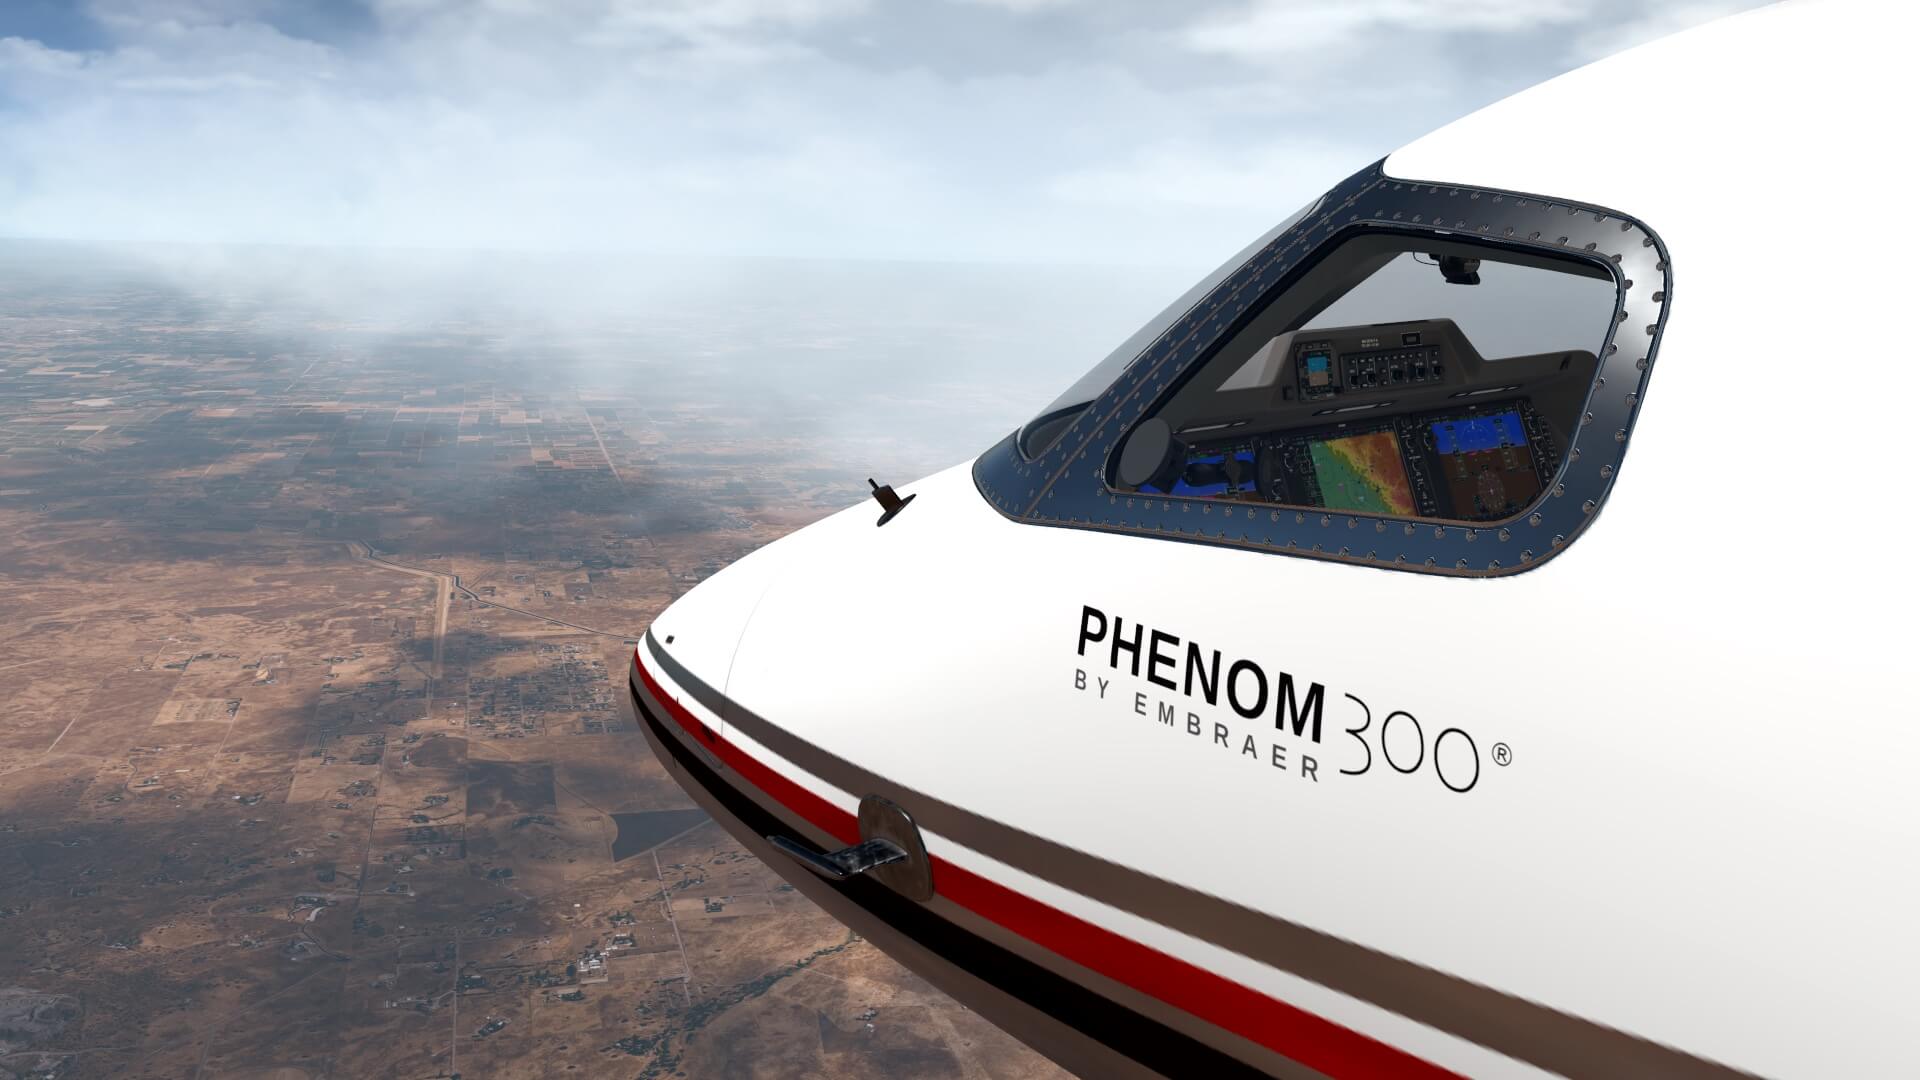
Also on behalf of Andy Clarke, our dedicated X-Plained.Com reviewer, we’re pleased to inform you that we’ve decided to explore the latest Aerobask executive jet model, the Embraer EMB-505 Phenom 300. Andy will do his part of the review while Angelique van Campen will do her part. At the end, it will be a comprehensive review that covers all the ins and outs of this Aerobask aircraft.
In case I forget it, Andy and I reviewed the latest version of the Aerobask Phenom 300 v1.3 on an iMac running macOS Big Sur 11.3 and X-Plane 11.53r1.
Some Phenom 300 Info
The following Phenom 300 information is extracted from several websites that offer dedicated Phenom 300 data. The easiest way to get that data is of course from Embraer Brazil, section Executive Jets, but there are a lot of Embraer pilot related forums that offer real flying data. So lets move on and see what the Phenom 300 for kind of executive jet is.
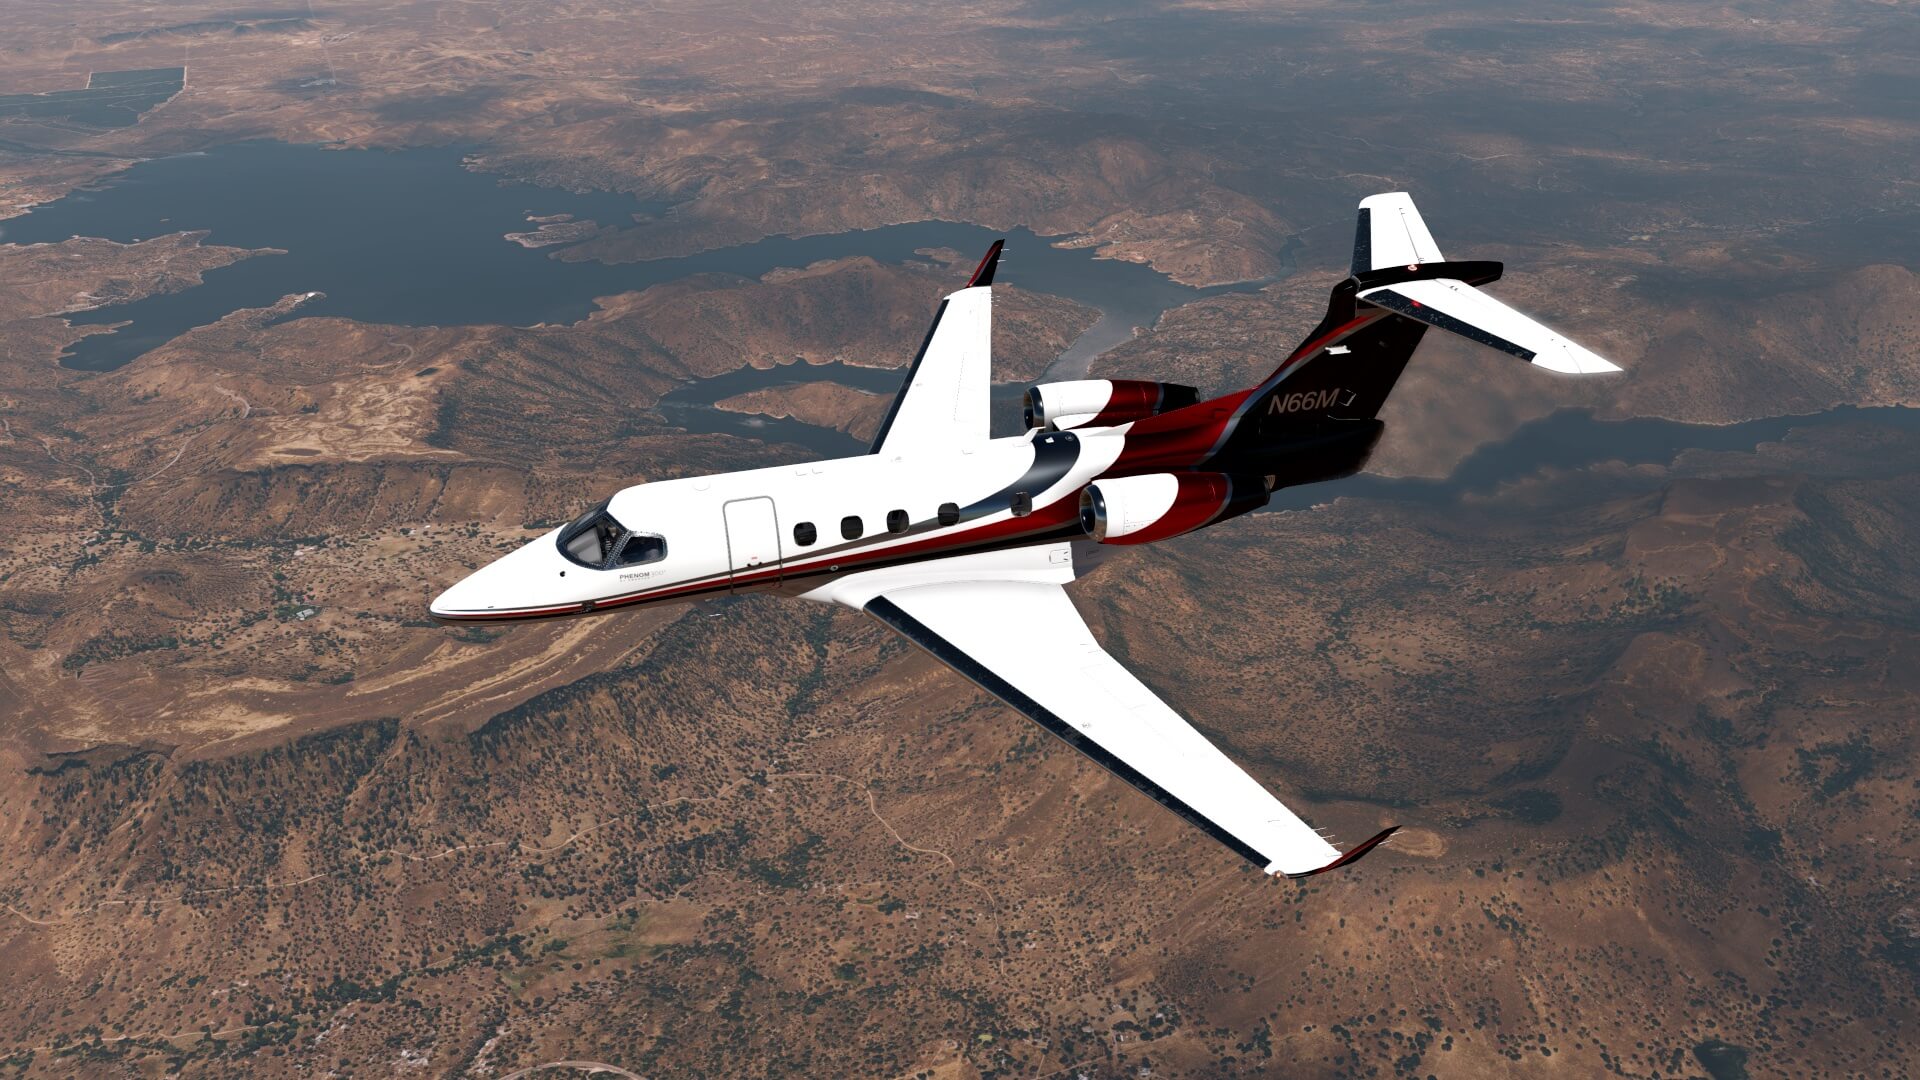
The Embraer EMB-505 Phenom 300 is a single pilot certified light jet aircraft developed by the Brazilian aerospace manufacturer Embraer. It is classified as a “Super Light Jet”. It can carry up to 11 occupants.
Embraer began designing the Phenom 300 after finding that potential customers of the Phenom 100 would also like a bigger aircraft. The Phenom 300 first flew on 29 April 2008, and received its type certification on 3 December 2009. On 29 December 2009 Embraer delivered the first Phenom 300 to Executive Flight Services at the company’s headquarters at São José dos Campos, Brazil. On 31 January 2020, Embraer announced significant upgrades to the Phenom 300, with maximum speed increased from Mach 0.78 to 0.80 (446 to 464 kn, 826 to 859 km/h), and range increased from 1,992 to 2,010 nmi (3,689 to 3,723 km). Rated engine thrust was increased from 3,360 to 3,478 lbf (14.95 to 15.47 kN) on upgraded PW535E1 turbofans.[
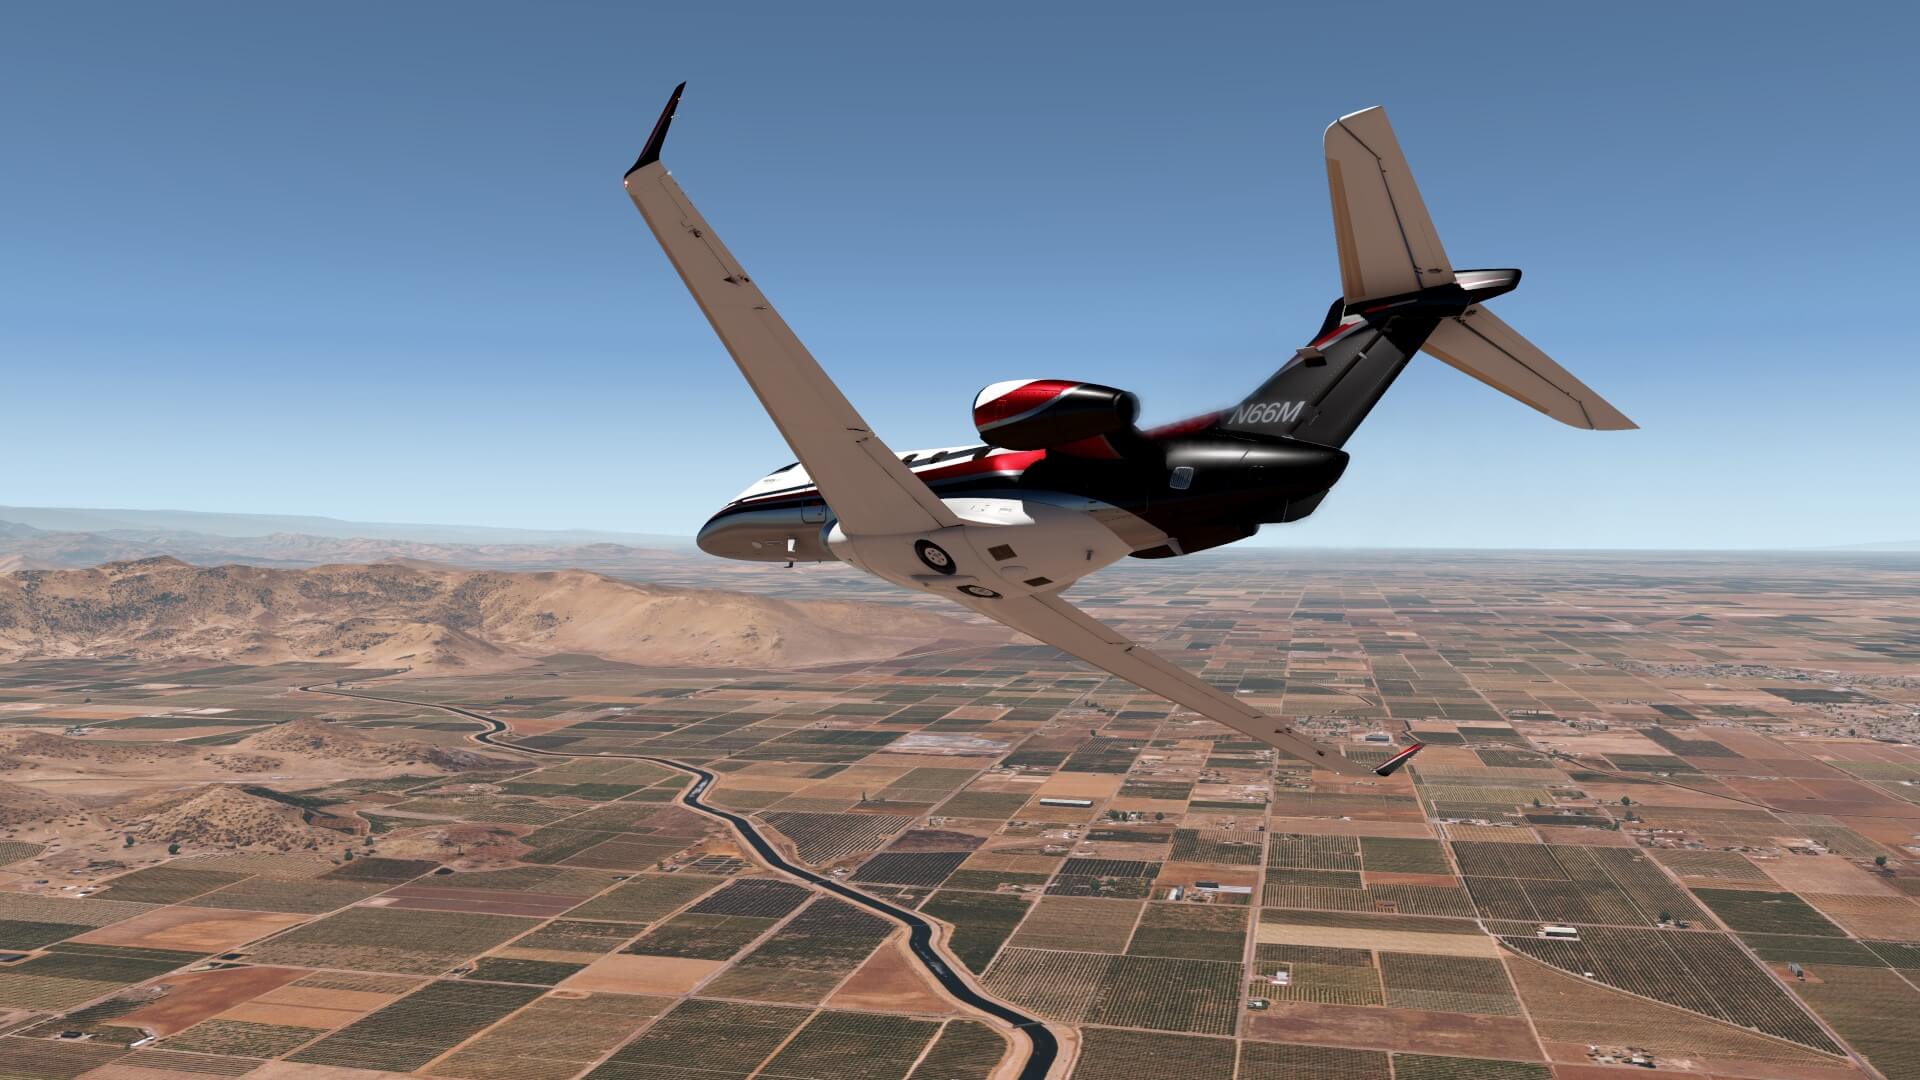
The Phenom 300 is a twin-engined cantilever monoplane with low-positioned, swept wings. It has a horizontal stabiliser in a T-tail configuration and a retractable tricycle landing gear. It has two rear-pylon-mounted Pratt & Whitney Canada PW535E turbofan engines. The enclosed cabin has room for nine passengers and a two-pilot crew; during single-pilot operation an additional passenger can be carried. Access to the cockpit and cabin is via an air-stair on the left-hand side. The Phenom 300 has single-point refueling and an externally serviced private rear lavatory.
As previously mentioned, it all started with the Phenom 300 which was upgraded in 2018 and became the 300E model. The Phenom 300E, featuring redesigned interior, new avionics suite (Garmin-G3000-based Prodigy Touch), and Ground Power Mode for engines.
Is it a success model?
Yes, you can say that. The 500th unit was delivered in March 2019. The Phenom 300 became the most delivered business jet with 60 units in 2013. This was also the case in 2014 and 2015.
Just to get an idea …. a new Embraer Phenom 300 has a list price of USD 8.76m. The total cost of ownership per year of the Phenom 300 is USD 1,505,487.
Aerobask Phenom Documentation
Normally I would start with downloading the Phenom 300 package from my X-Plane.Org account which is thru, but after you’ve unzipped it, it’s perhaps a good habit to check out the manuals first. A lot of time and effort is put into the making of these manuals so please check the manuals first. That said, here we go.
Ho ho …. hold on, when you waited for this review, you can also download the manuals before buying the product from the Aerobask website which is linked to this X-Plane.Org forum.
As expected, the Adobe Acrobat manuals in the previous X-Plane.Org forum link are the same as the ones in the Aerobask Phenom 300 package. These are:
– Aerobask Phenom 300 – Flight Manual
– Aerobask Phenom 300 – Normal Checklist
– Aerobask Phenom 300 – Performances
– Aerobask Phenom 300 – Procedures
– Aerobask Phenom 300 – TOLDG Cardboard kg
– Aerobask Phenom 300 – TOLDG Cardboard lbs
– Install_Recommended_settings
Although every manual is important, the Flight Manual – 31 pages – is perhaps the first one you should read. It explains in detail what can be found in the cockpit, how systems function or how to interact with them, in particular parts related to EDS (Electronic Display System). I’m also pleased to see that when something isn’t simulated, it is mentioned. When knowing this, there’s no need to seek any further why something didn’t work for you.
Further on, this flight manual explains the external panels that are simulated or implemented, the option menu, the integrated AviTab, the cabin layout with a nice feature known as “Airshow” and finally for those simmers with a less powerful PC or Mac, 2K textures. This means automatically that the default used textures for the Aerobask Phenom 300 is 4K quality.
Then some words about the other documents. The package comes with a paper version of the Normal Checklist – 1 page – and also explained in the flight manual; it doesn’t offer an electronic checklist which is normally a part of the EDS MFD (Multi Function Display).
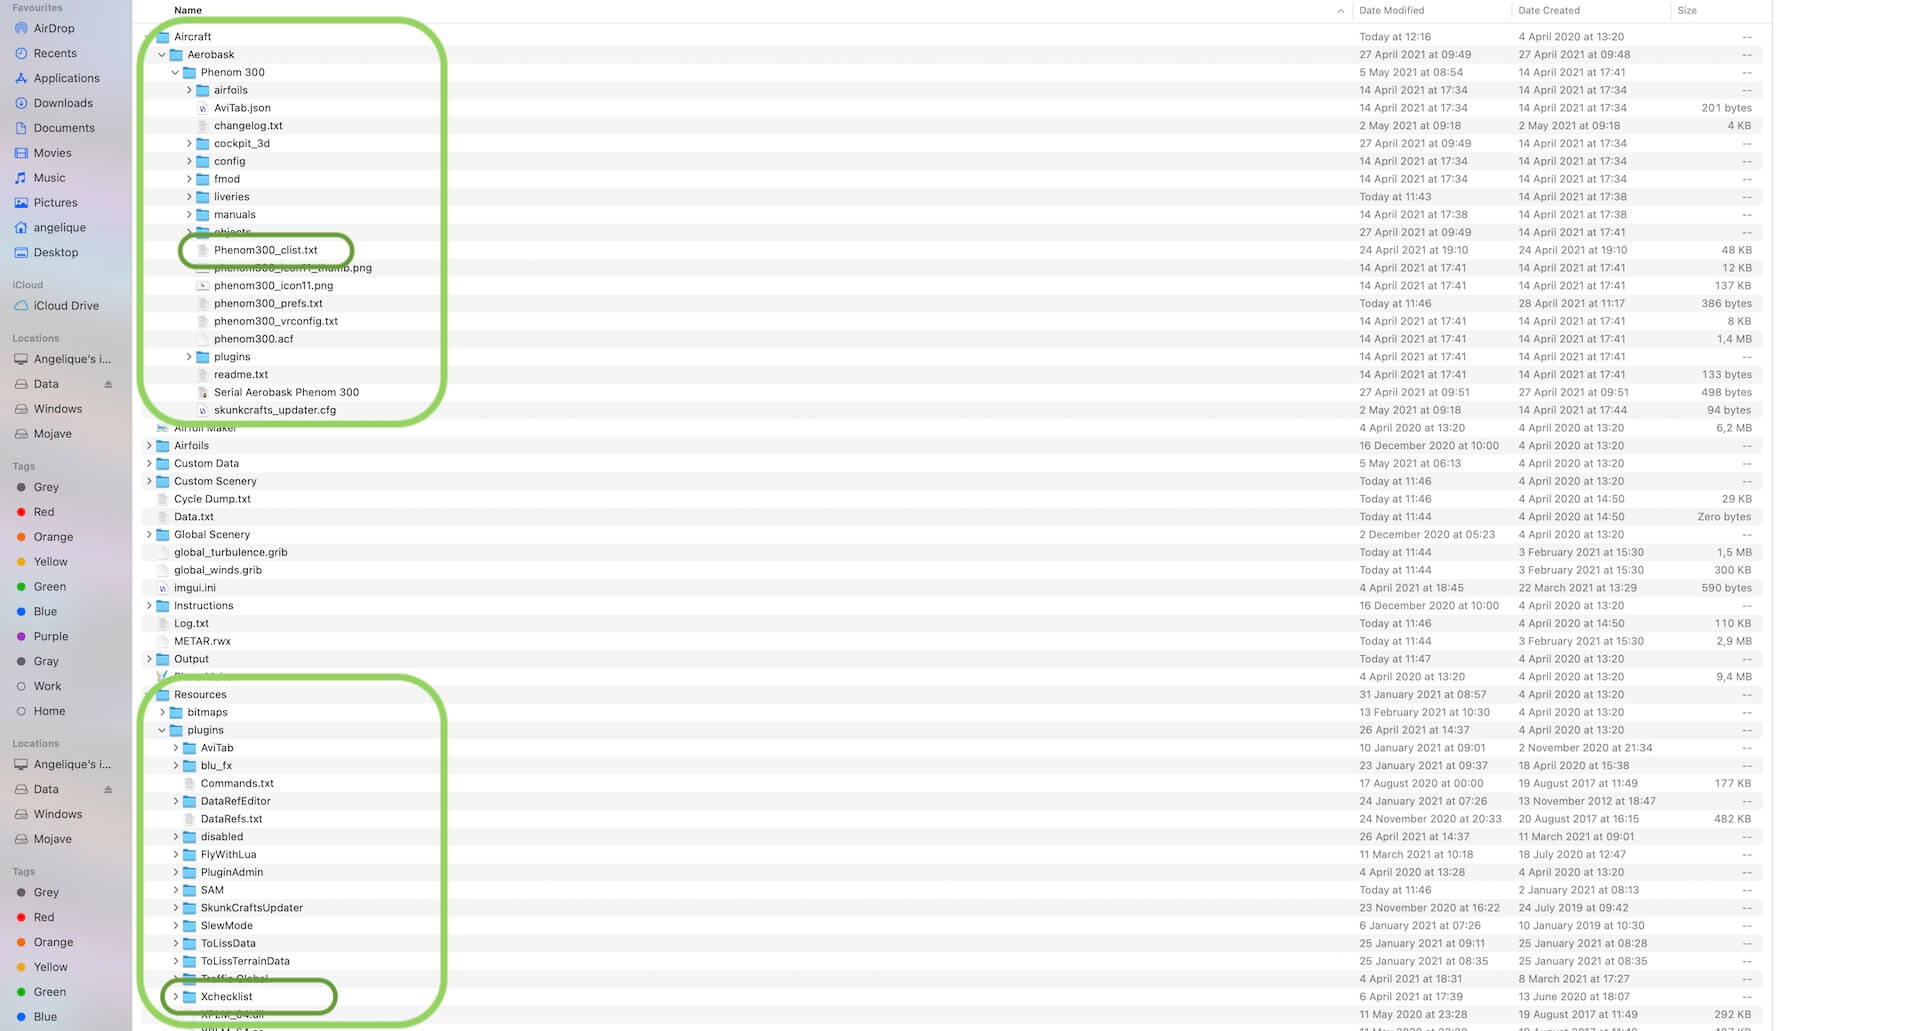
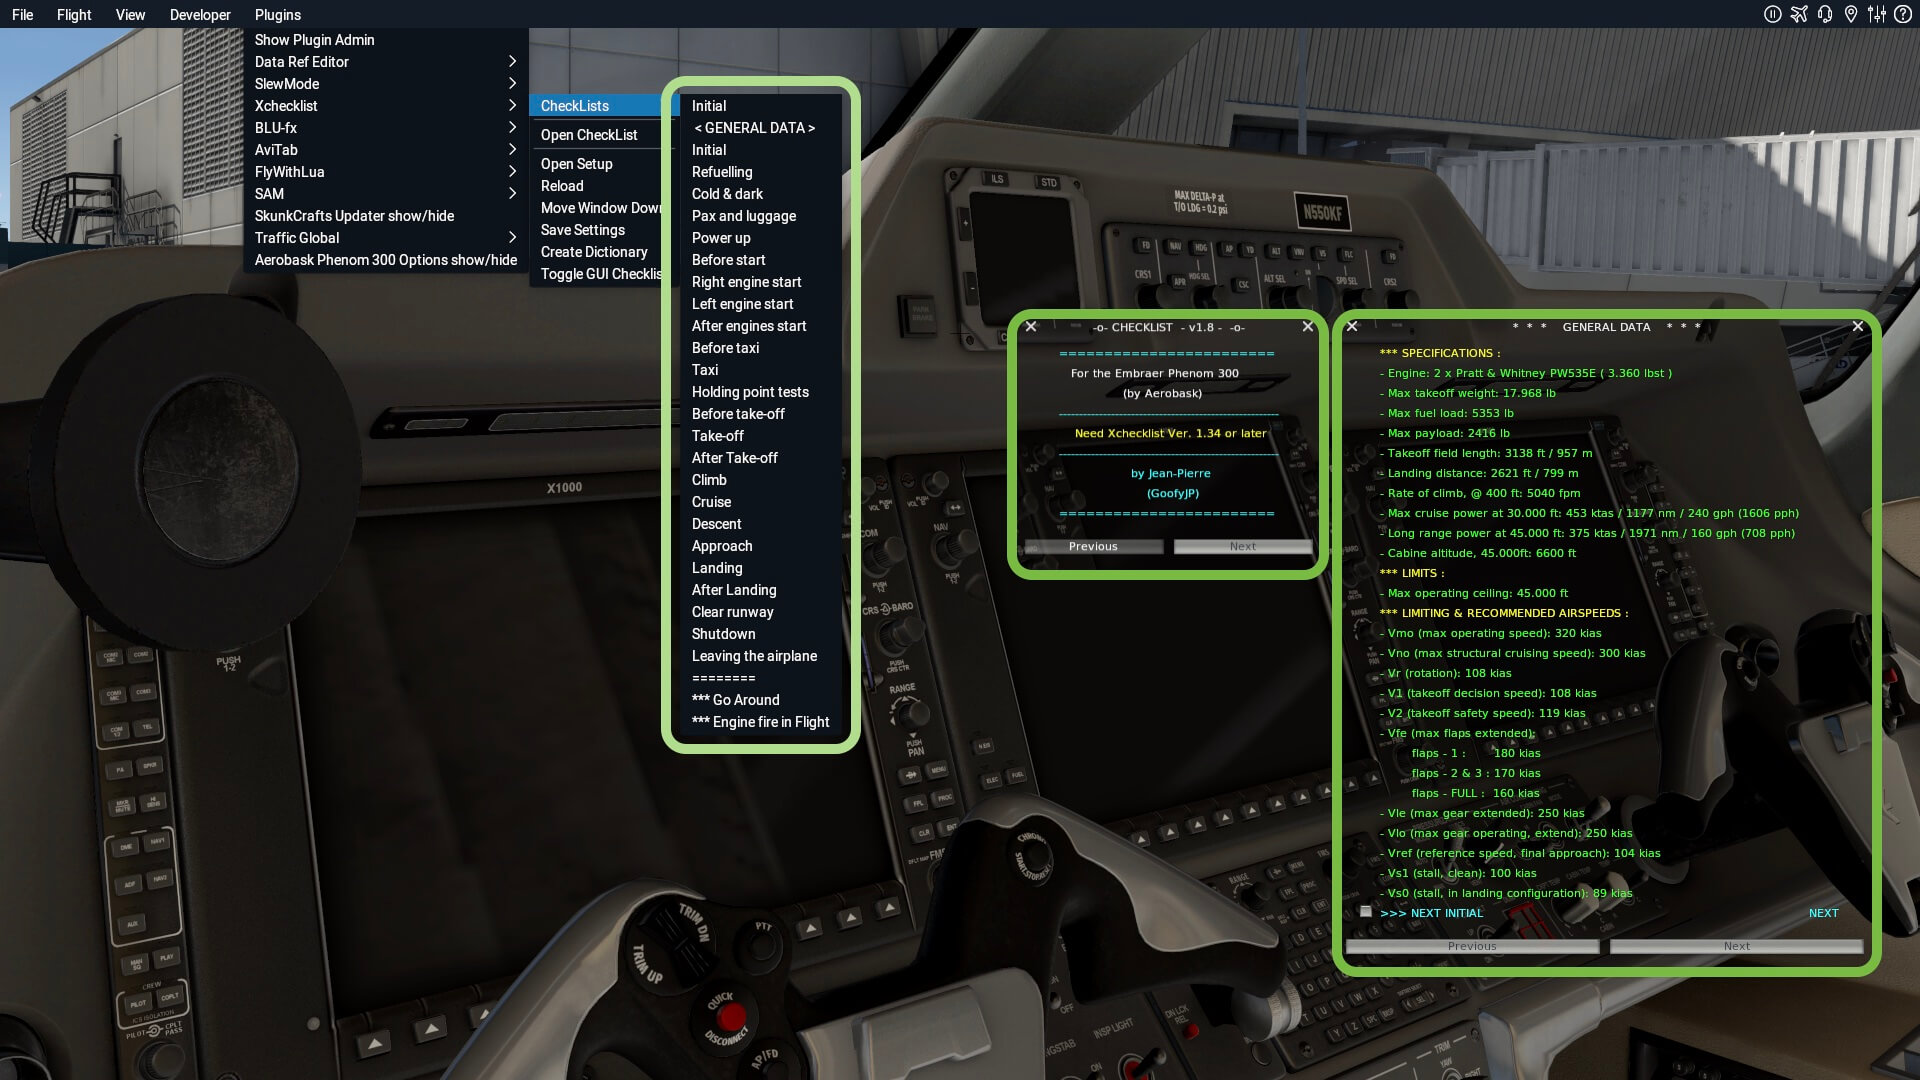
On the other hand, those simmers who prefer a kind of electronic checklist, they can download the Xchecklist from X-Plane.Org user sparker via this link and then X-Plane.Org user GoofyJP created a Phenom 300 clist (checklist_v1_8_phenom300_aerobask.zip). This clist can be found via this a href=”https://forums.x-plane.org/index.php?/files/file/70823-checklist-phenom300_clisttxt-for-the-phenom-300-by-aerobask/” rel=”noopener” target=”_blank” URL.
The Procedures – 30 pages – manual covers all different procedures thus the normal-, emergency- and abnormal procedures. That sounds logic, right, but it is worth to let you know that on page 4 you find a “reduced operational checklist” while it is followed by the “normal procedures” and honestly, when you want to learn everything of the Phenom 300, then this is a good way to start with. Since every step to perform in the normal procedures is not only highlighted, but also explained or what or where to expect something.
The Performance – 83 pages – manual deals with all kind of tables needed to calculate thrust, minimum runway length, TO speeds, your limited A/C weight and Vfs. And since it all sounds a bit complicated, the manual offers at page 6 an example how to find these values in the tables since these are needed to enter in the PFD (Primary Flight Display). At page 63 and 64 you’ll find all the info typically related to N1/Speed/Fuel-Flow/Altitude tables for the flight phases CLB, CRZ and HOLD. Then starting on page 65, you find all the data you need to the approach and landing and again, to get an idea how to find the necessary values, page 69 offers an example on how to read the tables and find the values for your flight.
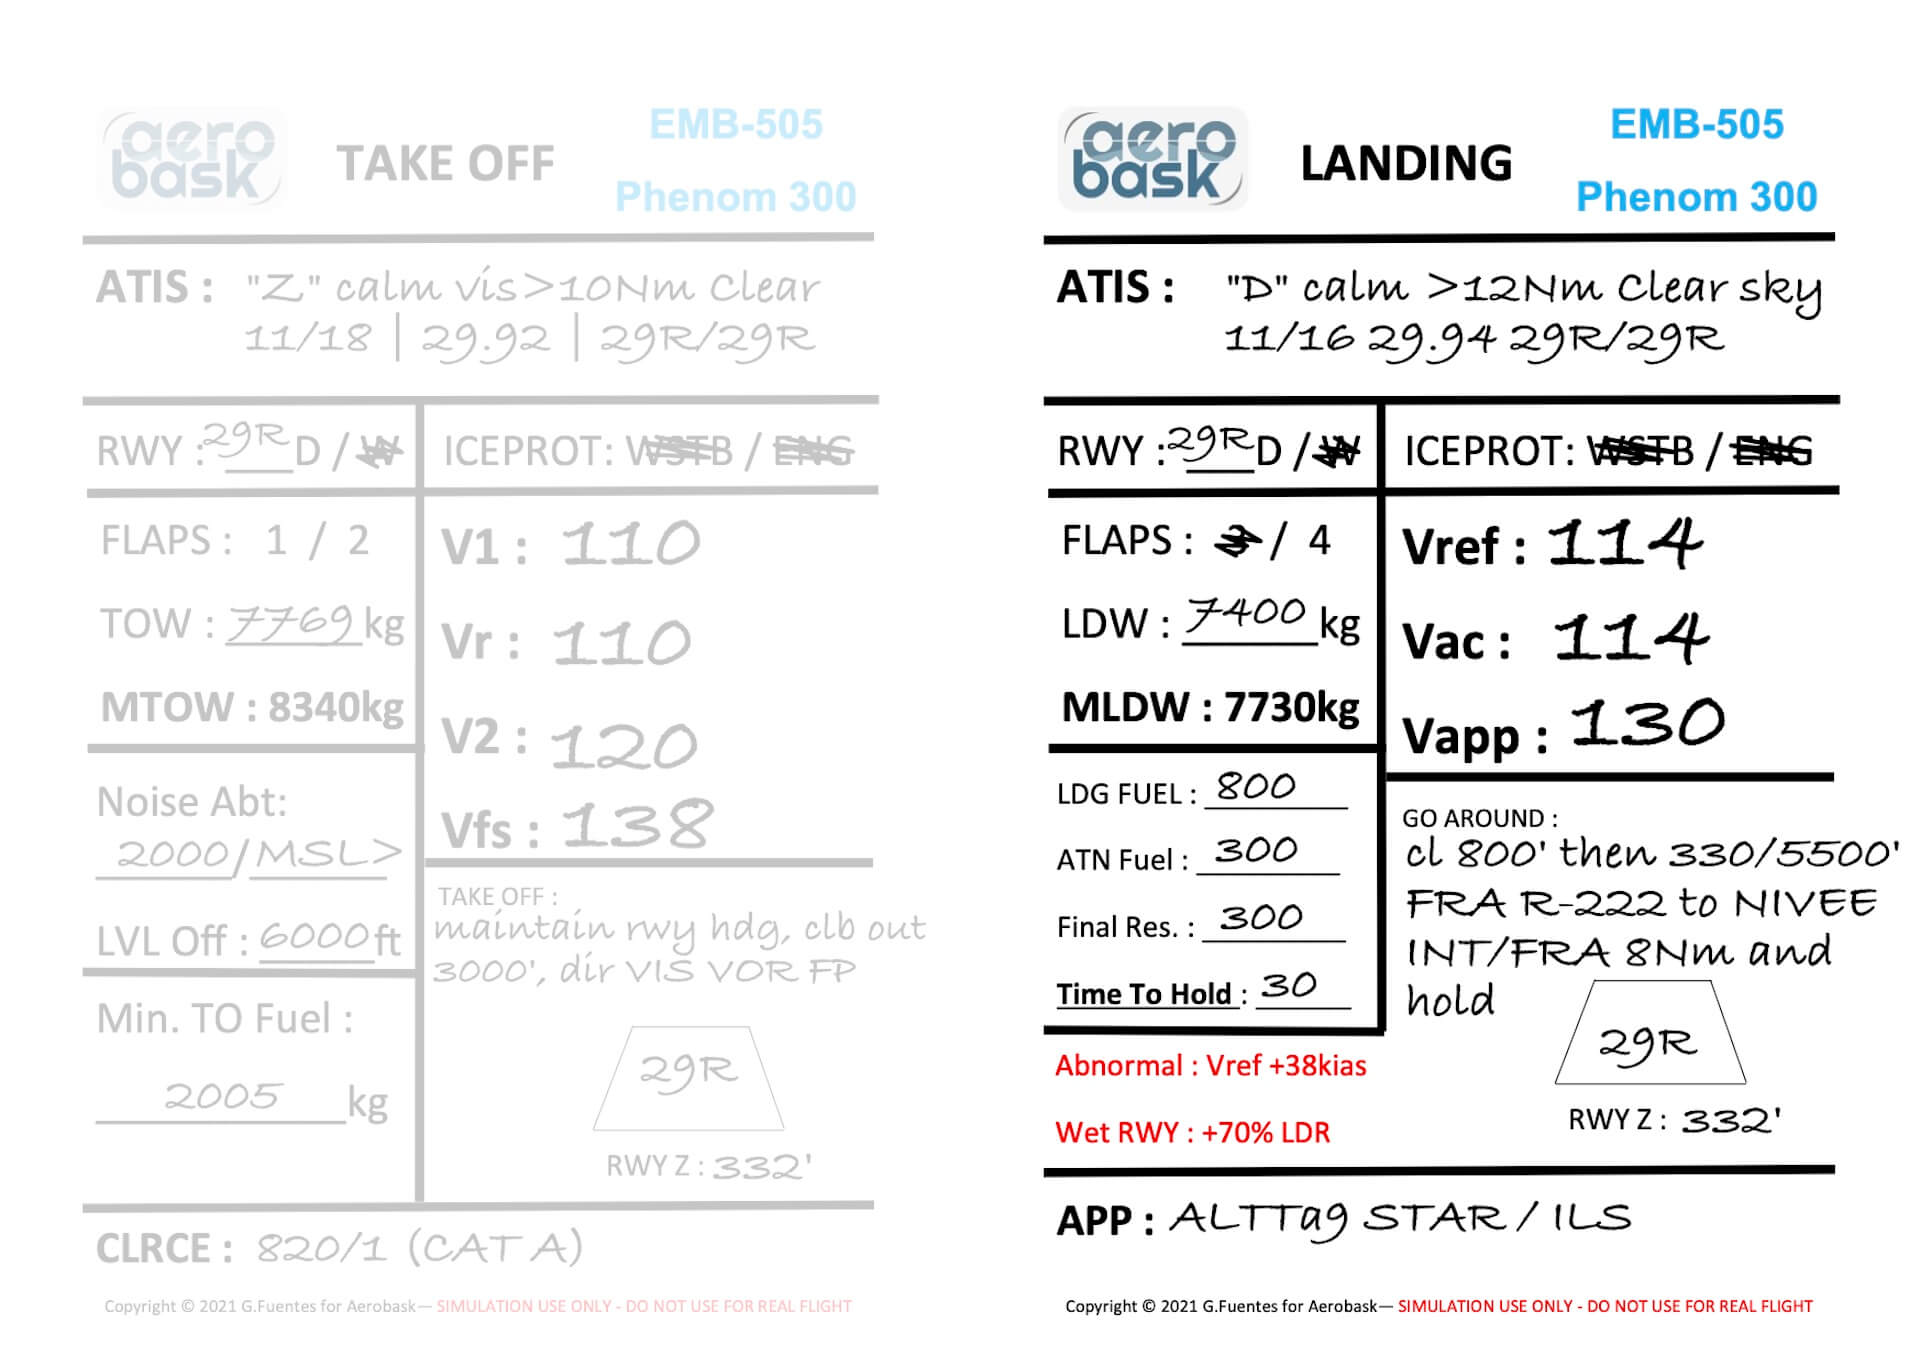
The TOLDG Cardboard kg/lbs pages that offer for each type of weight (lbs or kgs) 2 TO/LDG DATA cards. When you print the kgs/lbs page, you can cut them in half and fold each with on the front the TO data to be entered, on the back the landing data.
And finally, not shocking, but important enough to let you know, the recommended X-Plane rendering settings, dedicated for the left-hand side thus settings that deal with the GPU (Graphics Processing Unit).
Aerobask Phenom 300 Installation
Via your dedicated X-Plane.Org Aerobask Phenom 300 account page, you download the Aerobask_Phenom_300.zip (599 MB) file. On your account page you also find the serial number that is needed to activate the Phenom 300 once you’ve started up X-Plane and loaded the Aerobask executive jet.
Unzip the package (1.33GB) which creates the folder “Phenom 300”. Copy this folder with its content to the X-Plane Aircraft folder or when you own more Aerobask products, you can also copy and paste this Phenom 300 folder to a previous created sub folder named Aerobask.
Next you and I need to activate the product else we can’t use it. That said, start X-Plane 11, and select the Aerobask Phenom 300 from the list. At start-up, the serial number is asked. Enter it, and when confirmed to be OK, reload the Phenom 300 and you’re ready to go.
Aerobask Phenom Configuration
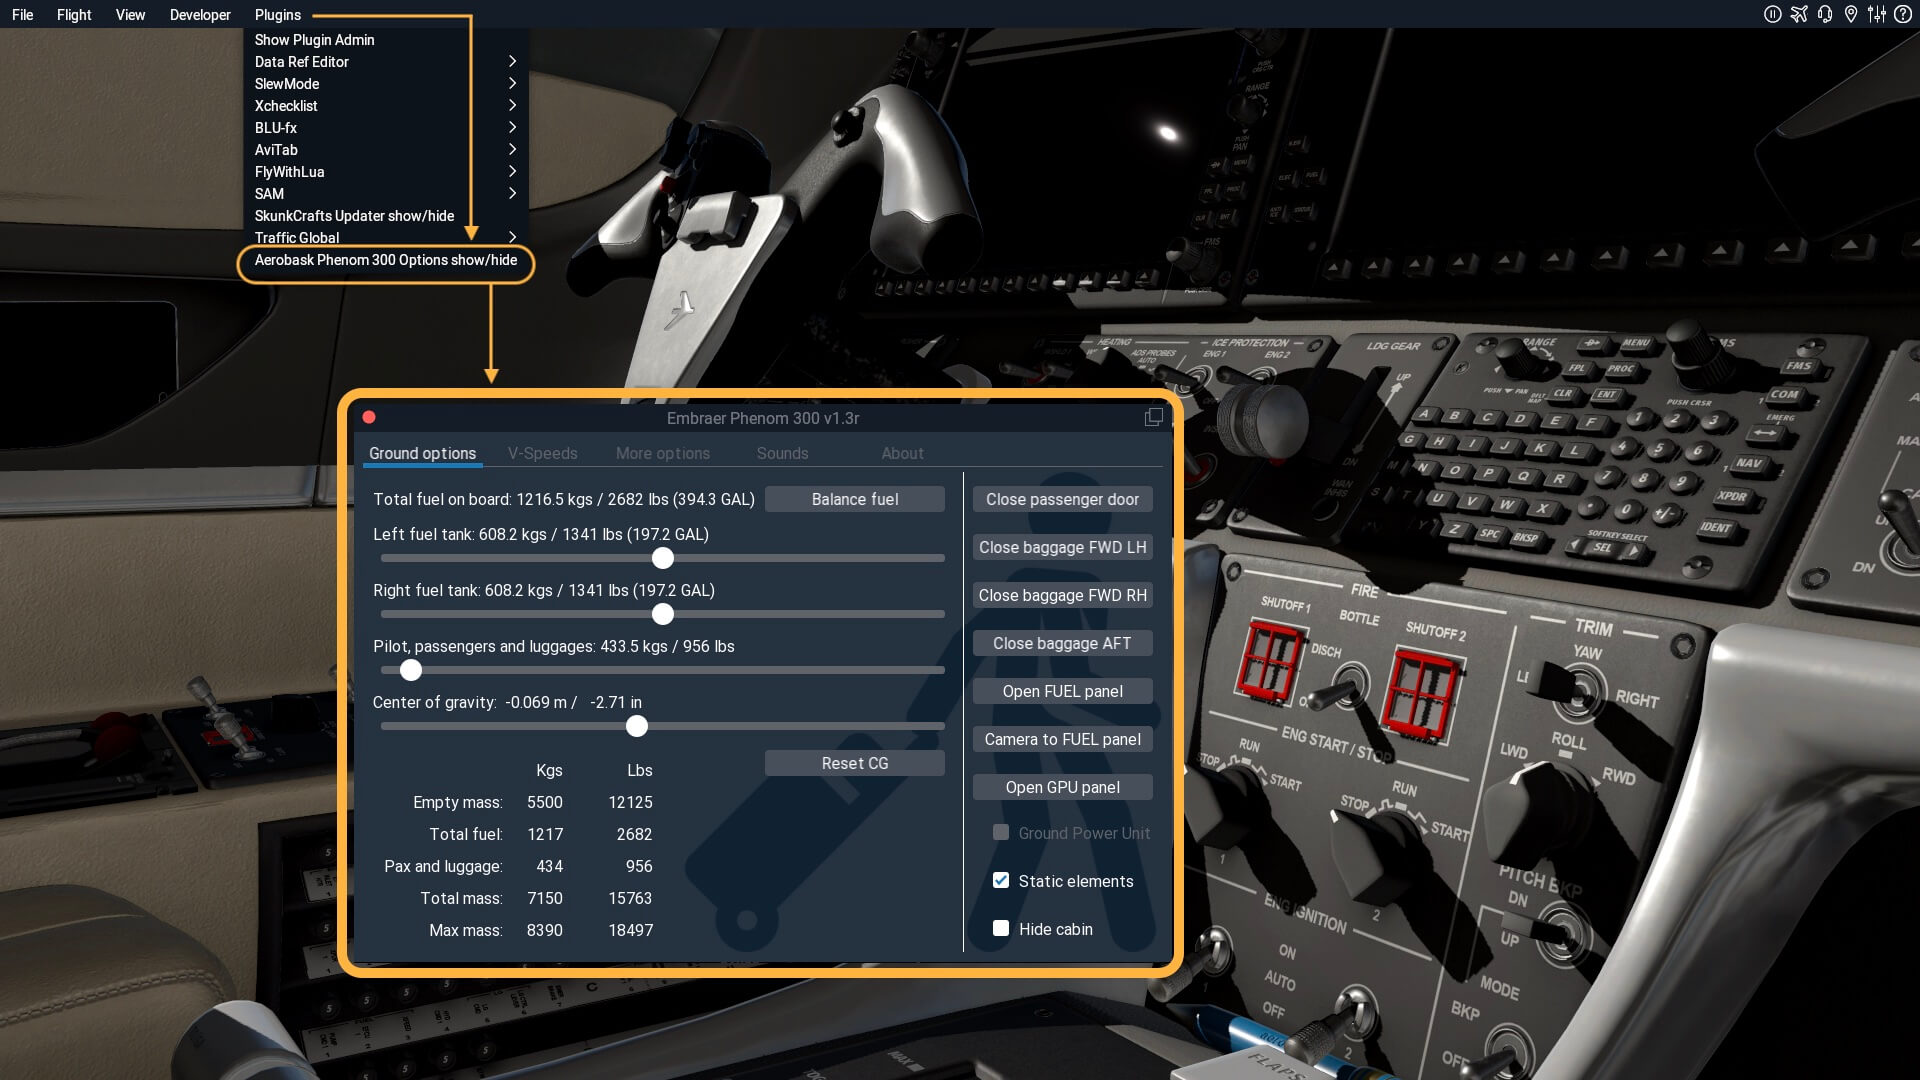
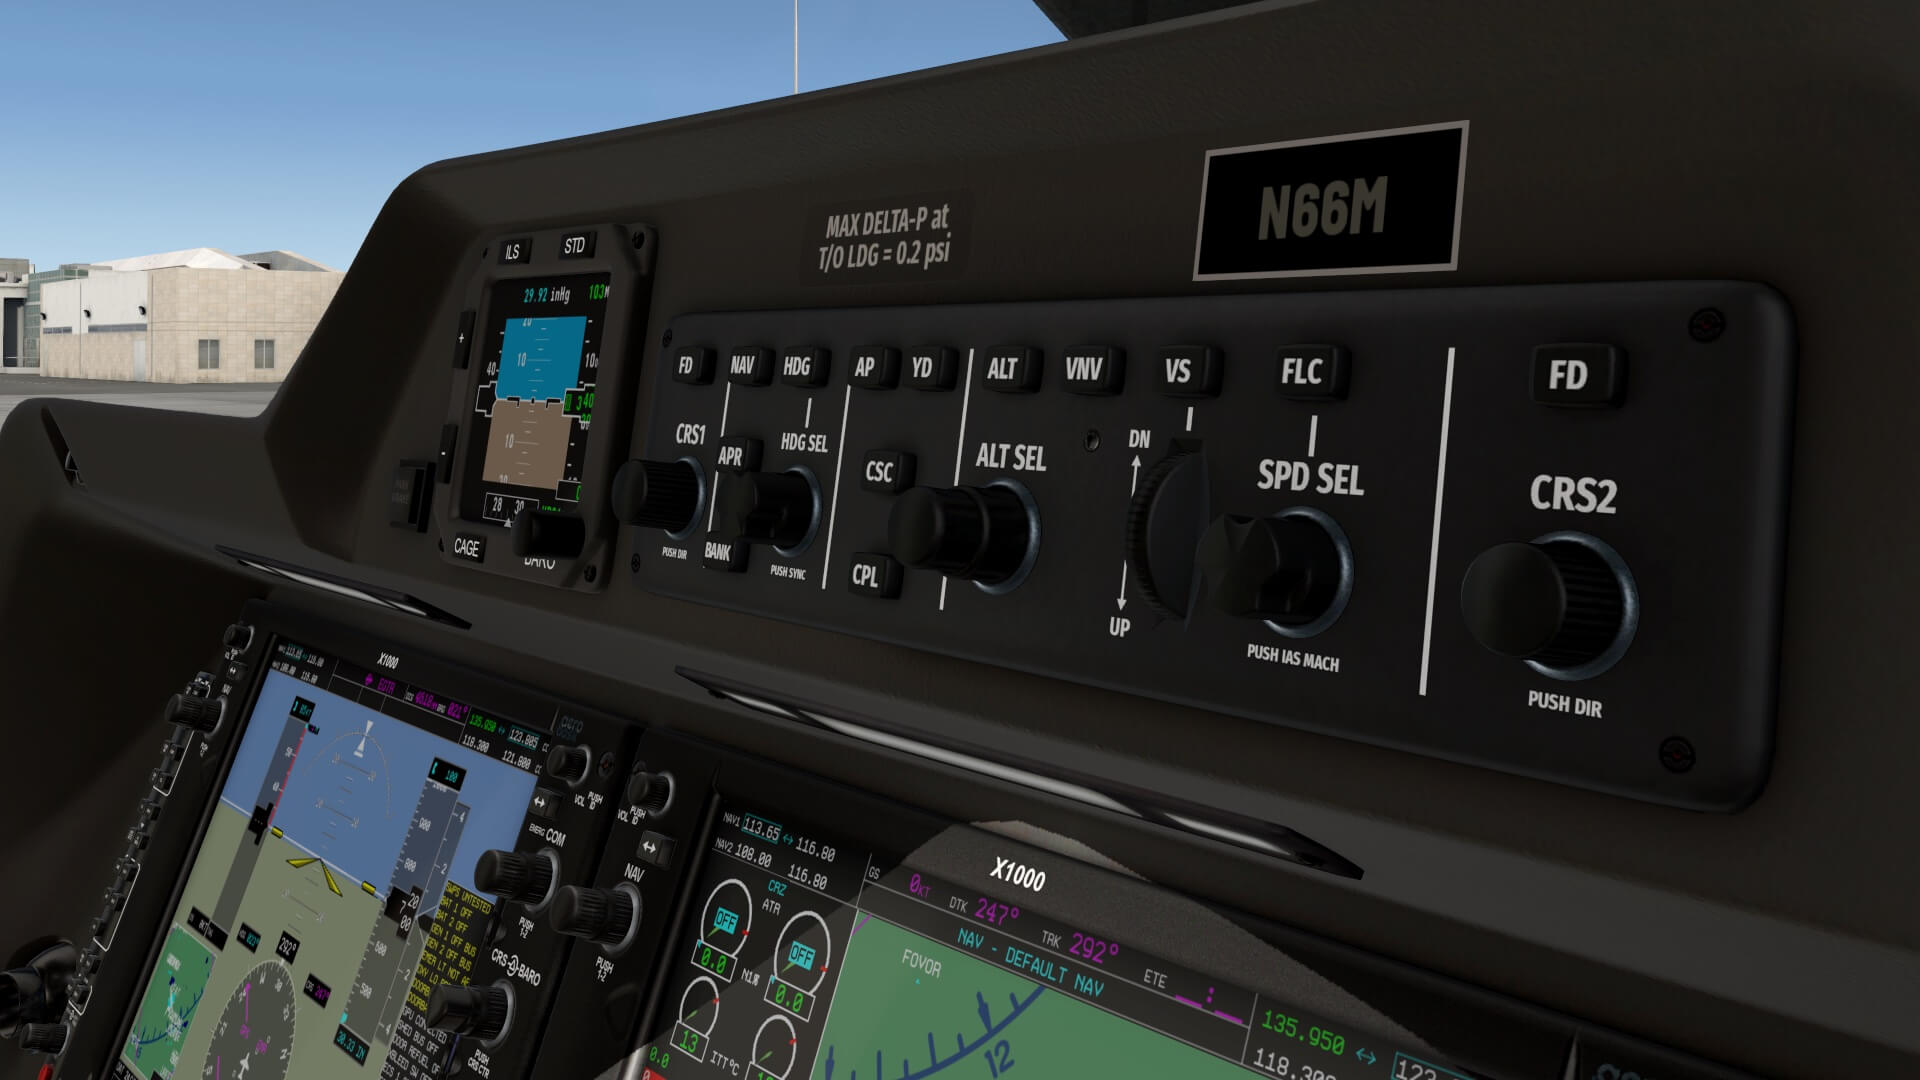
The Phenom 300 related configurations are done with the Aerobask Option menu. Requesting the Option Menu can be done via X-Plane Plugins – Aerobask Phenom 300 Option Show/Hide menu, or by clicking the base of the AviTab or by clicking the A/C registration plate above the Auto Pilot control panel. The following screenshots shows you all the different options.
The Aerobask Option menu consist of the following tabs:
– Ground operations
– V-speeds
– More options
– Sounds
– About
The different tabs are discuss in the Flight Manual, starting at page 26 and up. Although discussed in their manual, I always find something that I would like to add. Within the ground operations tab you can change the amount of fuel and payload as well as the control over all different kind of panels and adding external static objects and hiding the cabin.
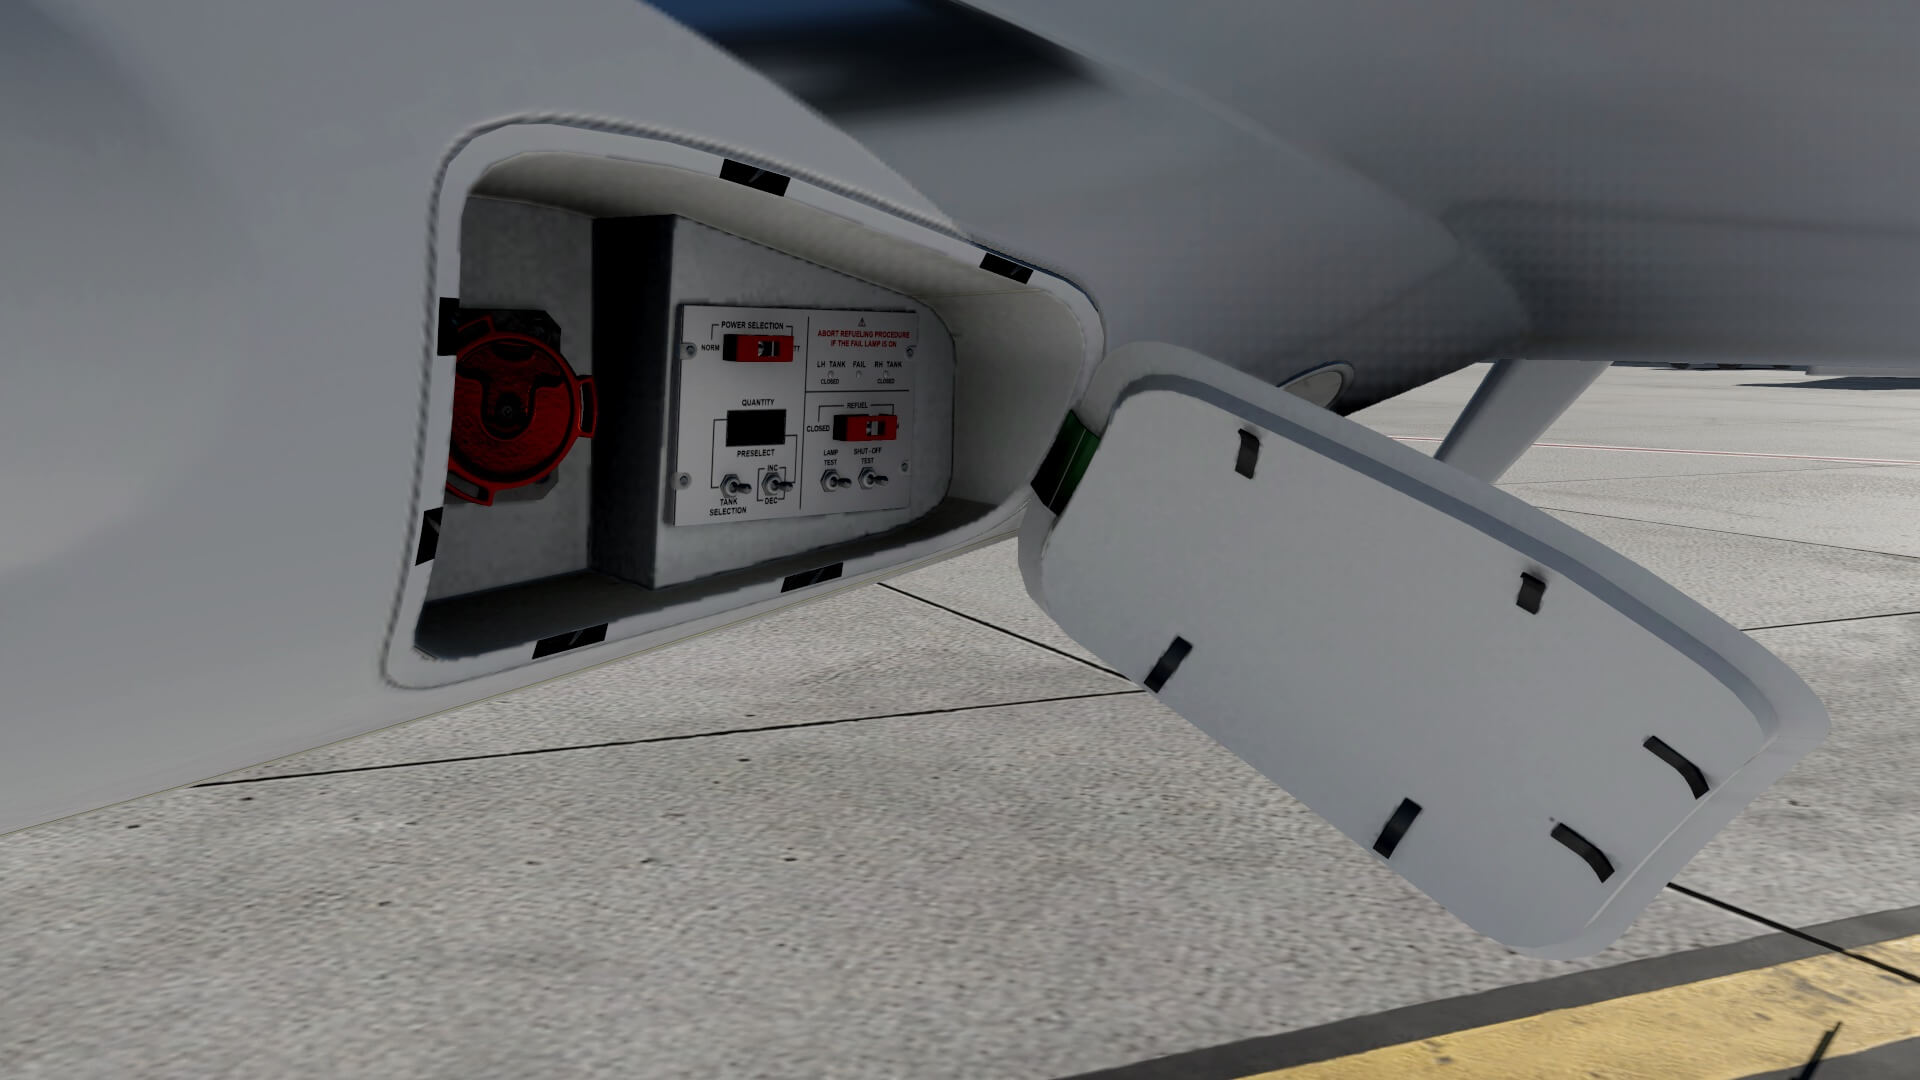
Worth to highlight is the option Camera to FUEL panel. There’s no need to look for where you can find the FUEL panel. Just click this “Camera to FUEL panel” option and you’ve moved yourself instantly at the right position. Either you’re looking to the closed fuel panel door or you see the fuel panel itself when you’d opened it before via the same Aerobask Option menu. One comment I have is the little jigsaw edge of the panel. I hope that with an update this could be a bit better.
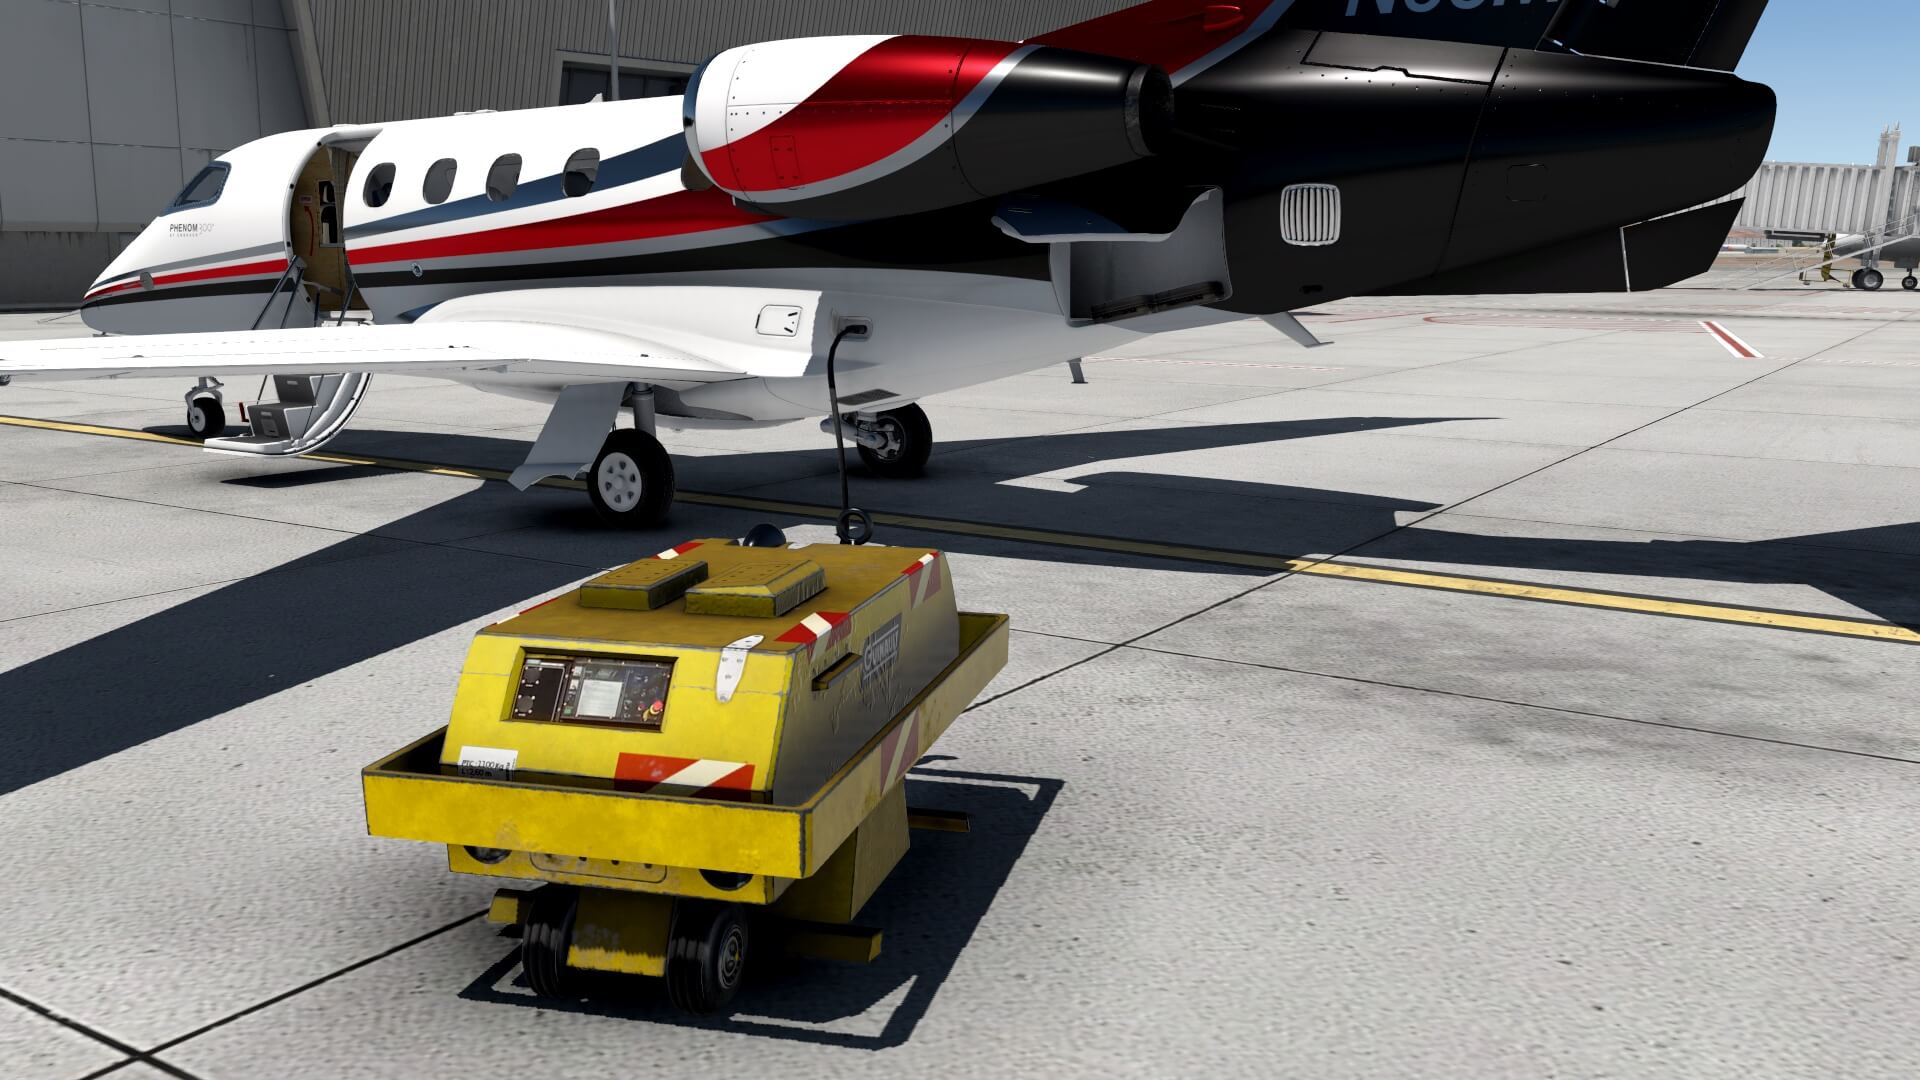
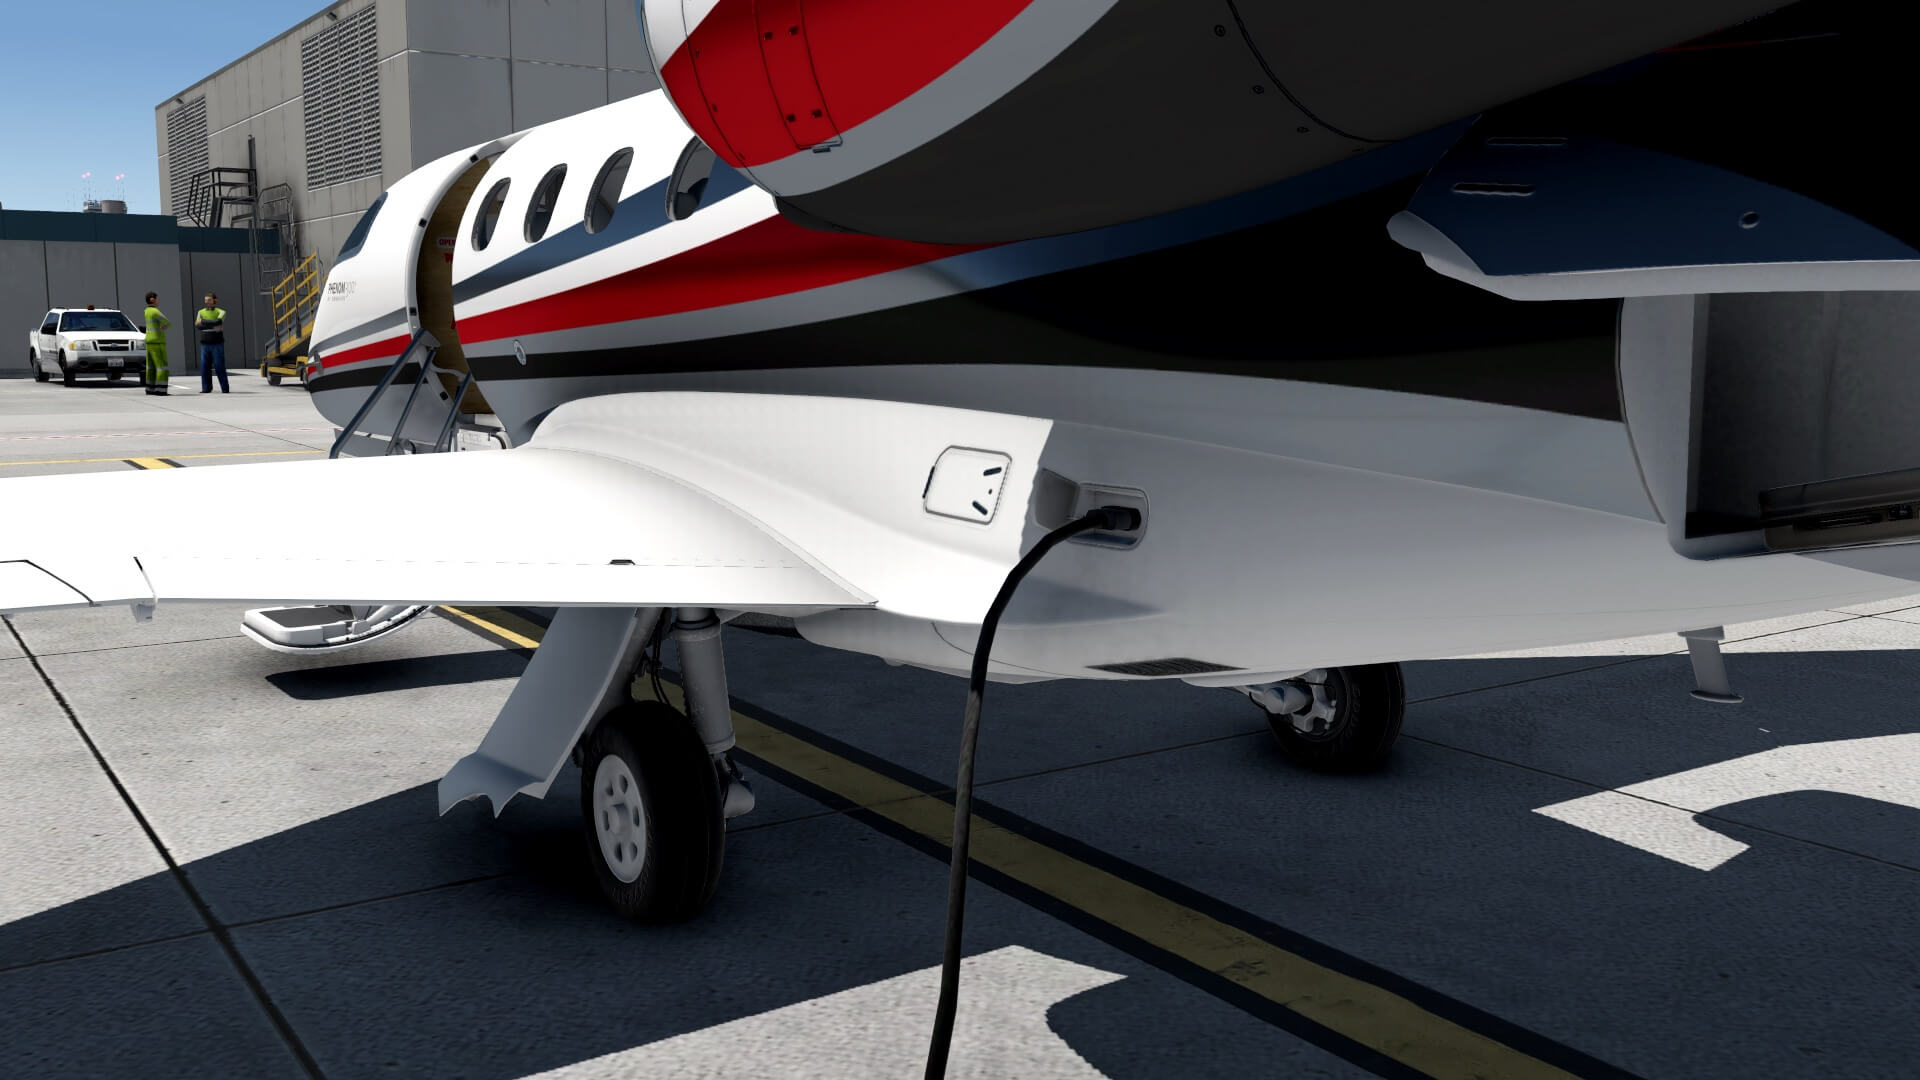
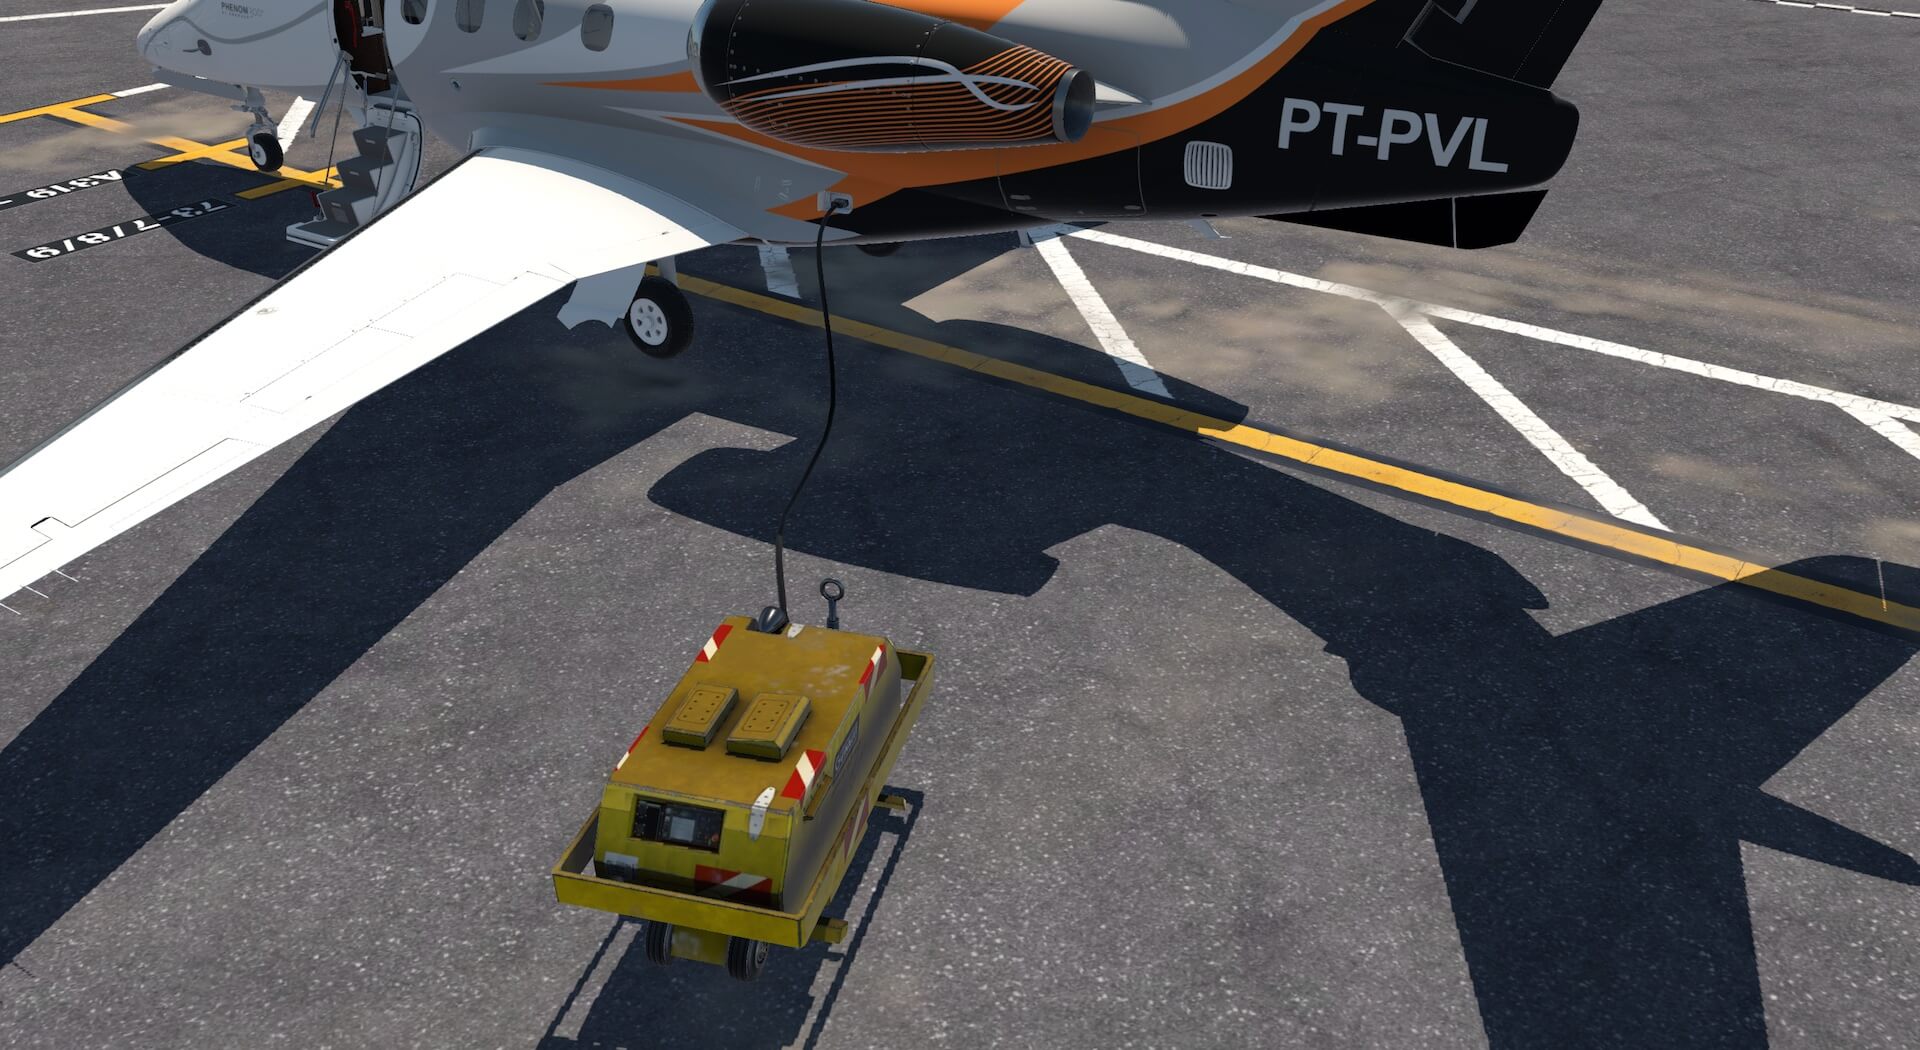
Something else …. I’d like the sound and the modeled GPU (Ground Power Unit). It’s a small GPU that provides DC (Direct Current) to the Phenom 300 which is totally different then the large commercial GPUs that deliver 3-phase AC (Alternate Current). Anyway, as long as the GPU panel is closed, the GPU option is greyed out. When you click to open the GPU panel, you can now enable the appearance of the GPU object.
The other way around goes easier and that is when you close the GPU panel, not only the panel closes as well as that the GPU disappears. But there’s no need to do this all via the Ground operations tab. You can also click at the Phenom 300 itself on the GPU panel located underneath the left-hand engine which will open and with the opened panel you click on the DC receptacle in the recess and the GPU pops-up, starts and the DC wire is connected to the aircraft.
The “hide cabin” option is not explained in the manual, but that’s easy to see when you tick the option …. it will save you the complexity and the large amount of used cabin polygons of the virtual cabin and that saves clearly many frame rates. Funny to mention is that when you check this “hide cabin” all seats, tables, carpet, tracks, walls, ceilings, cabinets and so on are gone and you feel you’re in the middle of a tube!
Ok, let continue with the next item. The V-speeds tab speaks for itself and is clearly explained in the manual, so no need for me to add any comments.
The More options tab is a collection of all different kind of settings that can be activated or deactivated like enable/disable instrument popups, or enable/disable instrument/windshield reflections (which means saving frame rates for low end PCs/Macs). Further on you find other enable/disable options related to the G1000 DU (Display Unit) system. The manual highlights a bit of what can be done, but the best way is just try all these options out by yourself and see what happens or what doesn’t happen.
The Sounds and About tabs speak for themselves.
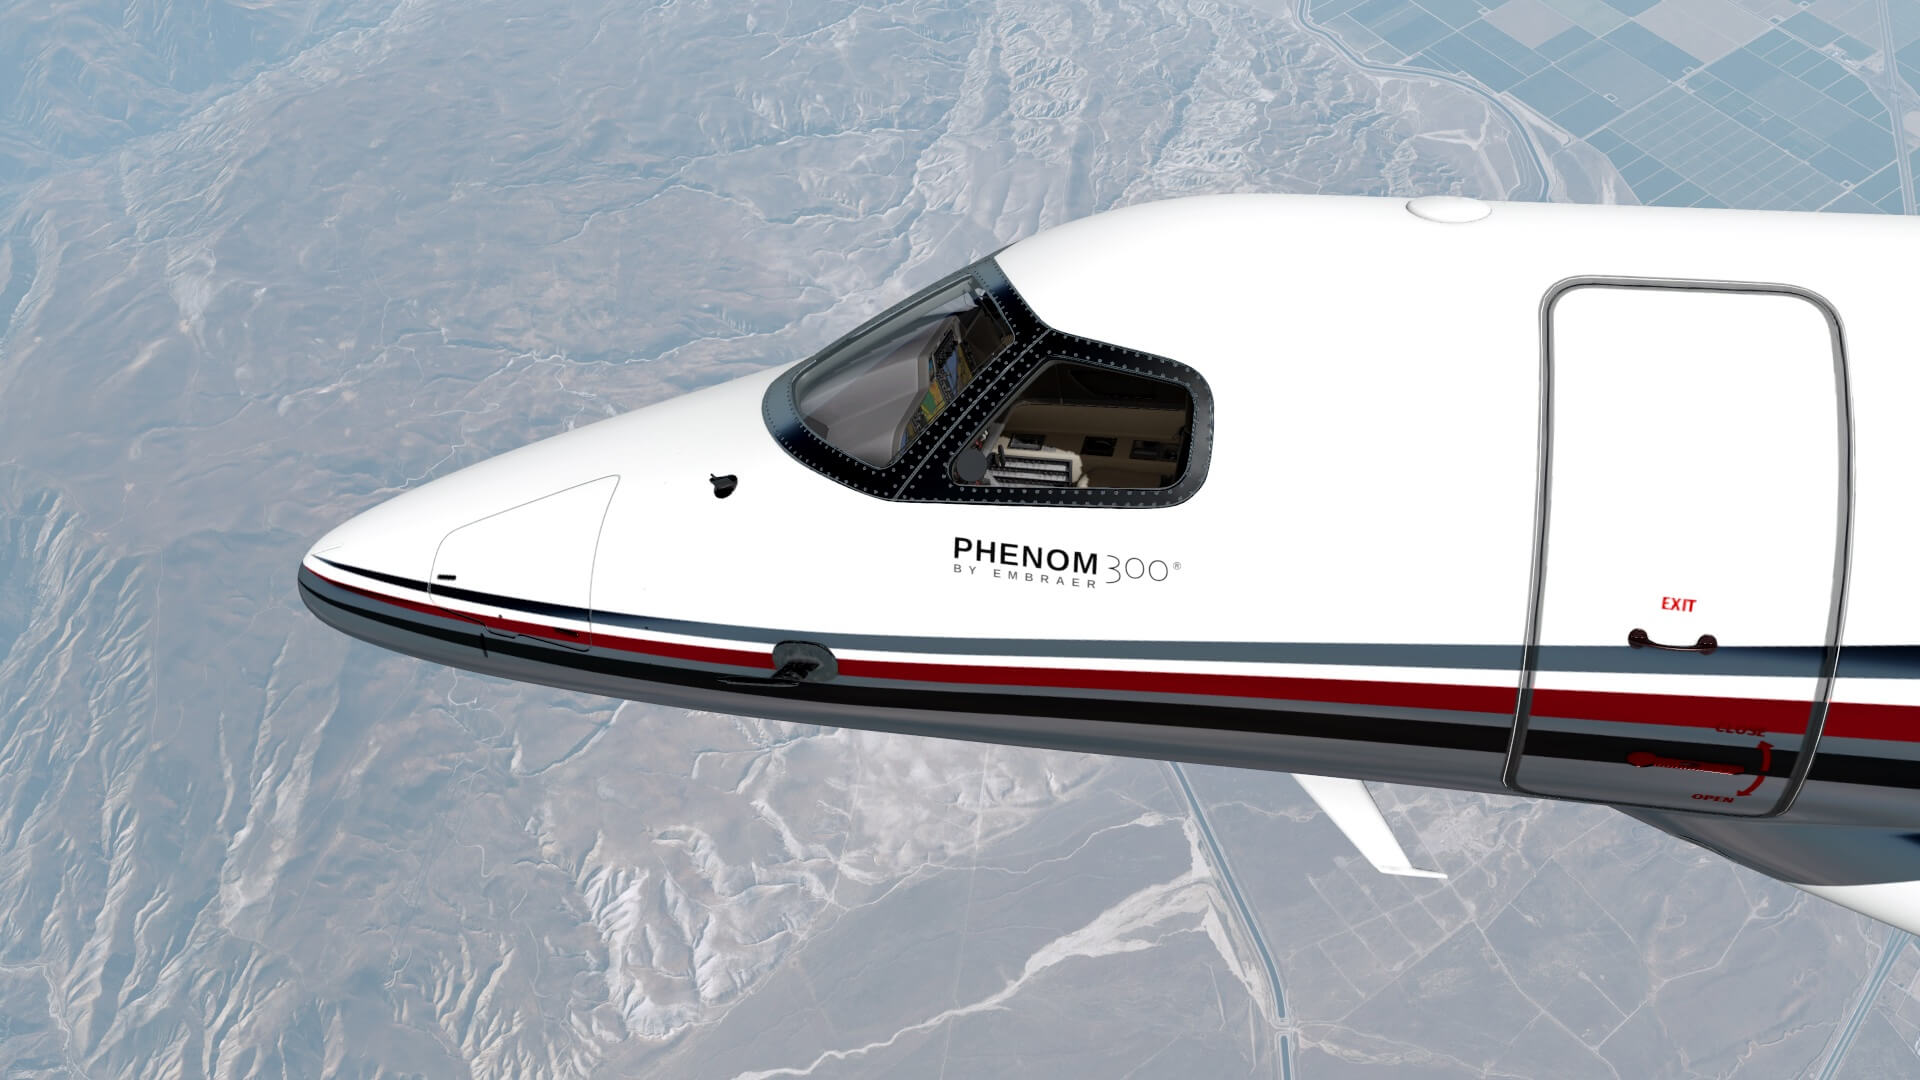
I would like to share with you two last things; first item is the opening and closing of all the panels and/or doors. As previously discussed, this can be done via the Ground operations tab, but you can of course also point your mouse to the respective panel/door, the mouse pointer changes into a hand and then click the left-hand mouse button. This will open or close the door. For the passenger or main entrance door with the build-in stair I’d expected that when you’re outside the Phenom 300, you need to click the red OPEN/CLOSE lever, but I noticed that nothing happened. Actually you need to move the mouse pointer to the red EXIT grip and then click the left-hand mouse button which will open the door. That the red OPEN/CLOSE lever isn’t simulated makes sense. Unnecessary polygons are needed and unnecessary polygons means frame rates loss and that’s not what we all want, but I’d expected to click around the red OPEN/CLOSE lever itself and not on the EXIT grip.
Second item is that although the Phenom 300 isn’t a very complex aircraft, I couldn’t find a flight tutorial. Angelique knows that writing a tutorial is a lot of work and the amount of time needed to write it, is not always worth the investment, but here we are, a gorgeous replica of the Embraer-505 Phenom 300 and no tutorial! Is it then so bad? No, of course not. You have the Normal Checklist and if you use it, the clist with XChecklist and a bit of common sense.
External Inspection
First a couple of words about the real Phenom 300. Even for me as ex-professional worked in the maintenance aviation sector, it’s difficult to find a maintenance manual or other technical information about the modeled Embraer Phenom 300. But I found a YouTube movie – not the newest one – that shows the manufacturing process and it turns out that the Phenom 300 is a regular build Alu skin construction with certain composite parts.
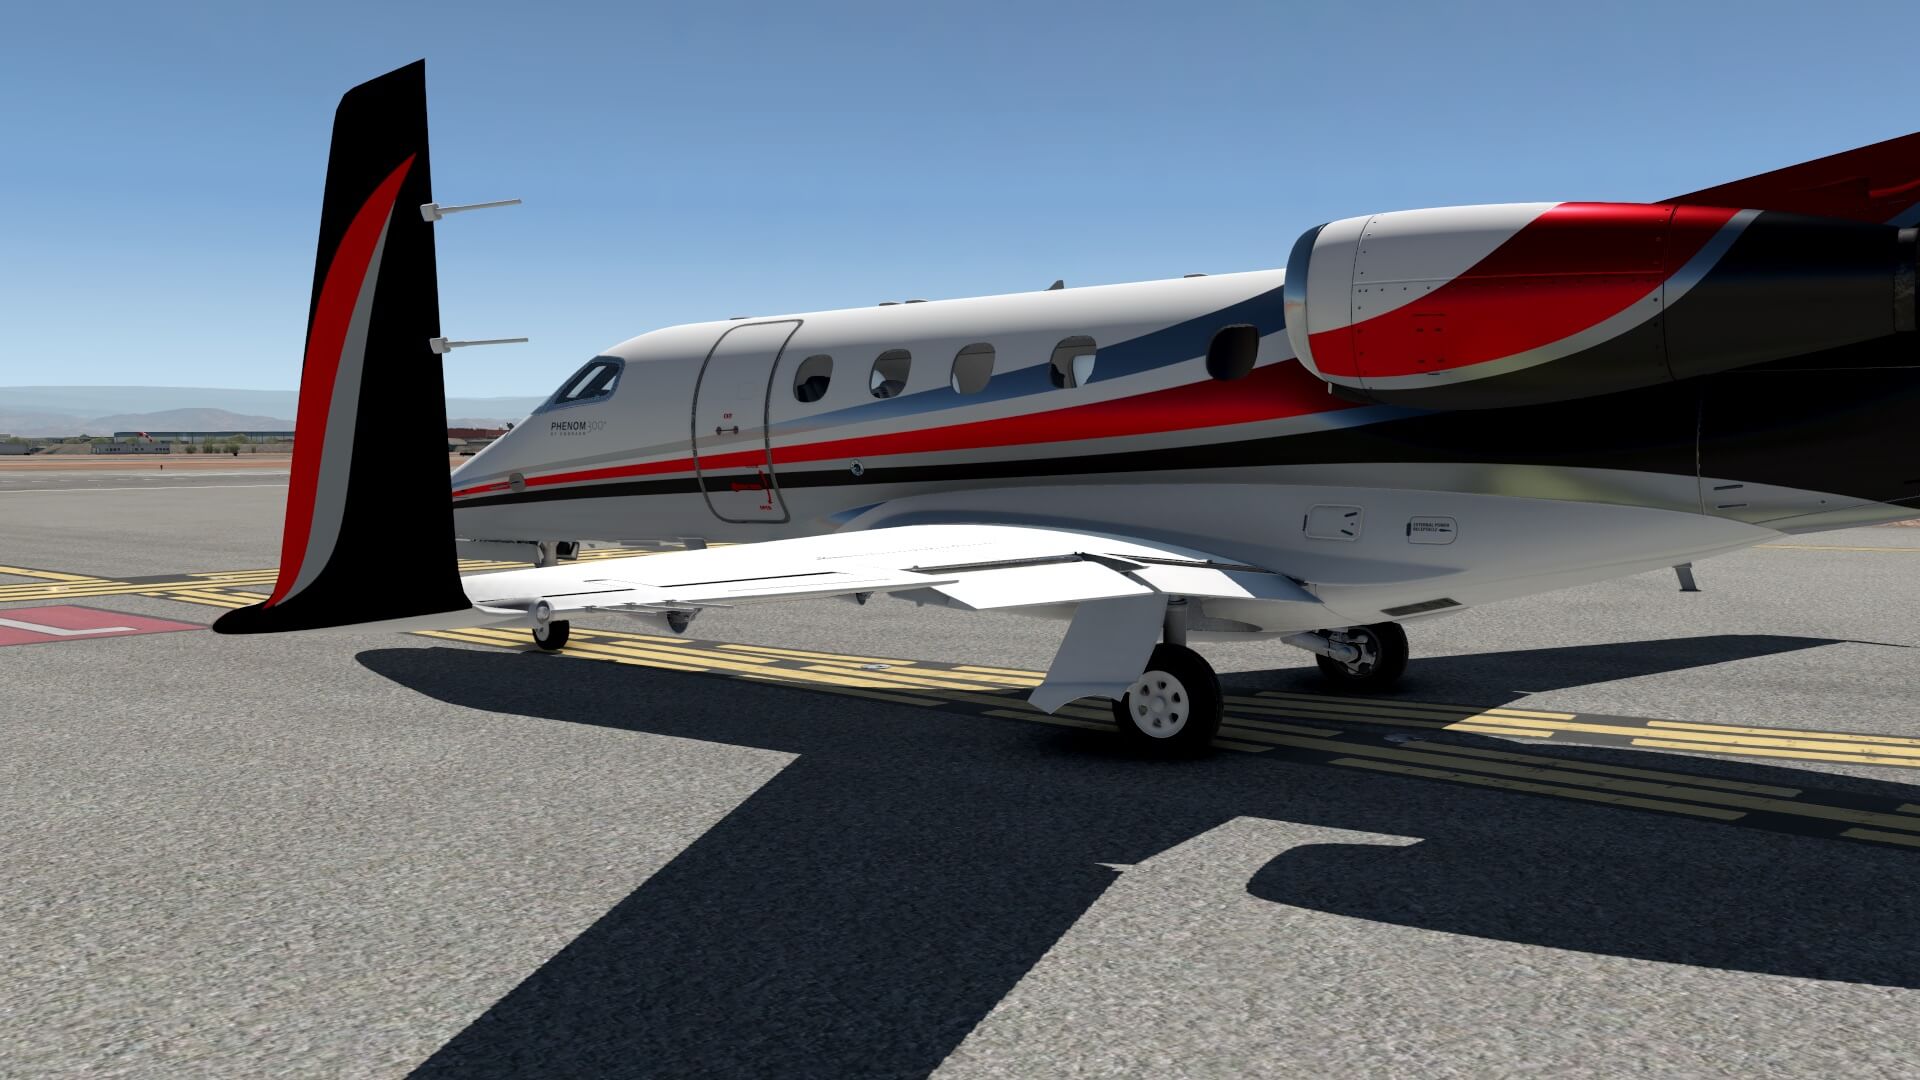
That said, rivets to connect parts together are used so they should be visible although the overall smoothness of the skin is outstanding and with a paint layer on it, the overall fuselage, tail and wing skin looks almost as it is made of composite materials.
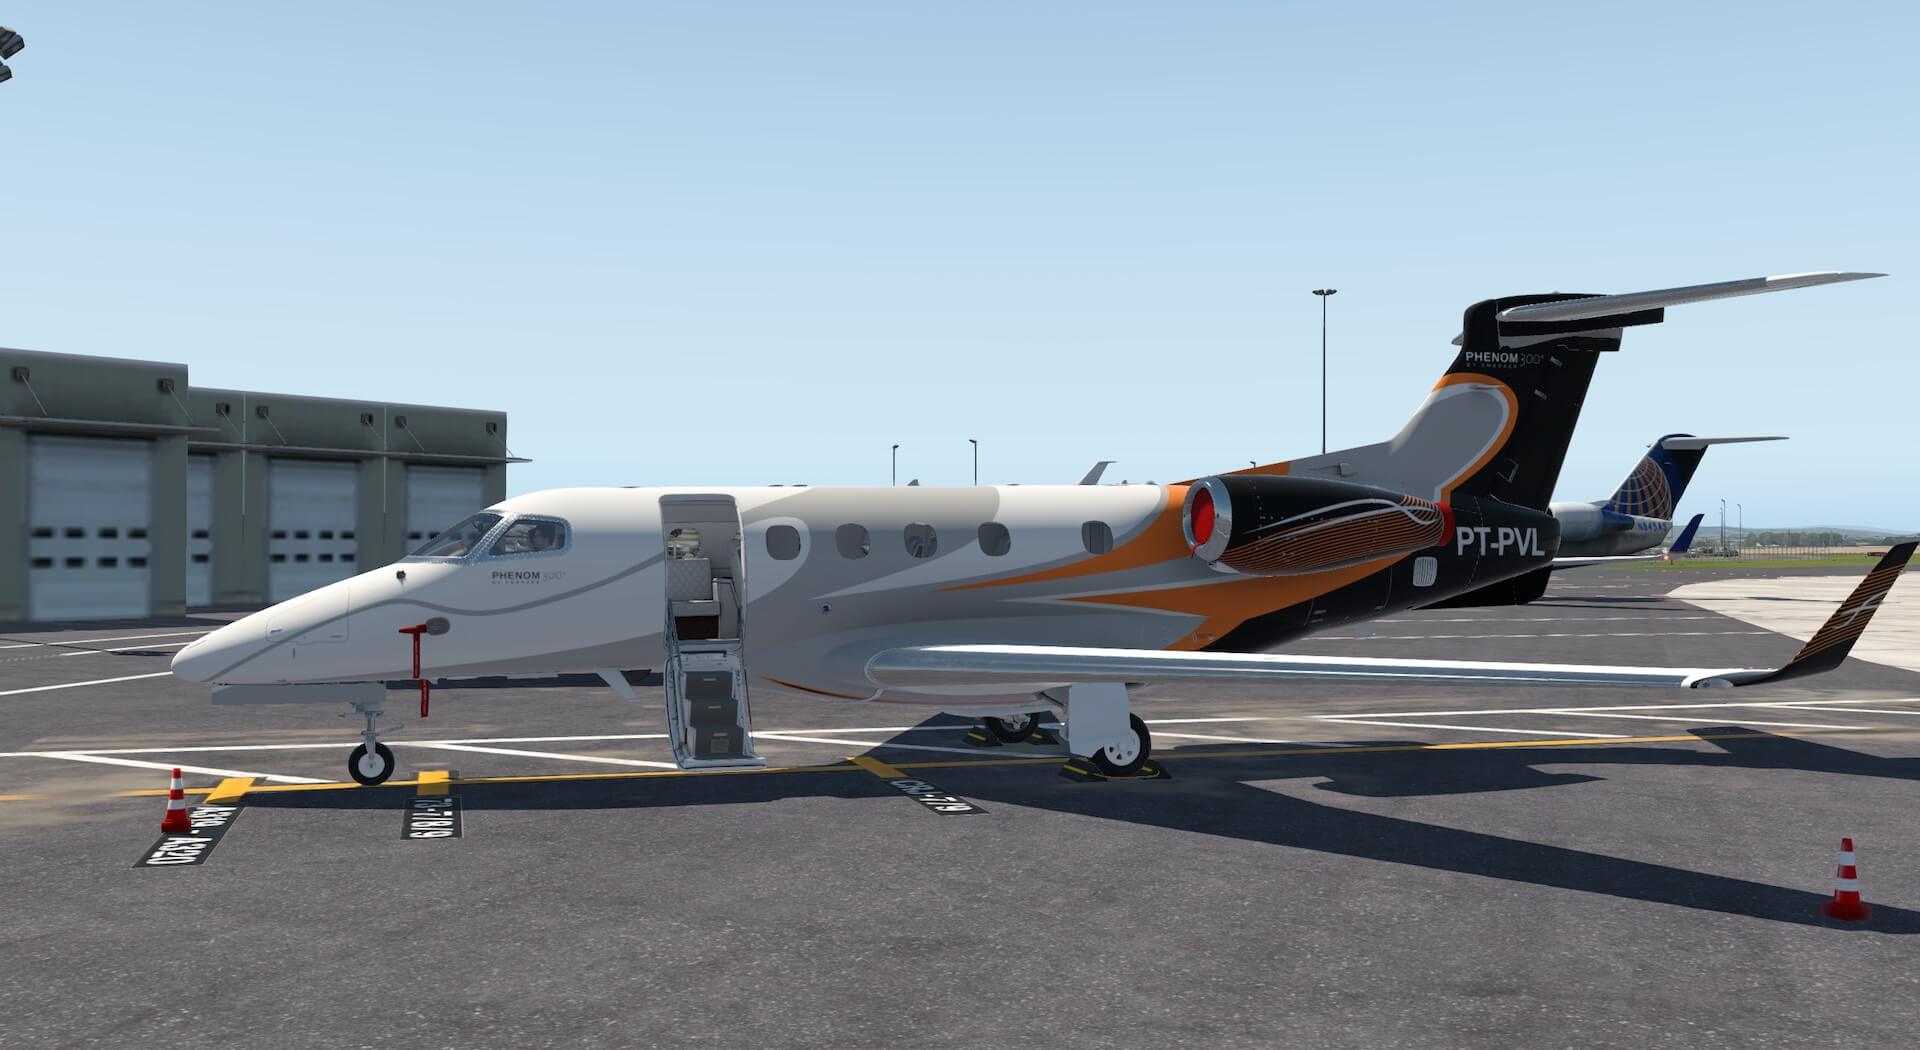
With that knowledge, it’s time to check the modeled Aerobask Phenom 300. From the terminal building I walk over the apron to my parked Phenom 300. That look from a distance is really impressive and even when I come closer, I’m still impressed with the overall modeling although I do see a couple of things that need further investigation. One of the things I see is the nose wheel assembly.
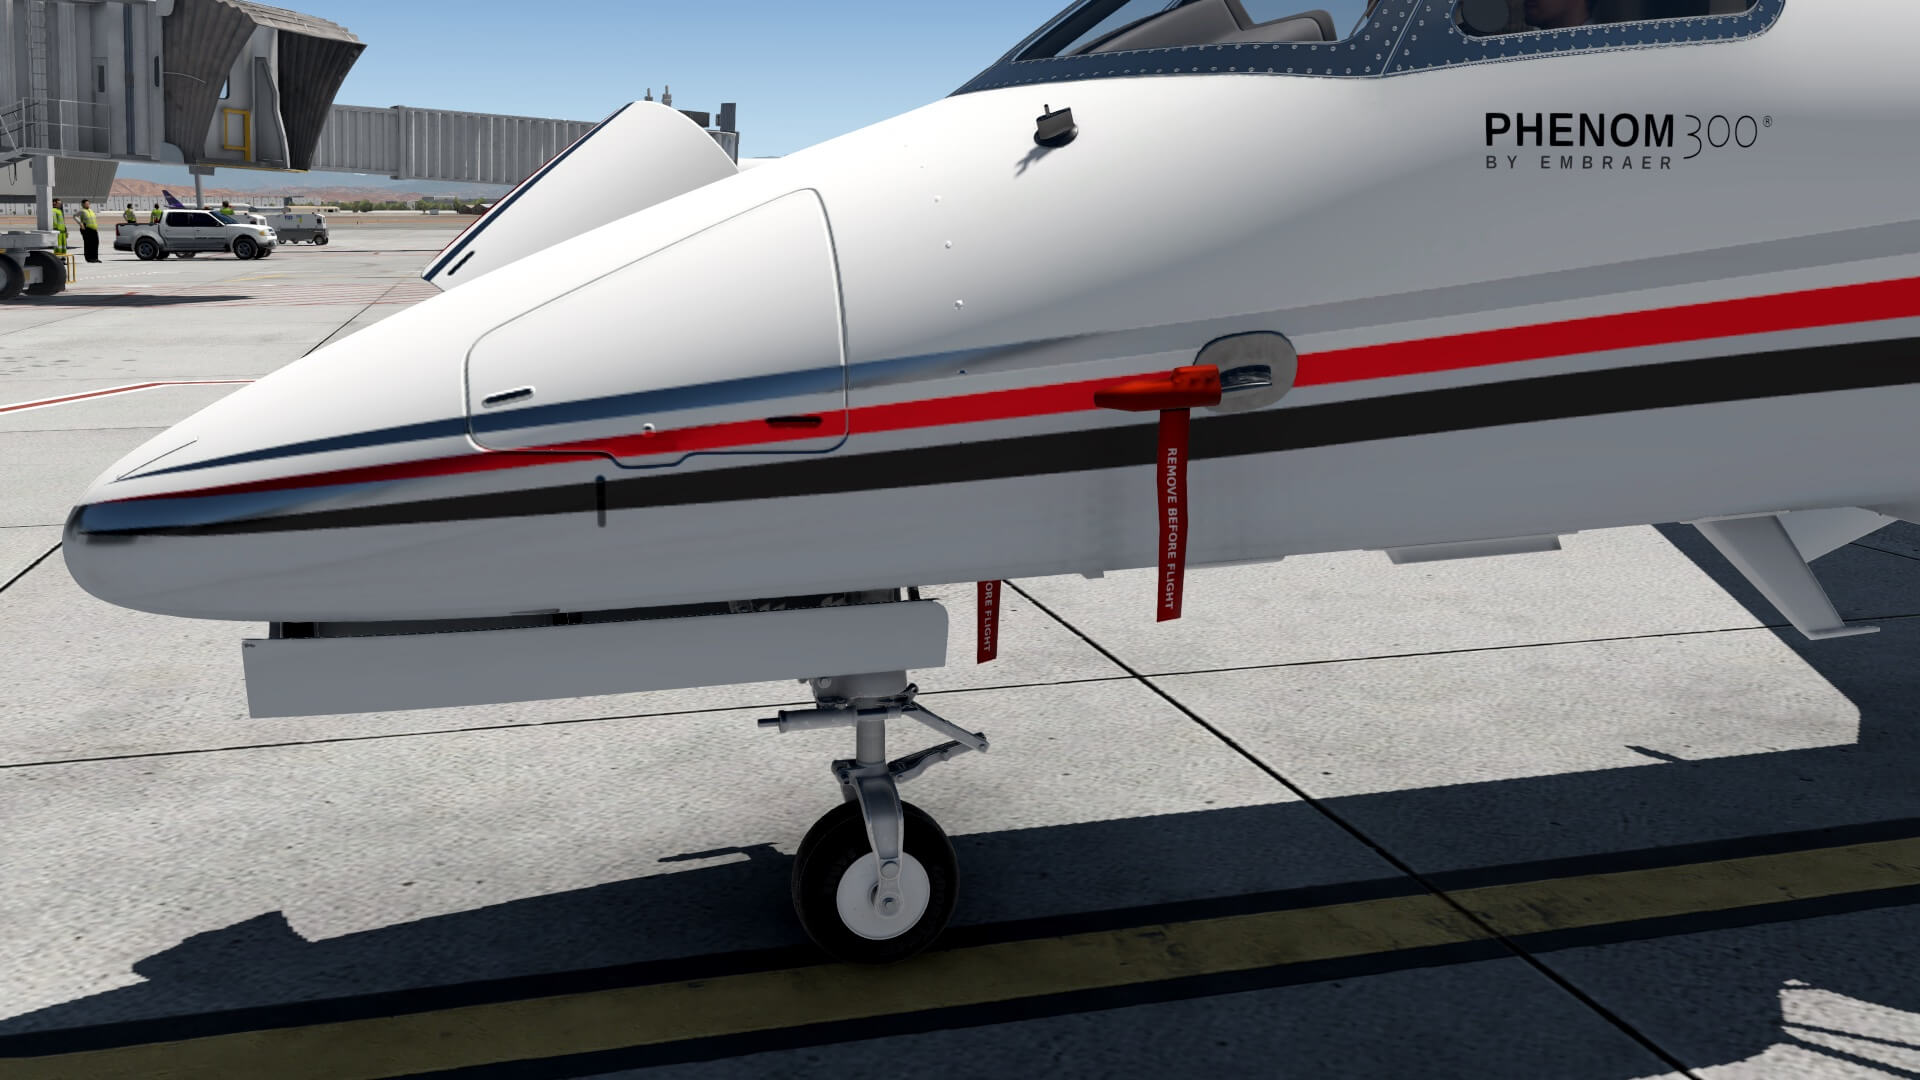
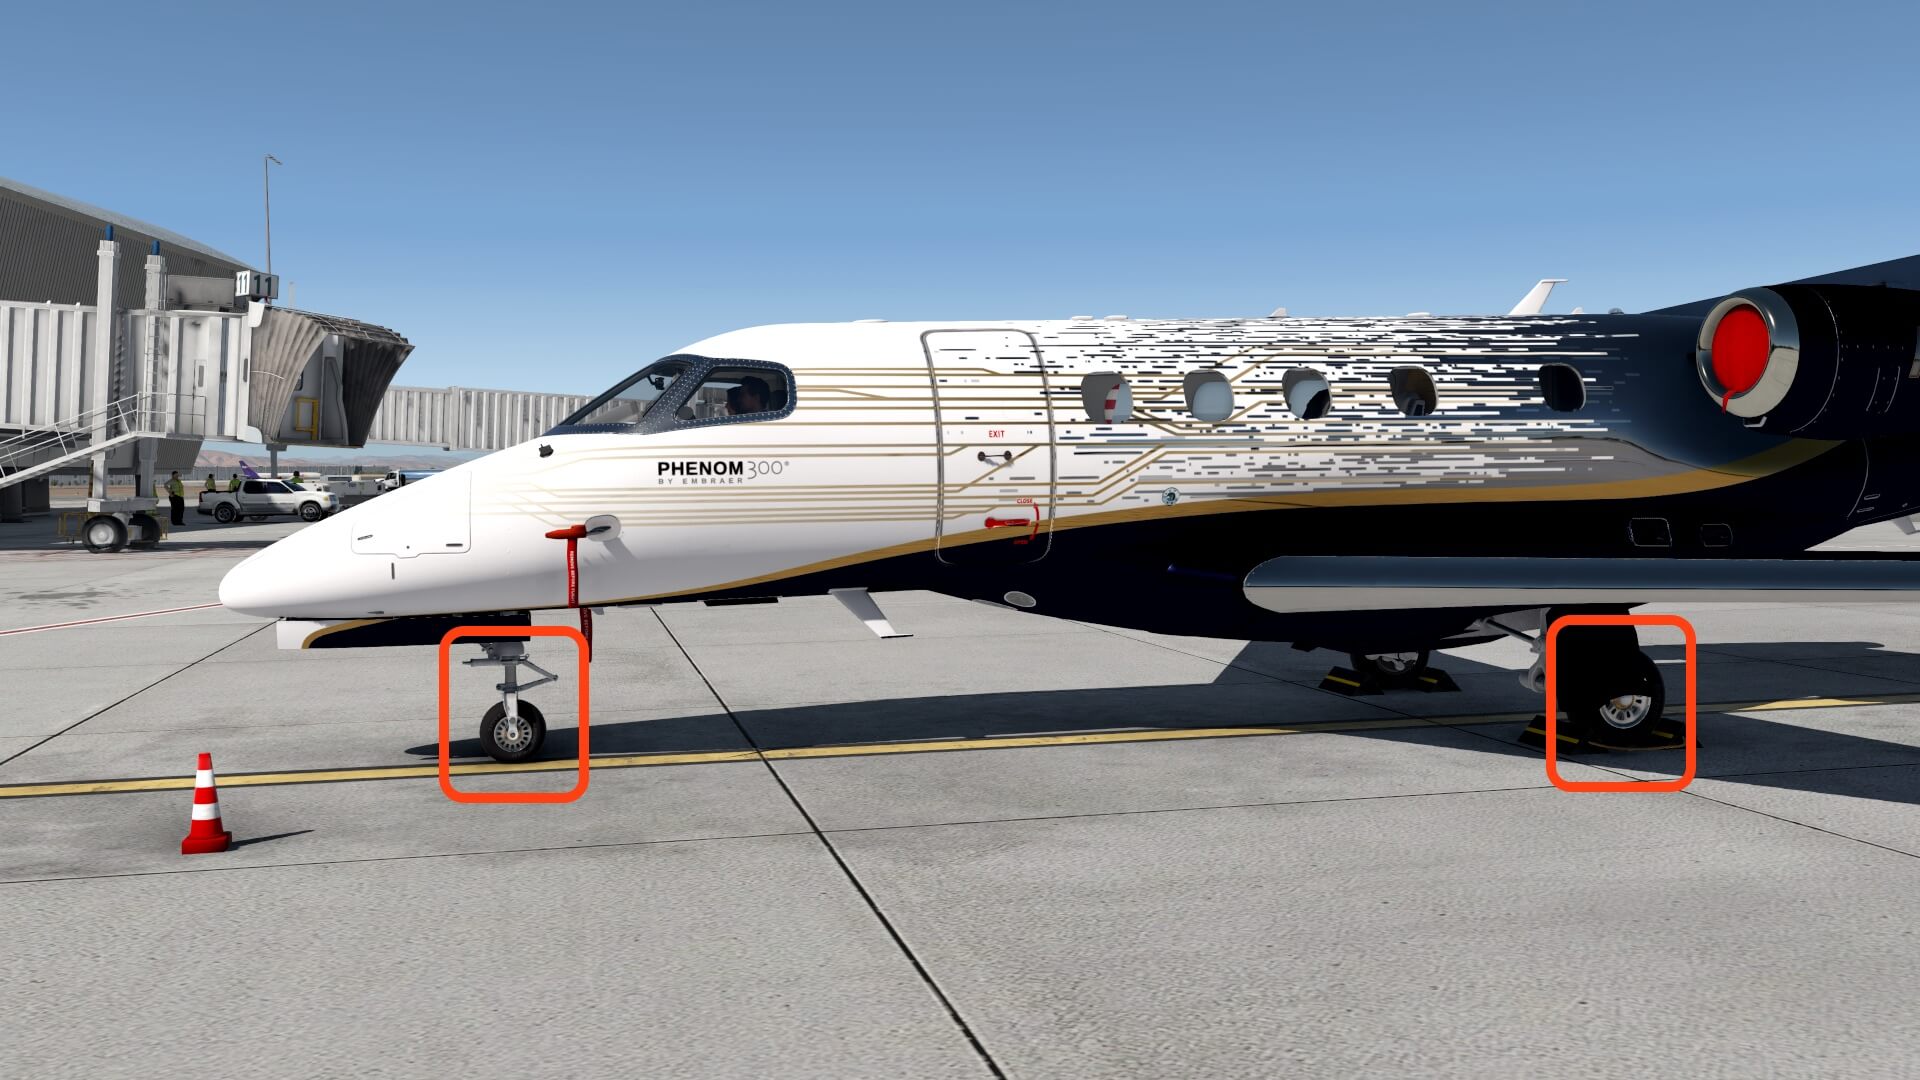
The NLG (Nose Landing Gear) strut is well modeled with eye for tiny details however, the wheel hub itself is closed while on photos I see a different hub. It could be that Aerobask had different photos, but I haven’t seen this type of modeled hub, so let me show what I mean. Keep in mind that although I mention this, it’s not really an issue, but it’s worth to show you the difference with the hundreds of real photos I’d seen.
You could be surprised to see that there’s hardly any weathering. Believe me, this is what I’ve seen on almost every real photo. These executive jets are so expensive that every owner has a group of cleaners that clean the model constantly and keep it as new, keep it as shiny as possible. And yes, on purpose I mentioned hardly any weathering because some weathering can be found at the leading edges of the wing and horizontal- and vertical fin. Further on, the fuselage skin looks smooth and yes, this depends a bit on the color of paint that is used, but in real all these models are so unbelievable smooth, that not much of rivets will be visible, exactly in the same way the Aerobask Phenom 300 is modeled.
I’d take a look to the FWD baggage compartment and open the left-hand luggage door. The inside is in an elegant way modeled. The opening as well as the closing speed is very nice. This is also applicable for the FWD entrance door, the entrance for both the passengers and crew. I’d expected to click the red handle, but it turns out that you need to place your mouse at the EXIT handle which is just a fixed bracket or grip. That the original red handle isn’t simulated, makes sense. It would require more polygons for only the handle and more polygons means that the frame rates could become less.
But when the entrance doors opens, it opens in a nice speed and the inside is well modeled. The stair is – of course – included, as well as the handrail and suspension devices. It’s all there and comes with eye for details and that makes me happy. Even the decal near the door hinge is clearly visible and if you want, you can even read the instructions.
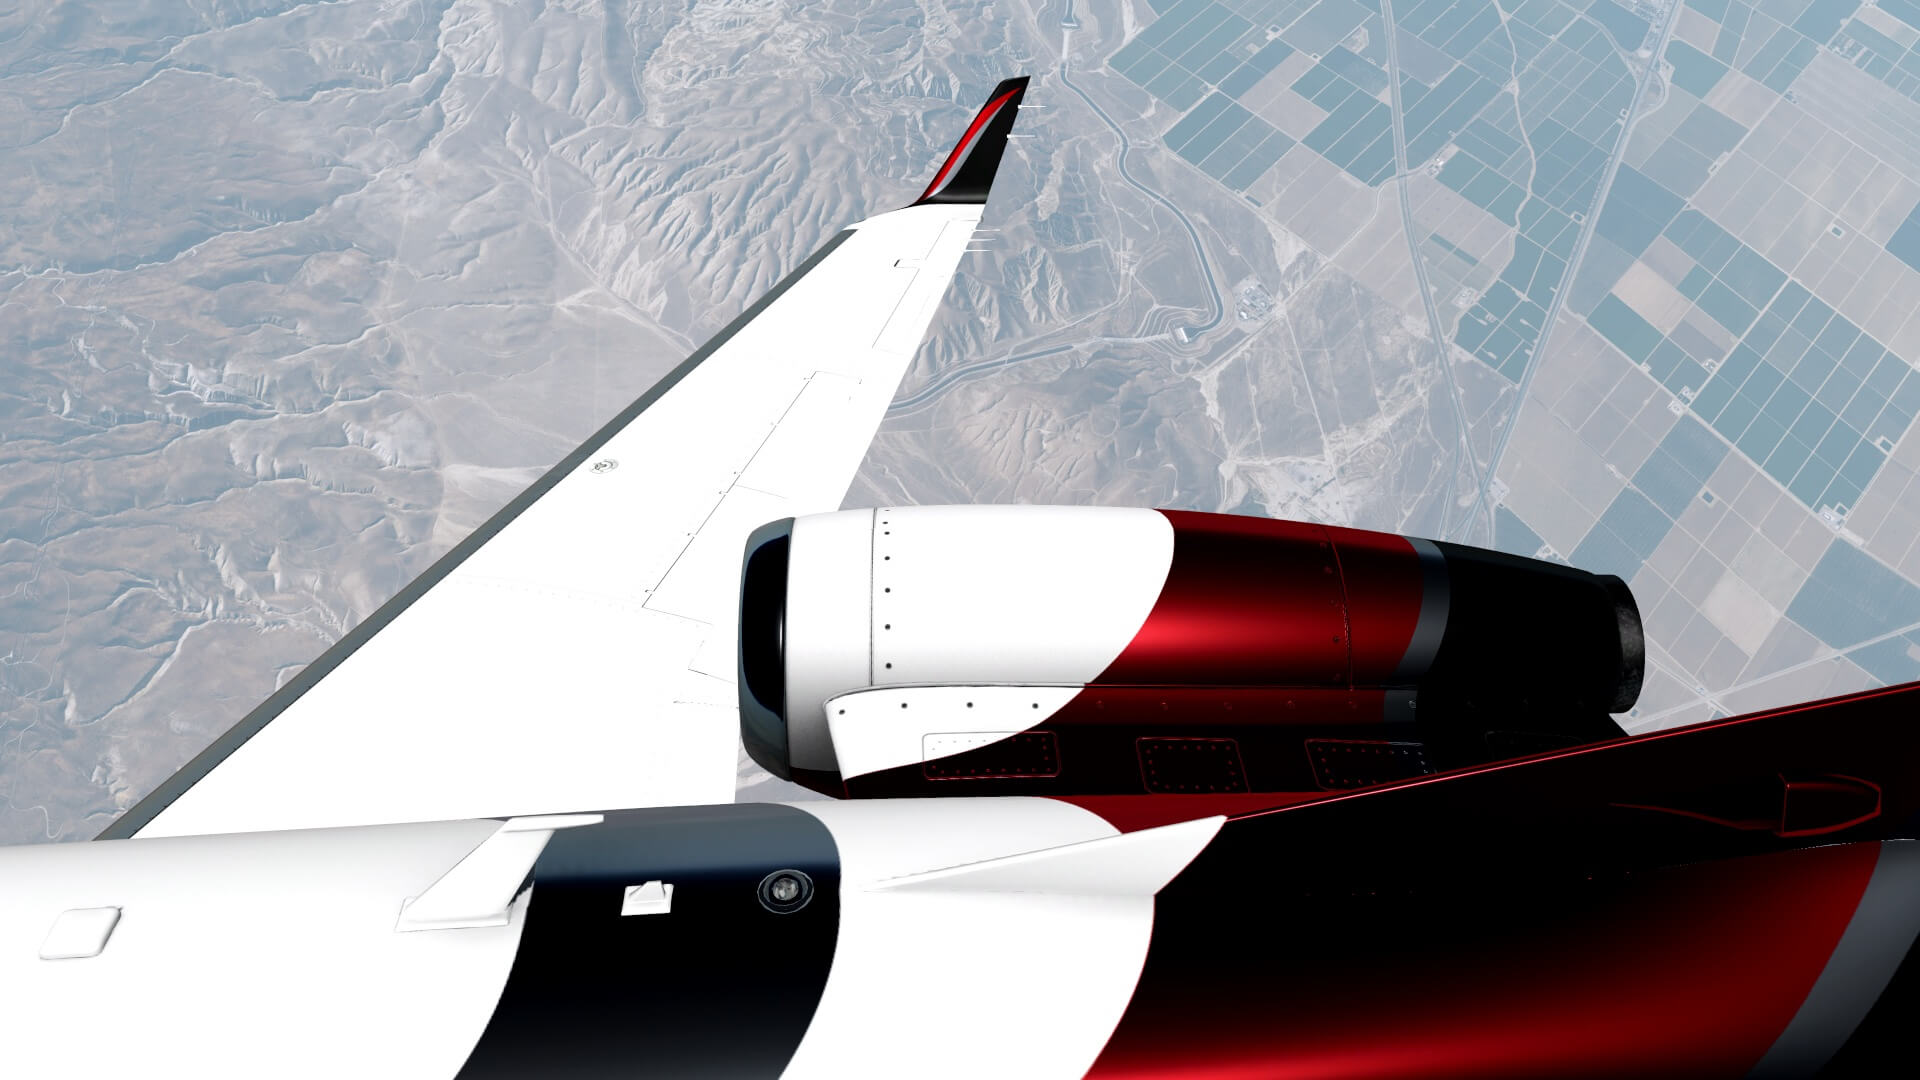
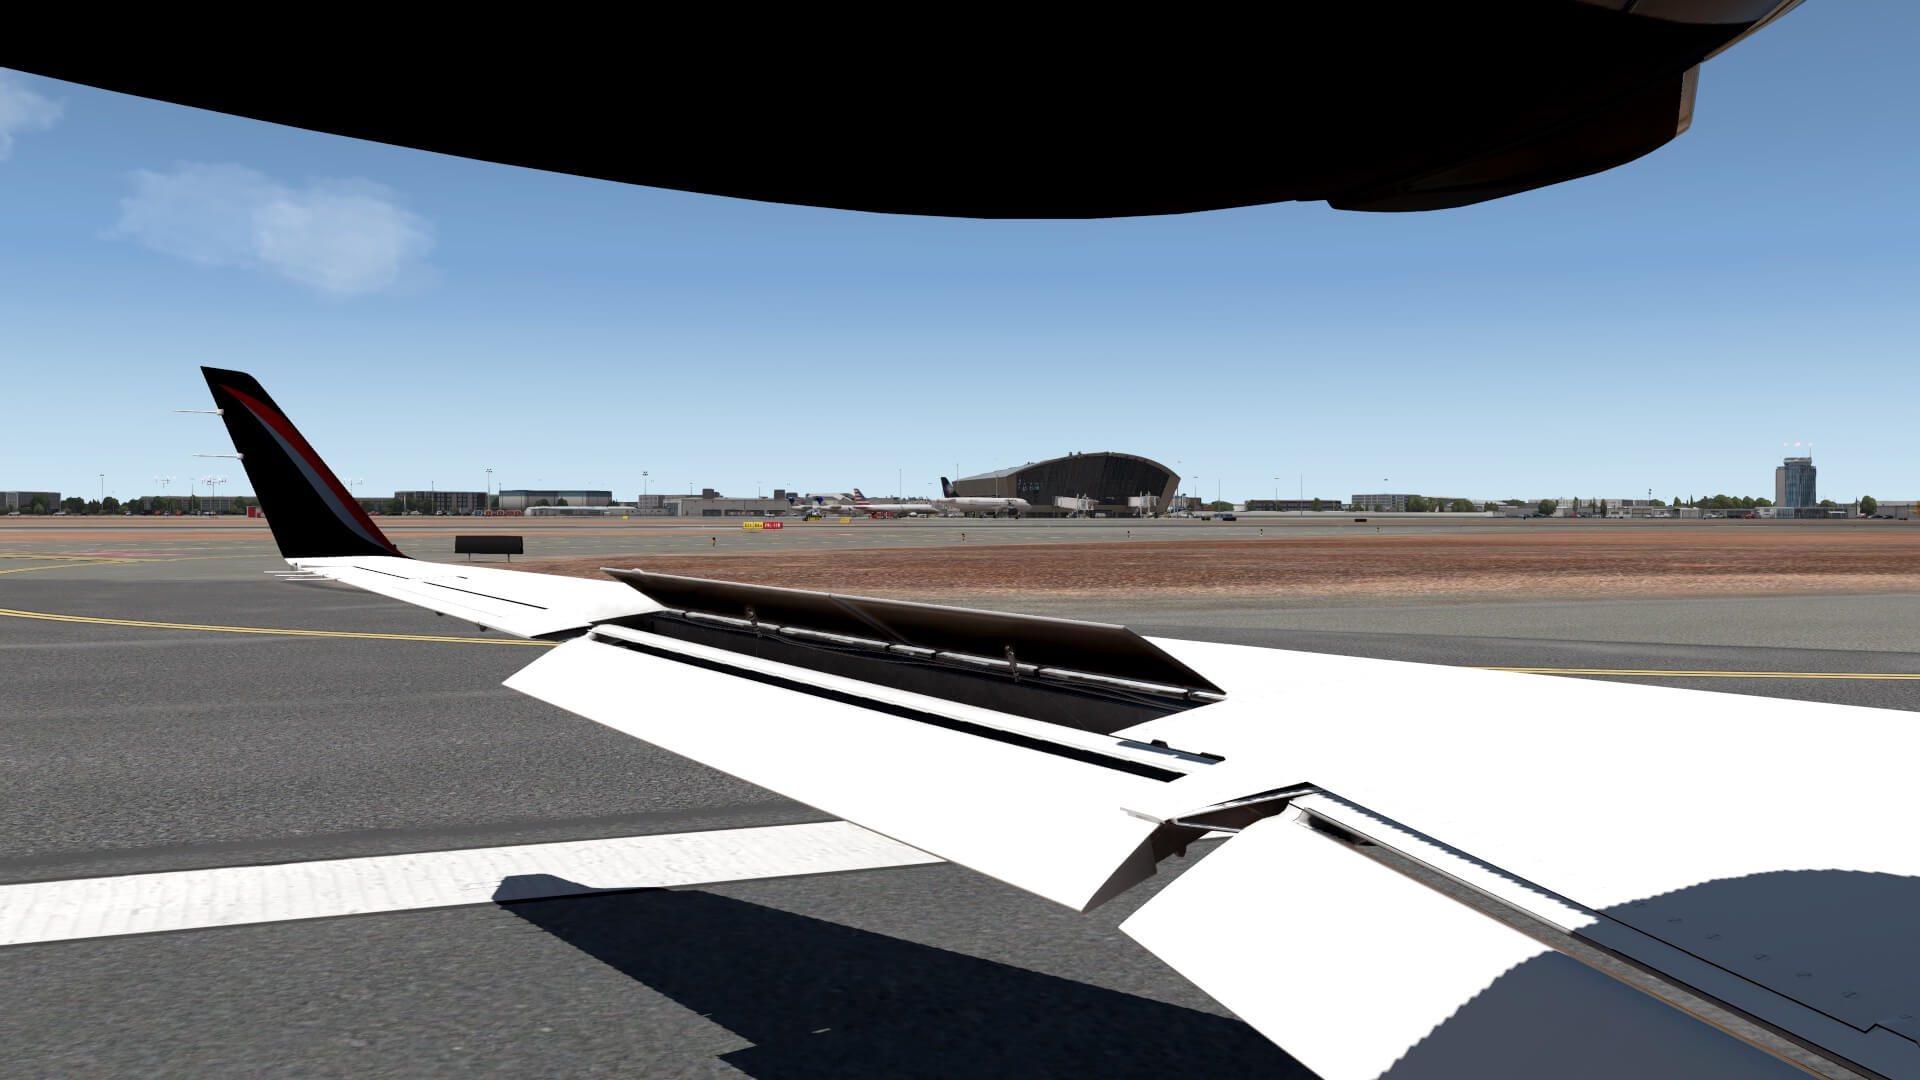
Via the wing leading edge I walk towards the wing tip and notice the nicely modeled screws and rivets. As expected and confirmed with a real Phenom 300 wing, the Alu skin plates are flush mounted towards each other. The wing fence and static dischargers are all there, but I can’t confirm if it is the same as with the real Phenom 300 since it’s difficult to find good close-up photos. From the AFT leading edge I clearly see the ailerons, the flaps and speedbrake panels. All well done.
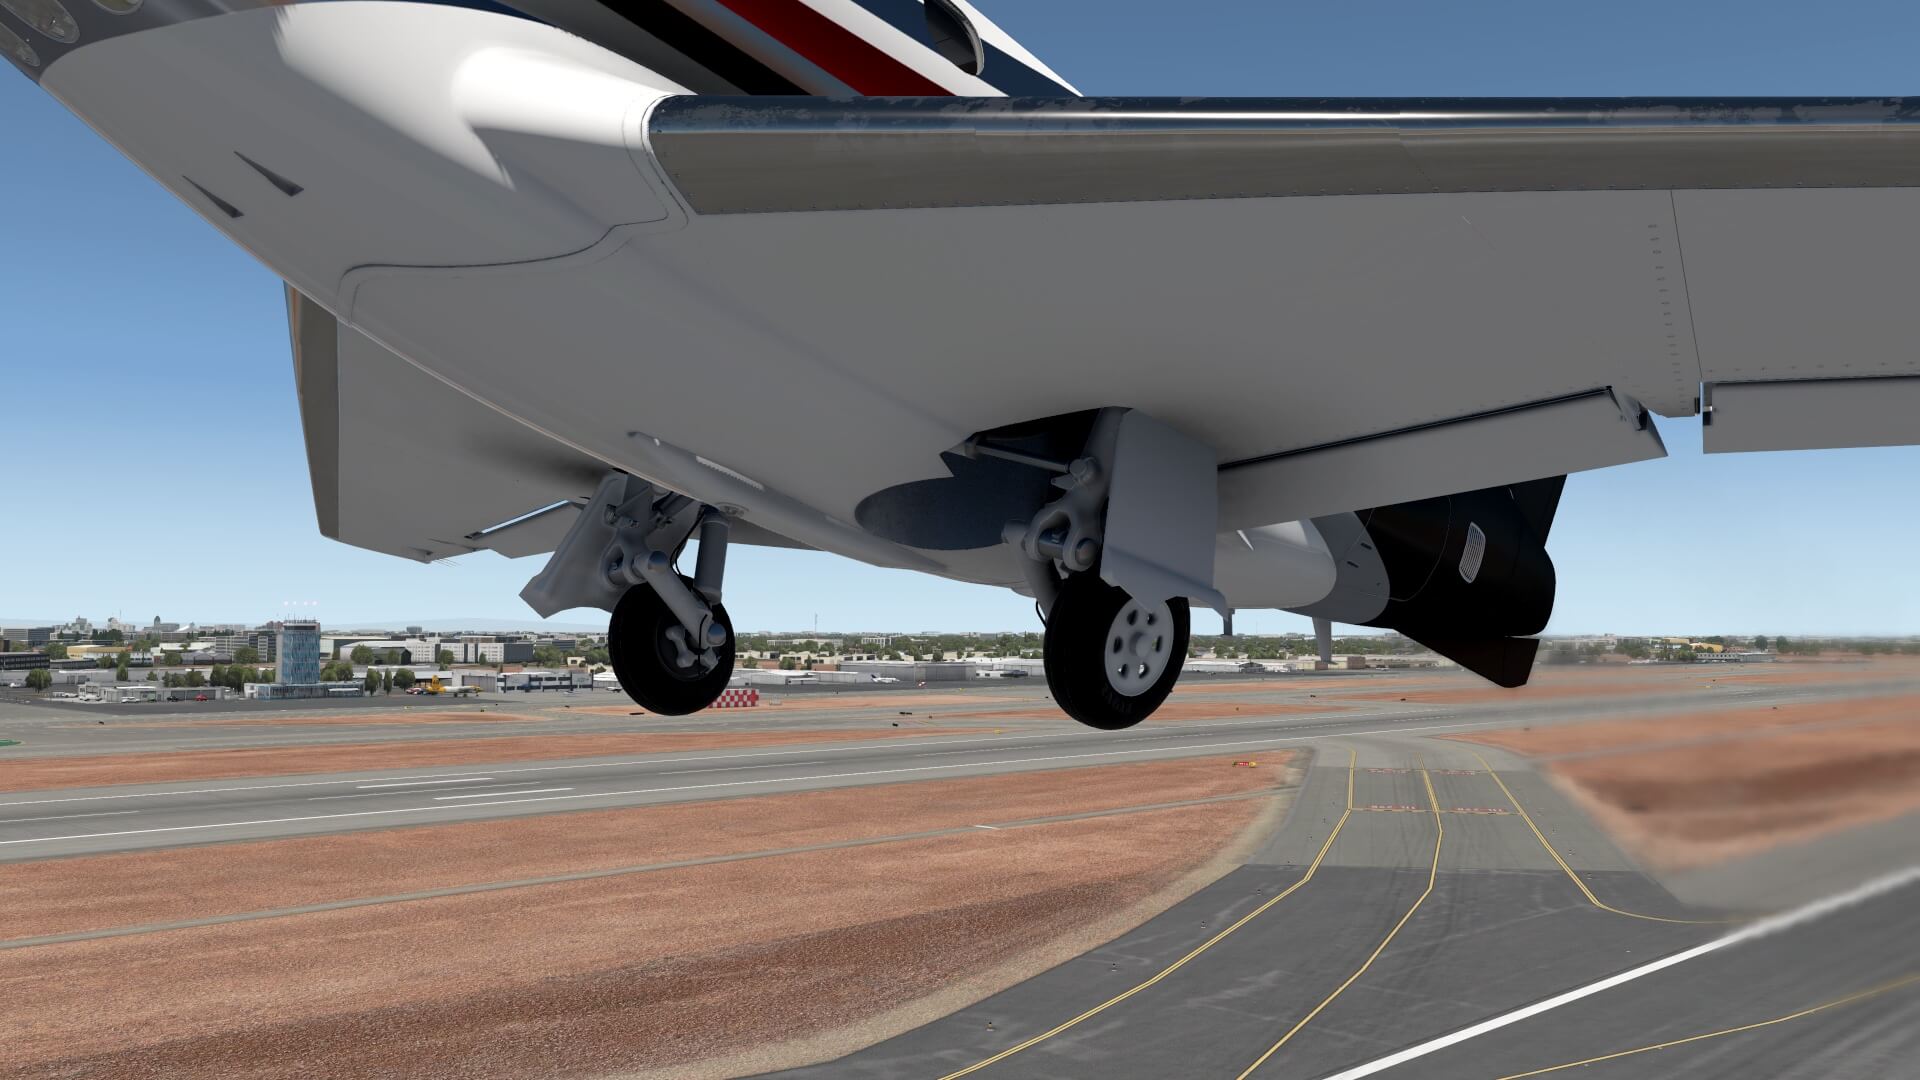
It’s not easy to see all the details from the landing gear so I need to lay on the ground and check out the MLG (Main Landing Gear) and wheel assembly. I can confirm, a nice job is done. The MLG itself is clean although a bit of weathering would be perhaps welcome and more the reality. Besides that, I see lots of parts, even the brake lines and/or wiring. Different then I noticed with the nose wheel hub, the main wheel hubs modeled as I’d seen on real photos.
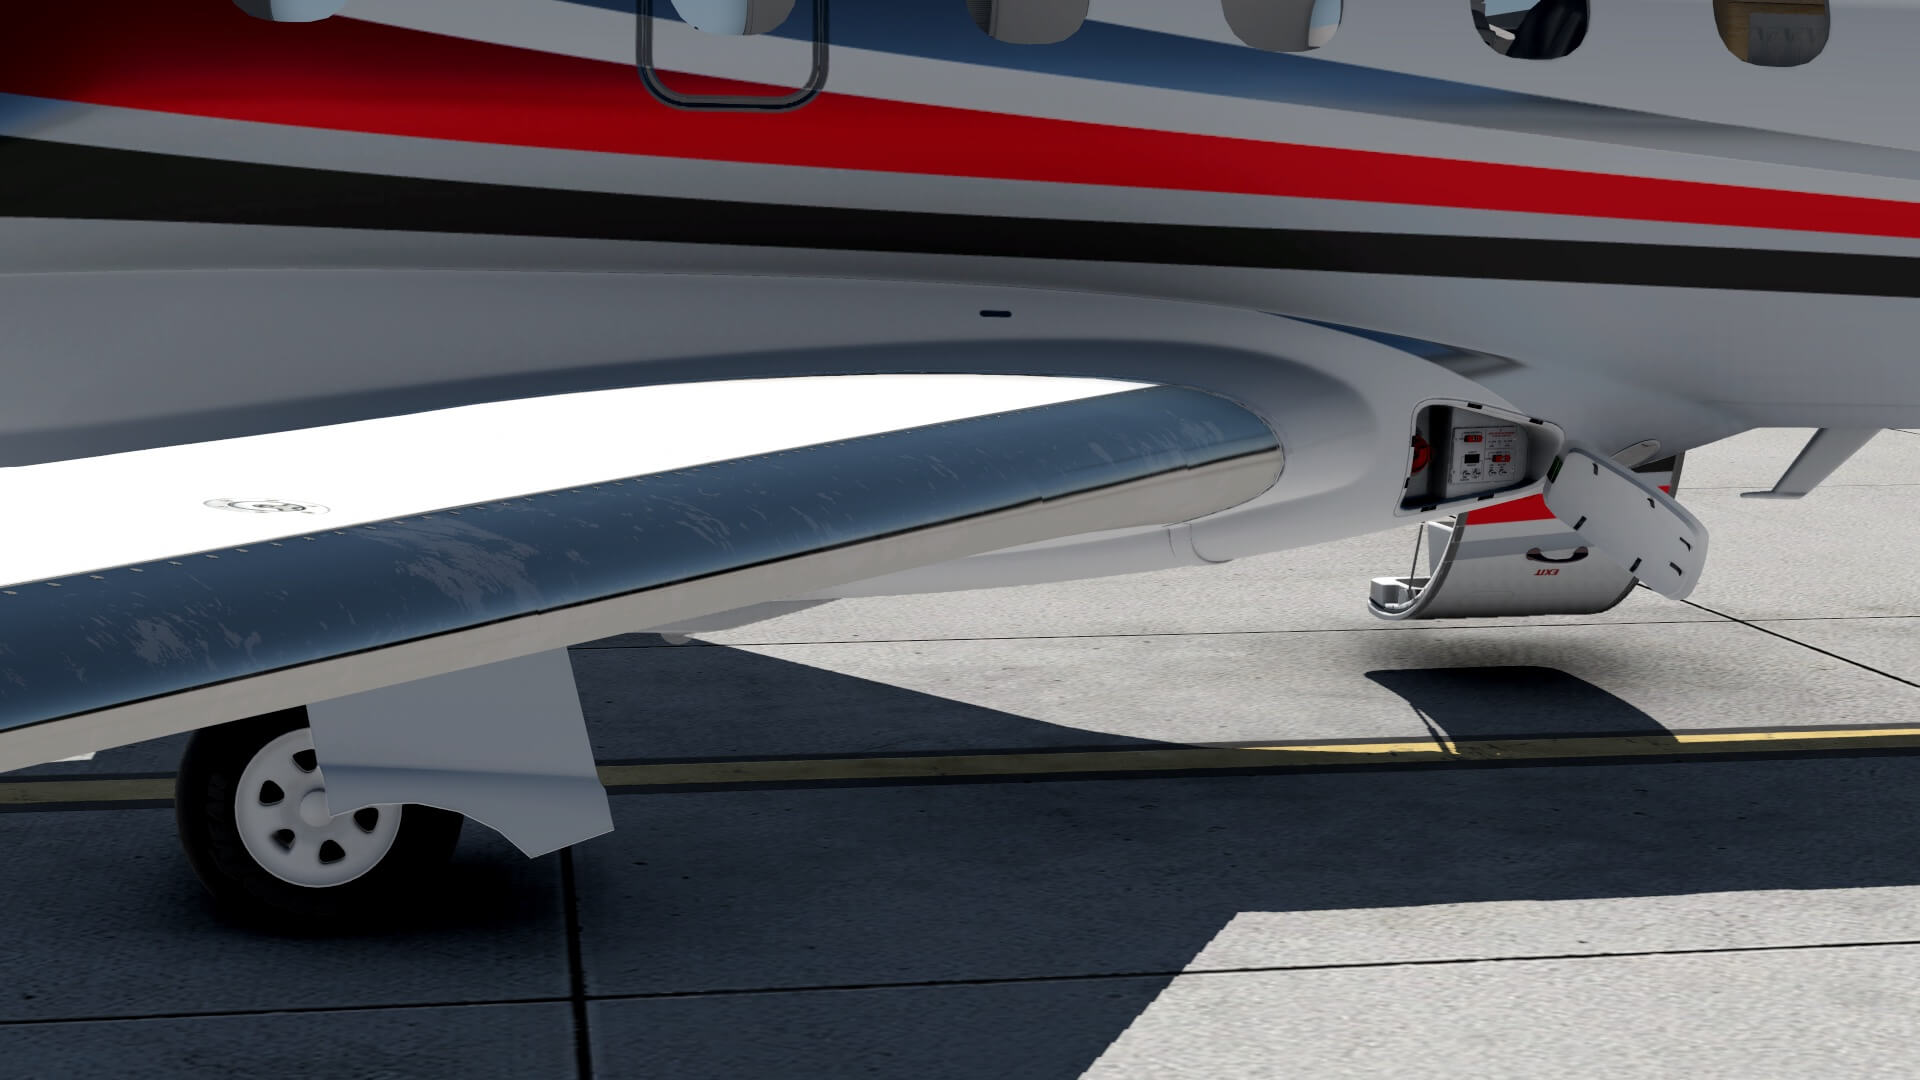
Then heading to the left-hand engine. Underneath this engine you have the AFT luggage compartment door and the access panel for the DC connector. There’s an additional panel before the DC panel, but no idea where this is for, but it’s not animated. Although each engine has an oil filling panel, it’s not simulated and not really an issue to me. Again as I mentioned before, too many animated panels means too many unnecessary polygons for something you probably hardly use. The AFT luggage compartment is “basically” modeled and it contains one piece of luggage. It’s basic, and yes, it looks nice and most important, it’s not forgotten.
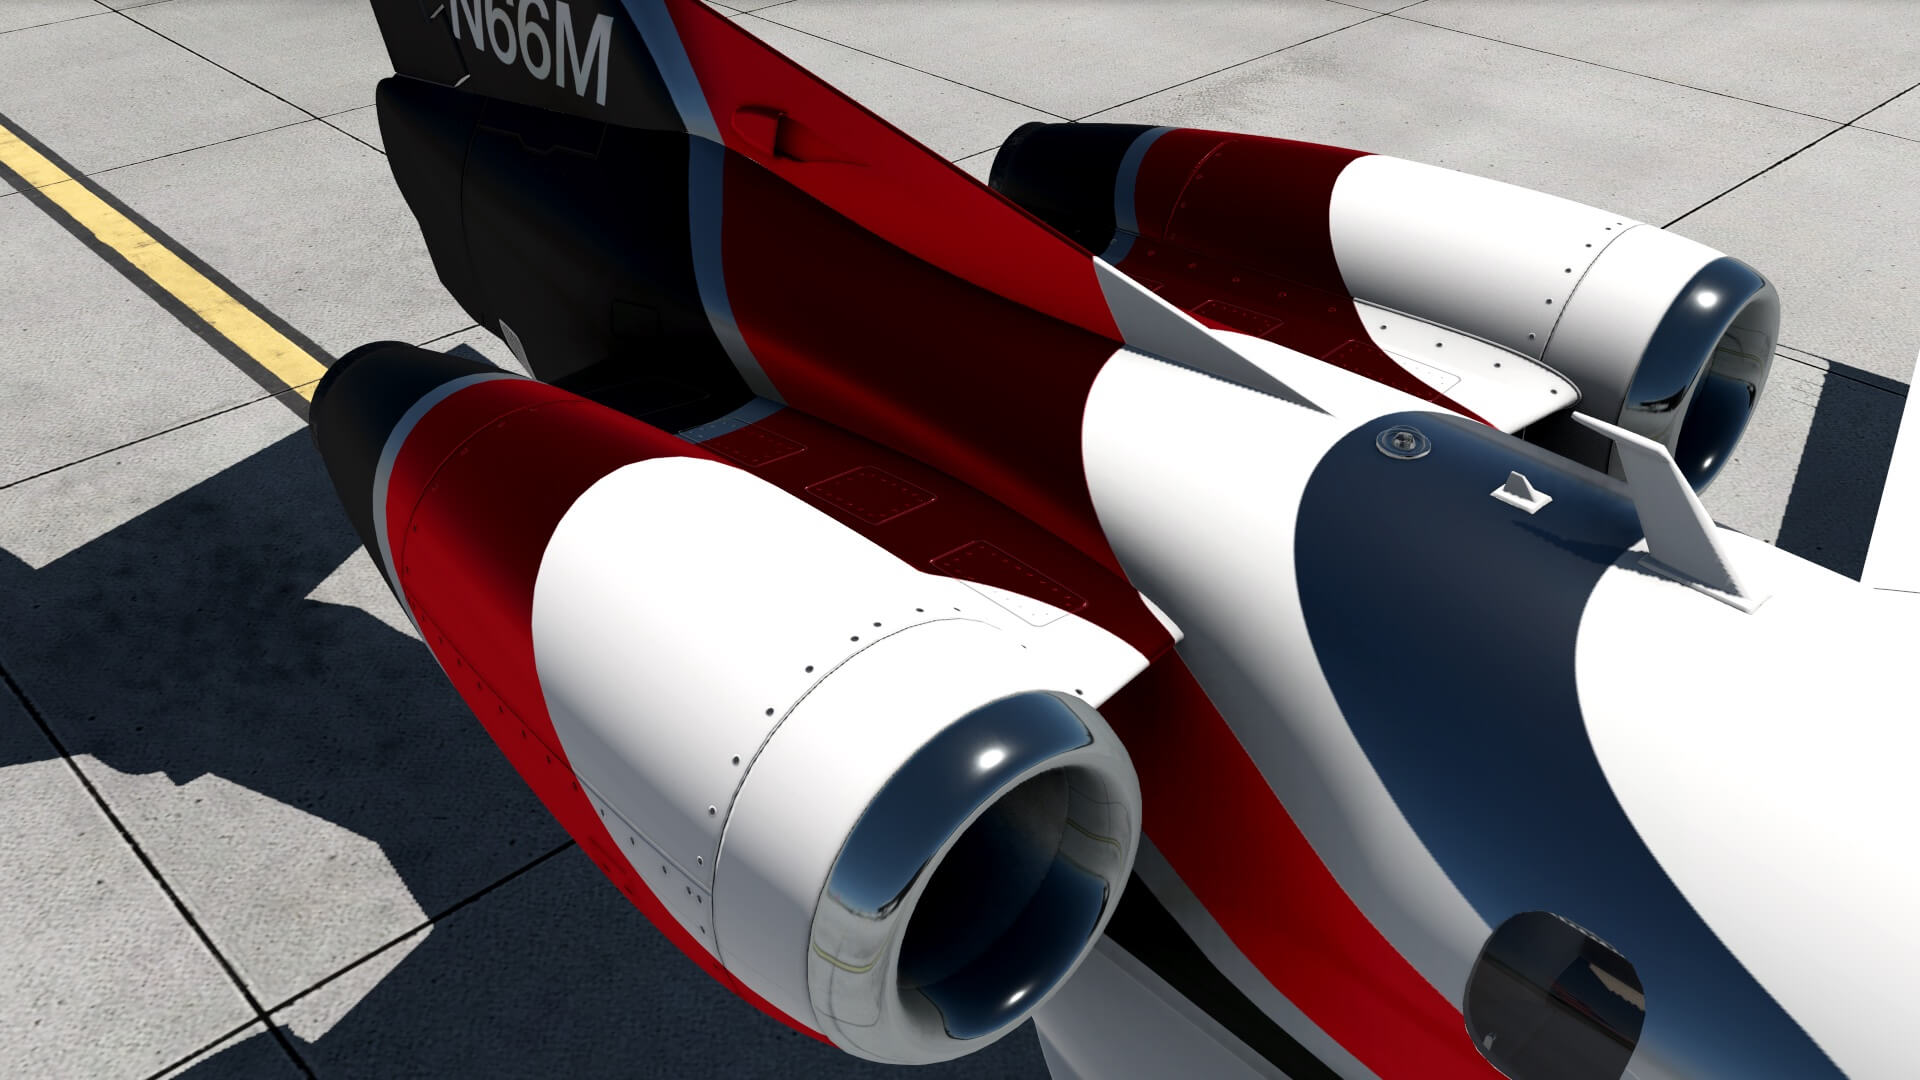
When you play a bit with the external lighting conditions, I’m very happy with the overall design of the engine. I absolutely like the way the panels, screws, rivets, the chrome inlet and the slightly dirty outlet are modeled, oops, and not to forget the fan blades.
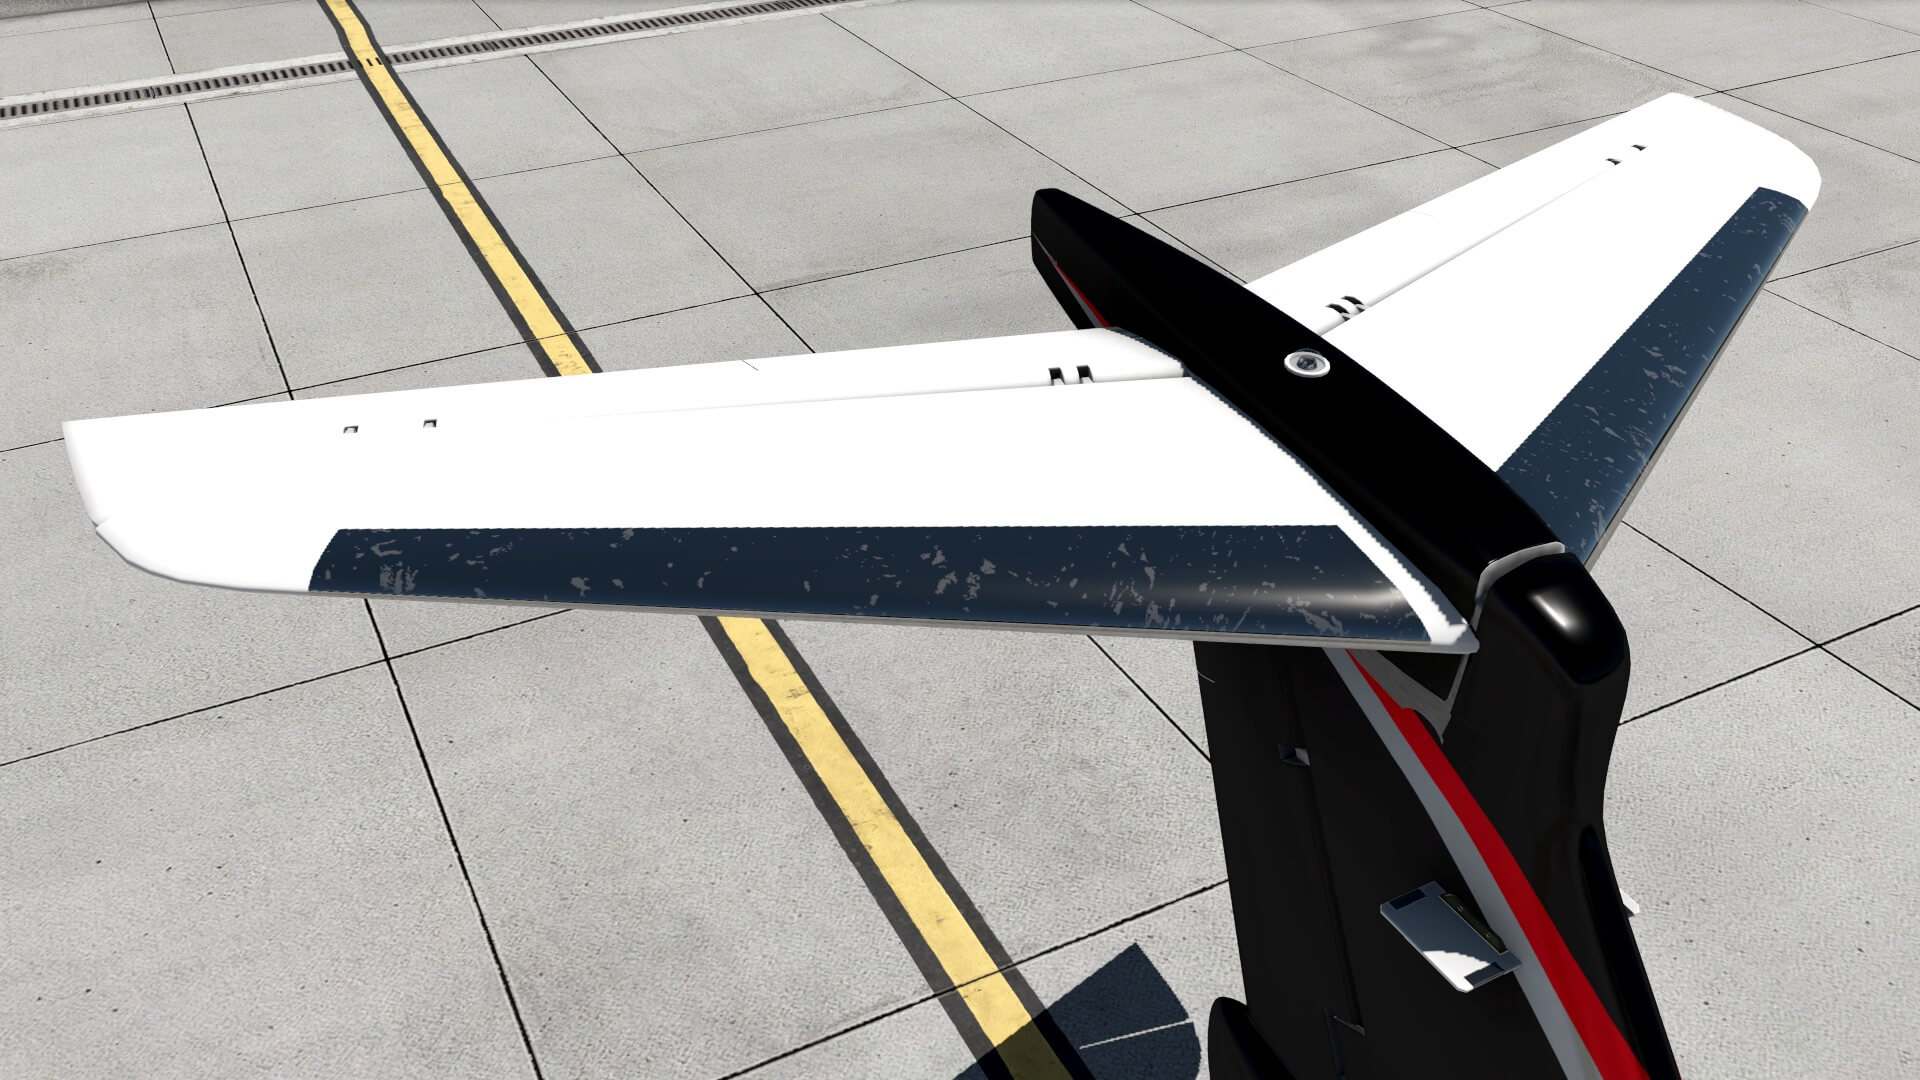
And then finally the T-tail. You like a T-tail or not, but this one is very nice. At each elevator and rudder I spot, I assume, the trim tabs. It could be also the balance tabs, but trim tabs sound more logic to me. As mentioned before, the leading edges are made of simulated more or less polished Aluminum I assume for the TAIL ANTI-ICING and do have weathered spots. The rest of the horizontal – and vertical fin has hardly any weathering or dents and/or scratches.
On my way back to the nose section I don’t see many other things to look for except then just in front of the RH wing leading edge, in the fuselage, the FUEL PANEL and in the nose section, the RH FWD luggage panel. All easy to access, click to open it, click on the opened panel to close it. Overall I’m happy with what I see and depending on the painting, certain parts of the fuselage will look different due to the used colours of the livery. I mentioned it before, I’m not so sure why around certain panels there’s a jagged line like on the FWD luggage panels, the FUEL panel and so on.
One last word about user liveries and then in particular two liveries I found and painted by X-Plane.Org user Digimagician who made a N550KF and C-FWTF registered “Digital Morse” liveries. They are beautiful, but not only that, both liveries have modified wheel hubs. Very nice.
The Impressive Cabin and Cockpit
Virtual Cabin
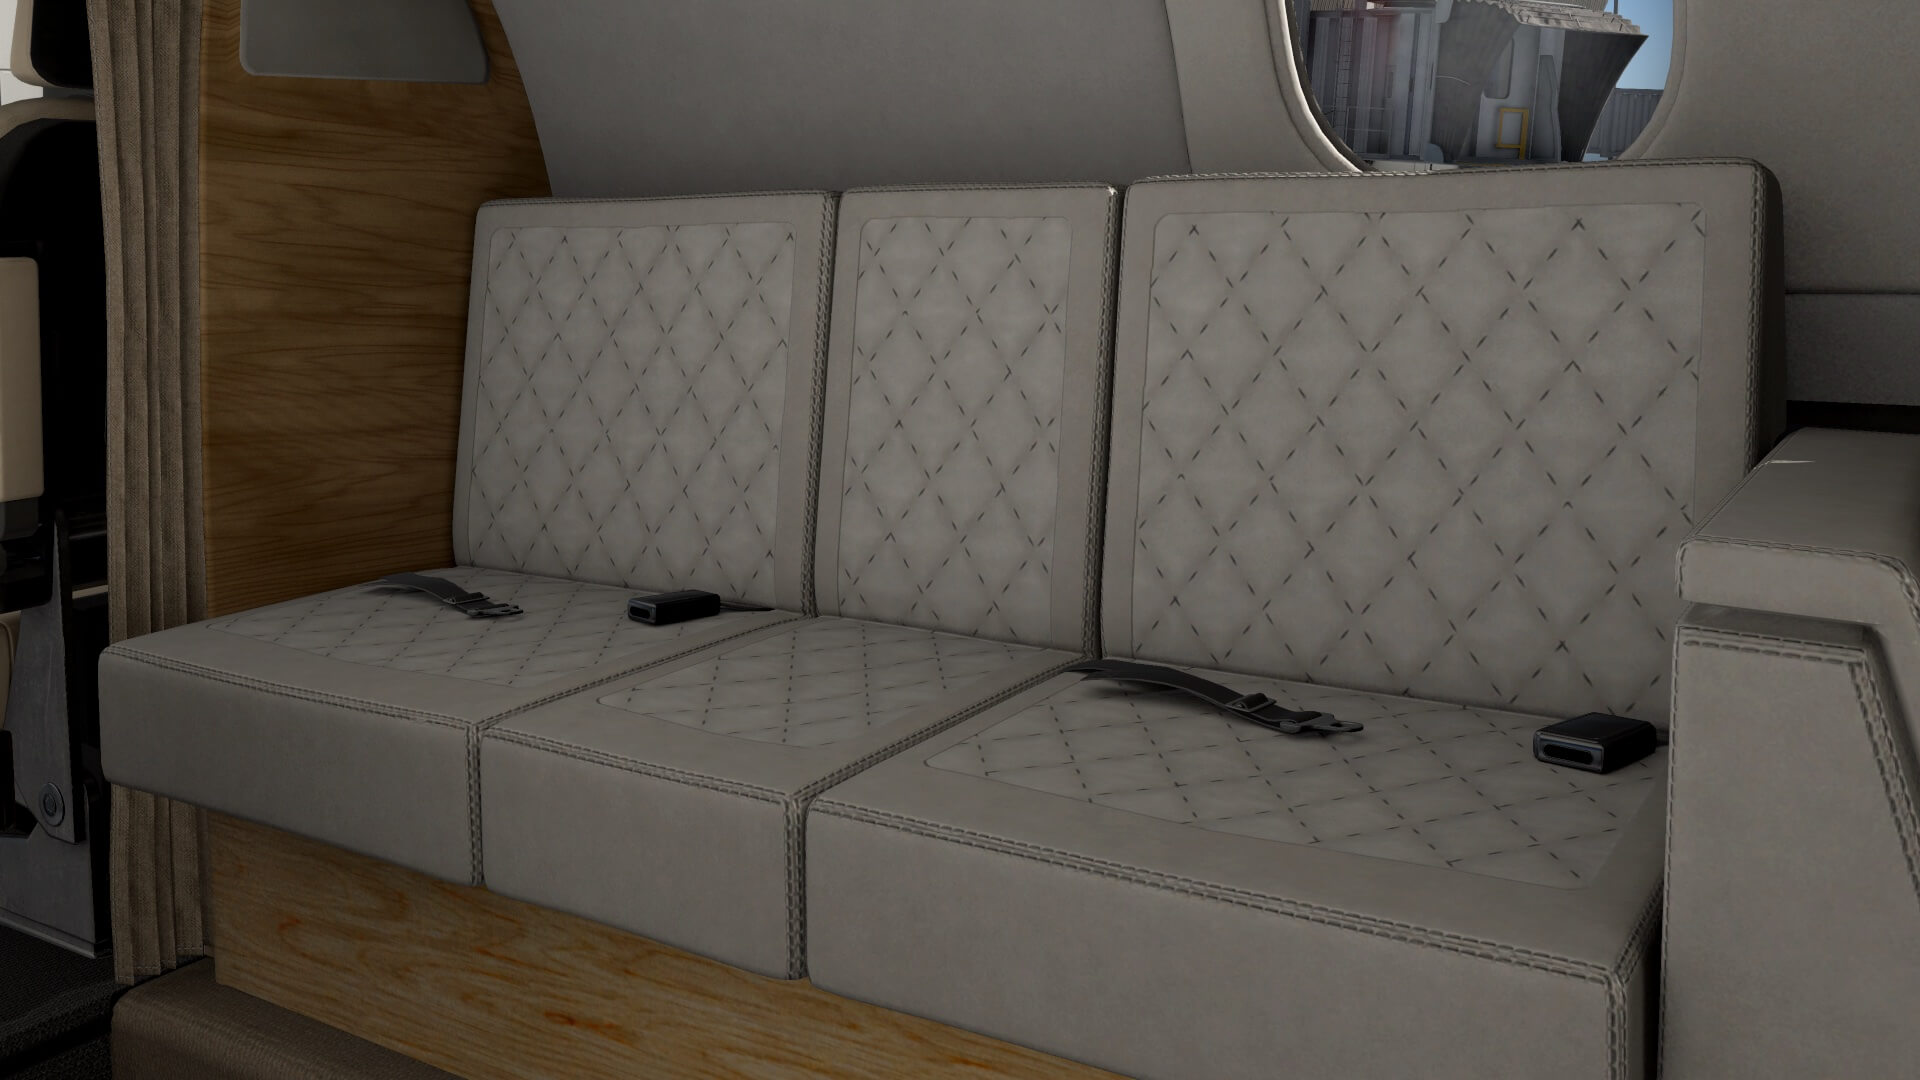
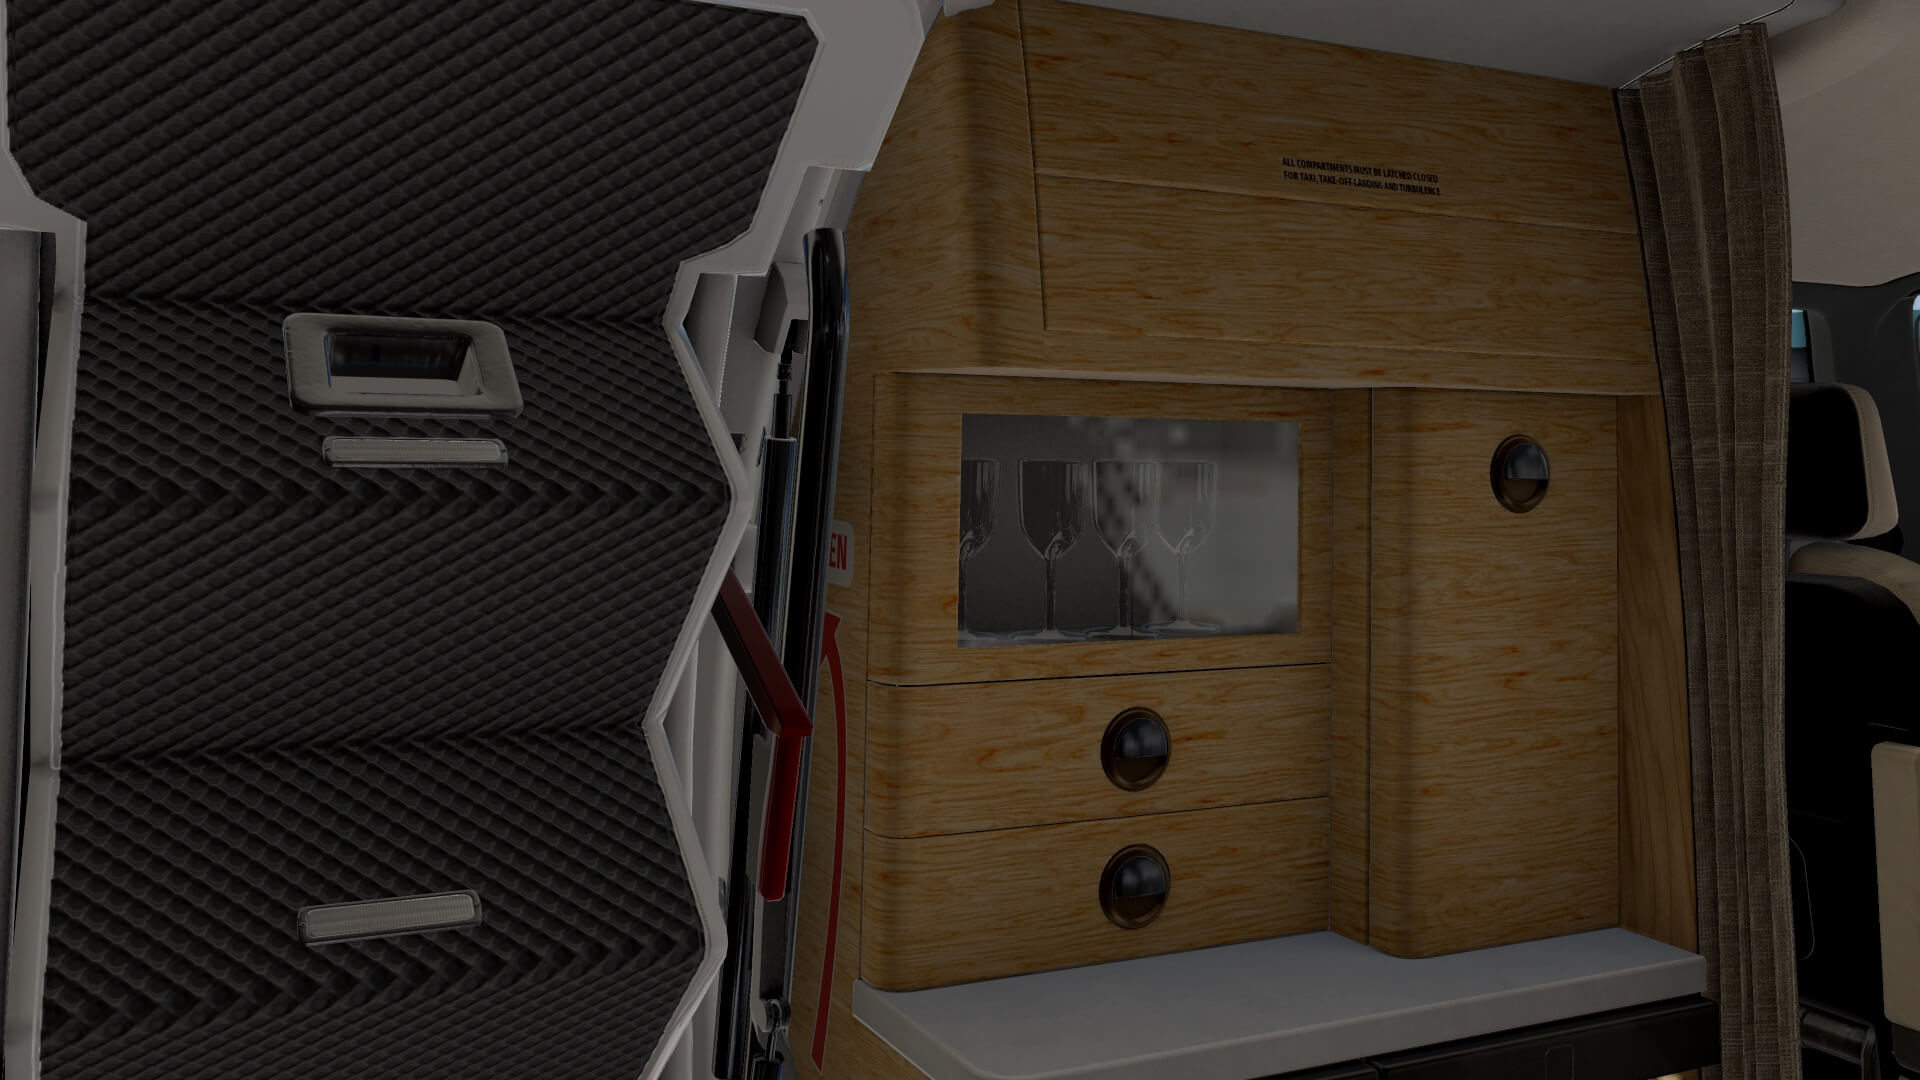
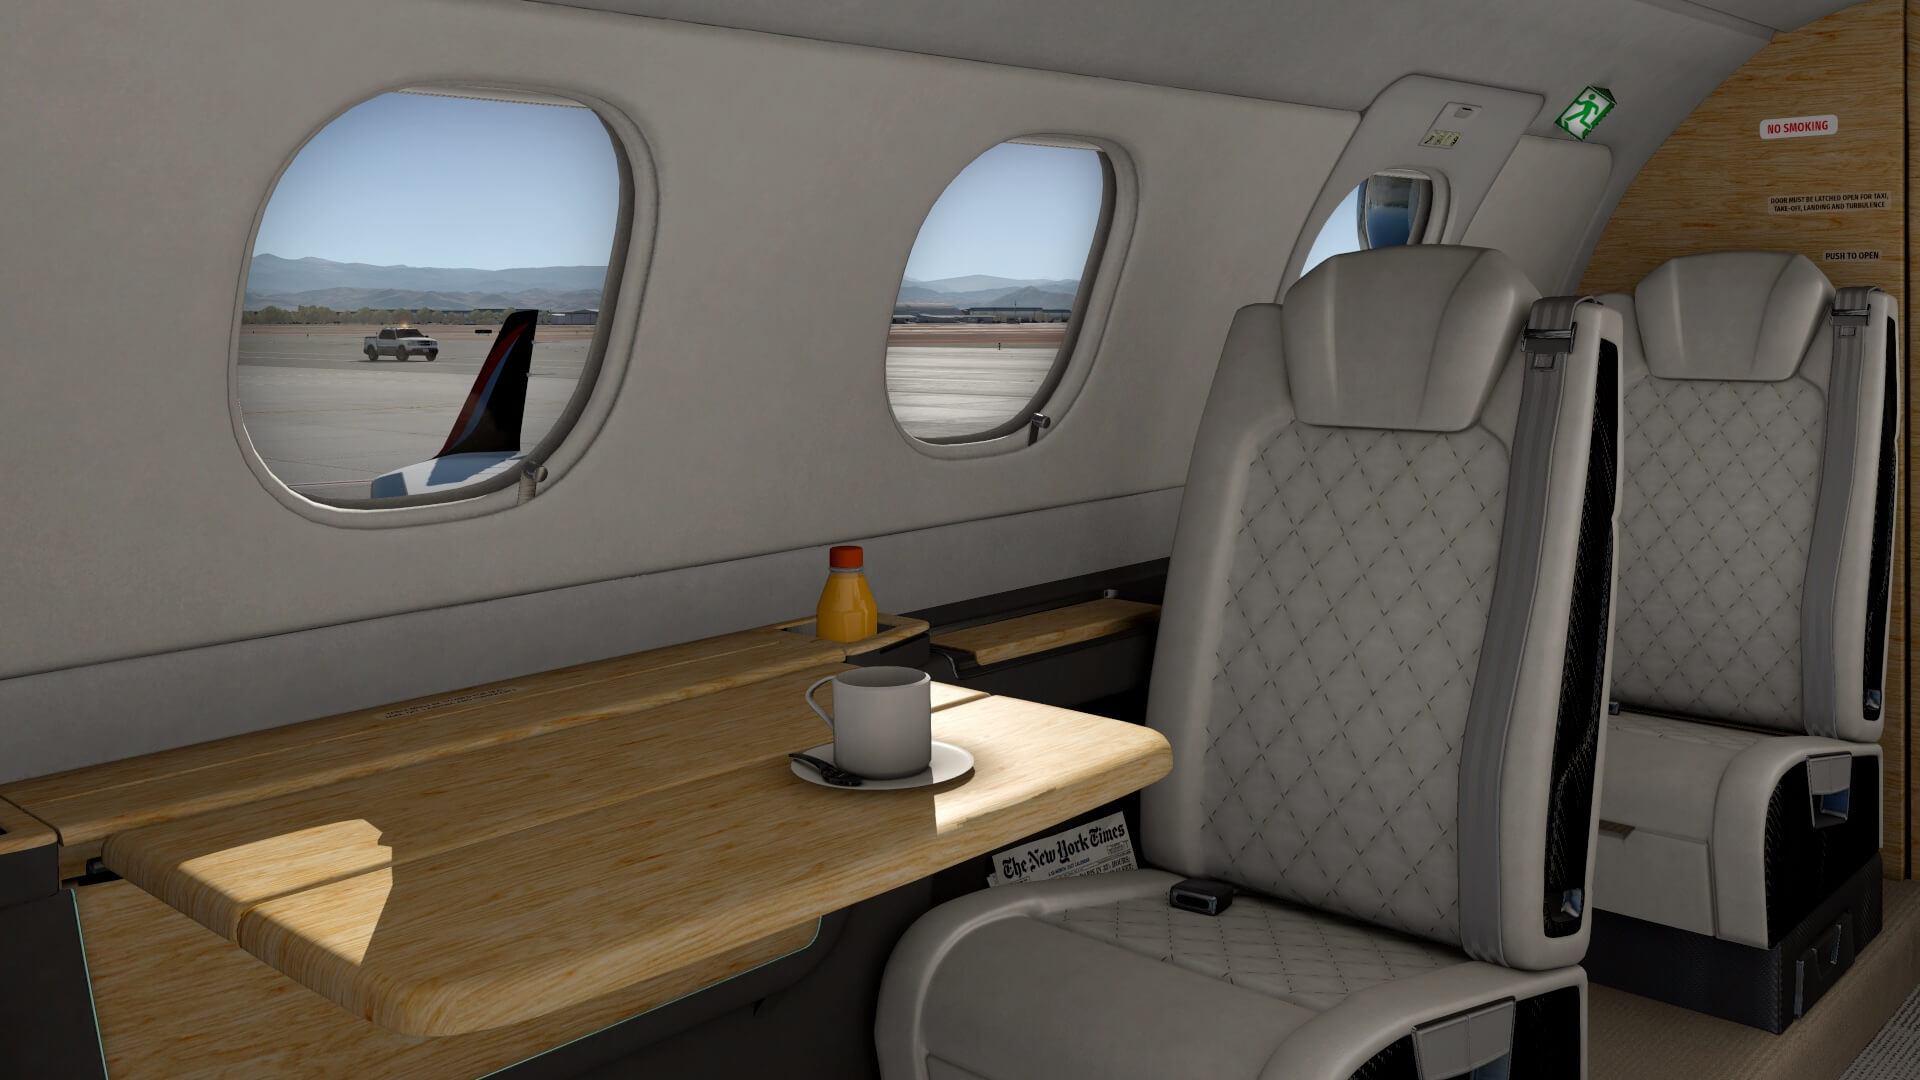
As I mentioned before during my inspection walk-around check, you enter the modeled Phenom 300 via the FWD entrance door with it’s integrated well modeled stair and handrail. The interior of the virtual cabin is well modeled, very well to be honest. In front of me is a bench while on my left I find a nicely looking well-crafted cabinet. Just to clarify; the drawers aren’t animated, but this is different on the right-hand side of the virtual cabin. The window blinds can be adjusted at any position as well as the tables that you can unfold or retract. When fully unfolded, you’re presented with a cup of coffee.
When it comes to eye for all those tiny details then I can easily say, wall panels and the ceiling including the lighting are all well modeled. And yes, all of this will cost you frame rates and therefore, discussed in my previous section, you can reduce the virtual cabin to a “virtual tunnel” without any details. A good thought from Aerobask to make it in such a way that when you have a low end PC or iMac, you can reduce the virtual cabin as a tunnel or when you have a high end computer, you can leave it as real as it gets.
The Flight Deck
Flight deck is the right name, but it’s small, at least, in real it’s a small area for two pilots. Ho ho, hold on, I’d seen a YouTube movie where only one pilot flew the Phenom 300. I wasn’t ware of this, but on the other hand, we simmers do fly alone too!
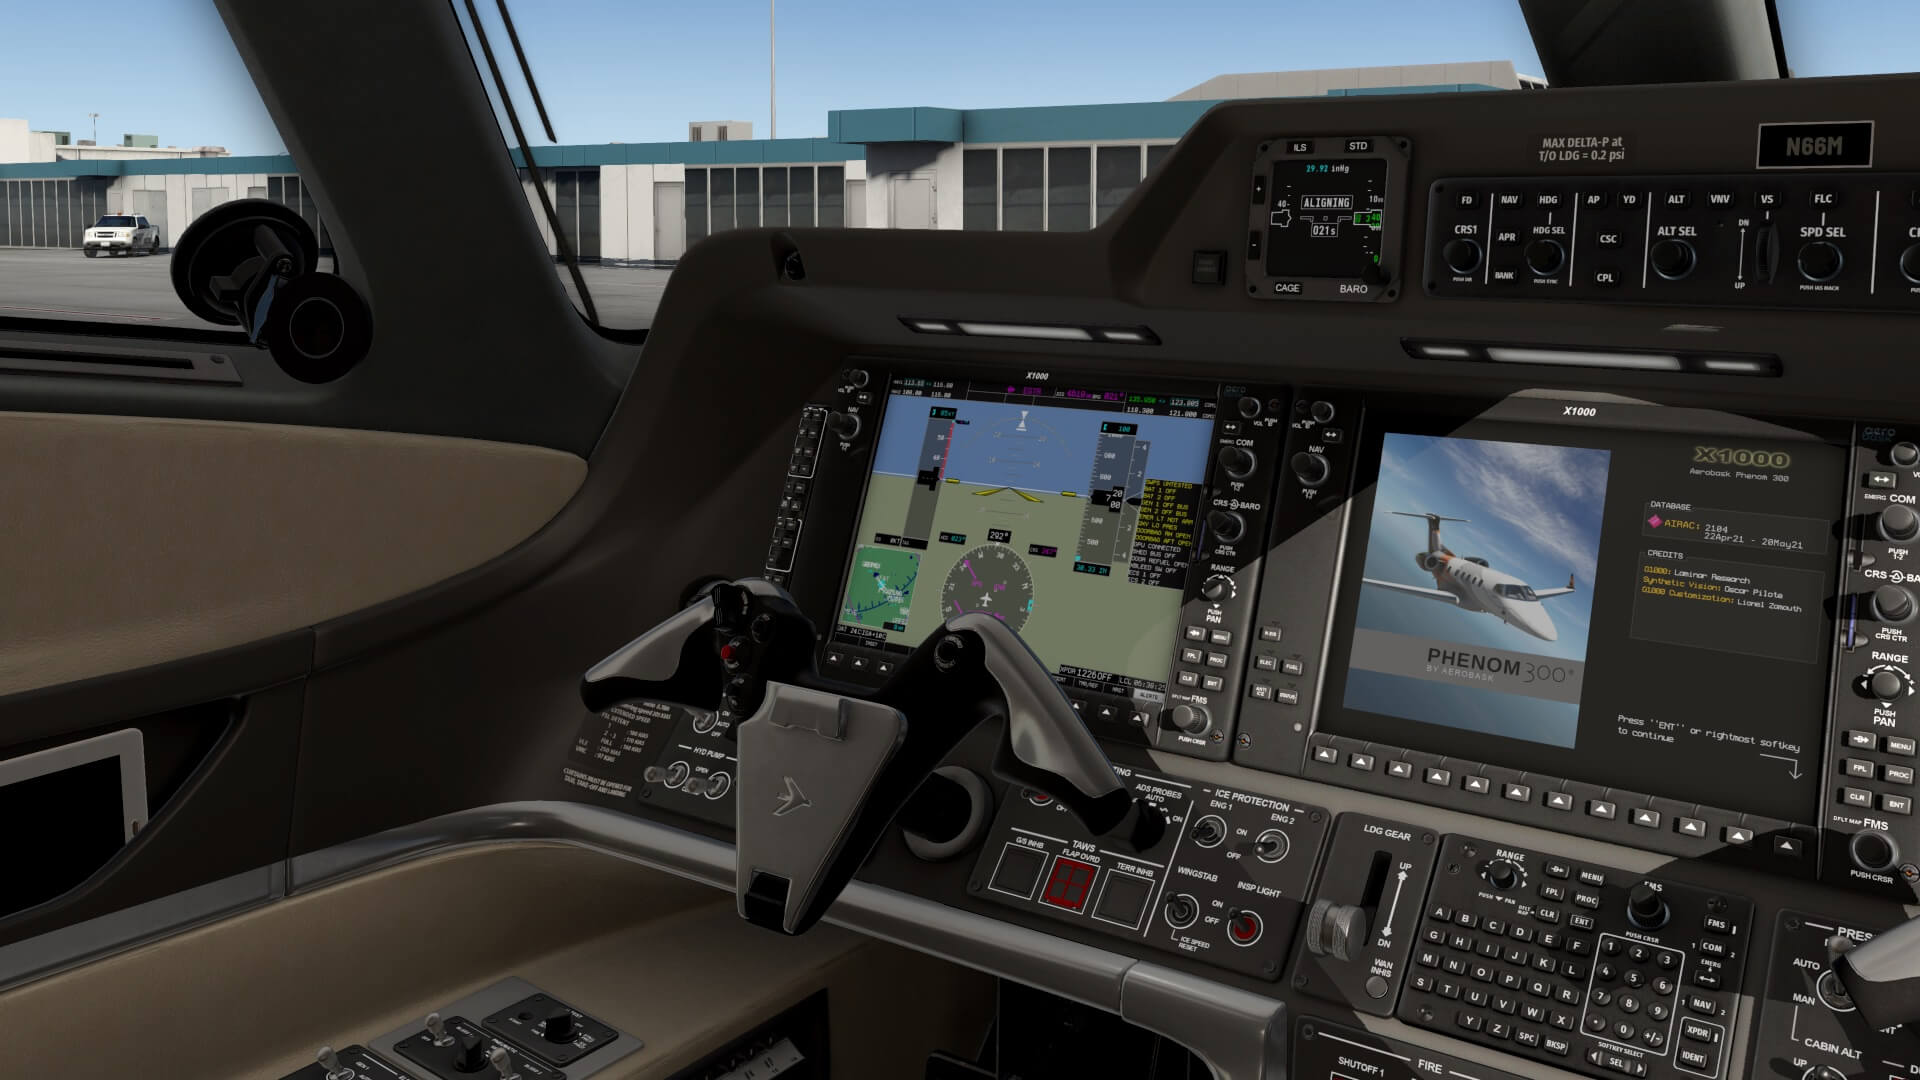
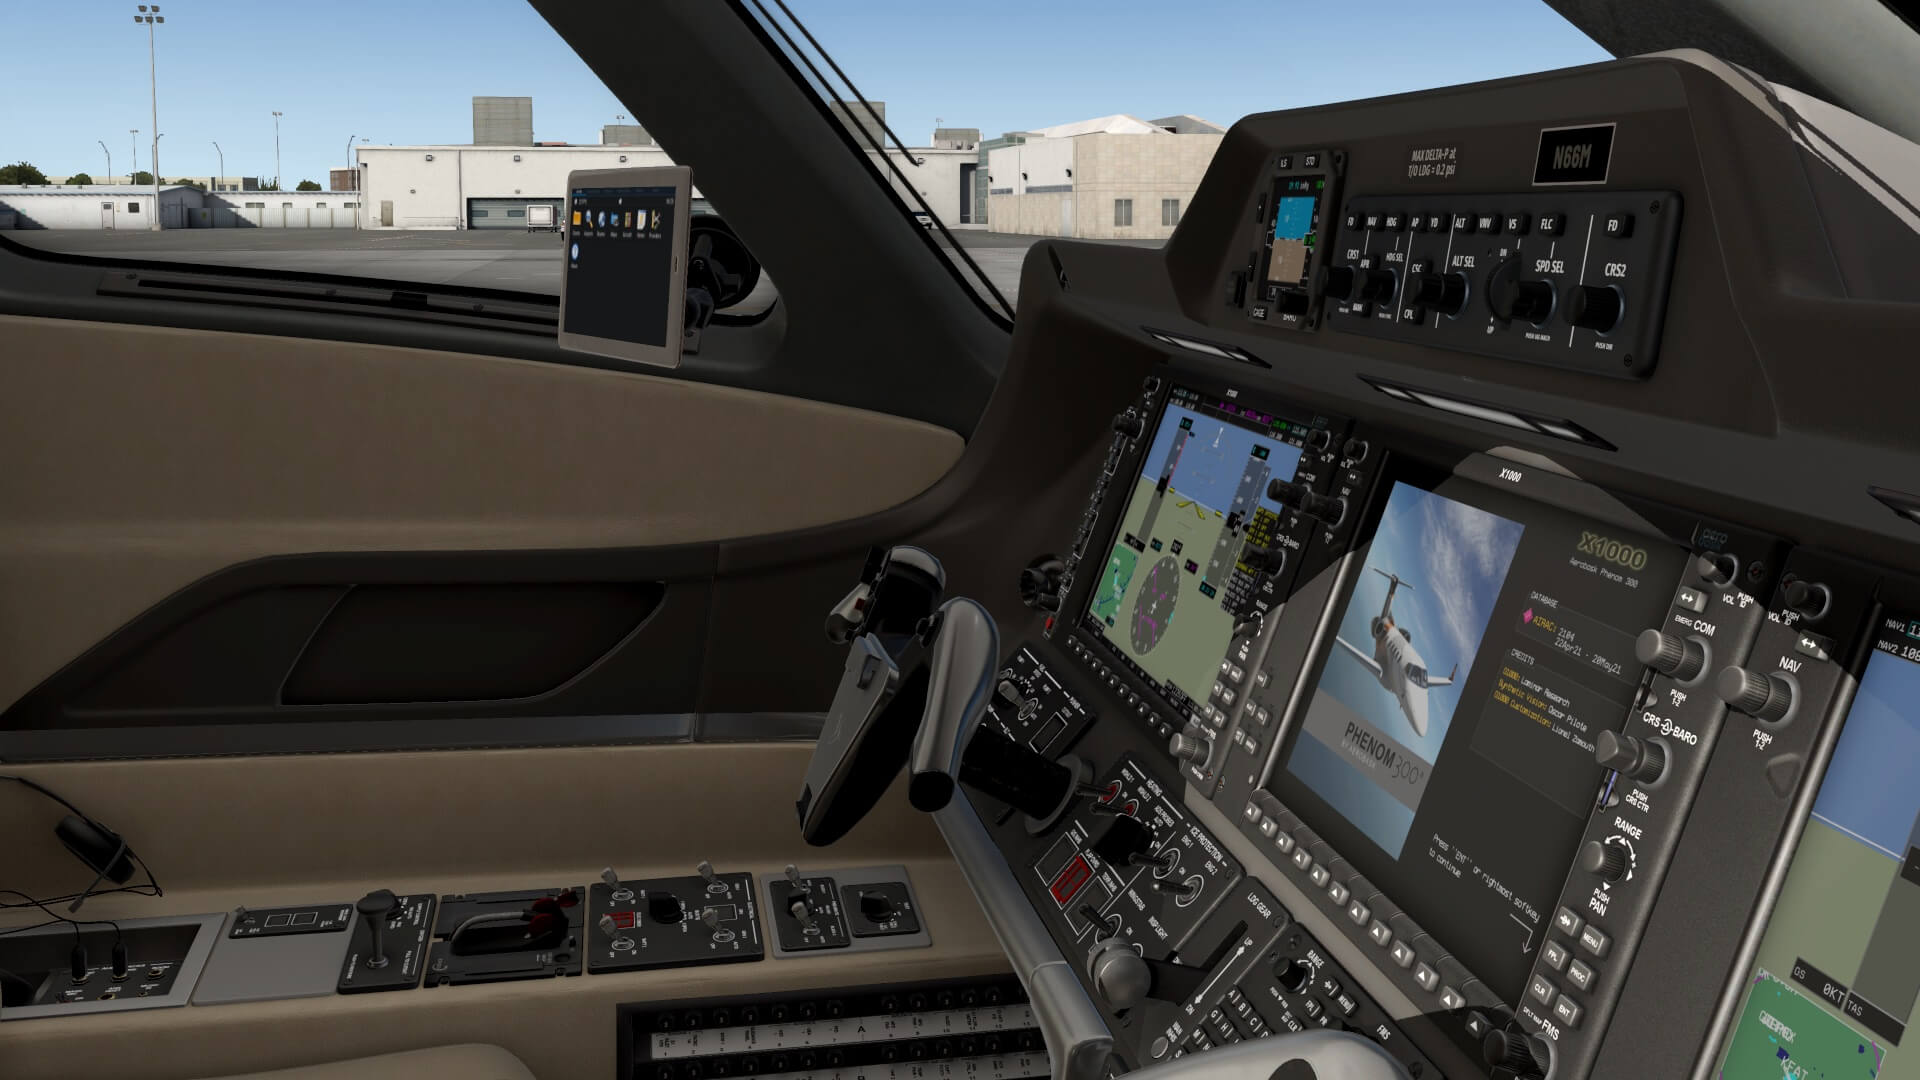
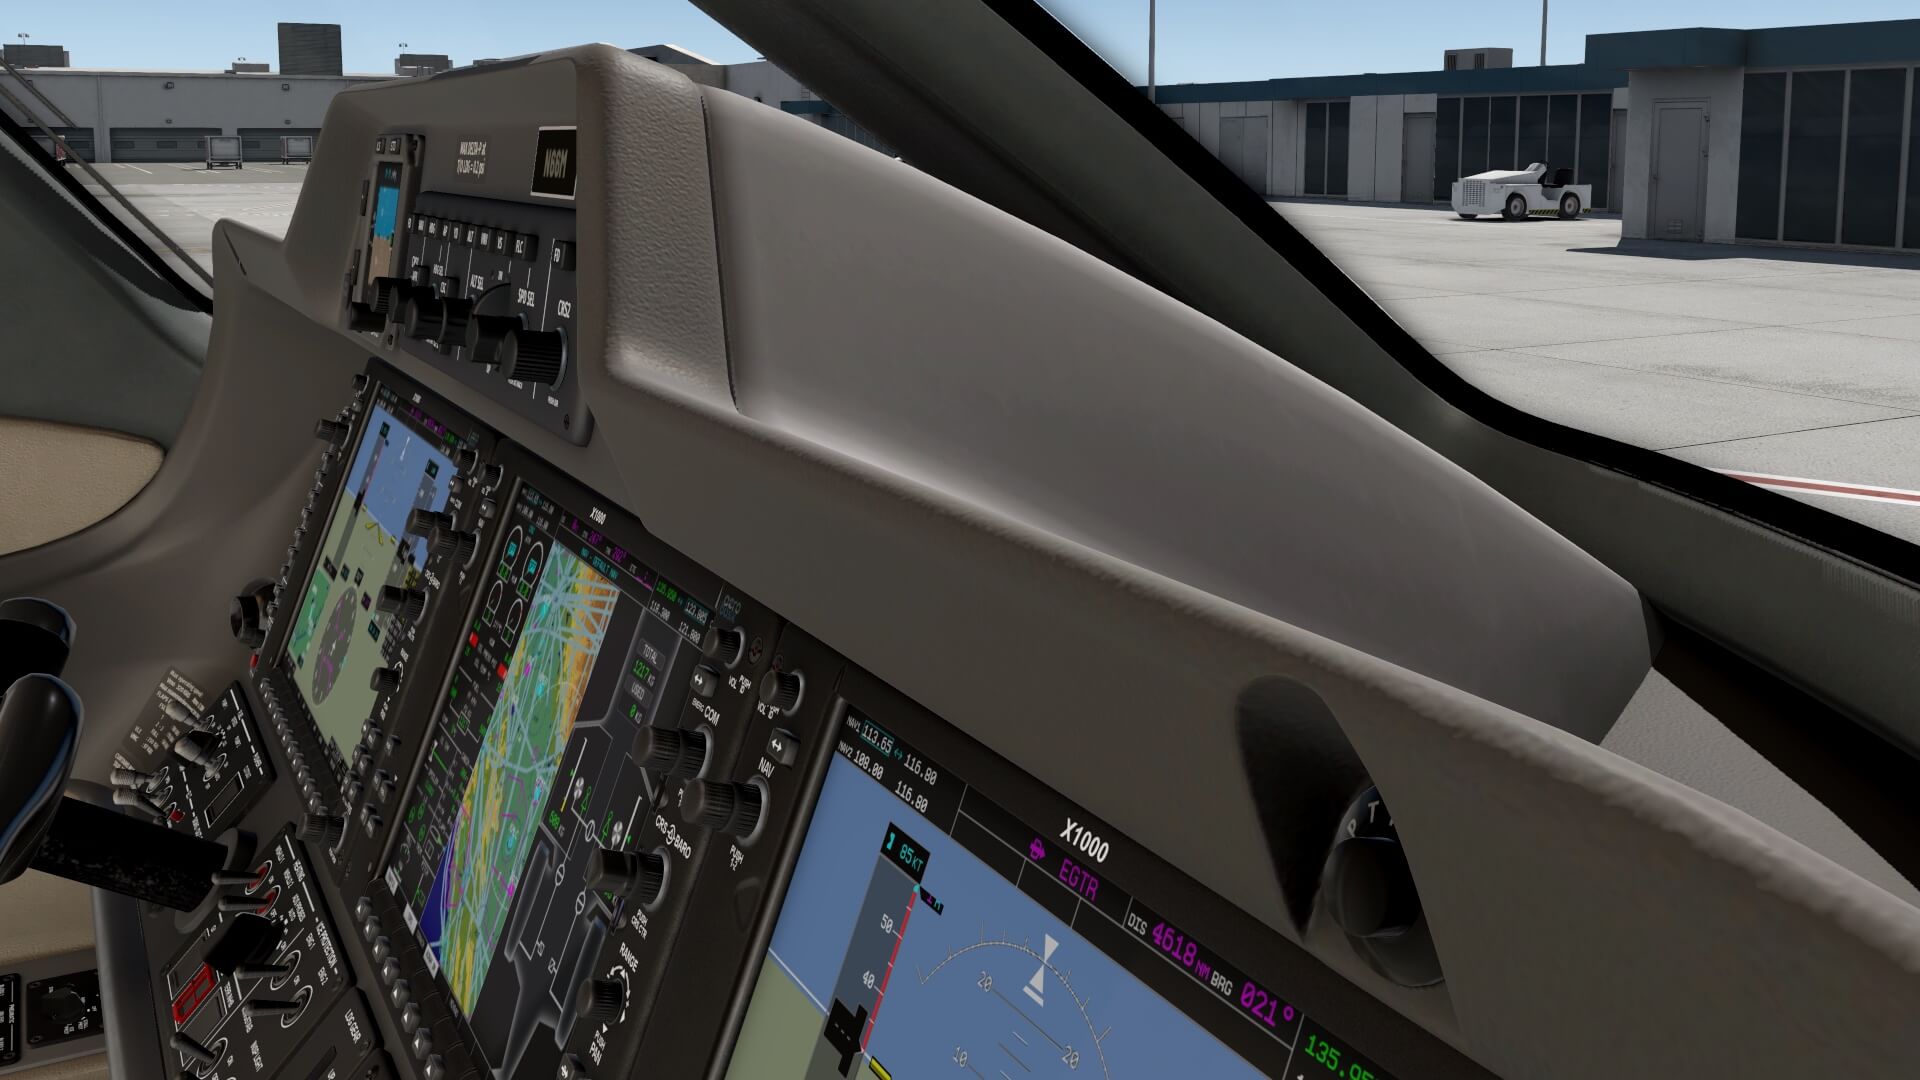
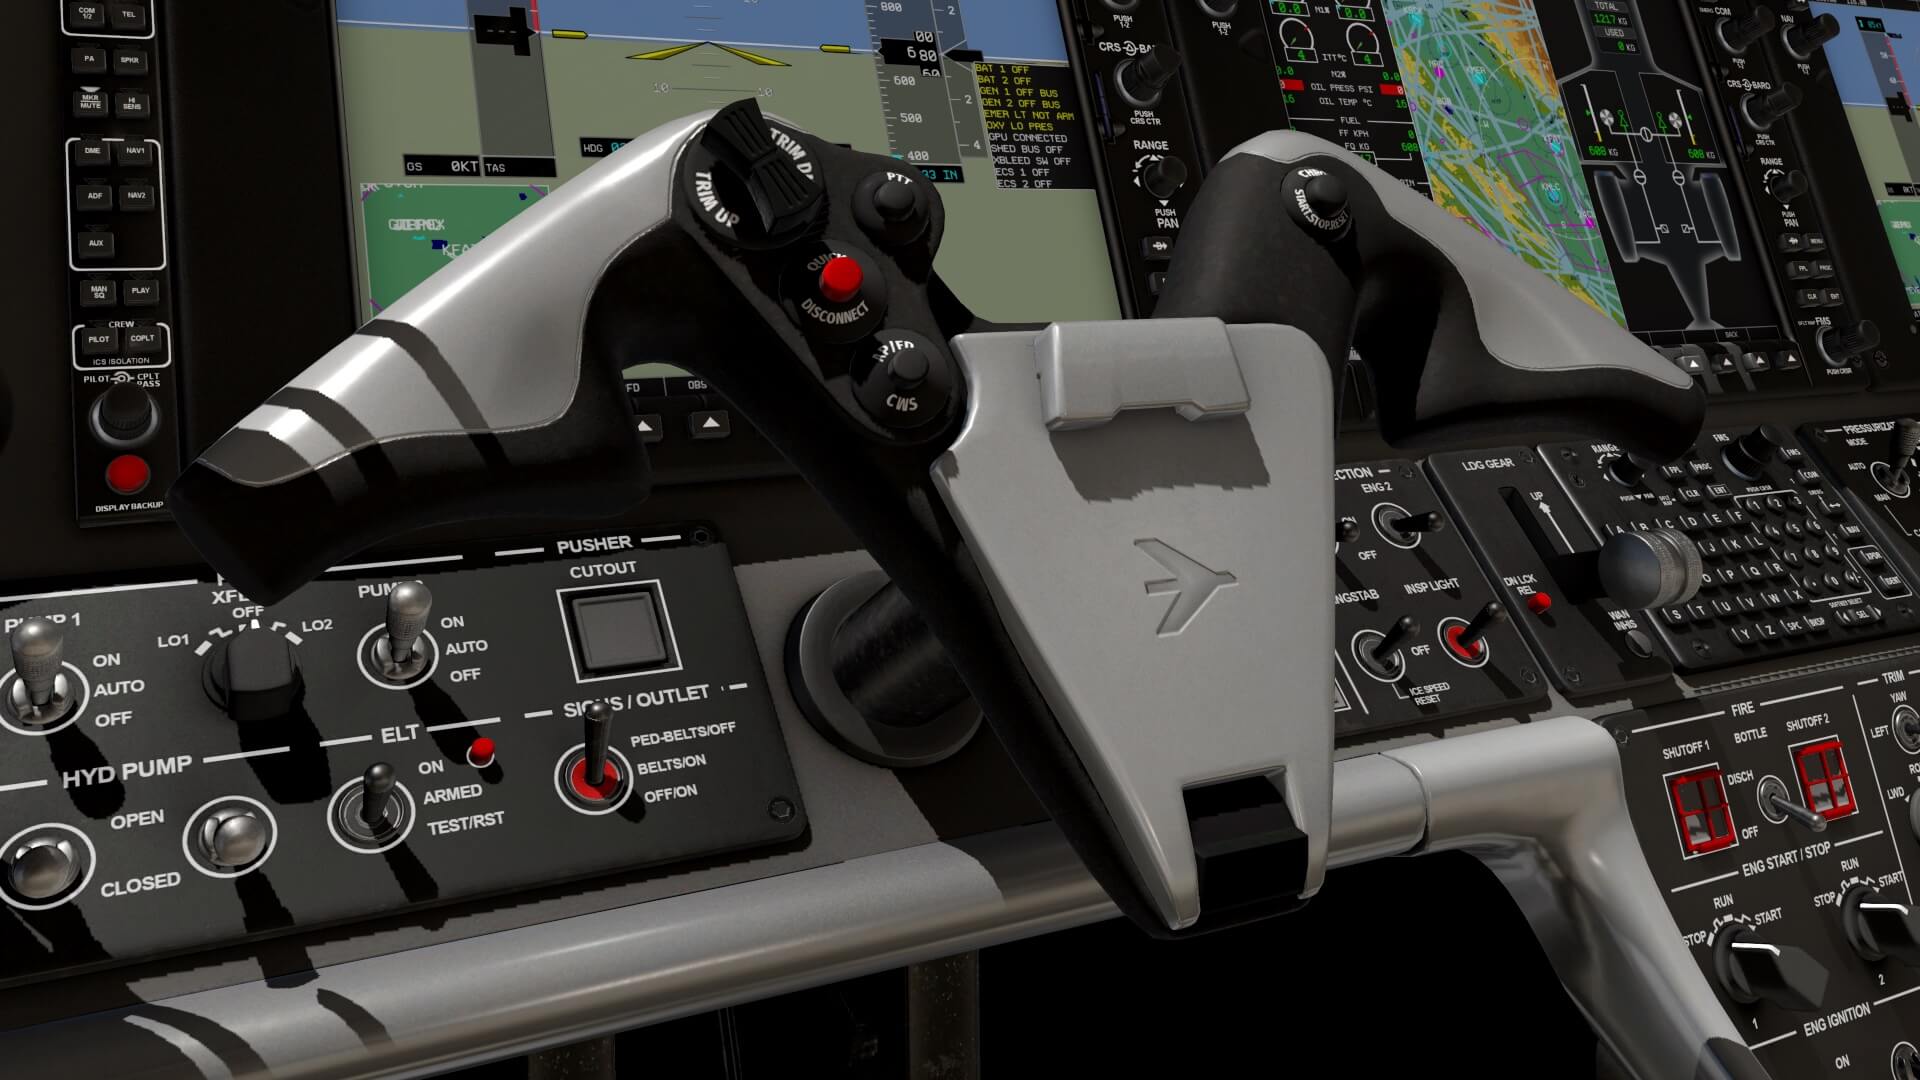
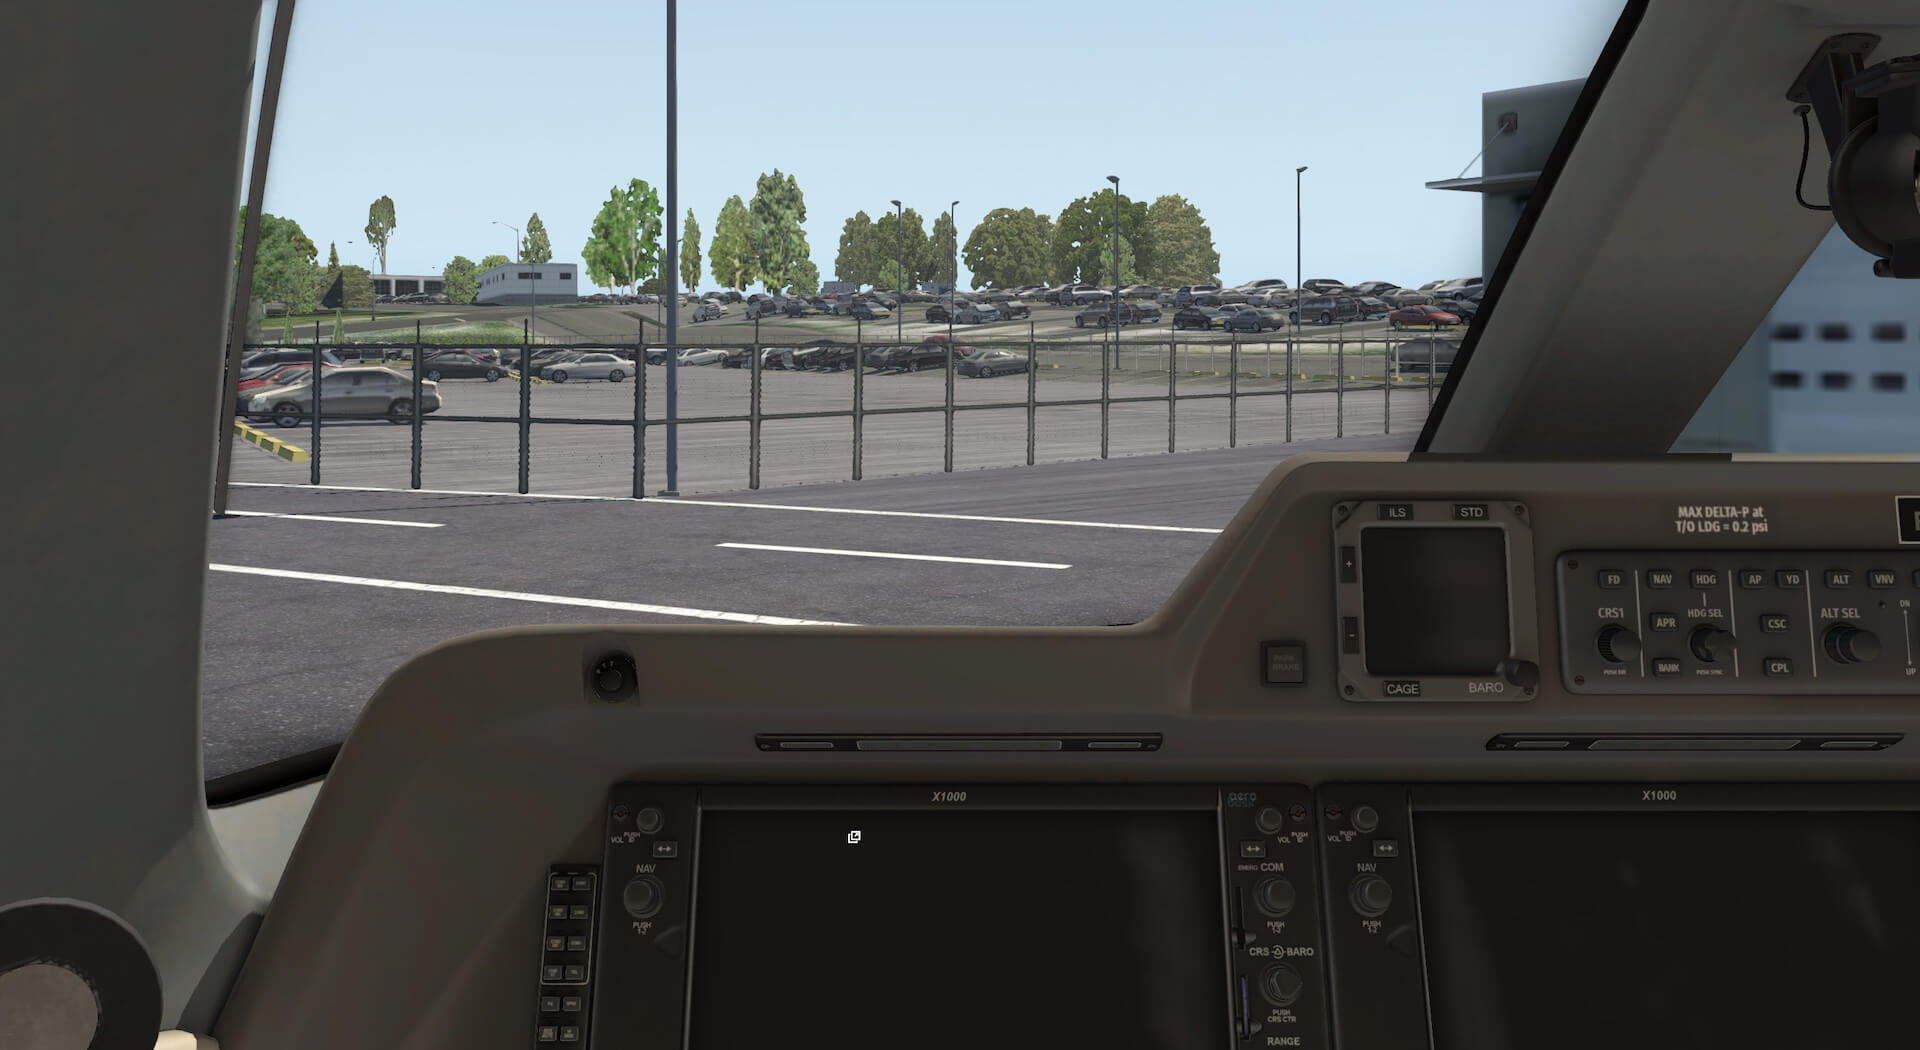
Anyway, the flight deck is divided by a curtain from the virtual cabin and of course in case you ask that, you can’t close the curtain. Logically that you can’t! That said, the overall flight deck looks pretty new with hardly any weathered parts, you could ask yourself the question if this is real or not? Believe me, when you have to pay a list price of USD 8.76m, you will try to keep it as new as possible! And with that in mind, I see the modeled flight deck floor, seats, instrument panel, the pedestal, the side panels, ceiling, switches, knobs, DU’s (Display Unit) and so on.
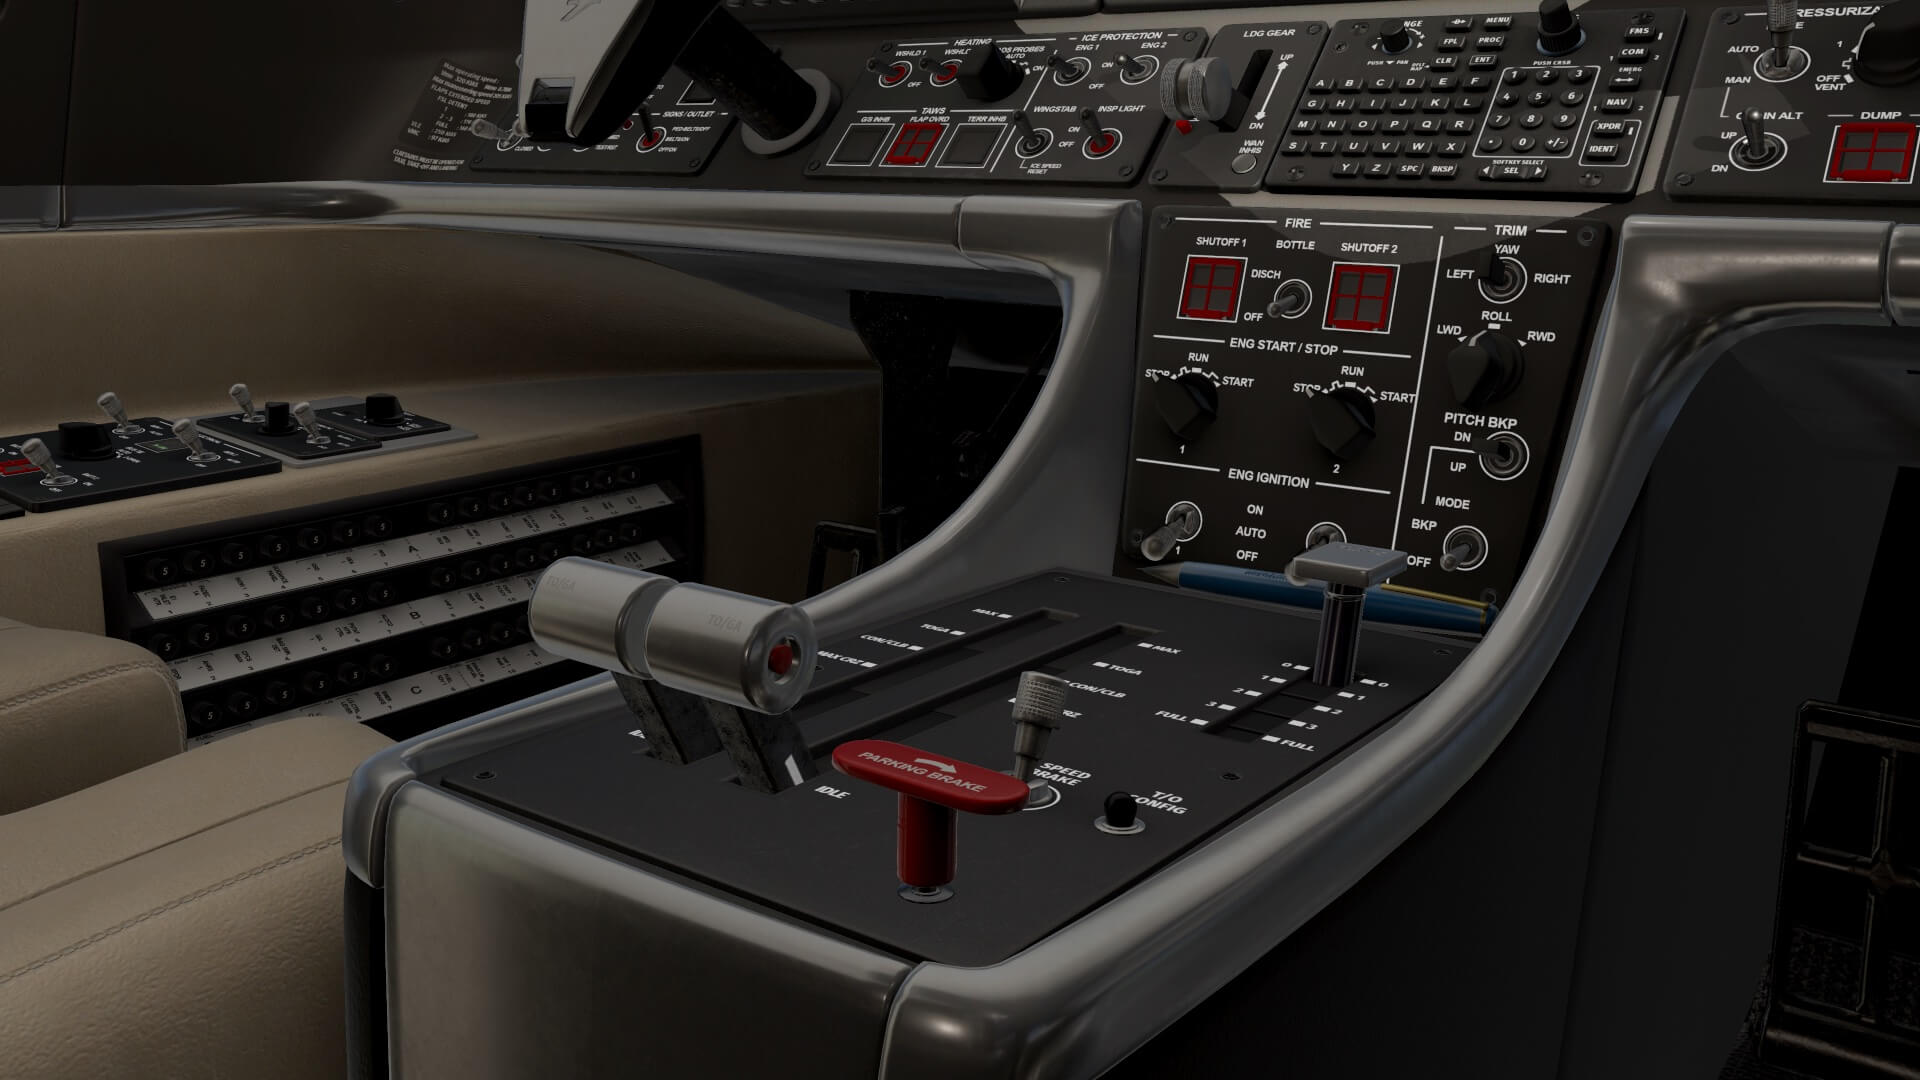
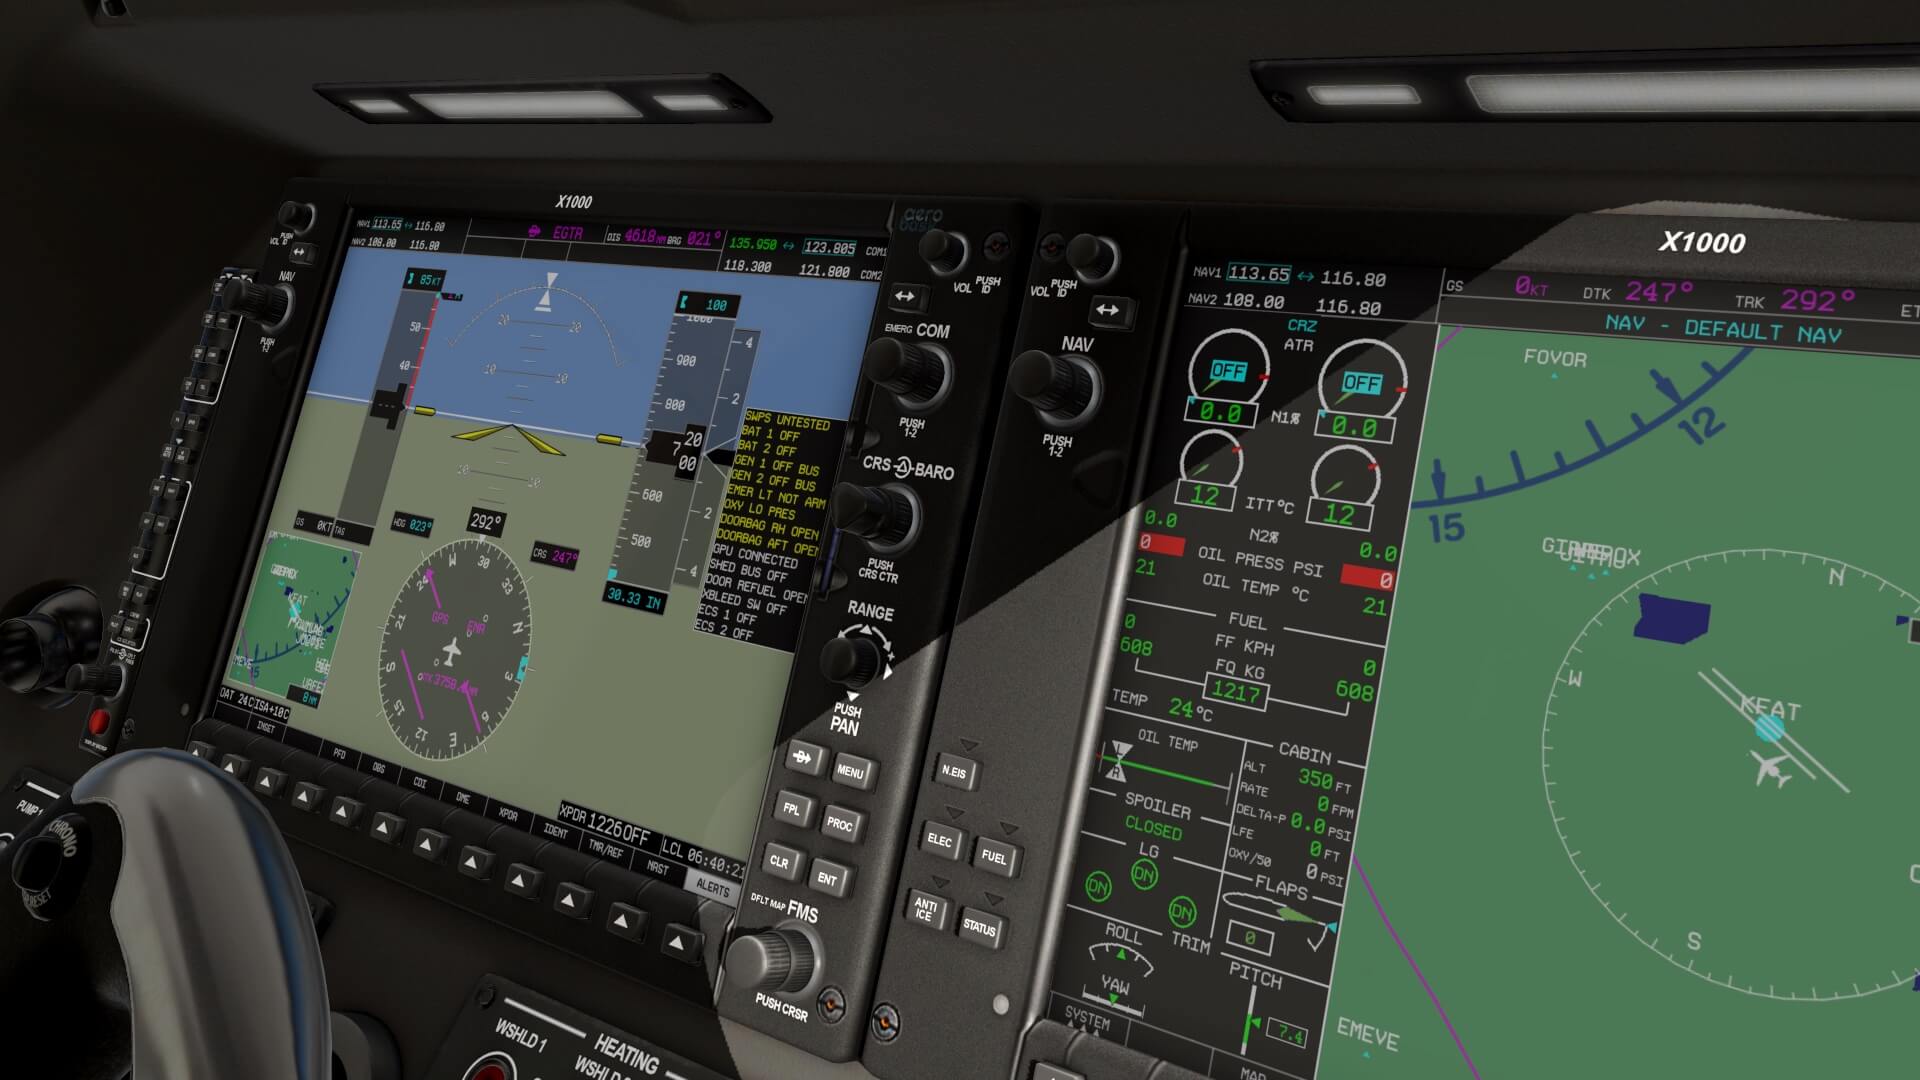
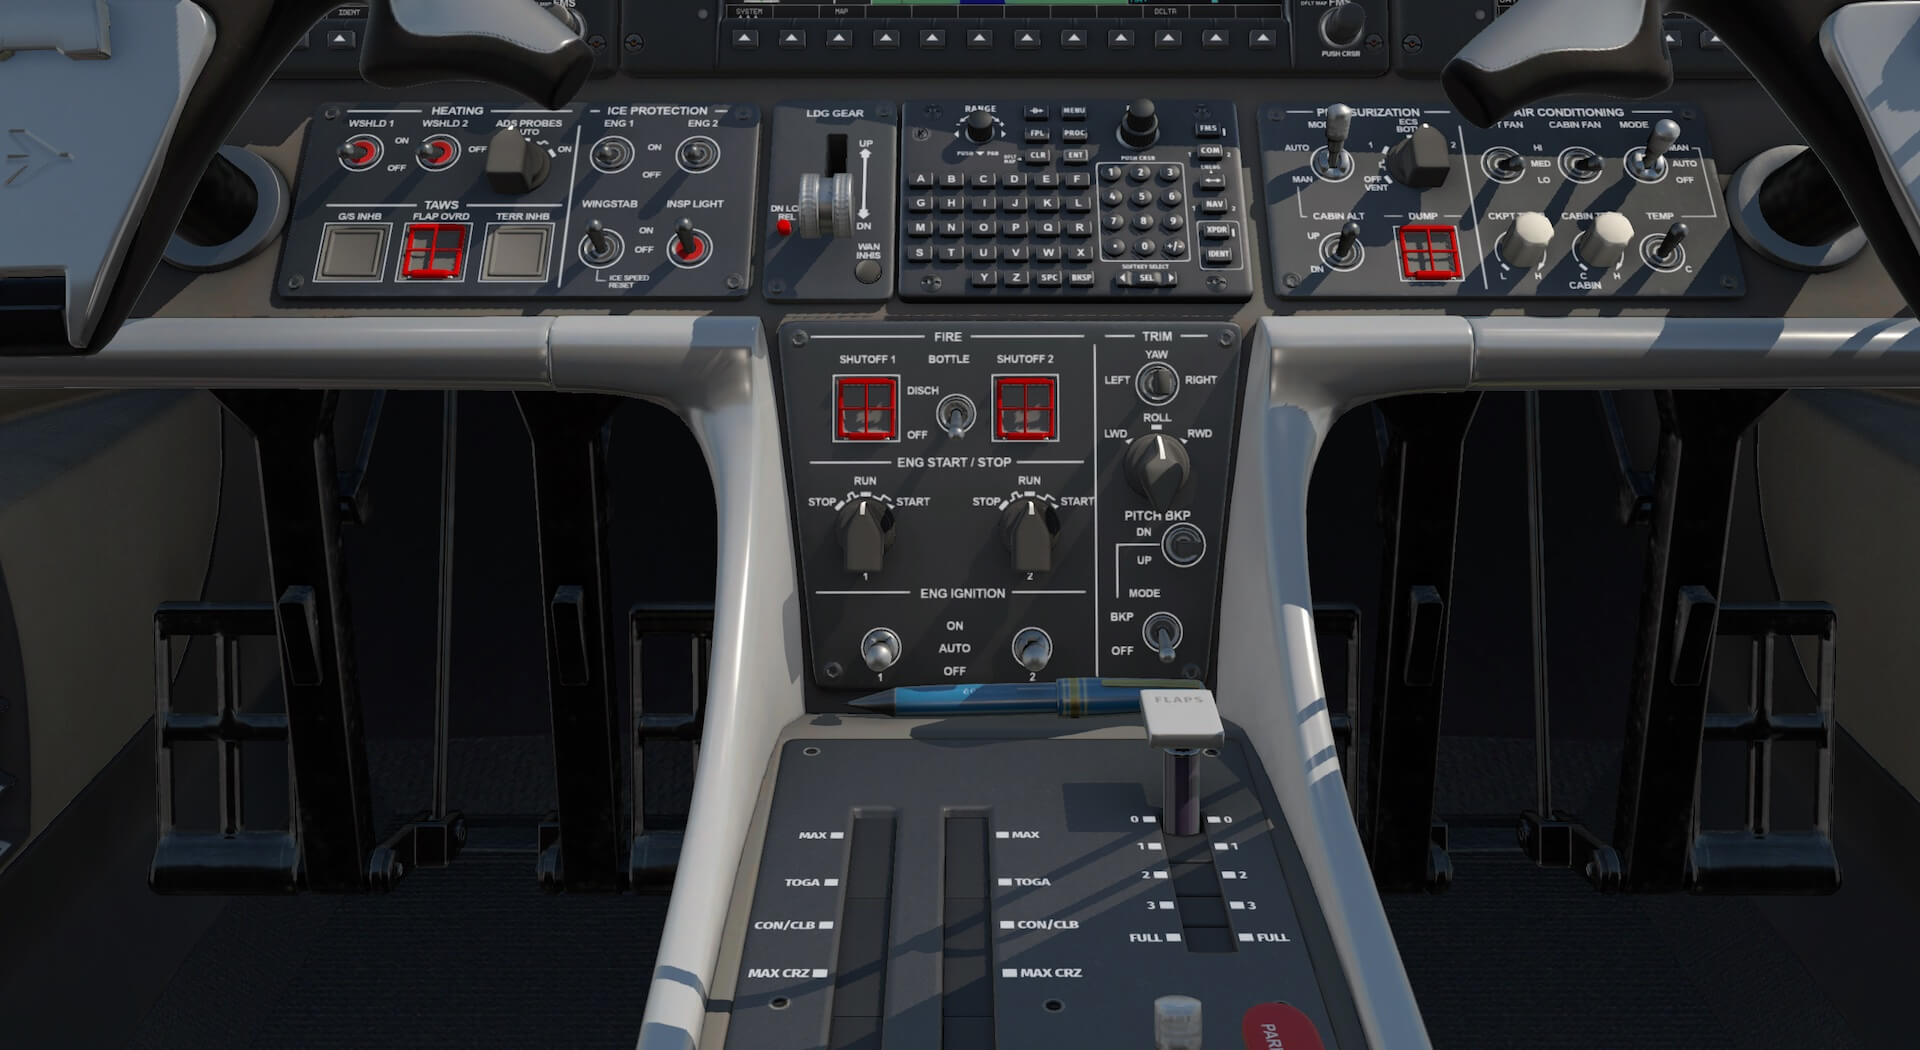
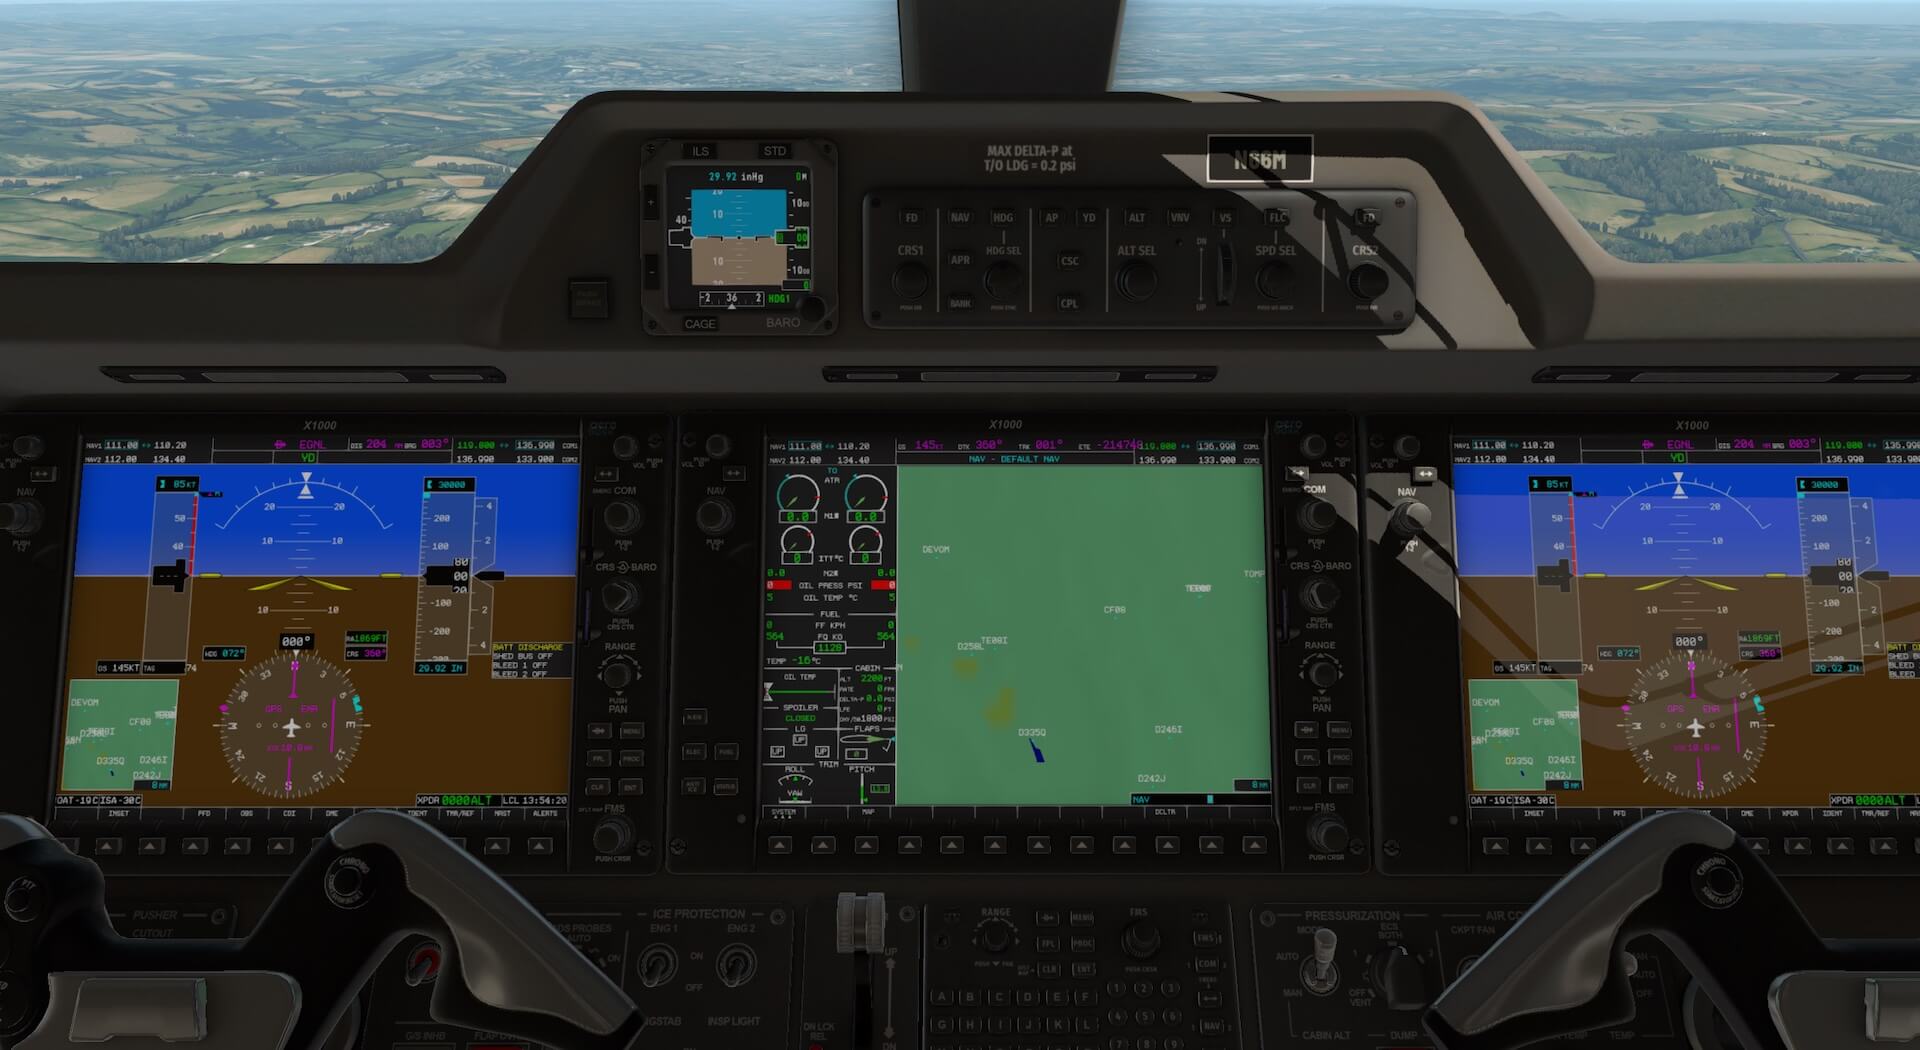
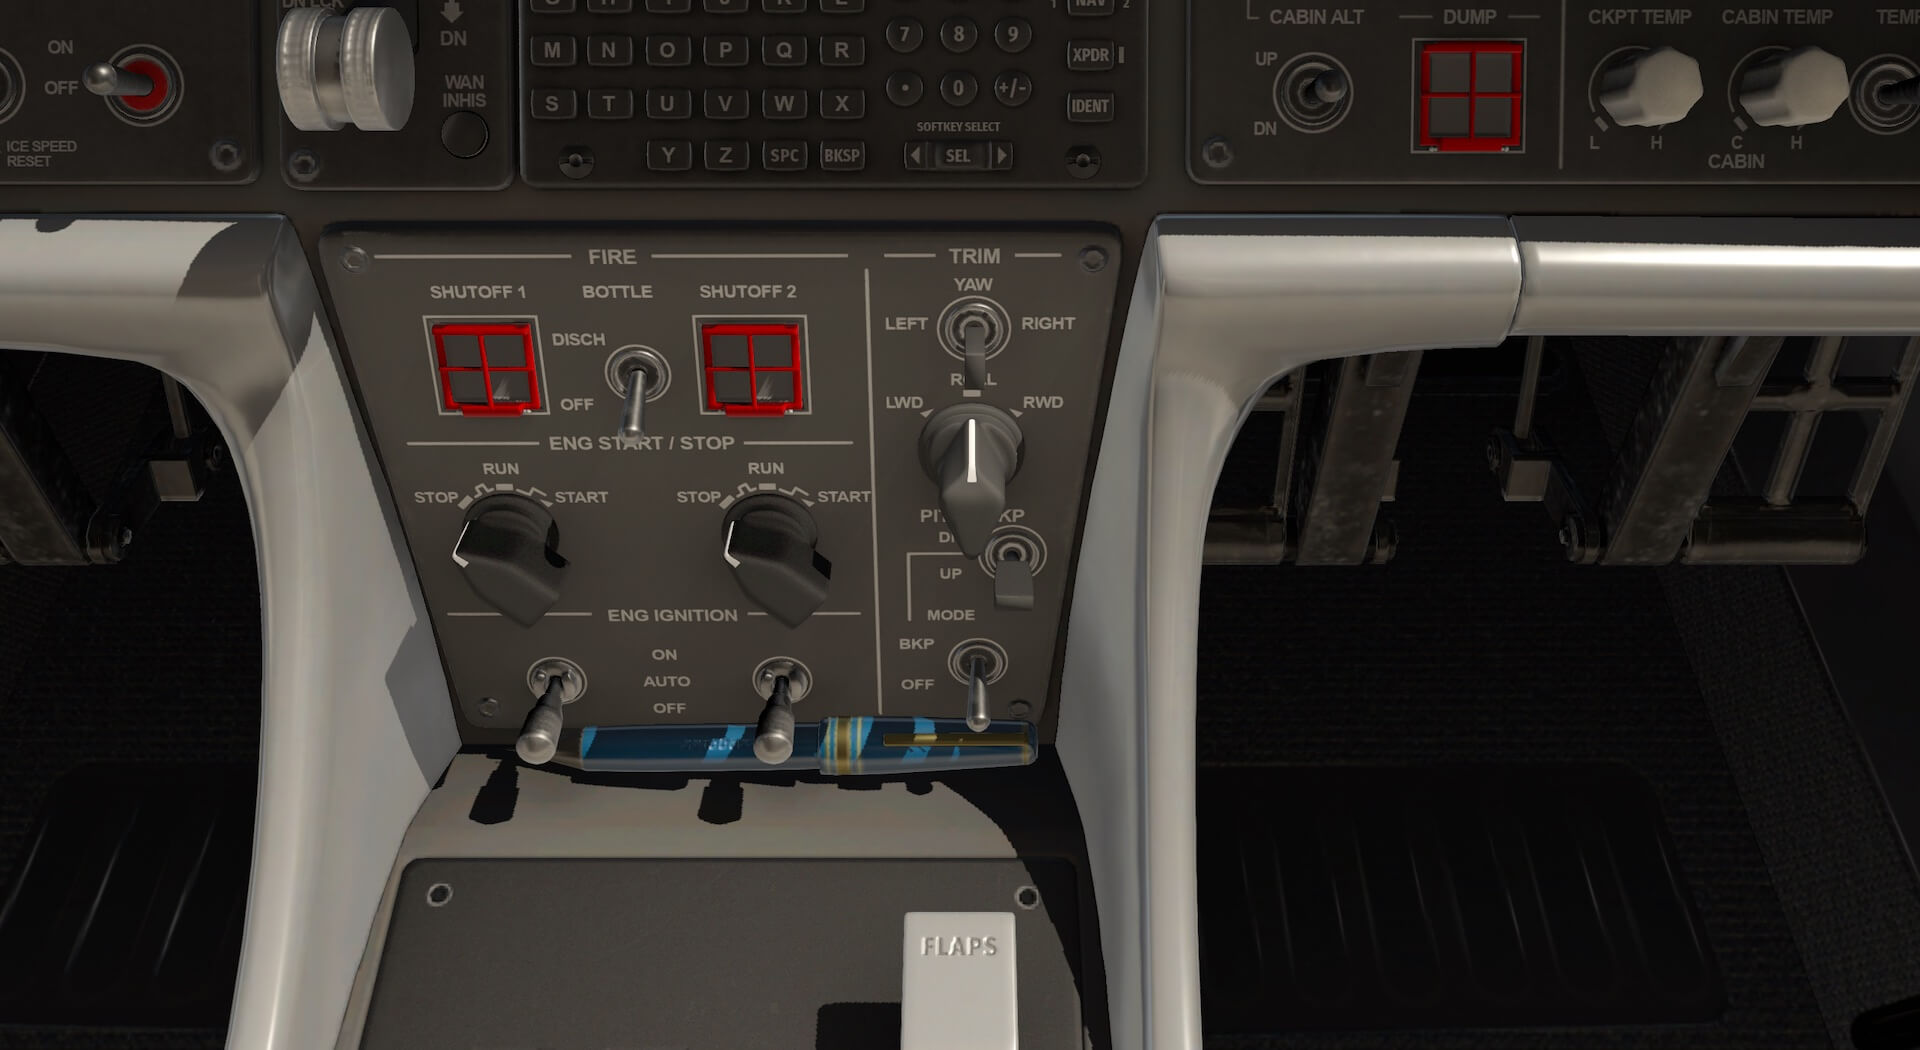
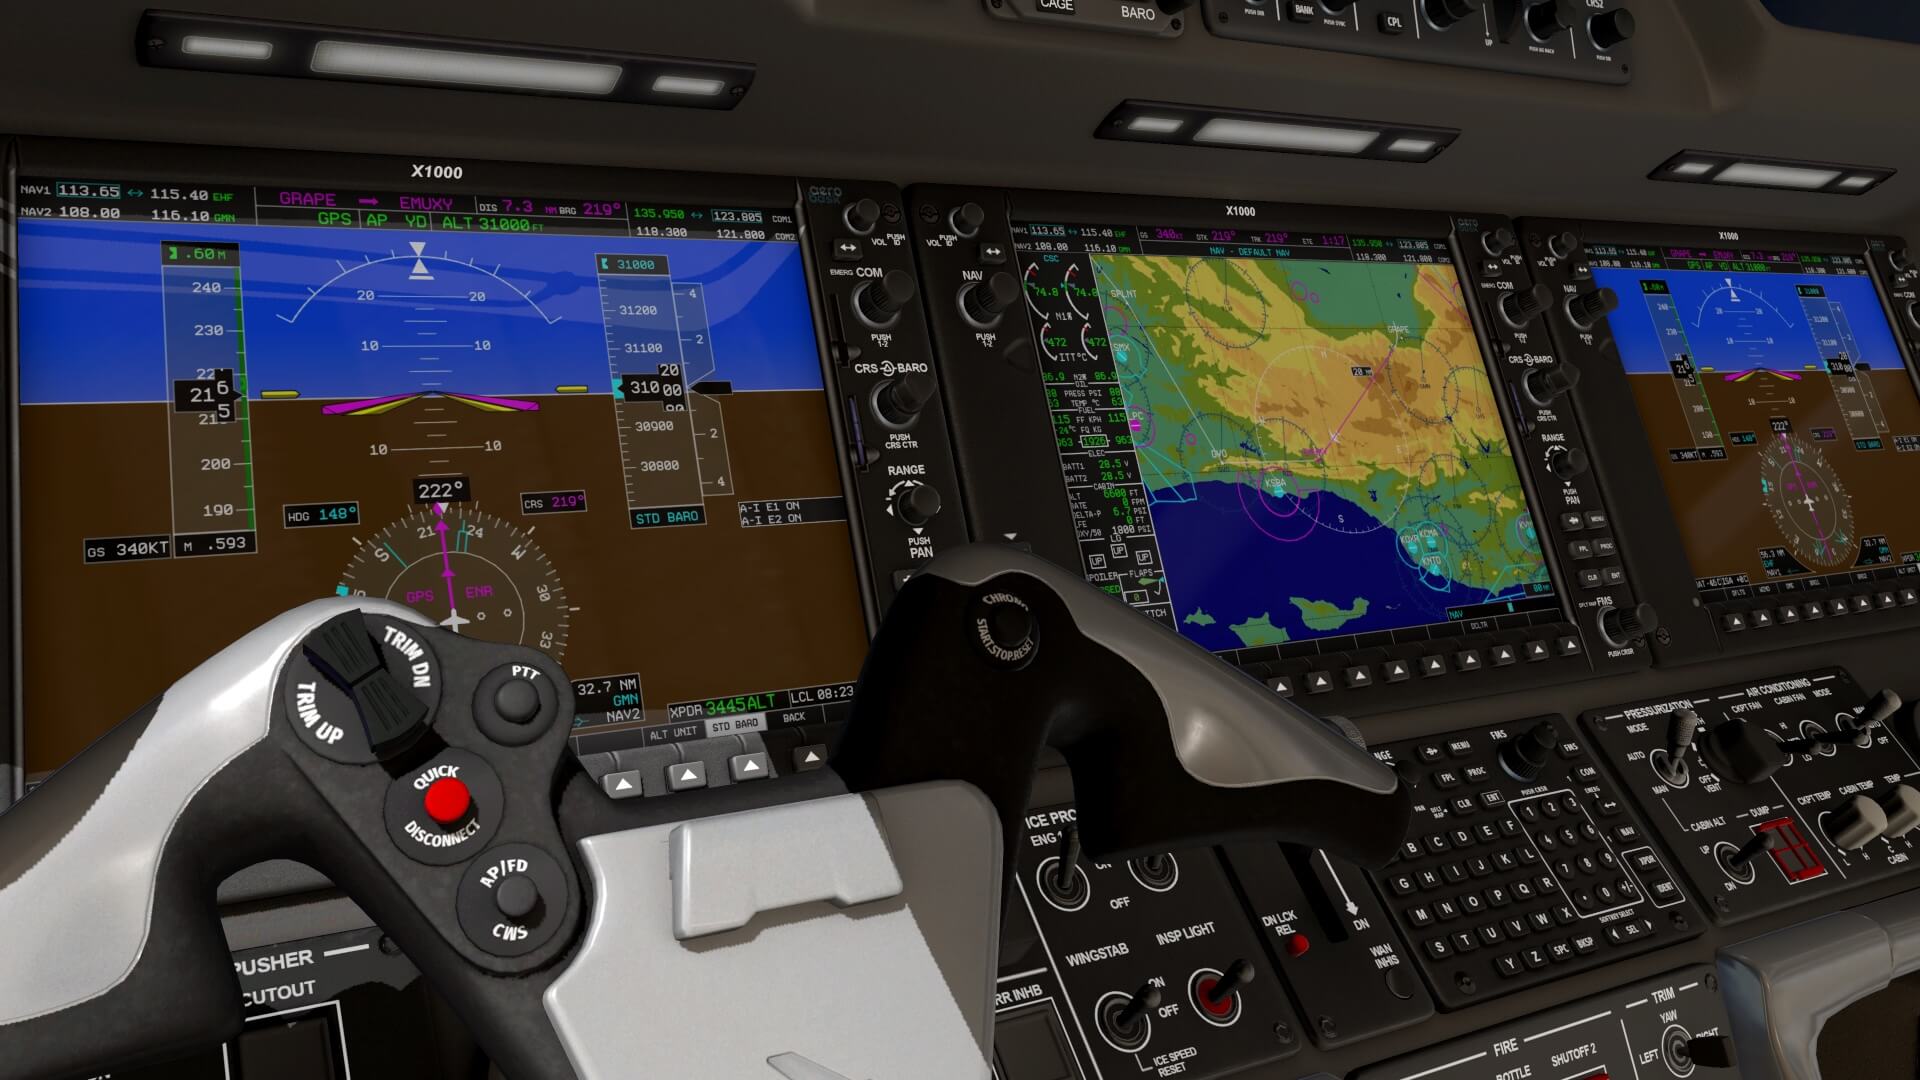
The whole flight deck is clean, although at the front of the pedestal I found a loose pencil, perhaps forgotten by the previous virtual pilot. As far as I could see and figure out, there are not really any animations except then of course the 2D popup instrument, panels or EDS DU’s. Of course, the 3 EDS DU’s are impressive and although they are basically the default Laminar Research X1000 displays, they are modified by Aerobask and not just modified, they are offering a lot more then the default DU’s.
The quality of the switches, knobs, selectors, it’s amazing to see how well this is done, how accurate each tiny detail is. And there’s more. The red guards over several switches are perfect, including the open/close sound when you click on it, or the text on the instrument panels or sub-panel identification, all is razor sharp. And not only razor sharp from a distance, you can zoom in and it stays sharp and then in a sudden, you see in much more detail the panel screws that fix them. Wow, that’s gorgeous.
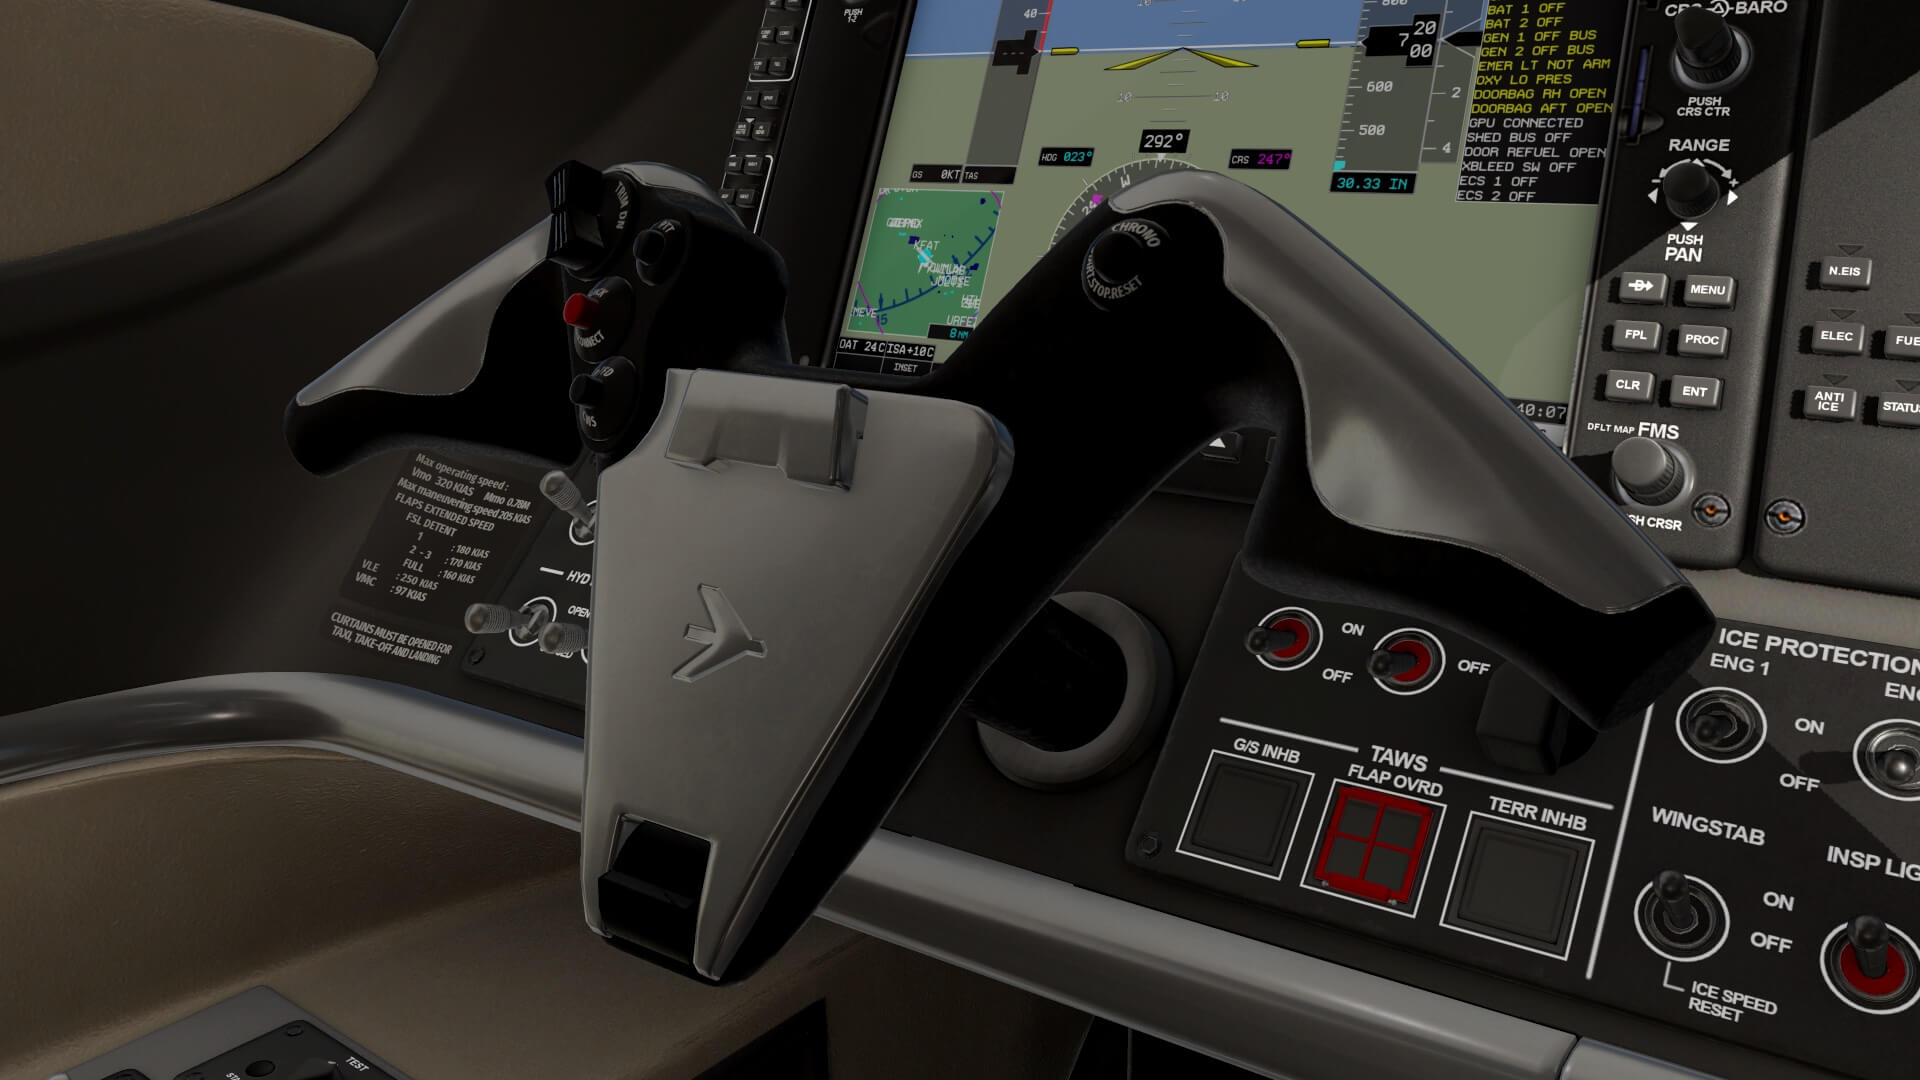
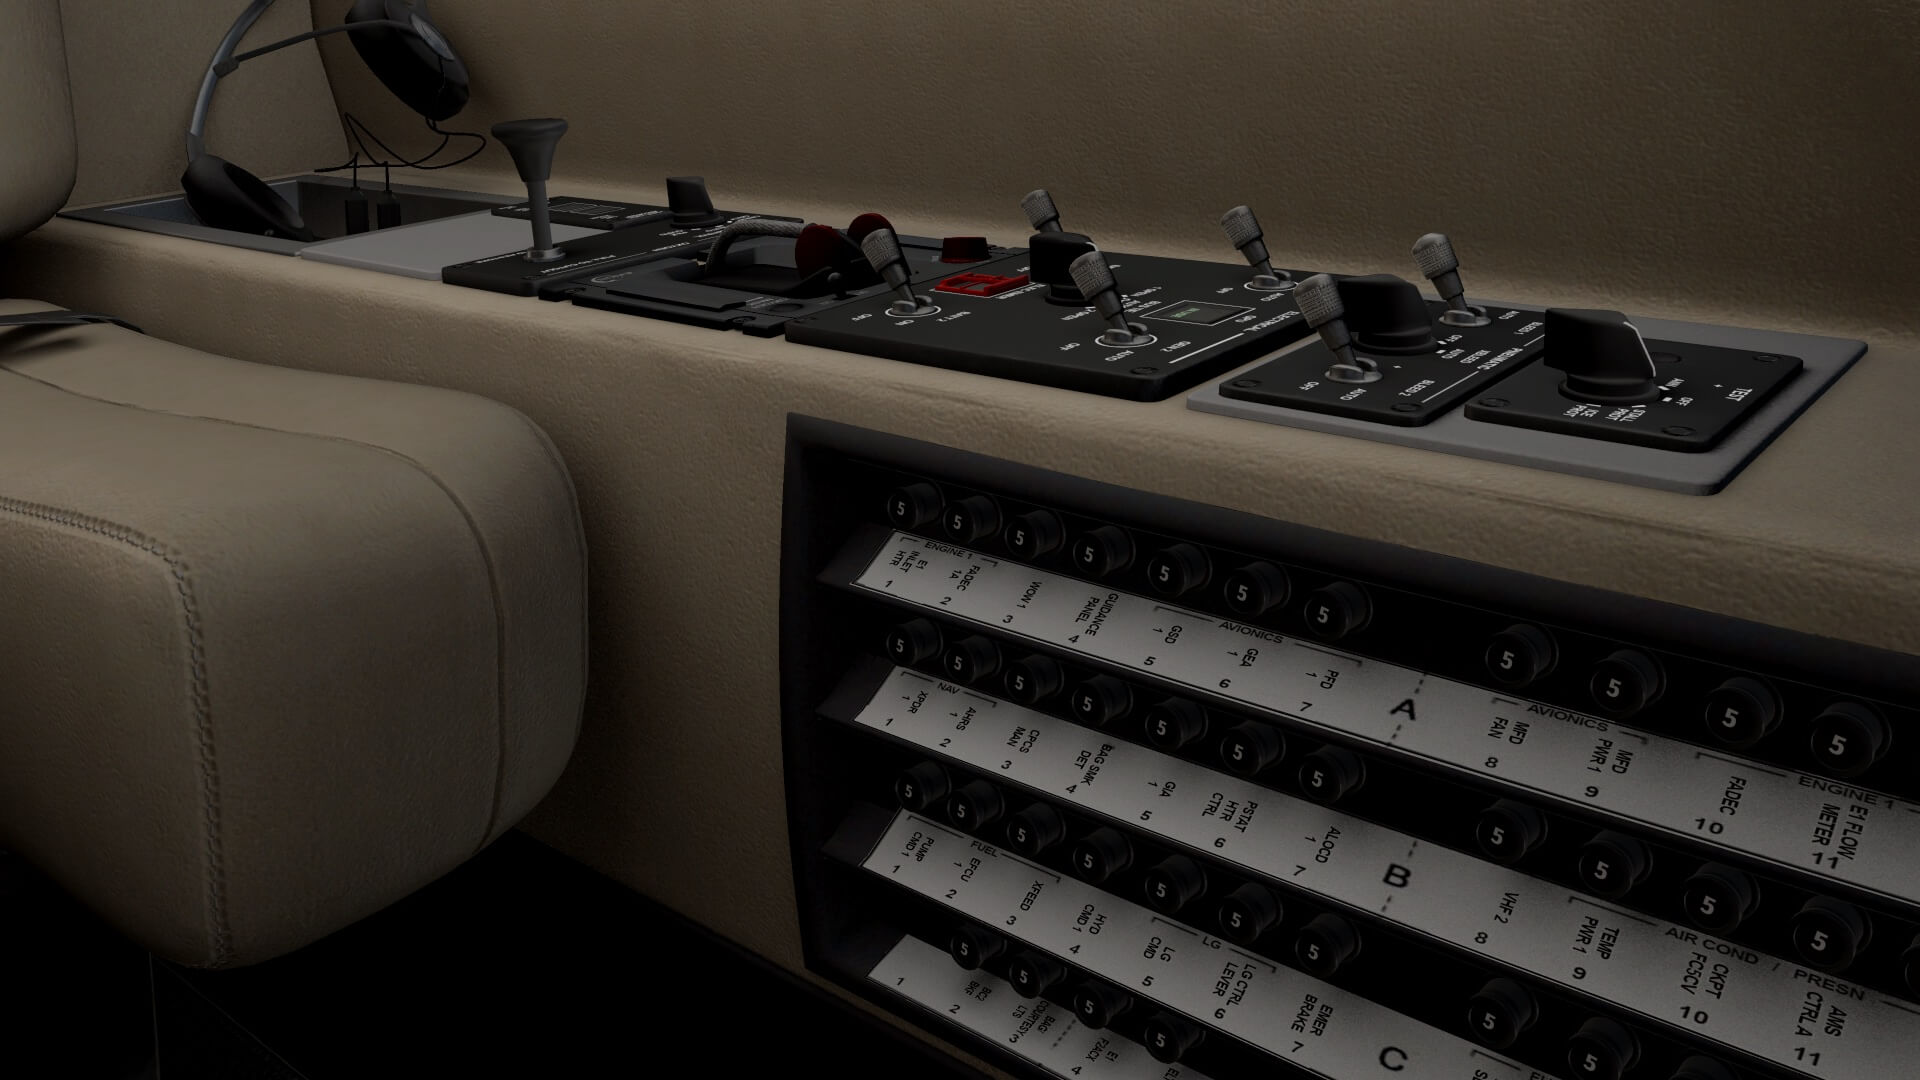
It’s difficult to say if the overall modeled flight deck is frame rate friendly or not, but I think it is. Ok, I have a very powerful iMac, but even with all the options as reflections ON, I can smoothly move myself thru the flight deck. What I also like are the control wheels although I personally had hoped that these had some weathering on them since human hands will influence the look of the control wheels. The same is also valid for the circuit breaker panels on the left- and right-hand lower side panels. Although none of the circuit breakers are animated, it looks as real as it gets and the CB identification plates are also razor sharp.
I mentioned this before, but there’s one other thing that is simulated or modeled as being “used” or if you wish “weathered”. That are the brake and rudder pedals as well as the linkage. Wow, that looks good, no, excellent! Normally I’m more a simmer that likes a weathered flight deck or cockpit, but in this case with this 8 plus million dollar executive jet, I like it like as it is modeled. On the left-hand side wall you have the connection for the AviTab while the pad itself is parked in a recess of the sidewall. Click the AviTab and the pad connects and depending if you have the AviTab plugin installed, it functions automatically, but when you have no AviTab plugin, then it will tell you that the AviTab plugin is missing.
Andy will start from here and discuss with you the systems and how the Aerobask Phenom 300 flies. I’ll offer you also an US California IFR flight. See you later.
Modeled Phenom 300 Systems
The aircraft comes with several modelled systems which are explained in the manual and, as I am not a qualified pilot or expert in X-Plane, I have followed the manual in order to outline those provided. I will cover the systems in the order the manual does it. Some of these systems are easier to use if buttons or keys are mapped to create certain actions. The functions that need to be mapped are explained in the manual.
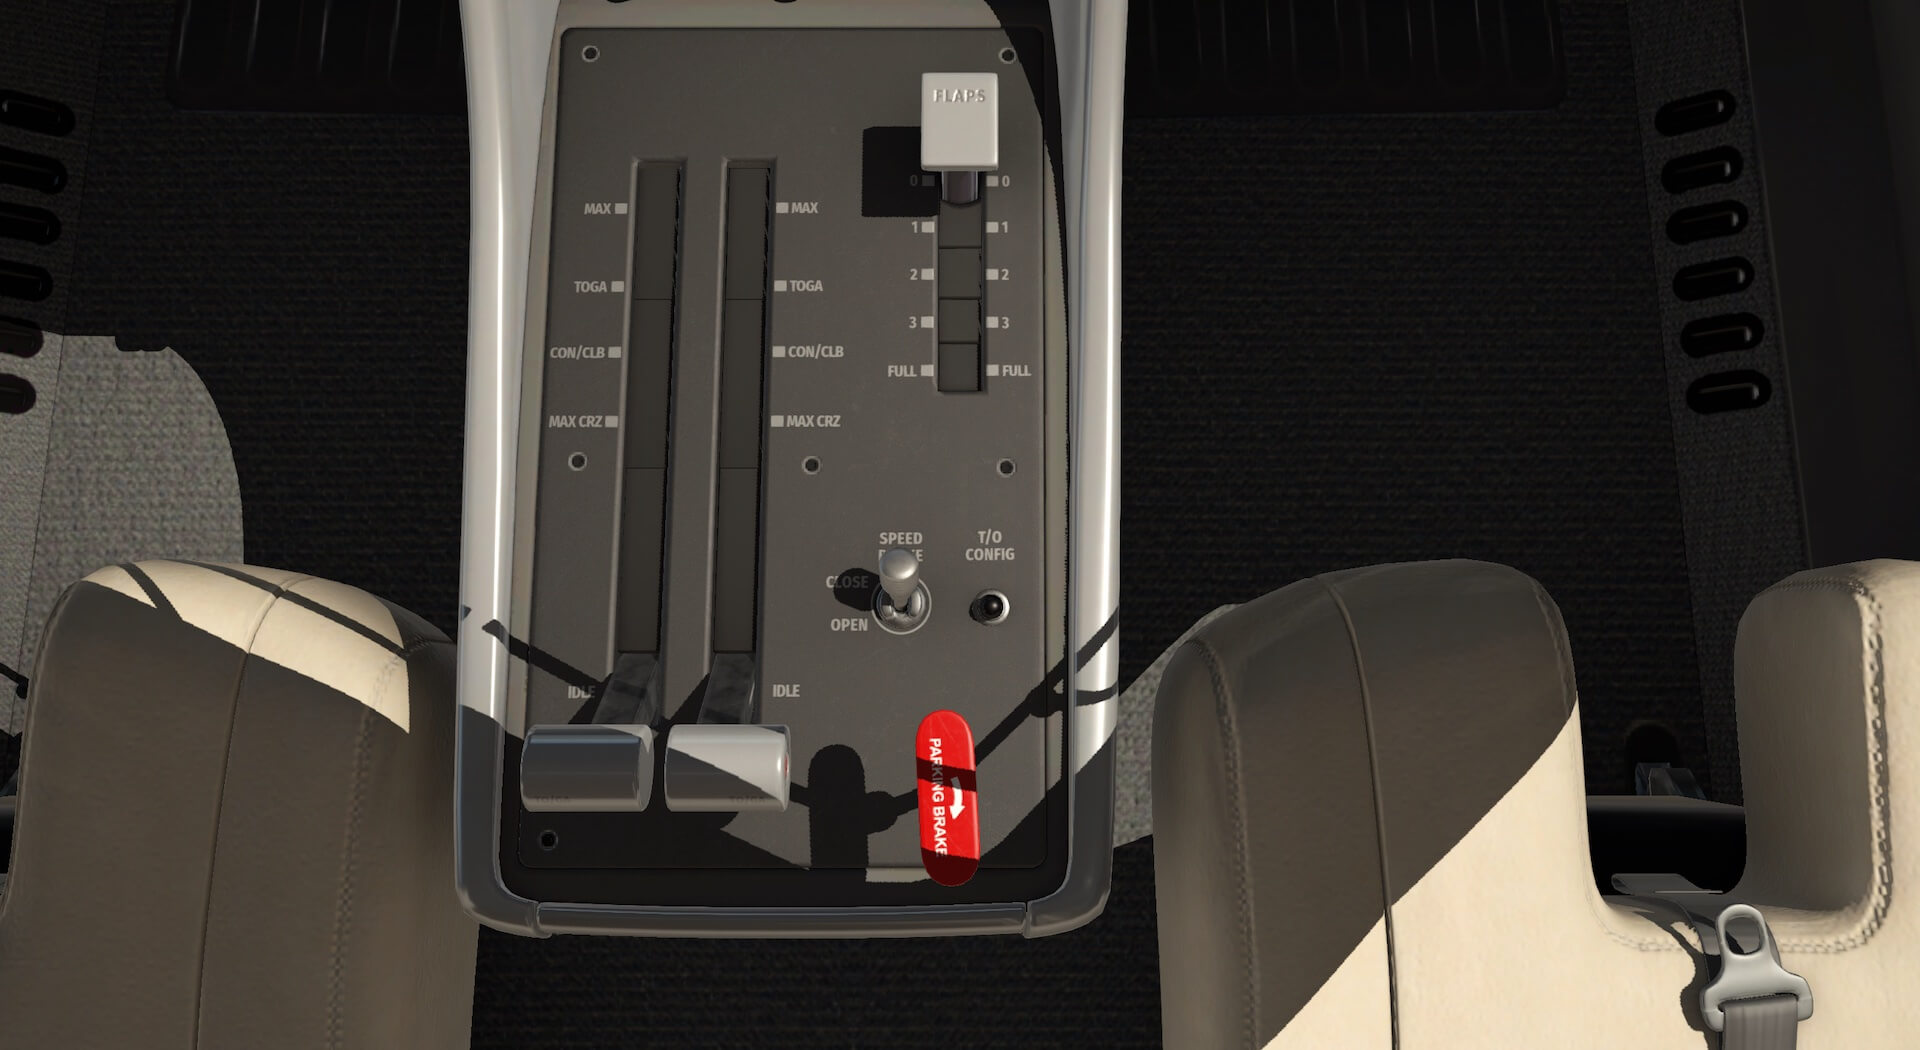
The Aerobask plug in allows for a large number of actions to be mapped if required. The first advice relates to the use of the thrust levers. The levers work independently and control one engine each. There is no reverse thrust. The position of the thrust levers is presented on the EIS which mean the pilot does not have to keep looking down to set the lever positions although the settings are also marked alongside the levers.
The full use of the levers is explained clearly. The manual recommends mapping a key to the Take Off/ Go Around button on the thrust levers. It should be noted that this button sets the autopilot for TO/GA and does not change the level of thrust.
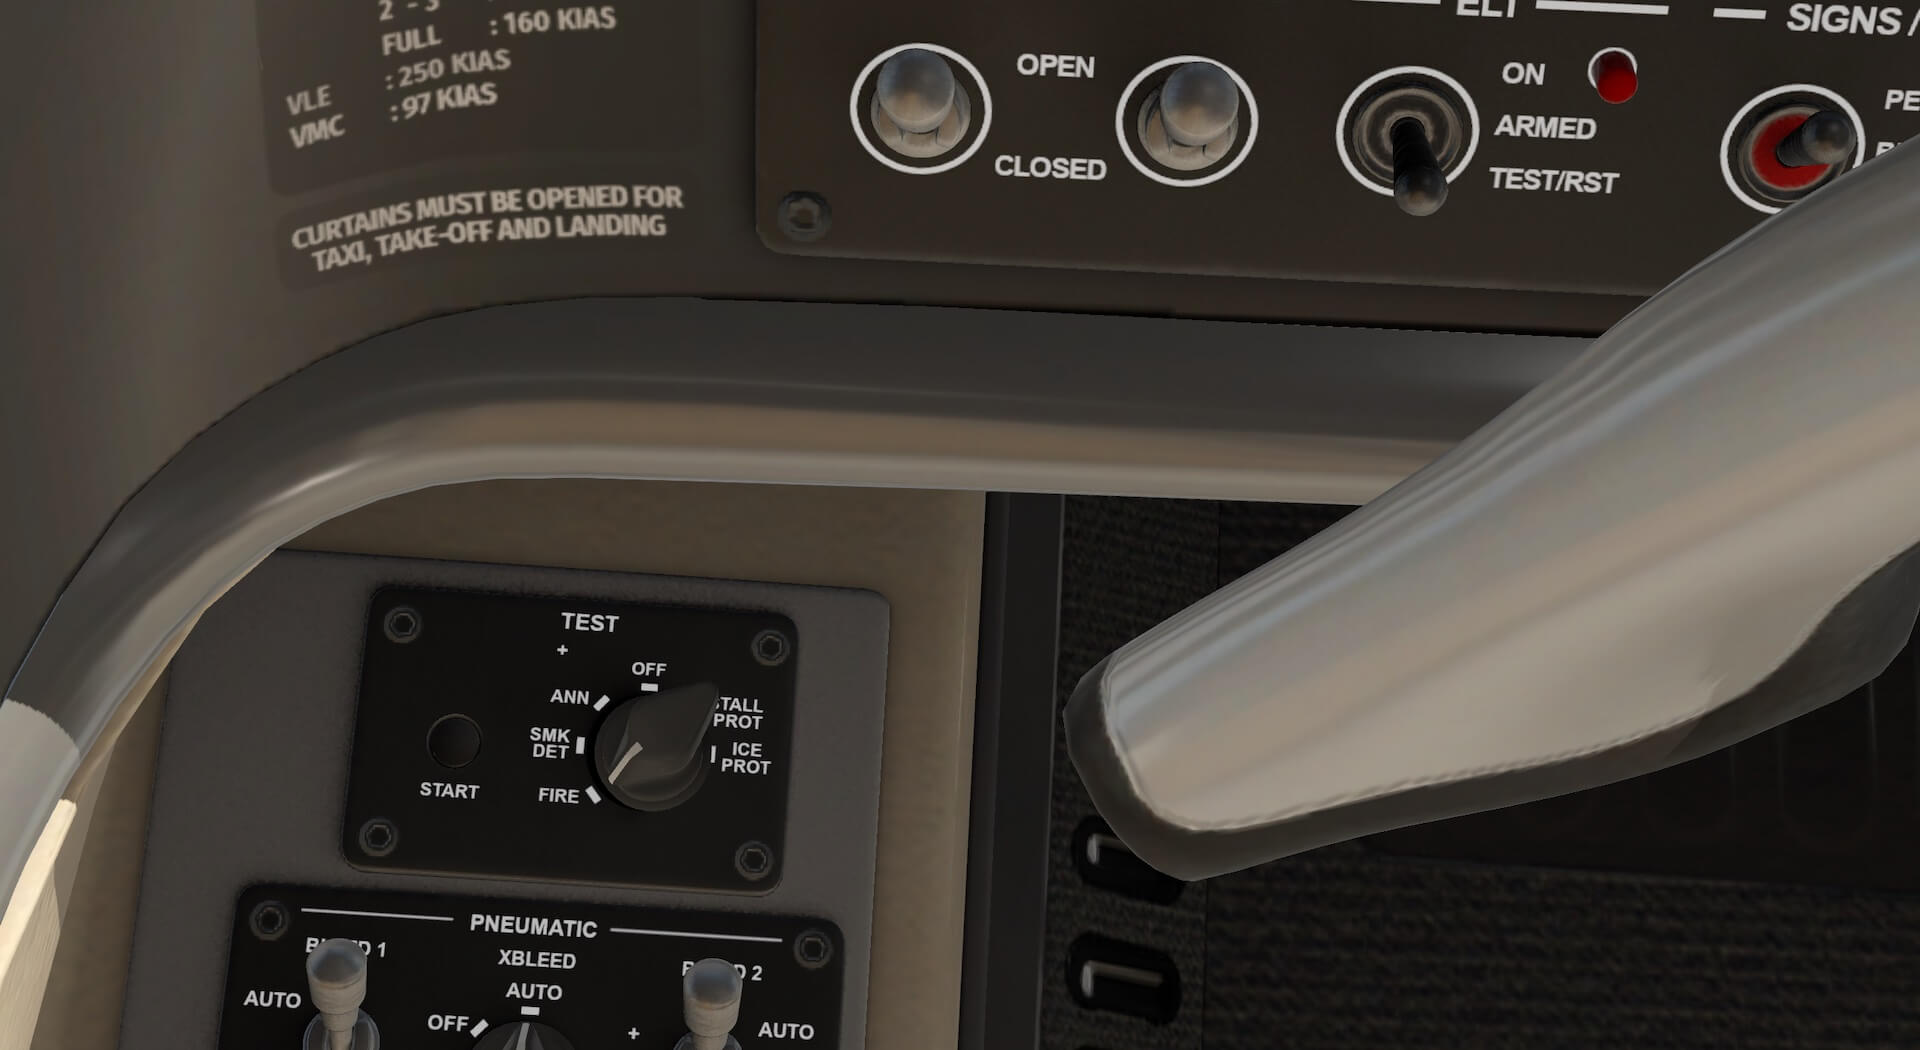
The model is equipped to carry out tests on its own systems. The test panel is in front left of the pilot and allows testing of engine and baggage fire detection, annunciators, stall protection and ice protection. In order to carry out a test the selector button needs to be turned to the required subject and the start button then needs to be pressed. With the test system working a series of beeps indicates all is well. In normal procedures the test button is set to off.
Below the test panel is the pneumatic panel which allows easy cross bleed should one engine become inoperative. In normal operations the switches are set to automatic. The ice protection systems for the engines, wings and stabiliser require bleeds to operate and this is modelled for realistic management of emergencies.
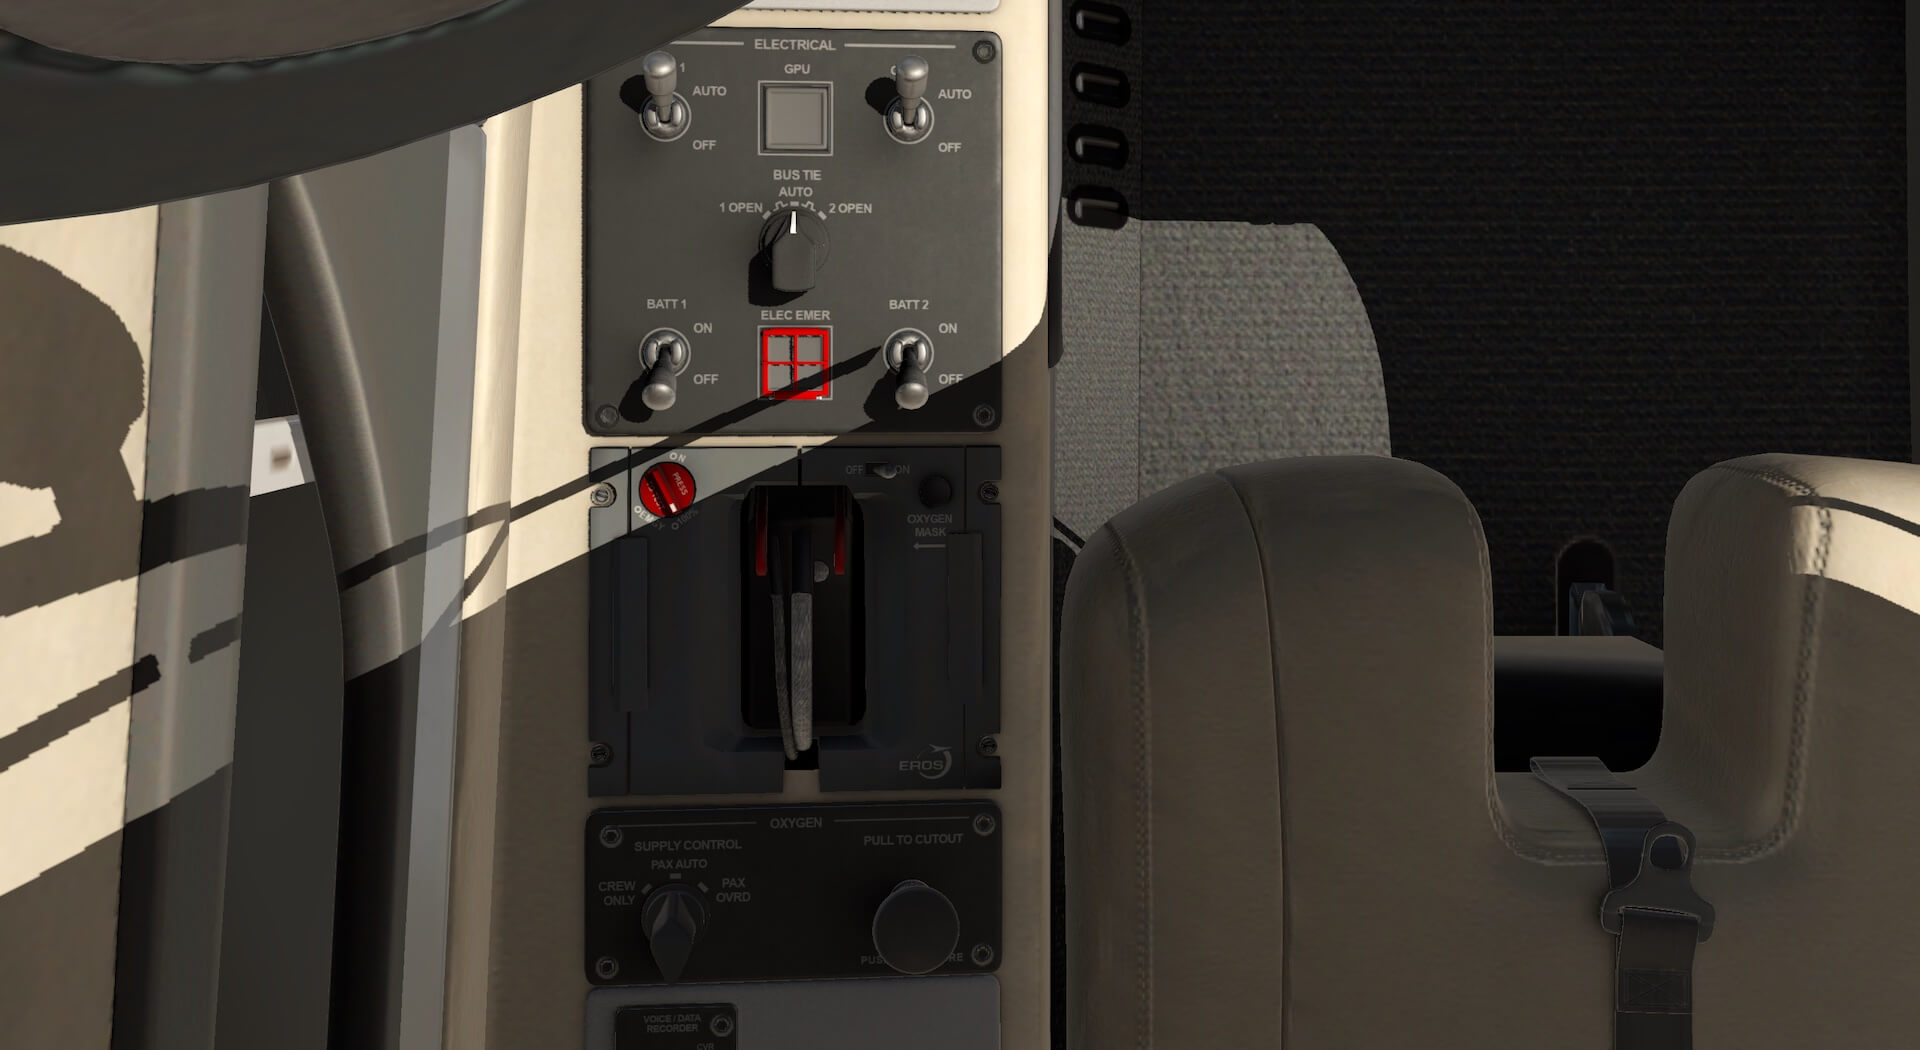
Below this panel is the electrical panel which enables management of the aircraft electrical system and connection to the GPU.. The normal and emergency procedures manual covers emergencies involving the electrical system including battery off warnings, battery discharge or exceedance warnings, generator off warnings and generator start fault. All procedures for these eventualities are clearly outlined.
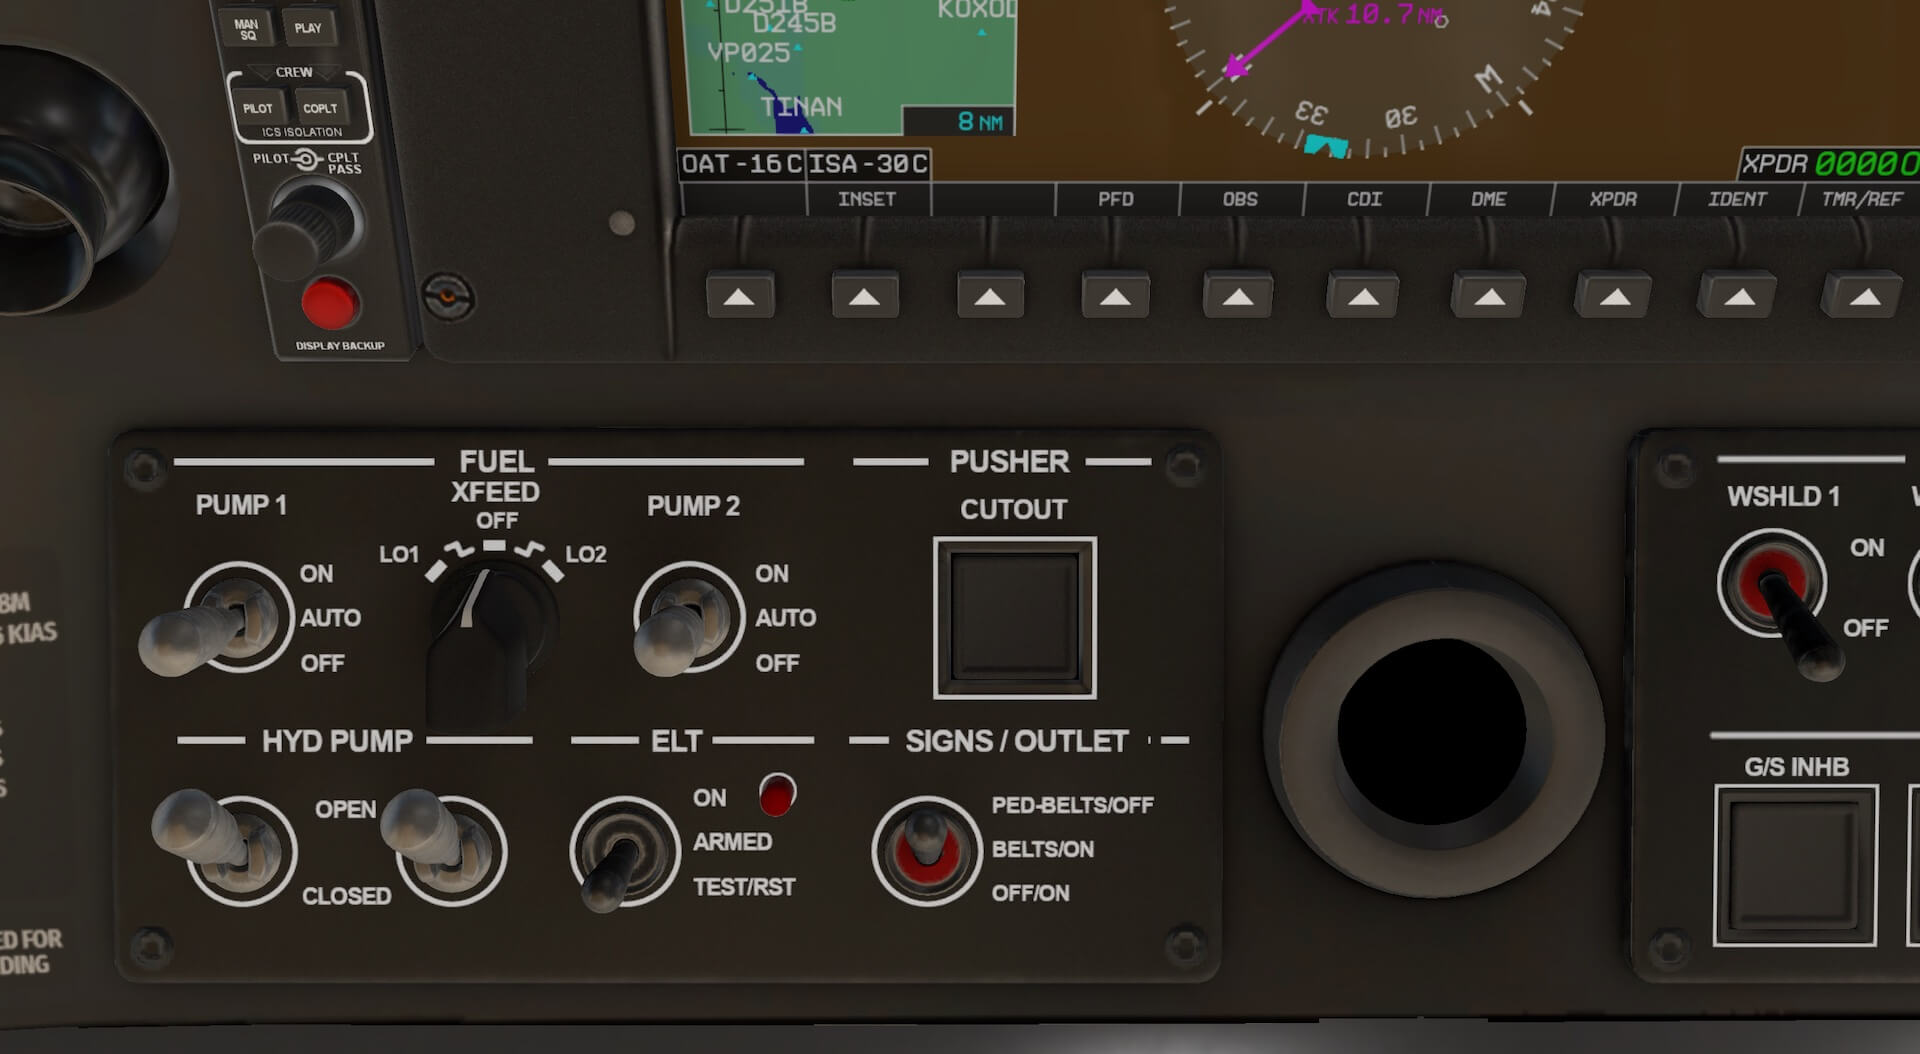
The panel in front of the pilot behind the yoke contains several systems. The fuel section allows cross feed of fuel in order to balance fuel load and also controls the fuel pumps. The hydraulic engine pumps are also controlled from this panel. The Emergency Location Transmitter for the aircraft can be armed and tested from this panel.
A Stick Pusher, sometimes referred to as a Stick Nudger, is a device installed in some fixed-wing aircraft to help prevent an aerodynamic stall. As with almost any system, there are potential risks caused by certain failures. In this case, a failure could result in activation of the stick pusher when the flight parameters do not require it.
The aircraft designer must, therefore, make provision for the flight crew to override an unwanted activation. In some aircraft, the stick pusher can be overpowered by the pilot, while in this case, the stick pusher system can be manually disabled by means of a button. The passenger signs are also controlled from here.
The pressurisation and climate control systems are modelled and controlled from a panel behind the co-pilots yoke. Ice protection and heating are controlled from a panel behind the pilots yoke. Here the heating for the windscreen can be controlled.
Automatic Dependent Surveillance (ADS) is a surveillance technique in which aircraft automatically provide, via a data link, data derived from on-board navigation and position-fixing systems, including aircraft identification, four-dimensional position and additional data as appropriate. This panel controls the electrical heating of the ADS probes.
A Terrain Avoidance and Warning System (TAWS) is a safety net that automatically provides a distinctive warning to pilots when the their aeroplane is in a potentially hazardous proximity to terrain. This panel in the model can inhibit some parts of this system fitted to the aircraft. The ice protection system is controlled from this panel. It can be tested through the Test Panel and this can be monitored in the Multi Function Display.
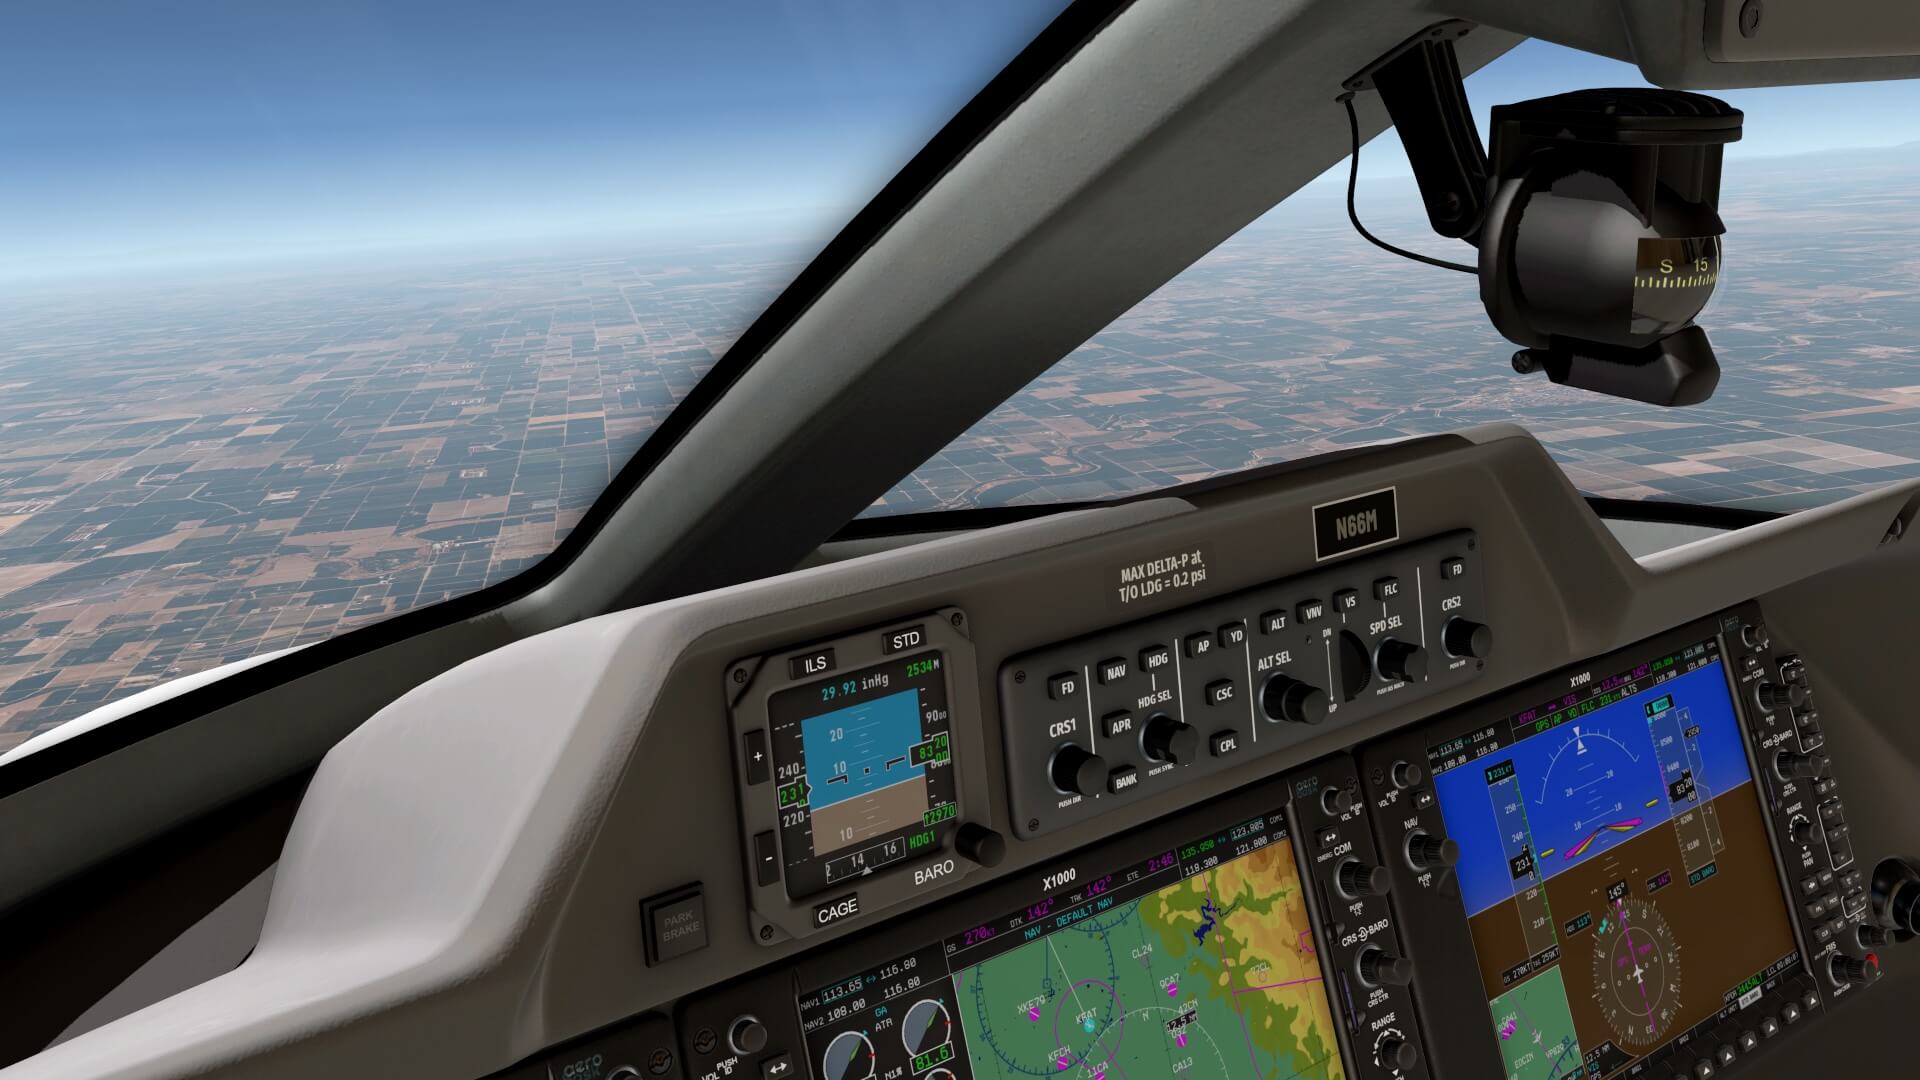
The aircraft has a modelled stand by instrument that displays attitude, altitude, indicated airspeed, mach number, slip indication, vertical speed. ILS and heading as a back up system to the main instruments. This is situated in the panel above the main display screens.
The engine, trims and fire control are governed by a panel just in front of the thrust levers in the central console. This includes an engine fire extinguishing system which allows for the discharge of a fire extinguisher in to the respective engine cowling of either engine. This panel also allows for the user to start and stop the engine, manage the engine ignition system and has a back up trim panel.
The aircraft light system is managed on a panel situated centrally above the windscreen. This panel controls exterior lighting, cockpit and cabin lights, dome light and reading lights. All switches are modelled and easy to follow.
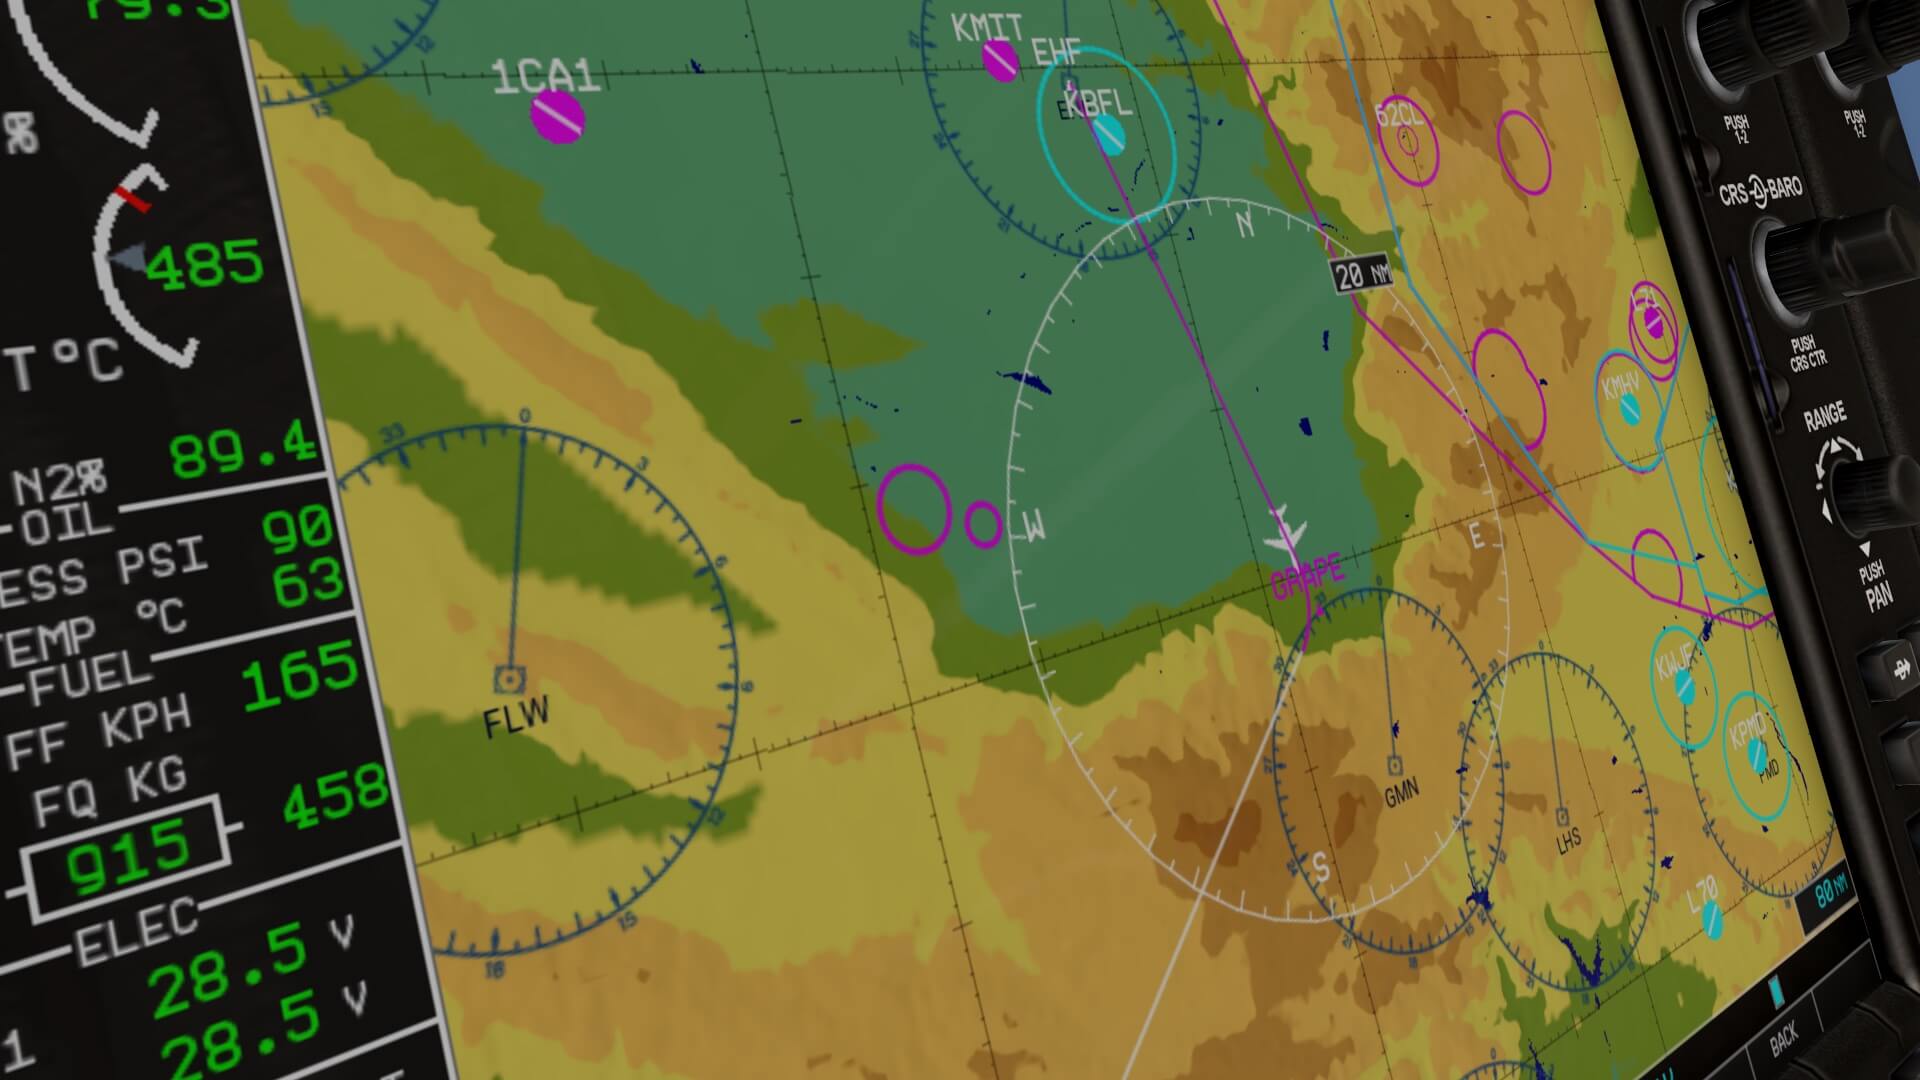
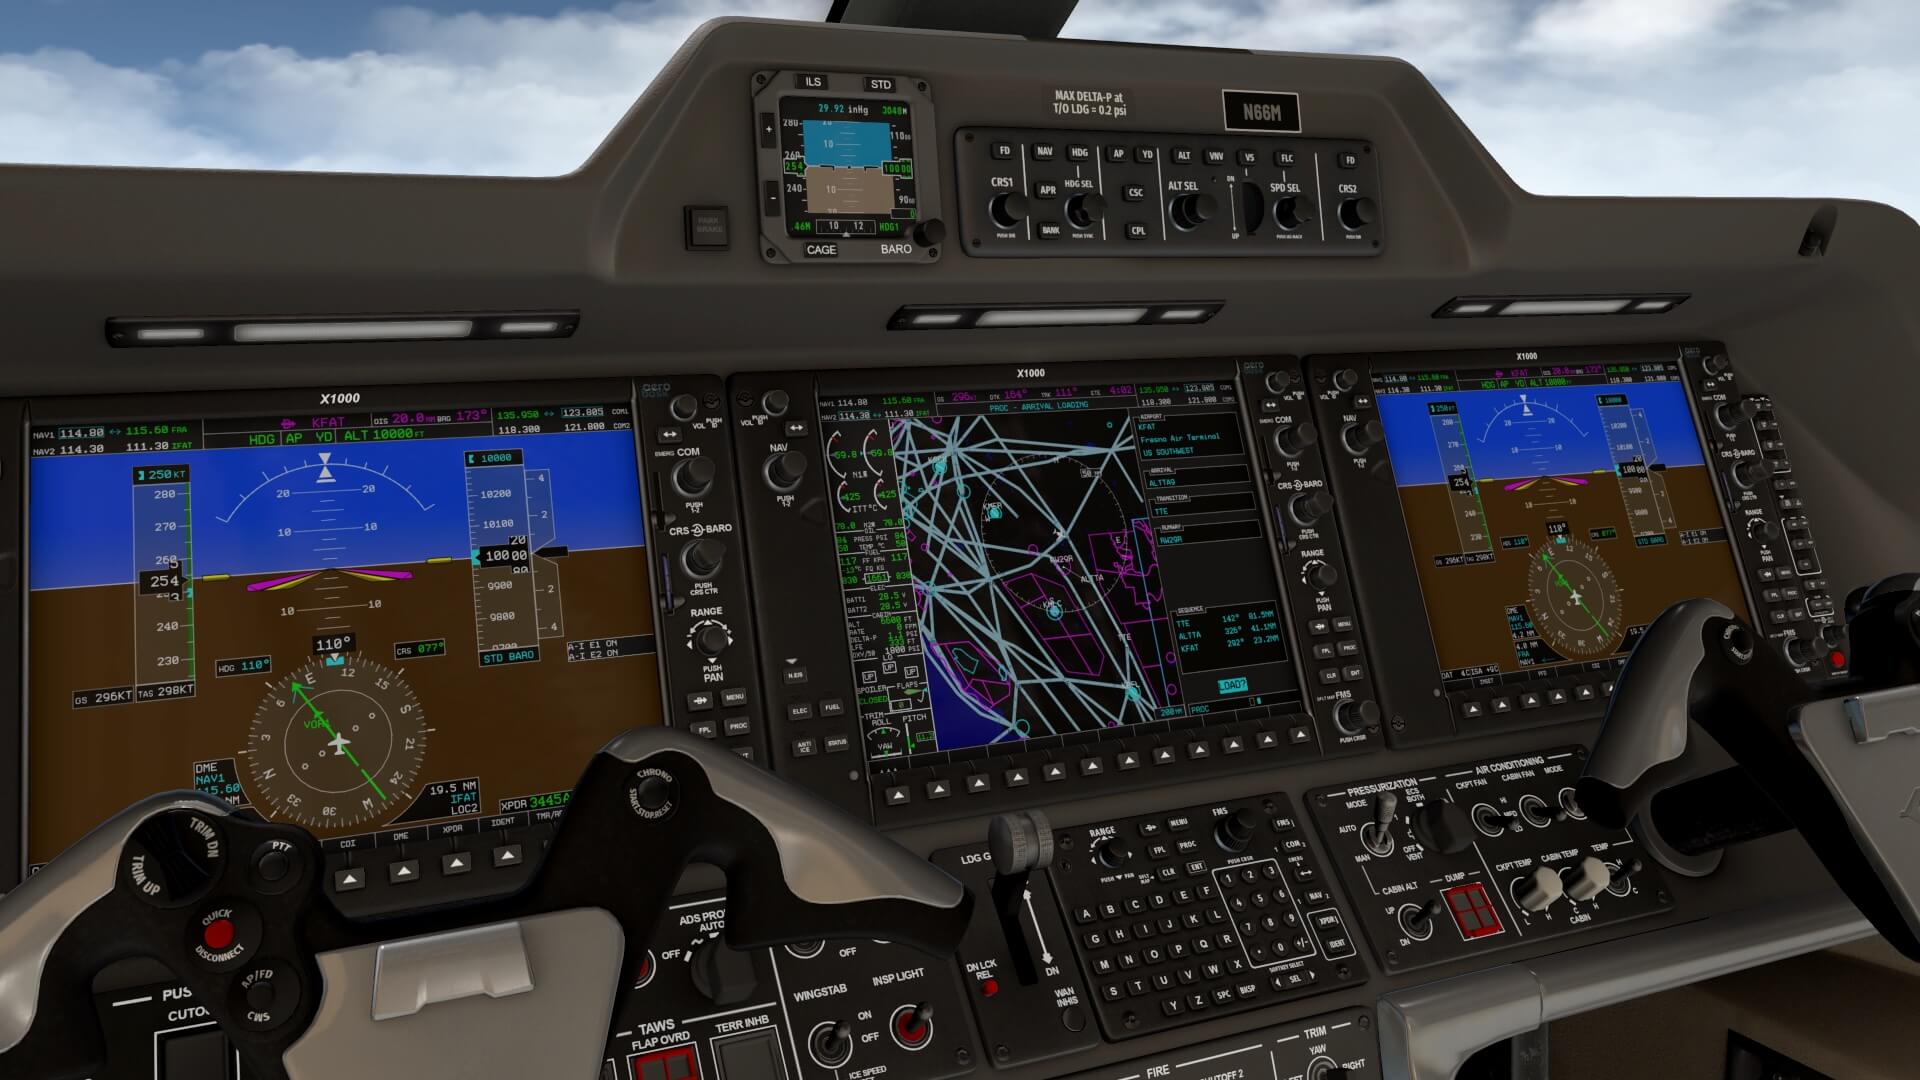
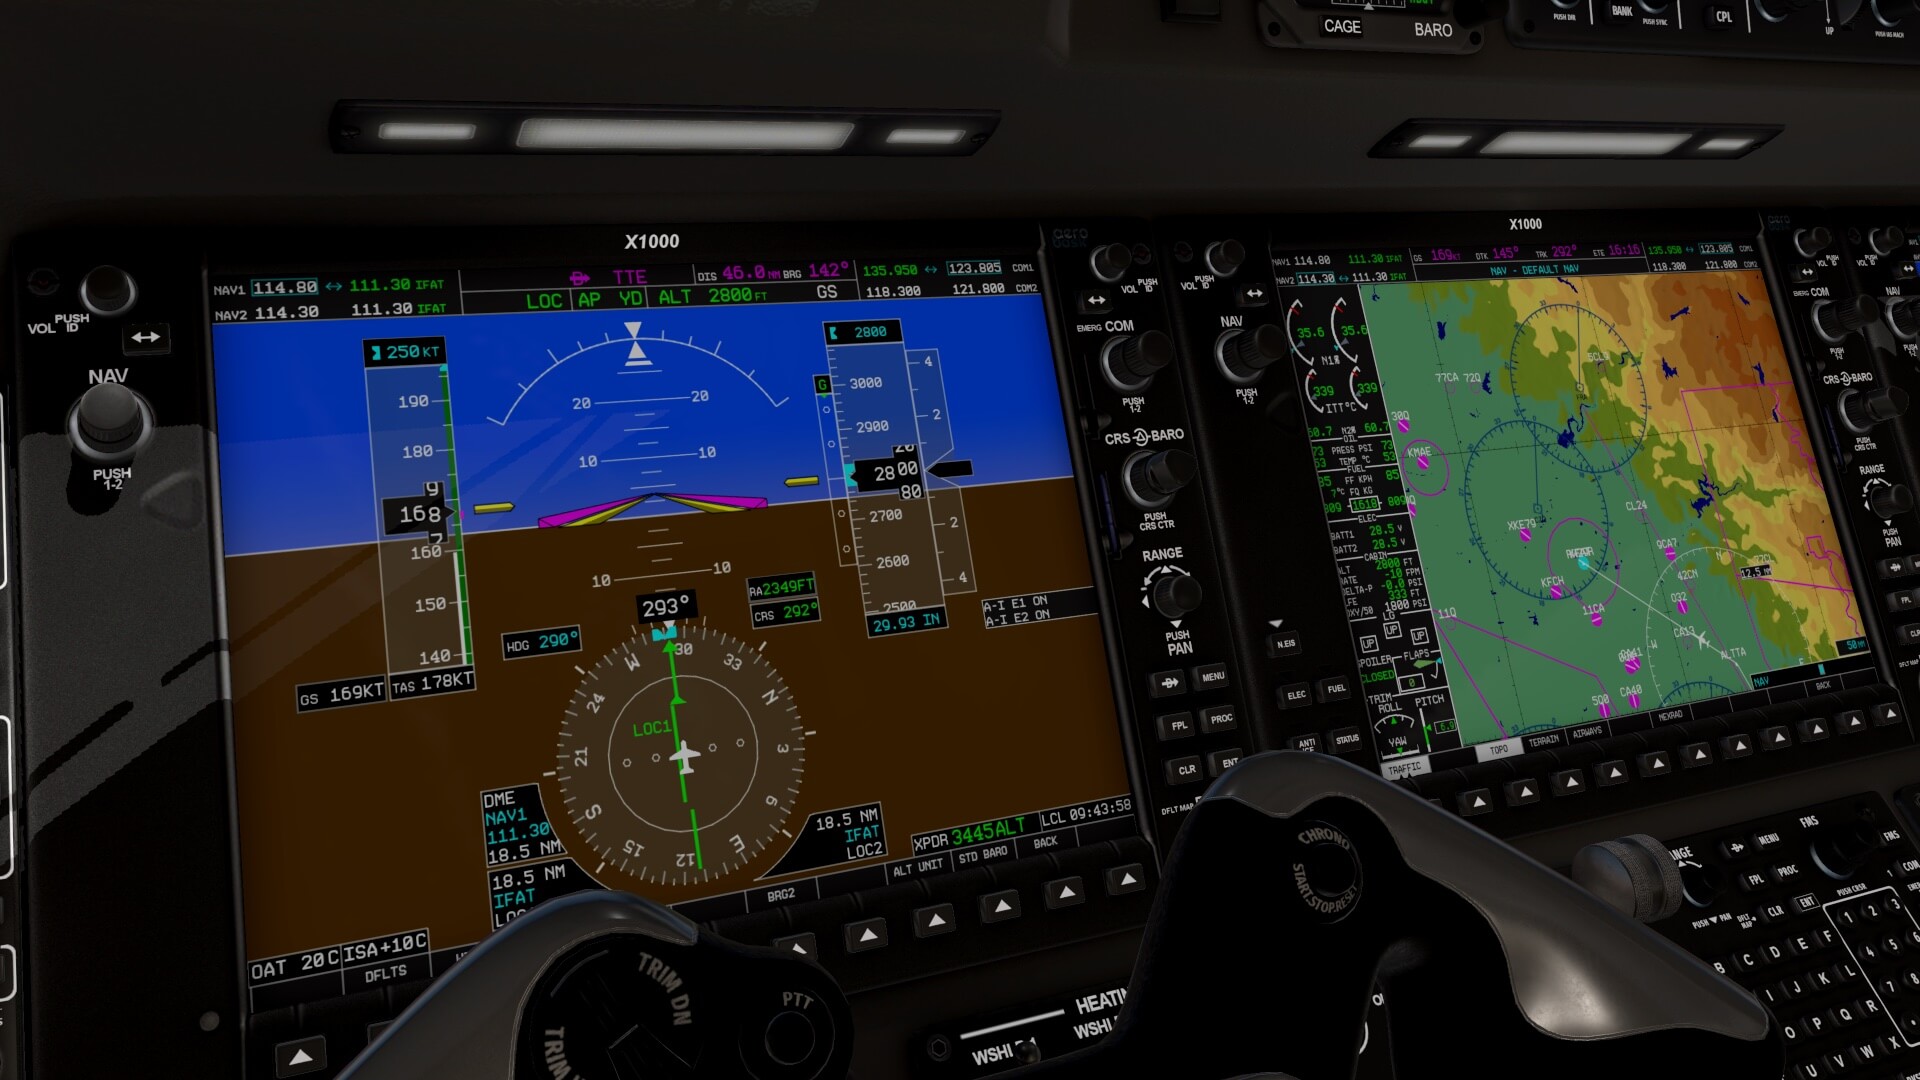
The developers have modified the Laminar Research G1000 to be similar to the Prodigy Flight Deck found in the Phenom 300. The G1000 manual covers most of the electronic flight information system (EFIS) presented in the model and can be found and downloaded via this link.
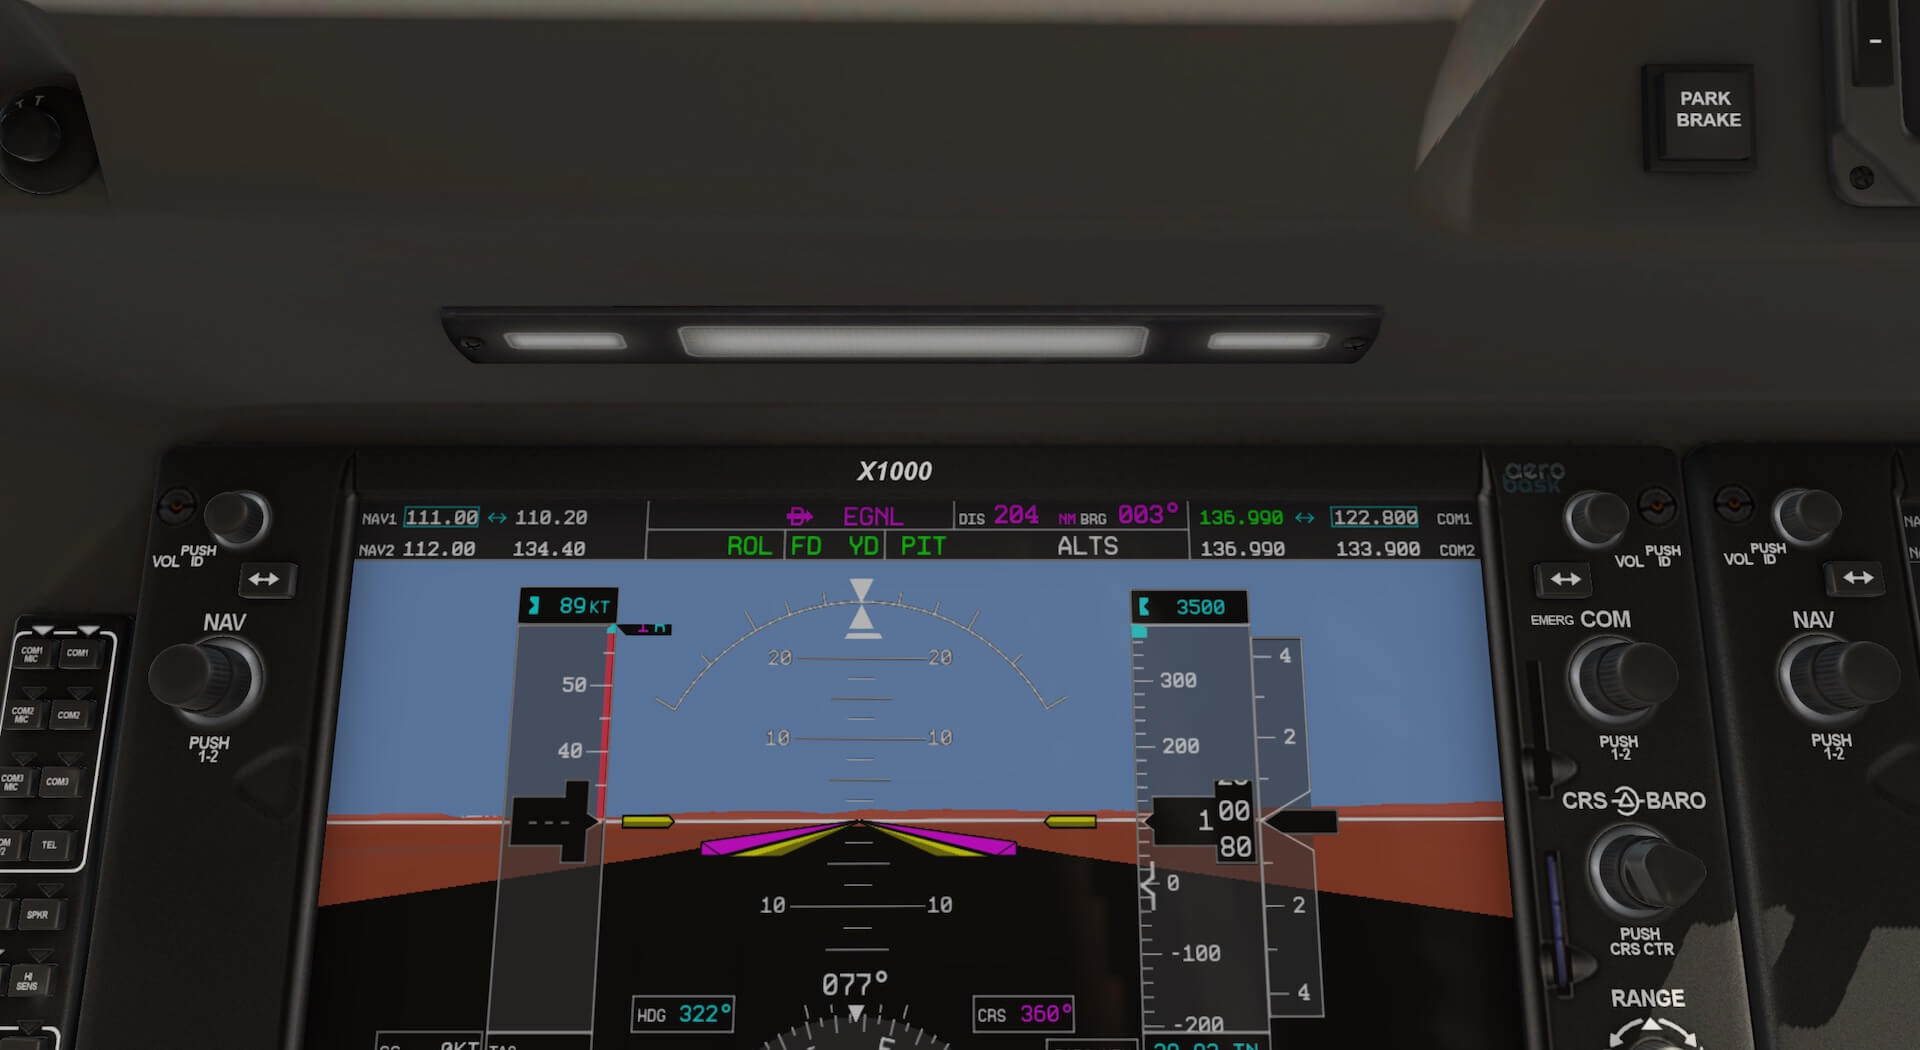
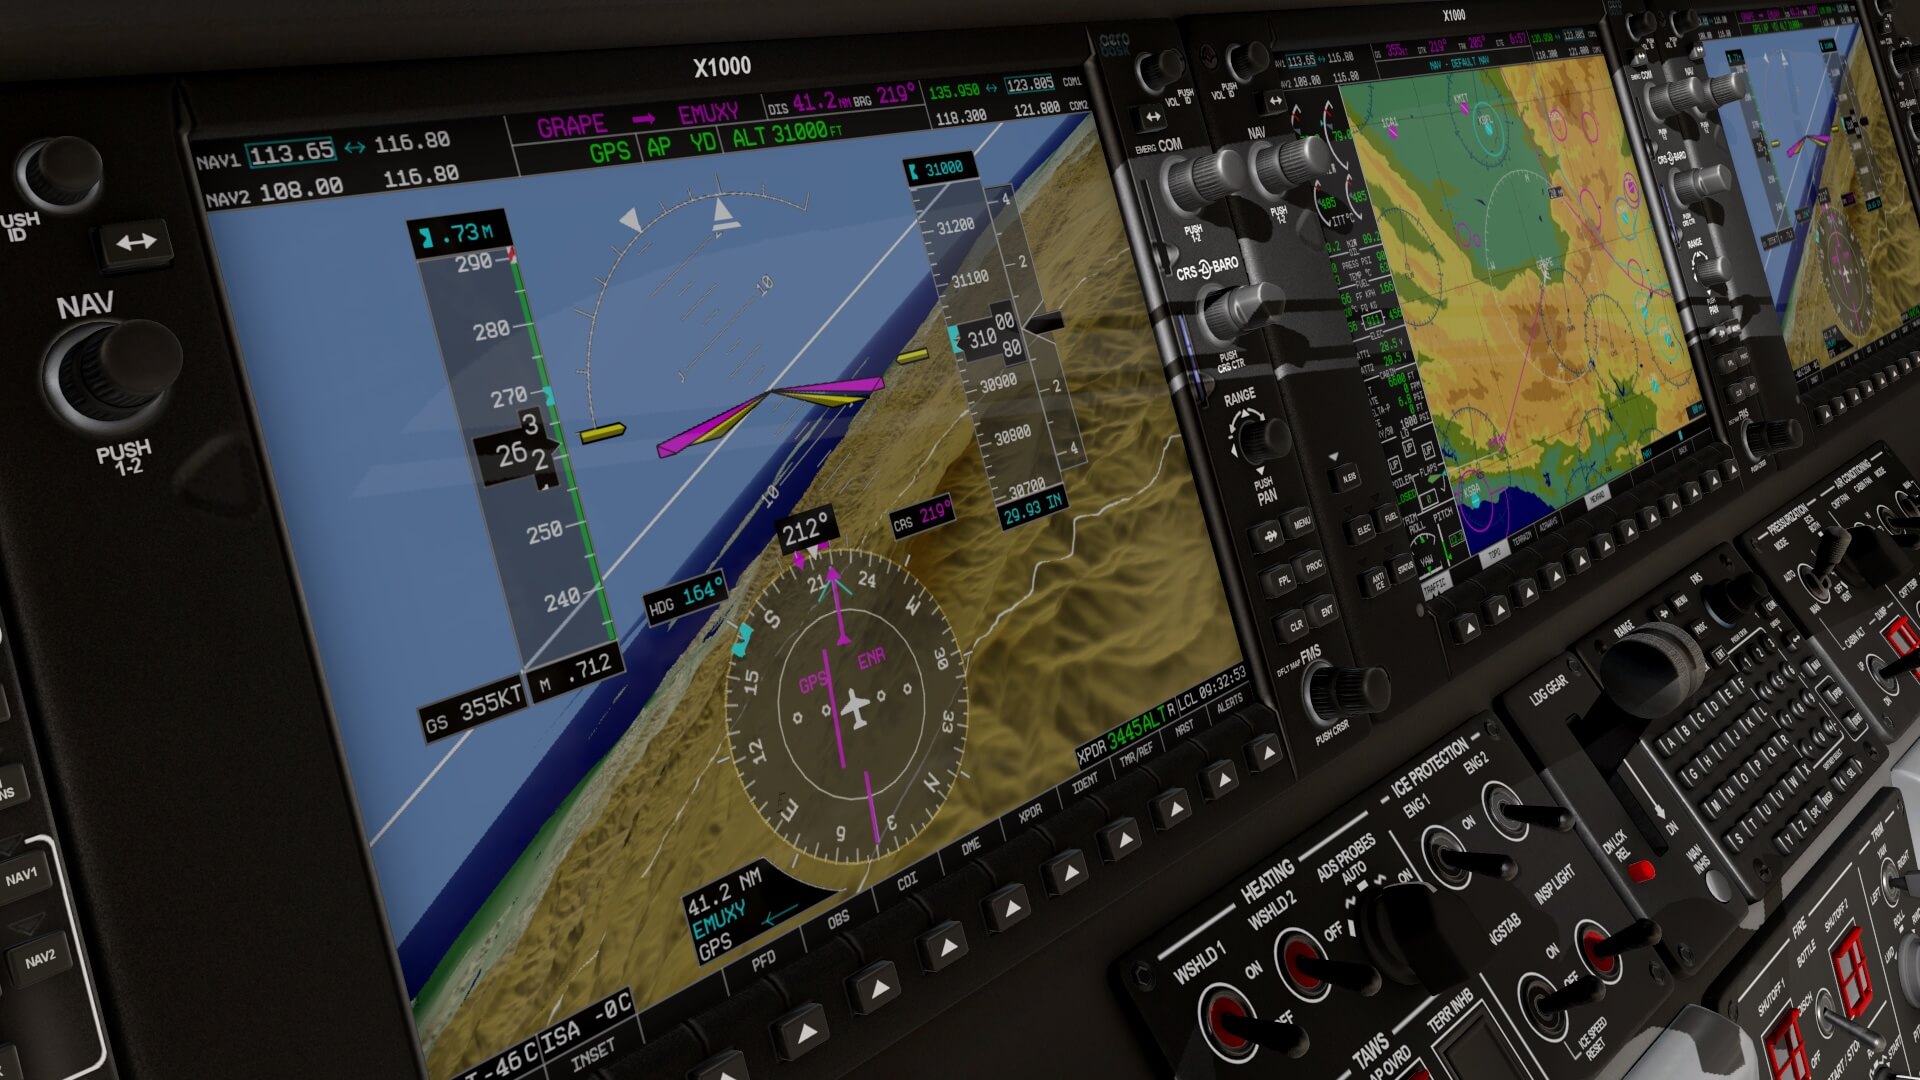
There some additional systems added by Aerobask to align with the Prodigy 300. The EFIS can be displayed as the standard G1000 (first screen shot below) or with Aerobask’s experimental synthetic vision, from the Aerobask options window, which changes the view and can display topology only or topology and terrain. See second screenshot below.
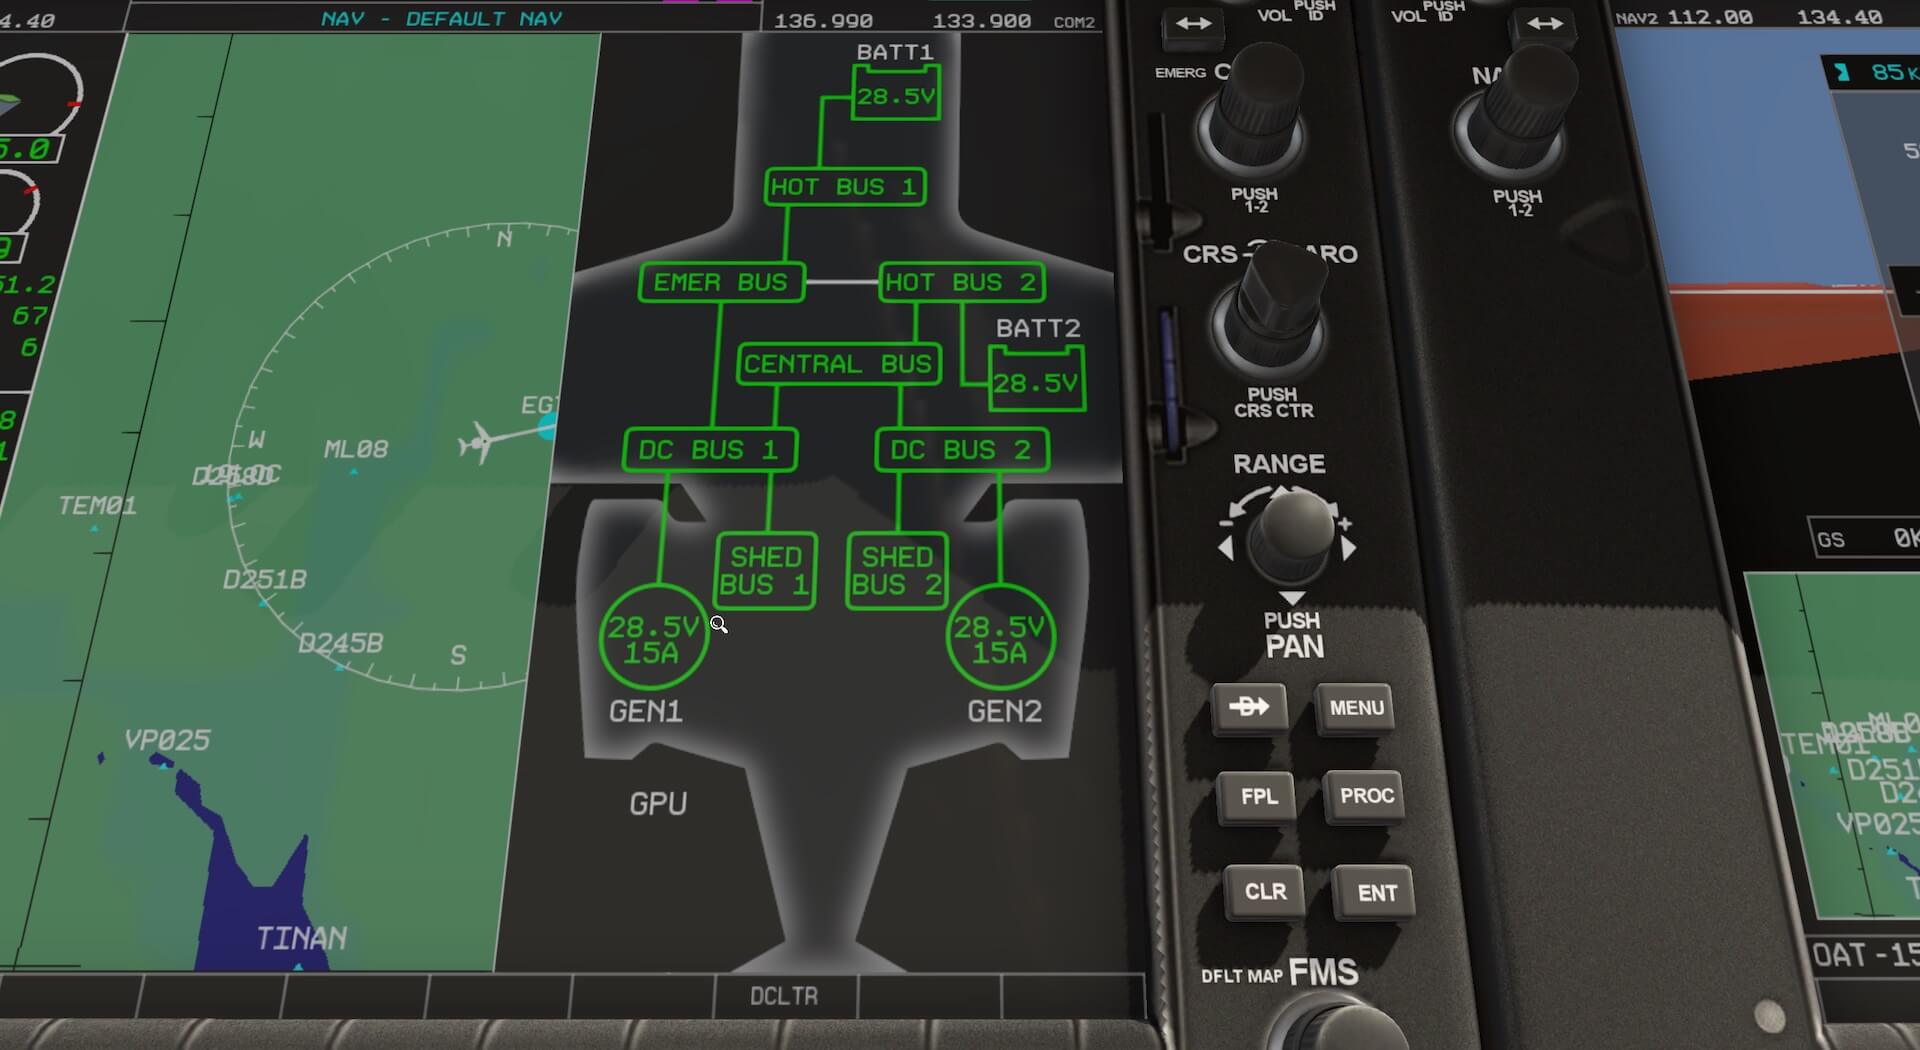
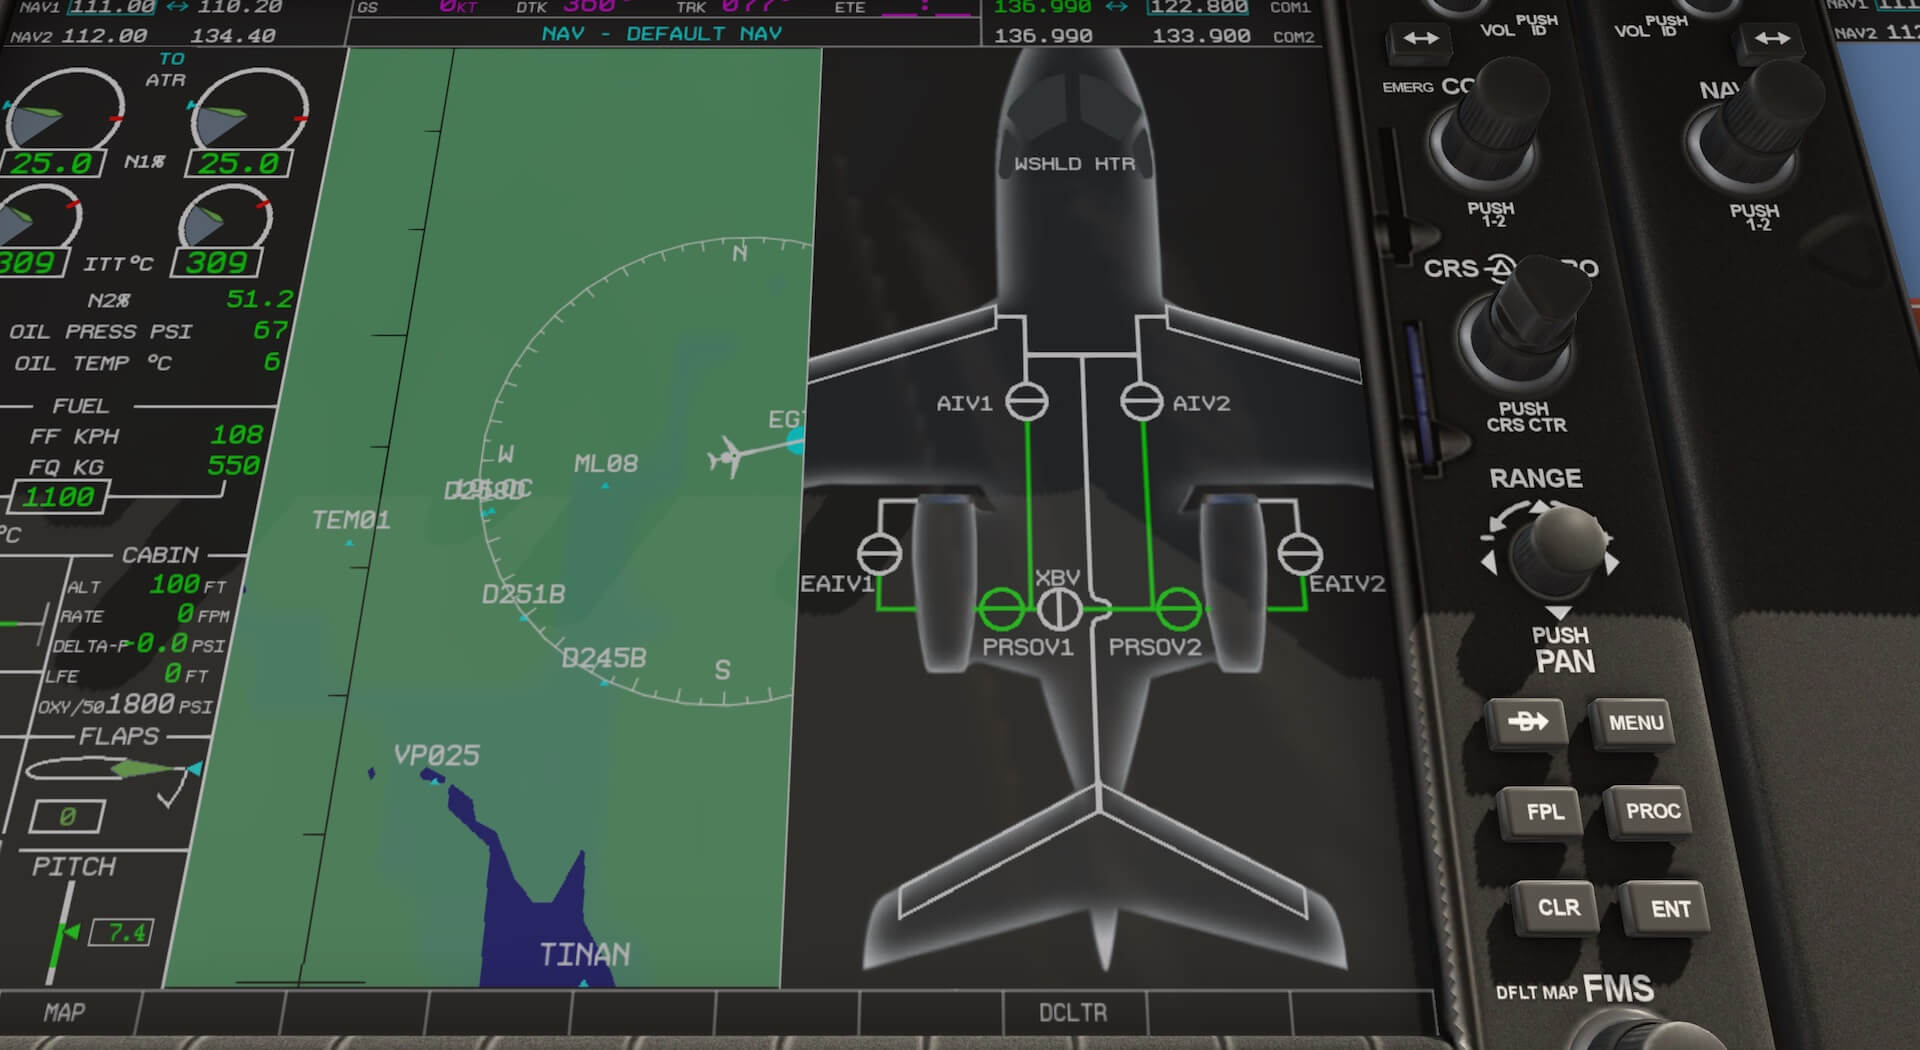
Aerobask have added additional items on the cockpit displays. They have added a flight mode annunciator at the top of the PFD, the aforementioned ice test notices to the crew alerting system, custom VSpeeds on the PFD Speed Tape and an AIRAC validity display in the MFD. The developers have also added four systems synoptics pages to the MFD which can be switched on and off by additional keys to the left of the MFD.
The Electrical page shows the aircraft electrical system in graphic form, the Status page gives a flight data reminder, engine data reminder, battery charge, hydraulic, oxygen and emergency brake accumulator pressure and door status, the Fuel page shows the status of the fuel system including total fuel on board, fuel used, remaining quantities in particular tanks and pump status and the anti ice page shows the status of the anti ice system in terms of heaters and valves. These are very useful pages clearly marked and straight forward to display.
Additional information has also been added to the engine indication system relating to thrust, engine status, fuel, pressurisation, landing gear status, spoiler state and the position of flaps and trim.
The model has a touch screen type facility for changing values. This means that by clicking a value a keypad appears allowing for values to be input and also means the values can be changed by using the mouse scroll wheel. The aircraft is equipped with GFC 700 automatic flight control system and a GCU 477 keypad to work with the Garmin Flight Deck.
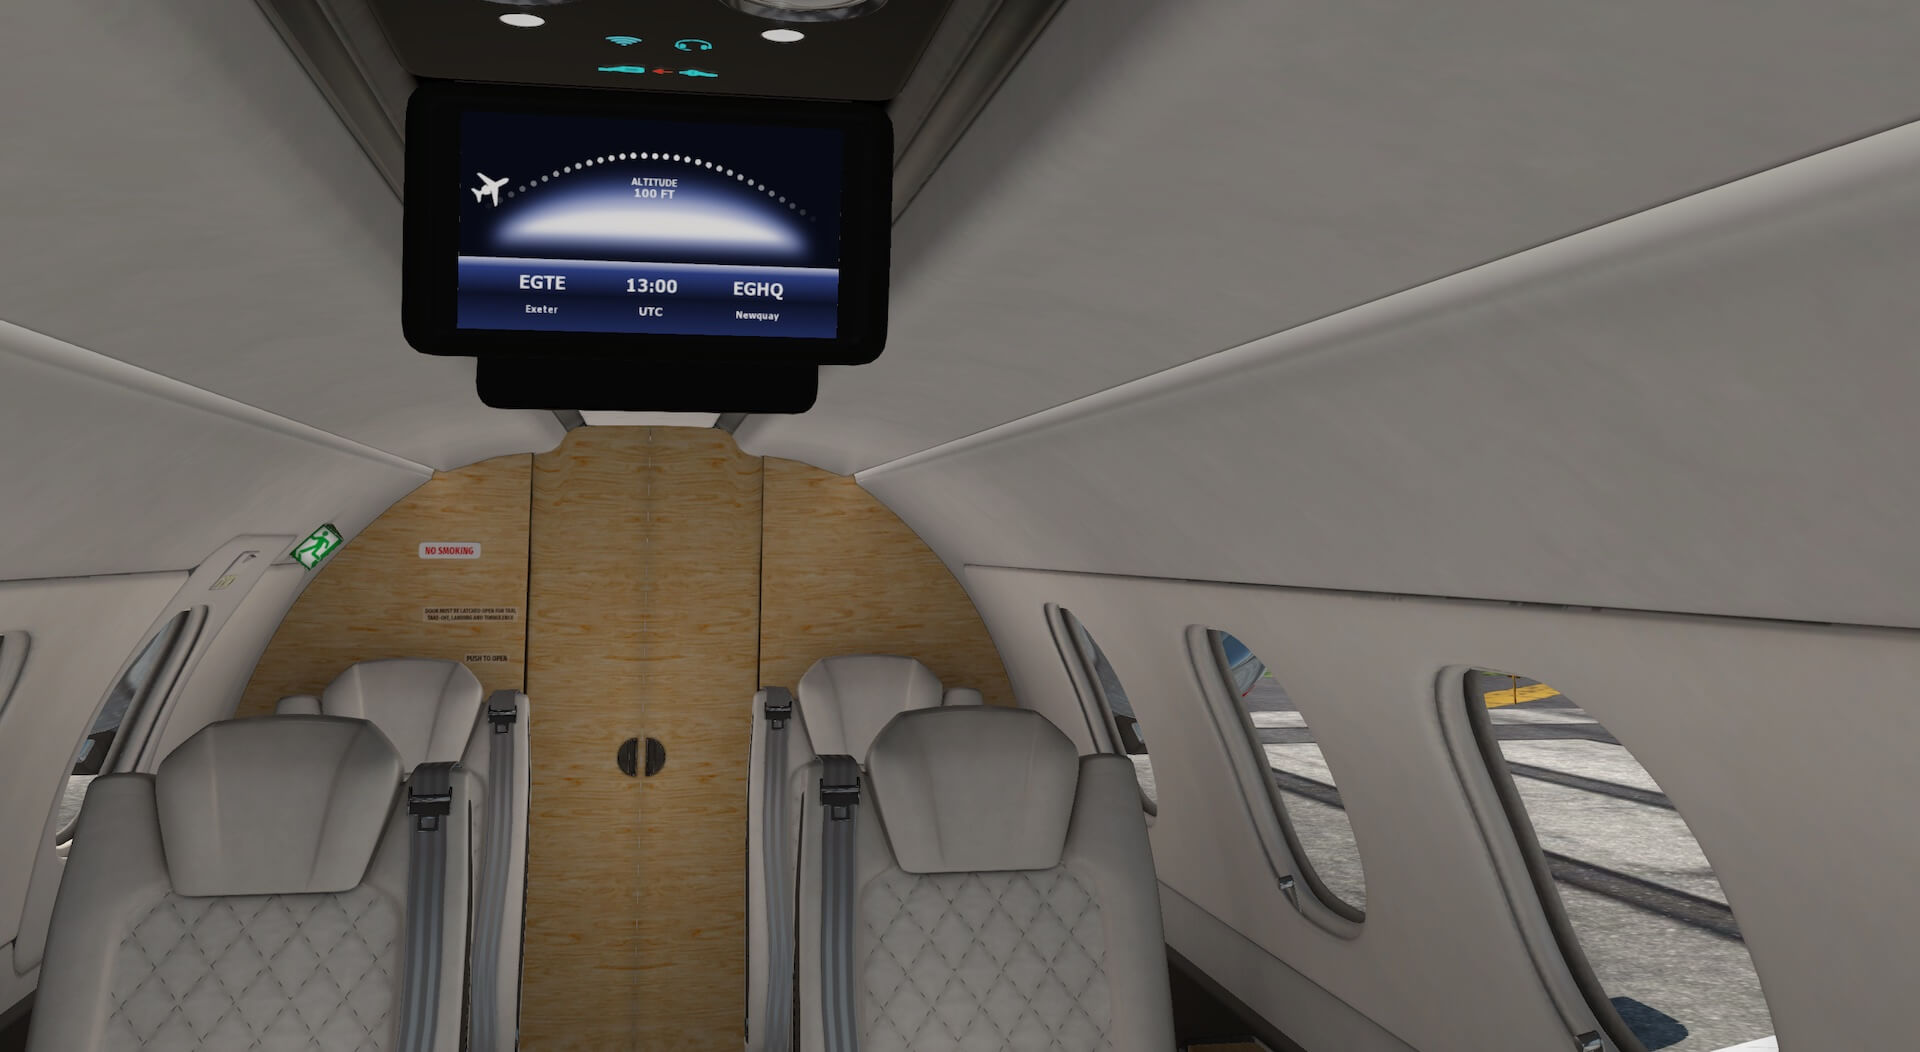
The model even includes a flight information system for the passengers which can be toggled down from the cabin ceiling. This gives information to the passengers including departure and arrival airports, time, altitude and distance to travel.
The Phenom is provided with many of its own bespoke systems which are modelled to work and provide information to the pilot. In addition Aerobask have enhanced many of the Laminar research systems to provide additional services. Whether these systems are used to make the flight easier or to create emergency situations there is no doubt they will increase the realism and pleasure of a flight for users of all levels of experience.
Basic Flight Experience
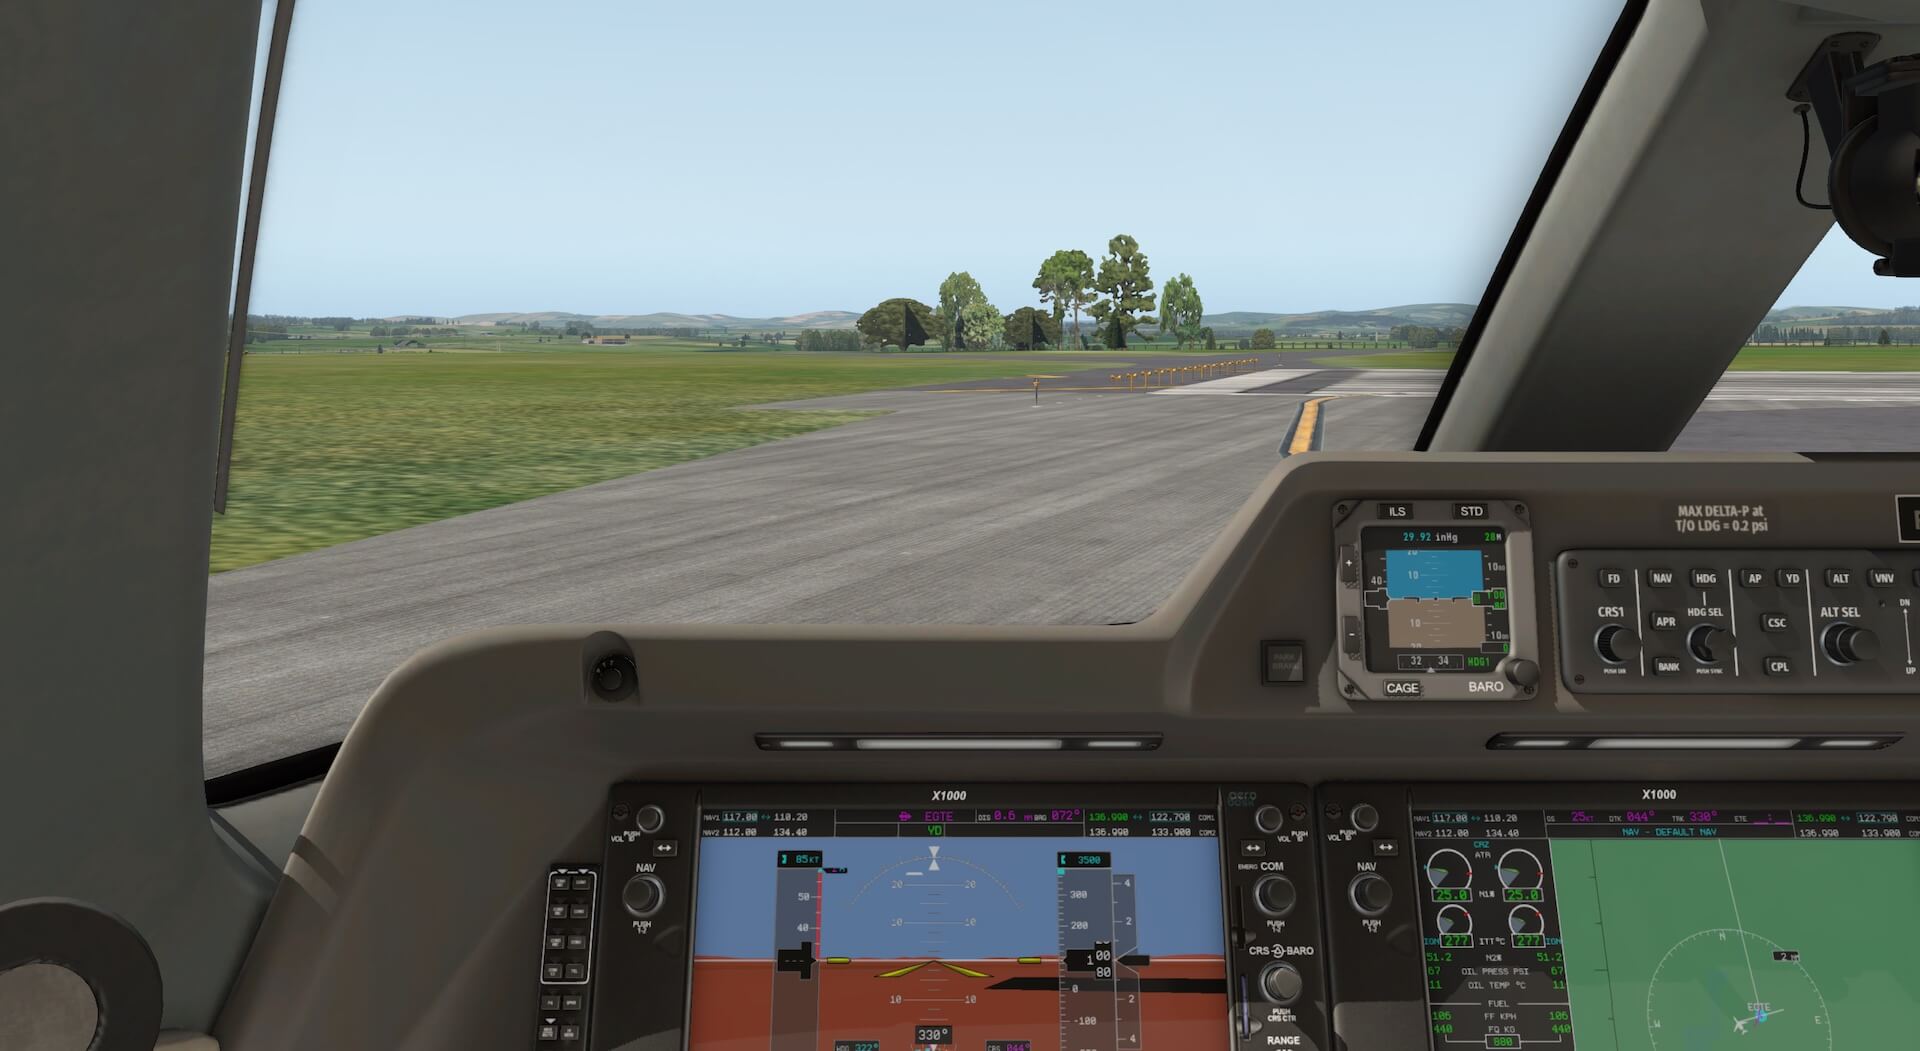
Initially I wanted to see how easy it was to jump in and fly the Phenom without using checklists or other guides. I loaded the aircraft with engines running at the end of the runway. I added flaps, increased the throttle and released the brakes.
The aircraft accelerated smoothly down the runway and all information I needed was immediately available on the screens in front of me. I took off and the aircraft climbed quickly as well as increasing in speed. I raised the flaps and the undercarriage and reduced the throttle settings. I then turned in to a circuit.
The aircraft was extremely responsive and I over controlled the model several times. Views from the cockpit were clear and all dials and instruments were easy to read. I lightened my touch on the controls and the flight became easier. As I turned back to land I found I was at too great an altitude with too great an airspeed. The aircraft warned me about my speed when I tried to lower flaps. I aborted the landing and went around again.
I lowered both airspeed and altitude much earlier on my second approach and lined up with the runway. My descent and approach was much more controlled and I completed a successful and smooth landing. The aircraft is very smooth and responsive in flight. It has good performance and therefore I needed to be aware of speeds and altitude but that was my piloting skills not a fault with the model.
I found that I soon became acquainted with the aircraft and the flight was very enjoyable. I thought that having so many systems working and so much information available may be challenging but it worked together smoothly and I did not feel overwhelmed. It is possible to simply fly the aircraft but practice makes the process much easier.
The next flight I started as cold and dark and used the checklist and performance tables. I approached the aircraft and entered via the passenger door. Having taken my seat I opened the normal procedures manual and followed the checklist. I ensured the ground equipment had been removed and the oxygen was set to Pax Auto on the control panel to left of the pilots seat.
I opened the GPU panel and called for the GPU to be attached. I heard the reassuring sound of the GPU engine running. On the bleed panel above the electrical panel I ensured all controls were switched to auto. I checked the hydraulic pumps were set correctly and also that the pusher was cut out. I left the ice protection system off. The next stage of the checklist was to check the pressurisation and air conditioning panel was set as required.
I checked the engine fire panel and continued to follow the checklist by ensuring the start/stop switches were set to stop, the ignition switches were at auto with the thrust levers at auto. Flaps and speed brake needed be up and closed the parking brake set and the doors closed. That completed the before start checklist.
I then switched the batteries to on and the engine start switches to start and back to run. The engines spooled up immediately with very realistic sounds. I moved on to the after start checklist. I had the GPU removed and closed the panel and checked the electrical emergency switch was set correctly. I used the test panel to test stall procedure and heard the stall warning as soon as I started the test.
The manual explains how to use the performance tables to set take off data in to the speed tapes on the display. I carried out this procedure and put the Vspeeds values in to the system via the Aerobask Menu. I entered my flight plan in to the system. I checked trims, controls and speed brake and kept ice protection off. I set flaps to the take off setting I used with the performance tables. I then taxied to the runway.
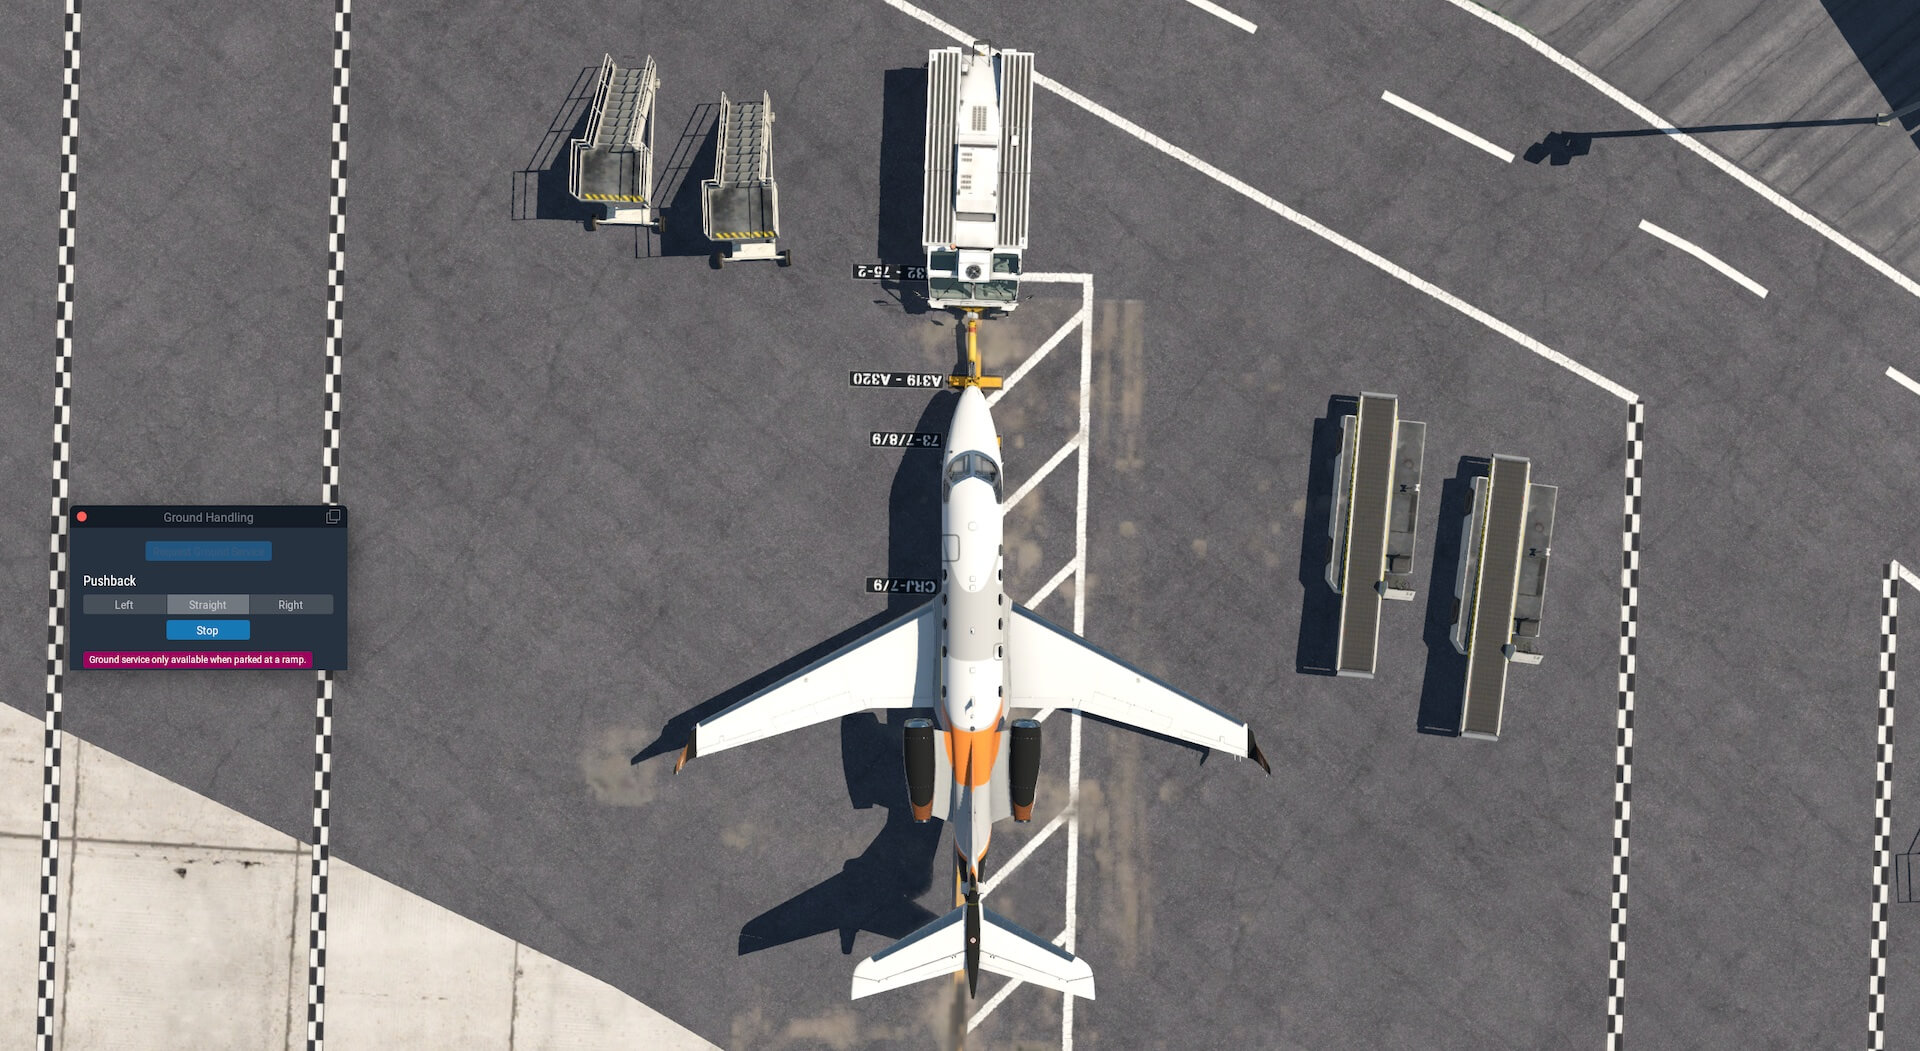
The aircraft was very smooth to use on the ground and responsive to steering, braking and throttle inputs. I checked the take off configuration was correct, that there were no advisory messages I needed to deal with, requested a pushback and then checked that the passenger belt signs were showing and the exterior lights and transponder were set. All aircraft systems worked very well and as described in the manual. The engine information system confirmed everything was correct. I had completed the before take off check list.
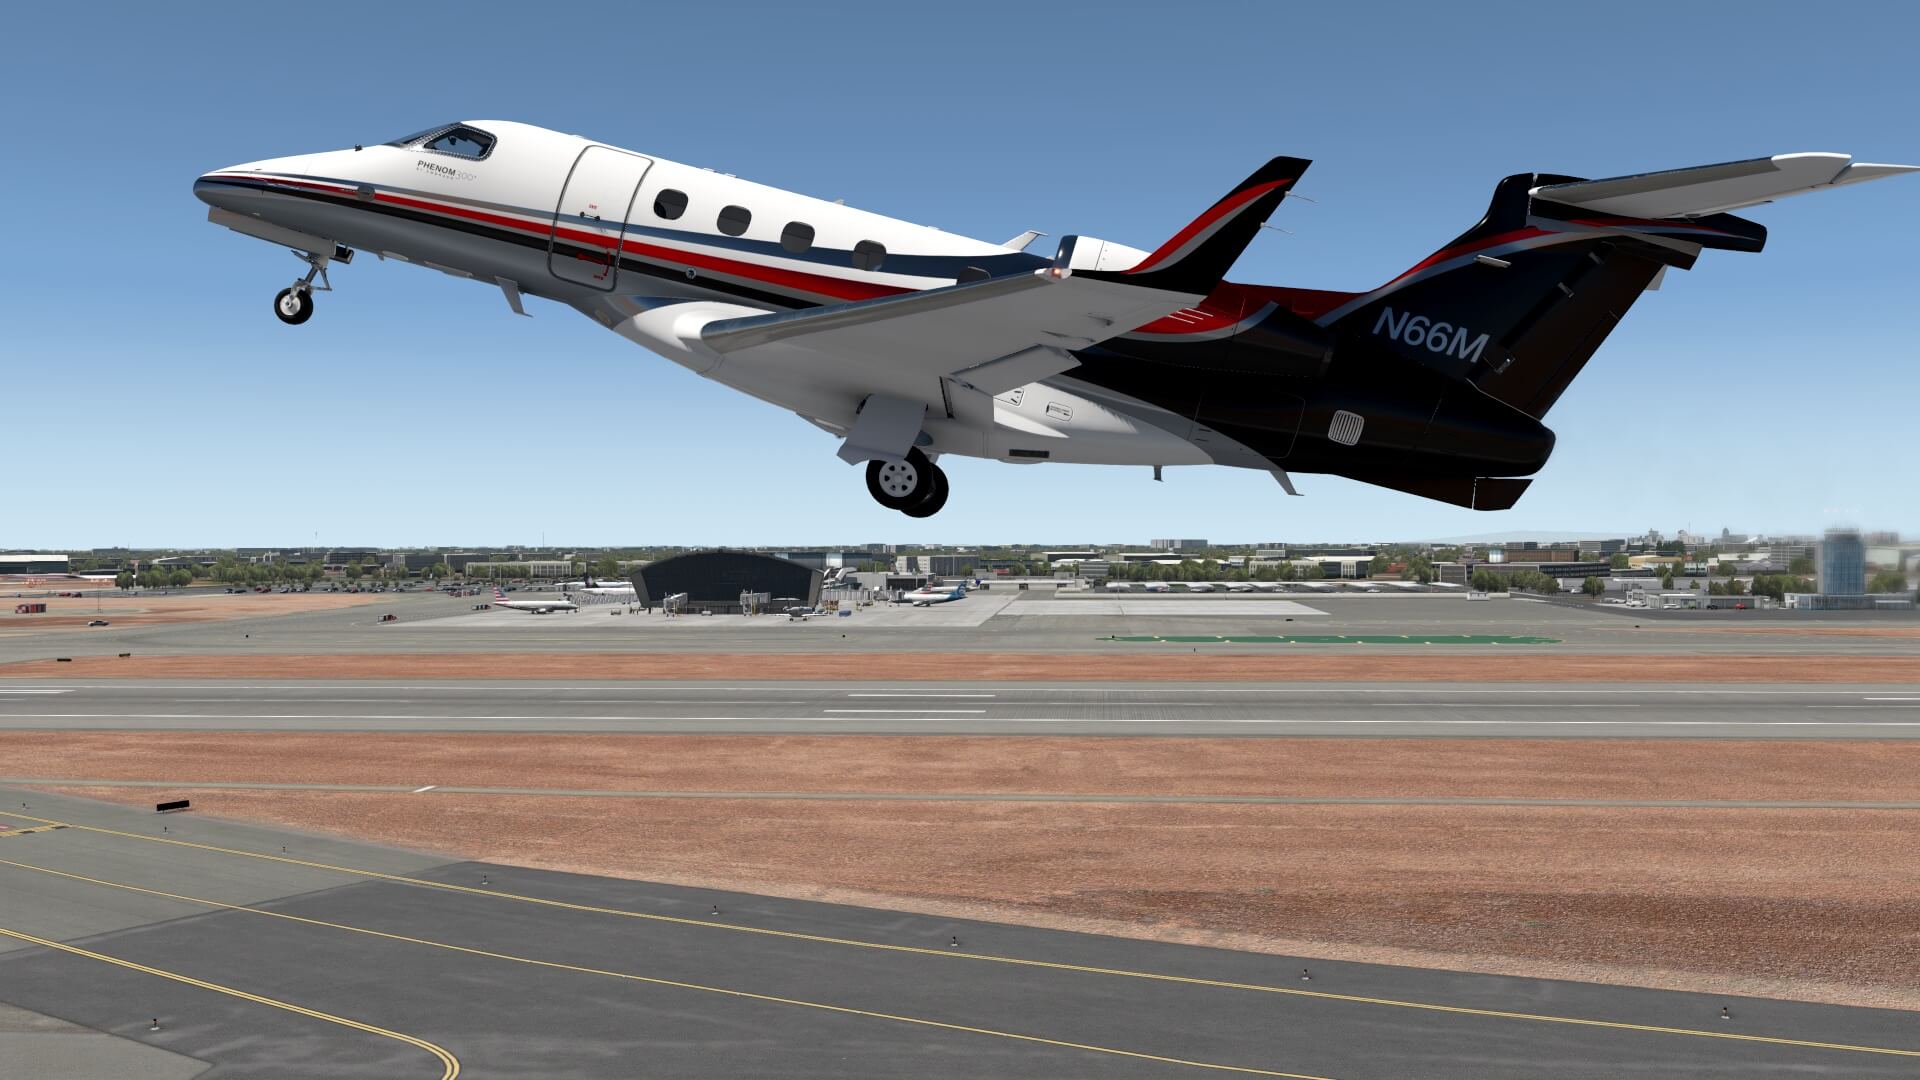
I increased the throttle to the Take Off setting and released the brakes. I moved smoothly down the runway and completed a successful take off using the markers on the speed tape to time my lift from the ground. I completed the after take off checklist by raising the undercarriage and flaps, switching on the yaw damper, reducing the throttle, checking the altimeters and setting exterior lighting as required. I also set the autopilot to navigation to follow the route I had loaded.
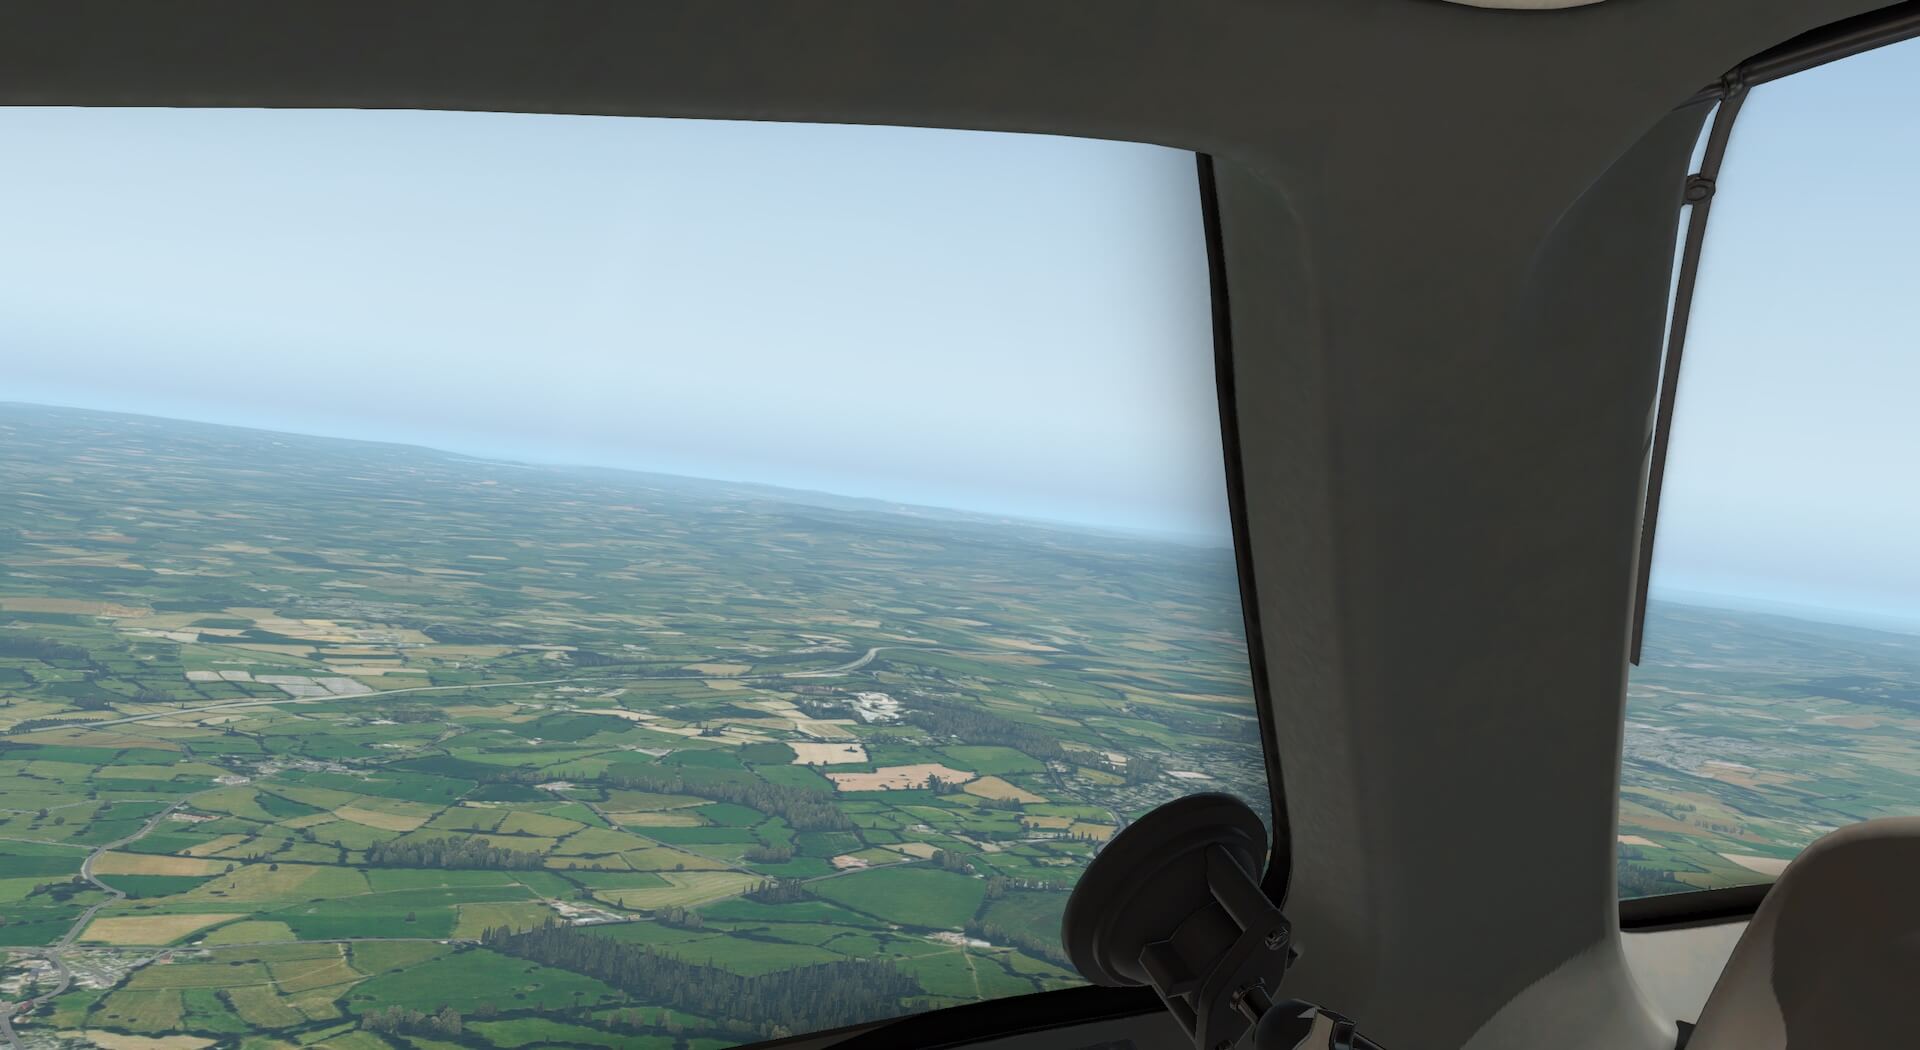
The aircraft works very slickly and is easy to operate. All the provided systems worked as expected. The autopilot turned the aircraft on to course and I enjoyed the views. The use of the aircraft is quite calming with all instruments marked and easy to read and a quiet cockpit environment to work in.
The cabin passenger information system worked well and was accurate to the flight. I was able to view the aircraft systems through the additional Aerobask synoptic buttons on the MFD.
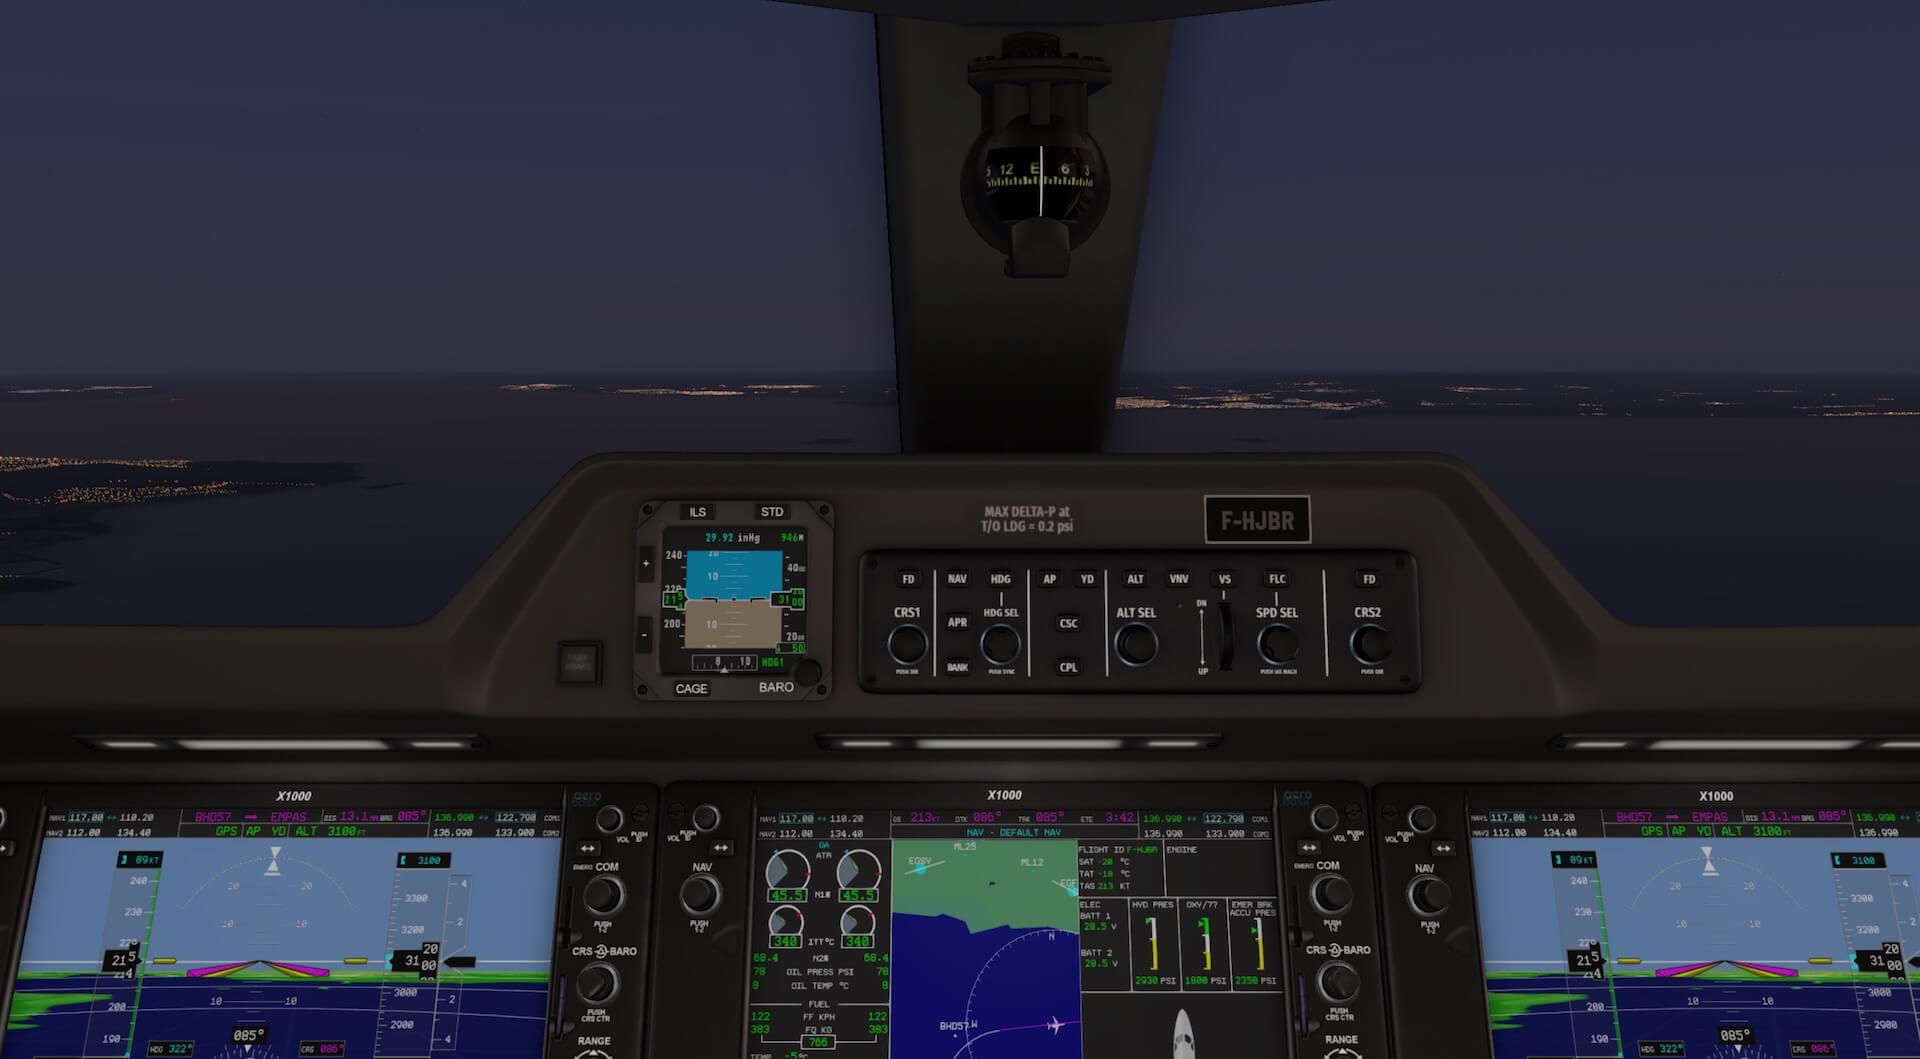
I took the opportunity to adjust the time settings during to view the aircraft in low light. The model looks impressive both internally and externally with realistic instrument and cabin lighting.
As I approached the time to descend I referred back to the checklist and ensured my landing Vspeeds were correct and windshield heat was on. Once on the approach I followed the checklist to check altimeters, the barometric pressure was set, the cross feed selector was set to off and exterior lights and interior signs were set.
The before landing checklist caused me to ensure the undercarriage was down, flaps were set, the yaw damper was off and speed brake was closed. I made a successful landing and completed the checklist by ensuring the flaps were up, the speed brake was closed and the external lights were set correctly. I taxied from the runway to the stand and used the further checklist to shut down the aircraft.
After this flight I flew again to check some systems I had not seen in operation during the earlier flights. I set some switches to off, or away from their recommended settings, and the Crew Alert System displayed warning messages even for the Environment Control System which is modelled to be operable.
I then used the emergency procedures checklist to simulate an engine fire in engine one. I set the thrust lever of engine one to idle and the start/stop knob to stop. An external view of the aircraft showed the engine had stopped. I opened the fire shut off button protection and pushed the button in. I then used the bottle switch to discharge the bottle in to the engine. All of the model responded as expected to using the procedure and I found the checklist easy to follow.
Preparations IFR Test Flight
Flight Plan
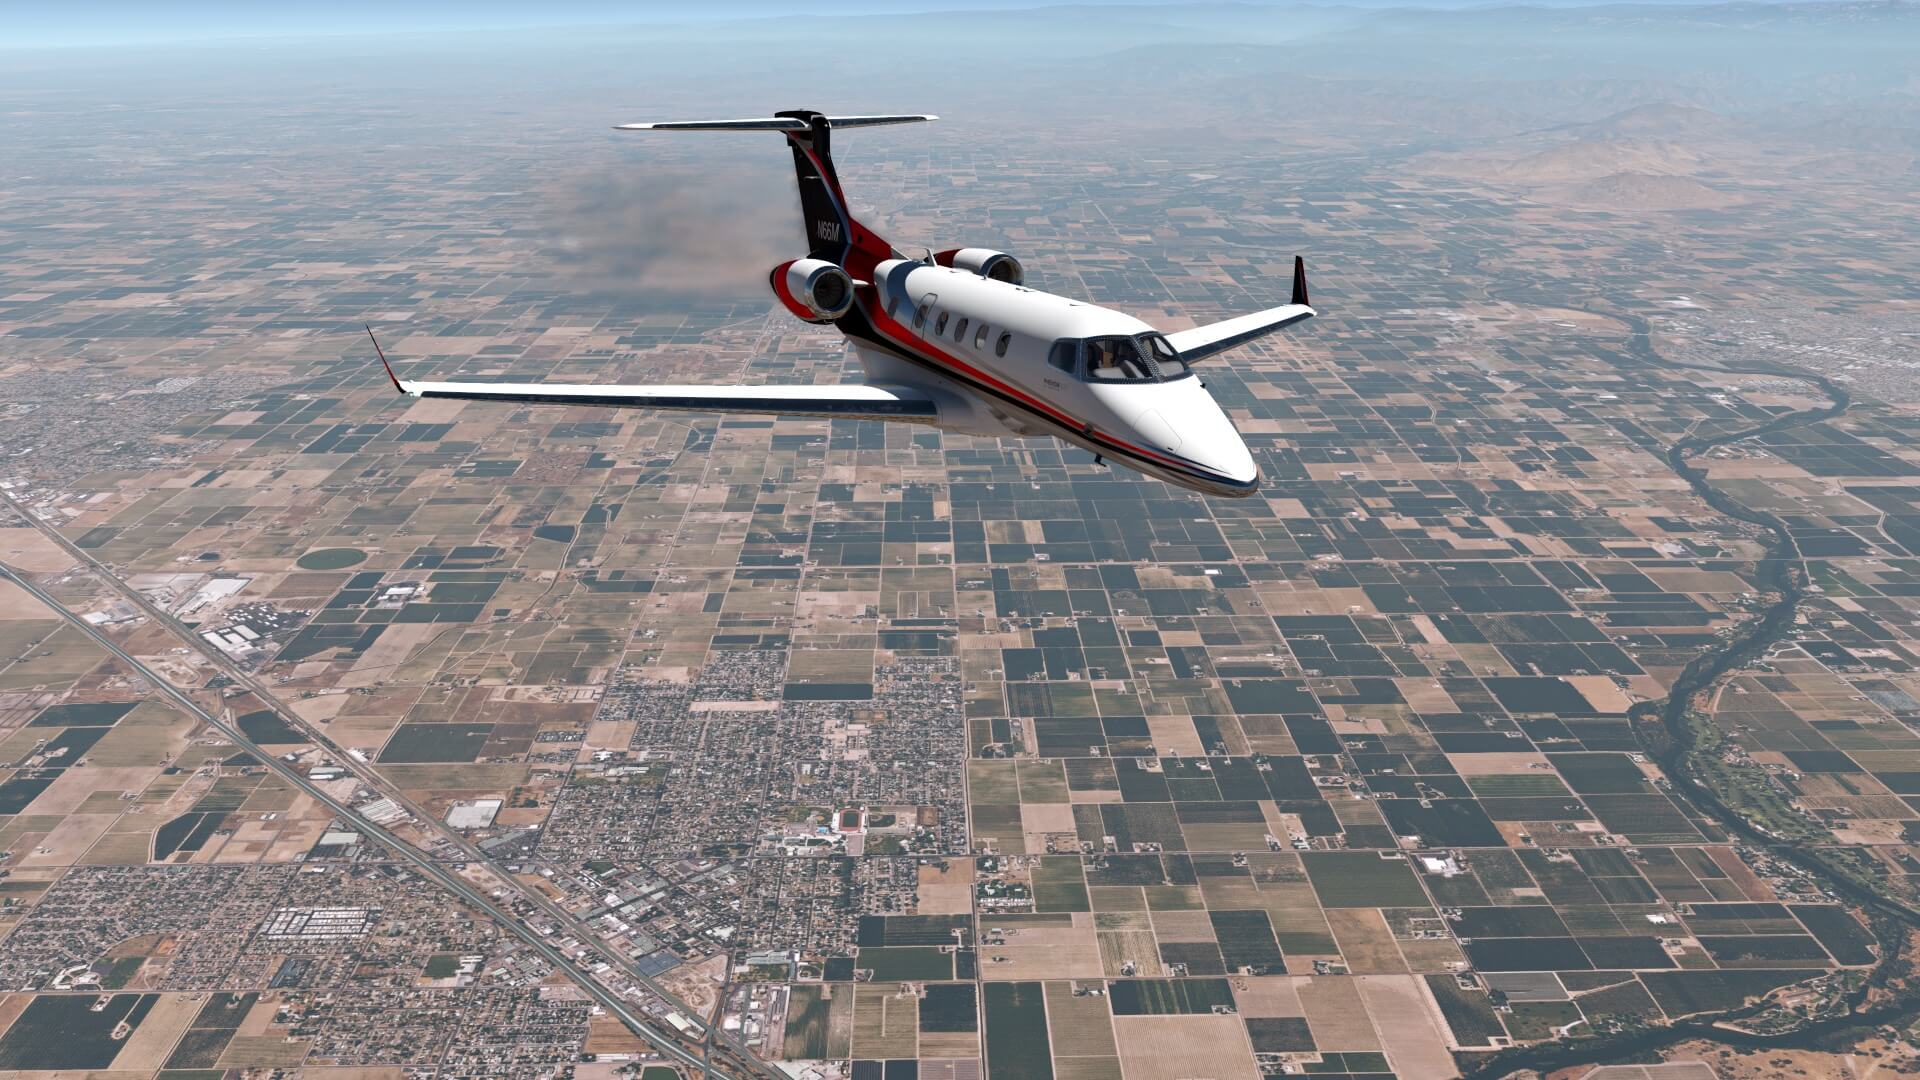
For my IFR flight I’ve decided to use Little NavMap from Alexander to create my IFR flight plan. It will be a flight from KFAT (Fresno International Airport), flying to the south in the direction of San Diego, then up passing LAX, then San Francisco and via the rockies back to Fresno. It should give me a good idea how this well modeled Phenom 300 flies. All together, you will have a good idea since Andy will shared already his basic flight experience with you.
Save the flight plan within Little Nav Map from menu File – Export Flight Plane as X-Plane FMS 11 … and take care that it is stored in the X-Plane folder Output/FMS Plans sub-folder. This means that the Aerobask Phenom 300 is using the Laminar “fms” flight plan format.
The created flight plan looks as follows : KFAT – VIS (VOR Visalia) – EHF (TACAN Shafter Bakersfield) – GRAPE – EMUXY – GVO (VOR Gaviota) – SPLNT – JOSUX – HEYSO – LIN (VOR Linden) – CCR (VOR Concord) – STS (VOR Santa Rosa) – JENBU – OBGEE – PYNUN – SIGNA – KFAT
Calculating Performances
Since the proposed flight plan is long enough to do the necessary testing – roughly 900Nm – and not to forget to enjoy the Orbx TrueEarth landscape, it’s also good to check out under what conditions we make the takeoff and thus what our takeoff speeds are.
The Aerobask Performance manual does offer the necessary tables for our calculations for thrust, VSpeeds, landing data and so on. KFAT lies at a field elevation of around 330 feet, and the current pressure is 29.92. Then the pressure altitude equals the field elevation. Calculating the pressure altitude in case the current pressure isn’t 29.92, has to be done as follows: pressure altitude = (29.92 – current altimeter reading) x 1000 + current field elevation.
That said, calculating the required takeoff thrust can be found in the Aerobask Performance manual starting at page 4. The VSpeeds calculation includes an example that starts at page 6. Check for yourself that you use the right table which means that you use the correct flap setting, if you have the ice protection ON or OFF. Keep in mind that the provided tables are only for a DRY RUNWAY and that when you need to interpolate between two values, you always need to take the highest value if applicable or if possible, you can take the value in-between the two.
I also found another option and that is this Phenom 300 Weight & Balance website. I’m not 100 percent sure if the calculations for your weight and balance as well as takeoff data are accurate, but it allows you to retrieve the necessary data online. A final word about some pages of the Aerobask Performance manual. Either you transport them to an external monitor or tablet or you print from this manual the pages 63 (Flight Planning CLB,CRZ and HOLD) and 64 (HOLD and APPROACH).
Electronic Checklist
Next, to become familiar with the Aerobask Phenom 300, I use an electronic checklist or actually, I use the clist.txt file fromX-Plane.Org user GoofyJP. I think that using this clist.txt file is a good way to understand a bit more of the modeled systems. As you know or perhaps not, to use this clist file you and I need to download the XChecklist plugin created by Sparker from X-Plane.Org. Unzip the package, and install the complete plugin folder under Resources/plugins folder. This will, at startup of the Aerobask Phenom 300, automatically present you with the electronic clist.
You and I could of course use the “Normal Procedures” list from the Aerobask Procedures Acrobat manual, but the advantage in my humble opinion of the clist and Xchecklist plugin is that items that are already in the correct position/situation, are mentioned and confirmed, so no need to worry too much about that in the beginning.
Refuelling
It’s so easy to forget and so beautiful modeled. While following the checklist there will be a moment where you need to refuel the aircraft. The refuelling procedure could be done of course via the Laminar Research Weight and Balance page, but no, please use the Aerobask refuel system. It’s awesomely modeled and really nice. Follow the steps in the normal procedure list or the clist and you’ll be presented with a very nice modeled external refuel panel.
The Flight
Preparations and Engine Start
The clist with the electronic checklist Xchecklist really start at the very beginning with a cold and dark Phenom 300 and of course, this is the best way to learn the aircraft. I follow all the steps, some are done for me because the switch or system is already in the correct position or condition, while for others I need to find out where it is located and then I need to perform an action and so on and then you reach the engine start procedure. I have a bit the idea that the engine N2 and N1 are very quickly increasing, perhaps a bit too fast. With that in mind, I decided to check a couple of real Phenom 300 engine start movies and found this perfect movie.
As you can see, it goes in reality also fast. N2 spools up fast while the N1 is followed quickly and is spooling up that fast too. So at the end, what I saw in the modeled Aerobask Phenom 300 is more or less correct. It is so much fun when I look to the movie and how the Phenom 300 MFD looks like. It’s almost the same. Well done.
Taxi, TO and CLB
Next I continue with the checklist, and before I know, I’m on my way to the runway. Before the takeoff I do the necessary AC generator tests as written in the clist before commencing the takeoff. Since I’ve loaded the flight plan I know in which direction I need to fly manually and I can tell you, that goes easy.
The Phenom 300 climbs steady and speedy out, then I retract the landing gear and after a while the flaps. Oops, I completely forgot to explain the loading and settings of the flight plan in the MFD.
The Aerobask MFD and also applicable for the PFD are basically the Laminar Research G(X) 1000 with several modifications to give it the own Aerobask DU’s, but still it’s a good idea to get an understanding how to use all the switches, knobs and so on, to download the original G (X)1000 Acrobat file from Laminar Research. When you’ve downloaded this manual, go to page 90 that explains the steps to follow how to load a flight plan.
Hold on, let me go back to the initial takeoff. It’s easy to keep the Phenom 300 on the centerline while speed increases, and since the PFD shows me the VSpeeds, it’s just see and watch what happens, and thus monitor the V1 and Vr and follow the FD (Flight Director). I climb out, steer in the direction to my first waypoint and trim a bit for pitch and roll. I connect the Auto Pilot for V/S (Vertical Speed) and NAV. I could also first connect the AP in HDG mode and use the HDG select knob on the GFC700 AFCS (Automatic Flight Control System), but I decide to press the NAV button right away. The Auto Pilot smoothly steers towards the flight plan track.
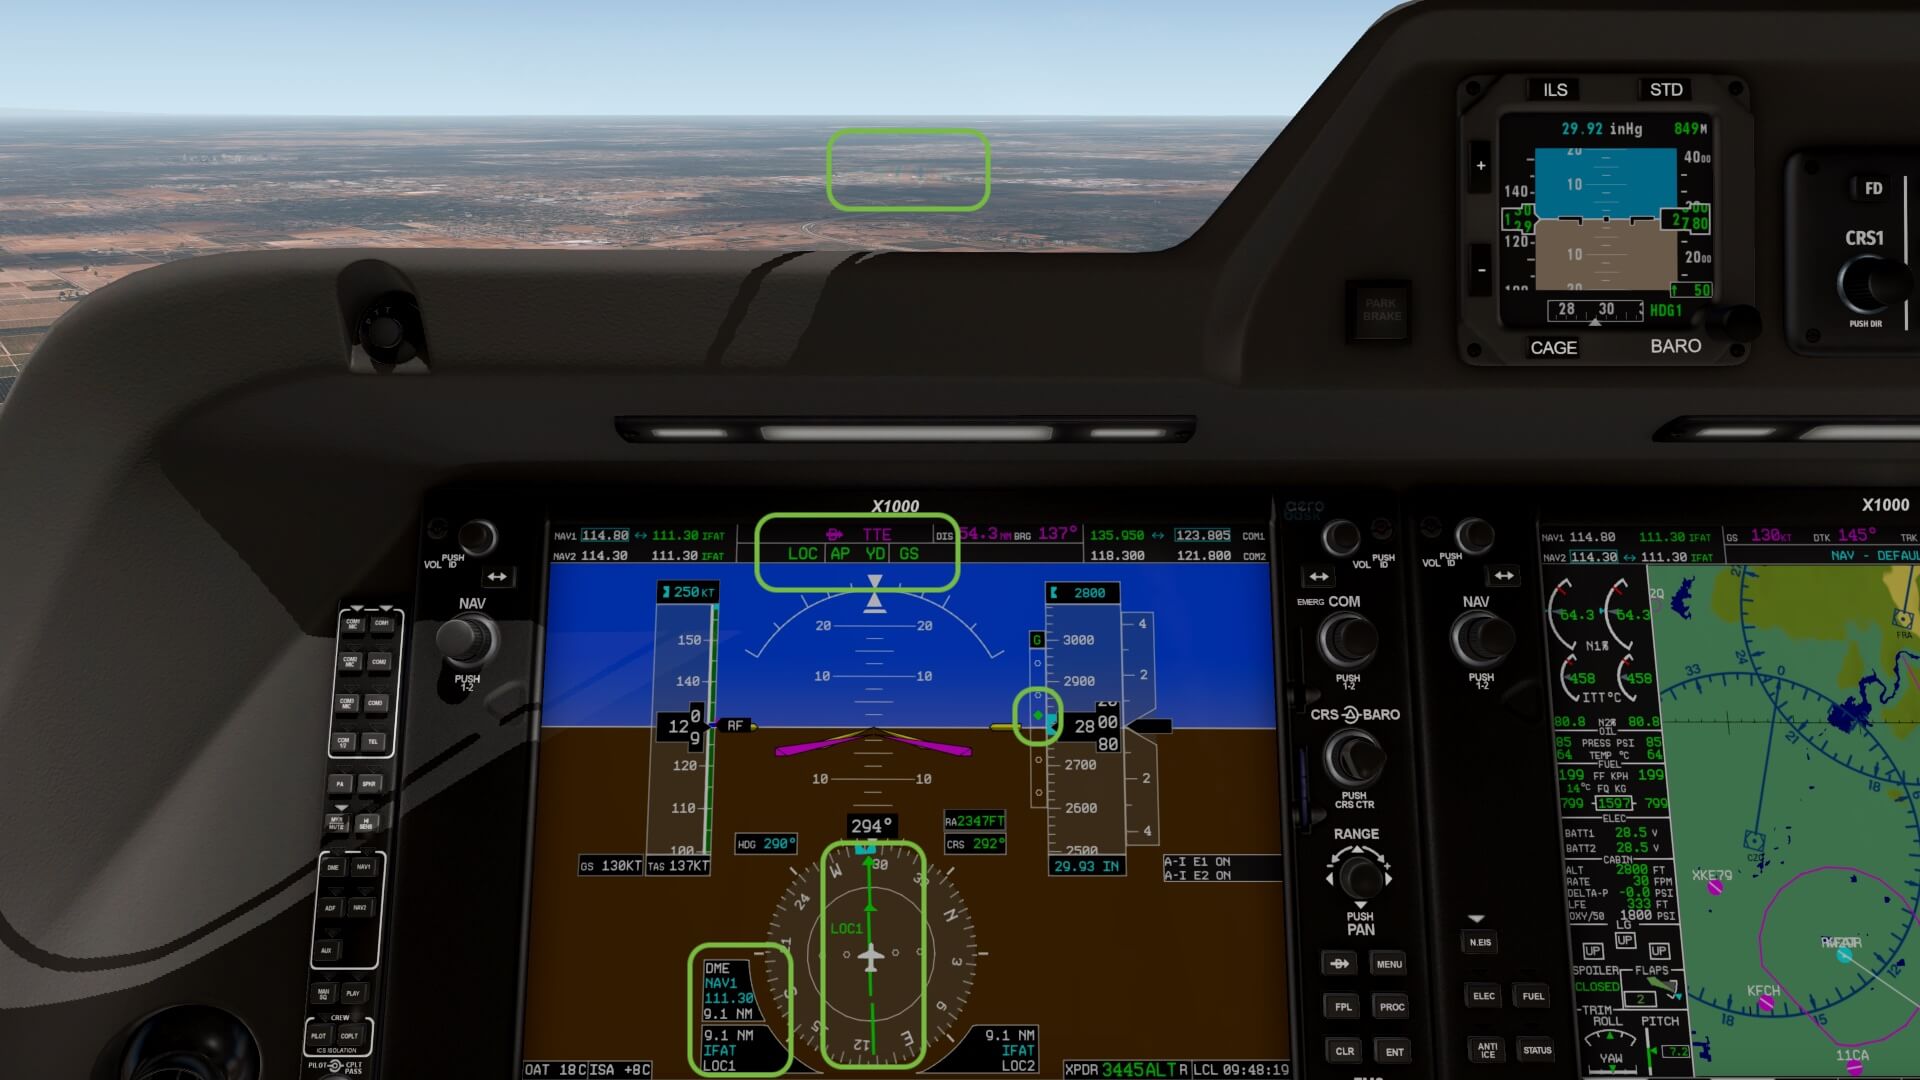
On the PFD FMA (Flight Mode Annunciator) I can check if my modes are active. I didn’t switch ON the Synthetic Vision during the takeoff, but I found out later on during my CRUISE that this visual feature hardly consumes any frame rates which is great news. So, once more, I’m talking about Synthetic Vision. It’s awesome to see real ground or sky in the PFD instead of the regular brown and blue colors.
Note the following; when you’re in NAV mode and on the PFD the CDI shows GPS (magenta), and the FMA shows GPS, then when you click the CDI button below on the PFD several times, you swap to VOR1, VOR2 etc. This is OK that you play around a bit during flight, but remember, the moment GPS is gone and VOR1 becomes active, the AP mode changes also from GPS to ROL mode and not FP track is followed anymore. In other words, when you’re finished with the CDI button on the PFD, double check if the CDI is back in GPS mode which connects the AP to the FP and click the NAV button on the AP panel, and verify yourself that the FMA shows GPS.
The Phenom 300 simulates the CSC mode which is the abbreviation for Current Speed Control. The CSC can be considered as a “basic autothrust” system. It can be only activated when the Auto Pilot is engaged and Altitude Hold Mode is active. More about the CSC on page 23 of the Aerobask Flight Manual.
And since I’m still climbing, I change from V/S mode to FLC (Flight level Change) mode. After my first assigned altitude I select the second and final cruise altitude which will be on this test flight FL310. Andy has discussed in detail all the systems and did his flight, so no need for me to discuss system details. I enjoy while the Phenom 300 is leveling off at my cruising altitude the modeled cockpit, and I decide to take a drink in the virtual cabin and be surprised about the good frame rates. An additional note from Aerobask; Aerobask recommends to use the “FLC” mode combined with “CLB” Thrust Rating to climb. A typical Climb profile will look like this : 180kts until 5000ft, 225kts until FL300 and .060M until Cruise.
Cruise
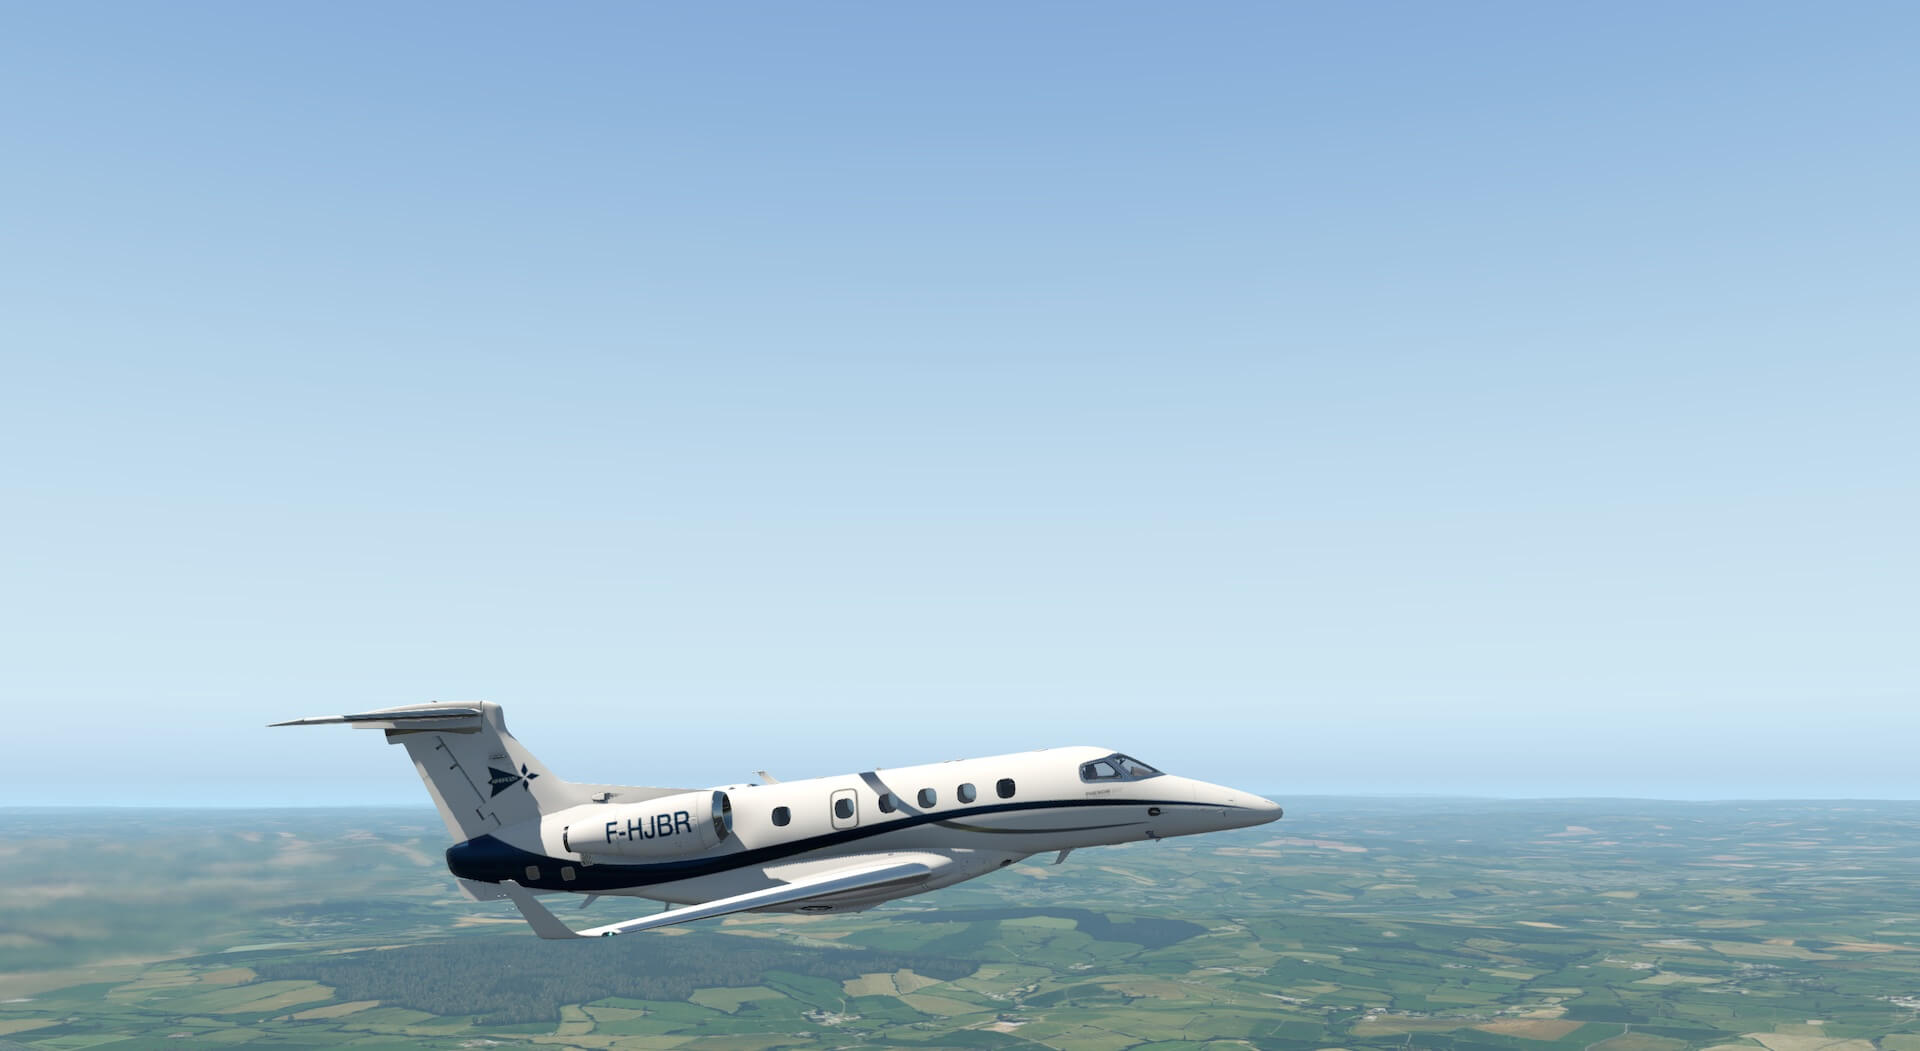
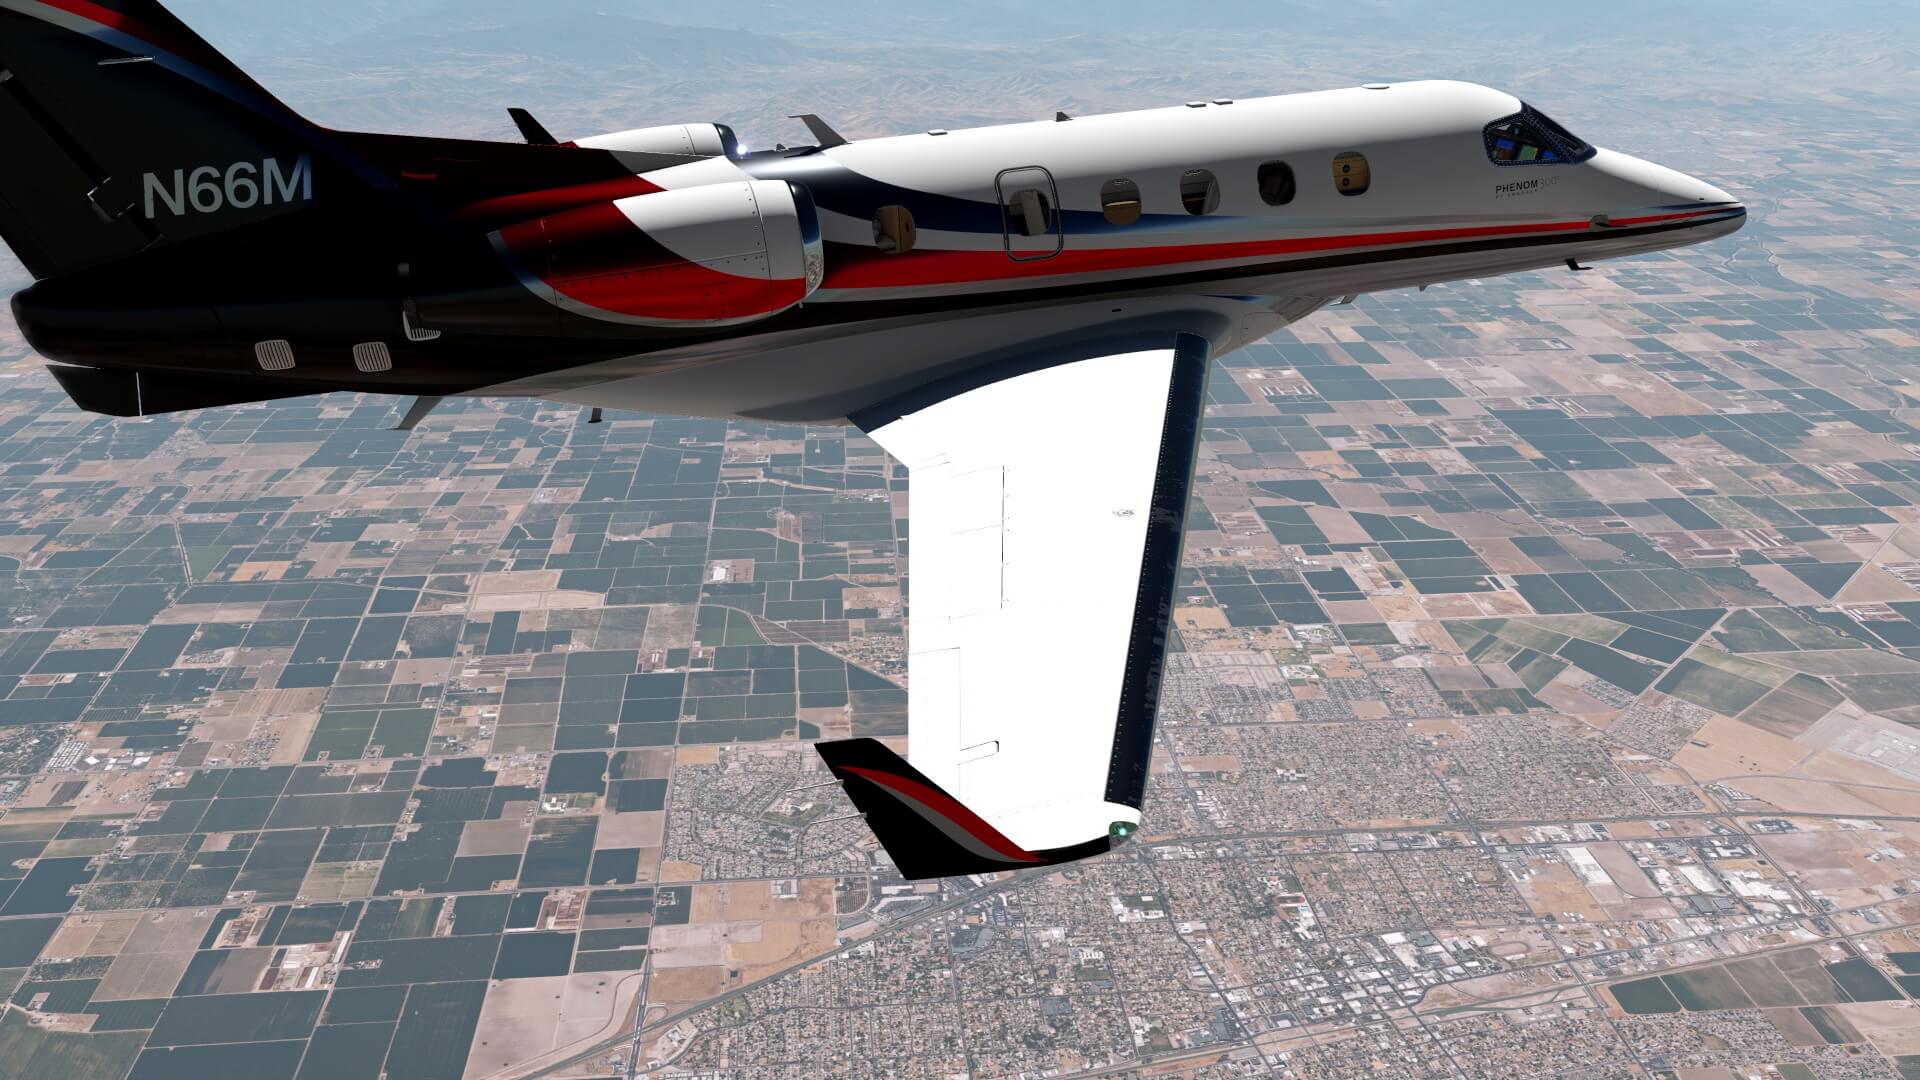
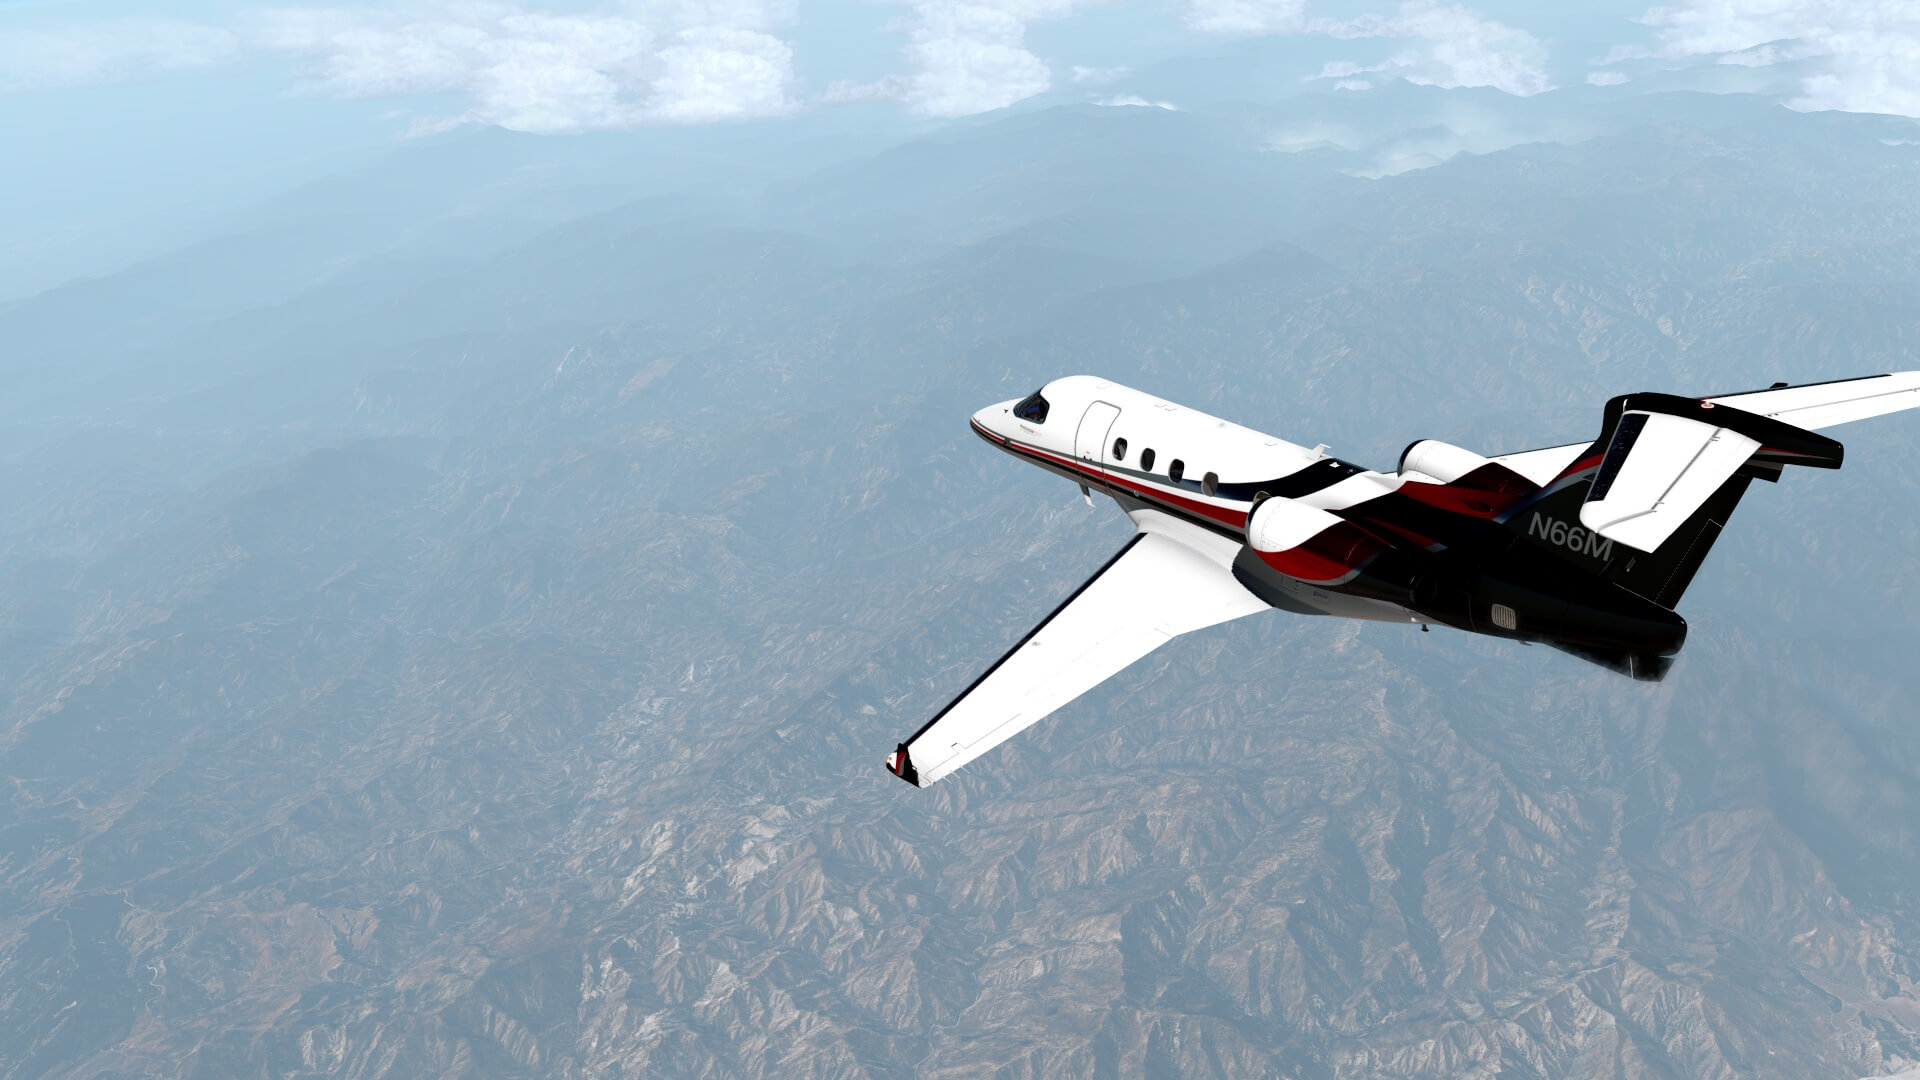
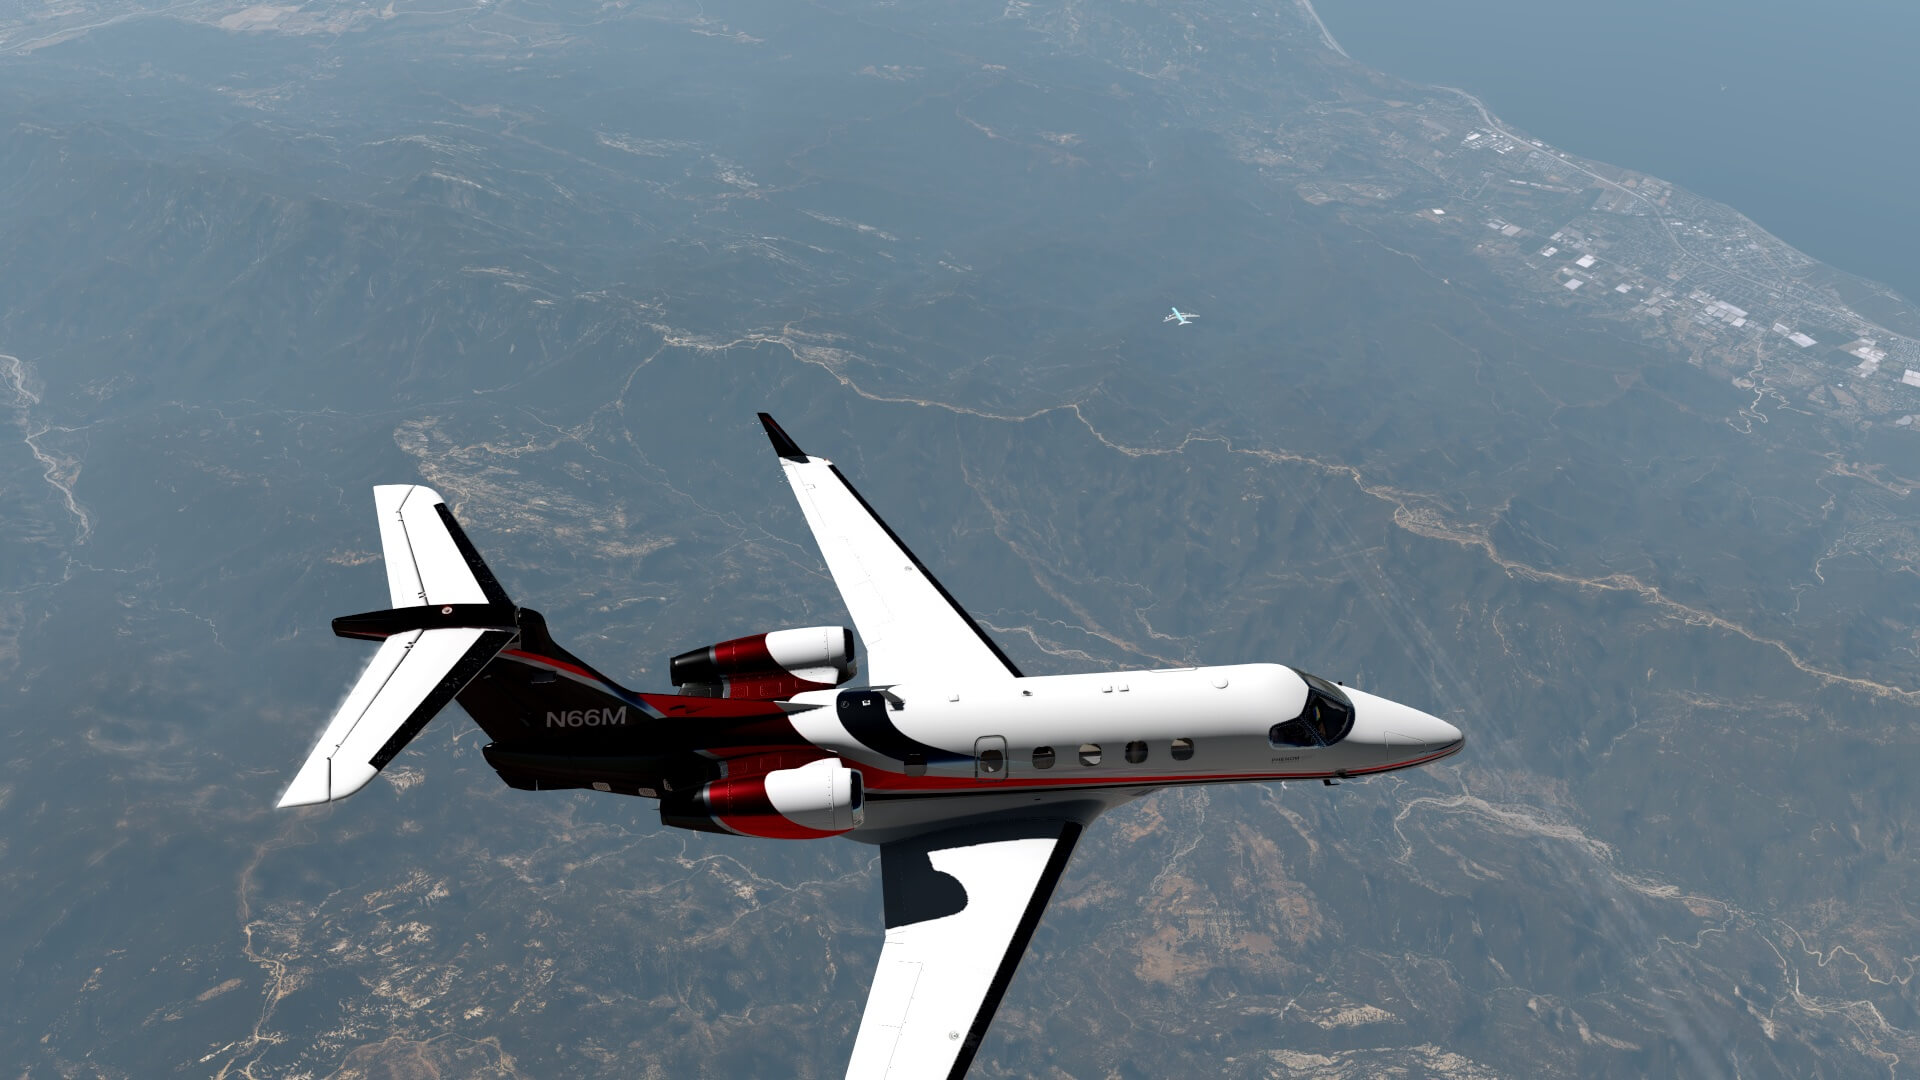
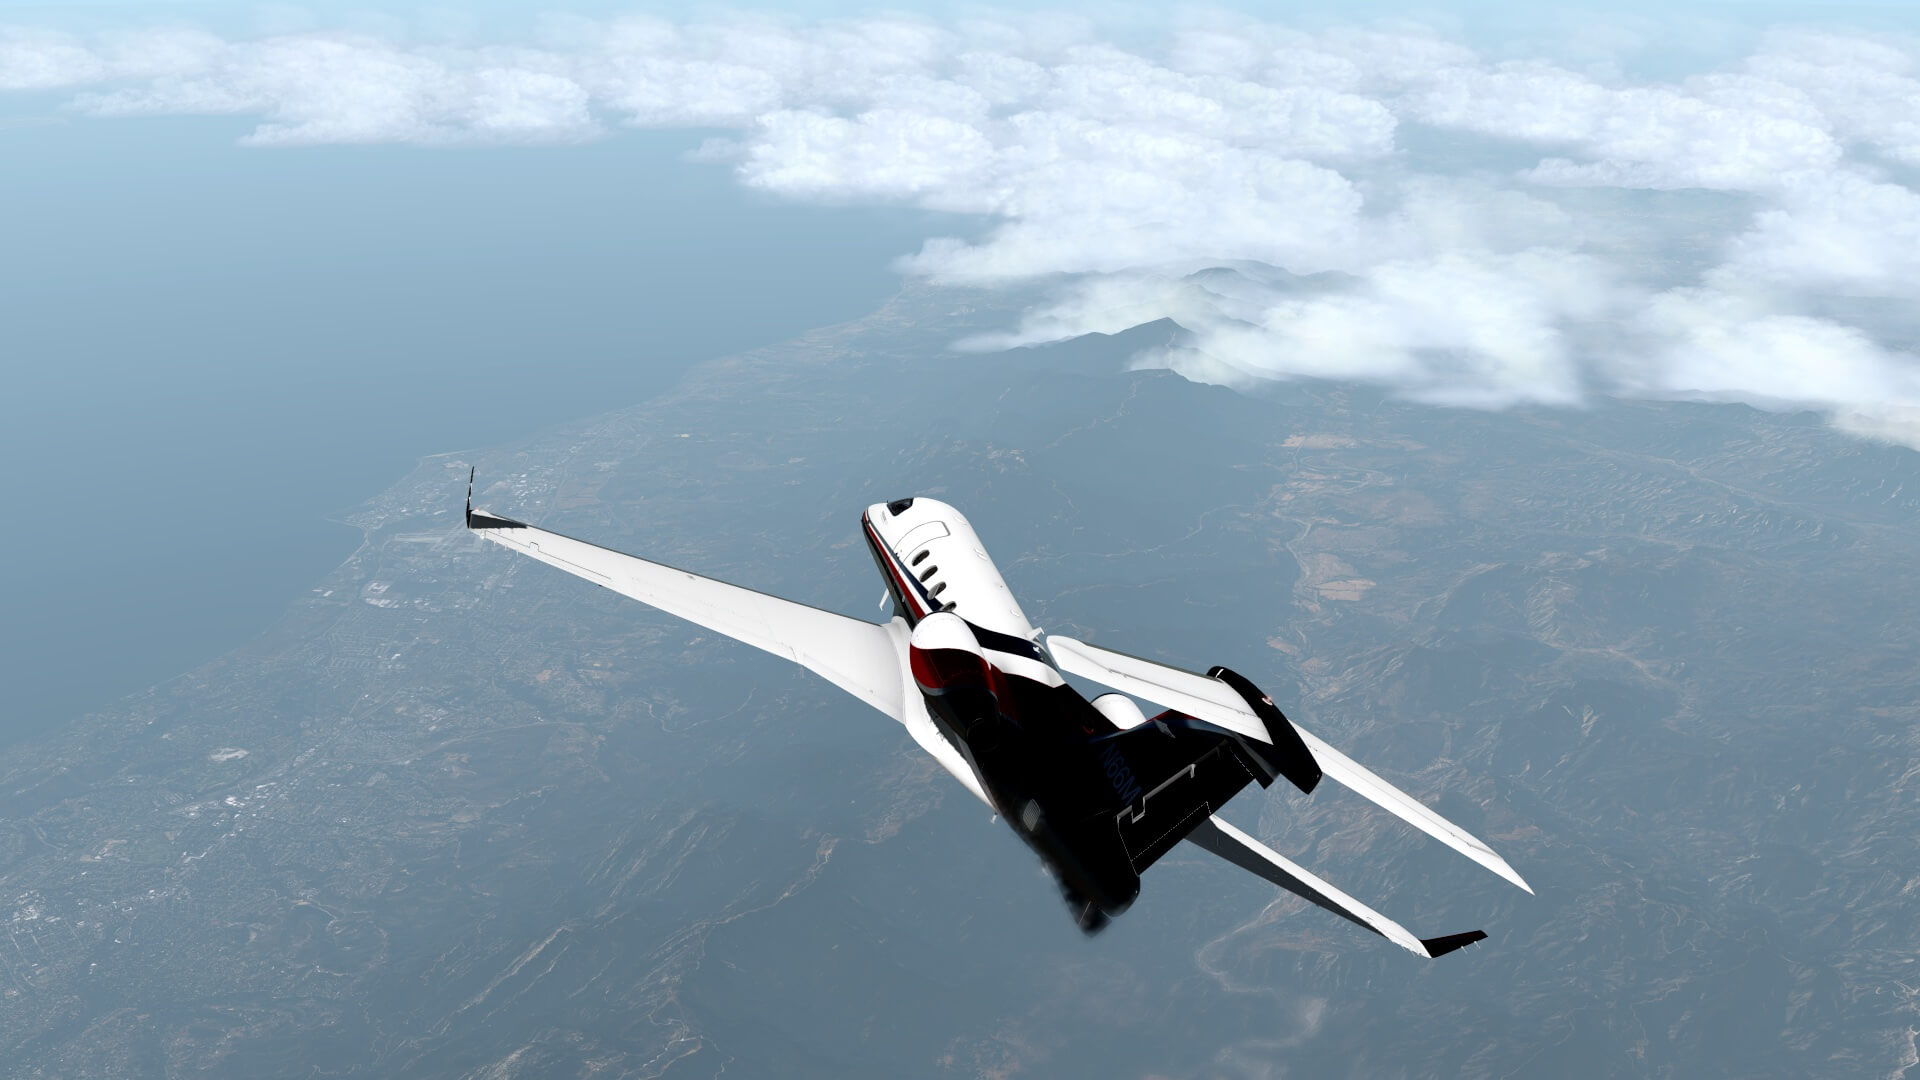
Being in cruise means that I can quickly have a look outside the aircraft and yes, I know, that’s a bit unrealistic, but it’s also the advantage of flight simulation programs. I’m still very happy to see how the external model looks like, and yes, a bit more weathering at some places would be nice, but besides that, I’m happy and yes, I’m also aware that this “weathering” is a personal opinion.
Back in the cockpit, I try out the several 2D popups like the IESI (Integrated Electronic Standby Instrument) and the GFC700. Very nice and all have a beautiful 3D look and feel. I do the same with the Garmin GCU 477. I’m not 100 percent sure since this is a unit that’s belongs to the Laminar Research X1000 system, but the 2D popup seems to be missing a kind of 3D effect. The housing or backplate seems not to me 3D, but just flat. I personally think this is nothing to do with Aerobask.
Anyway, I wanted to test one more thing during this flight and that’s how does the Aerobask fly manually so without the Auto Pilot? I can tell you, much easier then expected and as with many of my reviews, I can’t compare it with how the real Phenom 300 flies versus this modeled aircraft. The funny thing is always when you switch the AP OFF, that you suddenly see how much trimming or correcting the AP is doing to keep the aircraft on track. Now that I have to fly the Phenom 300 manually, I’m impressed by the actions performed by the AP. Always good to know that your “AP friend” is near you. It’s also nice to see the moment I connect the AP, how fluently the AP brings back the Phenom to the nav track.
So once more, when you disconnect the AP, you may assume that the aircraft is trimmed and at the moment of disconnection no input or manual trim is needed, but depending on the environmental conditions you have, a trim is most likely needed to keep it on the intended track. Then you’ll appreciate the accurateness of the Auto Pilot and learn that very small corrections are needed. Unless you pass a waypoint and need to change flight direction, only small trim inputs are needed. The advice is, be patient.
Before I forget it, the Aerobask Phenom 300 uses the default Laminar Research Auto Pilot system, but with the necessary modifications like the previous mentioned CSC. I found the flight long enough to have a satisfied feeling of the modeled Embraer EMB-505 Phenom 300. It is clean, it is well modeled, as well as the virtual cabin. Further on, several features are included that are interested for simmers with low end PCs and although only one is included, a 2K paint texture set, again for those who love this aircraft like I do, but who don’t have a powerful PC. And I’m talking and talking and enjoying every minute flying this well crafted aircraft, I almost forget the time and where I am.
Descent Preparations, Approach and Landing
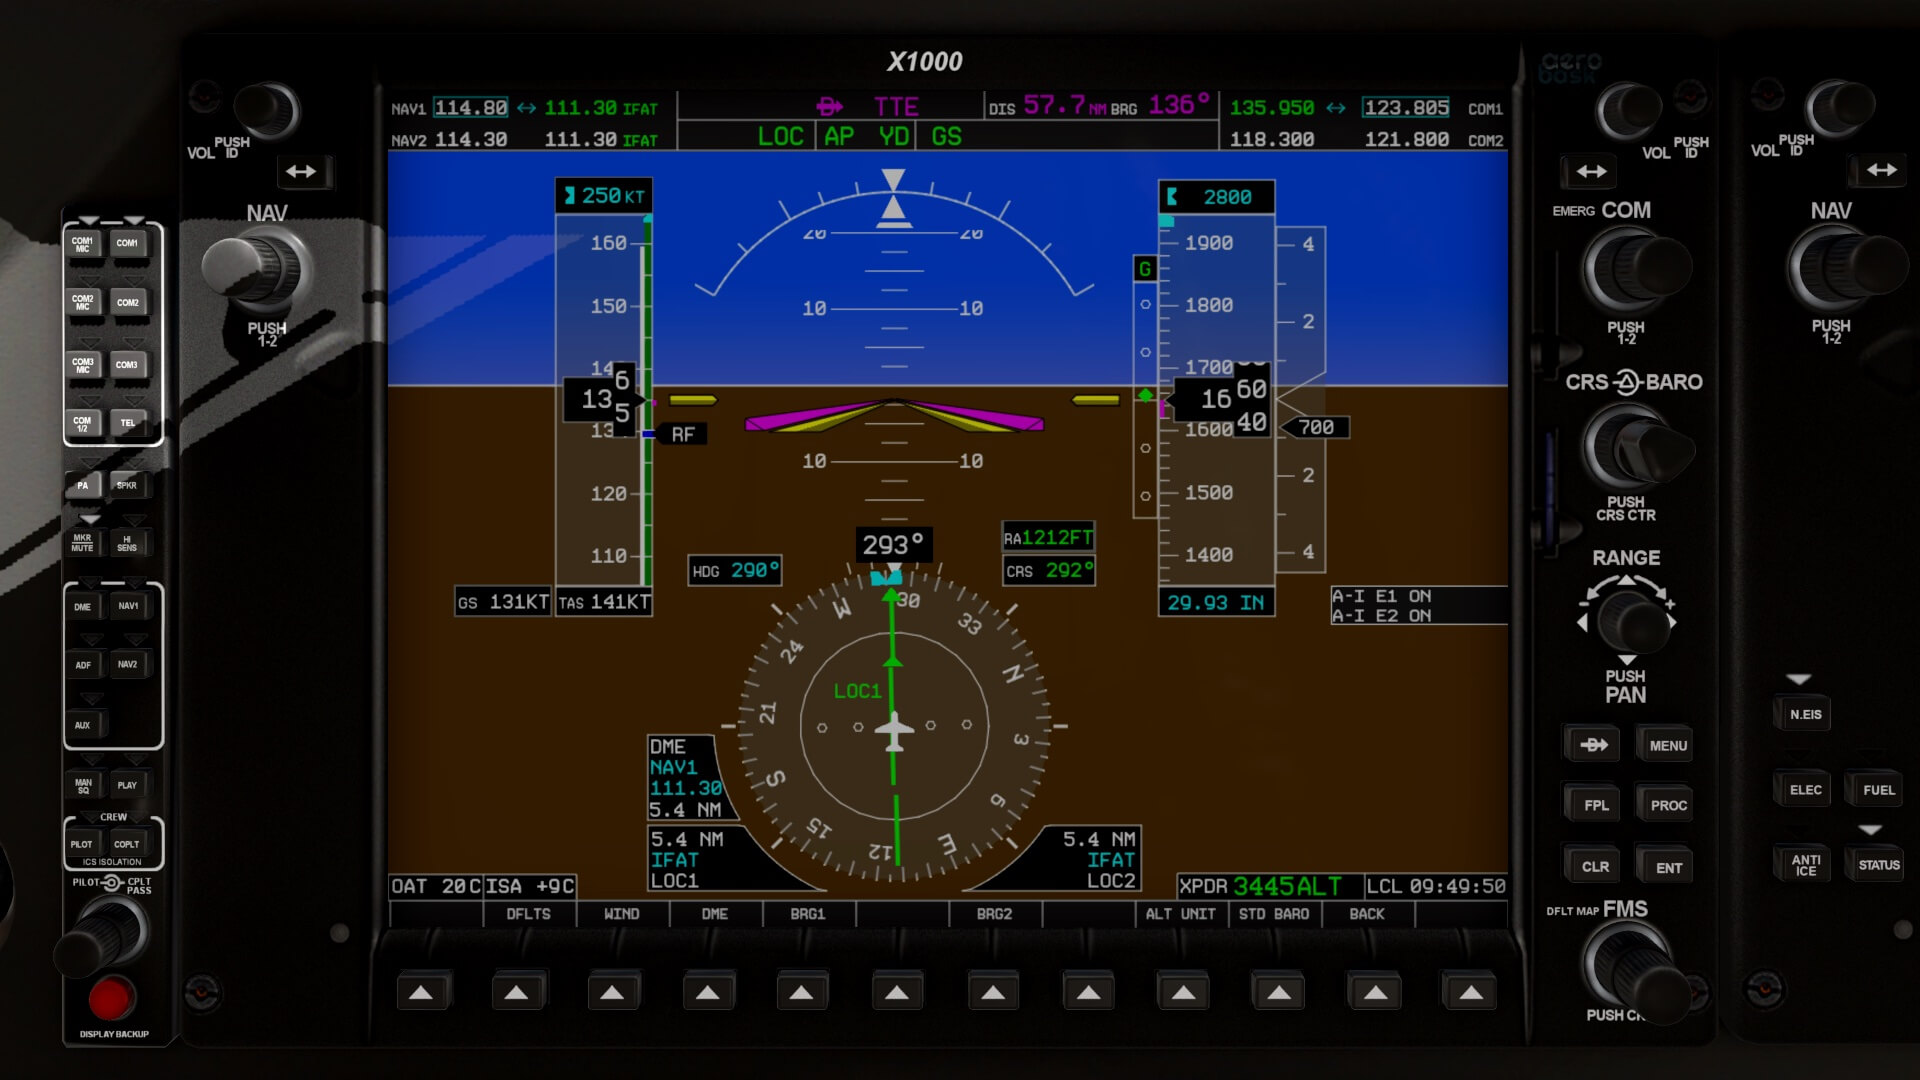
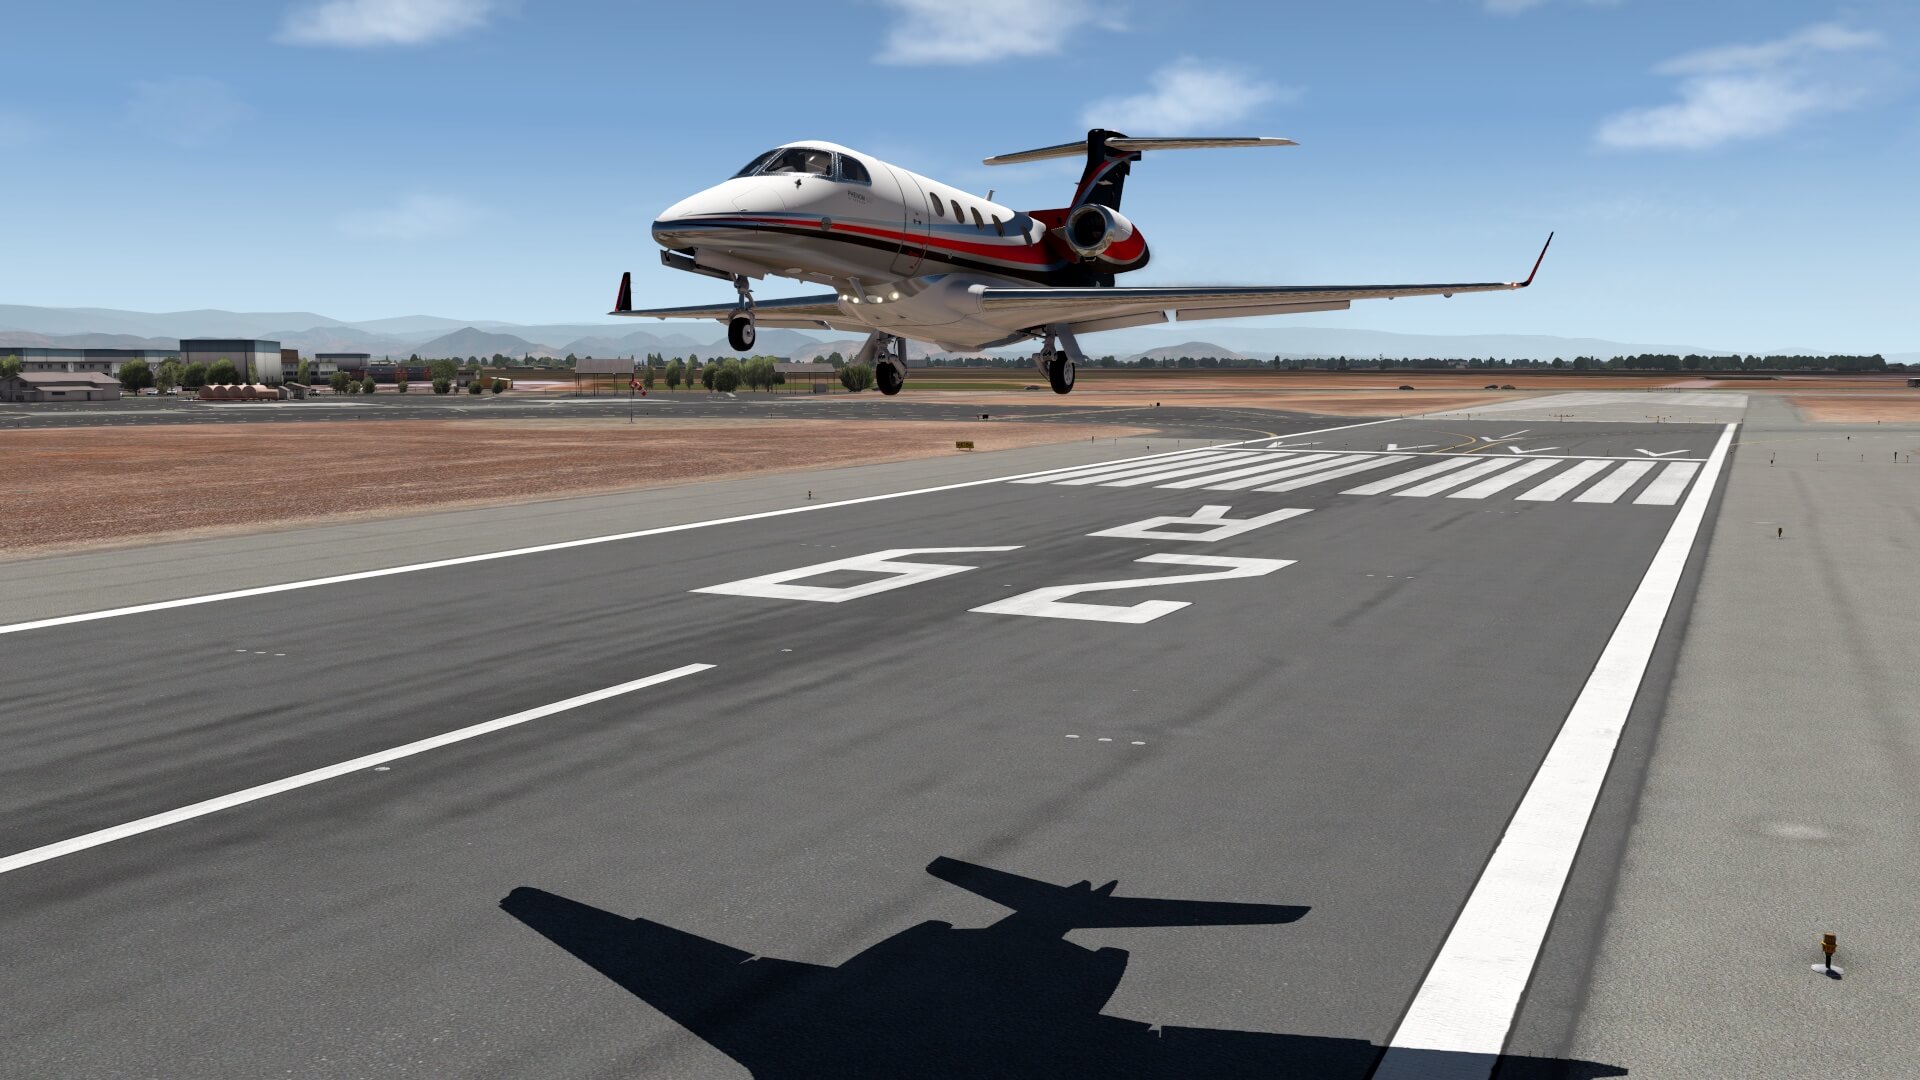
It may have been many miles, and yes, time flies, but I’m on my way back to KFAT and for the descent, approach and final I can use many possibilities. Since KFAT only comes with one STAR (Standard Terminal Arrival Route) namely ALTTA NINE ARRIVAL, and the fact that I want to use the ILS of runway 29R, I decide to pass north of the airport flying in a southeast direction, fly/tune for/to VOR TULE (109.2) and then on a HDG 323 to ALTTA and from there to KFAT 29R. When I want to do it manually, I need to know the ILS frequency which is 111.30, identified as I-FAT and I need to be at an altitude of 2800 feet. To visualize this a bit more for you, you’ll find the charts I need below, taken from AirNav.
One of the other options is using the X1000 to add an approach from the Data Base. That’s a bit up to you what you prefer. It also depends if your flying online via VATSIM or IVAO or offline. When you fly offline you are basically in control what you do then when flying online. Flying online means that ATC will tell you to do this or that, partly due to the filled flight plan and in most cases ATC orders you to do this and that and this could be that you need to descent earlier or later then planned. Or that you need to change heading and thus leaving the flight plan behind you and switching from NAV to HDG mode. From that moment on, you can forget your intended flight plan.
As previously said, my cruising altitude is FL310, and I want to descent first to FL100. This means that the distance to start for this within the flight plan is, assuming I go for a 3 degrees descent angle, around 70 Nm. And a certain the vertical speed is needed to achieve this which lies somewhere between 1750 – 2500 feet/min. This range depends on your actual GS (Ground Speed).
More information can be found at this dedicated IVAO “Top Of Descent Calculation page”, but I have to be honest that this is one option to find and do the correct calculations while when you search the Internet, many other calculations can be found.
I add some “spare” Nm’s and start my descent at around 100Nm before the ALTTA NINE ARRIVAL STAR. With approximately 2200 feet/min I start my descent and see how it goes. I could use the flight plan additional options, but decide to go when leveling off at FL100 to switch to HDG SEL and ALT with V/S modes. The challenge is to use only the MFD to navigate and not to check the actual position via X-Plane menu Flight-Show Map. Or that you use for example SkyScout on a tablet. On the other hand, you can decide to use the build map option from the AviTab.
490
491
492
493
494
495
While the Phenom 300 is descending, I’ll look at the Aerobask Performance pages to calculate the ULD (the Landing Distances Tables). Page 69 shows an example while for you and me we need to pick out the right page applicable to our aircraft configuration – EAI (Engine Anti Ice) plus flaps plus wingstab icing ON/OFF) – and environmental conditions as wind, airport altitude and aircraft weight (LDW).
After leveling off at FL100 I’m still far away from KFAT which is good news since I still need to descent to 2800 feet for the approach. In case you do the same flight, descent and approach and you find out that it’s all a bit too tight, you can always add a holding or, when you’re not flying online, a small detour to add some time to descent. I’ve also tuned for FRA VOR (Friant 115.6) and my plan is that after passing FRA, so maintaining a HDG of 110, I’m actually flying parallel – although far north of it – to the runway.
That I’m not using on this part of the flight the flight plan, that doesn’t mean I can check my current flight position in relation to, for example, waypoint ALTTA. In other words, I can command the AP in HDG SEL mode to fly towards waypoint ALTTA and activate on the GFC700 the APR mode. Before reaching ALTTA I’m already at 2800 feet and when close enough to ALTTA, the LOC signal is picked up.
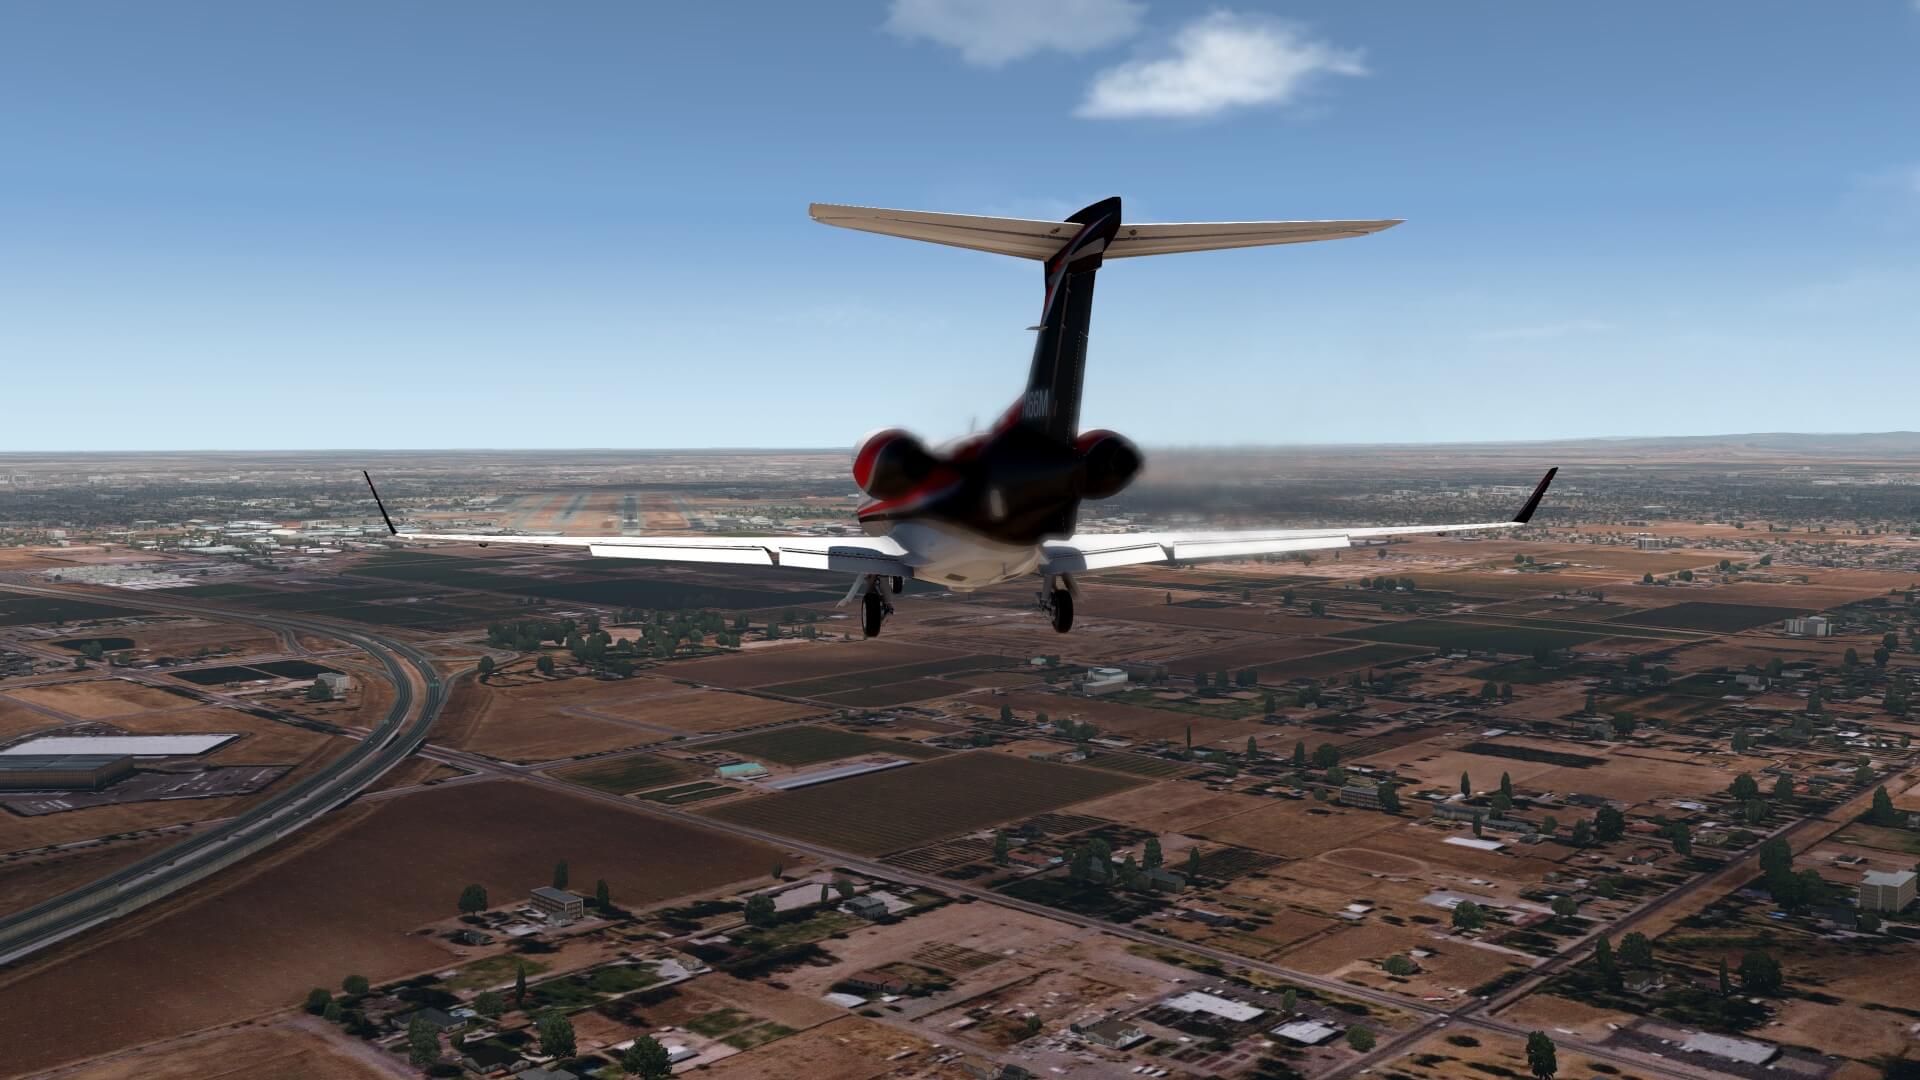
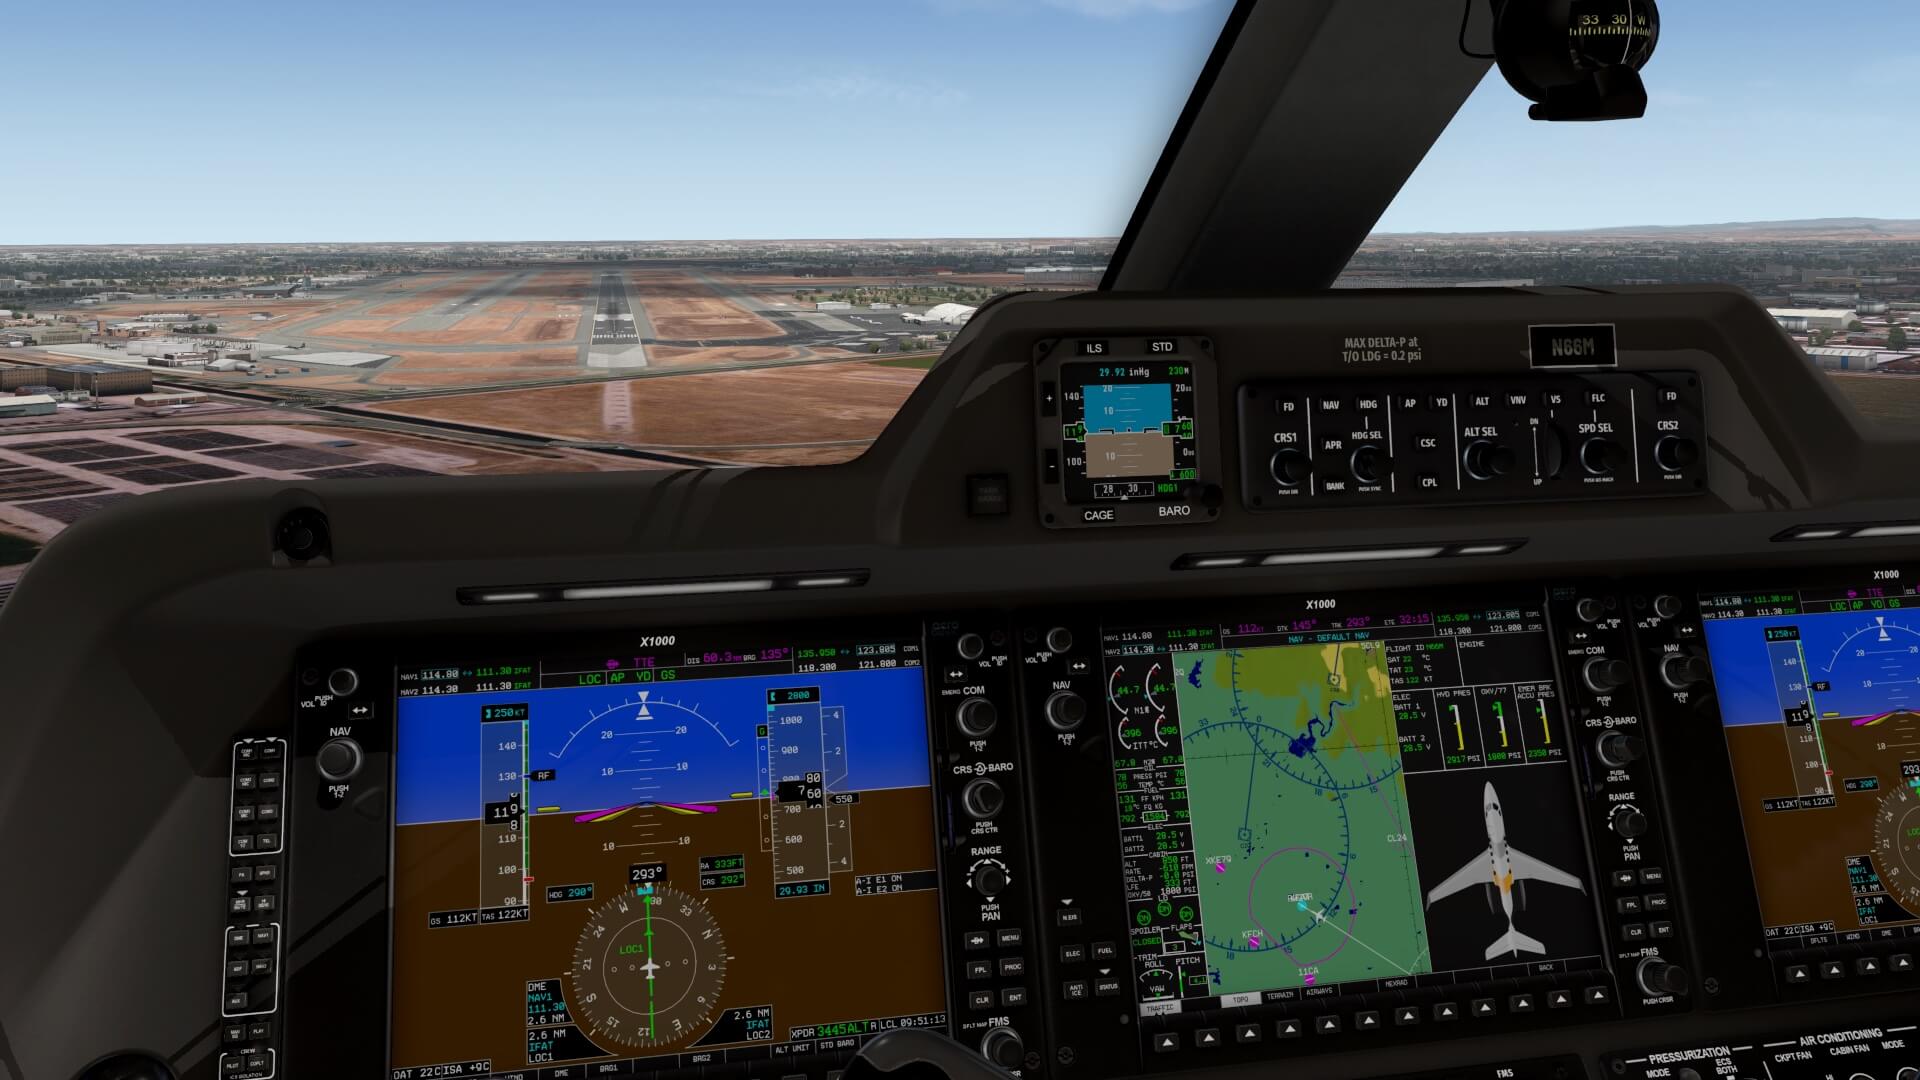
And then it goes fast, LOC track, flaps extending and the moment the G/S (Glide Slope) becomes active, I select the landing gear DOWN. Keep in mind that the real Phenom 300 and therefore also the Aerobask model is only CAT I certified which means it has no AUTO LAND and thus no FLARE or ROLLOUT mode. That said, disconnect the AP when you’re at 500 feet and the aircraft is on the ILS track, that the last part of the final approach is up to you to gently control and flare the aircraft before it touches the ground. Regarding the FLARE, according to Aerobask “This aircraft is known to fly at touchdown attitude (pitch) at Vref with full flaps. There is little to no flare to be done at landing if you maintain Vref from Threshold and idle at 50ft AGL.”
We’ve made it. I’m ware that I didn’t cover every part of this test flight, but I hope that this experience helps you in exploring YOUR Phenom 300 flight challenges.
Summary
I personally – your personal reporter Angelique van Campen – didn’t had the intention to write so much since this review is shared between me and Andy Clarke, but it turned out that I thought about this and that. The end result is a long review from me and Andy with lots of info and ideas. For myself I can say that I’m happy with the product knowing that Aerobask uses the Laminar Research X1000 with own modifications which is also applicable for the GFC700 with own implementations.
The 3D modeling and external and internal textures are gorgeous, with little weathering except for the rudder and brake pedals. I used the Synthetic Vision during my test flight and it’s indeed a very nice experience and above all, it hardly cost any frame rates. Talking about frame rates, these are on my iMac perfect. Suppose you’ve got a older or slow PC, you can always decide to test the 2K texture livery pack.
On purpose I haven’t compared the Aerobask Phenom 300 with the older Carenado Phenom 100 although the Carenado Phenom 100 does have for example a checklist build in the MFD. If it is of the same depth as the clist I haven’t checked. For sure the Carenado doesn’t have Synthetic Vision and I’m also not sure if the Carenado has dedicated modeled CSC and so I could continue. Too many things I don’t know what the Carenado has, so therefore no comparison.
I end my part of this review with the words; I really enjoyed the modeled Aerobask executive jet. Up to Andy.
The model is supplied with numerous working systems all of which are created to a high standard. The manual provides good guidance on how these various systems can and should be used. The systems are easy to follow and the signage for switches and instruments in the cockpit is very clear. Whilst provided with many things to do in the cockpit, and during a flight, the information the systems provide and actions they take are all helpful to the pilot and whilst they initially look a bit daunting to the less experienced user they add value to the model and enjoyment to the flight.
The aircraft is very realistic to fly. It is responsive yet forgiving and gives a very smooth ride. It is possible to just jump in and fly the model but more challenging and accurate flights are available to the more experienced user. The information provided on both normal and emergency procedures is very useful and the model responds as expected when these procedures are followed. A great model to fly with value and challenges for pilots of all standards.
For this review, I used besides the payware Aerobask Phenom 300 the following payware and freeware packages:
– Payware Orbx TrueEarth US North and South California
– Payware Just Flight Global Traffic for macOS
– Freeware Laminar Research DataRefEditor
– Freeware FlyWithLua NG 2.7.28
– Freeware FlyAGI Tweak Utility 1.15
– Freeware SAM Suite
For detailed Aerobask background information please visit the Aerobask website and when you also felt in love, then move to the dedicated Aerobask Phenom 300 X-Plane.Org store page. As of this writing, the Aerobask Phenom 300 cost you 44.95 USD.
Feel free to contact me if you’ve got additional questions related to this impression. You can reach me via email Angelique.van.Campen@gmail.com or to Angelique@X-Plained.com.
With Greetings,
Angelique van Campen and Andy Clarke
| Add-on: | Payware Aerobask Embraer Phenom 300 |
|---|---|
| Publisher | Developer: | X-Plane.Org | Aerobask |
| Description: | Realistic rendition of the Embraer Phenom 300 |
| Software Source / Size: | Download / Approximately 1.33GB (unzipped) |
| Reviewed by: | Andy Clarke and Angelique van Campen |
| Published: | May 31st 2021 |
| Hardware specifications (Angelique): | - iMac Pro - Intel 3GHz Intel Xeon W / 4.5Ghz - Radeon Pro Vega 64 16368 MB - 64 GB 2666 MHz DDR4 - 1 internal shared 1TB SSD (Big Sur 11.x) - 1 internal shared 1TB SSD (Bootcamp Windows 10) - 1 external 2TB LaCie Rugged Pro SSD (Big Sur 11.x) - Saitek Pro Flight System X-52 Pro and X-56 Rhino - Honeycomb Alpha Flight Controls - Honeycomb Bravo Throttle Quadrant |
| Hardware specifications (Andy): | - iMac Intel i5 27" - 3.5 GHz Intel Core i5 - AMD Radeon R9 M290X 2048 MB - 16 GB 1600 MHz DDR3 RAM - Logitech Force 3D Pro |
| Software specifications (Angelique): | - macOS Big Sur (10.15.x) - X-Plane 11.5x |
| Software specifications (Andy): | - macOS Big Sur (10.15.x) - X-Plane 11.5x - A variety of freeware and payware airports |



























































0 Comments