Carenado Beechcraft B58 Baron
Introduction
As I often do, I first look at Wikipedia for some initial comments for this aircraft- I find that Wikipedia is not too technical as some aviation sites may be, and usually offers some good information within the limitations of its crowd source model.
The Beechcraft Baron evolved from a combination of previous Beech-craft designs- the Bonanza fuselage and the Debonair tail section. It was first known as the Travel Air.
“Since its inception, the Baron has always been near the top of the light airplane hierarchy. In 2008 a new Baron costs roughly $1,040,000. As expensive to operate as it is to buy, the ‘next step up’ from a Baron is a very big one. Faster aircraft, with greater range and more load-carrying capability are generally turbine-powered and far more expensive. The older Baron variants, mainly the 55 series, have dropped little in value, with their fair market prices numerically equal to that of their original pricing, in today’s dollars.“
Barons come in three basic types- the short body B55 and B56, and the long body B58, with several sub-variants each. The B58 (reviewed here) commenced production in 1969, introducing club seating, larger doors, a gross weight of 5,400 pounds and 300 hp engines. Subsequent enhancements were the B58TC with turbo-charging, the B58P with pressurization and the G58 with a Garmin G1000 fitted to the aircraft.
Cruise speed is listed at 180 KTAS at 12,000 feet, and a range of 942 nm (1.745 km). The Baron is known for it’s hard landings if airspeed is reduced to or below red-line. Landings are usually carried out with some power applied, and if enough usable runway length exists often the final approach power is left at the setting while full flaps are extended just before the flare, settling the aircraft very nicely on the runway. For more information, check out this Wikipedia link.
Installation and Documentation
Installing the B58 Baron is as simple as dragging the folder containing the files into the Aircraft folder in XP11. If you have copied the key, it’s able to be pasted to the registration box when the aircraft is first loaded, requiring you to re-load the aircraft. The documentation is all within a folder named as such, and includes an auto-pilot manual, version history, normal and emergency procedures with the aircraft, a one-page reference sheet with useful airspeeds, X-Plane 11 Recommended settings, as well as some general Information and Copyright info.
Exterior Modelling
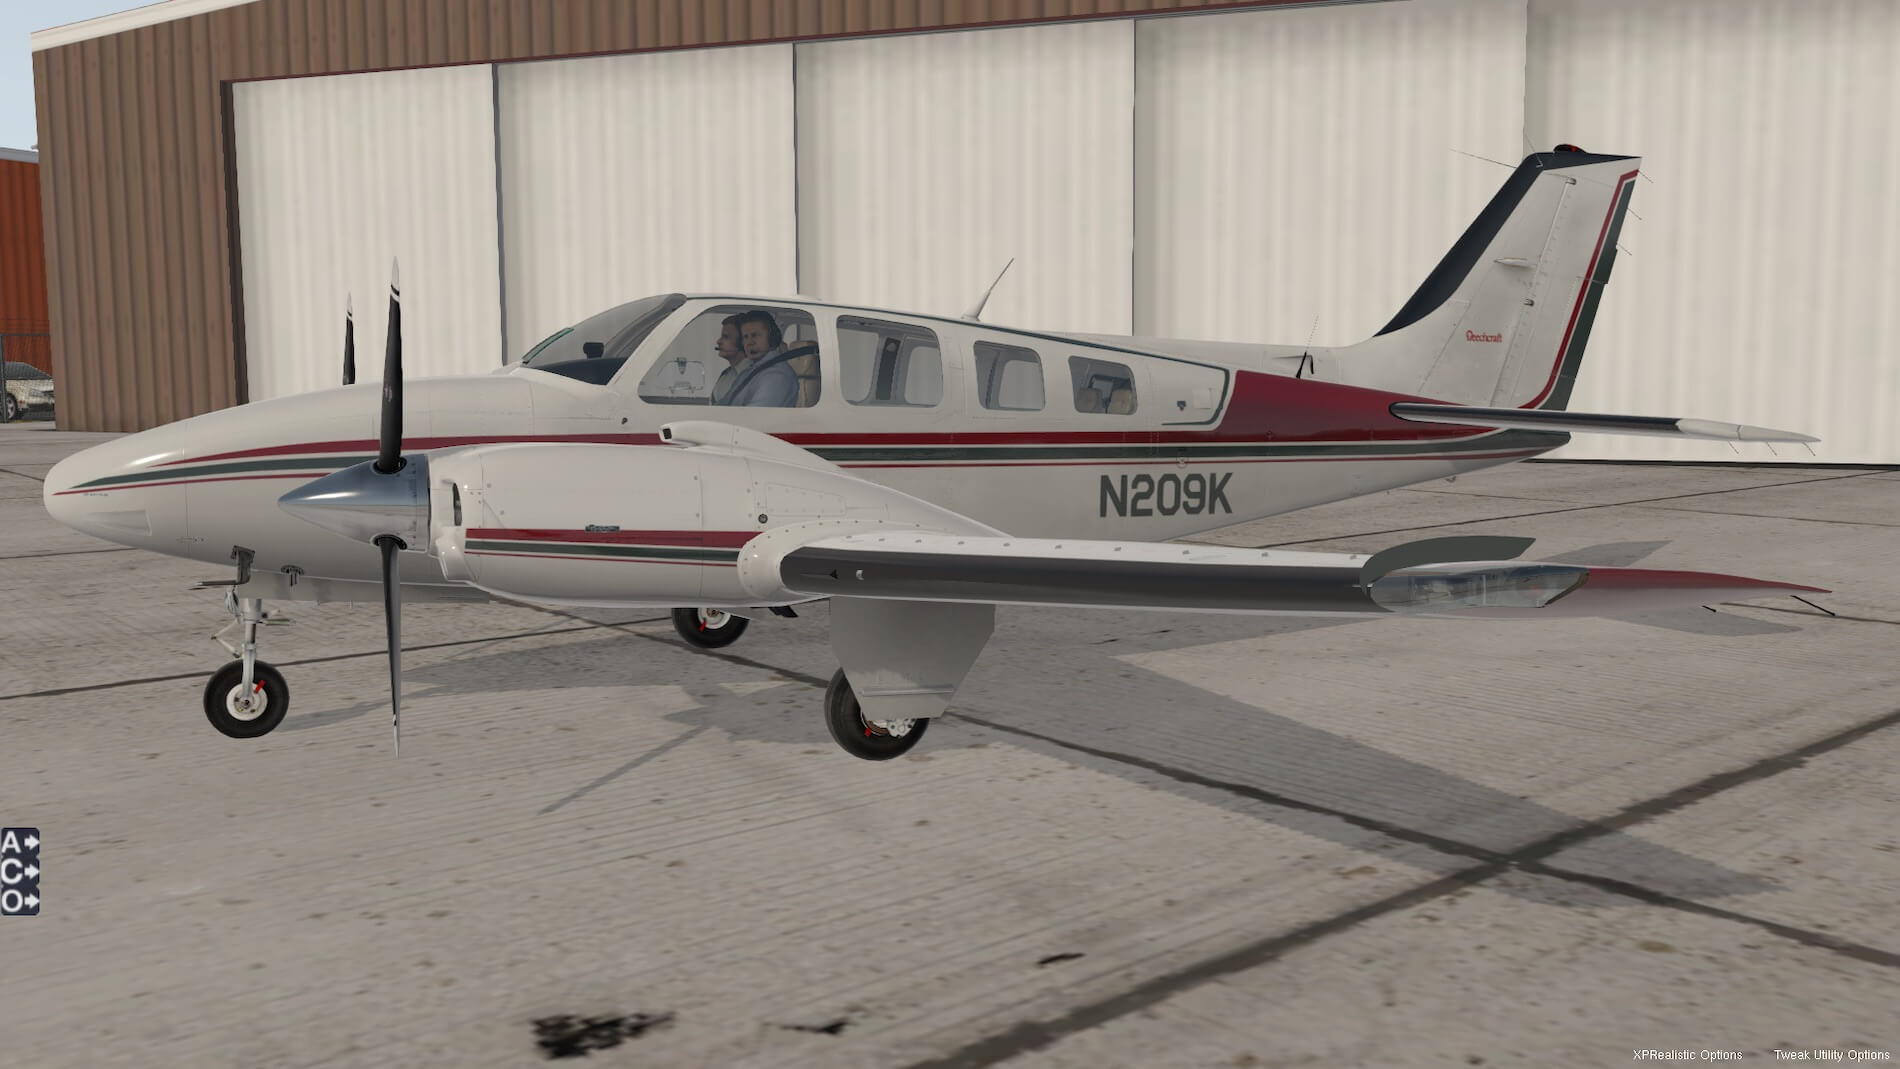
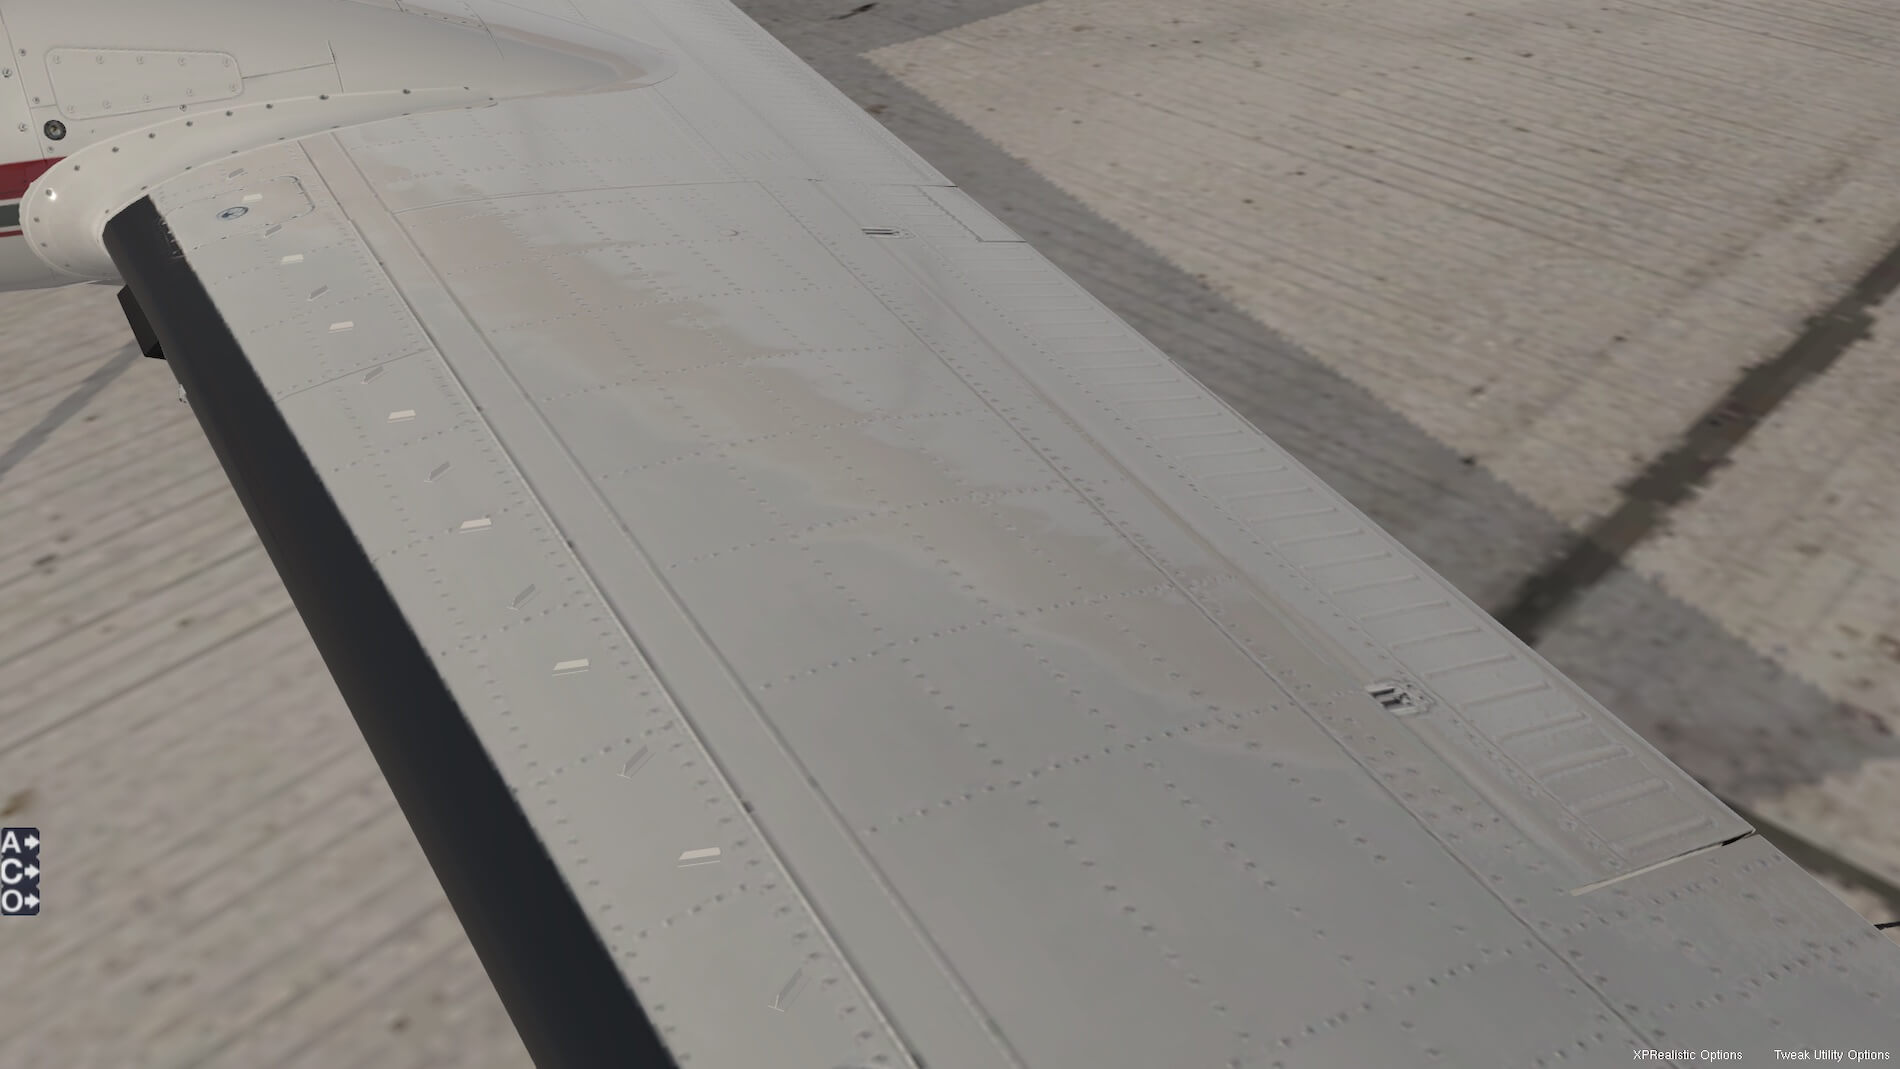
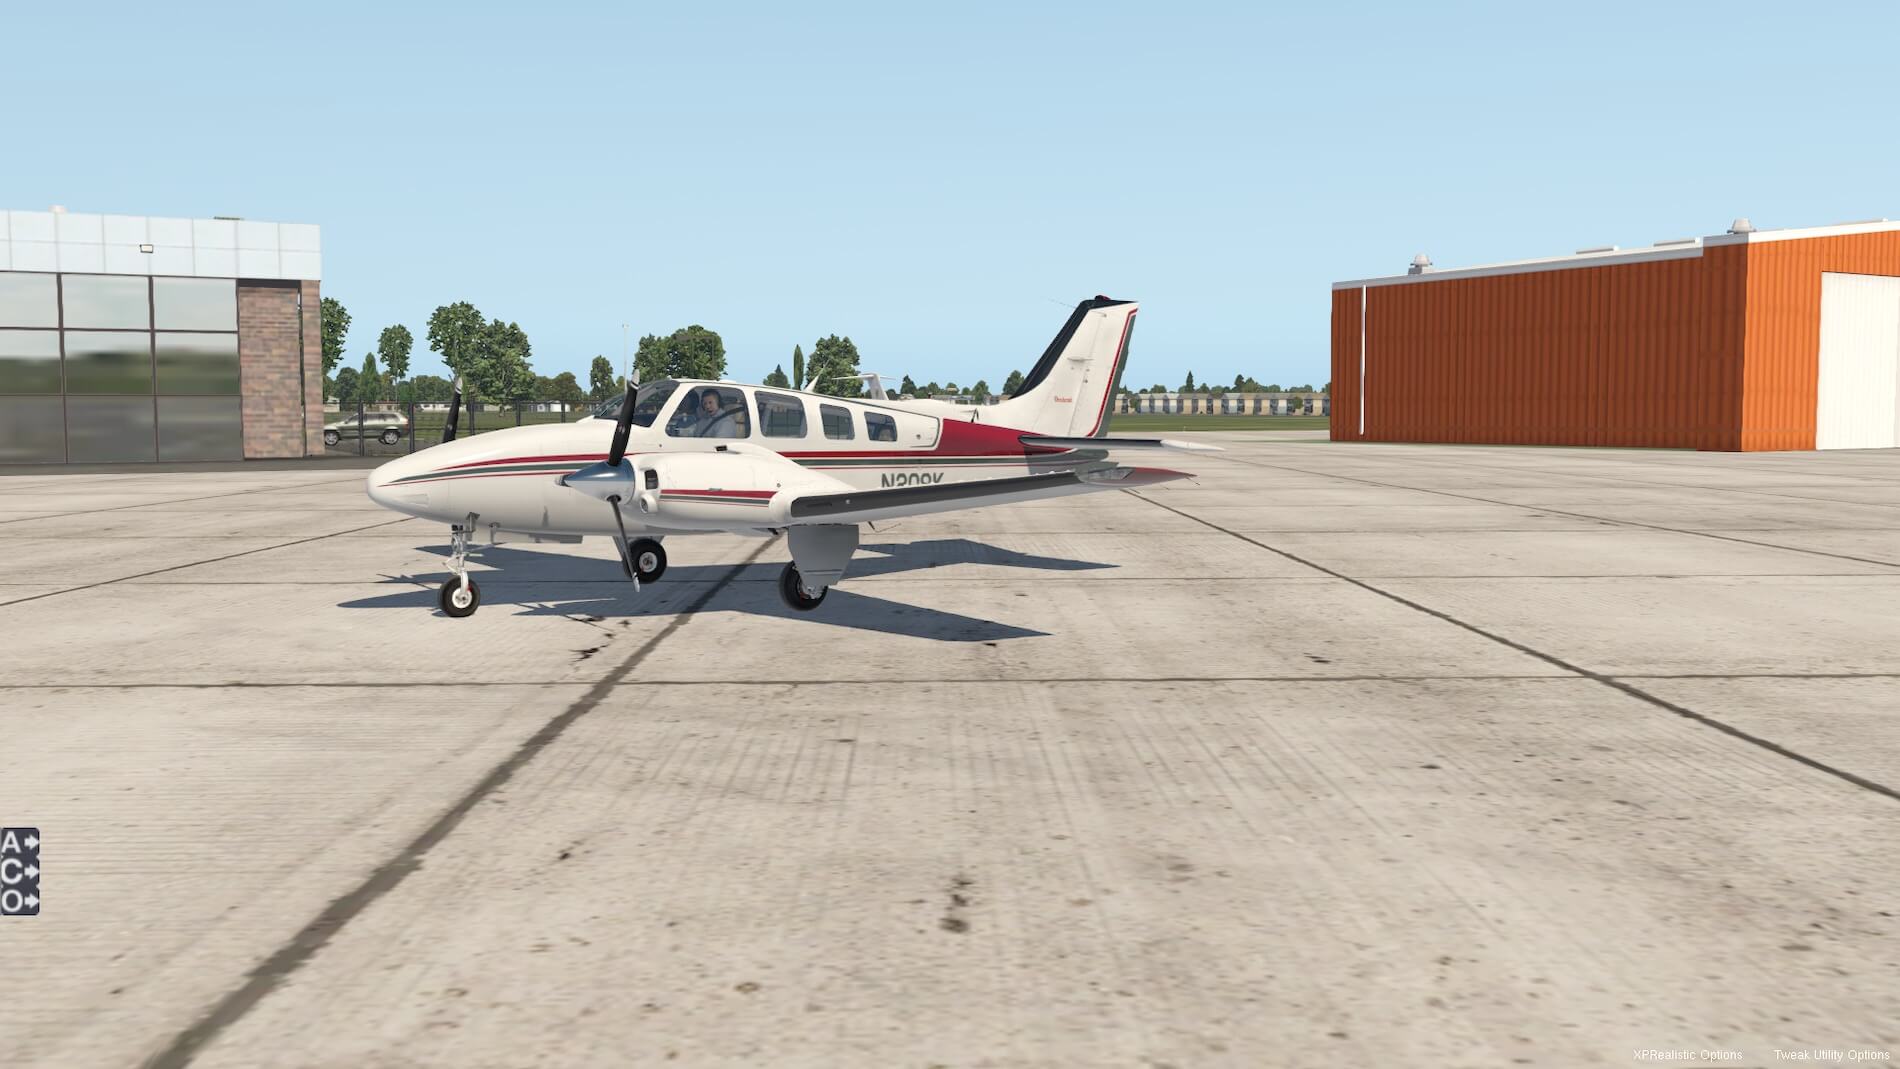
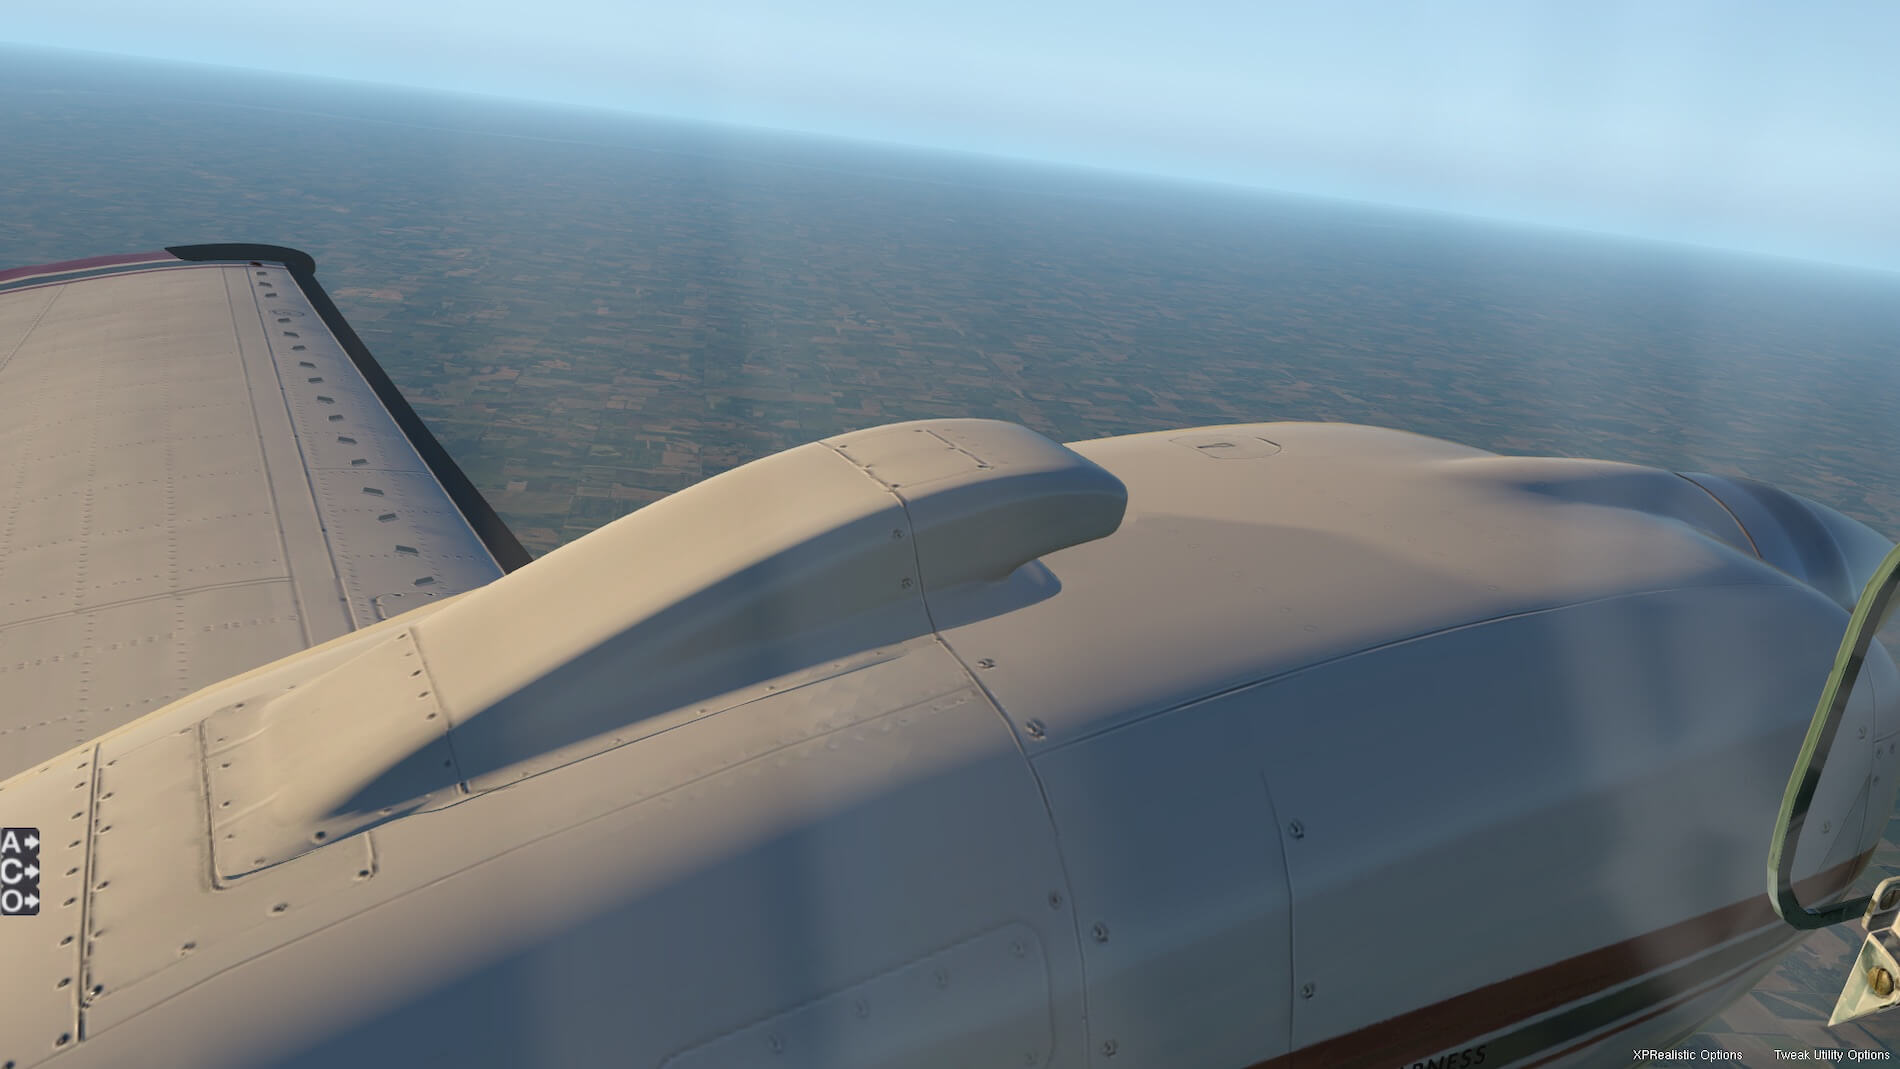
The first shot shows the B58 in a nose-on profile, as the aircraft shows off its unique fuselage profile. Engines are off and the aircraft has engine covers, wheel chocks and other static elements fitted. Then a profile view, showing that familiar pilot again who’s still curious as to what we are doing! On the wing upper surface rivets are well done as a vortex generators, and a level of sheen that looks great. A closer look at the left engine and prop, with the landing light imbedded into the front engine nacelle. A closer look again at the air cooling fins on the engine- even some screws showing.


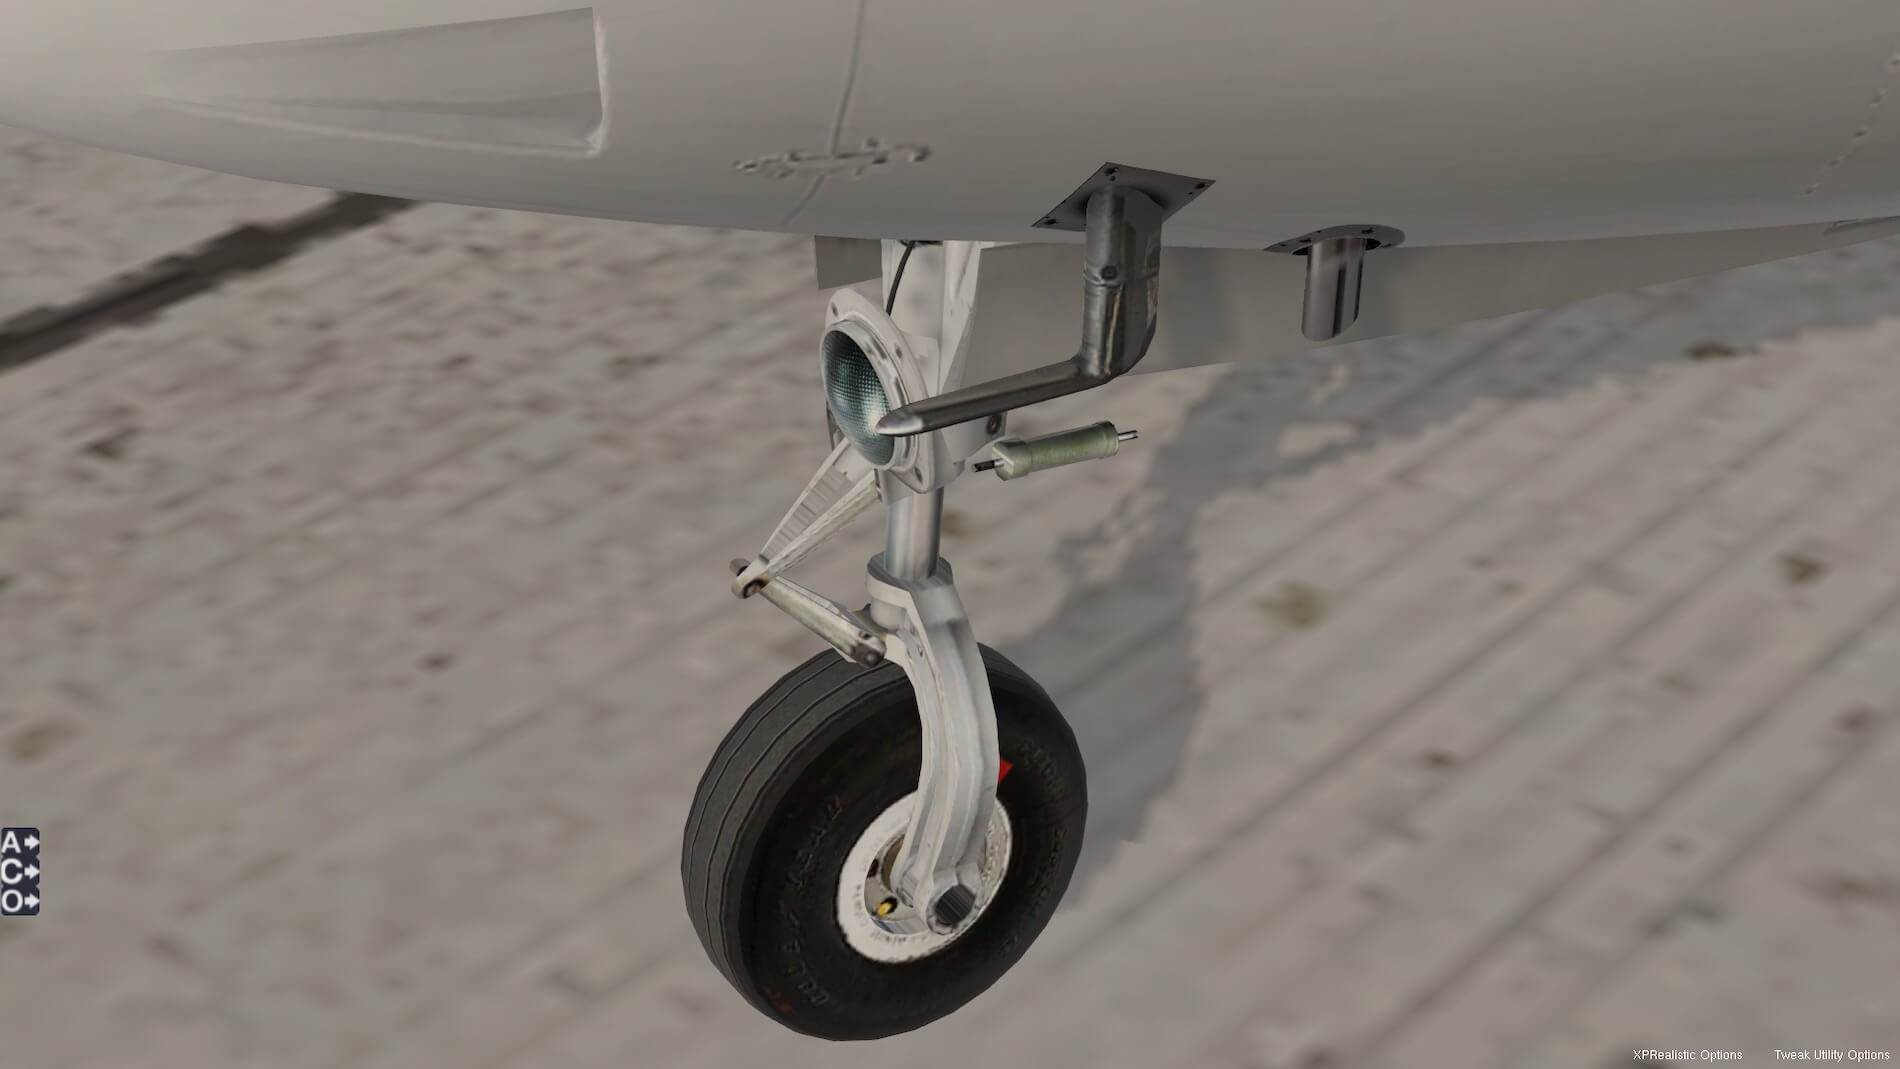
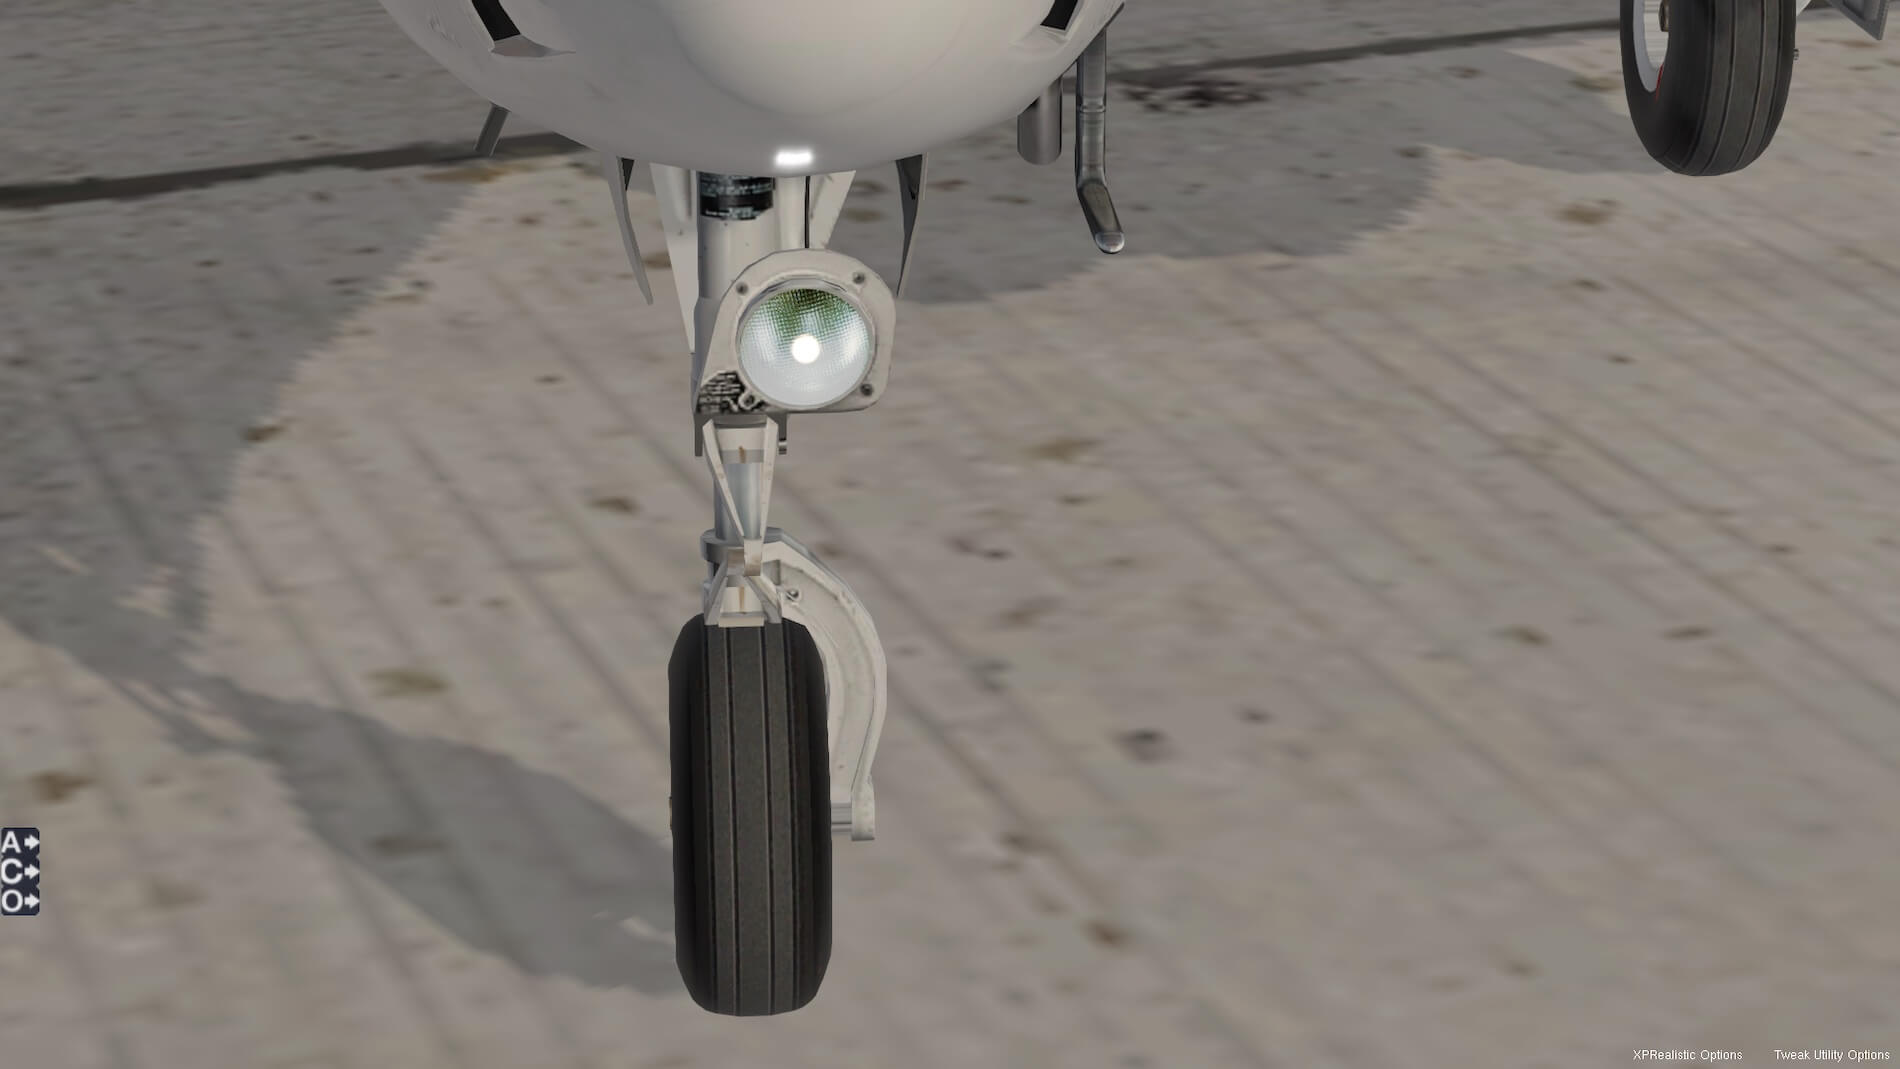
The nose wheel is well done other than a piece missing in the horizontal damping mechanism- it doesn’t appear to be connected. The Pitot tube looks good. Next looking at the empennage – great texturing again.

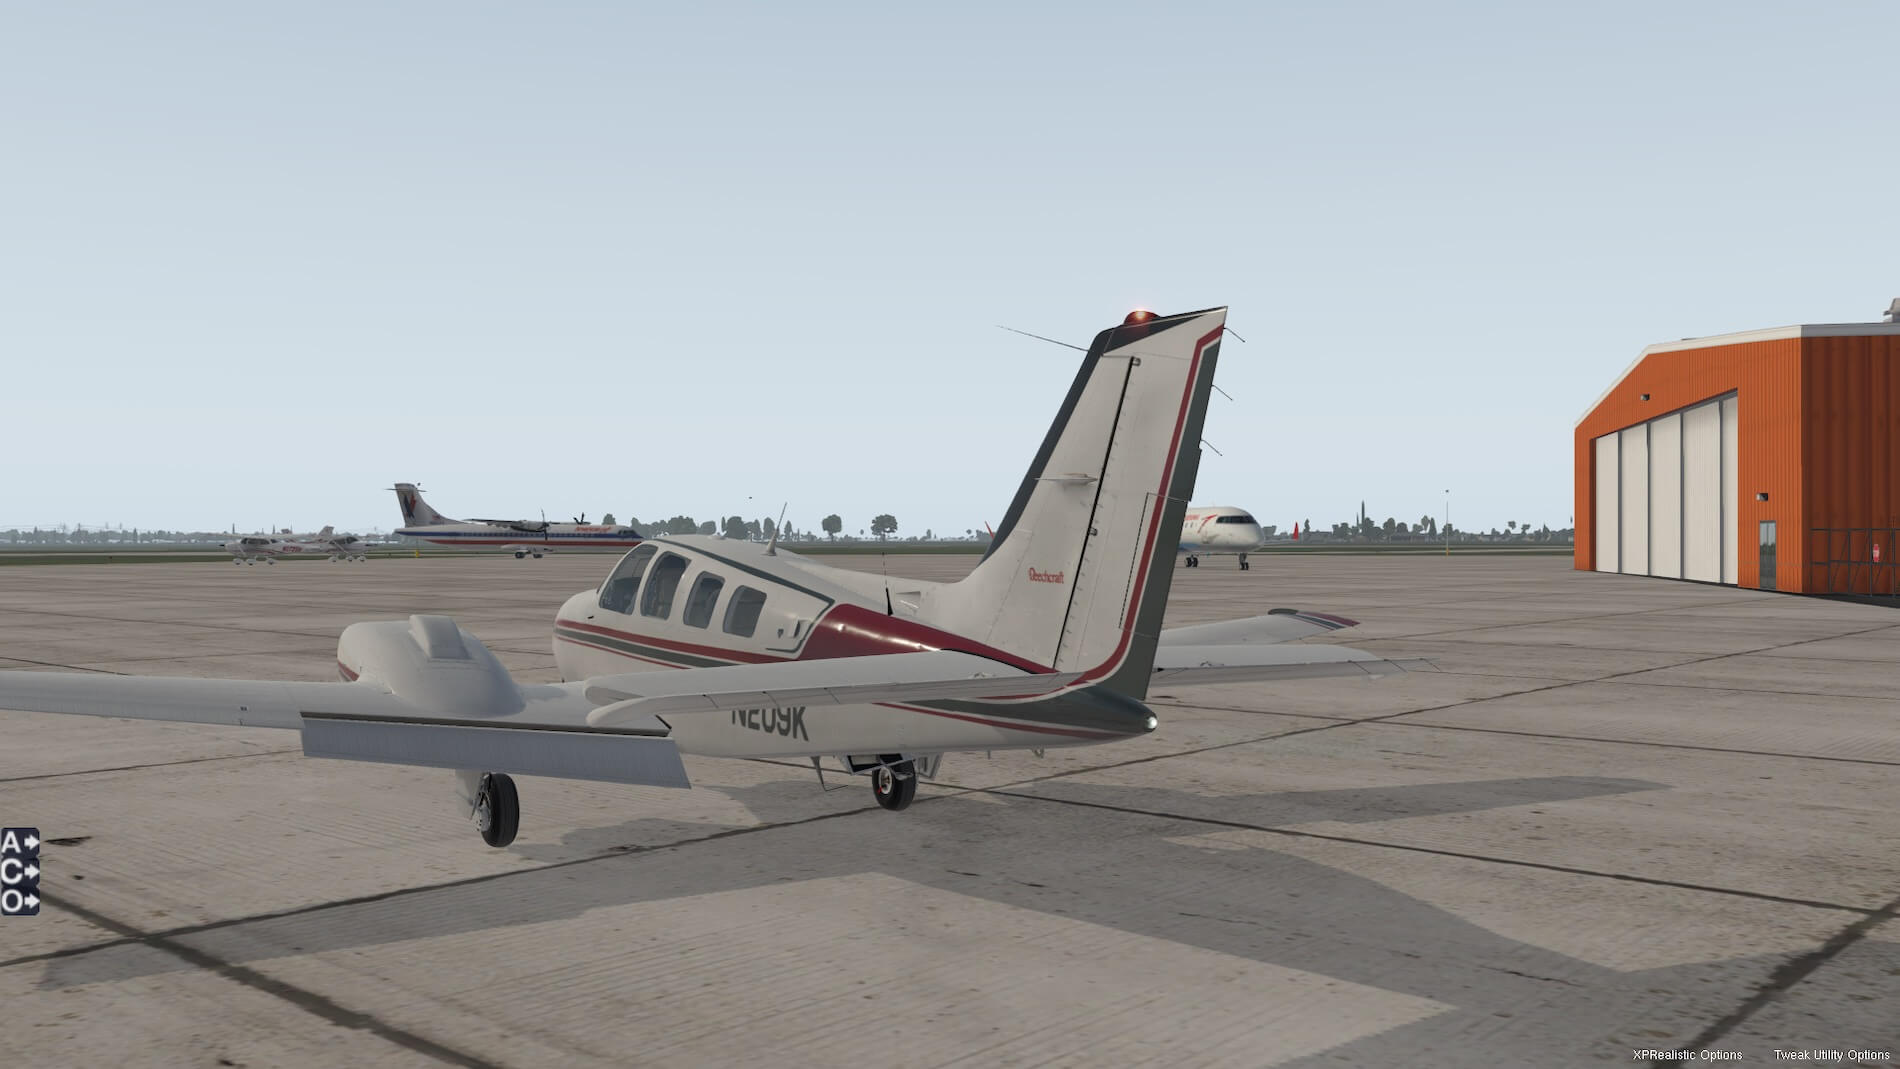
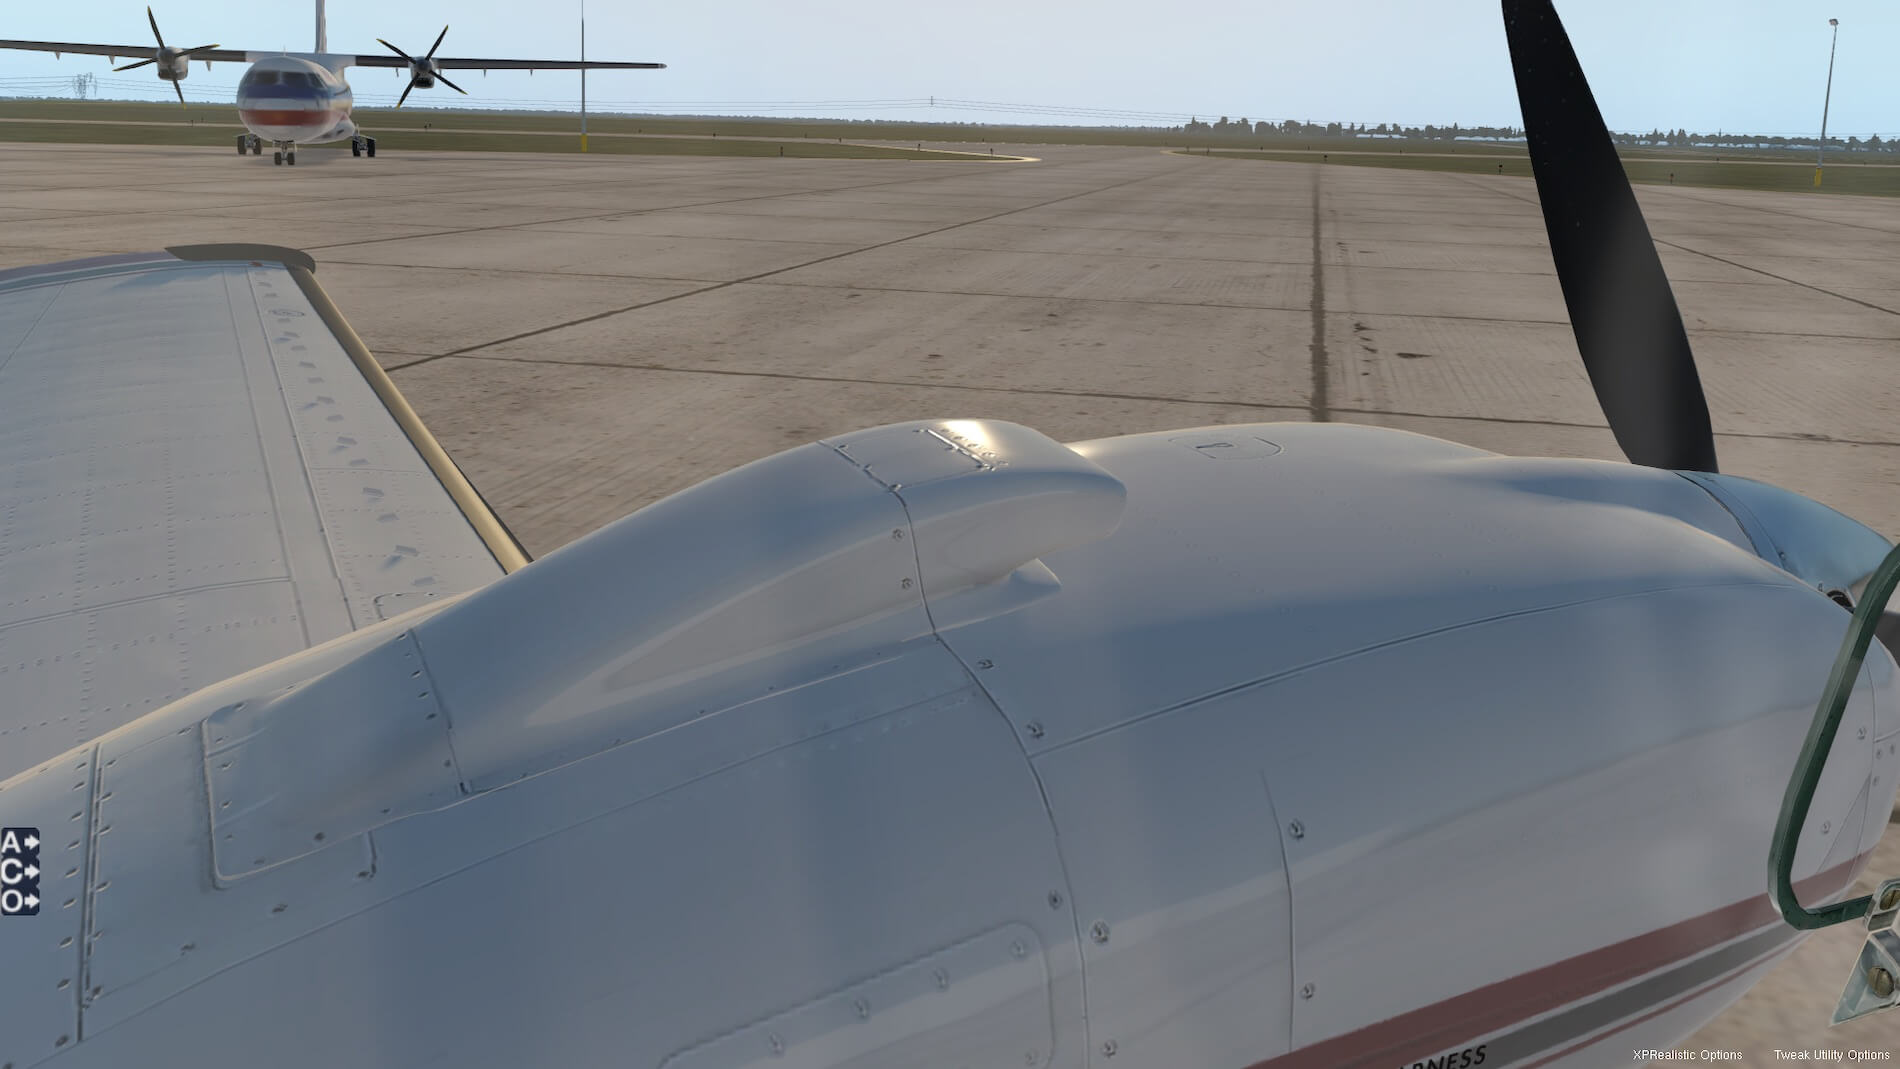
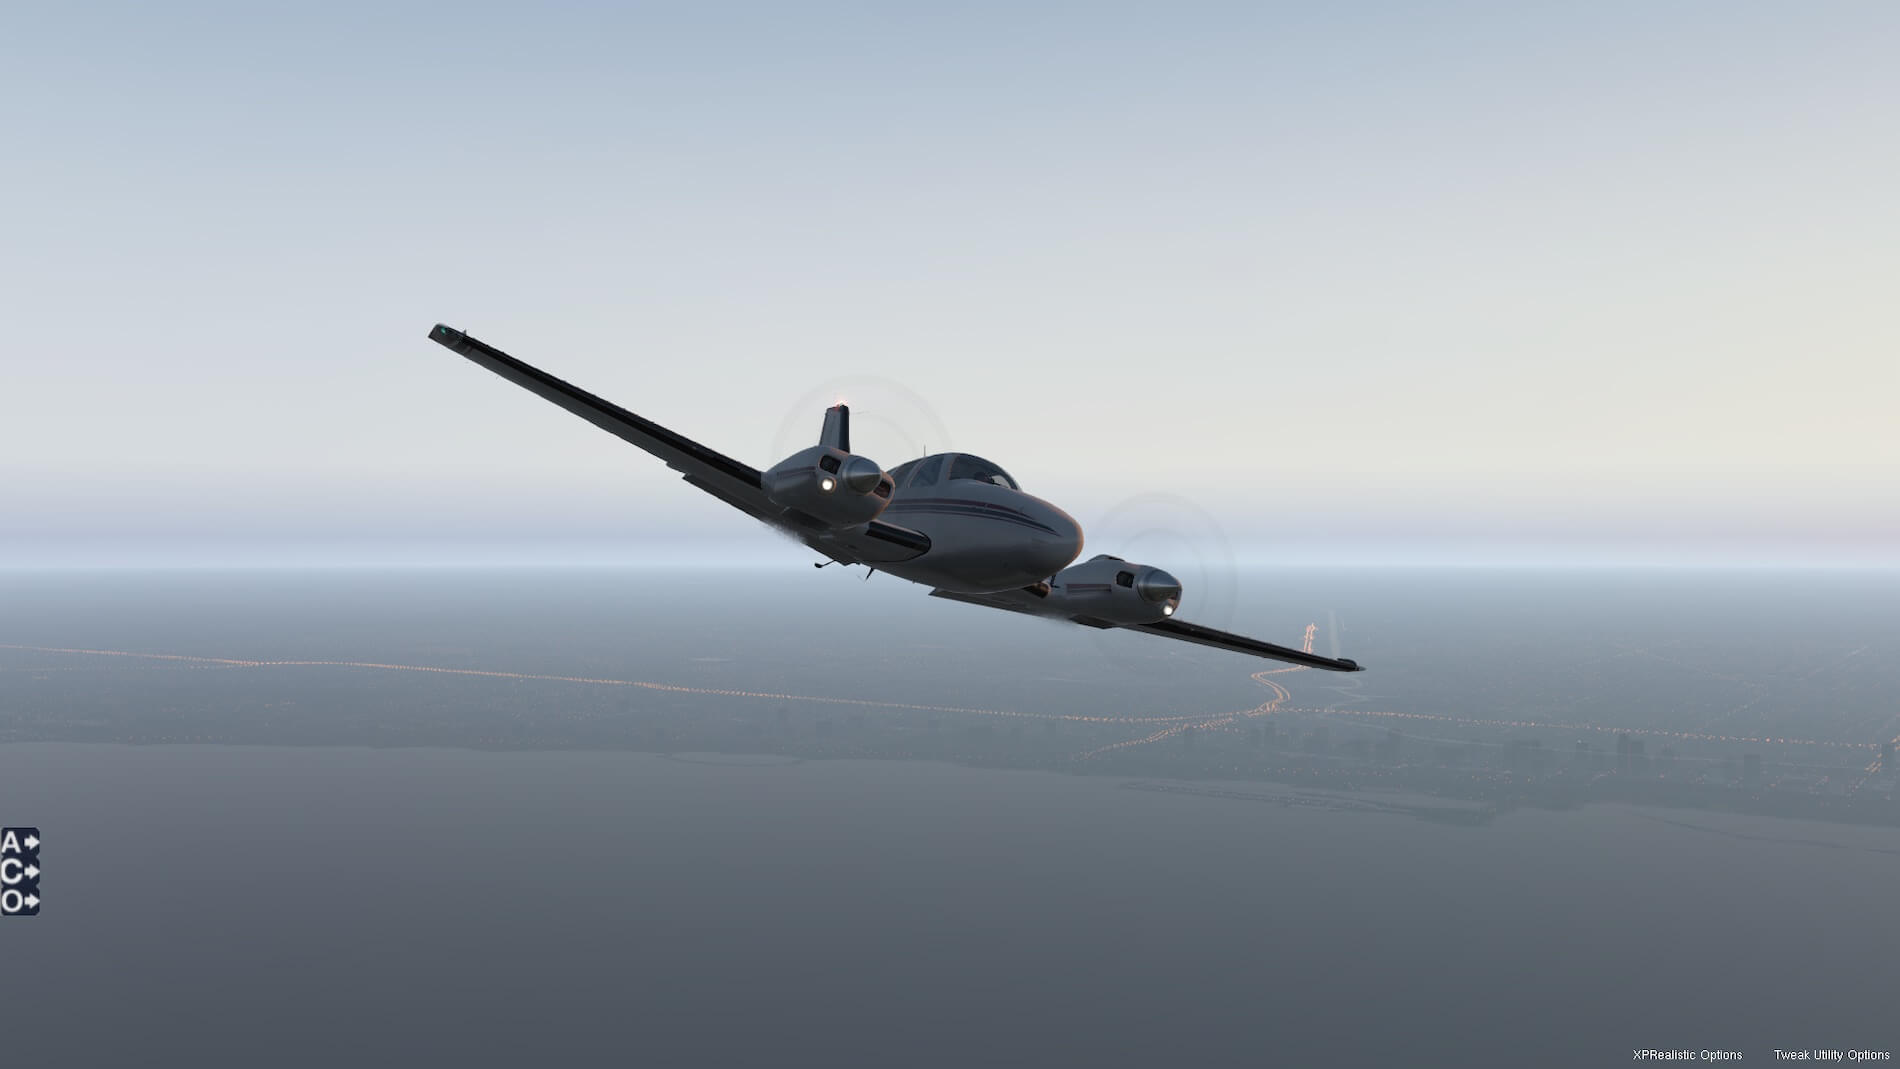
We now show the external model with the engines running. First from the front, then looking at the left engine again- better not get too close to that spinning prop! The taxi light on the nose wheel strut is well done, and take a look at the rear of the wing with the flaps set to full. A similar view now with the left aileron lifted to its fullest extent.


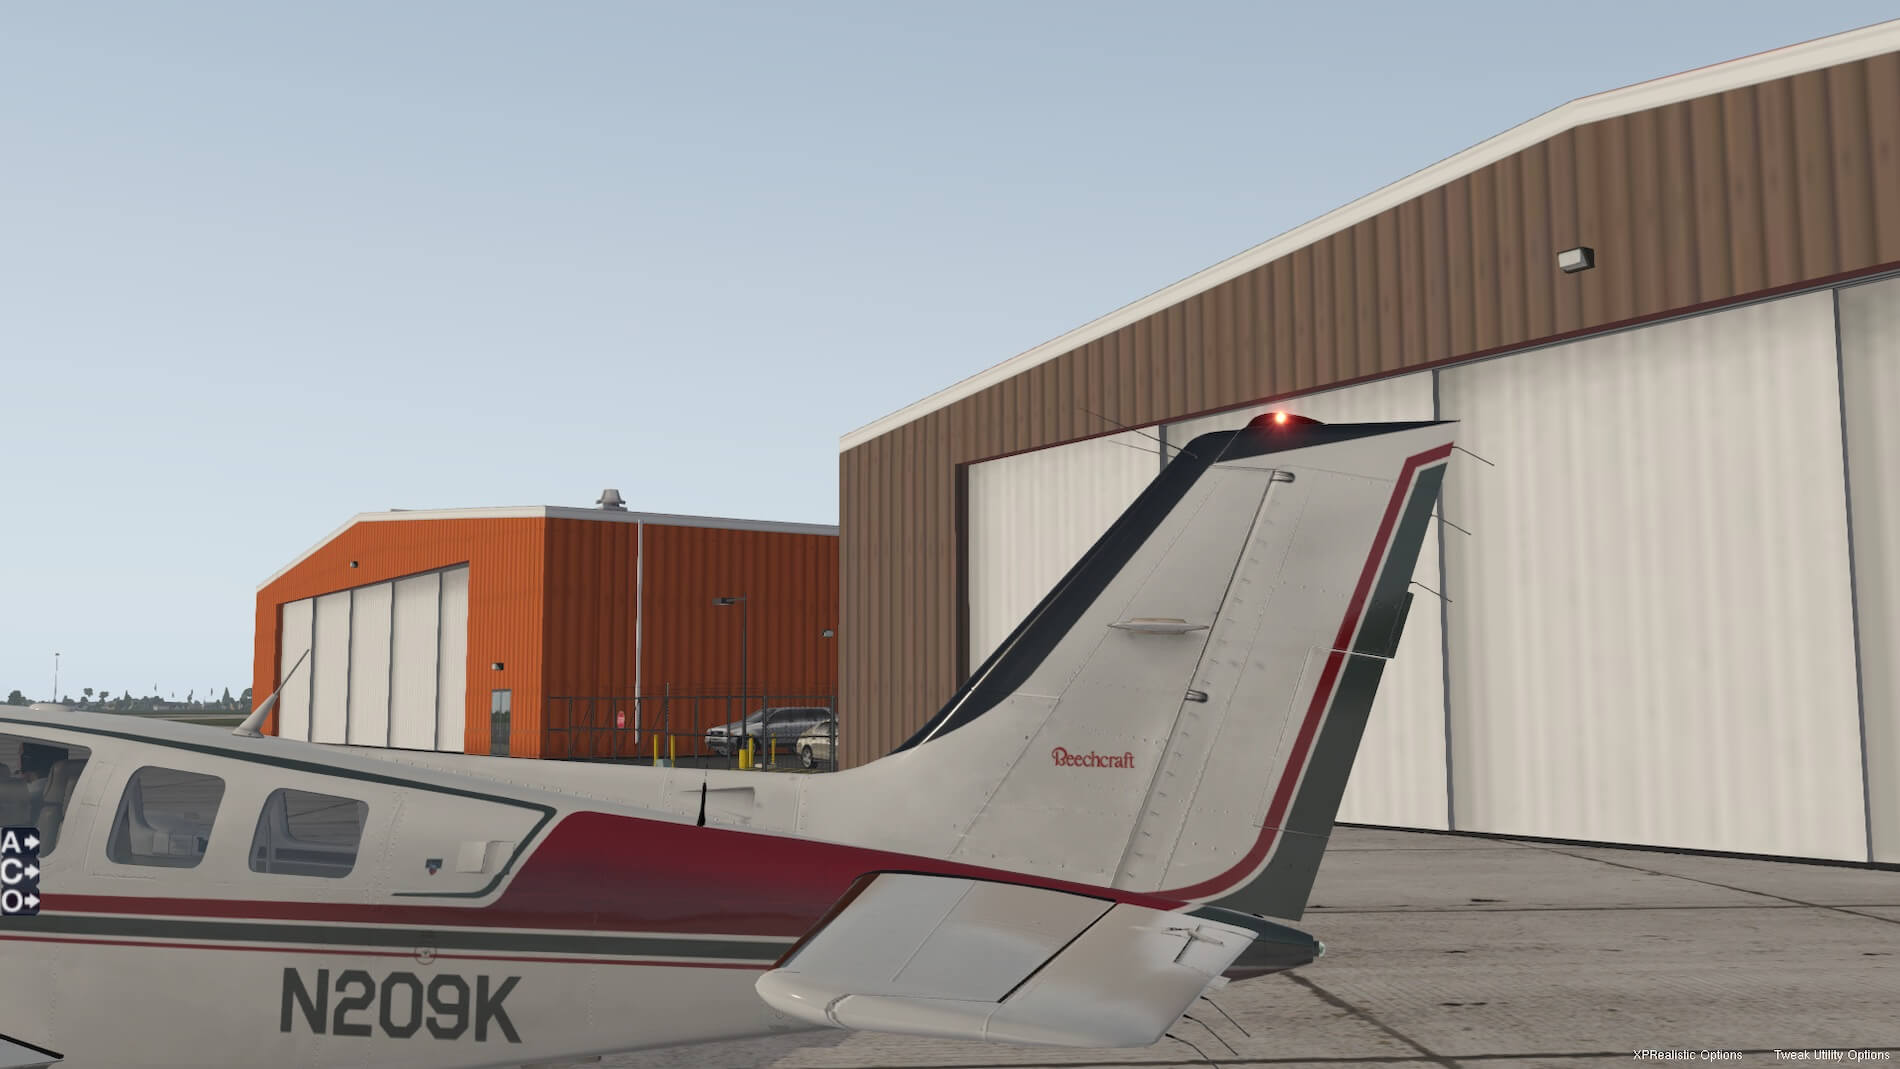
The rotating beacon shows on the rudder, with the “Beechcraft” name proudly displayed. The elevators at full nose up position, and the trim tab also fully trimmed for nose up (the downwards movement of the tab acts on airflow and pushes the elevator upwards, which in turn pushes the nose in an upwards direction) The tail nav light looks good, very realistic. I show the upper surface on the elevator with the trim tab fully extended downwards, and here there is a piece of the linkage to the trim tab that is disconnected (it looks connected when the trim tab is centered).


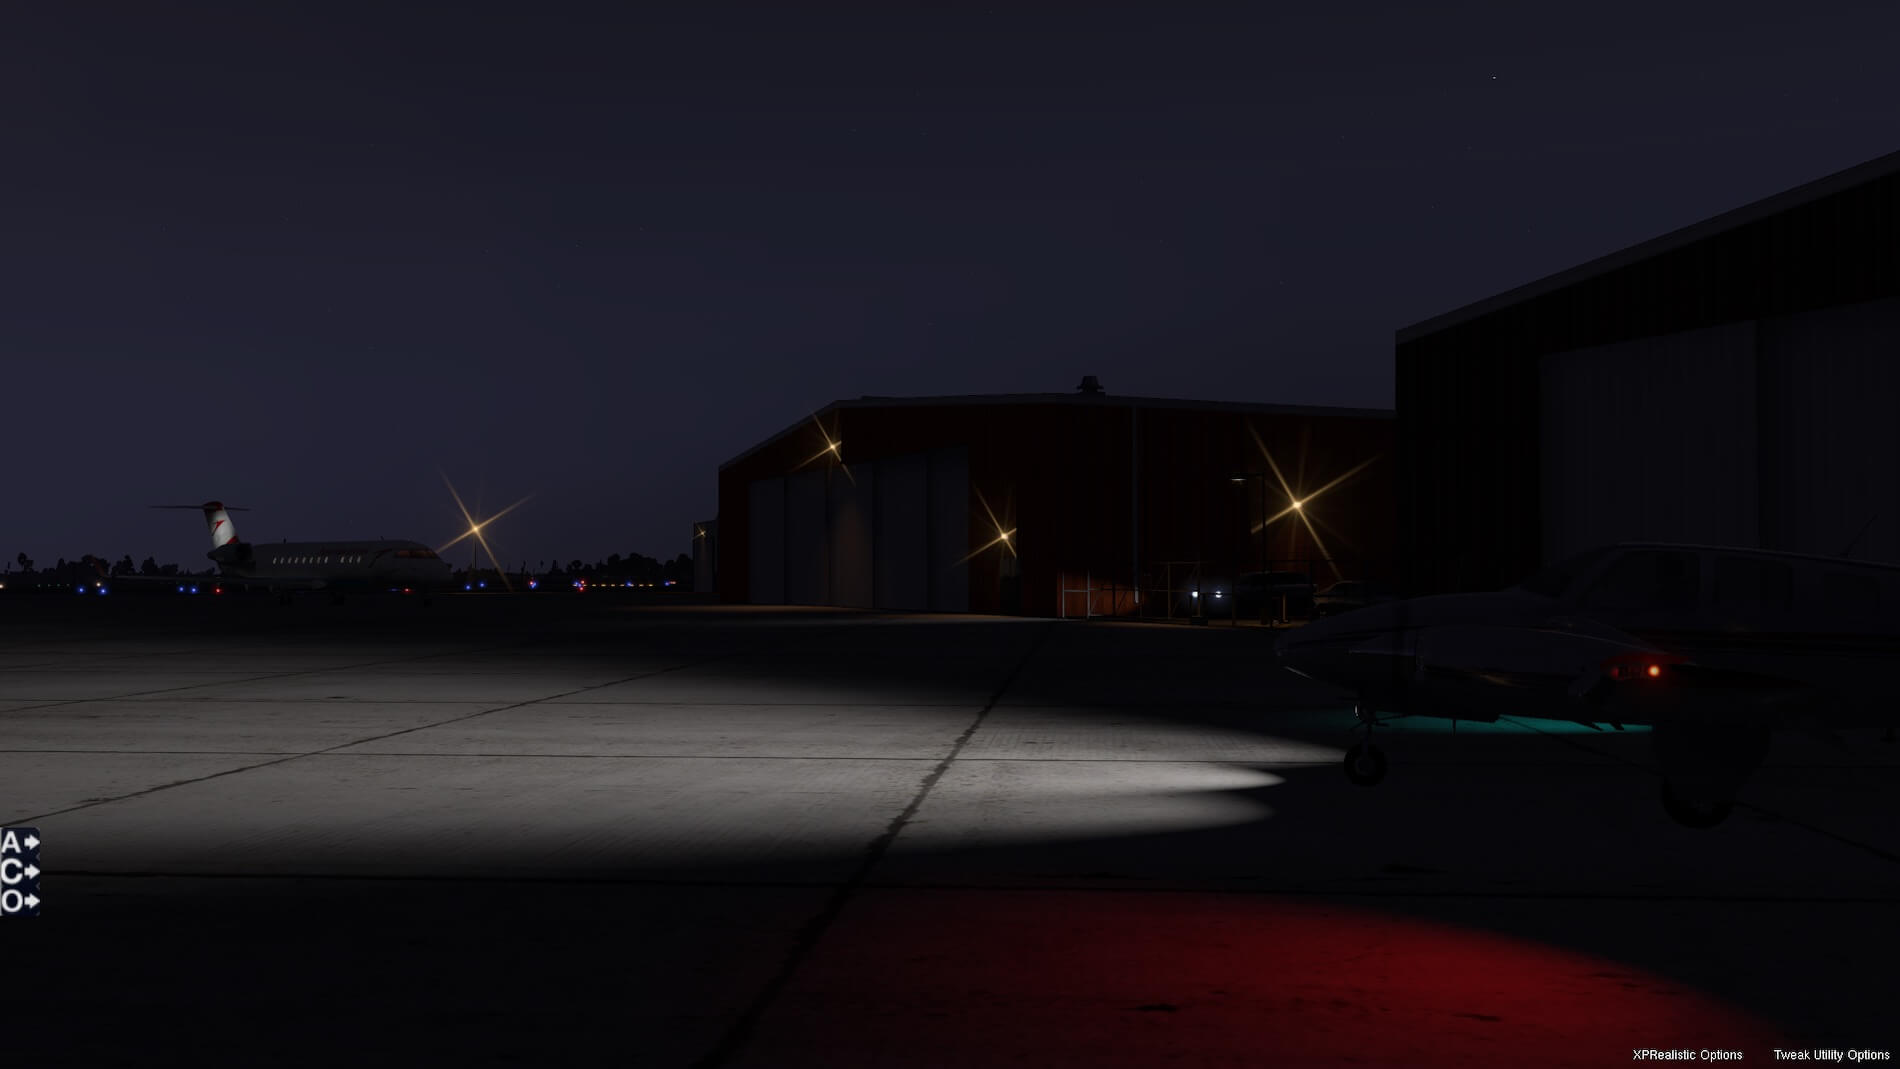
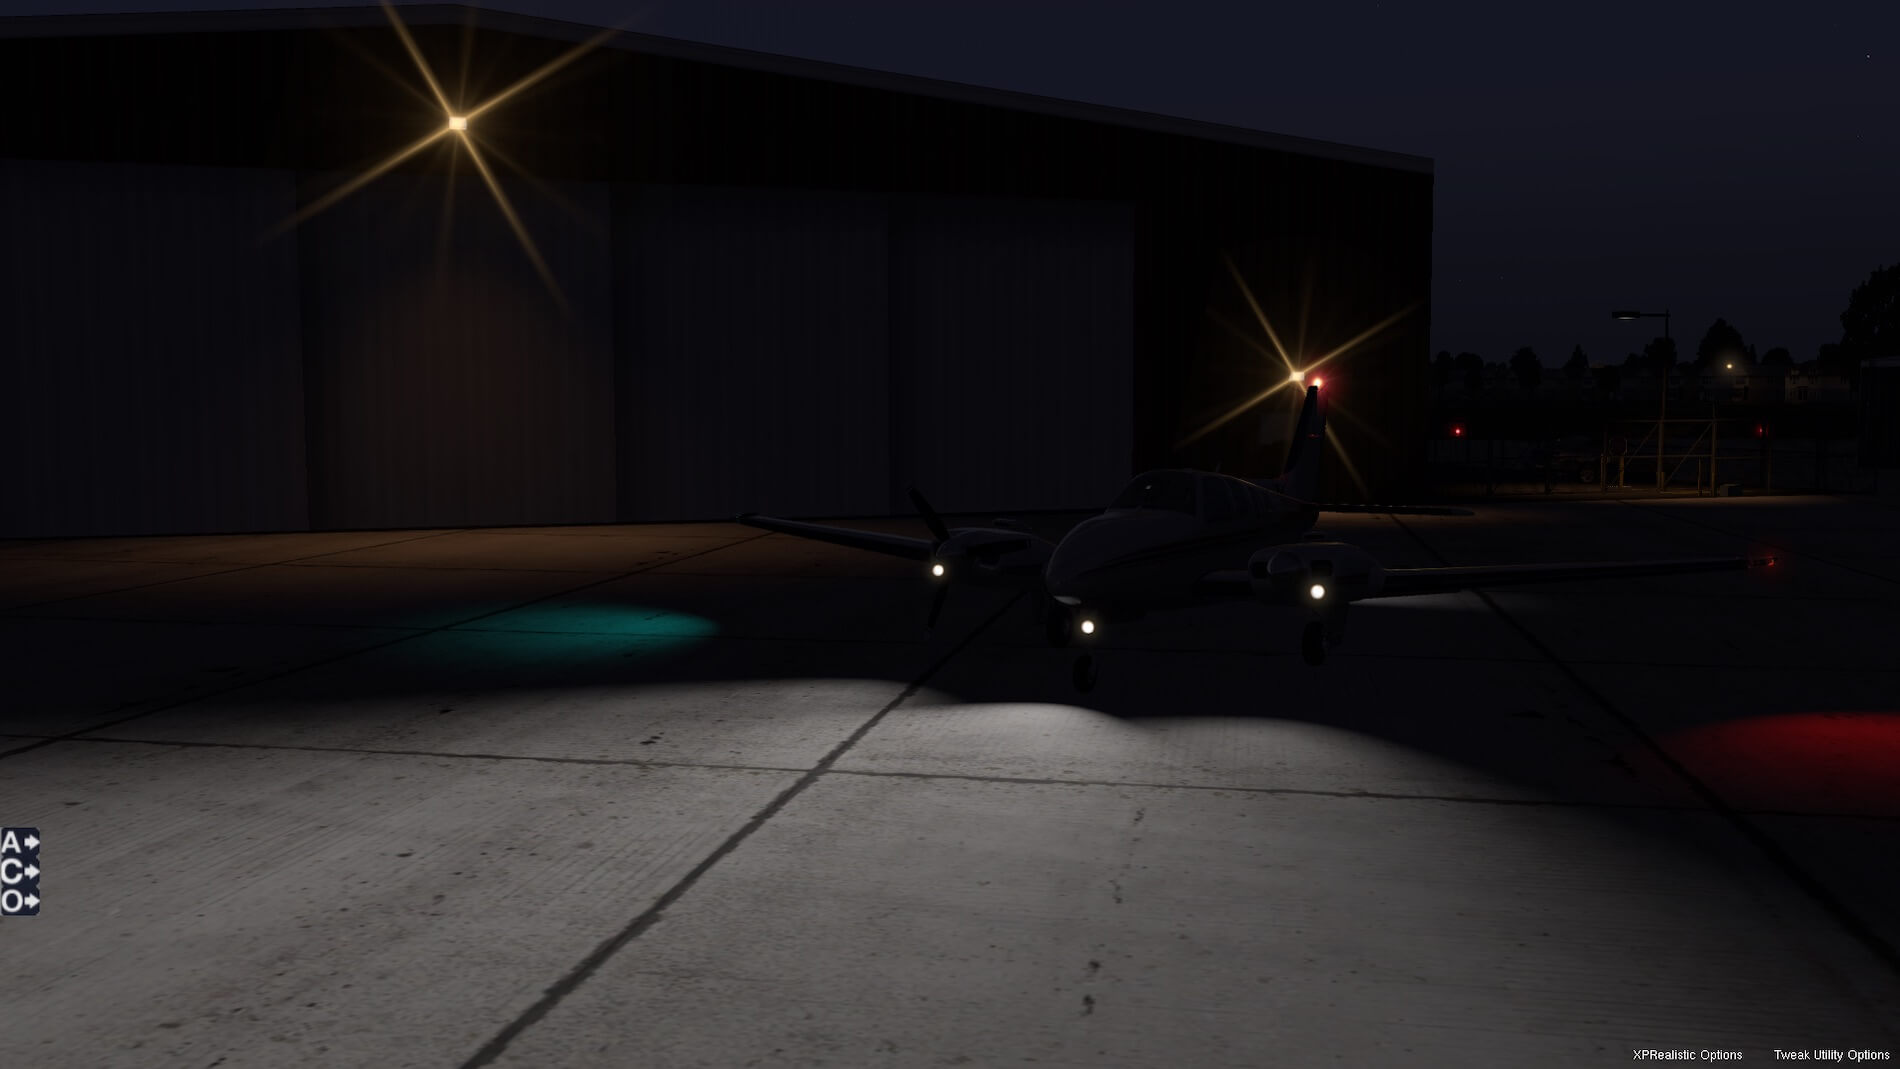
Finally, a look externally at dusk, showing the illumination of the landing / taxi lights, as well as the lights on the aircraft itself. This is a beautifully done model!
Internal Modelling
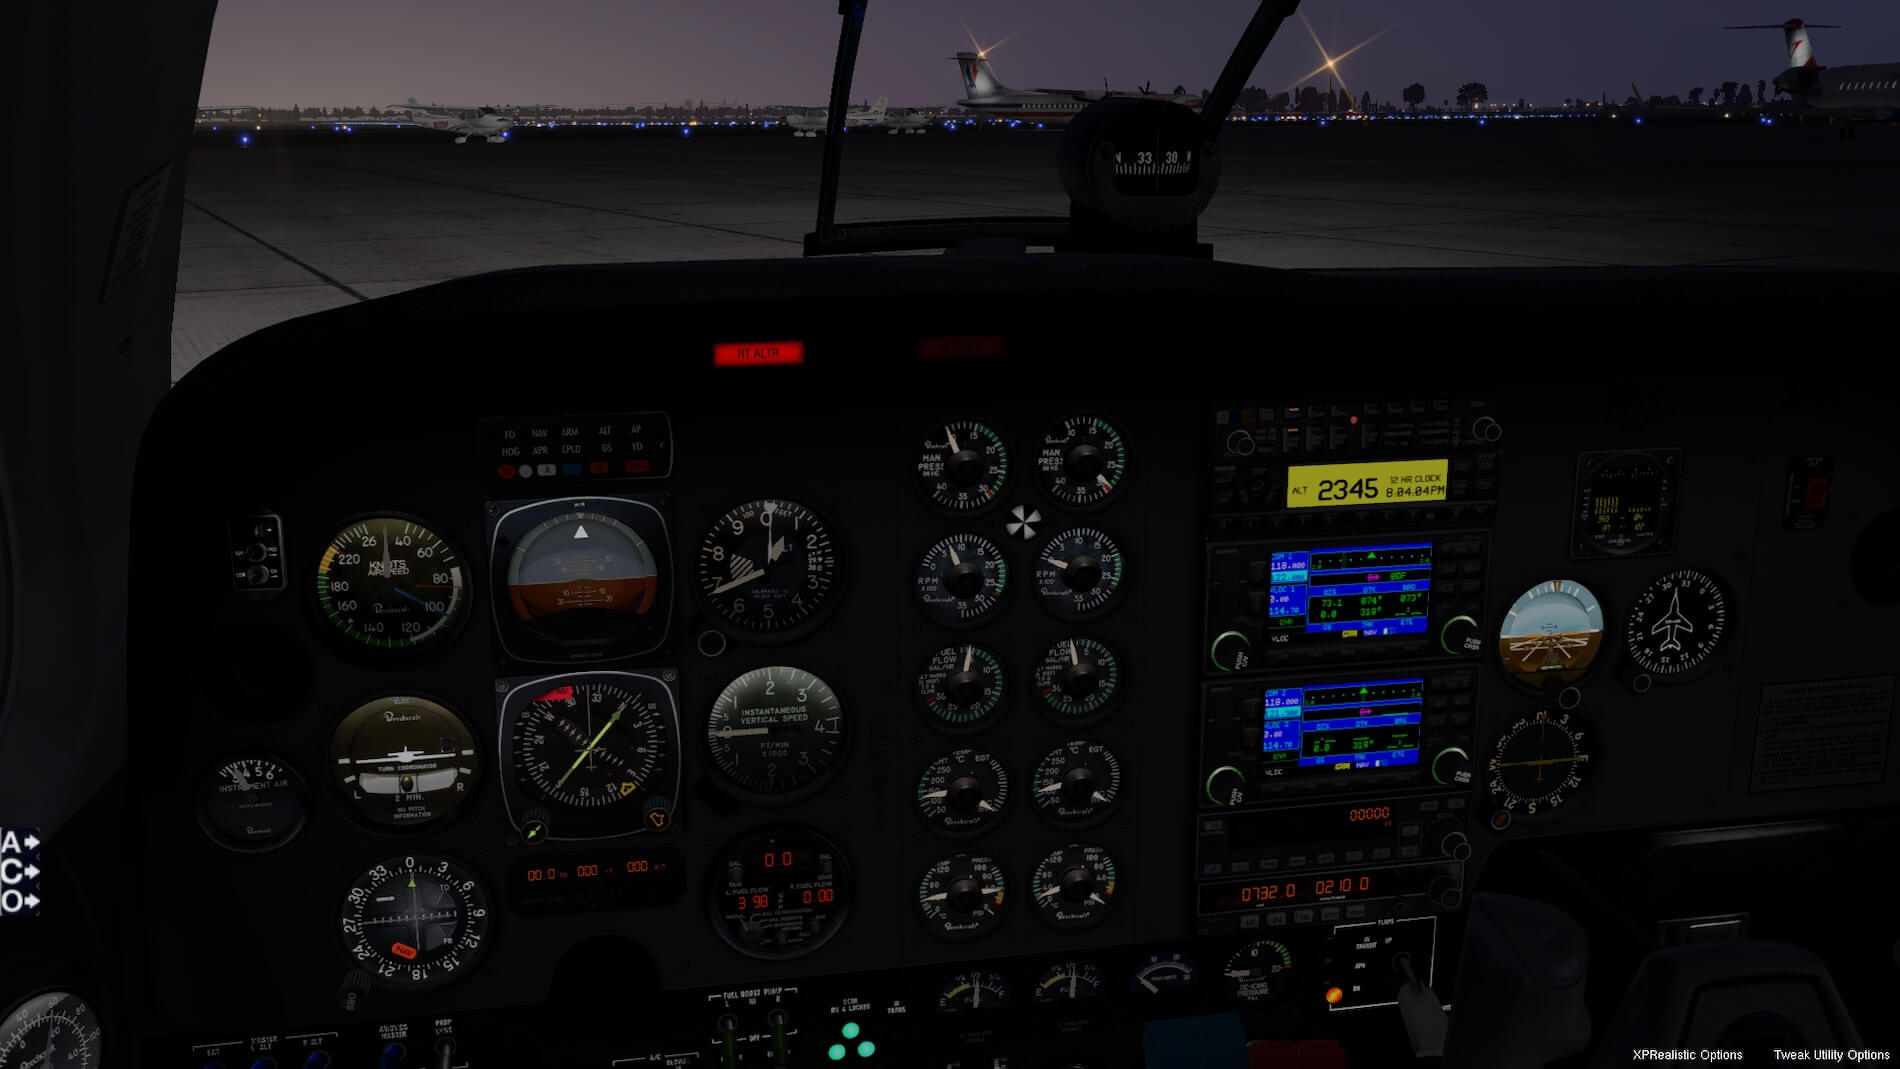
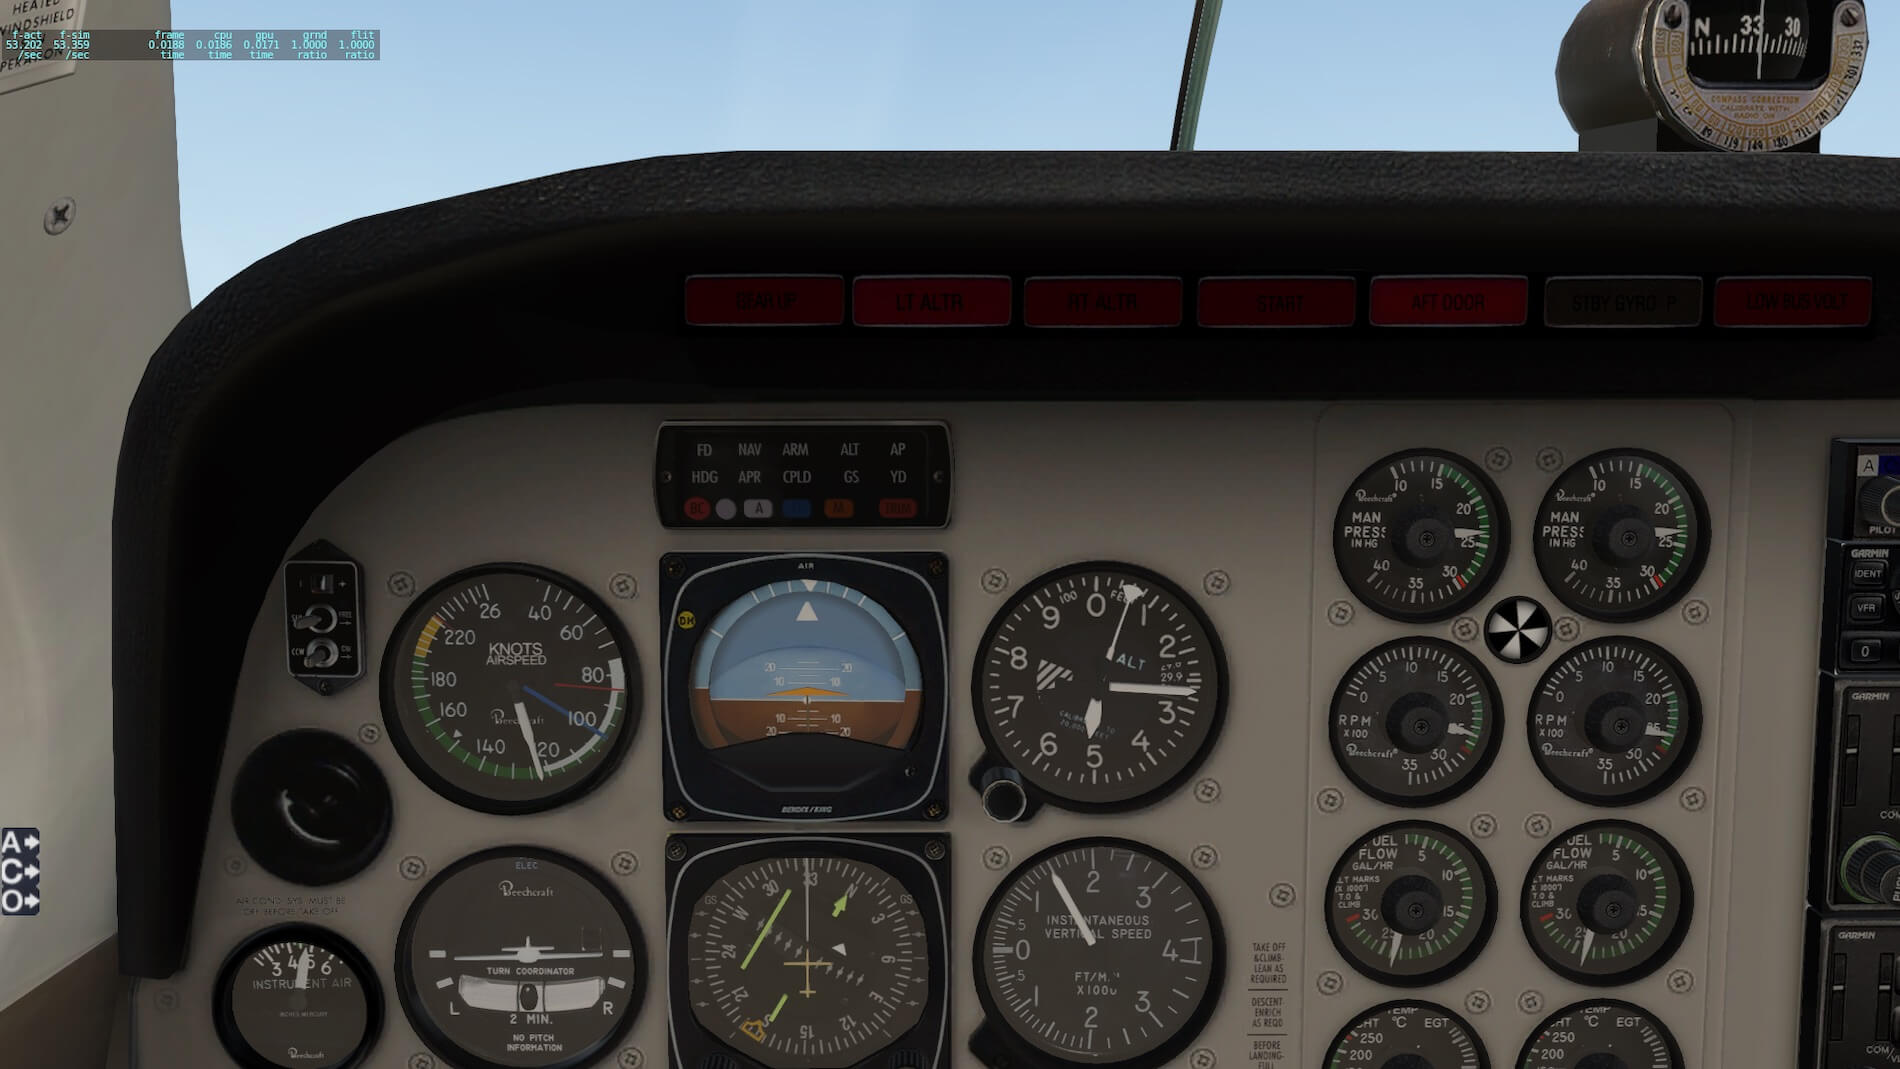
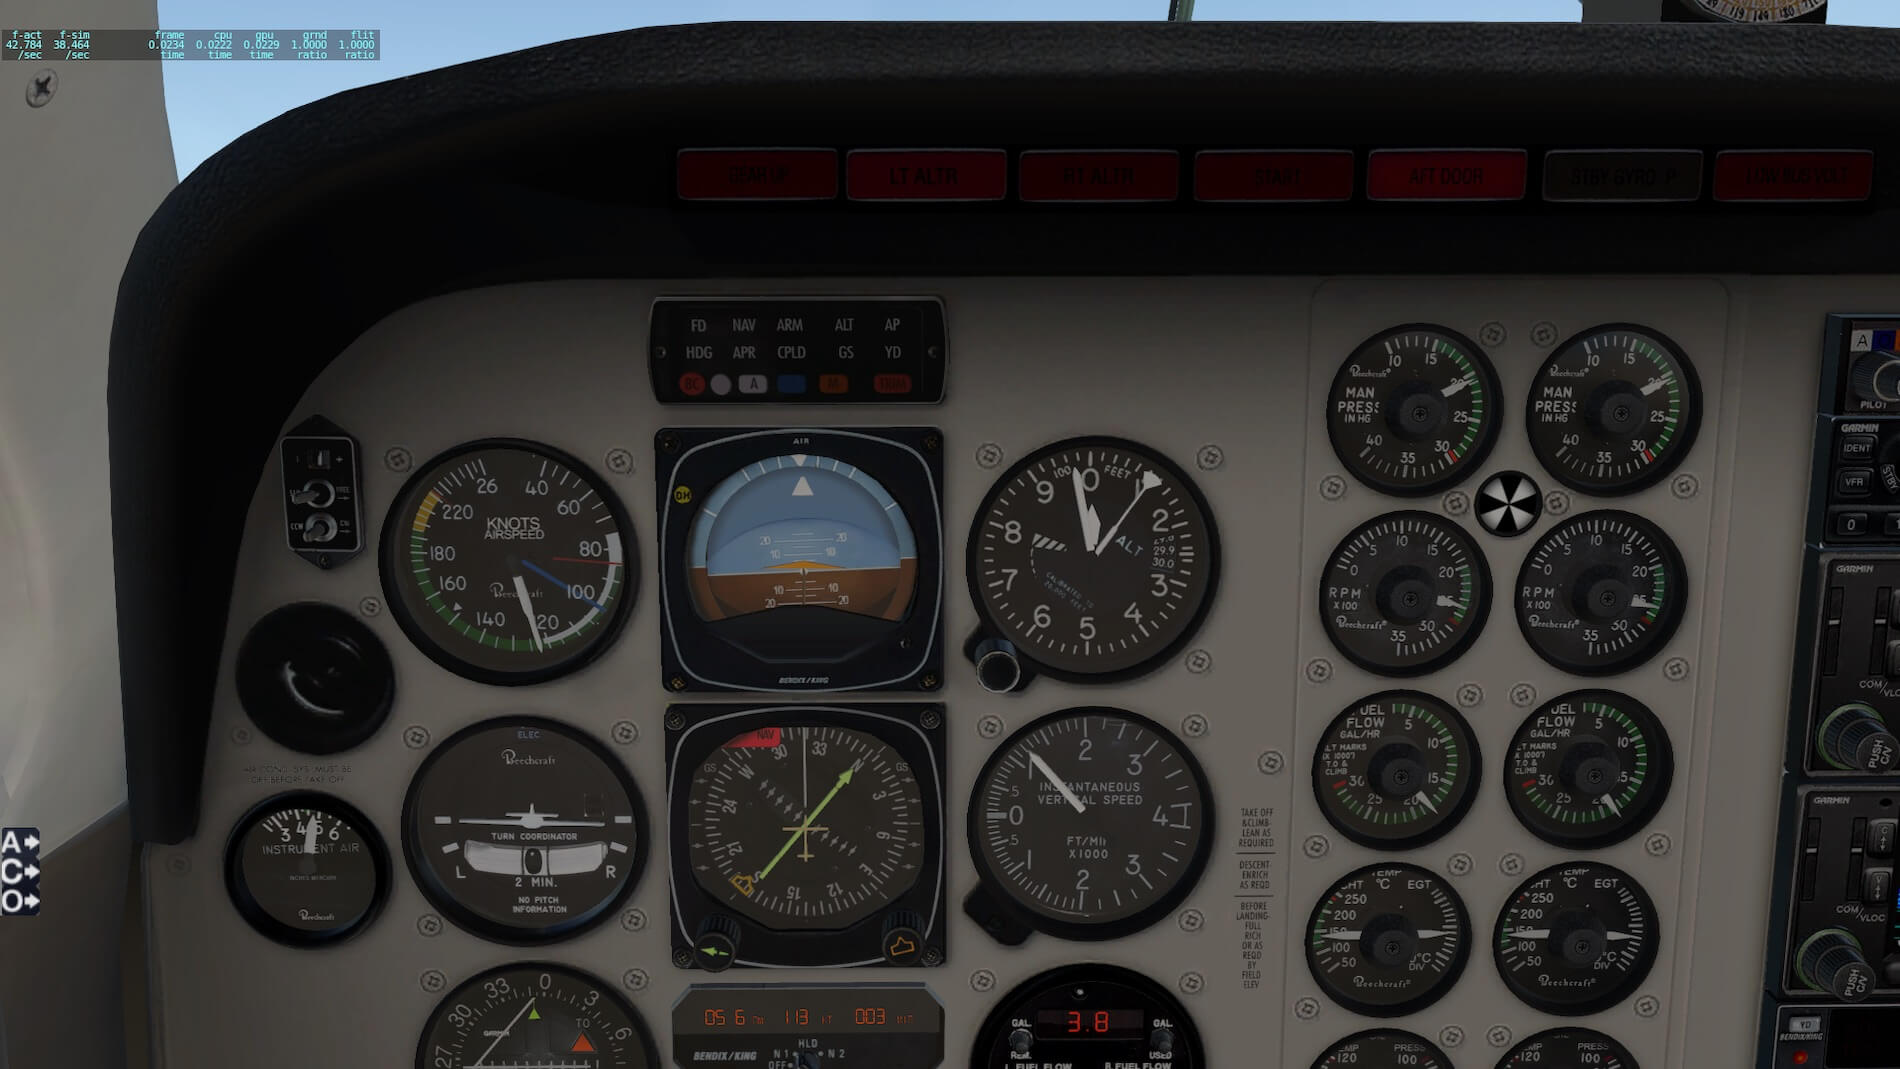
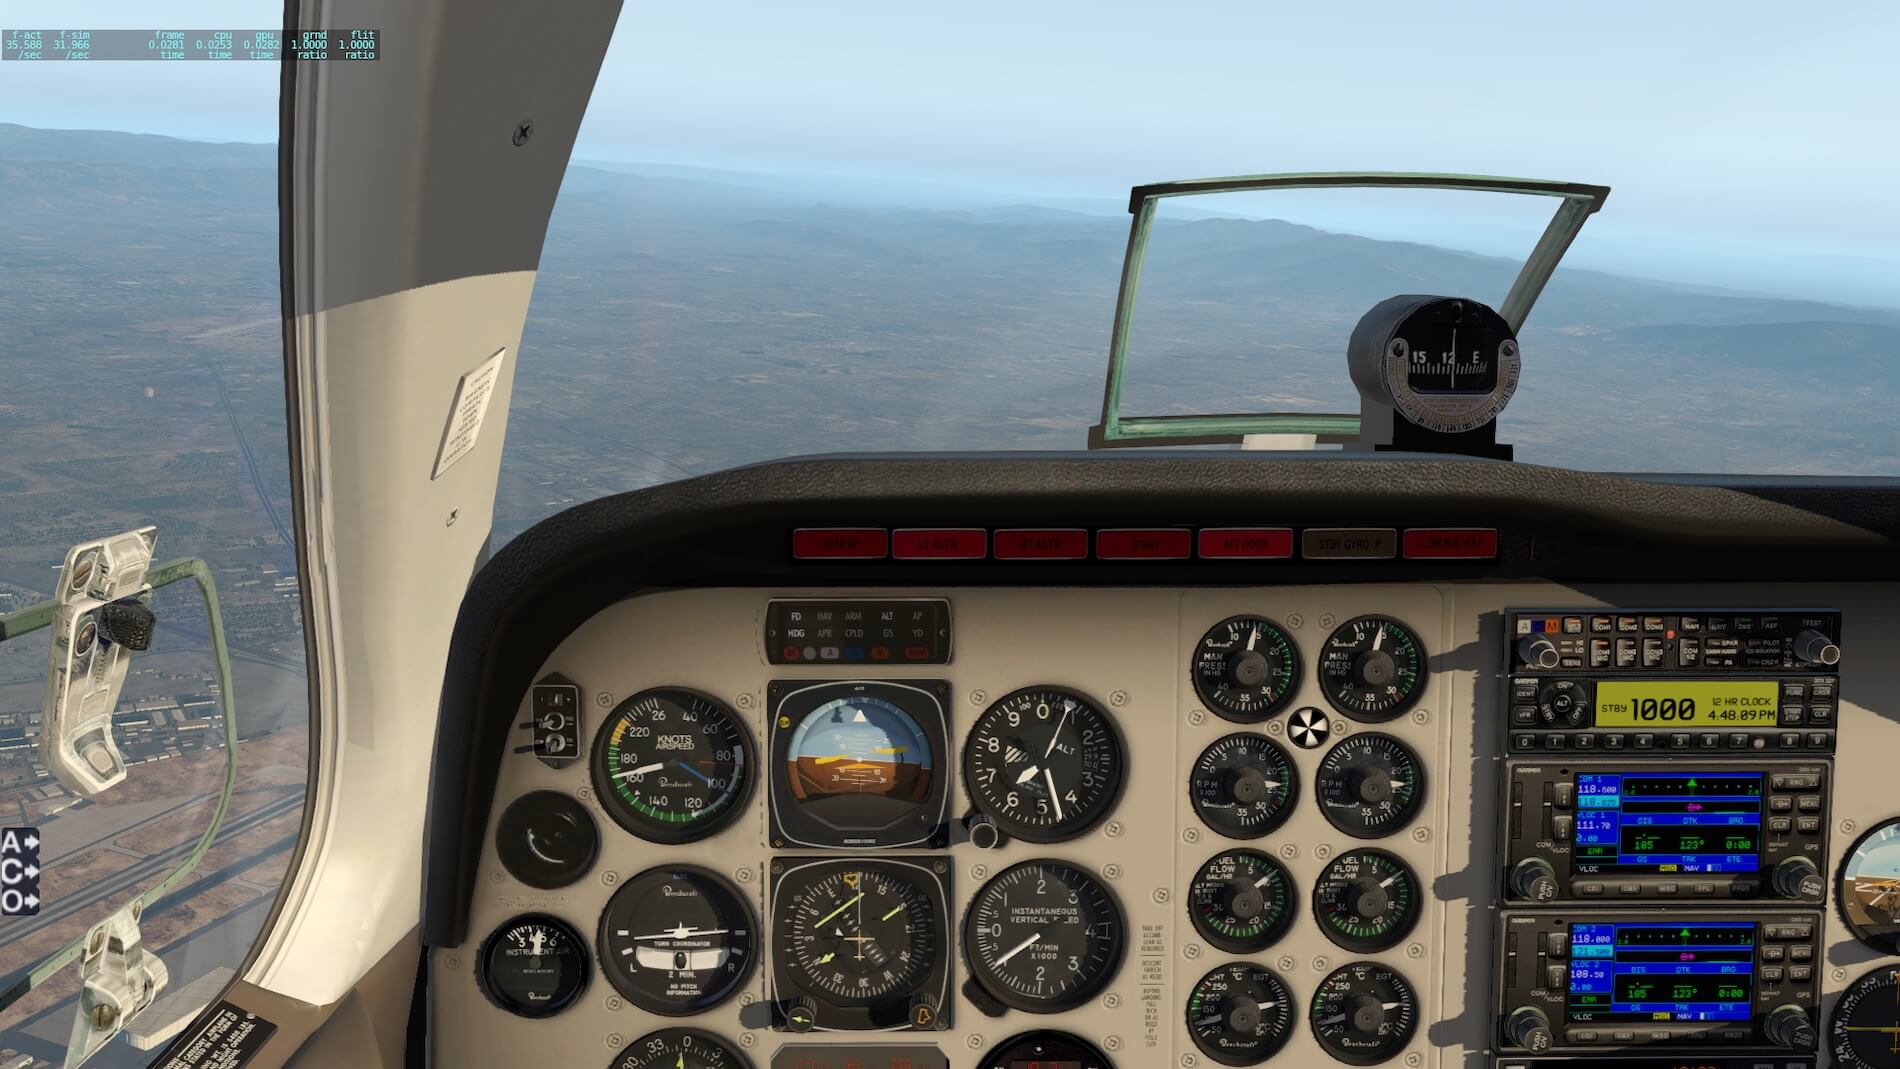
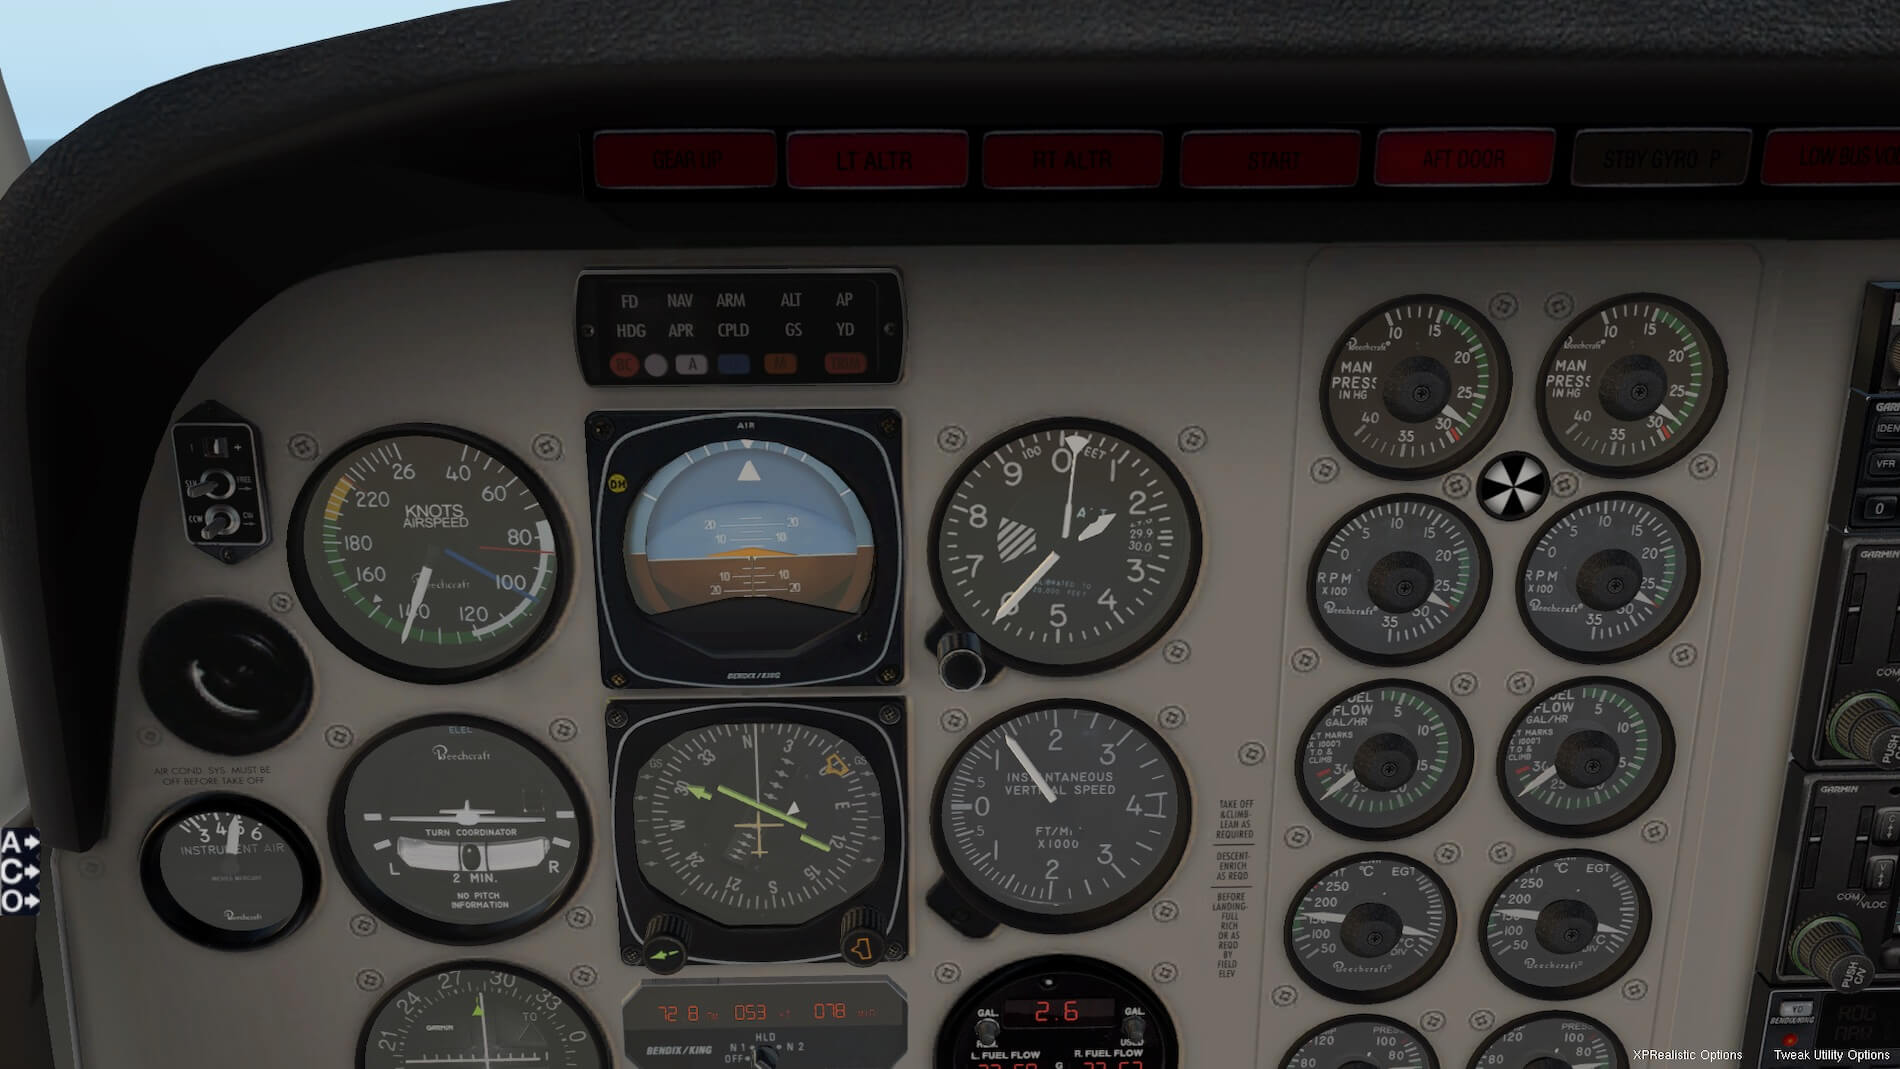
First an overall look at the conventional “six-pack”, with an HSI, twin Garmin GNS 430 units, and I have hidden the pilot’s yoke for more clarity. A look at the audio panel and transponder in the default setup upon loading the B58. The Exhaust temperature and cylinder head temperature indications, a J.P. Instruments EDM-780.
The right-side instrumentation, which is rather sparse as in the real aircraft. Also, the annunciator panel showing auto-pilot modes, marker beacon lights and a trim indicator.


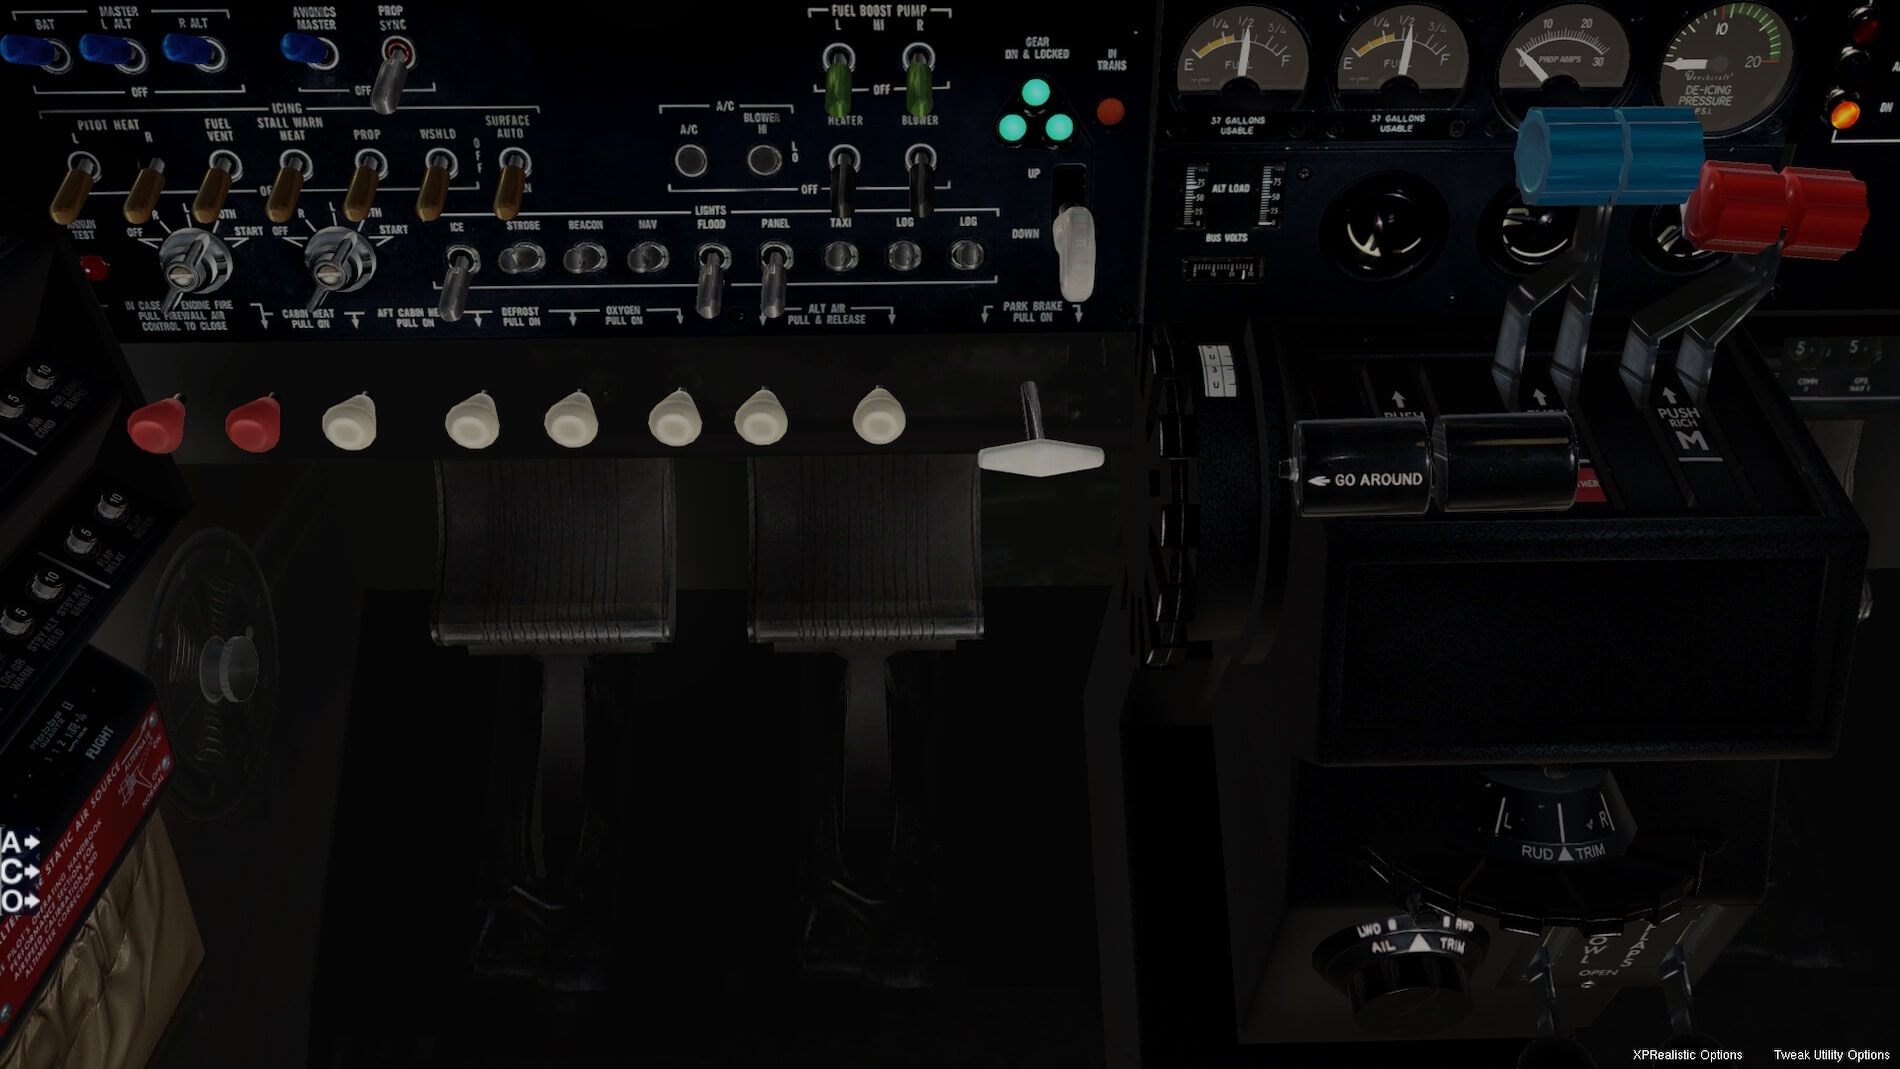
Next is the instrument air gauge, also showing the NAV2 VOR indicator. A DME and fuel-flow / fuel quantity indicators- interesting that the B58 is burning over 8gph in just idle, an expensive aircraft to not only buy, but to fly as well! The circuit breakers to the left of the pilot, and an outside temperature gauge in both Celsius and Fahrenheit as well as placarded limitations.
Below the circuit breaker panel are two Hobbs meters for engine and flight (DC power on) times, and a pouch for the POH as well as directions for the use and location of the alternate static air source should to primary be clogged or otherwise disabled. Also, a look at the various utility knobs for cabin heat and air, defrost, etc., which as well shows the trim wheel and gauge as well as fuel gauges and engine / prop controls.


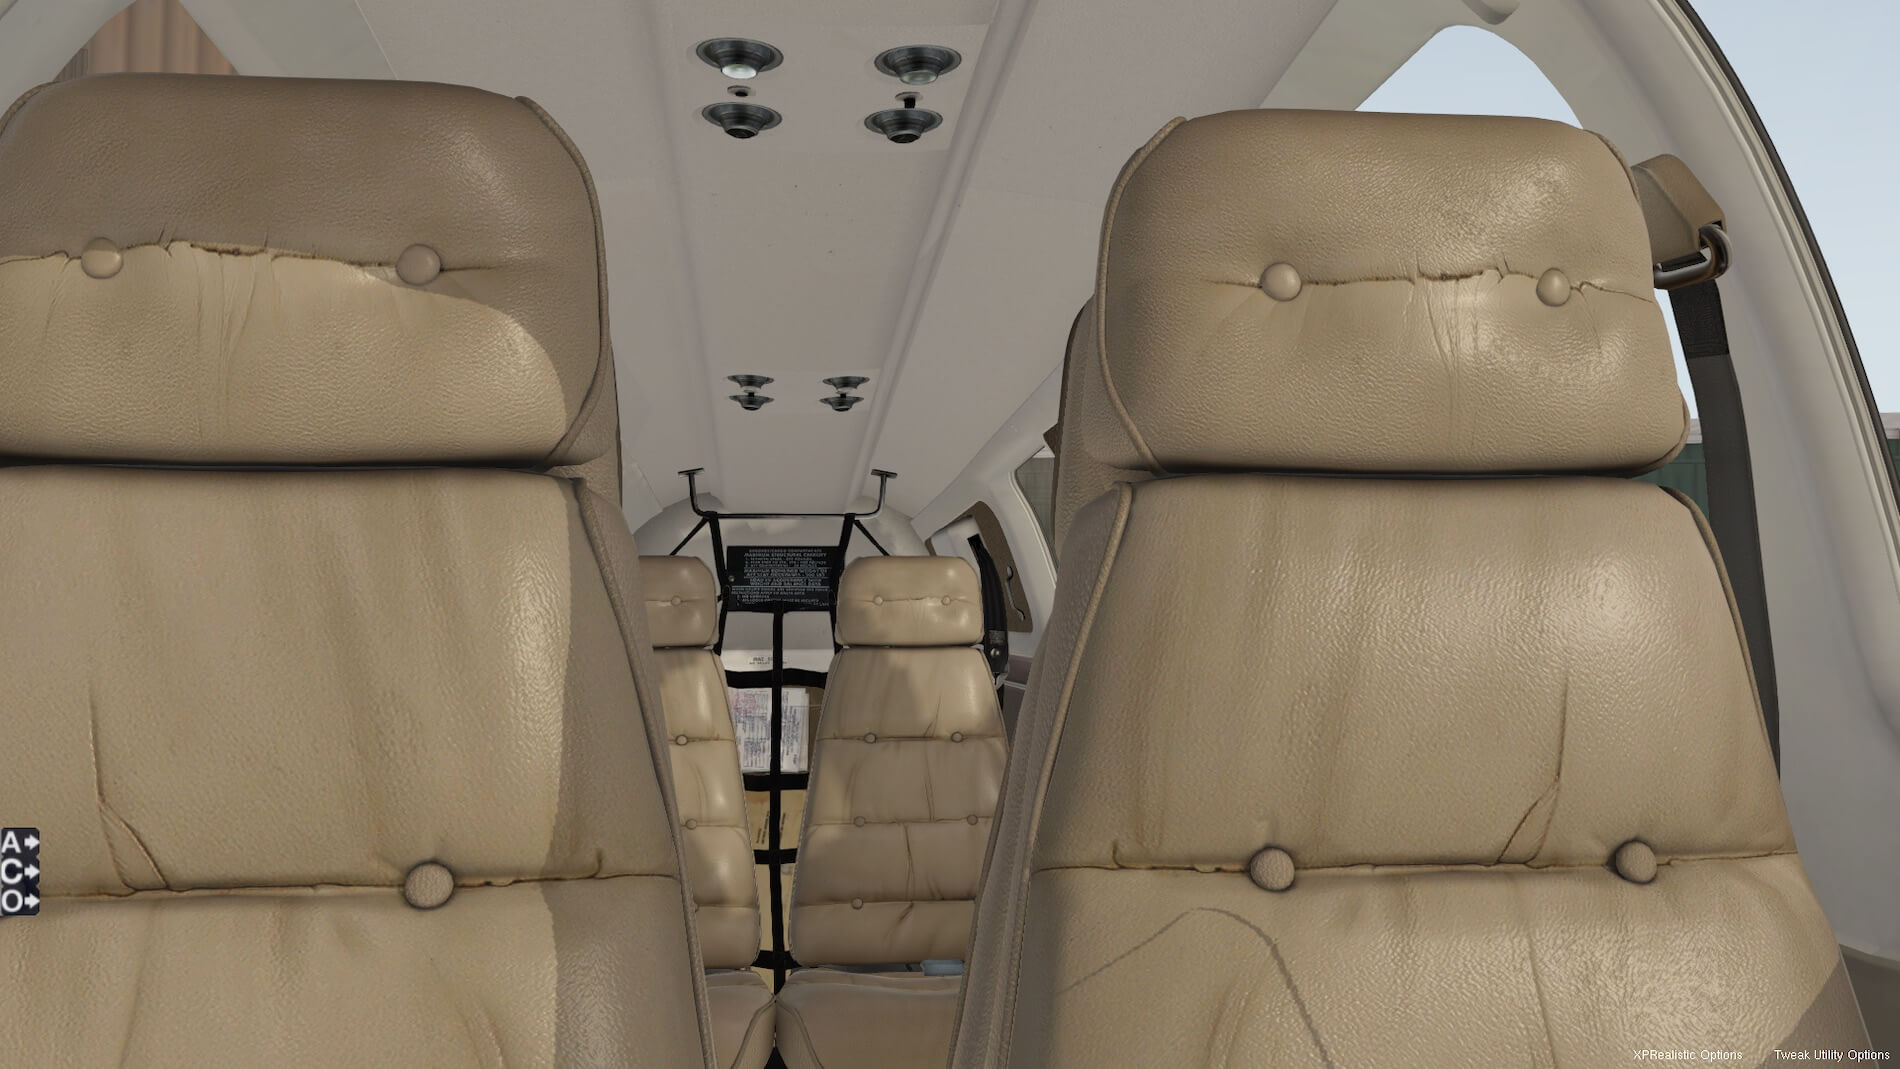
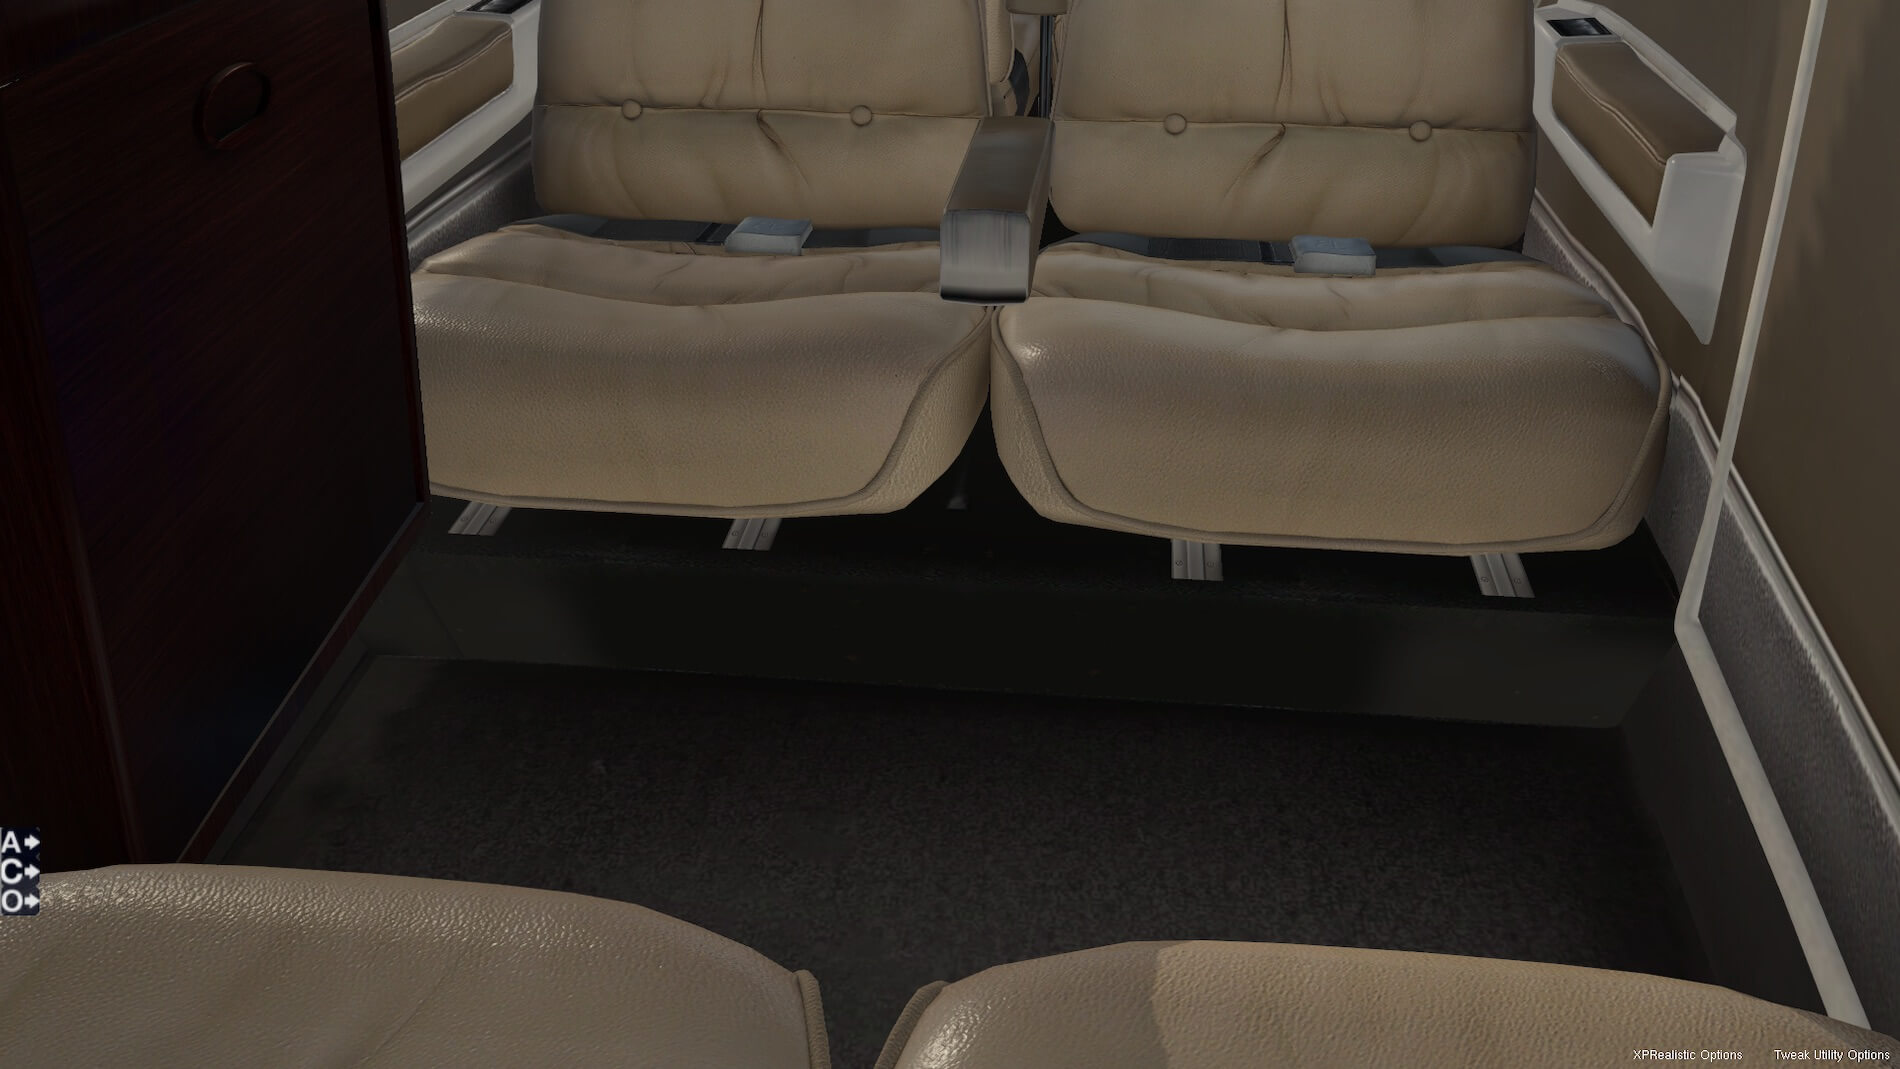
The pilots and passenger seats are very well done, also showing the club seating and drink holders. In the back is the baggage compartment with a duffle-bag and parcel, and on the rear wall the air worthiness certificate and other documentation.
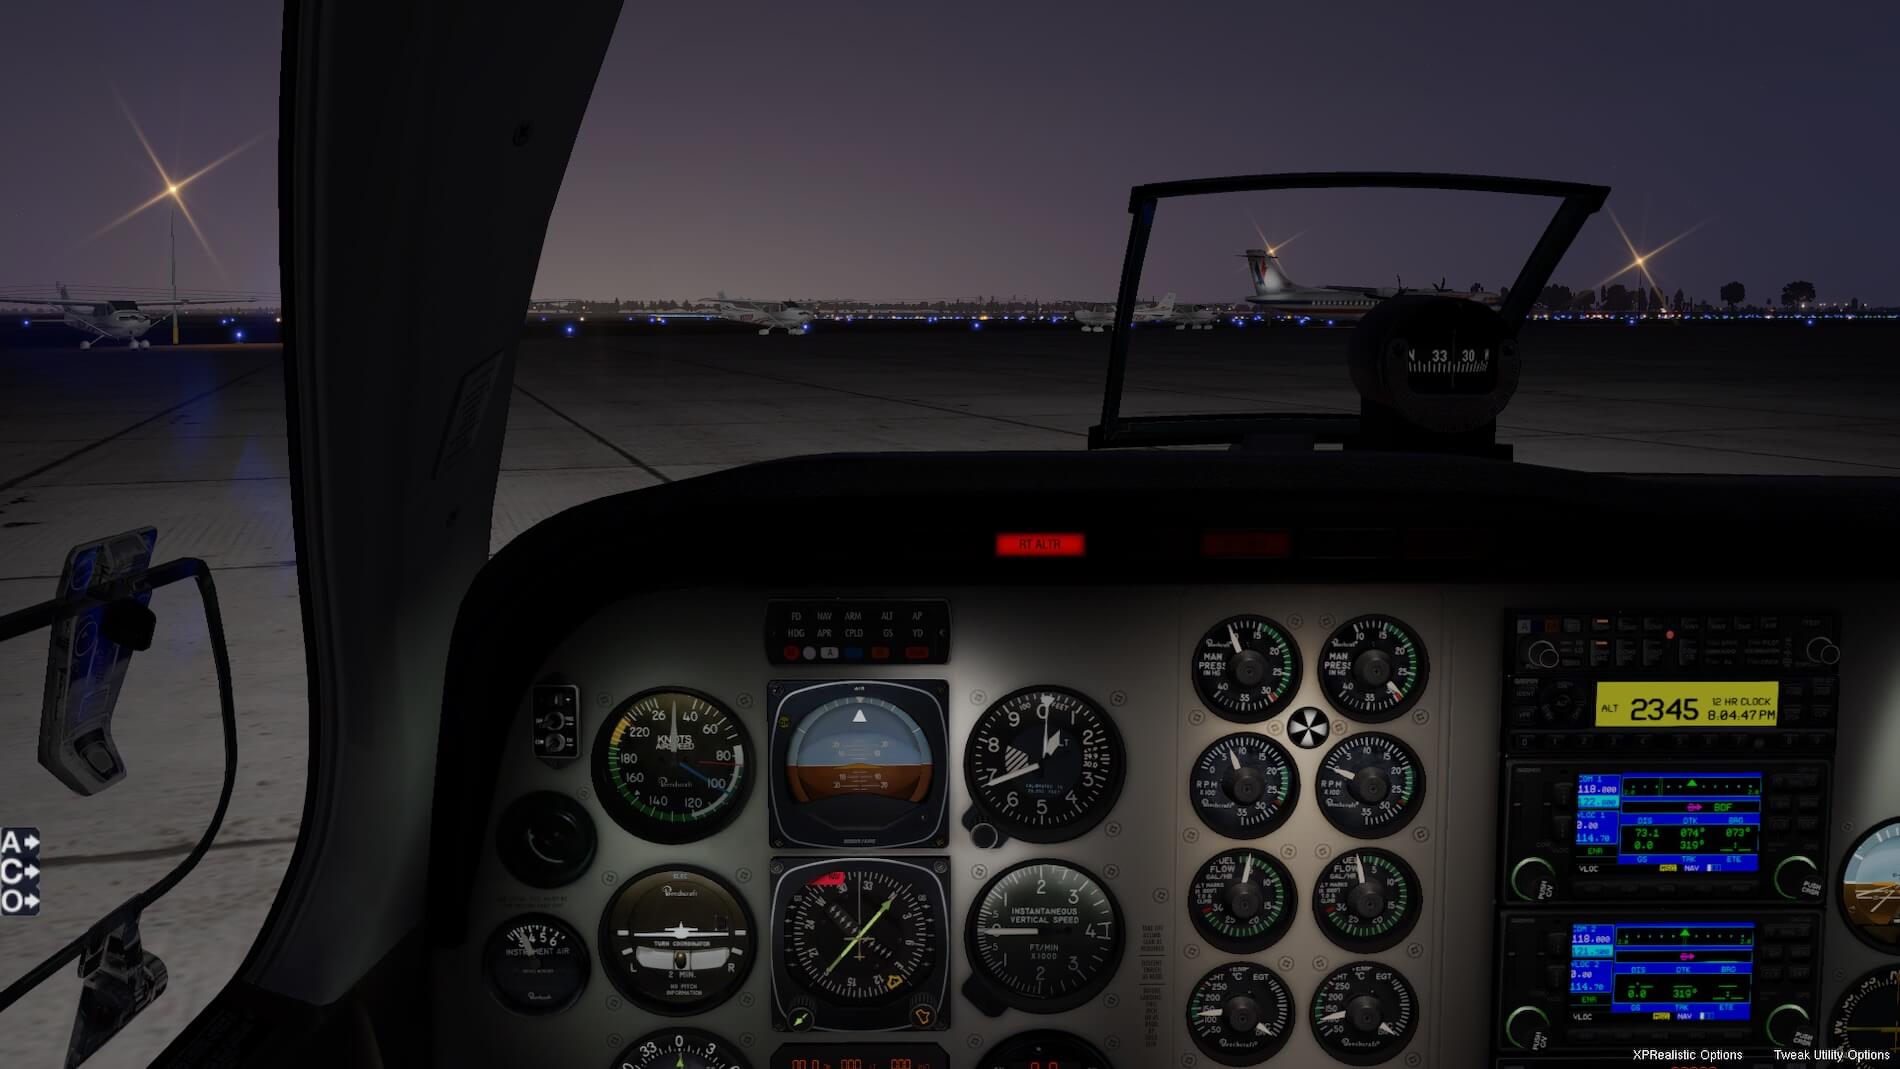
Finally a look at the internal panel lighting at dusk, which I really love, it’s very easy on the eyes- and the panel shown with flood lighting.


Systems
This is a General Aviation “light twin”, so systems are not complicated- no hydraulics or fly-by-wire here! The panel includes two GNS-430 units (they may be WAAS enabled, however the name on the faceplate of the units does not have the “W” suffix that would denote WAAS capability). The aircraft had dual controls with a very sparse instrument configuration on the right side, an HSI in the left side “six-pack”, twin NAV and DME among other features.
Two engines, each developing 300hp and a maximum gross weight of 5,400 pounds (2,450 Kg). Carenado has placed three icons at the bottom-left which are custom-dimmable (increased transparency) by scrolling over them with your mouse- you can make them totally disappear as well.
These icons are for Autopilot, Cameras (these are actually programmed as “Quick-Look” views, so can be changed by re-defining the Quick-Look views in X-Plane 11- the text in the Camera icon itself can also be changed to match your new view but is beyond the scope of this review- a good subject for a forum post!); there is also an Options icon that controls the opening of doors and the presence of static elements, window reflections and changing livery.
Sounds
The sounds are great! I like the “out-of-sync” beat between the engines, and the sounds appear to correlate correctly to engine manifold pressure and propeller pitch. FMOD is used in this product by Carenado which gives a nice spatial effect depending on where your view is originating from. The engine sounds increase when any of the main cabin doors are opened, a nice touch! All clickable switches and knobs have good sounds related to changing their function.
Frame-rates
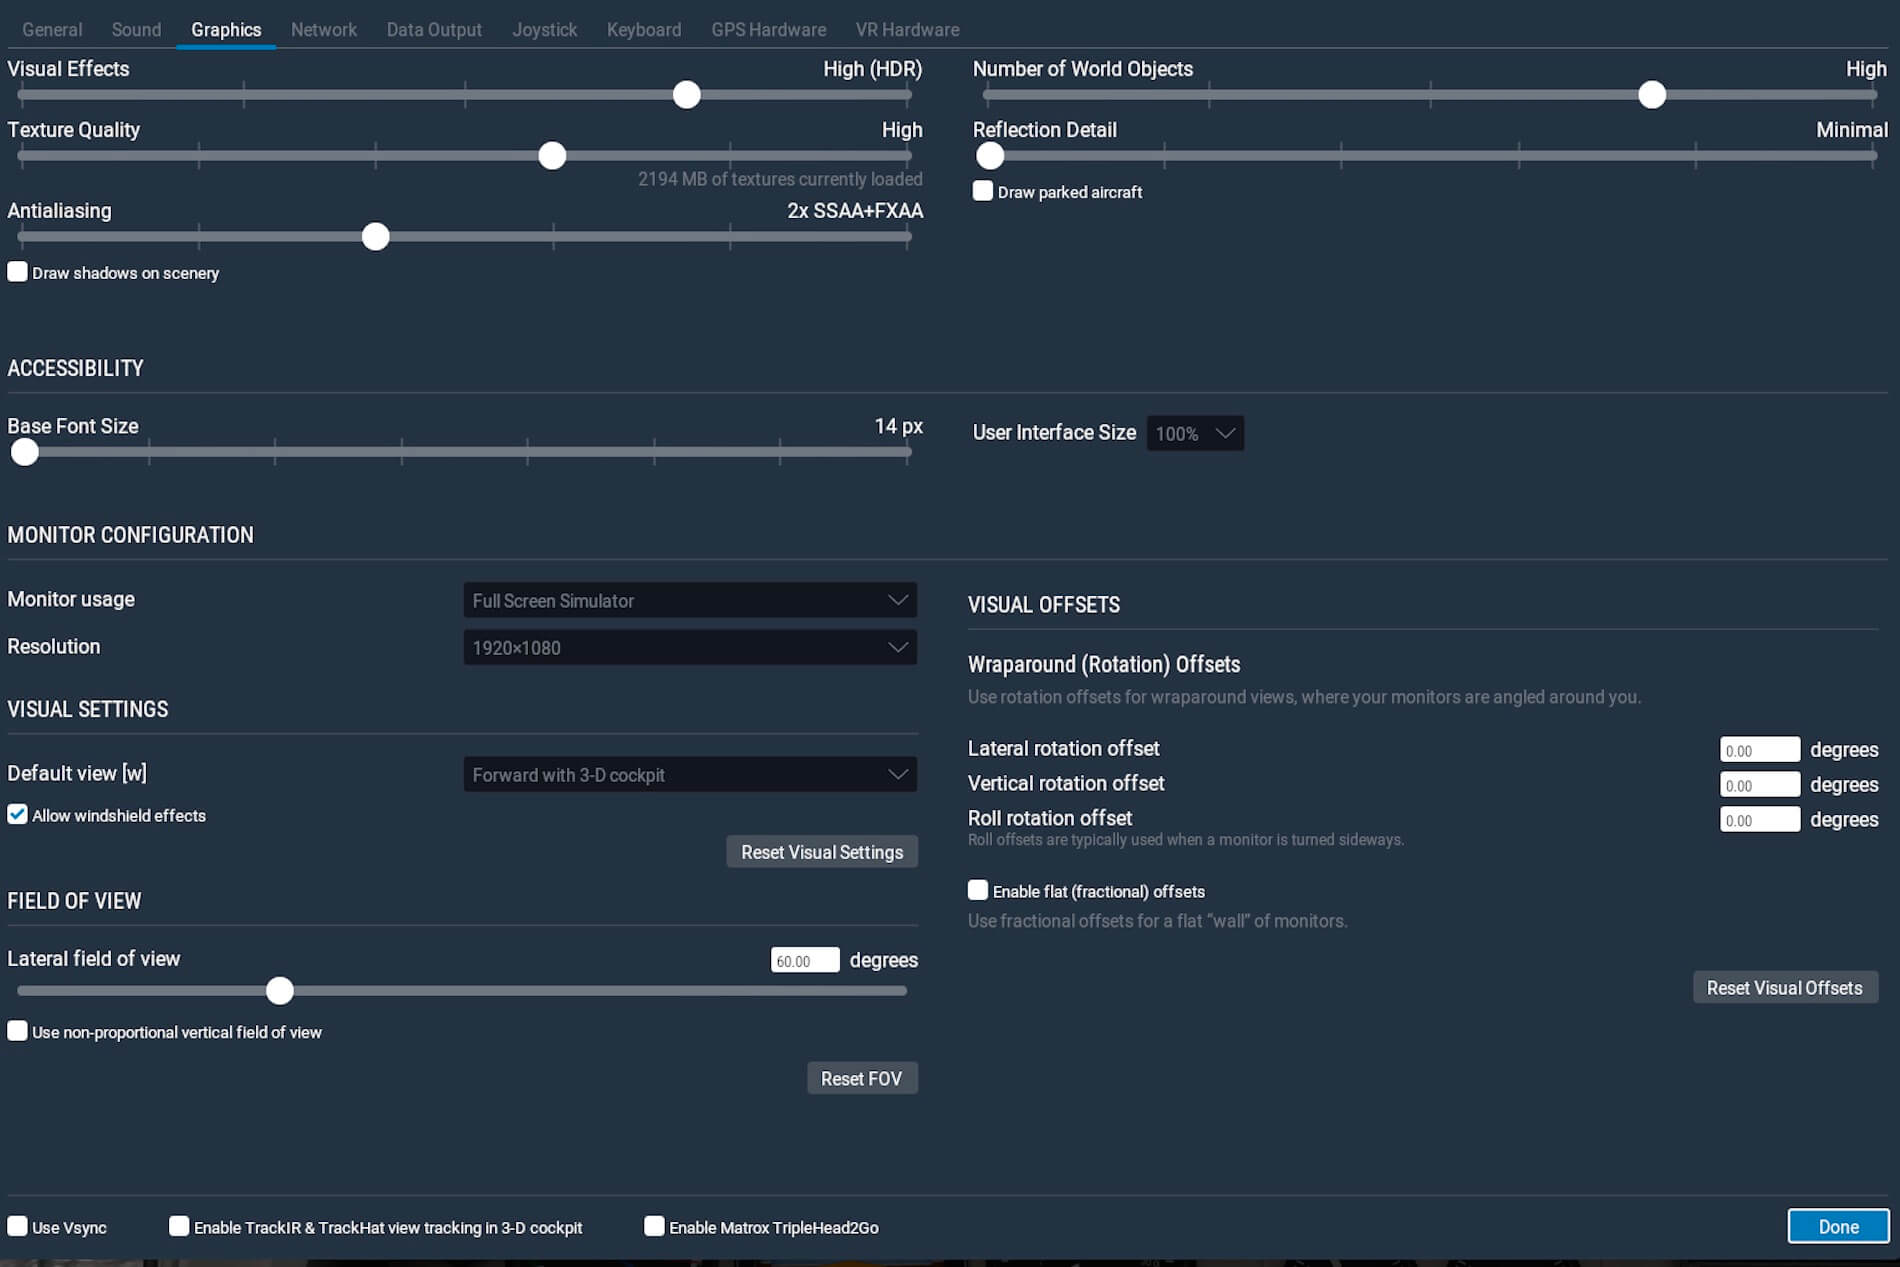
Here is a screenshot of my graphics tab.
I am getting 65fps at the stock KBRL (Burlington, IA) airport, but less then 20 at the Nimbus Studios KORD (Chicago O’Hare). If I enable the rain effect by placing the Librain files into the sim (you need to get these on-line, they are not provided), I get around 4fps. This is largely due to the fact that I am using a Mac.
Flight Experience
Flying by the Numbers
Flying VFR is fun- most of all because you see stuff. Lakes, rivers, roads, mountains. And you get to see other aircraft in your vicinity, how far from the ground and runway that you are on approach to landing- and best of all the visible horizon. Despite how much vertigo you might get from turbulence and changing attitudes of the aircraft, the eyes always send that true horizon information to the brain which easily overcomes any lack of orientation.
But IFR is another thing. Since filing for an IFR flight means you may not have any of those visual cues on approach, you can be very close to the ground and your entire reference to orientation is several small gauges about 2 feet in front of you. Under calm IMC this can be daunting, then add winds gusts and shear, and turbulence- you suddenly realize why the instrument rating is one of the hardest aviation exams to successfully pass.
So, if it’s not tough enough already, then add another variable- what attitude and power setting do you need to maintain speed down a glideslope or glidepath? In visual conditions (VFR), it’s possible to answer that question by continually adjusting throttle and attitude to keep that sight picture correct. However, in IFR, if you can’t see outside- that model of adjusting thrust and pitch will get you into serious trouble. So- what to do?
I got my instrument rating in a C172S. One of the first items I was taught in my instrument class was to know the RPM settings and attitudes for various phases in flight. For instance, with a correctly trimmed level pitch attitude and 2200 RPM, I got close to 90KIAS. If the trim was set correctly, I could almost let the aircraft fly itself in the vertical direction, making only fine corrections as temperatures and wind changed in flight, and focus on the lateral direction, where there is less stability (in the real aircraft). Reducing RPM to 1800 gave me the same 90 KIAS but now descending close to a 3-degree glideslope. All I need is a correctly trimmed pitch attitude and knowing what that number is for RPM- so simple but so powerful.
Back to the subject of this review- the Baron B58. I am not qualified for multi-engine aircraft, so have never flown the Baron. But- I found an excellent book on the performance and procedures for the B58, and one of the best books on IFR skills and practices I have read. It’s “IFR: A Structured Approach”, by John C. Eckalbar, available here.
While this book contains a series of simulated flights that demonstrate various IFR flight procedures, the first simulated “flight” is to establish numbers for manifold pressure (MP), propeller RPM, indicated airspeed (KIAS) plus other inter-dependent factors, for all of the major phases of flight. Not wanting to simply copy his work, I have done my own calculations on this Carenado B58, which I have copied from Excel below. Note that for this simulation table I have not included fuel burn- something for any flight is essential.

A few screenshots below showing my derivation of these flight numbers for the Baron- firstly in cruise climb at 5,000 feet, then at 10,000 feet, cruising at 10,000 feet and cruise descent passing through 6,000 feet. These are just a few of many that I took while obtaining the numbers for the above table.

So, we have looked at the internal and external features of this aircraft, and I have flown the aircraft with the sole purpose of acquiring performance numbers that we can use in flight. Note that this review covers the Carenado model only, not the REP addon for it, which would likely change performance data.
IFR Flight
My IFR flight with the B58 is one of fiction- for me as I don’t have a multi-engine license (AMEL), and I also are not certified for Part 121 ops. I enjoy conjuring up a route for my VFR and/or IFR flights for X-Plained. Sometimes it’s easy as I have flown a route before, or a certain aircraft type is operating on a route that I’m familiar with from being a passenger. This time is a bit different- I have not long returned from a family vacation in Burlington, Iowa, and Chicago, Illinois.
While I flew commercially to and from my home in the Denver area, I met up with someone on this trip that had flown from Chicago O’Hare (KORD) to Burlington (KBRL) on a very small airline using Cessna Grand Caravans and a Beechcraft 1900. They fly from hubs at KORD and KSTL (St. Louis, MO) to small cities in the US Midwest region, among other routes.
The real airline is Air Choice One. Wikipedia states “Multi-Aero, Inc., doing business as Air Choice One, is an American airline with its headquarters in Concord, Missouri within the Greater St. Louis area. It operates as a regional airline offering commuter flights from St. Louis Lambert International Airport, O’Hare International Airport, Minneapolis-St. Paul International Airport and Hartsfield Jackson Atlanta International Airport to smaller regional airports, subsidized under the Essential Air Service program. Air Choice One’s callsign, ‘Weber’, is in honor of Mike Weber, the airlines first Chief Pilot.”
The airline makes use of the Essential Air Service (EAS) Federal program that offers subsidies to small regional communities that had scheduled air services prior to the deregulation of Part 121 services under the Regan administration, and would have lost these services were it not for the subsidy.
Continuing the fictional flight, I am substituting the Baron B58 for the larger aircraft, and emulating the route, altitude and gate at KORD for the real flight. I am also not using the Air Choice One name, rather a fictional name of “Mississippi River Airlines”, using the ATC callsign “River”. I have looked at videos – link I and link II – as well as using FlightAware to get information on the real airline routing between KBRL and KORD- most go the opposite direction to this flight of ours.
While there is only one small terminal at Burlington, I am using what I have read to be the actual gate at O’Hare, which is gate L11A at Terminal 3, “Gate” L11A is a stairway to the tarmac next to gate 11 which is a conventional jetway. This O’Hare terminal map shows Terminal 3 (the primary user is American Airlines)- it doesn’t show gate L11A, however this gate is available in X-Plane 11 (I am using the Nimbus KORD add-on scenery). Further, I am assuming that Chicago TRACON (arrival and departure control) starts at the KORD Mode-C veil (see appendix for what this is)- it’s 30 miles out from the primary airport, and while I expect that the real TRACON airspace extends further (given how busy this airport is), I have the benefit of fictional poetic license!
With that setup for this instrument flight (filing IFR is the only way to get even close to KORD- other than declaring an emergency- and most – if not all- Part 121 are required to do so anyway to make use of more extensive flight management from ATC), our route of flight today will be KBRL-BDF-PLANO-KORD- we used Foreflight to file the IFR plan electronically. We have filed for an altitude of 10,000 feet, knowing that we don’t need supplemental oxygen (in the US) until 12,500 feet, and then only for required crew after 30 minutes.
However, just filing an IFR flight plan doesn’t mean we can depart IFR- we need an IFR clearance. This gets more complex at non-towered airports, since the controller clearing us can’t see or isn’t in control of us. We will receive a “release time”, and a “clearance void time”, which opens up a window for departure- since this window may be only 5 minutes, we will get our clearance after we have done our run-up- near the threshold of the departure runway. An excellent video by Bold Method regarding IFR clearances.
We meet up with our flight as passengers have been through security (actually more intense than at bigger airports), which is necessary as they will all have access to the sterile secured terminal area once we arrive at O’Hare. I have World Traffic 3 fired up in the background with this route entered, and while I expect to see little or no traffic at KBRL or en-route, I know we may see more traffic as we get close to KORD.
On this flight we have 4 passengers. While the B58 is certified for single pilot IFR, I have a copilot who meets the passengers in the secure area of the terminal, walks them out to the aircraft and gets them seated and strapped in at the appropriate seats that were assigned at check-in (yes, everyone had to weighed!).
This is to preserve the CG integrity of the aircraft. After securing the passengers and closing the large passenger door, the copilot does a short walk-around to make sure that I didn’t miss anything, and joins me in the cockpit. Note that since this aircraft is certified for single-pilot operations, my copilot is not a “required crew member”, but serves as an “augmented crew”. The airline would rather have two brains and four eyes up front, even if it does cost more!
Meanwhile I have been doing some pre-start checks, including double-checking fuel quantity, ensuring that the fuel selector is on “main tanks”, the avionics are switched off, cowl flaps are open, the gust lock is removed and that we have all required charts on board- I always carry a stand-by set of paper charts as well as those on the company iPad. I also have a frequency card that shows the “normal” frequency assignments for ATC along the route- although sometimes that can vary, as Chicago TRACON frequencies are sometimes changed to accommodate current traffic needs.
As we start preparing for engine start, we note the following information regarding KBRL:
Additional Remarks
- LINE OF SIGHT VISION BLOCKED BETWEEN RYS 36 & 12
- RY 36 IS CALM WIND RY
- SELF SERVICE FUEL STATION AVAILABLE ON NORTH END OF APRON.
- SFC CONDITIONS UNMNT BTN 0300-1300 DLY.
- GEESE ON AND INVOF ARPT
- COLD TEMPERATURE RESTRICTED AIRPORT. ALTITUDE CORRECTION REQUIRED AT OR BELOW -28C/-18F
We confirm that runway 36 is the calm wind runway. This being a classic “VFR day”, it’s important to know the runway in use as there is no control tower at KBRL. We have to be the taxiway and runway traffic management, which comes from good and clear communications with other participating aircraft.
I always check an approach chart, even when departing, for a quick visual look at important items regarding the airport. This approach chart shows me instantly (in the top left corner) an inverted “T” (takeoff minima are not standard), an inverted “A” meaning that there are limitations in using this airport as an IFR alternate, and a symbol looking like a snowflake meaning that there could be issues in cold weather (where altimeters read high even if adjusted for the correct pressure- a high-reading altimeter means that you will fly lower than you think you are- not good in IFR!).
What interests me the most is the take-off minima. If I was Part 91 (general aviation), I don’t need to consider take-off minima, although I would be foolish not to. But for Part 121 (us), and Part 135, it is illegal to take off unless these minima are met or exceeded.
We note that runway 36 is “300 and 1”, being 300 foot cloud base, and 1 statute mile of visibility. The visibility portion is standard for any aircraft with 2 engines or less, however the published minima applies to all aircraft regardless of how many engines. We also note that we should be climbing to 1,500 feet before making any turns from runway heading. Finally, we note in the chart supplement:
RWY 18–36: H6701X150 (ASPH–GRVD)
RWY 18: PAPI(P4L)—GA 3.0o TCH 40 ́. Thld dsplcd 601 ́. Trees.Rgt tfc.
RWY 36: MALSR. Tree.
This gives us the runway length, surface and condition. While runway 18 has the note “Rgt trc “ (meaning non-standard right turns in the traffic pattern), the absence of that comment in the runway 36 segment means that there are standard left turns in the traffic pattern- this is good to know in case we need to return to the airport and it’s not an emergency.
I was able to find a runway length requirement for the B58 on-line, which is stated as 2,345 feet (715m). However, this shows no allowance for runway condition, wet or dry, derating for temperature, or runway slope, among other factors that could also include gross weight. Normally this would be given in a chart that could be referenced to find the appropriate runway length. I couldn’t find any required runway length info in the enclosed docs. We confirm that the runway length of 6,701 is adequate for our take-off.
Most of the information I have shown here would be given to us by the Tower if there was one at this airport- either directly or through a taxi or take-off clearance. While I am deliberately omitting a lot of information here that I would need to work with in preparing for a Part 121 flight, I wanted to show just a portion of the data that we would need to consider. The final piece of information I am showing is available from this thumb-nail, from Sky Vector:
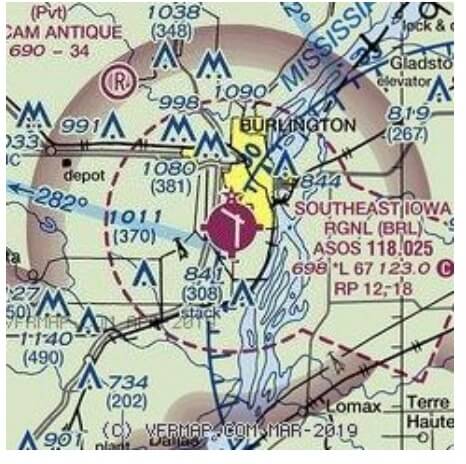
Note the magenta dotted line looking like a keyhole around KBRL- it signifies Class E (controlled) airspace to the surface, therefore ATC can take responsibility for our IFR flight immediately after take-off. However, we also need to be mindful of that previous note to fly runway heading to 1,500 feet (presumably there is an obstruction or noise abatement), and the fact that ATC only give us terrain / obstacle protection after vectoring us- and there is always a “Minimum Vectoring Altitude” (MVA) below high ATC will refuse to take the responsibility. The MVA is never published, so we are assuming that it is 1,500 feet.
OK- enough real-world stuff- let’s get to fly!!
I need to add that I am barely “scratching the surface” for the amount of work required to depart (IFR or VFR) safely from an uncontrolled airport.
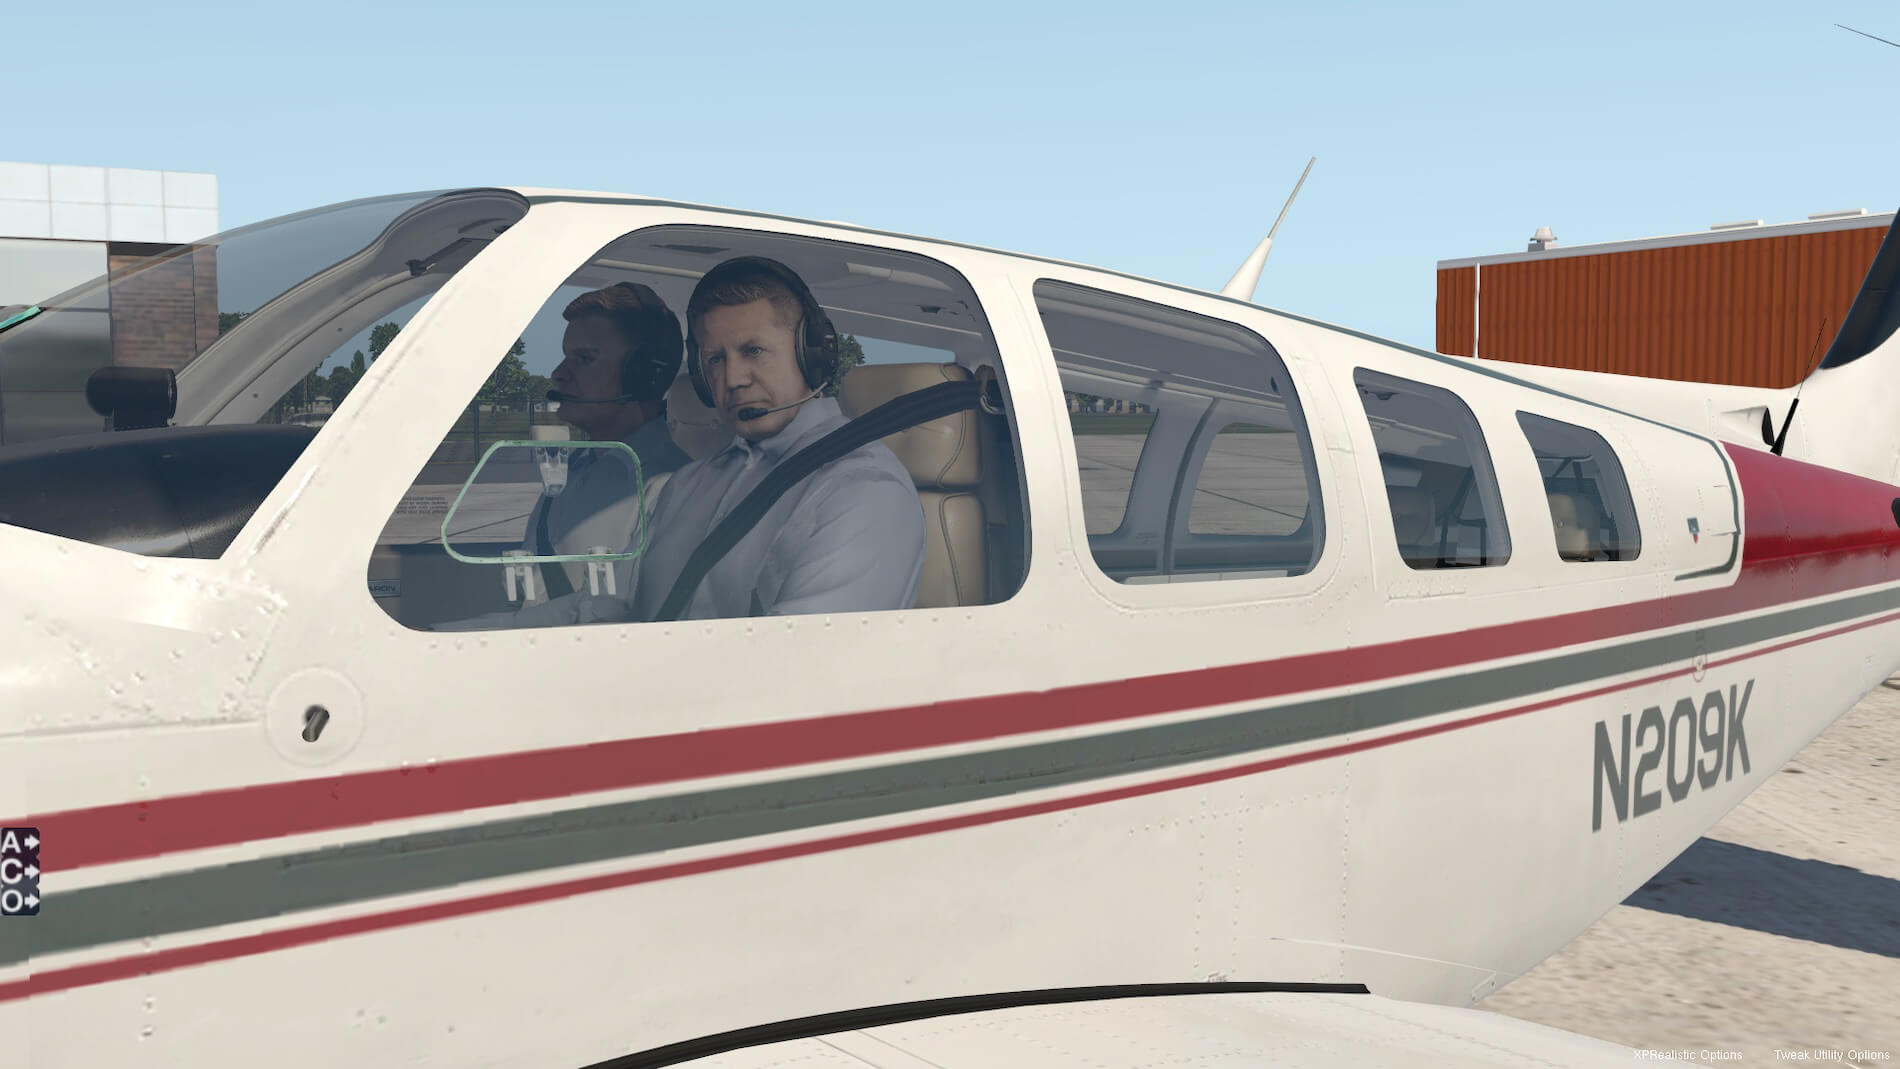
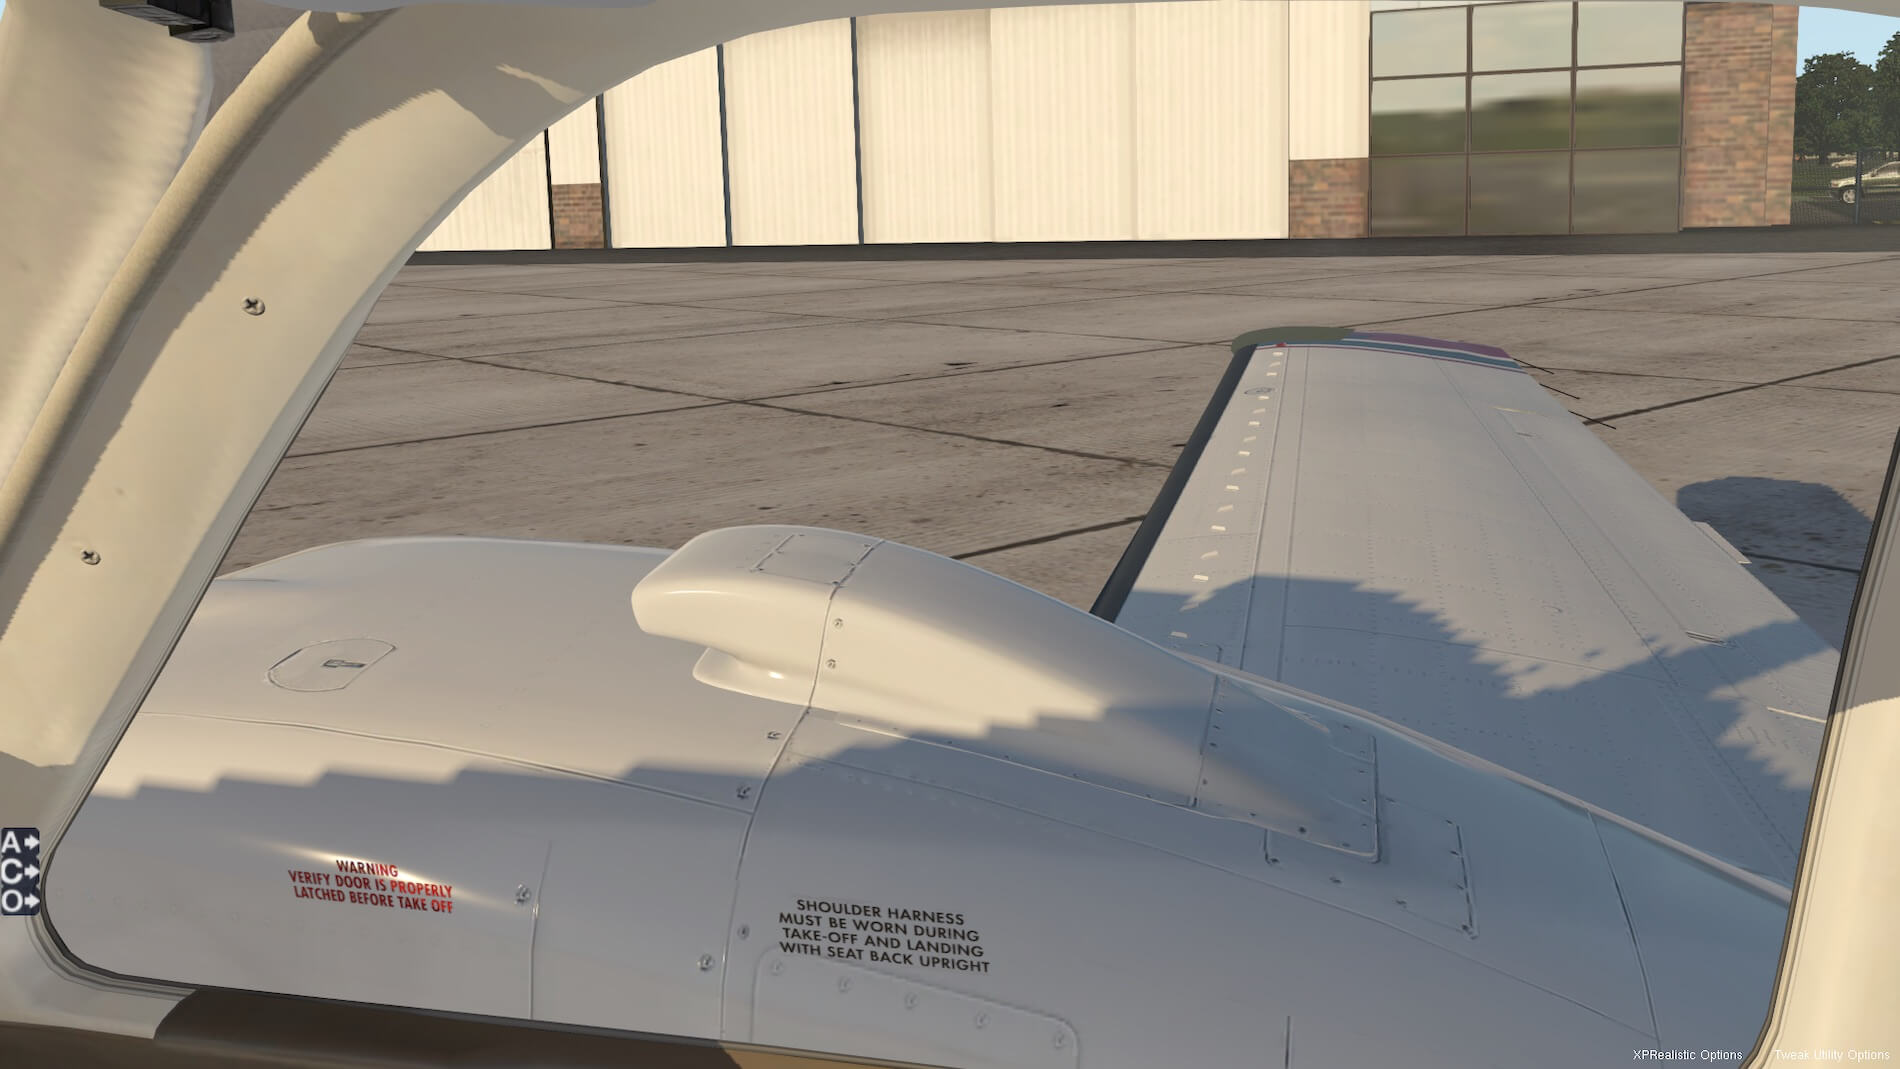
Our passengers walk out of the terminal to our recently-cleaned B58 Baron. While we normally fly larger aircraft on this route (KBRL to KORD), today is very quiet and so we’re taking the Baron. With the club seating, it’s very comfortable. As the passengers walk closer to the aircraft they see me and my copilot “Dave” in our seats, glancing at instruments and then out the windows. Our cockpit is dark before startup, and the afternoon sun throws shadows on the right wing.


We close the passenger door, and prepare for departure- battery on, prime the engines, engine start, generators on-line, throttle back to 1,000 RPM or less. Avionics on. Our flight plan is simple- but as we enter our first waypoint- the Bradford VOR, BDF, we note that there is a duplicate waypoint in Norway. Out of our range in the B58, I’m afraid. We set up the ASOS frequency, then taxi to the run-up area for runway 36.


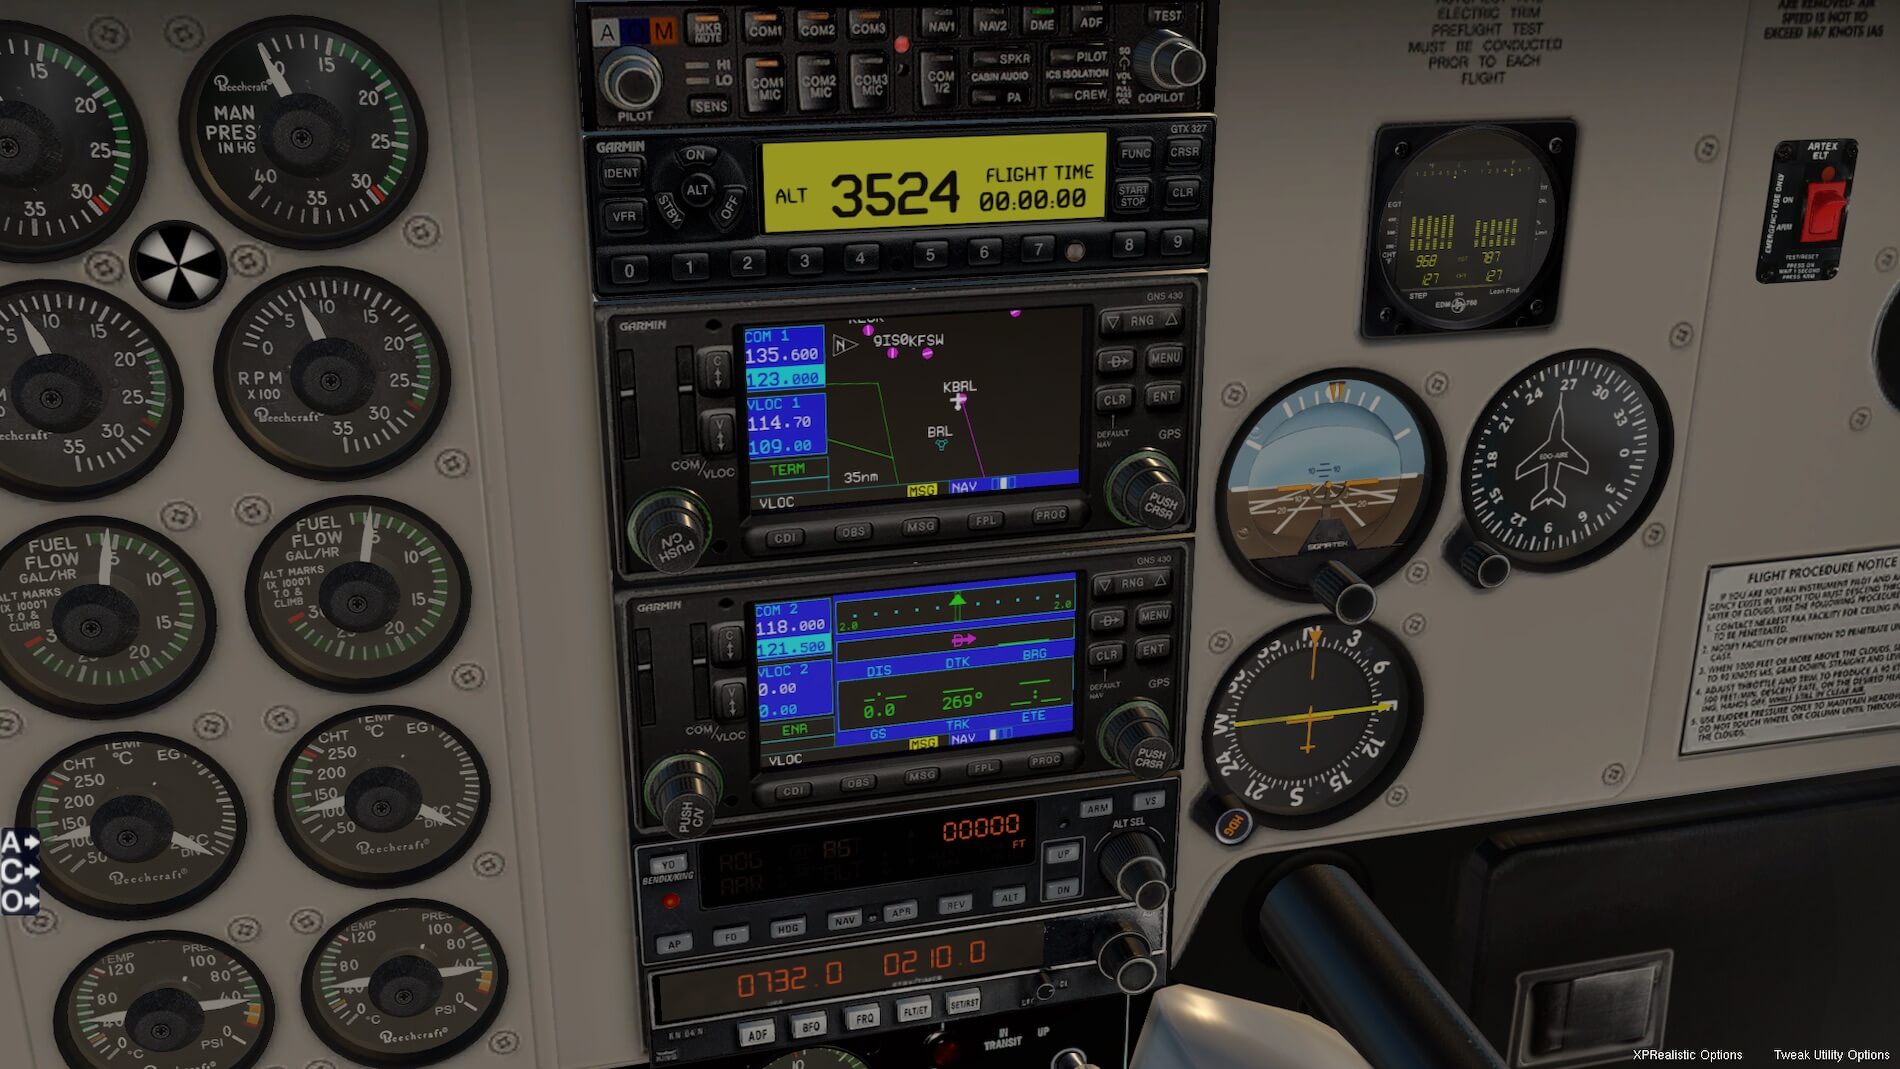
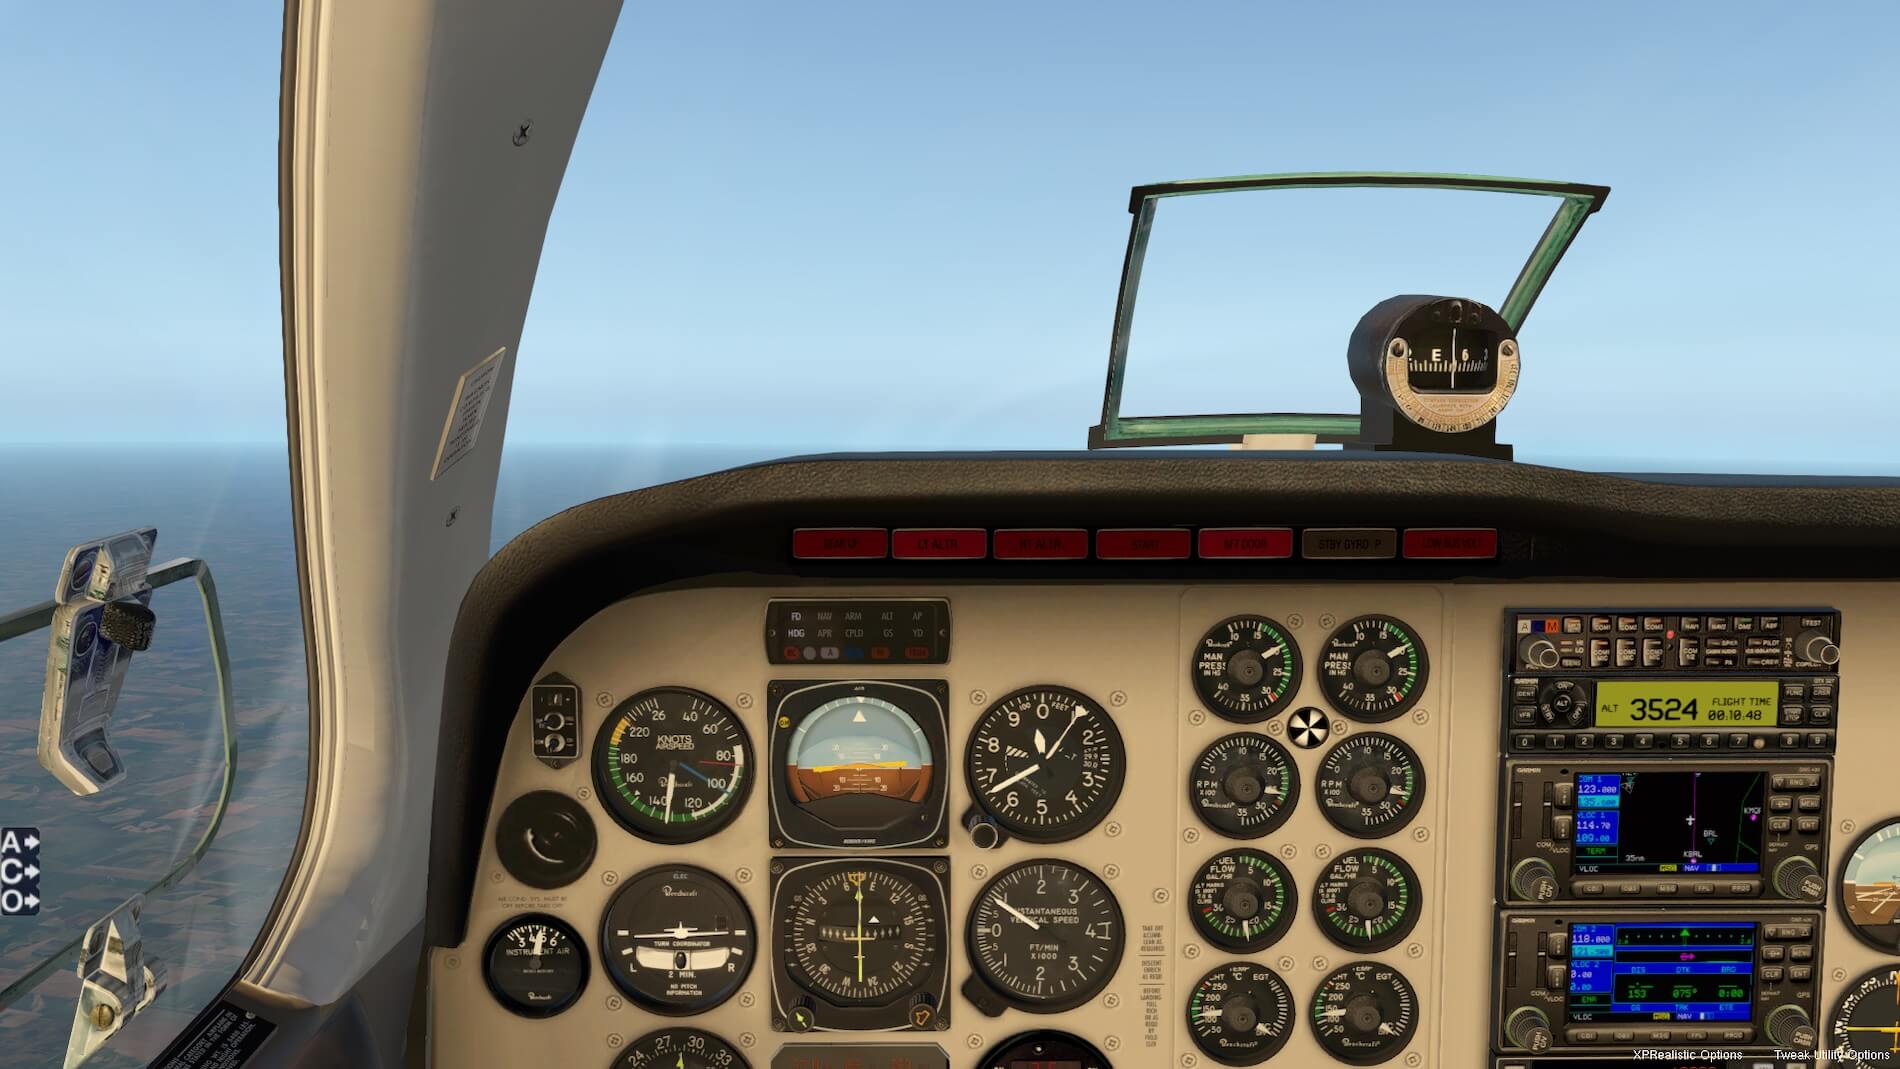
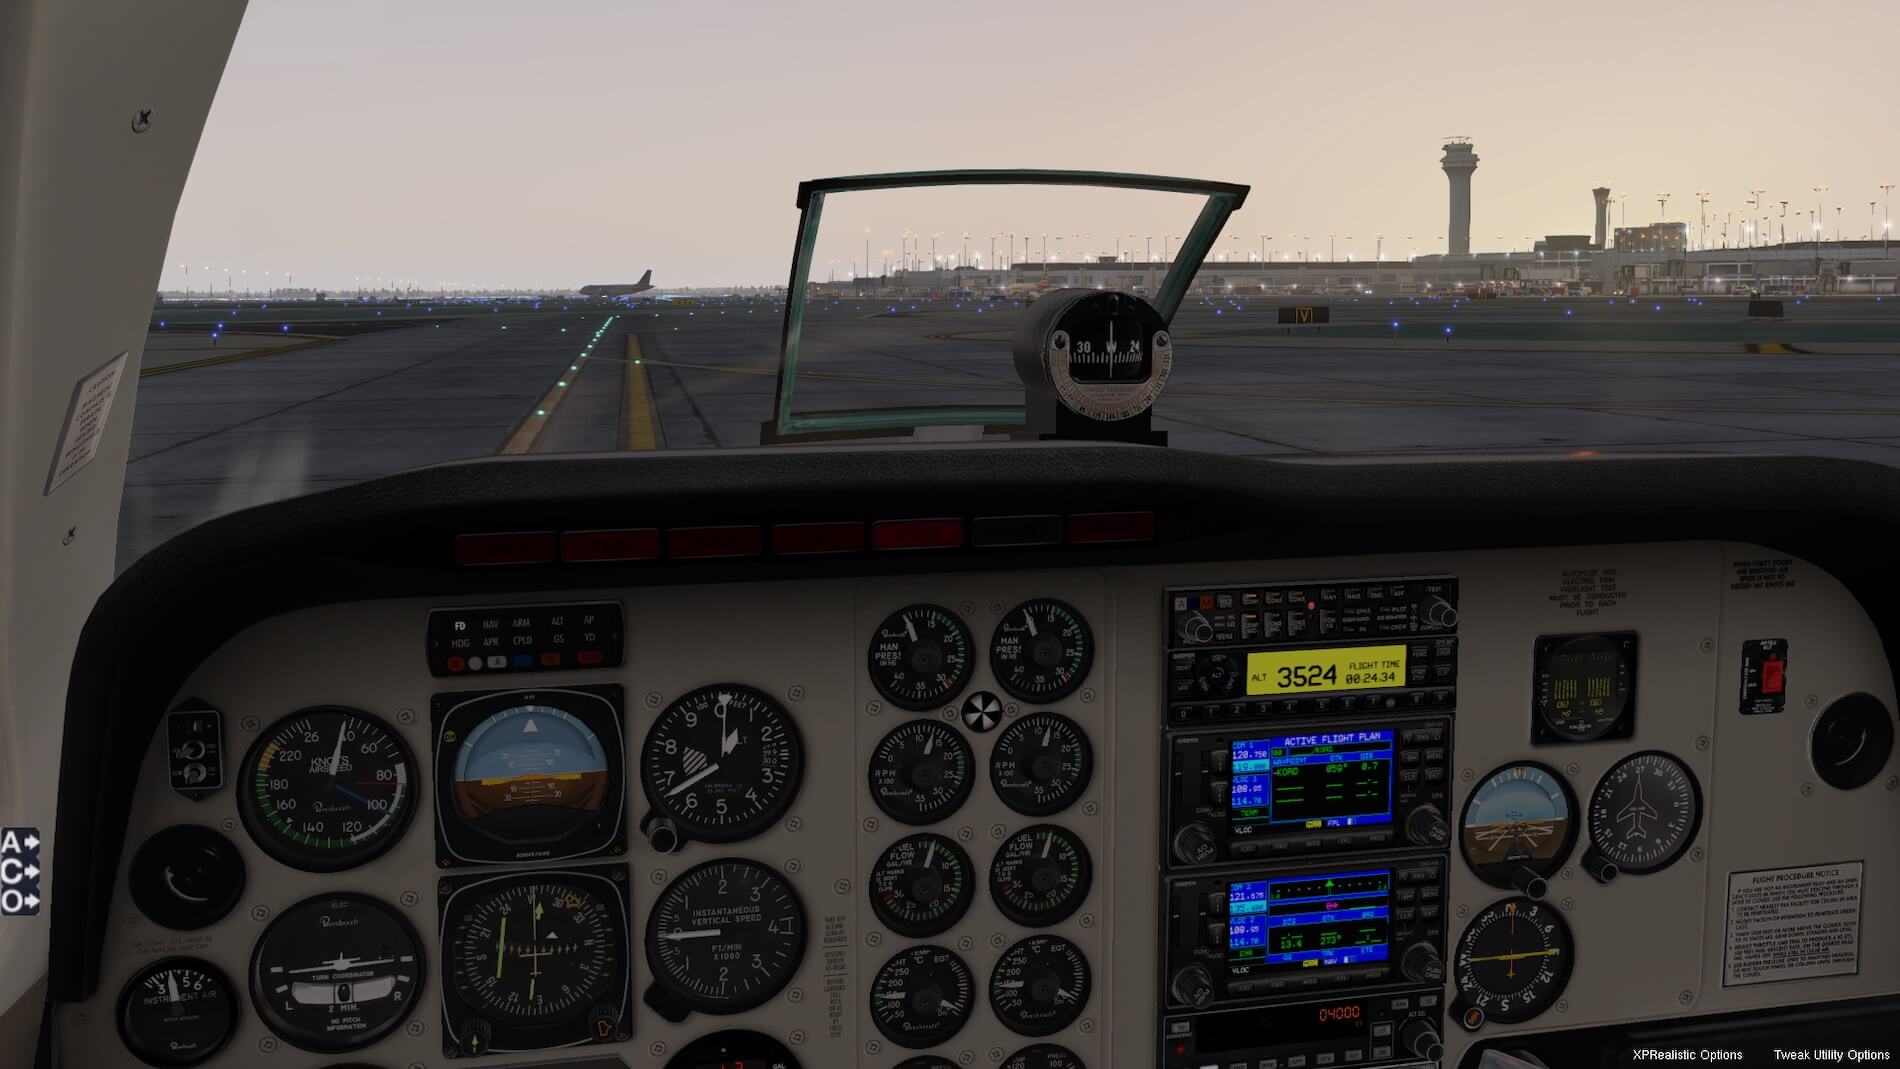
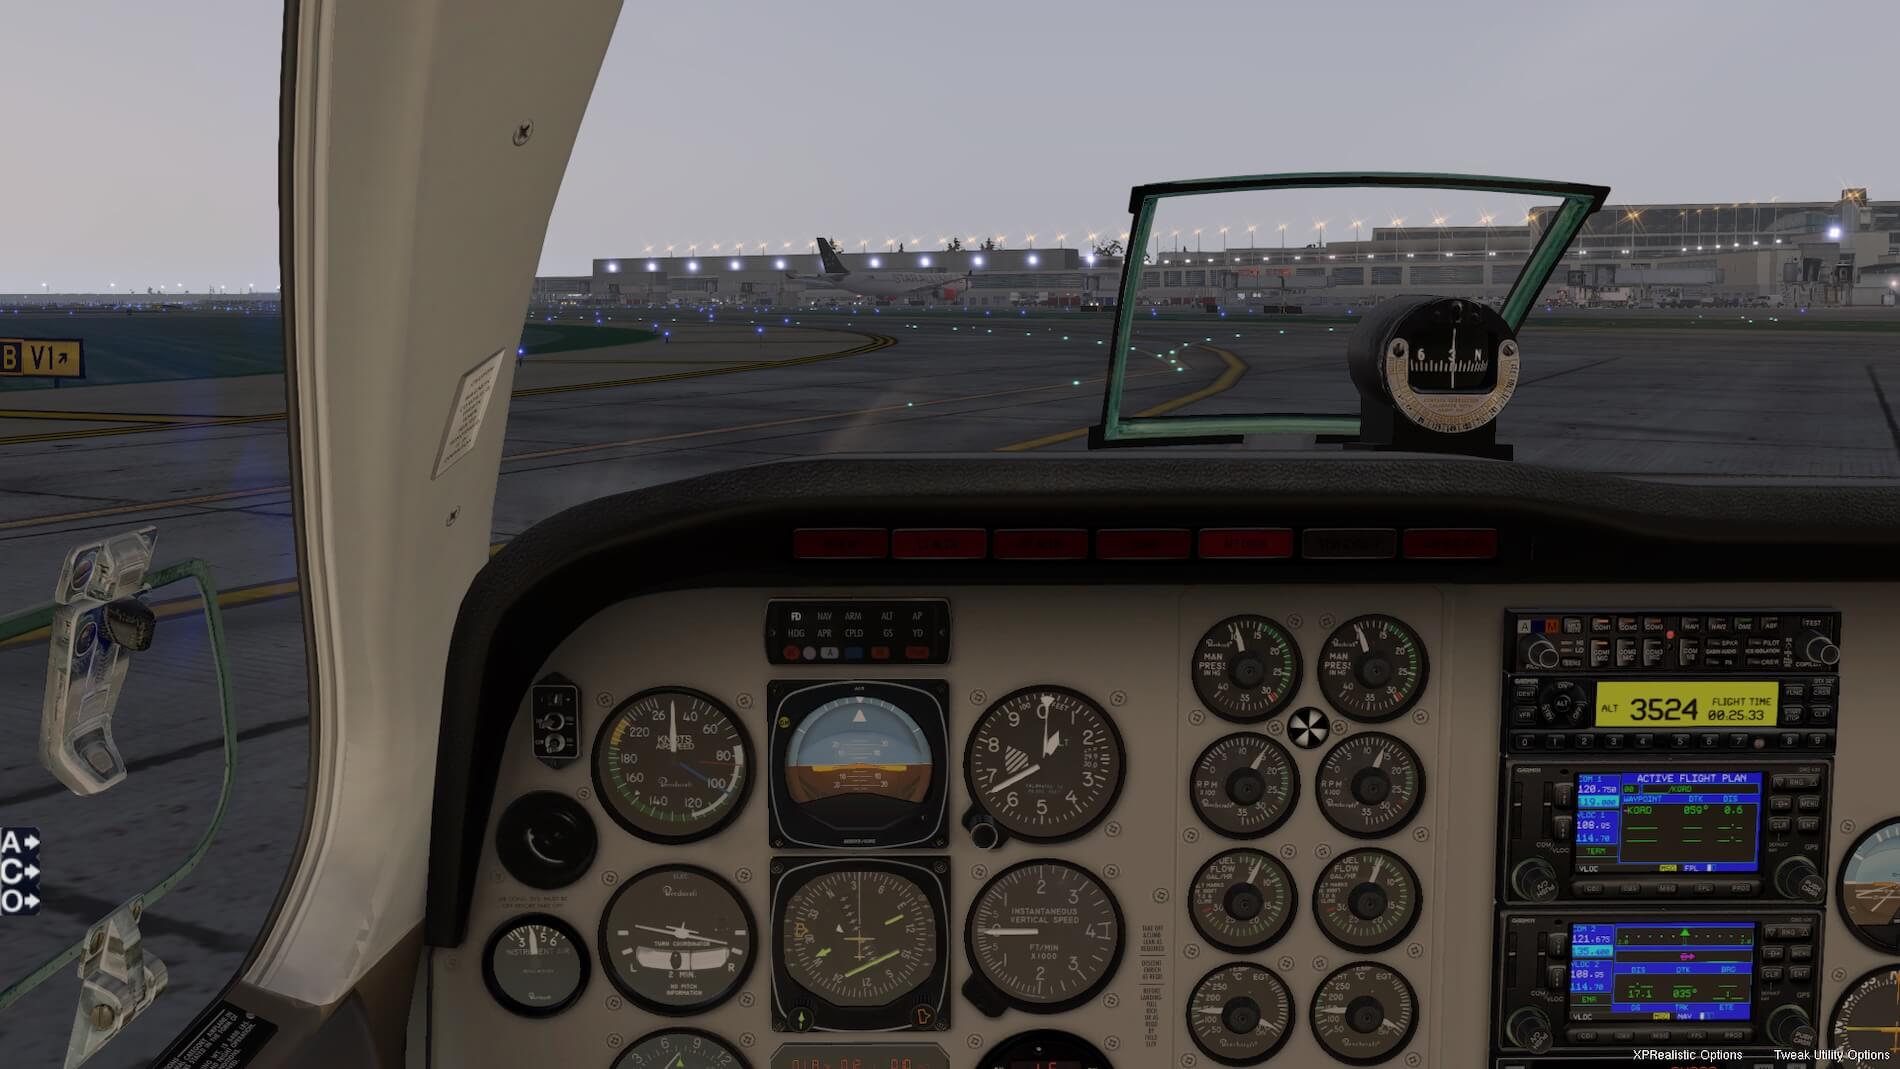
Run-up checks magnetos, spark plugs, fuel flow, variable pitch props, as well as controls free and correct, and final setting of instruments- altimeter setting checked, attitude indicator (part of the HSI), and final checks of COMM and NAV radios. However, for this IFR flight at an uncontrolled airport, we also need to contact Chicago Center for our clearance- and enter any changes to our planned route of flight into the GPS and our squawk code- in this case 3524. We are told to contact Chicago Center when at or above 1.500 feet. Also, of importance at an airport like this is the “Clearance Void Time”. We select “ALT” on the transponder, and all external lights on (looking good from the outside). Our flight panel looks good too, as does the flight plan on our GPS map- but wait, we need to select GPS, not VLOC!


We announce our intentions on the CTAF (Common Traffic Advisory Frequency), and taxi out, checking that no arriving aircraft are on final approach and the runway is clear. It’s time for takeoff, gear retraction, flaps retracted and the initial climb segment to 1,500 feet. The right window shows the Mississippi River paralleling our route.


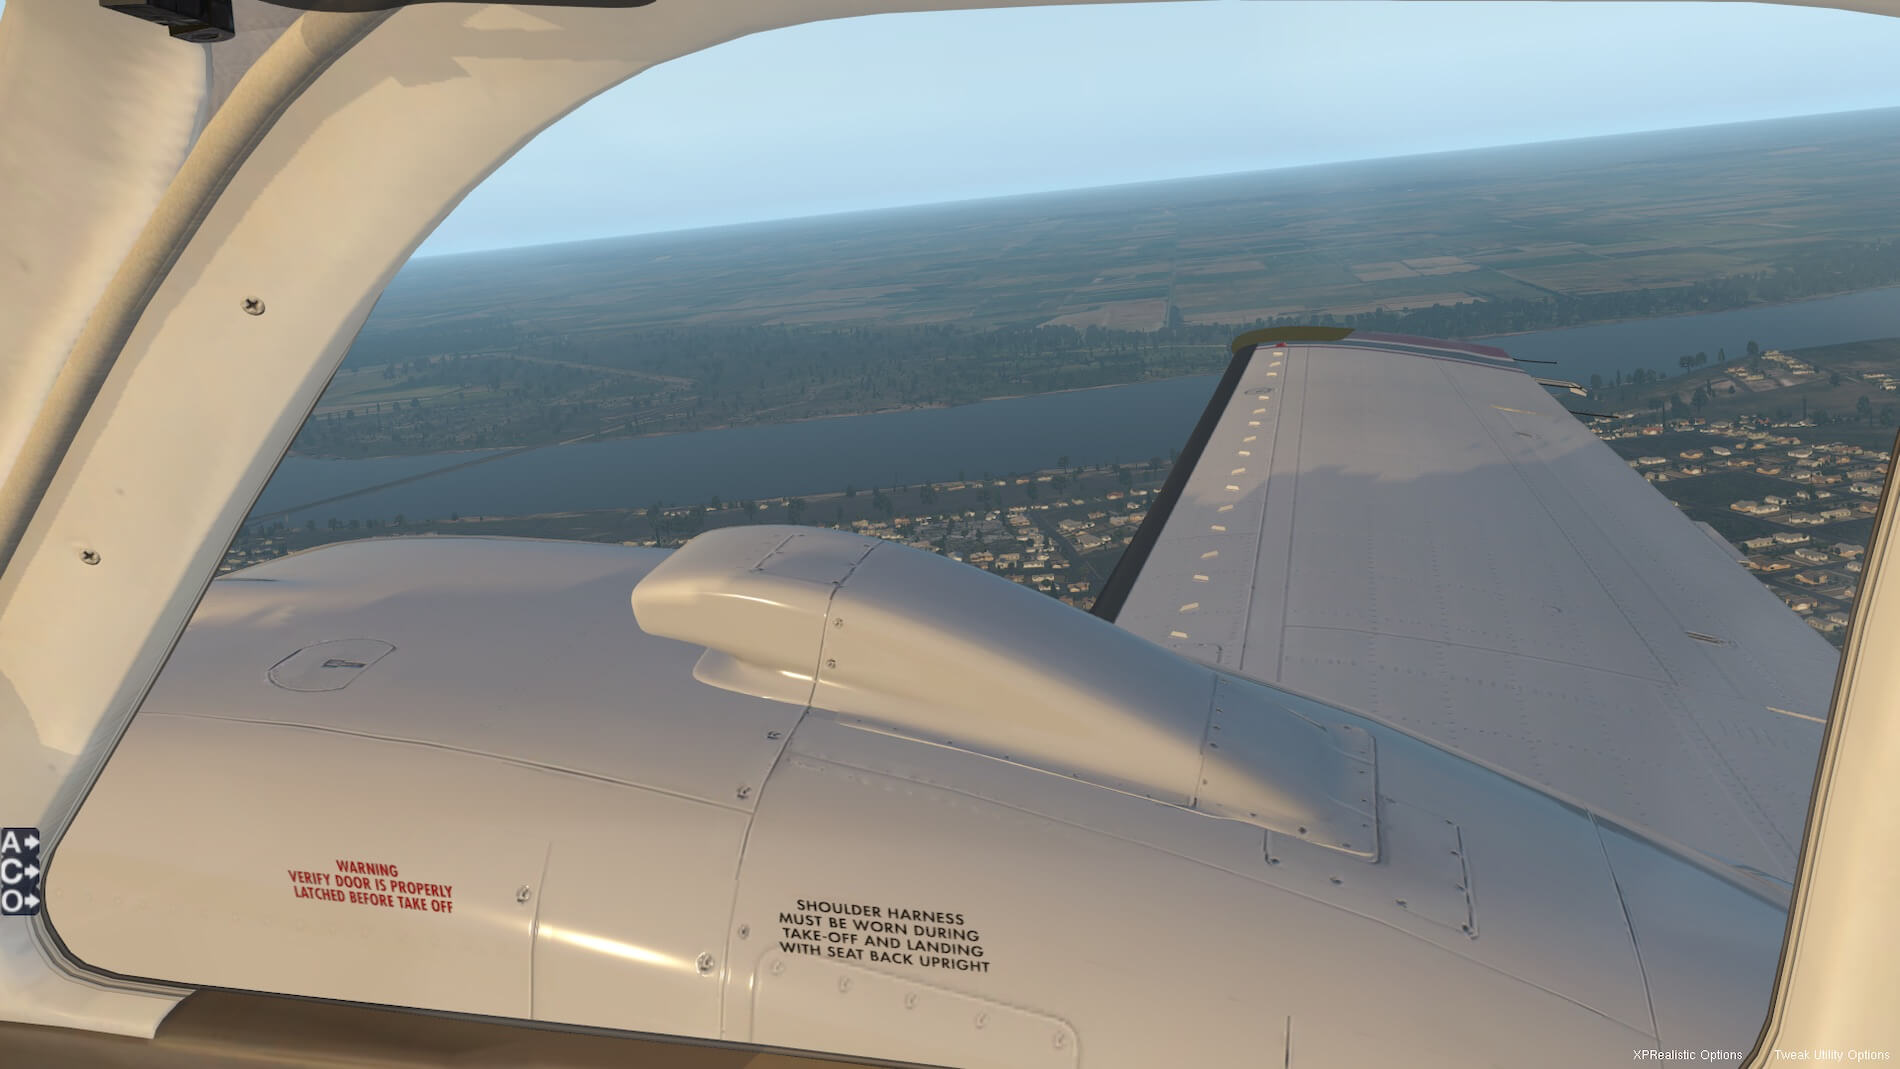
The “Mighty Mississippi” is shown in more detail in the following shot looking ahead and to the right, and externally from the aircraft over Burlington. The river forms the state boundary of Iowa to the west and Illinois to the east.


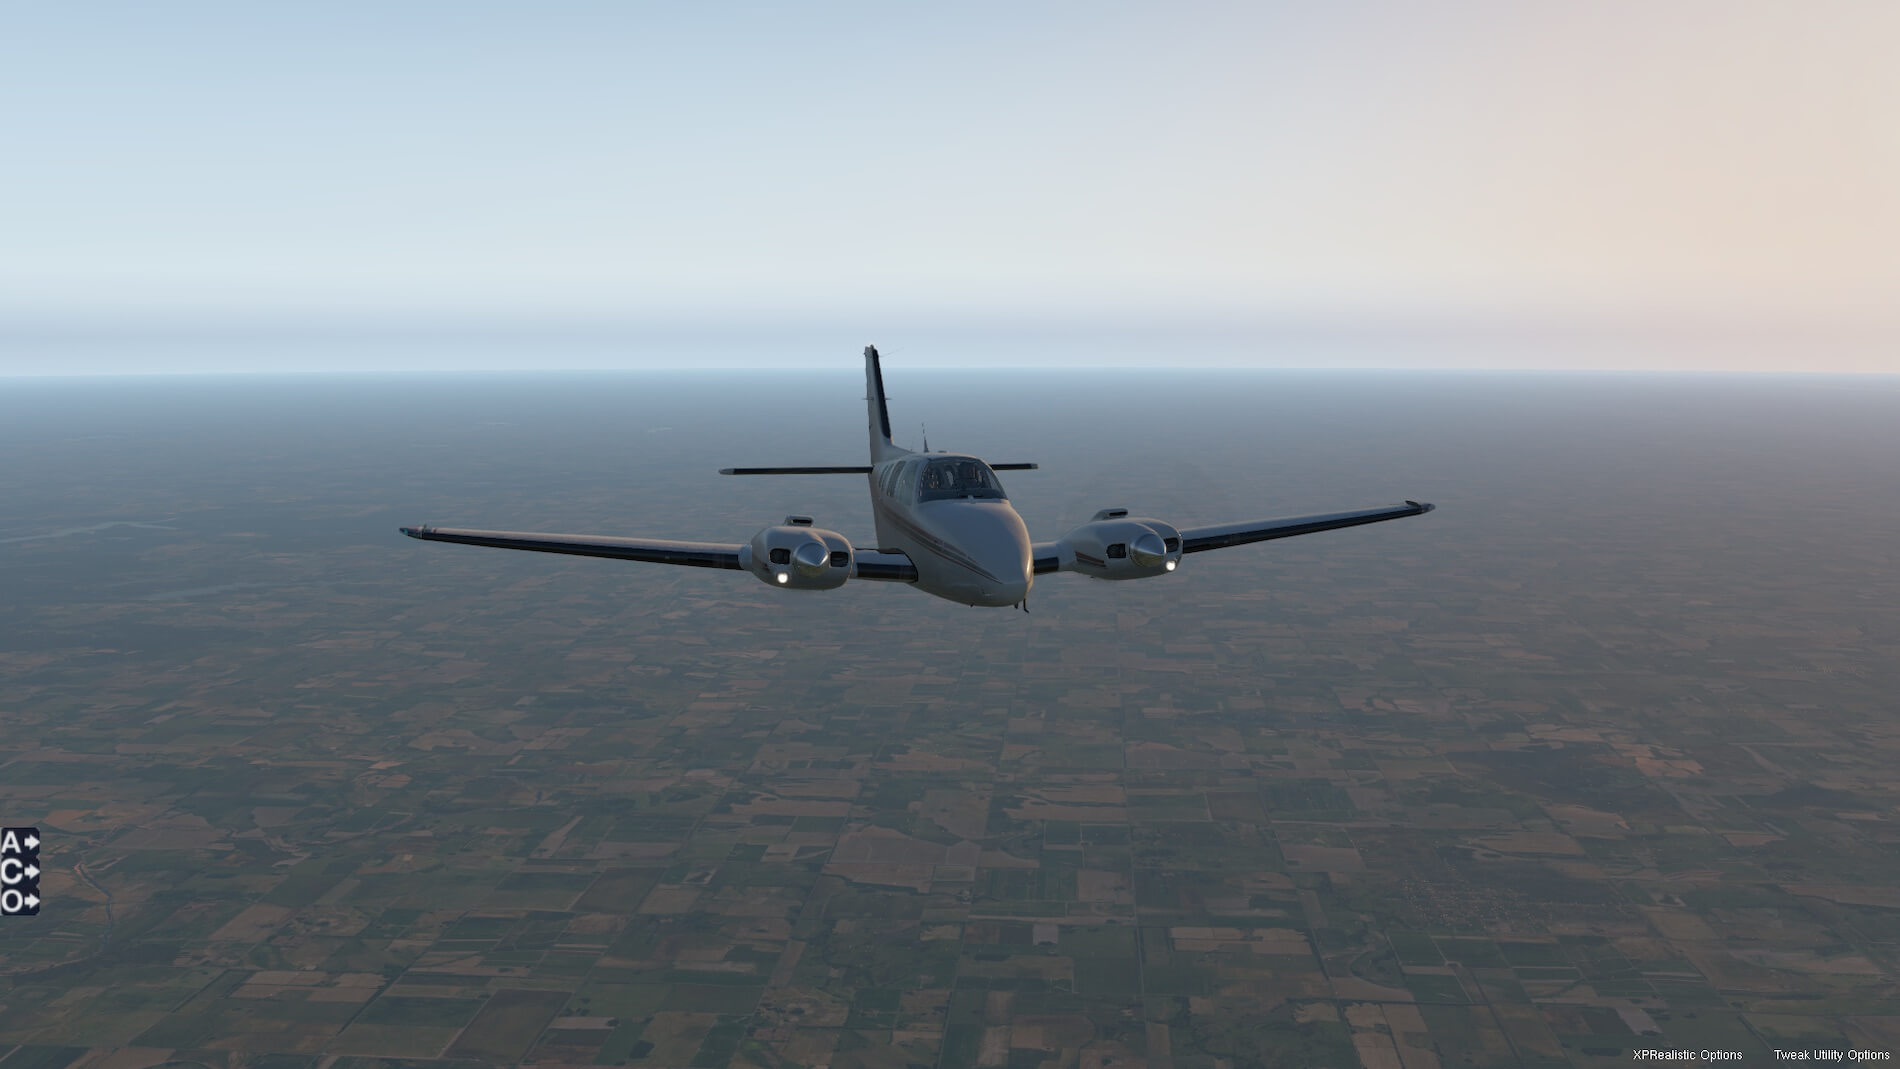
We have just passed 1,500 feet and so contact Chicago Center on 135.60. We are cleared to 10,000 feet and to fly direct to BDF. We push the “Direct-to” button on the GPS and select BDF. We have been in manual flight since departing KBRL and are now coming up on our cruising altitude of 10,000 feet. The manual control of this X-Plane 11 model is excellent- very stable and provides a sense of how heavy this “light” twin really is!


As we diverge from the river, we can still see it in the distance. I have now engaged our AP for Altitude Hold, and NAV. The vastness of the Great Plains can be seen from the external shots.


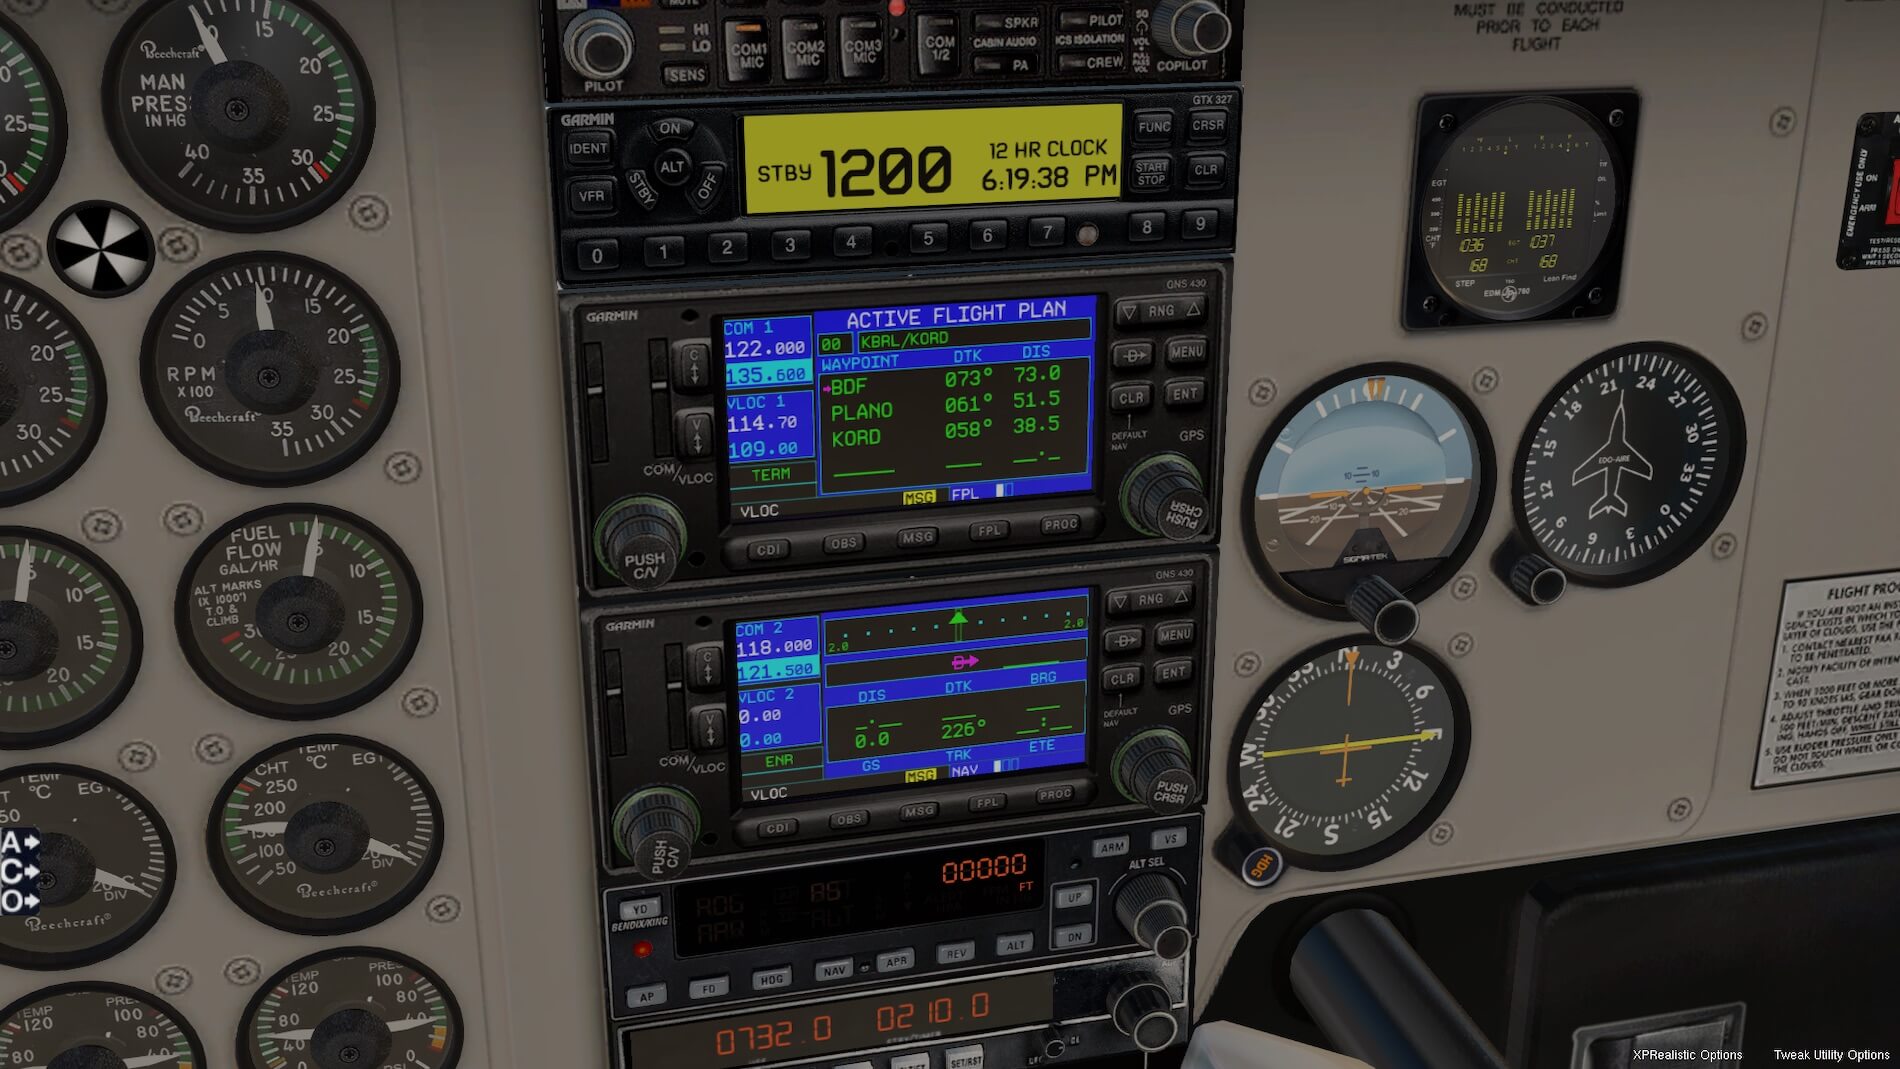
Everything is progressing well for our cruise to our first waypoint of BDF. Note that I have the VOR-2 display tuned to BDF as well, although I am using the GPS path as my primary track.


The flight path shows a slight turn to the left at BDF towards PLANO, which our AP executes well.


It’s time to review the comms at KORD, as things are going to start to get much busier very soon as we continue to fly over the seemingly never-ending flat expanse of this region.


So, we are now approaching TRACON airspace, so things are about to get very busy. I tune into the ATIS on COMM 2, which we need to confirm we have received in the initial contact with Chicago Approach. O’Hare is a huge and very busy airport, and while the controllers are helpful, they don’t have much time for mistakes or lack of good planning.
Chicago Center tells us to contact Chicago Approach on 119.00 (this is the frequency for handoff to Tower on runways 28- so in reality would be given another sector first as we are west of the airport- however I’m trying to avoid too much complexity and length of the review). We do so, stating that we have the ATIS Oscar.
Their reply is just an acknowledgement so our previous clearance is still current- however we are told to expect the 28C ILS approach. We grab our EFB and pull this approach up, and start the briefing- it will be too late once we get close to KORD! We also have Ground on the standby frequency of COMM 2. COMM 1 is now tuned to Chicago Approach on 119.00. We are still flying on auto-pilot at 10,000 feet, and on nav track from PLANO direct to KORD.
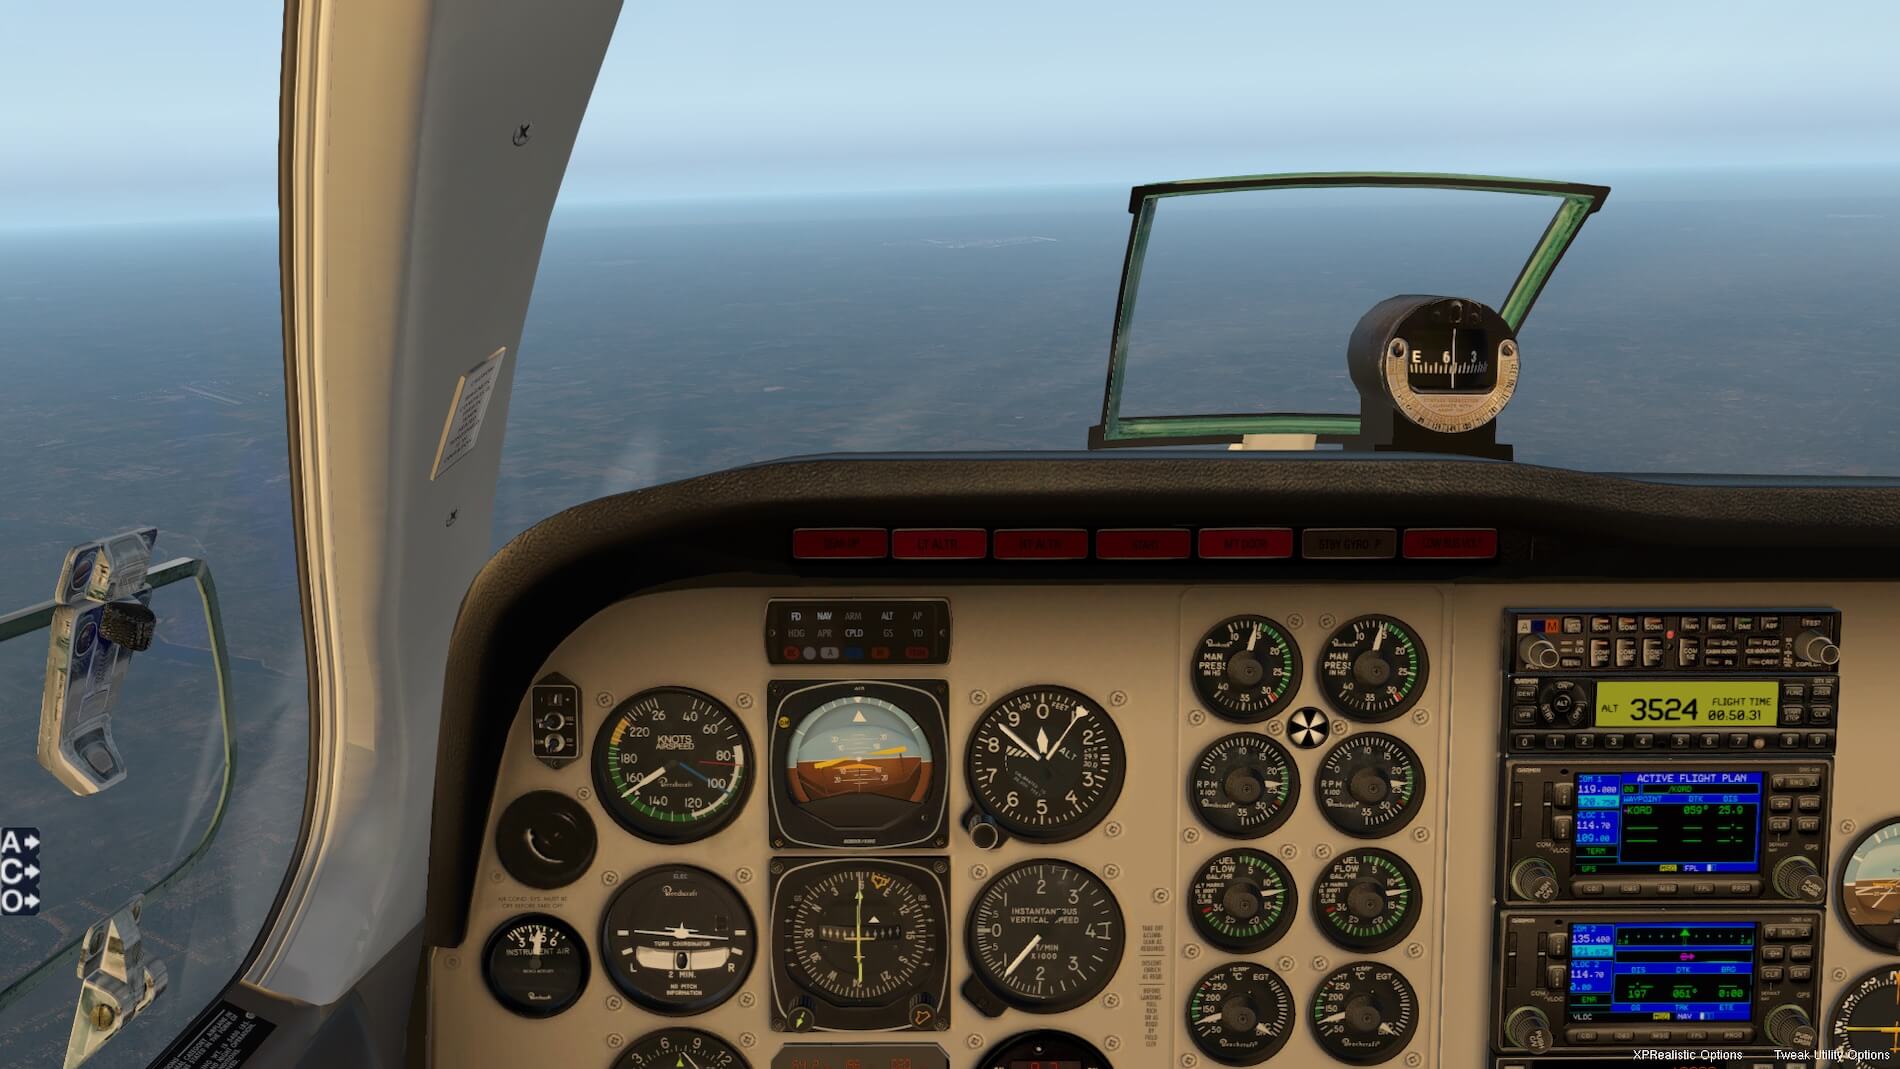
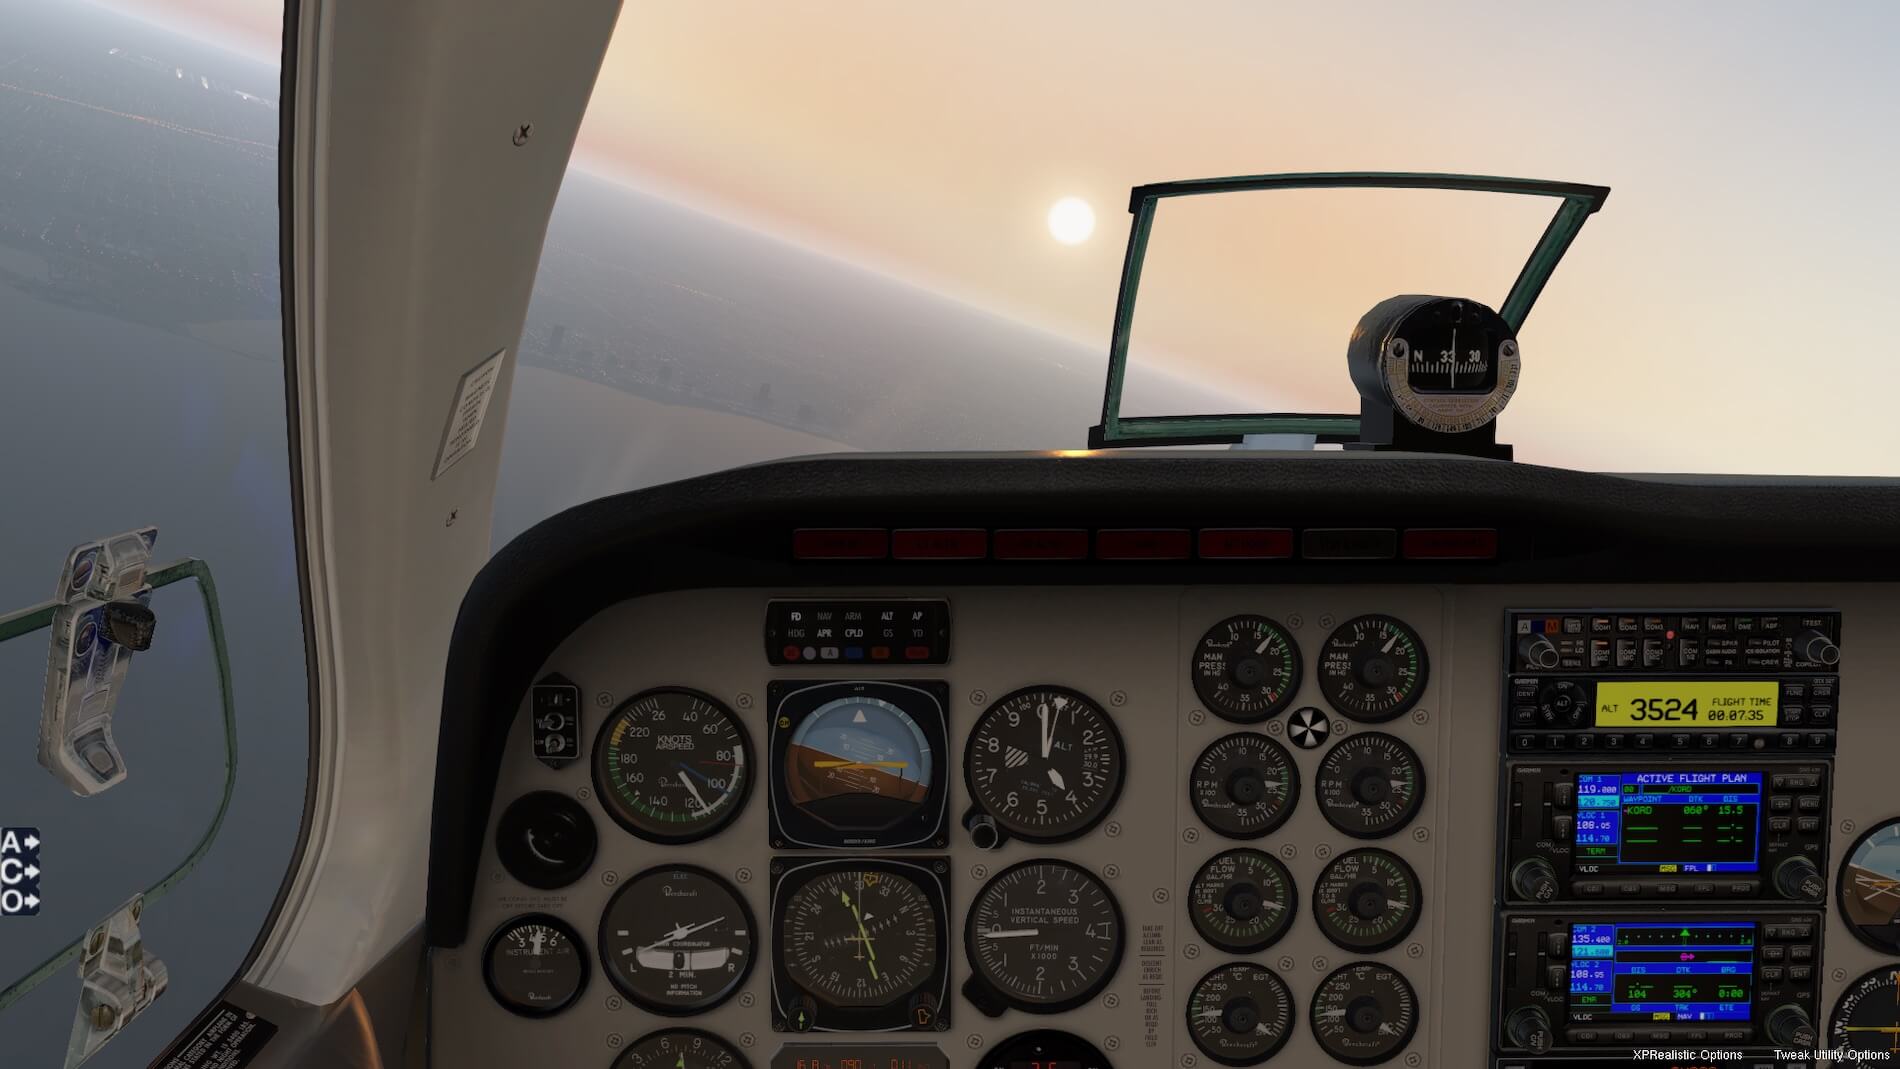
We are given a descent to 4,000 feet, so I switch the AP off and configure the MP, Props (they stay the same) and pitch per our “numbers table” for a 1,000 fpm descent at 165 KIAS. Lake Michigan is just coming into view through the haze and late afternoon lighting, and we can just visually make out KORD ahead of us. I have the AP altitude set for 4,000 so I will get a warning. Flight time is currently almost 51 minutes.
The passengers appear to be relaxed; however, my copilot tells them that we have commenced out descent and to check their seat belts and stow any carry-on materials so they are out of the way in case of an emergency evacuation. The MP can be seen to the top left at 14”, and props remain at 2300. We will need to check our MP on descent as it will start to increase along with the outside air pressure.


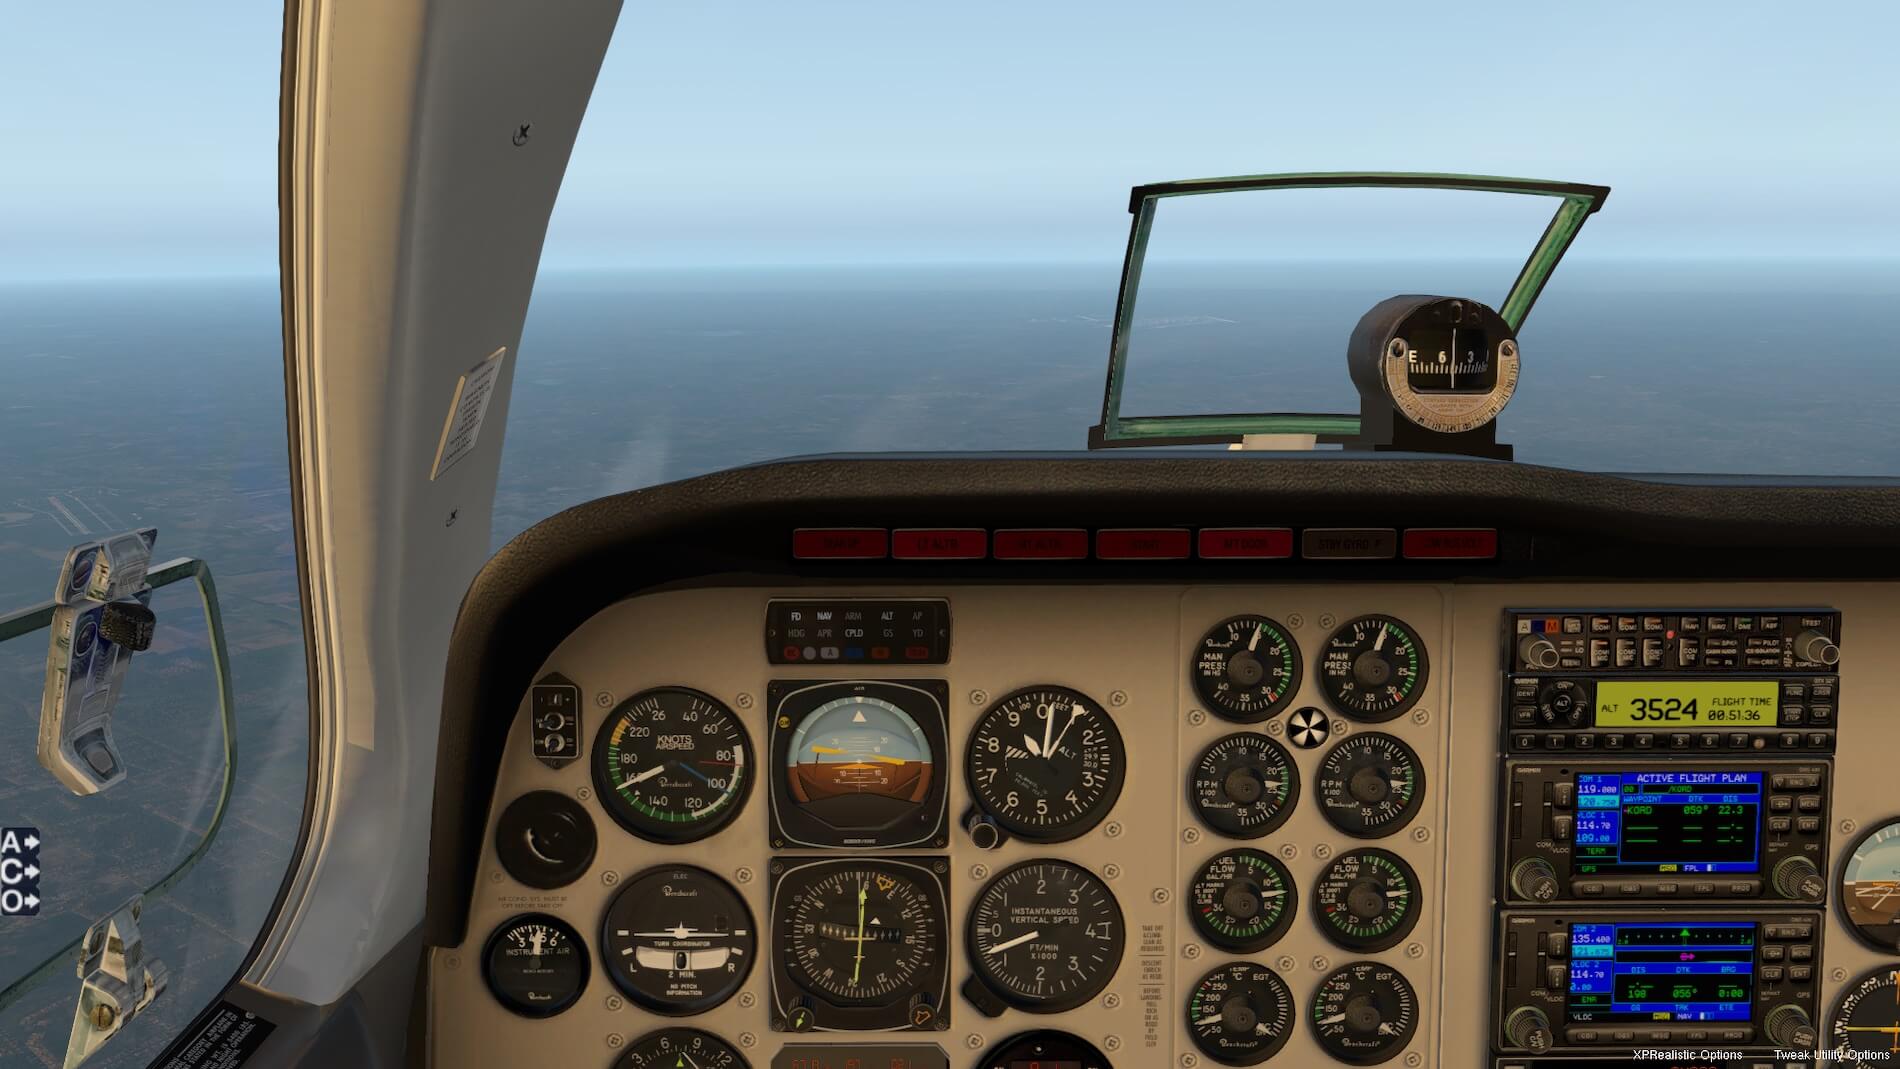
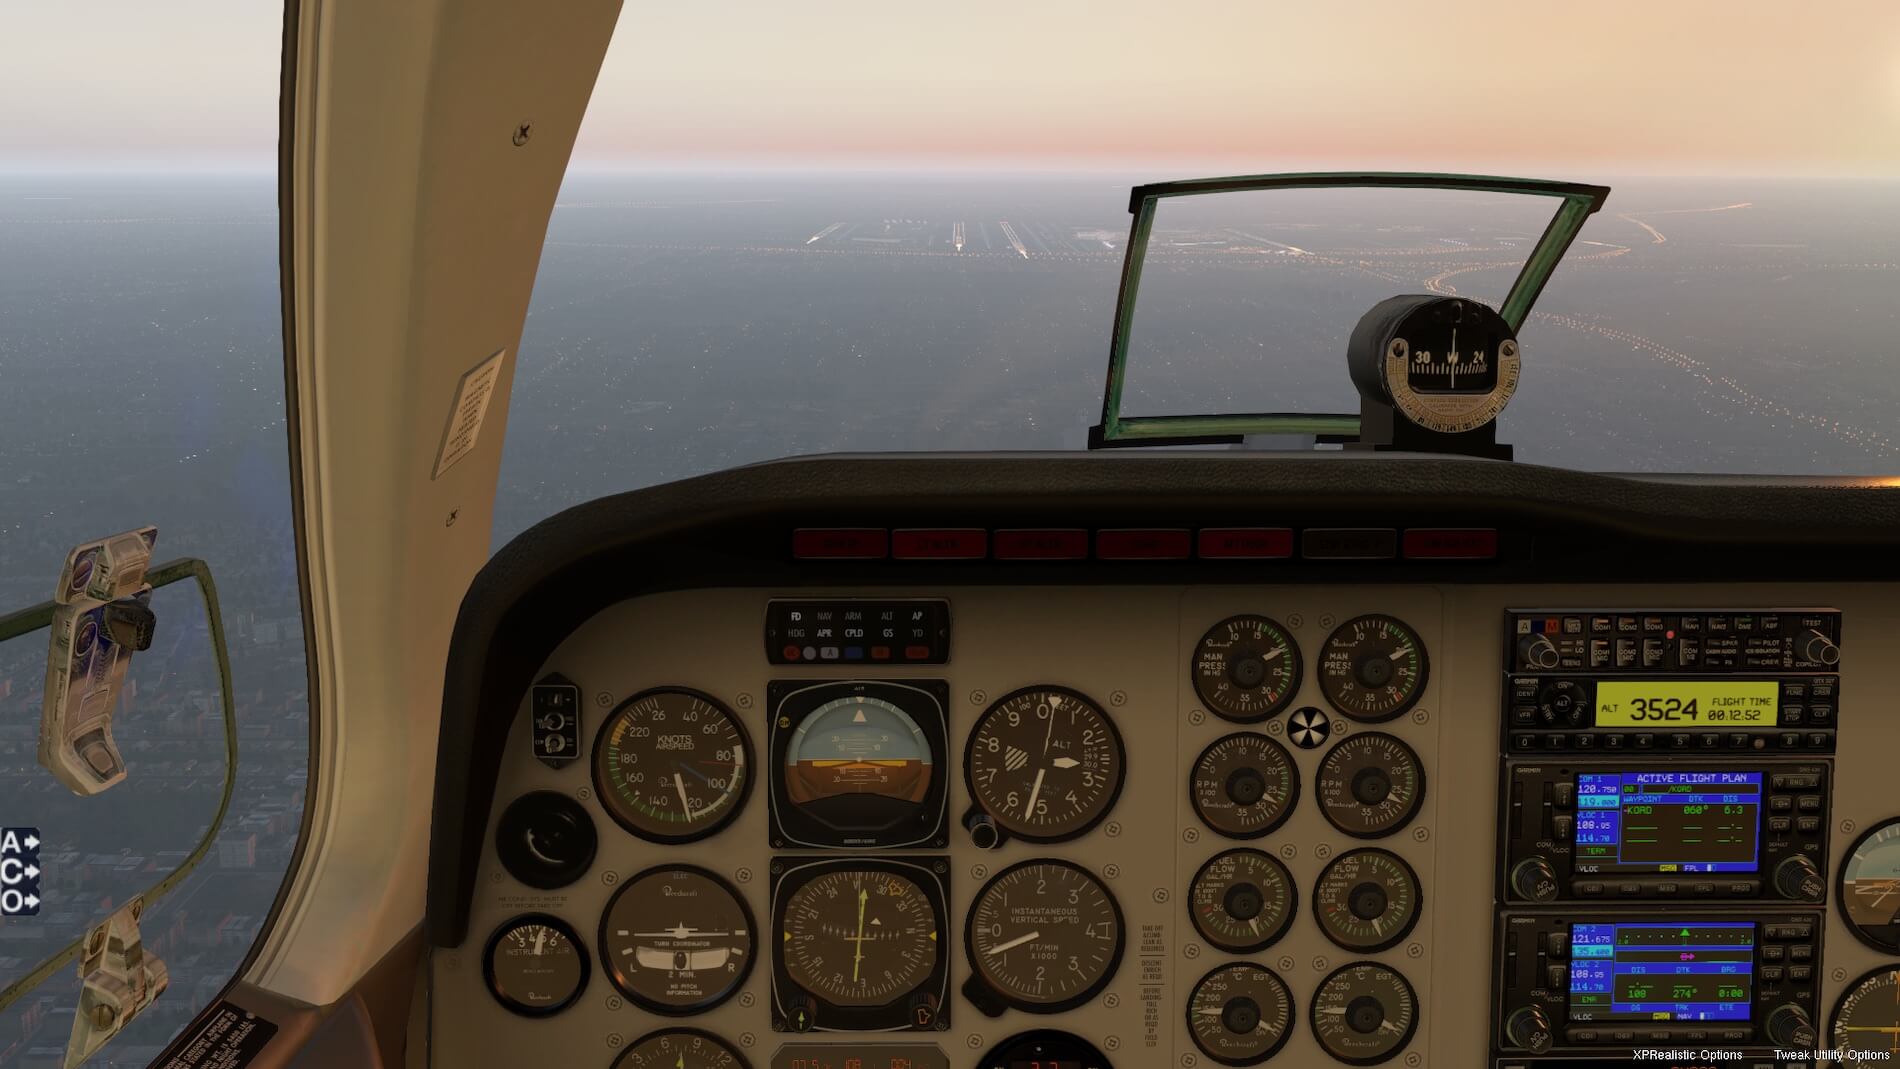
We’re now at 9,000 and noted that our descent rate is less than 1,000 fpm- a quick check of the MP shows that it has increased to 15”. We need to decrease it to our 14’ calculated previously- but are not surprised as we know that air pressure changes at an approximate rate of 1” per 1,000 feet- an aviation rule of thumb. Approaching 6,000 feet, with KORD very visible ahead of us. We keep reducing MP to keep it at 14”.

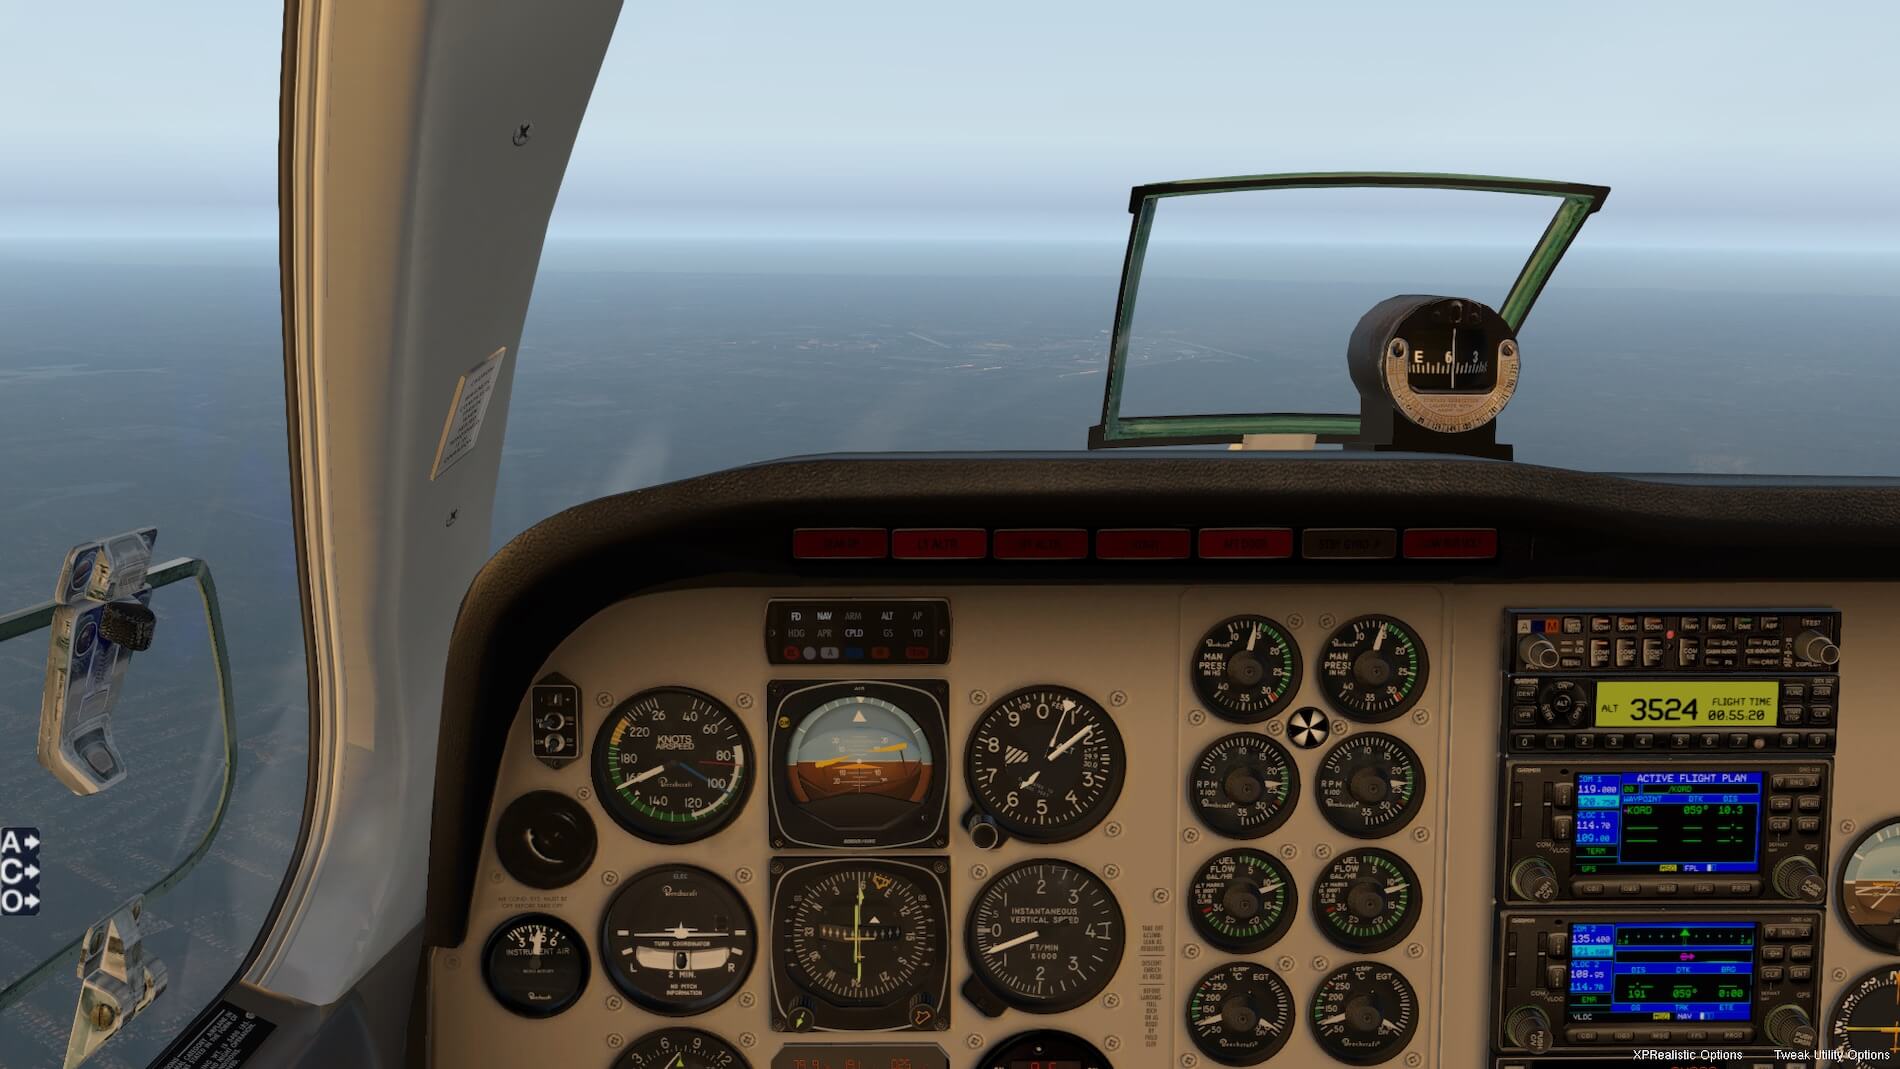
Chicago Approach tells us to turn right to 100, which is basically downwind for 28C, so we turn the heading indicator on the HSI to 100, mindful that we are in manual flight and we will need to make sure that we don’t overshoot this heading. A look to our left shows the KORD complex.


We have our 28C Localizer tuned to 108.95 on both NAV 1 and 2. Out of the front window we note the Chicago downtown skyline and ahead Lake Michigan. We are now level at 4,000 feet as cleared by Chicago Approach, and that calls for Approach flaps- which we can easily see and confirm out the right window. Looking at our engine gauges, we have 17” of MP, still 2300 Prop speed. This, along with our Approach flaps, is per our “numbers chart” for this phase of flight.

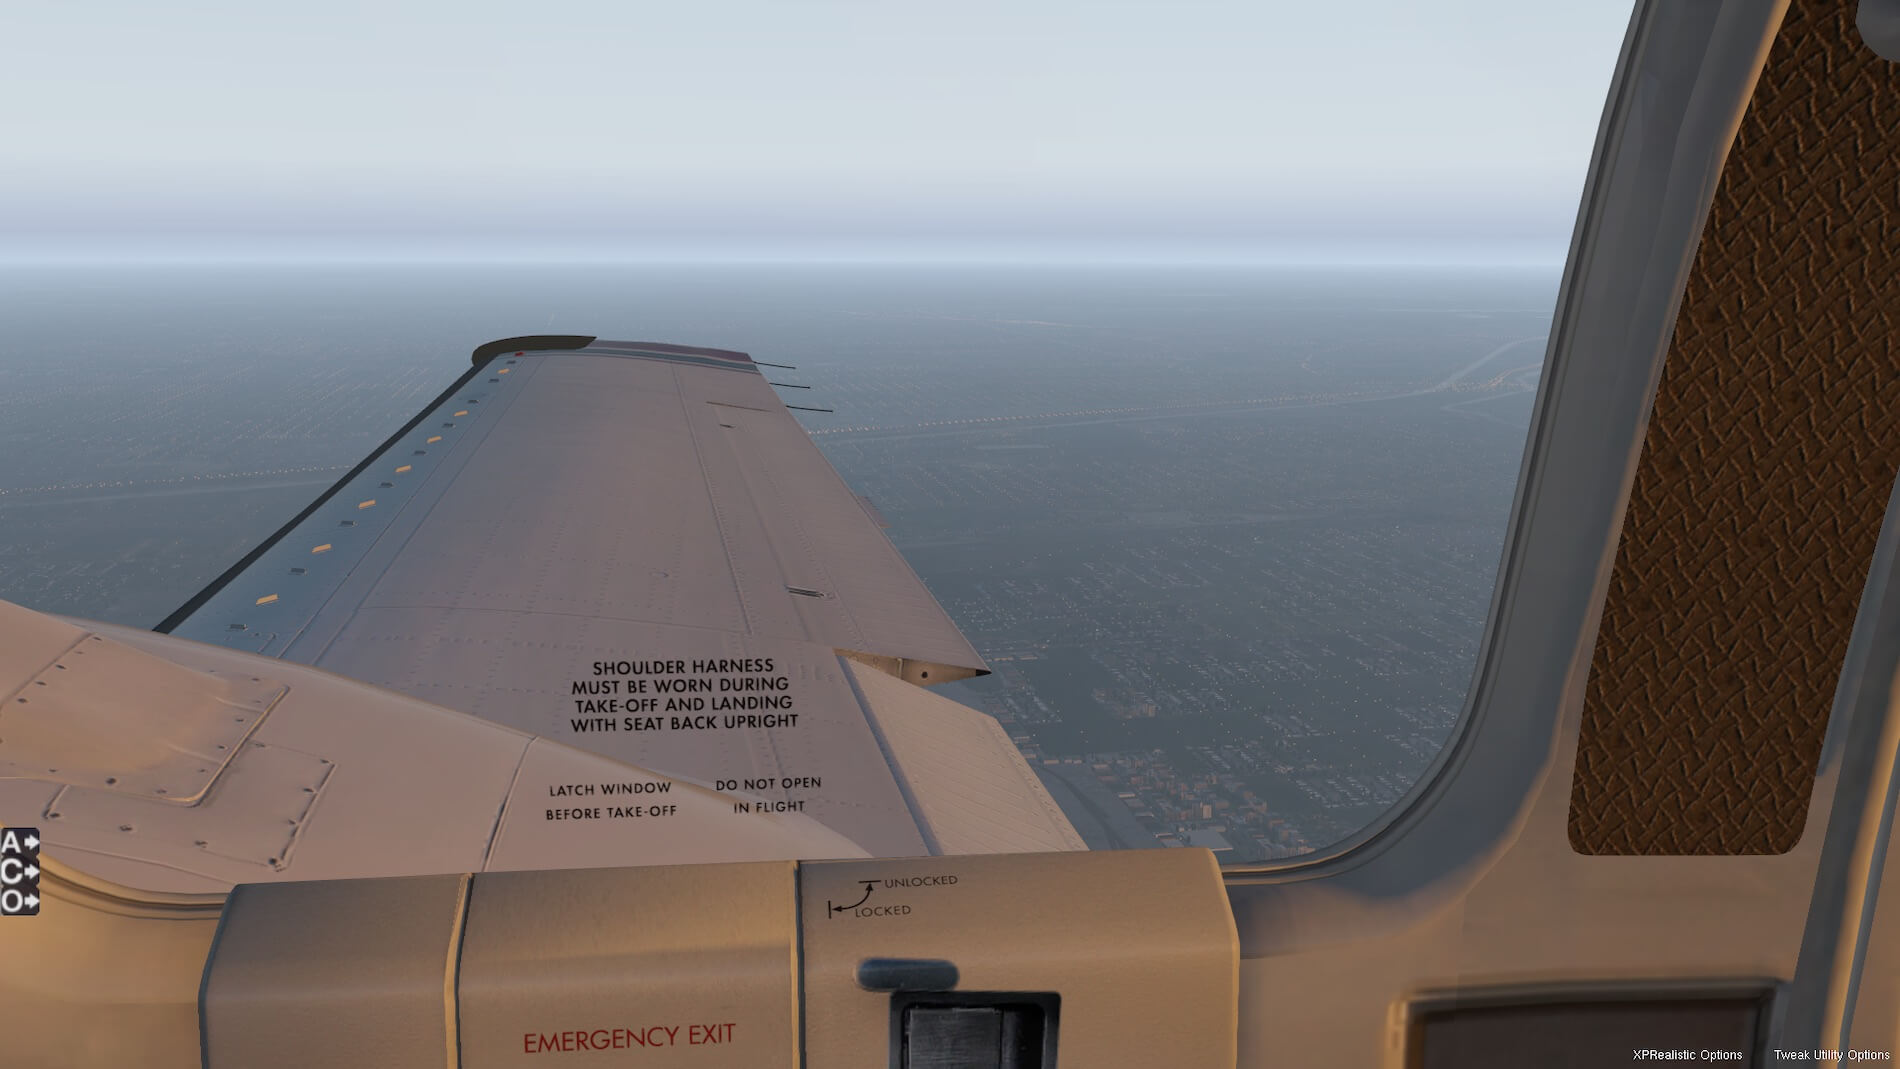

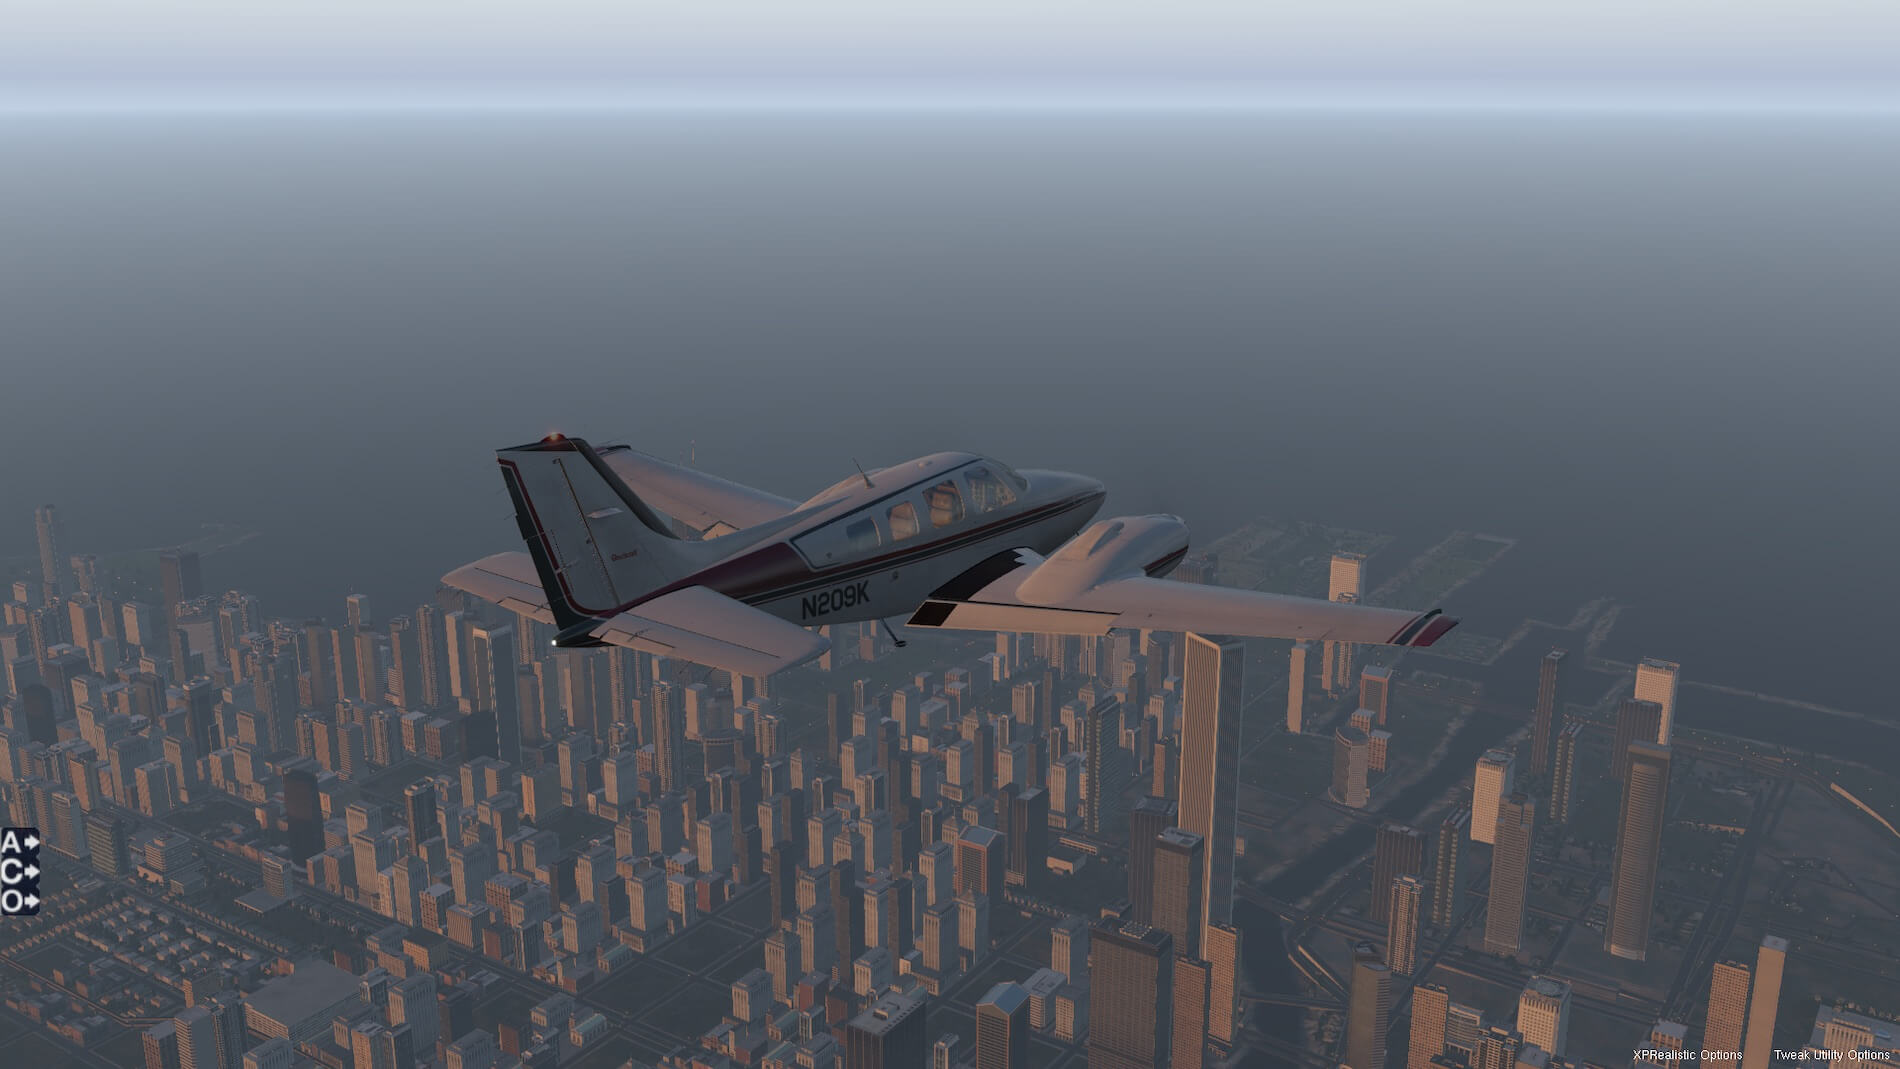
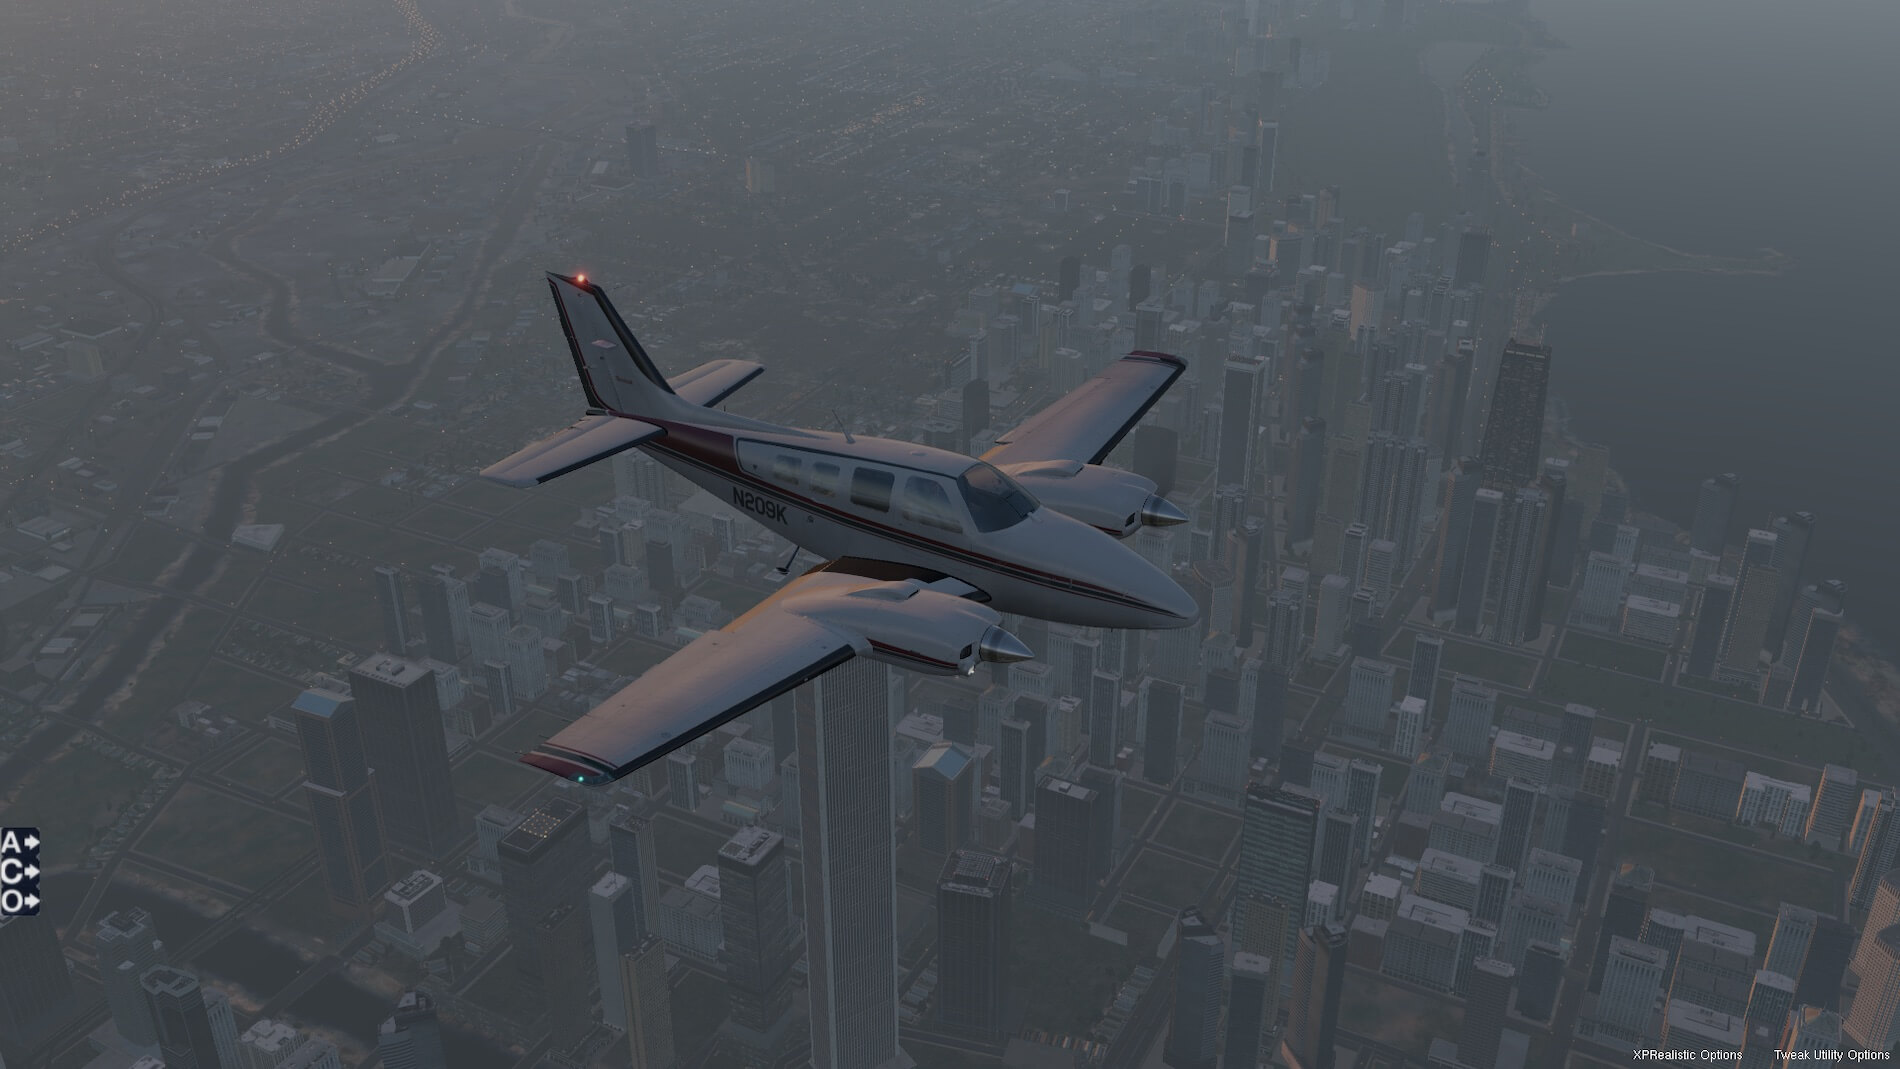
Now a spectacular set of screenshots as we pass over downtown Chicago, still at 4,000 feet.

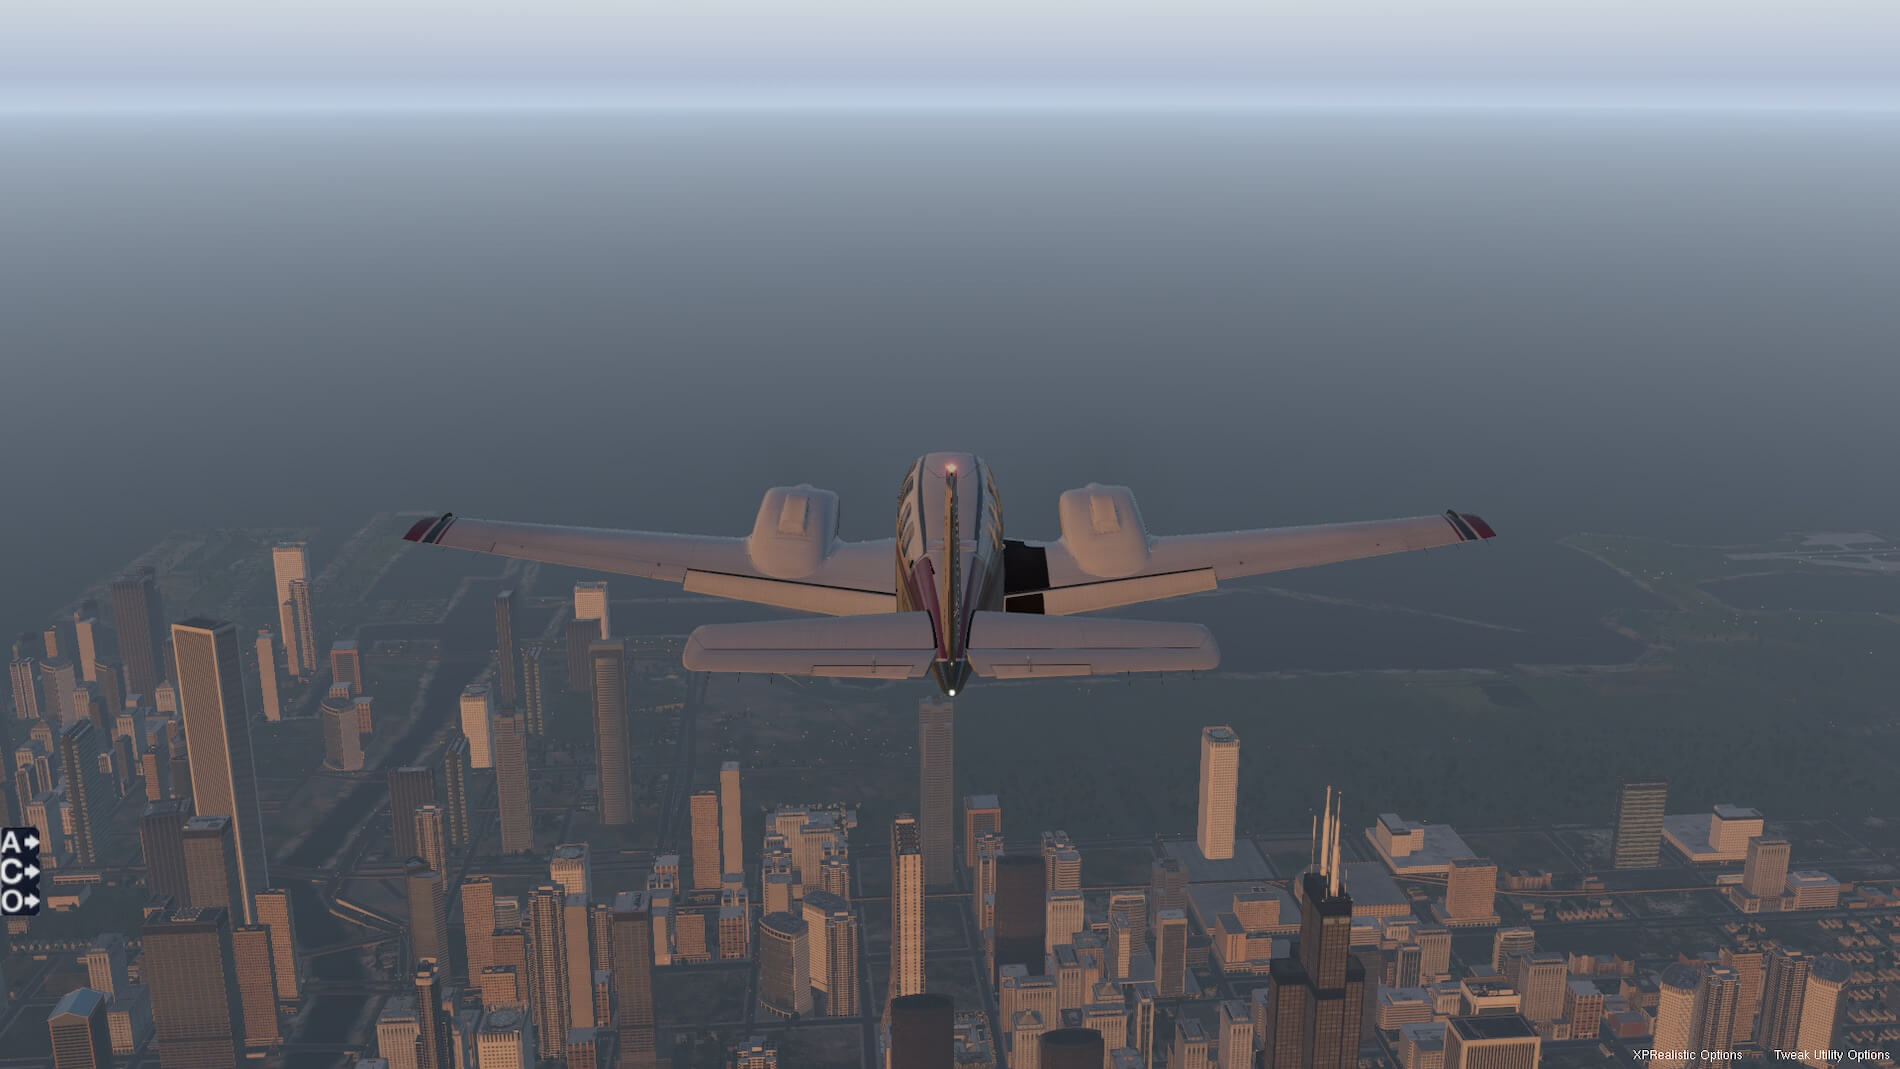

The left window view shows we are now above Lake Michigan, still outbound at 4,000 feet on a heading of 100. Chicago Approach gives us a left turn to 010, which is a base leg for 28C. At this time, I can hear them calling other aircraft for various approach speeds and some vectoring for traffic- they are making room for us. We soon get a vector to 330, and are on “a 45 to final”- still at 4,000 feet.


We then hear from Approach “River 4, you are 2 miles from RZUKO, turn left to 310, cleared the ILS approach to runway 28C”. This clearance for the approach authorizes us to descend below 4,000 feet once we are established on the 28C Localizer and we have captured the Glide-slope (or there may be an altitude step-down restriction that we need to conform with). As the needle on the HSI comes into center we turn to heading 280, still maintaining 4,000 feet.


A short explanation of why we are assigned runway 28C. In fact, in real life, we would be assigned a runway that is not as busy as this- maybe one of the 27’s, or 28L, however I am emulating what was the arrival and departure procedures on the “28’s” (and maybe still is- there’s been a lot of changes at KORD with the expansion and new runways at KORD). Take offs are assigned 28R- more about that in a bit.
Landing are assigned 28C. Note that landings always start at the threshold (displaced or not), whereas takeoffs can be an “intersection departure” where the takeoff is initiated further down the runway if the remaining runway length and the aircraft performance allow. Having observed the runway use several years, at that time (and maybe also now) the take-offs are usually assigned an intersection departure on 28R at N5.
That means that after our landing on 28C, we will be given a clearance to taxi back on P as far as GG, and we will cross 28R at GG, so will be behind the takeoff paths of most aircraft. Our clearance will only be to the GG intersection of 28R, we will receive permission to cross 28R once we get there. Of course, heavily laden aircraft use the full runway length, and we would be told to hold at GG for 28R until that takeoff had occurred.
Back to our flight: we are told to contact O’Hare Tower, who clear us to land on runway 28C. We move the Props to maximum speed, so that we can generate more power in the case of a Missed Approach. We’re have a beautiful ride down the Glideslope- I have enabled the AP again and used APR.


Close to landing we put in full flaps, keep the throttle where it is, and the aircraft will slow and settle onto the runway, and we brake. Tower tells us remain with him, and to take the next runway exit (which is P5), taxi back on P to GG, and to hold short of 28R, we read back as required.


We taxi back quite a distance, and even eventually get back to taxiway GG, where we taxi up to the hold-short line and wait for our next clearance.
BS, BT,
We get told to “Taxi across 28R, no delay, and monitor Ground on the other side”. We switch our strobe lights back on, then off again once we have crossed 28R.


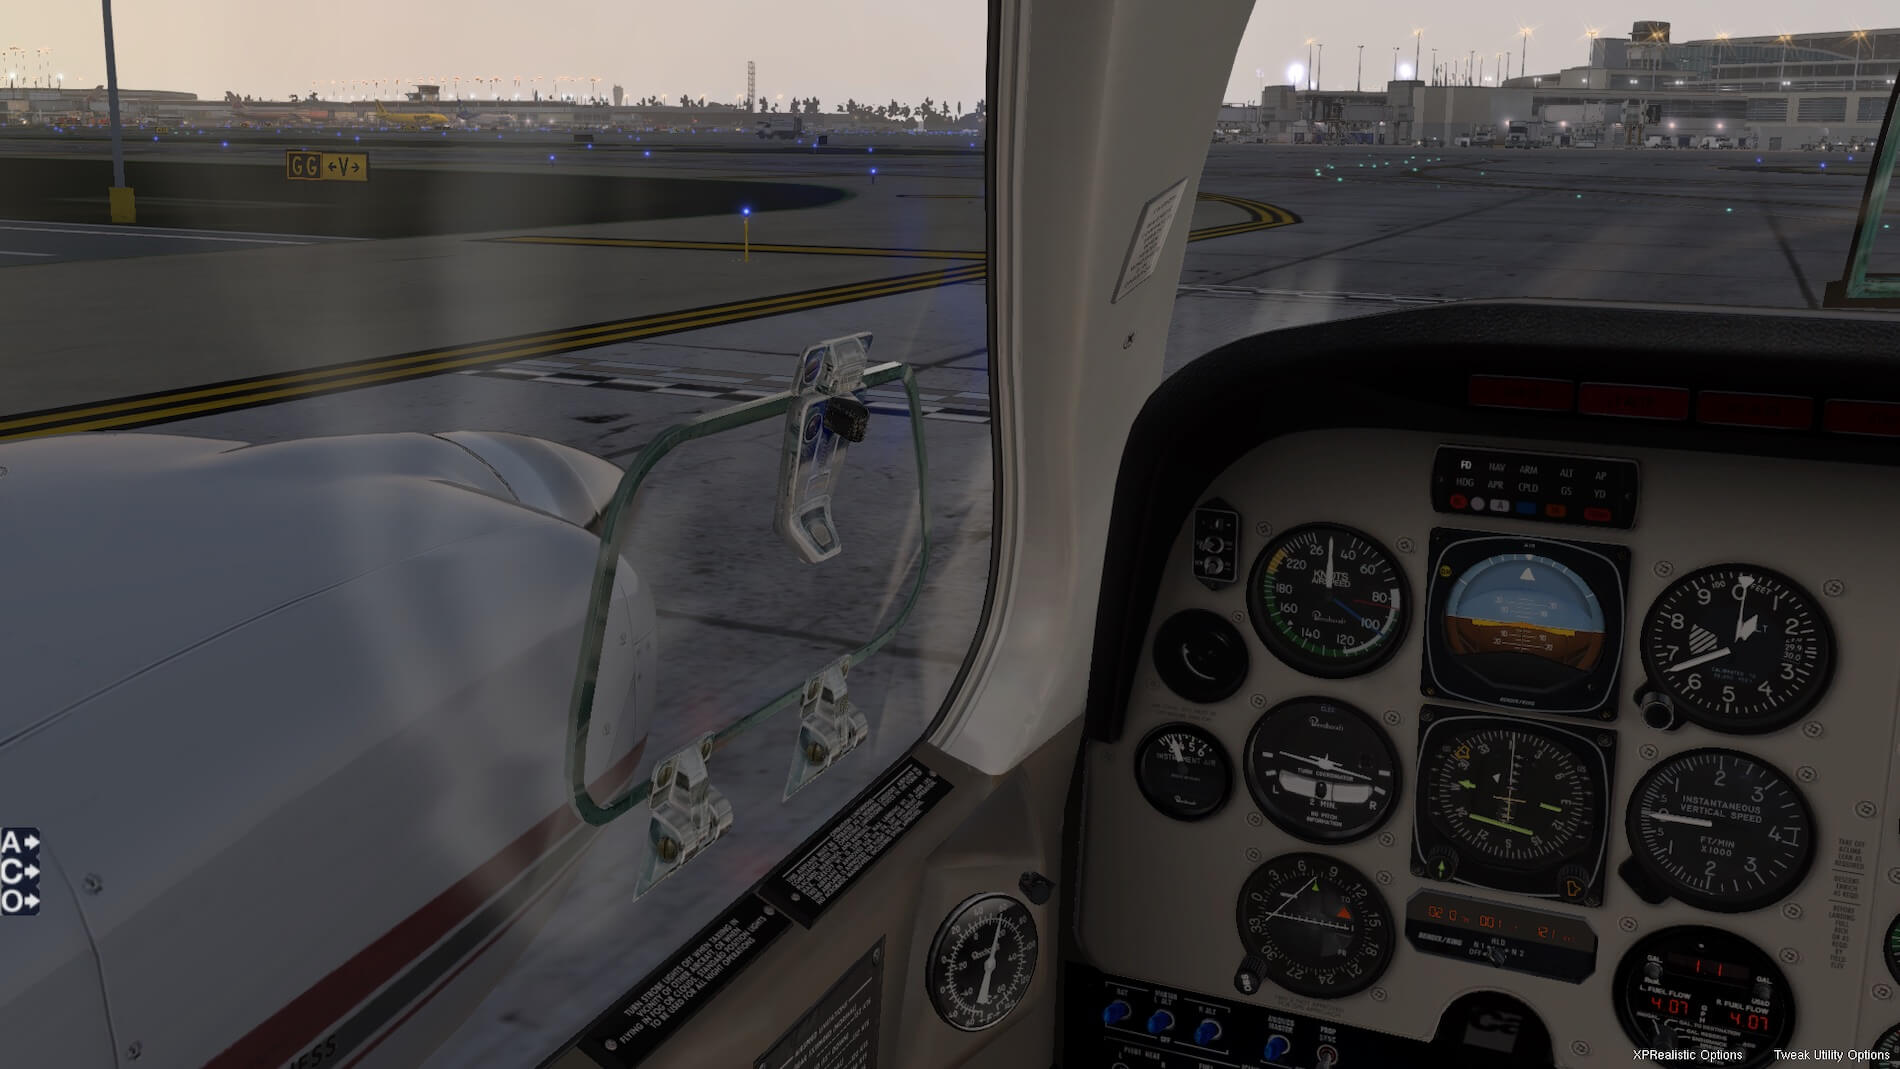
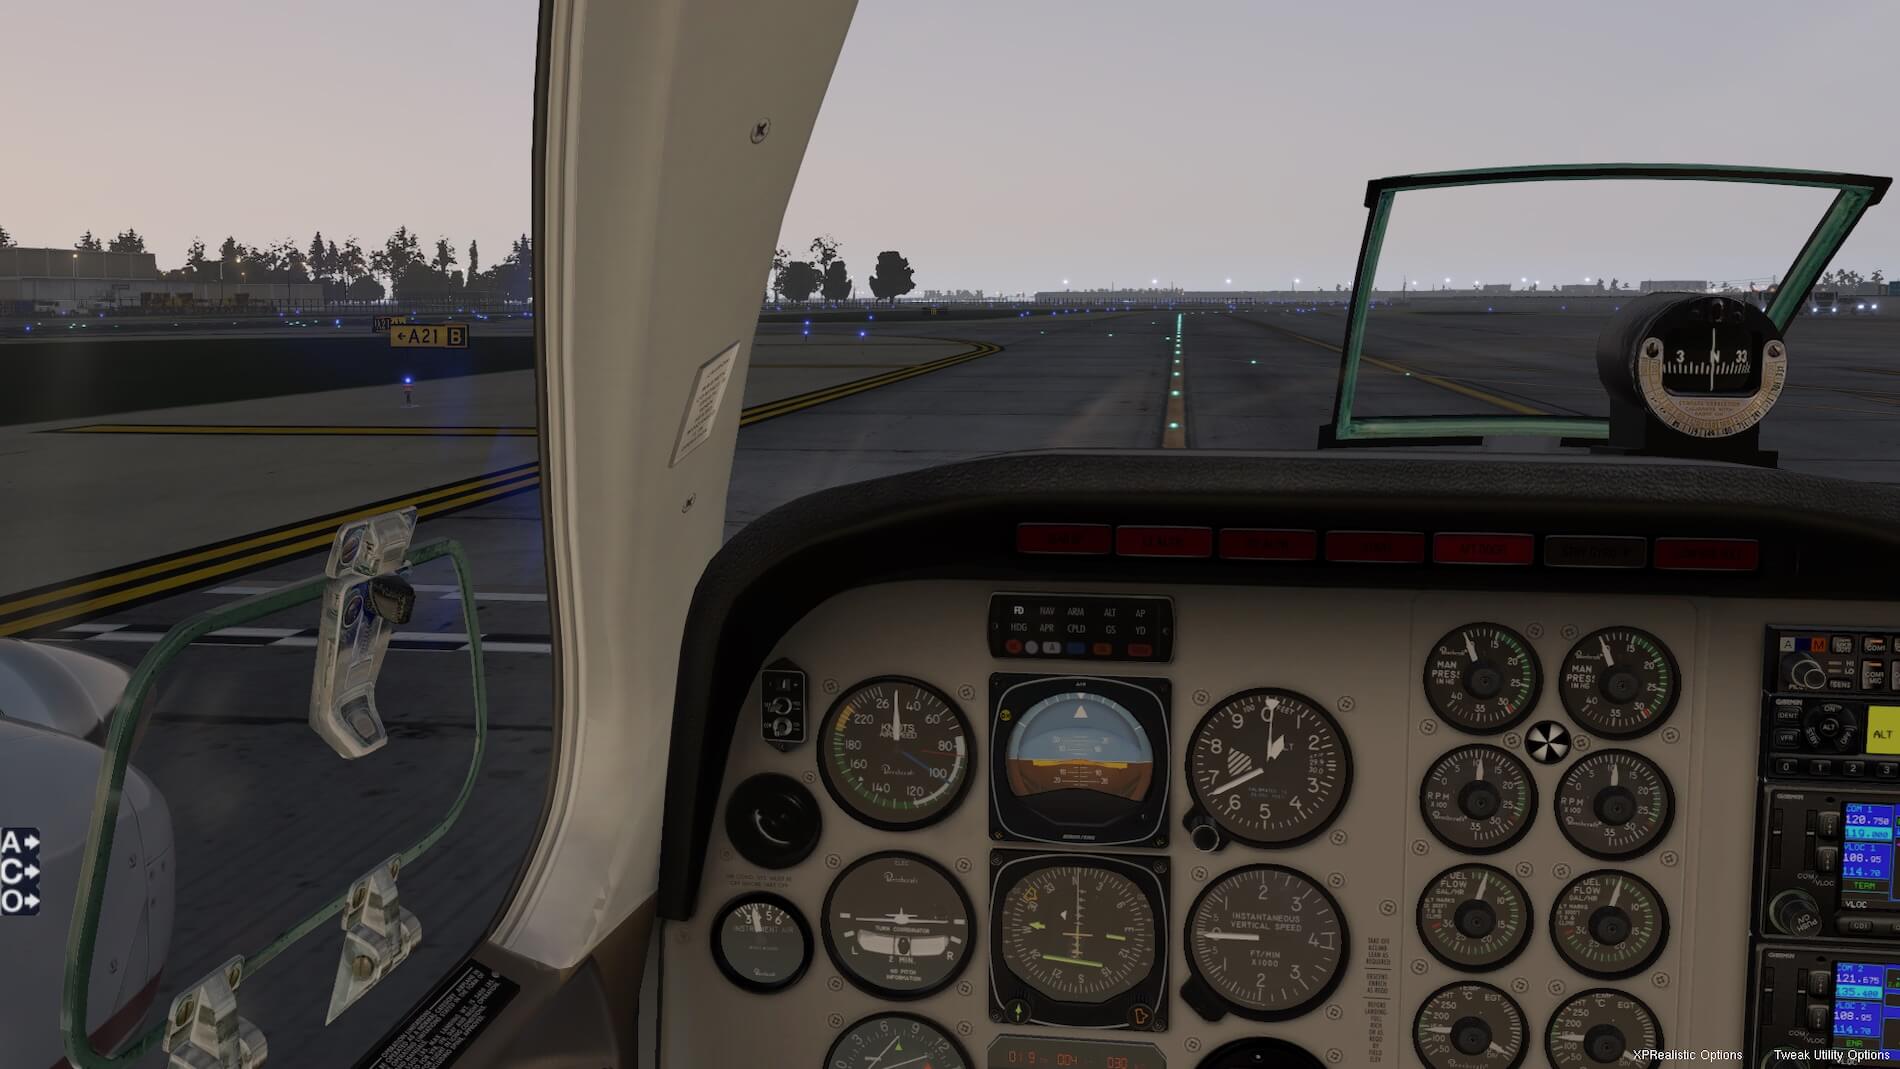
We are cleared by Ground to taxi on GG to V, B, A21, A, to terminal. Looking at the airport diagram this might sounds strange- but to get to Gate L11A from taxiway V, we need to move further counter-clockwise around the terminal structure. At KORD, there are two taxiways that surround the terminal complex in roughly a circle- they are A and B. But- A is only clockwise, and B is only counter-clockwise- so we must taxi on B until past the gate, then take A21 to A, and come back clockwise to the taxiway exit to the gate. Confusing?
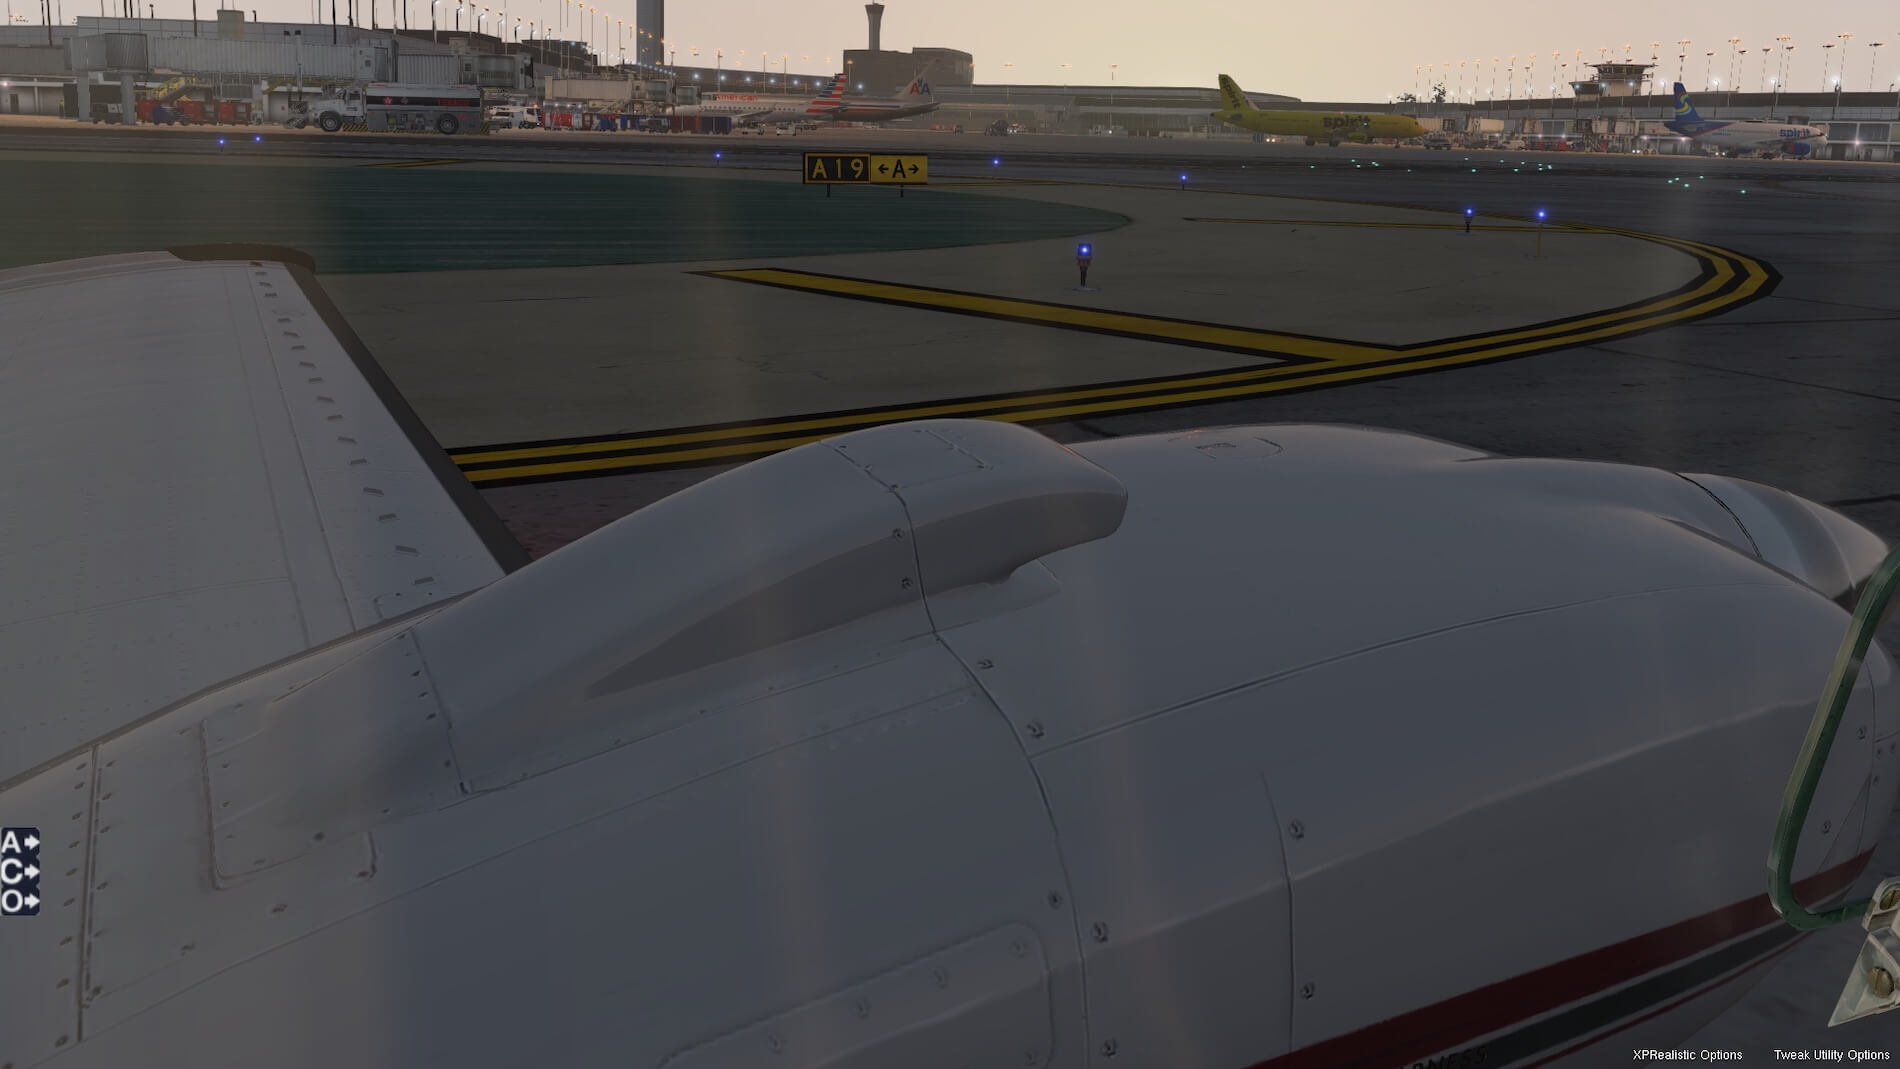
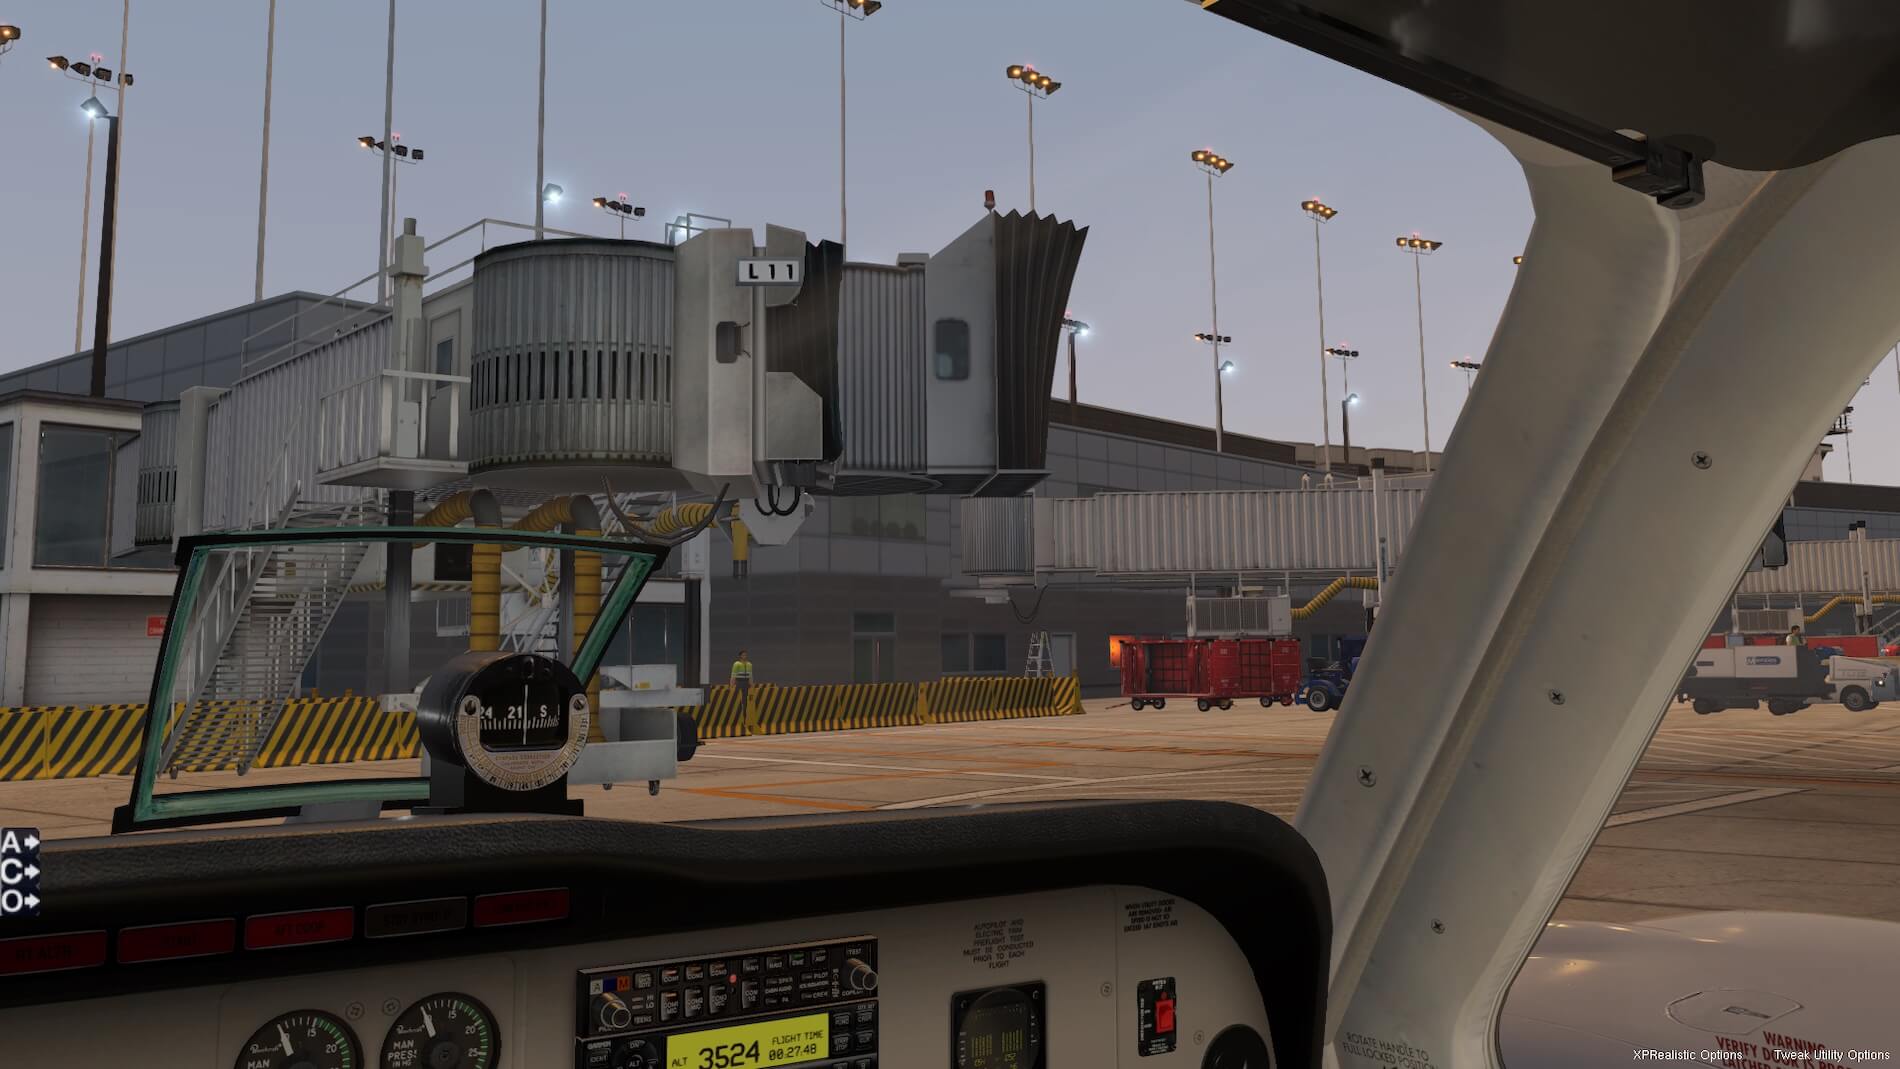
We see our gate 11A, with gate L11 next to us where there is a jetway. Our passengers are going to be escorted off the aircraft and will walk up a special set of stairs to the arrival area inside the terminal. We now shut the aircraft down. Welcome to Chicago!!
Summary
I am reviewing the Beechcraft B58 Baron as it comes from Carenado, without adding an REP (Reality Expansion Pack). While many may wish to enhance this excellent product by adding the REP package, I’m sure equally many do not. Besides, if I had added an enhancement such as REP then it no longer becomes a review about just the Carenado product.
I did notice several graphical errors in the model and I have included mention of those in the review- however, they are very small and do not alter the basic performance of the model. While I don’t have correlation to the real aircraft, I did find flying it in X-Plane 11 was very compatible with real flight reviews that I found on-line.
The stability, ease in handling, the feeling of having a heavy aircraft under your control- even how it is unforgiving if landings are done without sufficient airspeed. While I was generating my “numbers” table in the test flight, I found them to be overall relatively close to the real thing.
The graphics and look of this model is amazing (even given the few small issues I found). Great sound and good handling, along with effective lighting, to me all equals immersion, and this product is certainly that- I had a feeling of satisfaction after flying it, not frustration, which I often get if it doesn’t feel almost real.
More information can be found at the dedicated Carenado web page or you can also have a look at the dedicated X-Plane.org web page. As of this writing – July 2019 – the Beechcraft Baron 58 for X-Plane 11 cost you 29.95 USD.
Appendix
Mode-C transponders don’t only squawk their “squawk code” and have the ability to identify when requested by ATC. They also have the ability to send a code to ATC with the altitude of the aircraft. Incidentally, the altitude source for these units is unaffected by the altimeter setting on the aircraft’s panel, it’s “pressure altitude” which means it assumes a “standard day”. A correction is applied by ATC to convert the data adjusted to the local altimeter setting.
Mode-C transponders are required when the aircraft is above 10,000 feet, in Class A, B and C airspace, anywhere above Class B and C airspace- and within 30 nm of the primary airport in Class B airspace. It’s this last item that is known as the “Mode-C Veil”, and is also found on sectional and terminal charts by a thin blue circle centered on the primary airport. It is anticipated that ADS-B, when fully implemented, will supersede Mode-C transponders and the Mode-C veil.
Feel free to contact me if you’ve got additional questions related to this impression. You can reach me via email Angelique.van.Campen@gmail.com or to Angelique@X-Plained.com.
With Greetings,
Bruce Knight
| Add-on: | Payware Carenado Baron 58 |
|---|---|
| Publisher | Developer: | X-Plane.Org | Aerosoft | Carenado |
| Description: | Realistic rendition of the Beechcraft Baron 58 |
| Software Source / Size: | Download / Approximately 380MB (unzipped) |
| Reviewed by: | Bruce Knight |
| Published: | July 17th 2019 |
| Hardware specifications: | - iMac late 2017 - Intel i7 4.2 GHz - AMD Radeon Pro 580 8192 MB - 32GB 2400 MHz RAM |
| Software specifications: | - Mojave (10.14.5) - X-Plane 11.40 |
2 Comments
Submit a Comment
You must be logged in to post a comment.
In addition to being a great comprehensive review, it is a great tutorial as well. Thanks!
Hi richv, thanks for the kudos on the B58 review. I find these reviews a perfect blend for my passion for aviation and love of writing.