Carenado Piper PA-31T Cheyenne
Introduction
Information from airliners.net, rocket route and Wikipedia states that the Piper Cheyenne family of turboprop corporate aircraft is based on the popular Navajo and Chieftain piston twins. Although the first Cheyenne was not delivered until mid 1974, work on a turboprop version of the Pressurised Navajo, from which it is derived, dates back almost a decade earlier to the mid 1960s.
The prototype of the Cheyenne flew for the first time on August 29 1969, but Piper had to redesign the flight controls to handle the increased loads on the airframe due to the higher speeds. Production deliveries were further delayed due to flooding at Piper’s Lock Haven plant in June 1972. Certification had been granted on May 3 1972, while the first production aircraft, powered by Pratt and Whitney 462kW/620shp PT6A-28s with three bladed, constant speed, fully feathering Hartzell propellors, first flew on October 22 1973.
Piper introduced the lower powered (373kW/500shp PT6A-11s) and less expensive Cheyenne I in 1978, and renamed the original Cheyenne the Cheyenne II. Most aircraft are used in North America, and some airlines/operators have updated to the PA-42 Cheyenne III and IV, although there are examples used by operators in Europe and Asia.
The PA31T Cheyenne II has also been used by the Mauritanian Air Force and the United States Department of Defense.
General characteristics:
- Crew: 2
- Capacity: 4–6 passengers
- Length: 34 ft 8 in (10.57 m)
- Wingspan: 42 ft 8¼ in (13.01 m)
- Height: 12 ft 9 in (3.89 m)
- Wing area: 229 sq ft (21.3 m²)
- Empty weight: 4,870 lb (2,209 kg)
- Max. takeoff weight: 9,000 lb (4,082 kg)
- Powerplant: 2 × Pratt & Whitney Canada PT6-28 turboprop, 620 shp (462 kW) each
Performance:
- Maximum speed: 326 mph (525 km/h, 283 knots) at 11,000 ft (3,360 m)
- Cruise speed: 244 mph (393 km/h, 212 knots) at 25,000 ft (7,600 m)
- Stall speed: 88 mph (142 km/h, 77 knots) (flaps down)
- Range: 1,702 mi (2,739 km, 1,478 nmi) (economy cruise, 45 min reserves)
- Service ceiling: 29,000 ft (8,840 m)
- Rate of climb: 2,800 ft/min (14.2 m/s)
Installation and Documentation
Download speeds vary with internet connection but the process is straight forward. Once the aircraft is downloaded the file can be copied to the users aircraft folder. When X-Plane is launched using the model for the first time a window appears requiring the serial key, provided with the download, and once this is entered the system asks for the aircraft to be loaded again. Once this is done the aircraft can be used in X-Plane.
The download folder includes a Documents folder that contains eight items. There are a credits pdf, a recommended settings pdf, a version history document, and a copyrights pdf. There are four further pdf documents relating to the aircraft itself: normal procedures which contains preflight and other checklists, emergency procedures which contains checklists for events such as engine failure, engine restart and fire in flight, performance tables and performance reference table.
The documents do not contain an aircraft manual or cockpit diagram which I always think is a pity as users not familiar with the aircraft are left having to work out quite a bit for themselves and checklists become a search for the correct switch, button or instrument as opposed to carrying out the checklist itself. This means the full benefit of the developers hard work may not be achieved.
I did find a link to a pilots operating handbook for the Cheyenne and whilst this is not bespoke to this model it expands on the information provided in the documents folder and does contain cockpit and overhead panel diagrams. This can be downloaded in English from Pilotundflugzeug on the following link.
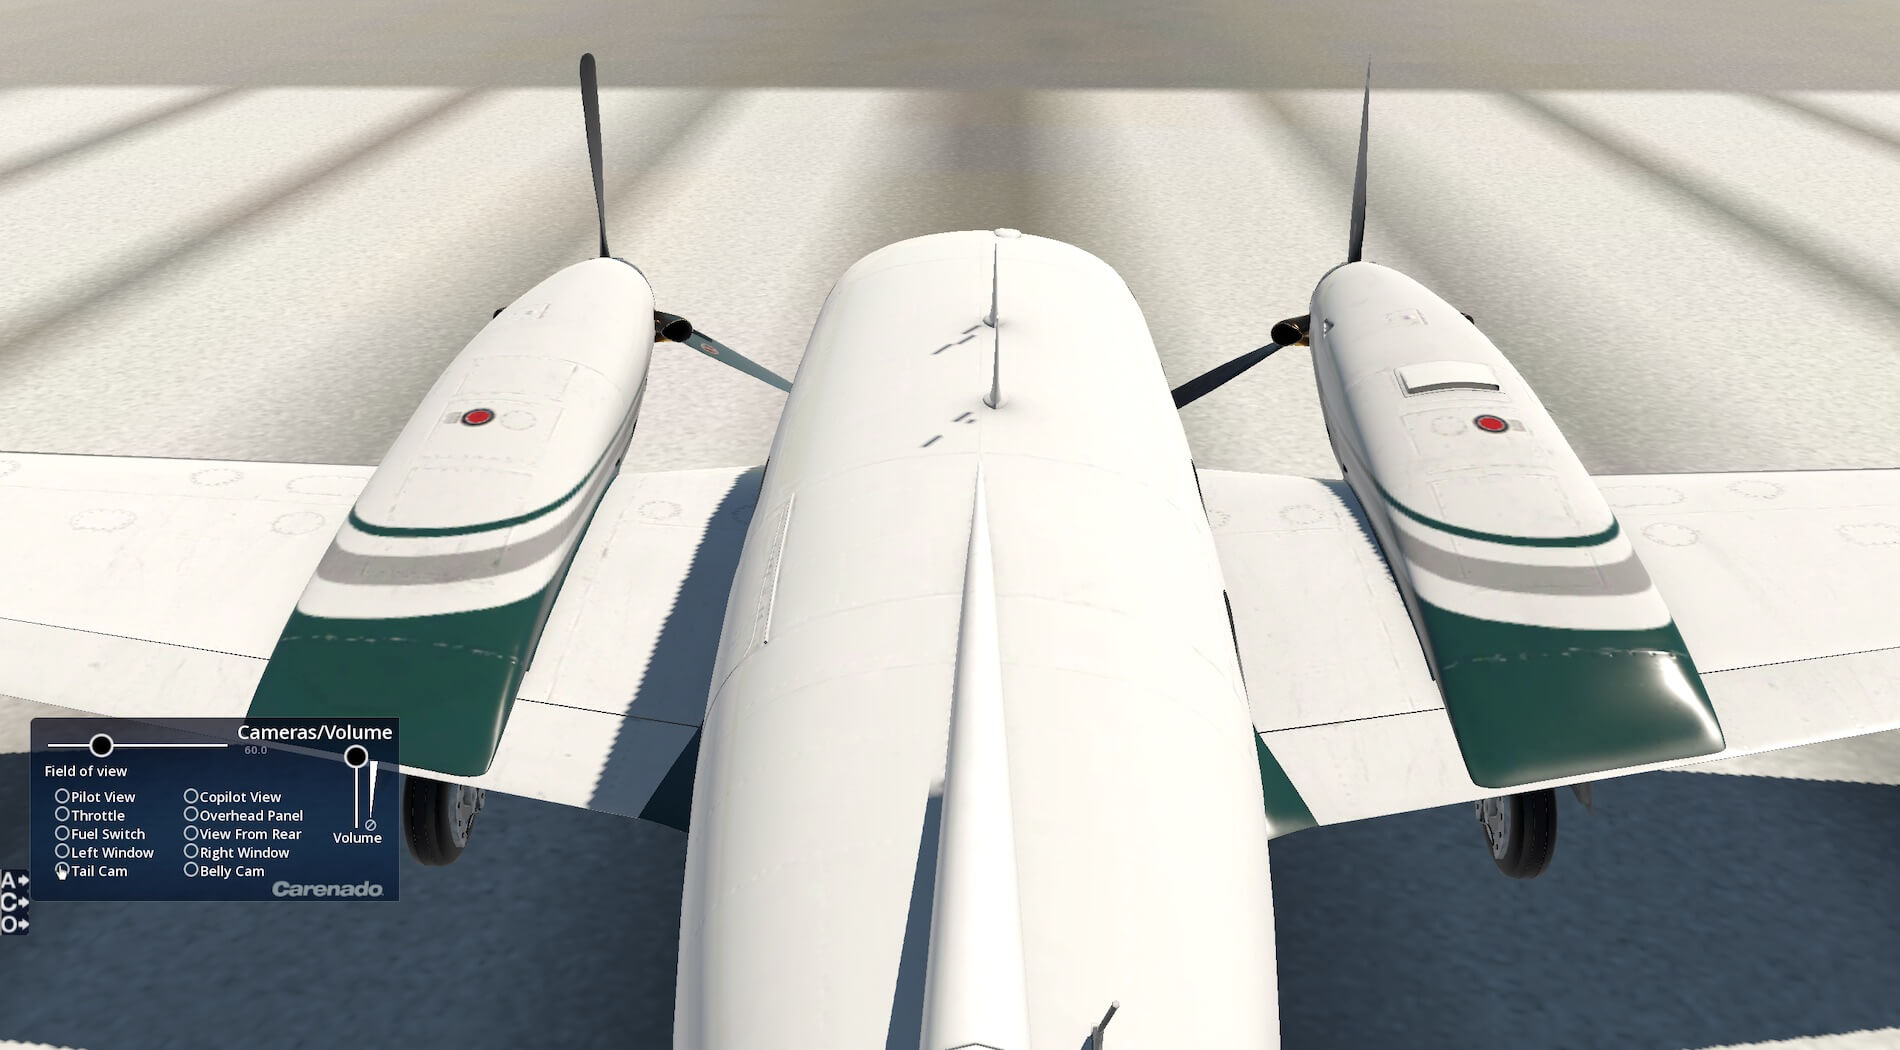
The model has an on screen menu that allows quick access to the pop out autopilot, quick change field of view, overall volume and camera views from pilot view, copilot view, throttle, overhead panel, fuel switch, view from rear, left window, right window, belly cam and tail cam. This also toggles various operations such as window reflections, instrument reflections, static elements, passenger door and baggage door.

There is an option for the luggage door but there is not one modelled on this aircraft. These menu options allow for quick movement around the aircraft to specific points, useful for getting to know the aircraft and also quick use of the various options on the aircraft. The menu also allows for change of livery without resorting to the X-Plane window.
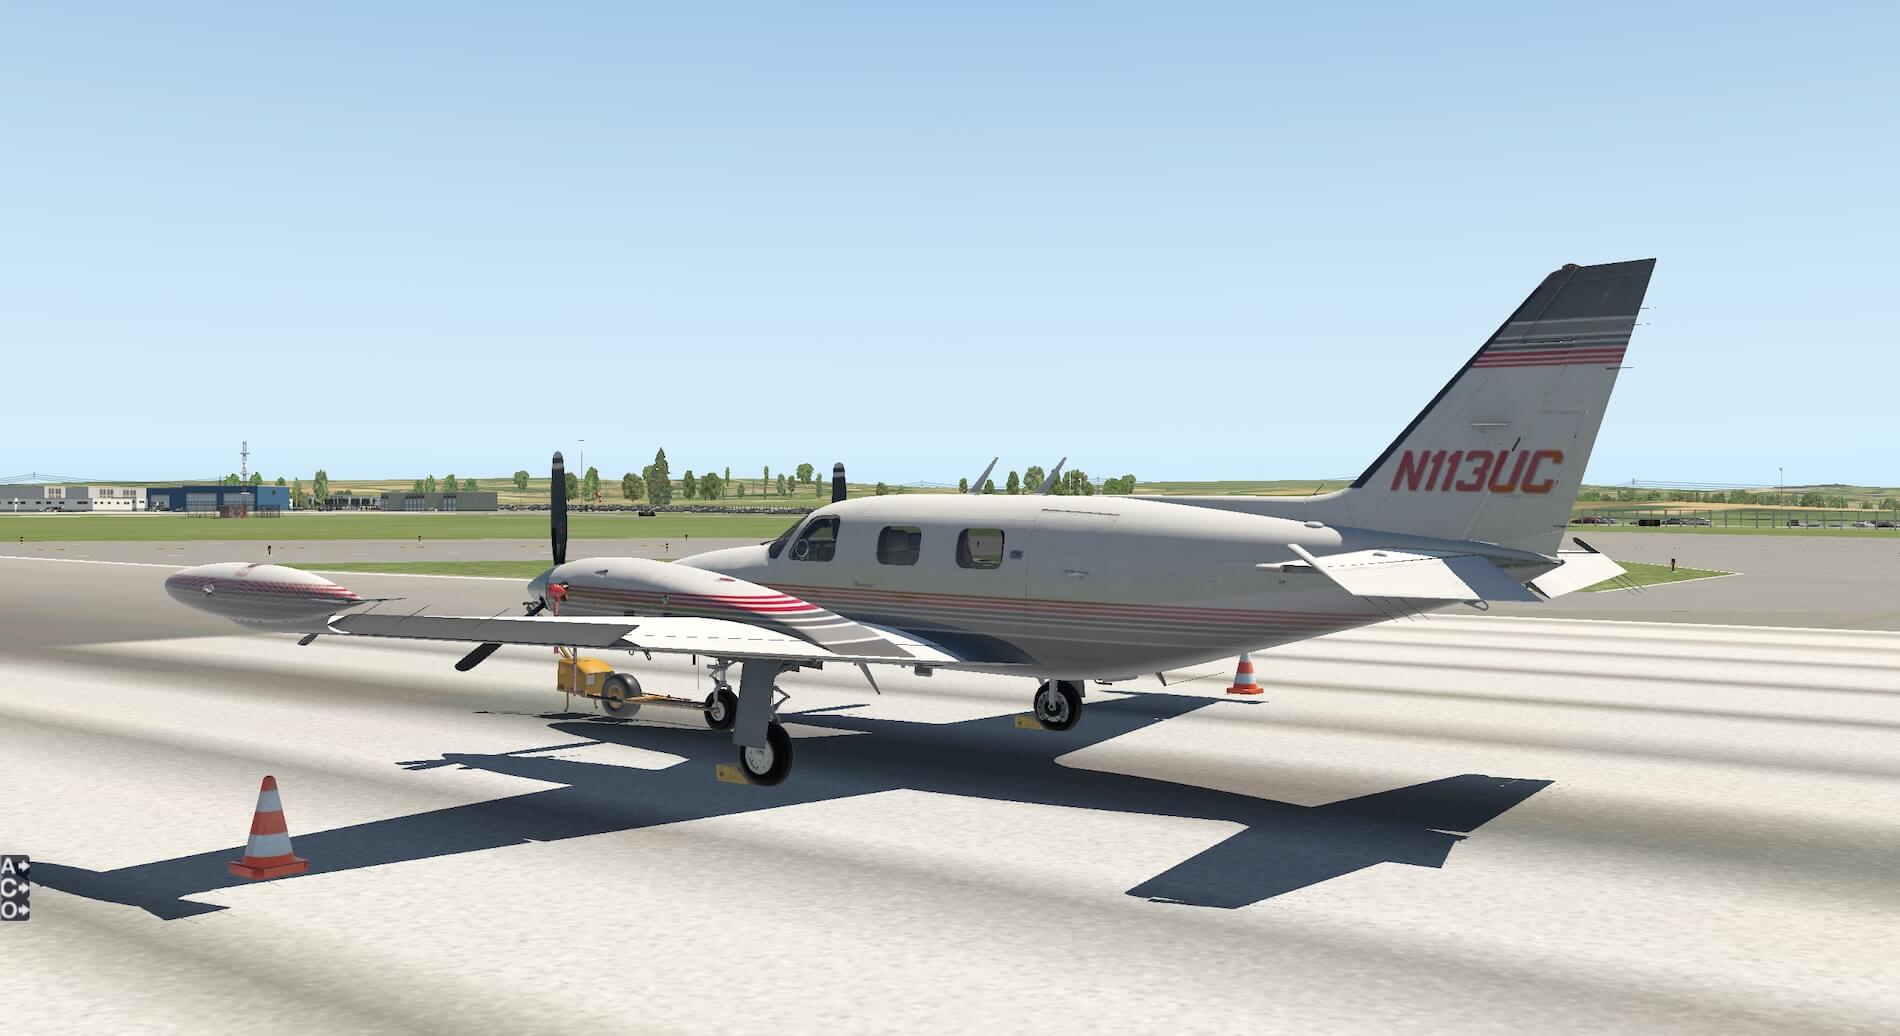
Exterior Modelling
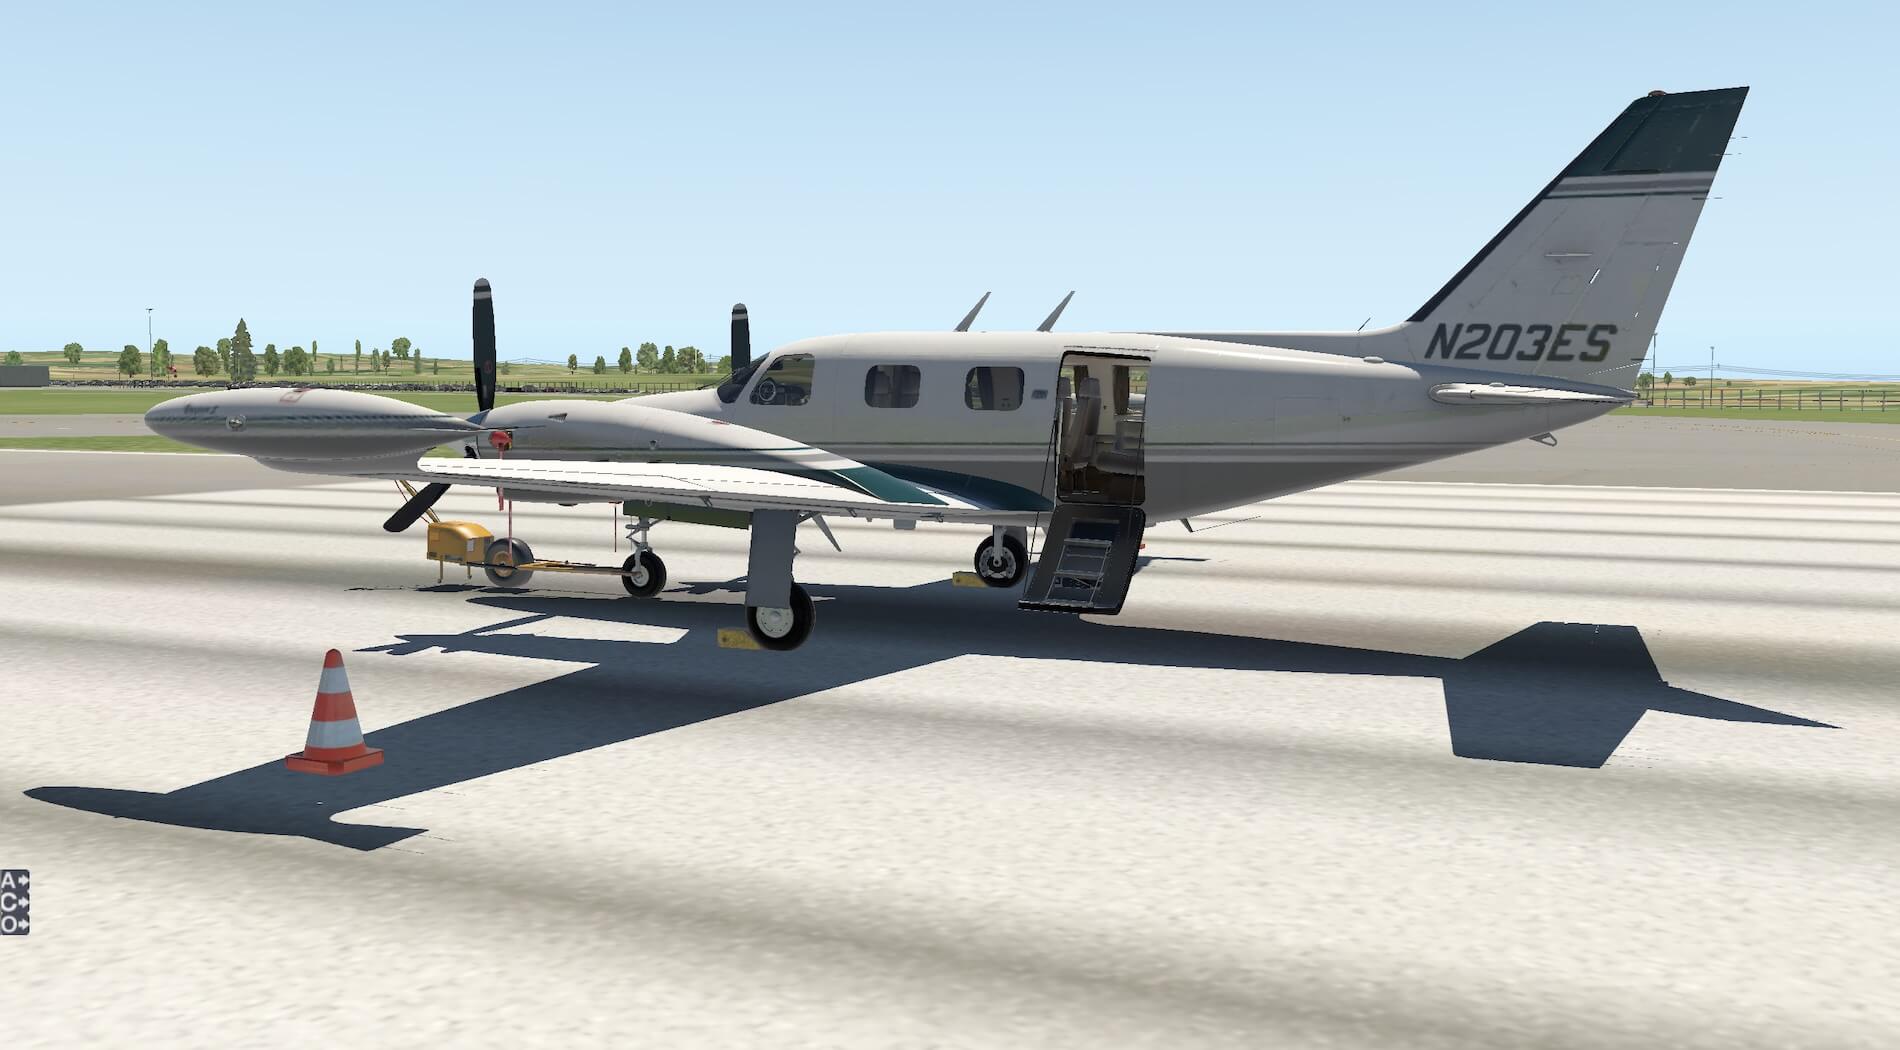
In order to review the exterior of the aircraft I followed the exterior part of the preflight check contained in the Normal Procedures PDF supplied with the model. The model is supplied with a default livery and five additional colour schemes.

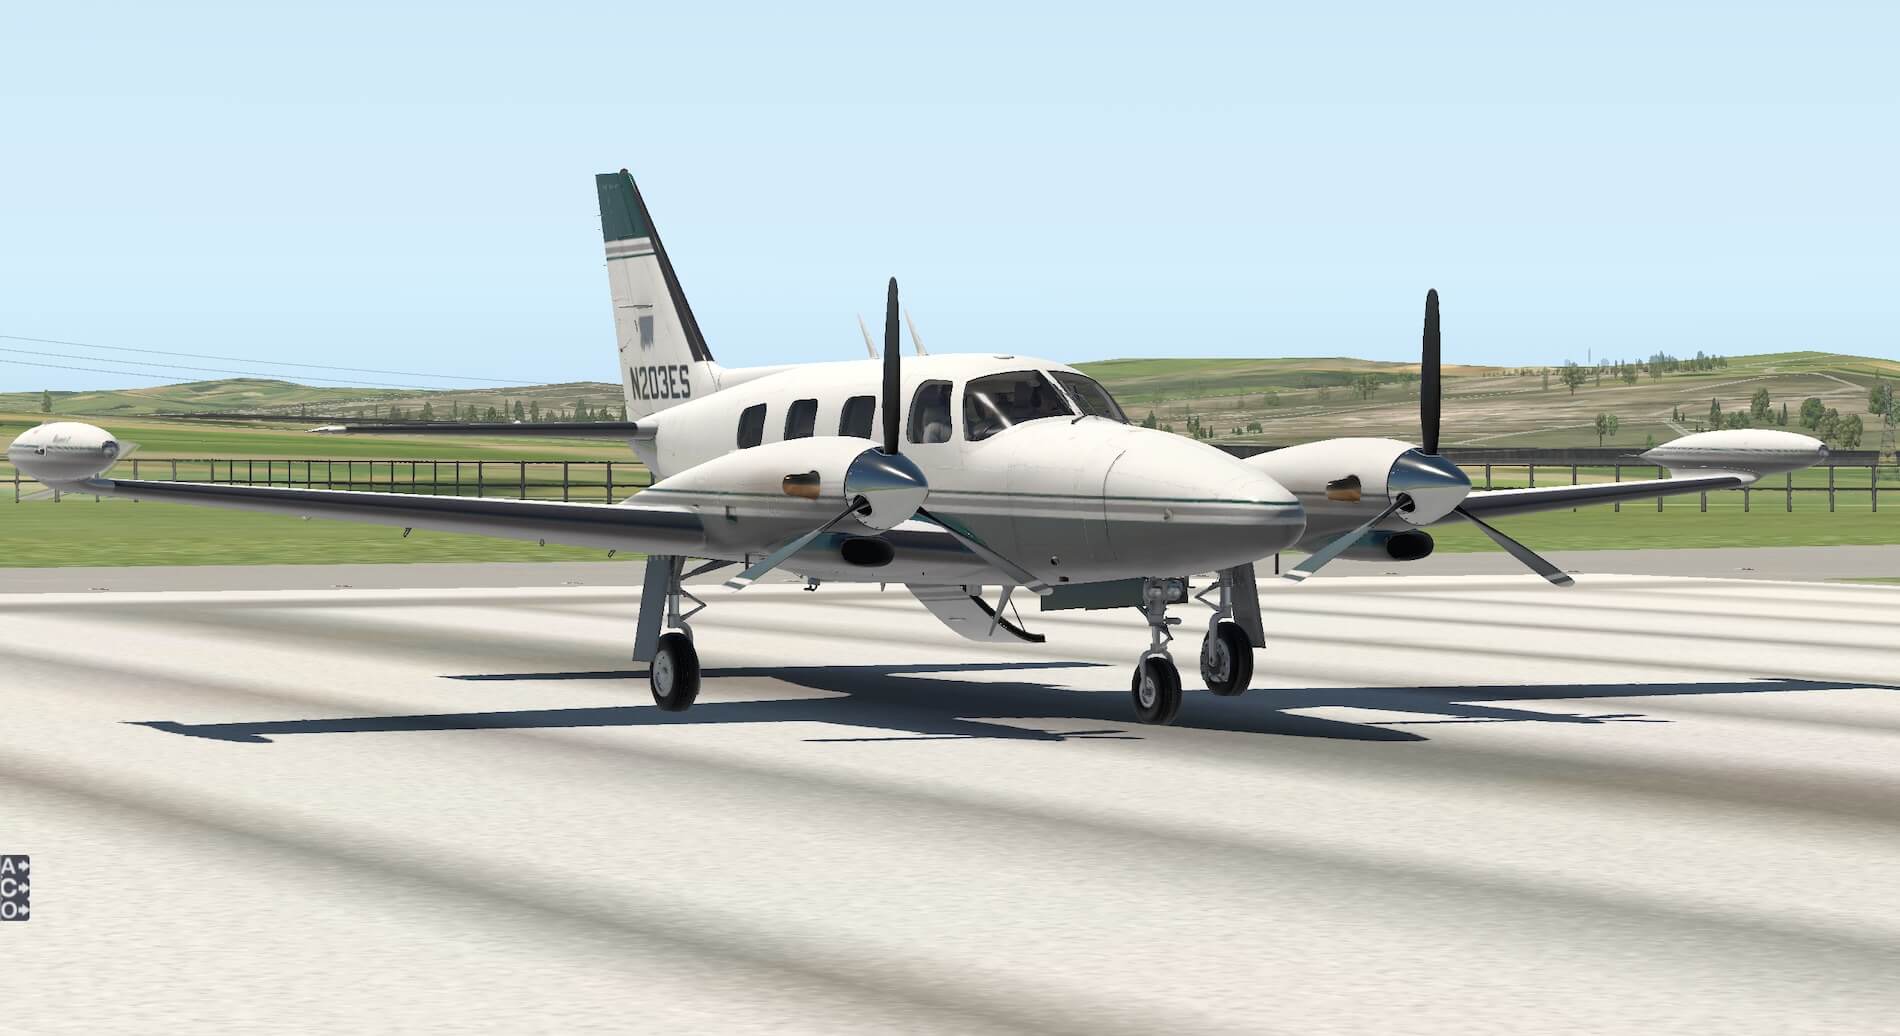
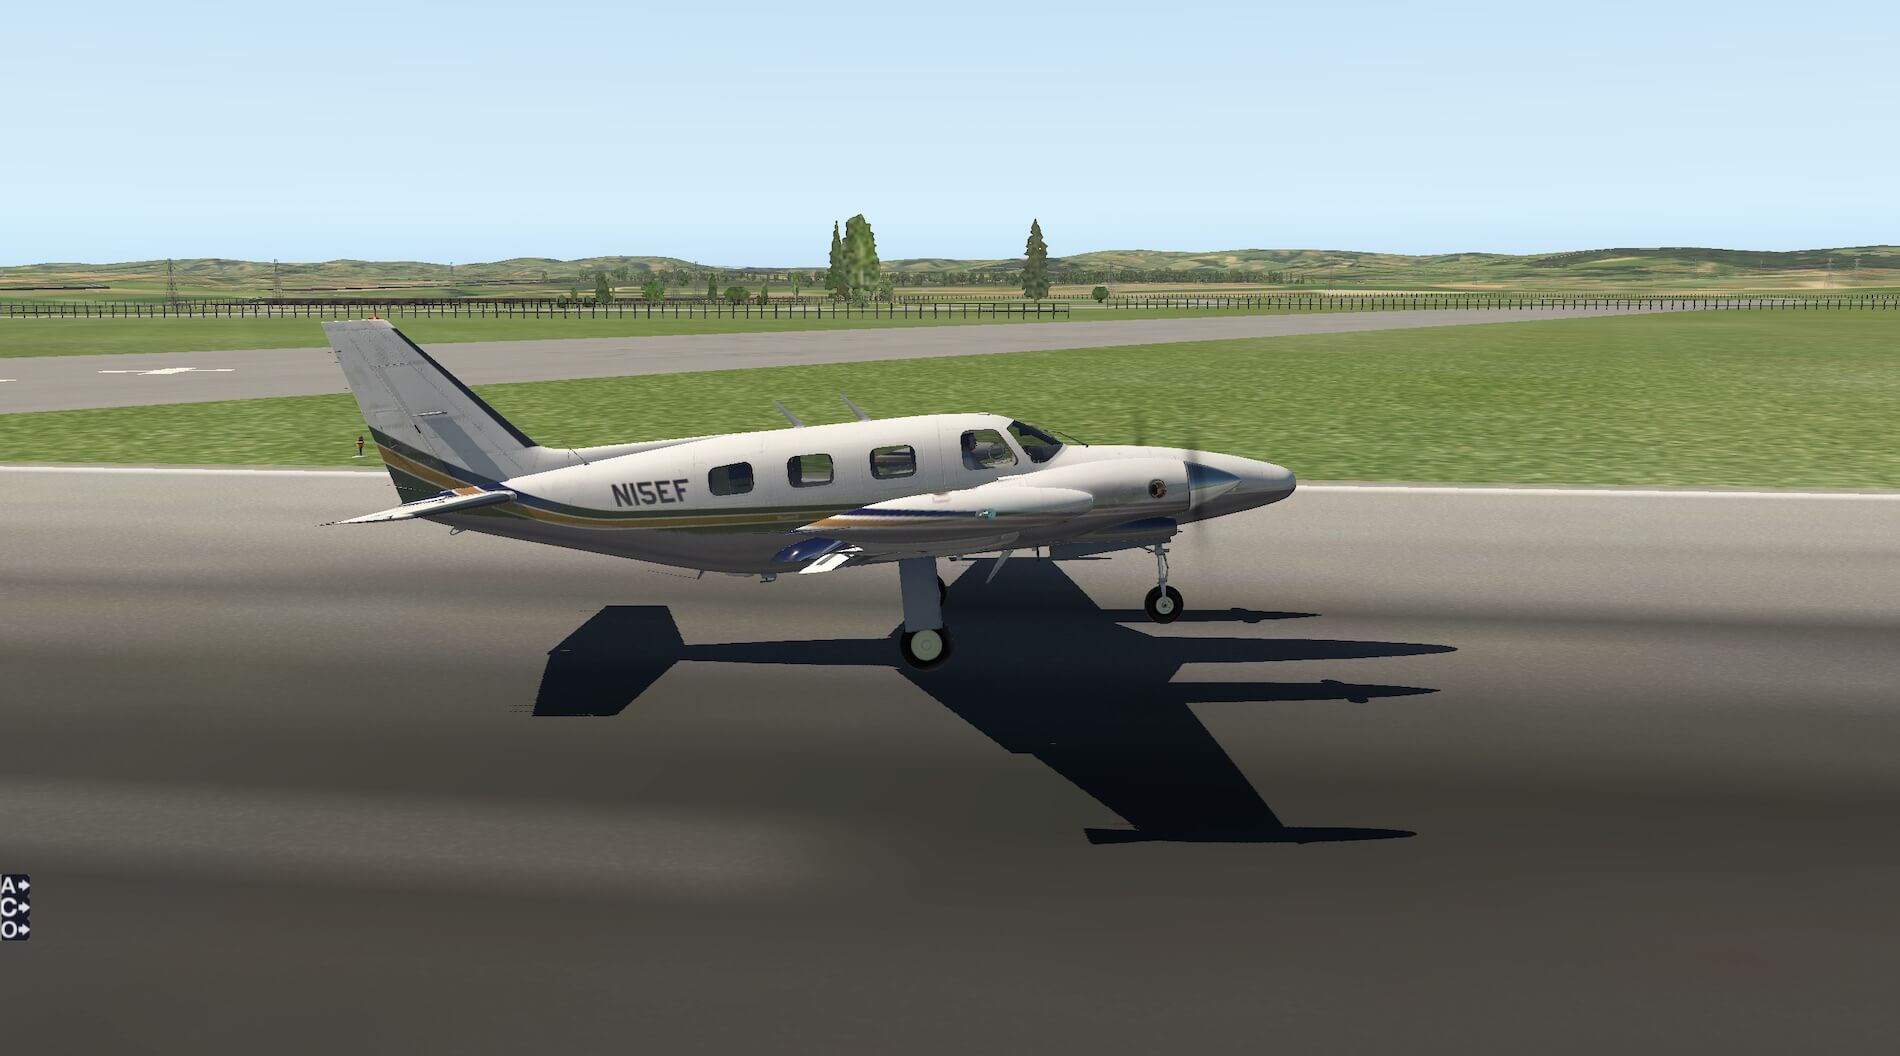
The checklist starts with the left wing and that is the direction from which I approached the aircraft, with the static elements in place. Immediate impressions were a detailed model with clean lines and vivid colours.
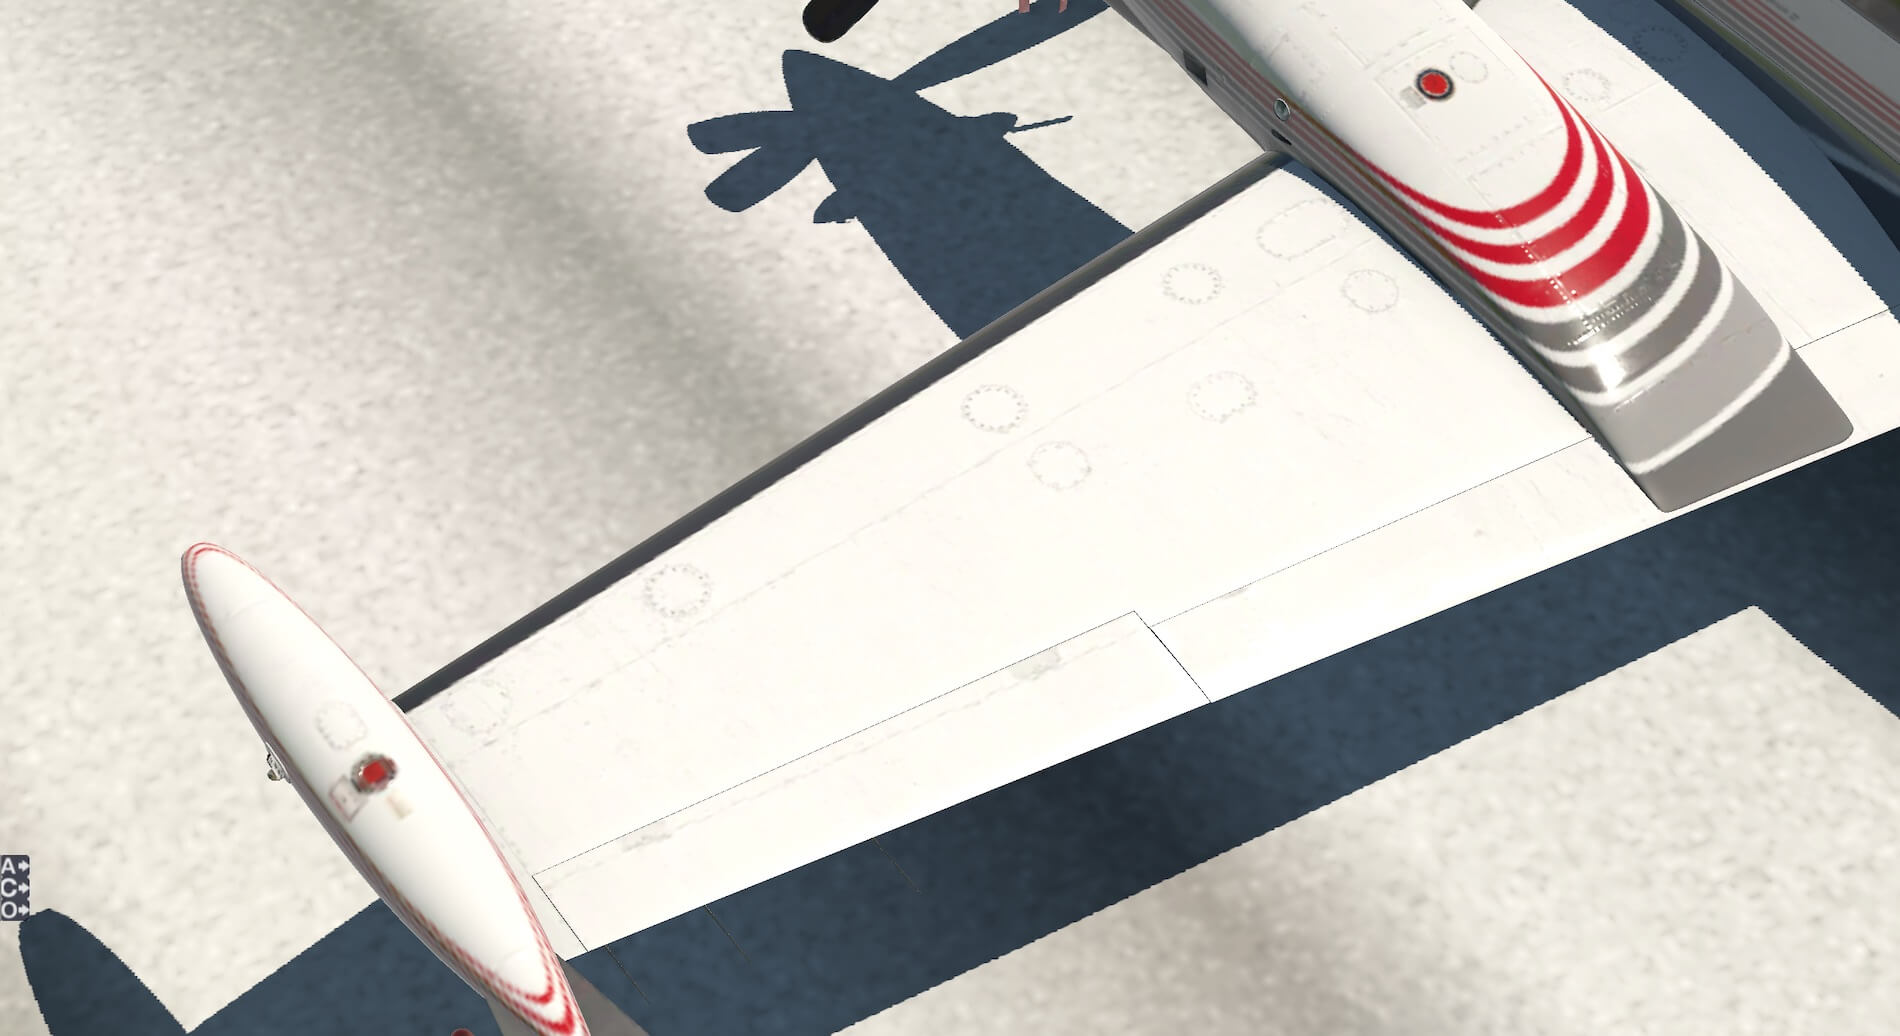
The checklist called for the wing surface to be checked and this demonstrated well modelled panels and access hatches with clearly produced rivets. Fuel filling caps are modelled in a different bright colour and the wing tip tanks are accurate and detailed. The lights appeared clear and created in detail.


Next on the list is the undercarriage and this was an opportunity to appreciate the attention to detail shown in the modelling of the tyre and struts. The tyre is created in a realistic colour with tread pattern and the strut and brake system is visible, modelled in authentic colour with appropriate wear marks.
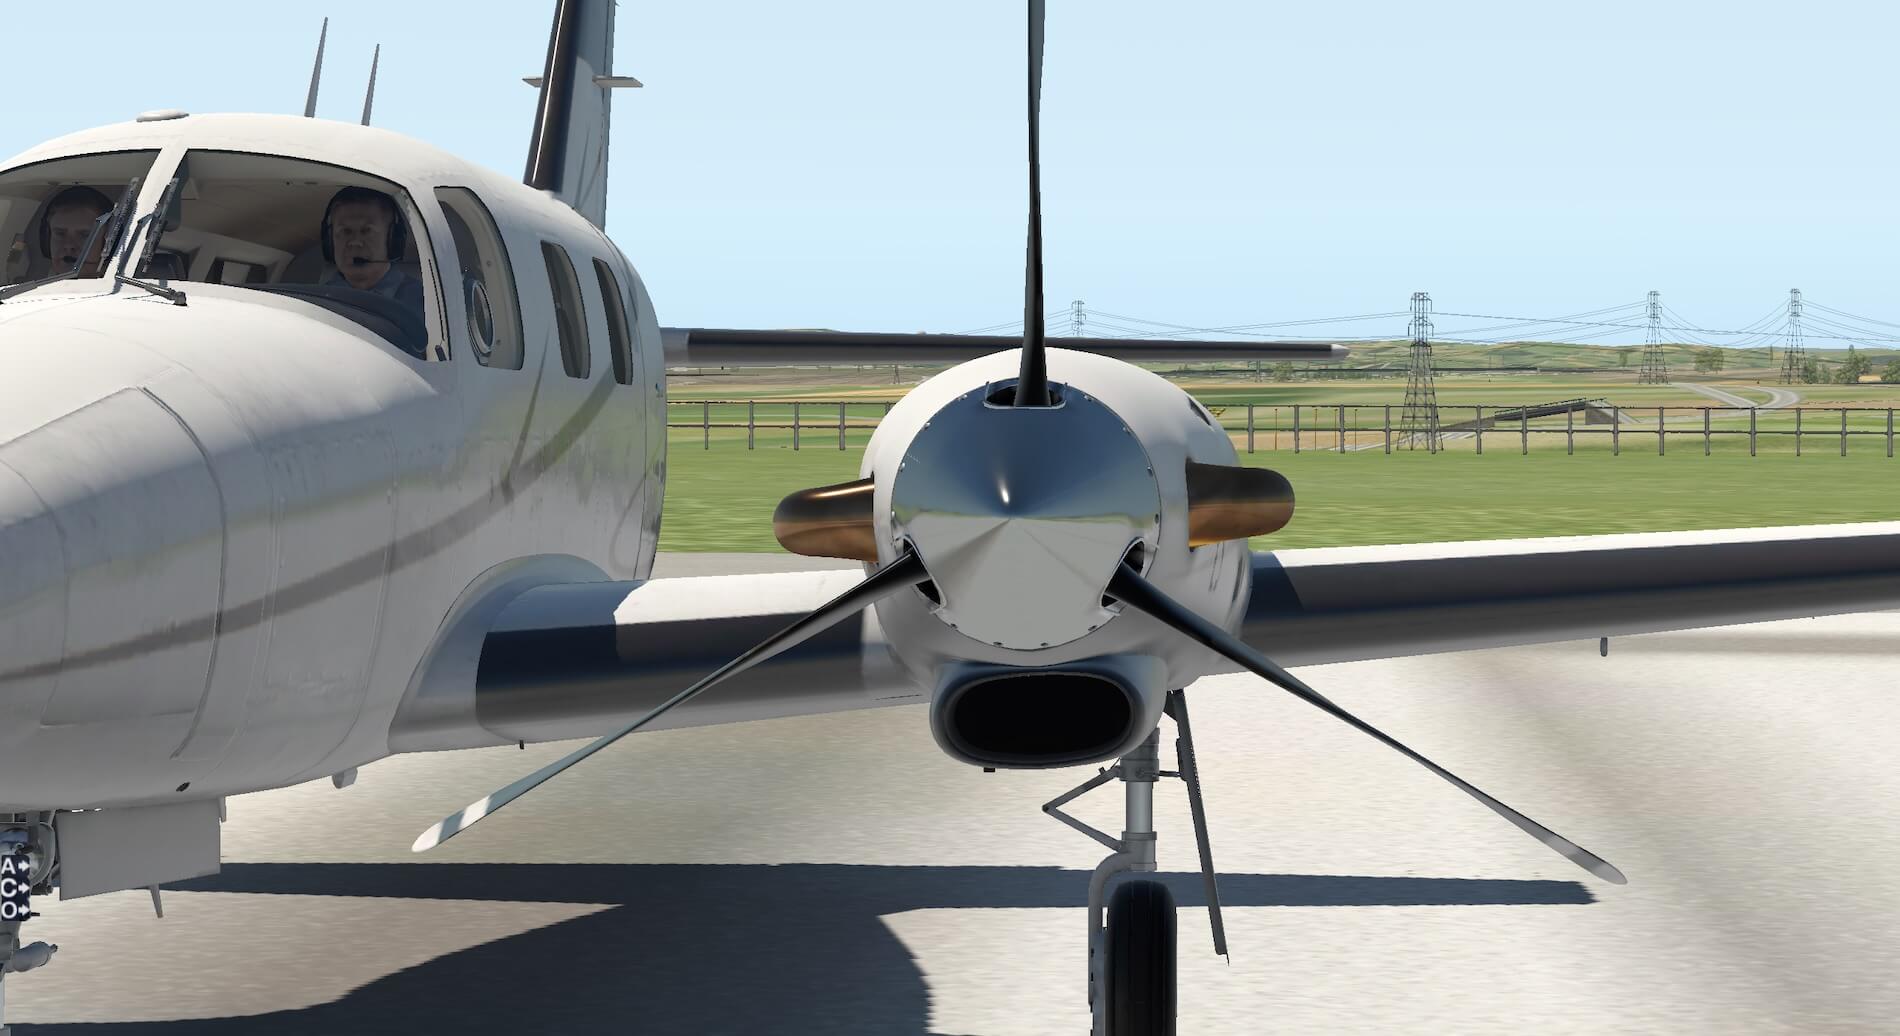
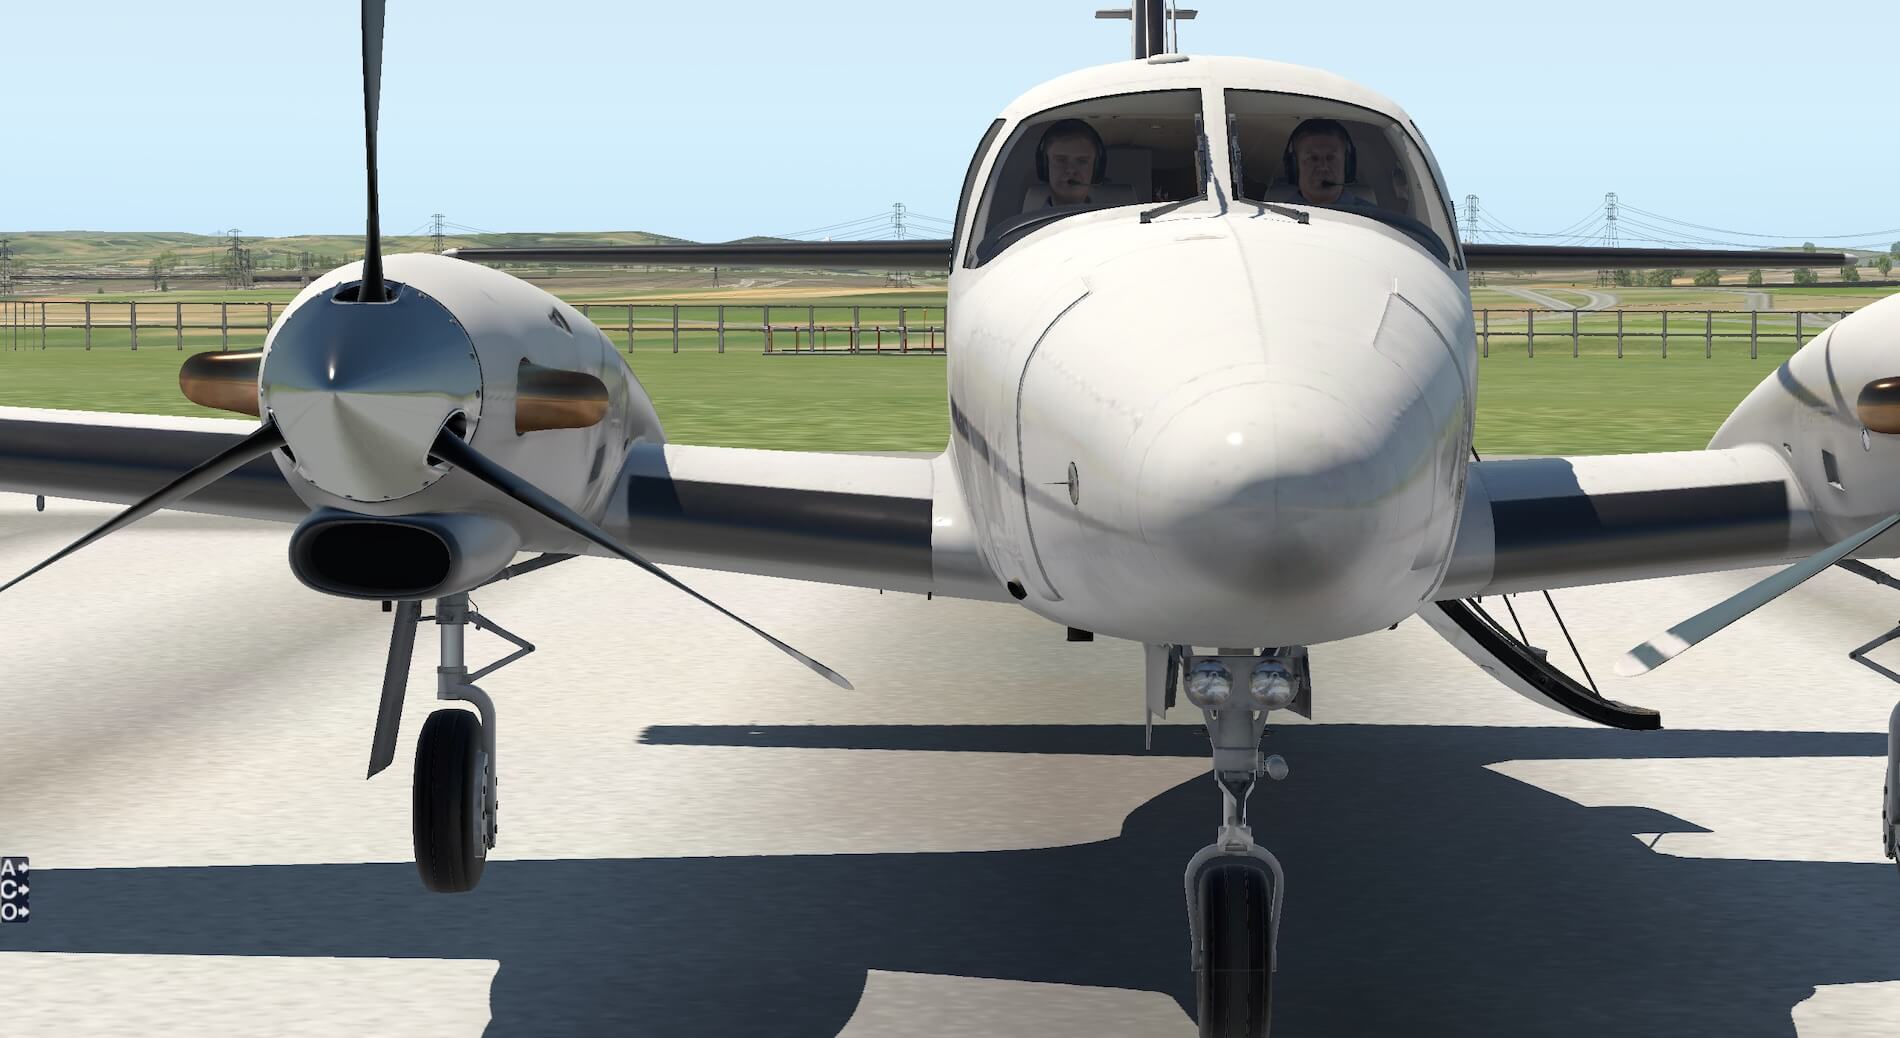
The underside of the wing is also detailed with modelled control surfaces. Inspection of the engine cowling, inlets and exhausts again illustrates that this is a detailed model with realistic colours and wear marks. The panels and propellor boss show a convincing level of reflection of the surroundings. The main body of the aircraft beyond the cowling continues the detailed theme and views in to the cockpit and cabin through the windows are as would be expected with the two pilots modelled to move independently.


The checklist moves on to the nose section and whilst not all items listed in the procedures can be operated the baggage door is modelled to open and close revealing the interior of the baggage compartment. This can be carried out from the on screen menu provided and works smoothly and realistically with the support moving out to hold the door open.
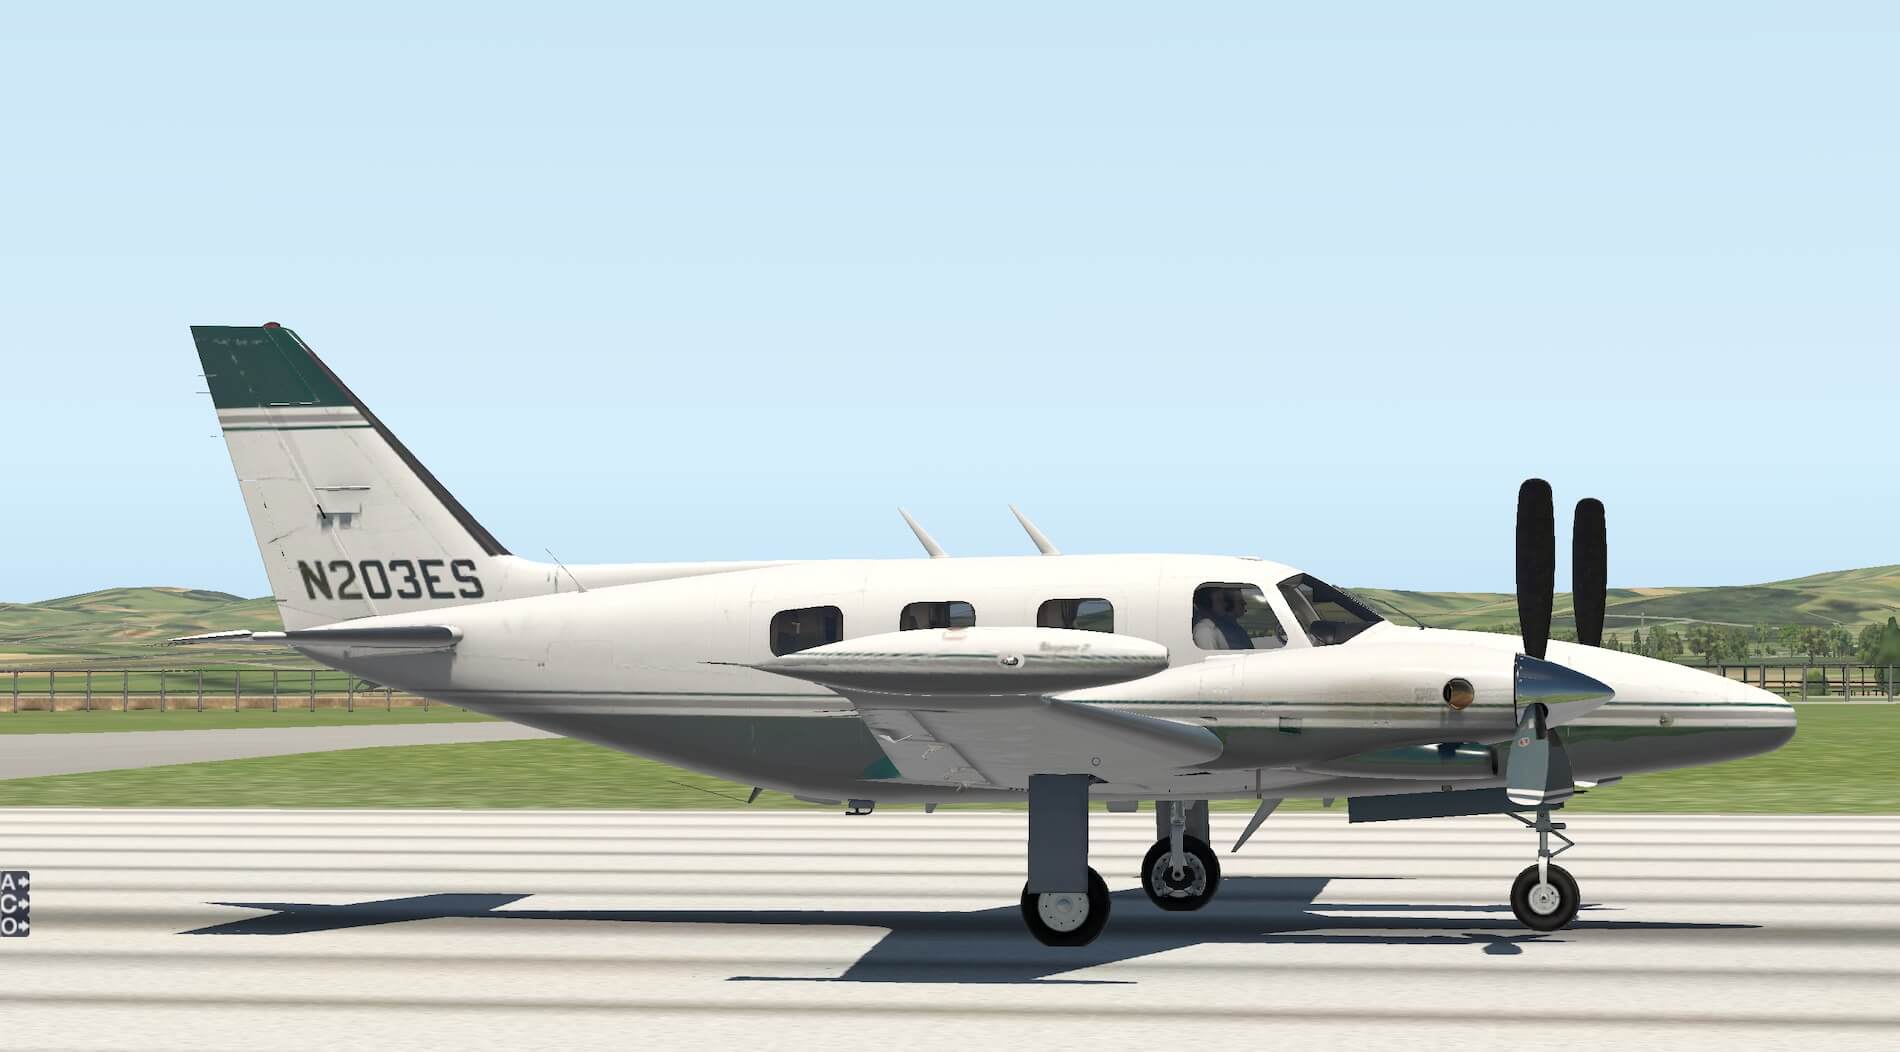
Viewed from the front the detail of the nose wheel is clear and the lights appear clear and modelled accurately. The view through the windscreen continues to show internal detail and the wipers are clearly visible. The process for checking the right wing is the same as that for the left and as expected the level of modelling remains high.

Moving to the right-hand side of the fuselage the aerials and antennae are modelled and the panelling and riveting is presented to a consistently good standard. The condition of the aircraft is presented as slightly weathered and this adds to the realism. Aircraft lettering is clear and legible.
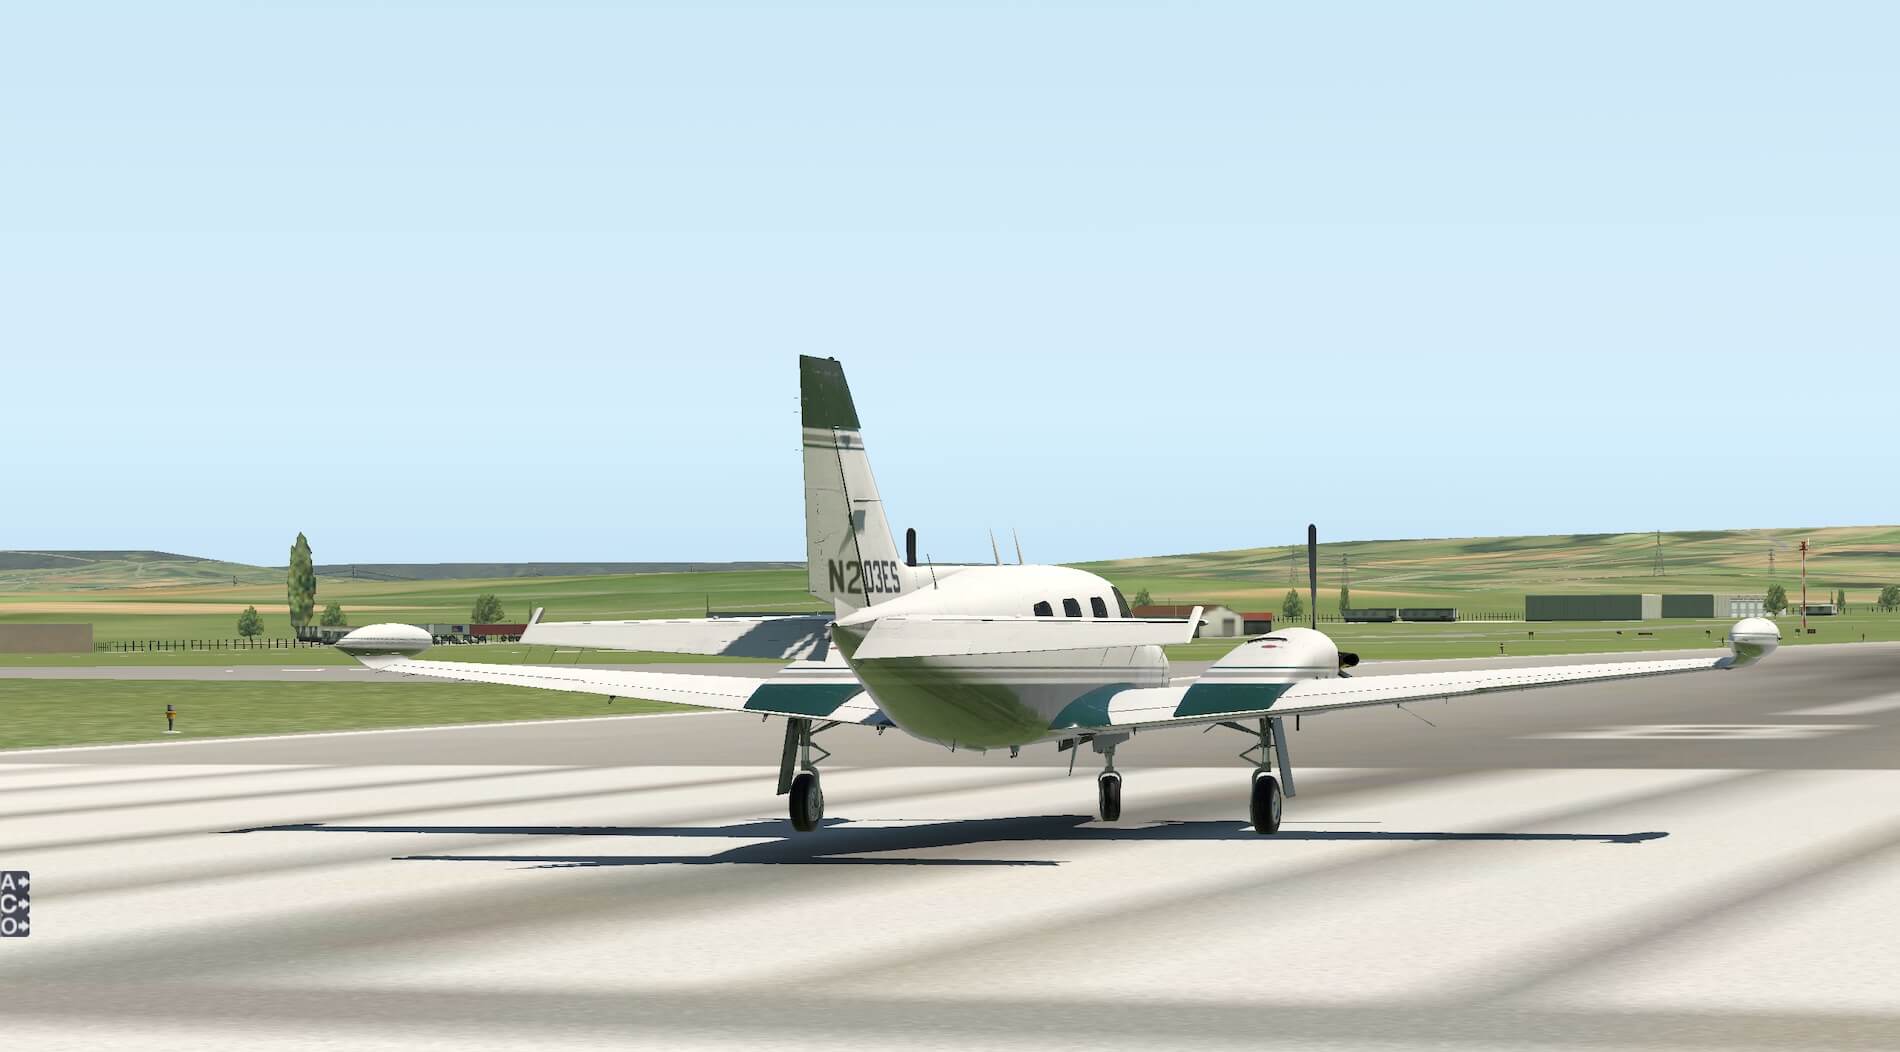
Viewed from the rear the tail control surfaces can be seen to be working and modelled in a convincing manner. Further examples of the reflections on the panels can be seen to the back of the lower cabin area. The view from the tail cam gives an example of the views provided by the menu.
The view from the rear left of the aircraft, still following the check list, shows the modelling continues in detail. The passenger door can be toggled to open via the on screen menu, revealing the modelling of the interior of the door and passenger steps. This also allows a direct view in to the rear of the passenger cabin and the modelling of the interior. The passenger door opens and closes smoothly and realistically. Panel detail, signage and colours maintain the same standard.

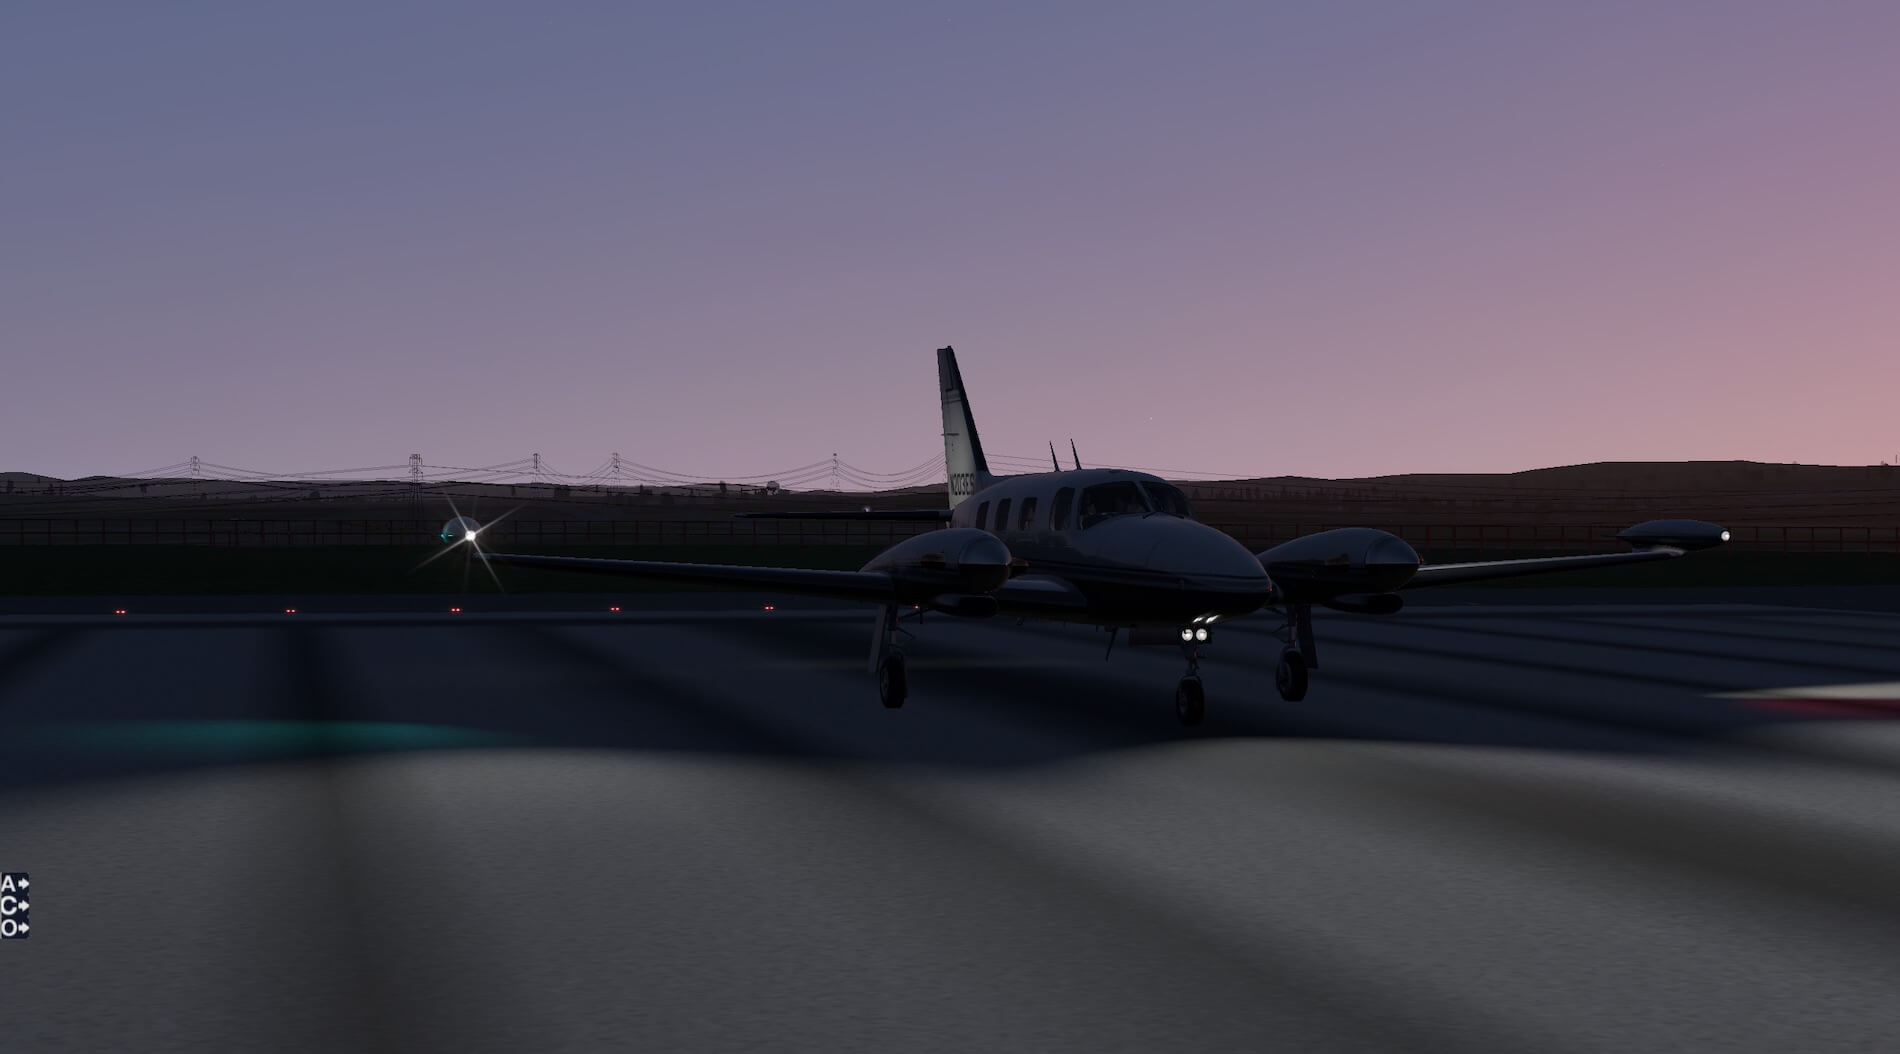
In low light the aircraft exterior lights are bright, crisp and sharp. Viewing the inside of the aircraft from the exterior the instrument panel glow partially illuminates the pilot figures and the cabin lights allow an appropriate view inside.


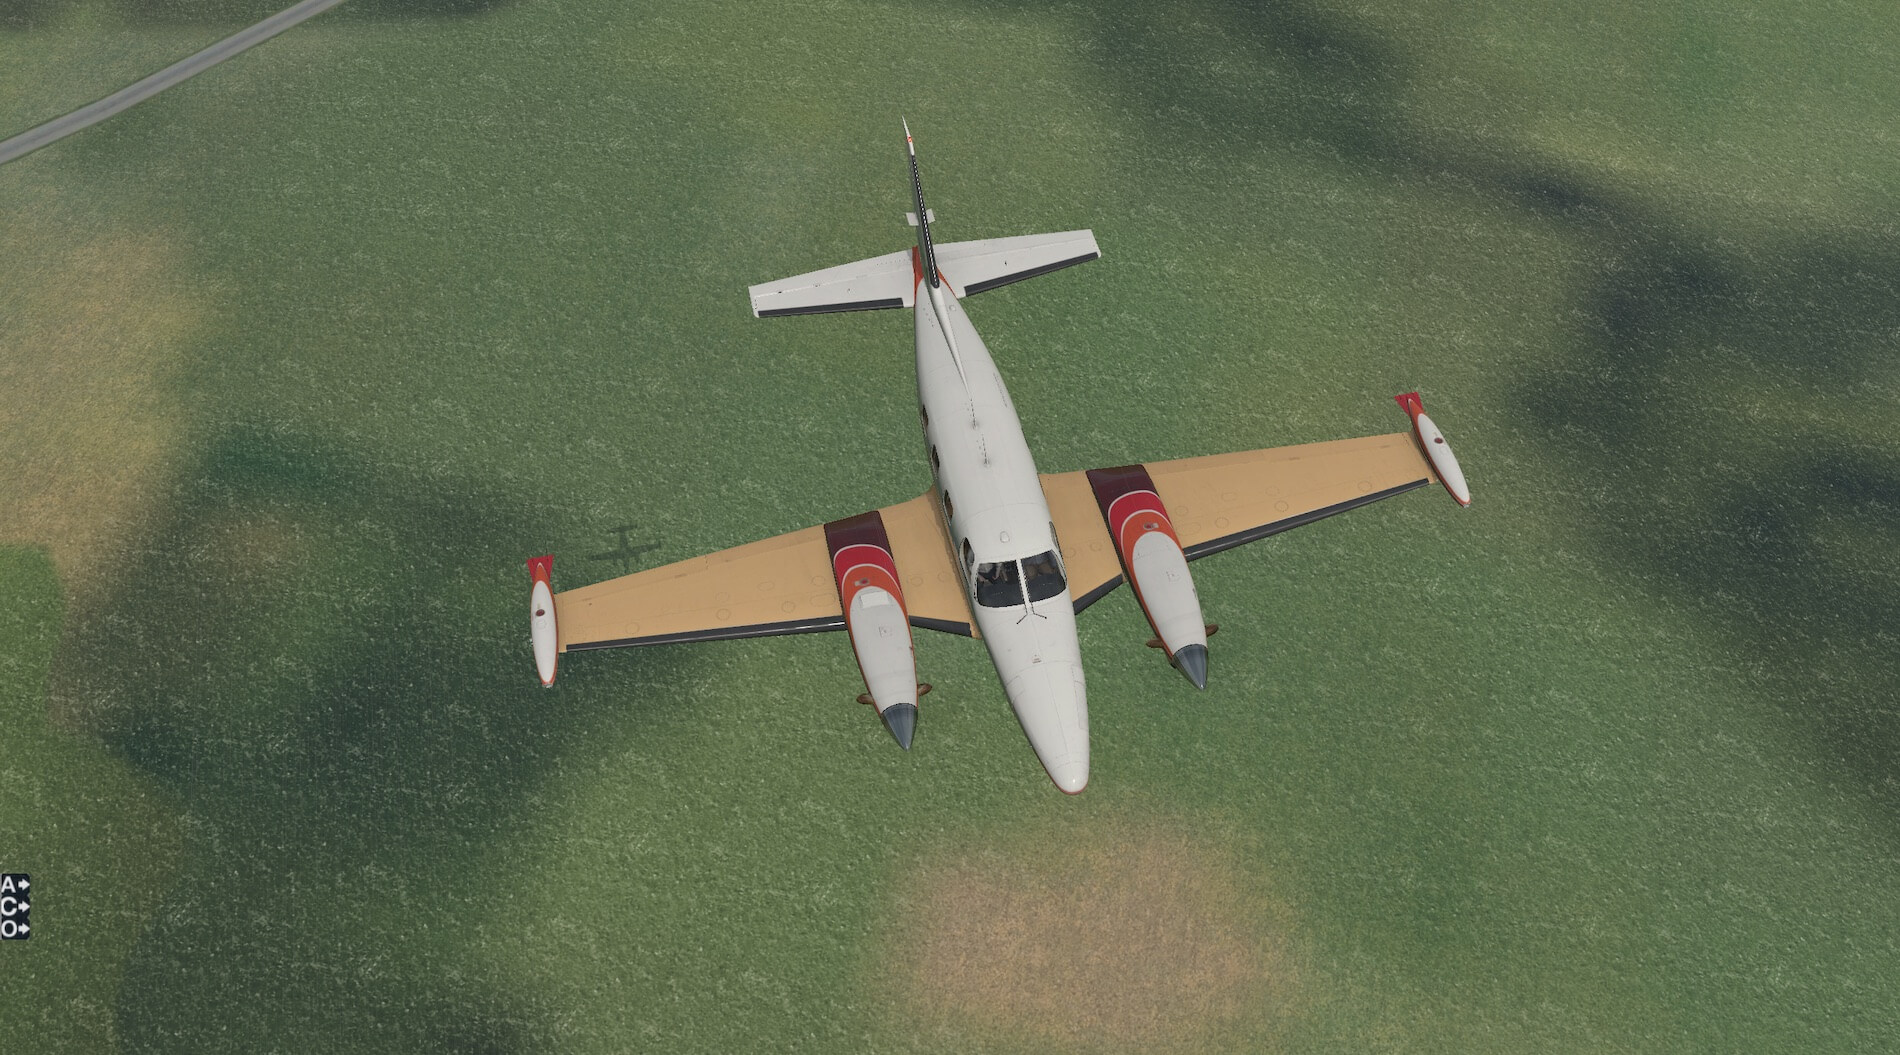
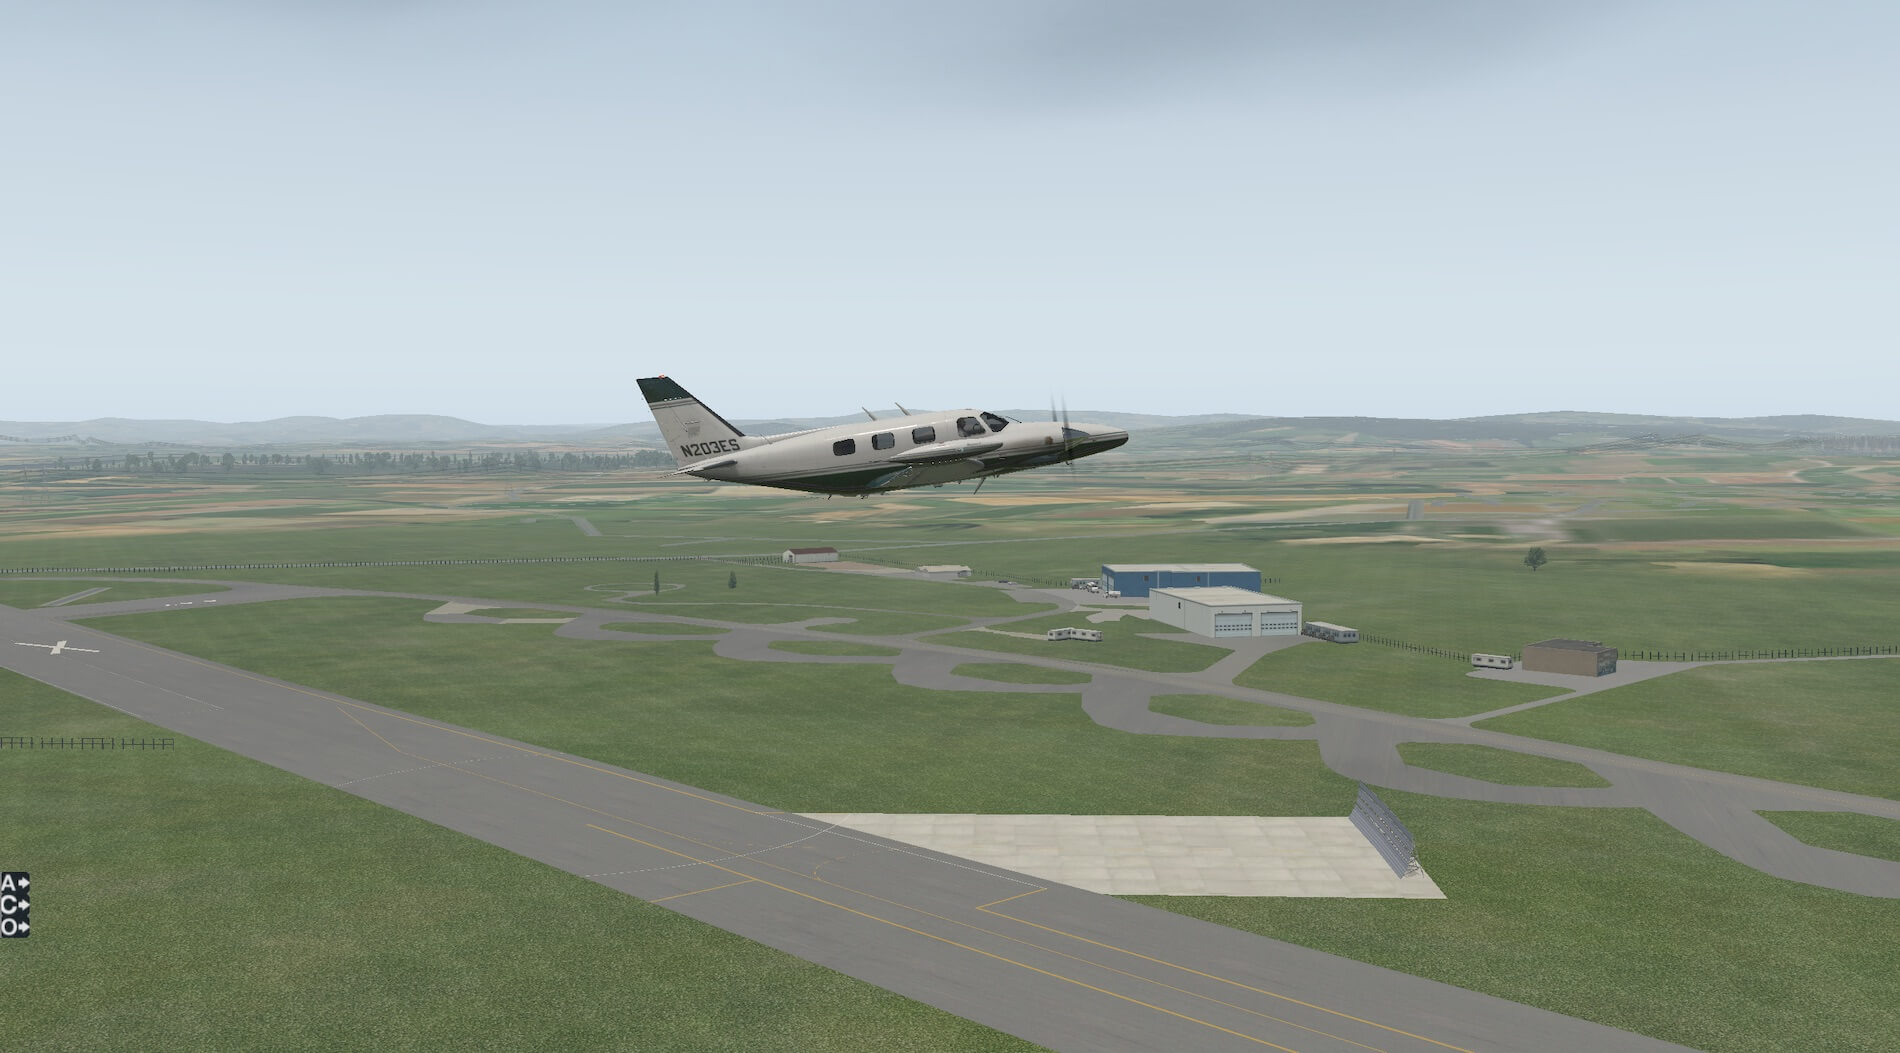
In flight the model maintains its integrity both in terms of the detail displayed and the colour and appearance of the aircraft. Light and reflections work well with the scenery and aerials and surface attachments remain visible. When lowered the undercarriage keeps the level of detail observed on the ground and the separate control surfaces are discernible in flight.
Propellor blur is visible and authentic. This is a well presented model whether viewed closely on the ground or in the air. It integrates well with the X-Plane scenery and has a high degree of realism.


The sales information states the model comes with high-end 4k Physically-Based Rendering graphics throughout, with ultra-realistic materials rendition including dynamic reflections, realistic metal and dielectric materials and having assessed the model it does live up to this description.
Interior Modelling
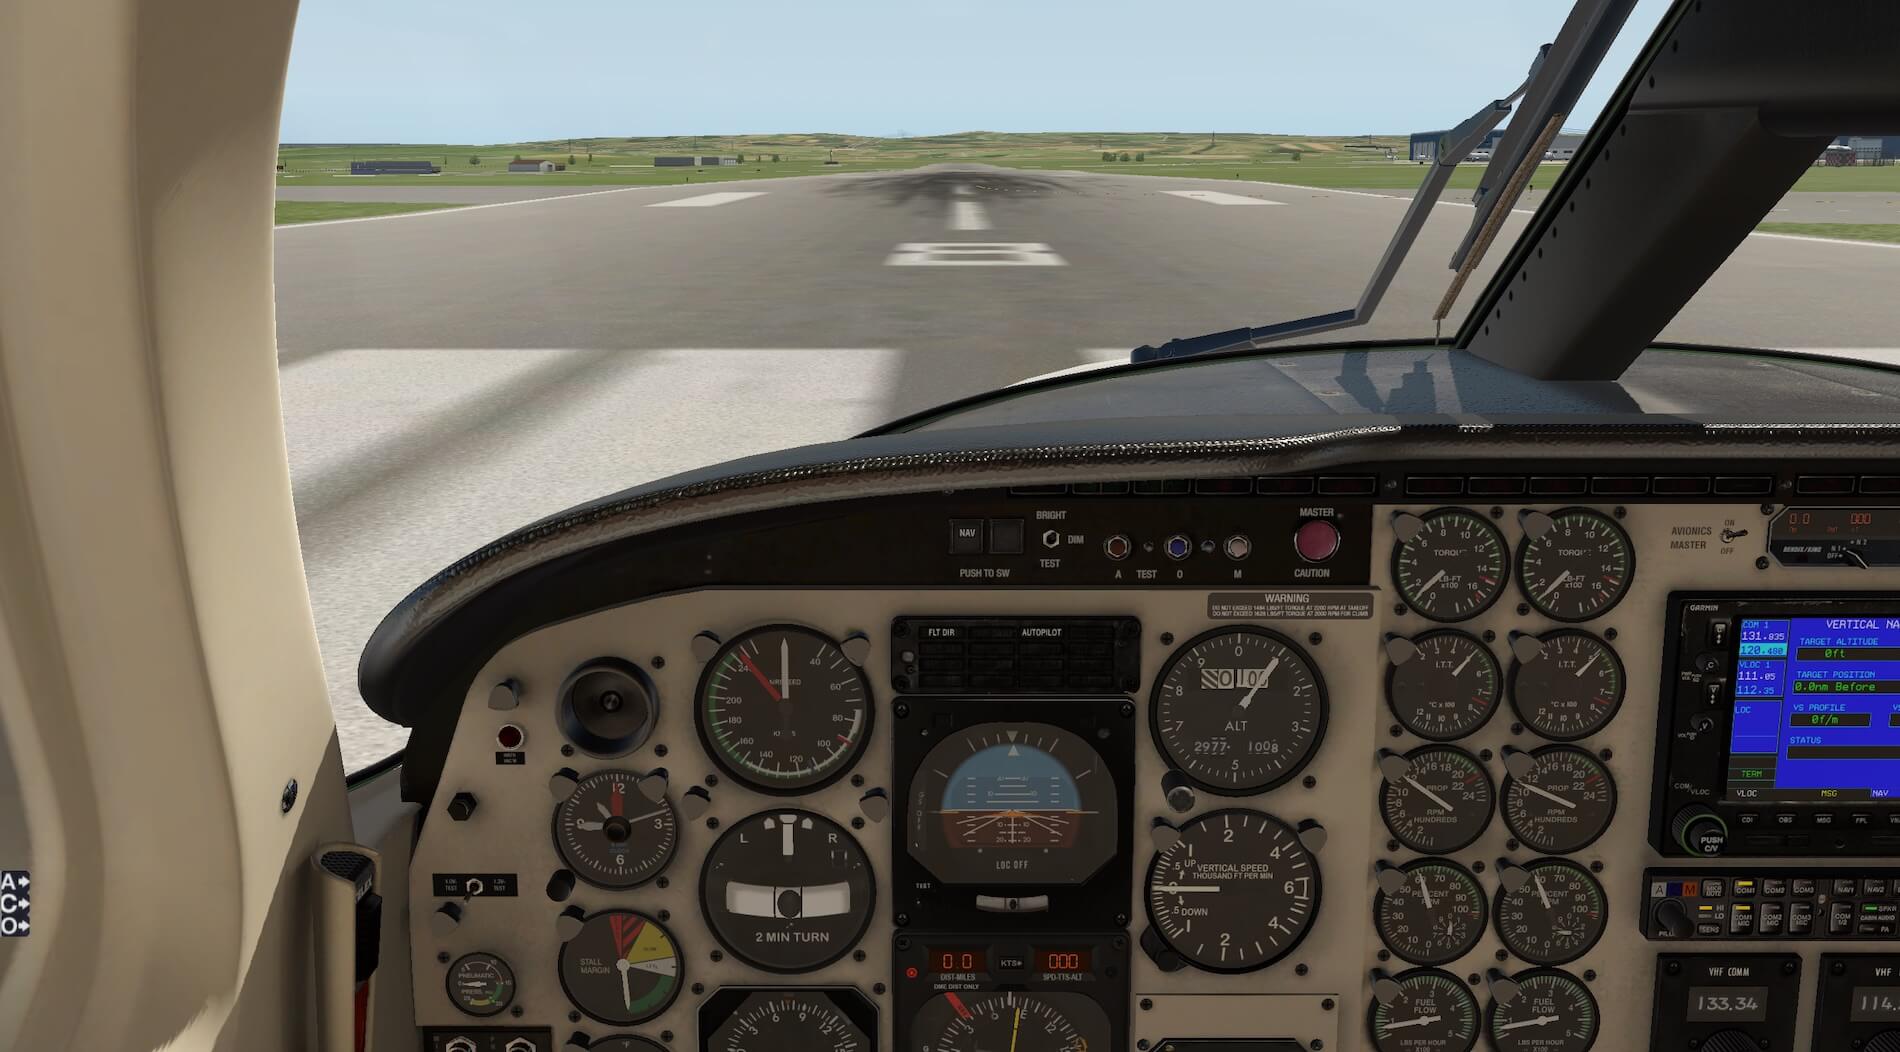
Using the internal section of the pre-flight checklist I entered the aircraft via the passenger door, moving through the cabin to sit in the pilots seat. Initial impressions are that the instruments and equipment are modelled to a high level of detail and are crisp and easy to view. The pilots window is modelled to open and close, giving a clearer view than through the window itself, due to the reflections on the surface.
Textures of the different surfaces stand out and display an appropriate and realistic amount of wear marks. Colours throughout the cockpit are convincing and of good quality. Views out of the windows show good detail across the rest of the aircraft.
Figures and labelling of switches and dials are legible and easy to see, though hovering the mouse over instruments and switches opens a generic switch labelling window which adds no further information and can get obstruct the view of the switch or operation.


The checklist starts with checking the flight controls. These move smoothly with joystick input. They are modelled to show the Piper emblem and look suitably used. The flight controls can be toggled to be visible or hidden by clicking on the base of the column, giving a clear view of the instrument panel. The pre-flight list requires that initially the avionics are off and this is controlled by the avionics master switch at the top centre of the panel.
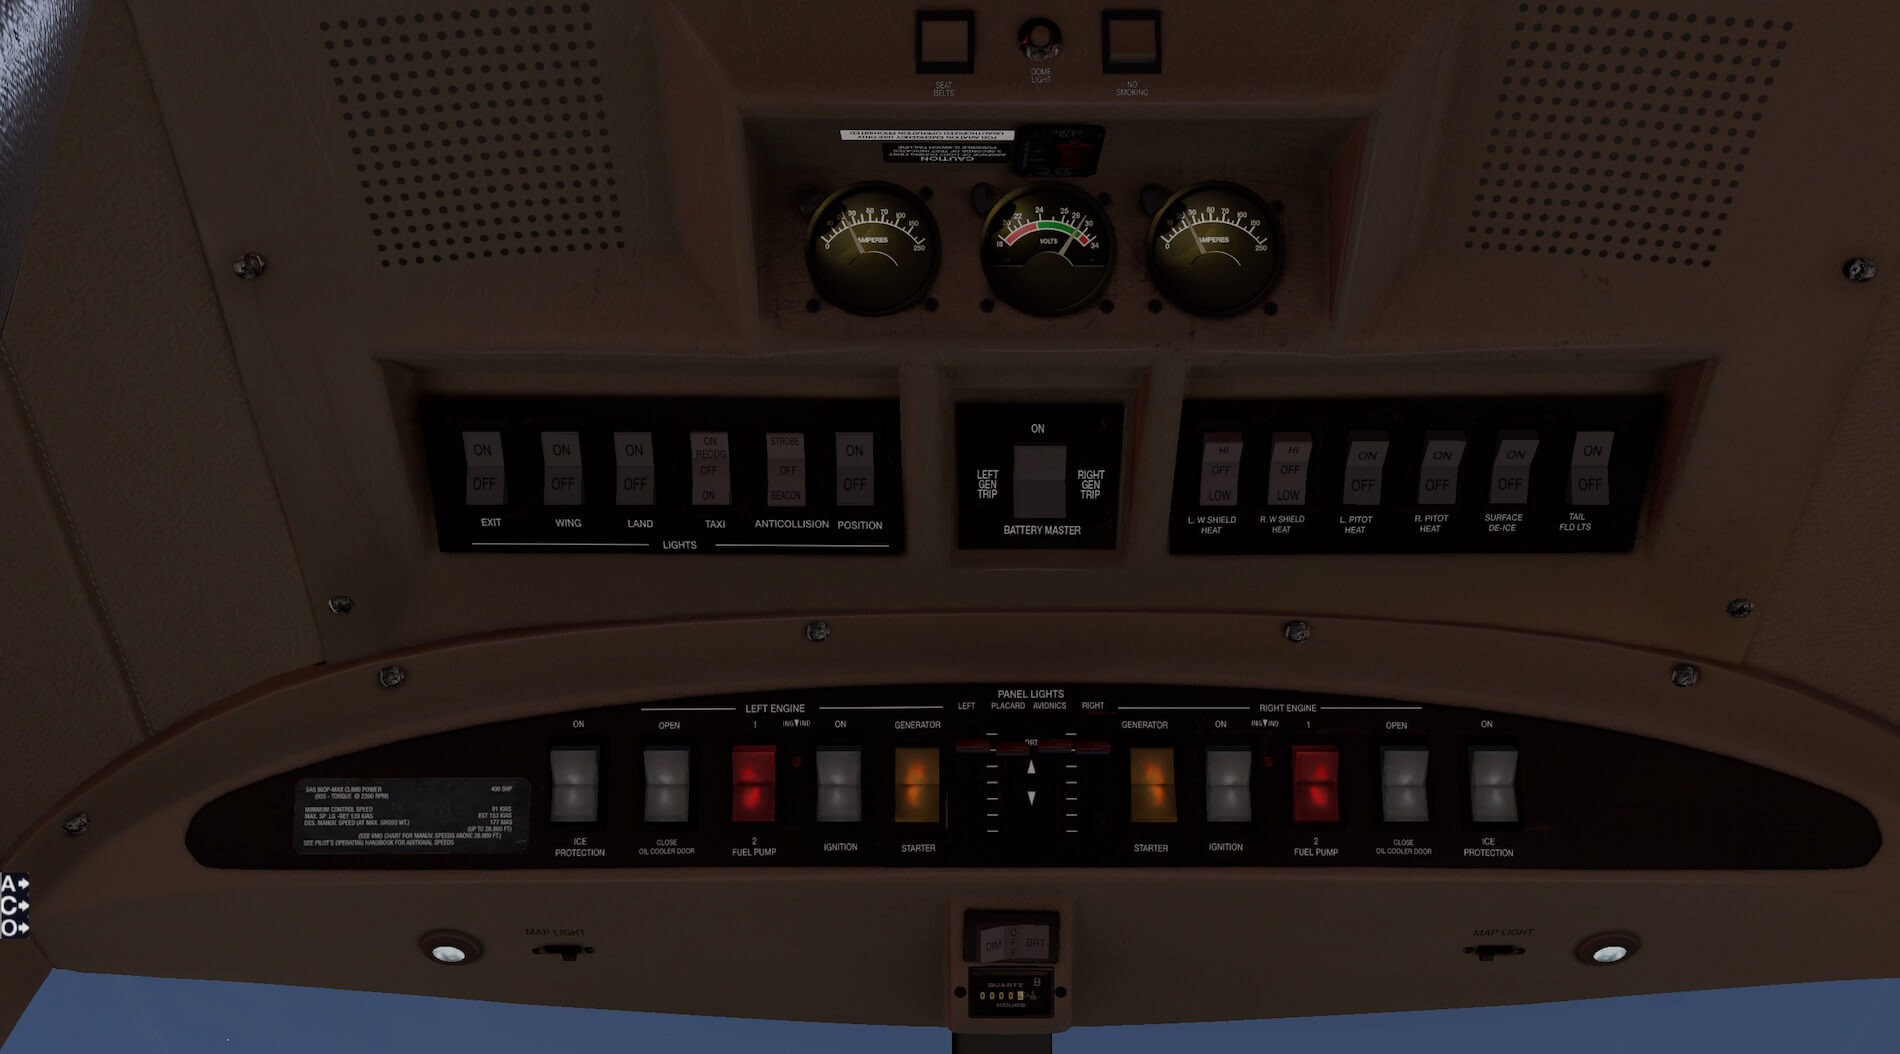
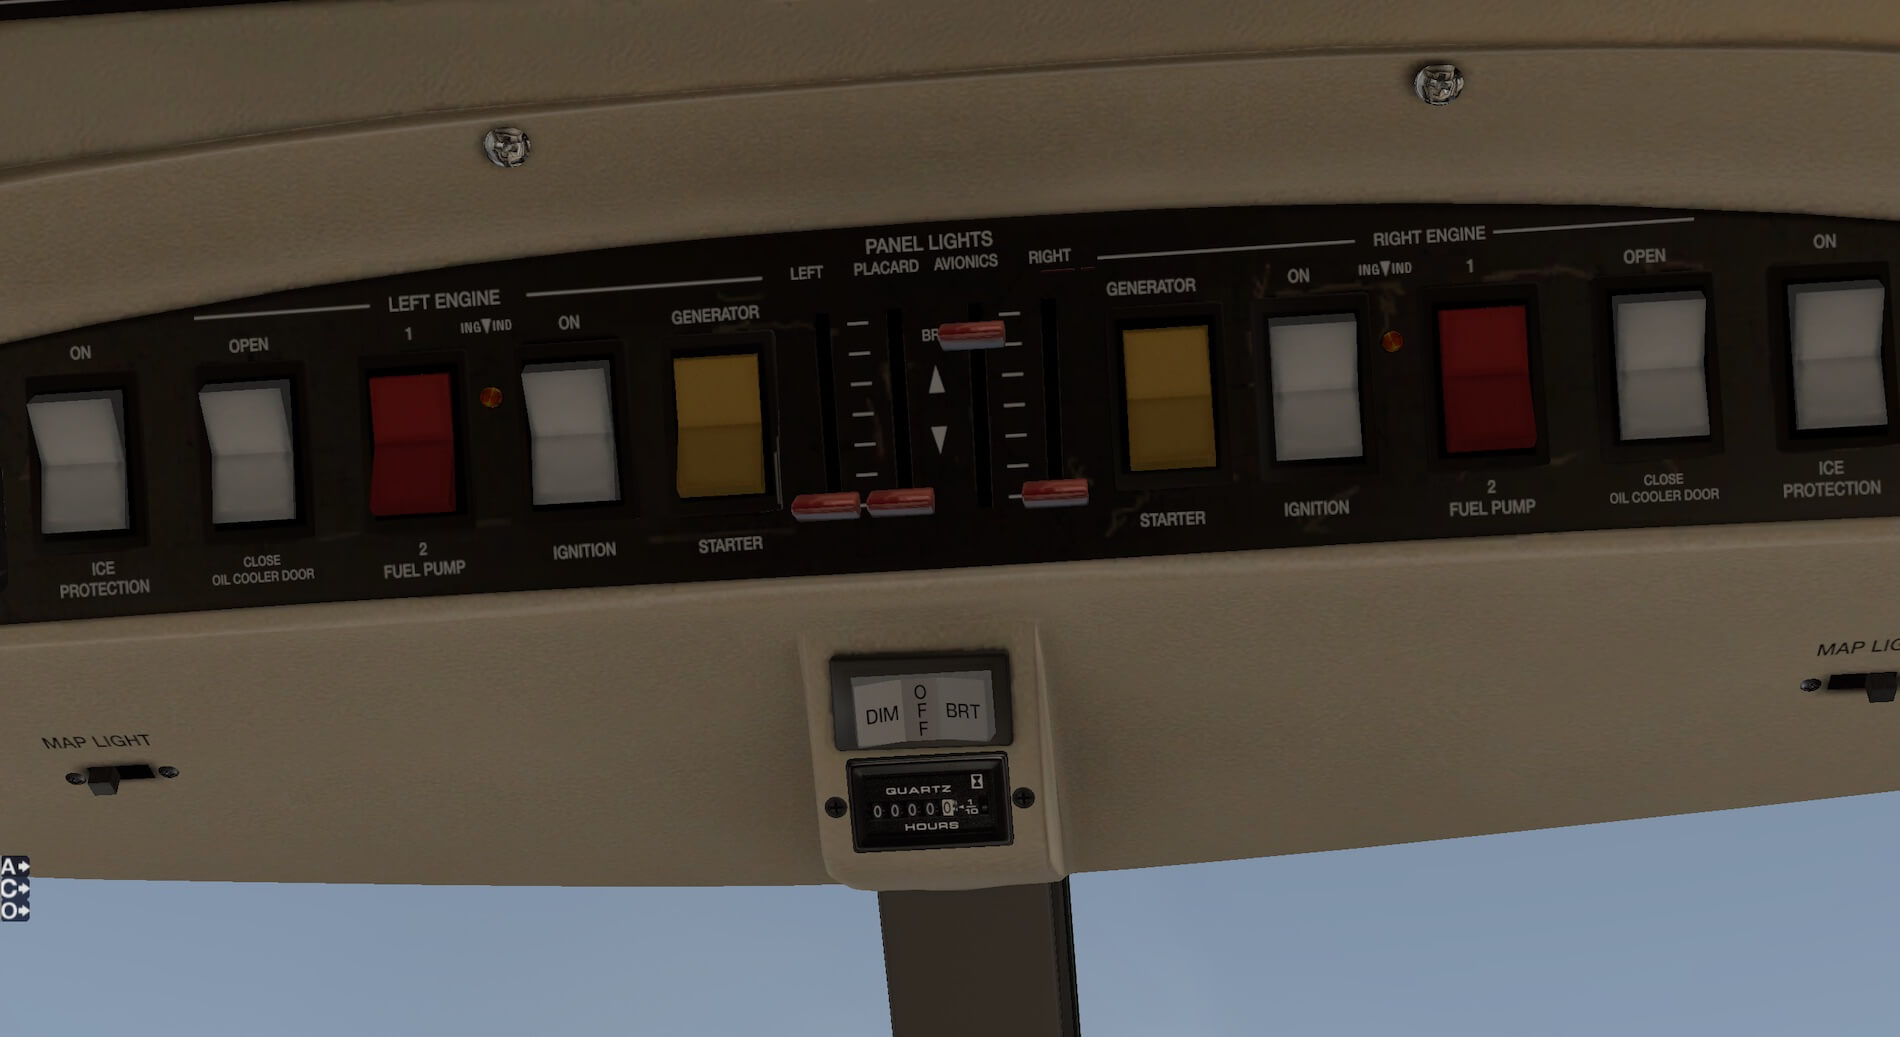
The checklist moves through checking the undercarriage lever is switched to down, fuel capacity is sufficient and aircraft surfaces are set correctly. Further checks include oxygen masks and pressure and the emergency window. The preflight checks require the main battery switch is set to off and this can be found in the detailed overhead panel.
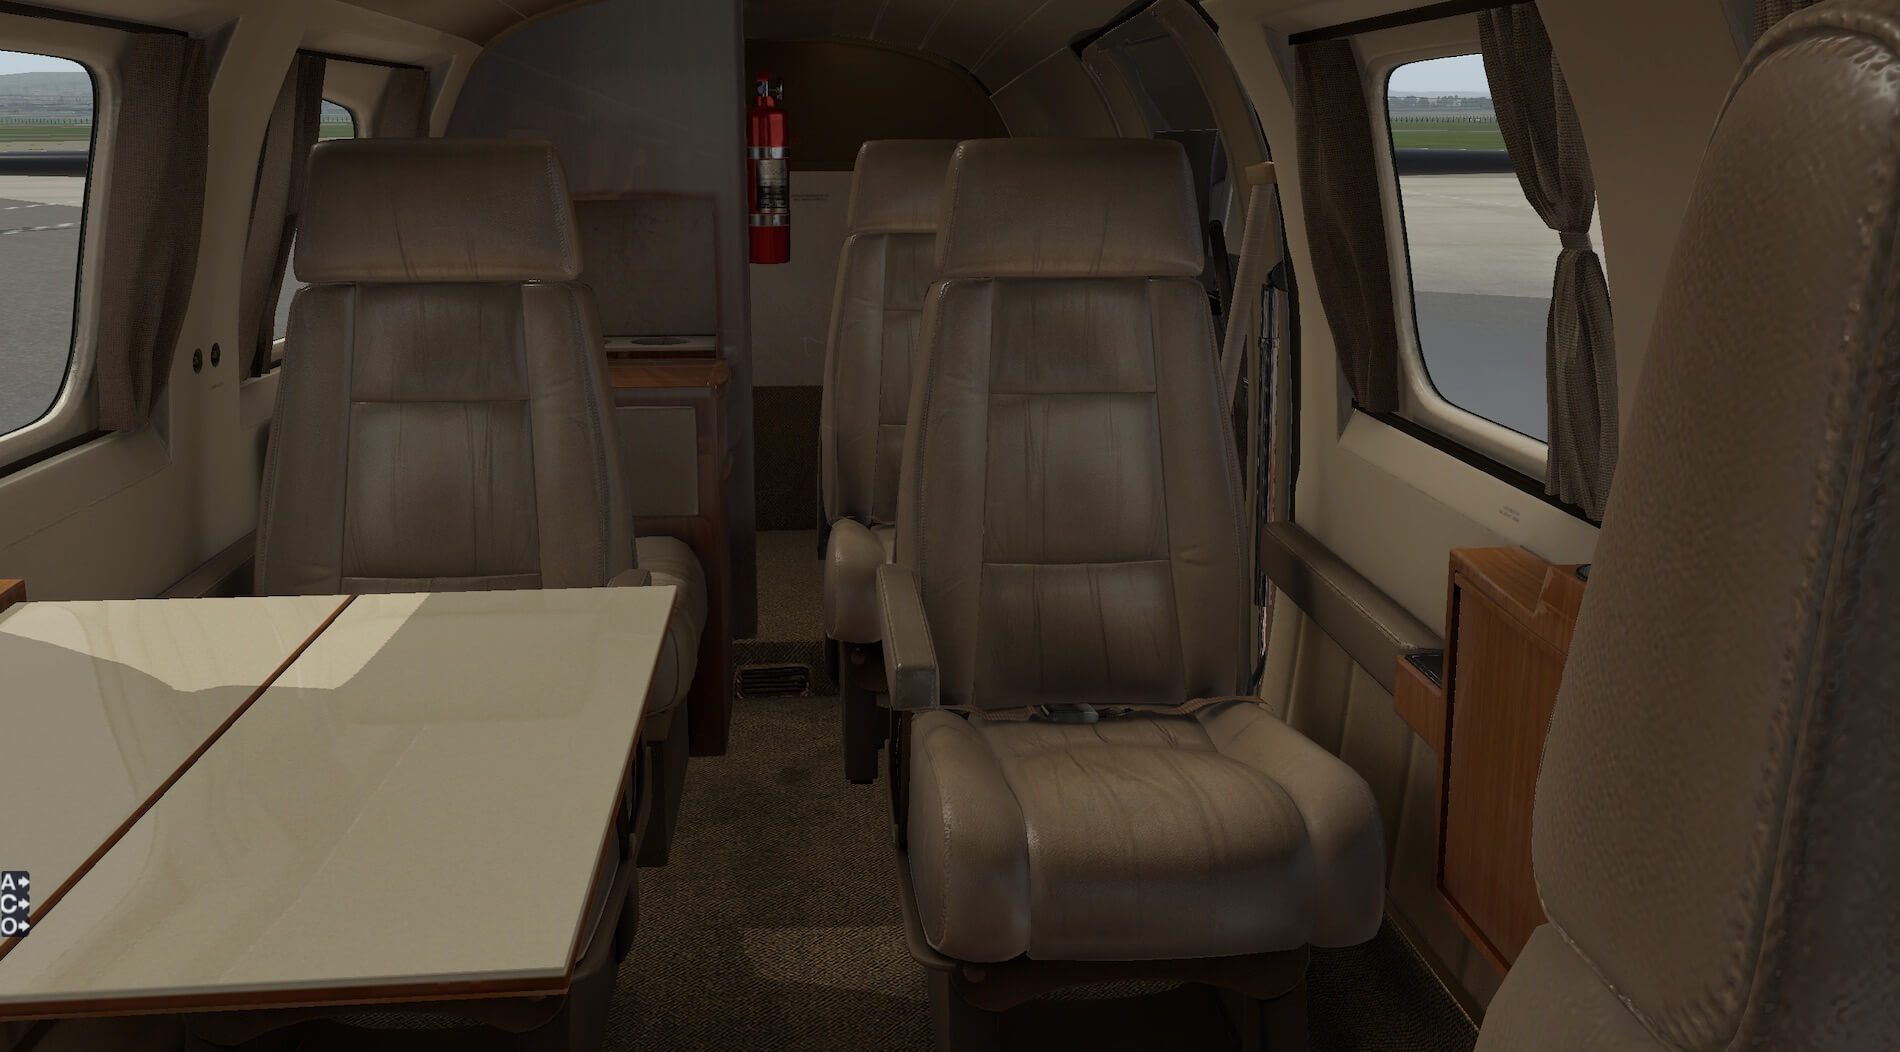
The next checklist is the one used before starting engines and I will refer to this when carrying out my flight later in the review. Once the battery and avionics are switched on the internal lights are all functional and their brightness can be controlled both in the cockpit and the cabin. The seats are modelled very well both in the cockpit and the cabin and the wooden divide between the pilots and passengers is very convincing.
The cabin itself is of good quality with the passenger tables modelled to open and close and all textures and surfaces modelled to a high standard, again with appropriate wear marks on seats and carpets. The luggage area contains a detailed fire extinguisher and the passenger door can be operated via its internal handle.

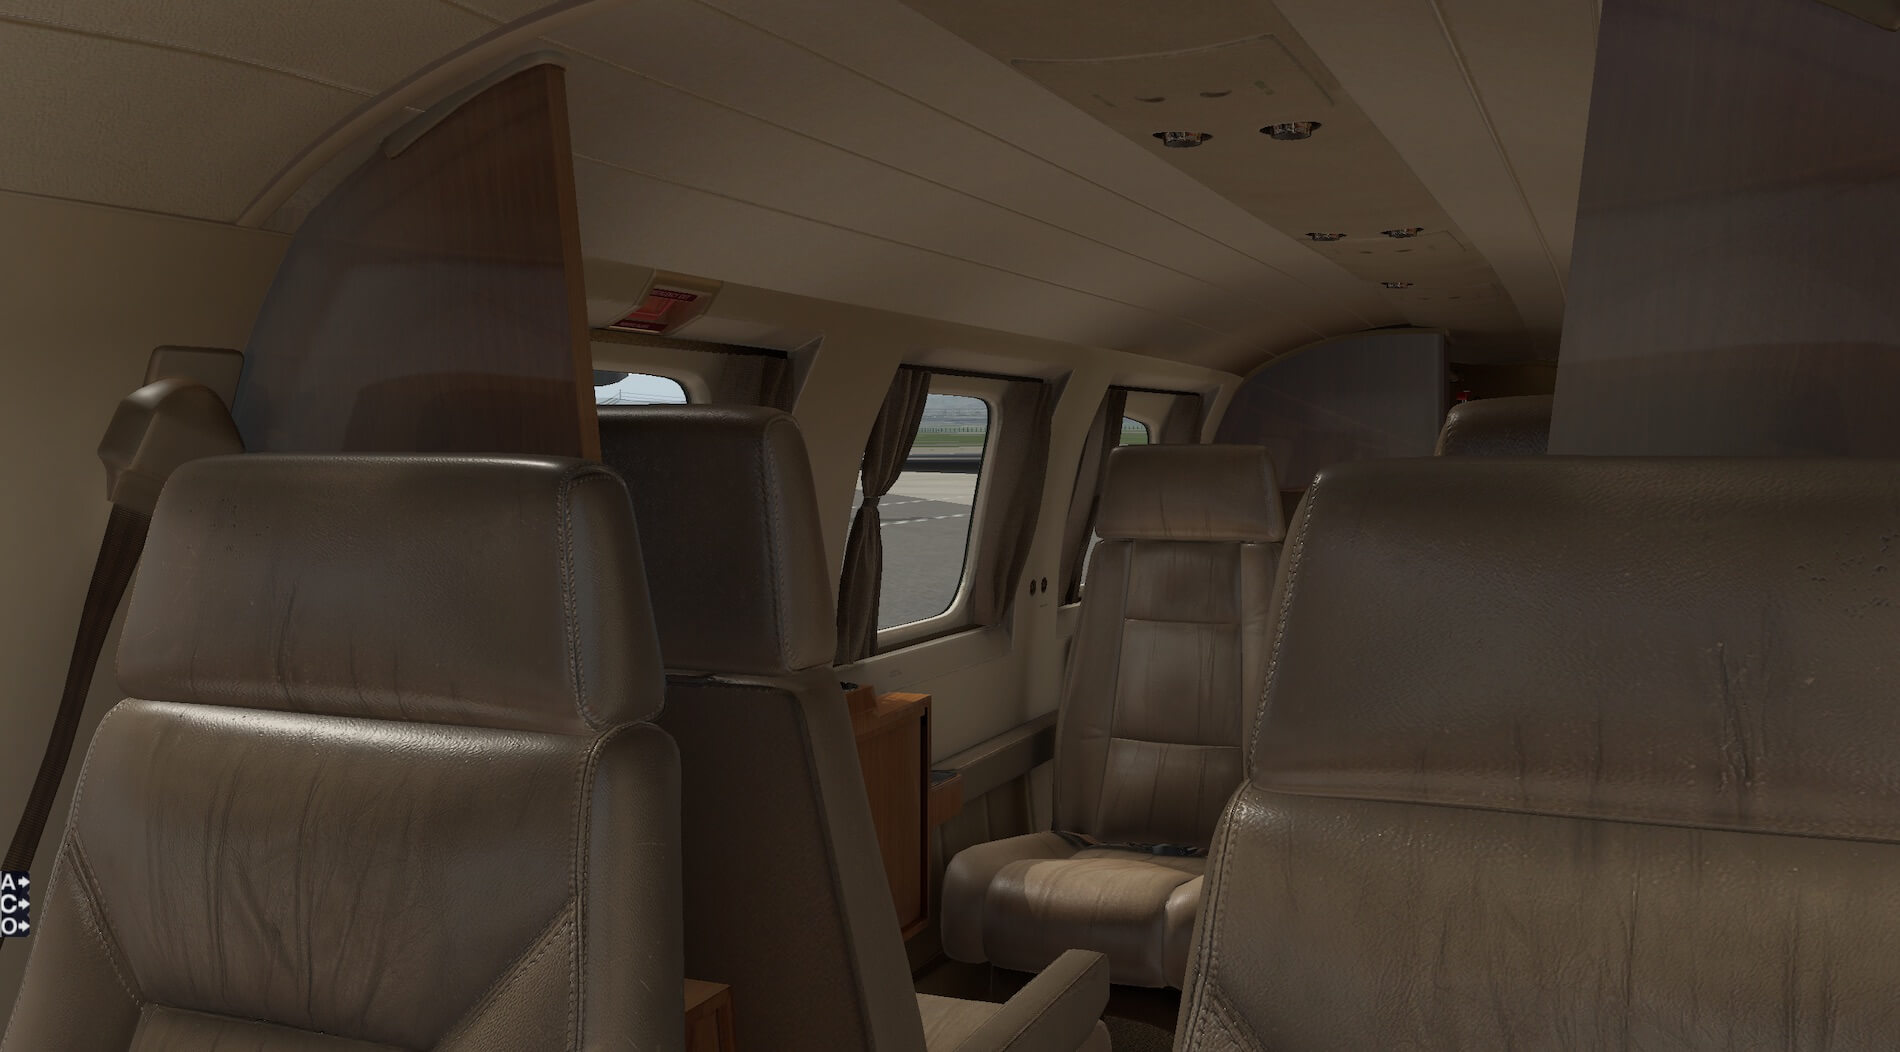


In low light the cockpit and cabin area look very good under the models lights, adding atmosphere and realism to the user experience. The internal modelling meets the same standard as the exterior detail and this creates a very convincing experience when looking around the aircraft.


Sound
The sales information states the model has in-depth FMOD sound design implementation and Wikipedia describes FMOD as a proprietary sound effects engine and authoring tool for video games and applications, developed by Firelight Technologies, that plays and mixes sounds of diverse formats on many operating systems.
This leads the user to expect a high quality set of sounds to compliment the appearance of the aircraft. The aircraft engines sound very convincing and change with throttle inputs. Ground noise is very realistic with tyre noise and cockpit vibrations and the movement of control surfaces such as flaps is supported by clearly audible mechanical noises. The undercarriage sounds very good when being extended and retracted.
Warning alarms are loud and strident and switches and dials have their own attendant sounds when operated, and listen for the ticking of the aircraft clock! The sound package does indeed compliment the appearance and quality of the aircraft and draws the user in to the realism of the model.
Systems
As mentioned earlier the model has its own on screen menu which allows the user to operate systems bespoke to the model and enables quick movement around the model to specific places. The model can be customised via a manifest.json file and rain water effects can be introduced via the librain plug in. I did attempt to use the librain plug-in on my macOS, but it caused issues for my computer and prevented X-Plane running correctly.
This is more about the capabilities of my hardware not the model and plug in but I was unable to test the rain and ice effects for this review.
The model comes with a KFC 300 autopilot which can be “popped out” via the on screen menu. There is no manual for this in the model documentation but I found one for the full KFC flight control system on the internet supplied free by seaerospace.com. You can download this manual via this link (https://www.seaerospace.com/product_resources/KA35A_PG.pdf)
This manual covers the full control system and therefore some components are not modelled as described and others have been replaced by X-Plane compatible instruments therefore it is not bespoke and takes some working through but it does explain how the components work. The autopilot allows for heading select, altitude hold, indicated airspeed hold, approach and navigation modes.
There is a button for speed profile but this does not apply to this model. The navigation mode can be linked to the Garmin GS530 based X-Plane flight management system which will control the aircraft via the Com 1 and Nav 1 channels and is Goodway compatible for loading of flight plans and other flight information. For those users operating a windows computer the model has Reality XP GTN 750 support.
The model is equipped with a communications selection panel, Distance Measuring Equipment, a radar altimeter and a transponder. It has a Bendix King KR87 ADF panel which is not fully functional but does allow the input of an ADF active frequency and a standby ADF frequency. It has two tuning dials for the Com 2 and Nav 2 frequencies.
The model also has a radar display similar to an Avidyne EX500. Again no user manual is provided but the radar has options to show heading and a base map, including a terrain display, traffic in the area, the loaded route, range and weather. This forms an impressive instrument panel alongside the flight management system.
The aircraft has three blade constant speed fully feathering propellors and these functions are all modelled as is the reverse thrust system available in the real aircraft. Together all of these aircraft systems are capable of providing the user with a large amount of information and take the use of the aircraft to a high level in terms of the equipment available for use.


I think it would help many users to have a manual available that covers the use of these systems bespoke to the model as it would allow users of all levels to immerse themselves further in to the work carried out by the developers to create a realistic model and would clarify where functions are modelled to be active rather than leaving the user to work out whether or not they are using them correctly. Once worked through and understood this is a good array of aircraft equipment.
Sales information states that the model is VR compatible but my computer is not compatible with this technology so I was unable to test it.
Basic Flight Experience
I decided to take a few short flights with no pre-flight checks and just operating throttle, flaps and undercarriage to establish how easy the model is to simply fly. I loaded the aircraft ready to fly at the end of the runway, lowered the flaps, increased the throttle and toggled the brakes off and then took off.
The aircraft ran down the runway very smoothly and was keen to climb in to the air. Having taken off the aircraft climbed well and the retraction of the flaps and undercarriage was accompanied by reassuring noises. The aircraft felt very stable in flight and visibility was very good. I banked the aircraft and carried out the legs of a circuit.
I turned in to the approach too early and had to go-round again, but having avoided the same mistake I lined up on the runway and managed a successful landing. I found the aircraft slowed down very quickly on the runway and I did not need to use the reverse thrust. I completed a few more similar flights and really enjoyed simply flying the aircraft.
The aircraft had enough speed to make the flights interesting and cover considerable amounts of scenery without going so fast that I could not appreciate the flight. The aircraft was very stable and smooth in flight and fun to fly.


In order to complete a full flight I followed the Normal Procedures check list. I revisited the before starting engines section and ensured I had followed it completely. The cockpit diagram in the pilots handbook proved to be useful. The list states that the inverter power switch is set to off to avoid damaging equipment. Searching the cockpit there is no switch of that name but this actually refers to the gyro power switch on the left of the cockpit. I ensured the switches were all positioned as required and that the battery power switch was on.
For the first engine I switched on the fuel pump via the switches in the overhead panel, moved the ignition switch alongside them to the on position and the adjacent switch to the starter position. I moved the condition lever to run and then switched the starter and ignition switches to off then the generator, again in the overhead panel, to on.
In accordance with the checklist I checked the oil pressure gauge and the undercarriage lever, switched off the generator and repeated the process for the second engine and ensured both generators were switched to on at the end of the process. Both engines started smoothly and successfully, accompanied by the appropriate sounds and great graphics as the propellors started to move.
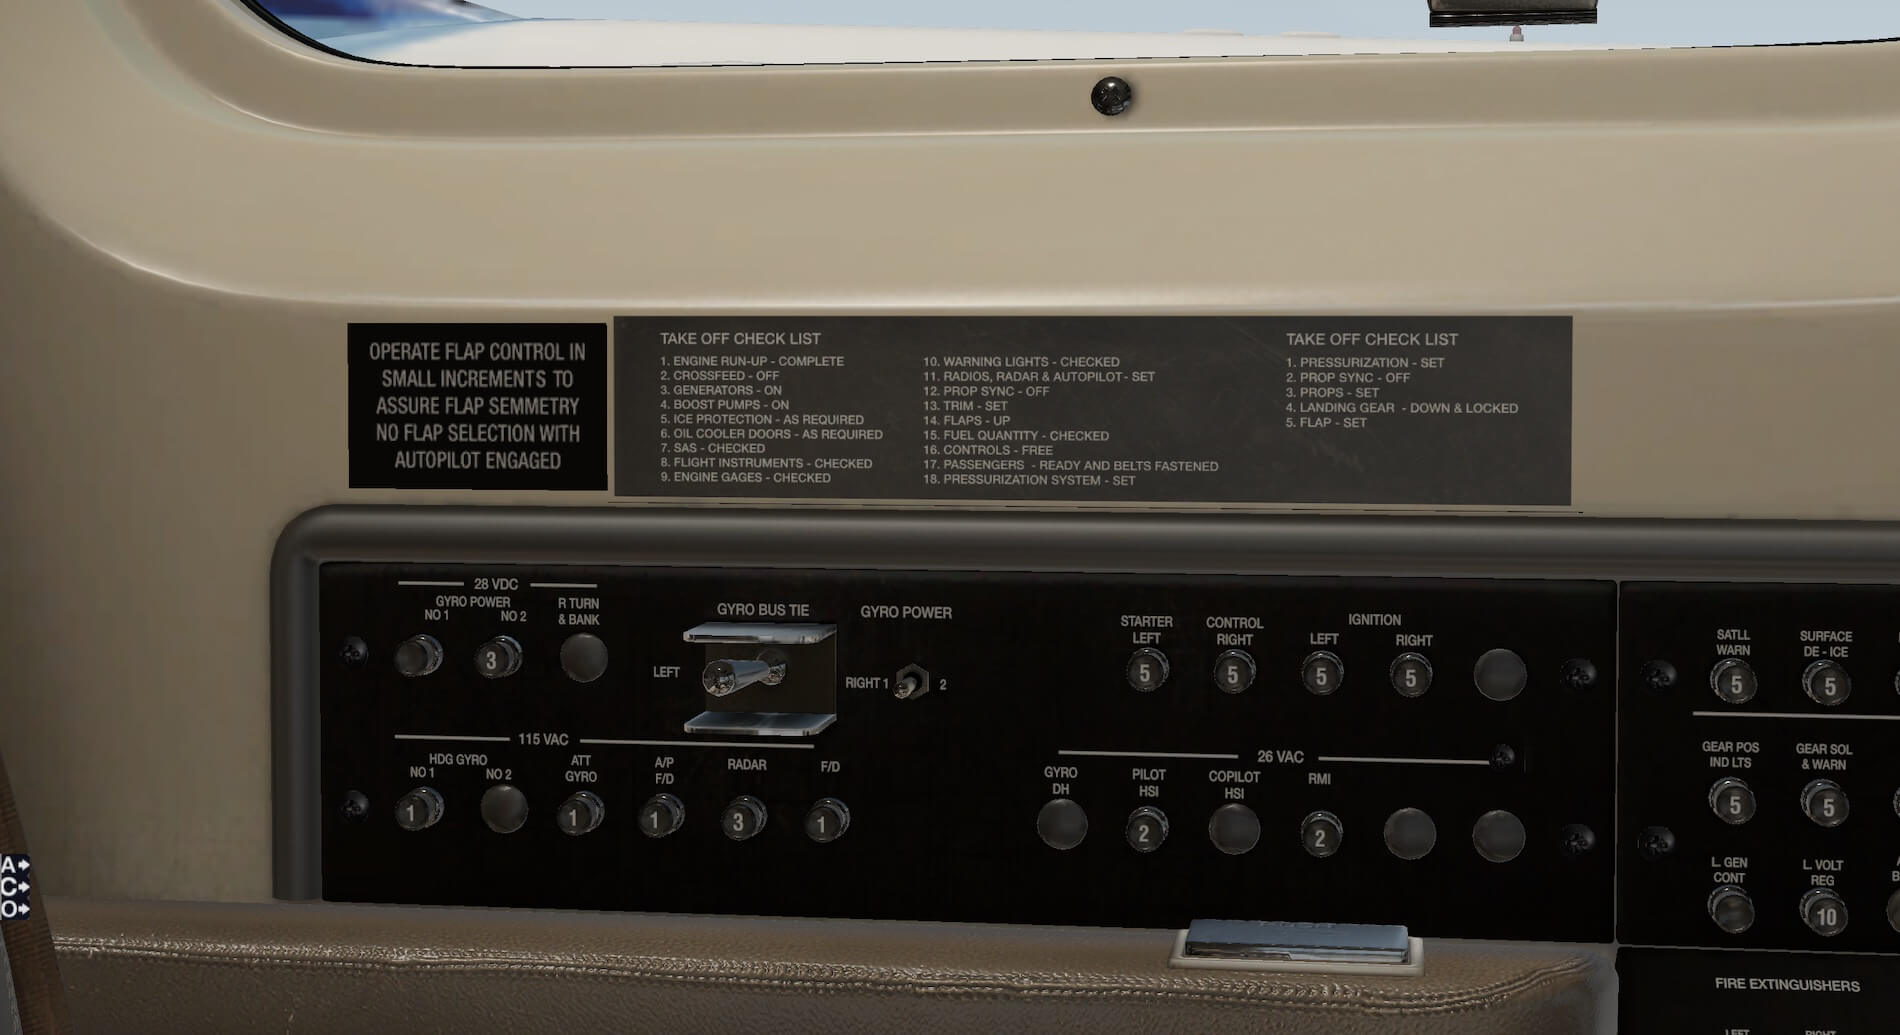
Before taxi I moved to the next part of checklist and checked the battery and generators were on. I checked the lights were set as required, and that cabin comfort and gyro power were on. I set the altimeter and checked the clock was reading correctly. The next requirement was to move the avionics switch to on. I ensured autopilot was set to off and carried out the bus checks as outlined in the checklist. Prior to moving to taxi I loaded a flight plan in to the FMS via Goodway.

The next stage was taxi and engine run up. Again following the checklists I checked the brakes, checked the thrust reversers, ensured the power levers were at idle, the prop controls were at feather and the condition levers were fully forward.
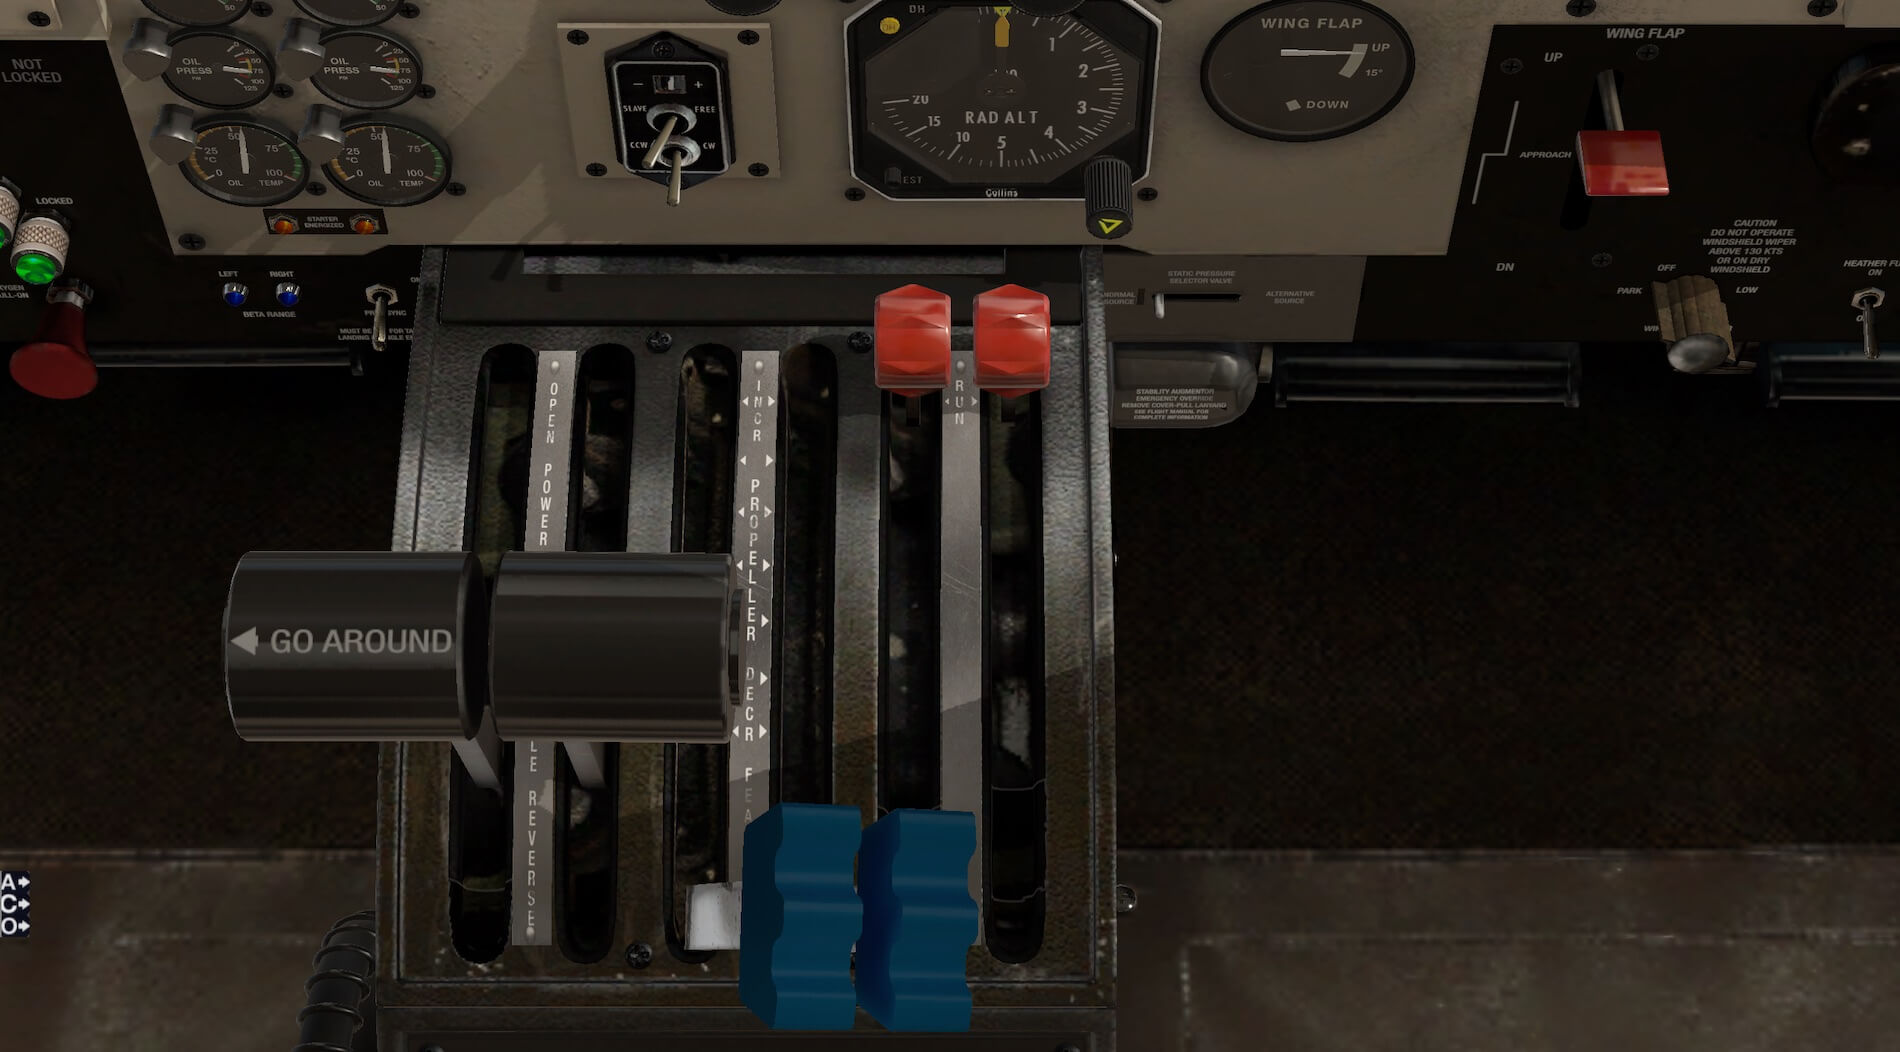
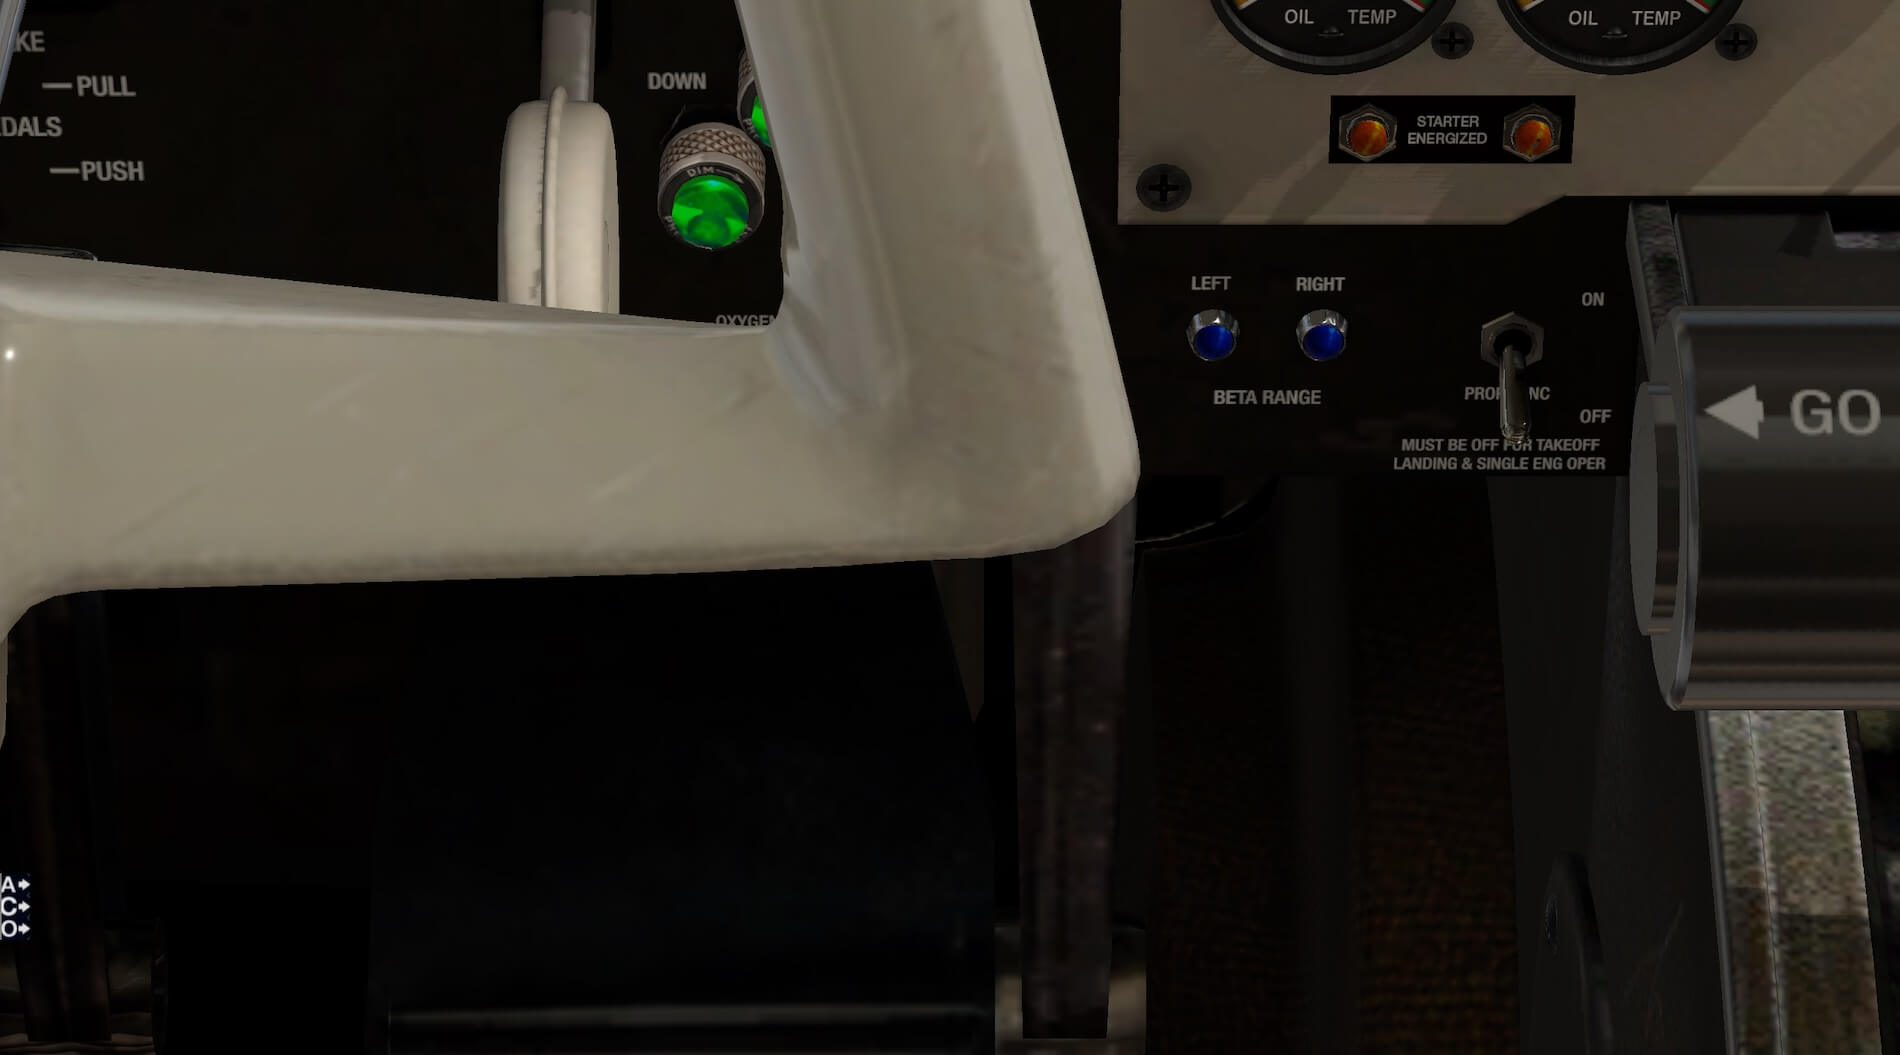
Engine run up involved checking the circuit breakers and ensuring the generators were on. The ammeter and voltmeter needed to be checked, propellor sync needed to be off and both fuel pumps had to be on. I set the RPM to 1625, checked the pneumatic gauge. I then adjusted the RPM to carry out the various tests outlined in the checklist. I reduced the power until the beta lights came on to the left of the throttle levers.
I continued to move towards reverse thrust until this was achieved and then moved the throttle levers to idle. Having completed this section I increased the throttle power and taxied to the runway. The aircraft responded well on the ground and a combination of propellor adjustment and power made the journey to the threshold smooth and straight forward.

Before take-off the checklist ensured that I checked the circuit breakers and confirmed the generators and fuel pumps were on. I checked the flight instruments switches and gauges as required. I reviewed the settings for the radios, radar and autopilot and ensured my route was displayed in the Flight Management System Multifunction Display.
I set the trim and flaps as required, set prop sync to off, checked the oil cooler door switches on the overhead panel were set to closed, ensured the flight controls were correct and moving freely and ensured the cabin comfort settings were as required. I then advanced the throttle levers and took off. The take-off went well and once airborne I retracted the undercarriage and switched on the flight director and autopilot to navigate via GPS.
I continued a steady climb and ensured the autopilot had captured the correct heading and this was displayed correctly. I set prop sync to on. The aircraft responded smartly and smoothly to the autopilot and the aircraft felt stable and agile. Once at the required altitude I set the autopilot to hold that level, checked the engine instruments and then set cruise settings and put wind shield heat on. Given the weather conditions I had set I had no issues with icing but all controls for this are in the overhead panel.
Once cruising I switched off the autopilot and followed the FMS route manually. The aircraft is great to fly and responds well, but realistically, to throttle and control inputs.


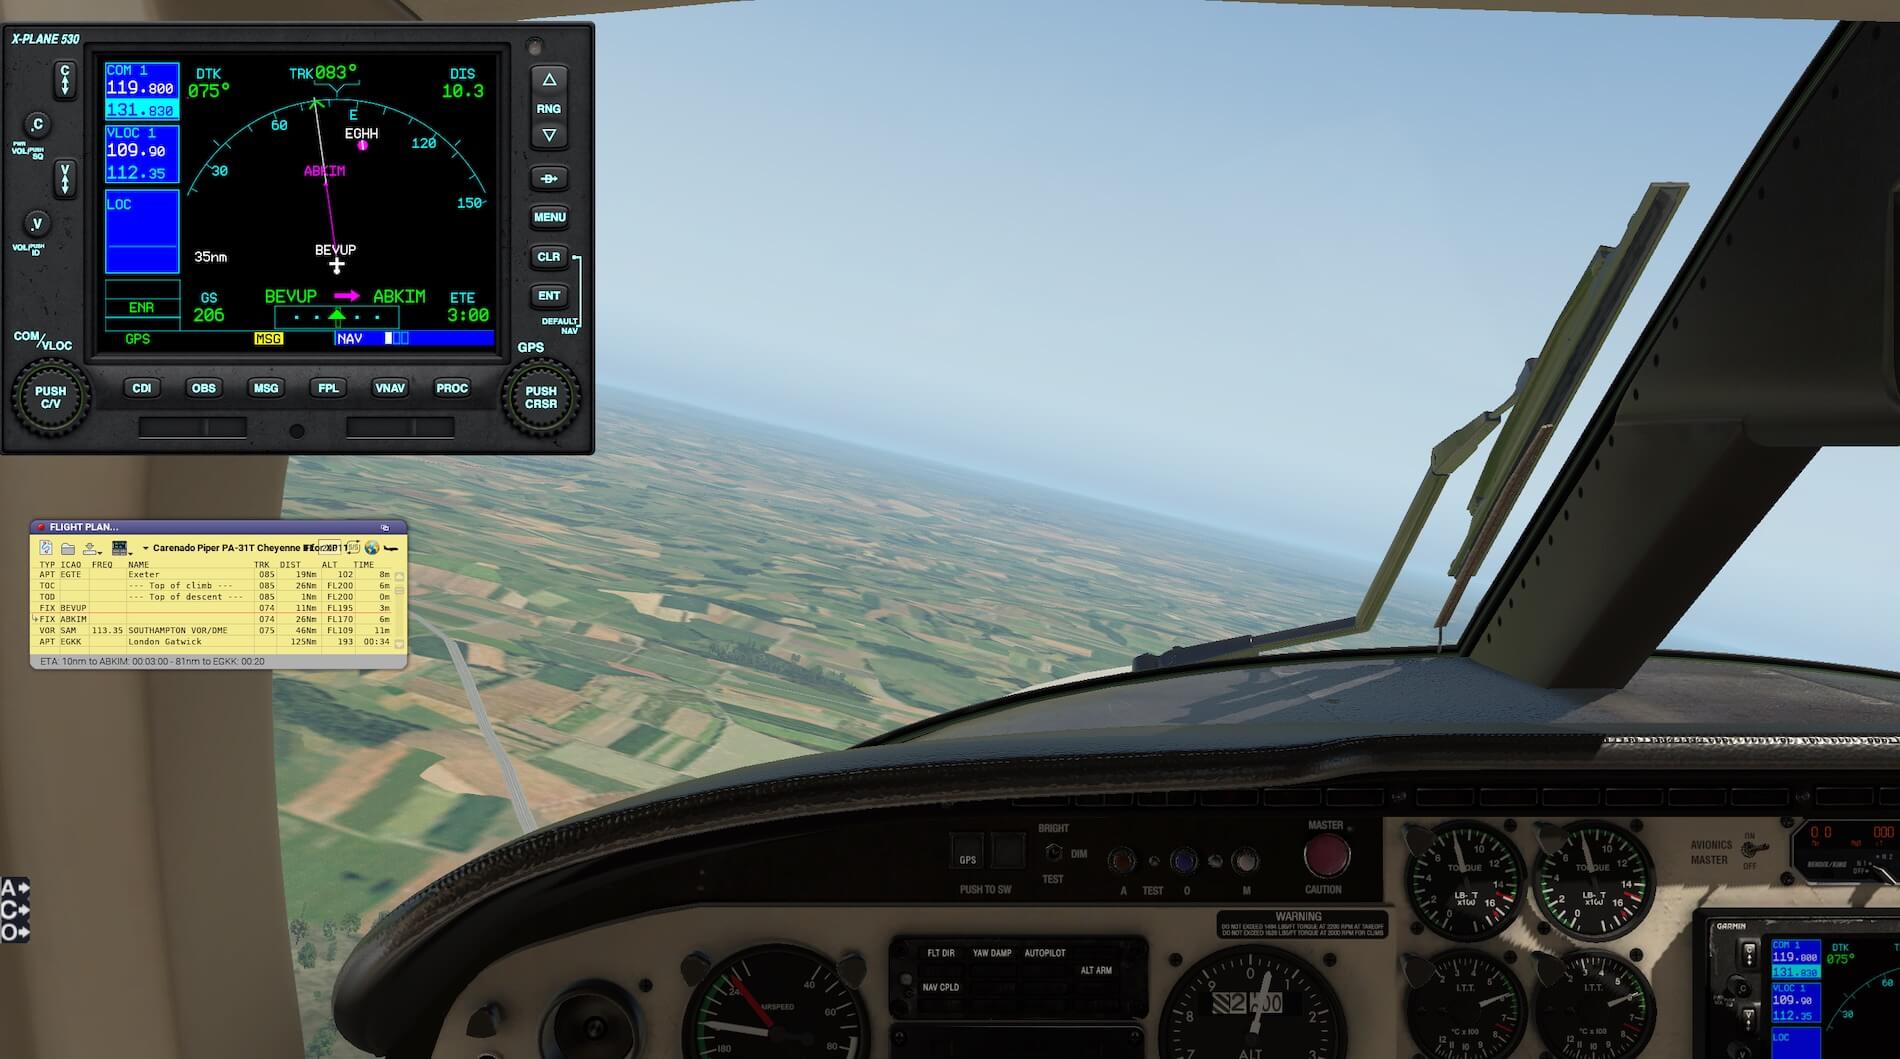

On approach I changed from GPS to VLOC, having ensured Nav 1 was tuned to the destination ILS frequency and set the propellor RPM to 2000. The aircraft immediately captured the approach and the glide slope and went through some gentle manoeuvres to line up correctly. I put the flaps down at the appropriate airspeed and then the undercarriage. Just prior to landing I switched off the autopilot and carried out a successful landing. I used the reverse thrust and the sound package ensured I knew it was operative whilst the aircraft came to a steady stop.

On landing I switched off reverse thrust and vacated the run way. I switched off the radar, heater fuel switch and ensured the appropriate lights were on. I taxied to the stand and went through the final part of the checklist for aircraft shut down.
I set the parking brake, switched off the avionics, electrical equipment and the gyro power switch. I went through the process of switching off each engine in turn, watching the feathered propellors take some time to stop turning, and then finally switched off the battery.


This was a thoroughly enjoyable flight. I had time to start to become more familiar with the aircraft and the autopilot and other equipment worked very well and as expected. I would have enjoyed the aircraft more if the manual had contained a cockpit diagram and some indication as to which systems were modelled to work as I spent considerable time working this out, and indeed learning how to use some systems, rather than actually using the model.
I was never sure I was using it to its full potential. This should not be seen to detract from the quality and realism of the model itself. It is a very impressive and forgiving aircraft that can be flown by pilots of all experience levels and can be used to create greater and greater challenges as the user becomes more familiar with it.
Summary
A high quality model which is realistic both inside and out with a large amount of modelled equipment and a comprehensive sound package. The developers provide a very useful on screen menu which enables the user to initiate changes to the model, livery and various settings without leaving the flight itself.
The modelling is carried out in detail and provides a very immersive experience. I think the model would benefit from the provision of a bespoke aircraft manual for the model to allow a user to use it to the full potential provided by the hard work of the developers.
The aircraft is fun to simply jump in and fly but does provide a progressively more challenging flight environment as more and more systems are employed correctly. An impressive model which can be a great platform from which to learn and experience twin engined flight whilst at the same time providing enjoyment and challenge for pilots of all levels.
More information can be found at the dedicated Carenado web page or you can also have a look at the dedicated X-Plane.org web page. As of this writing – July 2019 – the Cheyenne II cost you 37.95 USD.
Feel free to contact me if you’ve got additional questions related to this impression. You can reach me via email Angelique.van.Campen@gmail.com or to Angelique@X-Plained.com.
With Greetings,
Andy Clarke
| Add-on: | Payware Carenado Piper PA31T Cheyenne II |
|---|---|
| Publisher | Developer: | X-Plane.Org | Aerosoft | Carenado |
| Description: | Realistic rendition of Piper PA31T Cheyenne II |
| Software Source / Size: | Download / Approximately 600MB (unzipped) |
| Reviewed by: | Andy Clarke |
| Published: | July 15th 2019 |
| Hardware specifications: | - iMac Intel i5 27" - 3.5 GHz Intel Core i5 - AMD Radeon R9 M290X 2048 MB - 16 GB 1600 MHz DDR3 RAM - Logitech Force 3D Pro |
| Software specifications: | - macOS Big Sur 11.x - X-Plane 11.5x (64 Bit) Private Use - A variety of freeware and payware airports |
1 Comment
Submit a Comment
You must be logged in to post a comment.
As always, a well-crafted review. This particular ship is a real sweetheart and the perfect pick if you’re in a hurry to get somewhere in style. So thank you for that.
In fact, this model stands in absolute stark contrast to Carenado’s PA-34 Seneca V which is basically an overpowered version of a squat pig. Not only do you have to install every piece of MSBS ever conceived just to get it to [hopefully] run, but you have to always be careful what you install afterward because it might crash out again. I would suggest doing a review on that awful scrap, but it isn’t even worth the effort let alone wasting the money as I already have.
The moral of the story: Buy the Cheyenne and run away from the Seneca V.