Saab 340B Regional Turboprop Airliner
Introduction
In looking at Wikipedia we find the aircraft, a collaboration between Saab and Fairchild, first flew on January 25 1983 and was produced until 1999, when due to immense competition in the regional airliner market production ceased. The concept of this aircraft started back in the 1970’s as Saab envisaged moving into the commercial airliner market as well as the pre-existing military business. The turboprop concept came from the high price of fuel when the aircraft was first conceived.
After the first 40 units were produced, when Fairchild withdrew from the project, the aircraft continued to be produced under the name 340A, of which 159 models were built. In 1989 a new model commenced production, being a second-generation aircraft with more powerful engines and a larger horizontal stabilizer, named the 340B- which is the type modelled by Carenado for this review. A total of 200 units were built, by far the most popular model. Finally, in 1994 a third generation was produced named the 340B Plus, of which 100 were built.
The Saab 340 typically carried 30–36 passengers, with 34 being the most common configuration. The engines chosen for the aircraft were General Electric CT7-9B, with 1,750 shaft hp per engine. This engine had been previously used in rotary wing aircraft (helicopters), and was partly chosen for the ability to implement “hotel mode”, which is basically a brake on the propeller so that an engine can be supplying power and air conditioning without the propeller spinning.
This avoided the need for a separate APU, however the propeller brakes were found to be unreliable with a high maintenance requirement and were abandoned by many operators in favor of a separate GPU. The connection for the GPU was on the right side, meaning that the left engine needed to be started first to establish a power source prior to the GPU being disconnected and before the right engine was started.
While the 340 had been faster than jet-powered competitors such as the Fokker 100and British Aerospace 146, it had no clear advantage in terms of payload or range; as the regional airliner market became increasingly crowded, newer types such as the Bombardier CRJ200 and Embraer ERJ 145 family, which did have an advantage over the 340, had led to diminished sales.
During 1989, US region airline AMR Eagle placed a large order for the type, procuring a total of 50 340Bs along with options for an additional 50 aircraft. However, business conditions and demand for turboprop-powered regional airliner transformed dramatically during the 1990s; this can be perhaps best summarised by AMR Eagle’s decision in October 1999 to announce its intention to phase out its 340 fleet. Faced with diminished value and demand for the 340, Saab chose to shutter production in 1999. More information can be found via this Wikipedia link.
The Carenado product implements the X-Plane 11 FMS as a navigation source which is placed on the pedestal and displaces the CTOT panel which is moved to the rear. Since I am not familiar with the real-world aircraft in terms of handling and avionics configuration, I am unable to directly compare this product with its real-world counterpart. However, in the time that I have had this model installed on my computer I have absolutely enjoyed the immersion and complexity of managing engine torque and propeller configuration.
Since there is no auto-throttle, this model requires that you pay careful attention to the power settings if you are to have stable flight regime. I am aware that there is another 340 product for X-Plane on the market, this article in no way compares those two products as I regard them both to be very good.
The Carenado product includes high-end 4K PBR graphics with custom avionics and rain effect support (upon downloading the Librain plug-in, not included). There is a functional flight attendant panel, HDR lighting with gimballed 3D lights, extensive VR support and Reality XP GTN750 integration and excellent support on the Carenado forum. The aircraft is available here and at the time of writing this review was v1.2.
Installation and Documentation
Installation is very simple, placing the Carenado S340 folder in the download into the XP11 Aircraft folder. An activation window will spawn and allows the use of the “paste” function to populate the registration key.
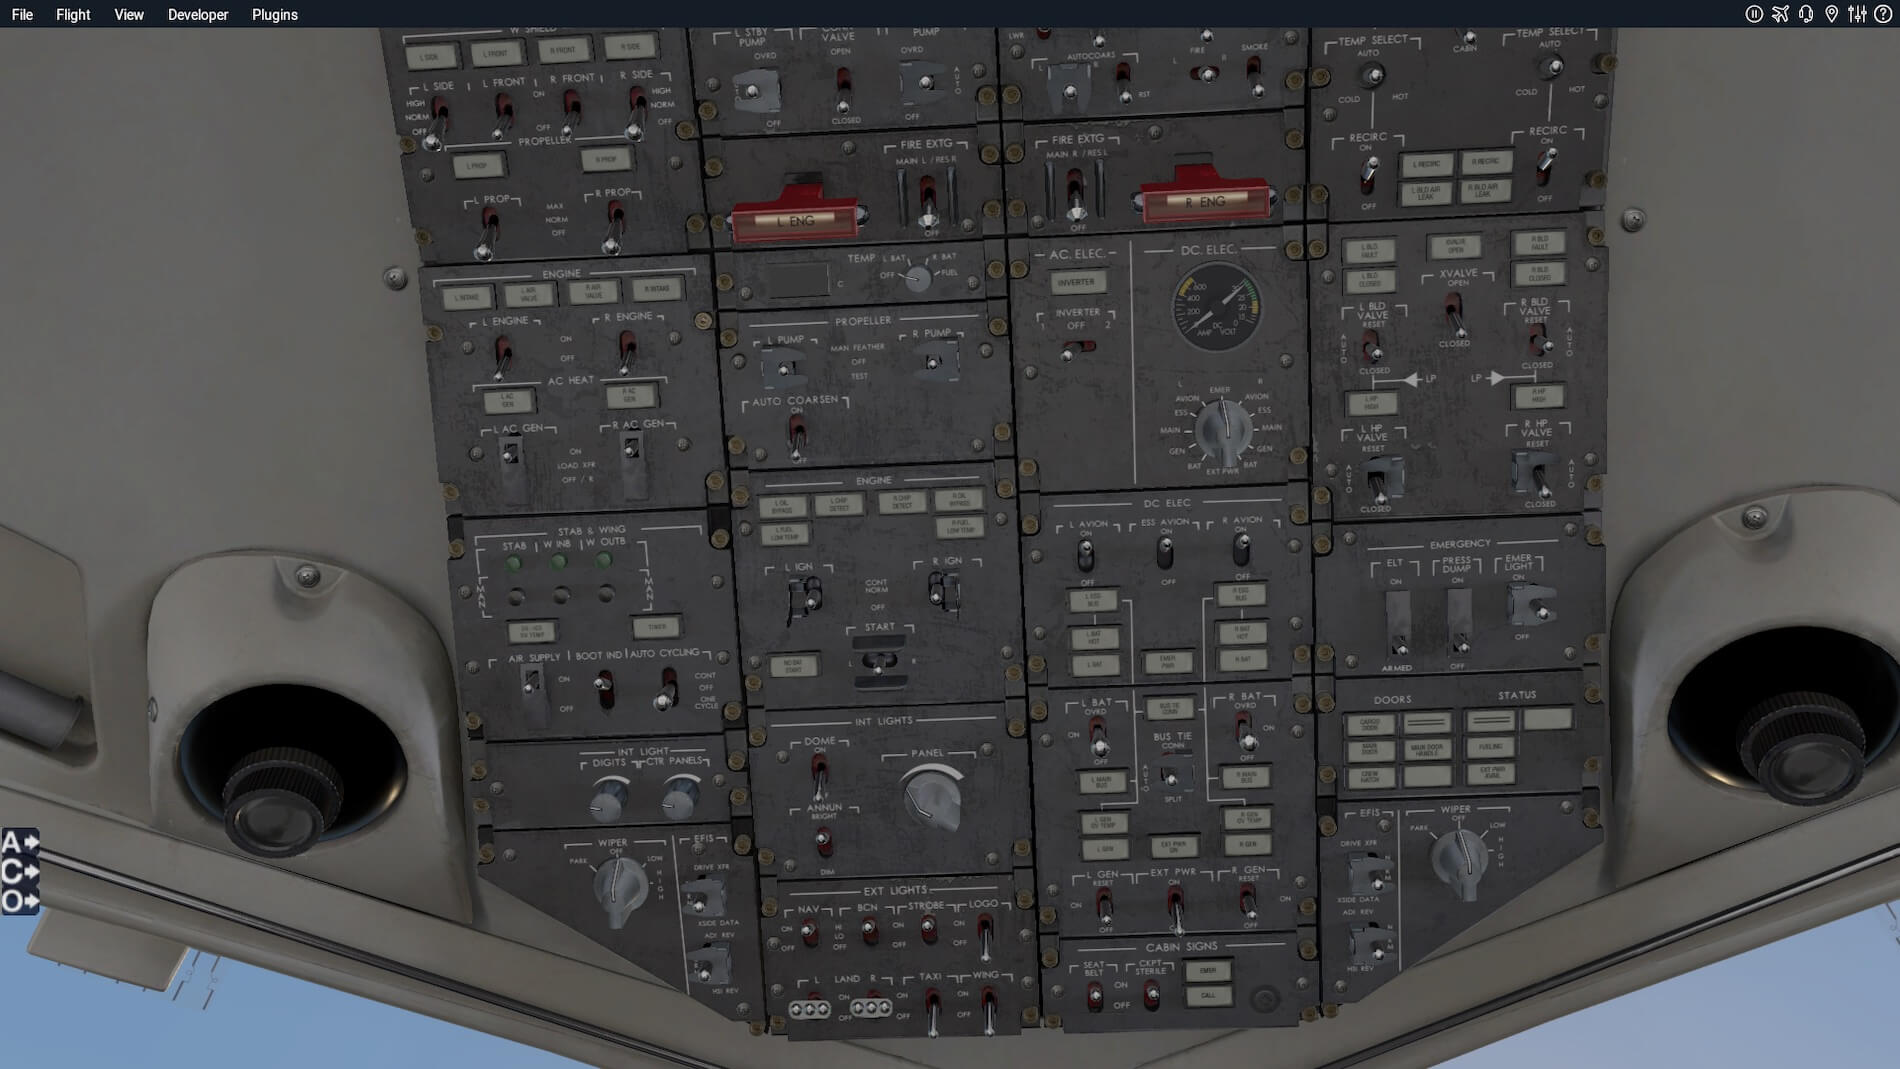
Documentation includes Emergency Procedures, Normal Procedures, a guide to the S340 overhead panel payout (most useful since the panel is complex), Performance and Reference tables- essential if you are to calculate aircraft performance vs environmental, load factor and engine configuration variables, the X-Plane FMS manual from LR, Version History, Credits and Copyright and Recommended Settings (in XP11).
Exterior Modelling
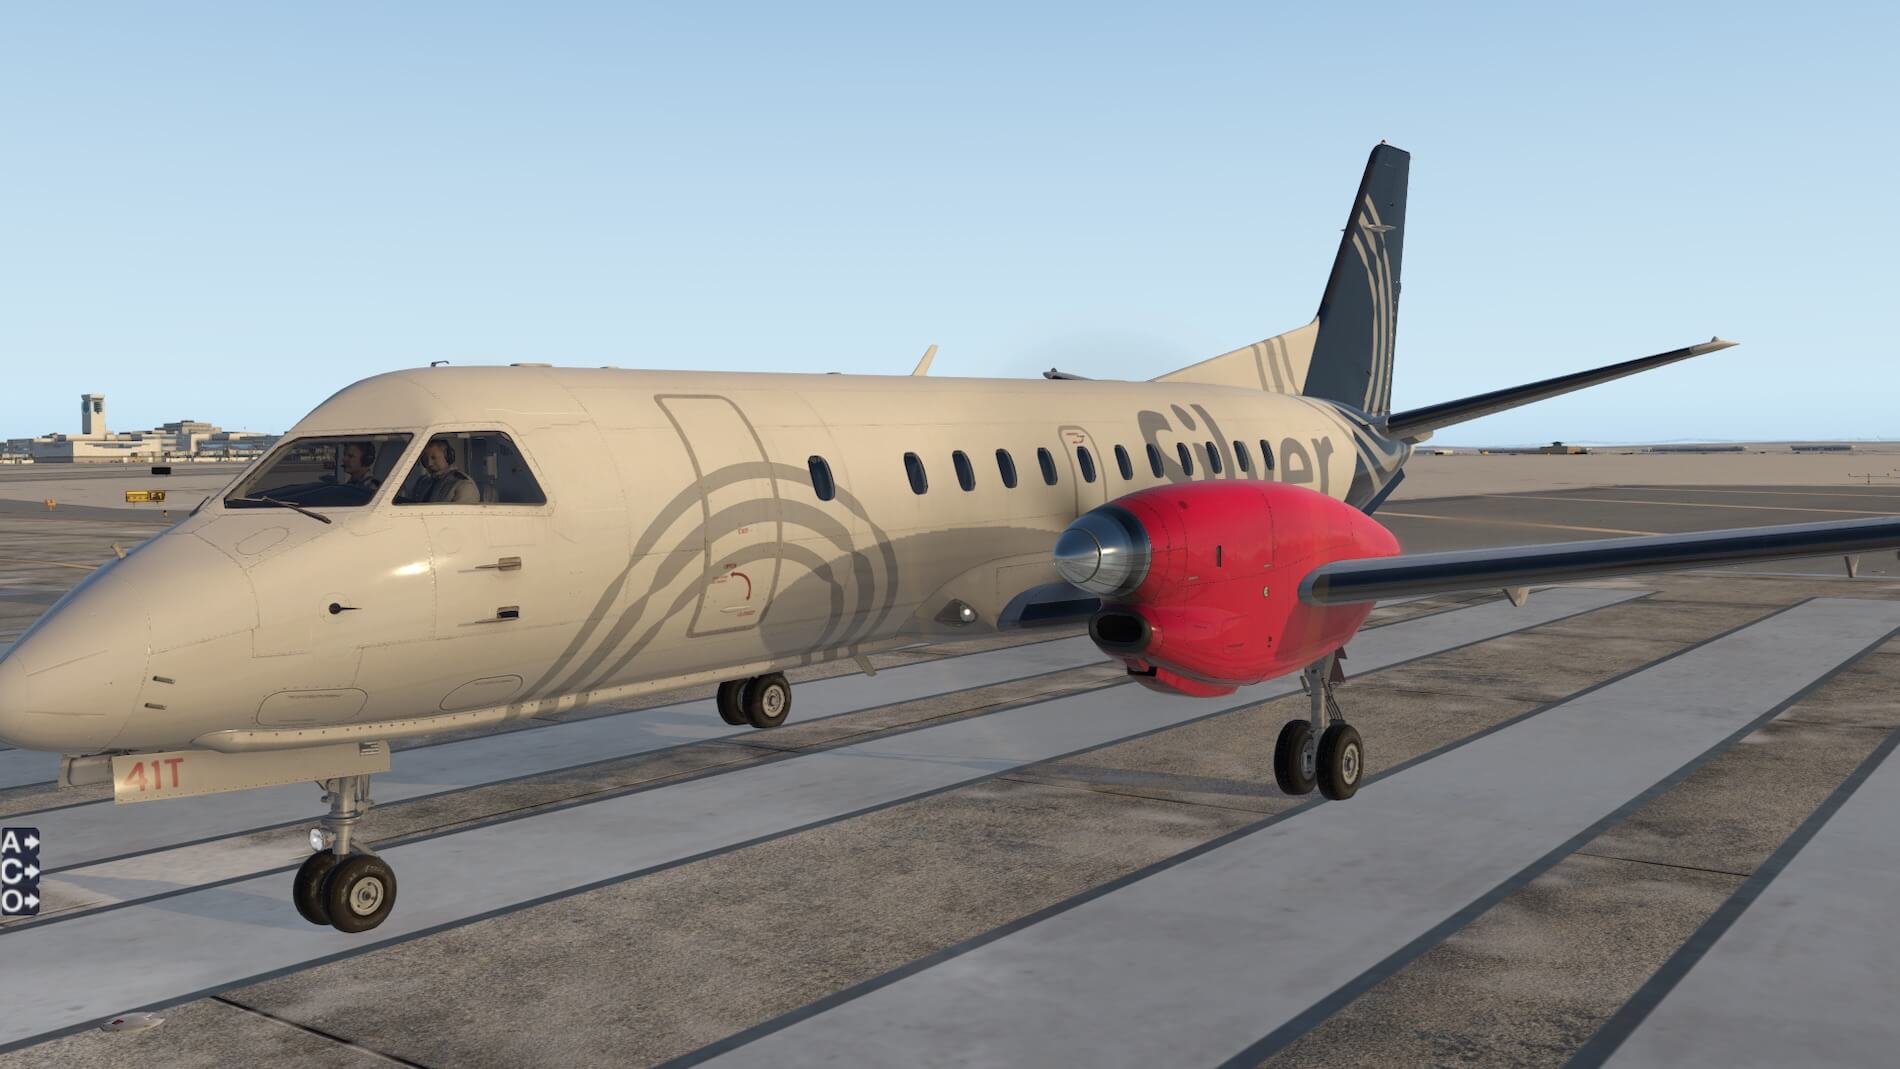
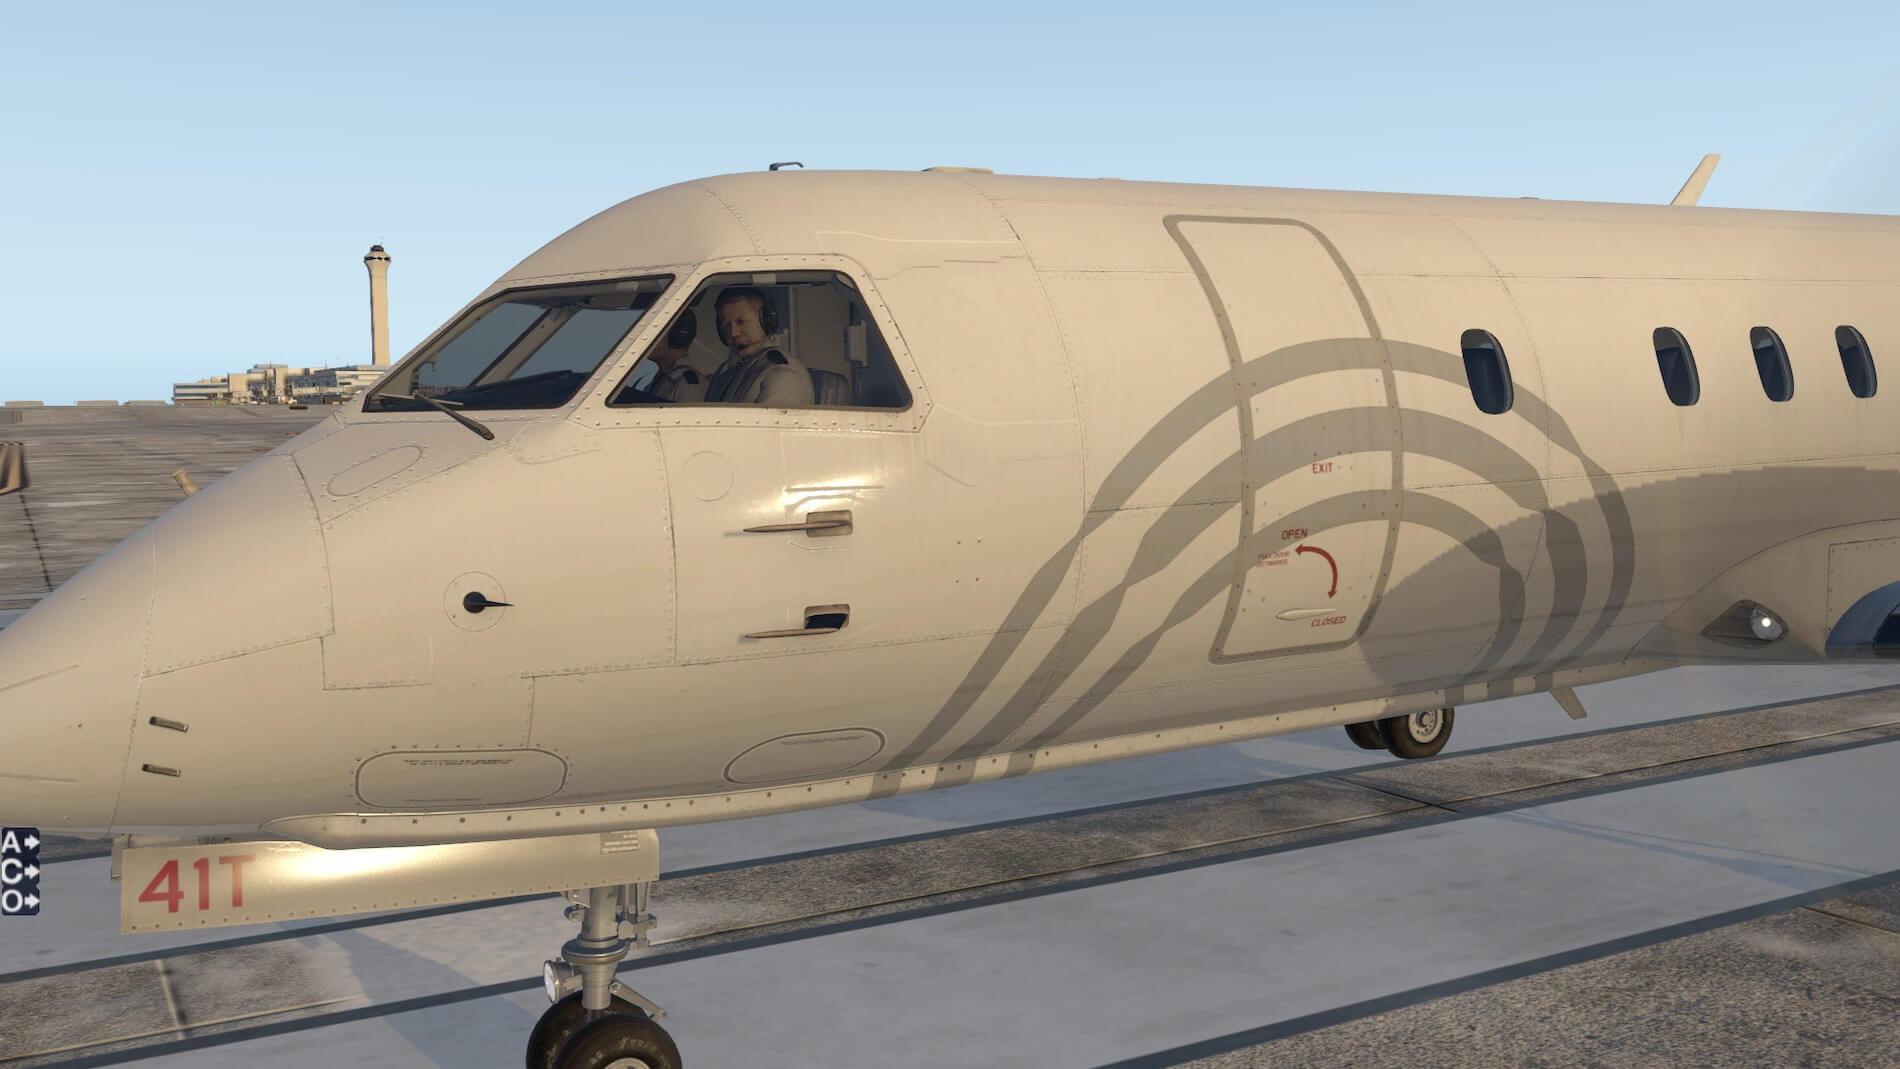
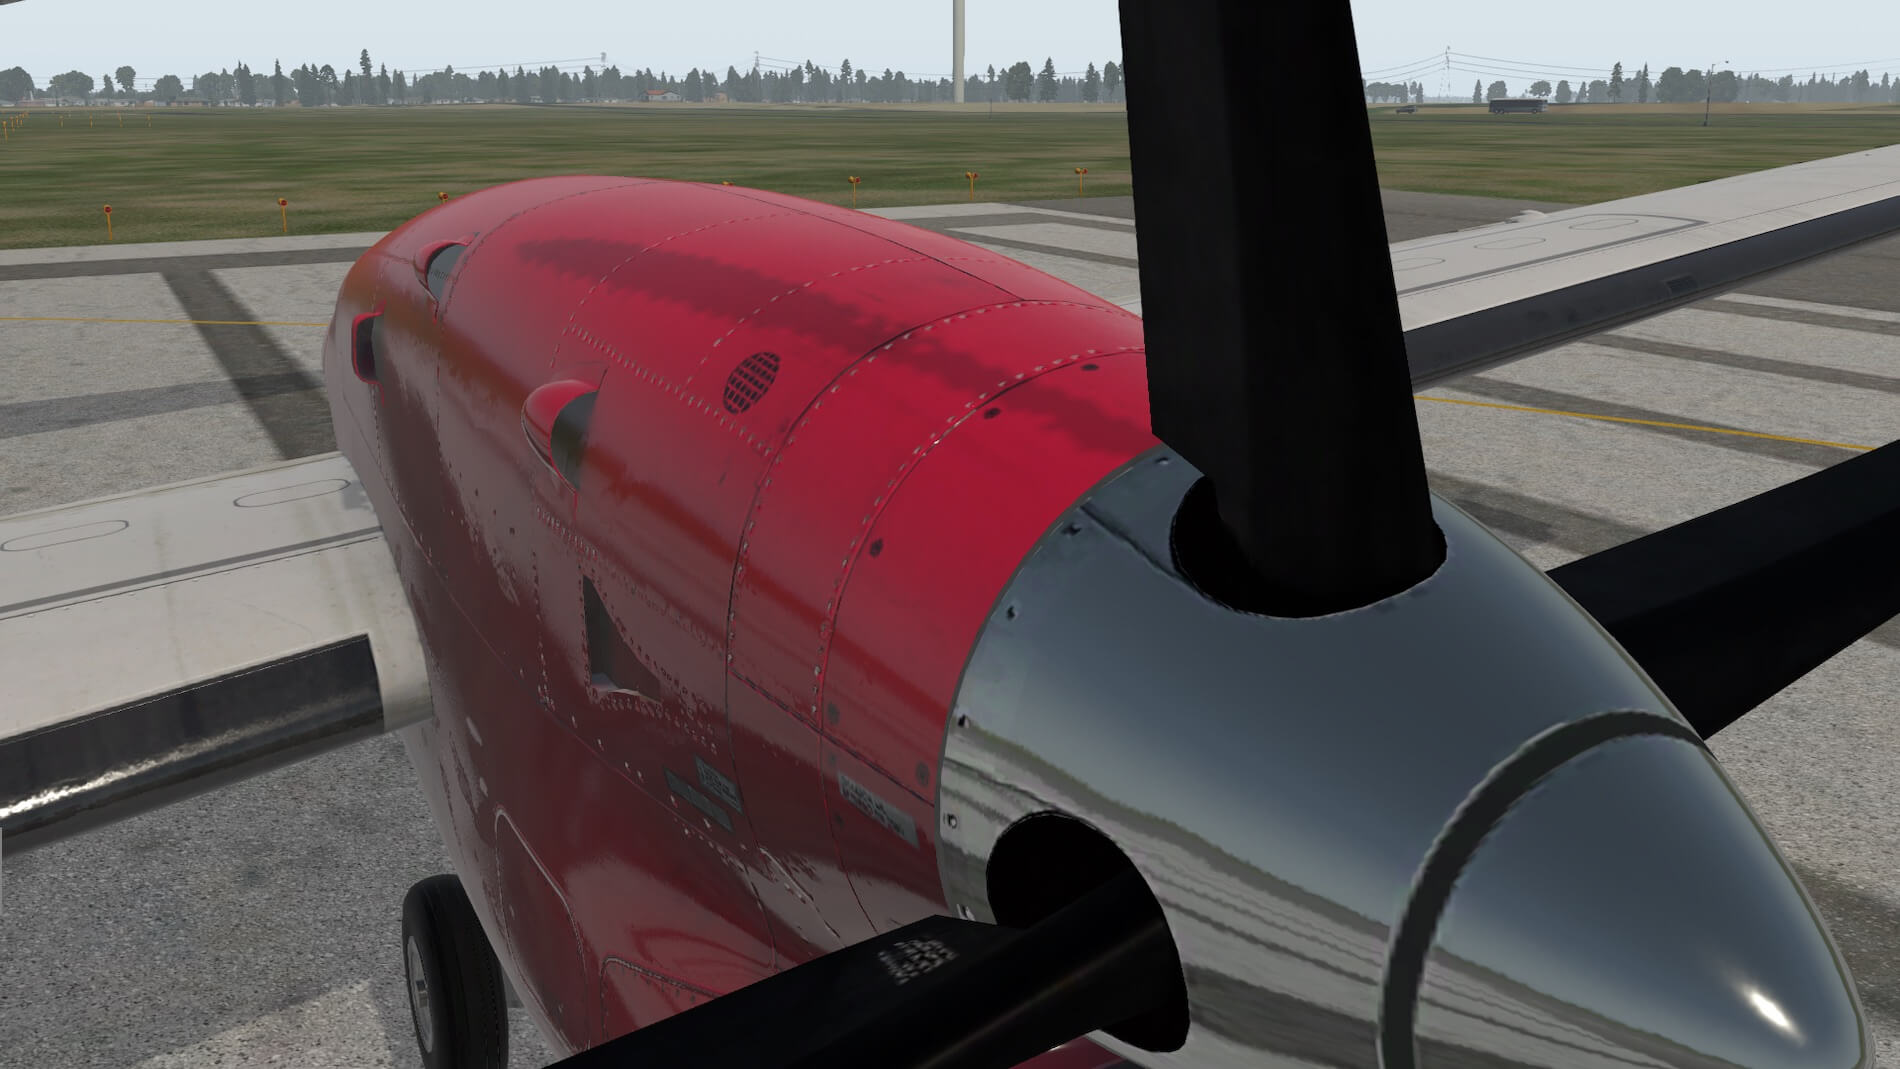
The exterior modelling is amazing. Firstly a look from the forward-left of the aircraft- that pilot sure looks familiar and both he and the copilot randomly gaze at instruments and at the camera (the flight crew can only be seen from the external view). You can see some of the reflections from here, but now going in closer the rendering of the pitot tubes and the detailing around the forward inspection panels can be seen.
Oh, and that pilot again who is very interested in us! Getting in even closer shows reflections on the propeller spinner with the landing light being also visible. A closer look at that prop spinner from a lower level. The fuselage panels can be easily seen as well.


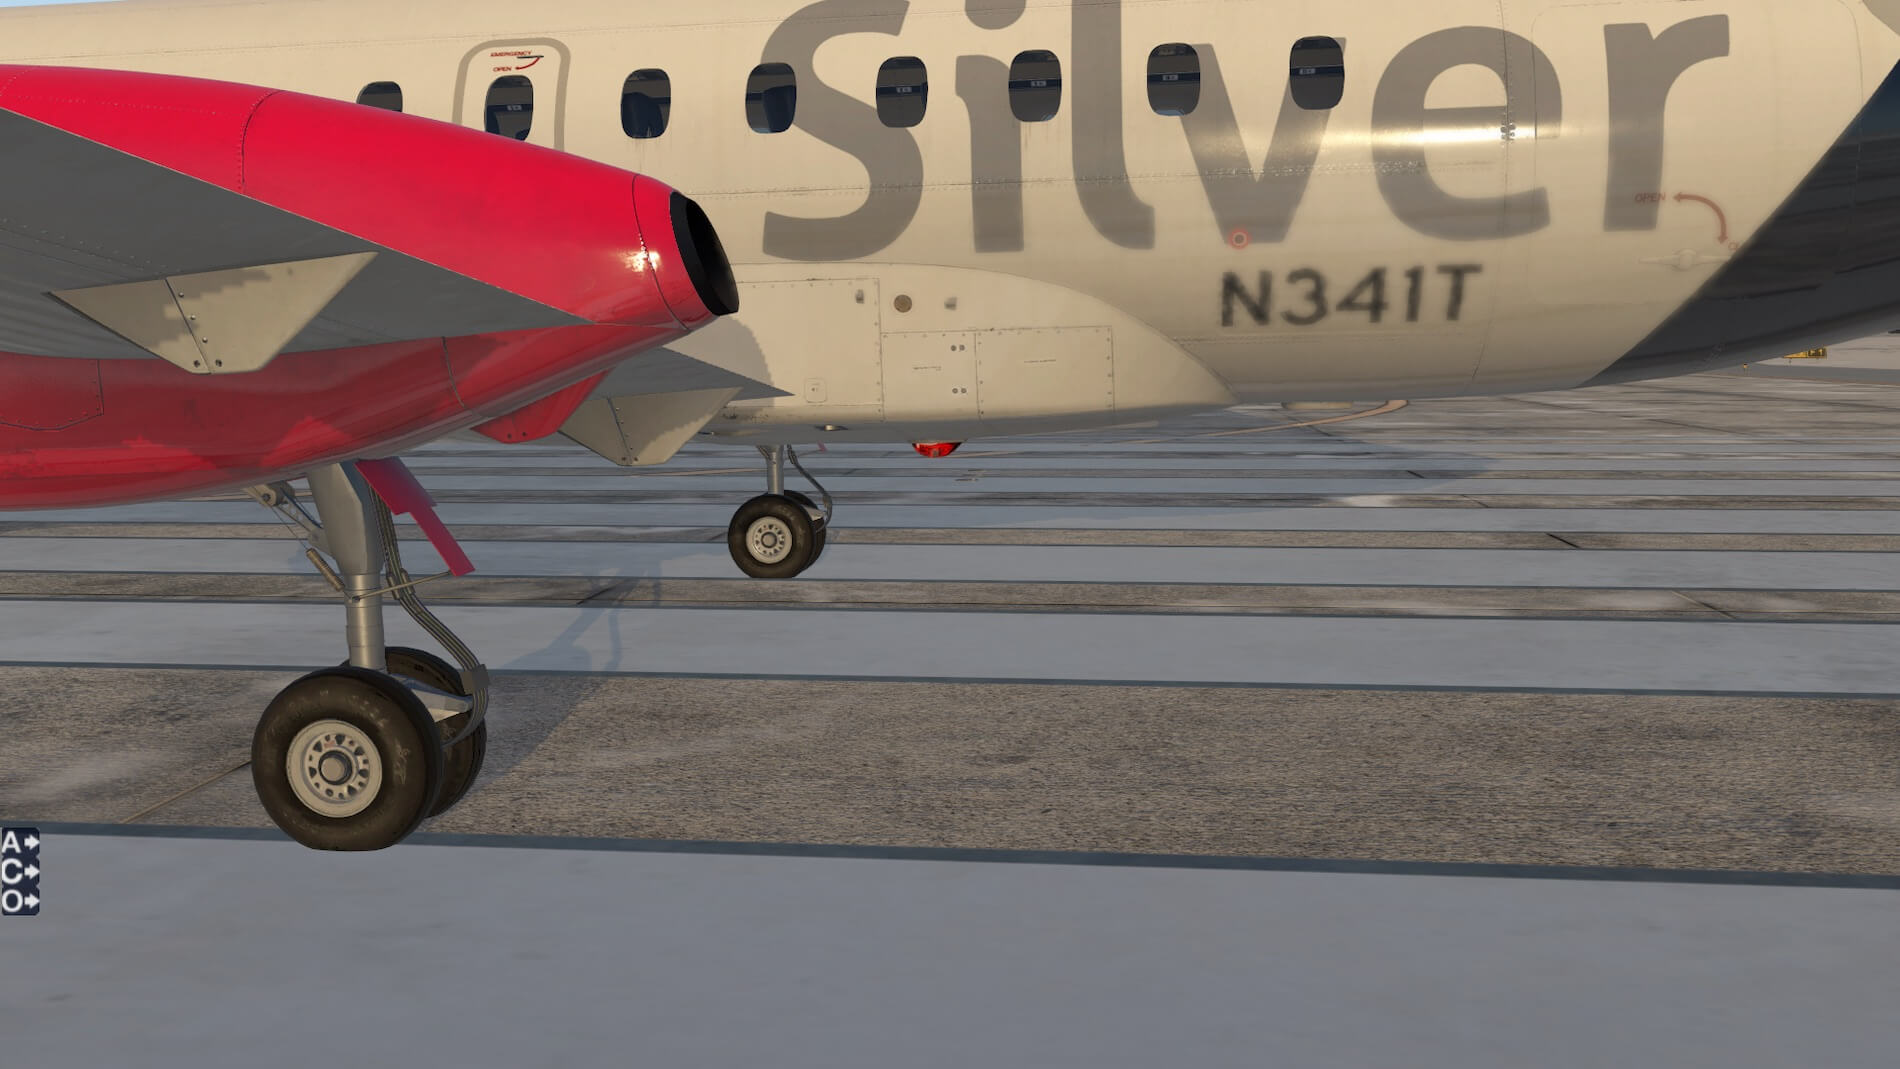
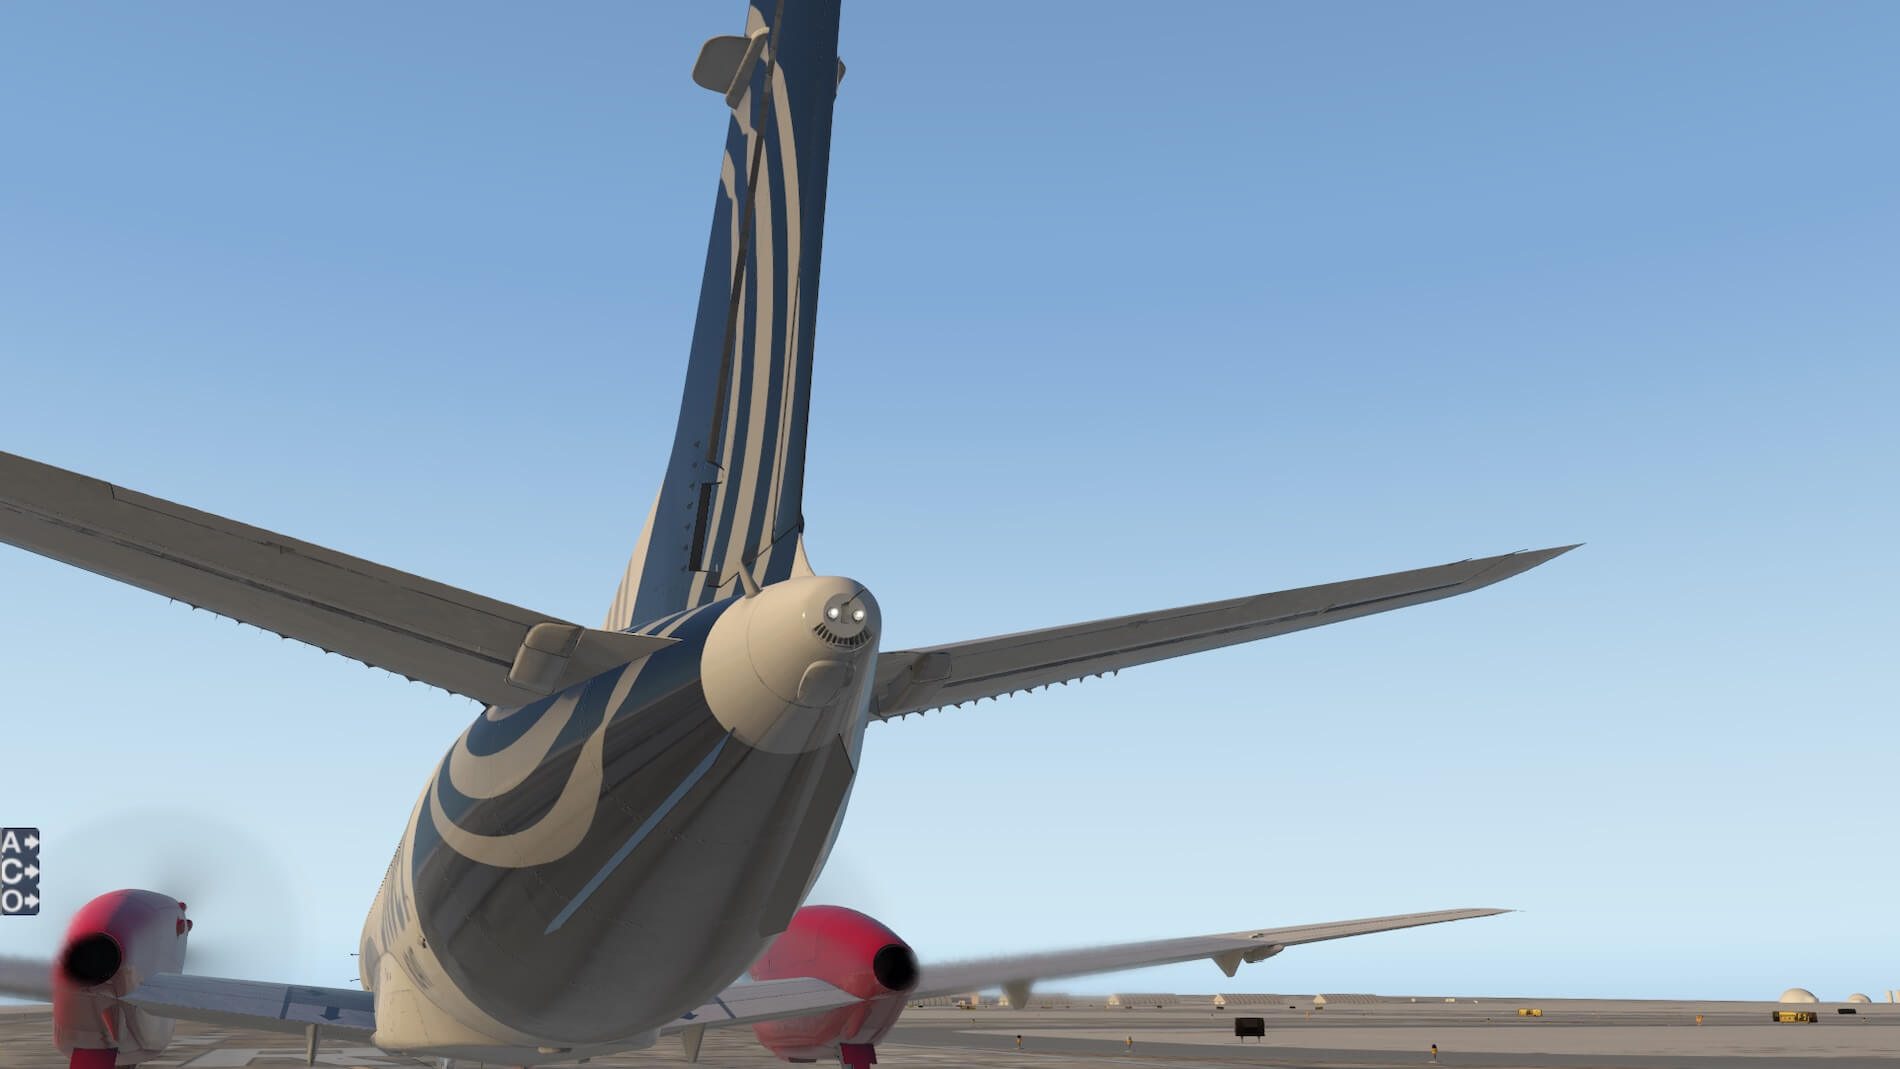
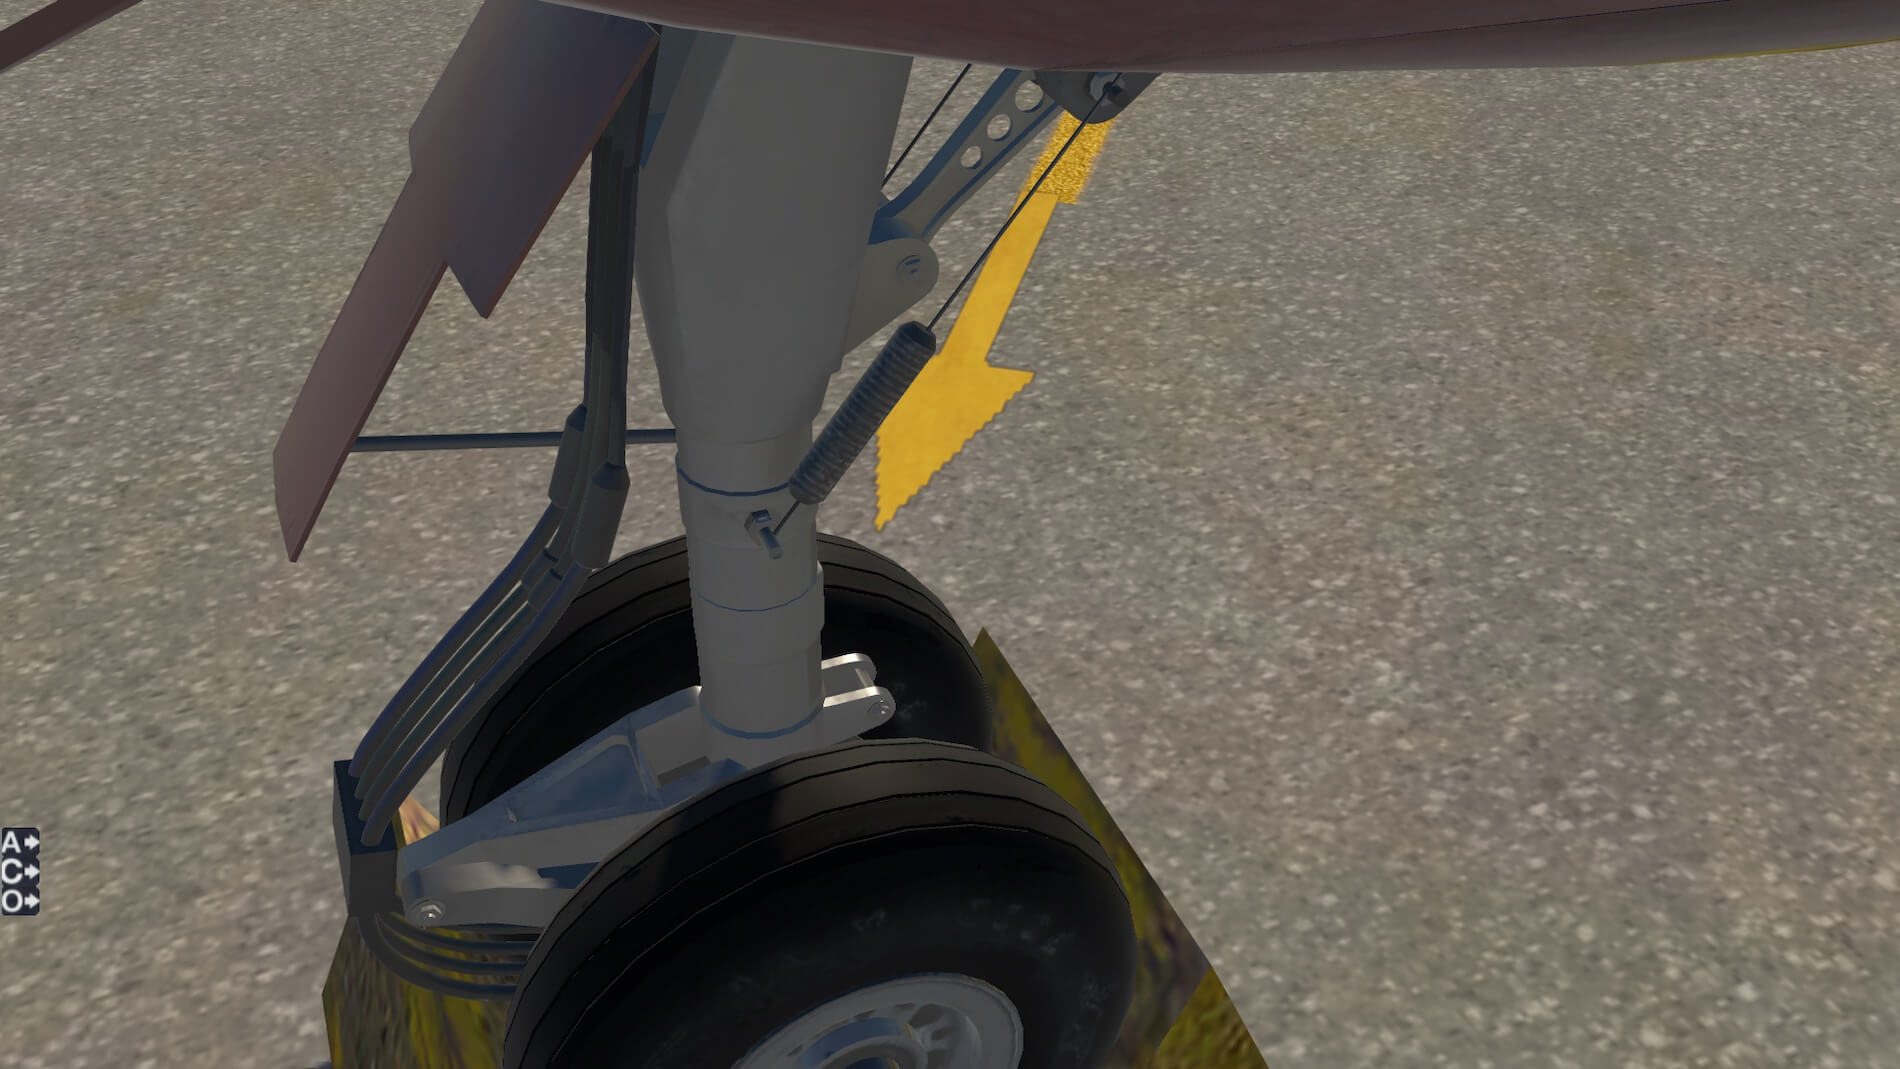
I like the detailed modelling around the landing gear and hydraulic lines, a lot of detail here. A look at the horizontal and vertical stabilizers also shows some of the exhaust effects from the engine. Note even the lightening stick on the aft of the fuselage! Looking at the aircraft from behind also shows the exhaust effects on the right wing from the starboard engine, and the aft navigation lights, even what looks like an air conditioning exhaust port. Finally, a look from the front of the aircraft, the taxi and landing lights are very well done – it’s an absolute pleasure to “walk around” this aircraft!


I have made further comments on the external visuals and details, including the air stairs, passenger and baggage doors and the GPU, in other parts of this review.
Internal Modelling
In looking at the internal modelling I decided to address this from two very different perspectives- the passenger and the captain – both very different roles, but due to the incredible work done on all of the interior (and exterior) I decided to bifurcate this internal feature portion of the review.
From a Passenger Perspective
Although this section deals with the internal modeling, I’m starting the passenger perspective as seen when approaching the aircraft, ready to board through the forward left door using the aircraft stairs (more on how these functions shortly). Having done this many times myself when boarding a regional carrier where an airbridge is not available- this for me is a moment of great anticipation!! I love aviation, and the excitement of being a passenger in an aircraft is only exceeded by actually flying one.
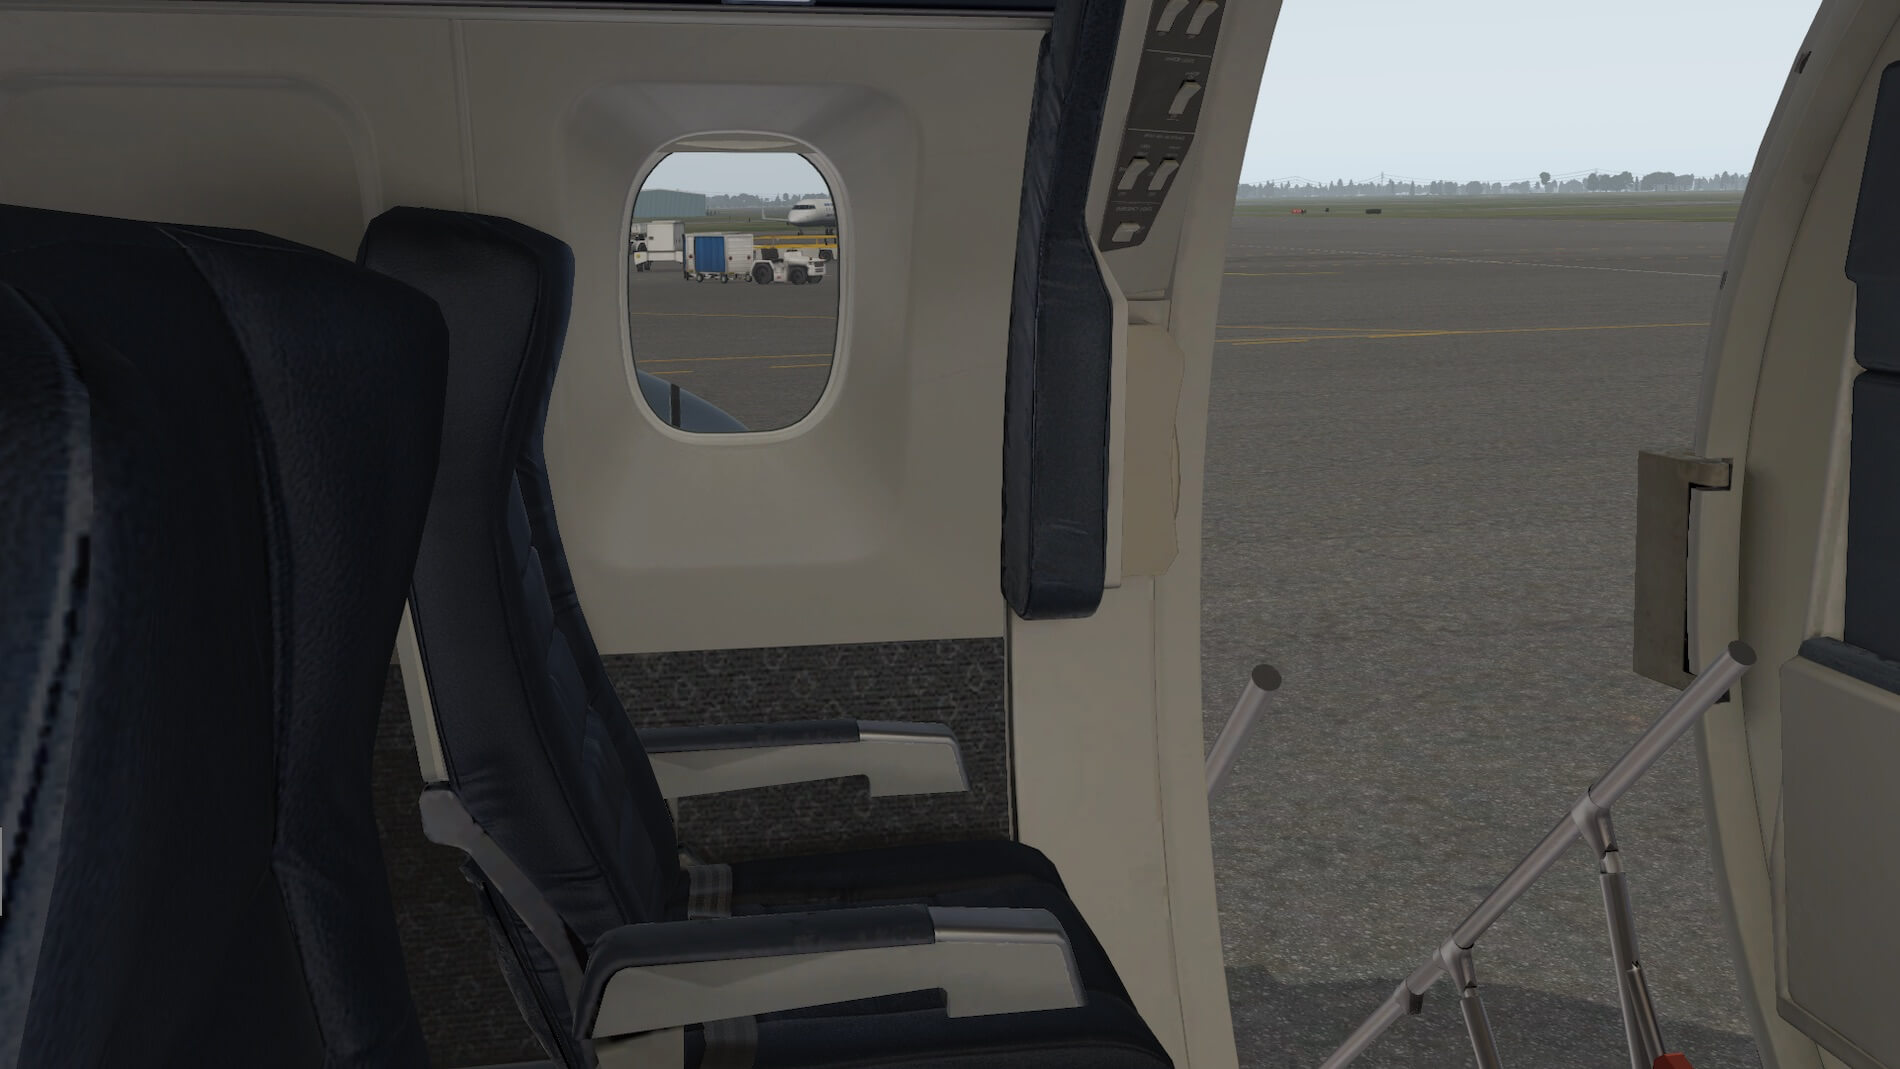
In this first screenshot (below) I can imagine the airport noise from other aircraft and ground vehicles and the smell of Jet-A fuel, as I walk towards this beautiful machine! Next, I have climbed the stairs and am looking inside through the front left door- here is where a flight attendant might be greeting me and checking my boarding pass, and I would be smelling that unique odor of the aircraft interior- sometimes supplemented by air freshening through the air circulating system.
I have to scratch myself to make sure I am not having a very pleasant dream! I can’t resist a look to the right and seeing the fuselage, admiring the engineering marvel that this aircraft is. And that propeller looks very close to my position- I’m sure thankful that it is not turning yet! One last look around, and as the passenger in front of me moves, I am finally inside the aircraft!
Amazing detail with the water taps, the cart locked away for take-off below and a waste bin to its left. The exit sign is clearly lit, as is the seat row and number- and that’s my seat! I’m in 1C- surprise, a window seat!


As I make my way to seat 1C, I look at the other passengers in their seats- some seats are yet to be filled. I barely hear the flight attendant (F/A) pointing me to my seat as I steal a glance to the left- I try to impress this image of the flight deck into my memory, since I won’t get to sit in there on this flight!! I’m always impressed by how much brightness there is from the various lights that are on, and the semi-glass avionics.
I see a back-up AI and note that it is not aligned yet. I have also noted that most of the passengers ahead of me haven’t even looked at the flight deck at all and I wonder how they can ignore it- don’t they have some driving urge to look at everything in this aircraft? I also note where the restroom is. The next screenshot is me sitting down in seat 1C, I will be looking directly at the F/A when she is seated.
I go to look out my window and note that the previous passenger had the window shade pulled down- why would someone opt to not be looking outside? That shade needs to go up, as the next two screenshots show.


It appears as though everyone is boarded, the F/A has left her post at the door and is checking on making sure that carry-on baggage is correctly stowed. I can now see outside the forward left door- the excitement is building! I note the passenger in seat 1A is trying to figure out how to recline the seat-back. Ah- he’s figured it out, he now looks very comfortable in his reclined seat- too bad that the F/A will make him return it to the upright position prior to take-off.

I see that while we are waiting for the F/A to make sure that everything is stowed OK, that the seat behind me is vacant. I can’t resist quickly excusing myself to the adjacent passenger and jumping into 2C. I note a tray table which I pull down- oh the experience! I look across and note that someone in 2A has seen me and has pulled down their tray table too, and that 1A passenger still has his seat reclined!


We all get admonished by the F/A, I get back into my seat after closing the tray table, and the 1A passenger reluctantly restores his seat to the upright position.
I look above me and see the light and F/A call switches- I can’t resist- first my light, then the one for the guy in 1B, and -yes- the F/A call button too. I just tell the F/A that I am helping her in making sure that everything works!
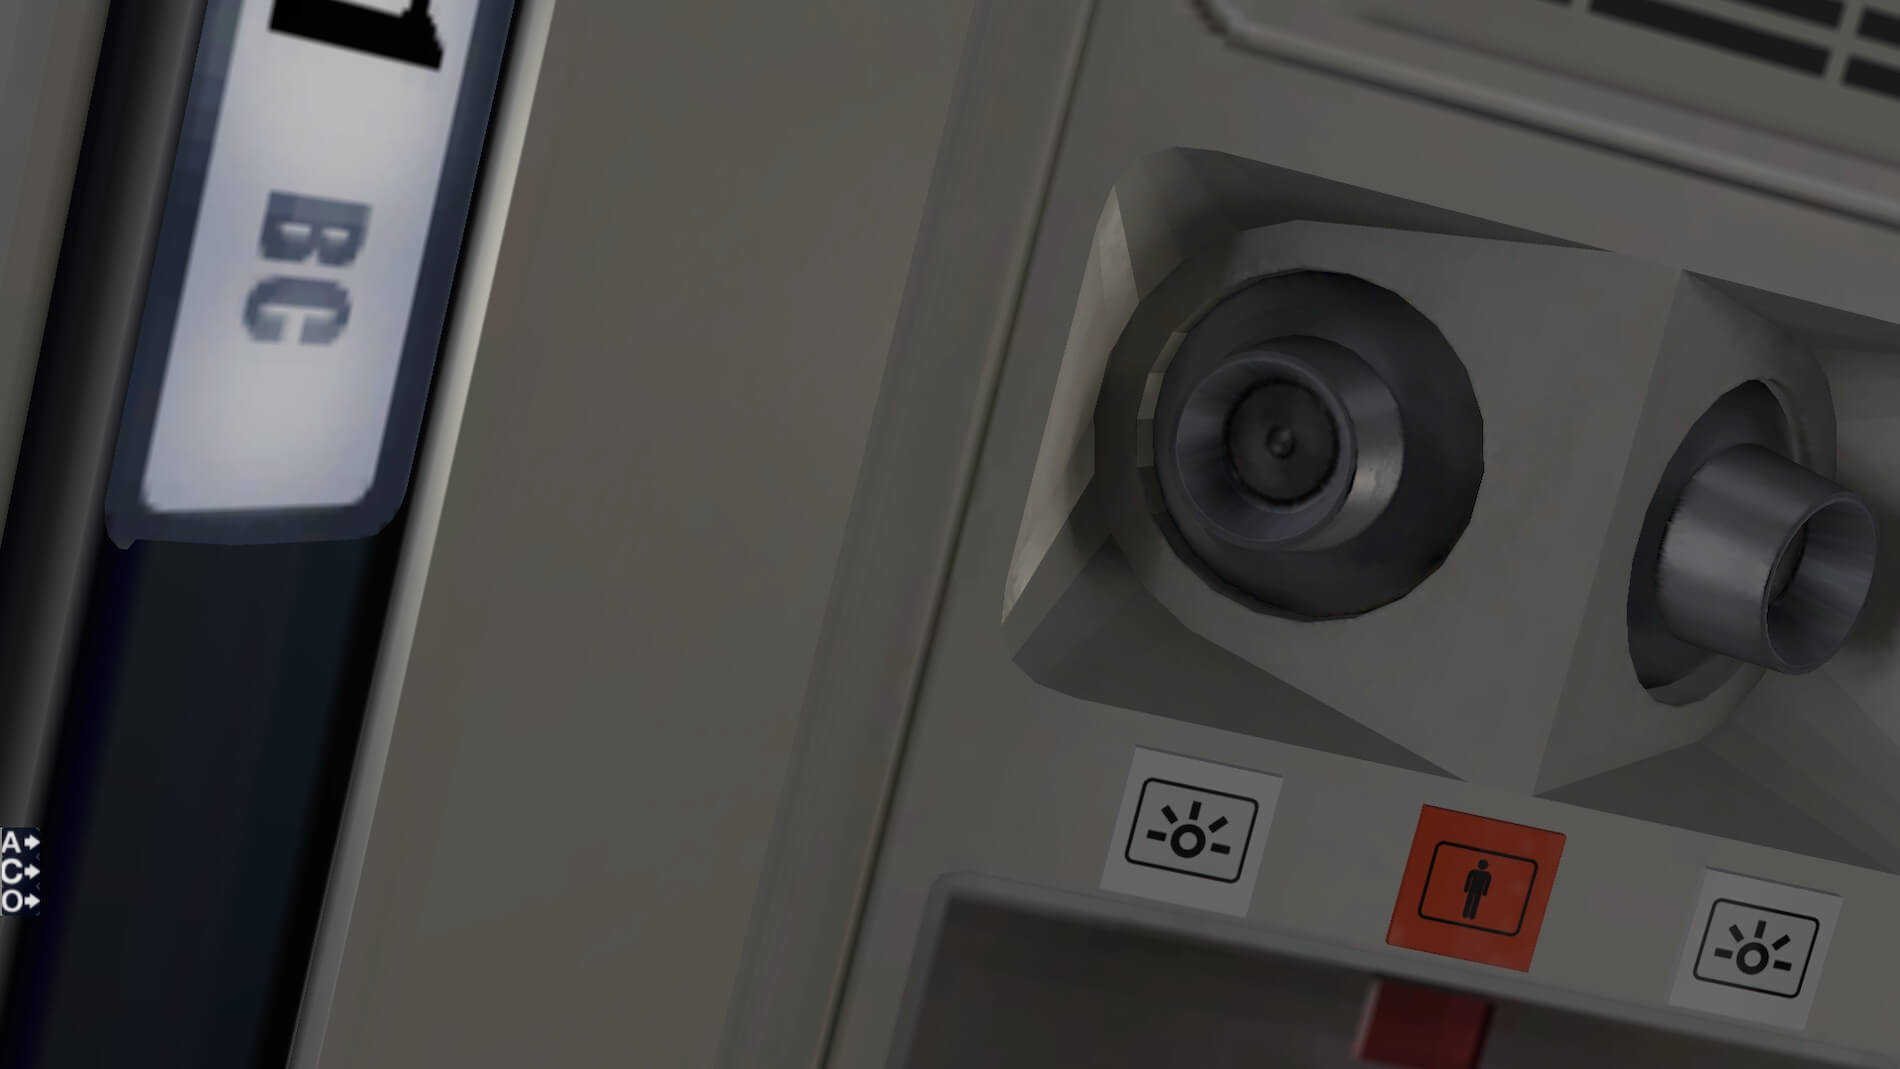


OK, I’m having a bit of fun and acting like a 5-year-old, but I must admit some of that 5-year-old is still with me when I fly as a passenger! I wanted to show that every seat has individually moveable window shades, reclining seats, tray tables that fold down, reading lights and FA call buttons. It’s just as satisfying being a passenger in this addon (well, almost!) with all the individual animation of features that would be movable on the real aircraft.
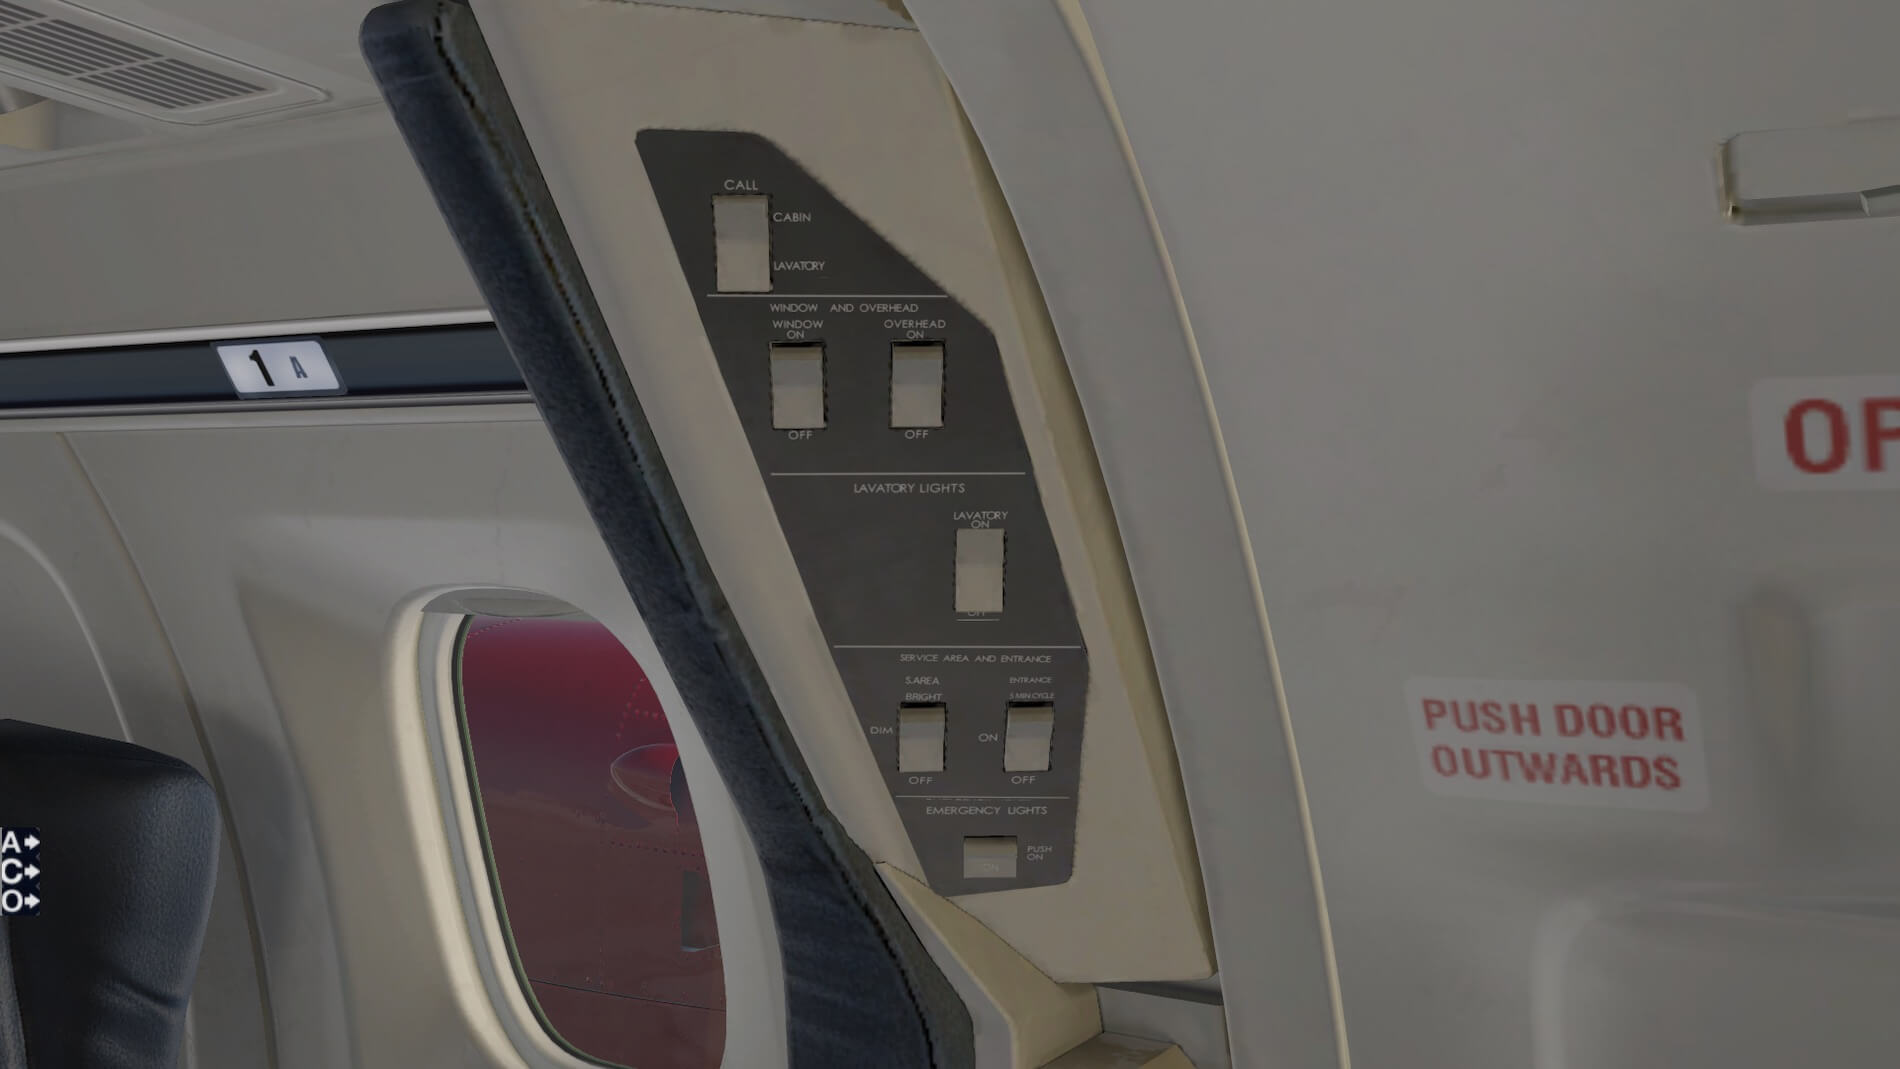
But- there’s more. By the passenger door there is a flight attendant station (shown below). This has the ability to turn off any FA call button light (just as in the real aircraft), and can control lighting in the cabin. The above-window and overhead lighting is amazing, it produces a soft indirect look to the lighting that is actually experienced on real aircraft.


From a Flight Deck Perspective
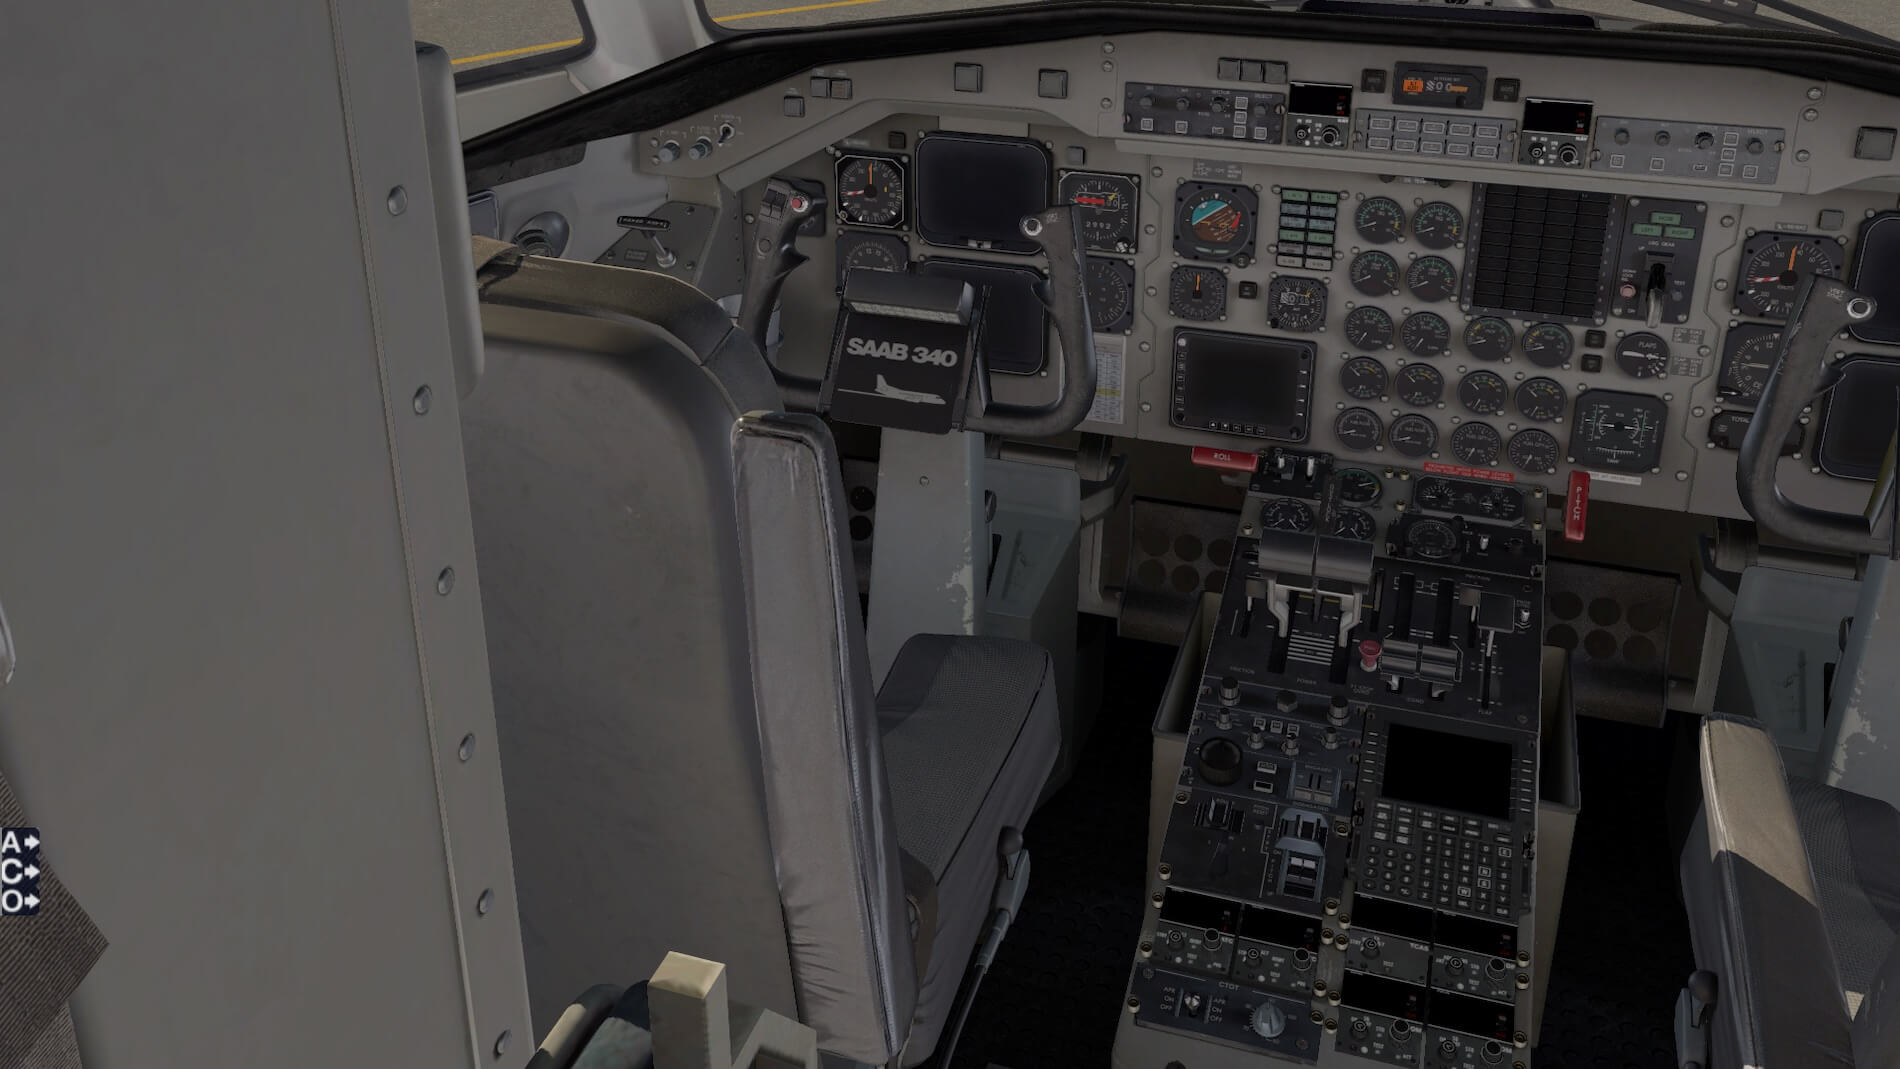
I refer to a lot of the functionality of the flight deck modeling in the flight that I document further down in this review. However, to state here briefly, there are gimballed 3D lights on the flight deck, both captain and first officer seats have moving arm rests, fully articulated sun visors and the jump seat moves for stowage, or when deployed is blocking the egress to/from the flight deck (I believe in the real world aircraft that the jump seat can only be deployed when the flight deck door is closed).
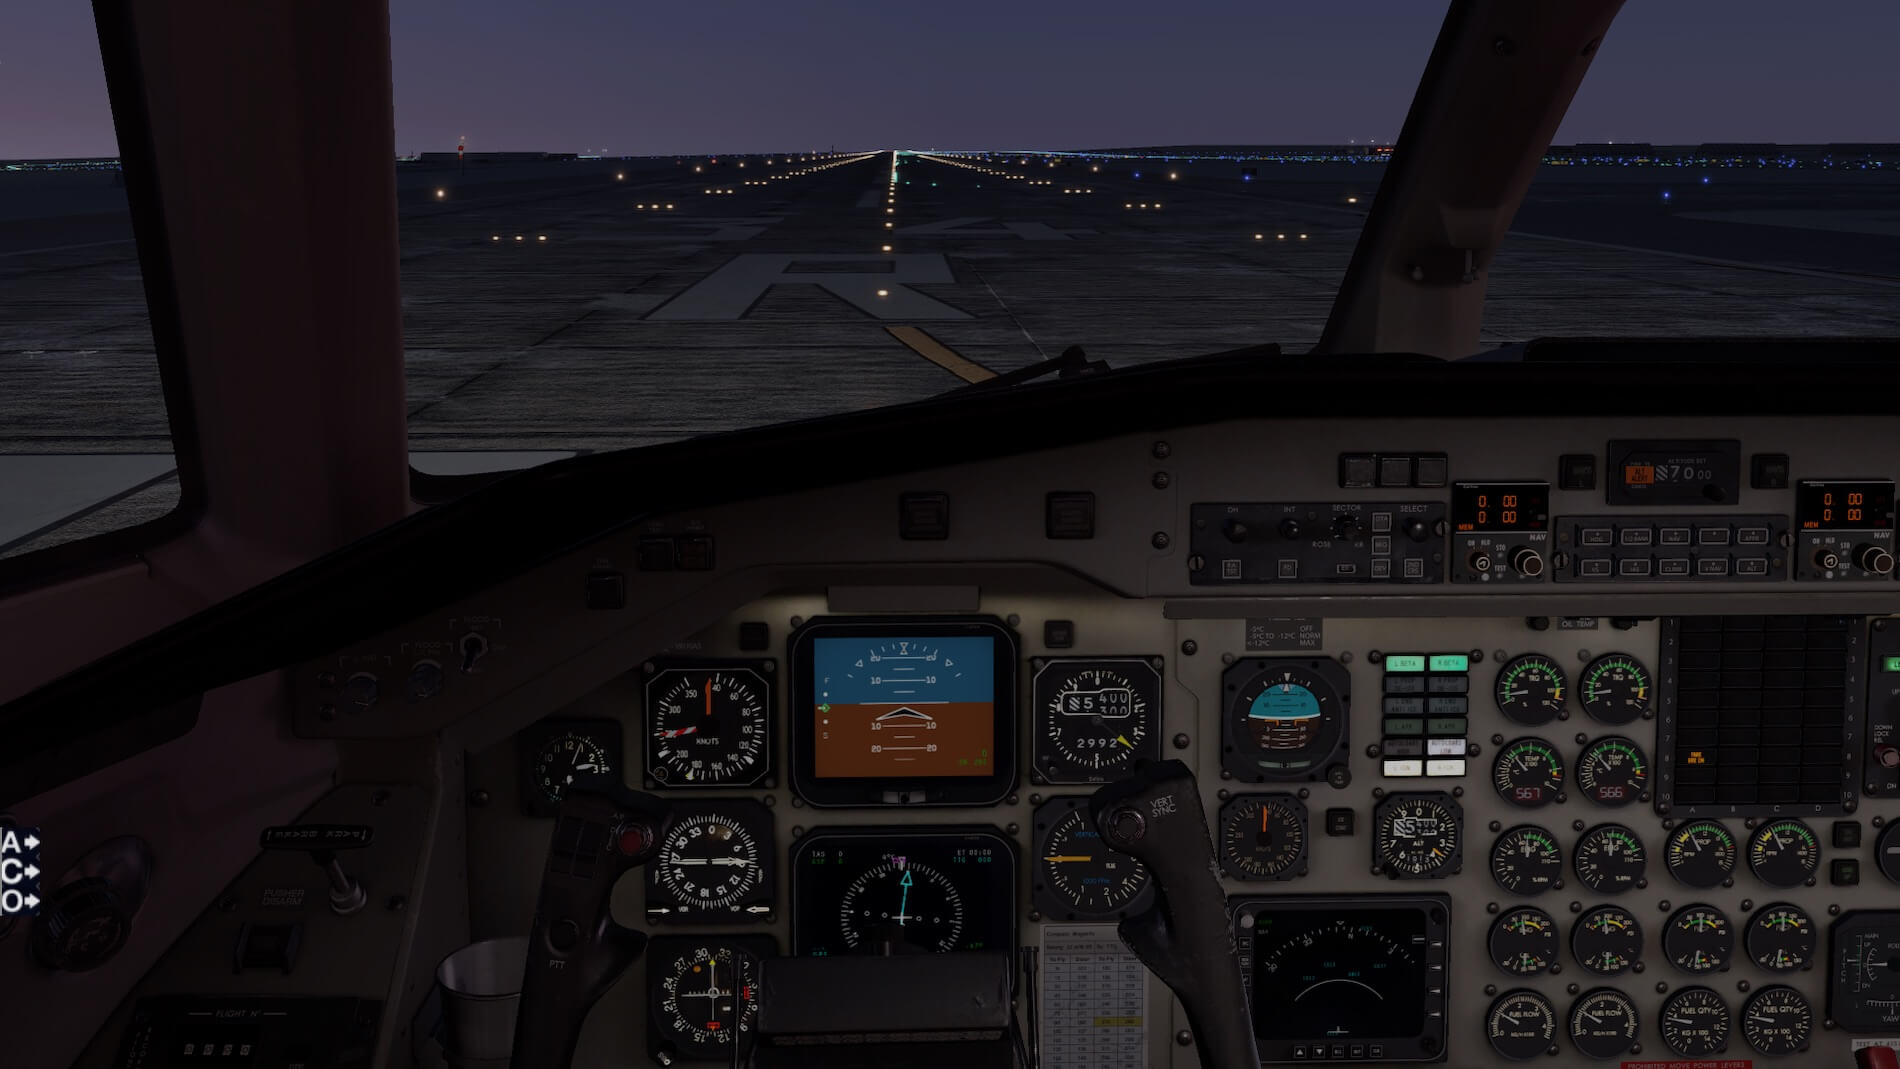
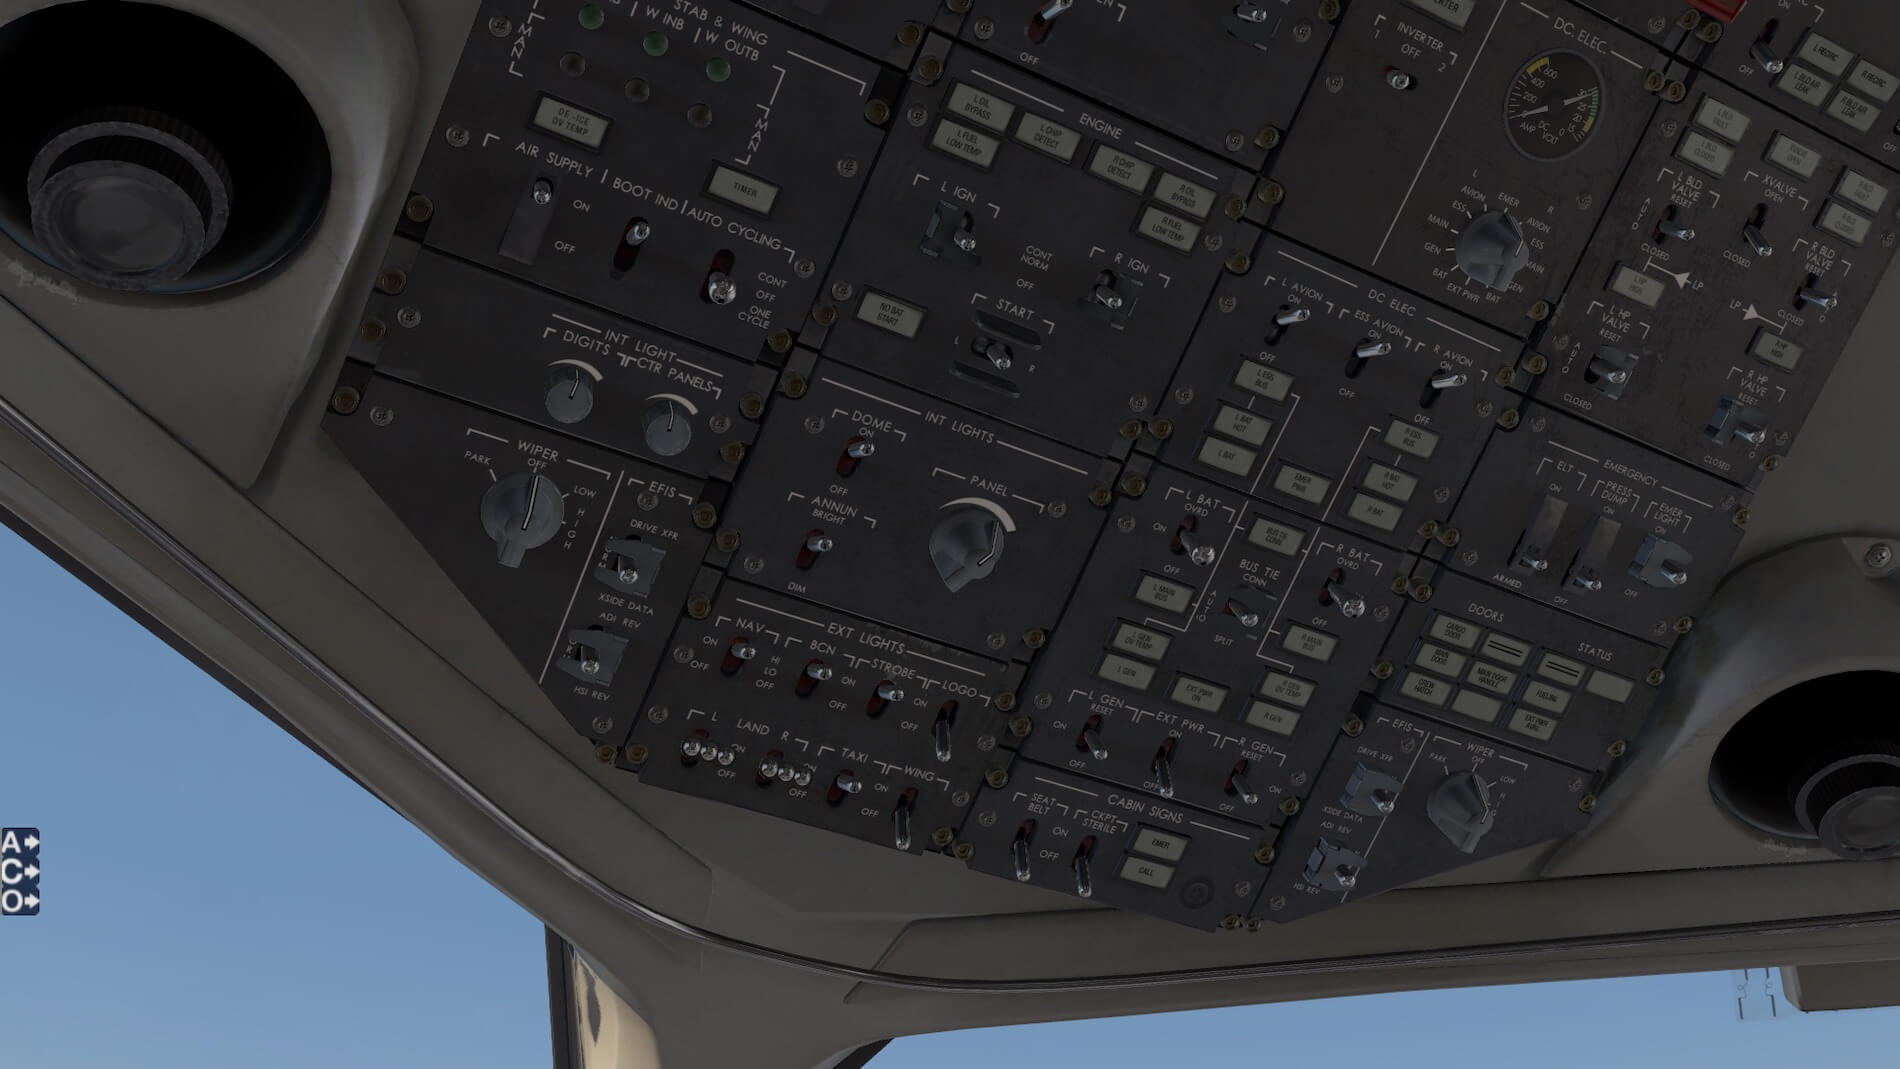
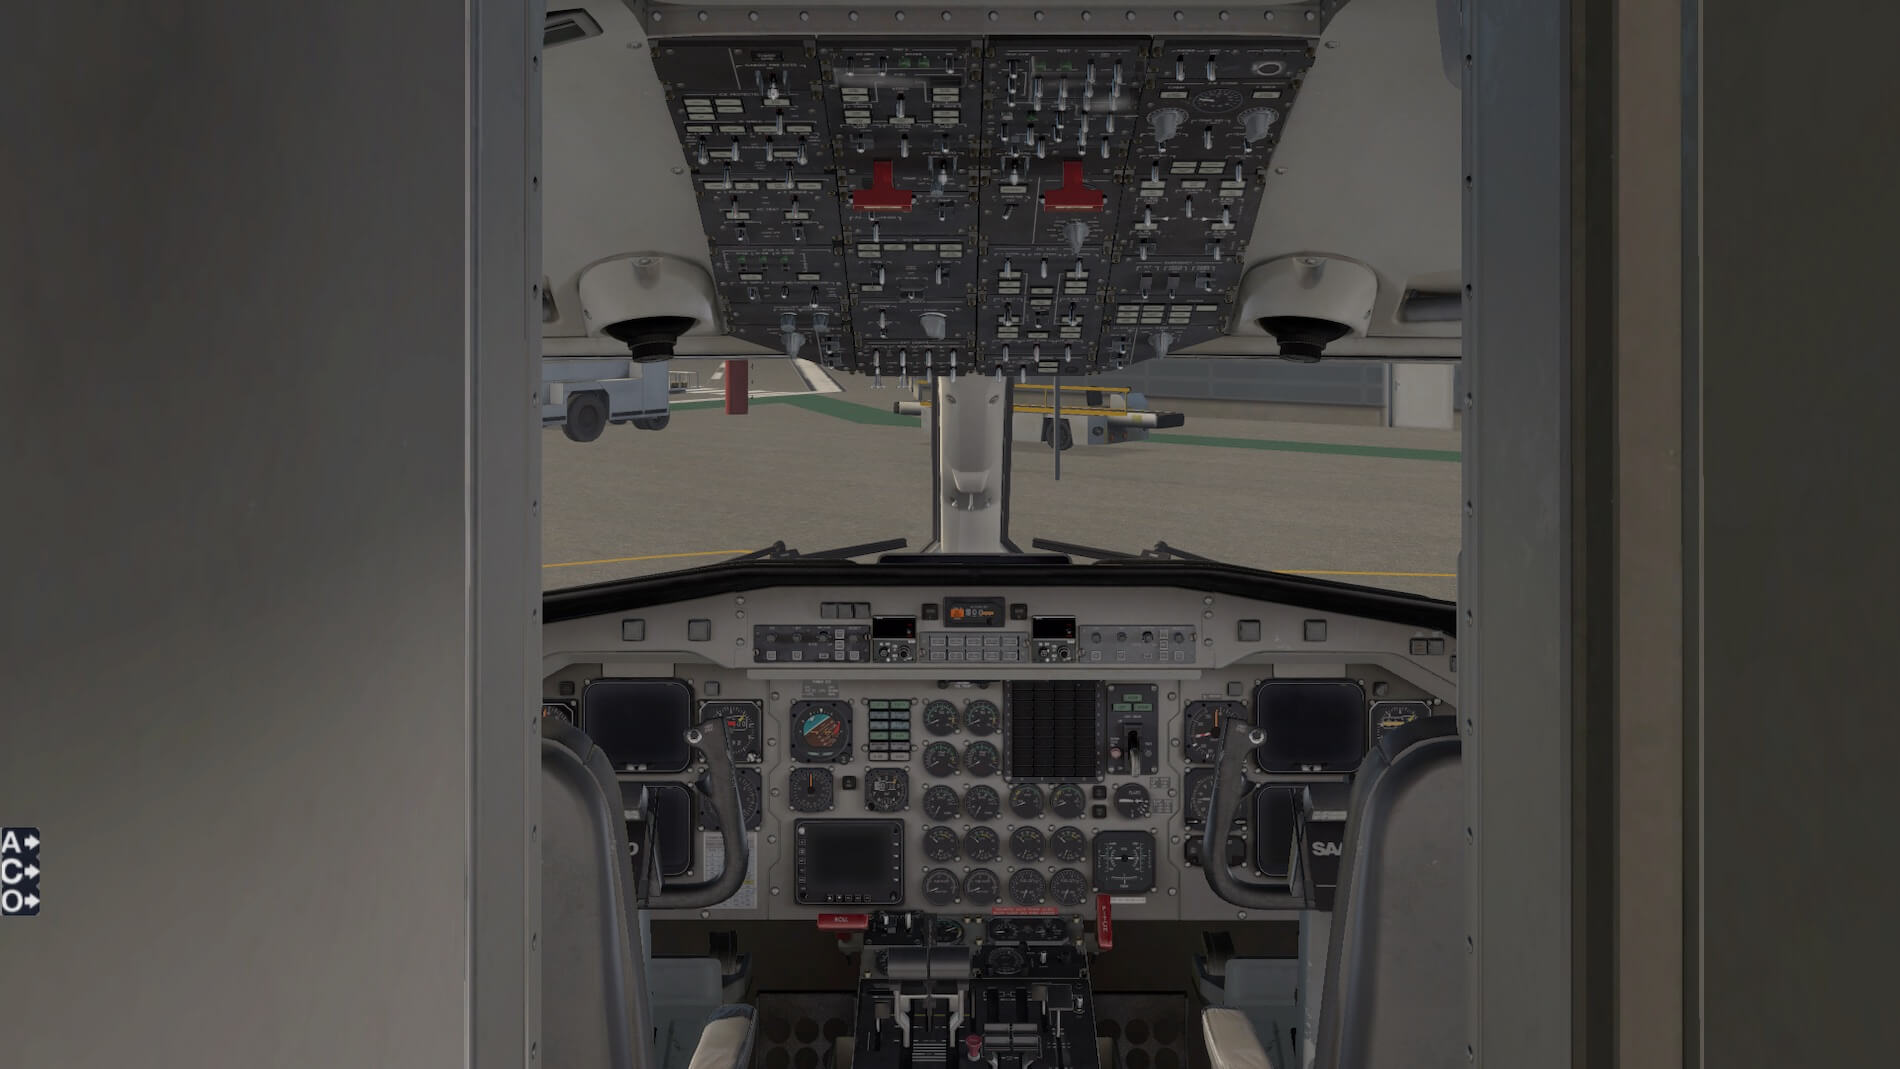
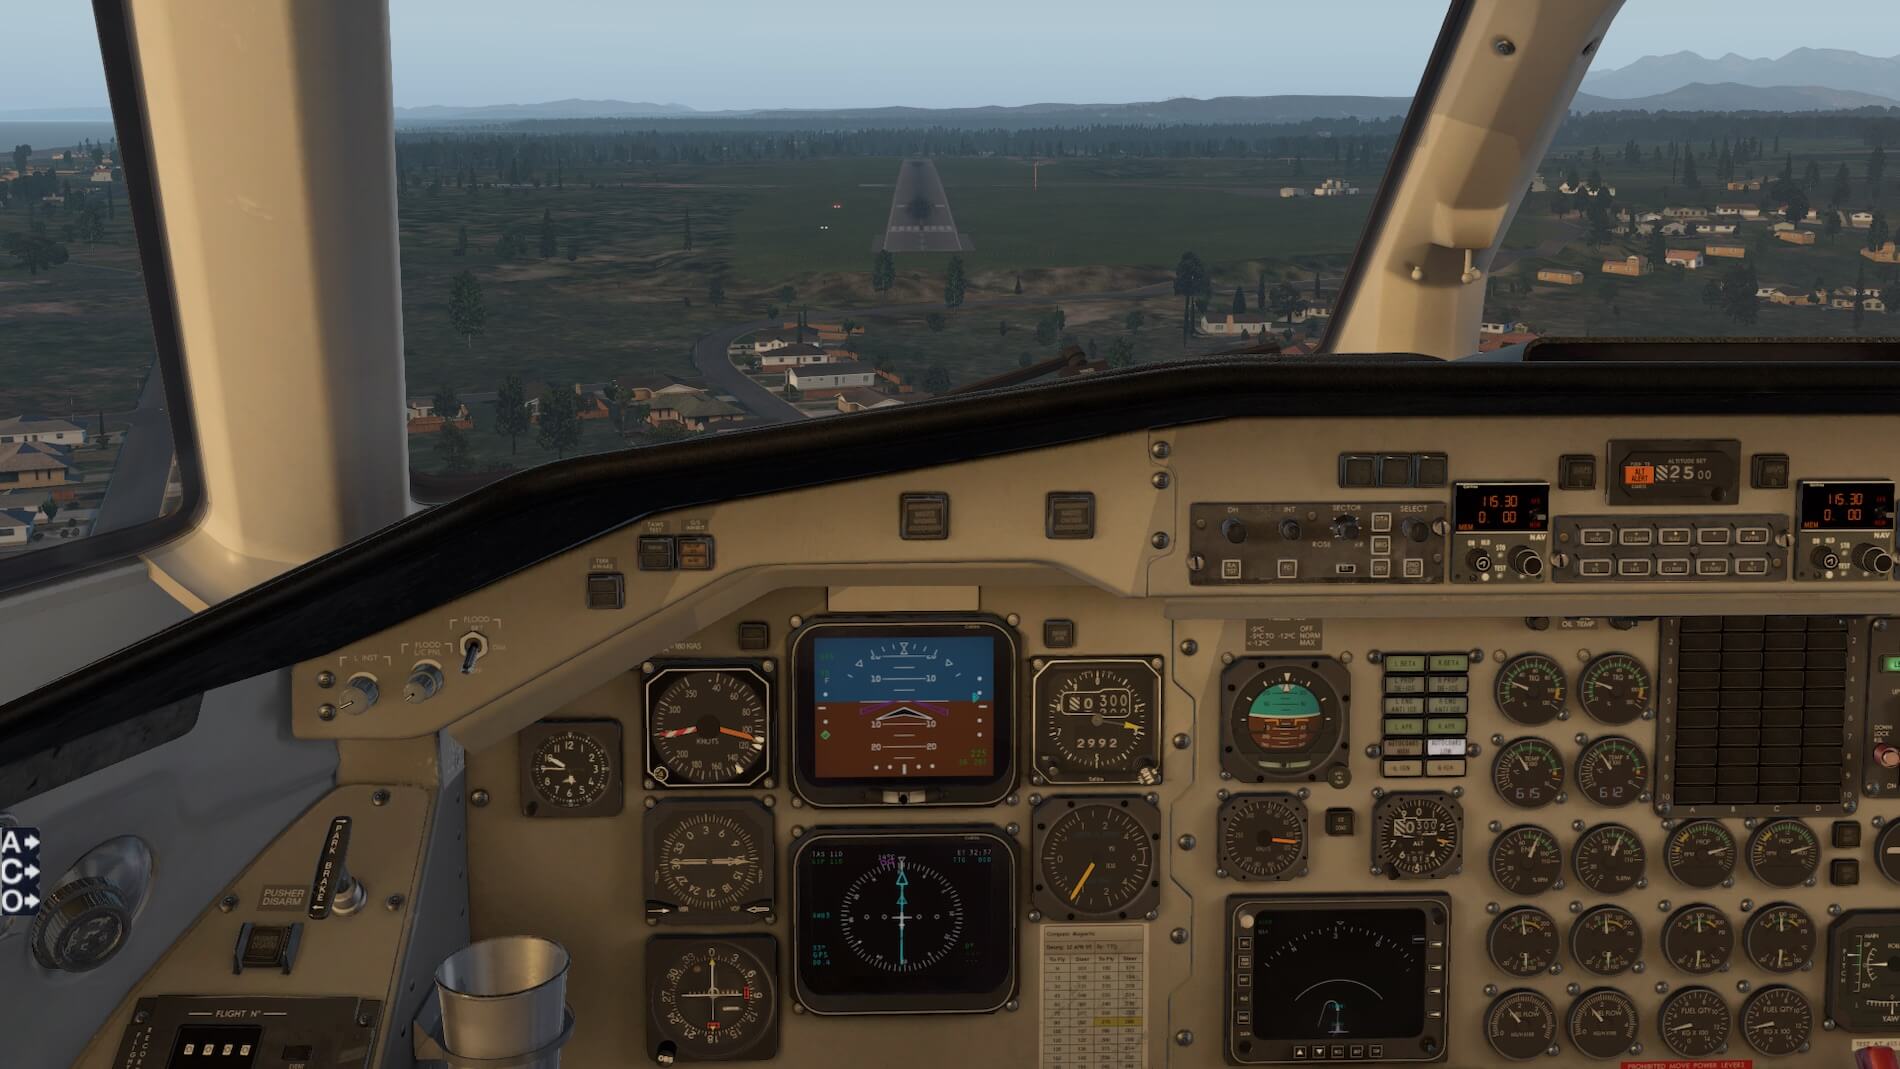
While I show much of the flight deck later as I fly the aircraft, some shots showing lighting and texture. First looking out the front window with the cockpit panel directly in front of me in the daytime. Next the same shot at dusk with lighting applied to the panel via several independent controls that effect gauge and panel lighting separately. Next a day-time look at the overhead panel followed by a night-time view of the same- once again there are several lighting controls that affect different lighting that can be individually controlled (the controls are also shown).


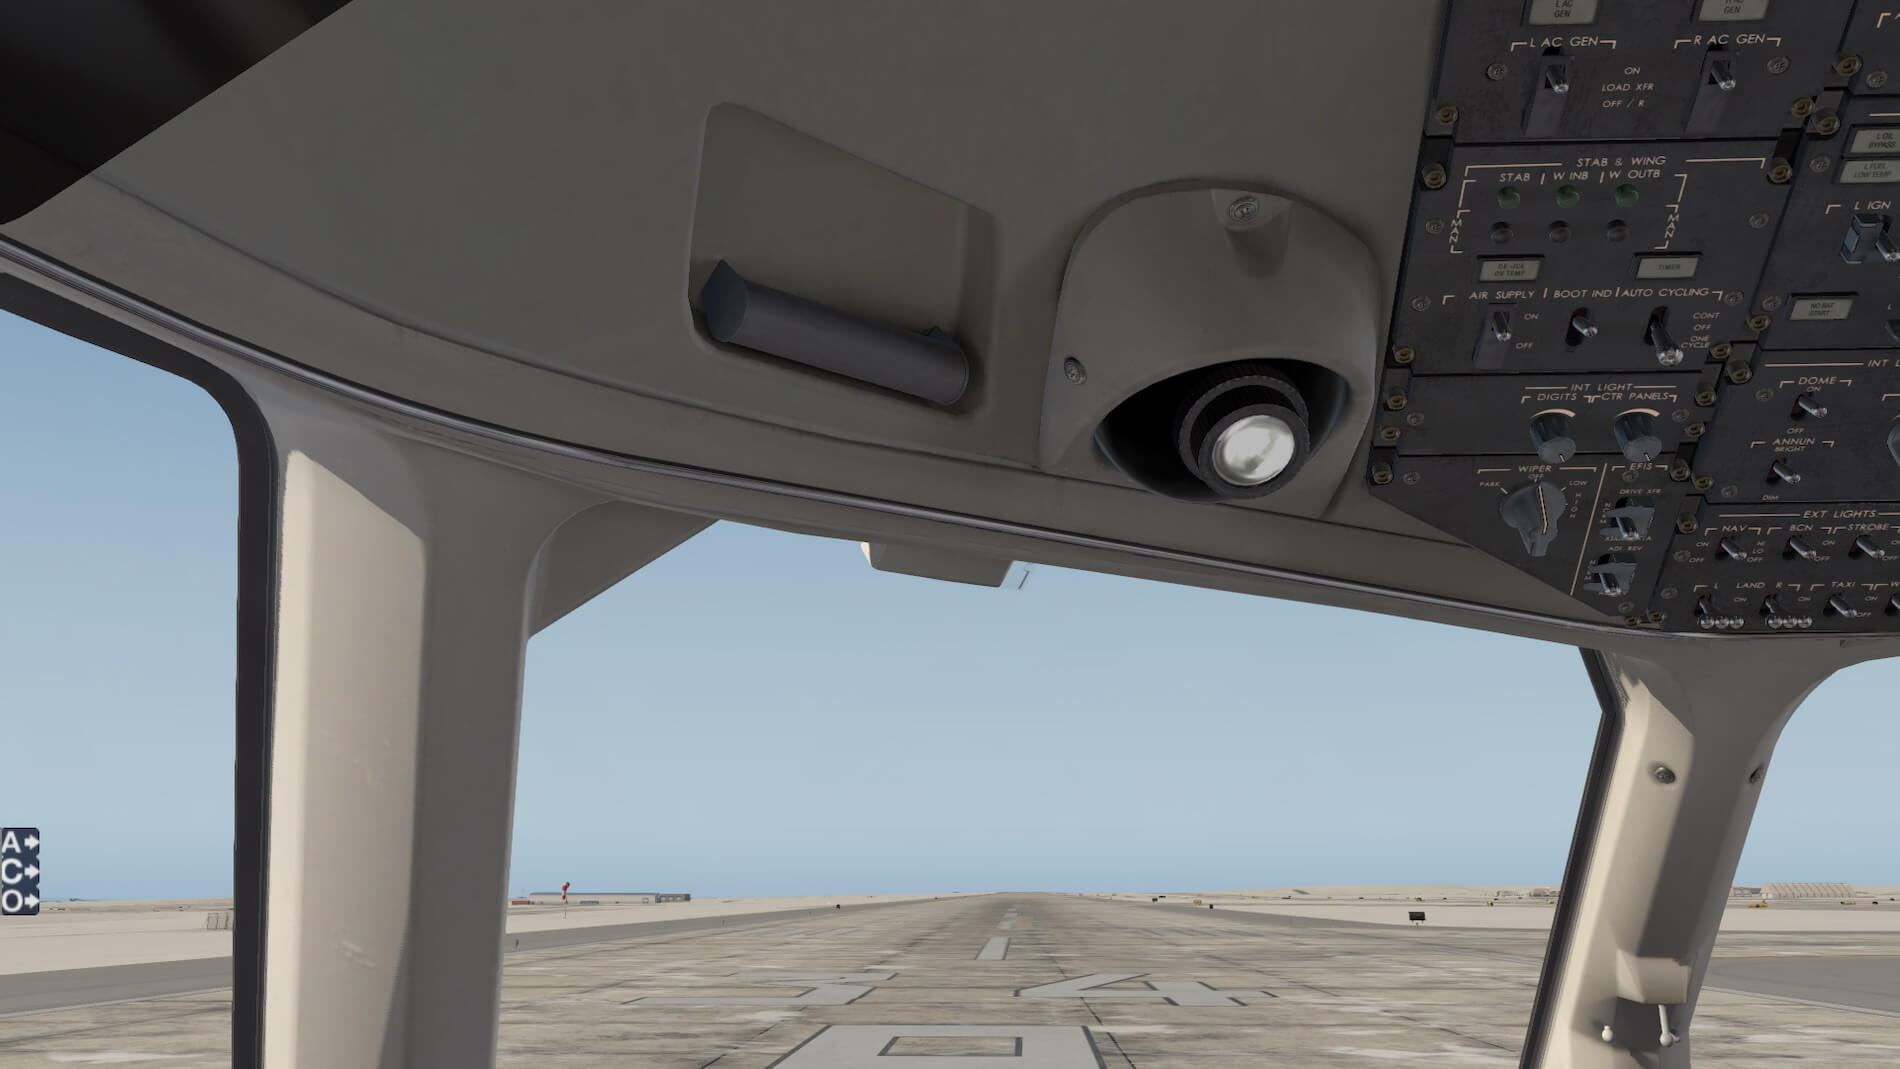
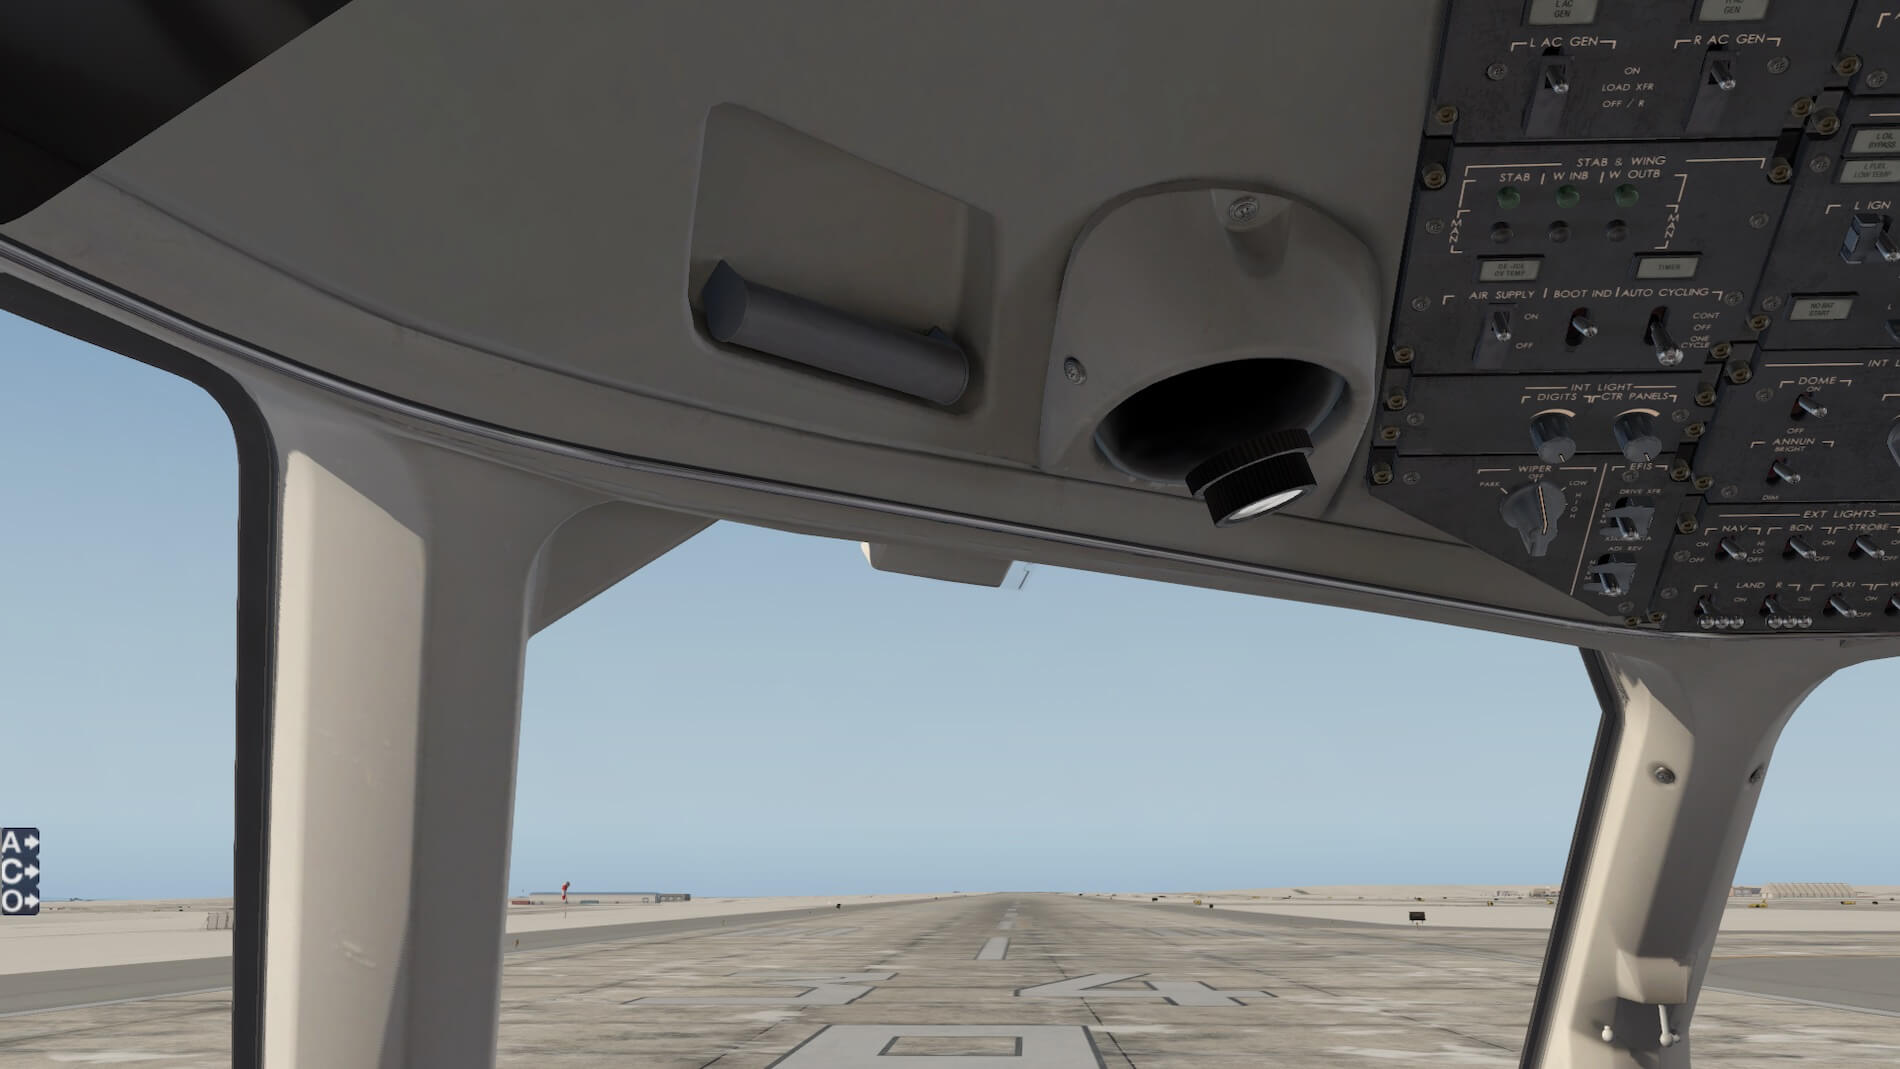
Finally, a look at those gimballed lights that are individually adjustable. I’ve shown 3 shots of the one above the captain’s head, in various random positions.

Systems
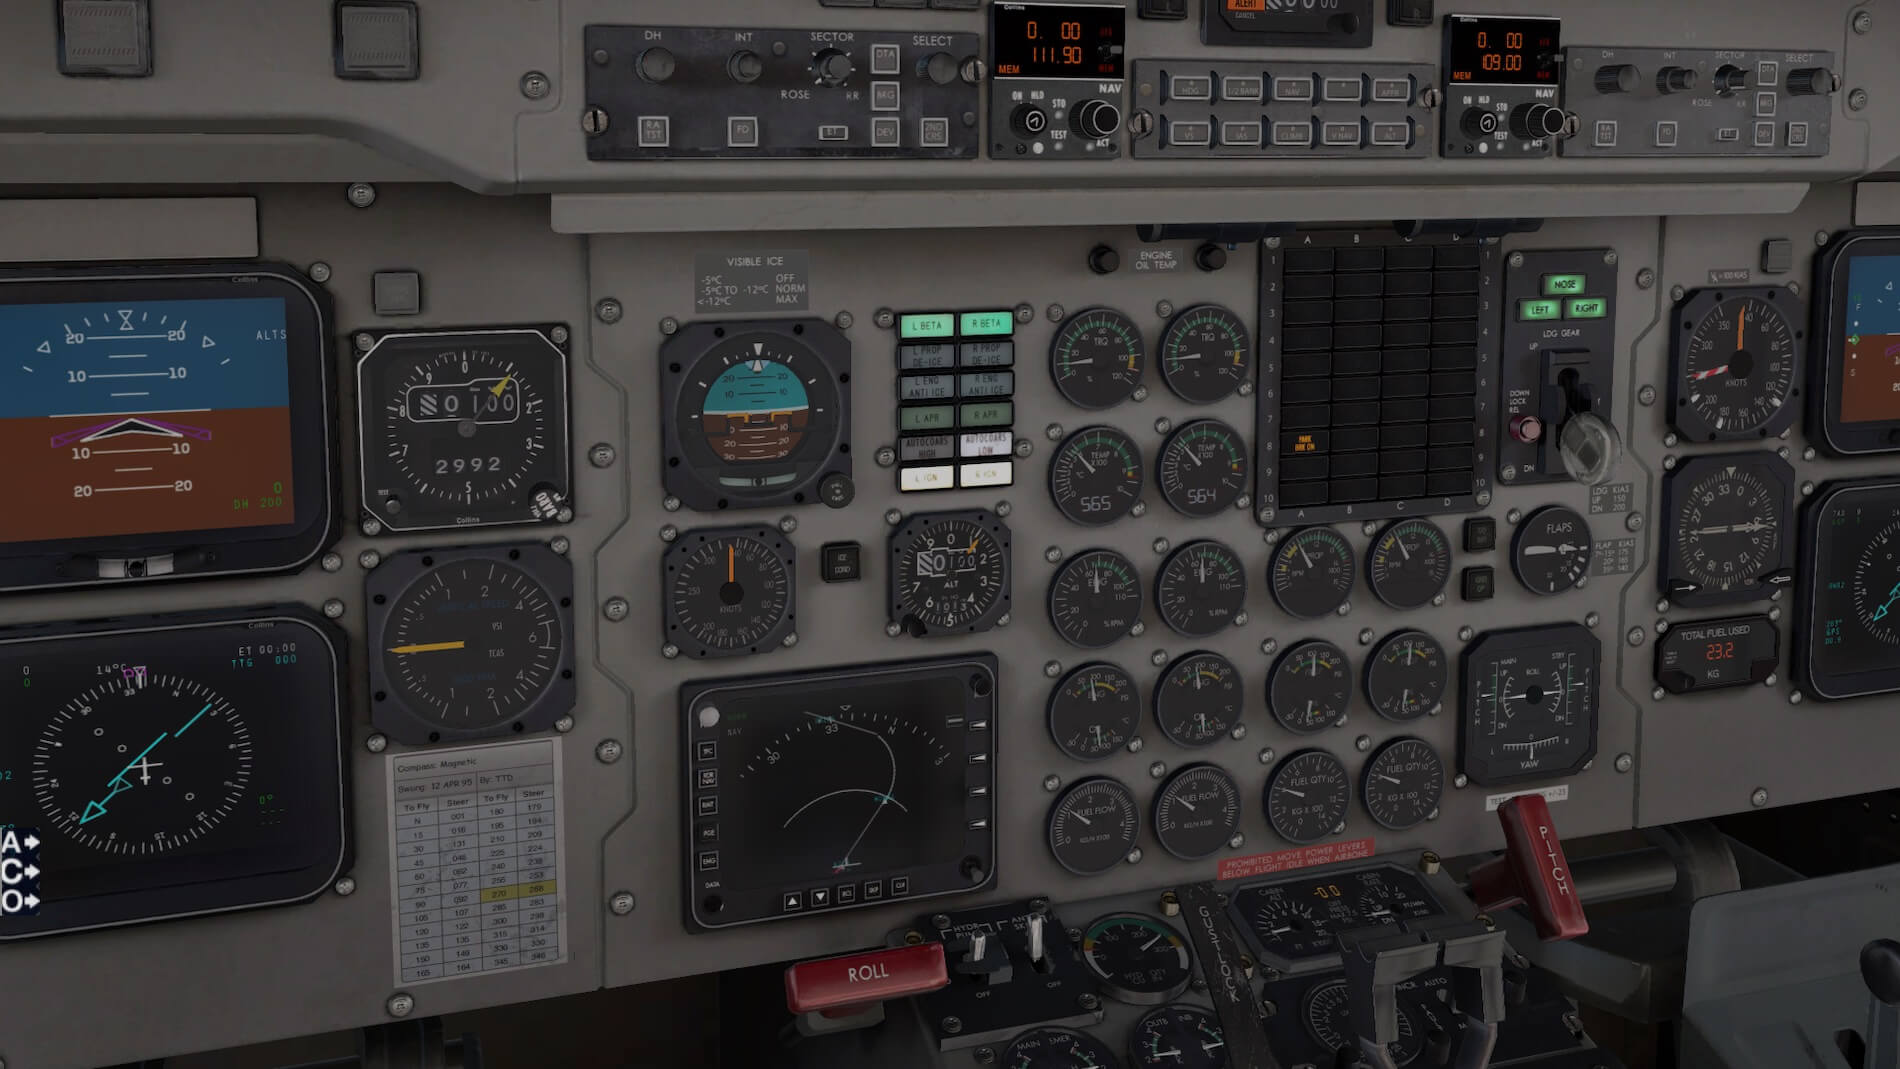
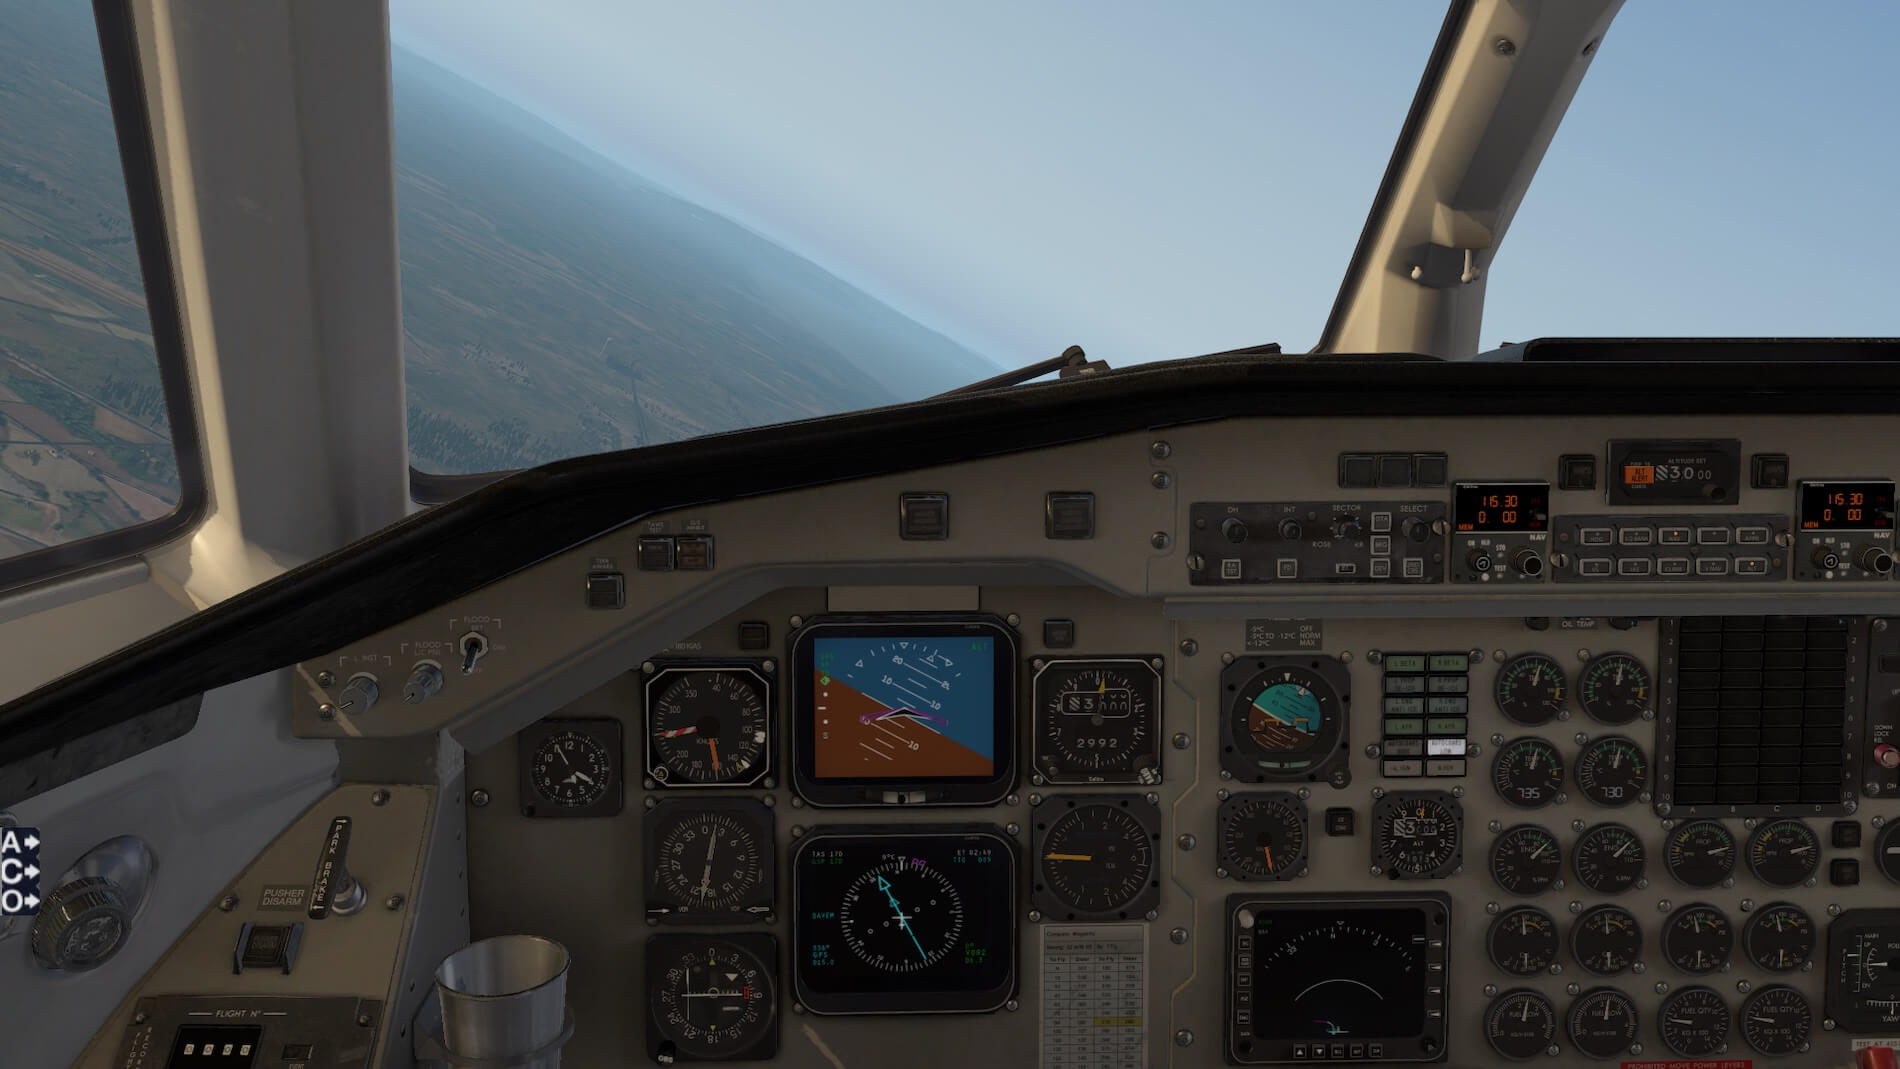
The systems on this aircraft reflect the early “semi-glass” period (similar to the B757/767), where the ADI and ESHI (fore-runners of the PFD and MFD) were new replacements to traditional “steam gauges”. While the X-Plane FMS may not be entirely accurate in the avionics suite, it does give a basic FMS functionality to the aircraft. I have not tried the GTN750 as it is currently only for Windows and I am on a Mac, however it would be no doubt a more relevant addition to the avionics if retrofitted at this time.
The systems as modelled here provide a more than adequate amount of depth for the simmer. One item that I see on the Carenado forum at X-Plane.org is the fact that the panel lighting does not cut out when the engines are started (as occurs with the real-world aircraft). This is so to avoid yet another layer of lighting modeling that would adversely affect frame rates.
I have assigned two of my yoke switches to “Beta” and “Reverse”. I do find that when entering beta that the throttles need to be moved in order to simulate the full beta range. Beta, and sometime reverse, is required to avoid over-speed on the ground when taxying.
Sounds
Turbo-props offer an awesome sound environment due to the speed that the engine and propeller is running at and the extensive modes that are available to best maximize the efficiency and function of the prop. The sounds in this model are fully 3D and I love the sound of takeoff when I have moved the throttles from idle to take-off power.
I have long believed that sound is a big factor in providing good immersion, and this Carenado model certainly does well on that score. I can hear no looping or other artifacts. I love the way that the noise of passengers talking fades to a lower volume when the flight deck door is closed, and external noises are also attenuated when closing the passenger door.
Frame-rates
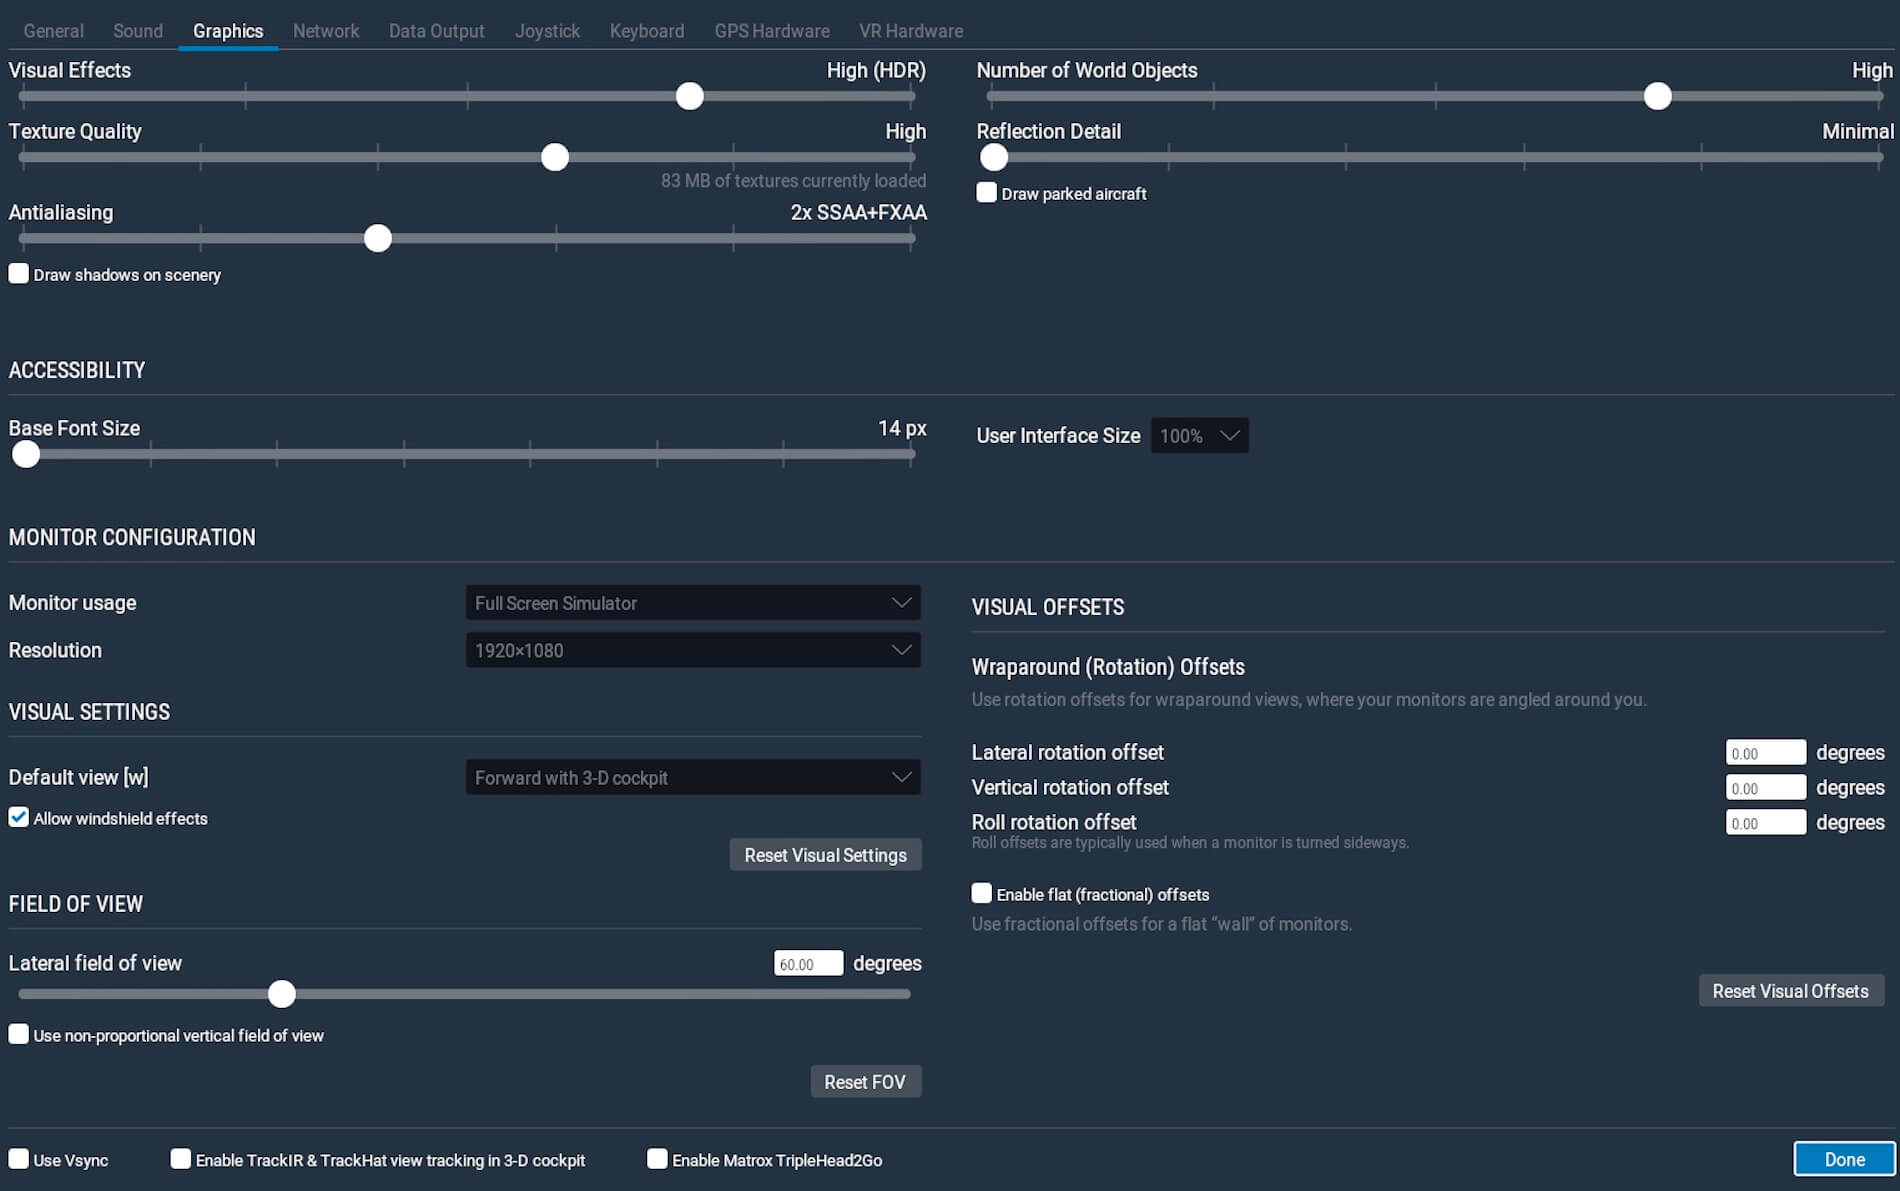
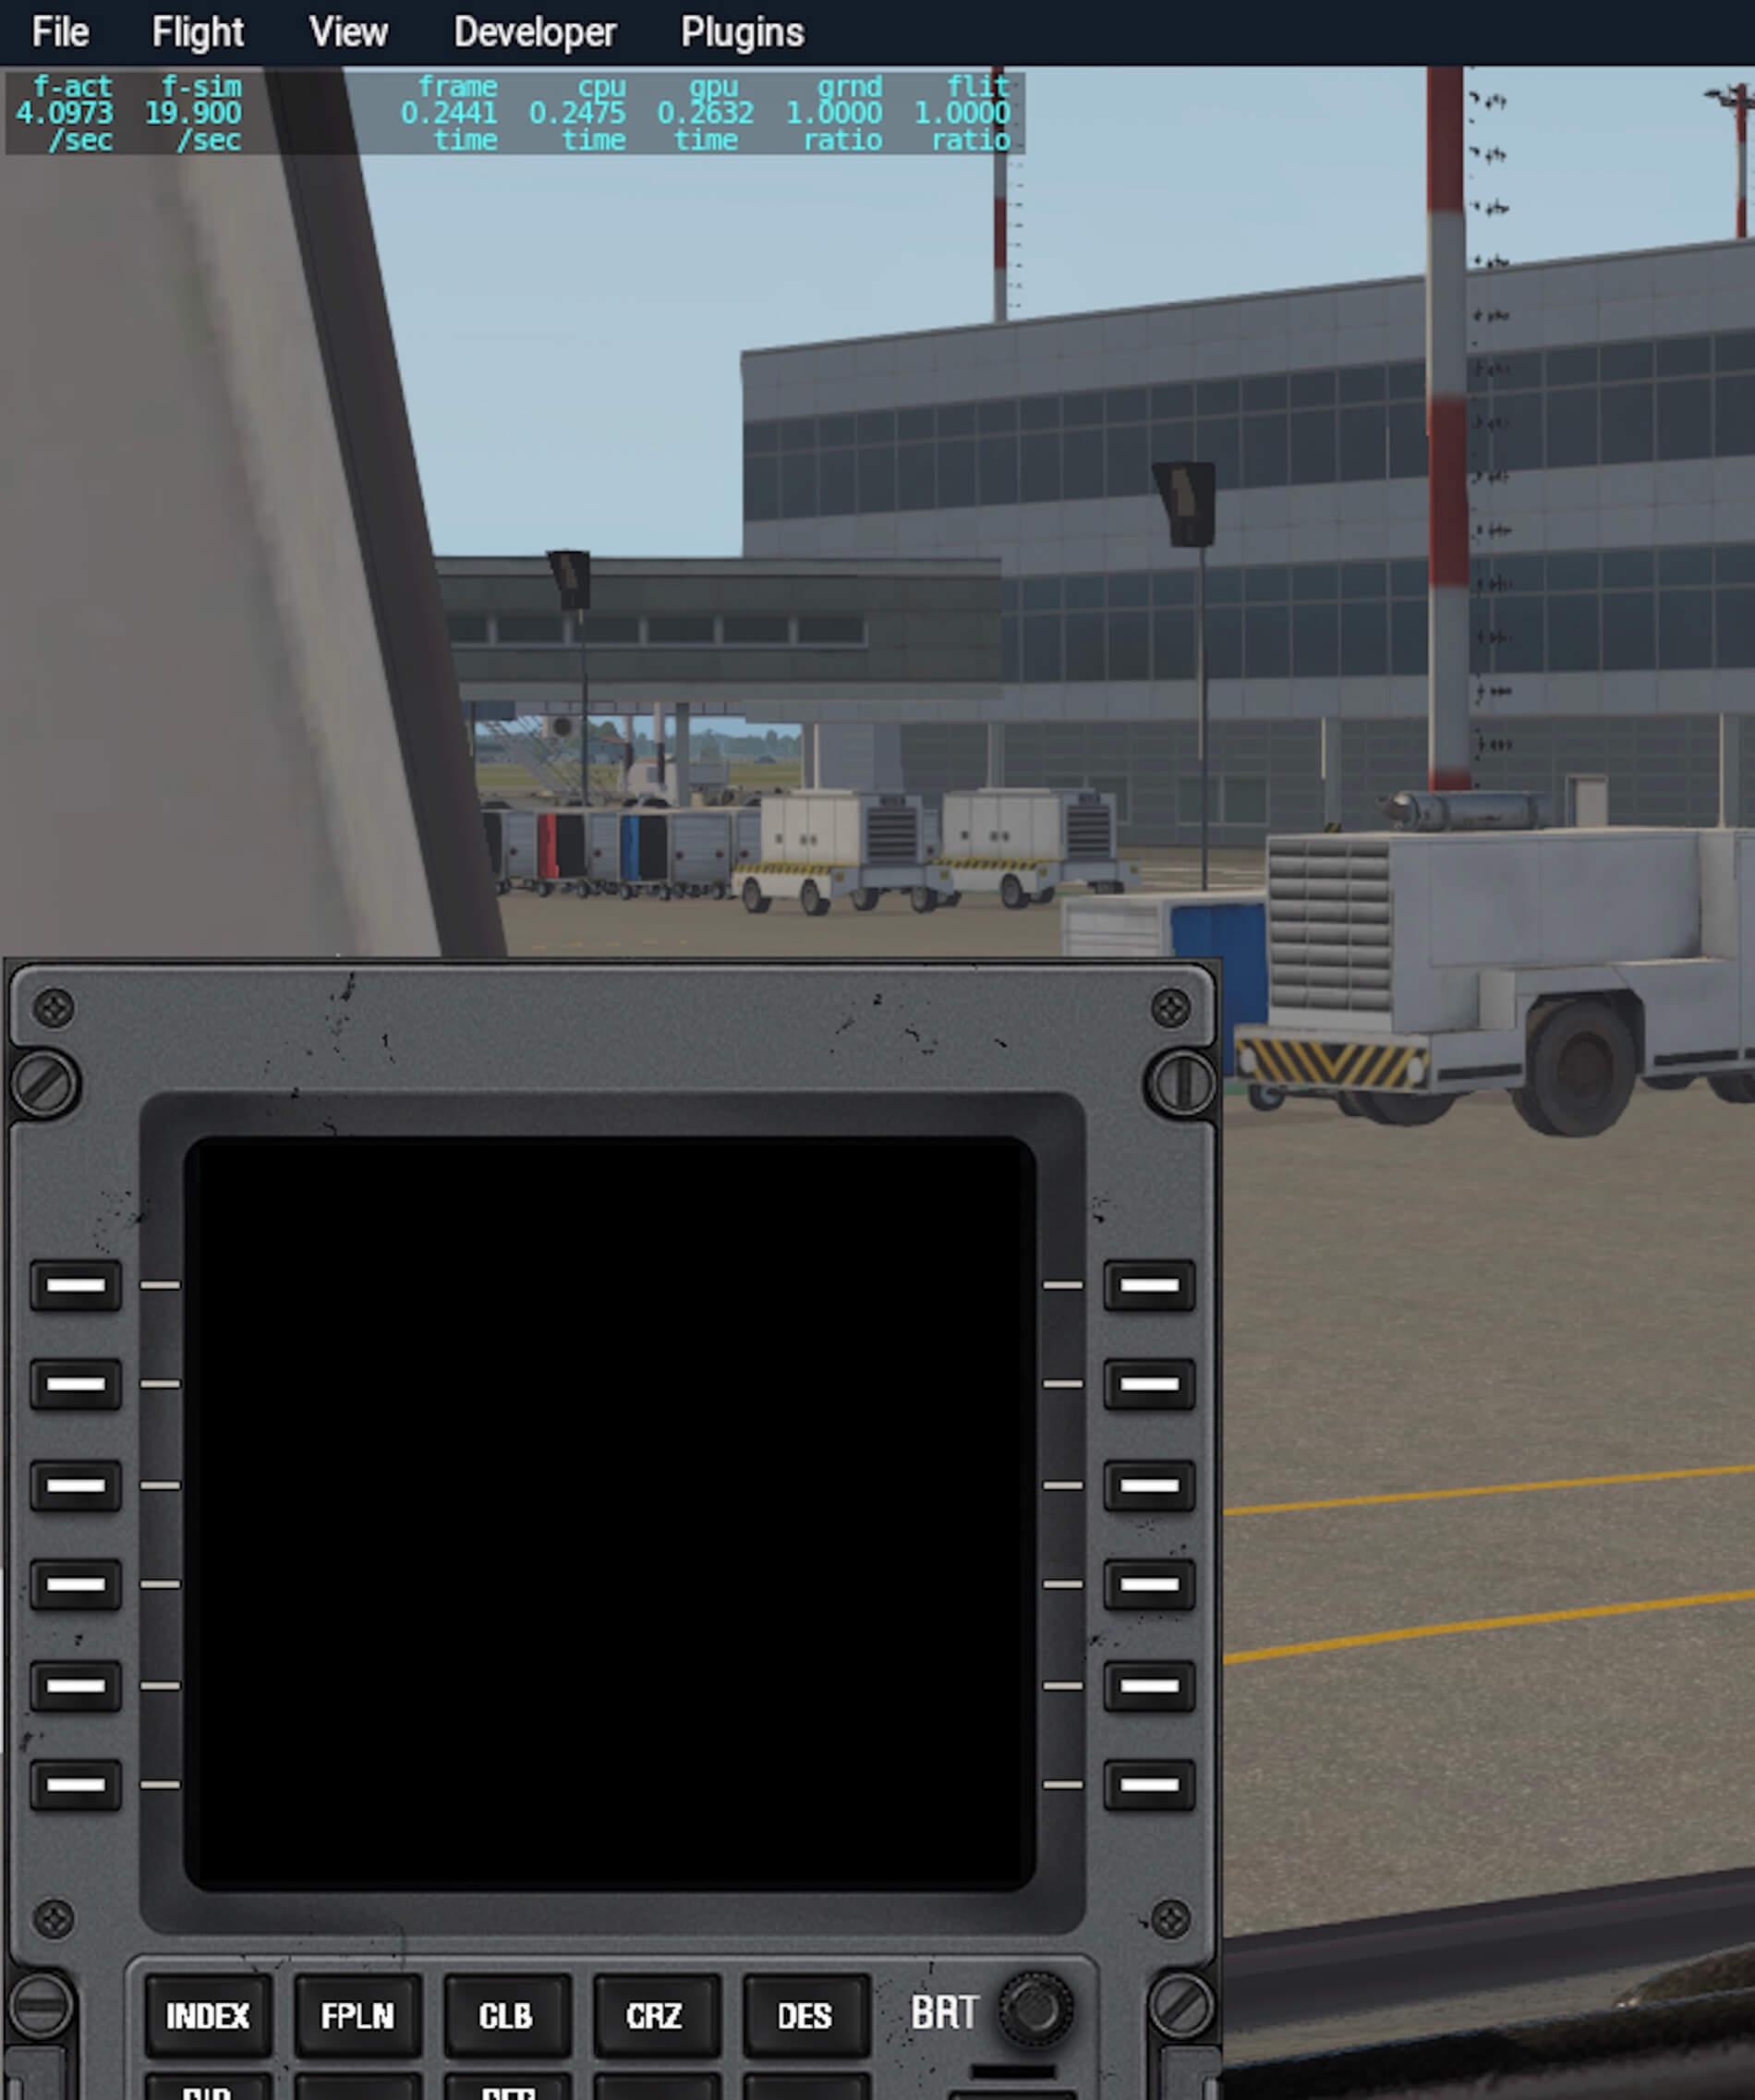
I show below my graphics settings in XP11.33, along with the fps output counter. I wanted to show fps at a commercial airport but without the additional load of addon scenery, so since I currently have no addon for Salt Lake City (KSLC), that’s where I tried this test. I am getting around 36 fps with these settings and at this location. However, when using the Librain plugin, even without rain actually being present, my fps falls to around 4fps.
I believe this is an issue exclusive to the Mac computers, and hopefully a rain effect plugin will be available at some future time that works equally well on a Mac.

Flight Experience
As previously mentioned, the Saab 340B is in a category of aircraft that I have never before flown, or had formal training to operate- as well as the fact that I am not qualified for FAR Part 121 or 135 operations (I assume it would be rare to see one of these aircraft operate under FAR part 91- the part of the FAA regulations that defined what we know as General Aviation).
With that in mind, and a desire to at least impart some knowledge in all of my review flights, I have chosen a very scenic and dynamic route that I am very familiar with as a passenger, and which is also reasonably short – about 100 nautical miles (nm). It’s also a route that utilizes turbo-prop aircraft of this size in real life on a regular scheduled operation. It’s in my native New Zealand, spanning the South Island’s Southern Alps, from Christchurch (NZCH) to Hokitika (NZHK). Hokitika is very close to the town where I was born and raised, Greymouth, also on the western side of the South Island.
The area of interest for our flight today is the Southern Alps, that form a spine down the middle of the South Island (see my Appendix 1 for graphic shots of the fault line that built not only the mountains but the entire country as it straddles the Pacific “ring of fire”; also some New Zealand history).
Air service is provided by Air Nelson, a subsidiary of Air New Zealand that fly similarly sized sized aircraft on this route- currently flying the de Havilland Dash 8-300 (Q300). However, they did operate the Saab 340A from 1990 through 2007 on this same route. They operate two flights daily NZCH-NZHK-NZCH. Filed altitude is usually 13,000 feet, being the transition altitude in that country (the transition level is 150).
Christchurch is a major hub and crew domicile for Air New Zealand that offer Airbus A320 / A320NEO services to other New Zealand cities and some Australian airports, as well as ATR-500 / 600 and Q300 turboprops (I’m unsure as to whether these Q300 aircraft are all operated by Air Nelson). Hokitika, in contrast, is a small regional center on the isolated and rugged west coast (simply known as “The Coast”). The airport (NZHK) is uncontrolled. The weather is forecast to be CAVOK, which is good as we will be able to view the scenic mountains as we cross them.
Our departure from Christchurch (NZCH) will be also on the calm wind runway 02, and we file the BAVEM5P SID, AVOCA transition. Information on NZCH is available here.
Our arrival in Hokitika NZHK) will be in a non-radar environment requiring position reporting, and at un uncontrolled airport. Information on the airport can be found here. We will be filing the BELEE2A STAR, with the R-NAV approach to runway 03 (calm wind runway), ANDEP transition.
Hence our flight-plan is NZCH02-BAVEM5P-AVOCA-BELEE-BELEE2A-NZHK03. Before proceeding with the flight description and screenshots I need to point out that despite searching I could find no Air New Zealand livery for this product- which would be technically correct as they flew the 340A model. So, I have used one of the more colorful included liveries- registration N341T with the name “Silver” (I’m not sure if that is an airline name).
Trip Planning
Our departure today is on runway 02 at NZCH. The runway length is 11,181 feet (3.408 meters). With plenty of runway available we will keep the Environmental Control System (ECS) on for maximum passenger comfort, and no engine anti-ice ((ENG A/I) is required. I will also arm the APR mode of the CTOT (Constant Torque on Takeoff, designed to address “torque bloom” on take-off- a common issue with turbo-props), which will provide an additional 7 percent power to the good engine should the other one fail.
We also plan on using 15 degrees of flaps. Similar to the Carenado tutorial (where the trip distance is slightly longer at 120 nm), we expect a takeoff weight of just under 25,000 lbs. The chart on page 5 of the included documentation shows this same takeoff configuration and gives us (at sea-level) a V1 of 104 knots, Vr of 106 knots and V2 of 108 knots. We should be retracting flaps at 137 knots. On Page 22 we get the required take-off field length for our weight and configuration, which is 3,000 feet (914m).
We expect ATC to have us fly runway heading until we are at sufficient altitude, then a vector to, or a “direct to” AVOCA.
For our arrival: Since NZHK is not controlled and has no radar coverage, we will need to generate our own descent profile. I plan on making this flight based on the excellent flight tutorial from Carenado, available here. I had planned on using the V-NAV function, however as explained here there are currently issues with V-NAV in XP11 and aircraft that are not equipped with an auto-throttle (a post in the linked forum thread indicates that LR may be addressing this very soon- perhaps in 11.35).
Not using V-NAV means that even though the weather is fair and with good visibility, we need to plan our descent profile carefully to make sure we are losing enough kinetic and potential energy so we don’t come in too hot to this short runway. I have described in some detail the planning of the descent phase to achieve a constant descent rate and be at or above STAR and IAP altitude minima, and hopefully have a smooth descent for our passengers- but if you would rather just jump into the flight then scroll down to the section “The Flight”.
I plan on reducing speed from 200 KIAS to 160 KIAS initially, then descending “via the STAR” to the Initial Approach Fix (IAF- where the approach begins). My first descent altitude will be 9600 at waypoint HK414, so I need to find the TOD to achieve this while keeping speed at 160 KIAS.
I note that the following two legs of the STAR (HK414 to HK401, and HK401 to ANDEP) have leg lengths of 6 and 10 nm, and altitude changes of 2,200 and 3,300 respectively. Some quick division gives me a descent profile of 367 and 330 feet/nm respectively, which is close enough to 350 feet/nm for my planning. These two legs have a lower altitude of 7400 and 4100 respectively, which gives me roughly 180 knots groundspeed (there is no wind forecast) for my 160 KIAS (indicated airspeed). At 180 knots groundspeed for 350 feet/nm, that’s close to a descent rate of close to 1,000 feet / minute (180/60X350).
Going back to that initial descent of 3,400 feet from our cruising altitude of 13,000 feet to 9600 feet, if I can keep my 1,000 feet/minute descent rate so that the passengers don’t feel me changing the descent rate, I get approximately 3.5 minutes. At this higher altitude my groundspeed (for my constant 160 KIAS) is approximately 200 knots. So, I will travel approximately 12 nm in 3.5 minutes. The leg of the STAR that terminates at HK414 is 14nm, close enough- so my TOD will be the initial waypoint of the STAR which is BELEE.
Having found my TOD, I now have to back up yet again for the deceleration to 160 KIAS- for this I have flown some test flights and found that if I decrease thrust from 60 percent to 30 percent, keeping the props at 1250 RPM, it takes me about 6nm at 13,000 feet to make that speed change. I can maintain 160 KIAS at 13,000 feet by slightly adjusting up the torque to 40%. So, I intend to start my deceleration at 10nm inbound to BELEE.
I’m not too concerned about calculating my descent profile for the final approach, since I will be changing configuration (gear, flaps and speed). My goal will be to get to a stabilized approach (heading, speed, configuration and descent rate) at 1,000 feet above the airport. Note that power is not included in the definition of being stabilized, it’s the one variable that is available to us all the way to touchdown.
However, since I’m fastidious about having all of the information possible for the flight available before I take off (essential for single pilot IFR), I note that the distance from ANDEP to KARVO is 5nm, and I want to be at 2,500 feet at KARVO- a drop in altitude from that at ANDEP of 1,600 feet. The descent profile for 1,600 feet over 5nm is 320 feet/nm, not too different from the 350 feet/nm on the STAR- this is reassuring in that the descent profile is somewhat linear throughout the STAR and from the IAF to the IF on the approach.
The runway at NZHK has a landing distance of 3,780 feet, or 1,152 meters, and has a Precision Approach Path Indicator (PAPI), low intensity (LIL) edge lighting at 60m apart.
All that remains is to check our required landing distance. At maximum landing weight we require 3,395 feet (1.035 meters). Not as conservative as I would choose, however runway 03 was certainly used by the 340A’s of Air Nelson, as I can personally attest.
So, summarizing my flight on descent and approach to NZHK: I plan to reduce speed from 200 KIAS to 160 KIAS at 10nm out from BELEE (BELEE is the start of the STAR). Then I’m descending via the BELEE2A STAR at 1,000 fpm, keeping airspeed constant at 160 KIAS. This should get me to ANDEP at approximately 4,100 feet, the altitude floor of the last waypoint in this STAR. I will continue the descent at 1,000 fpm from ANDEP (the IAP of the R-NAV 03 approach) to KARPO (the IF).
Since KARVO is only 10 nm from the threshold of runway 03, I will most likely commence configuration changes in this leg to the aircraft such as introducing flaps, lowering the landing gear and reducing speed. Following KARVO I need to maintain 2,500 feet to 2.3nm out from HK406, which is the FAF.
From the FAF there is a 3-degree slope on the glidepath to runway 03, where the Threshold Crossing height (TCH) is 50 feet. We have about 500 feet of runway to spare when comparing our landing distance for runway 03 to the max weight landing distance- however we anticipate landing at significantly less than the maximum landing weight.
The Flight
I’m not going to repeat the flight tutorial (on which this flight is based), as it does an excellent job of imparting knowledge and procedures. The flight tutorial is available at the X-Plane.org forums and access to it does not require the aircraft to be purchased. I’m going to run through a similar routine and will detail in both text and screenshots where I deviate from the tutorial, as well as any highlights or issues I see that are worth mentioning here.
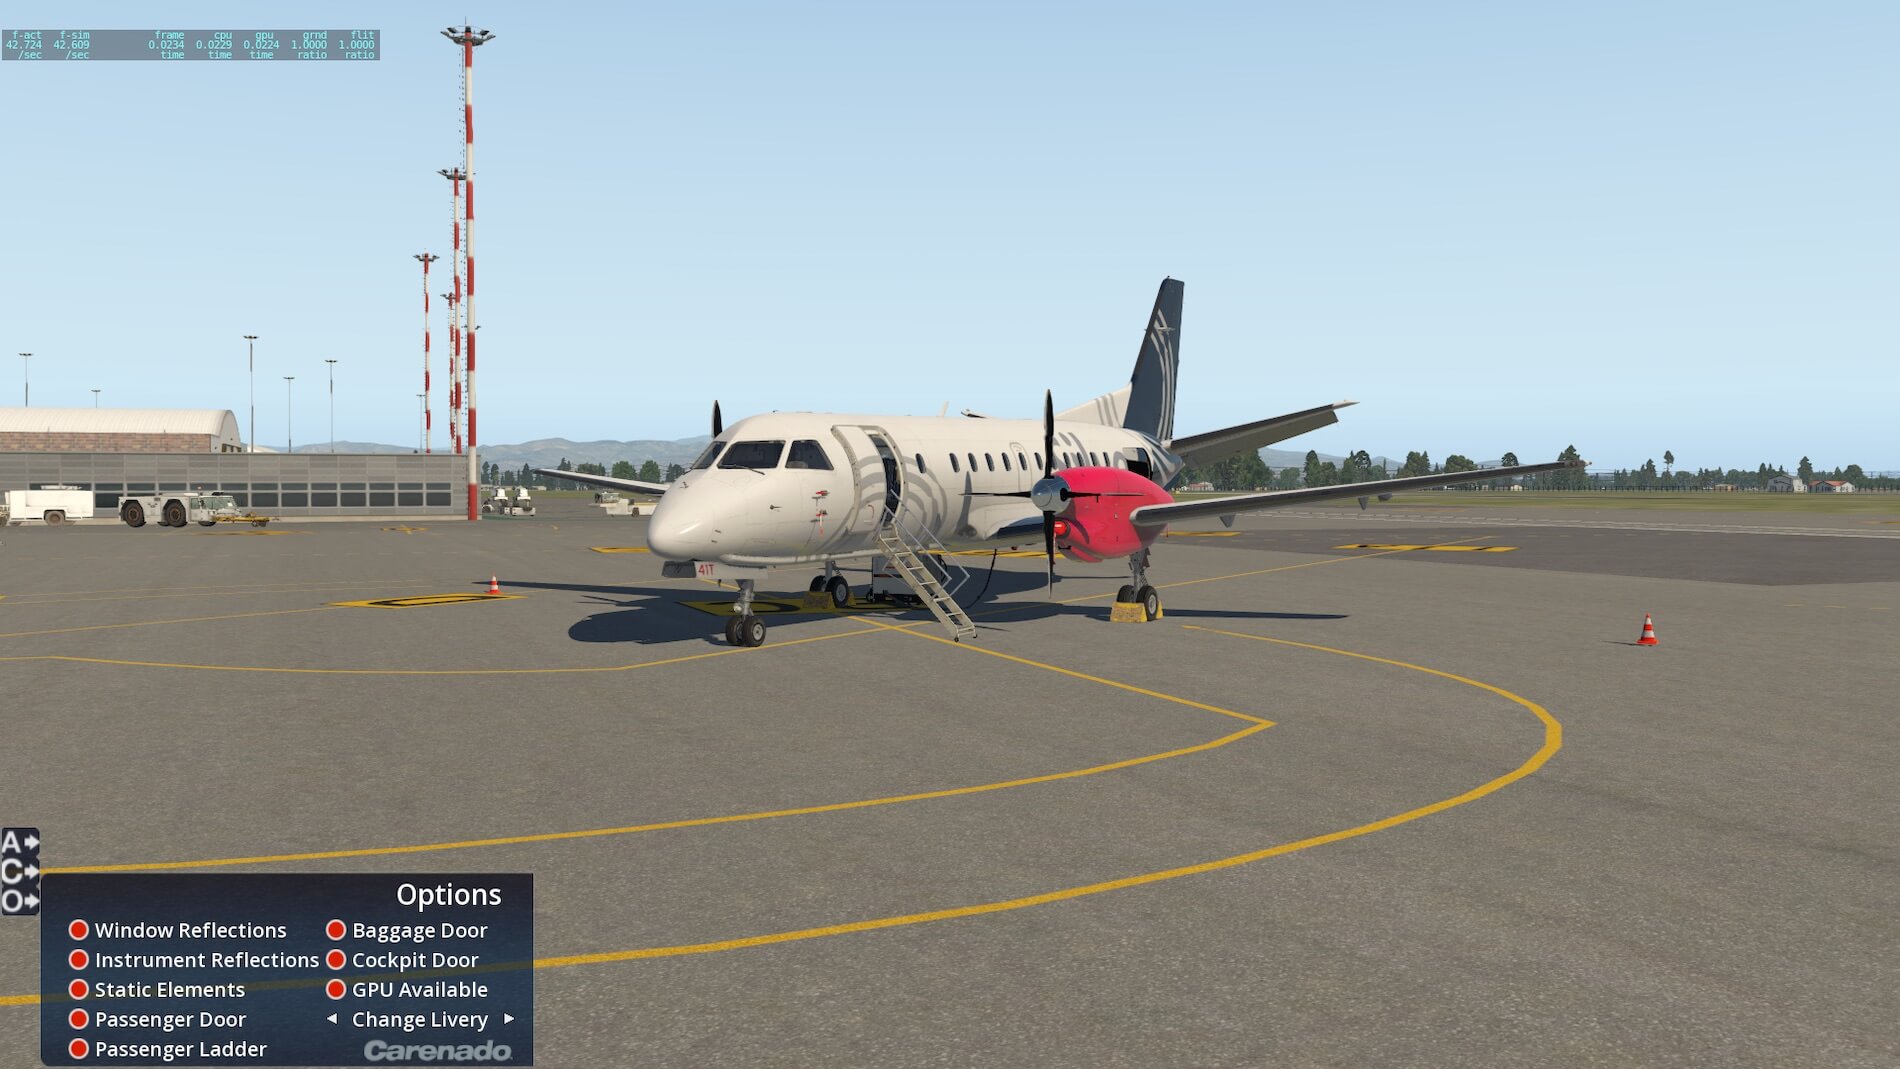
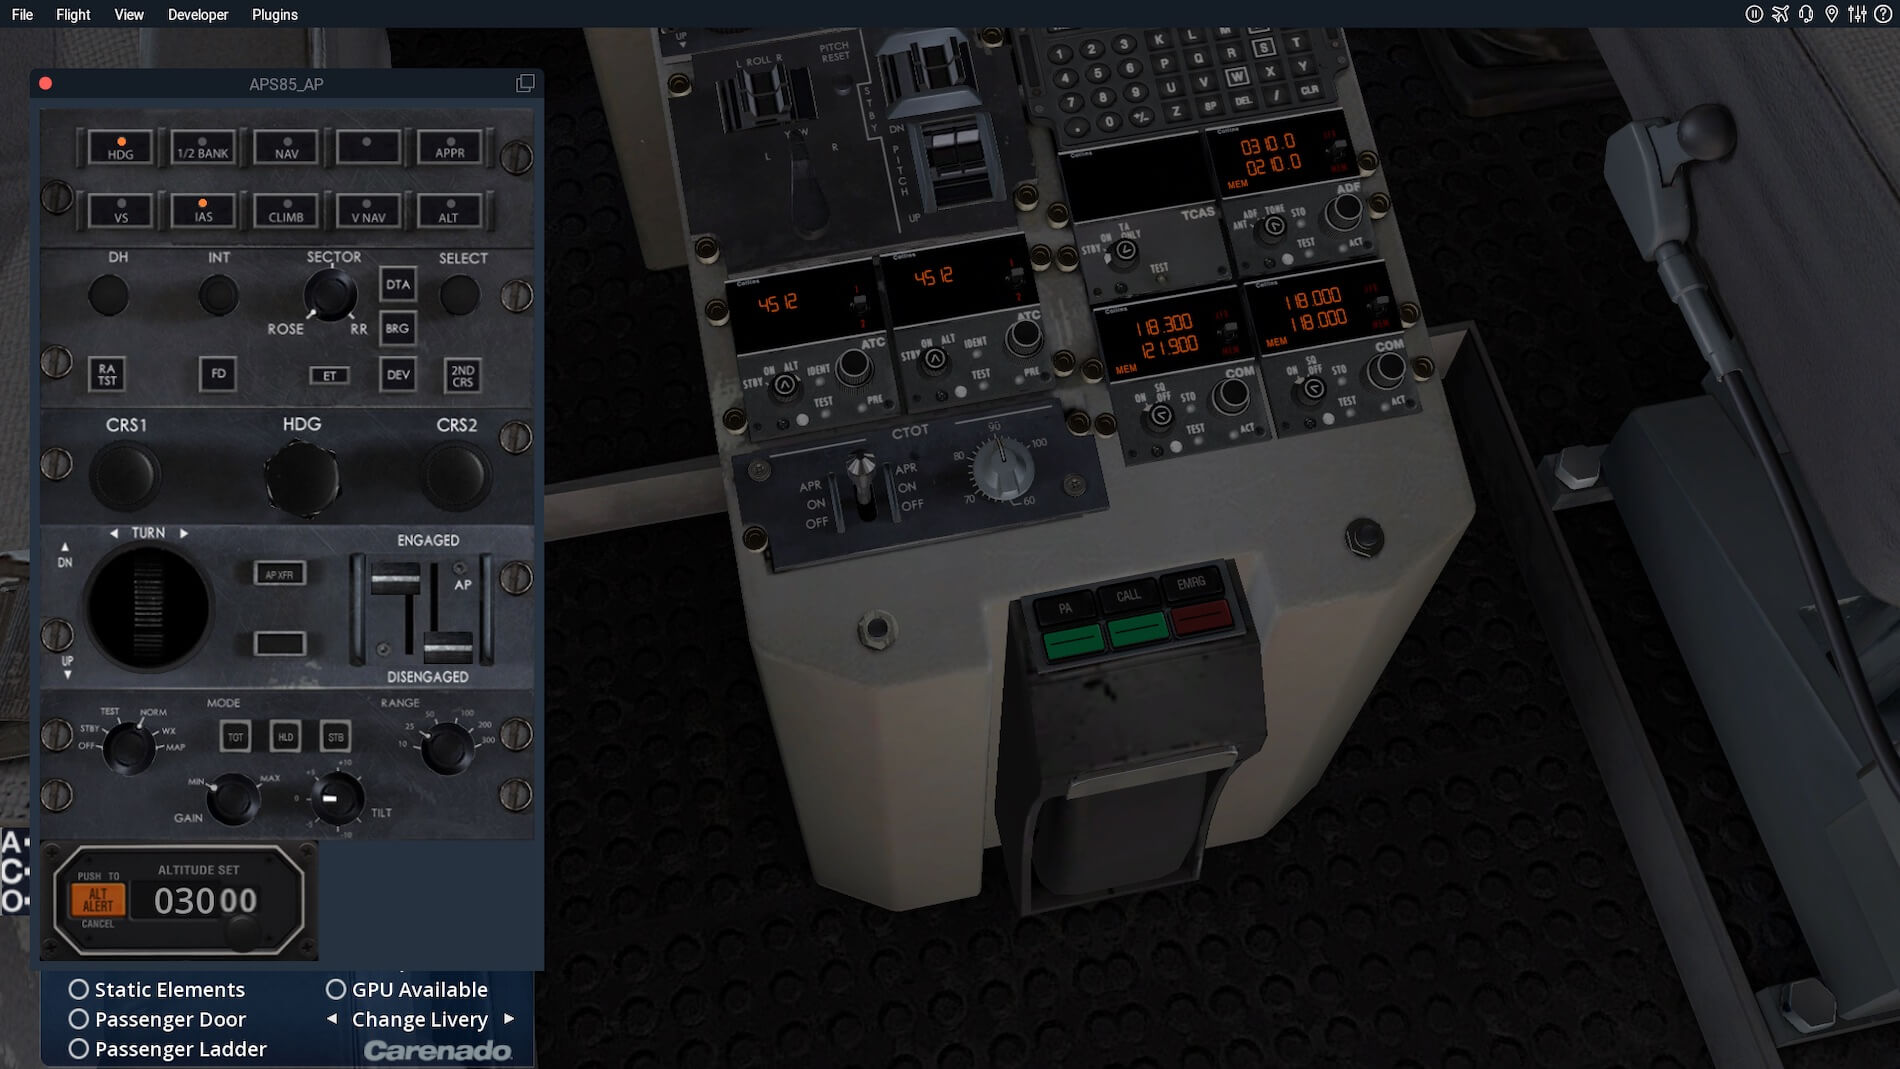
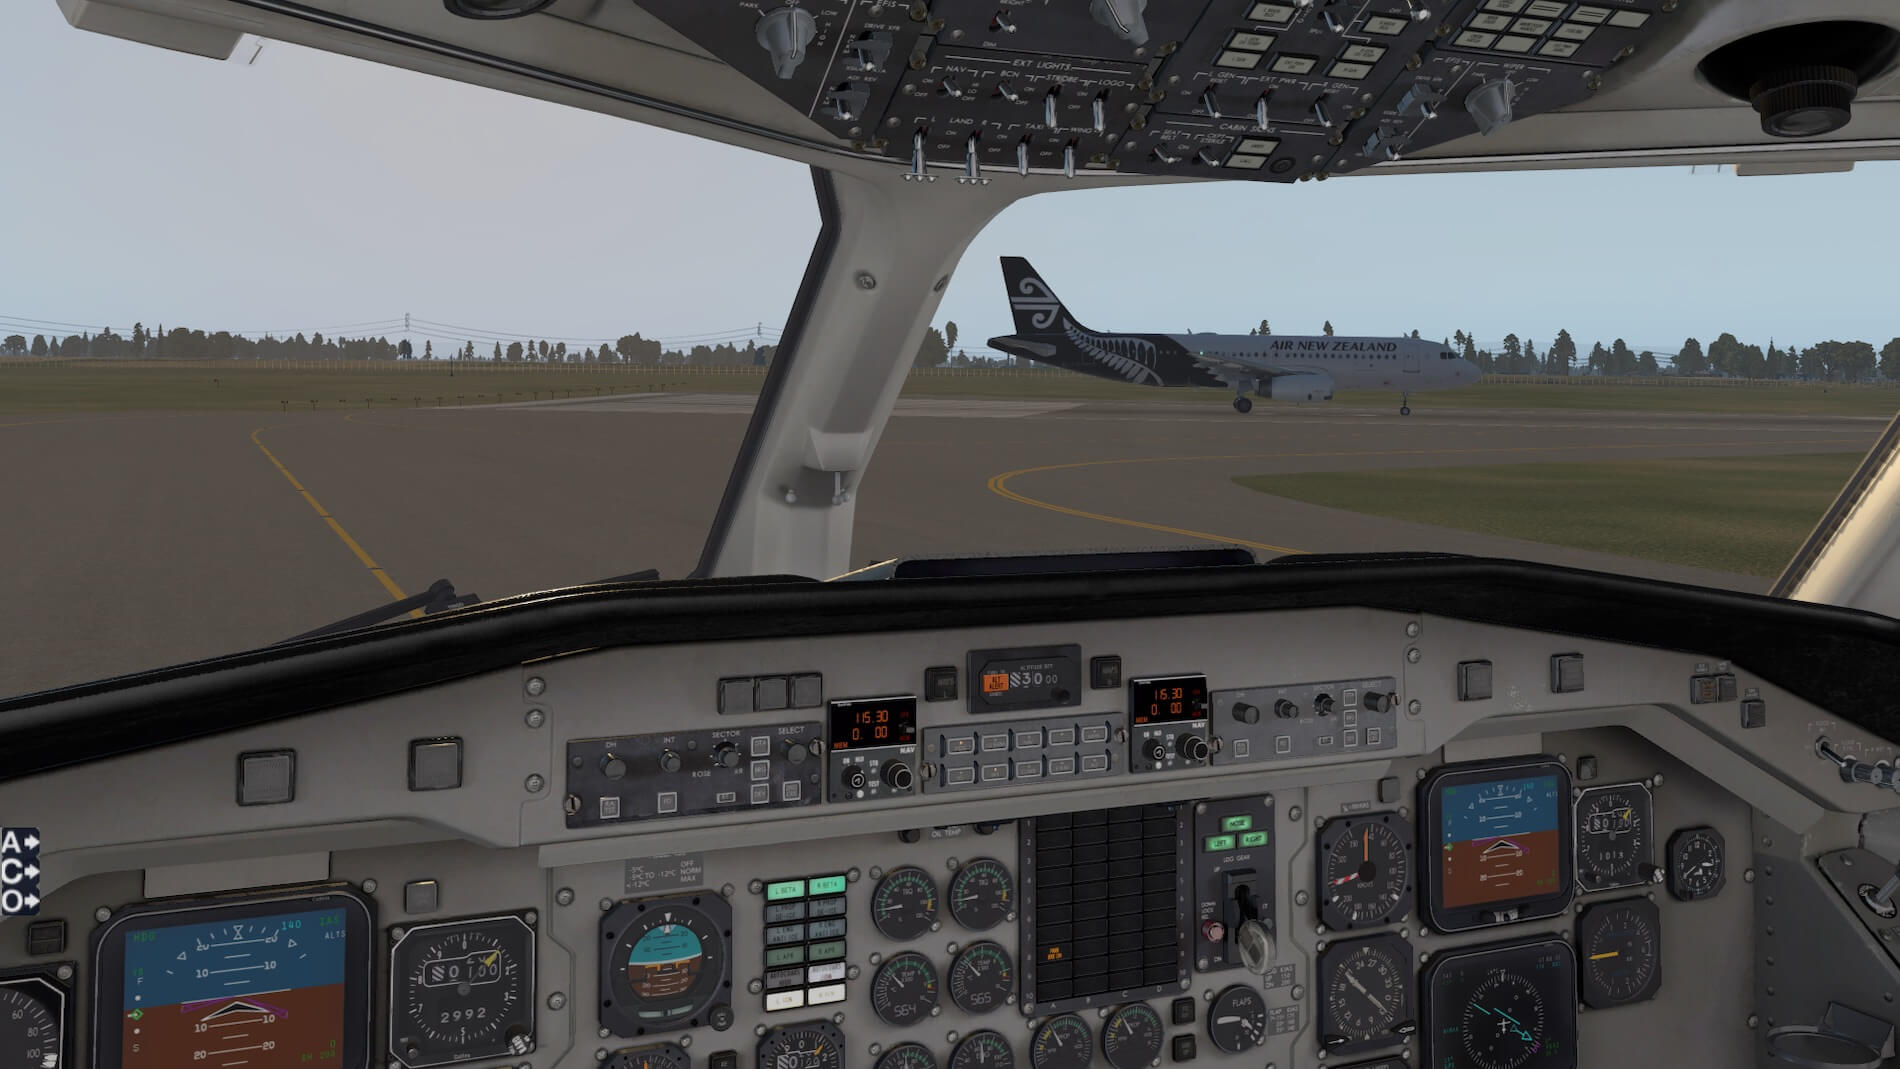
I would like to first discuss the icons to the bottom left of the screen, where we see an “A”, “C” and “O”. “A” brings up the 2D autopilot collage (below), “C” brings up pre-set views that are tied to the Quick-Look view function in X-Plane 11 (I have this bad habit of always setting my own quick-look views when I first load the plane, so I break that connection- however it is possible to rename the views in the menu, something best done with technical support at Carenado).
Finally, the “O” menu that contains features such as whether the GPU is being used, opening the passenger, cargo and flight deck doors, among other features. Carenado appears to be using these menus throughout their product lines and I love them. If they annoy you they can be diminished in intensity by hovering over them with the mouse and scrolling.
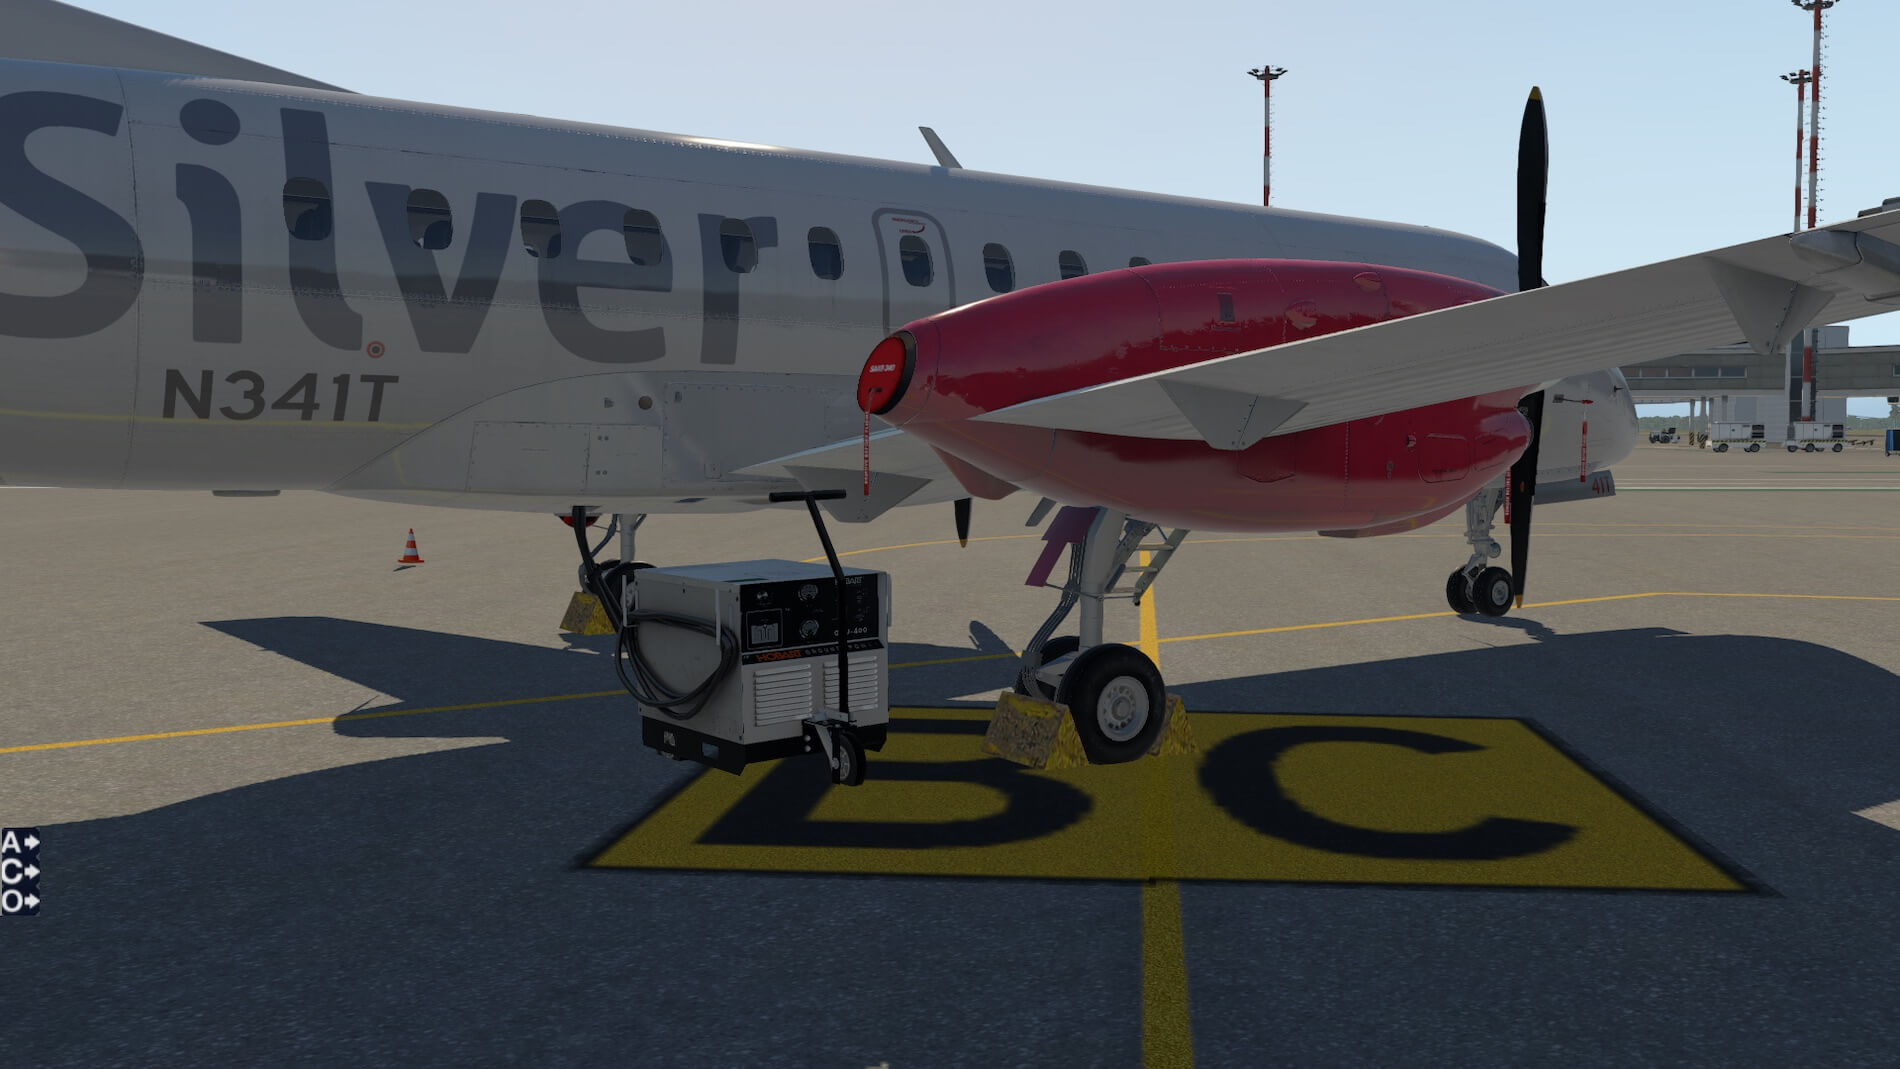
I have a screenshot below of the weight, balance and fuel for this flight. I then show us (the flight crew of two and one flight attendant) walking out to the aircraft after our pre-flight briefing. The aircraft looks inviting- it’s a beautiful day here today and the sun highlights the nice paint job. While I have assigned the First Officer (FO) the duty of walk around, I always take a cursory walk and glance around the aircraft to see if anything sticks out that I need to be concerned about. The GPU is running in the shade of the aircraft’s fuselage- a closer look shows that it is providing power to the aircraft. The baggage door at the rear right side is open and bags are being loaded.


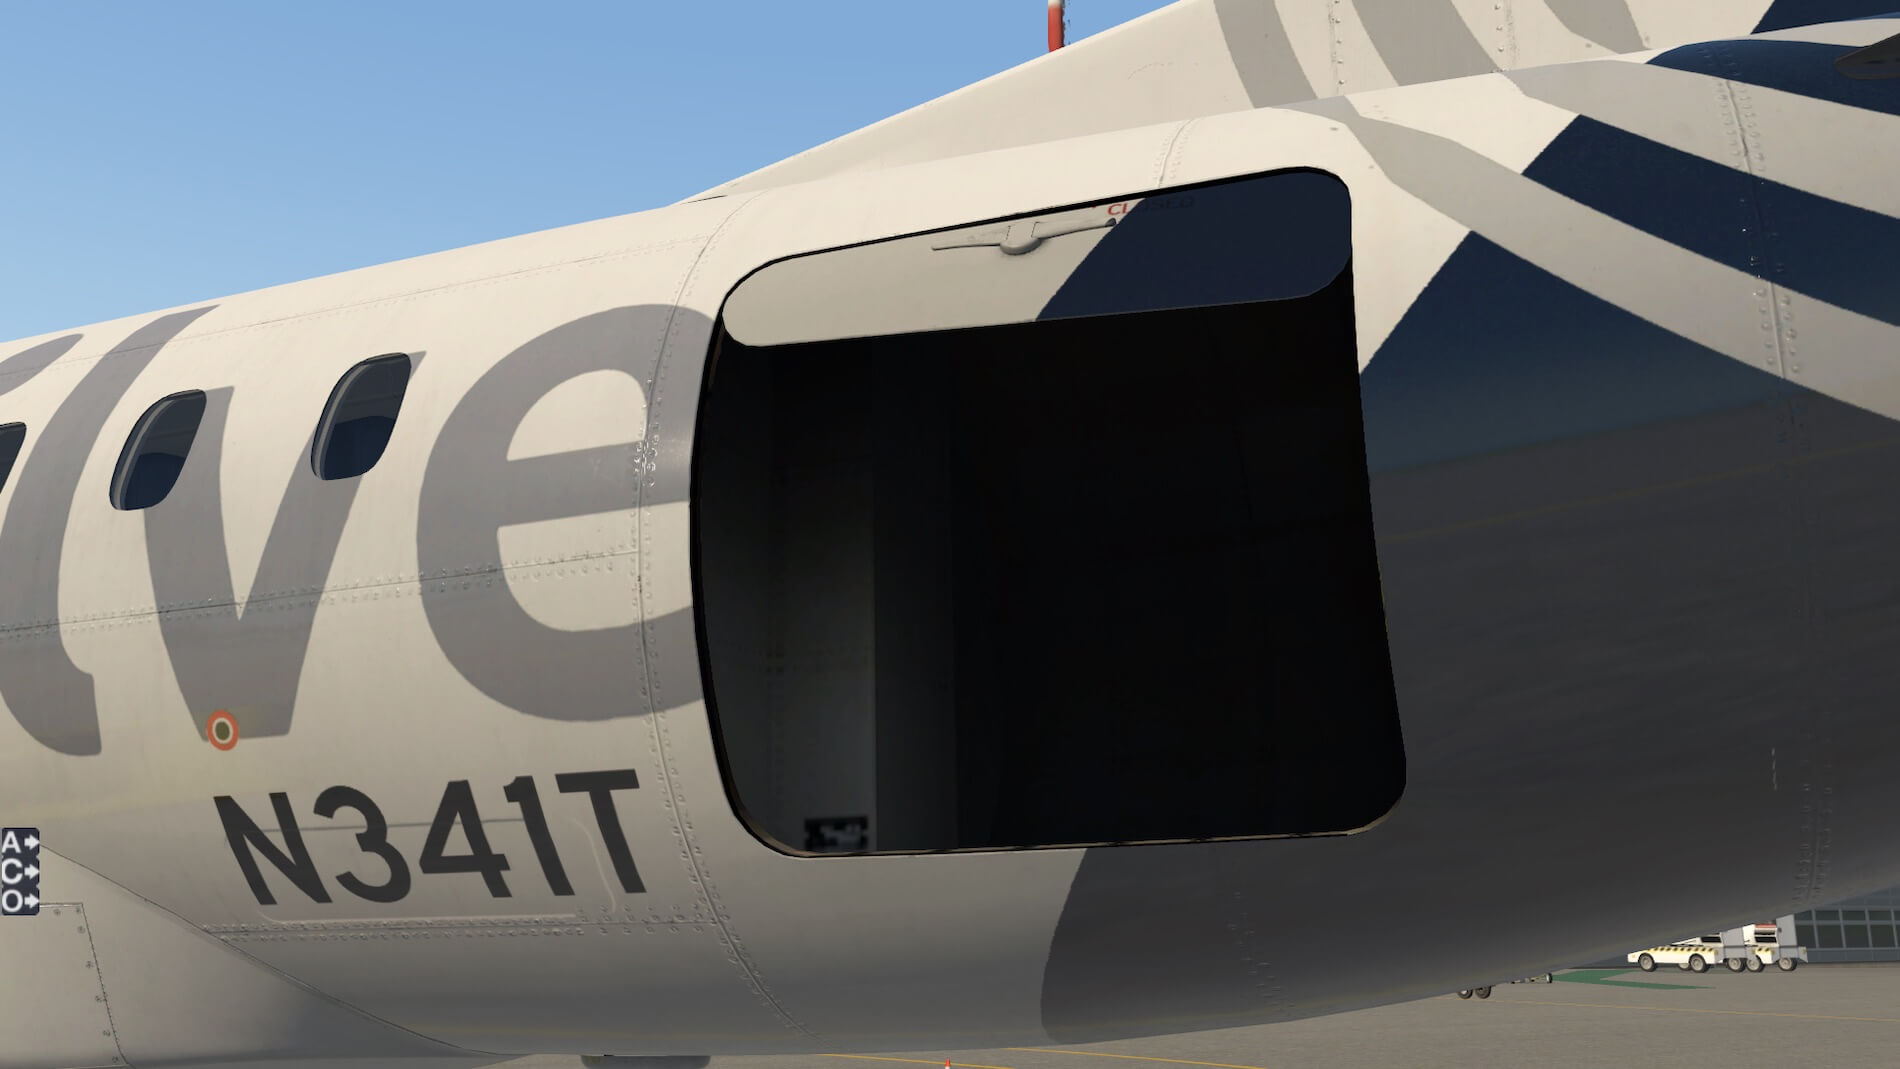
I check the main landing gear and the condition of the pitot tubes, as well as the taxi light on the forward landing gear. Now we are ready to ascend the stairs to the aircraft. These stairs are a part of the aircraft and will be retracted and stowed electrically once the flight attendant is ready to close the door. I’m surprised to see the door handle in the “Closed” position even though the door is clearly open- I would have thought that this external handle was linked to a similar interior handle on the door, but maybe not.


We enter the aircraft and turn left, and see our “office:” for the next hour or so. The jump seat is down blocking our way, so we stow it- it folds up to the left. The glass displays are dark. I note my left seat arm rest is down (as is that on the right seat)- I now move the arm rest up so I can get into the seat (and my FO will move her arm rest as well when ready to take a seat- totally independent of mine). Now a screenshot of what we see as we adjust our seat, looking out the front cockpit window.


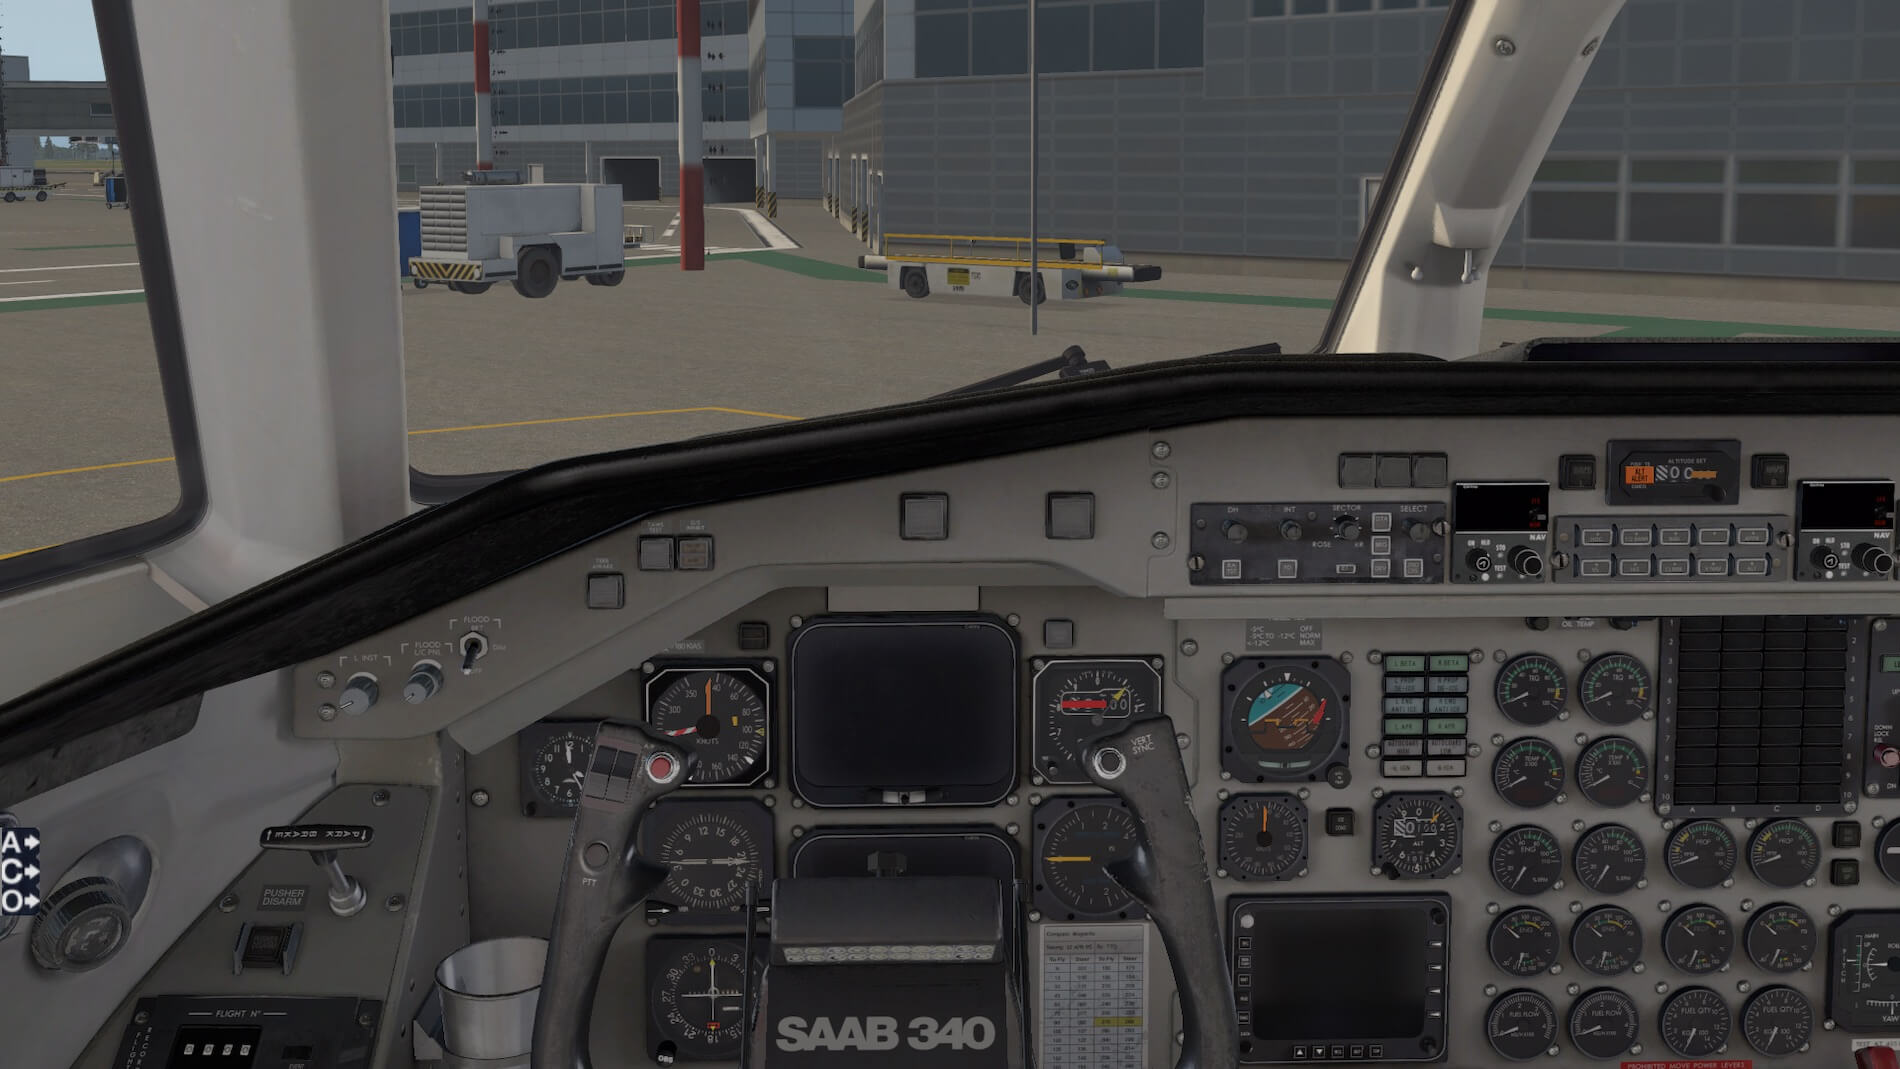
Our first job is to release the gust lock which is currently locking the yoke and restricting throttle movement (this is well done in this addon as it appears as though the aircraft yoke is disconnected from my hardware and the throttle moves only a little). A look at the overhead panel- we hope to see no lights on this panel by the time we are ready for takeoff.


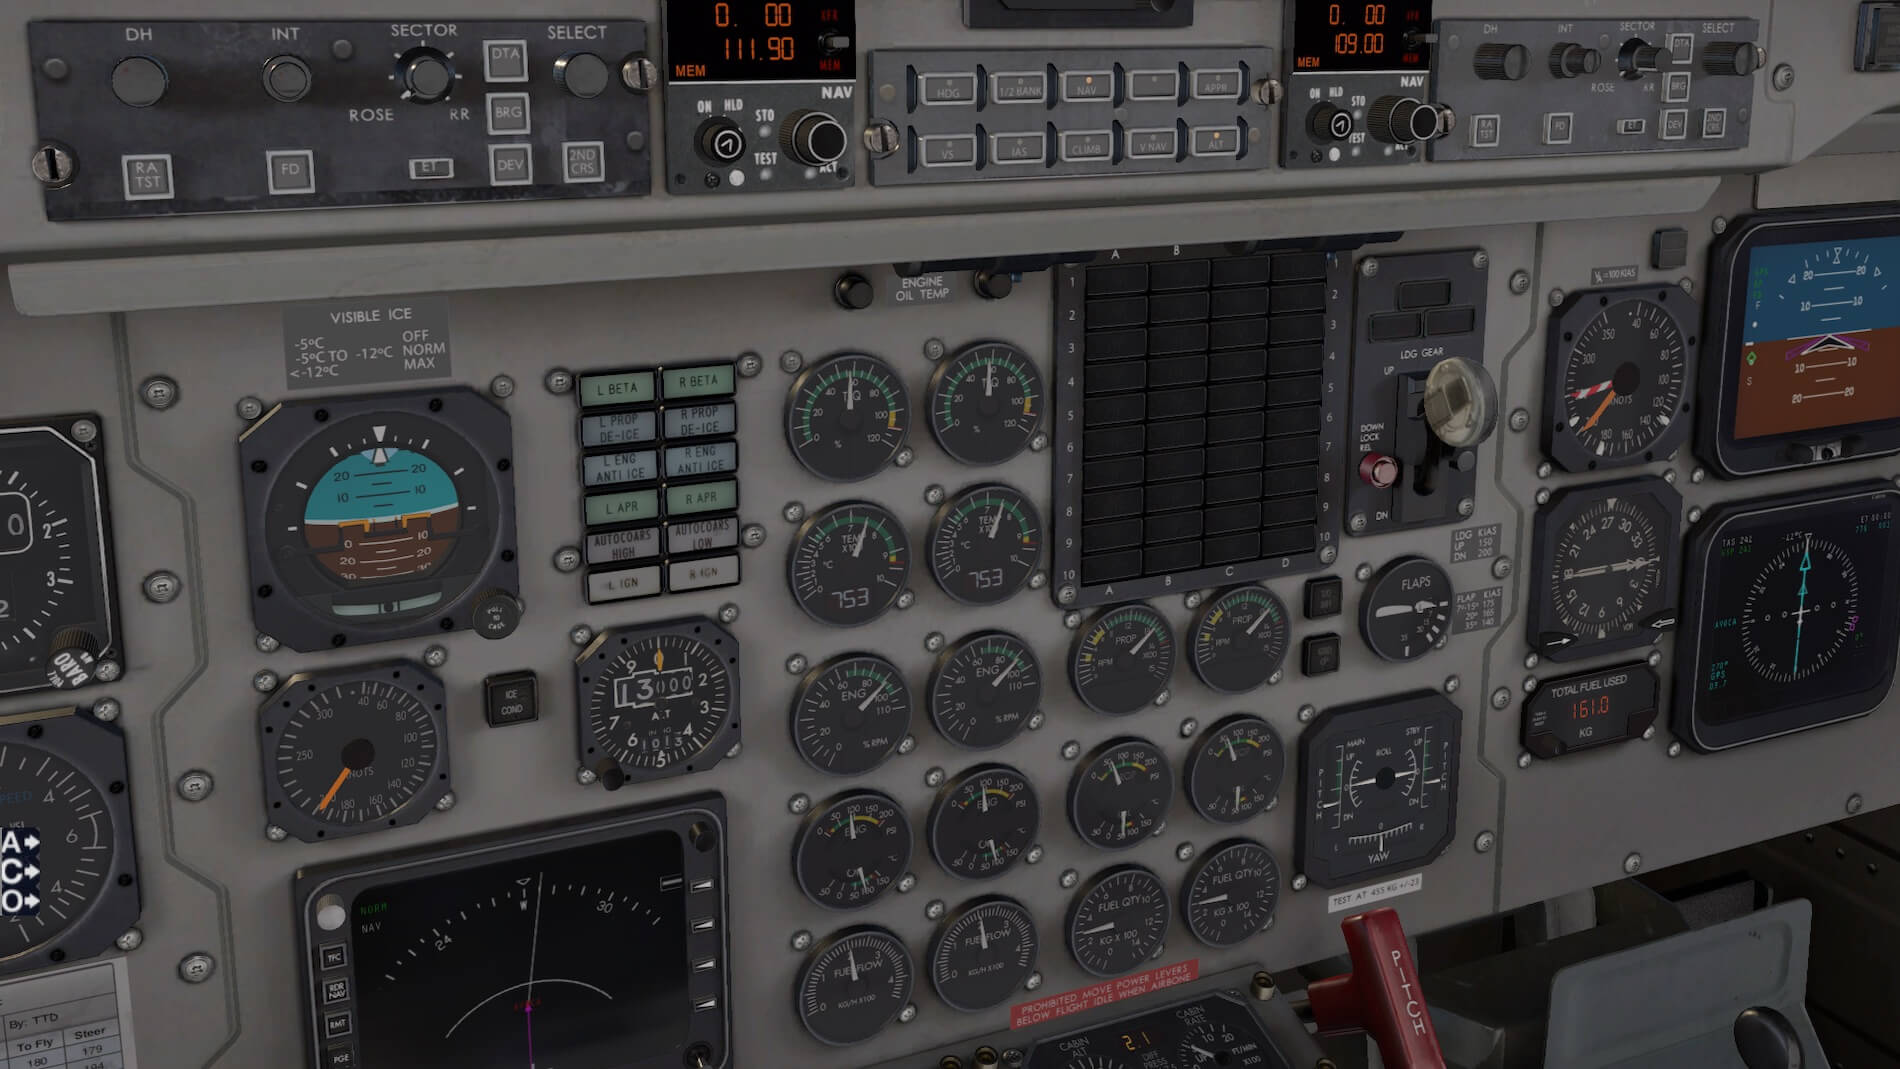
Having boarded the passengers and had the passenger manifest brought to us by the gate agent, we now retract the passenger stairs in preparation of closing the passenger door. I have shown three shots below that illustrate some of this sequence, however it happens very quickly. Finally, the engines are started and we look at the panel that shows our navigation set up (both on the MFD and the EHSI), along with the engine gauges reading normal.
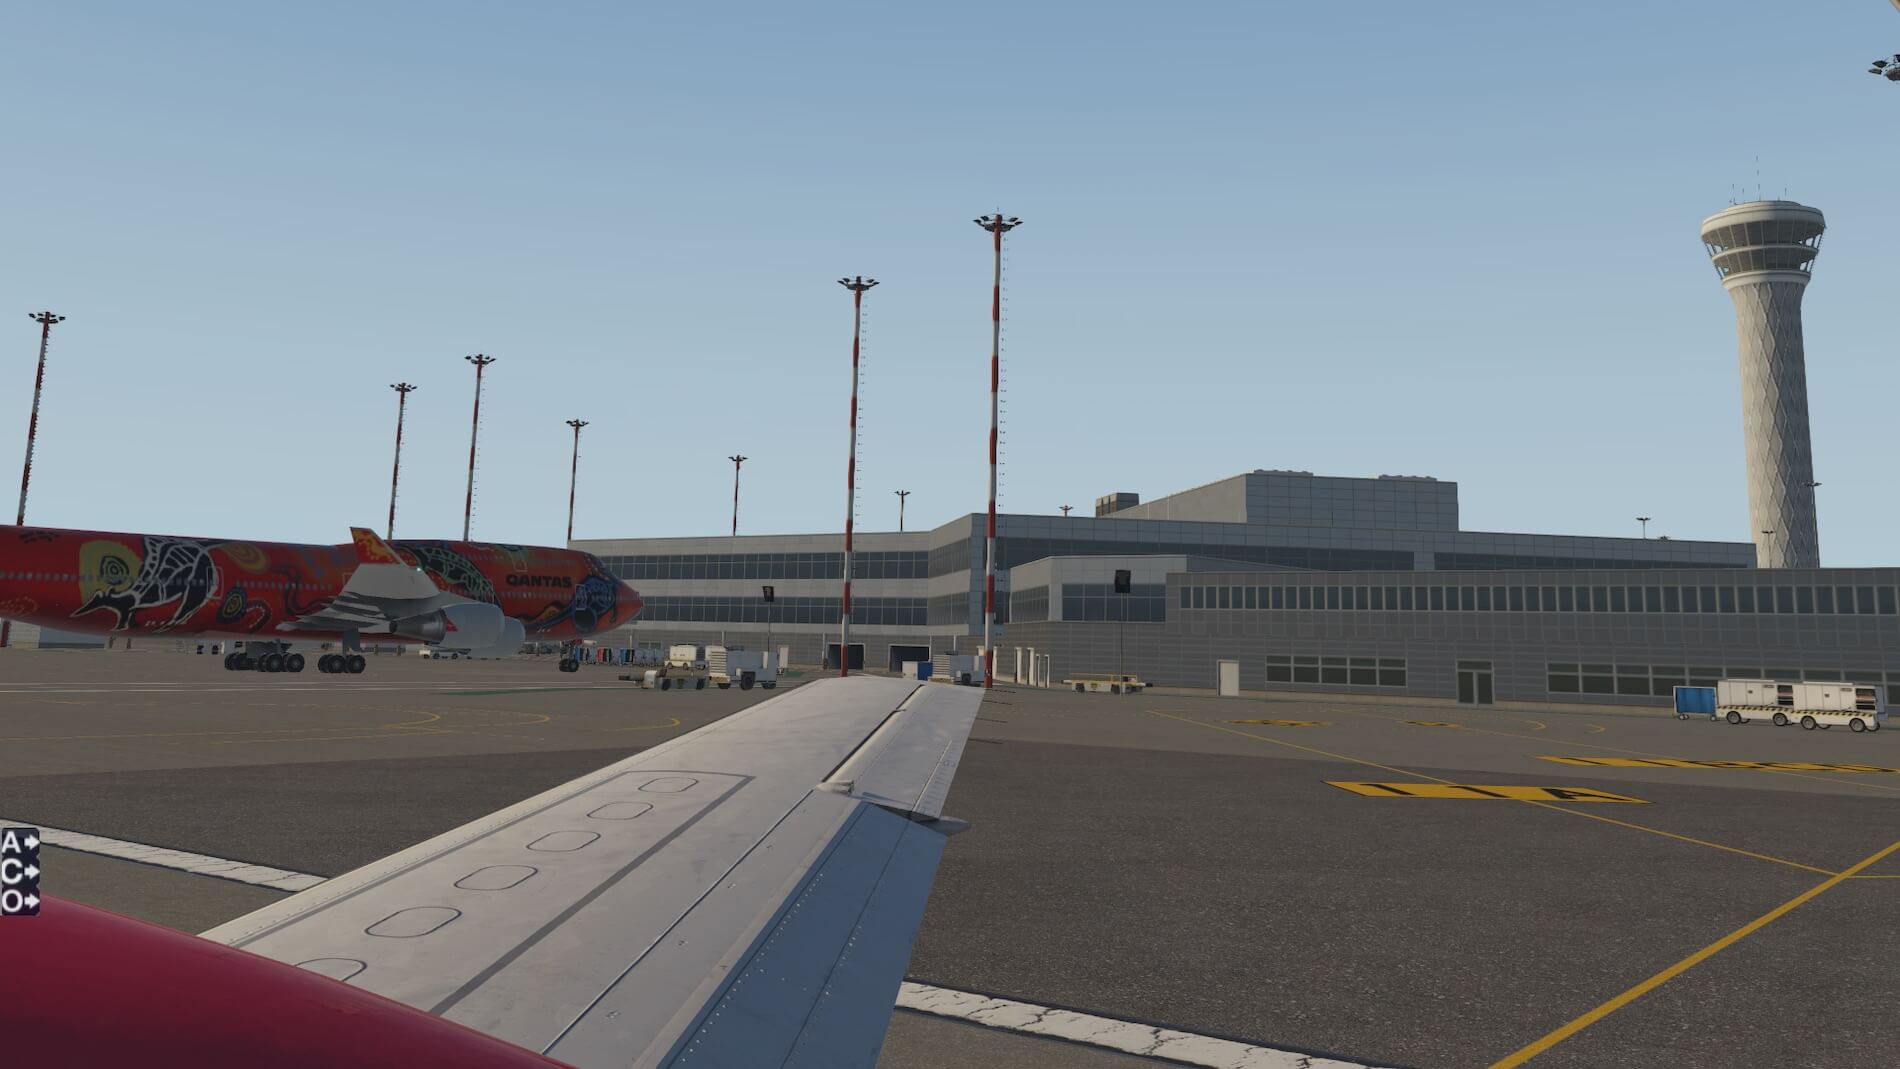
A look at our CTOT control shows it set to APR (automatic power reserve). For those that would like a description of the Autocoarsen and CTOT/APR systems I have included a link to a forum post on these topics here. I can’t resist the passenger view of the terminal in this nice NZCH scenery as we taxi from the terminal to runway 02. There’s a Qantas B744 parked at the international terminal, a part of World Traffic- maybe a little dated!


Once contacting Tower, we are told to “hold short” of runway 02 and advise “when ready” (for take-off). We run through the before takeoff procedure, ensuring the speed bugs are correctly set (to V1, Vr and Vfe, as well as our reference speed which is used by the autopilot when we elect to use the “IAS” option for climb (the aircraft will pitch to maintain this speed, depending on throttle position- both for climbs and descents. The “V-speed” bugs are set by dragging them with the mouse- the reference speed is set by moving the small knob in the airspeed indicator.
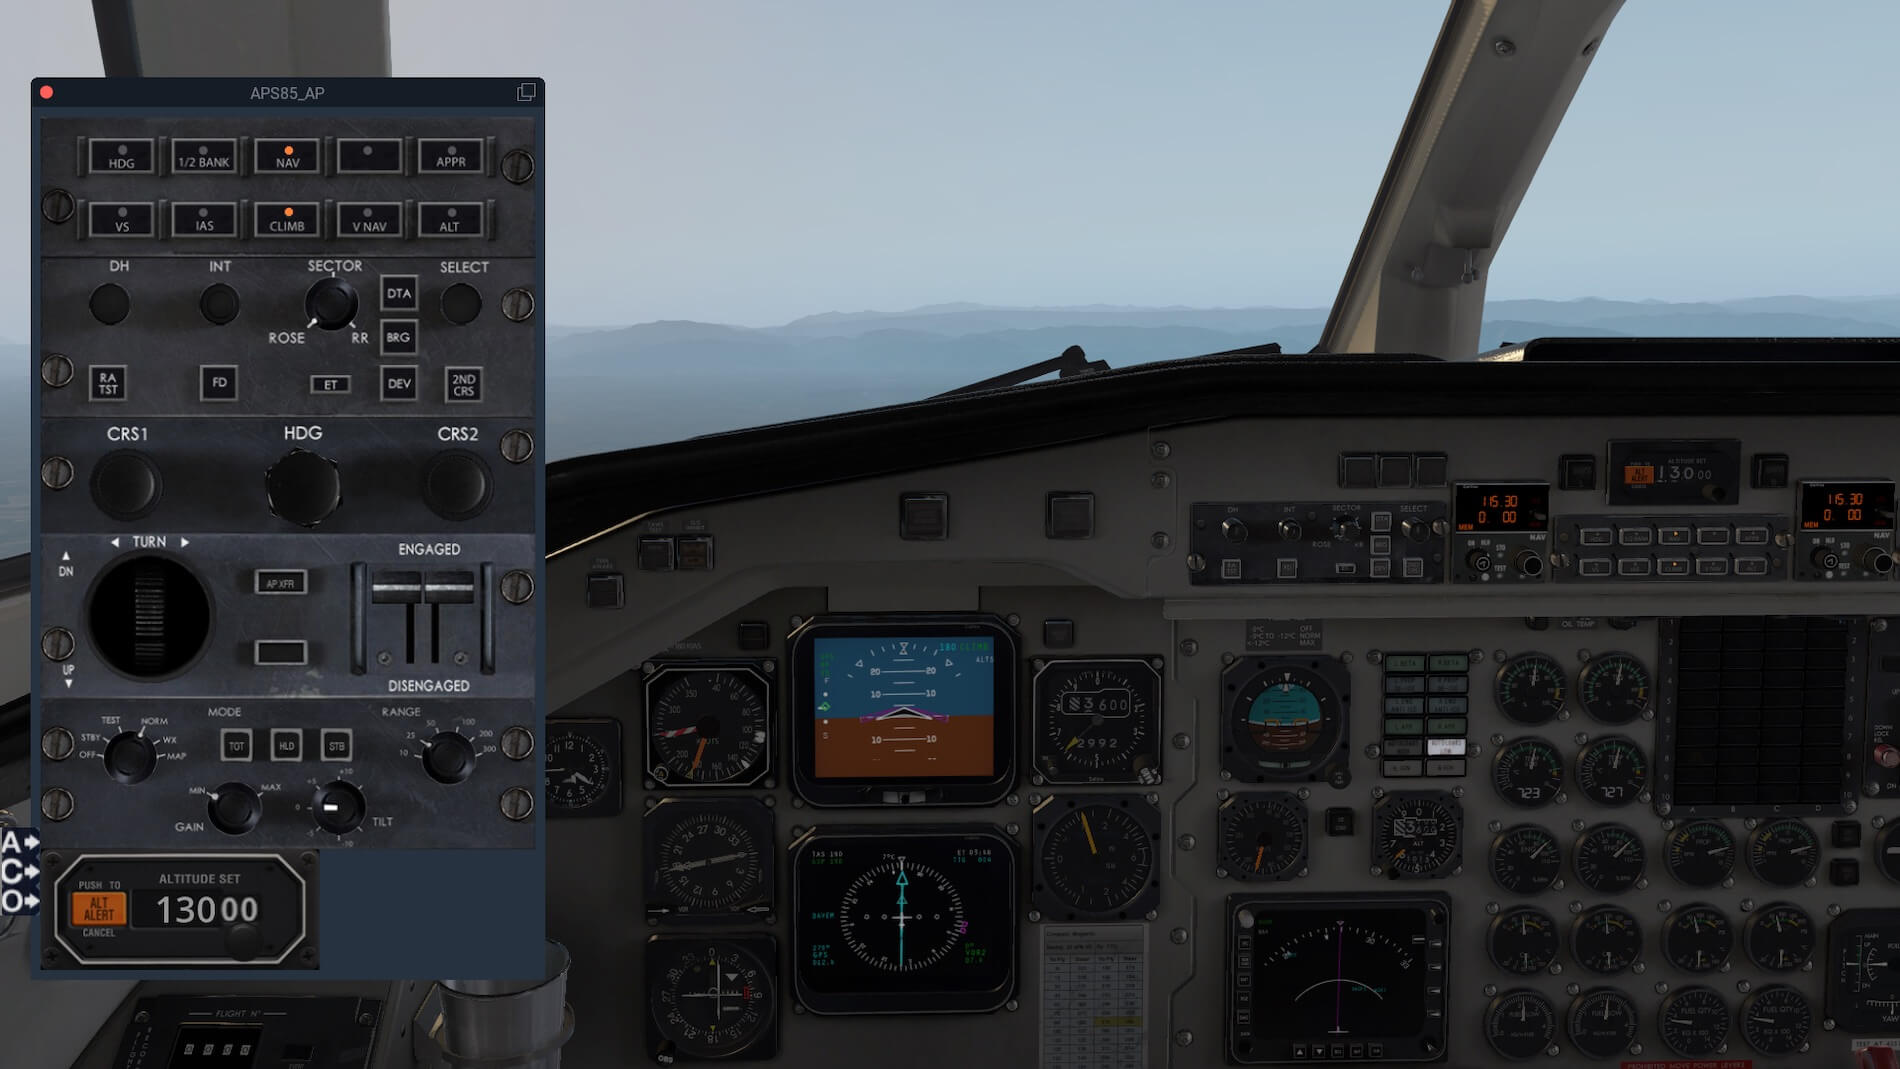
In the screenshots below I show the 2D autopilot collage- it places various autopilot panels that are located in different areas of the cockpit on the same screen. Some may think this is unrealistic, however it compensates somewhat for not being actually in the aircraft where your brain can do much the same thing- in the sim (2D screen 3 feet away from us) we don’t have that spatial dimension.
I think it’s a neat way to get around the limitations of a desktop sim. The autopilot is set for HDG (heading bug is set), IAS ( we will maintain the indicated airspeed that we set earlier when climbing or descending- basically when pitch is available as a variable). We have our initial altitude set at 3,000 feet. Note that we have the Tower on 118.3 on the COMM radio, our transponder is in Mode C with our assigned squawk of 4512.
The next screenshot below shows us at the runway hold short line, I have a 2D EHSI which I found to be essential for navigation and orientation. Note that our elapsed timer “ET) is not yet set to count up. Another look at the pedestal showing the FMS (which is also available in enlarged 2D by clicking on it). We tell Tower we are ready, but are told to wait for landing traffic- which we see, an Air New Zealand A320.
Tower then gives preference to another Air New Zealand A320 to take off ahead of us- since it is much faster, just starting its takeoff roll in the screenshot. Then finally “line up and wait”, as we align ourselves with the runway centerline and see that A320 disappearing into a climb in the distance ahead of us.


The passenger view shows the airport terminal as we take off. I have been through Christchurch airport many times, I get back to my home town in most years to check on elderly family. I chose this screenshot not so much for the plane but for the airport scenery- it is so well done (see credits at the end).
Then climbing out on runway heading- on the right side you can see the Pacific Ocean to the east with Banks Peninsular (several extinct volcanoes that form a deep-water harbor) on the wing tip. Below us is the city of Christchurch. On the left side, looking west, we see the Southern Alps- that’s where we are going once we get turned around from the runway heading. You can see the expanse of the Canterbury Plains as well, formed through alluvial accumulation from erosion in the mountains over time.
This is an area of the country that is plentiful for growing crops and running dairy cattle. Next, we are turning to our first waypoint on the SID, shown on the EHSI.


We now are looking again at the autopilot collage, we have been cleared to our final altitude of 13,000 feet, we have NAV as our lateral source for the autopilot (this is “GPS” or RNAV”). For our vertical guidance we have pressed the CLIMB button three times that sets us up for a 180 KIAS climb. A look at the overhead shows no warning lights- that’s what we want to see.
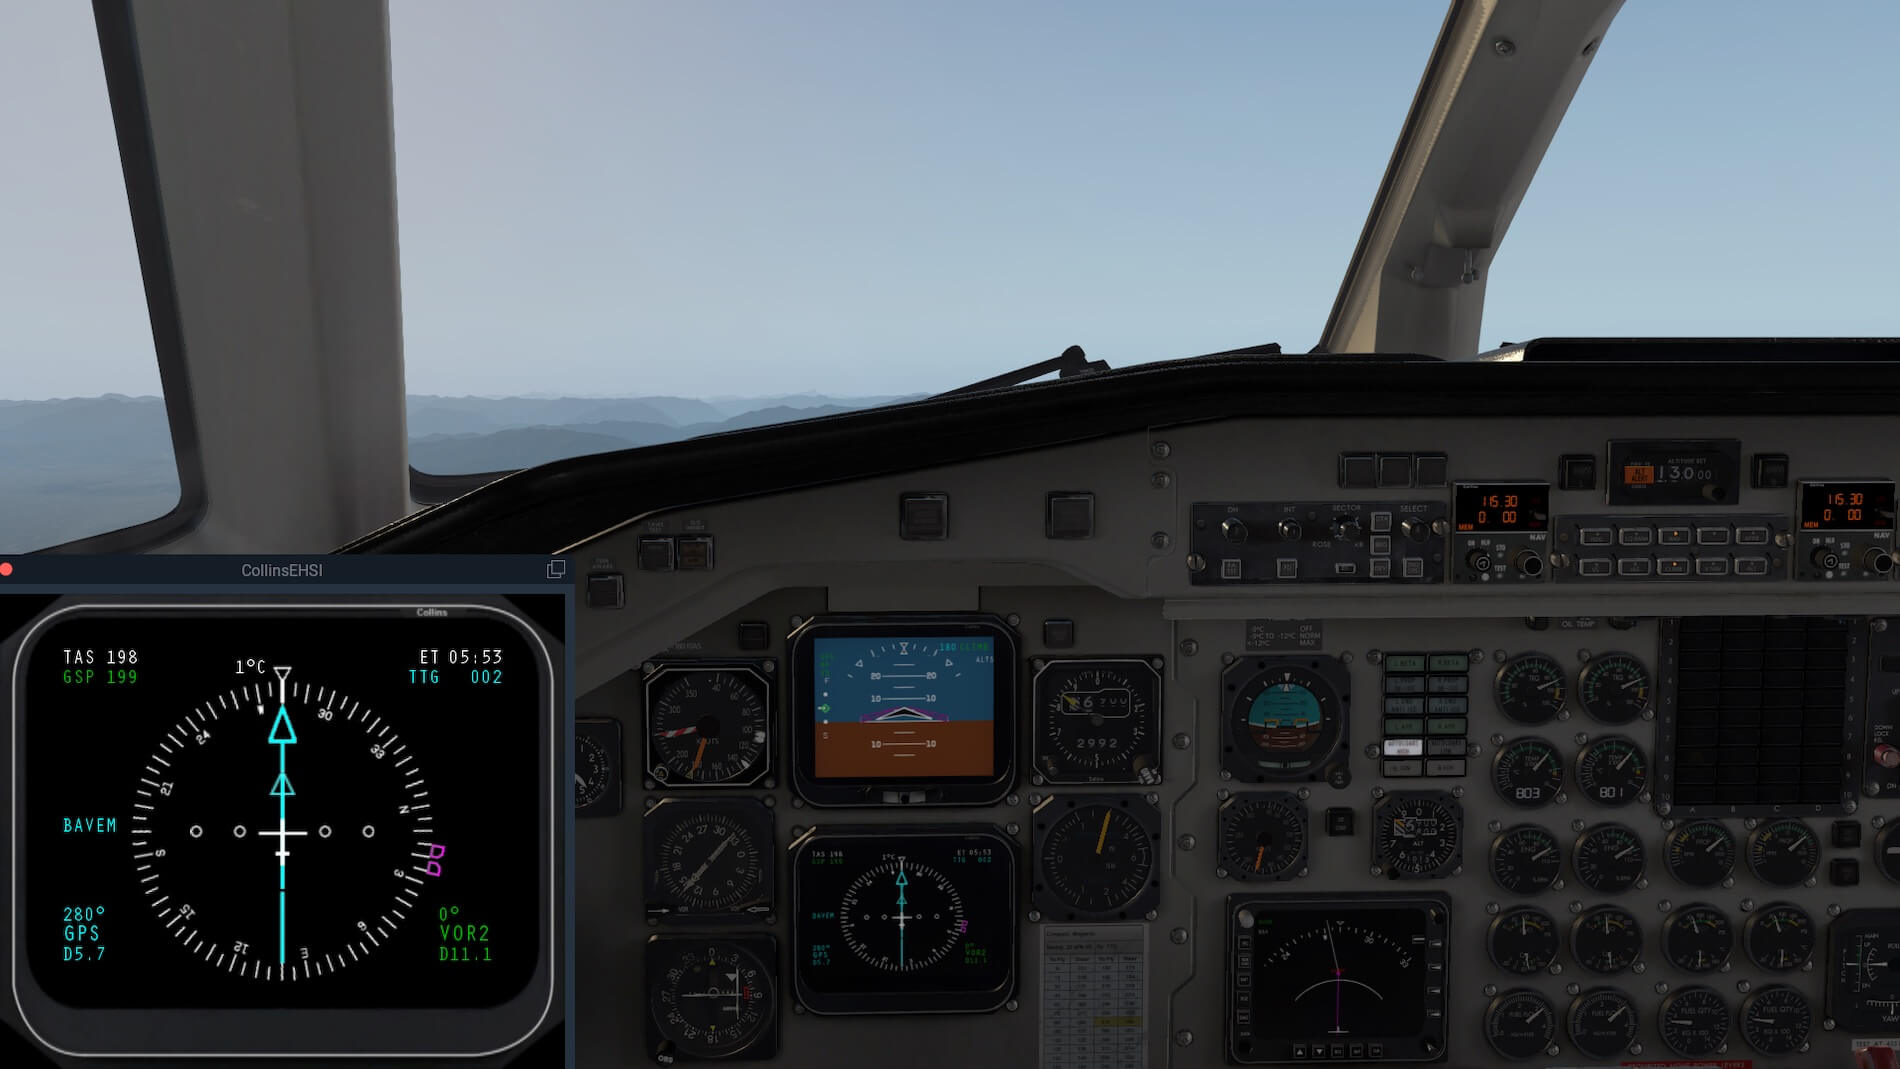
Then showing us having throttled back to climb power, the EHSI showing 5.7 nm to BAVEM, the elapsed time and time-to-go (TTG) to BAVEM, and even though we are not using VOR navigation, we had set the NAV radio to the CH VOR (on the airport) in case we needed it- in green we see that we are 11.1 nm DME from the VOR. (We always make sure that all instruments and avionics are put to work, even if we don’t plan to use them). A look at the EHSI and the MFD 2D windows, you can see BAVEM coming up on the MFD and the track we will be following after we pass the waypoint.
And finally, the ADI, showing the commanded airspeed and the fact that we are in climb mode. On the left we see that we have the GPS selected as our autopilot source and the AP is on, as is the yaw damper, and our speed bug is right in the middle of the vertical bar. Looking good!!


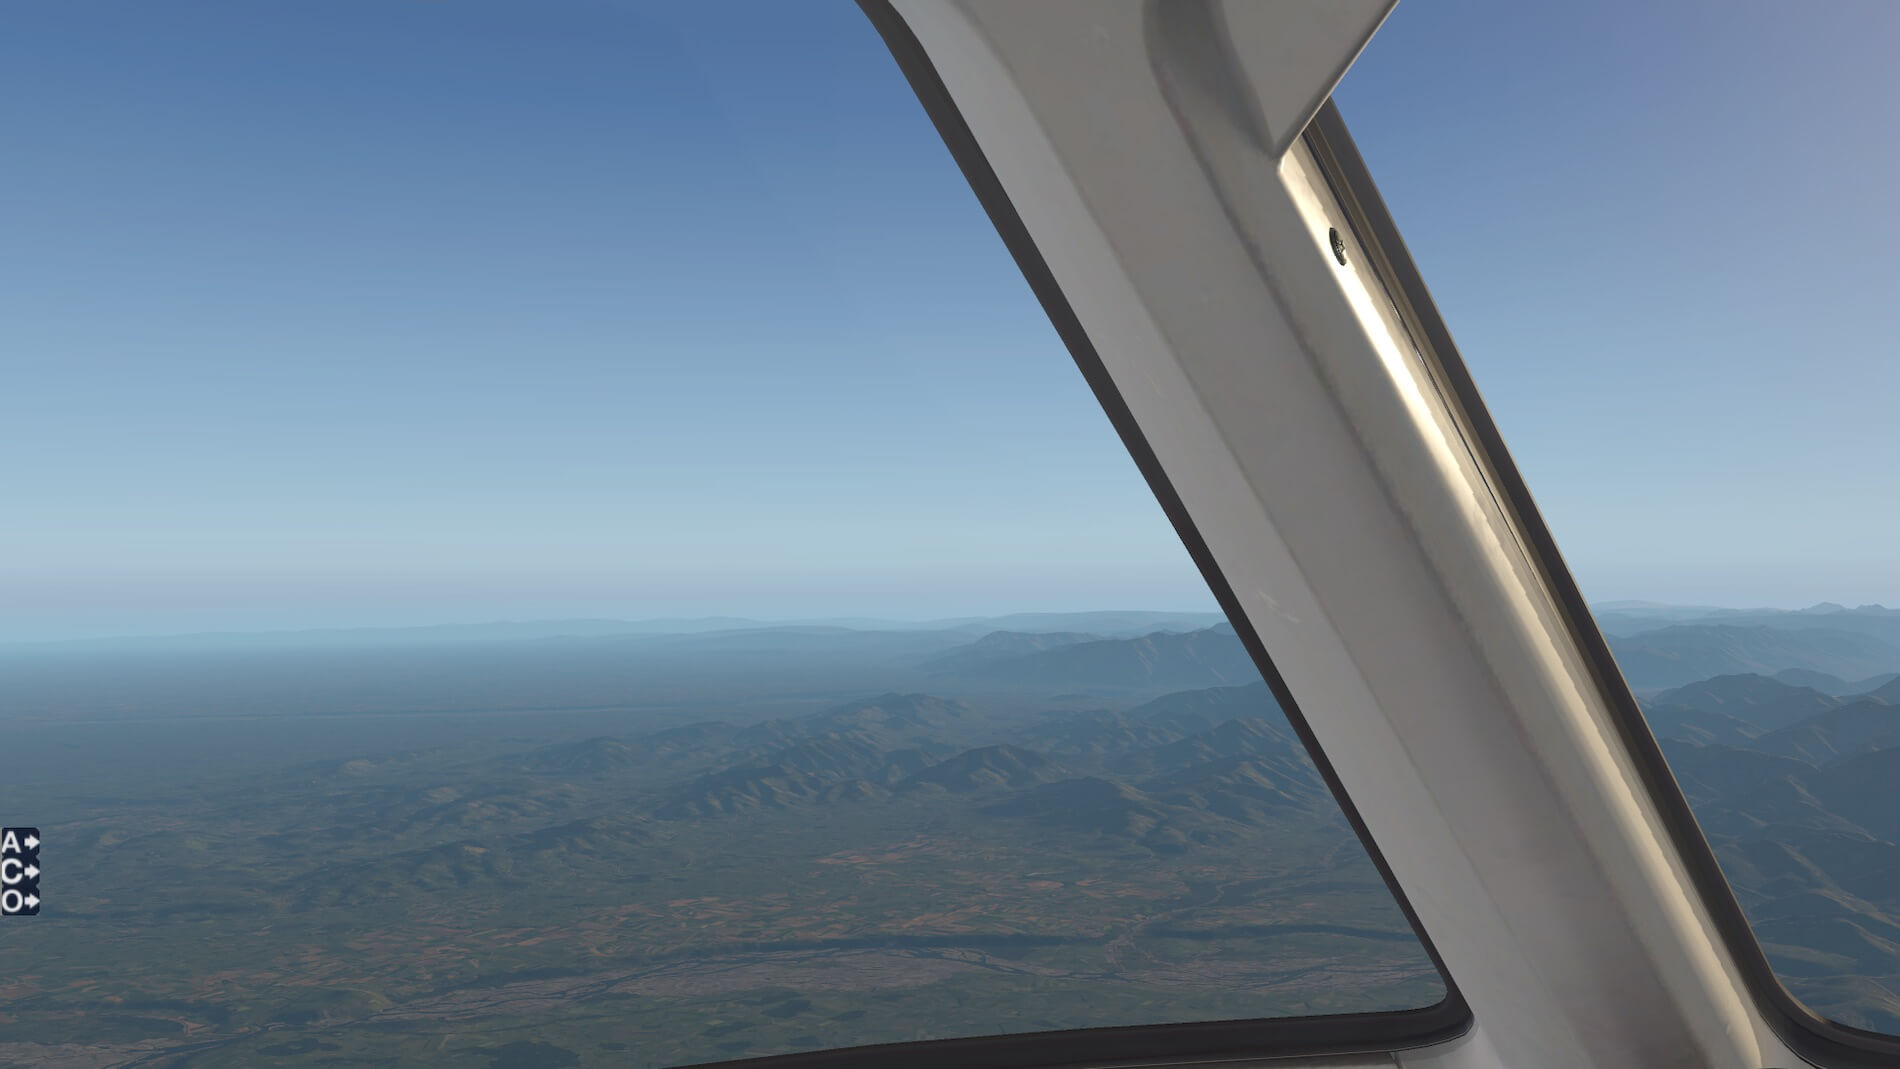
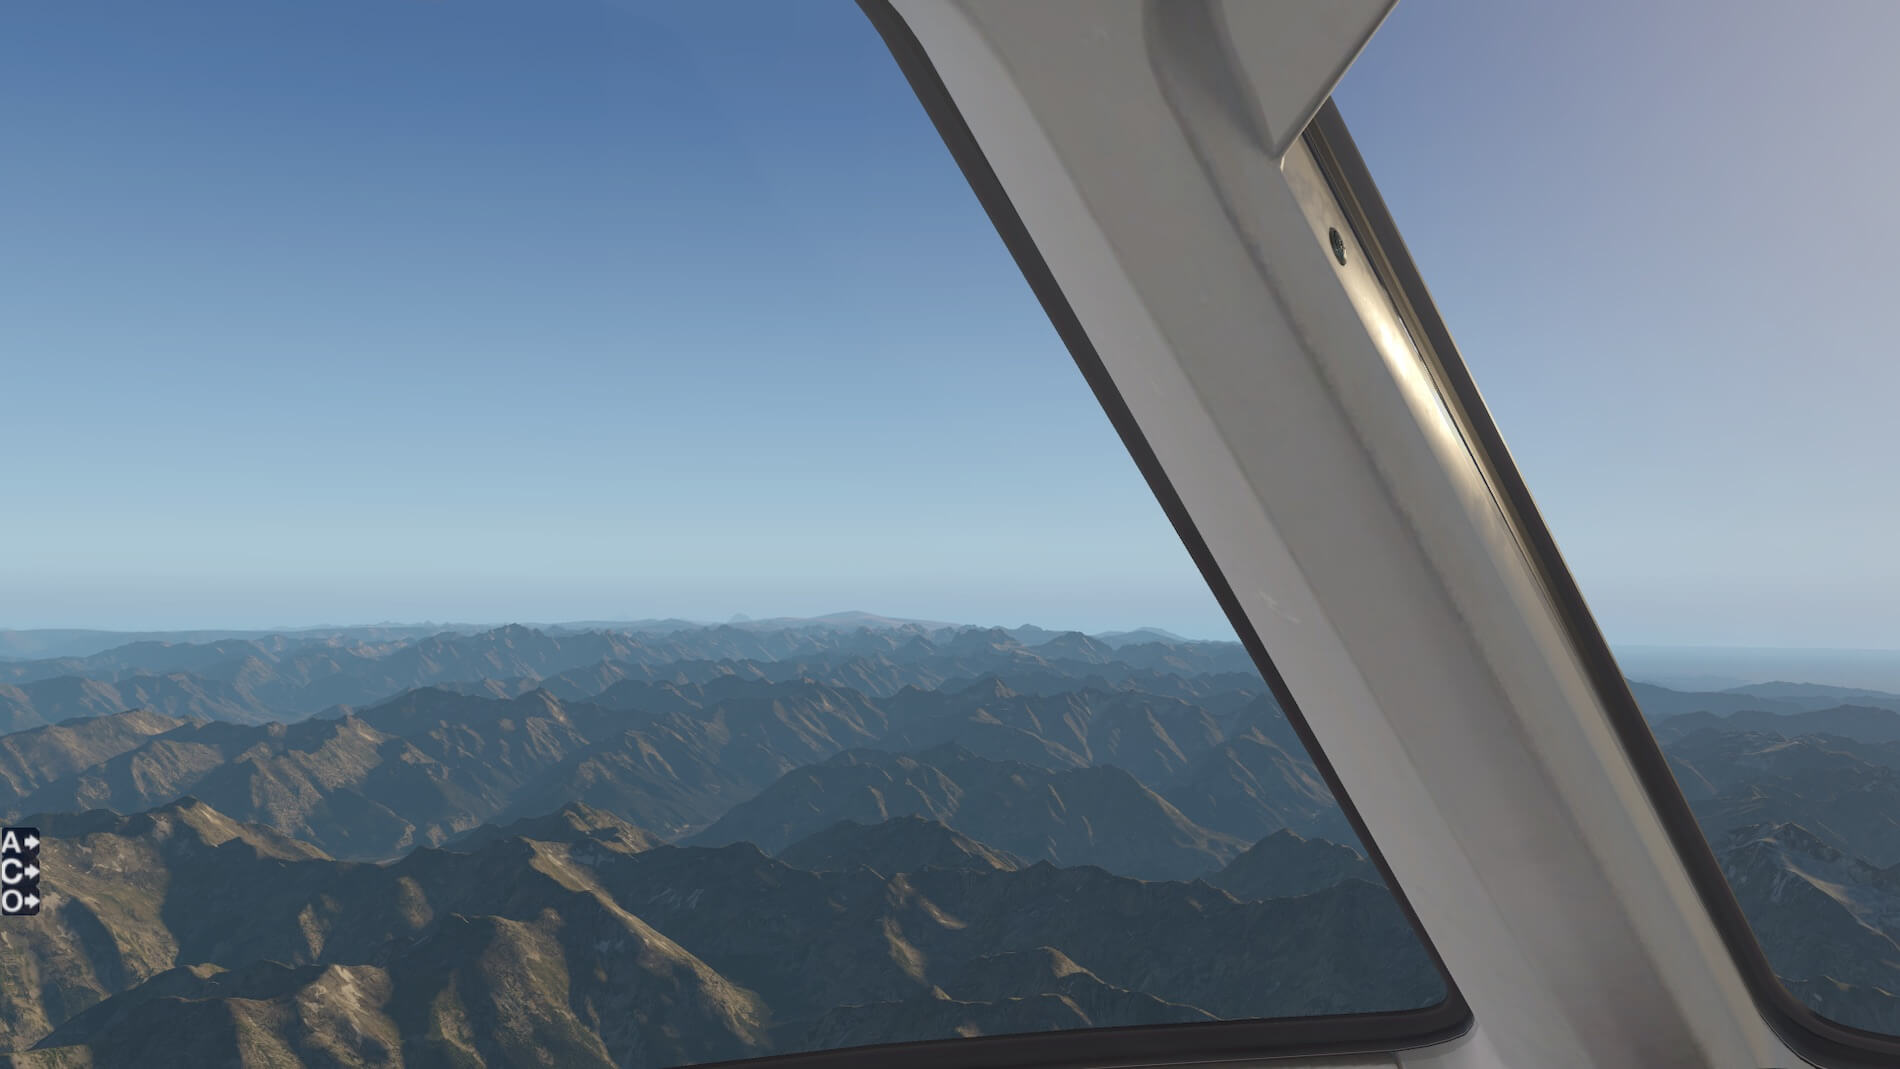
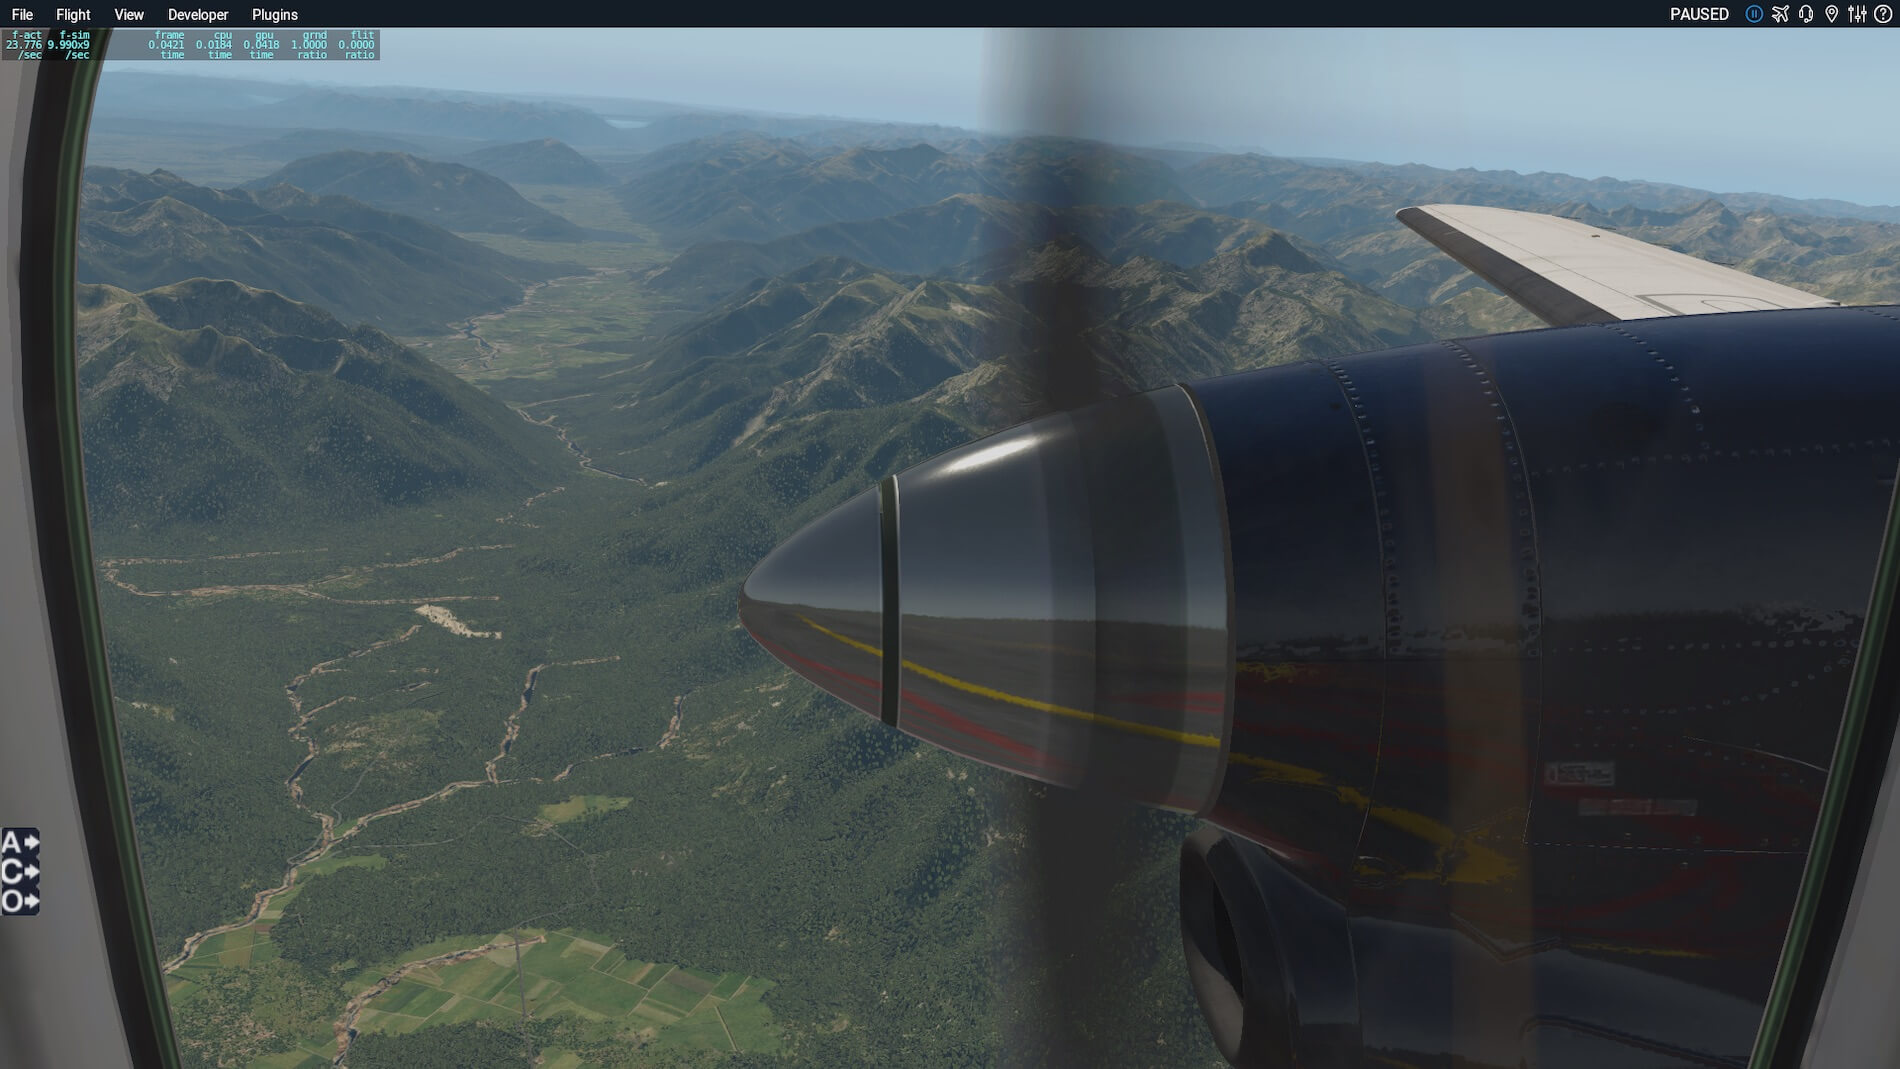
Looking south (left side) from our flight deck windows we can see the start of the foothills of the Southern Alps, with the Canterbury Plains to the east. The look ahead is quite formidable, very sharp peaked mountains. These mountains grow at a faster rate than erosion is removing them, as the subduction fault that creates them (and the entire country) is very active. We are in cruise mode, power has been reduced to maintain our planned speed of 200 KIAS.
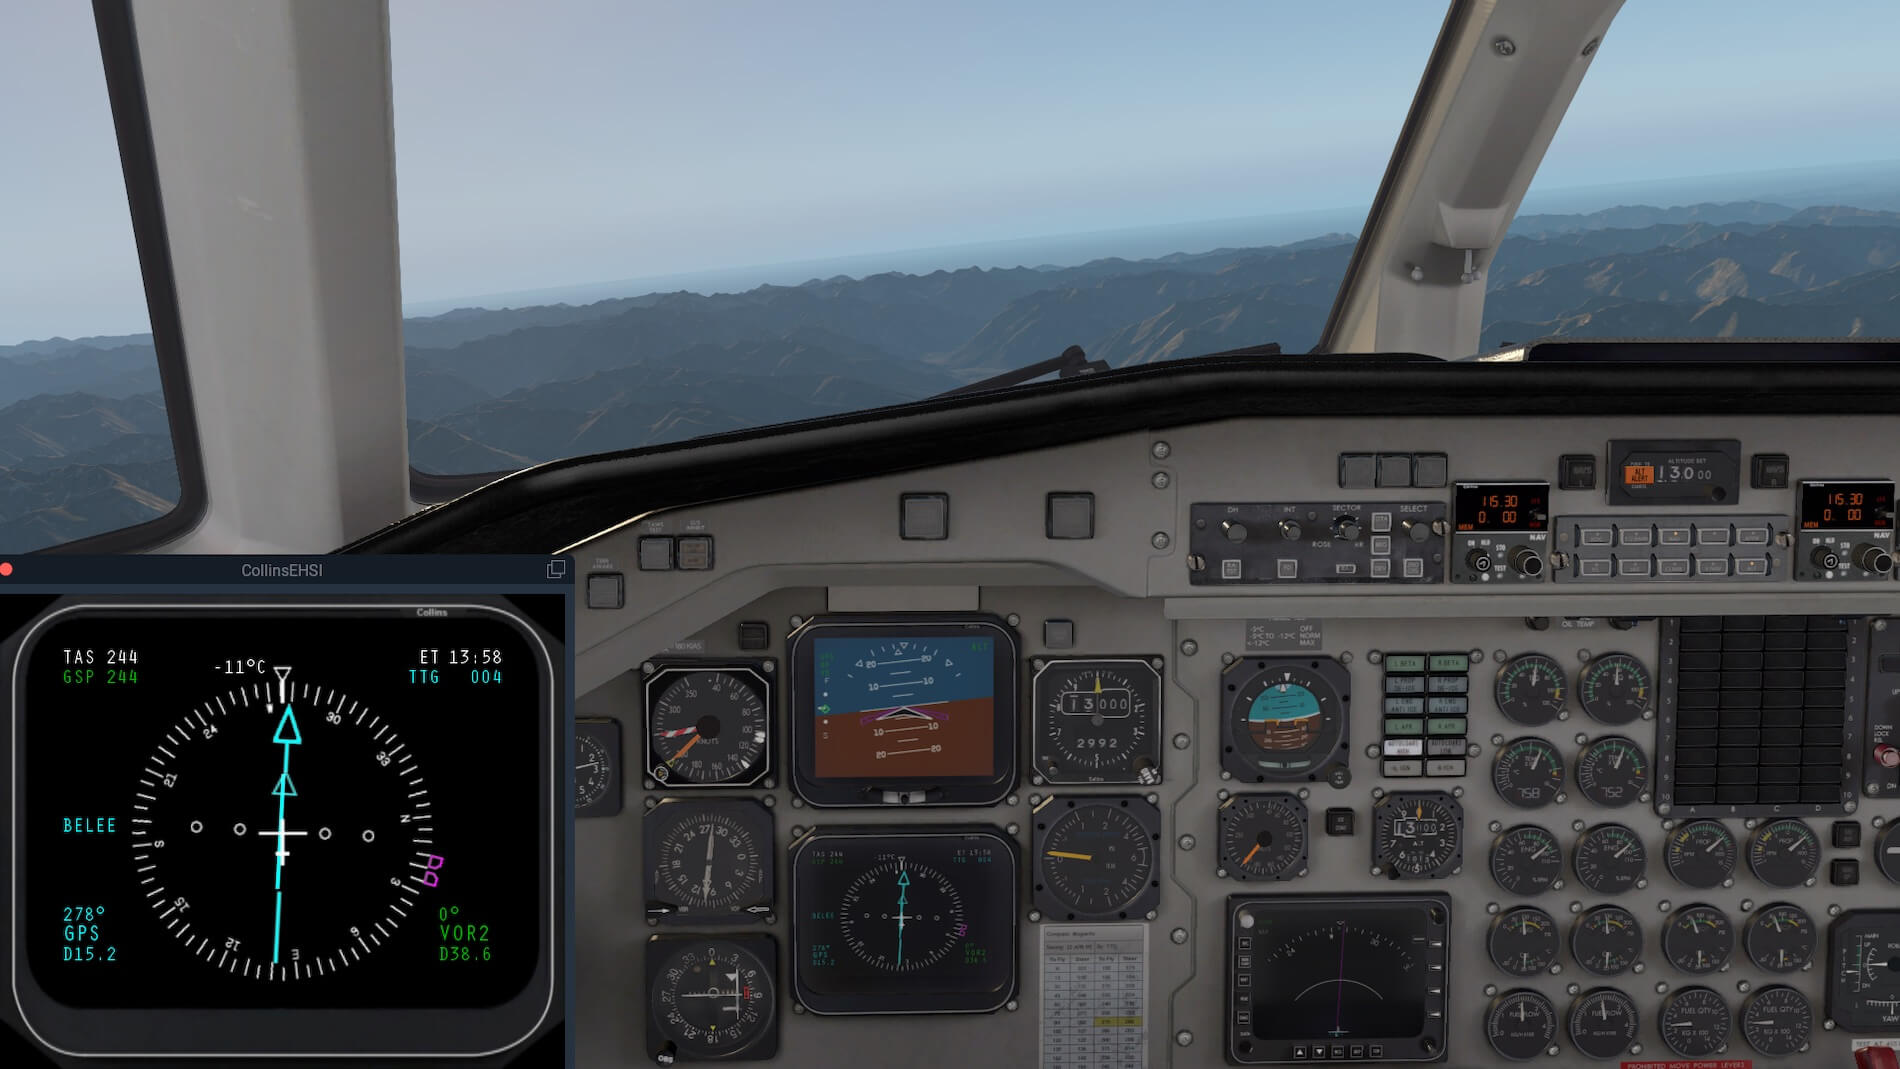
A closer look at the gauges tells us the power and propeller speed that is maintaining 200 KIAS for us. Next, a small right turn as pass the waypoint AVOCA and head to BELEE. We need to remember to start our speed reduction when we get to 10nm inbound to BELEE. The Tasman Sea is visible ahead on the western coast, we have been flying now for almost 14 minutes, and our CH VOR shows our range from Christchurch airport to be 38.6 nm.
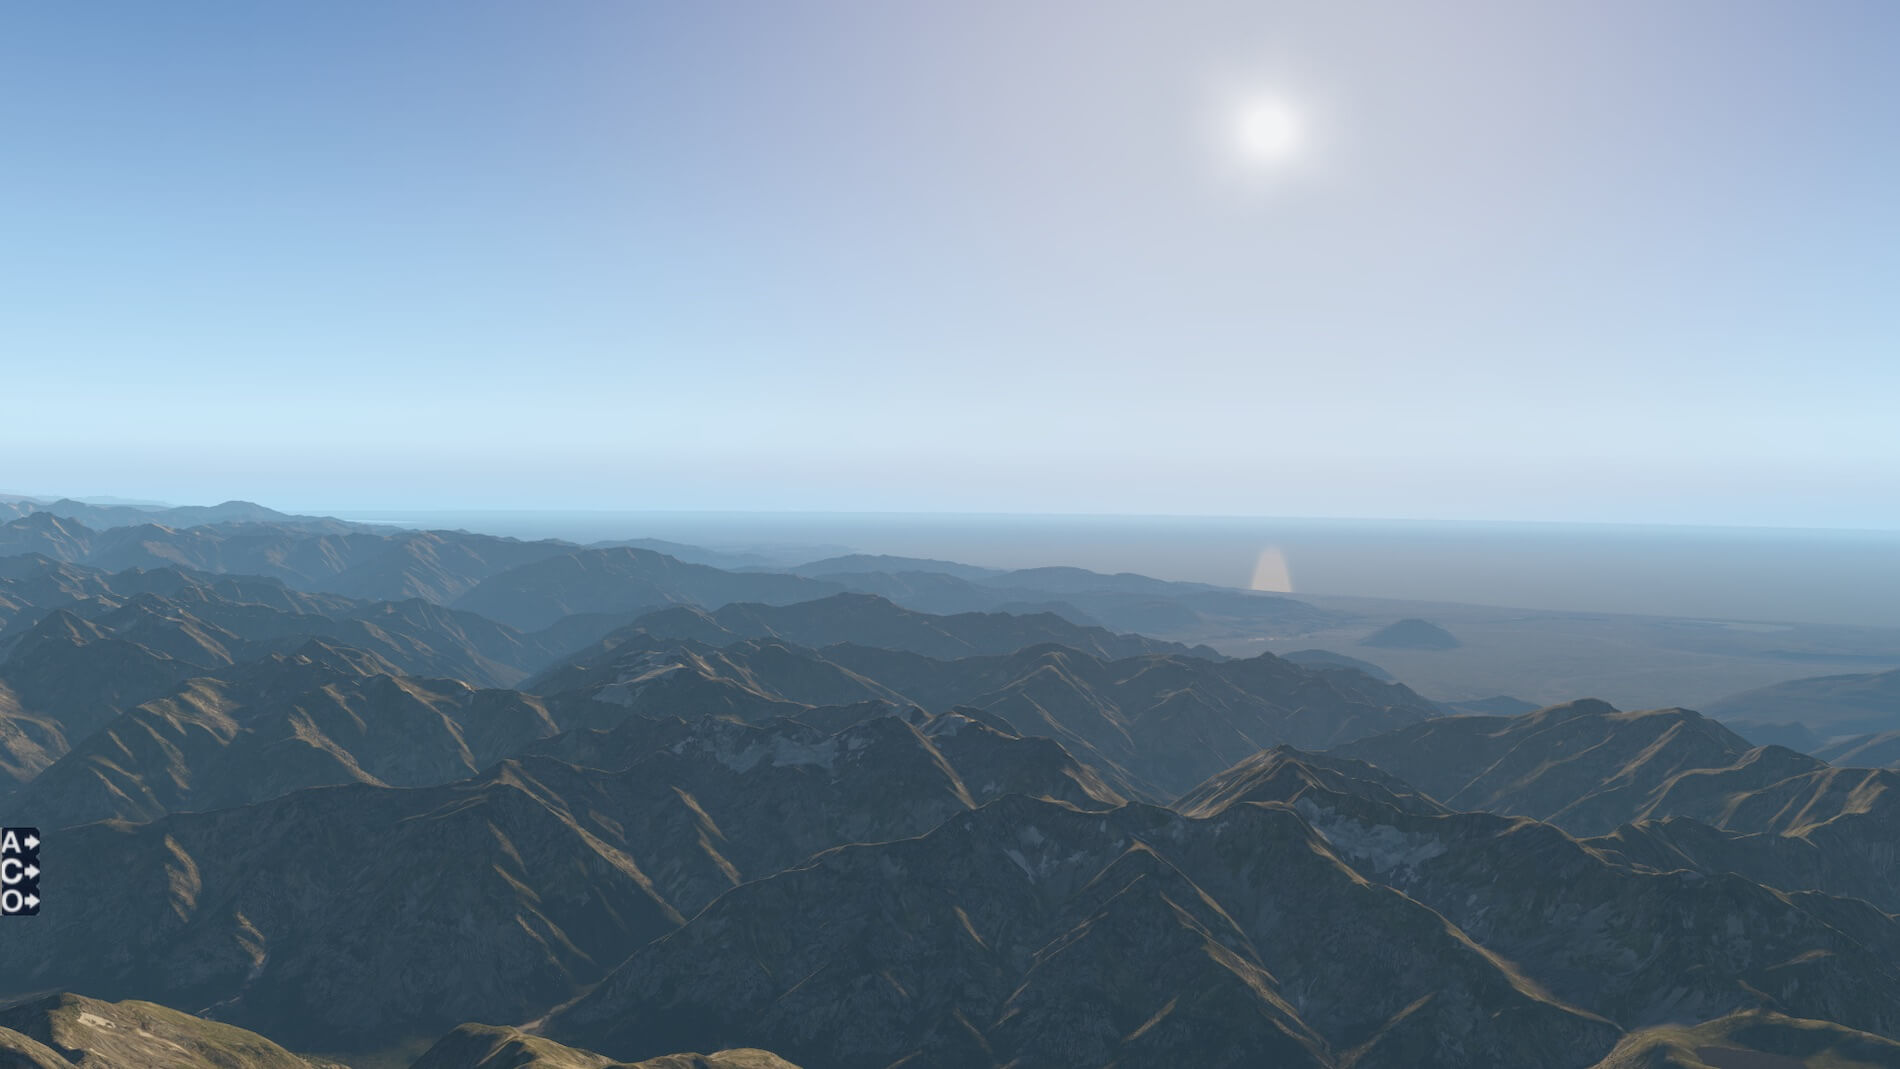
It’s not far to cross the South Island- but to drive there takes up to 4 hours since the access through the rugged Southern Alps is not a straight line and involves several high mountain passes. Next, as we move more to the western side of the Alps the mountains get bigger and sharper- as the fault line lies at the very western edge of the range. All of this was once sea floor until the fault line appeared and the land to the east of the fault was thrust upwards by the tectonic plate to the west.

Now we are at 10nm inbound to BELEE, time to reduce power and slow to our planned descent speed of 160 KIAS. We slow the aircraft to 160 KIAS, and very soon pass BELEE (the first waypoint in the STAR) and make a gentle turn to the left. Time to commence our descent. As we start descending, out to the left (south) we see the small coastal plain and lots of very rugged mountains.
The Tasman Sea (named after the Dutch explorer Abel Tasman who discovered New Zealand) is now getting very close. To the right (north) is a similar view- I could not resist placing the green arrow on my home town- Greymouth- where I was born and raised. Greymouth is about 25 miles (40 km) to the north of our destination, Hokitika.


In the screenshots below: descending to our first stepdown altitude of 9,600 feet with still 11.5 nm to go to waypoint HK414. At an altitude of 12,600 feet we still have 3,000 feet to lose- at a true airspeed of close to 180 knots that will take us about 3 miles for each minute, and at a descent rate of 1,000 fpm that would be 9 nm.
We don’t want to end up high (above the minimum altitude), since that means additional energy that we need to lose on this short approach and airport runway. We make our descent to 9,600 feet with 1.5 nm still to run to HK414, so we throttle up a bit to keep our airspeed at 160 KIAS. The AP now switches to the next STAR waypoint, HK401, and we commence the descent to 7,400 feet.
Next, we are navigating to ANDEP- not quite down to our planned descent of 7,400 feet but still manageable. We are almost at the coastline but a look out the left passenger window shows that we are still in mountainous country- and those mountains look even bigger now that we are descending!!

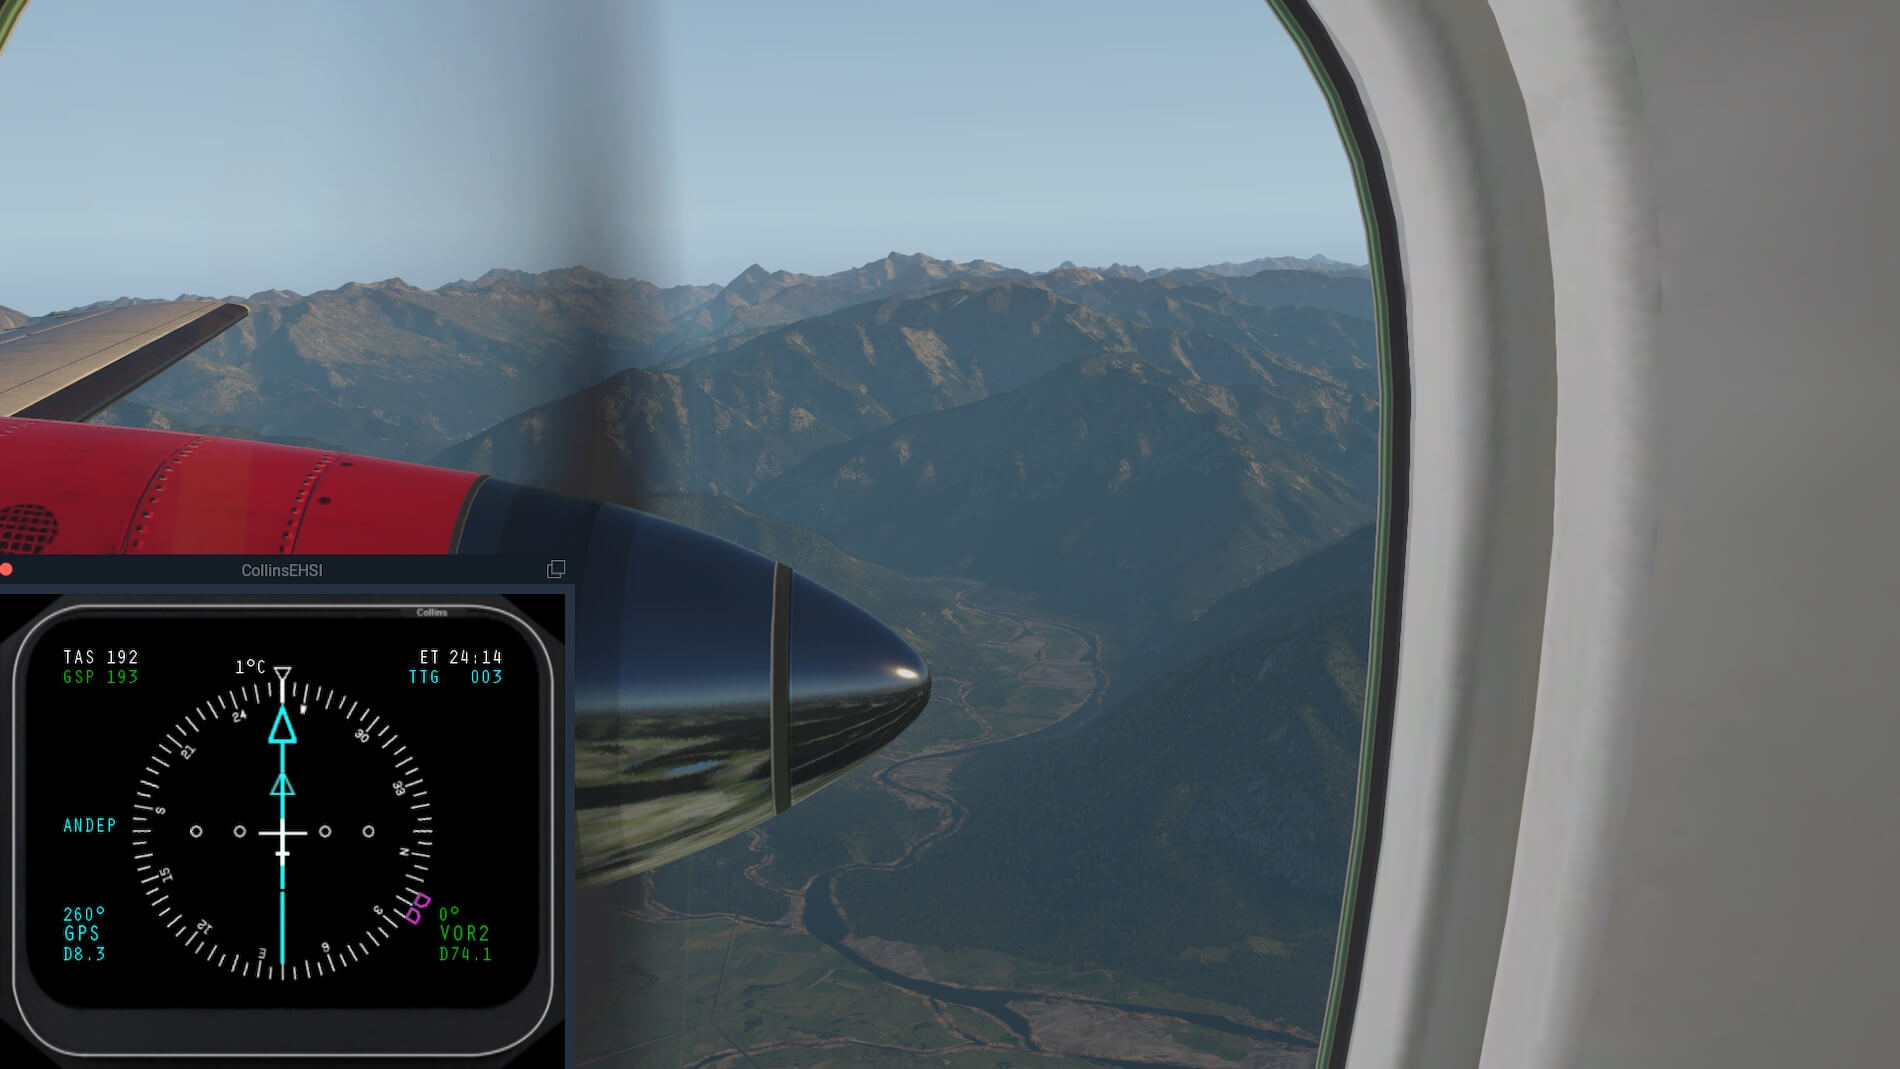
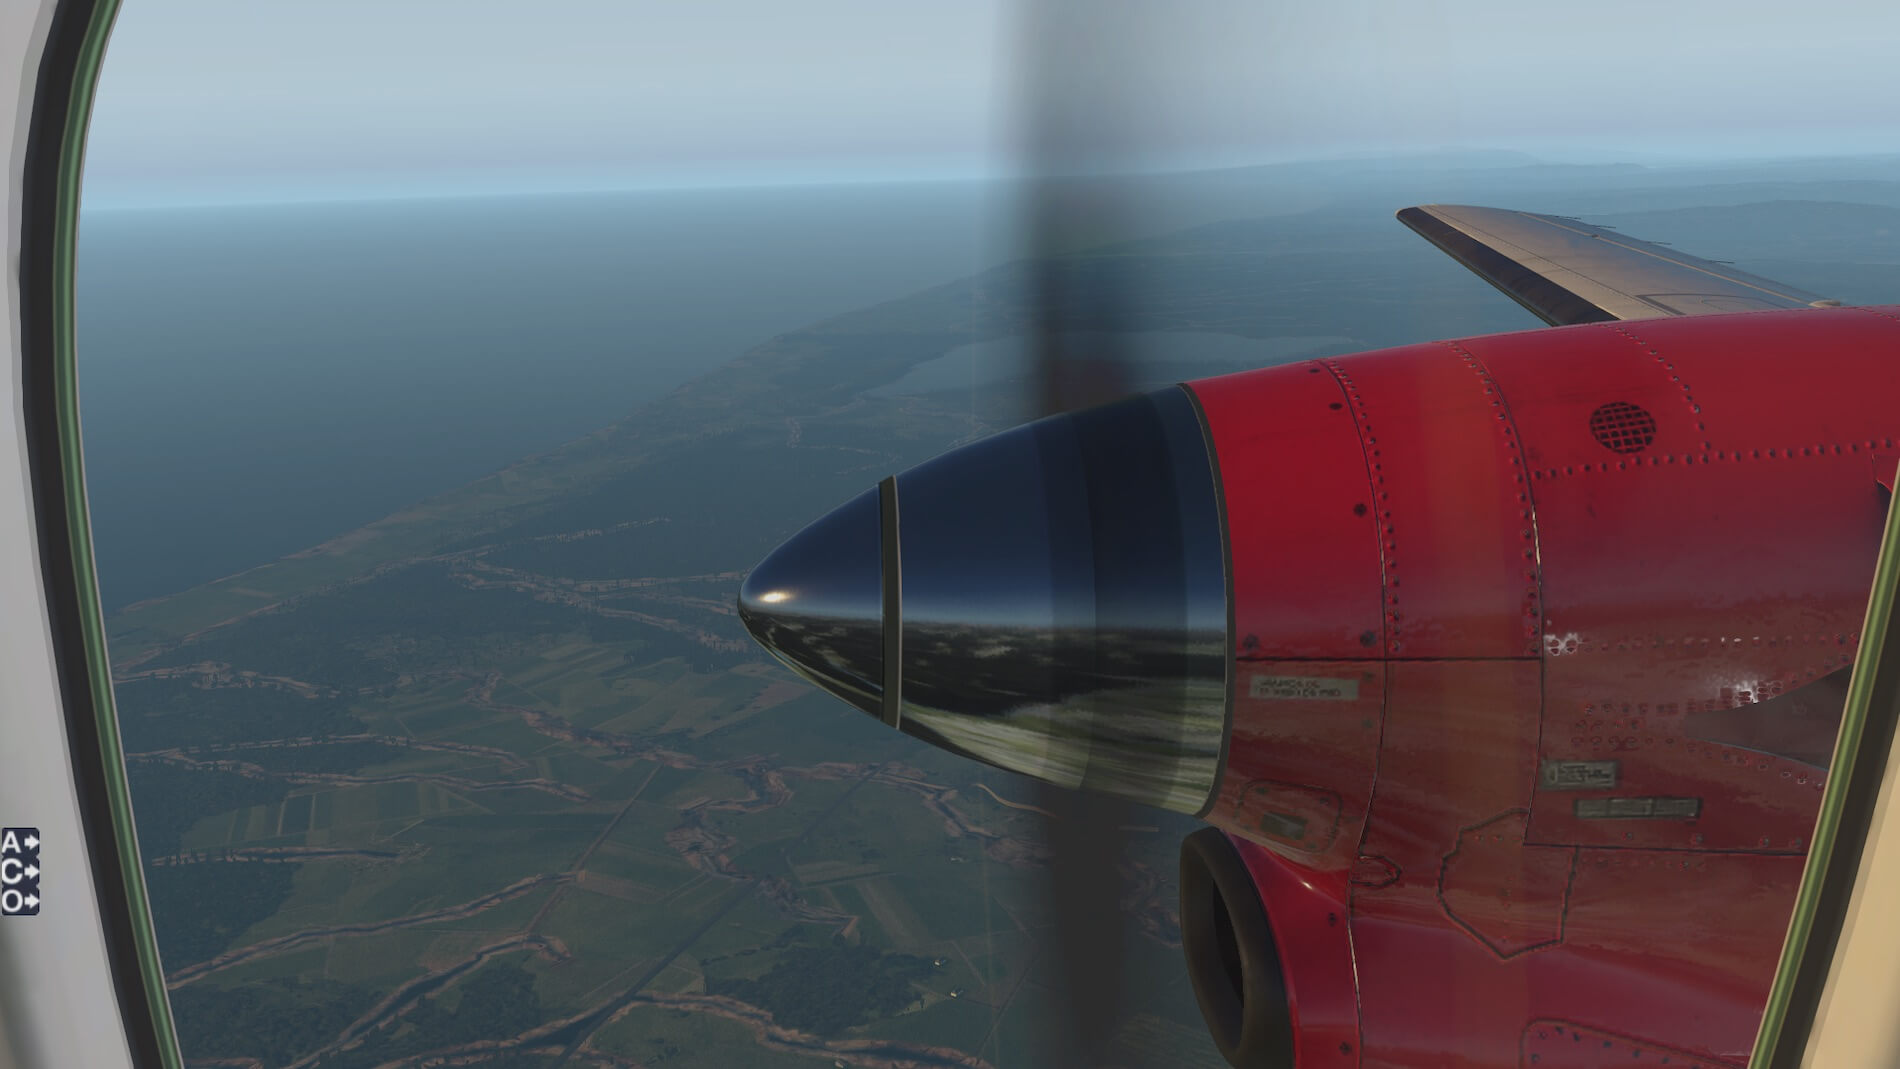
Next, we are at 5,100 feet on our descent to our next step-down altitude of 4,100 feet- with that same 3nm per 1,000 feet that sounds about right. You can then see that we made it to 4,100 feet as our AP switched to the first leg of the LNAV approach, which ends at KARVO. Looking out the right window shows that we are almost at the sea coast. I now bring the 2D window of the ADI up as I want to see the approach indicators.
The AP switches to final approach course, and our glidepath indicator is now showing- and we made it successfully down to 2,500 feet- I love it when a plan comes together! Another glance out the right passenger window shows that at our intersection with the final approach course we are past the sea coast and well off-shore.


Holding 2,500 feet as we see the glidepath indicator moving down, and we have started to lose speed during this short level flight portion of the approach. We set the AP for APP, and at glidepath intercept we start on our final descent. Now flying over the township of Hokitika- and while we are very close to the sea coast here you can still just see those formidable mountains to the right of the windshield.
We have disconnected the AP and are flying manually to the runway- airspeed is right at our bug of Vref. It’s great to see planning all coming together! Finally- we back-taxi on the runway and can again see those big mountains only a short distance away- that is close to the fault line where those two massive tectonic plates fight a never-ending battle. The tectonic plate to the west of the fault (where we are at Hokitika) is winning that battle as it lifts up the eastern plate and therefore displaces it.


Welcome to Hokitika!
Summary
I have thoroughly enjoyed this review, as this product from Carenado just kept giving many pleasant surprises as I flew it to gain familiarity and knowledge for this review. I also watched several real-world videos showing start-up, take-off and landing, to more understand this aircraft. Is this model perfectly like the real-world aircraft? No, it’s not, but the immersion and XP11.30+ graphics and flight modelling are very good.
An aircraft such as this is very well suited to short regional routes that can be flown in less than an hour. The sound is excellent, as is the lighting and texturing, and the depth of the simulation I found to be very nice. The features in the model such as independent movement of seat reclining, tray tables and passenger lighting are very well done and equal to or better than anything else I have tried to date. All of this is surpassed only by the great customer support on the forum where questions are answered very promptly.
Appendix: New Zealand geography, topography and history.
New Zealand was first discovered by the indigenous Maori people before 1300 AD, a Polynesian race that are closely related to the native Hawaiians and Tahitians. Coming from a more temperate climate, they had never before seen snow, so when the snowy tops of the Southern Alps became visible, they thought it was a “long white cloud”.
They gave this name (Land of the Long White Cloud) to this new country- “Aotearoa”. The first European to discover this land was the Dutch explorer Abel Tasman in 1642, who charted the coastline but never landed. Captain James Cook revisited the land in 1769 while observing the transit of Venus, and claimed it for the English crown. See also this link. (https://en.wikipedia.org/wiki/New_Zealand)
In 1645, Dutch cartographers renamed the land Nova Zeelandia after the Dutch province of Zeeland. British explorer James Cook subsequently anglicized the name to New Zealand.
Then Southern Alps mountain range is formed by the action of a fault line that is caused by the collision of two major tectonic plates- the Pacific and Indo-Australian. More about the Alpine Fault can be found here.
Finally, one last screenshot of our flight overflying the fault line. Everything to the right of the fault line (on your screen) is the Pacific Plate that is being uplifted by the collision caused by the Indo-Australian plate, everything to the left of the fault (in front of the aircraft).
Credits
This review was enhanced by this brilliant freeware scenery:
New Zealand Mesh v4 from Andras Fabian
New Zealand Overlay from Andras Fabian
Christchurch airport NZCH from fsclips
Feel free to contact me if you’ve got additional questions related to this impression. You can reach me via email Angelique.van.Campen@gmail.com or to Angelique@X-Plained.com.
With Greetings,
Bruce Knight
| Add-on: | Payware Carenado Saab 340B turbo-prop airliner |
|---|---|
| Publisher | Developer: | X-Plane.Org | Aerosoft | Carenado |
| Description: | Realistic rendition of the Saab 340B Turbo-prop with X-Plane FMS |
| Software Source / Size: | Download / Approximately 777MB (unzipped) |
| Reviewed by: | Bruce Knight |
| Published: | May 23rd 2019 |
| Hardware specifications: | - iMac late 2017 - Intel i7 4.2 GHz - AMD Radeon Pro 580 8192 MB - 32GB 2400 MHz RAM |
| Software specifications: | - Mojave (10.14.5) - X-Plane 11.40 |
1 Comment
Submit a Comment
You must be logged in to post a comment.
Excellent review!