The Delta Wing Simulations F-16C BLOCK 52+
Introduction
And I just thought it was the F-16 fighter from General Dynamics and Lockheed Martin, but it turns out that General Dynamic made many many variants of the F-16, but first this.
Your personal reporter Angelique van Campen and dedicated X-Plained reviewer Andy Clarke are pleased to inform you that they both decided to write a comprehensive review of the F-16C BLOCK 52+ from DeltaWingsim.Com. Just in case, the review is based on product version 1.2.

Oops, what is then the BLOCK 52+ for model? Let me try to explain that with the help of some Wikipedia information.
Wikipedia says “A large number of variants of the General Dynamics F-16 Fighting Falcon have been produced by General Dynamics, Lockheed Martin, and various licensed manufacturers. The details of the F-16 variants, along with major modification programs and derivative designs significantly influenced by the F-16, can be found at the dedicated Wikipedia web page.”
For now lets concentrate on the BLOCK 52+. According to Wikipedia “This variant’s main differences are the addition of support for conformal fuel tanks (CFTs), a dorsal spine compartment, the APG-68(V9) radar, an On-Board Oxygen Generation System (OBOGS), and a JHMCS helmet.
The CFTs are mounted above the wing, on both sides of the fuselage and are easily removable. They provide 440 US gallons (1,665 L) or approximately 3,000 pounds (1,400 kg) of additional fuel, allowing increased range or time on station and free up hard points for weapons instead of underwing fuel tanks. All two-seat “Plus” aircraft have the enlarged avionics dorsal spine compartment which is located behind the cockpit and extends to the tail. It adds 30 cu ft (850 L) to the airframe for more avionics with only small increases in weight and drag.”
-
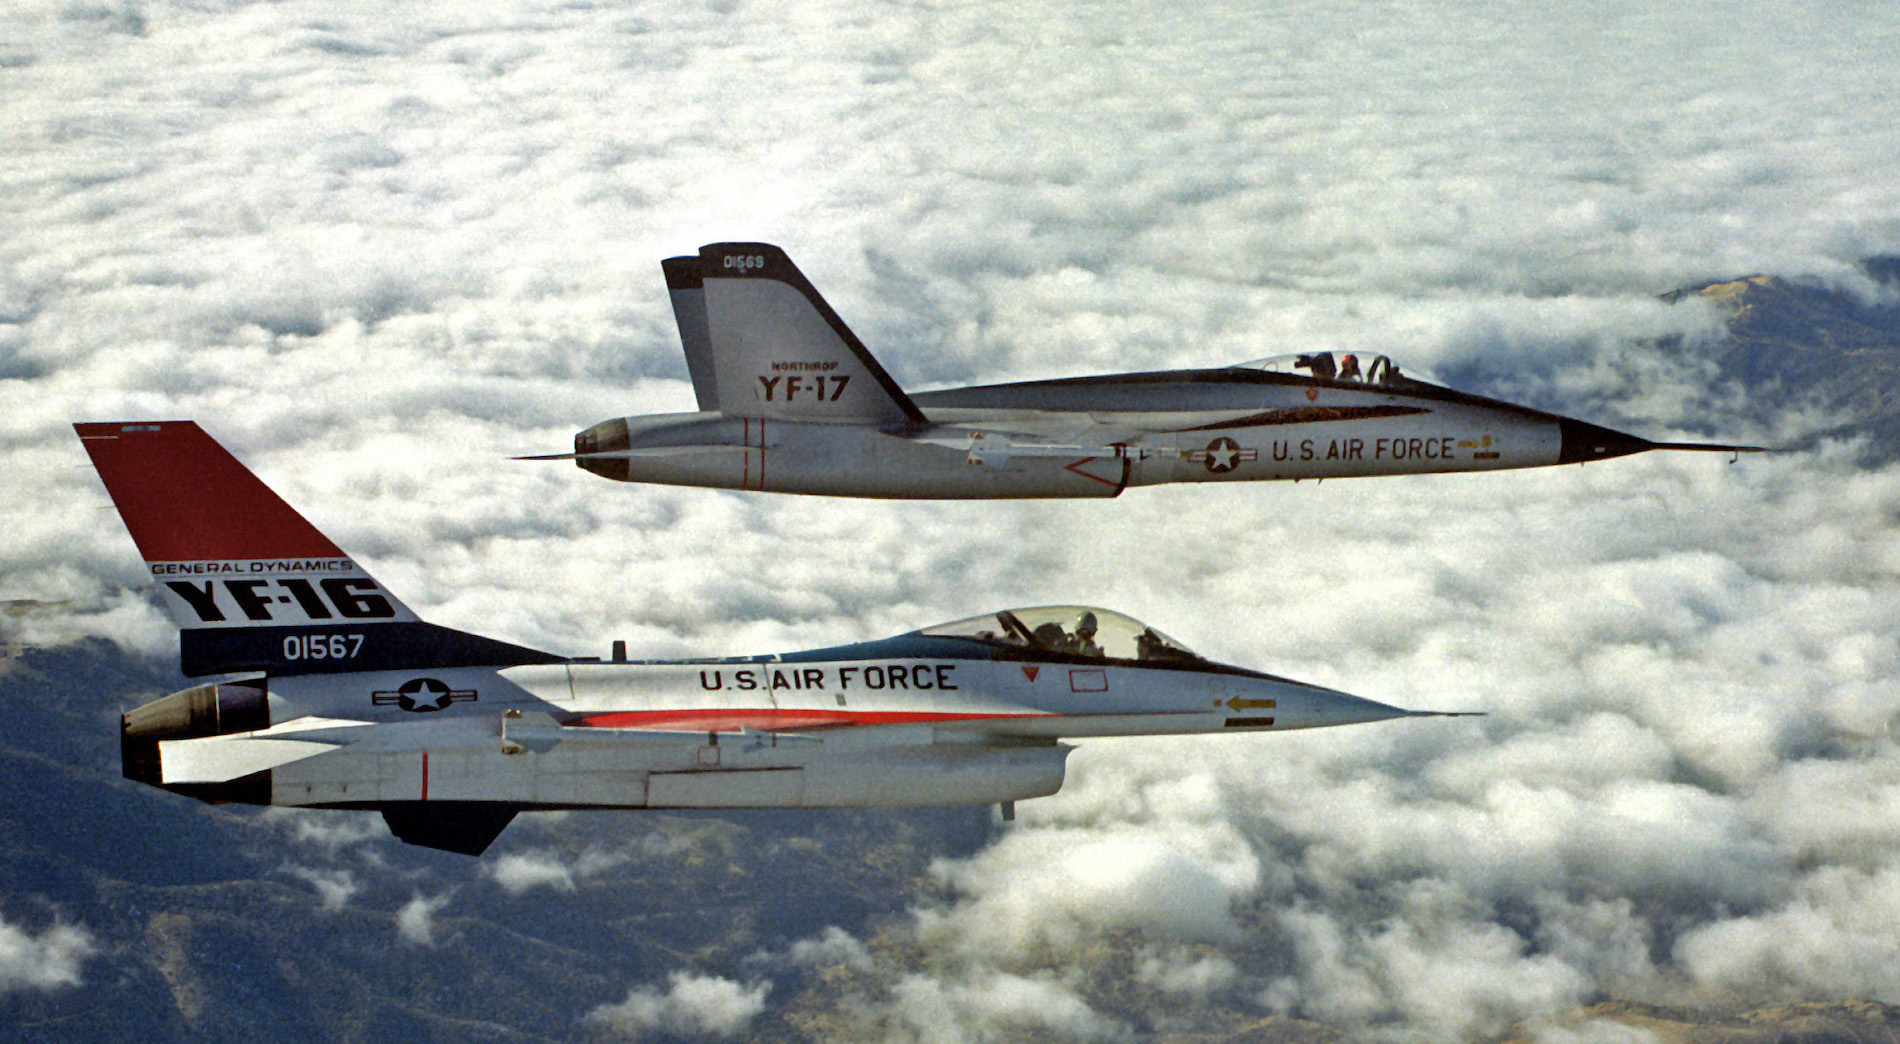
- An air-to-air right side view of a YF-16 aircraft and a YF-17 aircraft, side-by-side, armed with AIM-9 Sidewinder missiles.
By the way, the very first YF-16 is a “two single-seat YF-16 prototypes were built for the Light Weight Fighter (LWF) competition. The first YF-16 was rolled out at Fort Worth on 13 December 1973 and accidentally accomplished its first flight on 21 January 1974, followed by its scheduled “first flight” on 2 February 1974. The second prototype first flew on 9 March 1974. Both YF-16 prototypes participated in the fly off against the Northrop YF-17 prototypes, with the F-16 winning the Air Combat Fighter (ACF) competition, as the LWF program had been renamed.”
Delta Wing Simulations team
Who or what is the newly DeltaWingSim group?
First; “Delta Wing Simulations proudly presents you, F-16C Block 52+ Fighting Falcon, Airshow Edition. Our first release – November 2020 – of F-16 will be orientated into the Airshow Edition of the Jet. No weapon systems will be available in this first Special Edition. Flight model is optimised for realistic performance with basic FBW functions controlled by plugin.
Delta Wing Simulations is a small team created in 2020 and it is goal is to create simulators of some of the most known fighter jets of the top quality.”
Team members are:
Kostas D. Koronakis -Graphic Design, 3d Modelling, Textures
Andrzej Borysewicz -3D Modeling, Animations, Product Testing
Gary Hunter – Flight model, Product Tester
Dimitris Koronakis – Programmer, Product Tester
The above text is taken from the following promotional movie from DeltaWingSim and it must be said that thew product has had already some updates to improve the F-16 even further and to add new features.
Installation, Documentation and 4K-2K Liveries
Once downloaded from X-Plane.Org, you just unzip the package, and install it as a sub folder in the X-Plane Aircraft folder. You can if you like this, create a sub folder within. Aircraft named DWS or Delta Wing Simulations and install the F-16 under this folder. That’s it! At startup or loading of the F-16, a serial number is needed to activate the fighter. I checked the F-16C folder contents and found a the Skunkcrafts updater. This means, as of this writing November 2020, there’s no longer a need to check for the latest fighter version at X-Plane.Org. This is now handled by the Skunkcrafts file.
The modeled F-16C BLOCK 52+ comes with one Acrobat manual; DWSim F-16 Flight Manual. The provided manual has 30 pages and although it doesn’t look much, the DWS team tried to add as much as possible in this manual. I had hoped for real system description/operation information, but also know that F-16 manuals are probably classified and not able to be used for flight simulation use.
A plus is the description and step-by-step procedure how to do the cockpit preparations, the startup and basic setup of the F-16C. Andy will find out how deep the systems are simulated. In case you didn’t know, the F-16 was the first fighter that was equipped with kind of FBW (Flight By Wire) system.
In one of the previous versions you had a separate 2K OPTION folder. This to improve frame rates for those who didn’t had a powerful PC or Mac. This is luckily changed with version 1.05. There’s no longer a 2K OPTION folder with different texture files that need to be overwritten in case you want to use these. No, it’s now different and much easier. Each fighter livery including the liveries that come with the package has a 2K and 4K livery folder.
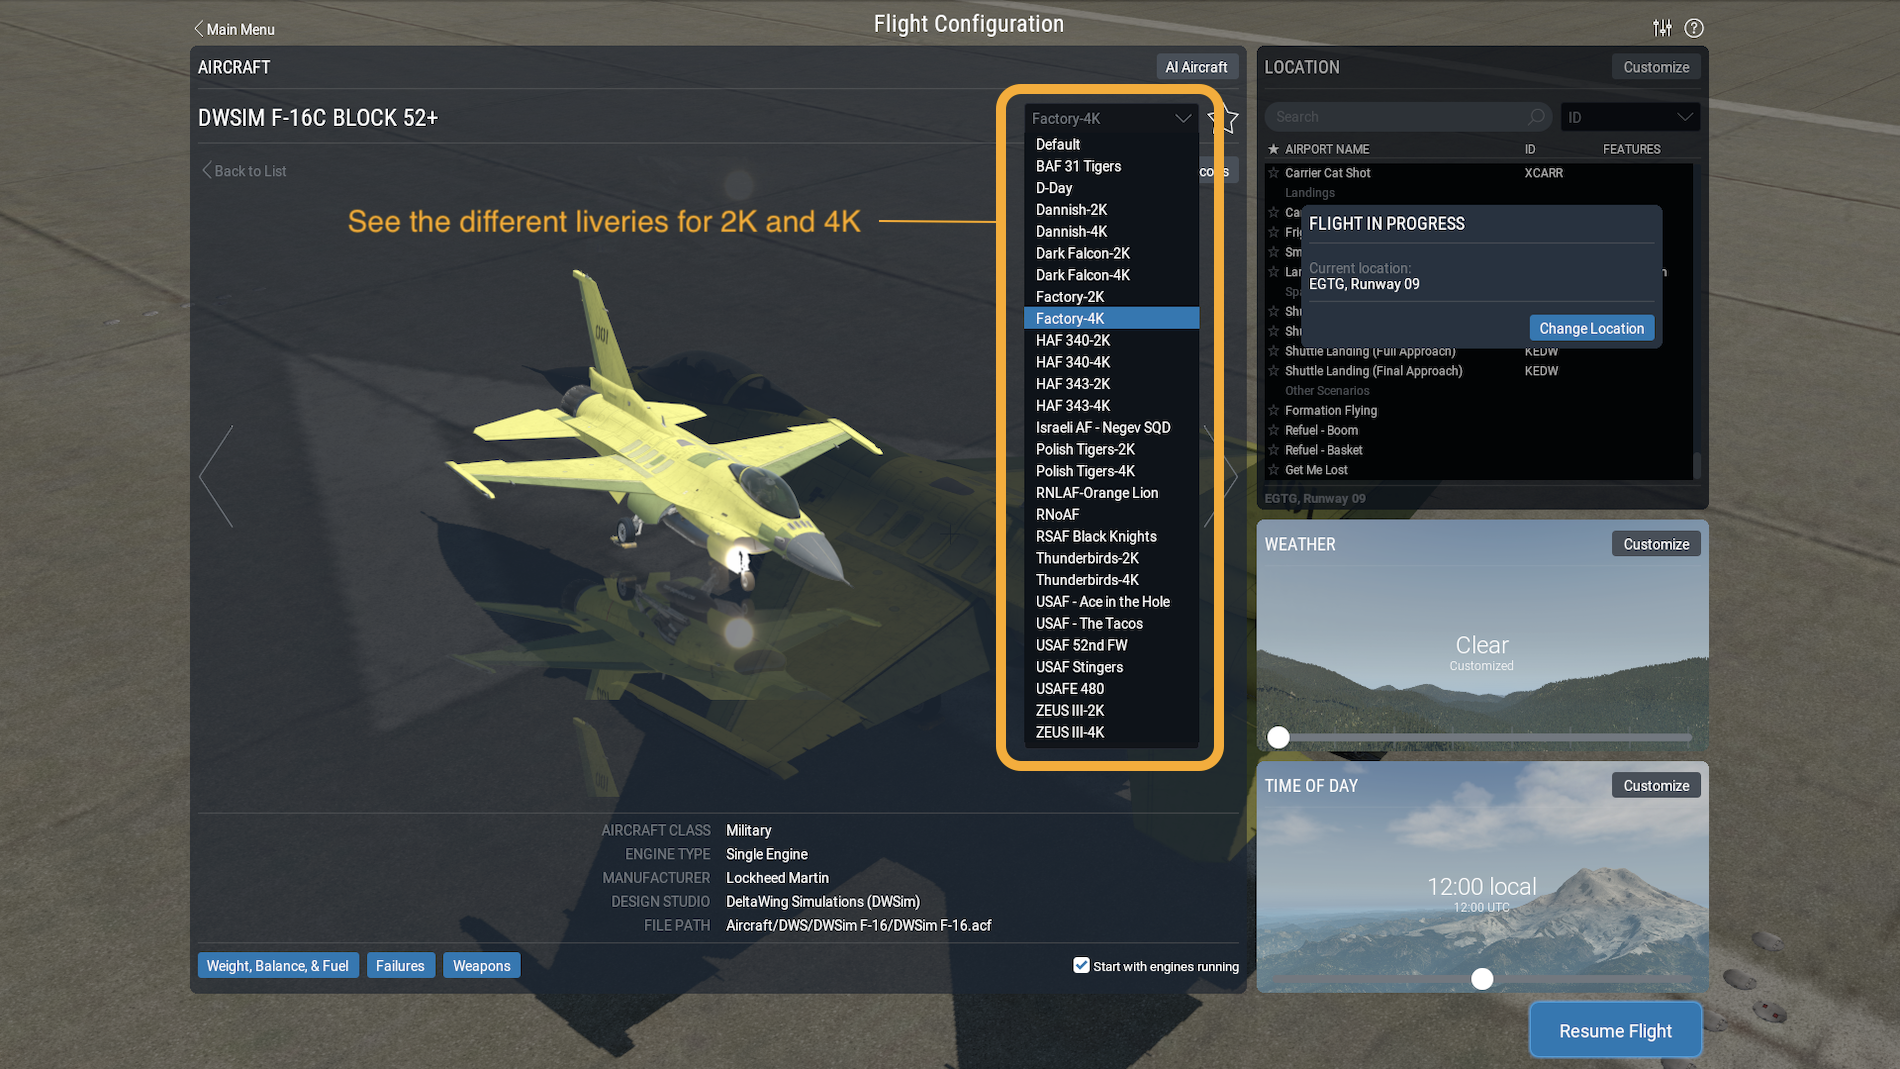
So it’s easy. You select within X-Plane the F-16C of your choice and decide to go for the 4K or 2K texture quality. Which one do you need? That depends on your system. I can imagine – just to give you an idea – that I can handle 4K textures on my iMac Pro but Andy will use the 2K textures because of his older iMac.
Exterior Modelling
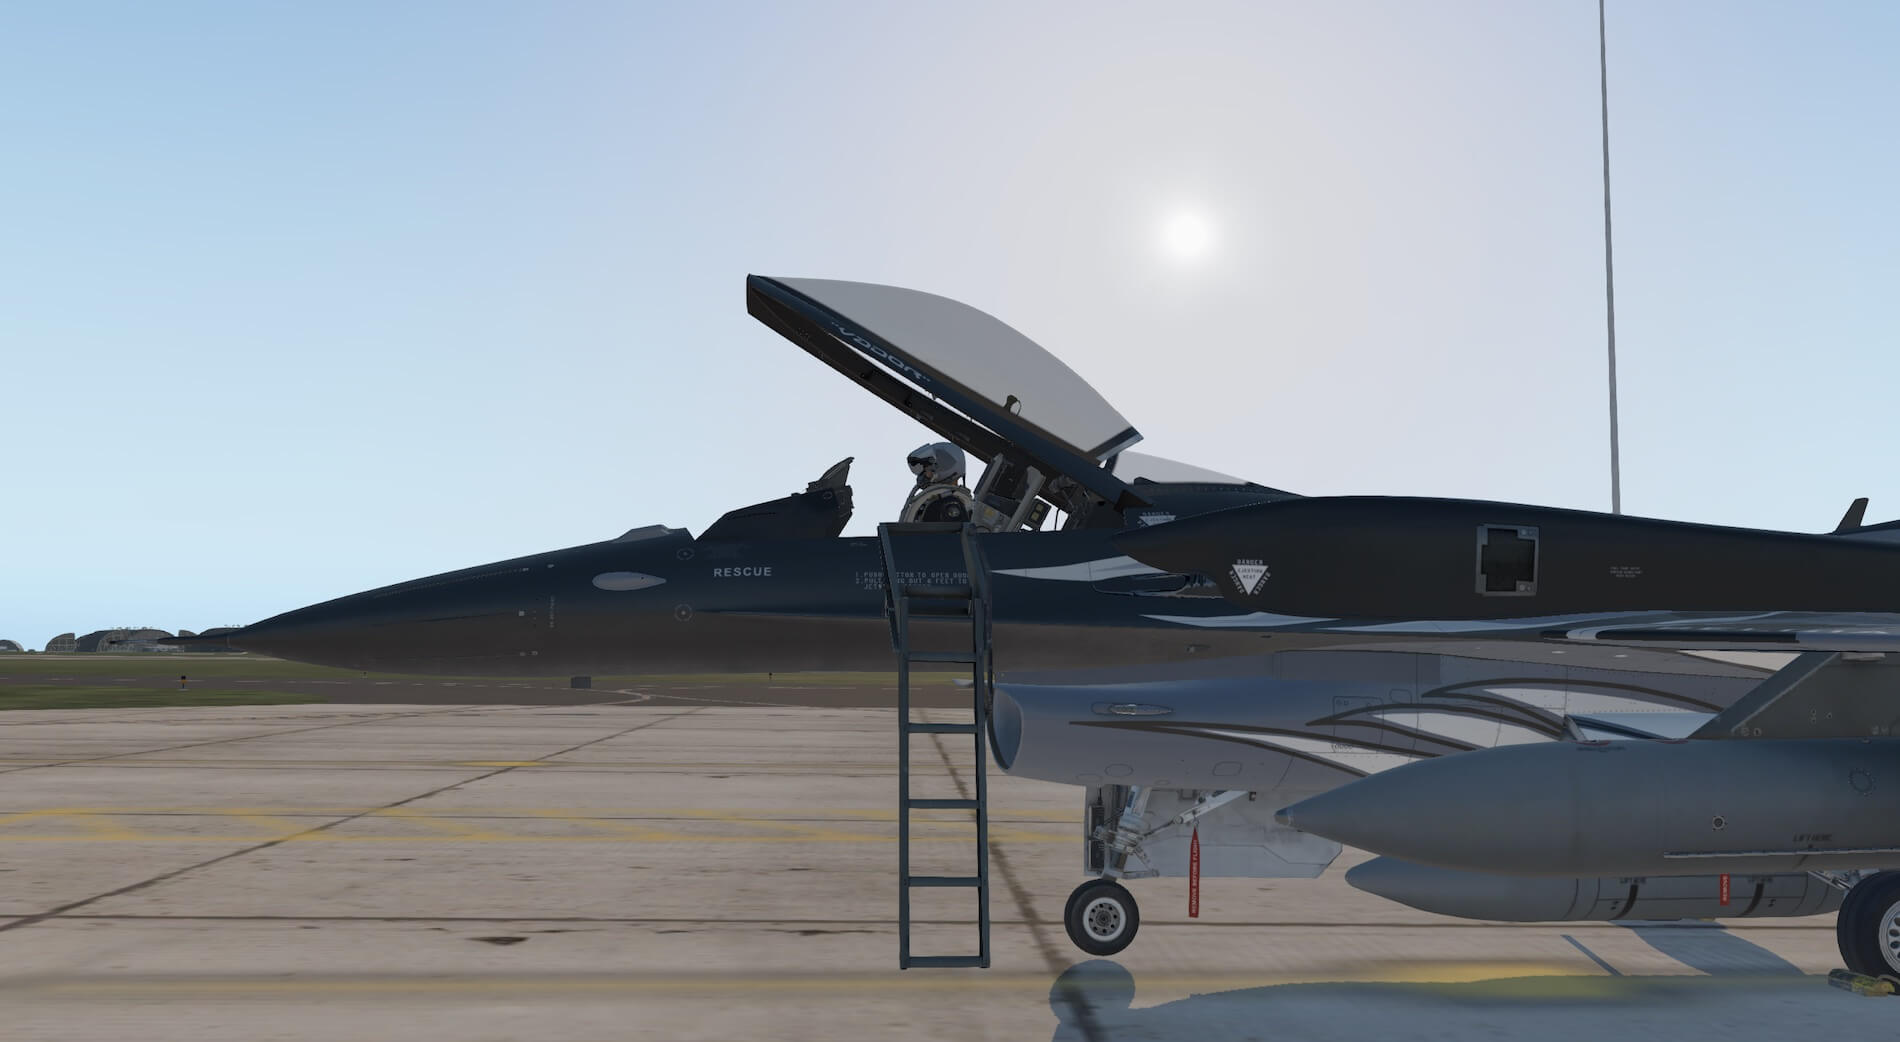
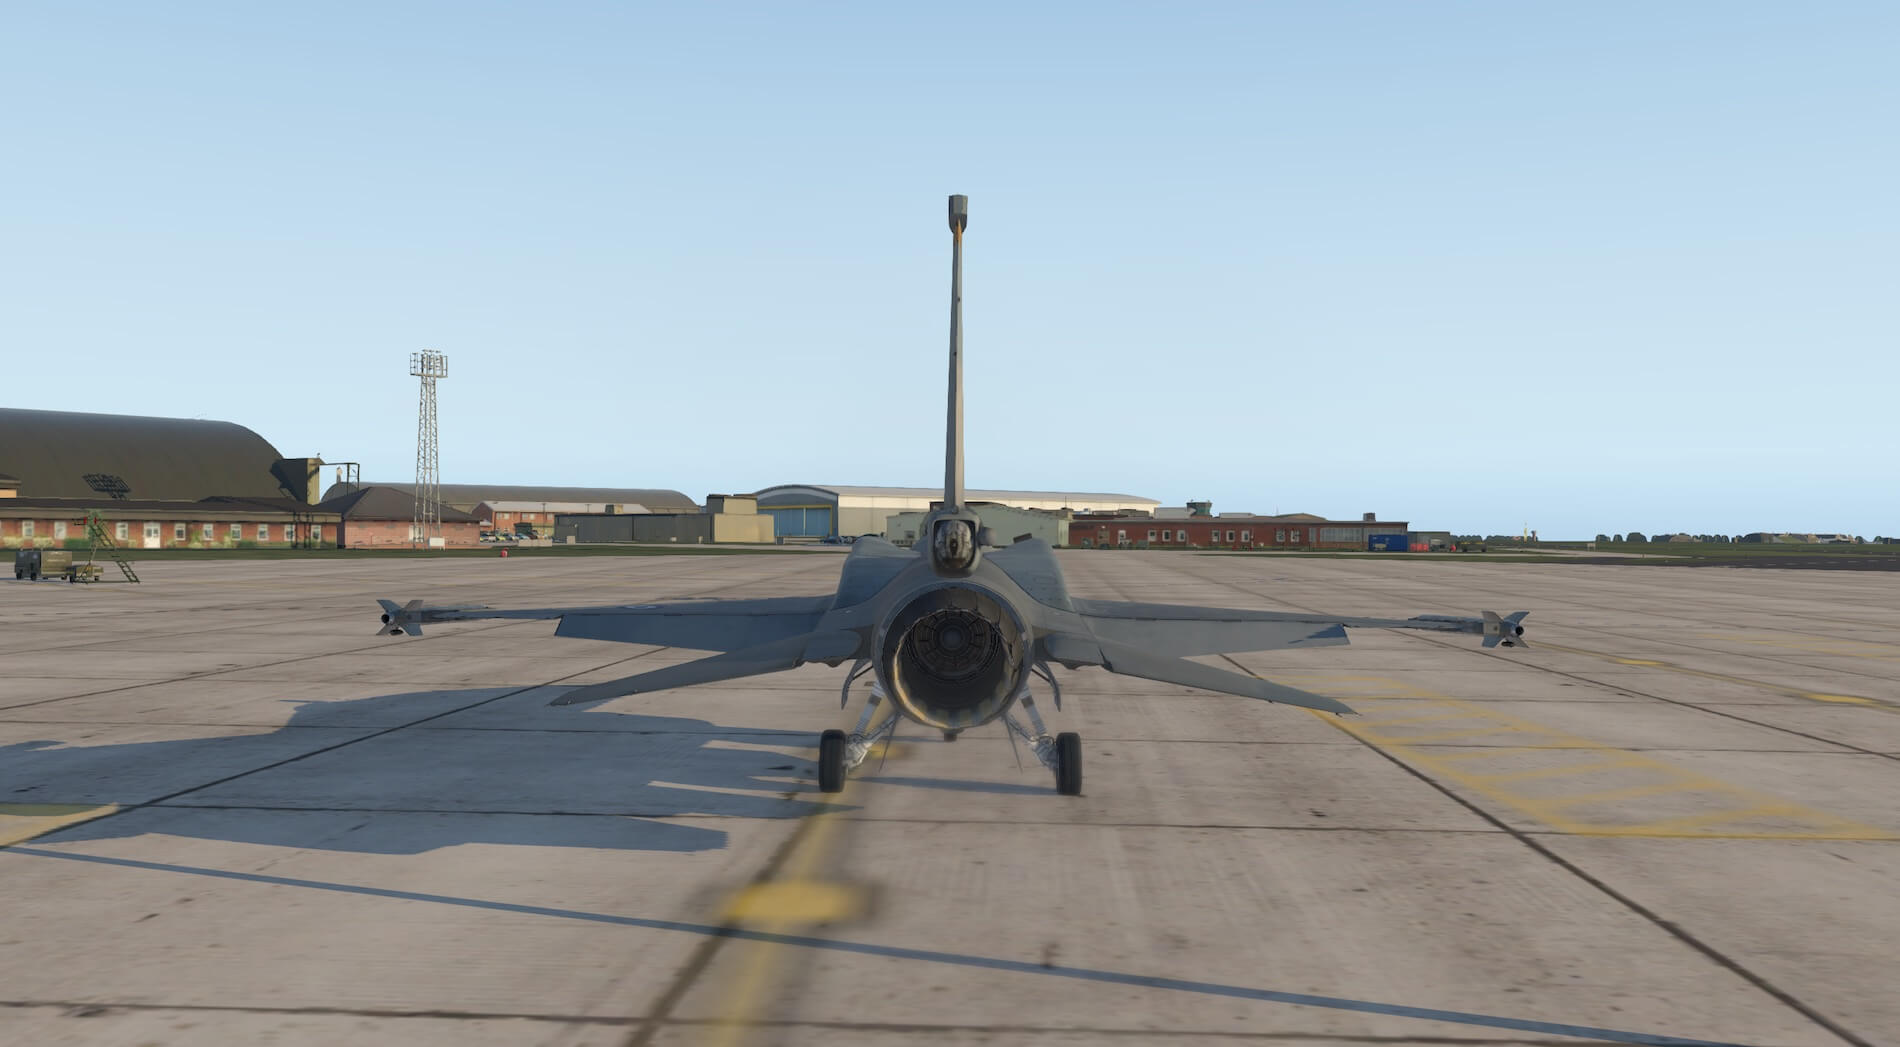
I am not a pilot and have never sat in an F-16, I have, however, seen many of them at close quarters both on the ground and in the air. I write this review from the perspective of someone who uses X-Plane recreationally and try to cover aspects I would be interested in about the model. Approaching the aircraft from the front left with ladder on, cockpit open, chocks in position and remove before flight equipment in place the aircraft looks impressive.
The additional equipment can be toggled via the pilots kneepad, in the cockpit or as pop out window. The additional equipment does look very realistic and adds to the realism of the static aircraft, including the fire extinguisher positioned nearby. Moving closer to the aircraft colours and textures are very convincing and signage is clear and legible.
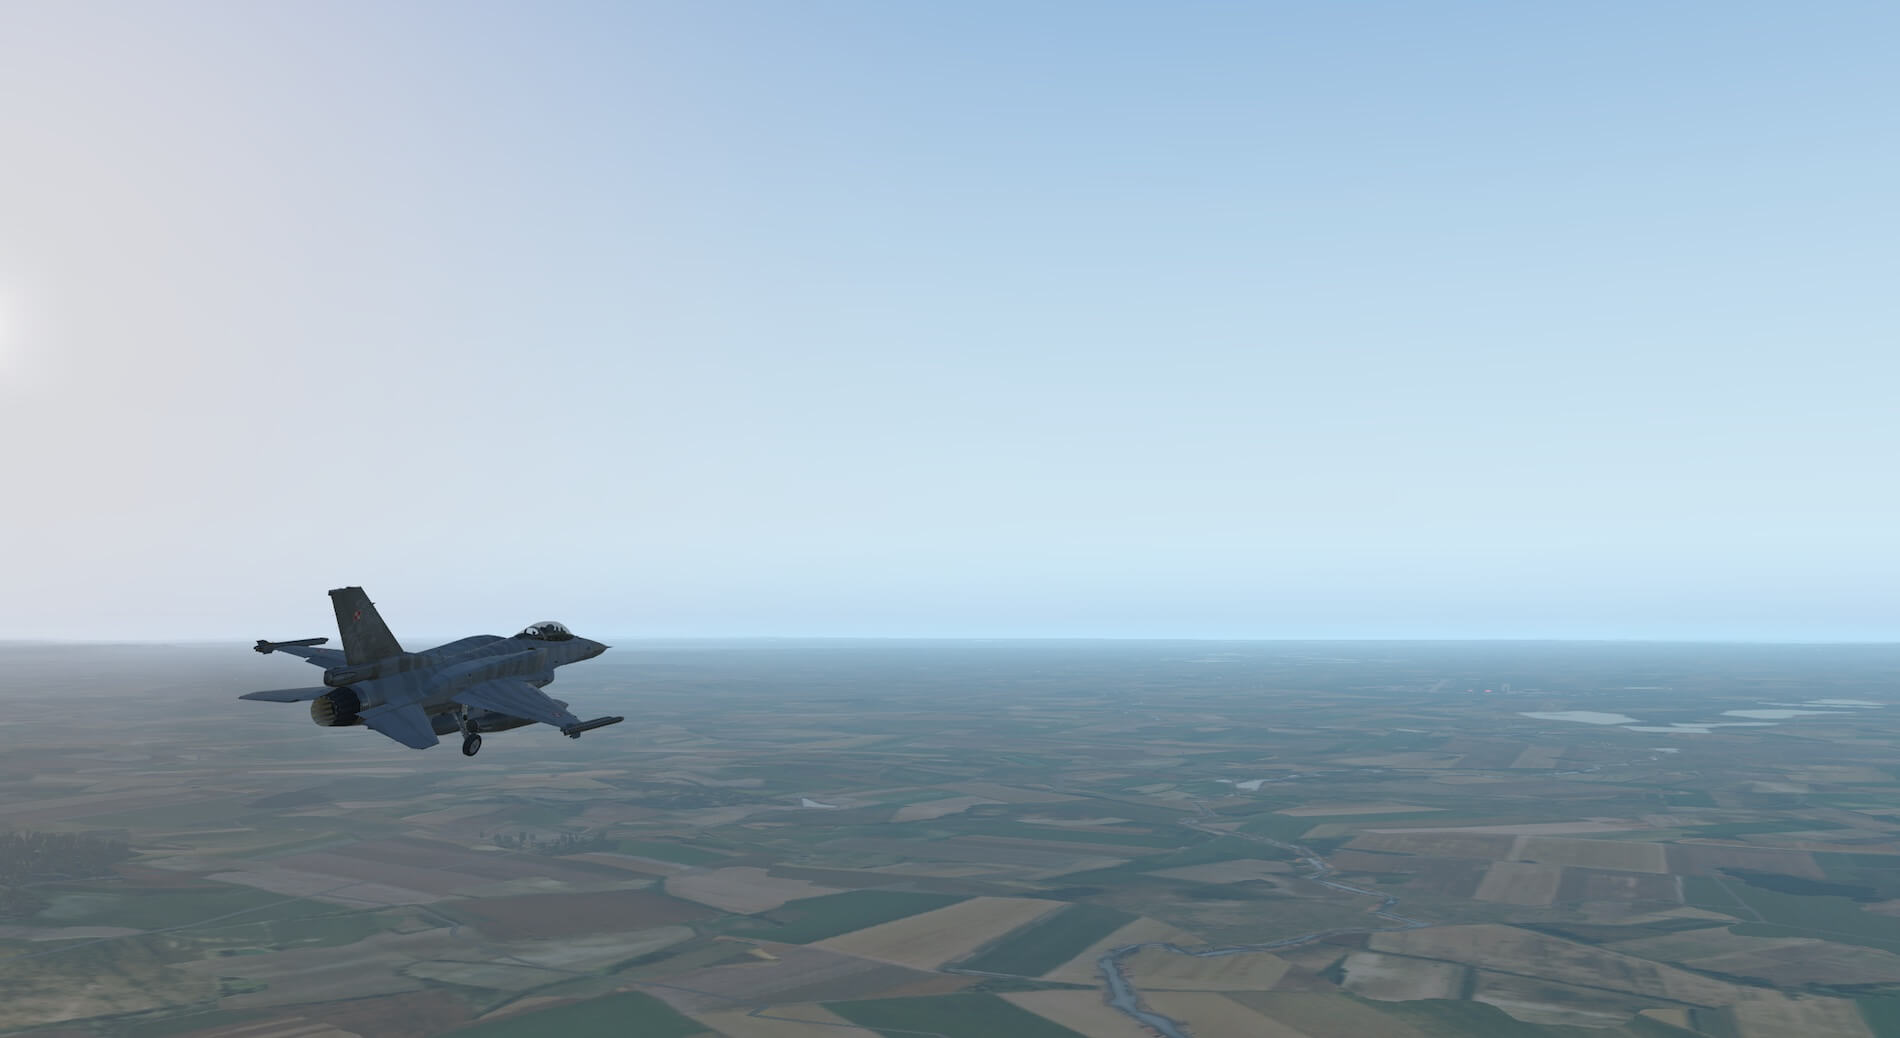
The raised cockpit illustrates how the glass effects work with different angles of light and allows an initial view of the pilots seat. Panels and fixings are modelled to a high standard and the undercarriage is presented in detail. The aircraft works well with light and shadow. Wing tanks add to the realism and they can be toggled to reveal more detail under the aircraft.

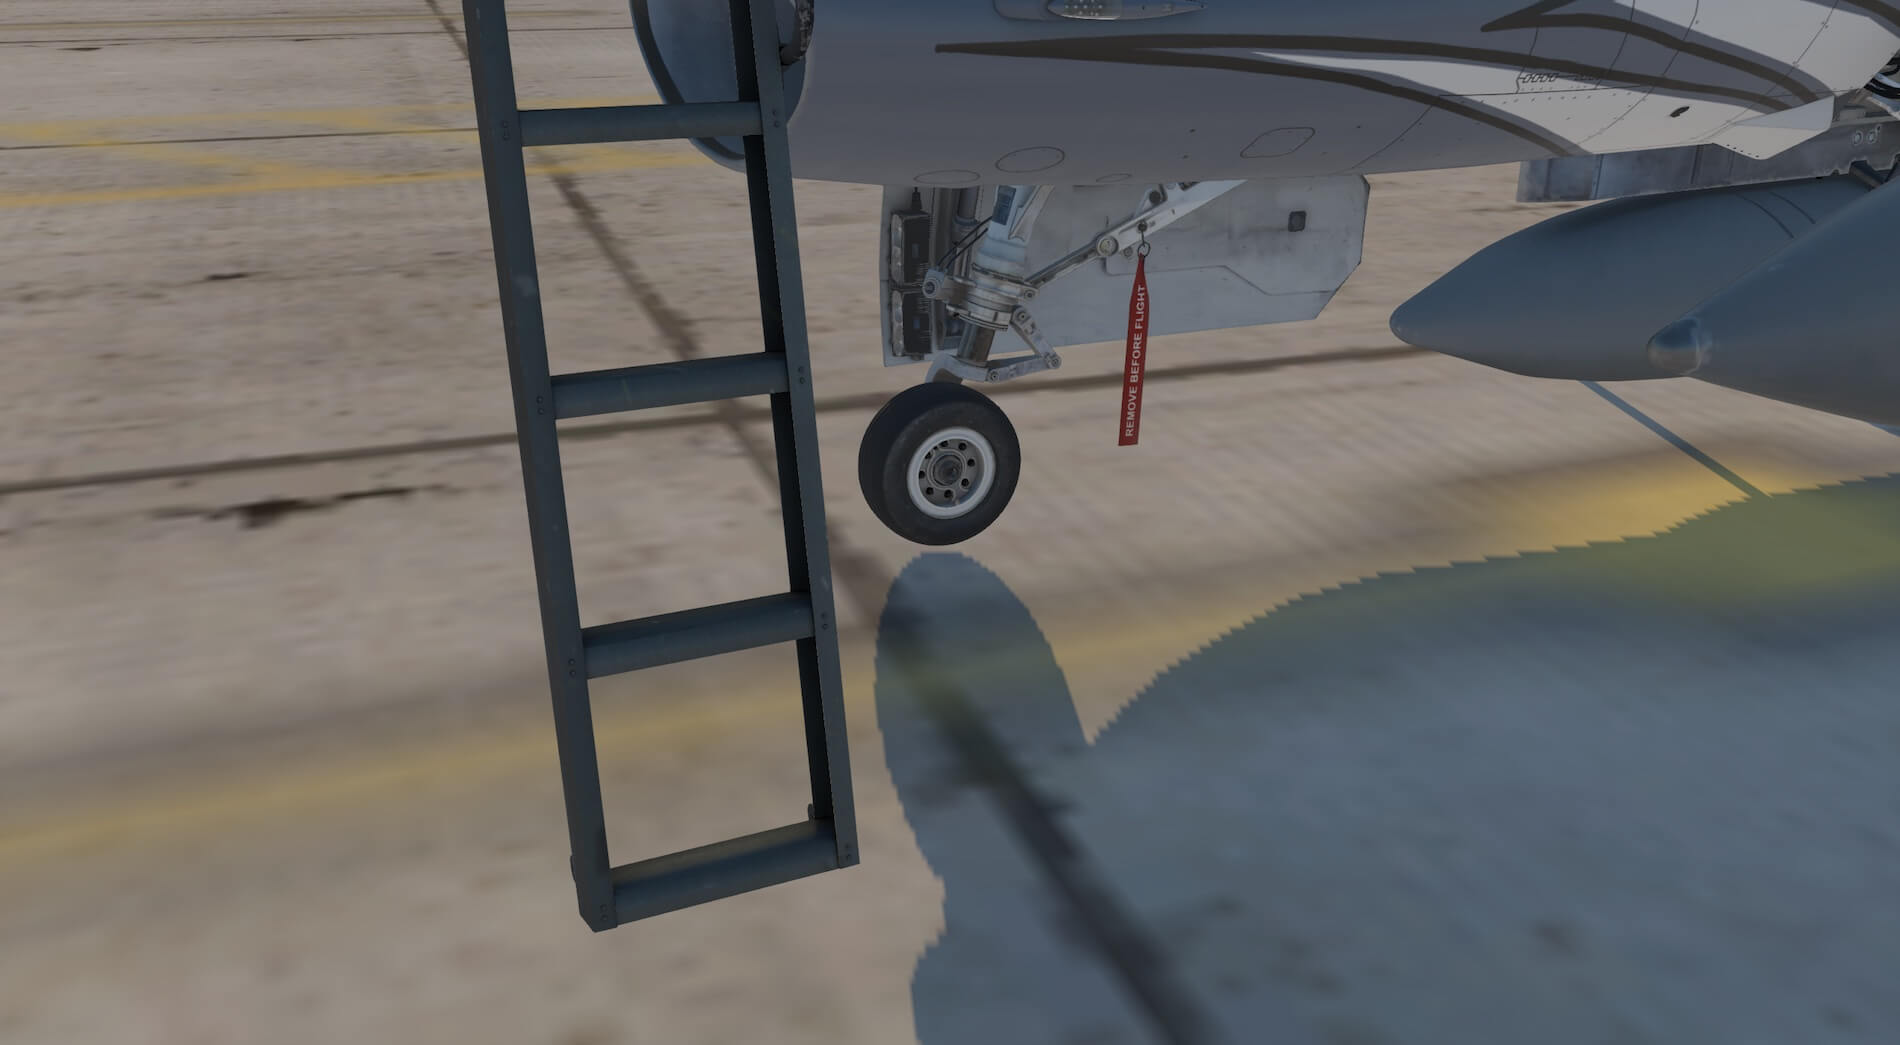
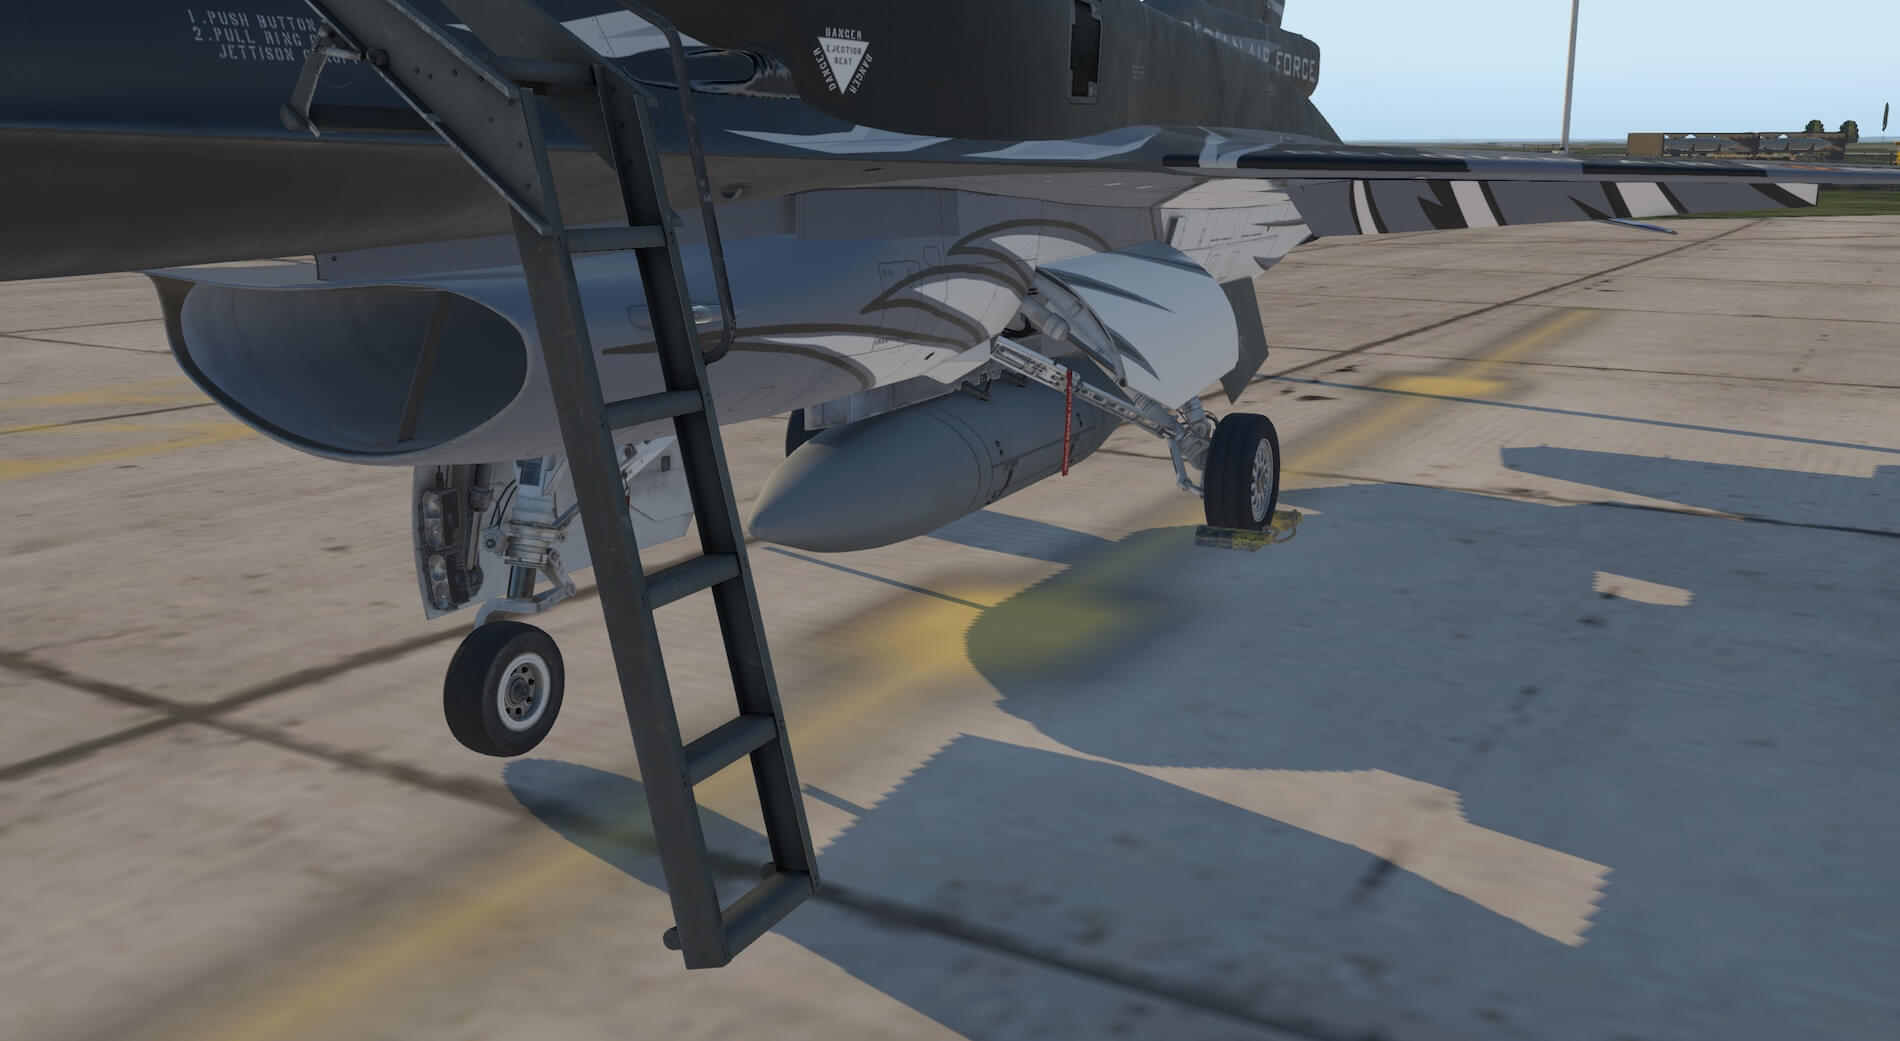
Moving to the front of the aircraft shows the model has captured the squat stance of the aircraft on the ground. The undercarriage continues to look good and the colours remain impressive. The view also shows the short wing span of the aircraft. Moving closer shows the well modelled lights in the front edge of the undercarriage door. Removing the ground objects and ladder and closing the canopy shows the character of the Viper and allows a view in to the air intake. Other items of note are the pilot figure in the cockpit and the smokers on the wing tips.


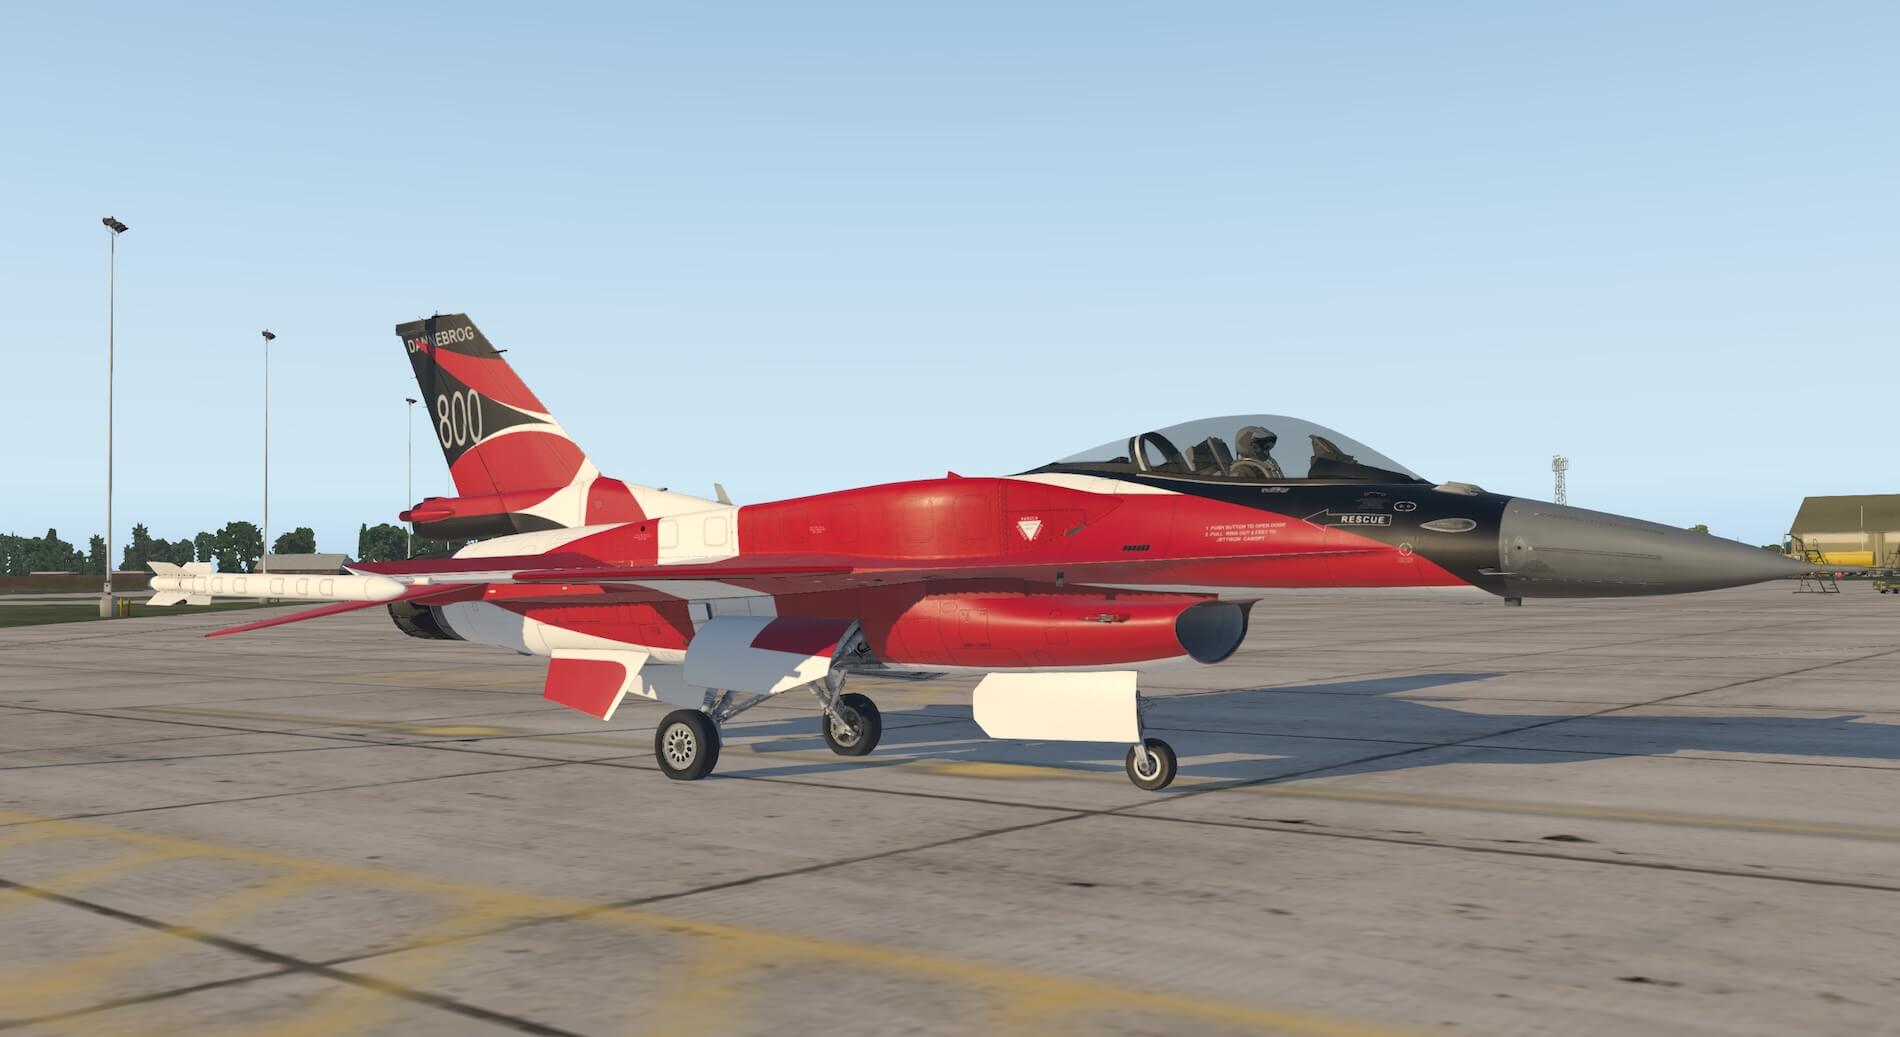
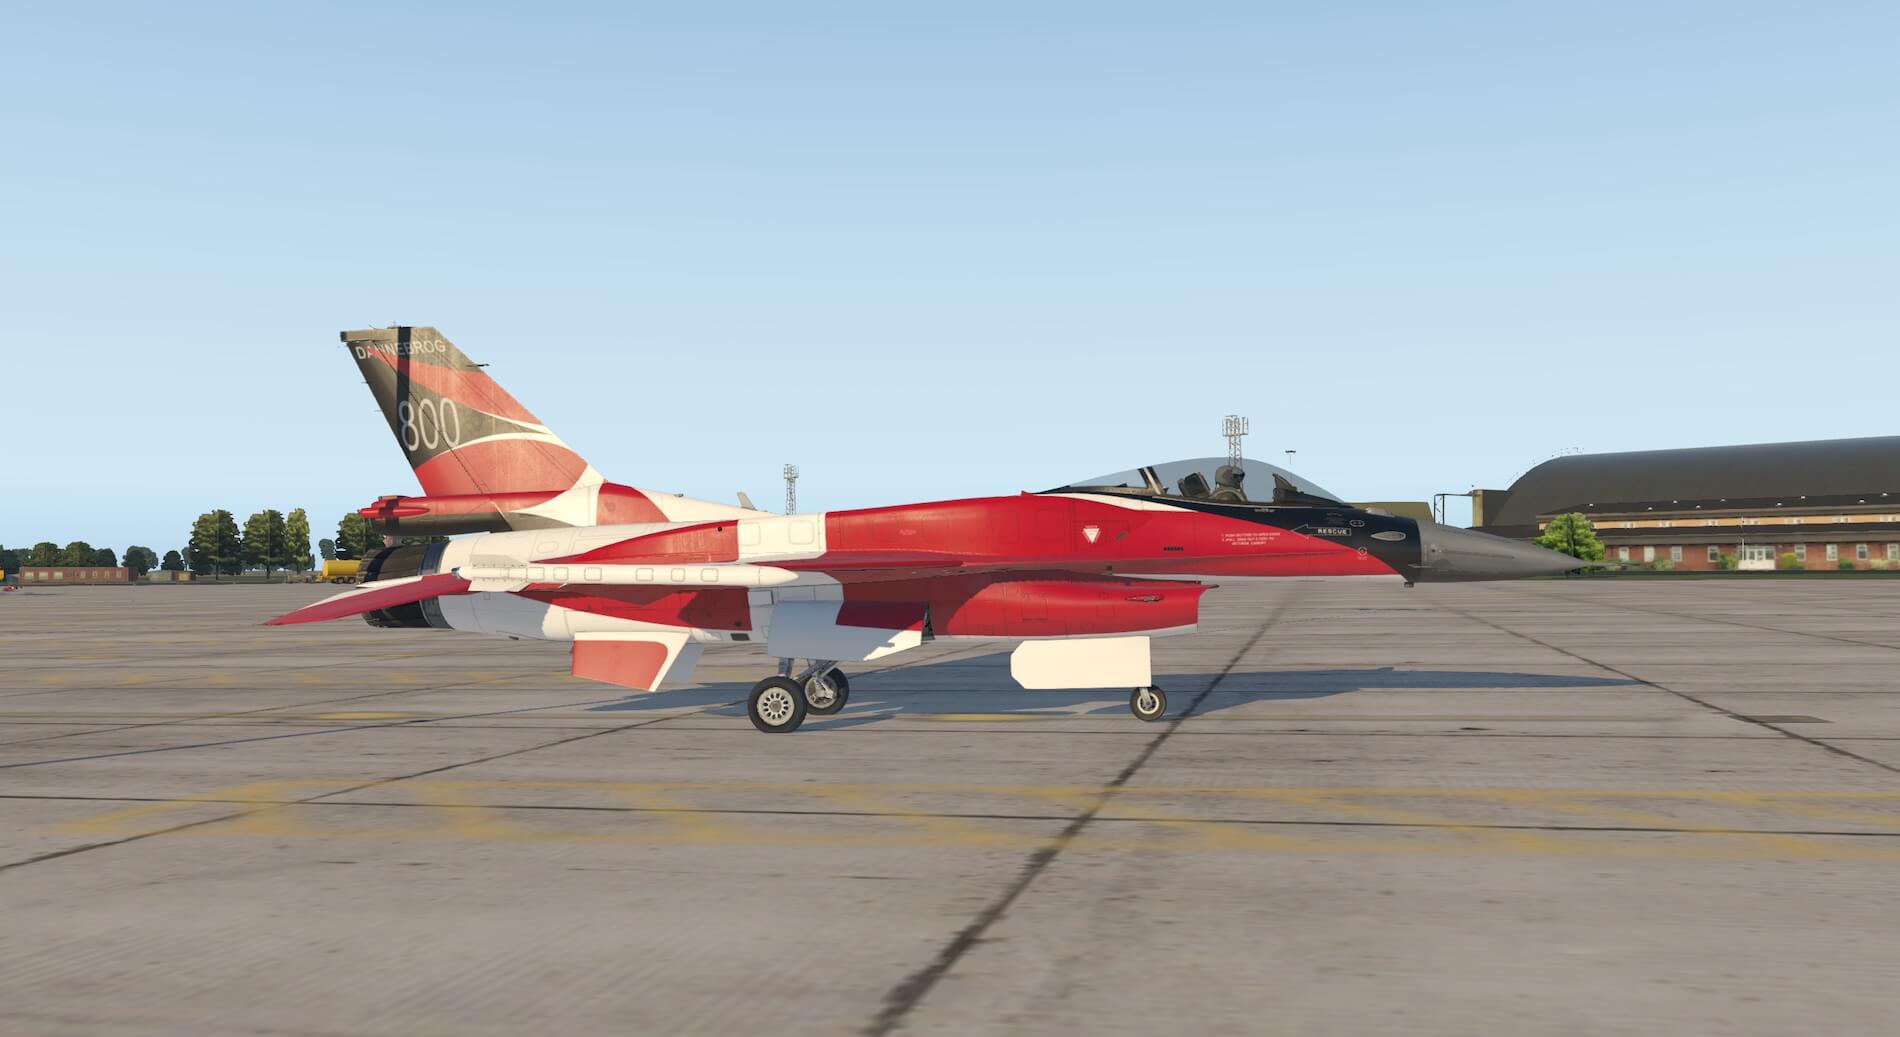
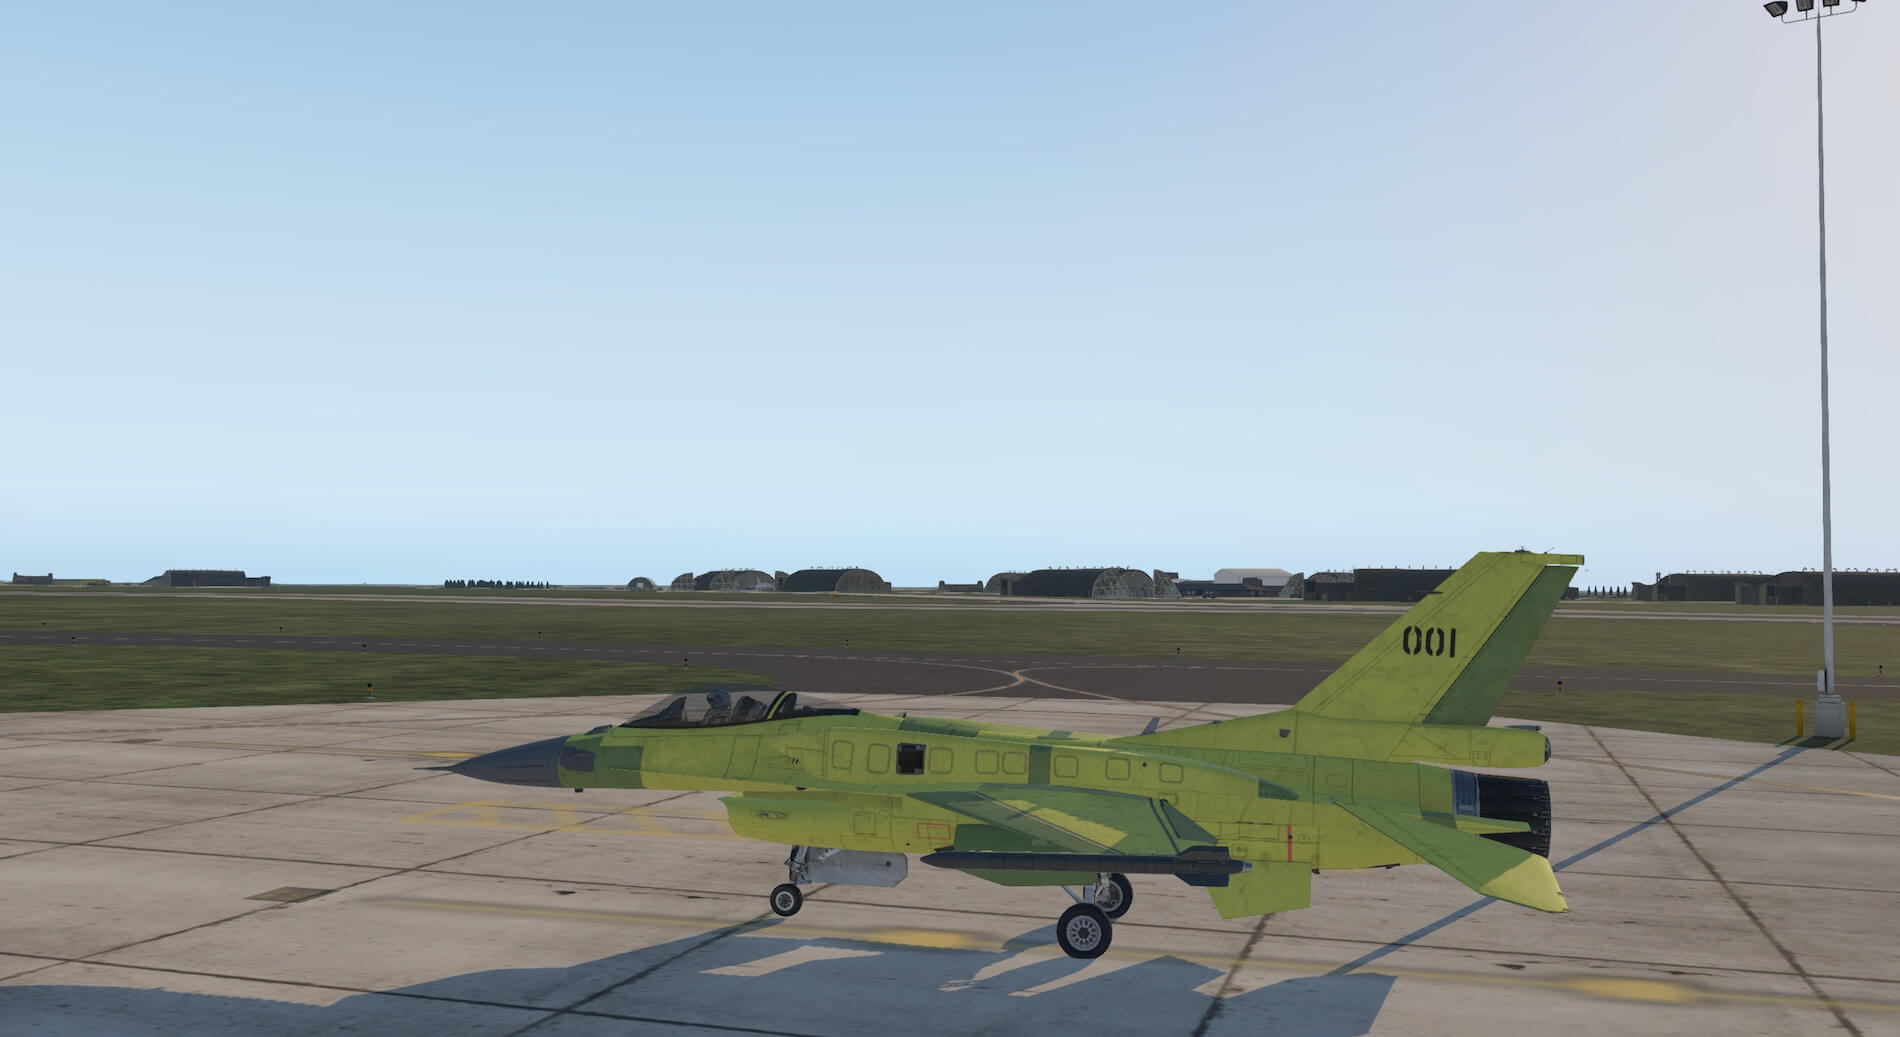
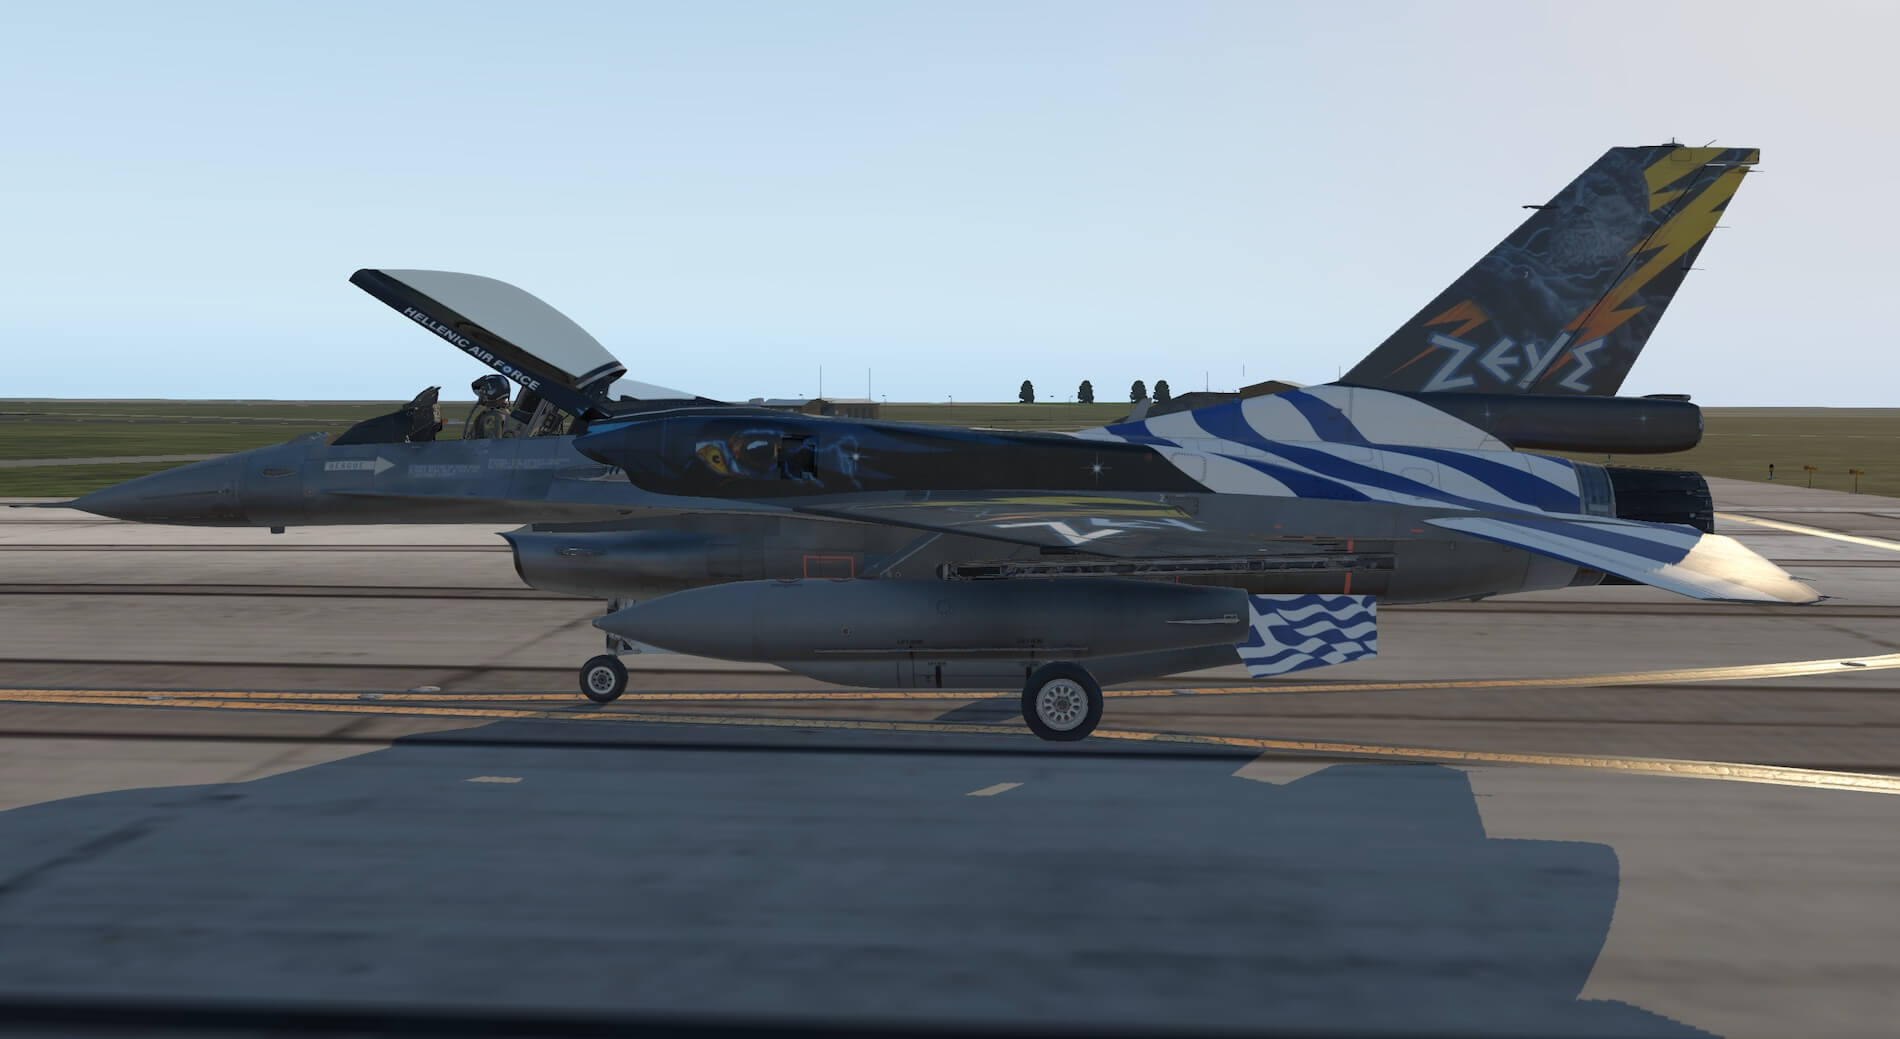
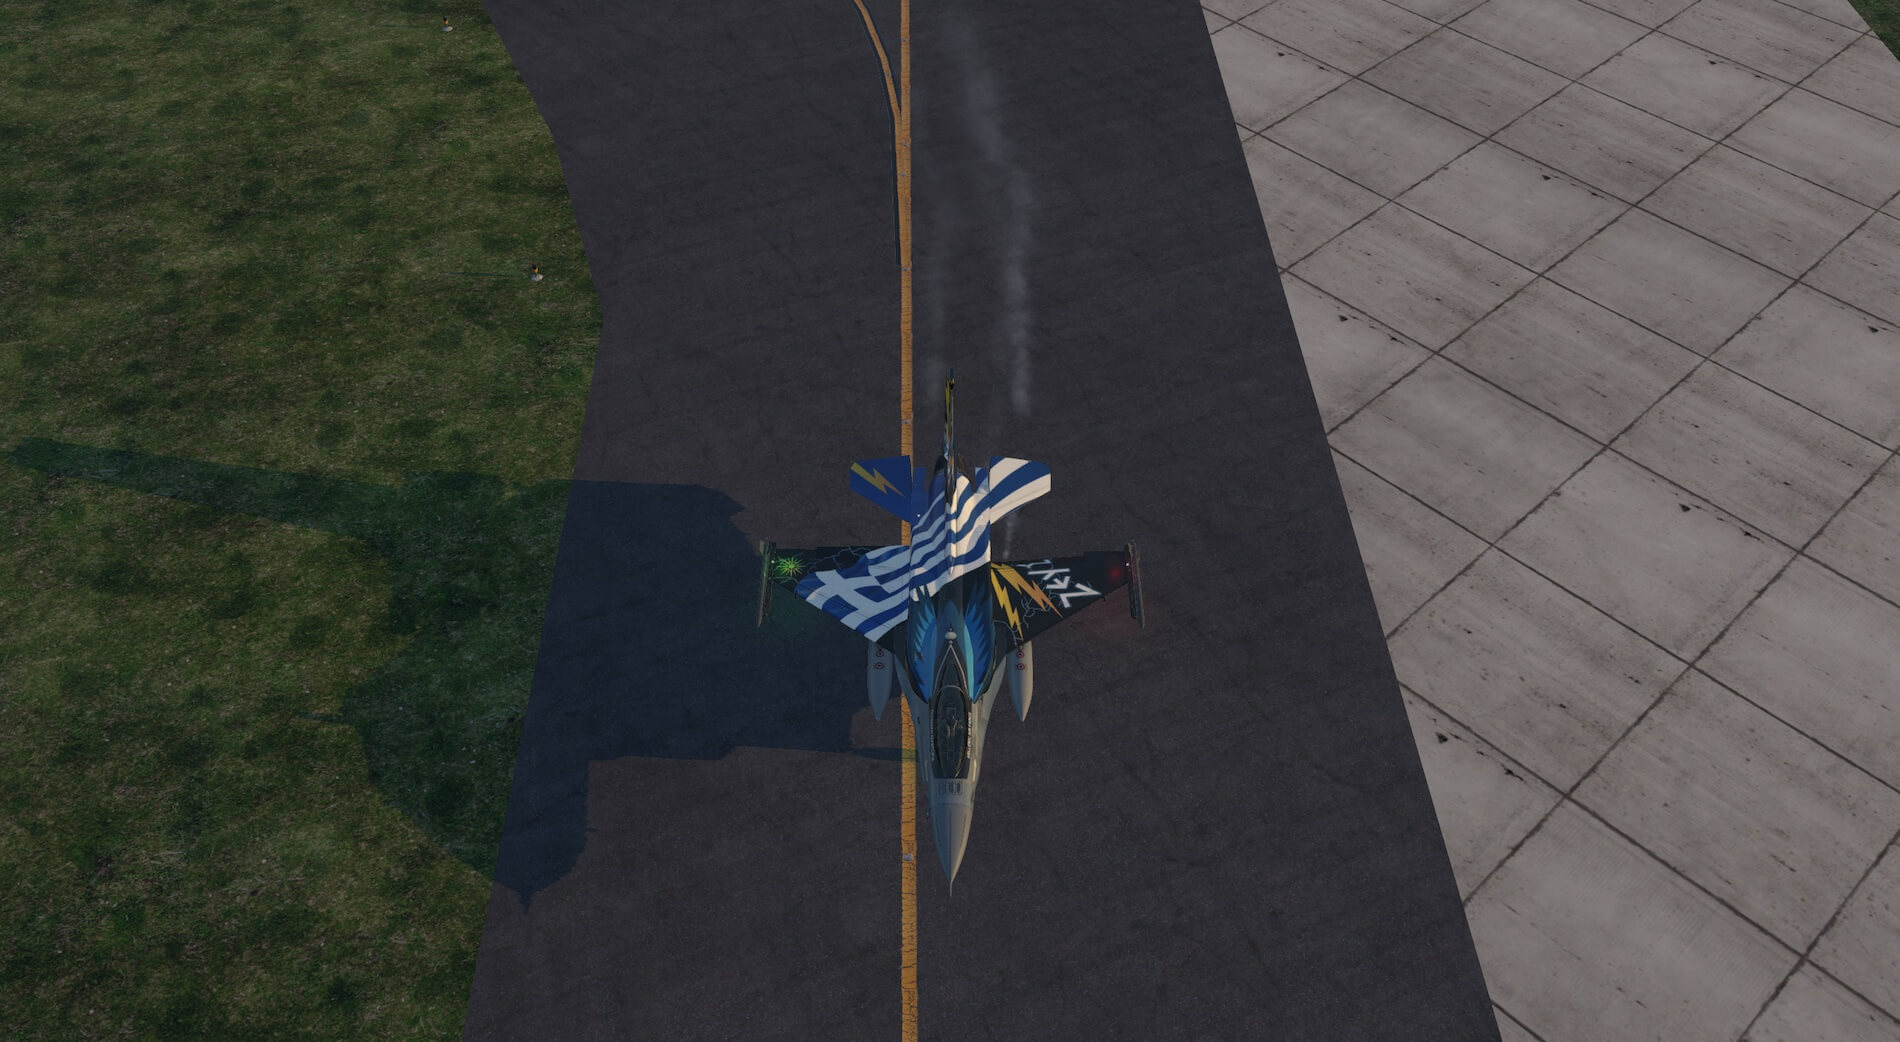
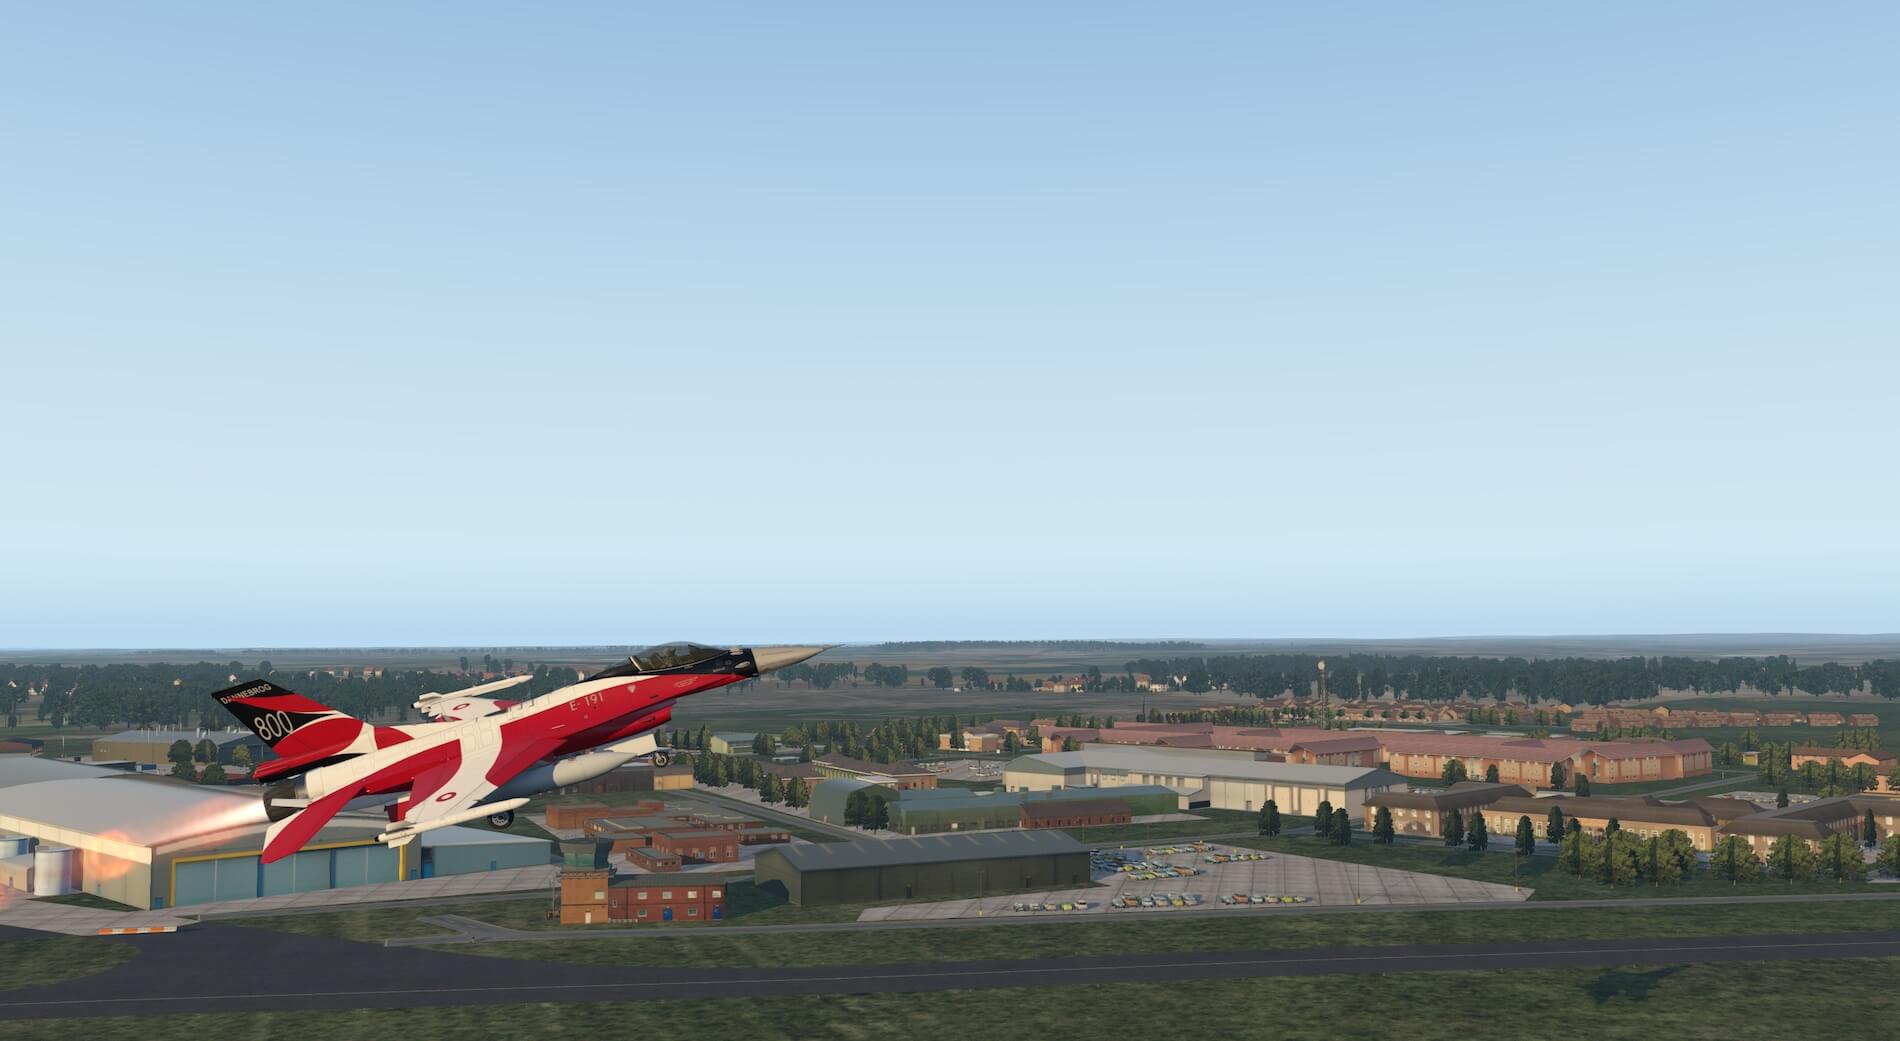
Moving around to the front left the colours remain impressive when changing livery. The model is supplied with a default colour scheme and eleven more in 2K and 4K. More liveries are available from the developers ready for download from the dedicated X-Plane.Org forum. The liveries work well with surrounding scenery and are all crisp, vivid and clear. Access panels and signage remain detailed. Moving to the tip of the starboard wing shows familiar profile of the F-16 and the attention to detail applied to all visible parts of the model including panelling on the wing tip smokers. There is good contrast between painted and unpainted surfaces.
Views from the rear of the aircraft shows the wear marks around the exhaust and the metal finish as opposed to a painted finish. With engines off there is no power to the control surfaces and they are positioned to illustrate this to good effect.


From the port wing tip the attention paid to the modelling of exterior antennae, aerials and sensors is illustrated to good effect as is the distinctive position of the cockpit and the all round view afforded to the pilot. The undercarriage detail remains impressive when viewed from any angle.
With the engine running the control surfaces come alive and movement of the joystick causes the characteristic appearance of the aircraft being manoeuvred. Views into the exhaust show an impression of movement in the engine and throttle changes cause the exhaust to feather and increase and decrease its diameter.


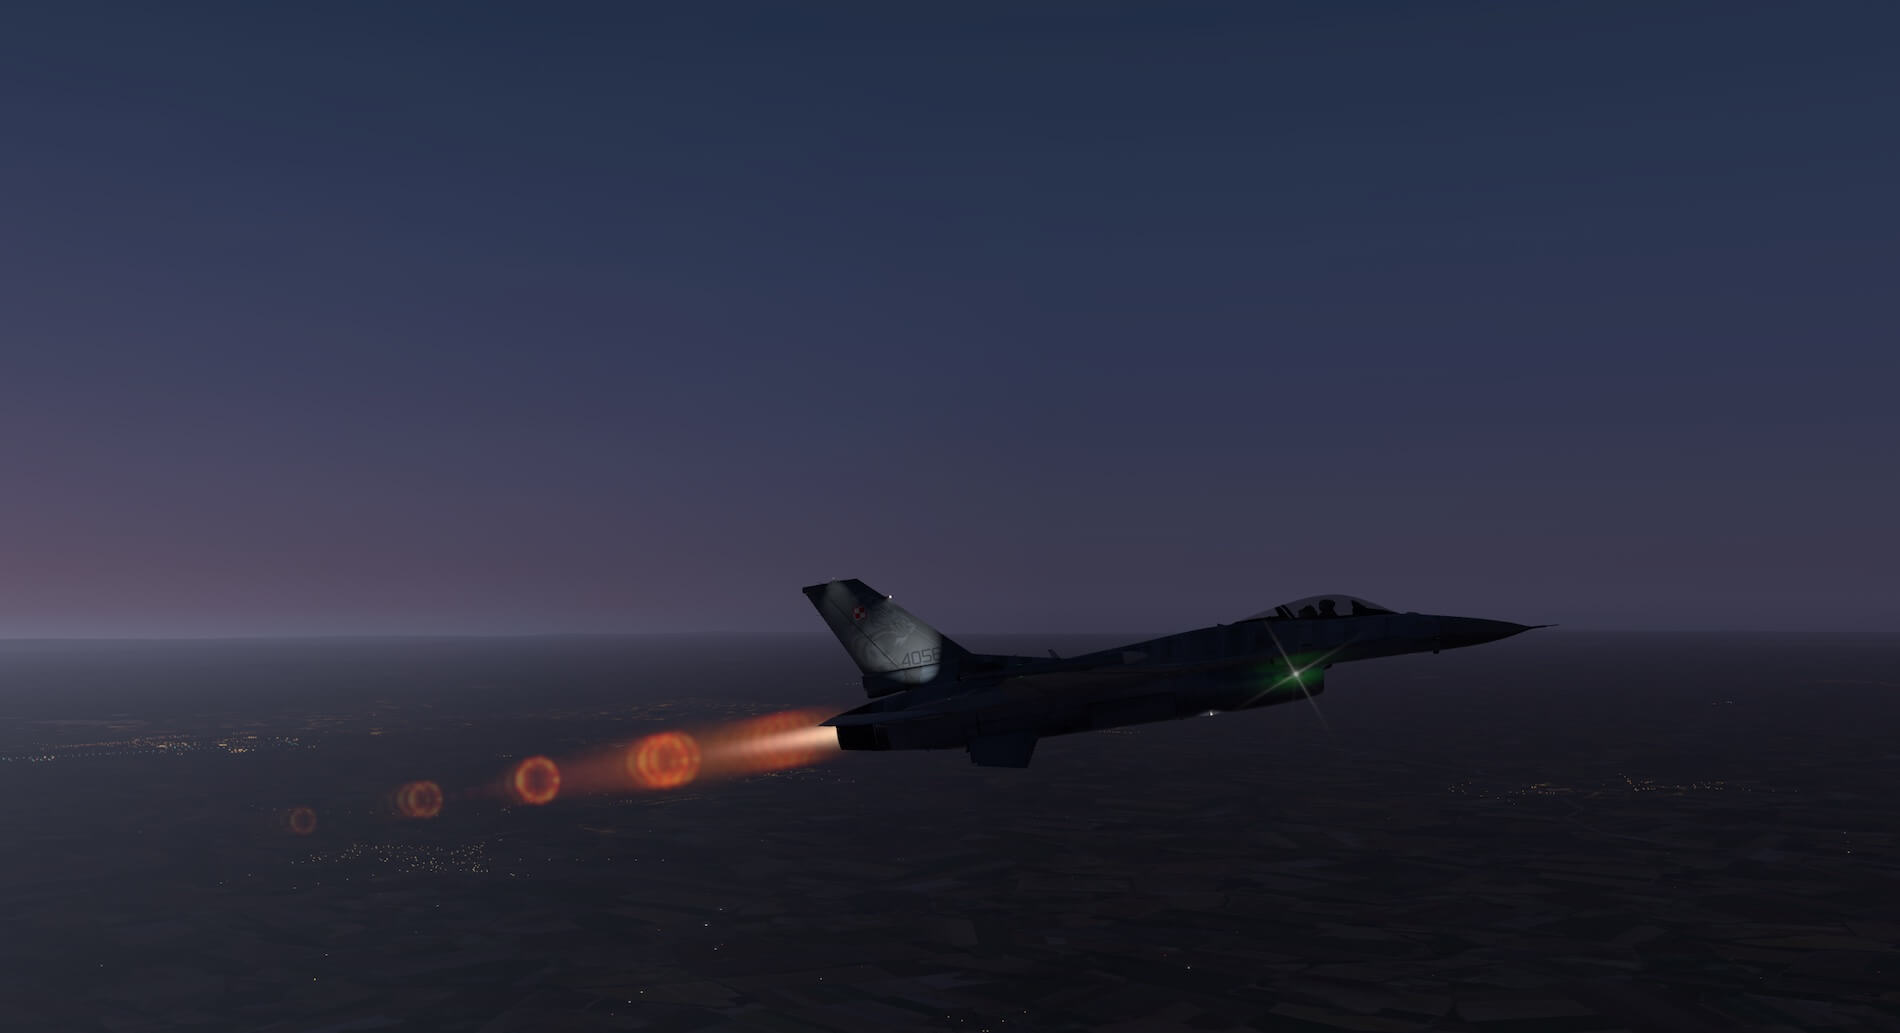
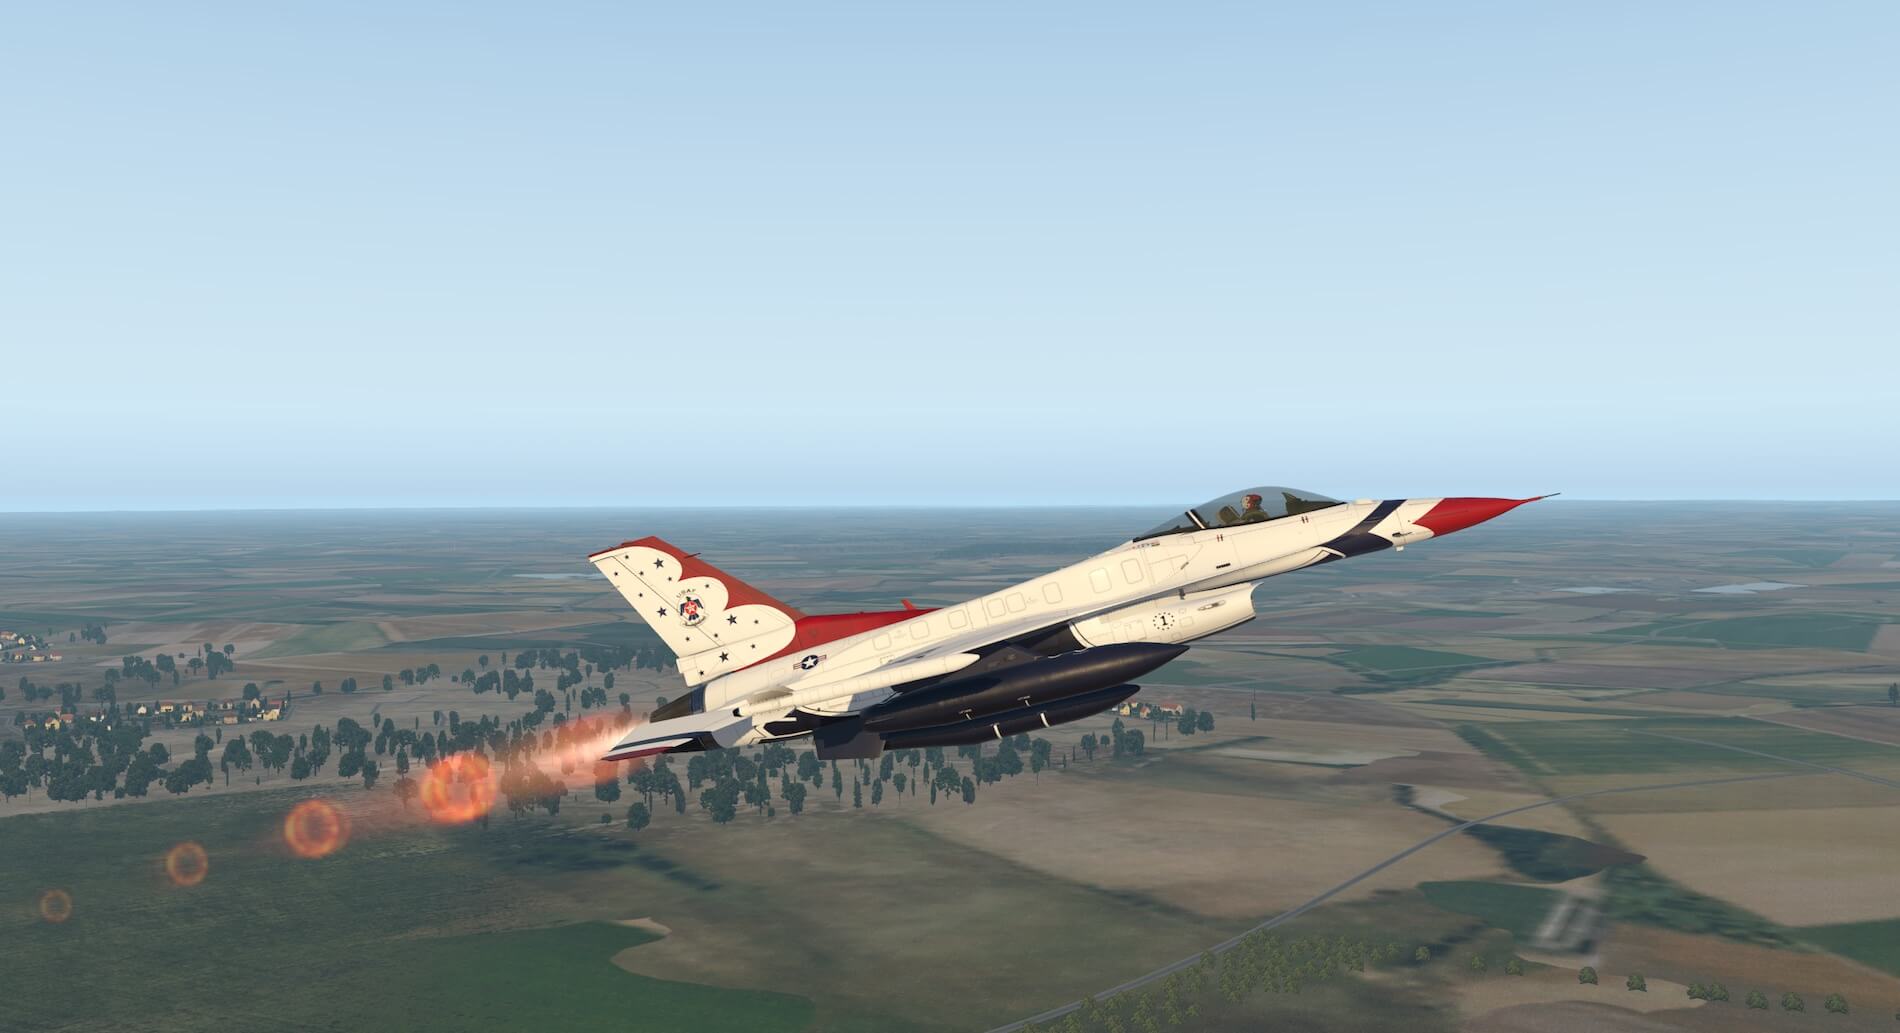
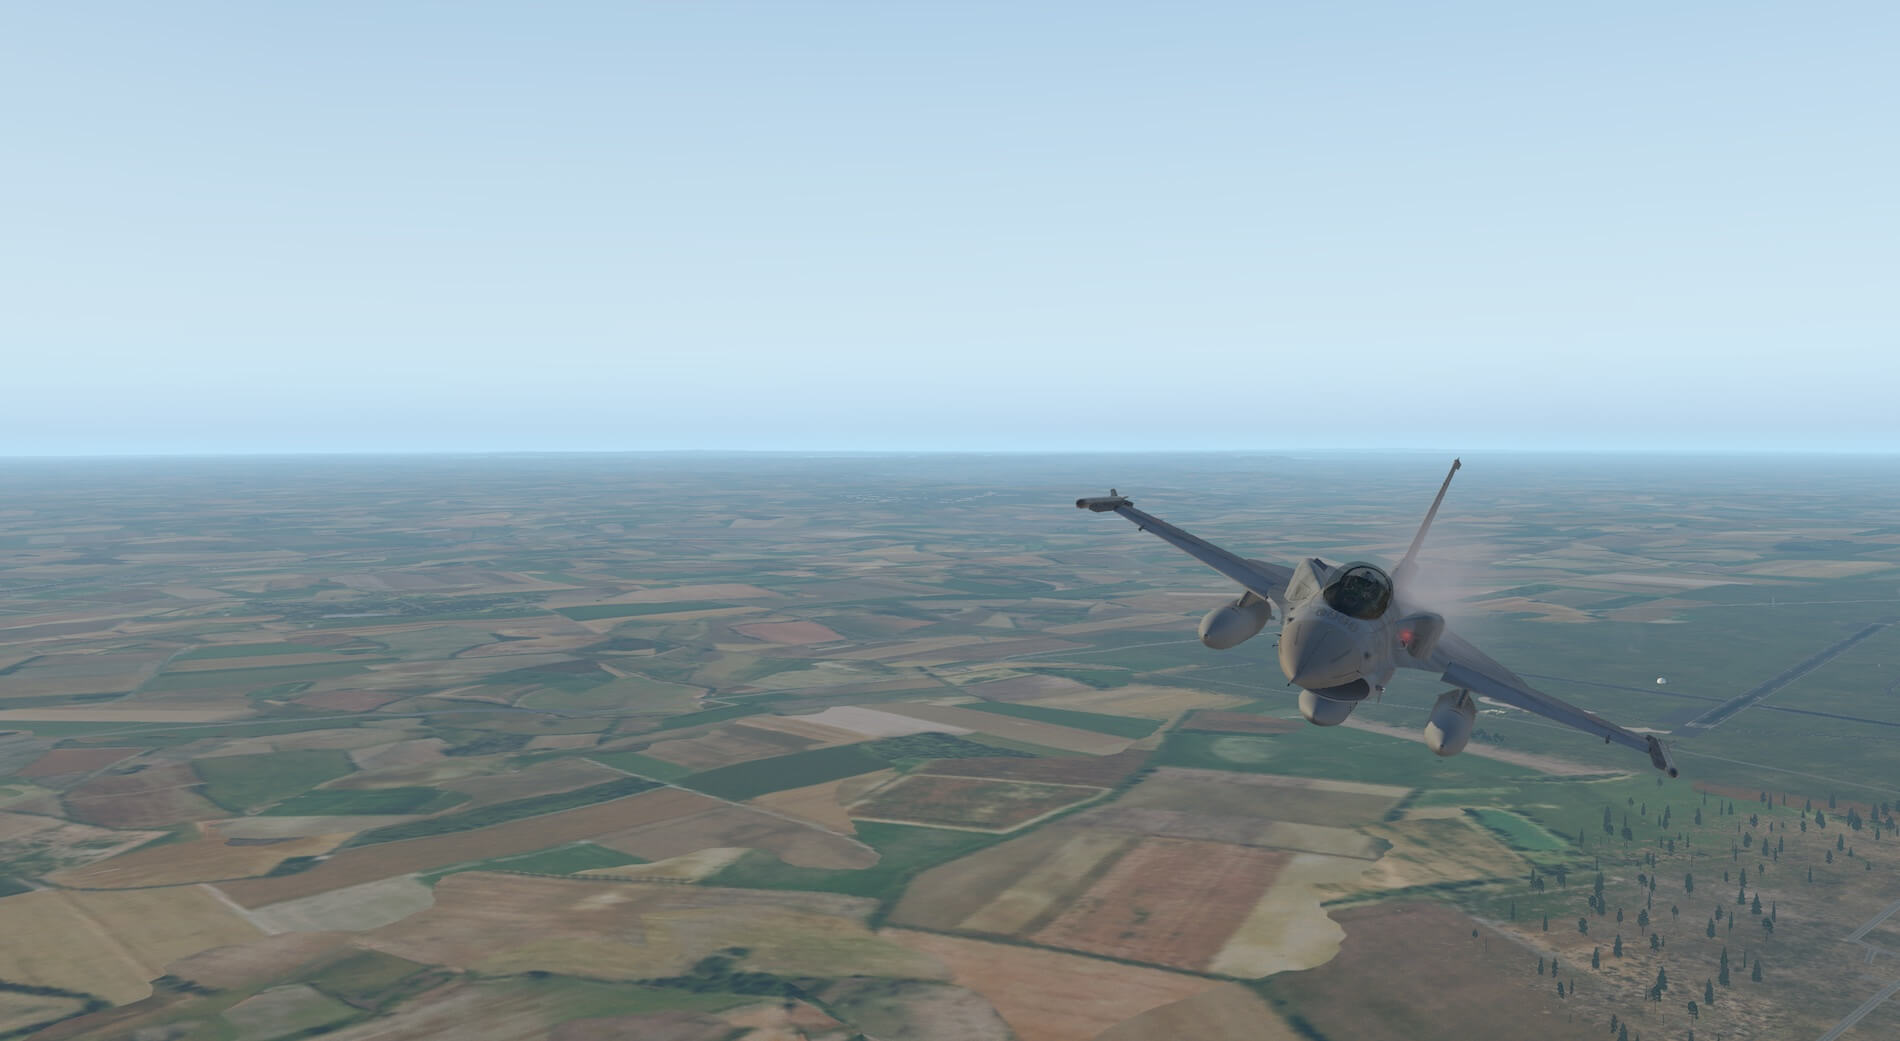
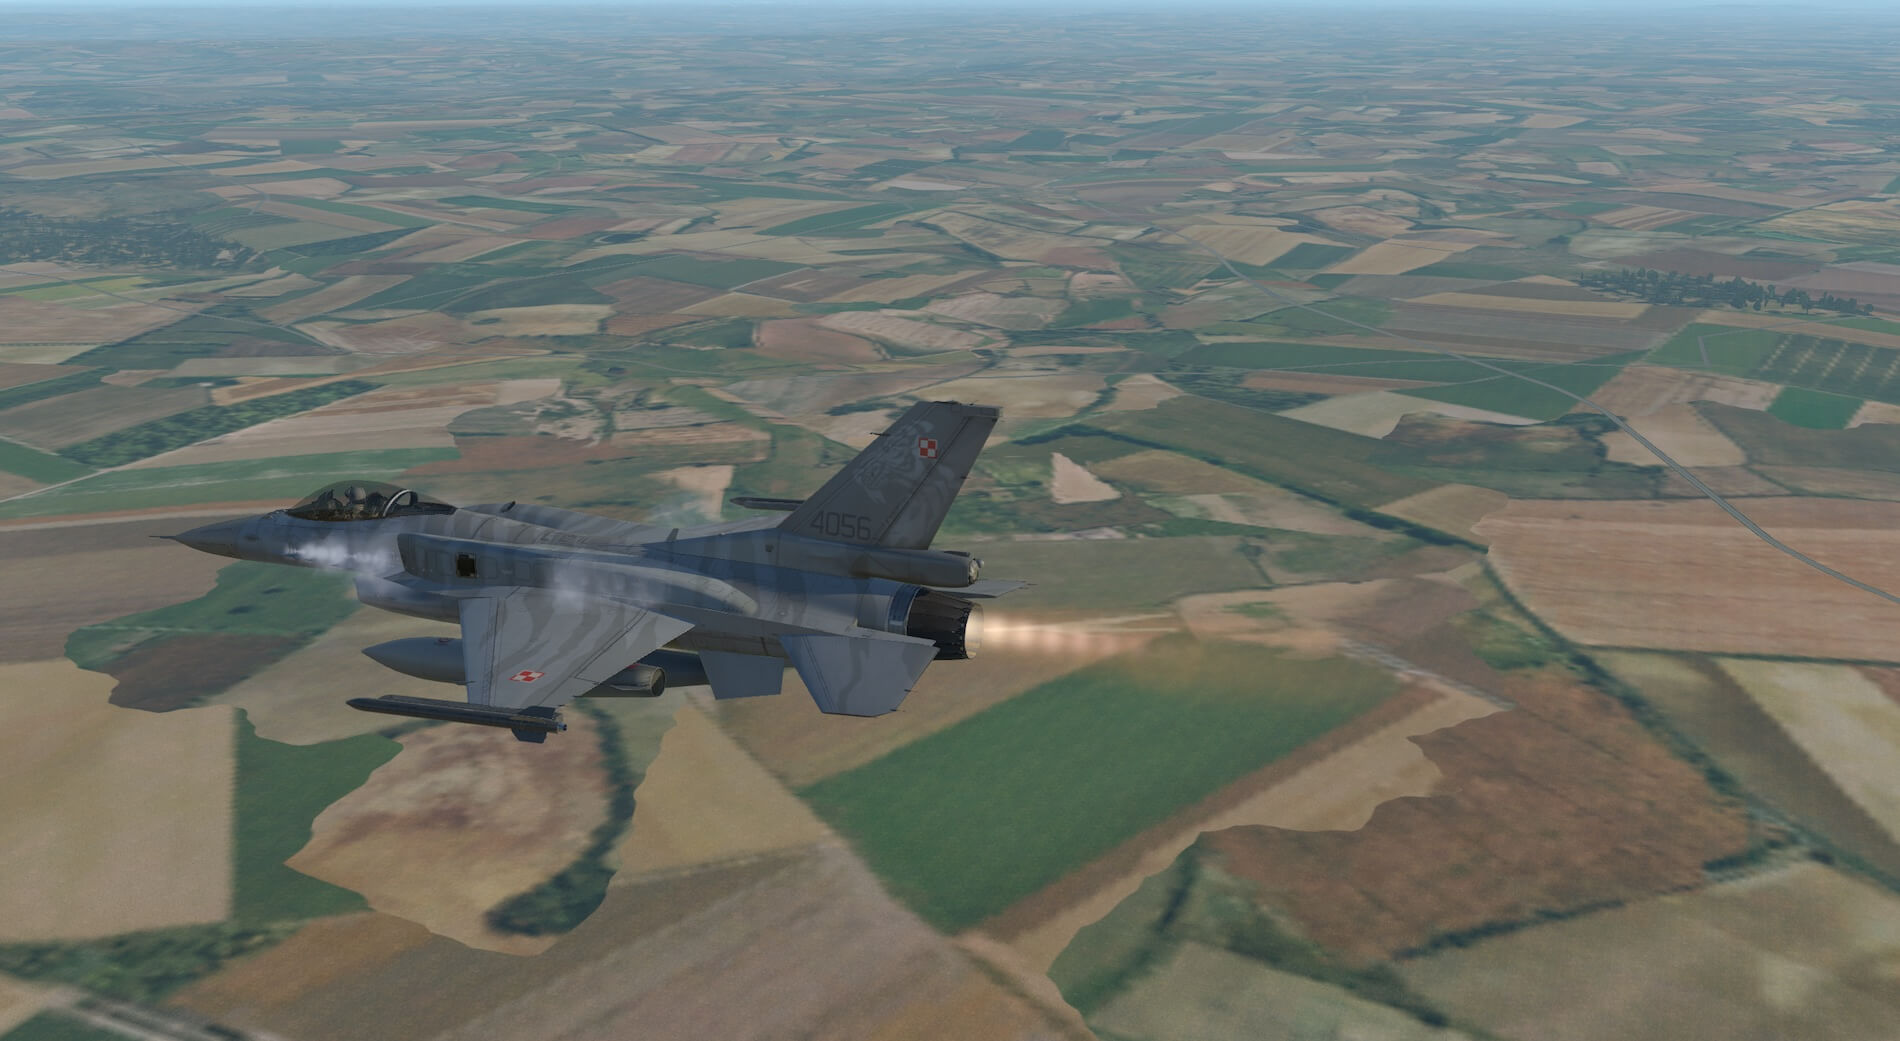
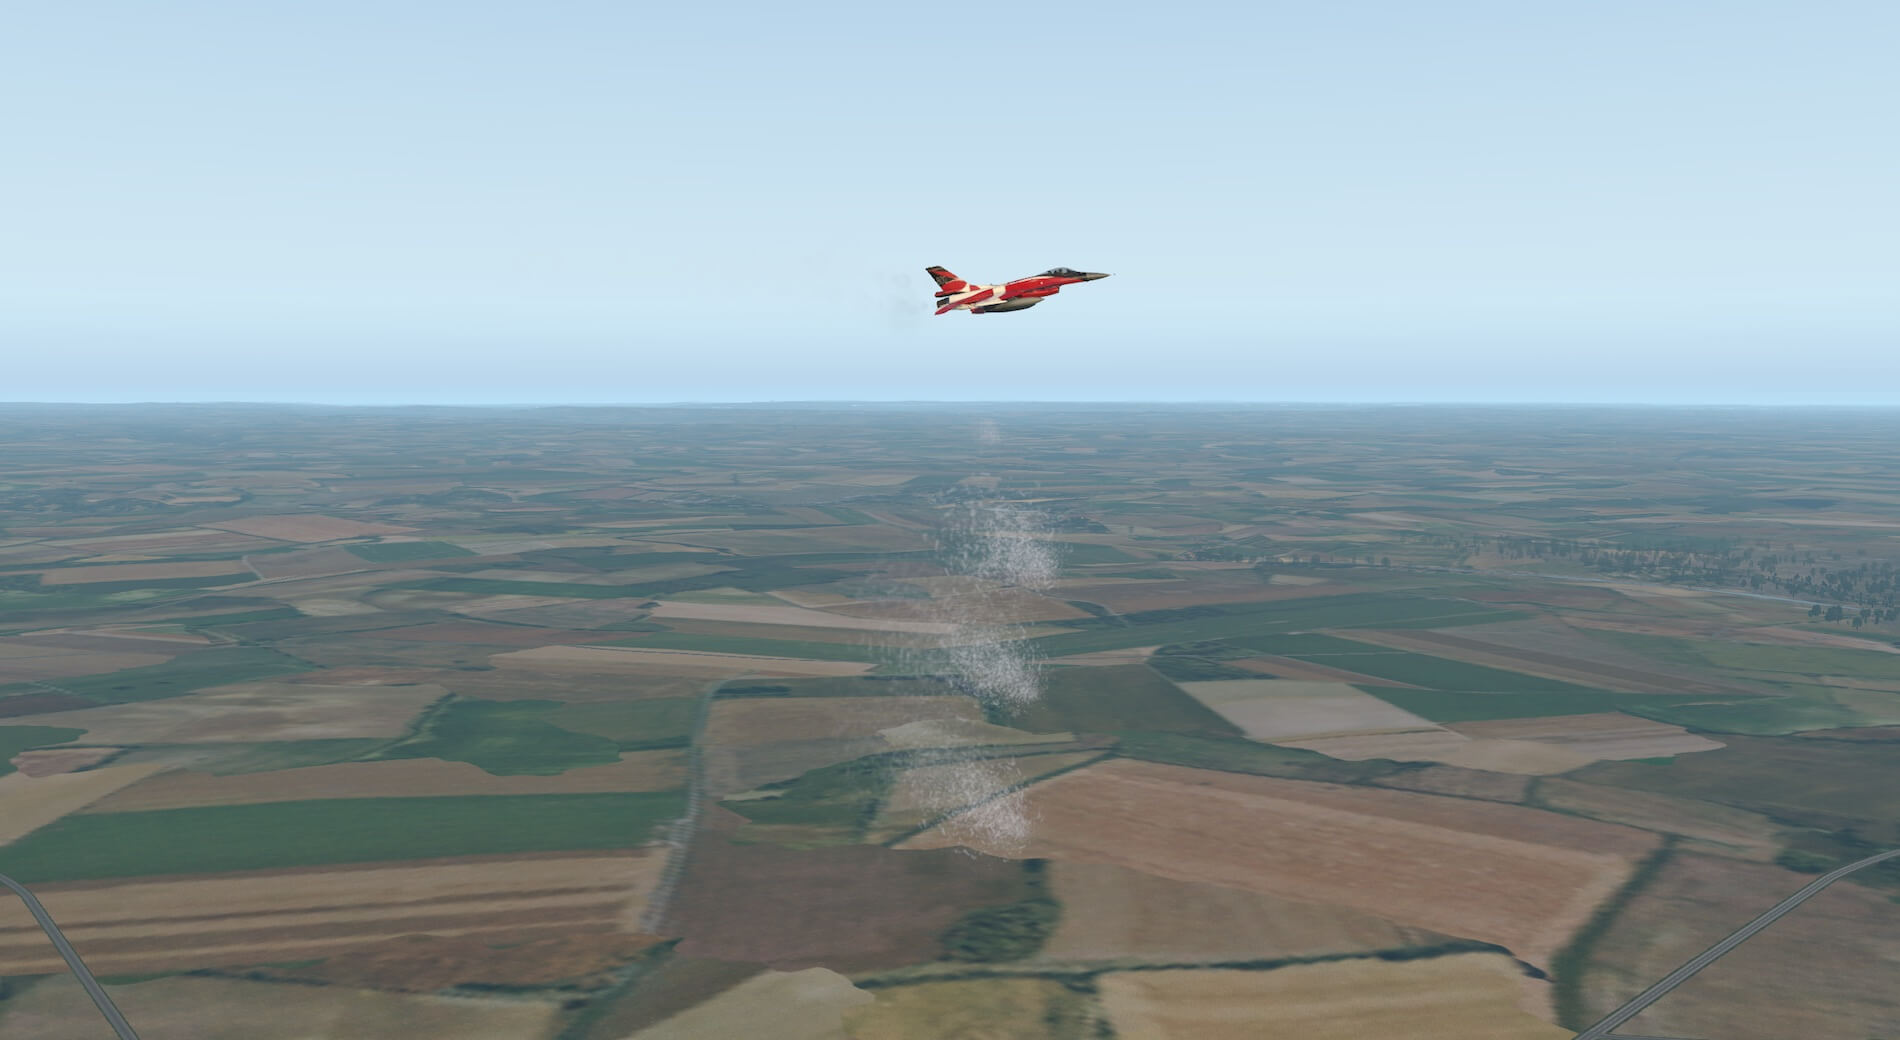
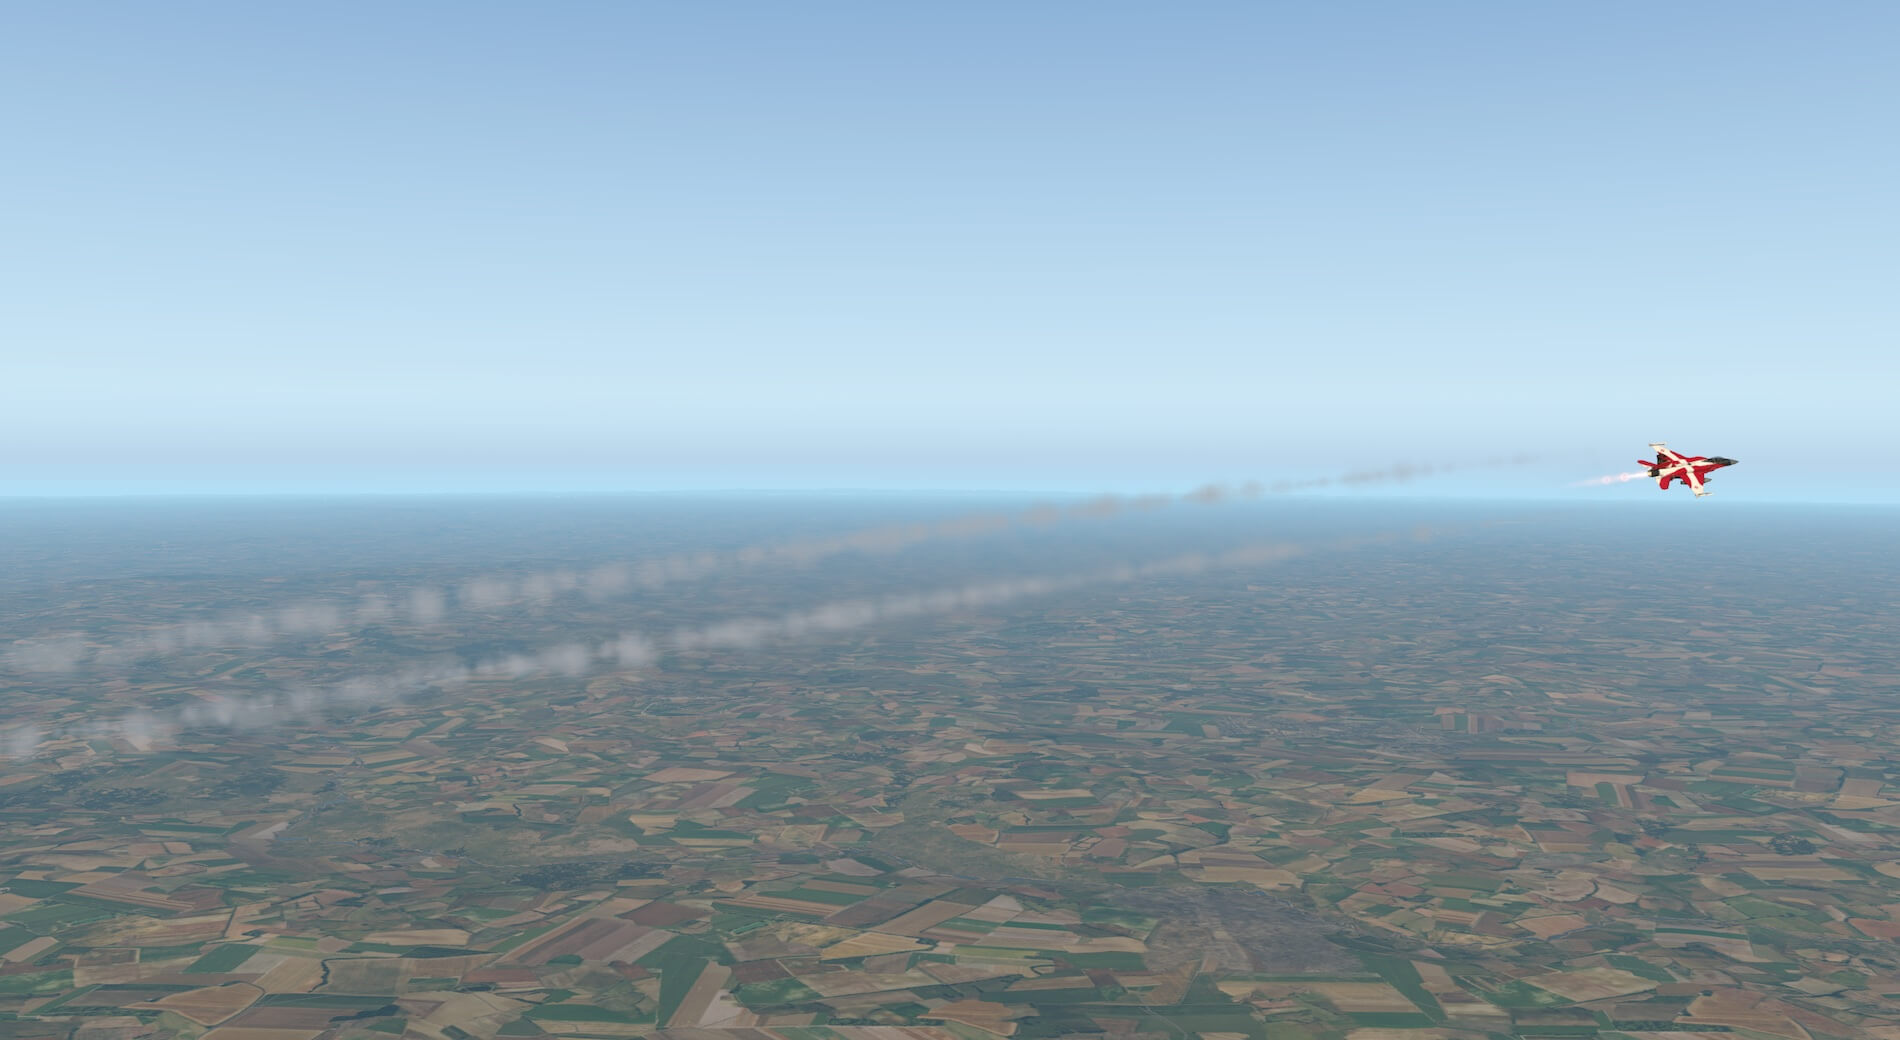
In flight the aircraft looks very impressive and convincing. Opening the throttle shows the reheat from the engine and sharp manoeuvres create that decompression vapour cloud familiar to anyone who has seen the F-16 display.

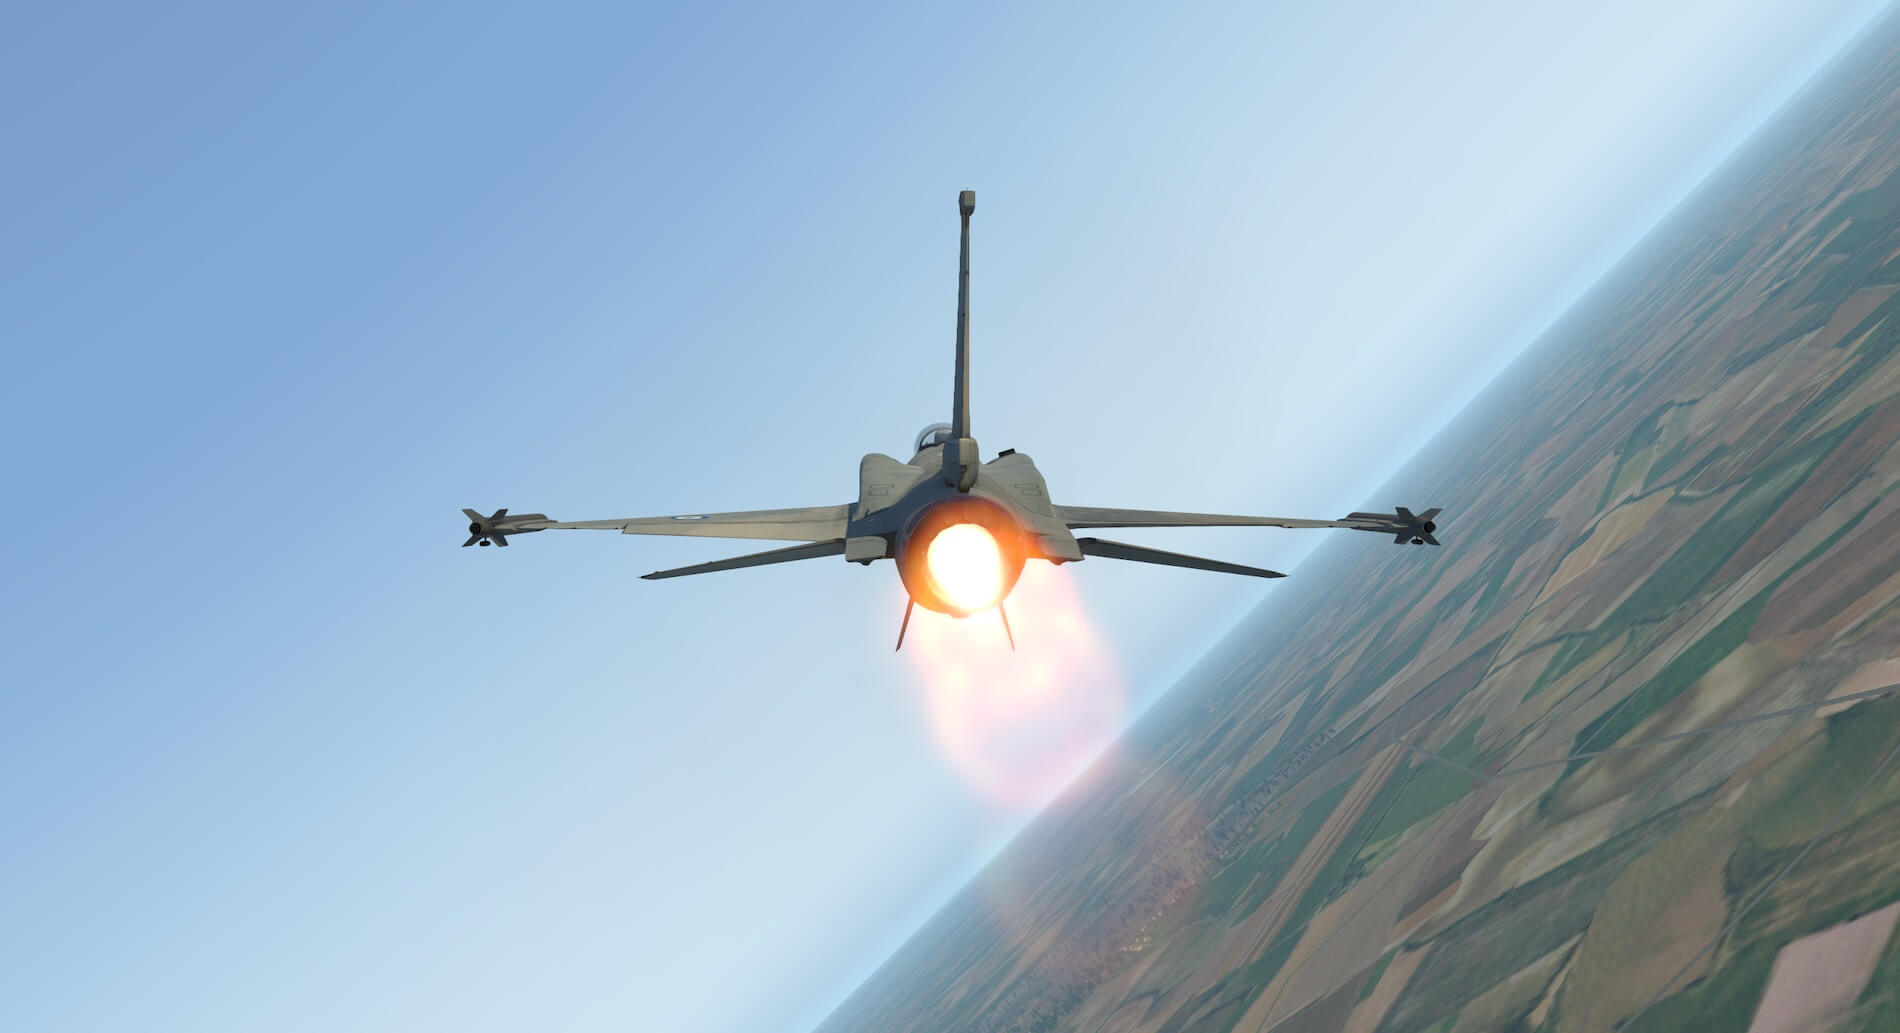


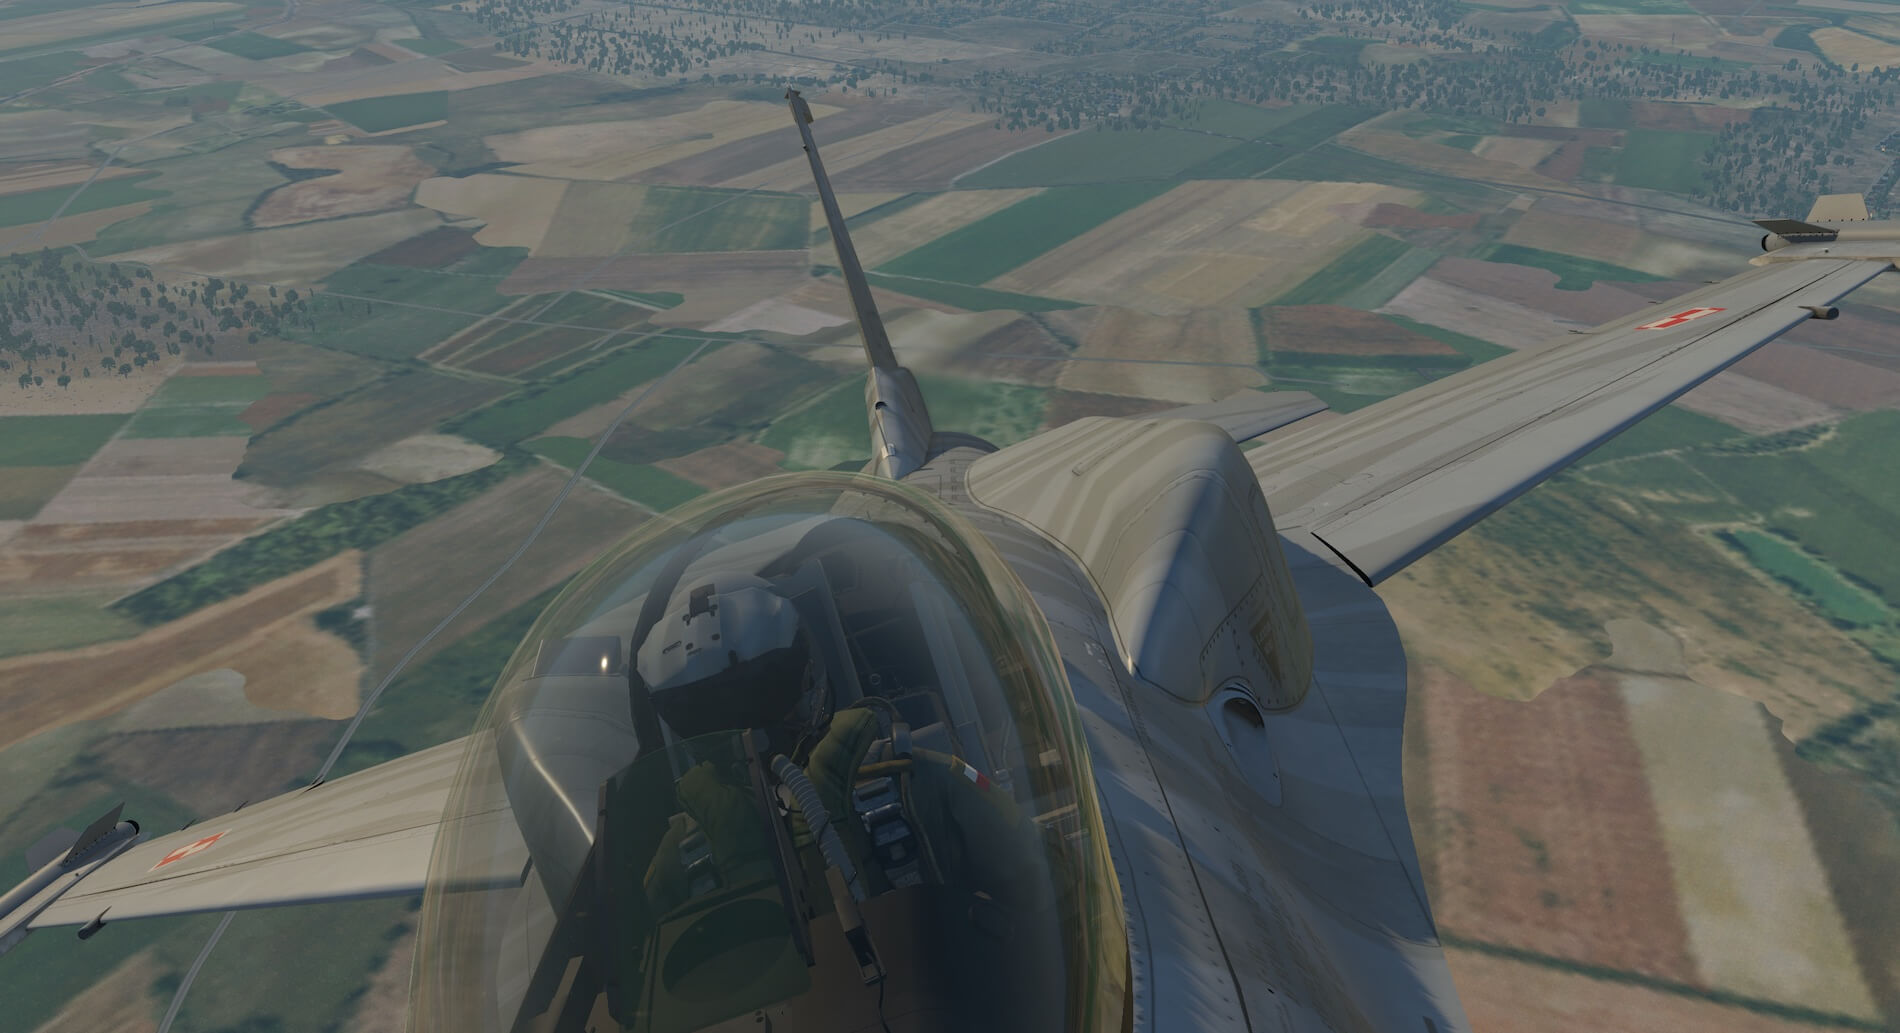
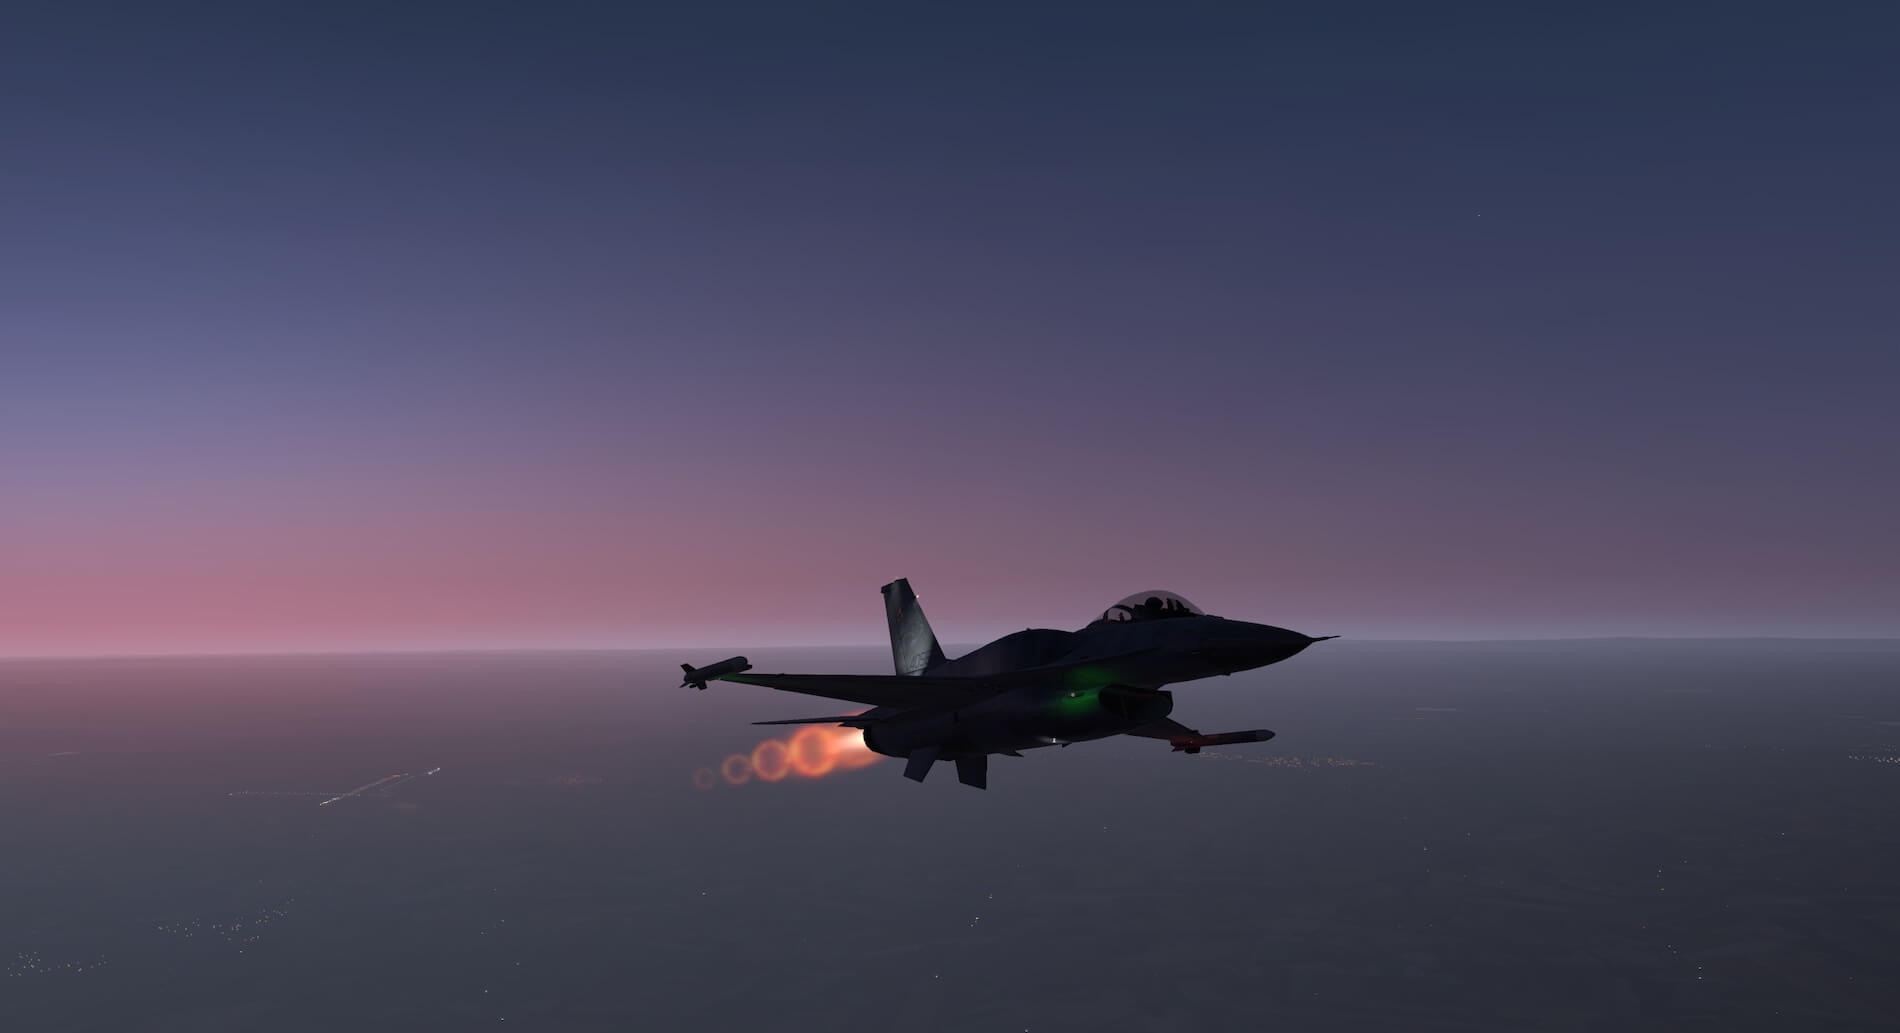
All exterior views in flight show the attention to detail the developers have put in place. The pilot figure can be customised in several ways, I will give more detail later, but this certainly pays off as pilot and cockpit detail looks very realistic from outside the canopy. The model has numerous external light options and is very impressive when in low light. The exterior modelling is delivered to a high standard and the development team have clearly gone to great lengths to ensure no aspect of the aircraft has been missed.


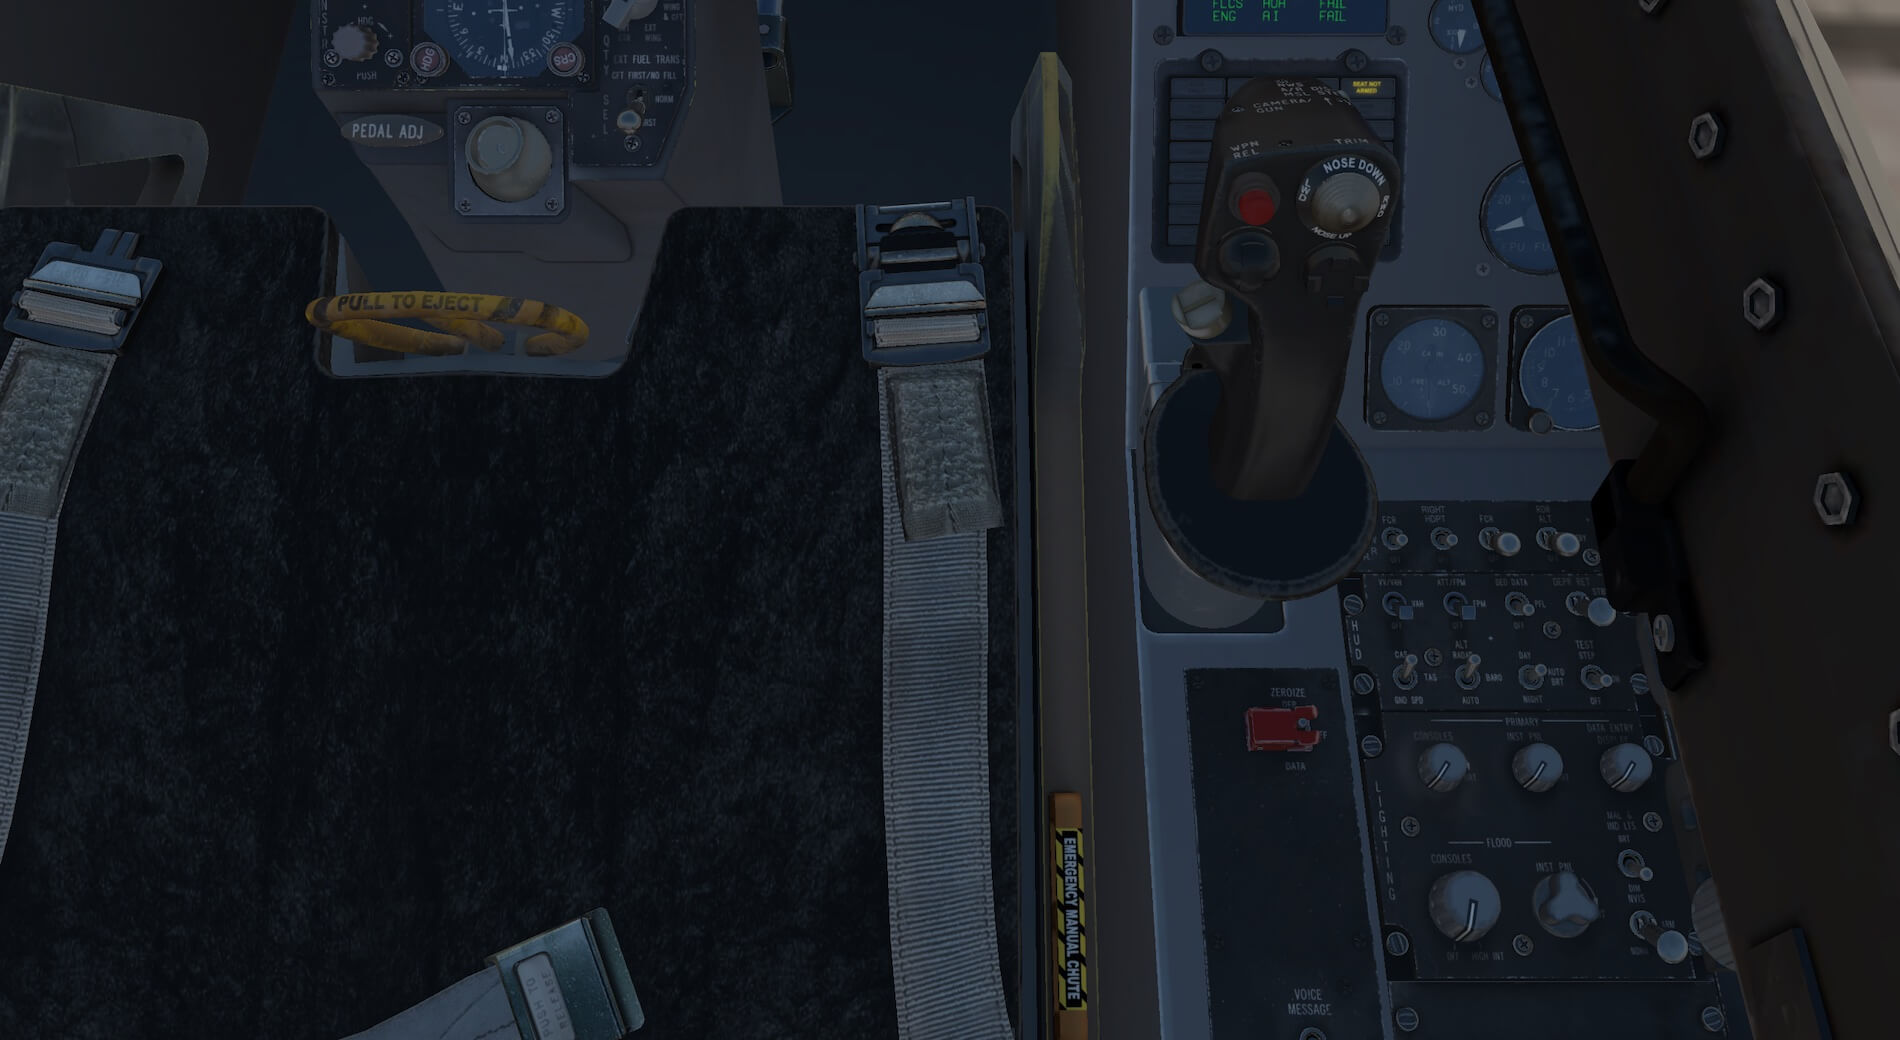
Interior Modelling
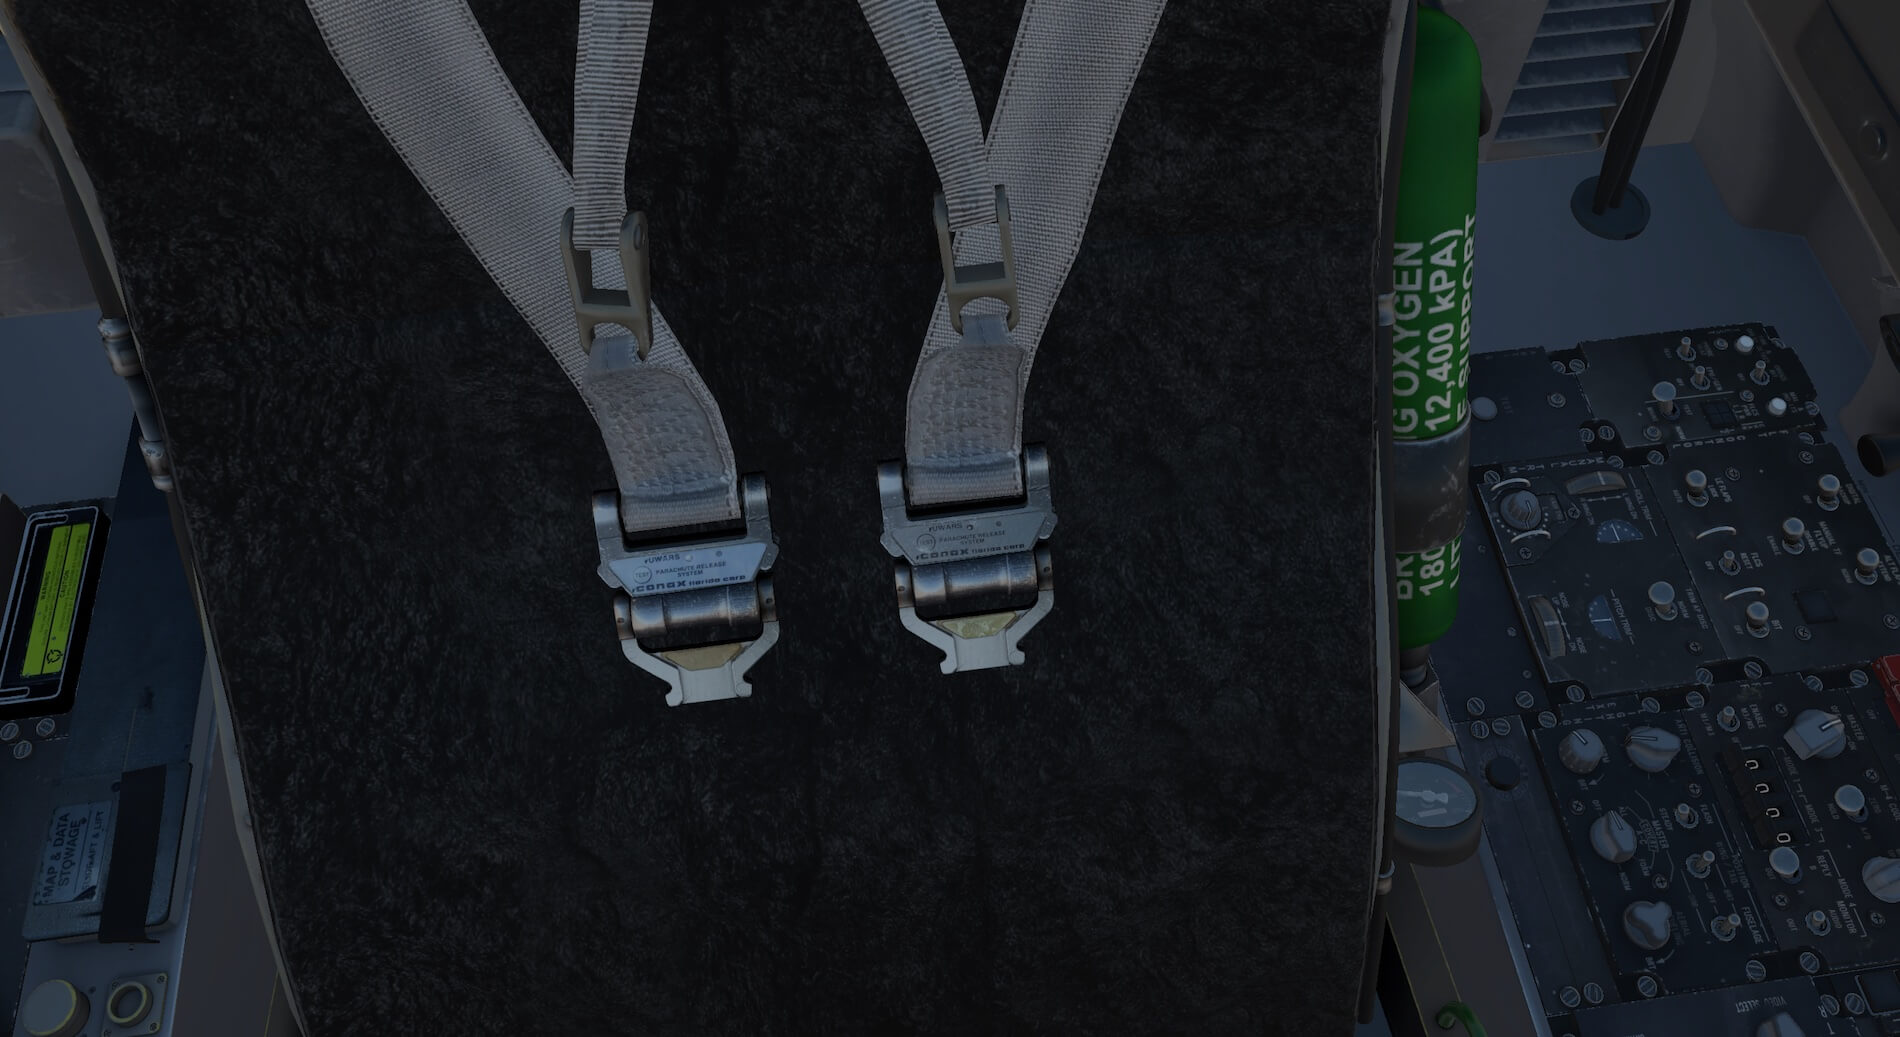
The interior of the aircraft is modelled in detail. Instruments are clear and legible and signage is easy to read. Colours and textures of all materials, including the harness straps and buckles, are very realistic and the effect of different lighting is convincing. The aircraft equipment is created to a high standard and sitting in the pilots seat is highly immersive. Camera views around the cockpit show the attention to detail. As is the nature of military aircraft the cockpit has a very utilitarian look with some levers and wiring visible. Individual bolts and fixings are all modelled.


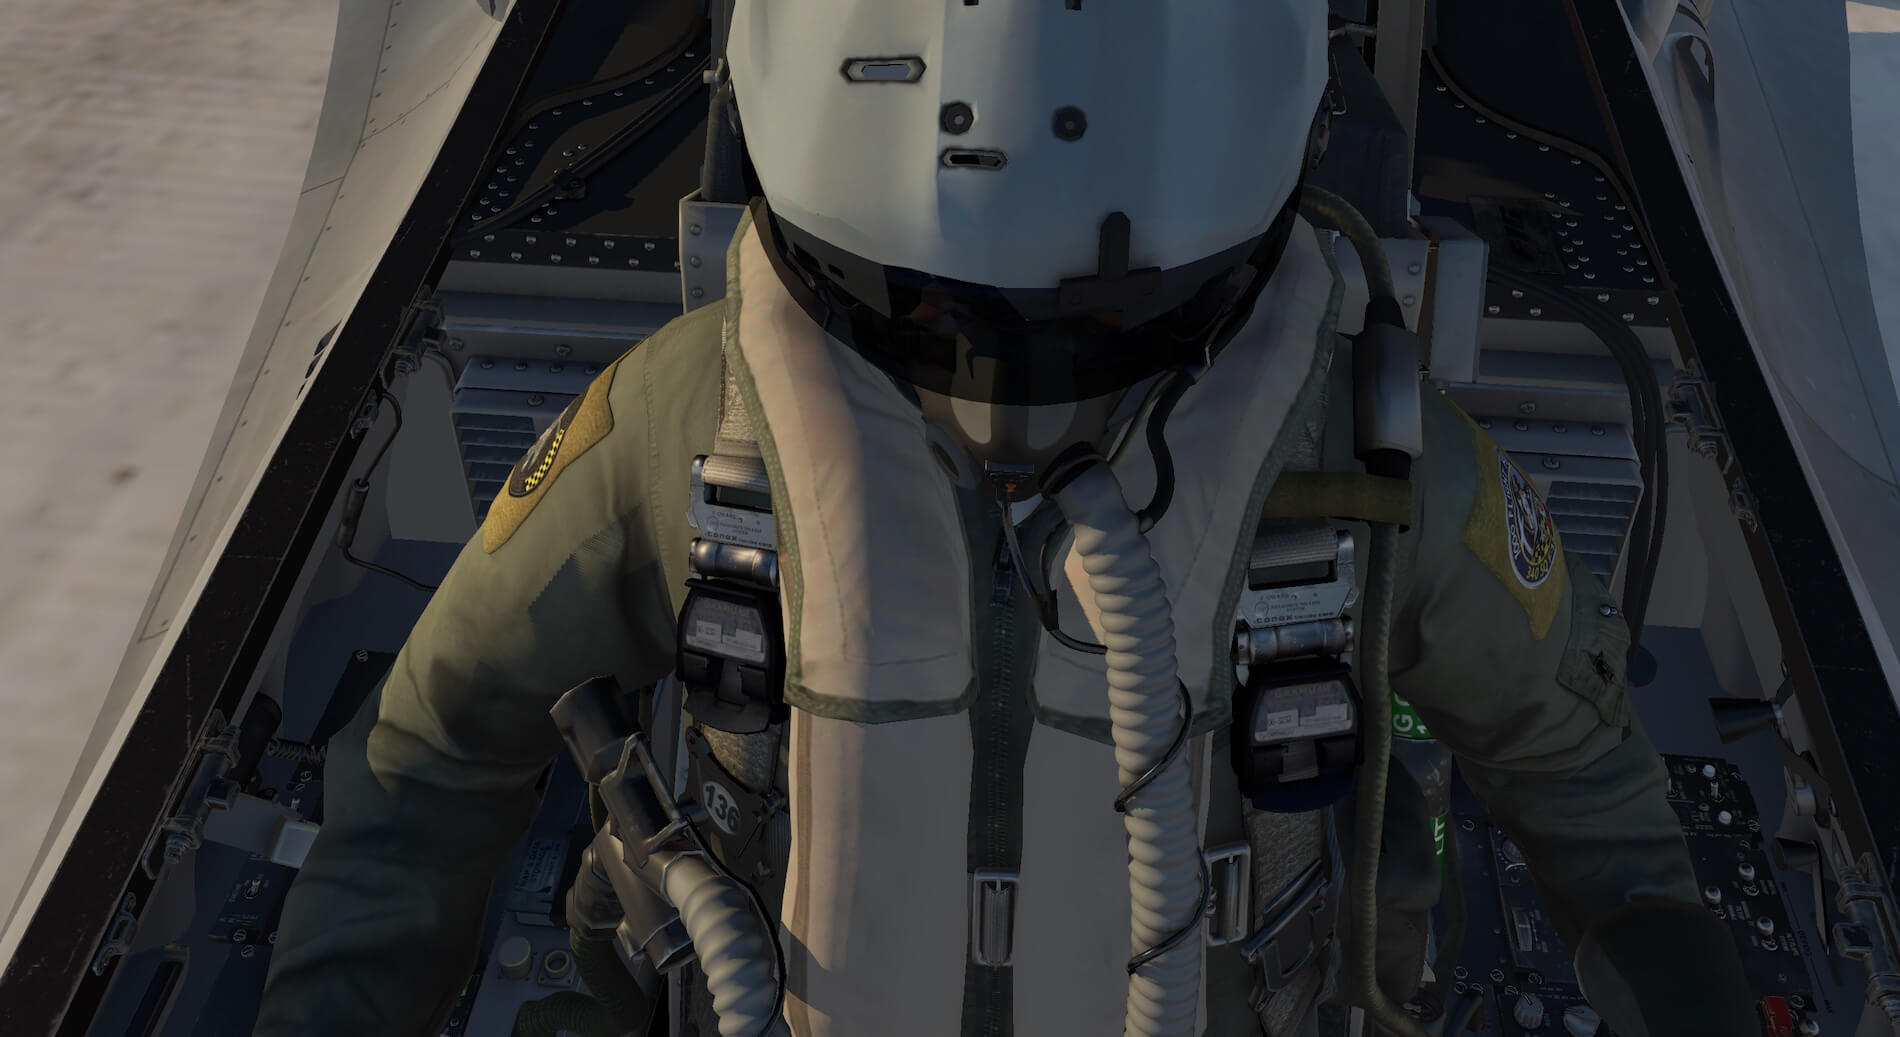
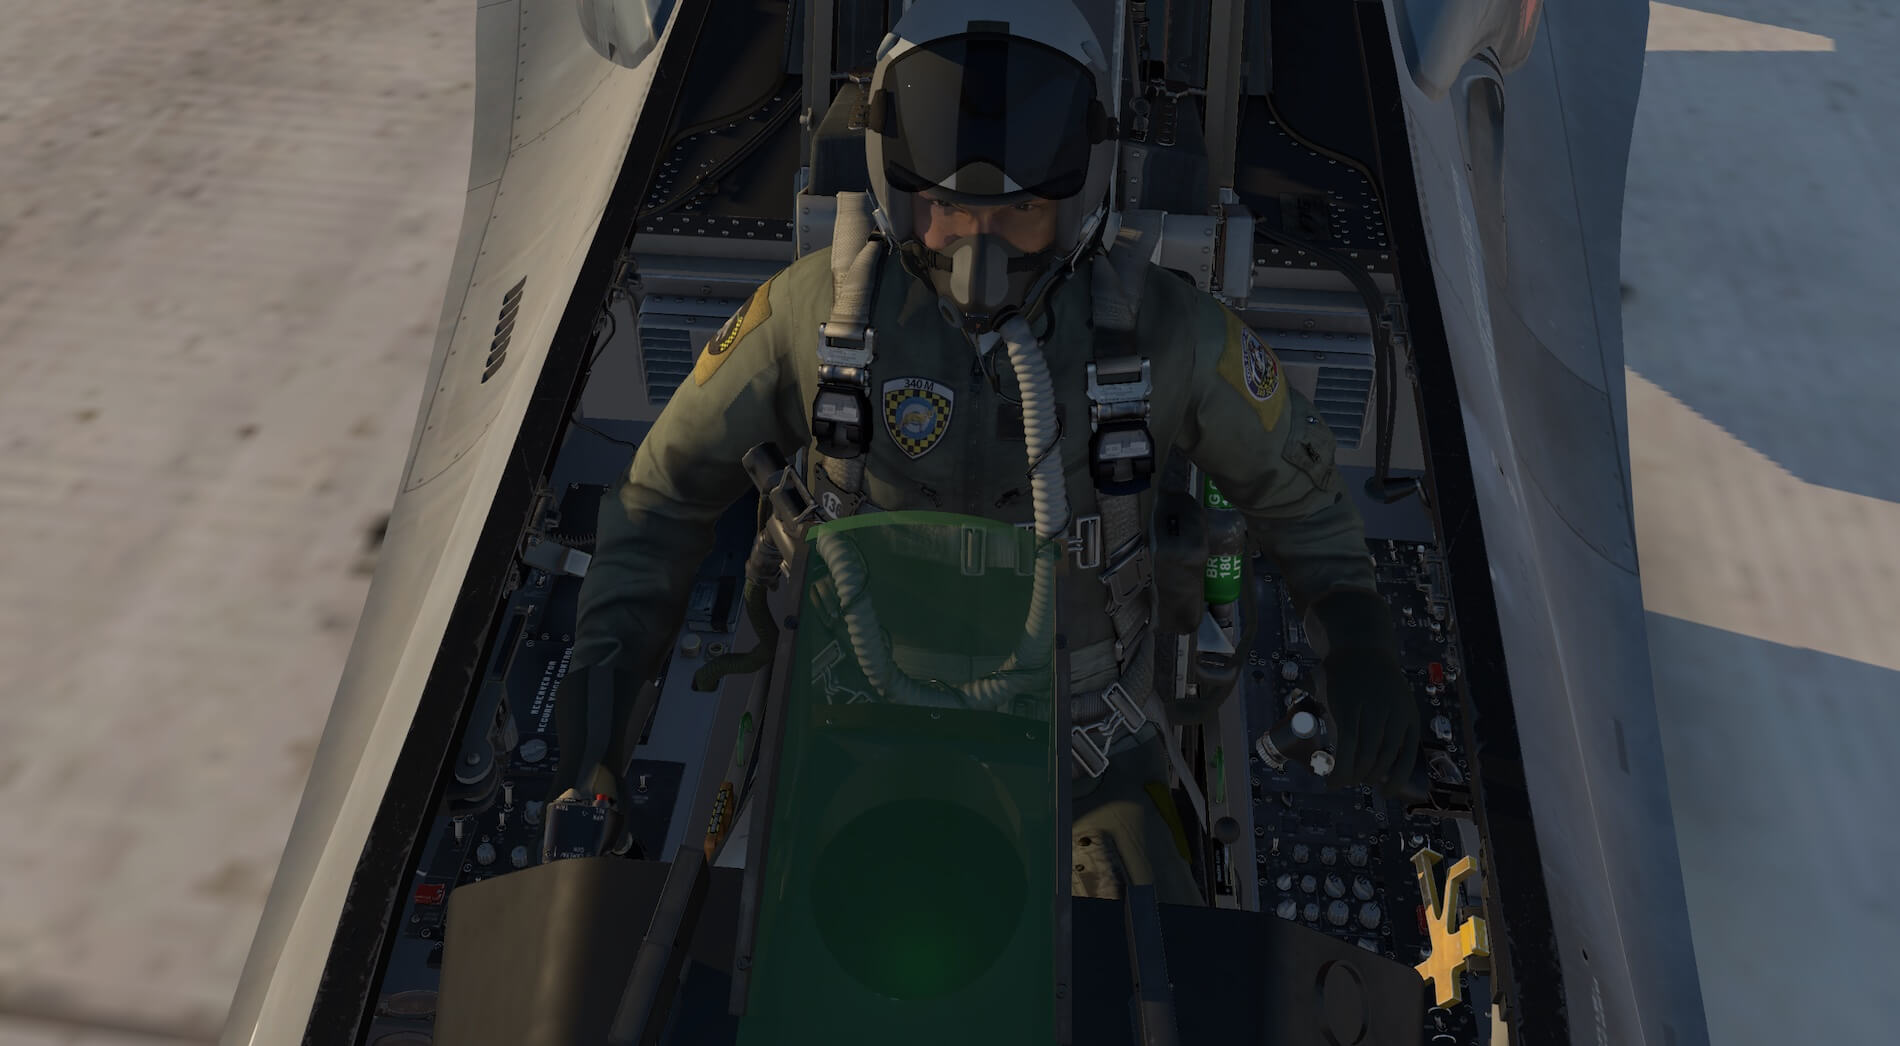
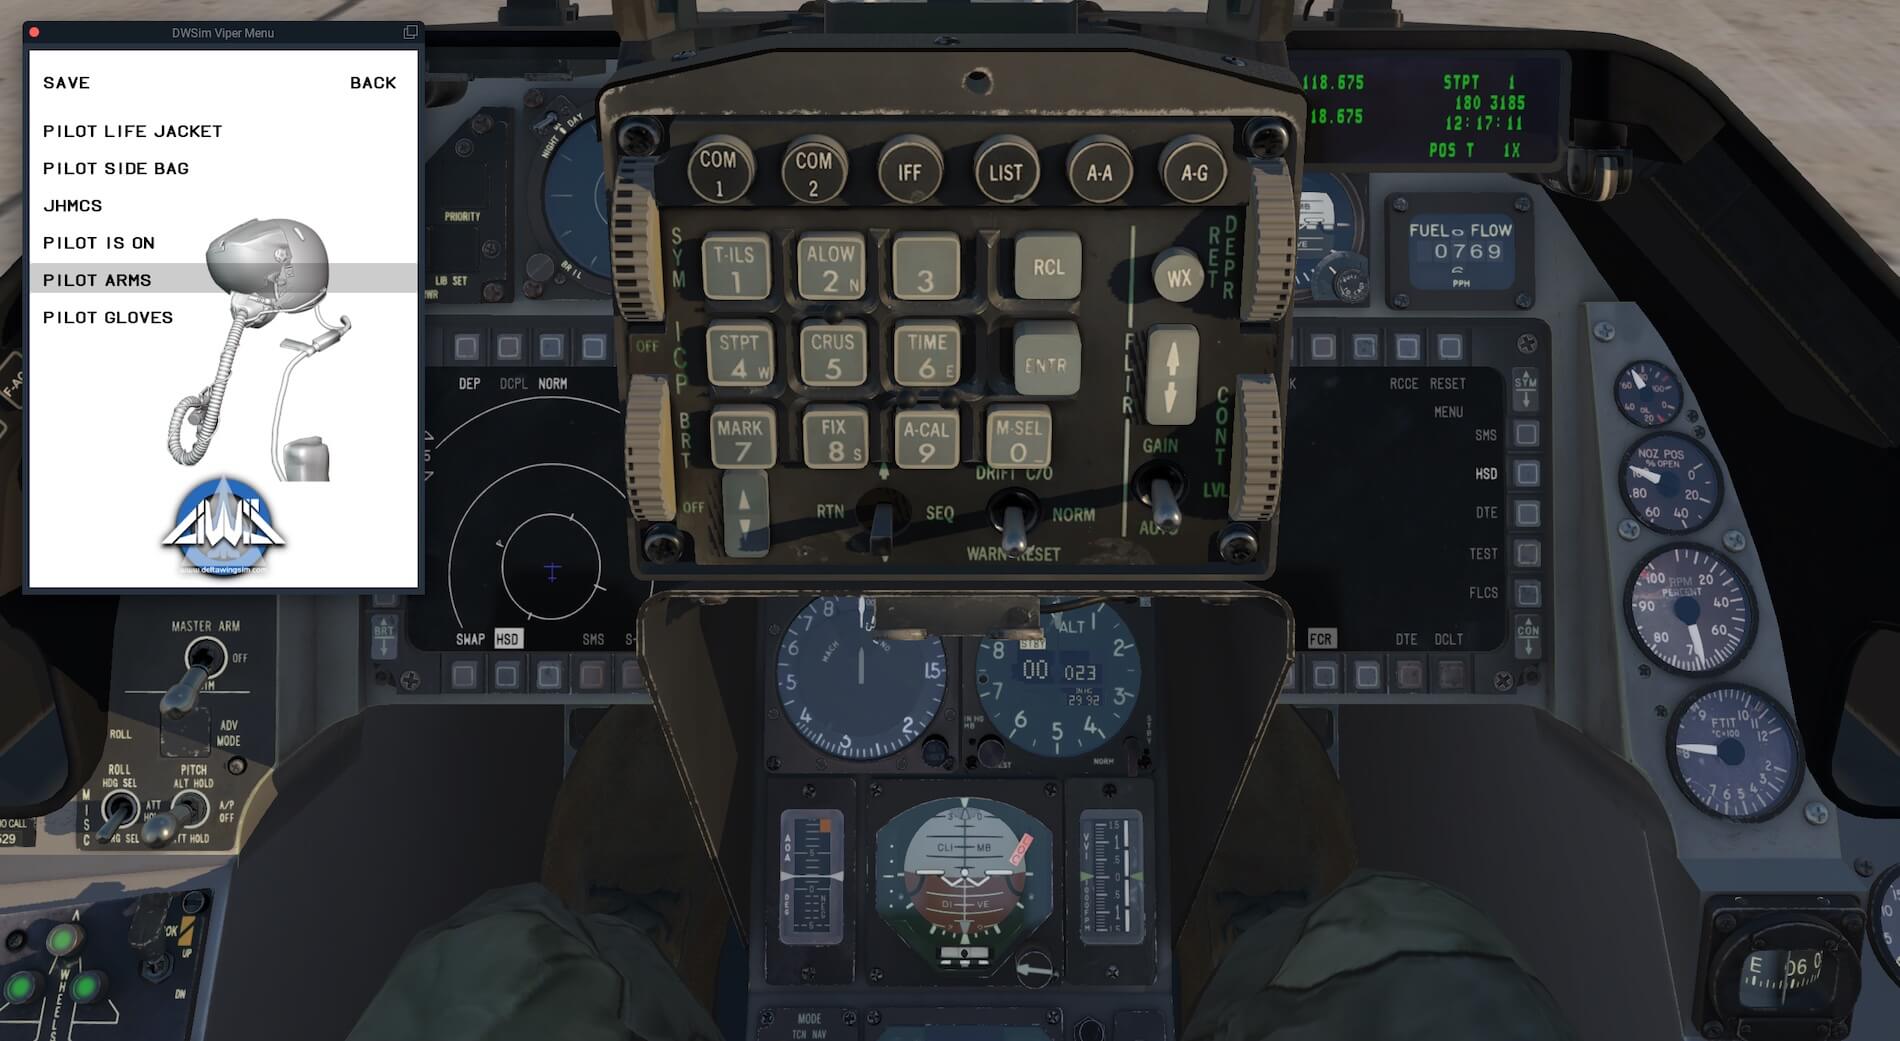
The pilot is also modelled to great effect and is very realistic, complimenting the other interior detail. The set up menu on the pilots kneepad allows the pilot equipment to be customised. This means the life jacket can be toggled on or off, as can the pilots side bag and the Joint Helmet Mounted Cueing System. The pilot can also be set to be only displayed when viewed from outside the aircraft. I found this useful when exploring the cockpit, instruments and controls. The detail continues even on the underside of the canopy rim when open.


In low light the interior remains impressive with various lighting options controlled from the side panel and adding atmosphere to the cockpit.

The interior of the model compliments the exterior modelling. The production of the detail textures and colour present a convincing, modern atmosphere for a modern military aircraft.
Sound
The sound of the engines is obviously a key part of any model, especially for those who know how those engines sound on the real aircraft. I have been lucky enough to hear the F-16 on many occasions and when heard from outside the cockpit the engine sounds of the model are very accurate and really do recreate the presence of the actual aircraft.
When entering or leaving the aircraft the canopy is accompanied by very convincing sounds indication canopy movement. The verbal warnings are clear and realistic and the settings allow for G effects on the pilot which sound very convincing in addition to the voice of the pilot at times such as deploying the smokers. The hum of the instruments in the background when in the cockpit creates a good atmosphere and the sound of actions such the movement of the undercarriage adds realism. The sound package compliments the visual modelling of the F-16.
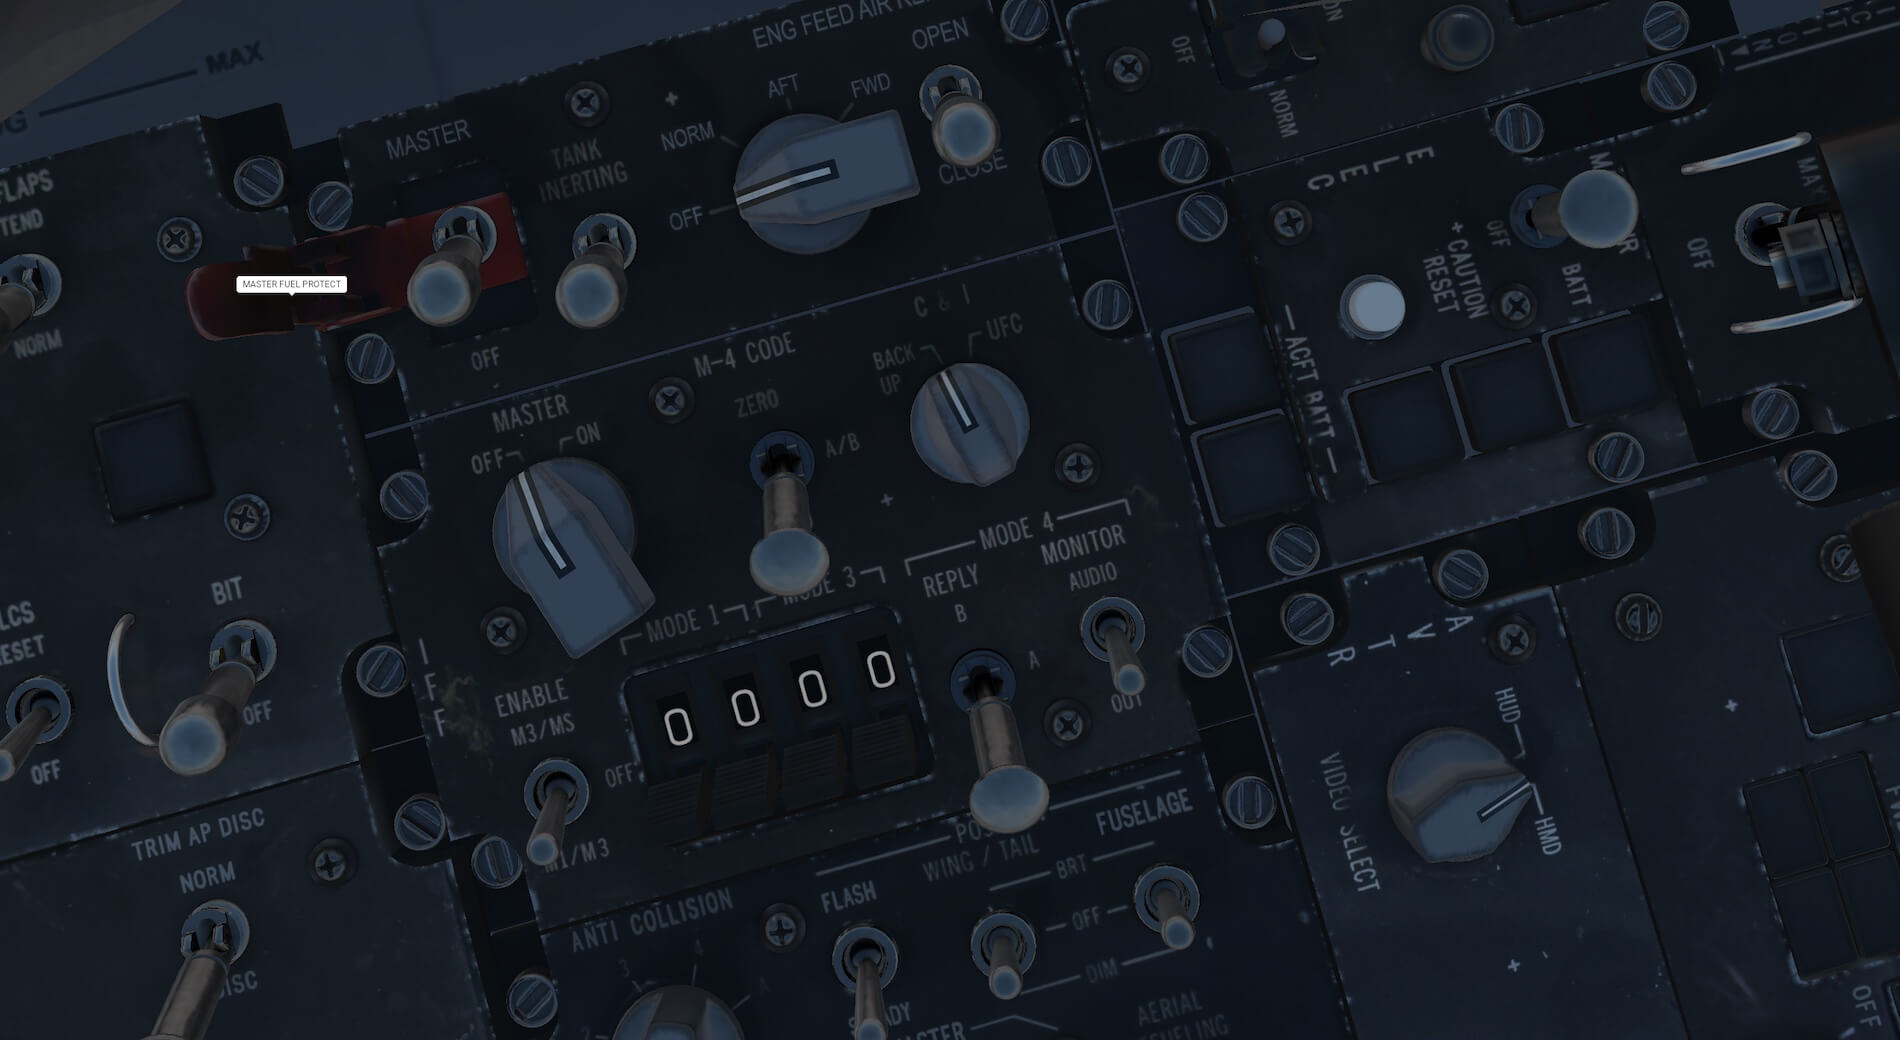
Systems
The model is designed to be the airshow edition and at present the only weapon system is the Vulcan gun. The developers intend to develop the capabilities and equipment of the aircraft through updates and through communication with them we are aware of some interesting and exciting things to come. The manual explains the systems that exist in this edition both those of the aircraft and those added to allow the use of the various options in the model.
These options are controlled through the pilots kneepad that can be opened by clicking on it when the pilot figure is in place, using a small lever modelled to the left of the pilots seat when there is no figure and by a pop up window which can be set up through the keyboard commands provided in the Viper section of the X-Plane keyboard set up menu. This pop up menu also provides a calculator that converts decimal latitude and longitude, Nav Aid location and Latitude and Longitude minutes and seconds in to a suitable format for the aircraft navigation system.
Very useful when planning a route. The load out section of the kneepad menu allows for toggling of a central fuel tank, wing tip or engine smokers, and a tail chute. Wing tanks can also be toggled on or off but this is done through the X-Plane weapons section, when in flight configuration, and I will explain this in more detail later. The second selection controls camera views displayed in the MFD from the front view, back view and view from the back of the seat.
The third section allows the pilot to be configured as I described in the internal modelling description above and in addition allows the pilots arms and gloves to be toggled separately, again useful to access controls and instrumentation. The next section toggles sound effects for the pilot and high G situations. The fifth section is the External Objects menu which allows for the ladder to be toggled on and off, when the aircraft is on the ground with the canopy open, for the chocks to be in place and remove before flight objects and markers to be toggled. The final section, only on the pop up kneepad is the calculator as described above.
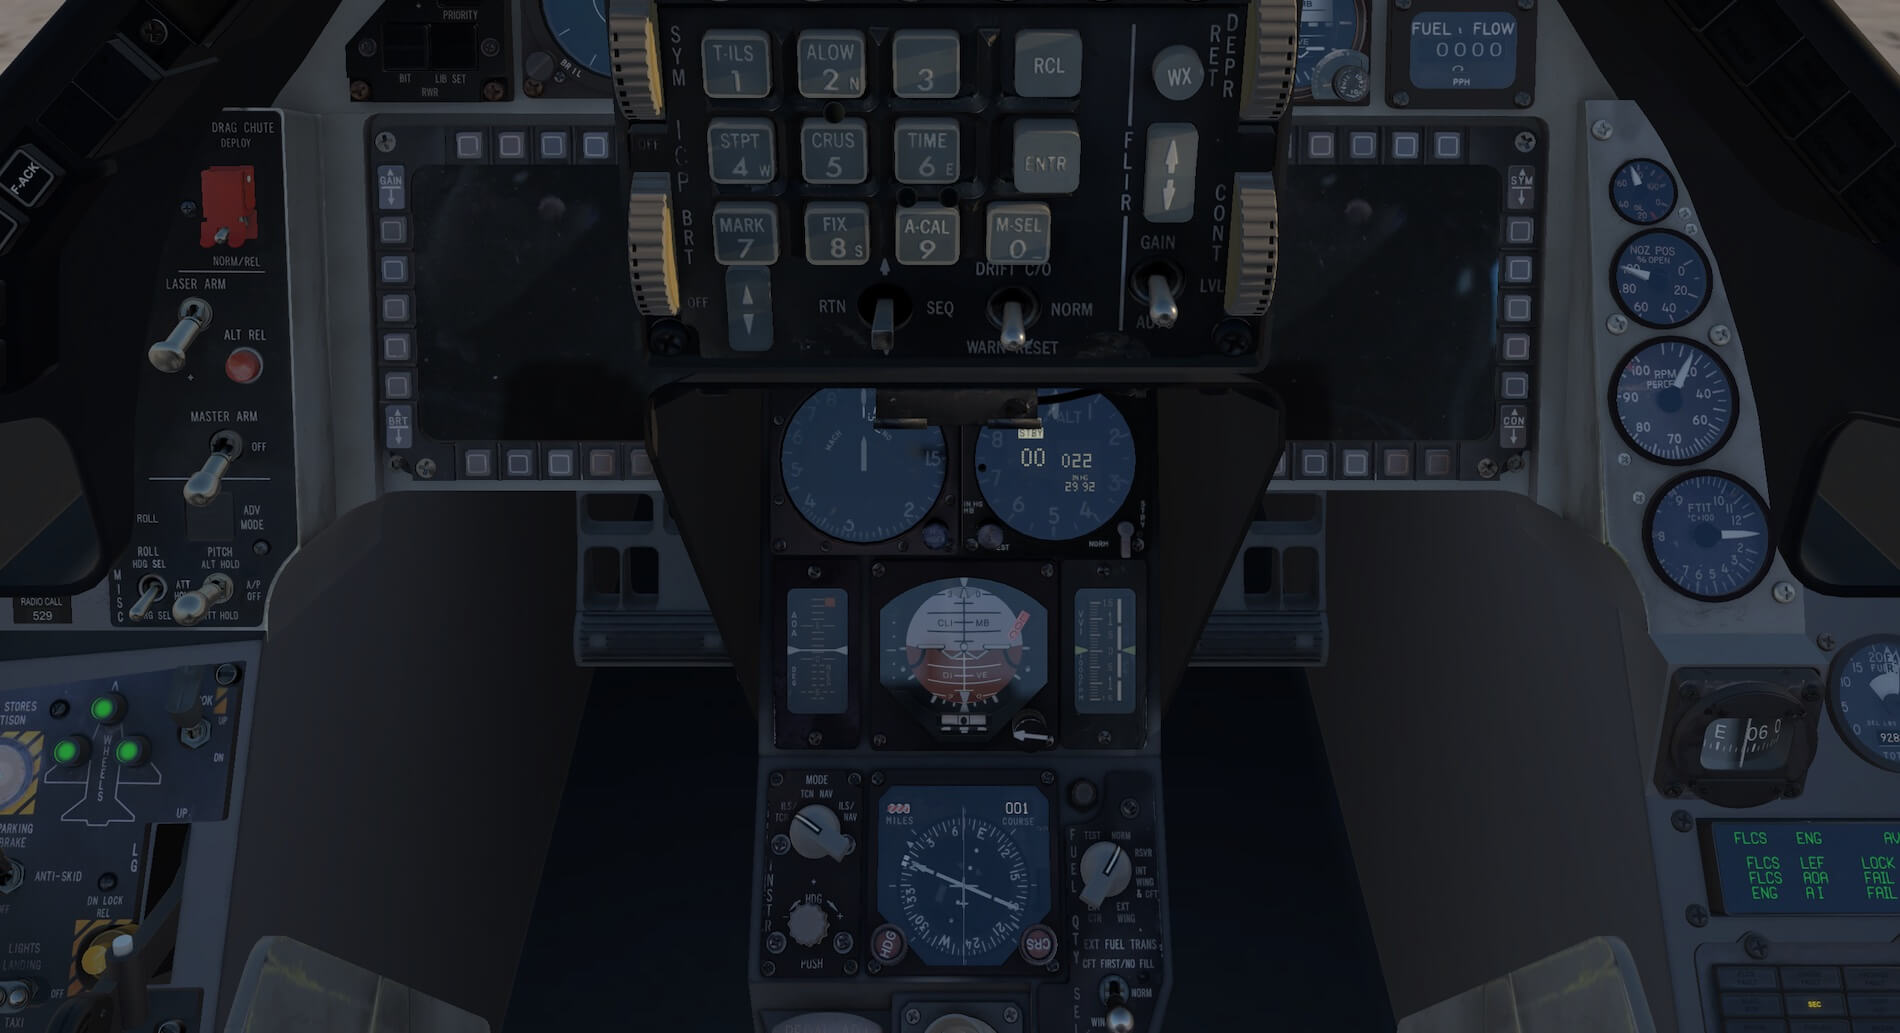
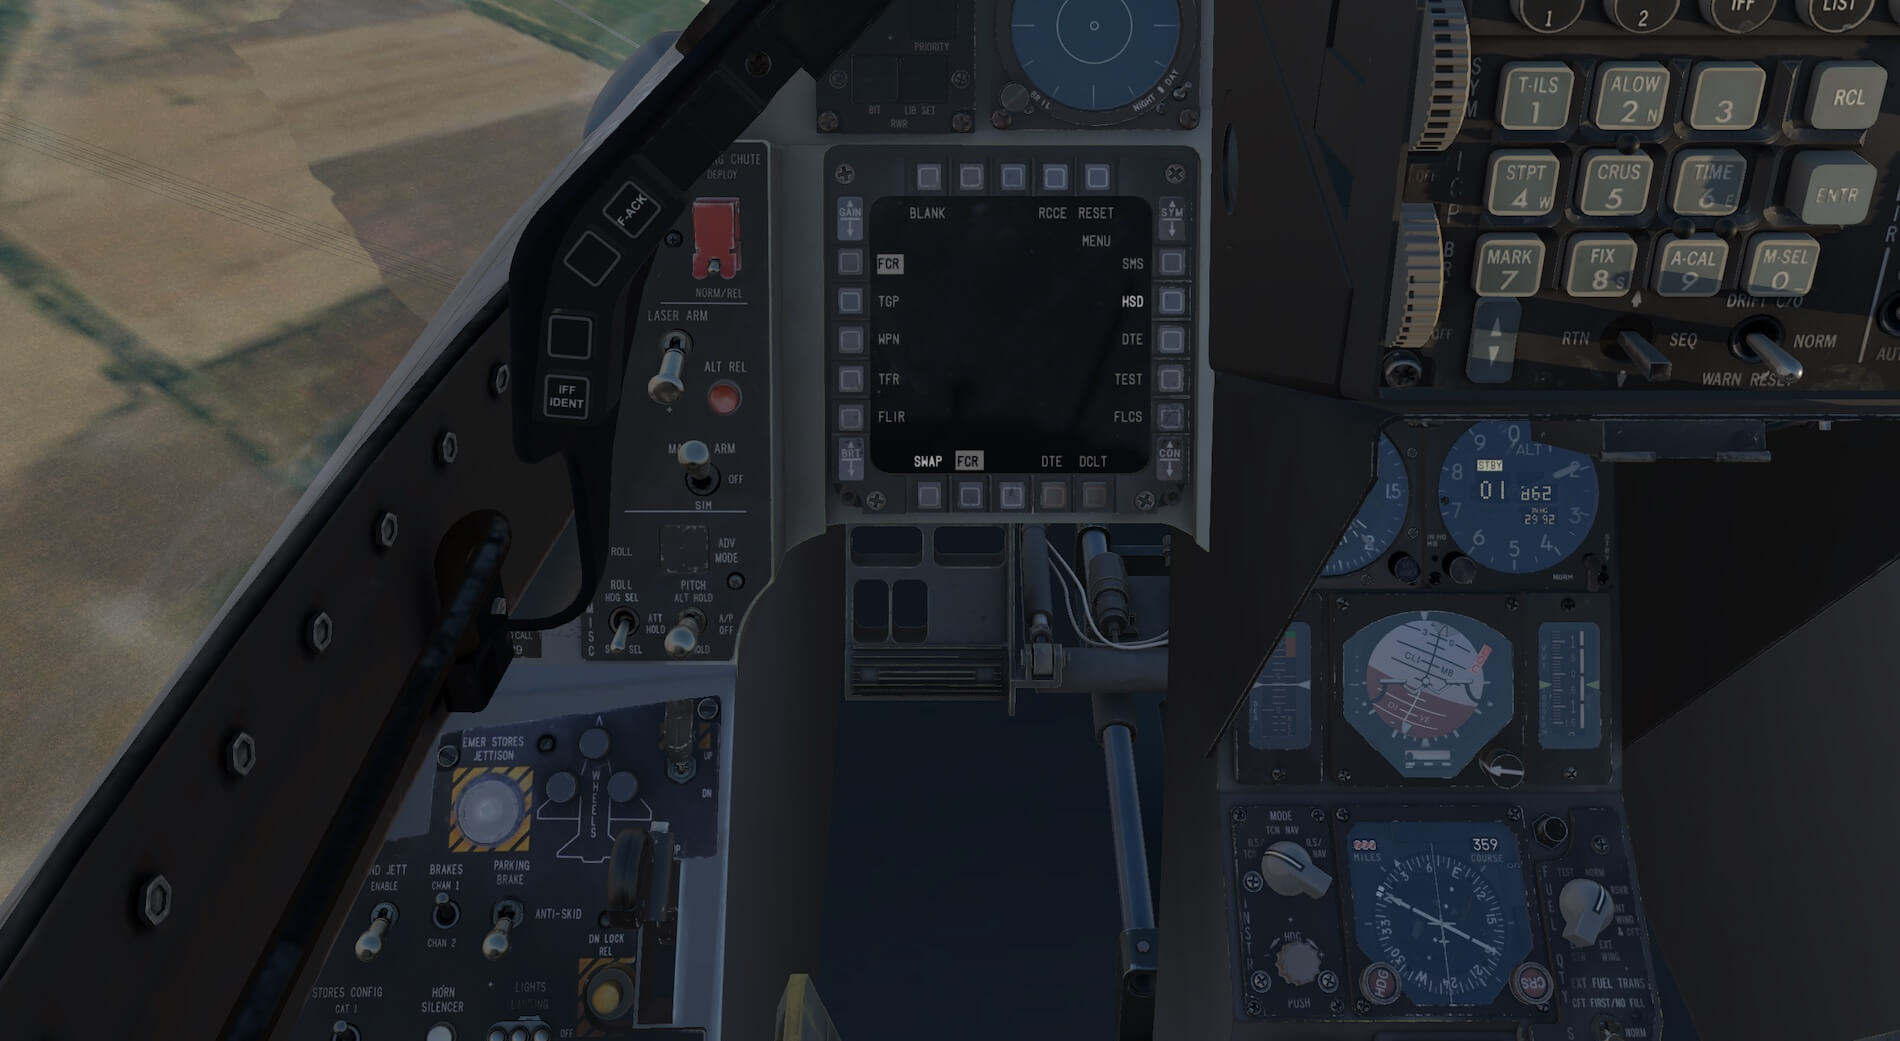
The aircraft systems are made to be realistic in a military aircraft and therefore data input and instrumentation can be different from the default X-Plane equipment. The cockpit diagrams in the manual certainly help find the various switches and controls and there is also a handy diagram illustrating which panels are presented but not modelled to work in this version.
VHF Communications, Bingo Fuel, the minimum amount of fuel needed to reach the planned airfield, altitude alert and steering points can be input by the keys on the Integrated Control Panel positioned in front of the pilot and these are displayed on the Data Entry Display to the right of this. The steering points are input in latitude and longitude and can assist with manual navigation or used to control the autopilot.


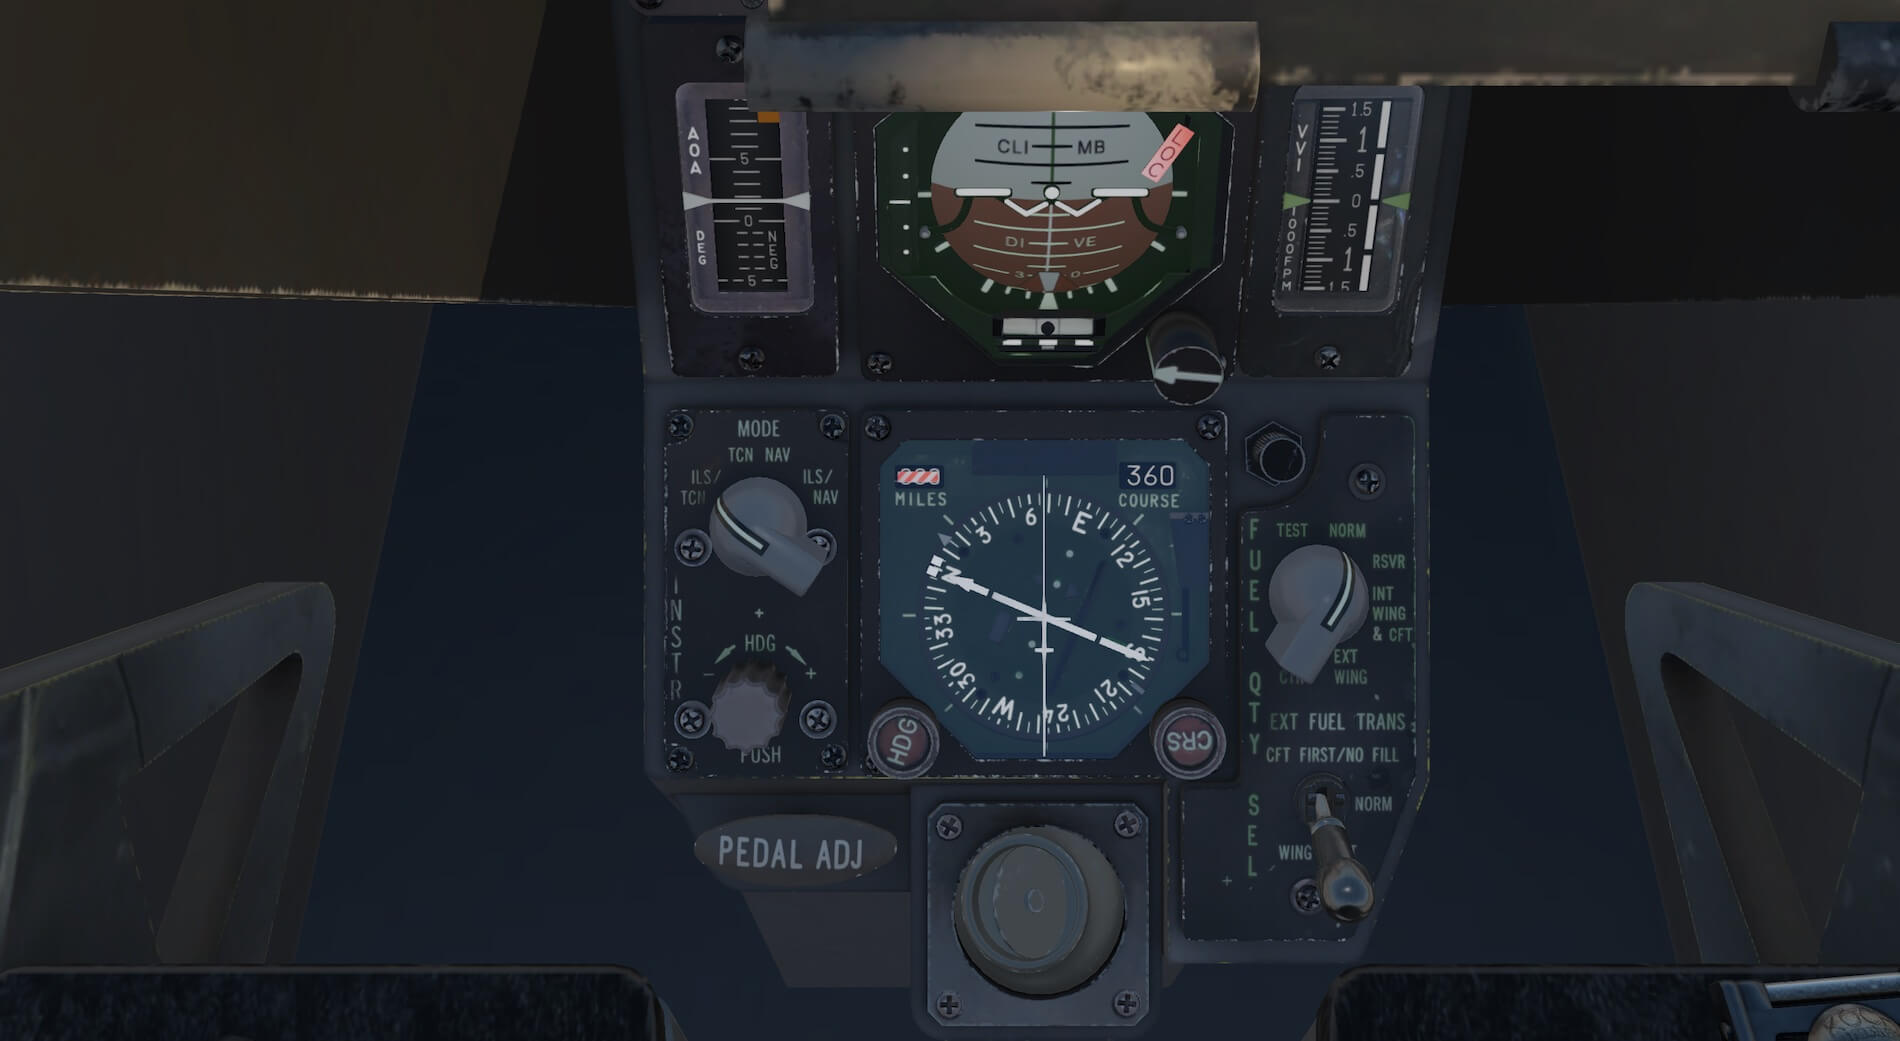
The aircraft has the ability to use VOR, TAC and ILS frequencies. The manual explains the process and instrumentation to use. There is also a back up ILS system. The model also has an autopilot with a distinct military feel to it and it is one of those instruments that differs from the standard X-Plane equipment. The autopilot has altitude hold, attitude hold, heading select, current roll and navigation by steering point options. It is fully explained in the manual.

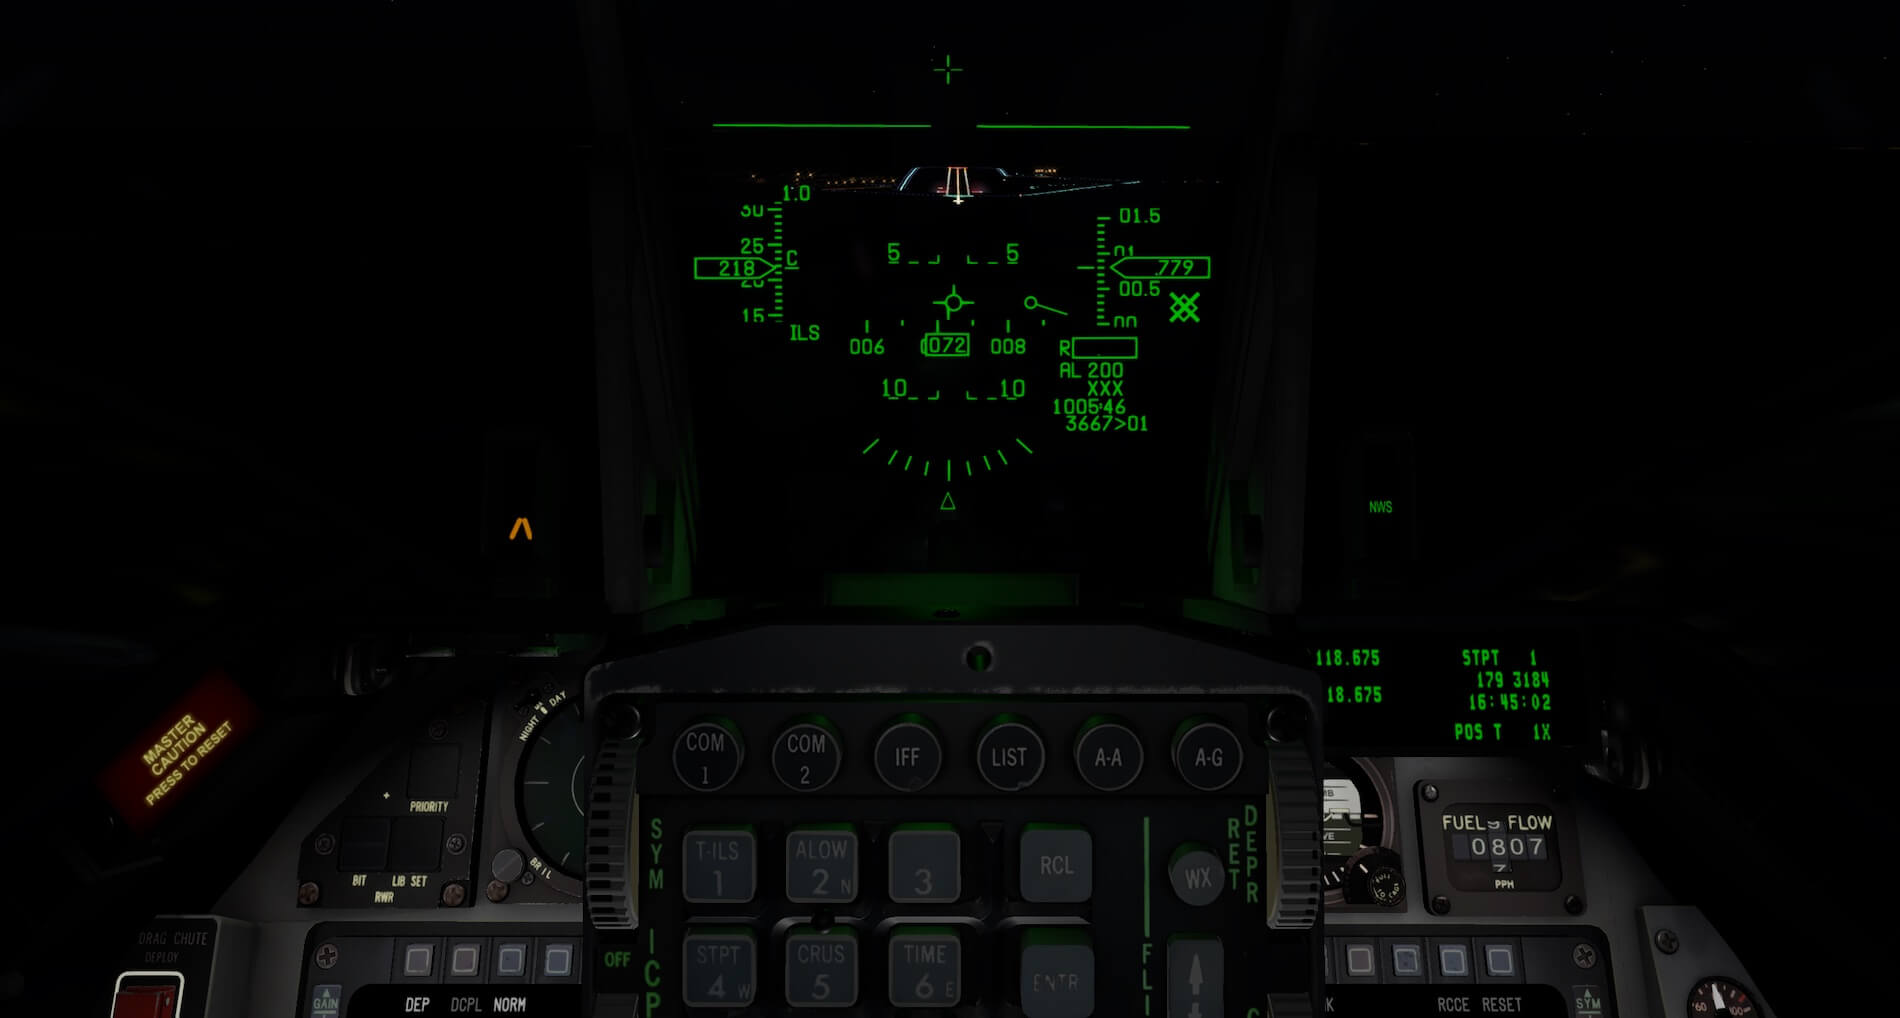
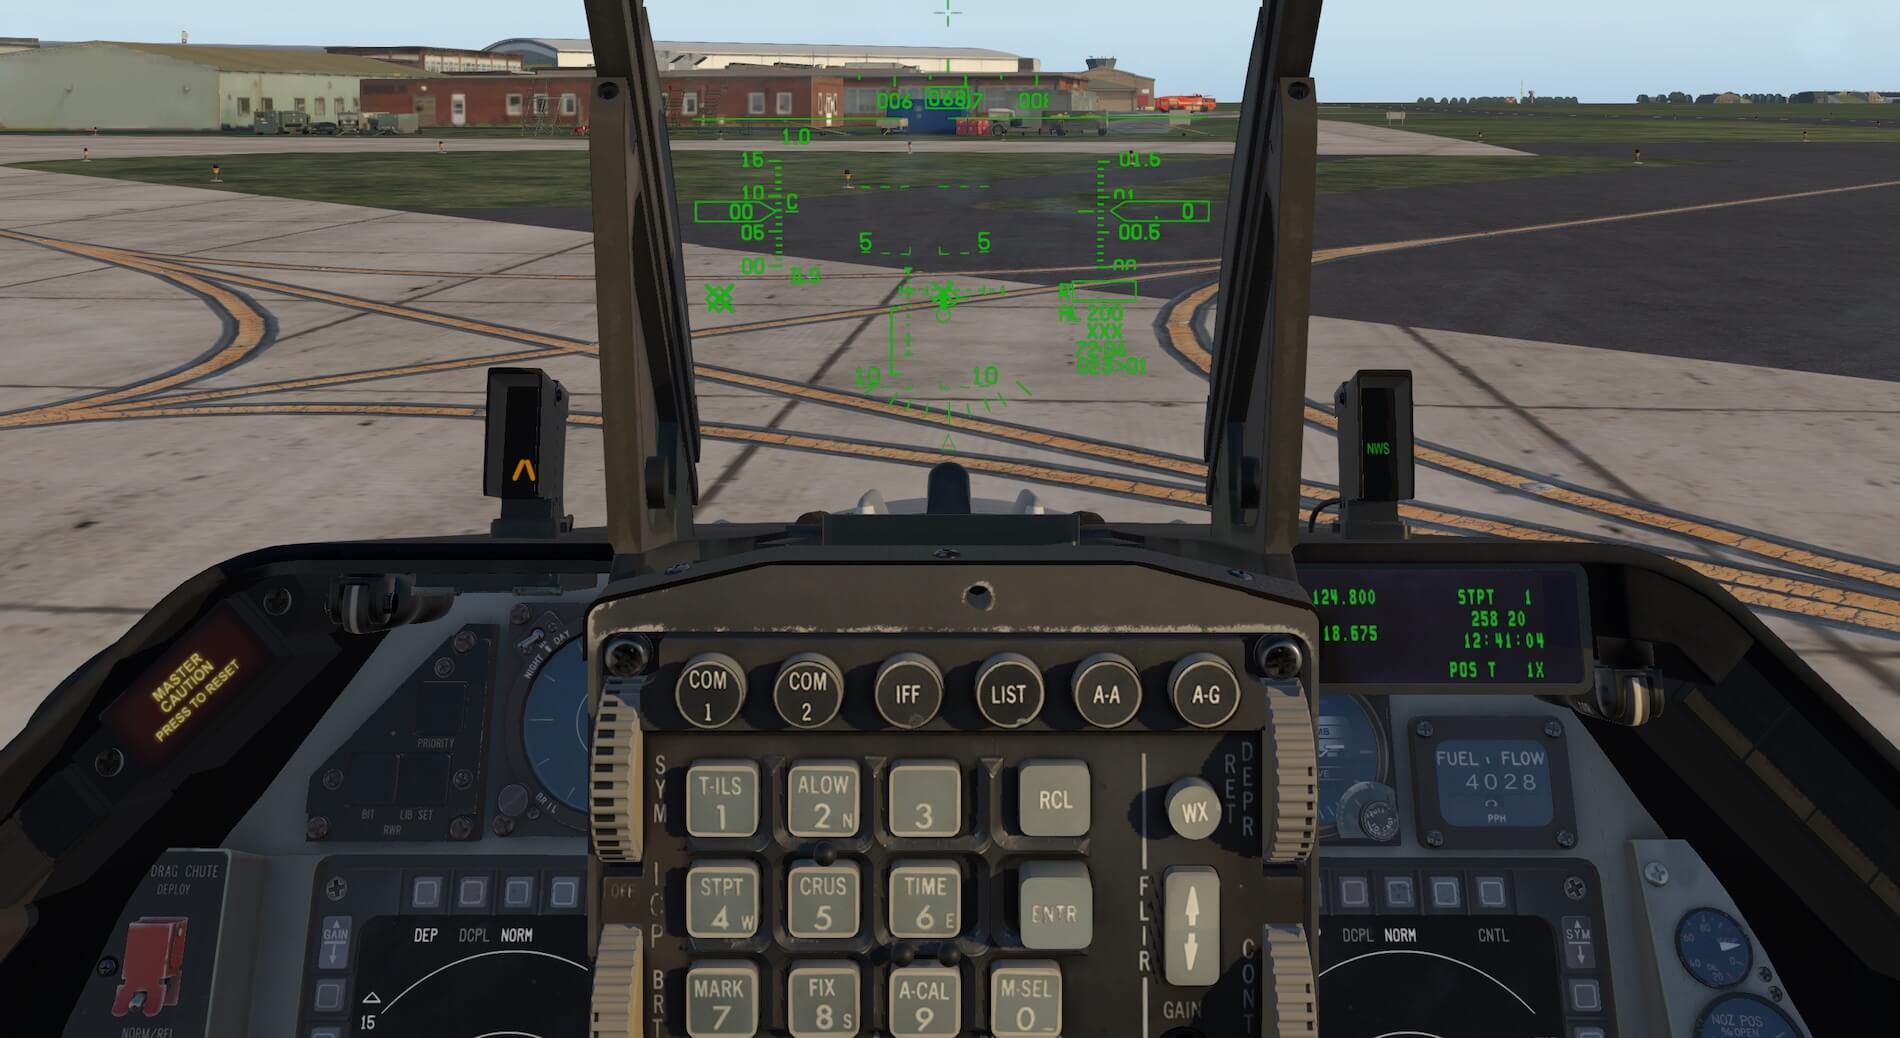
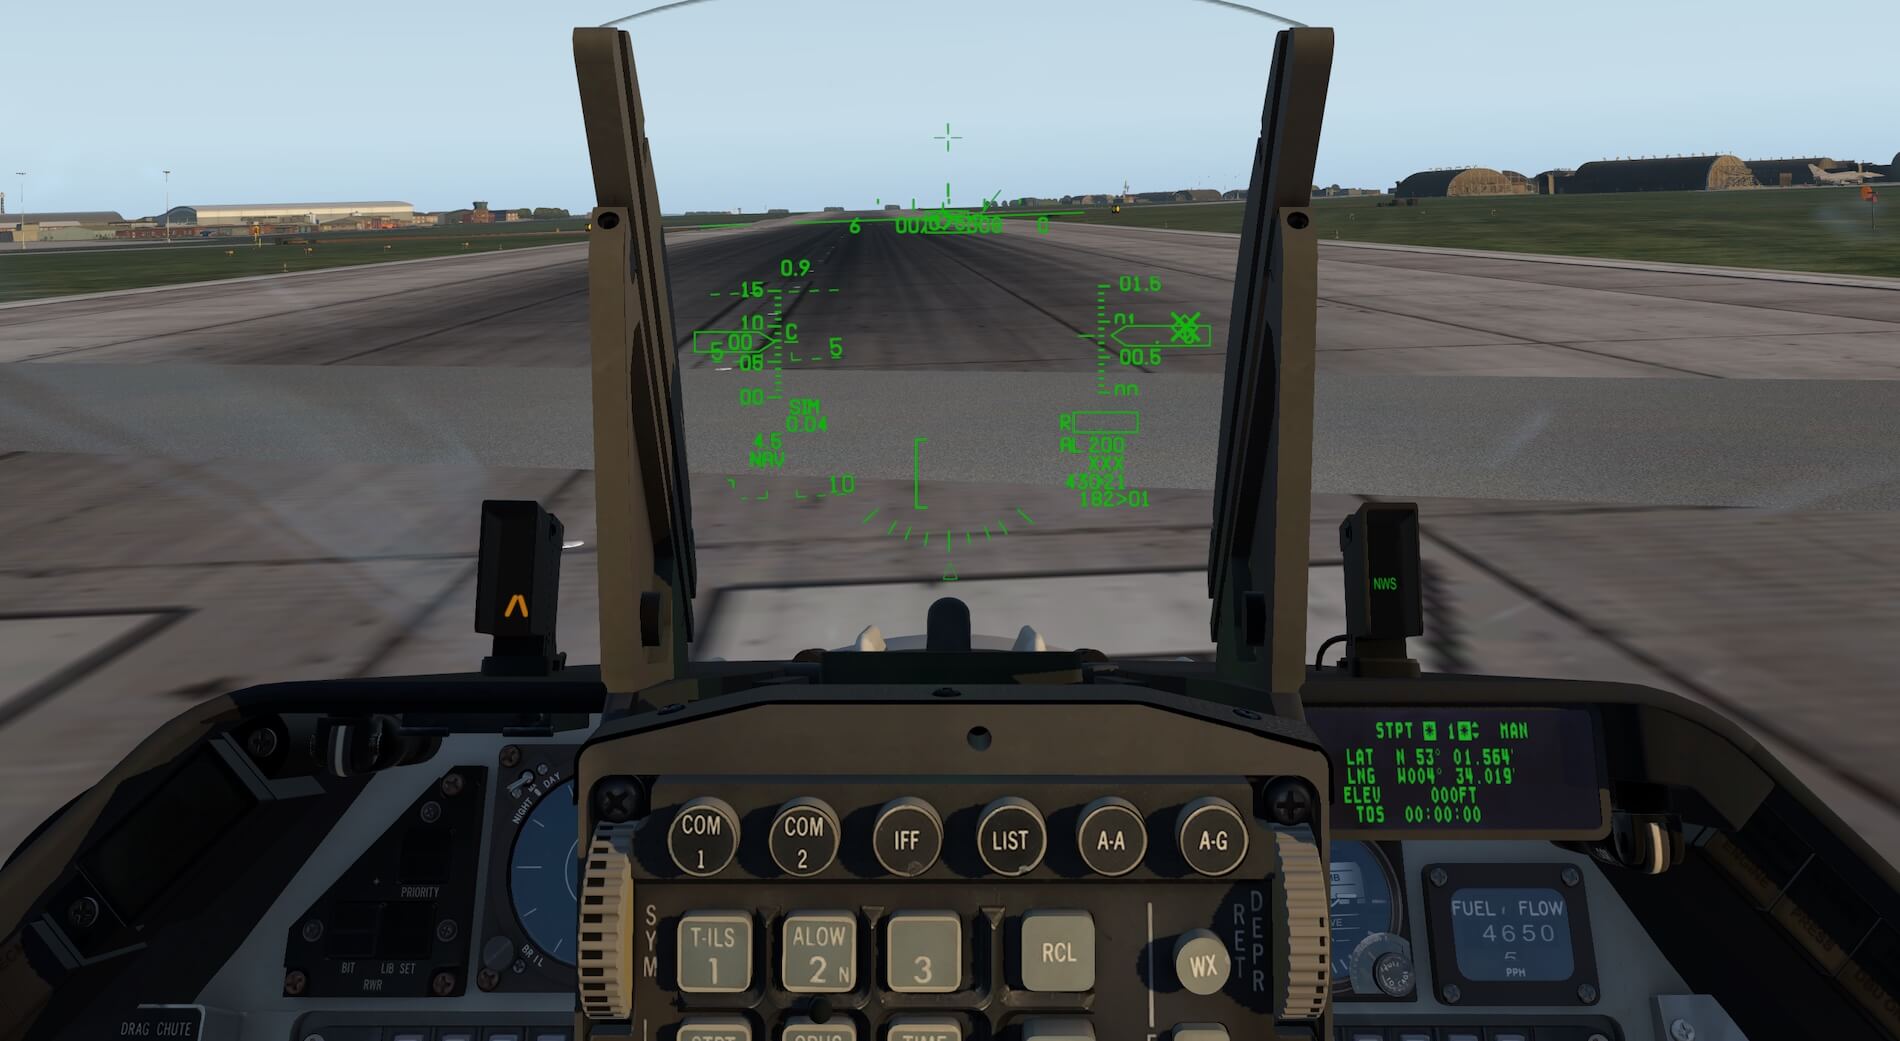
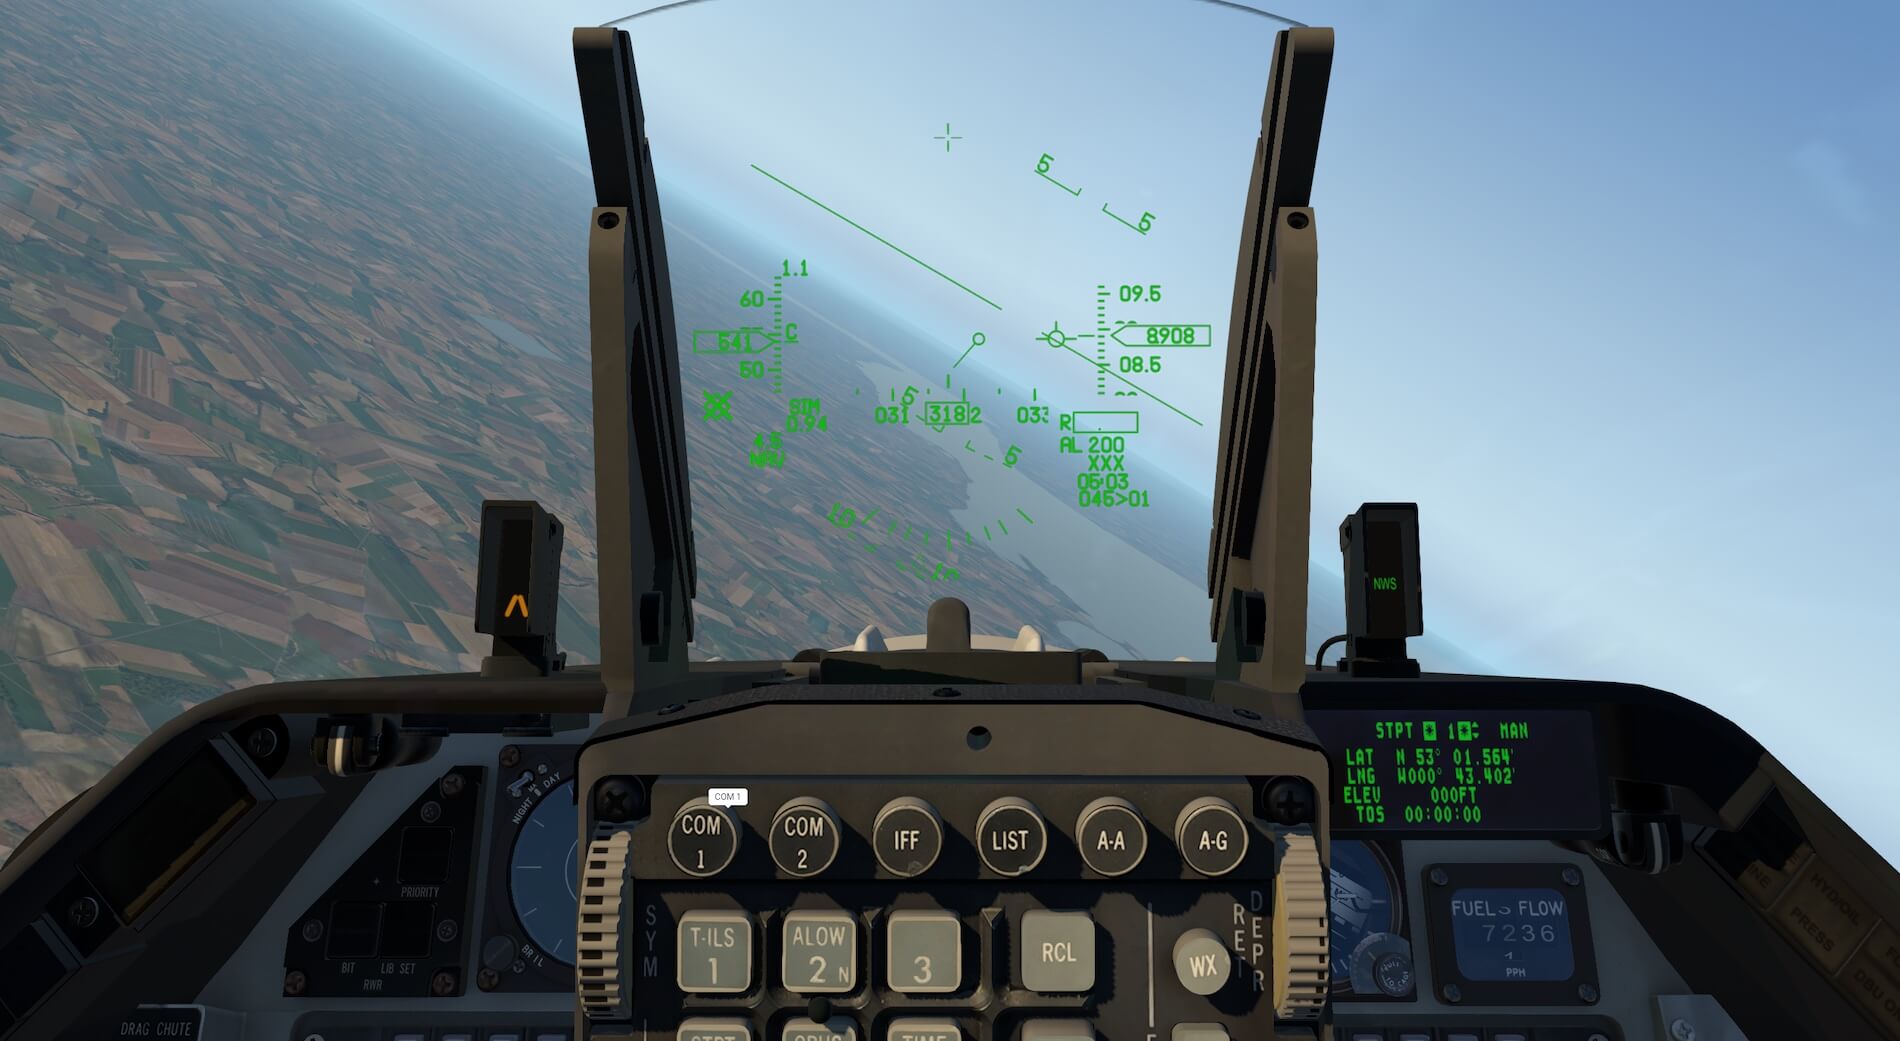
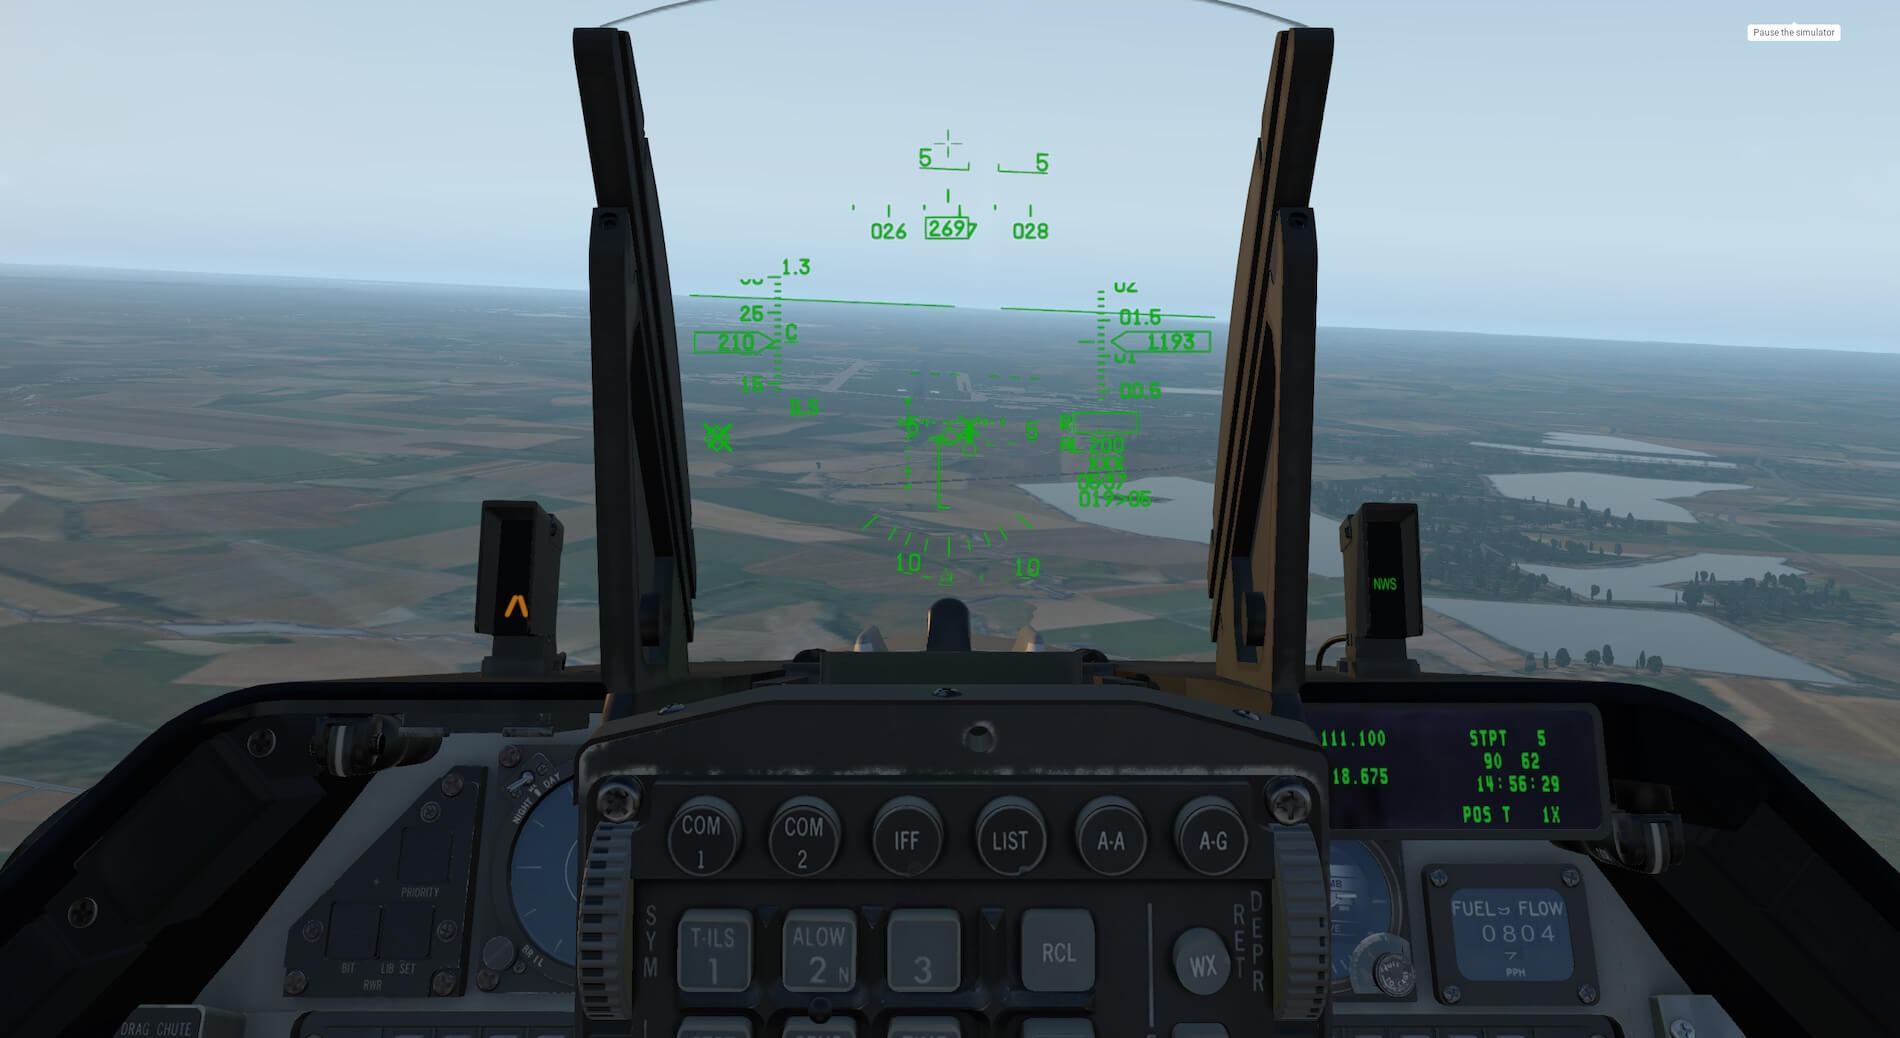
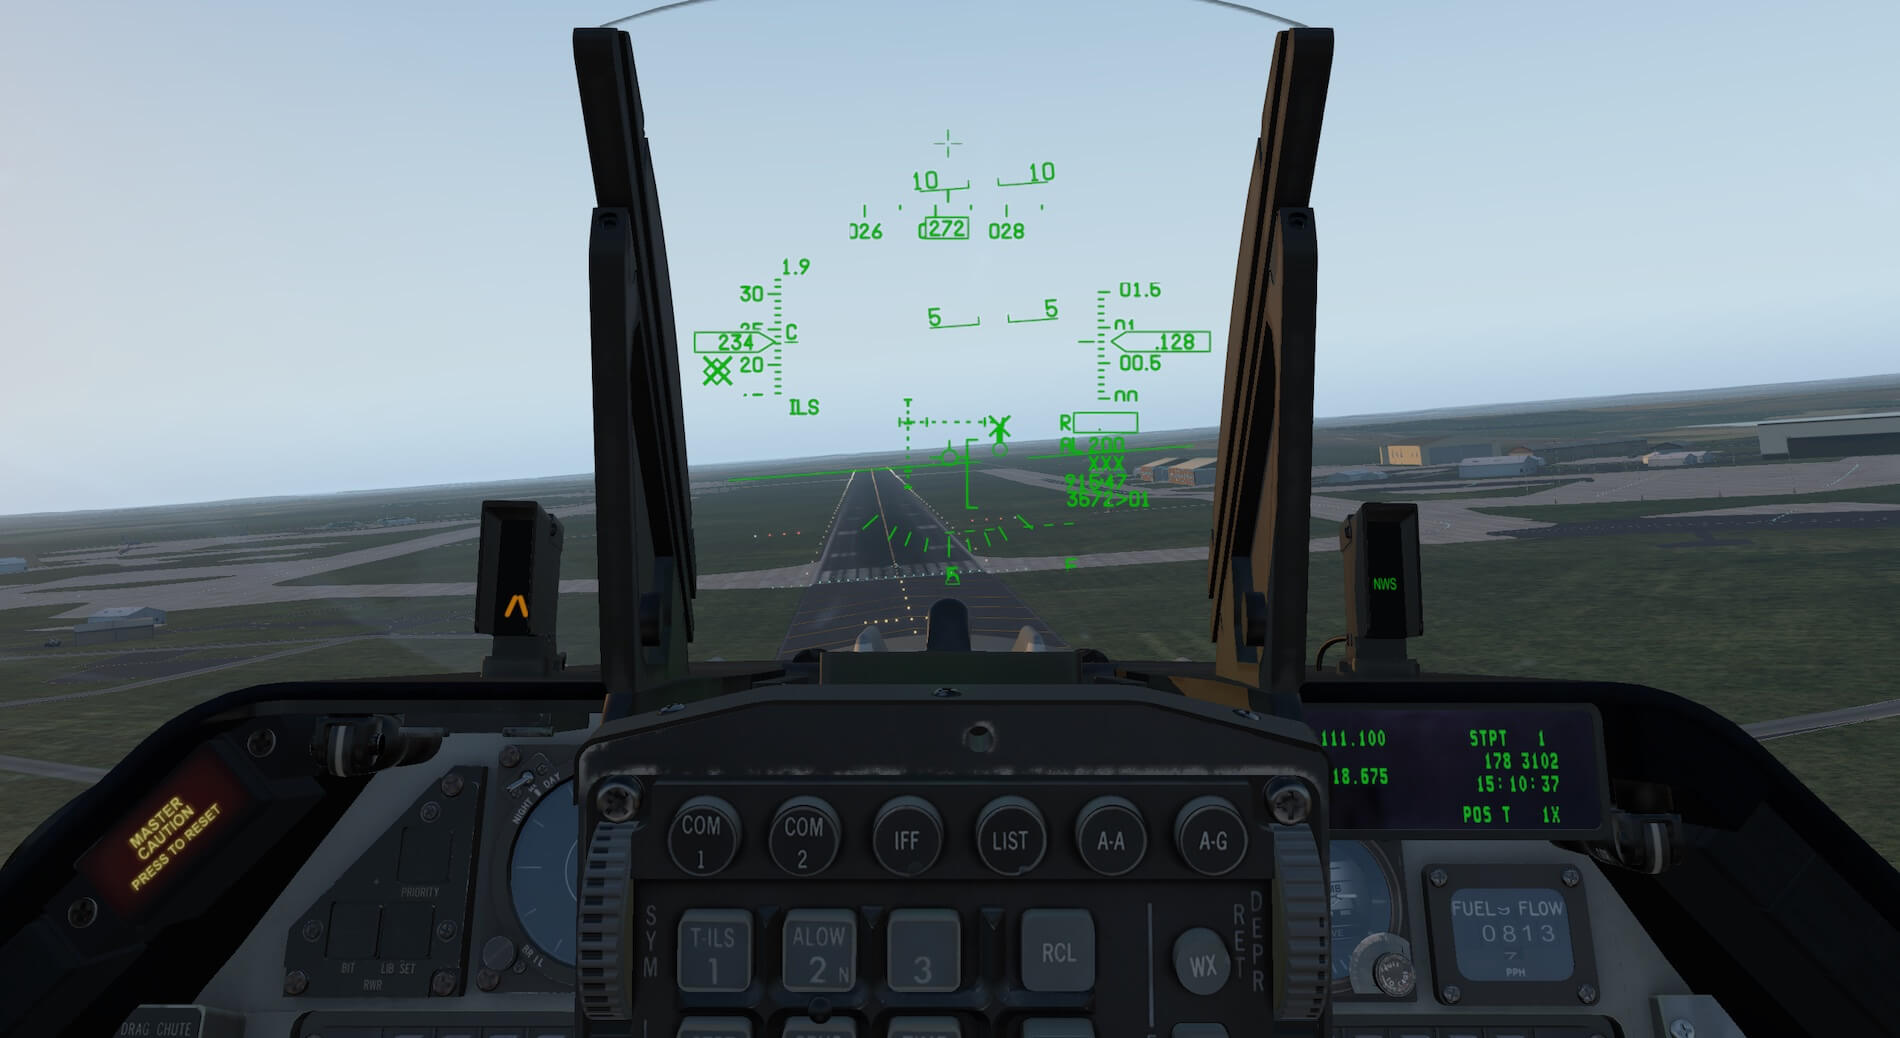
The aircraft has a Head Up Display which is very well presented and easy to read once the user has familiarised themselves with the information provided. Again the manual explains this very well. The HUD can be used in navigation mode which provides a considerable amount of information on heading, steering points, altitude and speed.
There is a sensor and HUD control panel which gives choices between calibrated airspeed, true airspeed, ground speed, radar or barometric altimeter and day and night mode for the display. There is also an ILS /Landing mode which provides information to assist with those operations. The HUD also displays the gunsight when the AA button is pressed on the integrated control panel.


The weapons menu in X-Plane allows for the weapons and defence systems to be set up by the user. The DeltaWing team have produced their own equipment for the model and the description of these assets appears in the weapons menu. The default position is for flare, chaff, M161A1 Vulcan Gun, Centre Line Tank and Wing Tanks. These can be toggled on or off but given the type of equipment provided the weapon stations cannot be swapped around.
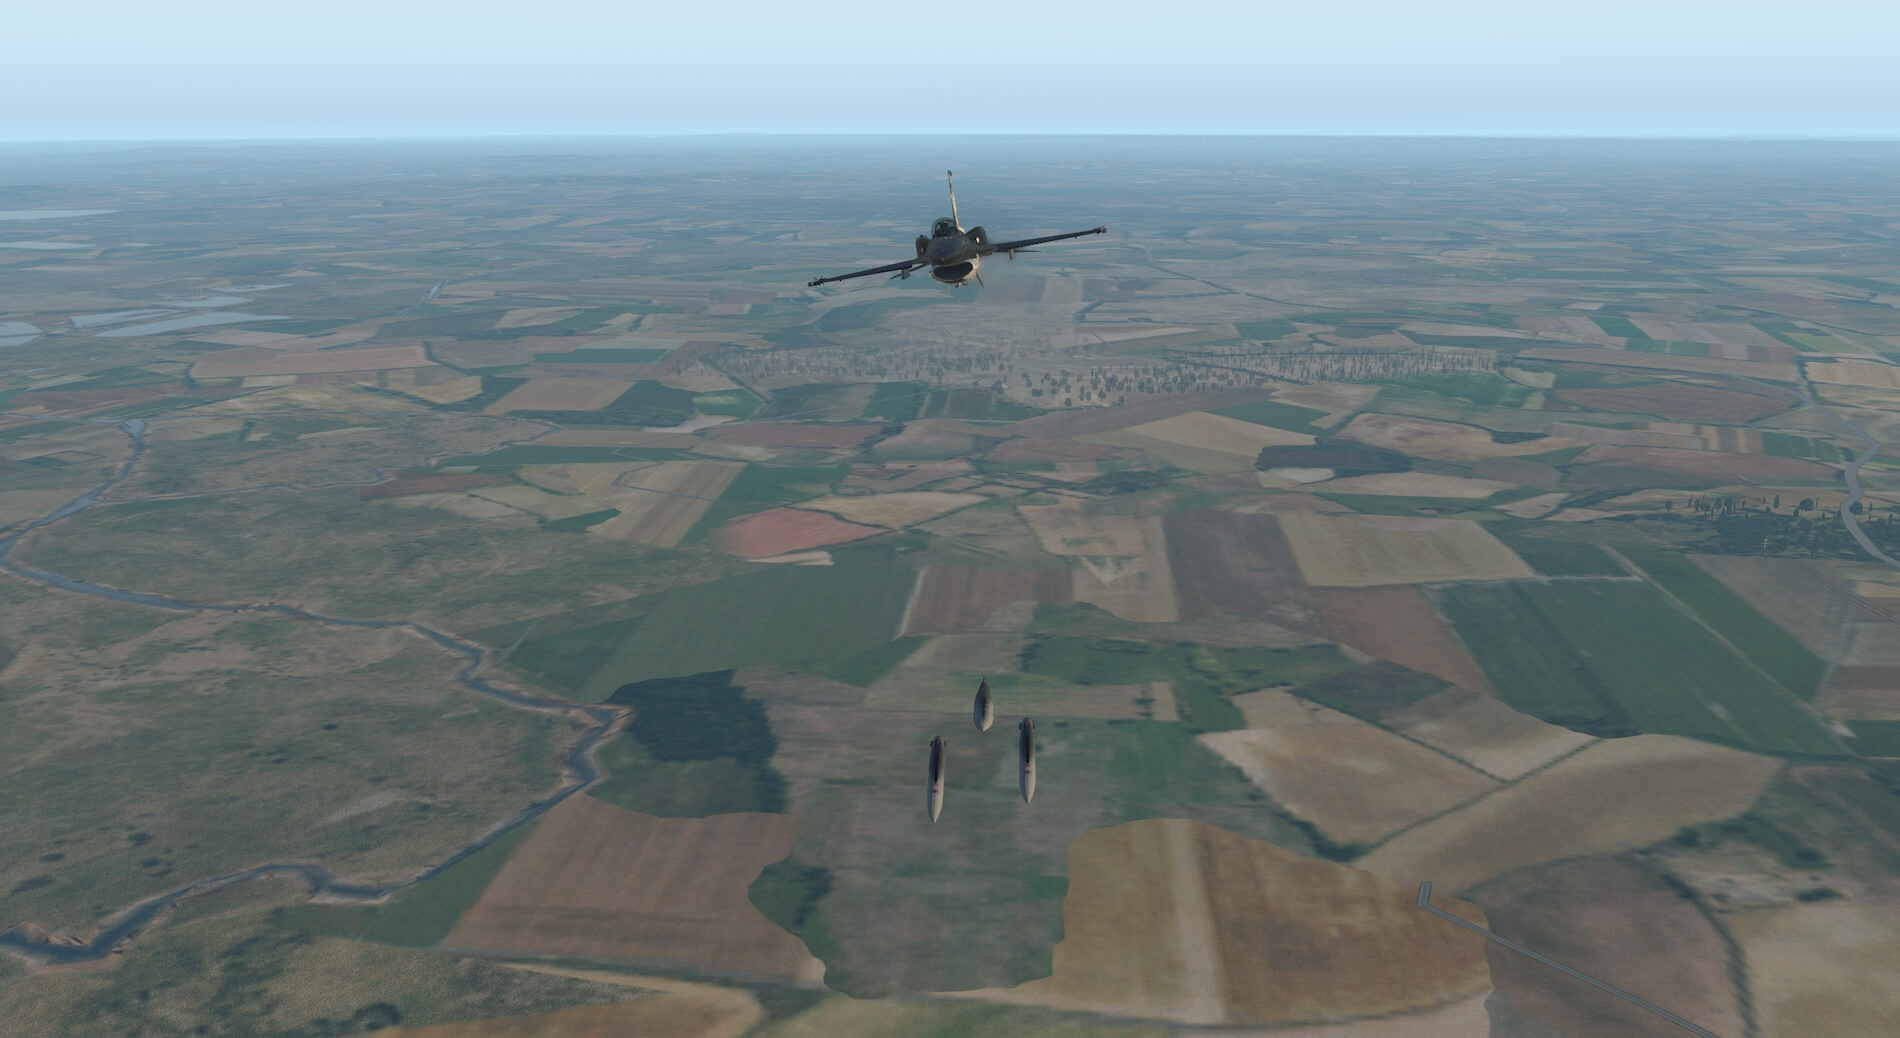
The centre line tank can be swapped for a travel pod. The reason that the tanks are included in the weapons section is that a keyboard command can be bound to a key, through the Viper subsection of the keyboard settings menu in X-plane, allowing for the tanks to be jettisoned.
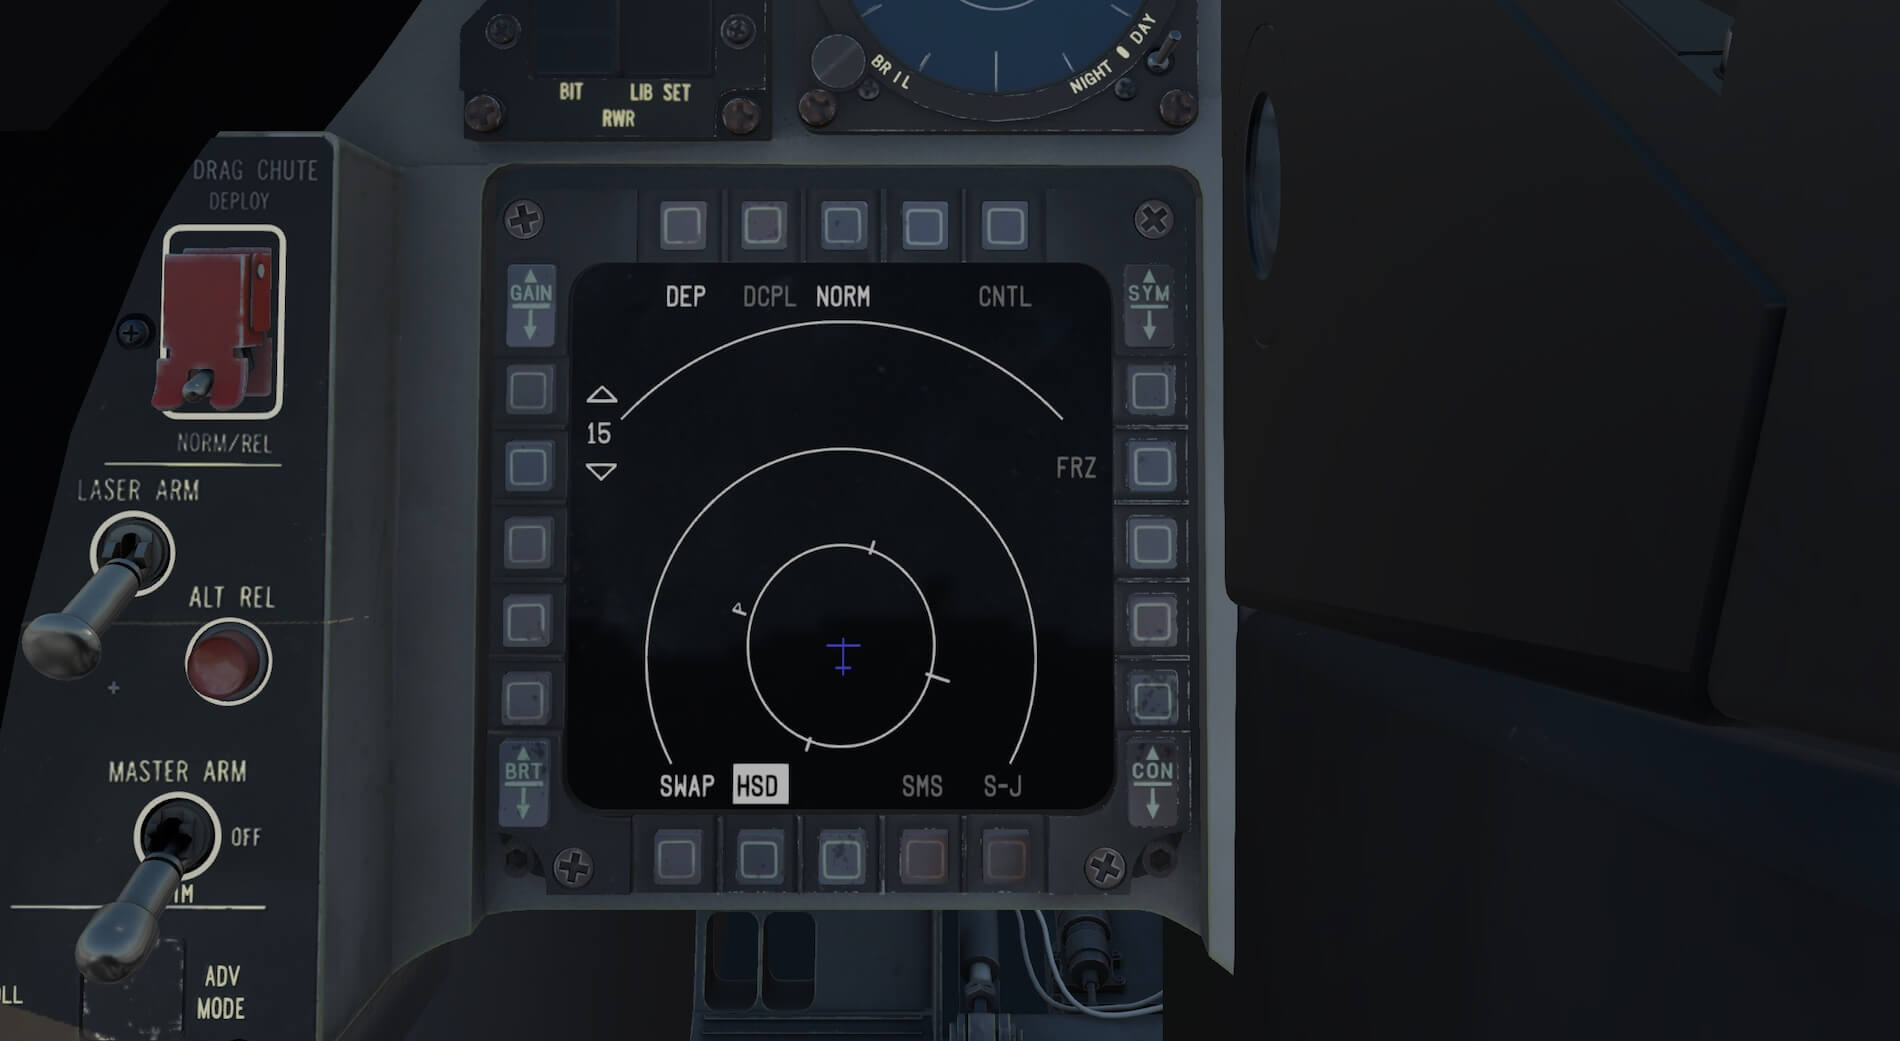
The aircraft MFD creates a Horizontal Situation Display showing the position of the aircraft in which the radar range can be decreased and increased. Fuel levels can be managed through the fuel quantity select panel to the right of the pedestal. It shows fuel quantities in different tanks and manages external fuel transfer causing the aircraft to consume fuel from external tanks first.
The systems provided in the model bring realism and authenticity to the use of a military aircraft along with some thoughtful additions by the developers that allow the user to enjoy various configurations of the Viper.
Basic Flight Experience
The first flight I took I loaded the aircraft at the end of the runway and attempted to make a flight with little reference to procedures and manuals. I did, of course, read the manual first to understand the model. I checked the flaperons and control surfaces and then increased the throttle. The aircraft built momentum along the runway and took off smoothly.
The undercarriage retracted in response to the ‘g’ key on the keyboard. I found I reached a greater rate of climb than I wanted to and spent some time becoming accustomed to the amount of control input required. The aircraft was responsive and forgiving and this allowed me to learn its renowned agility. The aircraft was fun to fly and the basics were straight forward to learn.

Having flown for a while and spent time learning the aircraft I returned to the airfield to attempt a landing. I still had to be more sensitive with my control inputs to make the process smooth, an issue for me not the model, but I was able to make the appropriate adjustments and carry out a successful landing.
When I toggled the wheel brakes the parking brake switch moved to on but this made no difference to the aircraft performance and I was easily able to switch it off again. The aircraft was straight forward to handle in the roll out and on the ground in general. All together an enjoyable first flight experience which showed that it is possible to simply jump in and fly the model without too much experience.


For my second flight I used the procedures for start up outlined in the manual. I initiated the flight sitting in the cockpit with the canopy open. Having checked the parking brake was set correctly I closed the canopy. The manual is easy to follow and I set the power switch to main power and the start switch to position 2.
The engine started up immediately and I was able to watch engine RPM percentage climb to 20 percent and waited for the “sec” light to go out and then clicked on the throttle trigger. After a few seconds the start switch moved automatically to off indicating the start up process was complete. I then switched on the MFD screen. Initially I thought this had not worked but I adjusted the brightness button on the MFD screen and they became visible. I further adjusted the brightness for the instruments and panels.


The next stage was to cover inputs into the Data Entry Display to the right of the instrument panel using the Integrated Control Panel next to it. I decided not to input altitude and bingo fuel warnings but I did input steering points. It took a little while to learn the calculator and system but once repeated a few times it becomes straight forward. I then checked the kneepad and ensured external objects, such as chocks were removed and I set up the load out I wanted and switched on the required external lights.

I released the brakes and increased the power to taxi forward. The model again handled well on the ground and I taxied to the end of the runway and then paused prior to take off.

I checked the control surfaces, increased power and the aircraft moved slowly down the runway. Take off was successful and the aircraft climbed well as I raised the undercarriage. Having reached an appropriate altitude I followed the procedure to set the autopilot to maintain altitude and follow the steering points. After a little adjustment the aircraft settled at the chosen altitude and changed heading towards the first steering point.
The good all round visibility afforded to the pilot was immediately evident. The Head Up Display gave lots of information and I spent some time learning the different indications. It also confirmed I was on the correct course for the first steering point and gave the time and distance to that co-ordinate. Manually moving off the direct course to the steering point and then restarting autopilot caused the system to move to a new bearing to achieve the designated steering point in a manner similar to the real aircraft should it be diverted from its original course for any reason.
Should that deviation mean that it becomes desirable to miss a particular steering point the selected point can be altered in the loaded list or a steering point can be amended.

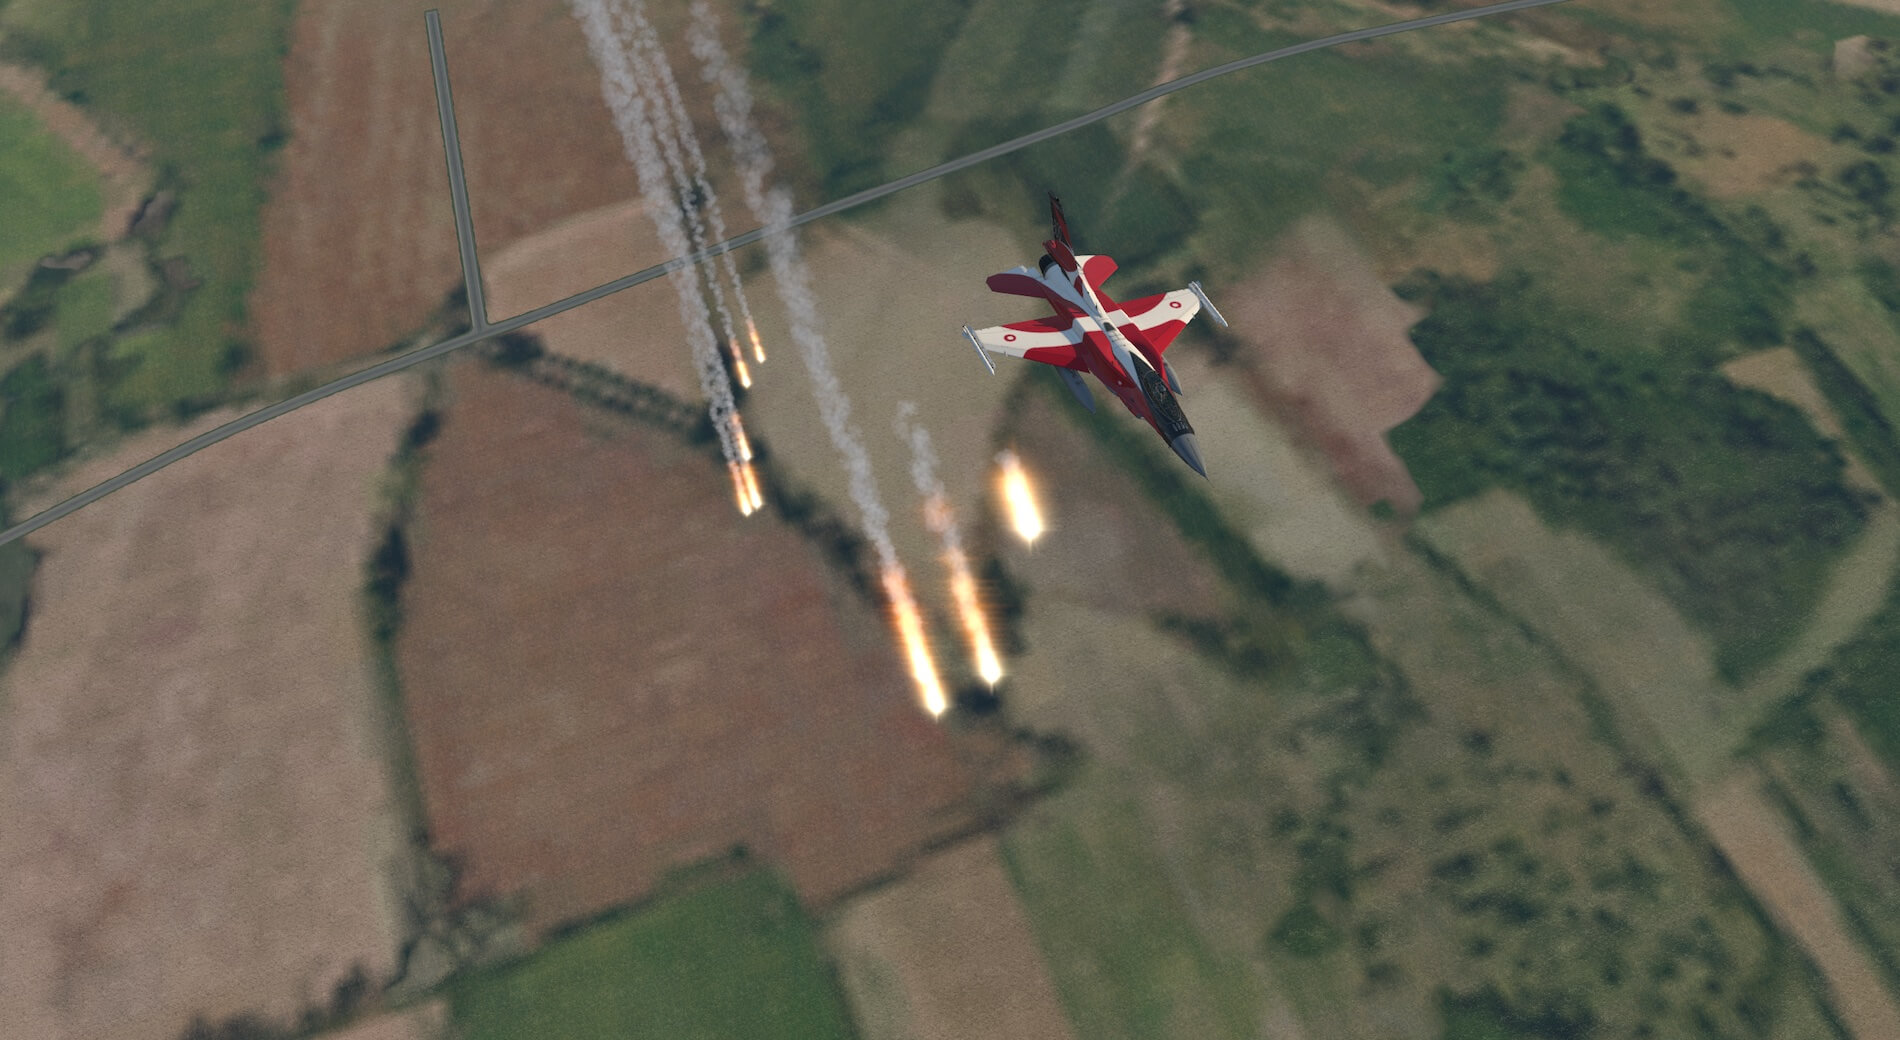
Before going further in to the flight I switched off the autopilot and used the keyboard key I had bound to the “Eject all drop tanks” command in the Viper/Cockpit section on the keyboard commands menu. All three tanks dropped smoothly and simultaneously. I had also set a fire guns command to the joystick and setting the master arm switch to the up, arm, position and executing this command brought about some realistic effects from the Vulcan gun.


I armed the chaff dispenser and then used the button I had bound to Deploy Chaff and this worked well. I repeated the process for flares and this also looked extremely effective. As I had wing smokers attached I pressed the X key on the keyboard and this initiated a stream of smoke from each wing tip. I also looked for the information provided by the JHMCS.
Wikipedia states that a helmet-mounted display (HMD) is a device used in aircraft to project information to the pilot’s eyes. Its scope is similar to that of head-up displays (HUD) on an aircrew’s visor or reticle. An HMD provides the pilot with situation awareness, an enhanced image of the scene, and in military applications cue weapons systems, to the direction their head is pointing. I used the knob to the left of the instrument panel to adjust the brightness of the display.
It is not immediately apparent when looking forward, which makes sense as the pilot has access to the HUD, but becomes visible when panning left and right, providing much of the same information as the HUD itself.

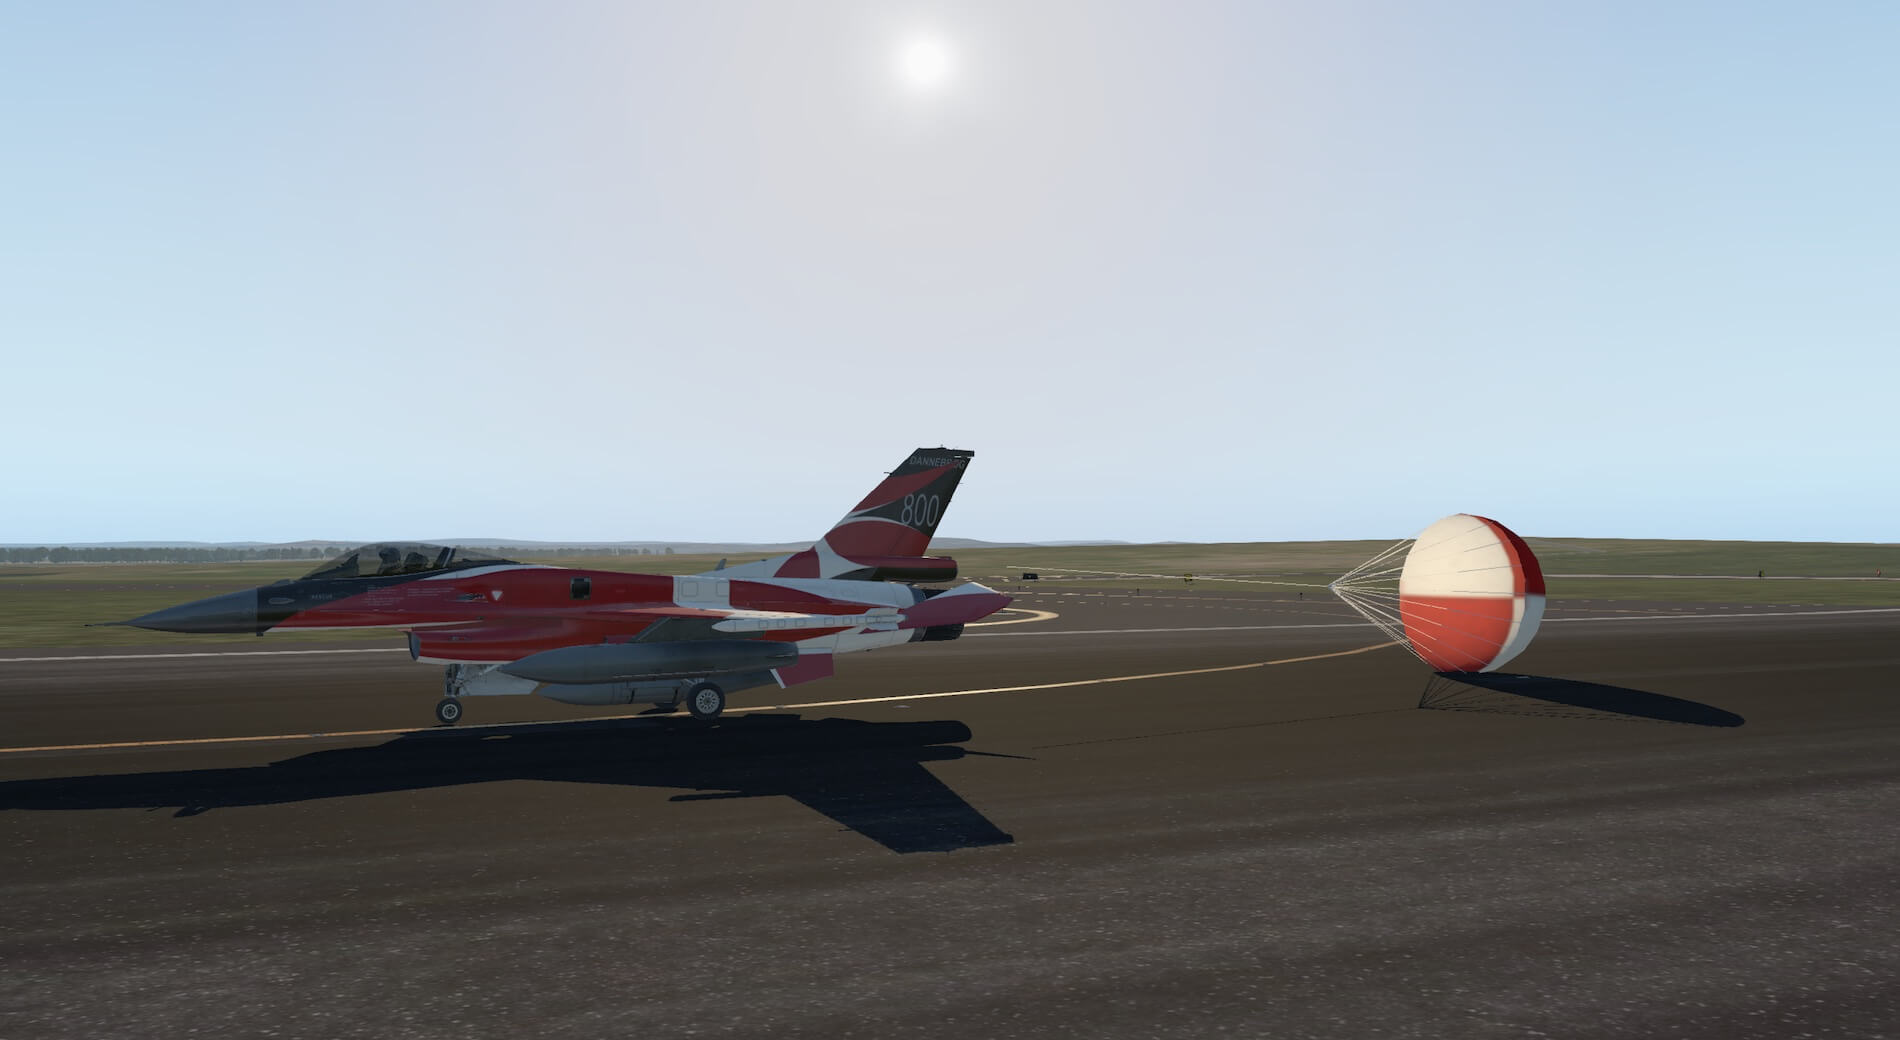
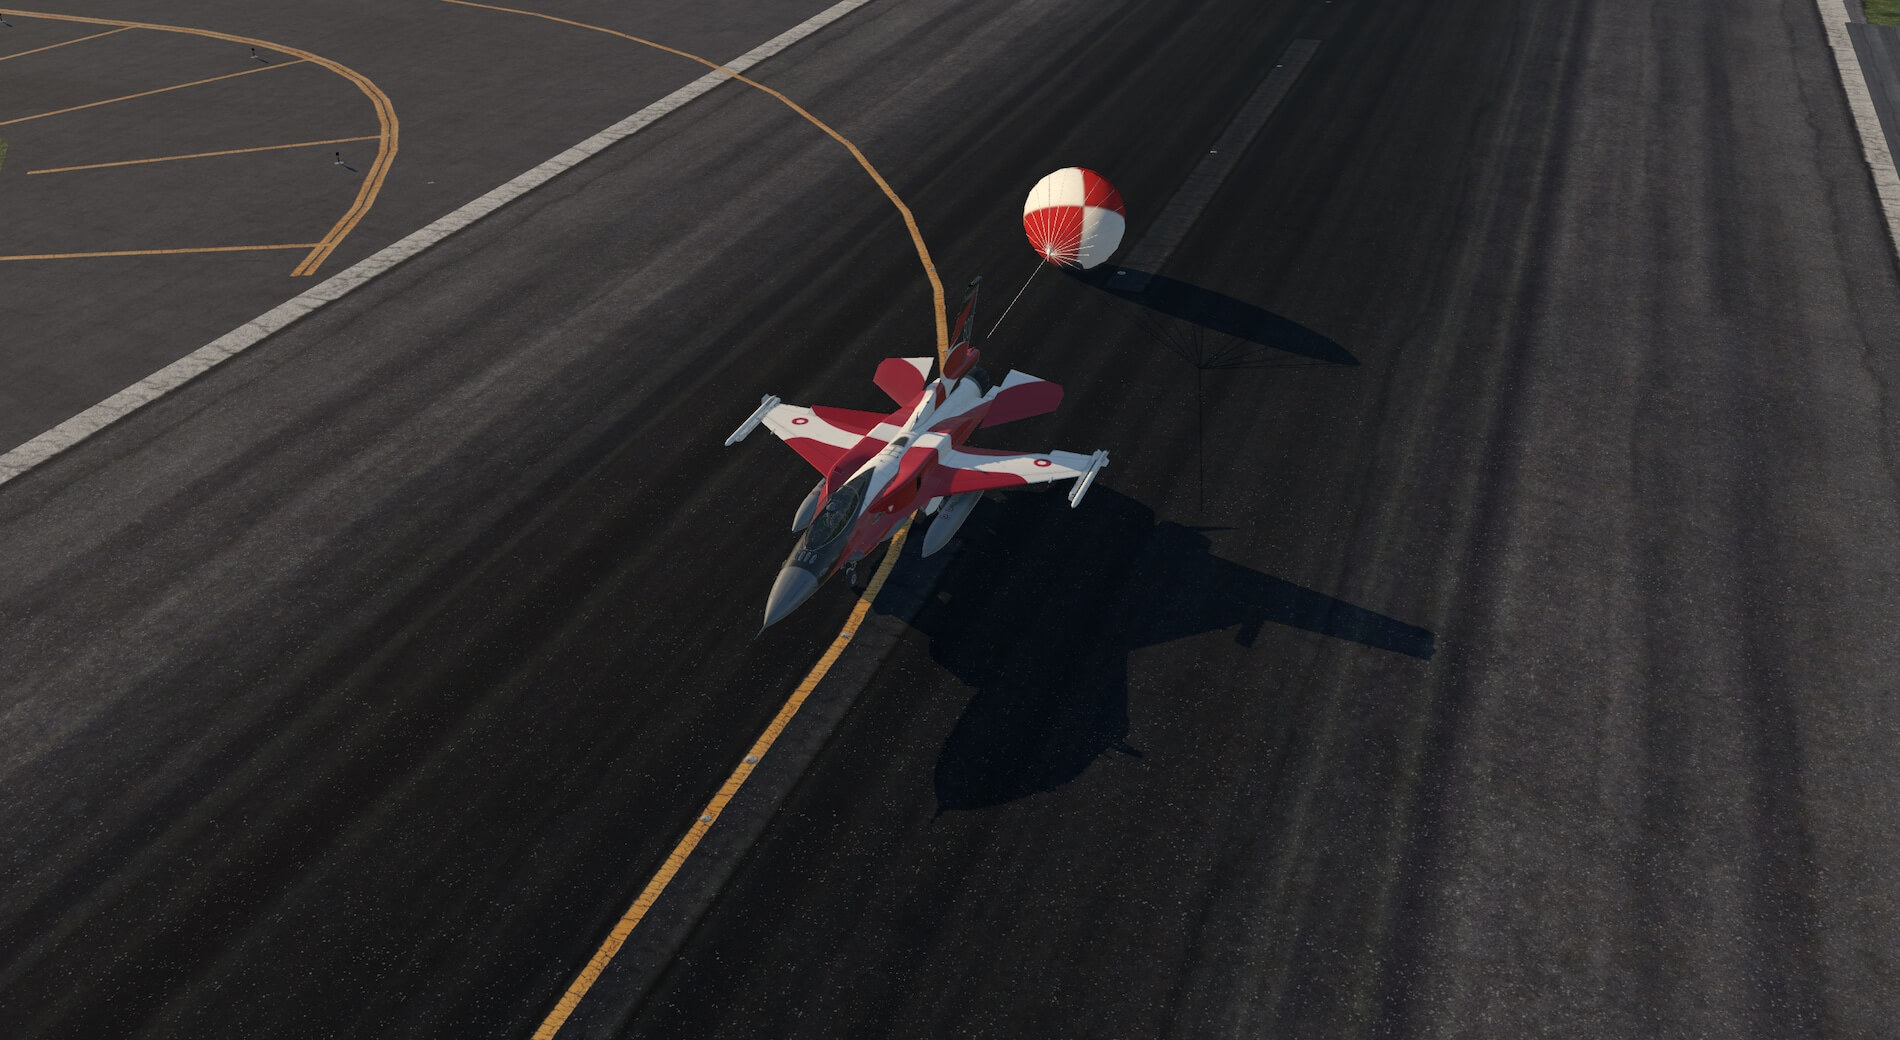
I then switched the autopilot back on and headed for the next steering point and then on to my destination airfield. All worked well and with the airfield in sight I tuned in to the ILS frequency and changed the HUD to ILS mode. I followed the guidance on the HUD and found I was still heavy handed on the controls. Once I applied more gentle inputs I could follow the guides better and achieved a landing. I used the switch in the cockpit to deploy the chute and it deployed immediately.

I taxied to the stand and went through the engine shut down procedures in the manual. I set the parking brake, turned off the MFDs, switched off the engine via the throttle switches, switched off the master fuel switch, turned off the internal and external lights, switched off the main power, opened the canopy and attached the ladder.


A thoroughly enjoyable and highly agile aircraft to fly. Whilst forgiving the model is, like the real thing, highly responsive and I had to learn to be steady with my inputs. The developers are constantly upgrading the models capabilities but with a gun and chaff and flares already operative, with fuel tanks that can be jettisoned and a working drag chute the Viper is already an interesting, fun and challenging aircraft to fly.
Summary
When Andrzej approached me before the official release date of the F-16C BLOCK 52+, I was a bit surprised. I knew Andrzej and Kostas as being members of the SSG (Super critical Simulations Group) team, but didn’t know they started an own development with this first modern fighter. I’m also aware of another F-16 model for X-Plane, so me and Andy where both curious what to expect. It’s not only the look and feel, but also the flight dynamics that must be good and as real as possible. To get that “real as possible” feeling, a real F-16 pilot must be a member of their team.
According to Andy; the external and internal modelling of the aircraft have been completed to a high standard with great attention to detail. Considerable imagination has been applied to how the user can interact with the model along with many alternative ways to present the pilot. The systems to engage with the model fit seamlessly with the systems for the aircraft itself.
The developers have managed to make the use of the model both straight forward and accessible without compromising on realism. The sound package compliments the standard of the visual presentation of the aircraft. In flight the model is agile and responsive and some pilot finesse has to be acquired to avoid over controlling the aircraft. The Viper is challenging yet fun to fly and the developers have continued with the realism in creating their own means of inputting steering points and the system for inputting data.
Whilst this departs from the traditional FMS used by X-Plane it does create a very realistic experience. The model is further enhanced by the addition of extras such as smokers, drop tanks, weaponry, a variable HUD and a helmet mounted display. Even at the end of the flight the deployable chute adds realism. A great model which I know the developers intend to evolve still further and a real experience for pilots of all backgrounds and experience.
More information about the modeled F-16C BLOCK 52+ can be found at the dedicated X-Plane.Org store page. Our review is based on model version 1.2 and cost as of this writing, November 2020, 45.00 USD.
Feel free to contact me if you’ve got additional questions related to this impression. You can reach me via email Angelique.van.Campen@gmail.com or to Angelique@X-Plained.com.
With Greetings,
Andy Clarke and Angelique van Campen
| Add-on: | Payware DeltaWing Simulations |
|---|---|
| Publisher | Developer: | X-Plane.Org | DeltaWing Simulations |
| Description: | Realistic rendition of the F-16C BLOCK 52+ |
| Software Source / Size: | Download / Approximately 1.8GB (unzipped) |
| Reviewed by: | Andy Clarke and Angelique van Campen |
| Published: | January 19th 2021 |
| Hardware specifications (Angelique): | - iMac Pro - Intel 3GHz Intel Xeon W / 4.5Ghz - Radeon Pro Vega 64 16368 MB - 64 GB 2666 MHz DDR4 - 1 internal shared 1TB SSD (Big Sur 11.x) - 1 internal shared 1TB SSD (Bootcamp Windows 10) - 1 external 2TB LaCie Rugged Pro SSD (Big Sur 11.x) - Saitek Pro Flight System X-52 Pro and X-56 Rhino - Honeycomb Alpha Flight Controls - Honeycomb Bravo Throttle Quadrant |
| Hardware specifications (Andy): | - iMac Intel i5 27" - 3.5 GHz Intel Core i5 - AMD Radeon R9 M290X 2048 MB - 16 GB 1600 MHz DDR3 RAM - Logitech Force 3D Pro |
| Software specifications (Angelique): | - macOS Big Sur (10.15.x) - X-Plane 11.5x |
| Software specifications (Andy): | - macOS Big Sur 11.1 - X-Plane 11.51r1 (64 Bit) Private Use - A variety of freeware and payware airports |
0 Comments