Part I – the JARDesign JD332
Introduction
We’re pleased to inform you that this comprehensive JARDesign JD330 review is this time written by Bruce Knight and Angelique van Campen. According to Angelique; “Even during my working days with Lufthansa Technical Training as technical instructor, but also the years with Martinair Holland as ground engineer and with KLM Engineering and Maintenance, I’ve always been a fan of Airbus aircraft. That said, I’ve always been a fan of the Airbus A330 and sister model A340, so seeing this JARDesign A330 for X-Plane 11 got my- better to say our – full attention.”
For many reasons, I‘ve decided to do this review together with my fellow reviewer Bruce Knight. Two people see more than one, two people can concentrate themselves on each with their own skills. All together, it will become a massive review and not only that, a review that offers all the ins and outs of the JARDesign model, we hope!
Attention … attention
The original lay-out as of this writing has become so big that Bruce and I have decided to split the review in a Part I and a Part II. Part I is this review that covers almost every aspect of the modeled aircraft including a comprehensive test flight in southern France while part II covers Bruce his in-depth US test flight with all kind of additional sections indirectly related to flight preparations and so on.
The review covers the JARDesign JD330 version 3.3r1. Oops, almost forgotten. The modeled JARDesign JD330 is actually the A330-200 series that comes with Rolls Royce Trent 700 engines. I contacted Evgeny from JARDesign about their work on a A330-300 Series and the A340 Series. According to Evgeny “Until we have released – no release date available yet – the A340, we not have plans for the current JD330 3D model to modify it with other engines and/or the longer -300 Series.” Another important item Evgeny would like to share with you is their – JARDesign Group – philosophy of this modeled A330-200. Evgeny continues “People who love and know the Airbus philosophy, who have at least the one of the A320 Family aircraft in their hangar but who love to fly and having the experience with bigger (or long range) aircraft models.”
But first, a ToC or Table of Contents. As mentioned above, it is to be expected that this will be a long review and to keep track of all what we have checked and tested, a ToC would be welcome.
Table of Contents
The Real Airbus A330-200
Installation and Documentation
– JD330 Aircraft installation
– JARDesign GHD Installation
– JARDesign Co-Pilot Installation
– BSS Trent 700 Sound Package Installation
– Updating AIRAC Cycles
– Documentation
Walk-Around Inspection
– Intro
– Polygons versus FPS
– JD330 GHD
– Inspection | Nose Section and Engine
– Inspection | Slats, Flaps, Spoilers and MLG
– Inspection | Tail and Cargo Compartments
Modeled Interior
– Cockpit
– Cabin
Tips and Tricks
– Popup Displays
– Dual MCDU or ….?
– MCDU Page Buttons
– Dealing with a MCDU “DISCONTINUITY”
– Interactive Checklist
– JARDesign Virtual Co-Pilot
General Preparations
– Creating a Flight Plan
– Creating a JARDesign Flight Plan
Test Flight I | Preparations
– Intro
– Used Add-Ons
– Checklist, MCDU and CI (Cost Index)
– The Charts
Test Flight I | LFBO – LFBO
– Preparations, Pushback, Engine Start and Taxi
– Take Off (TO) and Climb (CLB)
– Cruise (CRS)
– Descent, Approach, Final Approach and Landing
Sounds
– JAR or BSS Sounds
Summary
The Real Airbus A330-200
According to Wikipedia; “The Airbus A330 is a medium- to long-range wide-body twin-engine jet airliner made by Airbus. Versions of the A330 have a range of 5,000 to 13,430 kilometres (2,700 to 7,250 nautical miles; 3,110 to 8,350 miles) and can accommodate up to 335 passengers in a two-class layout or carry 70 tonnes (154,000 pounds) of cargo.
The A330’s origin dates to the mid-1970s as one of several conceived derivatives of Airbus’s first airliner, the A300. The A330 was developed in parallel with the four-engine A340, which shared many common airframe components but differed in number of engines. Both airliners incorporated fly-by-wire flight control technology, first introduced on an Airbus A320, as well as the A320’s six-display glass cockpit. In June 1987, after receiving orders from various customers, Airbus launched the A330 and A340. The A330 was Airbus’s first airliner that offered a choice of three engine types: General Electric CF6, Pratt & Whitney PW4000, and Rolls-Royce Trent 700.”
“Airbus’s first airliner, the A300, was envisioned as part of a diverse family of commercial aircraft. Pursuing this goal, studies began in the early 1970s into derivatives of the A300. Before introducing the A300, Airbus identified nine possible variations designated B1 through B9. A tenth variant, the A300B10, was conceived in 1973 and developed into the longer-range Airbus A310. Airbus then focused its efforts on single-aisle (SA) studies, conceiving a family of airliners later known as the Airbus A320 family, the first commercial aircraft with digital fly-by-wire controls. During these studies Airbus turned its focus back to the wide-body aircraft market, simultaneously working on both projects.”
“In the mid-1970s, Airbus began development of the A300B9, a larger derivative of the A300, which would eventually become the A330. The B9 was essentially a lengthened A300 with the same wing, coupled with the most powerful turbofan engines available. It was targeted at the growing demand for high-capacity, medium-range, transcontinental trunk routes. Offering the same range and payload as the McDonnell Douglas DC-10 but with 25 per cent more fuel efficiency, the B9 was seen as a viable replacement for the DC-10 and the Lockheed L-1011 TriStar trijets. It was also considered as a medium-ranged successor to the A300.”
“The A330-200 is a shortened, longer-range variant, which entered service in 1998 with Korean Air. Typical range with 253 passengers in a three-class configuration is 13,400 km (7,240 nmi; 8,330 mi). The A330-200 is ten fuselage frames shorter than the original −300, with a length of 58.82 m (193 ft 0 in). To compensate for the smaller moment arm of the shorter fuselage, the vertical stabiliser height of the -200 was increased by 104 cm (40.9 in).The −200’s wing was also modified; structural strengthening of the wing allowed the maximum takeoff weight of the −200 to be increased to 229.8 tonnes (507,000 lb). The −200 is offered with three engine types similar to those found on the −300, namely the General Electric CF6-80E, Pratt & Whitney PW4000, or Rolls-Royce Trent 700. Airbus also boosted fuel capacity to 139,100 L (36,700 US gal) by adding the centre section fuel tank, standard in the A340.”
“A new vertical stabiliser was introduced in 2004 beginning with MSN 555. This newer fin is shorter in height by 50 cm (20 in) and was derived from the design of the vertical stabiliser of the A340-500 and -600, later becoming standard on all new A330-200s.”
There’s of course a lot more at the dedicated Wikipedia page then what you’ve just read. Check for more in-depth A330-200 information the following Wikipedia link. But there’s so much more to find at the Web. For example, the official Airbus A330 webpage from Airbus Industries or actually it’s EADS (European Aeronautic Defence and Space Company).
So let’s see if the JARDesign model of the A330-200 can hold its own. During this review Angelique will discuss the installation, documentation, configuration, but also the 3D model, and a French test flight. Bruce on the other hand will discuss the modeled aircraft systems, his US test flight and other stuff like frame rates, sounds and so on.
Installation and Documentation
JD330 Aircraft installation
The download package is ratter small and can be downloaded from several places, but it’s of course the key that is needed to activate the JD330. You can buy and download the aircraft from X-Plane.Org, but also via the dedicated JARDesign JD330 webpage or via this JARDesign JD330 link.
What said before, these links are only useful when you bought the aircraft and thus that you own a serial number else you’ve got the JD330 software package and that’s it. The download package – JD330XP11.zip – is only 322MB for both Windows and macOS, but no Linux support. Unzipped the overall size is 523MB. The reason, in case you ask yourself that too, that the package is small is only because it comes with a JARDesign house livery.
Since the basic package comes only with one livery, I decided to downloaded some liveries from either X-Plained.Com or X-Plane.Org. Unzip, unrar or un7Z the livery package and installed it into the sub folder called ‘liveries’. Included in one of the JD330 folders, called FlightPlans, is an absolute ton of pre made flight plans that you can use. Flight plans have the extension “txt”. Many flight plan programs can be used to create your own flight plan and upload them in this subfolder.
JARDesign GHD Installation
Although the JD330 aircraft installation is very simple and straightforward, it’s a good idea to check out this JARDesign forum page since you also need to download a version of GHD (Ground Handling Deluxe) which is free of charge as long as you use it with the JD330. When you want to use GHD with any other aircraft, you need to buy a GHD license. Additionally and therefore not mandatory, you can also install the CoPilot package from JARDesign via the same URL as given above.
JARDesign Co-Pilot Installation
After having a chat with Evgeny from JARDesign, it was clear to me that the co-pilot package is an essential part of the JD330 experience, but let me make this clear that you can use and fly the JD330 without your virtual co-pilot. Later on we will discuss the use of the virtual paper checklist, situated at the left-hand sliding window and separately of that we will also explain the use of the JARDesign co-pilot.
Anyway, first download the virtual JARDesign co-pilot – JD-CPL-330.zip – via this link and unzip the package. Next open the “manual” Acrobat file. It explains for Windows 10 and macOS how to set up speech recognition as well as how and where to install it.
BBS Trent 700 Sound Package Installation
I was in doubt if there was a need to include the BBS dedicated JD330 Trent 700 sound package in this review. I can tell you afterwards, it was every minute worth and it’s also worth your money. The new sound3d package which is removed and replaced by the BBS package is awesome. It’s not only a couple of files that are added, it’s the overall sound impression. Wow!
Just for your info; the unzipped BBS folder is roughly 240MB of new and refreshing sound files while the default JD330 sound3d folder only has 34MB, so a big difference isn’t it?
The installation is simple and straightforward. According to the text file “The BBS folder must be installed under the …\X-Plane 10\Aircraft\330_JARDesign\plugins folder. First delete folder “sound3d”, then copy and paste the new “BSS” folder to …\X-Plane 10\Aircraft\330_JARDesign\plugins. For best realism, keep the original volumes inside plugin.” And that’s it!
Updating AIRAC Cycles
Further on, you need to update the AIRAC cycle too. The JD330 is using the default Laminar Research FMS DB which is located in the Custom Data/GNS430/navdata/ folder. That said, the JD330 doesn’t need a dedicated AIRAC DB.
Documentation
Well, this is a bit disappointing. You get a lot of aircraft for your money, but sadly documentation is not included. But help is on the way. When surfing to the following JARDesign Flying school, DOCs, FAQ forum link, you find a lot of movies, documents and so on regarding the A330. Not all are brand new posts, but it’s kept up-to-date and other JD330 simmers keep on uploading stuff that could be interesting. An Acrobat tutorial is unfortunately not included.
We appreciate if JARDesign will and would include in the near future a tutorial that includes the steps to take. It’s not unusual that developers aren’t including a tutorial flight or other important documentation. In that respect it doesn’t surprise me that nothing is included, but I hope it will be in the future. What I can tell you is that I will add some tips and tricks in my section of Test Flight I.
Walk-Around Inspection
Intro
A walk-around check or inspection or whatever you want to call it, is the first step to get an idea of the modeled external 3D model. I know the JARDesign JD320 Neo which was and still offers a high quality 3D model with razor sharp decals on the fuselage, wings, tail and so on. So I won’t be surprised that the JD330 will be of the same level of detail. That’s a bit the idea of this walk-around inspection.
Polygons versus FPS
My JD330 is parked at LFBO, but not at the Blagnac airport itself, no, I parked the aircraft at the Airbus Service area. The livery I use for this inspection is the Airbus factory rollout livery with registration F-WWKX. Before starting with my walk-around inspection I first would like to highlight the following; frame rates versus polygons.
When the developer decides to use many polygons for whatever part of the aircraft e.g. the engine inlet, the rounder the engine inlet looks like, but the consequence is that the frame rates will drop due to the higher amount of polygons. The other way is also true, when less polygons are used for the 3D model or object, the higher the frame rates will be. In other words, the developer needs to find a balance between reasonable amount of frame rates versus the amount of polygons that is used to draw e.g. a circle and thus the way a circle looks round from a distance.
JD330 GHD
I start my inspection at the nose of the aircraft, but first the integration of the GHD (Ground Handling Deluxe) with the JD330. Via the MCDU you can select which ground equipment you want to see. There’s a lot that can be selected. You can request stairs, you can control the passenger doors, you can open/close the cargo doors in conjunction with the lower cargo deck hi-loaders, you can select the GPU (Ground power Unit) and much more.
What said before, this GHD package needs to be installed separately, but as long as you use it with the JD330, it’s automatically activated. On the MCDU and important to know that no electrical power is needed so actually, the following can be done with a dark and cold cockpit, click the MCDU MENU button. Next click LSK 2L GROUND HANDLING. On this MCDU page you can select or deselect the GHD objects. Once you’ve selected the objects you want to see, click LSK 6L DRIVE UP. Some of the steps and the output around the aircraft can be seen on the following screenshots.
Inspection | Nose Section and Engine
I’ll start my walk-around inspection at the nose section of the aircraft. The NLG (Nose Landing Gear) with wheels is well modeled with eye for many details. Although the strut and wheel assy looks a bit clean, the modeled gear is well done. You can see a good looking NWS (Nose Wheel Steering) and supporting struts including the smaller objects like the hydraulic lines at the steering cylinders or the fixed small NLG door at the back of the strut. What said before, a bit more dirt or more weathering would give the overall view a more realistic look and feel. At the same time, it must be said that a brand new aircraft and thus a brand new NLG strut are alike the modeled strut with default textures.
While moving along the fuselage to the RR engine, I look up and see a gorgeous fuselage and due to the primer paint and all different primer colours, you can clearly spot the different Aluminium skin plates. Besides that, the decals on the fuselage are clearly visible and readable. Perhaps you’ll be surprised to see that the doors have a different primer which is in real too since the doors are provided by a different vendor and each vendor uses it’s own primer color. And what does it matter. When the final paint of an airliner is added to it, you don’t see all of this. Together with the NML files, a kind of 3D effect is added to the aircraft structure.
I reach the belly with its typical light blue bottom. Most likely the belly panels are made of virtual Kevlar or Aramid fibre. Near the wing leading edge you’ve got a good look on the static ports. Turning towards the RR Trent engine you can see what I mentioned before; the engine inlet polygons. Personally, I had hoped for a bit more polygons, but I also know that the frame rates will be negatively influenced due to too many polygons and that’s not what you and I want. Besides that, a well shaped inlet, realistic looking fan blades, a beautiful inlet cone and all the decals and panels are at their place as expected.
Inspection | Slats, Flaps, Spoilers and MLG
For my walk-around inspection I’ve extended the slats and flaps as well as extended the spoiler panels. That said, from the engine I walk towards the wing tip. While walking in that direction, I move up to see the modeled slat inner construction as far as visible. And there’s a lot visible. The slat tracks are well and realistically made. The same is also applicable for the flap tracks and their carriages. When I look a bit more in detail to the spoiler panels, I do see for example the modelled spoiler actuators. Of course, not all what’s in real is modeled since, again, modeling too many objects thus using more and more polygons means less frame rates.
What was applicable for the NLG is the same for the MLG (Main Landing Gear). It is modeled with eye for details, it is modeled with passion. It looks realistic although I would love to have seen a bit more weathering and/or dirt. The landing gears, but also the wheel assy and brakes are too clean. In the real world, the strut is not so clean, the brakes are generally dark because of the Carbon plates and carbon dust and the clean wheel assy is only correct when it’s a brand new wheel assy!
Besides all of that, it looks great and I have to correct myself a bit; the brake fan grill is not clean. It has some dirt as well as the rim of the wheel assy. The torque links at the back and the hydraulic/wiring links at the front of the strut are well modeled. This is also applicable for the hydraulic lines that run up to the top and also the same for the small electrical harness. I was a bit surprised that the top hinges are not connected to anything. Originally this should be a huge bracket that holds the gear.
Is it a problem or?
No, it’s not a problem at all since using these objects means more polygons and this means less frame rates.
Inspection | Tail and Cargo Compartments
I’m almost at the end. The only part that’s left is the aircraft tail section and not to forget the cargo doors. The walk-around was performed at the left-hand side of the fuselage and besides a couple of small differences, the right-hand side of the aircraft will result in the same look and feel.
But first, the tail.
I’m sure you got the idea already about the overall modeling and that’s the same for the horizontal- and vertical stabilisers with each of them having attached the single rudder and elevators. Looking to all the rivets, I’ve got the idea they are a bit too big, but this could be also the livery. I see the THS (Trimmable Horizontal Stabilizer) markings at the leading edge, the construction of the APU tail cone and the black parts on the vertical fin. This is also known as CFRP (Carbon Fibre Reinforced Plastic) and as a side note, to the group AFRP (Aramid Fibre Reinforced Plastic) belongs Kevlar which is, when not painted, the yellow material on the fuselage/wing or tail skin.
Last but not least are the cargo areas. The A330 is, as with many other large Airbus aircraft, equipped with a FWD, AFT and BULK cargo compartment. The FWD and AFT cargo doors are always hydraulically controlled and operated while the BULK is the only manual inwards going door. The idea of the FWD and AFT cargo compartments is to store LD3 or LD6 containers while the BULK is only for the hand luggage.
The cargo doors which are as you can expect, fully animated as well as the cargo compartments. Together with the added GHD it’s a a great feature that is included. With a FWD/AFT cargo door open, you can see, not with full details, the hooks, the Aluminium fuselage construction, the cargo door inner skin and so on.
And with this last paragraph I’ve reached the end of my virtual walk-around inspection. Was it fun, did I like it? Yes, I’m satisfied although I had hoped to see a bit more polygons at certain parts, but while writing this, I also know that more and more polygons wil definitively result in less frame rates. I mentioned that before.
When you have a powerfull Windows PC or iMac then it’s not a problem to see more polygons, but the JD330 should be flyable for all kind of simmers. That said, it should be flyable for people who have less powerfull computers too and that’s what this JD330 does. And it must be said, it flies with enough available frame rates. We’ll cover the available frame rates later in this review.
Modeled Interior
Cockpit
This could be an interesting section, but we keep it short this time. The test flight not only deals with all the preparations, but much more. And many screenshots of the awesome modeled cockpit will be visible in that section, so we think there’s not so much needed to highlight that in this section. Ok, a couple of words then.
The modeled 3D cockpit is gorgeous and we can only say that the modeler has great eyes for all those tiny details. The textures for all the panels, sub-panels and so on are either real photo material that has been used or the modeler is also a great graphical artist. We’re both impressed with what we see, but only a good looking 3D cockpit isn’t enough. It should fly well too, it should reflect the real flight dynamics as far as possible within X-Plane as the real A330-200. We’ll see that later on in the LFO-LFBO test flight.
Cabin
In doing this portion of the review it was hard to know where to start with this beautiful model. So, I chose a location that many of us who do long distance travel could relate to- waiting for the lavatory in the Economy section. Oh, so many times I have seen this picture in different types of aircraft. Looking forward through the Economy section you can see the clean textures and well-done lines in the interior modelling of the cabin. It’s bright inside in daylight, and the seating is typical of an Economy class aircraft.
I also look around to see the rear of the aircraft- different textures on these seats as is often found in large aircraft. I like the way the overhead panels have a realistic curve at the rear end where the fuselage begins to narrow. Looking from an aisle seat at the window- as Angelique says in her part of this review, the windows do display discrete edges and are not curved- what this does, of course, is gives us more fps. Next looking forward as a passenger might from that aisle seat in Economy, the lines and textures maintain their good form as previously stated.
There are FA” jump seats” near this emergency door- they don’t move and neither does this door open. I like the internal door hinge, as in the real aircraft it has a lot of weight and is very strong in order to be able to withstand the force of the heavy door being opening.
We then take a look at the galley at the rear of economy- I can imagine the nice smells coming from these locked meal carts. A look through the L3 rear-left door (now opened), showing the tail plane and elevator. Here’s the door hinge that appears to be securely attached to the door and the cabin structure.
Now a shot at night-time of the Economy cabin. I love the soft lighting, and the variations in luminosity where lights are placed. This looks so cool! Next a look at First Class- my first reaction is that those colors have to go! Maybe they are typical of an airline’s seating upholstery, I’m not sure. The flight-deck door, with the escape hatch for the flight crew- a slight spelling mistake here, I think “rivers” should be “rivets”.
Before leaving the passenger cabin- there are no movable or clickable parts in the cabin, such as window shades, light or FA call switches. I like that this gives us better fps, and I wonder- in reality- how many simmers actually sit at a passenger seat with the window shade pulled down- it might be a nice feature, but is it ever used?
Several shots of the flight-deck not covered in the test flights. The reading light works and is dimmable, and independent of the FO reading light. The jump seats on the flight deck are realistic from what I have read online regarding the actual flight deck. The door unlock button does not work, but you can move through the flight deck door (or most other surfaces) without being blocked- the one big exception to this would be the flight deck seats.
In summary regarding the internal modelling, I think it is very well done and illustrates that the developer has taken some time to make it look realistic without adding moving and/or working parts. It is very well done, other than those First-Class seats!
Tips and Tricks
Popup Displays
What the heck is this for title … popup displays?
The JD330 comes with several popup displays. One of them is the MCDU. You can click on the build in 3D modeled MCDU or, much easier, you assign a keyboard combination to it. With the keyboard combination you can request the popup floating MCDU, but with the same combination you can also let it disappear. See for this the following screenshot. The popup MCDU is not resizable which means, it can be a bit small. The higher your monitor resolution, the smaller will be the popup MCDU.
But there’s another popup and it looks a bit like a semi transparant ND (Navigation Display), but according to Evgeny JARDesign calls it the big map. To get it, you can assign from the same page as seen on the previous screenshot, a keyboard combination. to it. When you look closely to the screenshot, I assign F5 for the MCDU and F6 for the big map screen.
Dual MCDU or ……?
I noticed that the modeled A330 isn’t equipped with a dual FMC since selecting a page on one MCDU e.g. F-PLN, the same page also appears on the other MCDU. Adding to the simulated single FMGEC is that the JD330 uses an in-house developed Auto Flight System. That said, no Laminar Research AP and/or A/THR software is used.
Just to clarify a bit more about the FMGES, FMGEC, (M)CDU and so on.
The real A330 Series has a Flight Management Guidance and Envelope System or in short FMGES. It consist of 2 identical FMGCs (Flight Management and Guidance Computer) or sometimes known as FMGEC whereas the E stands for Envelope, 3 MCDUs (Multipurpose Control and Display Unit), 1 FCU (Flight Control Unit) and finally, 1 FM source selector. The FMGECs are responsible for three different functions; flight management (as we know from the FMS/FMCs), flight guidance (FD, AP and A/THR) and finally, flight envelope.
There’s of course much more to tell about the FMGES and all what’s related to it, but that goes far beyond what’s needed for this review, but in case you want to know a bit more about it, then I suggest that you visit for example the dedicated Aviaddicts FMGS web page.
MCDU Page Buttons
From the modeled MCDU the following “page” button – SEC F-PLN – isn’t active and both the ATC COMM and MCDU MENU buttons have the same output, showing you the JD330 MCDU MENU page. This pages allows you to change the following:
– LOAD AND FUEL
– GROUND HANDLING
– DOORS
– PUSH BACK CALL
– SOUND VOLUME
– SETTINGS
Most of the above MCDU pages speak for themselves. The GROUND HANDLING LSK 2L (Line Select Key) is actually the additional GHD plugin. It allows you to add ground equipment around the aircraft and/or position stairs, buses, a VIP car, hi-loaders, fuel truck, catering trucks and the GPU. The DOORS LSK 3L allows you to control all the doors of the aircraft. The SOUND VOLUME LSK 5L gives you the option to control certain sounds as well as “to set 3D sound volume”.
Only problem is that it seems that you need for this a separate plugin. Time to check with Evgeny from JARDesign. According to Evgeny “The answer is so simple as you know it. It’s only a statement, just a line telling you where or what to do. This is also the same for the intercom volume. Adjusting the 3D sound goes not via the MCDU, but via the X-Plane menu Plugins – Sound 3D”.
With the SETTINGS LSK 6L button you can activate or deactivate several settings. That’s by itself clear. A white line means that the function is OFF while a green line means that the function is active. Not very clear as you see it on the MCDU page, but I hope that this additional information helps.
Although the LOAD AND FUEL LSK 1L is not that difficult since you control the amount of fuel as well as the payload (amount of passengers and/or cargo), it offers a wealth of additional information. It shows you the calculated aircraft weights (DOW, ZFW, TW, ZFW CG % MAC, CG % MAC and THS TO TRIM position). Further on, it shows you an interactive Weight and Balance graph. Interactive means in this case that whenever you modify the payload and or remove/add fuel, the “% MAC” lines move accordingly. Some of the data you see in the left-hand table is coming from the data you entered in the MCDU.
Dealing with a MCDU “DISCONTINUITY”
The flight plan normally doesn’t contain a SID (Standard Instrument Departure) or STAR (Standard Terminal Arrival Route) besides the words SID and STAR which is a requirement for the JD330 readout. You could add a SID and/or STAR within Little Navmap, but JARDesign doesn’t do anything with it. In other words, If you create a new flight plan with VOR/DME beacons or waypoints and add a SID to it as well as a STAR and save it as “txt”, and load this into the JD330 MCDU, guess what, there’s no SID and STAR included.
So, don’t add a SID and/or STAR, but add the SID and STAR after you loaded the flight plan (without the SID and STAR information) in the aircraft MCDU which is by the way also the normal way how pilots setup there flight plan. When you think about it, since you don’t know yet which runway is in use, you don’t know in advance which SID you need and the same implies also for the landing. You don’t know if the wind comes out of a different direction or ATC orders to and on another runway then expected or perhaps there’s no wind at all, then in consult with ATC, you can request a certain runway which is convenient to land and so on.
Worth to highlight is in case you see a DISCONTINUITY in your MCDU flight plan. Let me try to explain this. Assuming you’ve created a txt flight plan with e.g. Routefinder or Little Navmap. When this flight plan is loaded into the JD330 MCDU, all looks OK although you could see a F-PLN DISCONTINUITY just below your departing airport. In my case that’s LFBO. Normally a F-PLN DISCONTINUITY can be deleted by pressing the MCDU CLR button followed by the LSK next of the F-PLN DISCONTINUITY line.
However, this won’t work as just described and perhaps you don’t understand why this is not possible. I don’t know why it works this way, but once you know the idea behind it, it makes sense. Don’t worry yet about this, but first follow these steps. In one way or the other, you need to add this. So, click the LSK next of the departing airport and add the correct runway depending on the environmental conditions. Then add the SID and if applicable a TRANS (transition). Once you’ve done this, click the LSK that shows TMPY F-PLN. A new MCDU page pops up showing you the added runway, SID and TRANS.
Perhaps you’ve noticed that the flight plan is not green but yellow. This means it’s a temporarily flight plan, so it’s not yet active. When all looks OK, click the LSK next of TMPY INSERT. Now the flight plan is back green and active. Moreover, your F-PLN DISCONTINUITY line has disappeared, but suppose you see a F-PLN DISCONTINUITY, you can now delete it as previously explained. Adding to this, then you’ve deleted the F-PLN DISCONTINUITY, your flight plan has been changed but temporarily. To change the flight plan from temporarily to active, click again the TMPY INSERT LSK.
Interactive Checklist
As you know now, the JD330 doesn’t come with any documentation and therefore also no checklist, but guess what, the JD330 has a basic build-in checklist.
On the captains side you’ll find on the non movable sliding window a JD330 NORMAL CHECKLIST. The first page you see at startup is always the BEFORE START CHECKLIST. At the left-hand side you either see a dash or a check mark. A dash means not yet completed or action has to be taken while a check mark means action performed. And some data is directly taken from the MCDU like for instance the fuel quantity. Most of these checklist items on this page are speaking for themselves however, some aren’t so clear what to do like the first line COCKPIT PREP. The BARO REF checklist item is a bit confusing.
The check mark only comes in view when you’ve set the baro knob to STD (standard) which is on the ground in my humble opinion not logic. Time to contact Evgeny to ask him about how to deal with the interactive checklist. According to Evgeny “There’s no need to select the BARO knob to STD (standard) to get the check mark. The reason that the dash isn’t replaced by a check mark is because there’s a difference between the simulator baro value and the selected baro value.
When these two values are the same, then the dash is replaced by a check mark. Regarding the COCKPIT PREP conditions, you need to turn ON all 3 batteries, set the Radio Panel and set the weather panel on the pedestal. With these actions performed, the dash will become a check mark.”
JARDesign Virtual Co-Pilot
As highlighted earlier, the Co-Pilot is a free add-on from JARDesign and when you can deal with the virtual Co-Pilot and speech recognition, it’s worth to forget the virtual paper checklist. How to install, how to configure as well as how to setup the speech recognition is already explained in that previous section.
Just to make this clear to any simmers who would like to test the virtual co-pilot. When correctly install, you’ll find an additional X-Plane menu, namely A330 – Co-Pilot. The following three screenshots shows you different procedures to follow.
Reality is that the captain and co-pilot interact with each other in e.g. completing the checklists. Your virtual co-pilot can do the checklists by herself or you can give commands to her and she will perform what you ask. When you ask “FLAPS ONE”, she will move the flap handle to position 1. When you ask “GEAR DOWN”, she will move the gear handle to DOWN. This and many other steps are included in the JARDesign Co-Pilot. I can tell you already that these steps are very handy when you’re in the approach phase of your flight. You need to do already a lot of things, and then the co-pilot can help you with that.
Asking her – the virtual JARDesign co-pilot – to do the PRELIMINARY COCKPIT PREPARATION by selecting from the X-Plane menu “Commands – Procedures – Preliminary Cockpit Preparation”, she will do all the steps/actions to complete this checklist without saying anything. Personally I prefer to do ll those steps myself, but that’s what I think of it. During my flight and perhaps Bruce too, we’ll give it a shot how it works in flight. To be continued!
General Preparations
Creating a Flight Plan
Although the review deals with the JD330, a bit more background how to create a flight plan and what or which programs can be used for this, it always welcome, right? But first, what kind of flight plan extension is the JD330 using? Simple and straightforward; the extension “txt”. Now let’s have a look which online programs can be used for this.
As you might know, for creating a flight plan you could use many programs like Routefinder which offers you quickly a flight plan. Or you could go for FlightAware (http://uk.flightaware.com). Another option simBrief. You need to register but it’s for free and a wealth of flight planning information becomes available, but you need a legal license to update the AIRAC since the default AIRAC that is used within Simbrief is a very old version. But for now the most important question is that you can save the flight plan in txt format. You can save but first you select within SimBrief the option JARDesign Airbus which is a txt extension.
Then there’s also the browser-based Online Flight Planner (http://onlineflightplanner.org), but I go for SkyVector, but then you and I need for this X-PlaneTools. One of the reasons I prefer SkyVector is not because it’s easier, but with SkyVector I have the control over the amount or sort of waypoints, VOR or NDB beacons.
You and I all know SkyVector, but SkyVector saves your flight plan in “fpl” format which in turn can be converted to fms with X-PlaneTools. I prefer to create a sightseeing IFR flight, so I use SkyVector above all the other options since it allows me to add waypoints on my scenic IFR route.
But you can also go for the offline freeware tool LittleNavMap. I can tell you that this is an awesome planning program, but it can do much more then just flight planning. Besides many other things, this is a great tool in case you need to create flight plans for many commercial aircraft which can be saved in many formats.
Anyway, I saved within LittleNavMap, just to test this, my LFBO-LFBO flight plan as txt format (LFBOLFBO.txt) and copied and paste is into the X-Plane dedicated JD330 FlightPlans folder. You find this “txt” in Little Navmap via menu File – Export Flight Plan to Aircraft Formats – Export Flight Plan to TXT.
Overall, I could have used RouteFinder to when you find that more convenient. Only problem with this Airbus test flight which departs from LFBO and has as destination also LFBO which is as real as it gets for airbus real test flights, is that RouteFinder can’t make anything of it and therefore I use Little Navmap since with Little Navmap I can add any waypoints and/or beacons to test the JD330. That said, I can create my own flight plan with my own beacons (VOR or NDB) and/or a mix with waypoints.
Creating a JARDesign Flight Plan
In the previous section I used external online flight plan programs or offline programs like Little Navmap to create my flight plan. If you don’t like to use other programs or website to create your flight plan, you can also decide to stay with JARDesign. But then the next question rises …. does the JD330 has a flight planning program build in? The answer is simple, it is straightforward, it is as easy as it can; YES!
As with other sections too, I won’t write a complete tutorial how to do certain things since that’s the job of a developer unless enough movies are around where the developer explains steps to perform. But for the following example I will give it a bit of a step-by-step procedure how to create a flight plan, and add a SID and STAR to it.
I’m at LFBO and want to fly to EHAM (Amsterdam Schiphol International Airport). At the MCDU INIT page I type in the scratchpad LFBO/EHAM and click LSK 1R FROM/TO. At the next MCDU page you’ve got the choice to select LSK 1L or LSK 2L. At LSK 2L is written REQUEST GENERATE FLPN. You understand it already, when you click LSK 2L the JARDesign flight plan engine will generate a flight plan for you.
Next click LSK 6R INSERT and the generated flight plan becomes active, but the MCDU page goes back to the INIT page. To see the flight plan, click the F-PLN MCDU key. It seems we’ve got a F-PLN DISCONTINUITY at LSK 2L which we can’t remove, but no worries yet. Another thing is, the EFIS ND map doesn’t show you the flight plan, but believe me, it’s there.
Bring forward the big map what I discussed before. To see the whole flight plan, click the TO PPOS button – it will become white – on the big map it will unlock the PPOS of the aircraft at LFBO. First, move your mouse pointer to the center of the rose, then press the left-hand mouse button and sliding the mouse while holding the left-hand mouse button down for zooming out and up for zooming in. When the mouse pointer is not in the rose, you can do with the same previous mouse actions the map.
When you have the map repositioned an d zoomed in of your choice, you can now enter a SID. On the MCDU you select from the F-PLN page LFBO, followed by DEPARTURE. Now you need to select a runway, after that a SID and if applicable, a transition. In real you would have all the SID papers in front of you, but in this case the JARDesign MCDU and popup ND show you how a SID runs and if it’s the right one for your initial waypoint. This kind of feature is by the way also applicable for Little Navmap. So you select on the MCDU which SID you want and if OK and no transition is available, you click on the MCDU DEPARTURE page LKS 6L TMPY F-PLN.
Very easy isn’t it?
Although I just explained how to add a SID, the same way it works for a STAR. But again, this is only interesting when you don’t want to use any other external online/offline program or website, whatever is applicable. In my opinion it’s a very nice feature unless you seek for real flight plans from LFBO to EHAM. In that case you need to check it out at Simbrief or FlightAware.
Test Flight I | Preparations
Intro
As written before in the General Preparations section, I created my own flight plan with the help of Little Navmap. The route I’ve created allows me to test many things on this test flight. Although I’ve selected a cruising altitude of FL320, I go for an Airbus test flight from LFBO to LFBO. Not that all the waypoints I’ve included in this flight are real, the idea of this test flight is as real as it gets.
In case you want to do this test flight too after you’ve bought the JD330, this is how the LFBOLFBO.txt file content looks like: LFBO SID AGN DCT RARAK DCT SECHE DCT MIRBA DCT SAU DCT ENSAC DCT RILON DCT MAGEC DCT BIDAC DCT TBO DCT BARBO DCT BERGA DCT BGR DCT SIJAN DCT AMOLO DCT FINOT DCT MASAM DCT SALSI DCT LOMRA STAR LFBO.
In case you want to perform yourself this test flight, here’s the download link to the LFBOLFBO.txt flight plan file.
Used Add-Ons
This section isn’t directly related to the JD330, but more to which add-ons I used for my test flight. Besides the reviewed JARDesign JD330 and the BBS Trent 700 Custom Sound pack, I installed the following packages to get the best ground and flight experiences while flying over the Midi-Pyrénées region:
– Aerosoft Toulouse v1.03 for X-Plane 11 | X-Plane.Org
– Aerosoft Toulouse v1.03 for X-Plane 11 | Aerosoft
– XPFR Toulouse v3.1 for X-Plane 10.50 (can be used with X-Plane 11)
– Zones Photo for X-Plane. Providing ZL16 ortho textures.
– FlyWithLua NG v2.7.21 for X-Plane 11
– Environment+ v1.1 for X-Plane 11
Instead of Environment+ v1.1, you can also use the multipurpose plugin from FlyAgi:
– FlyAGI Tweak Utility v.1.12b for X-Plane 11
– alpilotX.net HD mesh scenery v4
– alpilotX.net UHD mesh scenery v4
– X-RAAS 2.1
Checklist, MCDU and CI (Cost Index)
For my Airbus test flight I decided to use the old fashioned way in respect to the checklist; just a paper checklist! You find two kind of checklists at the dedicated JARDesign forums. This link brings you to a normal procedures and supplementary procedures checklist. And this link gives you access to another, a bit more in depth checklist and actions to take checklist.
I mentioned already in one of the previous sections the presence of an interactive Load and Trim Sheet which is a part of the MCDU MENU option, right? Actually, and worth to highlight I think, this is an interactive version of the official FCOM 2 (Flight Crew Operating Manual) section LOADING Weight and Balance. When you’re interested in the official although old FCOMs, then check out this dedicated FCOM JARDesign forum page.
You’ve noticed already that you need to enter manually the COST INDEX (CI) value, but since there’s no automatic function for this like e.g. the aircraft TO speeds, it would help when you know what to enter for CI value. The following is a link to an official Airbus document from 1998 named Gettings to grips the COST INDEX. Yes yes, I know, it’s an old document and I’m not 100 percent sure if it’s still up-to-date, but with this document you get a better understanding about the cost index value.
Starting at page 12, the CI explanation begins for the A330 and A340 and at page 21 there’s a small table – although it’s with PW engines – it shows that the CI value starts at 0 and goes up to 200. In other words, when you enter a value of 50, or 100, you’re always in a good range. The idea is this; the higher the CI value, the more fuel you use. If this is programmed in this way that it’s noticeable, is something I’ve not tested yet.
I found at skybrary.aero the following information. Hopefully this helps a bit understanding the differences between a low or high CI. According to skybrary.aero “There is great variation between operators on the CI that they use for a given type or in a given situation. For example, one airline generally uses a CI of around 9 in the A320 which results in a climb speed of about 290, a cruise speed of about .76 and a descent speed of about 260. However, if the aircraft is running late, the crew may use a CI of 50 or more which would give speeds of 320, .79 and 330 for the same phases.”
The Charts
I’m aware that digitally charts can. be found every where or from JARDesign their FMCar (Follow Me Car), but I prefer to use ordinary charts. The A330 is modern and many new features are added to the real A330, but it’s not as modern as for example the A350 Series.
That said, I’ve download for LFBO a couple of charts that I need.
Test Flight I | LFBO – LFBO
Preparations, Pushback, Engine Start and Taxi
Using this checklist I follow the steps to complete and this also means the data that’s needed for the amount of fuel as well as all other data for the MCDU. For a couple of things you don’t need to think. This means, you click the respective LSK and the data is automatically entered in the fields. Realistic? Not really. We only bring this to your attention.
I decided to install X-RAAS. When you’re not familiar with this, RAAS stands for Runway Awareness and Advisory System which is from Honeywell. It’s a free plugin for X-Plane 10 and X-Plane 11. It is an electronic detection system that notifies aircraft flight crews on the ground of their position relative to their allocated runway but it also warns the (virtual) crew in flight. It works well with the JD330 however, it’s not fully integrated into the EFIS system. That said, you’re aurally warned the moment you’re approaching for example a runway as well as that you see a small window popping up with text indicating which runway you’re approaching or whatever is applicable.
Although I entered a FLEX temp value – F50 which means a flex temperature of 50C -, but for some MCDU values there’s no need to think about e.g. your flap position and THS. Just click the LSK and the correct data is entered for you. How real is this …. not as it could be.
Anyway, I prefer this way more then having a virtual co-pilot next of me. This way is in my opinion the best way to learn the aircraft by doing it yourself and not by a virtual co-pilot. Got me right; there’s nothing wrong with the JARDesign co-pilot but again, I want to do it all by myself.
It’s because I know where to find all the stuff – manuals and others – so I need to know all the steps to be taken and to know all the “hidden” features this JD330 has, but I find it a shame that there’s no up-to-date video.
I did noticed something else related to the MANAGED MODEs on the FCU. The moment electrical power is applied to the aircraft, either via the GPU or via the APU, I noticed that all the FCU windows show already MANAGED MODE – dashes with dots – without having the IRUs aligned and without any data like TO speeds entered in the MCDU. I’m wondering if this is correct since e.g. the SPEED window on the FCU can only go into MANAGED MODE whenever the FMGEC/MCDU has the relavant data. The same for the HDG/NAV window. As long as the IRUs aren’t aligned, I doubt if the window can already show MANAGED MODE. Anyway, just a thought!
I continue with the rest of my work on the MCDU and when all done, it’s time to request the pushback truck.
Requesting ground equipment, or the fuel truck, hi-loaders, stairs – and don’t forget to open the respective doors via the MCDU MENU DOORS page – is easy, but getting them away, isn’t as easy as it looks like, but there’s also an option “HIDE ALL” which has become my friend. With one click, all ground equipment objects are gone with the wind. Not sure of this has anything to do with the Aerosoft LFBO and the chosen location, but sometimes I don’t understand anything of the driving route of these individual objects. Sometimes it just looks like that they drive thru each other without following a logical drive away path.
Requesting the pushback truck is easy as long as you know since there’s no manual or whatsoever how to deal with this truck. The truck itself looks good and yes, it’s all free of charge. Personally I like the Better Pushback truck above the JARDesign pushback truck. The Better Pushback has much more detail. On the other hand, the JARDesign comes with a truck which works flawless with the JD330. After my pushback, I set the parking brake, request a disconnection of the pushback truck and I’m ready to taxi via W50 – W40 -W35 – W30 – W20 and S2 to runway 32L.
Take Off (TO) and Climb (CLB)
It’s a good habit to rehearsal all what’s coming the moment you and I start with the actual TO. Not that it’s complicated and yes, I know, you can use the PAUSE button but I don’t think there’s a need for. Before the actual TO, I check the list once more if I’ve covered all the item to do and if everything is set on the FCU (all in MANAGED MODE including the selected initial level off ALT with also the dot), and after cleared for TO, I turn onto the runway, make a rolling TO, move the throttles forward till I see on the PFD FMA (Primary Flight Display Flight Mode Annunciator) FLEX TO – SRS – HDG.
A/THR (Auto Thrust) is automatically engaged, and the only thing I needed to do is to keep the aircraft on the center line which is easy when you look to the YAW BAR on the PFD. The different speeds are announced and at Vrotate I gentle move the side-stick, oops, that’s in the real aircraft. I gently pull the joystick and try to give the aircraft a climb of 15 degrees. With a positive climb, I select the GEAR UP and in this case when you had the virtual JARDesign co-pilot installed, I could ask her to do it for me. You can connect AP1 or AP2 but you can also decide to fly the JD330 for the first 10.000 feet by yourself. Only thing to keep in mind is the FLAP/SLAT position. When you’re familiar with Airbus aircraft you will see the F or S in the speed-scale of the PFD indicating that you can safely retract the FLAPS and/or SLATS whatever which selection you had made.
After I engaged AP2, I check the AFTER TAKEOFF checklist and do what’s written. It’s not a long list, but it is handy when the PACKS are back ON. The moment the AP and A/THR are connected and all on the FCU is in the MANAGED MODE, there’s actually not much to do anymore. The FMGES is taking care everything. Different then what’s written in the checklist, I’ve set the first initial level off altitude at FL090. I leave it as it is and therefore, the aircraft will level off at FL090. It gives you and me the time to see what all happens. The THR CLB changes to SPEED, the CLB mode changes to ALT* and later on to ALT and finally, I’m on track thus I’m in NAV mode.
Without ATC approval I can set another leveling off altitude, but in case you’re flying online via VATSIM or IVAO, you can request a new altitude or ATC orders you to go directly to the intended cruising altitude of FL320. When you enter a new altitude, keep in mind that you press the ALT button. Pressing the ALT button means you’ll in managed mode and on the PFD FMA you’ll see CLB. When you pulled out the ALT knob, you will see on the FMA OP CLB. OP is in this case een Open Climb without flight management.
While the JD330 continues the climb, I noticed – I mentioned this before – that when you click on the EFIS (Electronic Flight Instrument System) ND, a popup ND appears in the right-hand upper corner. The popup ND is a bit transparant so you don’t loose a square corner but you’re still able to look thru it. Unfortunately there’s no other popup EFIS or ECAM (Electronic Centralised Aircraft Monitoring) display simulated.
During the CLB I decide to go out of the NAV mode and want to see the HDG SEL behavior. As expected, this works fine. Pull the HDG knob (left-hand mouse button | situated above the LOC switch) and the actual HDG is displayed in the window. See this as HDG HLD. On the PFD FMA the green NAV is replaced by a green HDG and the CLB is replaced by OP CLB. Turn the HDG knob to the heading you want to fly. Remember, lateral navigation is no longer performed by the FMGEC. When you want to go back to the NAV mode – also known as the MANAGED MODE – you simple push the button (left-hand mouse button) and you’ll see on the PFD MFA in green NAV and the aircraft will change its heading accordingly to fly towards the first waypoint in the flight plan.
The same goes as easy as expected with the vertical speed (V/S) knob. The moment I start introducing a V/S, I was levelled off at FL090. Pull the knob and the V/S window shows you the actual V/S. Turn the know and enter a value of your choice. When you set the ALT value to whatever you want, lets say FL210, then the V/S will stop the moment the aircraft reaches the selected altitude. In the FMA you see during the V/S CLB mode in blue ALT and above in green V/S. The same you can also do with the SPEED/MACH selector which is by default always in the MANAGED MODE. Right click with the mouse on the SPEED button, and it will show you the actual selected speed. This is indicated in a blue triangle on the PFD speed scale. When the speed triangle is magenta, it means it’s in managed mode controlled by the FMGEC.
Under normal conditions and as far as my knowledge goes, pilots always fly in MANAGED MODES for SPD/MACH, ALT (CLB or DES) and NAV. During the approach is is common that ATC commands the pilots to follow a different course and thus no longer following the flight plan path. In those conditions HDG SEL is used. The same is also applicable when pilots need to descent faster or slower then commanded by the FMGEC and thus pilots will use the V/S button.
I mentioned before already that the simulated FMGES isn’t a split system. This also means that the EFIS control panels (EFIS CTL PNL) on the glareshield aren’t separated. What does this mean? When you select on the Captains EFIS CTL PNL a different ND (LS, VOR, NAV,. ARC or PLAN) it will change on both ND’s. The same for the RANGE selector. When you change the range on the co-pilots ND, then it changes also on the captains ND. Normally and in the real Airbus these are split systems. The captain sets his own preferences via the ECAM CTL PNL as well as the co-pilot enters his own preferences.
Cruise (CRS)
I finally have reached my final cruising level of FL320. I did a couple of tests, but I would like to test the aircraft behavior with GEAR DOWN and a slow flight with SLATS/FLAPS extended. I can’t do that under the current conditions since me speed is for those tests too high. I need to reduce my speed with the SPEED knob. When I don’t reduce my speed, I will get an ECAM level 3 warning that my VMO for GEAR DOWN and/or FLAP position is too high.
OK, I’m at FL320, managed speed 280 or equivalent Mach value. I right click the SPEED knob, use the small SPD/MACH button to change to speed value and select 240 knots which is 10 knots below the VMO GEAR DOWN. I do hear additional sound from the extended NLG Nose Landing Gear), but more important, the FF (Fuel Flow) will increase dramatically which is of course logic. If the FF I see on ECAM is the correct value, is something I can’t confirm. Next test, a slow flight with lowering my speeds and extending my flaps.
My starting point is FL320, SPD out of MANAGED MODE and selecting the green dot speed which is roughly 211 knots. Flaps are still UP. With FLAPS 1 there’s no problem yet. My speed is far below the Vmax and far above the minimum selectable speed. Before I select FLAPS 2, I first decrease the IAS to 200 knots. When the aircraft has reached 200 knots, I select FLAPS 2. I go one step further and decrease my IAS to 171. Then, when the aircraft is stabilised at 170, I select FLAPS 3, and after I have set the speed again lower, I’m able to select FLAPS 4. All perfect as it is now but I’m very close to the Vls (Lowest Selectable Speed) and below that, oops, the Alpha Protection speed.
For those who aren’t familiar with the term “green dot” speed. According to the following Airbus article “the green dot (GD) speed is the managed speed target in CONF CLEAN when the FMS approach phase is activated. It is also the recommended speed to extend flaps to CONF 1 and for a holding in clean configuration, but how is GD speed determined?
The Auto Flight System (AFS) computes GD speed using the aircraft weight, based on the Zero Fuel Weight (ZFW) entered in the FMS during flight preparation, and the pressure altitude. The GD formula has been set up so that the resulting airspeed provides the best lift-to-drag ratio for a given altitude and aircraft weight, in clean configuration with one engine out. In some phases of flight, GD is computed to minimize drag and thus, the fuel consumption (for example during the HOLD phase).”
On purpose, I select the FLAPS in speedy mode back to RETRACT. As a consequence, Vls and Alpha speed protection and the Alpha Max speed scale move up and bring me in the A.FLOOR protection situation. For a short moment I see on the ECAM UPPER DU A.FLOOR in amber while the PFD MFA shows TOGALK (TO GALOCK). Although the AP has been disconnected, I can control the pitch myself, the thrust is set to full to bring me out of the A.FLOOR situation.
I’m very happy with what I’ve seen and how to back control of the JD330. One thing you need to know in case you plan to try it yourself; the thrust mode is locked which means you can’t; get rid of the TOGALK on the PFD MFA. You can’t deselect the A/THR button. The only way to get out of the TOGALK is to retard the throttles completely to IDLE. This will disengage A/THR and thus removed the TOGALK mode. Then put the throttles slowly forward, A/THR will automatically engage and on the PFD MFA you see by yourself THR CLB or SPEED whatever is applicable.
While relaxing a bit from the previous exercises, I checked ECAM a bit more in detail. ECAM is equipped with automatic Flight Phase selected pages. I had hoped this worked, but not always the right page is shown. At least in CRUISE, I expected to see the CRUISE page, I know it’s there, but it won’t show up. I informed Evgeny already about this, and hopefully when time permits, he will have a look into it.
Time to relax, time to sit back and enjoy this movie that deals with this Airbus test flight from LFBO Toulouse/Blagnac and covers the JARDesign GHD, the taxi to runway 32L, the TO, CLB and CR.
I think it’s time to do some descent and approach preparations, right?
Descent, Approach, Final Approach and Landing
Before starting the descent, I think it’s a good idea to check with the charts or the build in big map, to see which STAR I should take. I know already that I go for a landing on runway 32L since the weather conditions haven’t changed since my departure. Since I don’t fly online, I’m a bit free in which STAR I take although some STARs are way far from me and therefore not logic to choose these. I need to keep in mind that it’s in real always possible that ATC orders you to fly “this and that heading” or “to start your descent or approach now” instead of following the flight plan with the programmed STAR.
Anyway, I’ve decided to take STAR MEN6L, but before I can do that – and to have a correct flight path – to the runway – I first delete via the MCDU the following waypoints; FINOT, MASAM, SALSI and LOMRA. Just click the CLR button on the MCDU in the lower right-hand corner, followed by clicking the LSK of the waypoint you want to remove. The MCDU will ask you to confirm. Confirm this action by clicking LKS 6R (TMPY INSERT*). If a DISCONTINUITY appears, remove this line in the same way as deleting a waypoint.
When you’re not sure, but I bet you are sure, you can always return to the previous (green) flight plan page by clicking LSK 6L. But you did remove all the waypoints so after that’s done, your last waypoint is AMOLO and ignore for the moment any DISCONTINUITY. Next you add the runway for your landing and the STAR. In white you’ll find on the MCDU LFBO. When you click on the LSK next of it, you click on the new MCDU page LSK 1R where is written ARRIVAL. Then you follow with the runway and the STAR. As of this writing, the STAR I’ve chosen is MEN6L, but it could be that with AIRAC updates it will become MEN7L and so on.
What’s important right now are the altitudes to be at when arriving at the waypoints and if applicable, the maximum speeds that apply. After MEN the first waypoint on the STAR is NARAK with a altitude constraint of FL190 or below. Then, when we reach IAF LASBO, we need to max at FL080, speed constraint 190 knots. Then we need most likely to change to HDG SEL and set a HDG of 143 while descending to 4000 feet.
When we’re 16NM out of VOR/DME TOU, we make a 180 standard turn while we descent further to 3000 feet. Since we’ve programmed the MCDU for an approach and landing on 32L, the ILS frequency should be active and set. For the rest, we’ll see when we reach out for the last waypoint on our flight plan AMOLO. Or we can keep on flying in NAV mode and at a certain moment we select the APP button, but no HDG or V/S is needed.
You will notice that all restricted altitudes along the STAR are not only mentioned in the Acrobat document, but they are also mentioned on the big map and on the ND provided you’ve selected CONSTRAINT.
We need to do one more thing at the MCDU and that’s related to the APPR PERF (ormance) page. On the MCDU you click the PERF key, and with LSK 6R you scroll to the APPR page as can be seen on the screenshot below. With the help of the DCDU (Datalink Control and Display Unit) you can retrieve the correct airport information of your arrival airport. The arrival airport information is known because it’s taken from the entered arrival airport in the MCDU. Just in case you missed the DCDU; the DCDU is situated below the aircraft clock on the center instrument panel.
At the APPR page we need to enter the arrival QNH, the local temperature, wind information, and the DH. The DH can be found at the ILS32L chart. Further on, we need to check if the TA (Transition Altitude) is correct. This can also be found on the chart. We can also decide which landing configuration we want; either CONF3 or FULL. Just click the LSK next of it. One last confirmation is the ILS frequency. Select the RAD NAV key on the MCDU and as you can see on the screenshot below all relevant information is already entered by the system or database itself. Remember, we selected the runway thus the DB system knows which ILS information is needed. That’s it for the moment.
While approaching waypoint AMOLO, I see already my TOD (Top Of Descent) or T/D on the MCDU. This means that I can enter already the final altitude (3000 feet) in the ALT window on the FCU. That’s in my case the altitude for my landing at runway ILS 32L. More then that is for the moment not needed. Just before reaching T/D, I push the ALT knob which brings it in the MANAGED DES mode. When I had pulled the knob, I bring the Auto Flight in an OP DES.
I noticed that I need to be ADD or BELOW waypoint NARAK at FL190. This seems not be a big issue however, descending from FL320 to FL190 is not easy for the JD330 to descent enough to be at FL190. Normally the vertical speed should be calculated correctly in a way that at NARAK we’re at FL190 or below. Since I did many of these example flights, I still find the calculated T/D point a bit late.
Personally I prefer to start the descent a bit earlier, lets say around max 50NM before the calculated T/D, but that’s my personal preference. Of course, when you leave it up to the calculated T/D, you can select during the descent a vertical speed and set this then to a value that you will reach FL190 before NARAK, but this means you’re out of the MANAGED mode. If during your descent the airspeed becomes too high, the system will inform you to add more drag thus you need to select to select SPEEDBRAKE half.
Anyway, I prefer to stay in the MANAGED mode and see if everything goes according to the Airbus JARDesign book. It turns out that just before reaching NARAK I’m at FL190, so that goes as expected. But we’re not yet there since our next constraint is waypoint IAF (Initial Approach Fix) LASBO. At LASBO we need to be at FL080 and even though the difference between FL190 and FL080 seems not much, it is!
Suppose that you want to practice this flight too, you can always add a holding via the MCDU at waypoint LASBO. A holding is also a good way to circle around while lowering our altitude or because it’s too busy which isn’t in this case not applicable since I’m not flying online. But I have to be honest, the STAR chart for runway 32 doesn’t offer me a holding at LASBO. Lucky that we are flying offline with no ATC, so I’m free to test different things like introducing a holding.
Adding a holding at waypoint LASBO is easy. Click in the flight plan at the LSK next of LASBO. This will show you the MCDU LAT REV from LASBO page. Next click LSK 3L HOLD. You have several options how the holding could look like, but for now the easiest is to select LSK 1R COMPUTED. This results in a new MCDU page that shows you the information of the computed holding. I’m happy with it, and click LSK 6L, followed by on the next page LSK 6R. The computed holding is a R holding. Suppose you’ve activated this and think “I don’t like the R holding”, you can always delete the holding, do it again, but instead of the computed R holding, you enter in the scratchpad L, click the LSK and the MCDU has generated for you a L holding.
My descent is continuing and while approaching IAF LASBO, the JD330 reaches the holding and follows nicely the path. Not only that, the speed constraint is 190 knots, and at a point the speed is automatically reduced to the new setting of 190 knots.
By the way, if the weather is OK with not too many clouds out there, you could see LFBO below you. While the aircraft follows the holding, you will see on the MCDU, situated right of the HOLD R in amber/orange, IMM EXIT. In other words, whenever there’s a need or whenever you’re flying online and ATC orders you to do, you can via this LSK immediately exit the holding. Not that the aircraft makes a weird movement, no, that won’t happen. It will calculate the right path to enter the flight plan again.
As mentioned before, there’s not only a speed constraint, but also an altitude constraint of FL080. I mentioned that before, right? And yes, the JD330 follow this limitation too, logically. That said, when the aircraft reaches FL080, even with the altitude selector set to 3000 feet (for the ILS), the FMA shows first ALT CST* and can active, it changes into ALT CST. Perfect!
When the JD330 is back on the flight plan and following the last turn, I first noticed that the SPEED constraint is no longer active which means, the speed goes up to 250 knots, which is the maximum for aircraft below FL100. Don’t worry about the speed. When we reach the (DECEL) line in the flight plan which is the pseudo waypoint, the APPROACH PHASE should become automatically active. We’ll see when we’re out of the last turn. I also got a MORE DRAG message on the PFD. This means I need to increase the drag to reduce the speed, so select half speedbrake and if you don’t feel comfortable, select full but only when there’s a real need for it.
I can confirm that the automatic APPROACH PHASE activation works the moment the DECEL pseudo waypoint has been passed. But if you feel not sure if it works, you can always select the PERF button on the MCDU and scroll to the DES or APPROACH page. Adding to this; the automatic APPROACH PHASE activation only works when you’re in NAV mode. If you’re in HDG mode which could be, then you need to activate the APPROACH PHASE manually at the MCDU.
When activated, you’re also aurally informed by this action. What said before, the DECEL waypoint is a pseudo-waypoint which the FMGEC automatically enters into the flight plan. It is the point at which the aircraft will automatically begin to slow to approach speed (or flap maneuvering speed if flaps not in landing configuration) when in managed speed mode.
And now it’s also time to click the APP button on the FCU. The moment I’ve clicked the APP button on the FCU, the FMA shows on the 2nd line in cyan G/S and LOC. Further on, I spot the CAT 3 and SINGLE lines as well as my DH (Decision Height).
A bit depending on the distance to go, I start selecting FLAPS 1 although my thrust is changed to THR DES and the new speed is set to 190 knots, so I have to be cautious that I don’t get an overspeed with the selected flaps. At around 11NM from, TBN, I’ll see that the ARMED LOC changes in to LOC* for capturing and then LOC TRACK. The G/S signal takes a much longer time to become captured.
According to the chart this will be at FAF (Final Approach Fix) which is approximately 7NM out of ILS/DME beacon TBN. But what I see, how the JD332 does this job, I’m satisfied. I follow the checklist items in this last flight phase and one of them is clicking the LS button on the FCU. Remember what I wrote before, this automatically activates both LS buttons on the FCU since the simulated FMGES isn’t a split system.
As expected – at FAF approx 7NM out of TBN – the G/S changes from ARMED (cyan) in green 1st line G/S* (CAPTURED) and then G/S TRACK. Thats’ for me the moment to select the landing gear DOWN and a bit later the FLAPS to FULL. I decided to do the next step to, but there’s not really a need for right now, but I also selected the second AP ON. In my case I clicked the AP1 button on the FCU. That said, I’ve got 2 AP’s connected although only one AP is the master and the other is the SLAVE. Neither less, the FMA will show DUAL (AUTO LAND). Selecting or adding a second AP is only possible when you’ve activated the APP button on the FCU and the G/S and LOC signals are active.
Additionally I decided to set the ND mode selector to ILS. This gives me the old fashioned ROSE mode with all relevant ILS G/S and LOC information although the PFD does give you the deviation signals for the G/S and LOC signals via the LS button.
While the JD330 is following the ILS path and all FLAPS and GEAR is DOWN, I can do the last checklist preparations before the landing and don’t forget, you always have ECAM WD that helps you to not to forget certain things. I wake up at passing 100 RA (Radio Altimeter) height since the computer tells me so. At approximately 600+ RA height, X-RAAS informs me that I’m approaching runway 32L. Yeah, that’s the runway we’re intended to land on.
Then an aural waning at 500 feet RH, while at 400 feet there’s another aural warning, – we’re around 1+NM out of TBN – and the FMA G/S and LOC are replaced by LAND. At 300 RH, another aural including 100 ABOVE which 100 RH above our DH since DH was set at 200, right? Just before landing, I notice that LAND is changed into FLARE and during the roll out at the runway, you guess it already, the FMA shows ROLL OUT.
Everything seems to work according to the book although I’ve seen on my test flight some glitches during the descent while entering STAR MEN6L as well as during the G/S capture. I noticed that at G/S capture, I had both the G/S cyan (2nd line) and G/S* (1st line) in view while normally you have either the 2nd line or the 1st line3 but not both. These things an a couple of other glitches are already passed forward to Evgeny from JARDesign.
Did I cover everything with this test flight? Did I see all odd things? Did I check the MCDU, EFIS, ECAM and aircraft systems thoroughly? The advantage is that Bruce and I made several flights before we start writing down our ground and flight experiences, so we’ve seen a lot but that doesn’t mean we’ve seen everything. We covered a lot, but as always, not all. On the other hand, we’ve a good impression of the modeled A330-200 and based on that, we’re able to help you in buying it or not.
Sounds
JAR or BSS Sounds
There are two options for sounds in the JARDesign A332, the ones that comes with the original product, and a set made by Blue Sky Star Sounds (BSS), which is available from the X-Plane Store. Interestingly, there are several versions of the BSS sound pack at “the Store”, featuring the RR Trent700 engines sound, a Pratt and Whitney sound pack and one termed “GE Expansion”. As the JarDesign model features the Trent700 engines, this is the version that I also tried, in addition to the default sounds. The BSS sound pack costs $US11.00 at the date of this review.
Let’s talk about sounds and what they mean for simulation. When we fly in an aircraft, either as a passenger or pilot, obviously our visual senses are primary, but we also get the tactile sensory input from our inner ear as the aircraft banks, accelerates, changes altitude etc. Obviously, we need a full-motion simulator to provide that sensory perception. Almost as important is the aural perception- the wind noise, the sound of the engines- which often has a very heavy bass component as the engine spools up, the sound of thrust behind a jet engine, as well as the avionics and system fans. These all aggregate in our minds to offer one of the most immersive additions we can provide on a desktop simulation (in my opinion).
Having expressed my thoughts on the importance of sounds, I’m back in the JARDesign A332 with the default sounds.
After I have turned on the GPU power, there is a slight and hardly perceptible sound of air movement- maybe from avionics fans. When the APU Bleed was engaged (which enables the air conditioning packs to work), there is no additional sound. Starting up the engines is audible, however lacks the bass dimension that I refer to above. Flaps extension sounds are somewhat realistic but perhaps more for a Cessna- which I believe is a default X-Plane 11.41 sound. On the takeoff roll, the engine sounds from the flight deck are somewhat thin and lack depth, and accelerating to 300 KIAS provides very little wind noise.
The sounds heard from the passenger cabin are the same as the flight deck, there is very little spatial component. Extending the speed brakes has no rumbling effect, and behind the engines (inside the cabin) there is little jet exhaust sounds. I was pleasantly surprised in external views of the aircraft. There is a good jet exhaust noise behind the engines and the overall sounds are much more realistic.
Something that I like with the default sounds, which are also available with the BSS product, is the Flight Attendant, Ground Crew and First Officer announcements that are triggered by various aircraft states (such as “seat belts” being switched on, the initial movement of the aircraft on taxi from the ramp, etc.).
As I write this I ask: am I being too critical?
Most likely- yes, but there’s a reason for that. I have been exposed to the BSS sound pack for the Trent 700, and while this review is not about that product, I will make some comments. Lots of good avionics fan and additional air-conditioning noise, the engine starts sound very real, and the entire aural experience is enhanced to a great degree. When I extend the speed brakes there is a very clear and deep rumble, and a more subtle rumble when flaps are extended. However, when I compare this BSS product to later ones (for other aircraft models), where they employ very good spatial effects and even reduce engine noise as the aircraft climbs and the air in thinner, this BSS product is a little dated.
Summary
The JD330 doesn’t have the approval from Airbus so it’s not a licensed A330-200 model. This means that JARDesign isn’t allowed to use the word Airbus for its model. The ToLiss A320 for example is an approved Airbus model and as far as I know the Flight Factor A320 Ultimate isn’t an approved model either. When a simulated model isn’t approved by Airbus, does it mean it isn’t good, does it mean that it isn’t reflecting the reality, and so on?
A developer can use his or her programming knowledge and based on the available manuals model the aircraft systems. It’s not easy when you look for example to the JD330, but it’s possible and will cost a lot of time and effort from the JARDesign team to fulfil this. I also know that JARDesign lead developer Evgeny Romanov visits quite often together with S7 Airbus pilots the FFS Level-D simulator at Domodedovo to check his modeled aircraft versus the FFS Level-D simulator. Still no guarantee that the modeled JD330 is 100 percent reflecting the reality, but is the best way to model systems by seeing it in real.
OK, lets see; the modeled JD330 cost as of this writing January 2020 60.95 USD which is without doubt a lot of money, perhaps a bit pricy. The JD330-200 Series comes with only RR Trent engines. A comparable aircraft model is the RWDesigns A330-300 which comes with RR Trent, GE CF6-80E1 and the PW4000 Series engines.
Since I don’t own the RWDesigns A330-300 nor that I ever reviewed it, I can’t judge about the differences. What I do know is that JARDesign programmed there own FBW software as well as programming a dedicated Auto Flight system. This is not weird since the Flight Factor A320 Ultimate has done the same which is also applicable for the SSG 747-8 v2 Anniversary Series.
Lucky that the JD330 is reviewed by two persons. Each having their own skills and own eyes and interpretation. Bruce covered a flight and Angelique covered a flight. Actually, we both made many test flights before writing down anything while during those test flights we observe the modeled aircraft behavior versus the books. Therefore, we both have a good idea if it flies OK or if certain systems or textures need further improvements. Knowing JARDesign for a while, they will always try to improve the aircraft and you’re automatically informed at startup of the aircraft if a new update is available.
The modeled JD330 3D model looks very nice knowing the balance between the amount of polygons thus the realistic look versus frame rates. The 3D cockpit is really awesome, but there’s a bit more then only a great and good looking cockpit. It should also fly well, having enough frame rates and systems should be simulated as far as possible versus the real aircraft. People always think that they get a simulated aircraft for such a low price that it is equal to an ultra realistic FFS Level-D simulator, but believe me, that’s not possible. In other words, it will never be perfect, but as long as the developer constantly improves the model, then I’ve got a good feeling.
The modeled JD330 comes with a couple of nice features like the GHD (Ground Handling Deluxe), a virtual co-pilot, a popup ND (EFIS Navigation Display) and a popup big map in conjunction with the MCDU. The GHD and the Co-Pilot packages can be separately downloaded from the following JARDesign forum page.
Everybody wants to hear; is it worth your money?
Knowing that there’s another A330 Series aircraft for X-Plane 11 available, I’m confident to tell you that I found the model worth it. Is it perfect? There are always glitches or issues if you wish in complex programmed aircraft which is in my opinion logic. More important for me is what does the developer with these glitches do or will the developer improve and add new features? That will be a clear answer; Yes, JARDesign will always try to improve their product!
But I also need to highlight the absence of any manual. I don’t understand why for example the different checklists aren’t included with the package. That the aircraft package doesn’t have the FCOM’s I can imagine since these are official Airbus manuals, but on the other hand, when JARDesign offers them on their forum. But applicable to many simmers, not having a tutorial is not good. It’s a complex aircraft and either a tutorial has to be a part of this package or a link to an up-to-date movie of a tutorial flight.
And now it’s up to Bruce to give his summary of the JARDesign JD330.
Firstly, this has been a great cooperative project with Angelique and myself doing independent test flights and discussing much of what we have seen while evaluating the aircraft. Yes yes, I know, my US test flight impression will be published as a separate Part II of the JARDesign JD330. We both have different skills and sometimes see things through a “different lens”, however we both share the passion for flight simulation.
But I can tell you that while making my test flight, which is an excellent way to get to know the aircraft systems, I researched online for documents or videos to make sure that I knew how the “real thing” worked. After all, I have never flown an A332- nor will I ever do so, and I wanted to have a good appreciation of what I should expect from an X-Plane 11.41 model vs what would be unreasonable to anticipate would be modelled. I even reached out to a retired A320 captain- knowing that the systems are so similar to an A332 that pilots can transition between one and the other. As I became more aware of the complexity of the systems, I also realized how well the JARDesign aircraft works.
I did have some critique in my test flight (which will be in Part II of this review) of missing items in the MCDU operation such as creating a flight plan to an alternate airport, the access to the INIT-B page even though the engines are running (prohibited in the real aircraft), and some other missing items. Some of this is also likely to be my lack of knowledge of the real aircraft systems. In reflection, some of the items could only be expected in an advanced simulation, and may require that development take place without the limitations that X-Plane 11.x places on the aircraft.
So, summing up- the model flies well, looks amazing, doesn’t waste fps on functional items such as window shades that are seldom used anyway, and with the auto-population of fields in the INIT and PERF pages this would make an excellent learning device for how an MCDU works. Many of the systems are very well done, which I would refer to as a “deep simulation”.
Items that detract from the model include the lack of documentation which was already highlighted by Angelique, the default sound, and some items that appear as simply lack of attention to detail such as the thrust reversers being operational in flight. However, there are more positive attributes than negative, and I must say that I have thoroughly enjoyed flying this aircraft as I built my segments of the review. Given that the developer does listen to comments, which is perhaps the most important item of all, I believe the aircraft is worth the money.
More information can be found at JARDesign and of course at the dedicated X-Plane.Org web page. and not to forget the BBS Trent 700 dedicated sound pack for the JD330.
Feel free to contact me if you’ve got additional questions related to this impression. You can reach me via email Angelique.van.Campen@gmail.com or to Angelique@X-Plained.com.
With Greetings,
Angelique van Campen and Bruce Knight
| Add-on: | Payware JARDesign JD330 |
|---|---|
| Publisher | Developer: | X-Plane.Org | JARDesign |
| Description: | Realistic rendition of the A330-200 Series |
| Software Source / Size: | Download / Approximately 322MB (unzipped) |
| Reviewed by: | Angelique van Campen |
| Published: | January 16th 2020 |
| Hardware specifications: | - iMac Pro - Intel 3GHz Intel Xeon W / 4.5Ghz - Radeon Pro Vega 64 16368 MB - 64 GB 2666 MHz DDR4 - 1 internal shared 1TB SSD (Big Sur 11.x) - 1 internal shared 1TB SSD (Bootcamp Windows 10) - 1 external 2TB LaCie Rugged Pro SSD (Big Sur 11.x) - Saitek Pro Flight System X-52 Pro and X-56 Rhino - Honeycomb Alpha Flight Controls - Honeycomb Bravo Throttle Quadrant |
| Software specifications: | - macOS Big Sur (10.15.x) - X-Plane 11.5x |


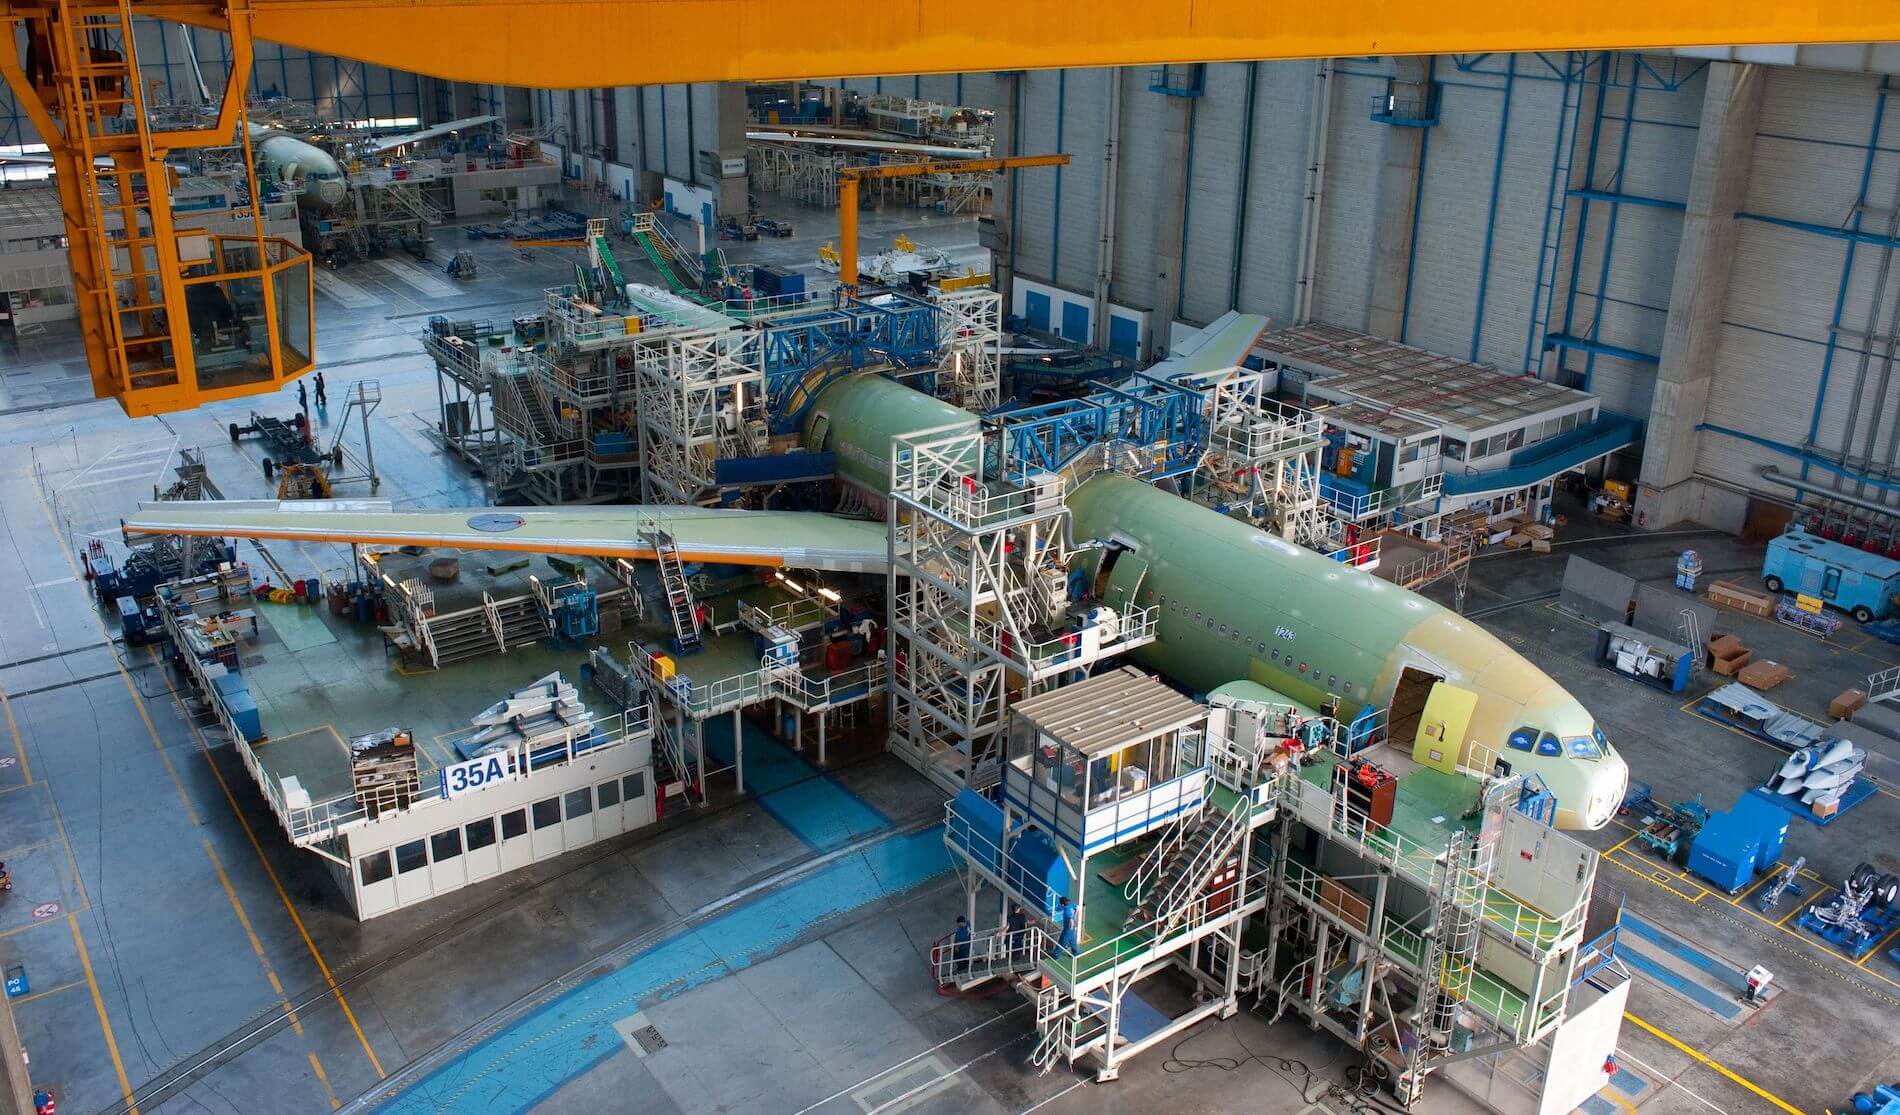




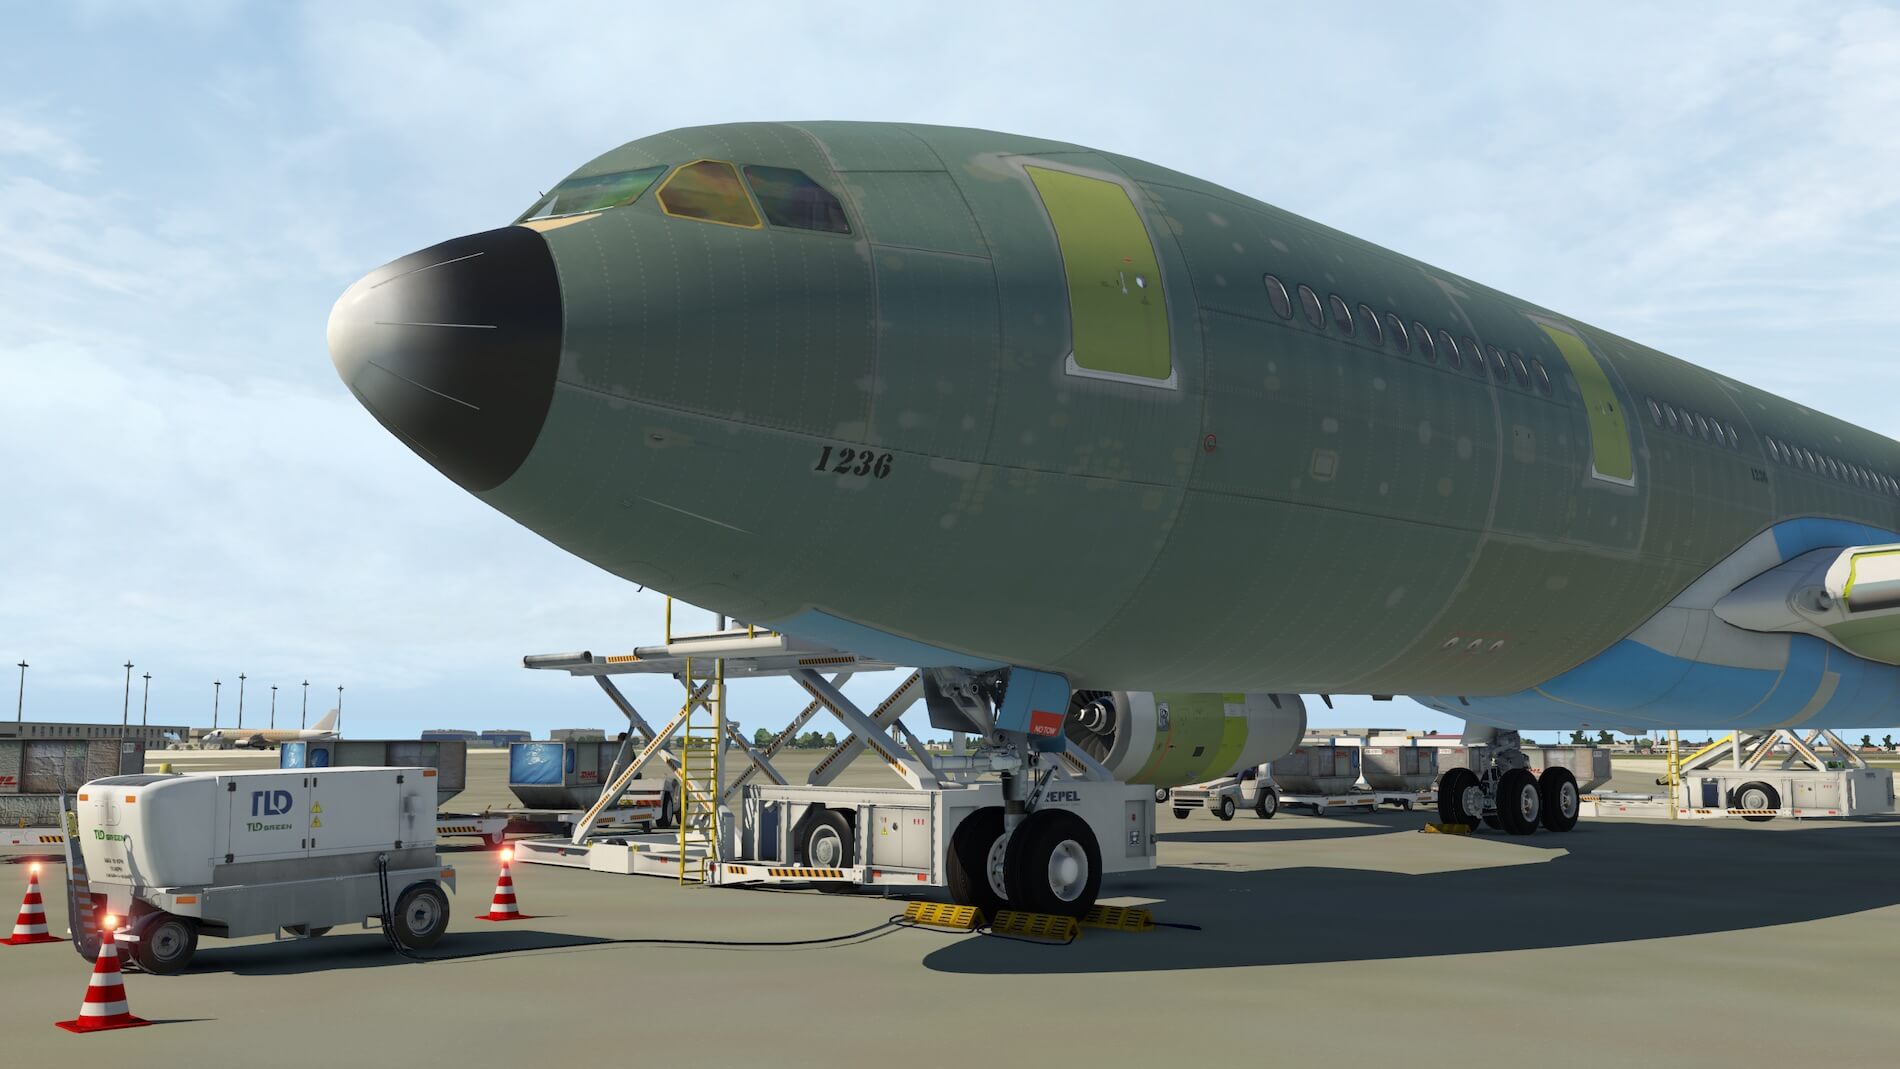
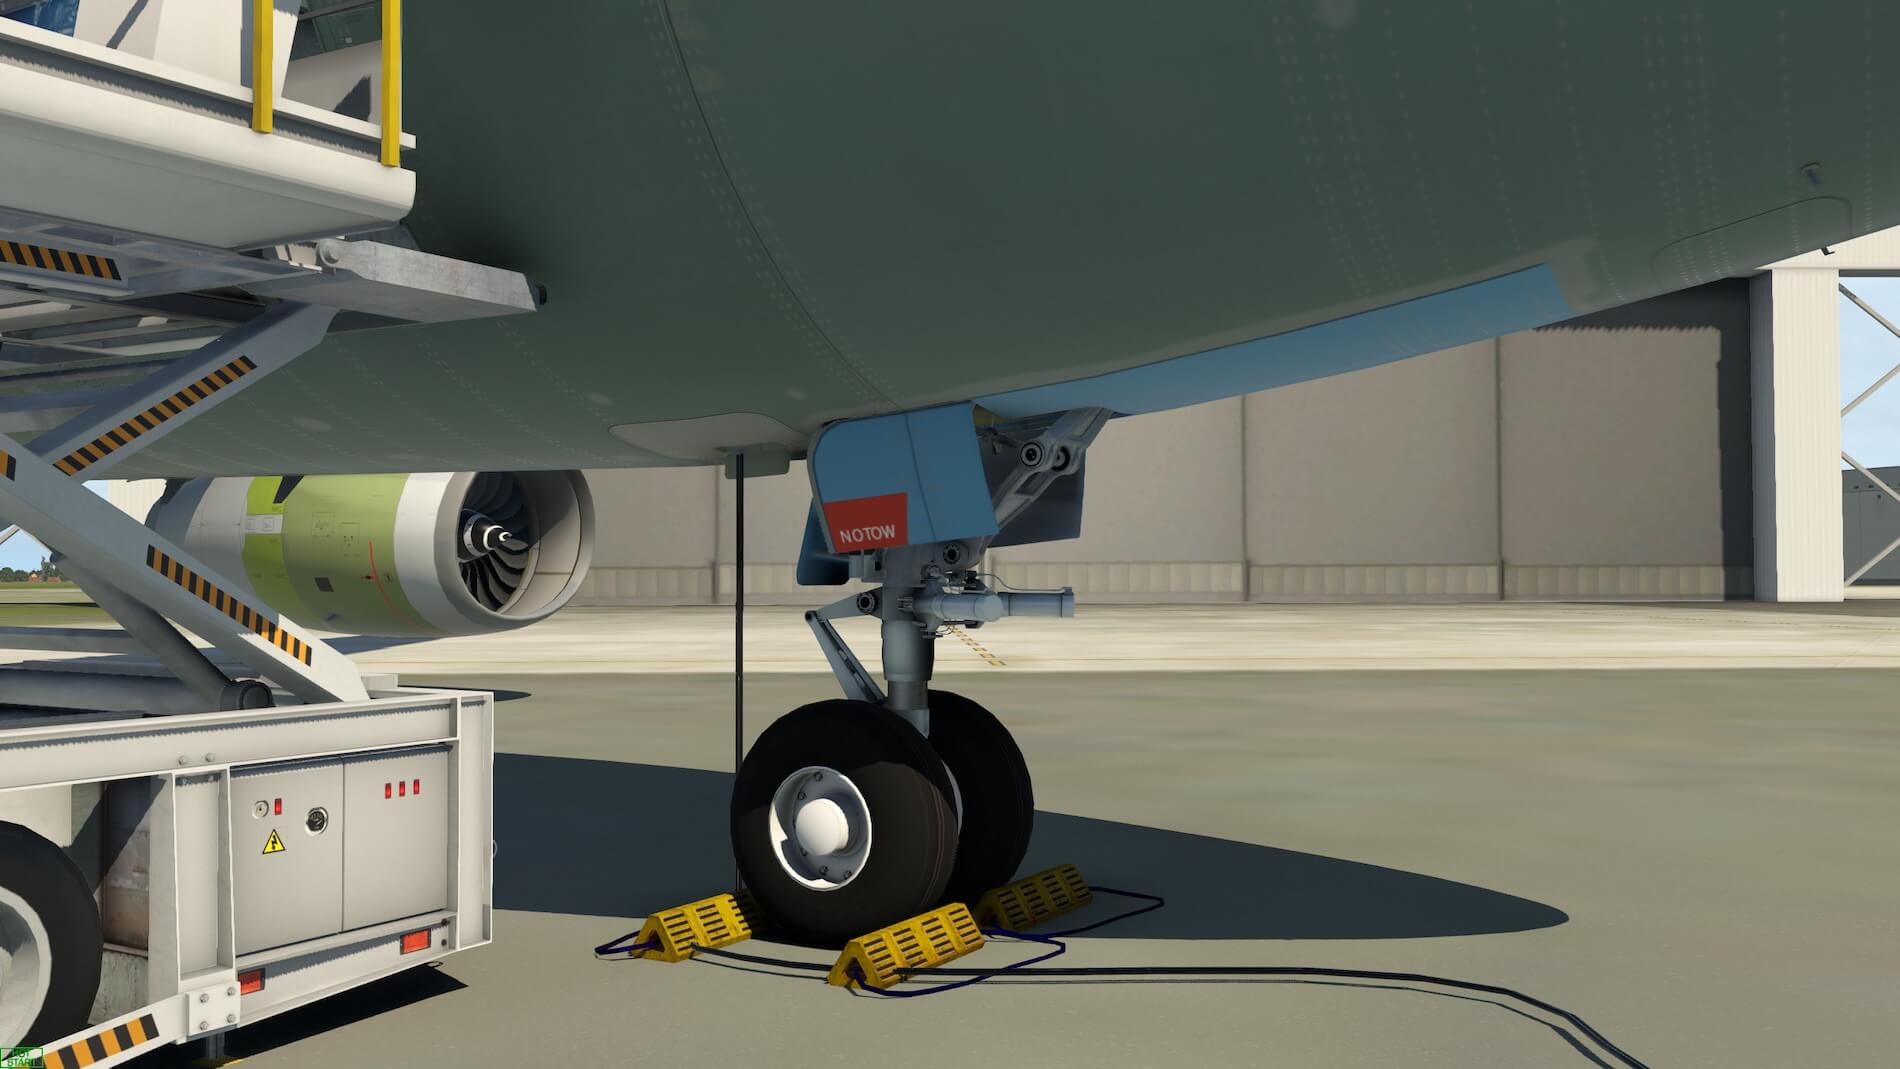
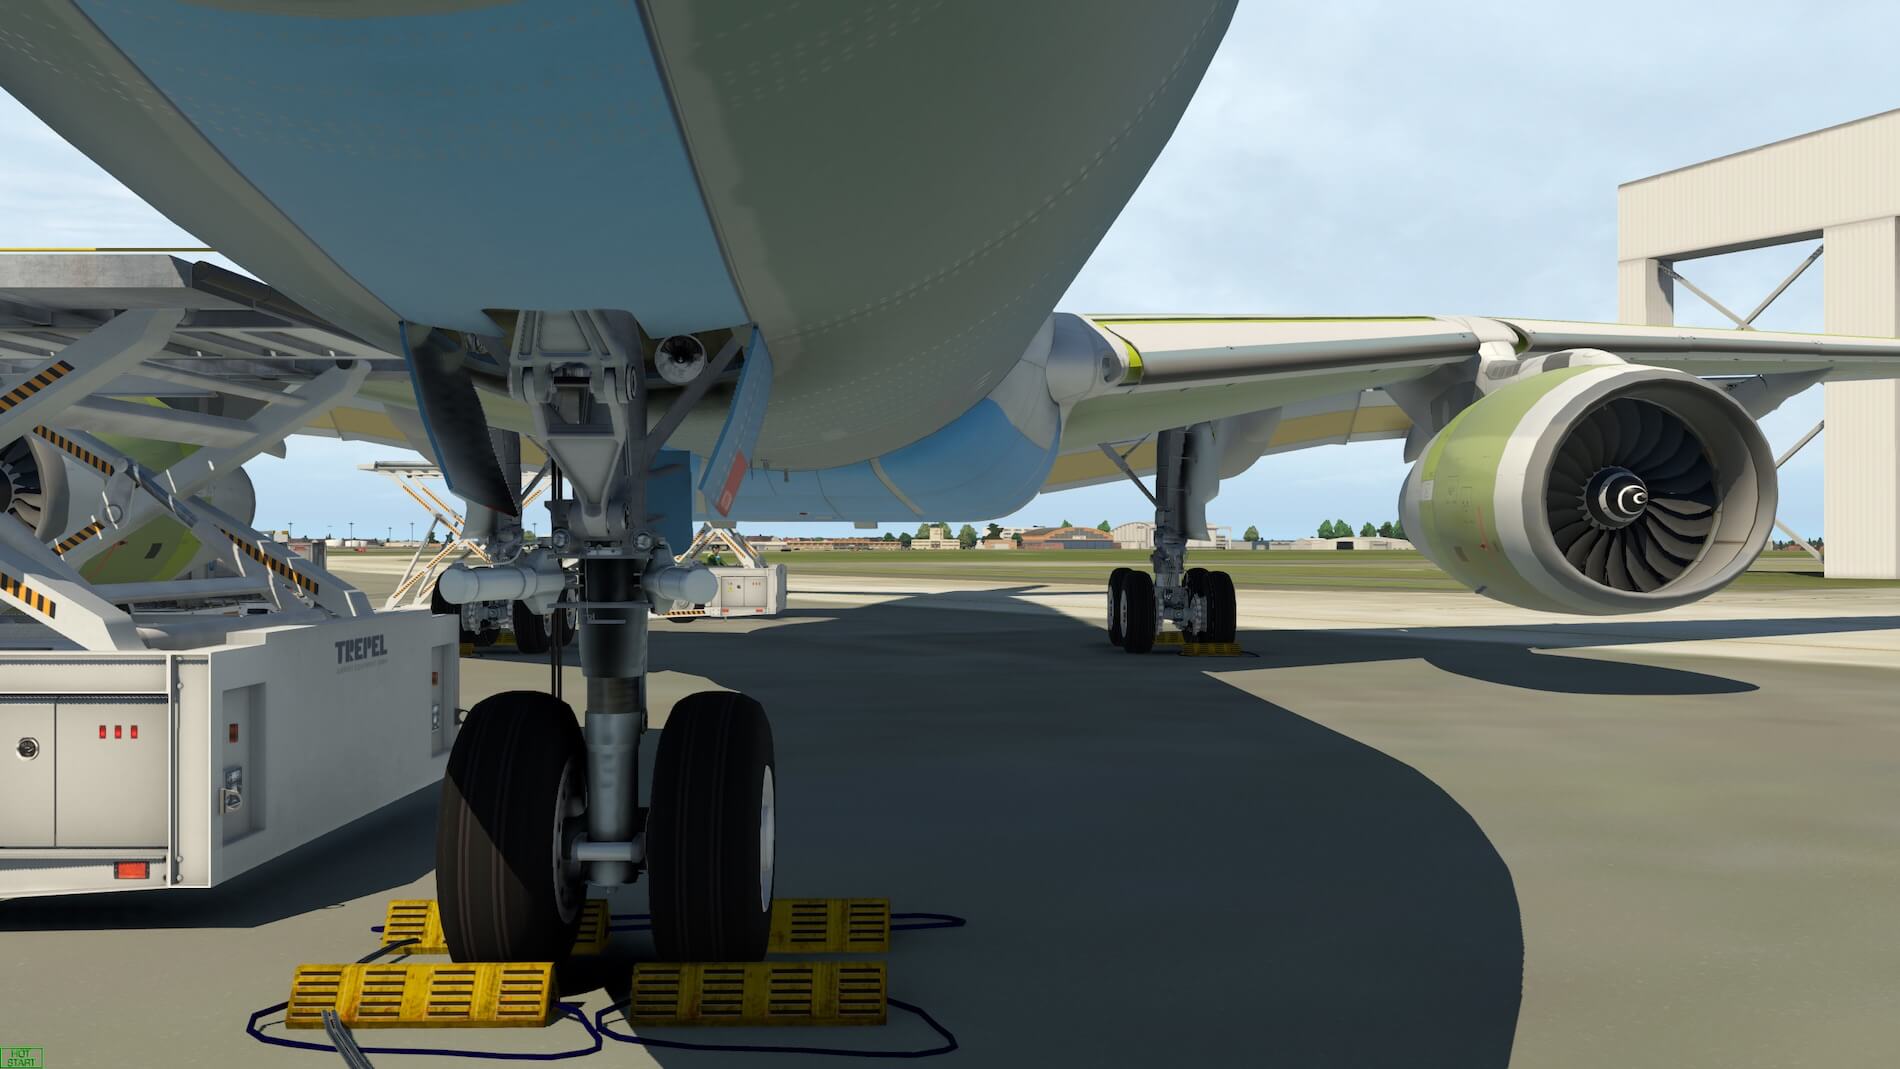
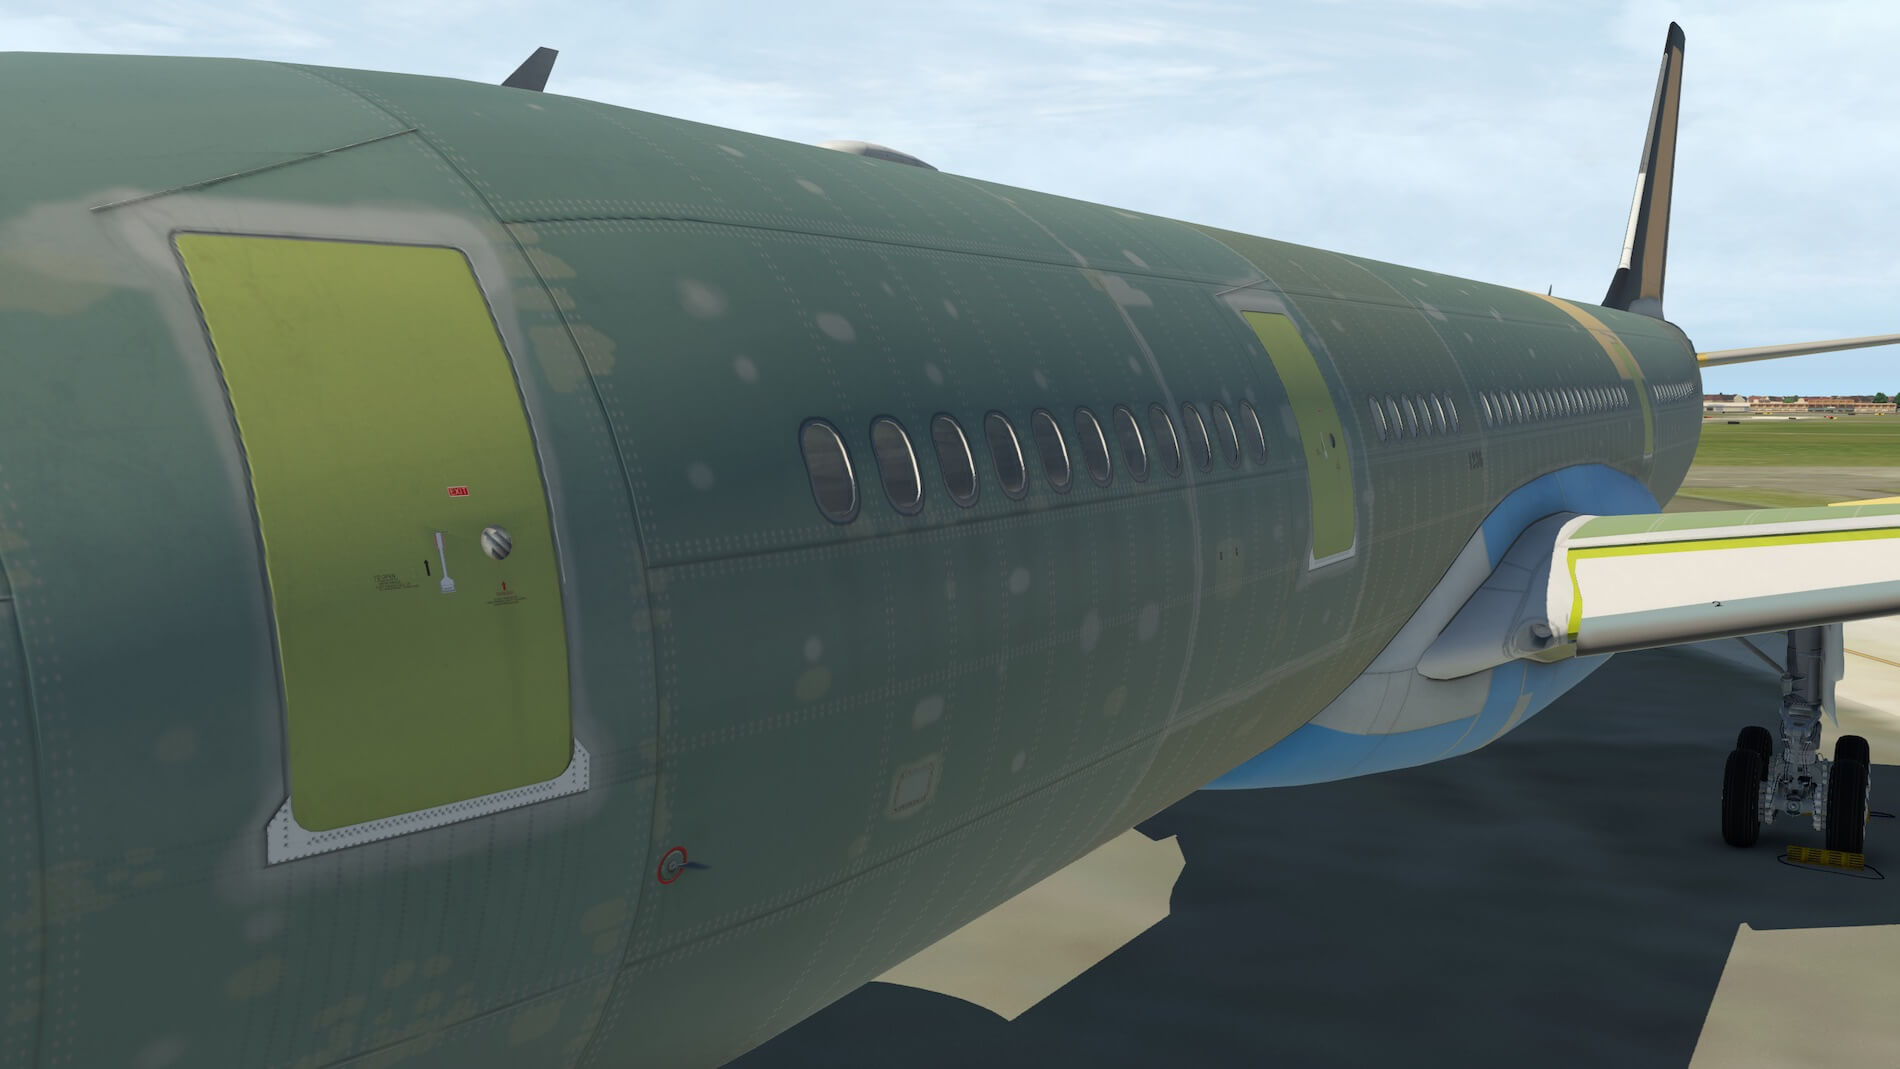
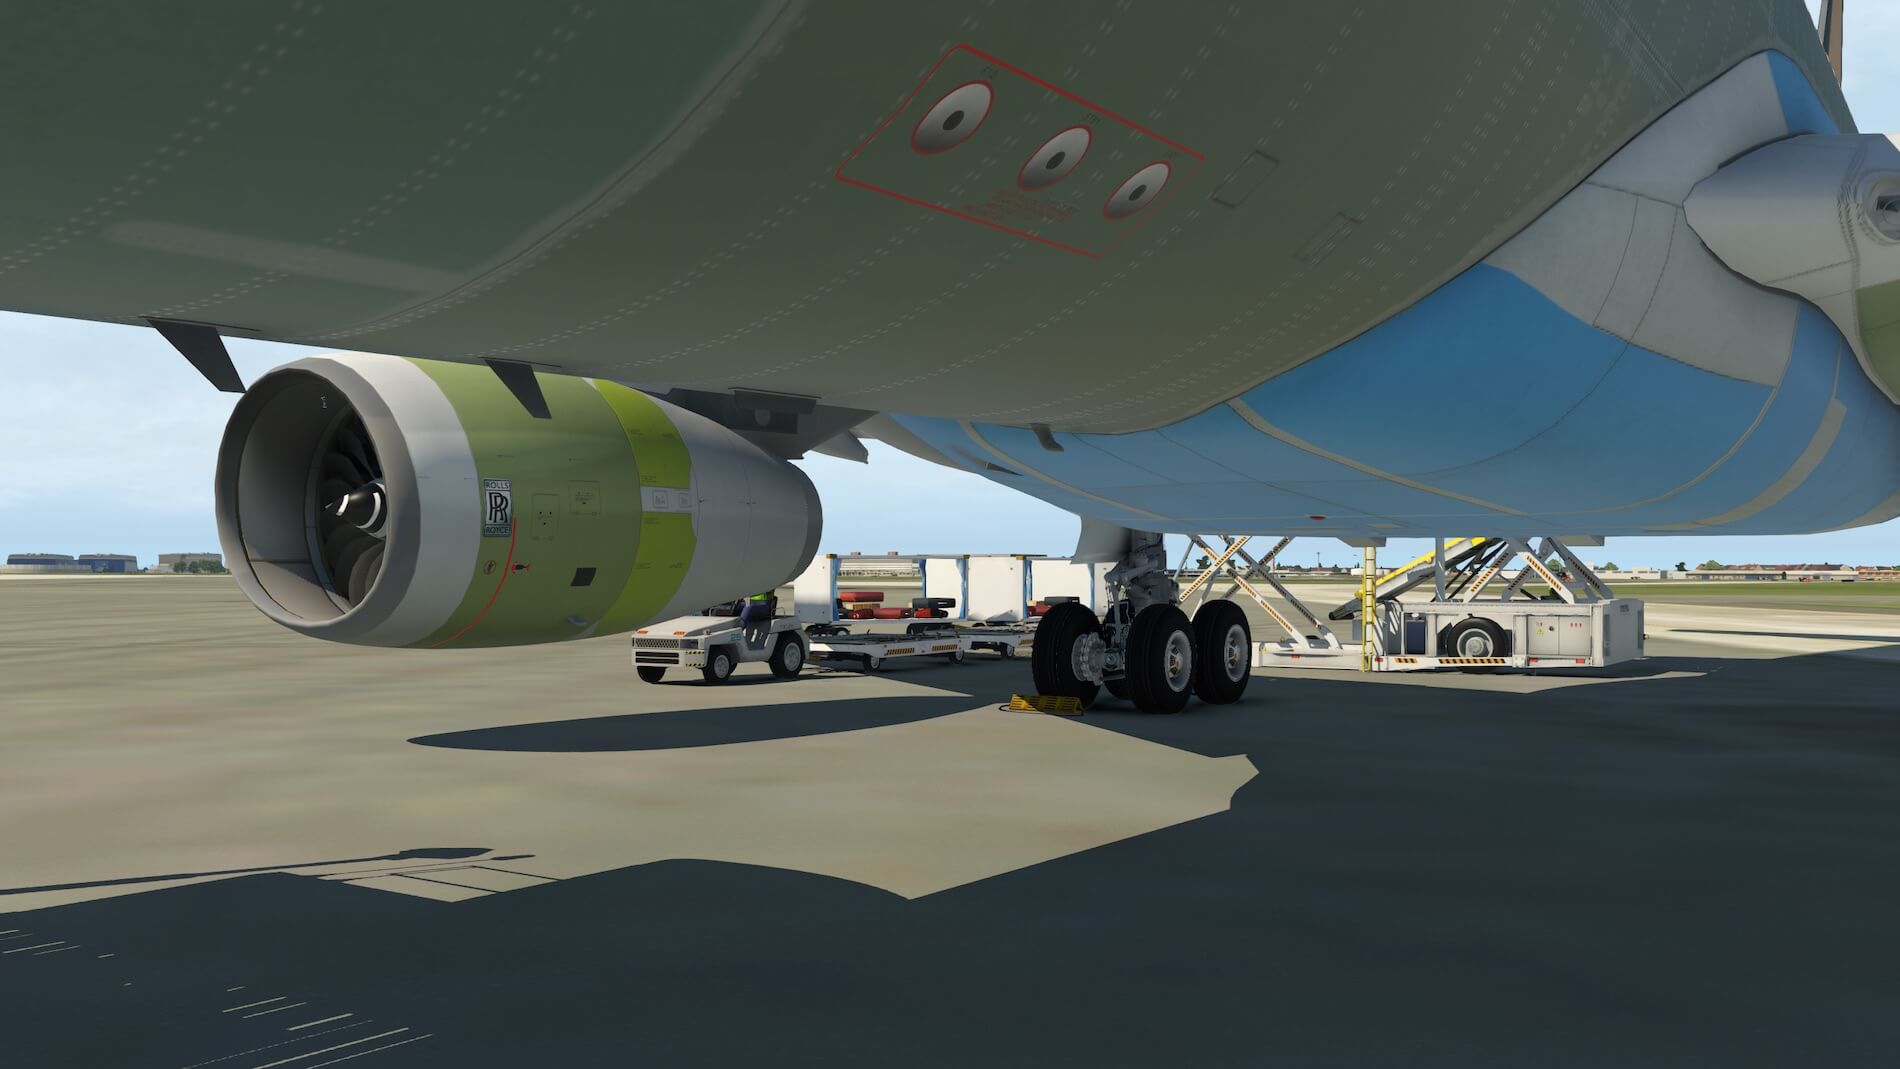

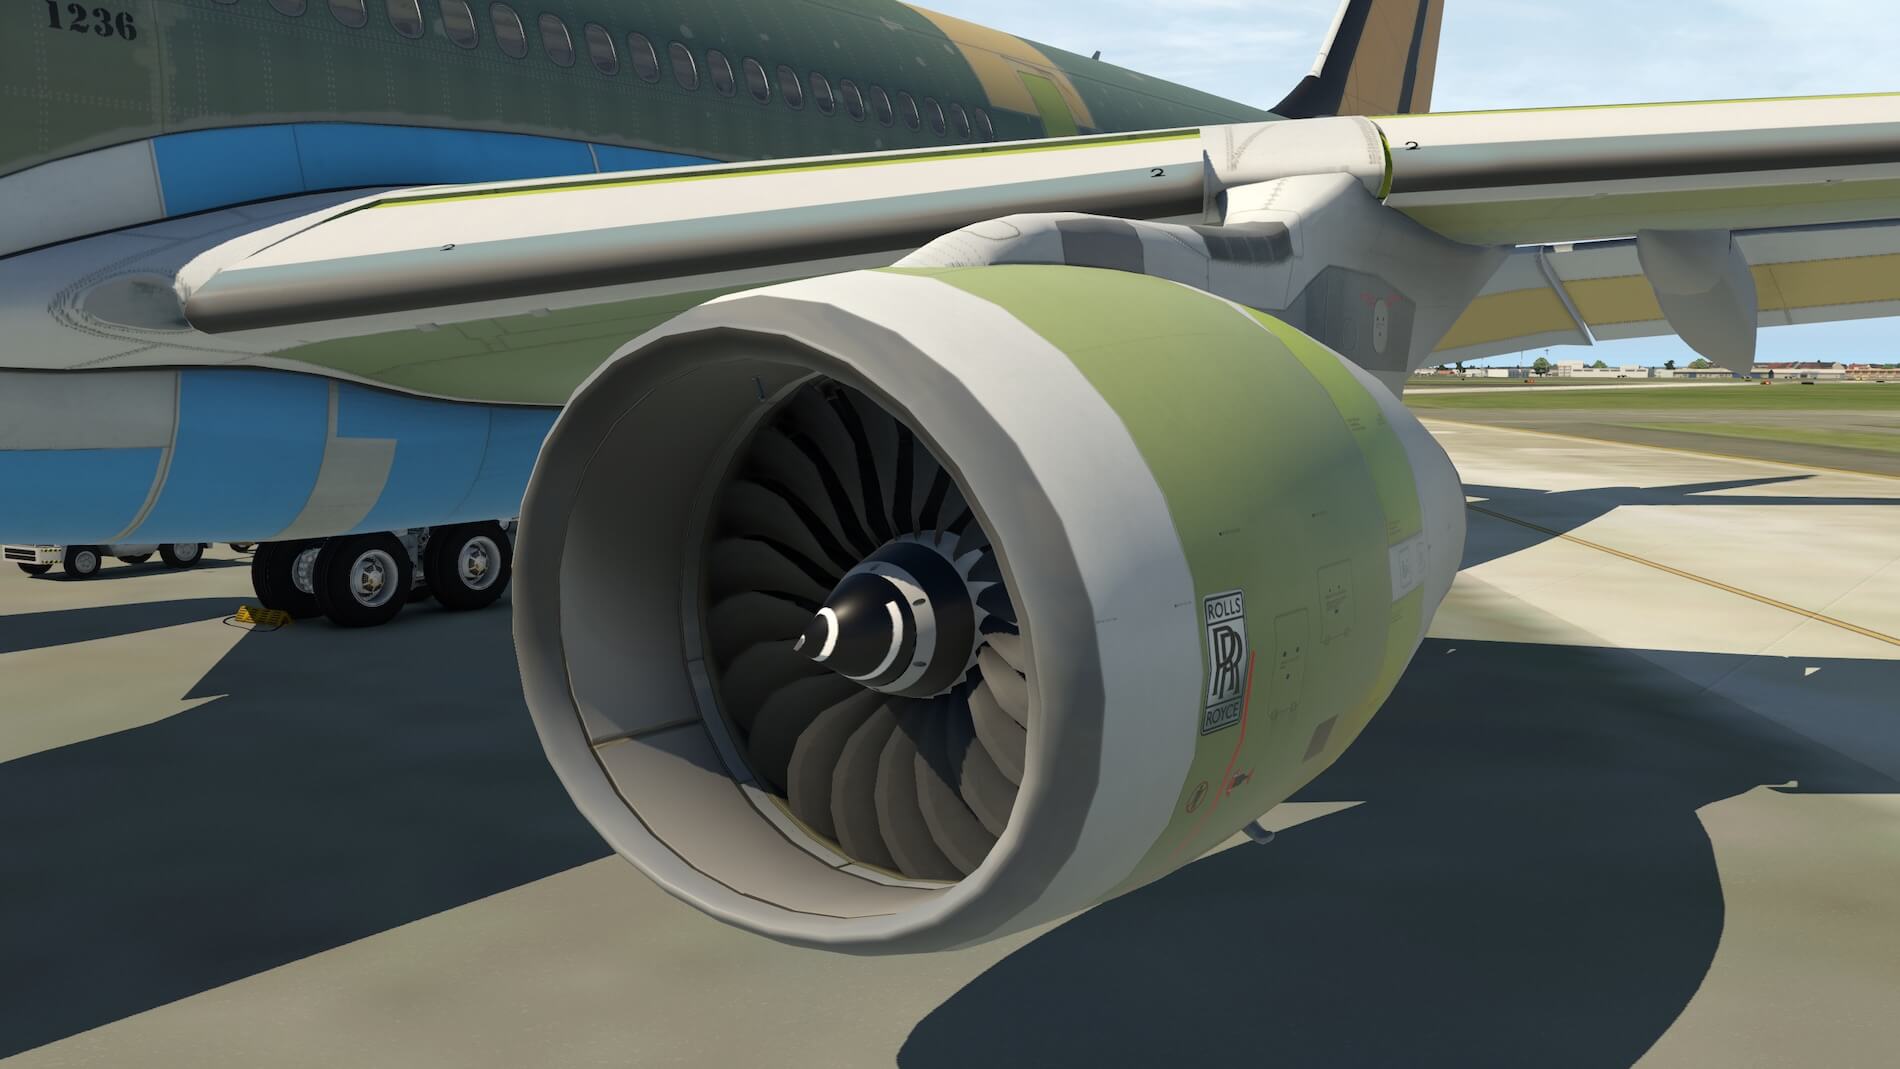
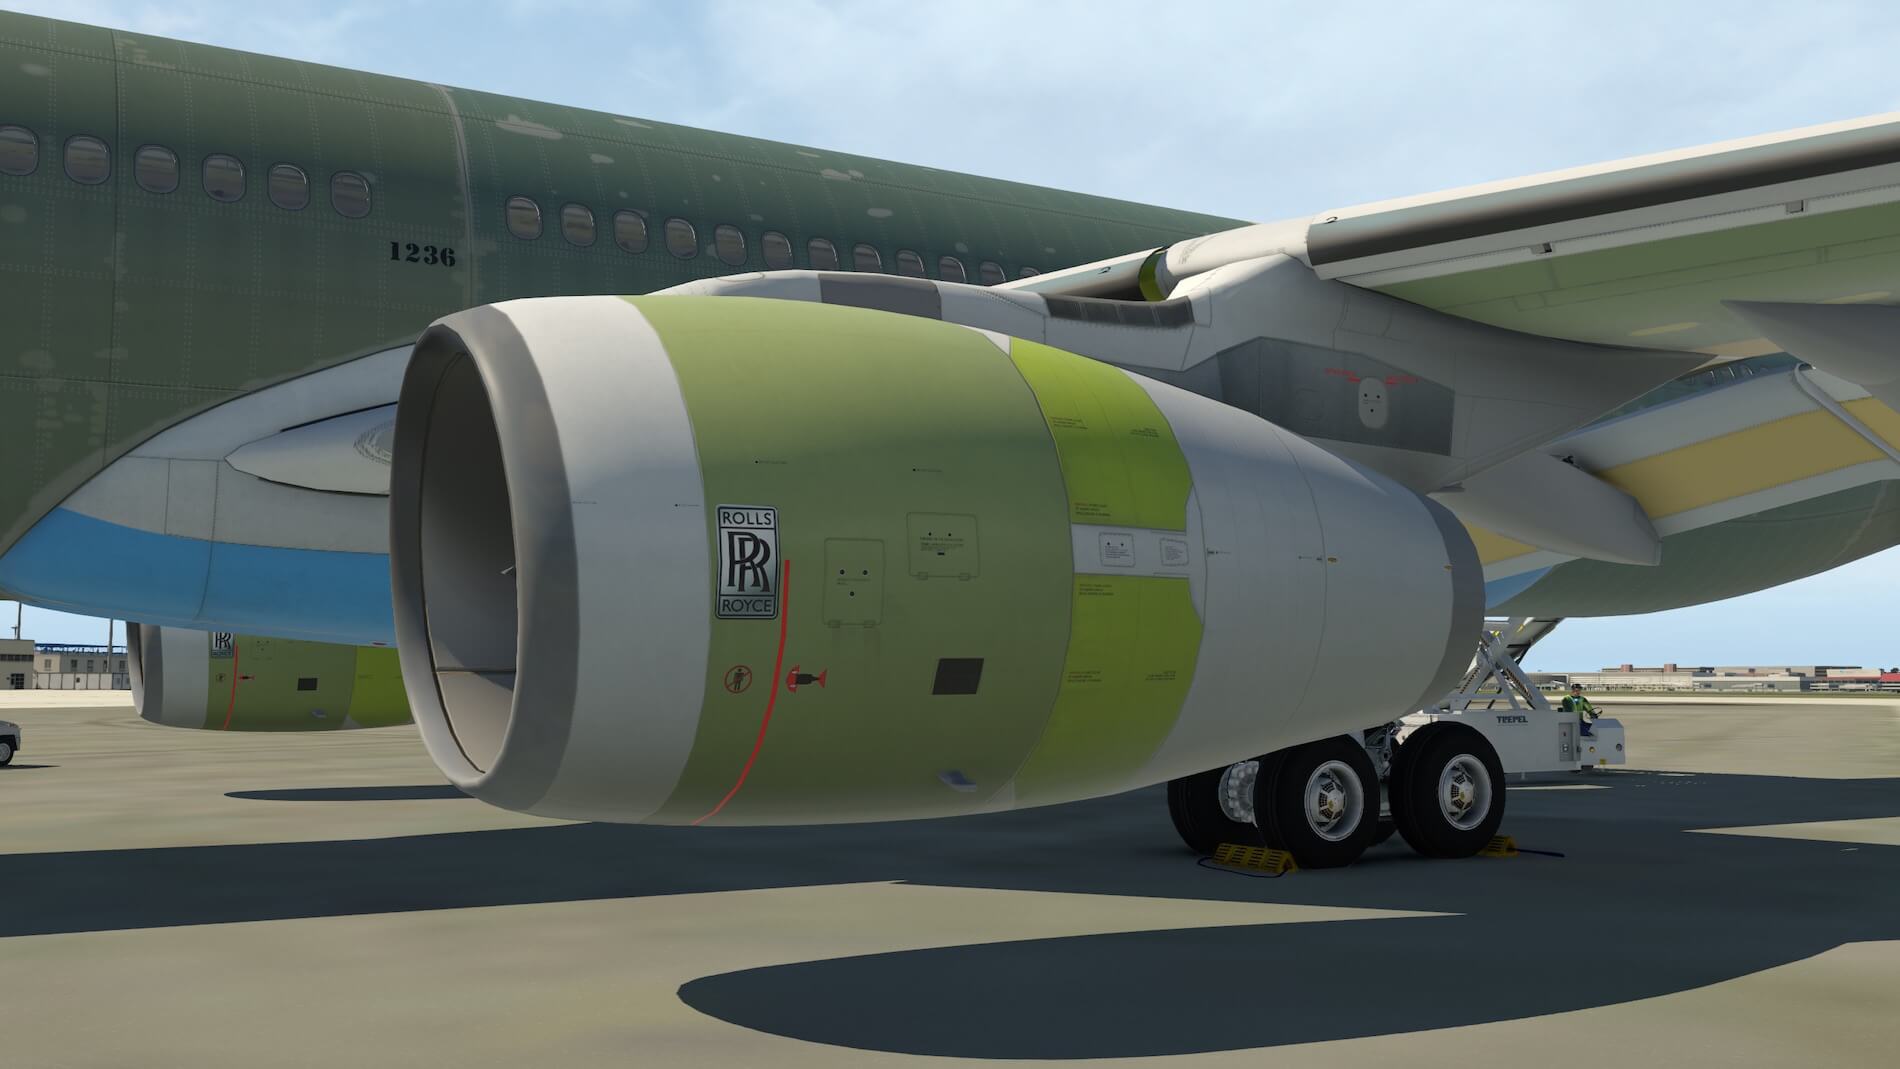


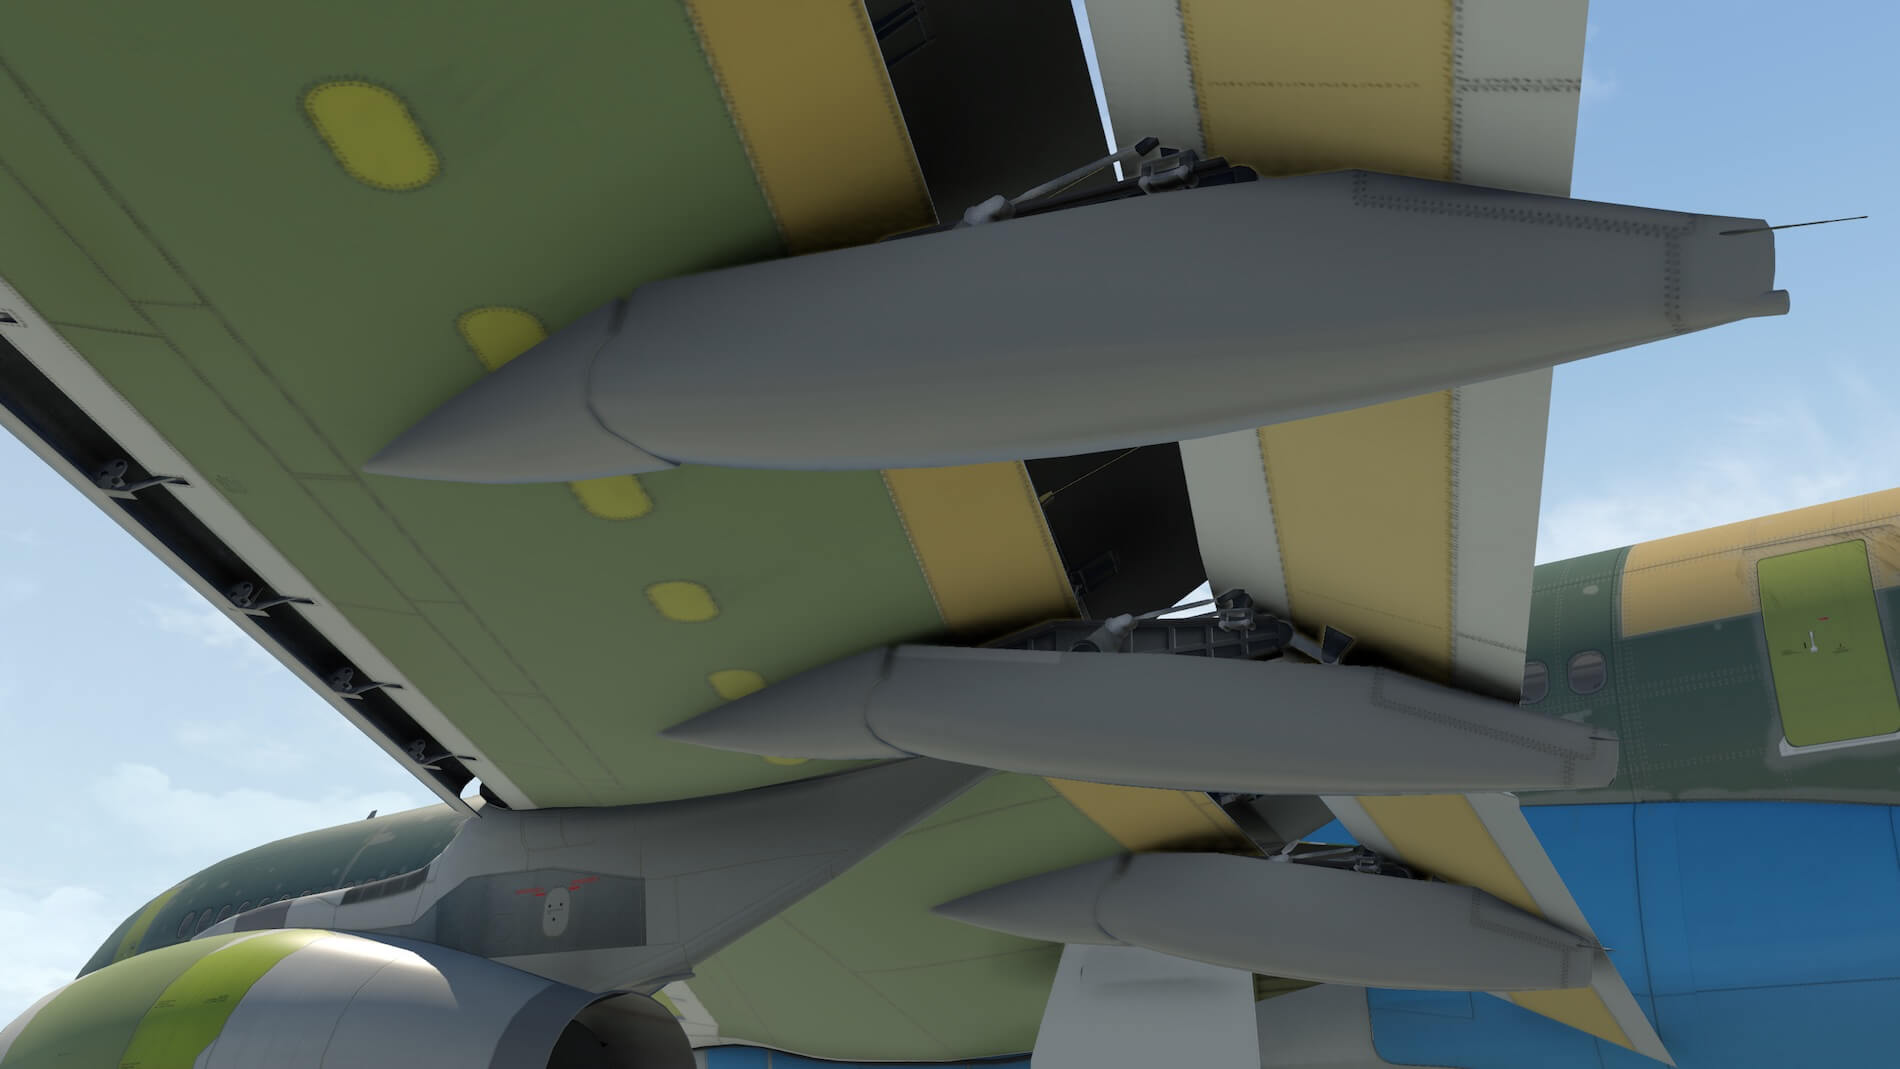


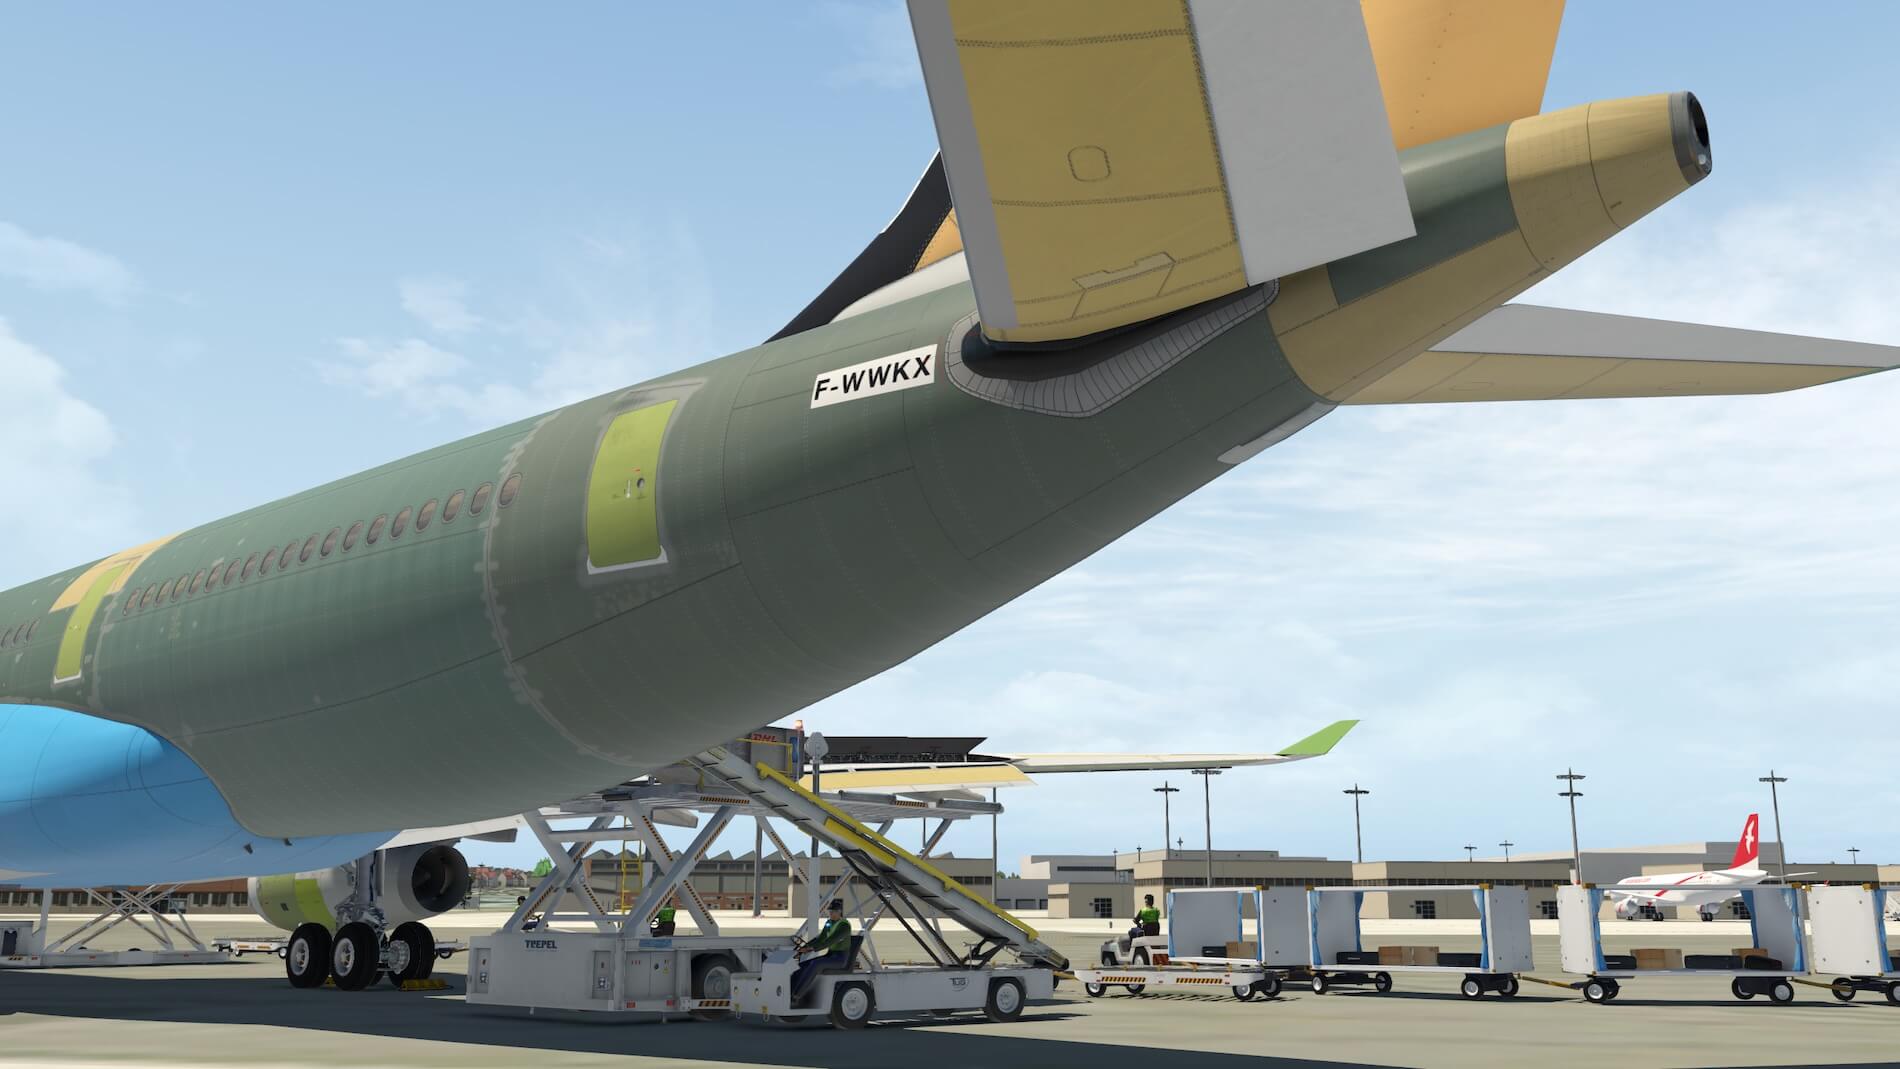

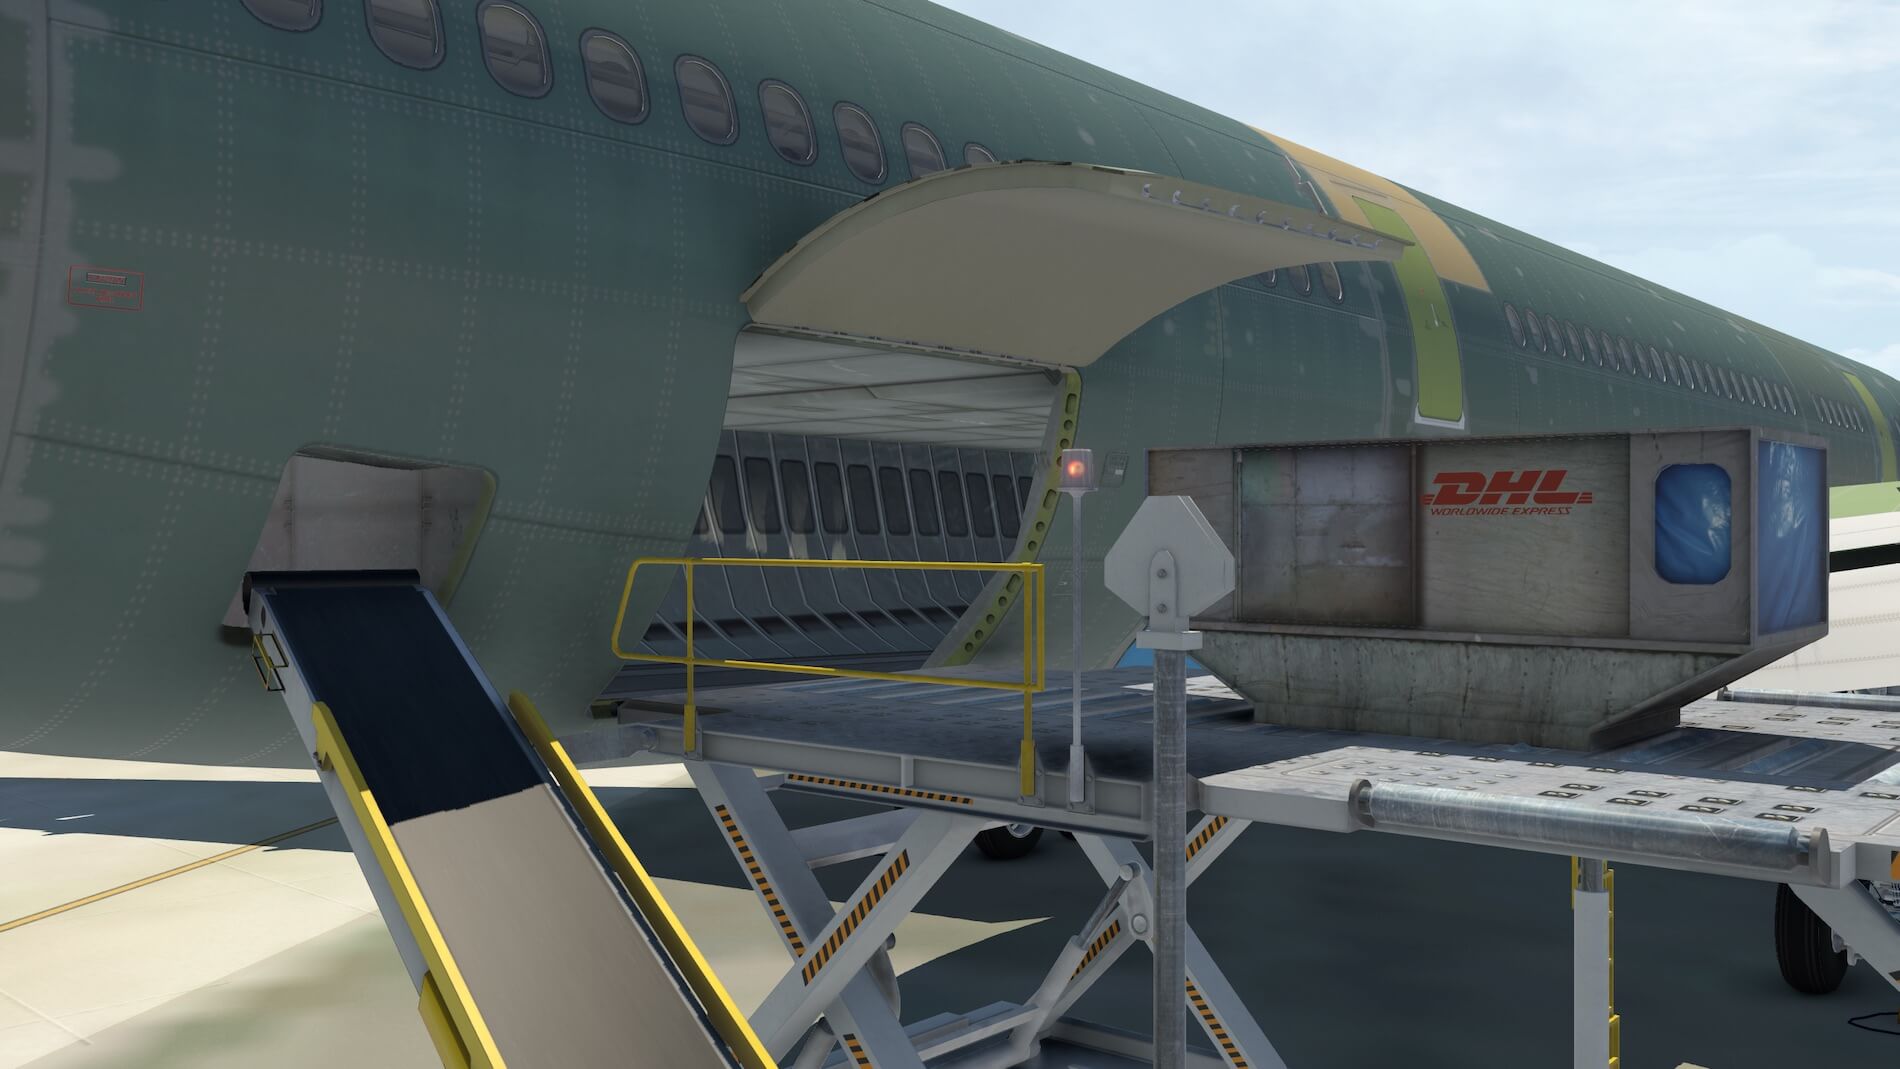


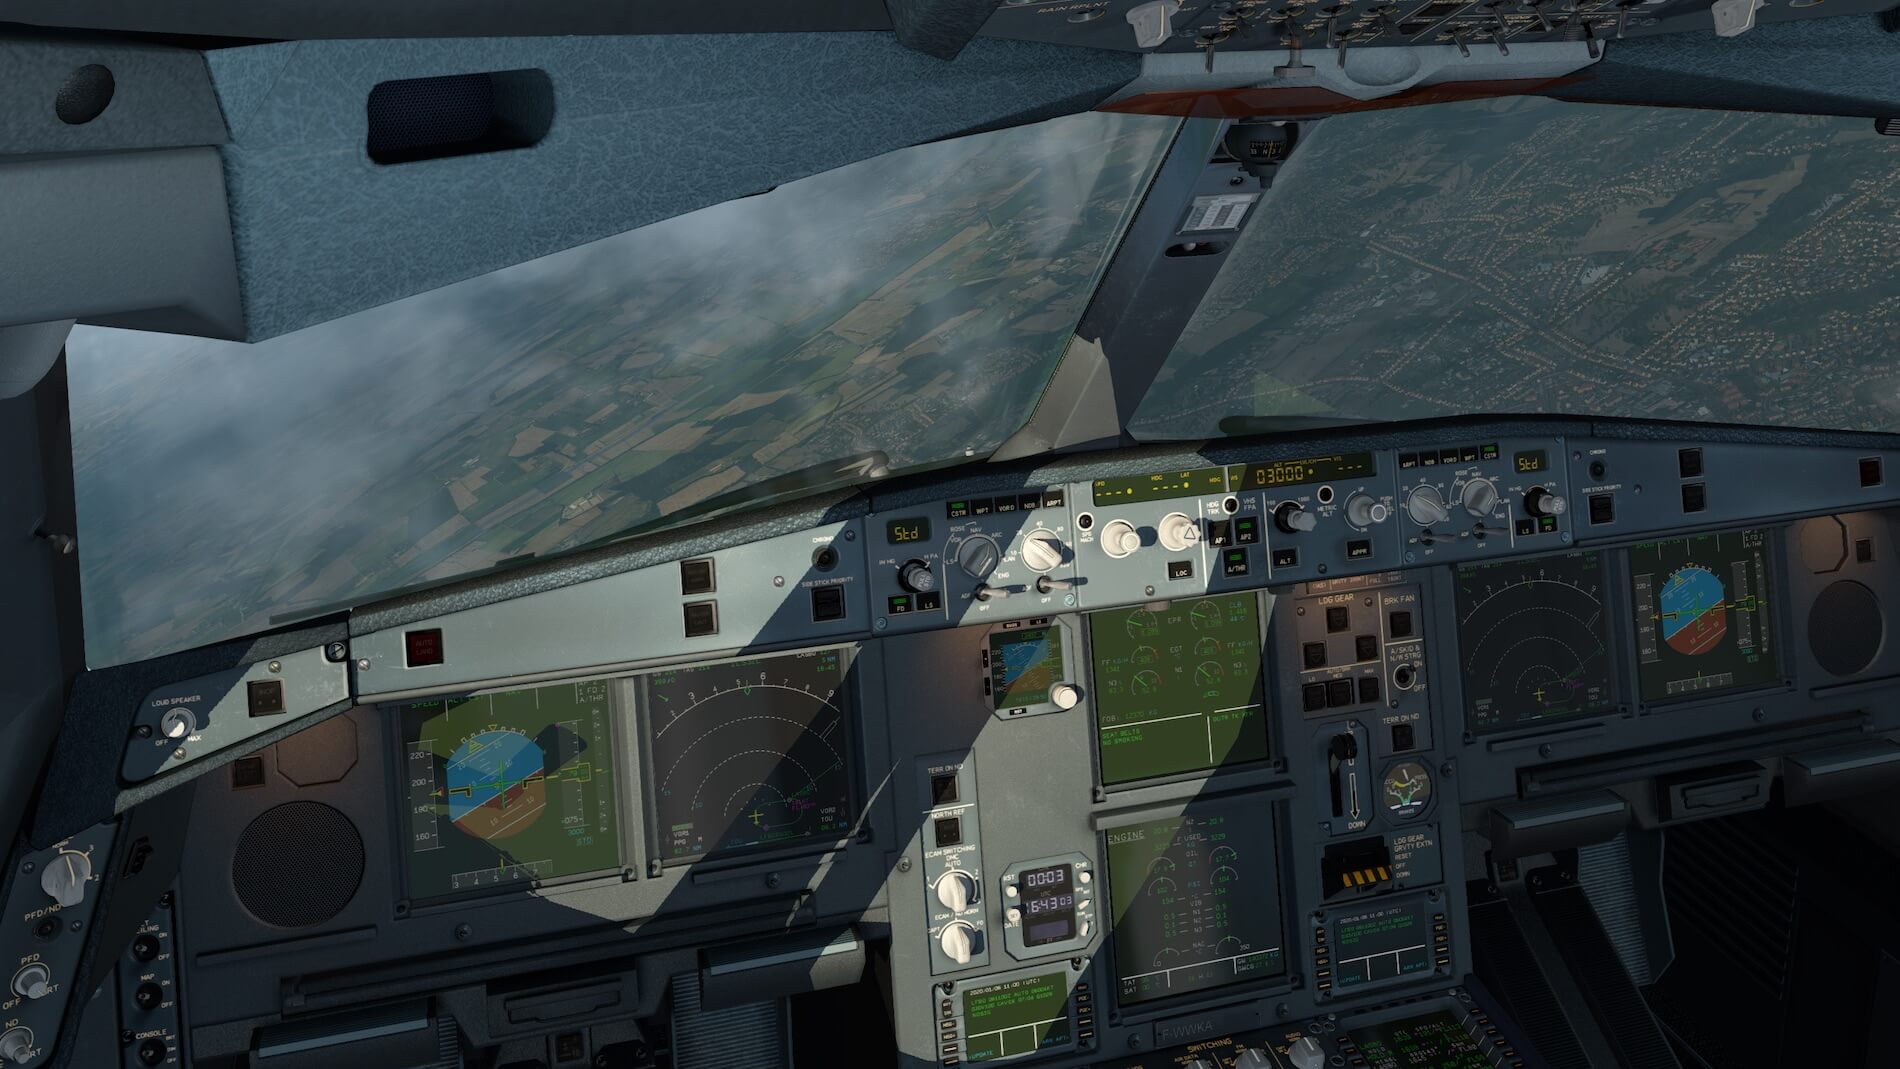
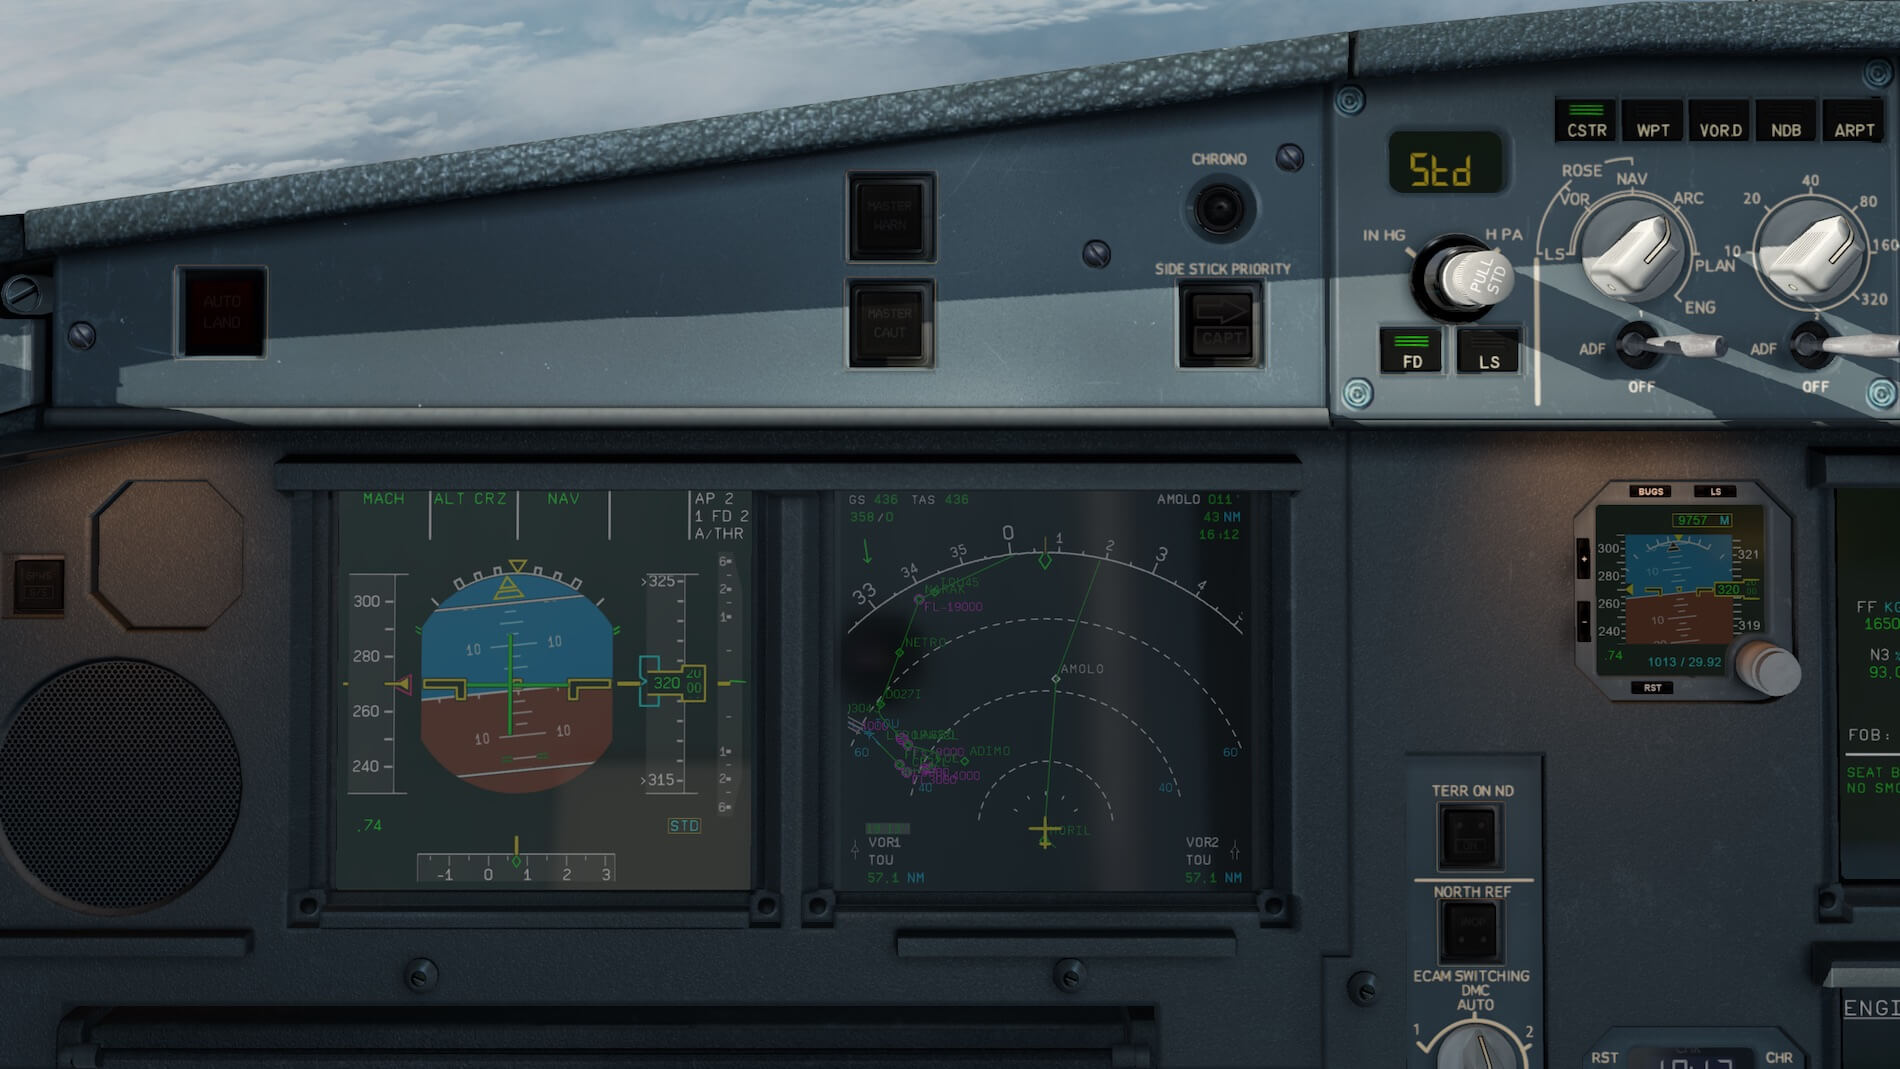


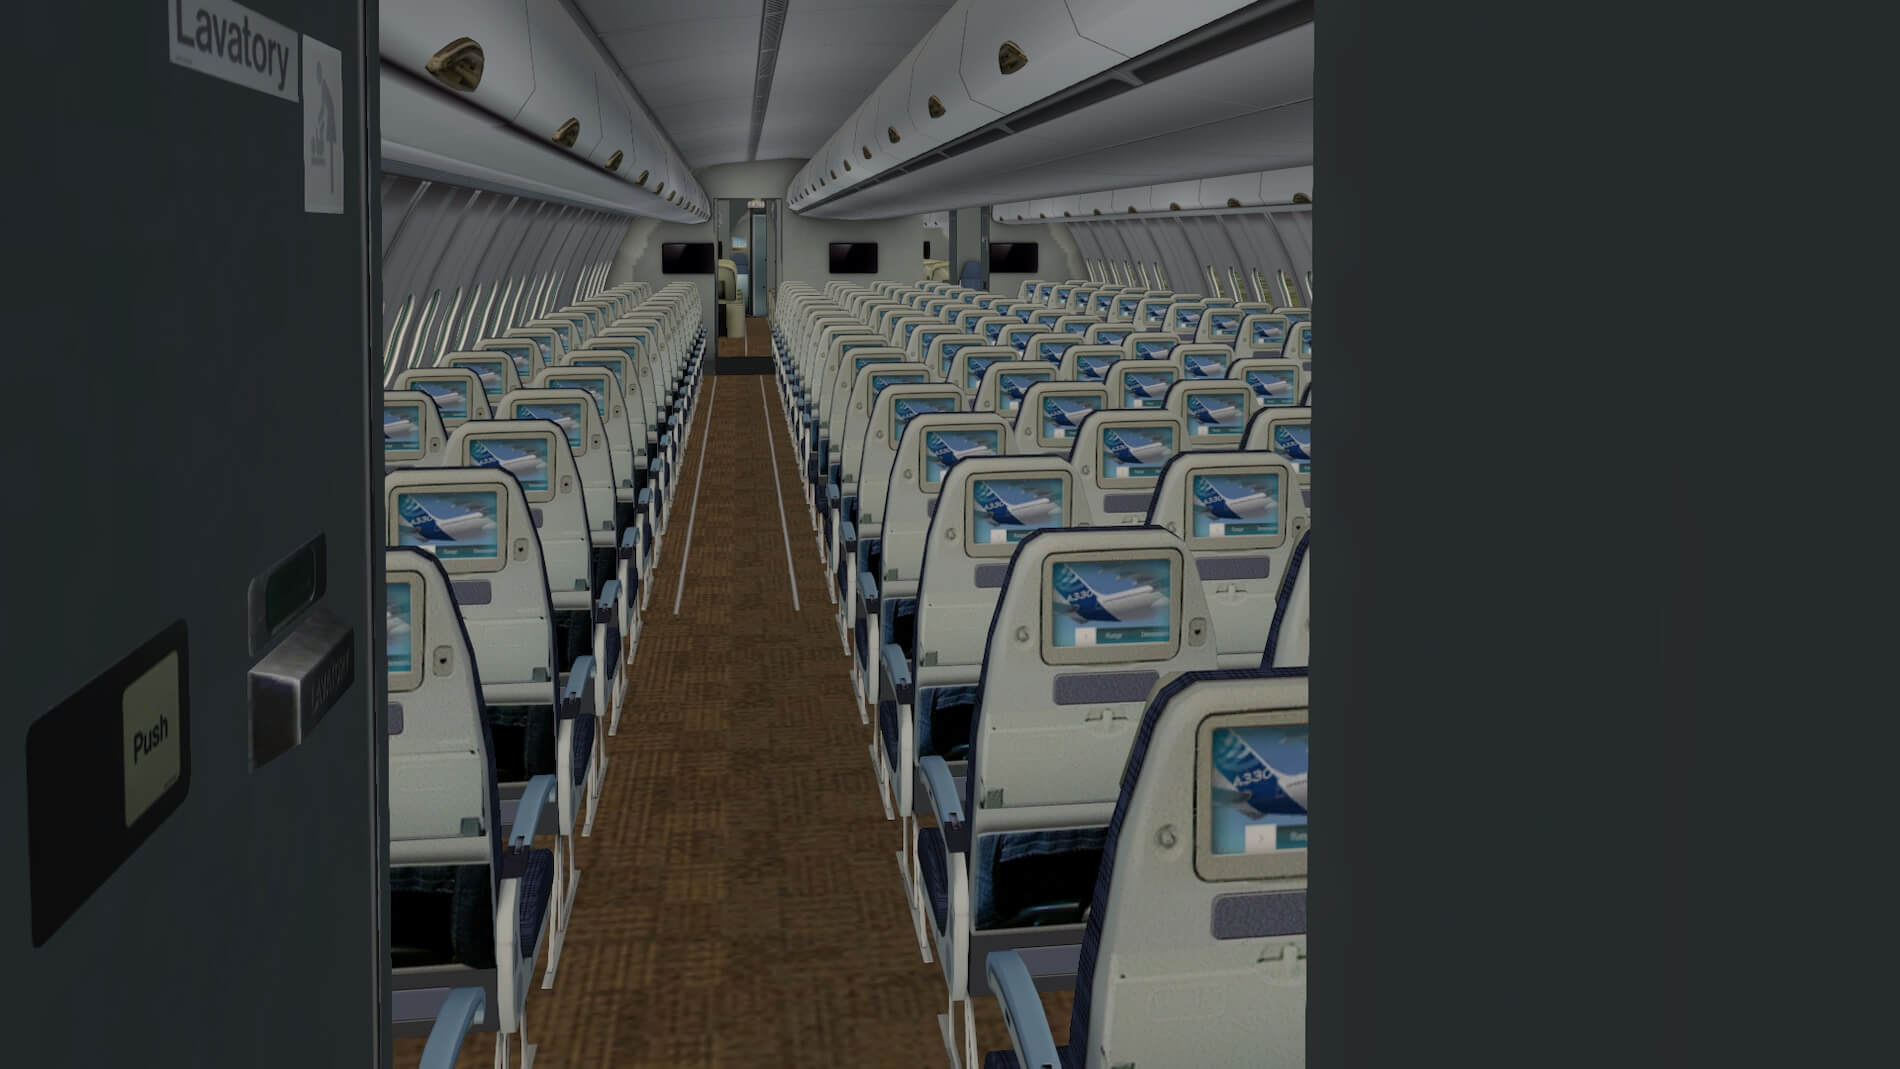
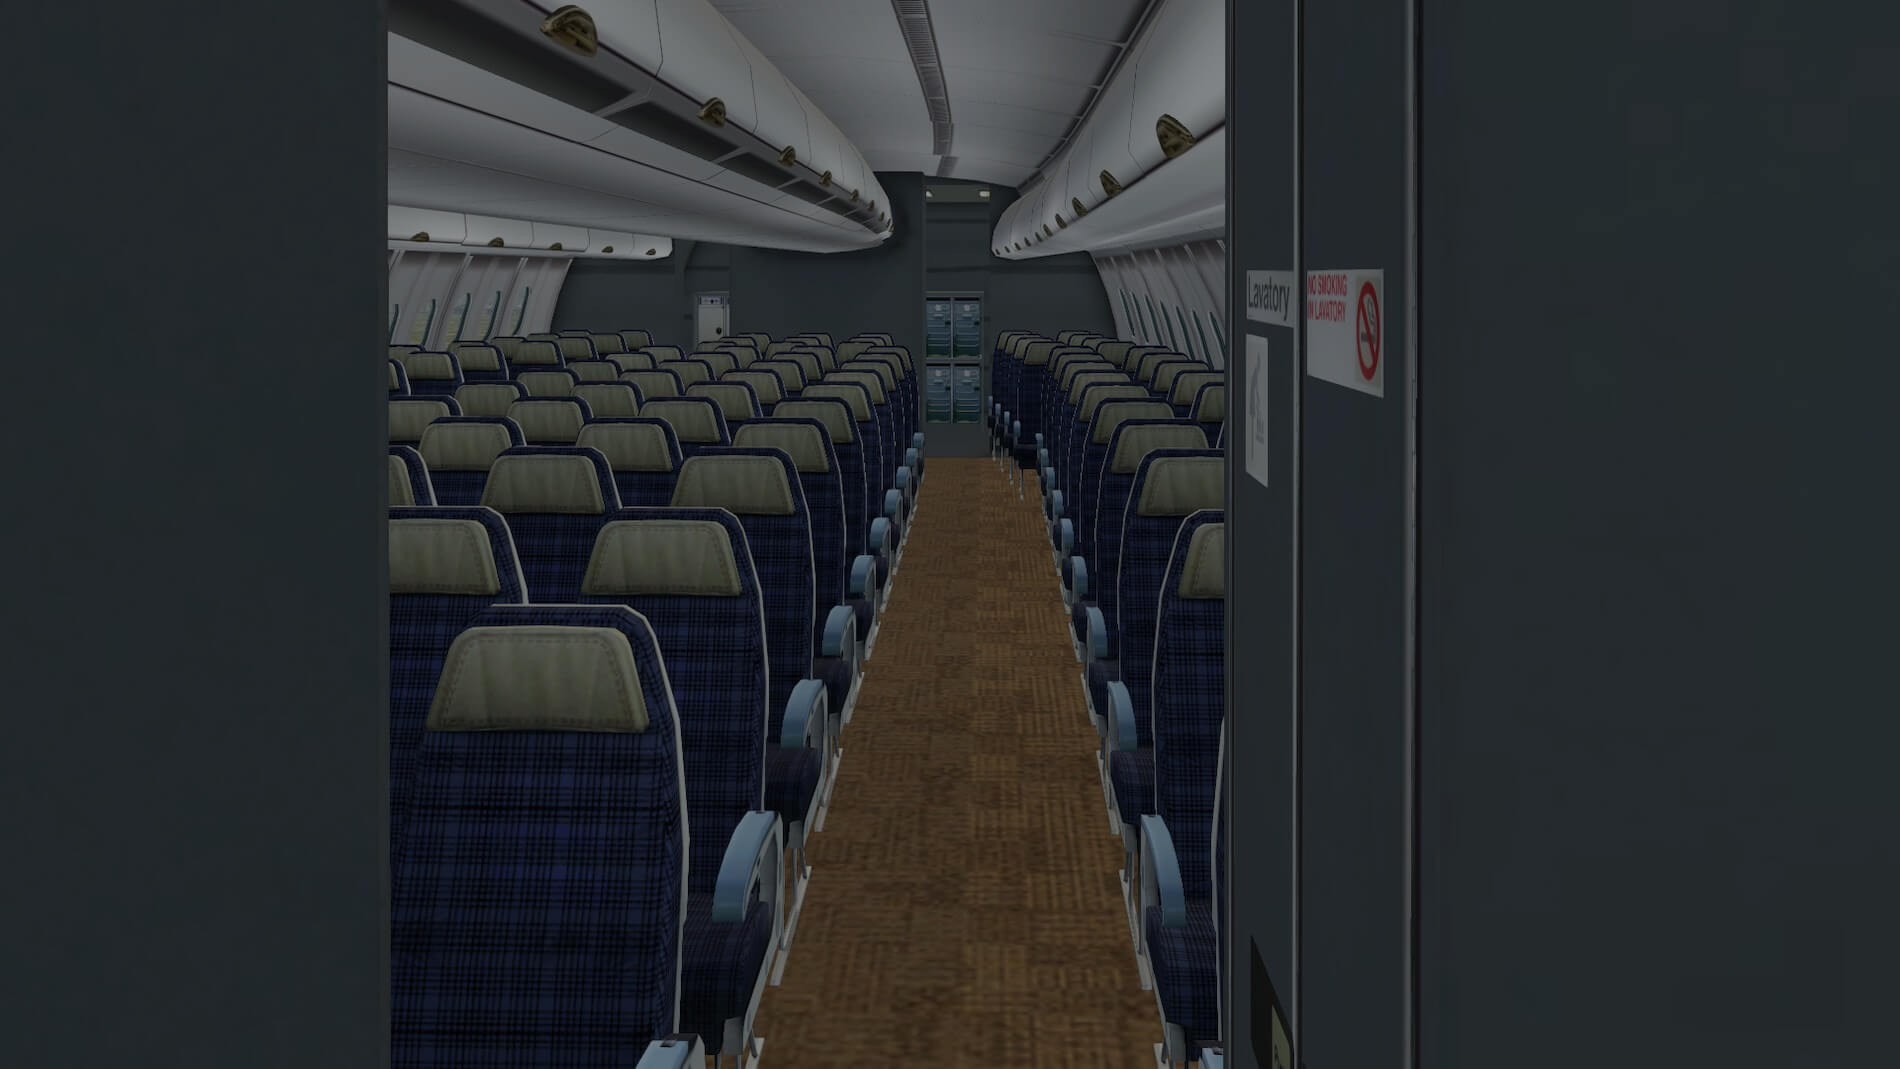


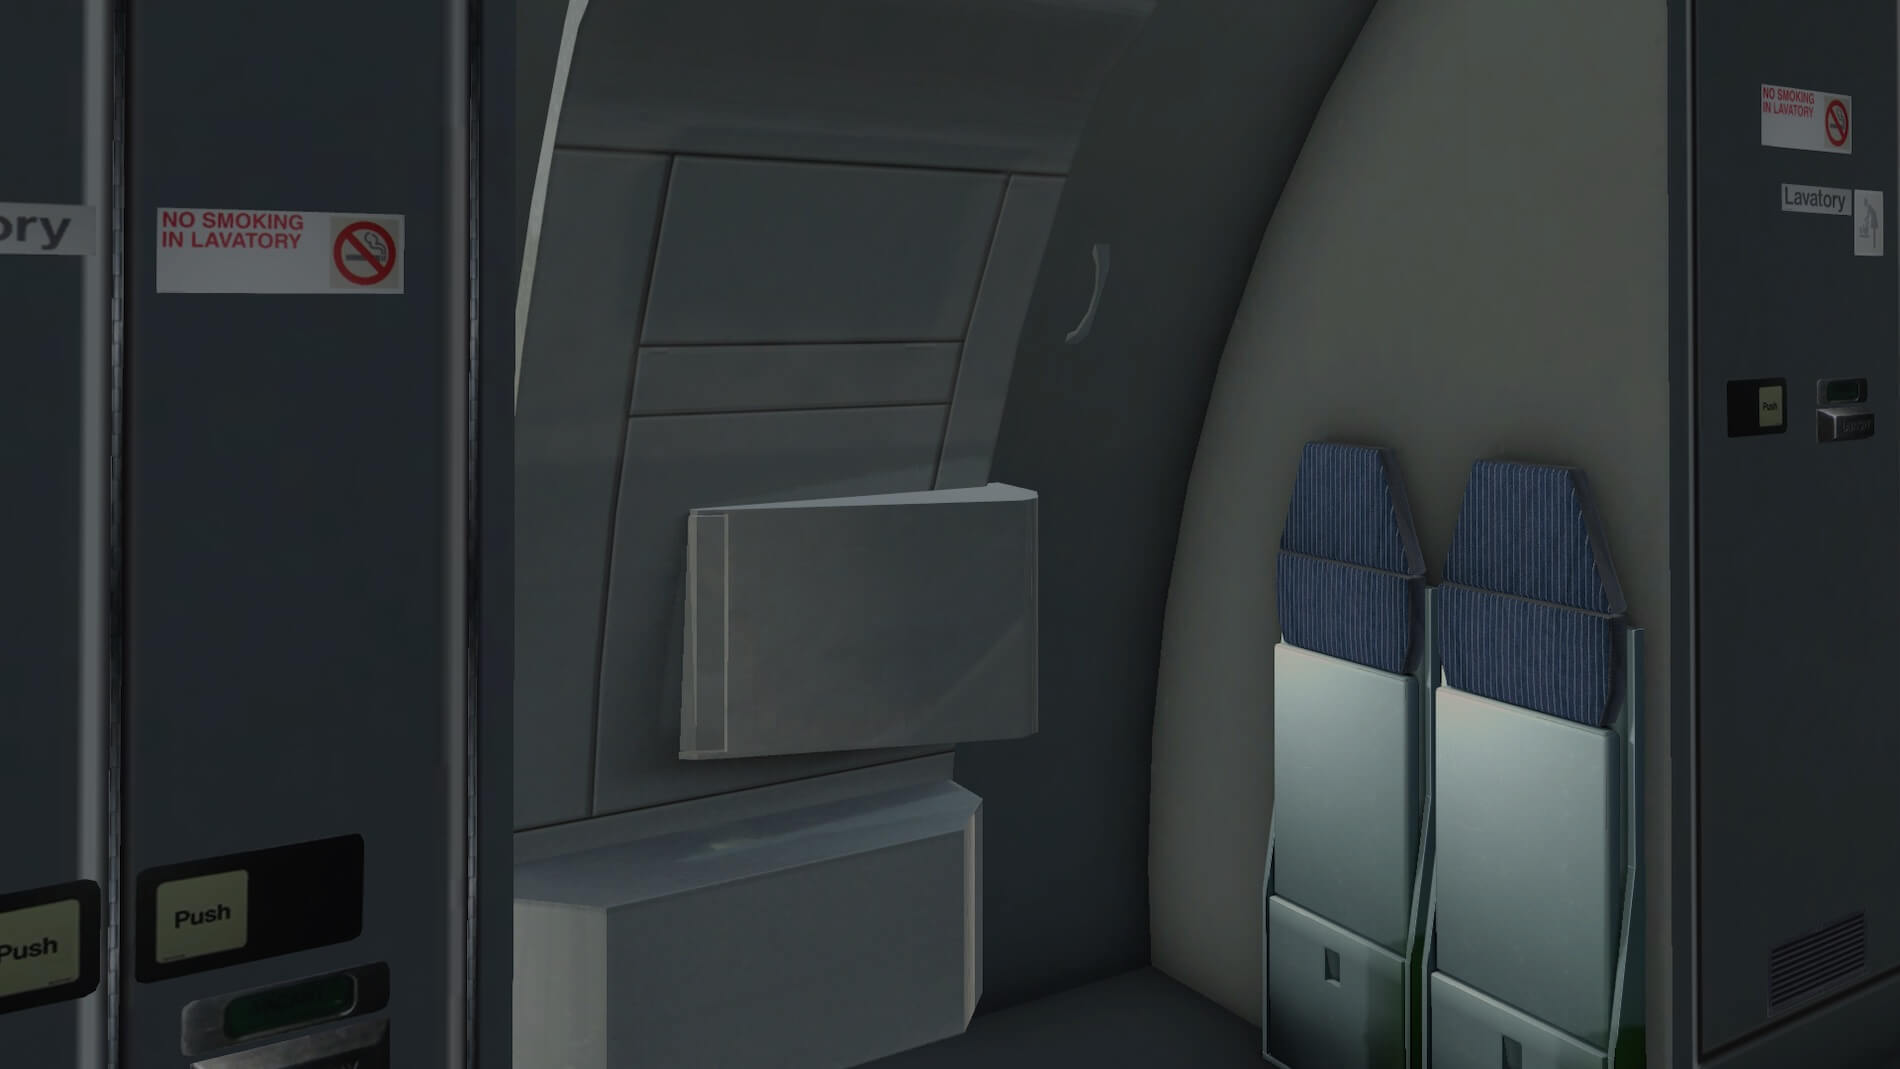

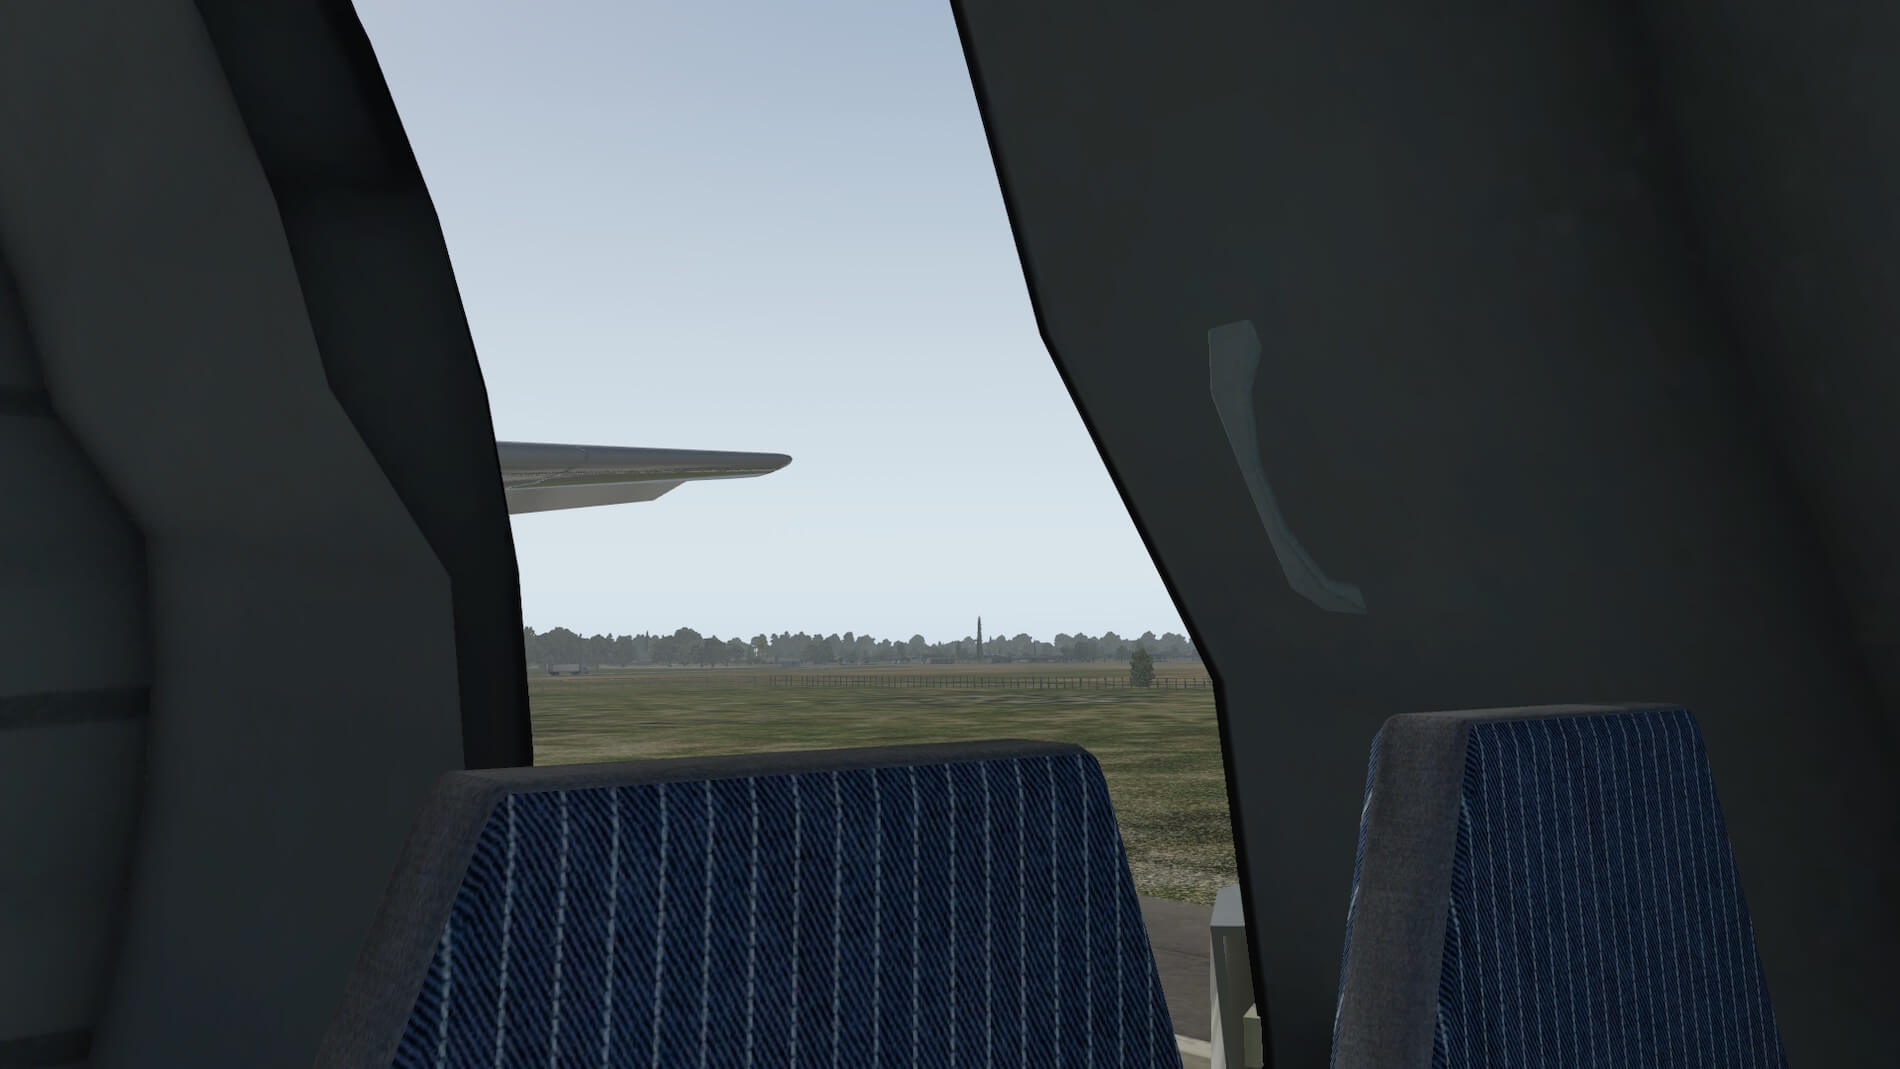

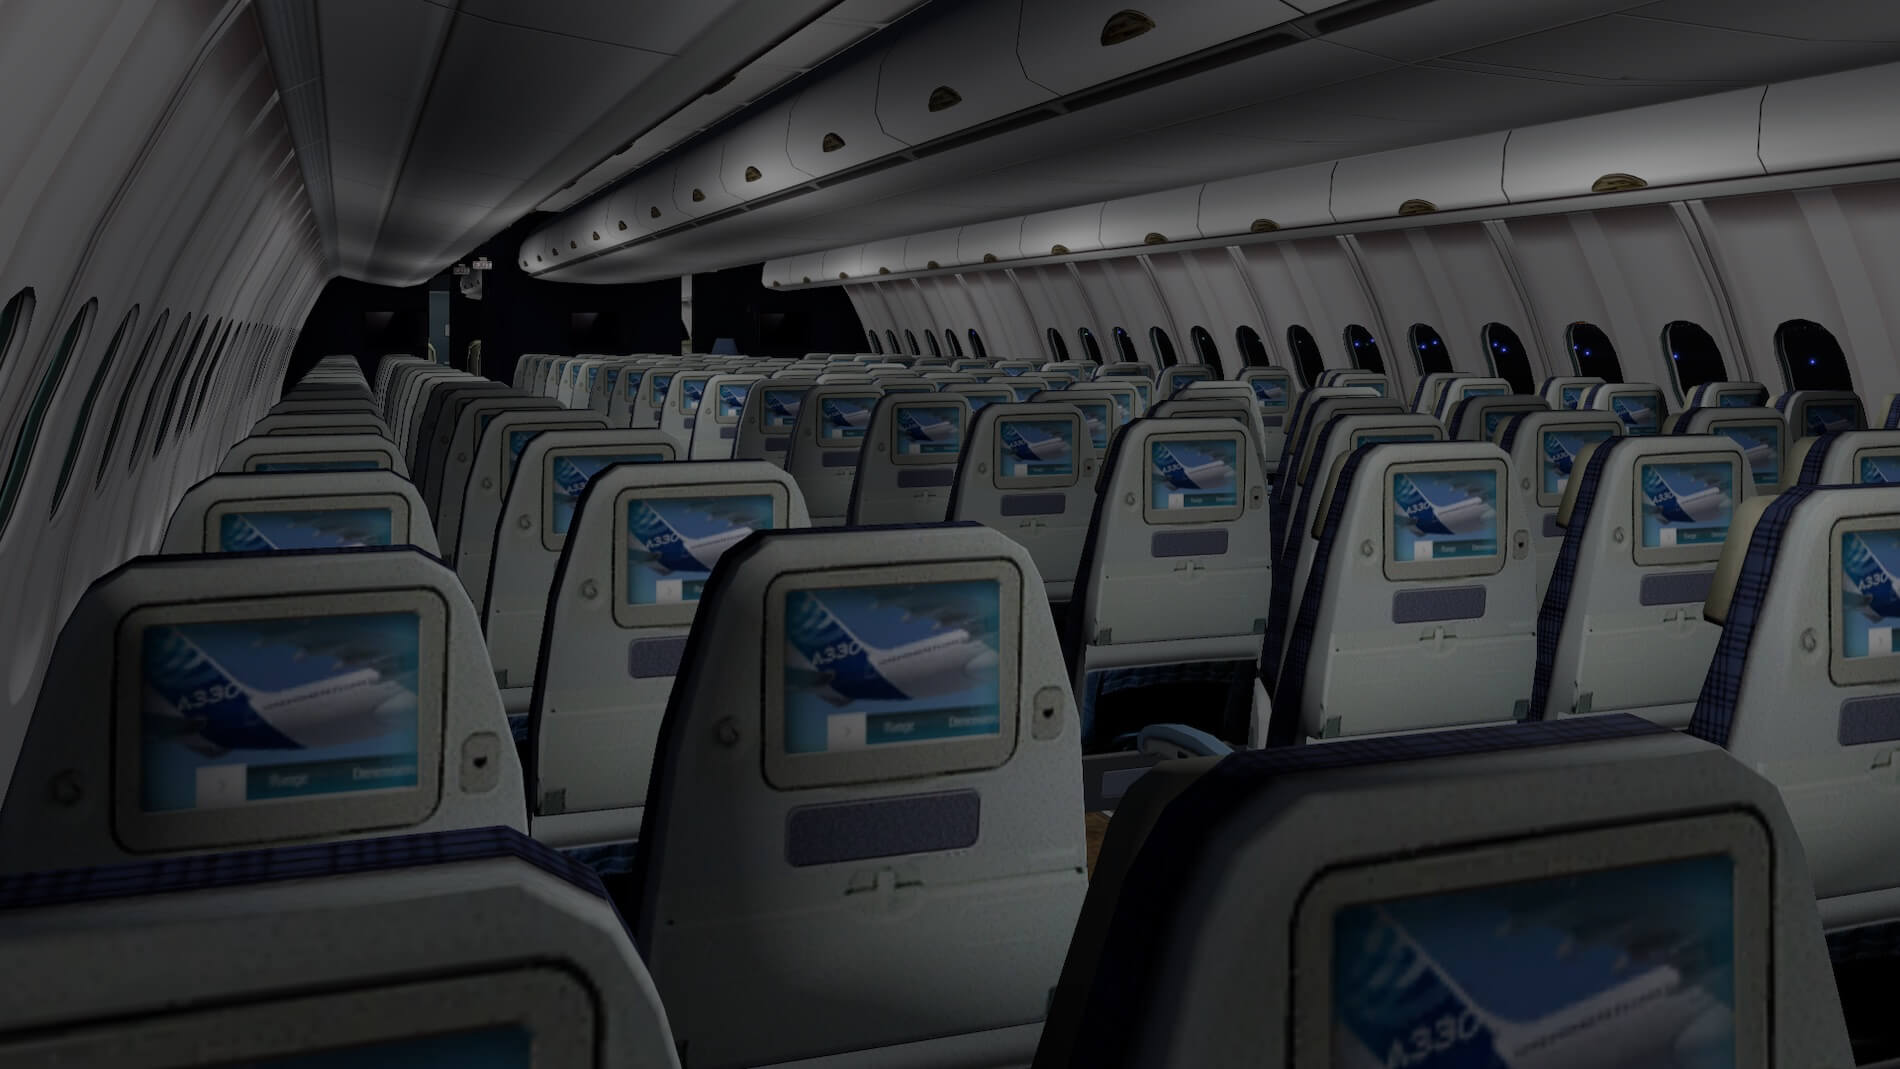

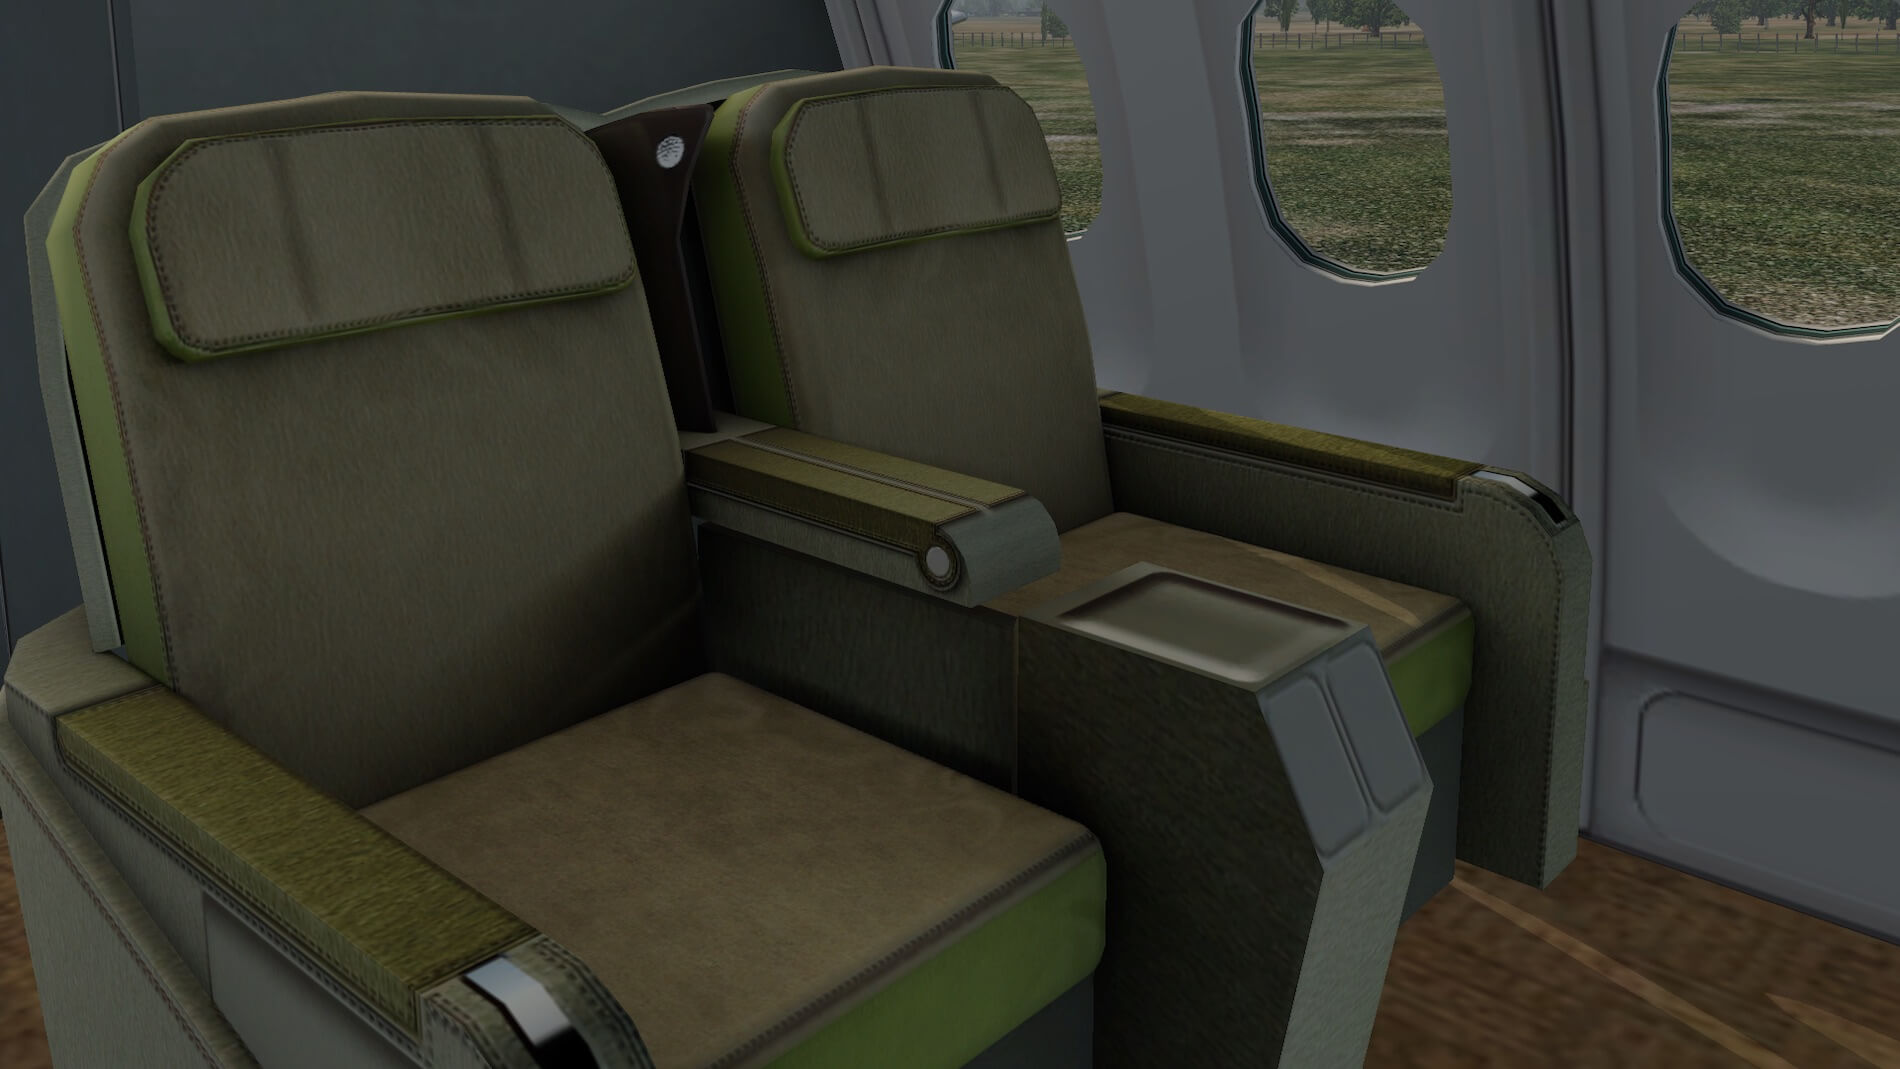


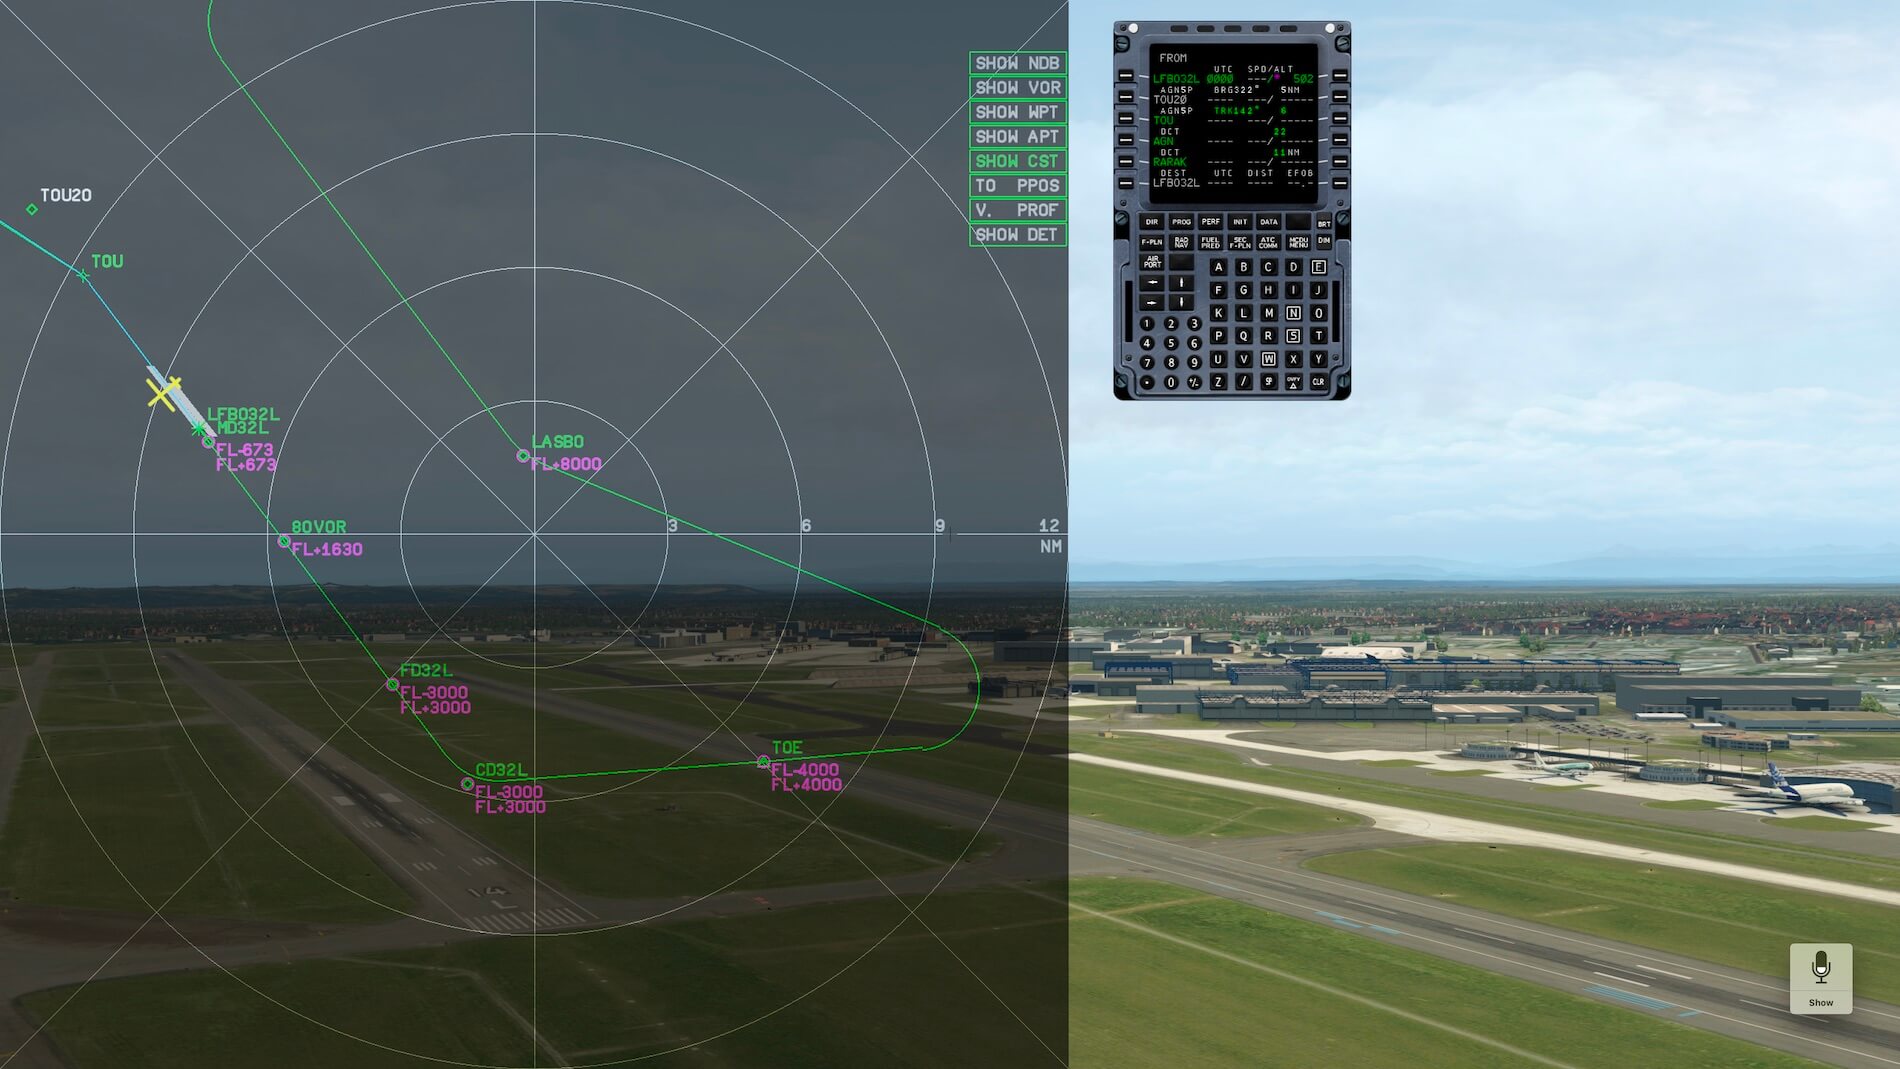


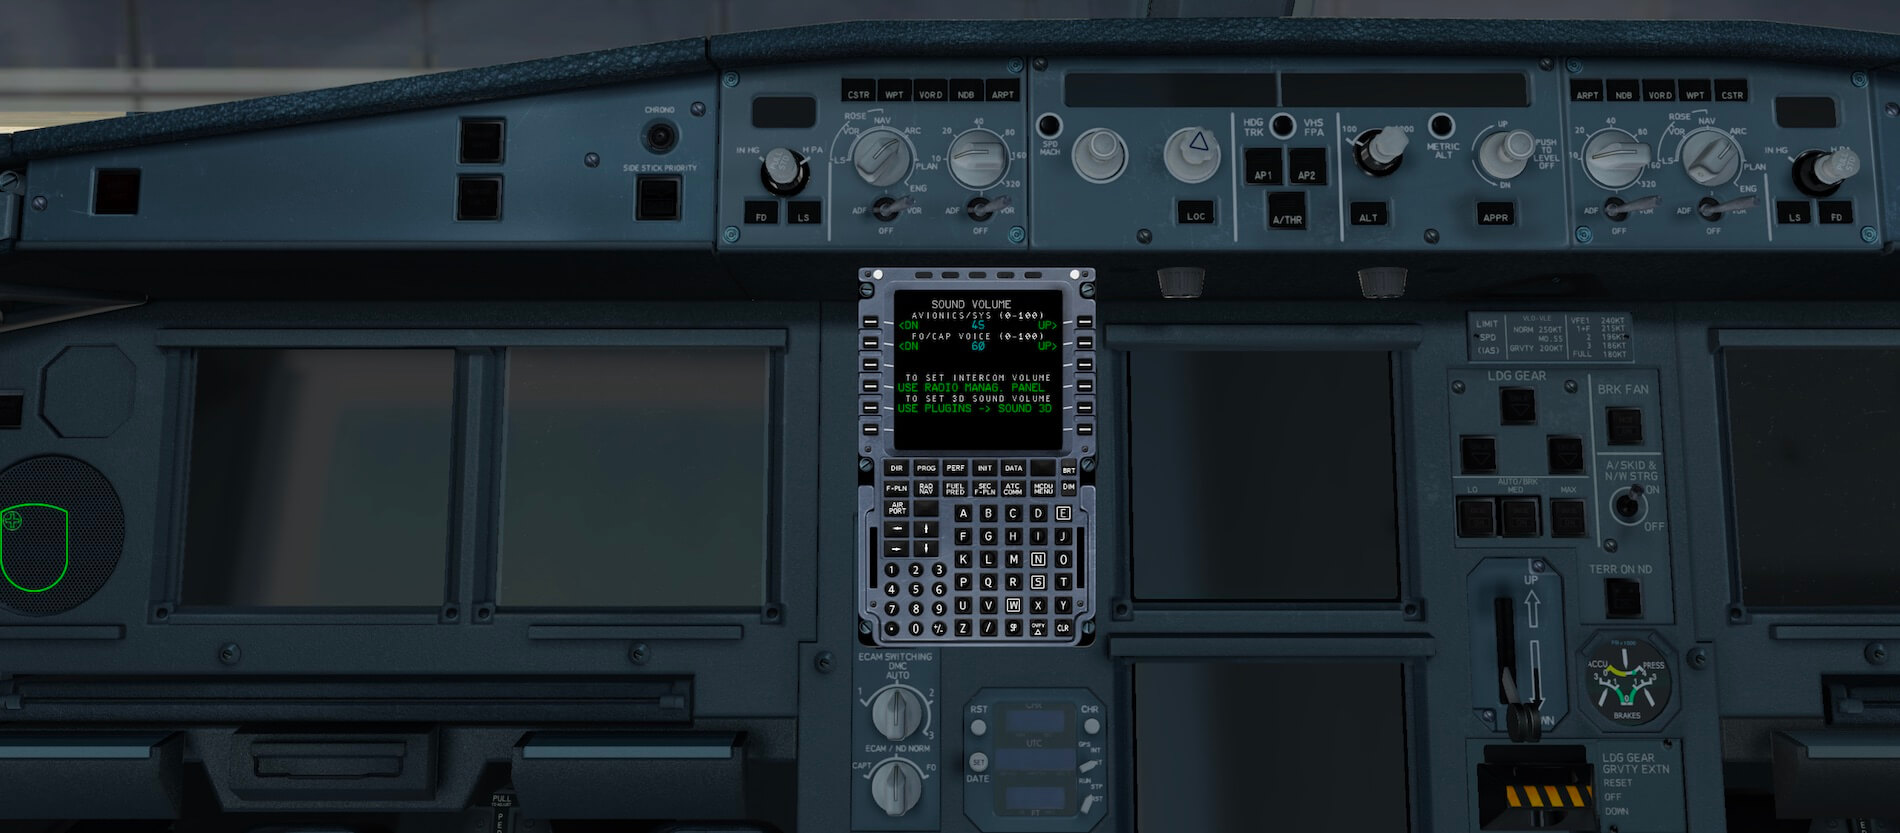


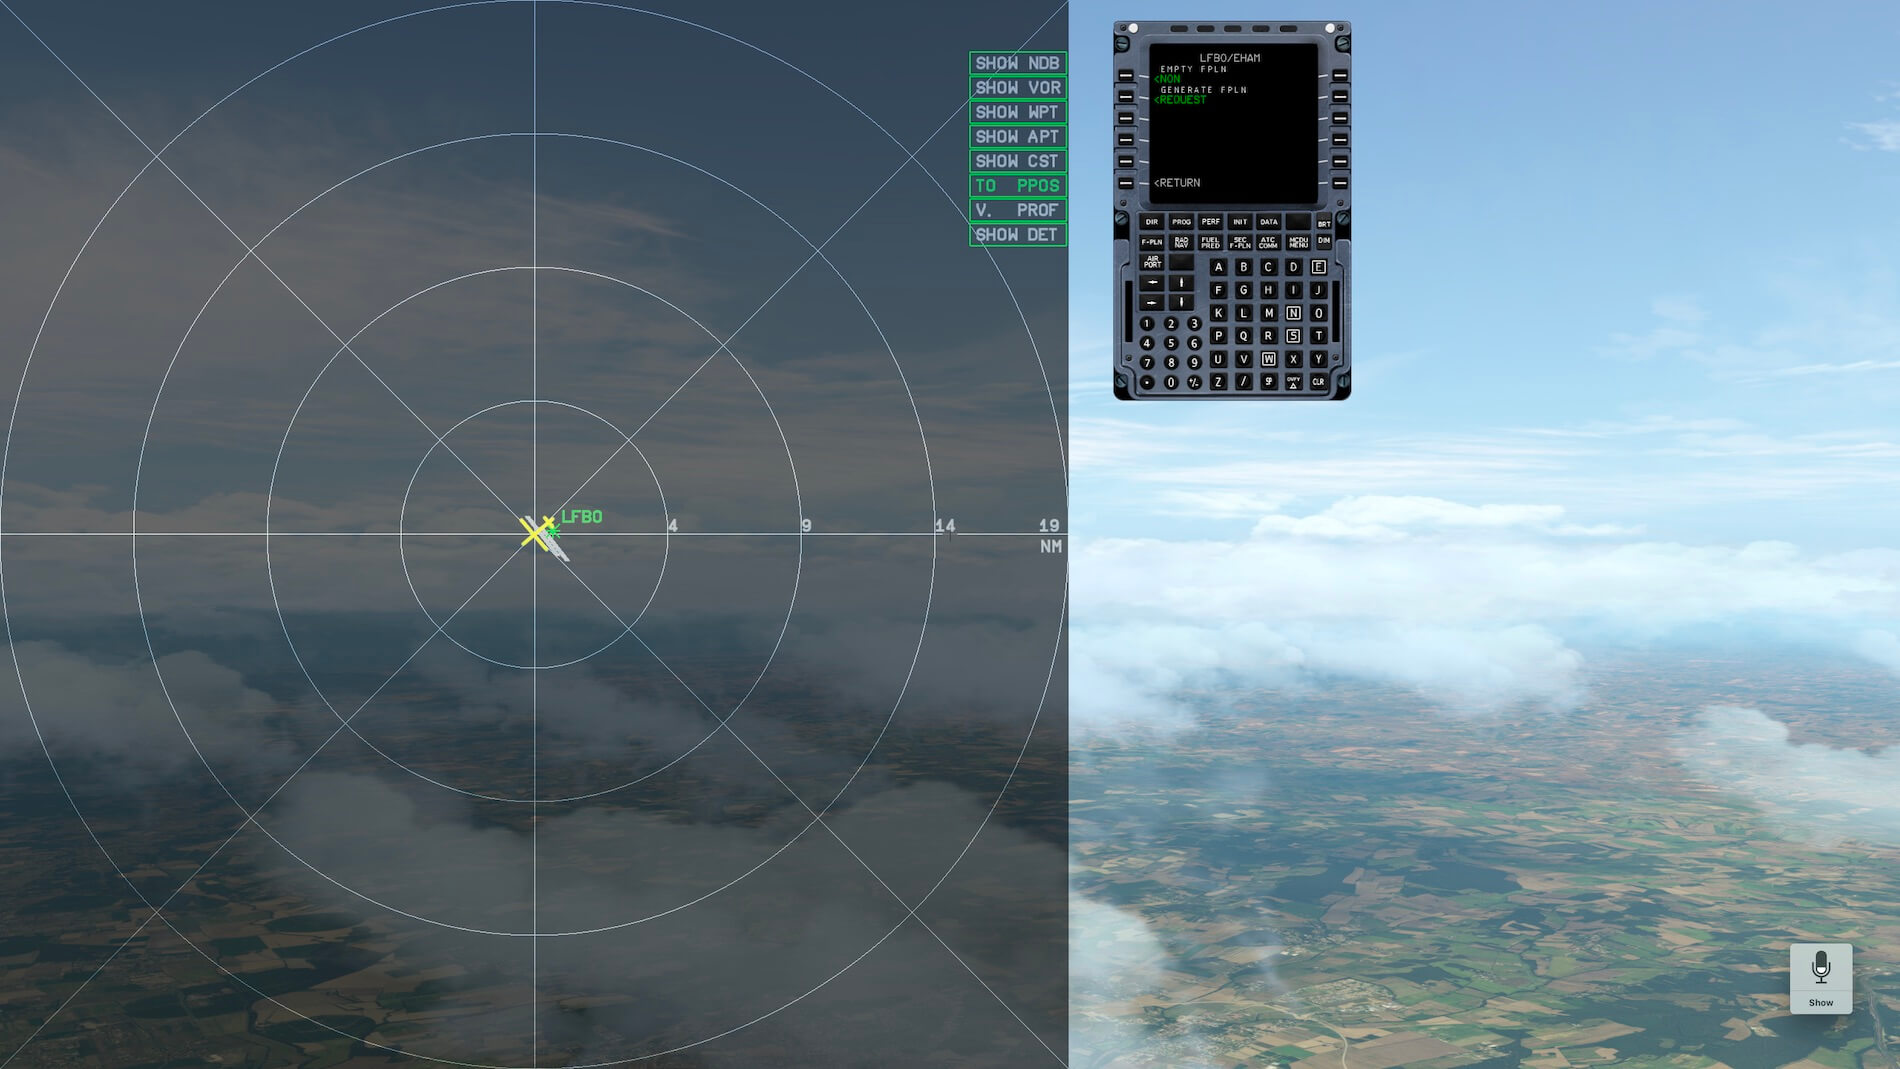


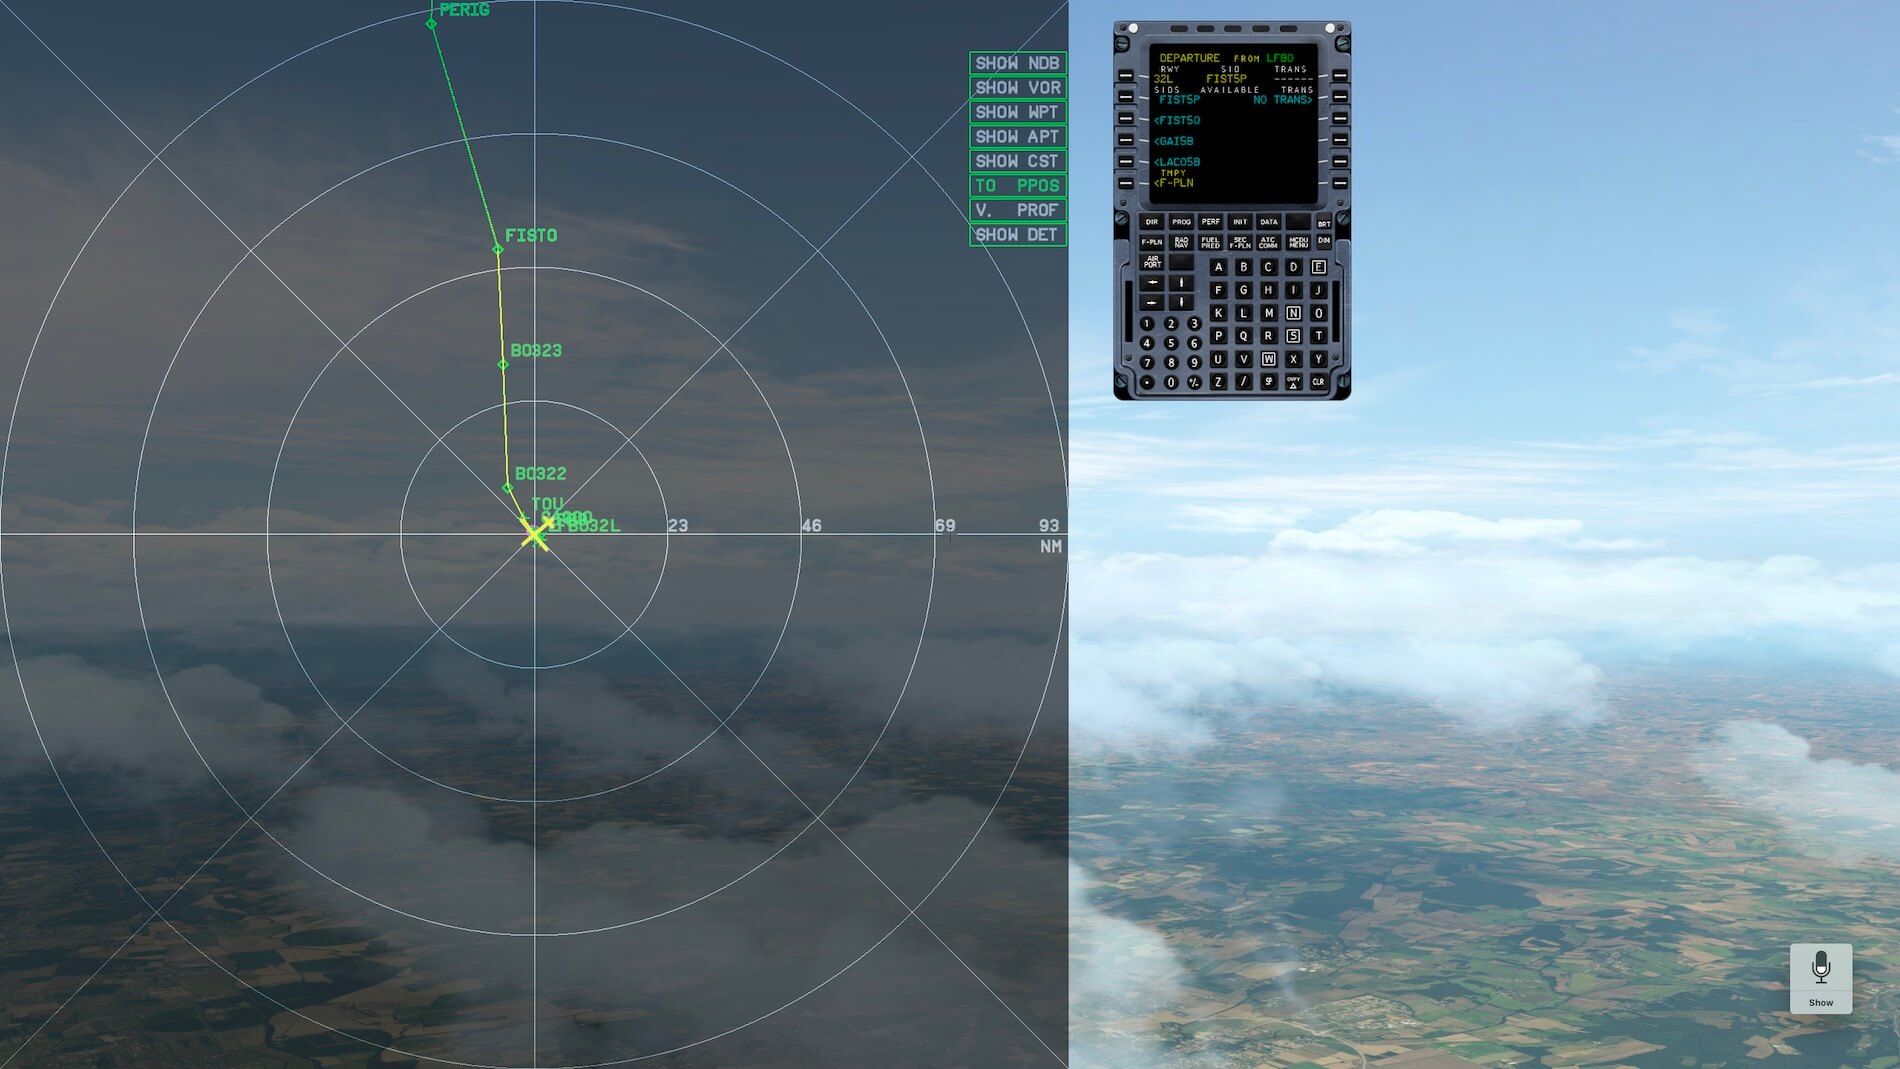


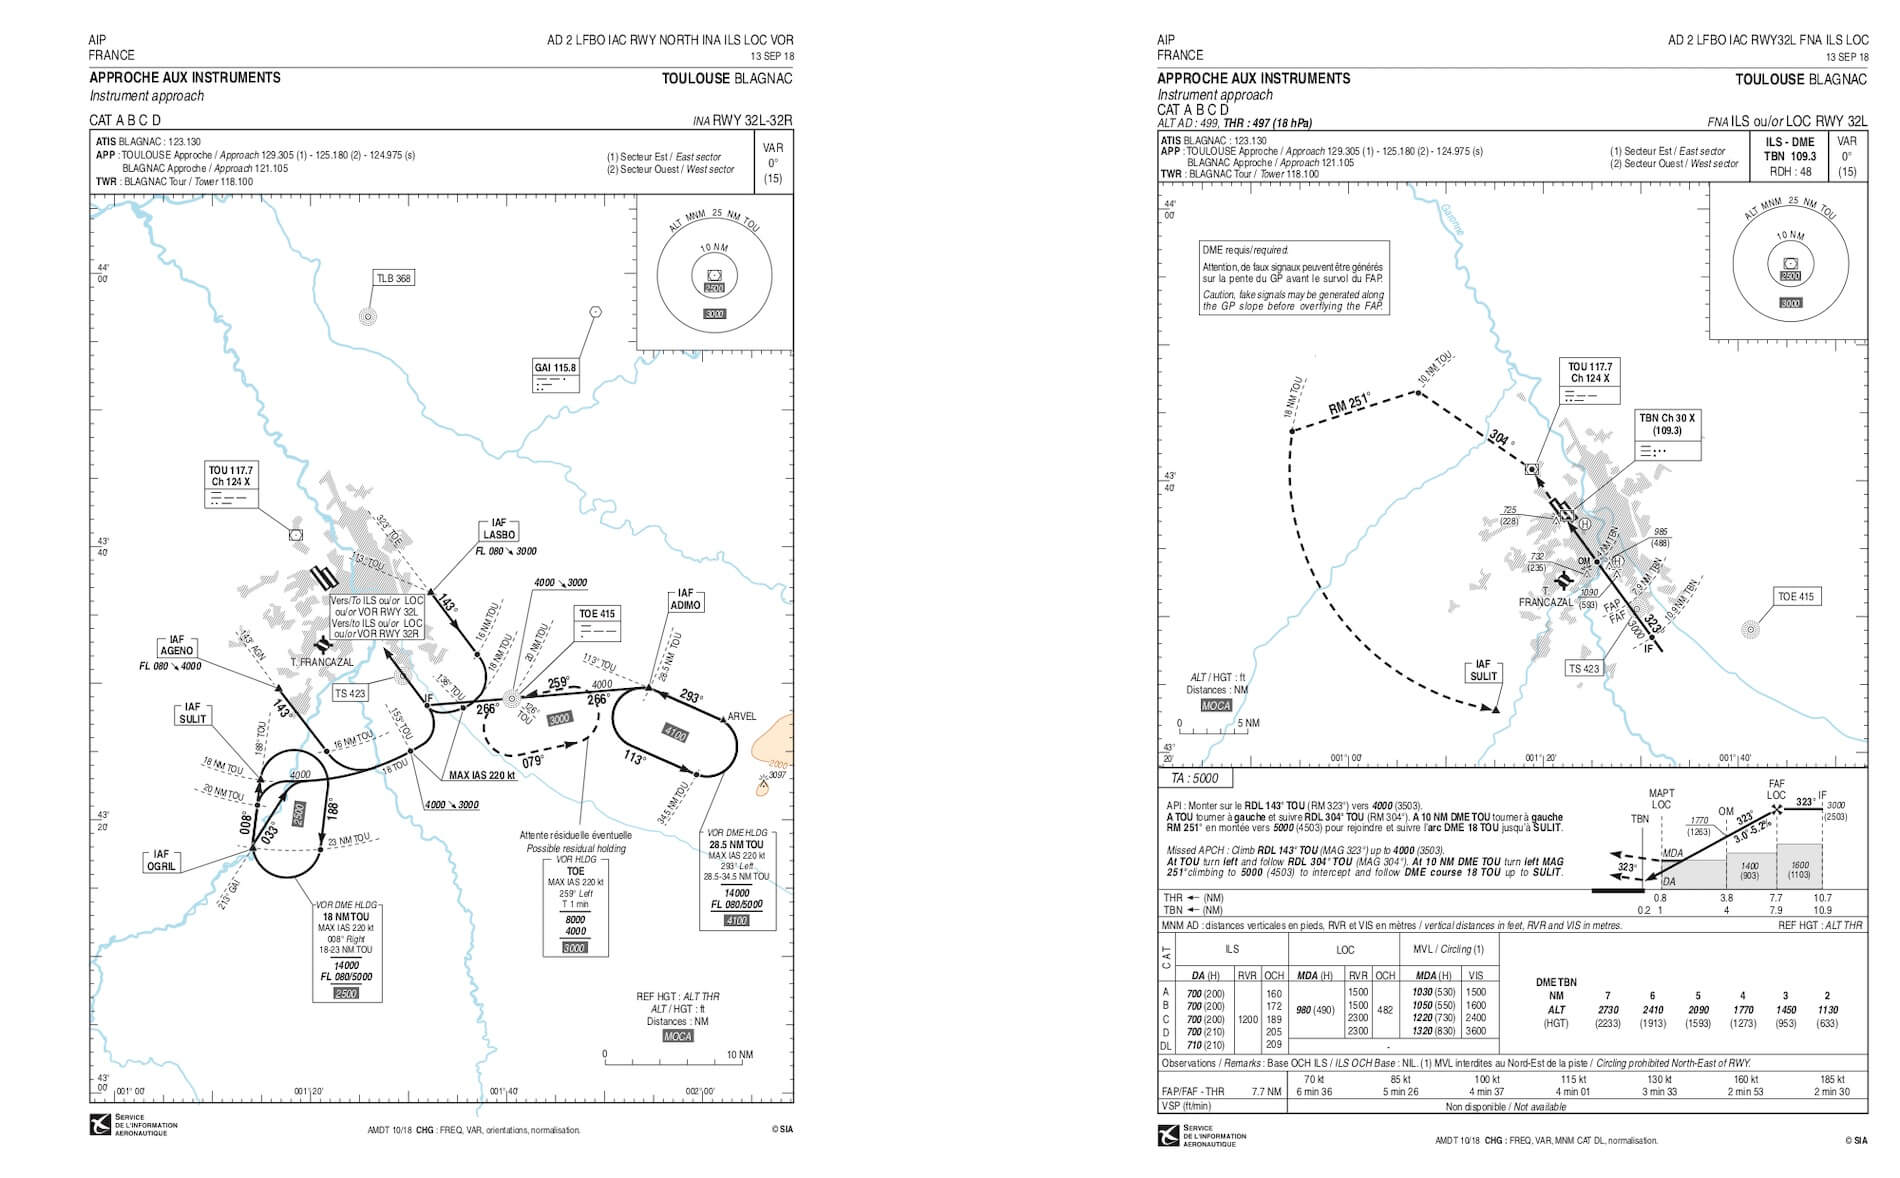
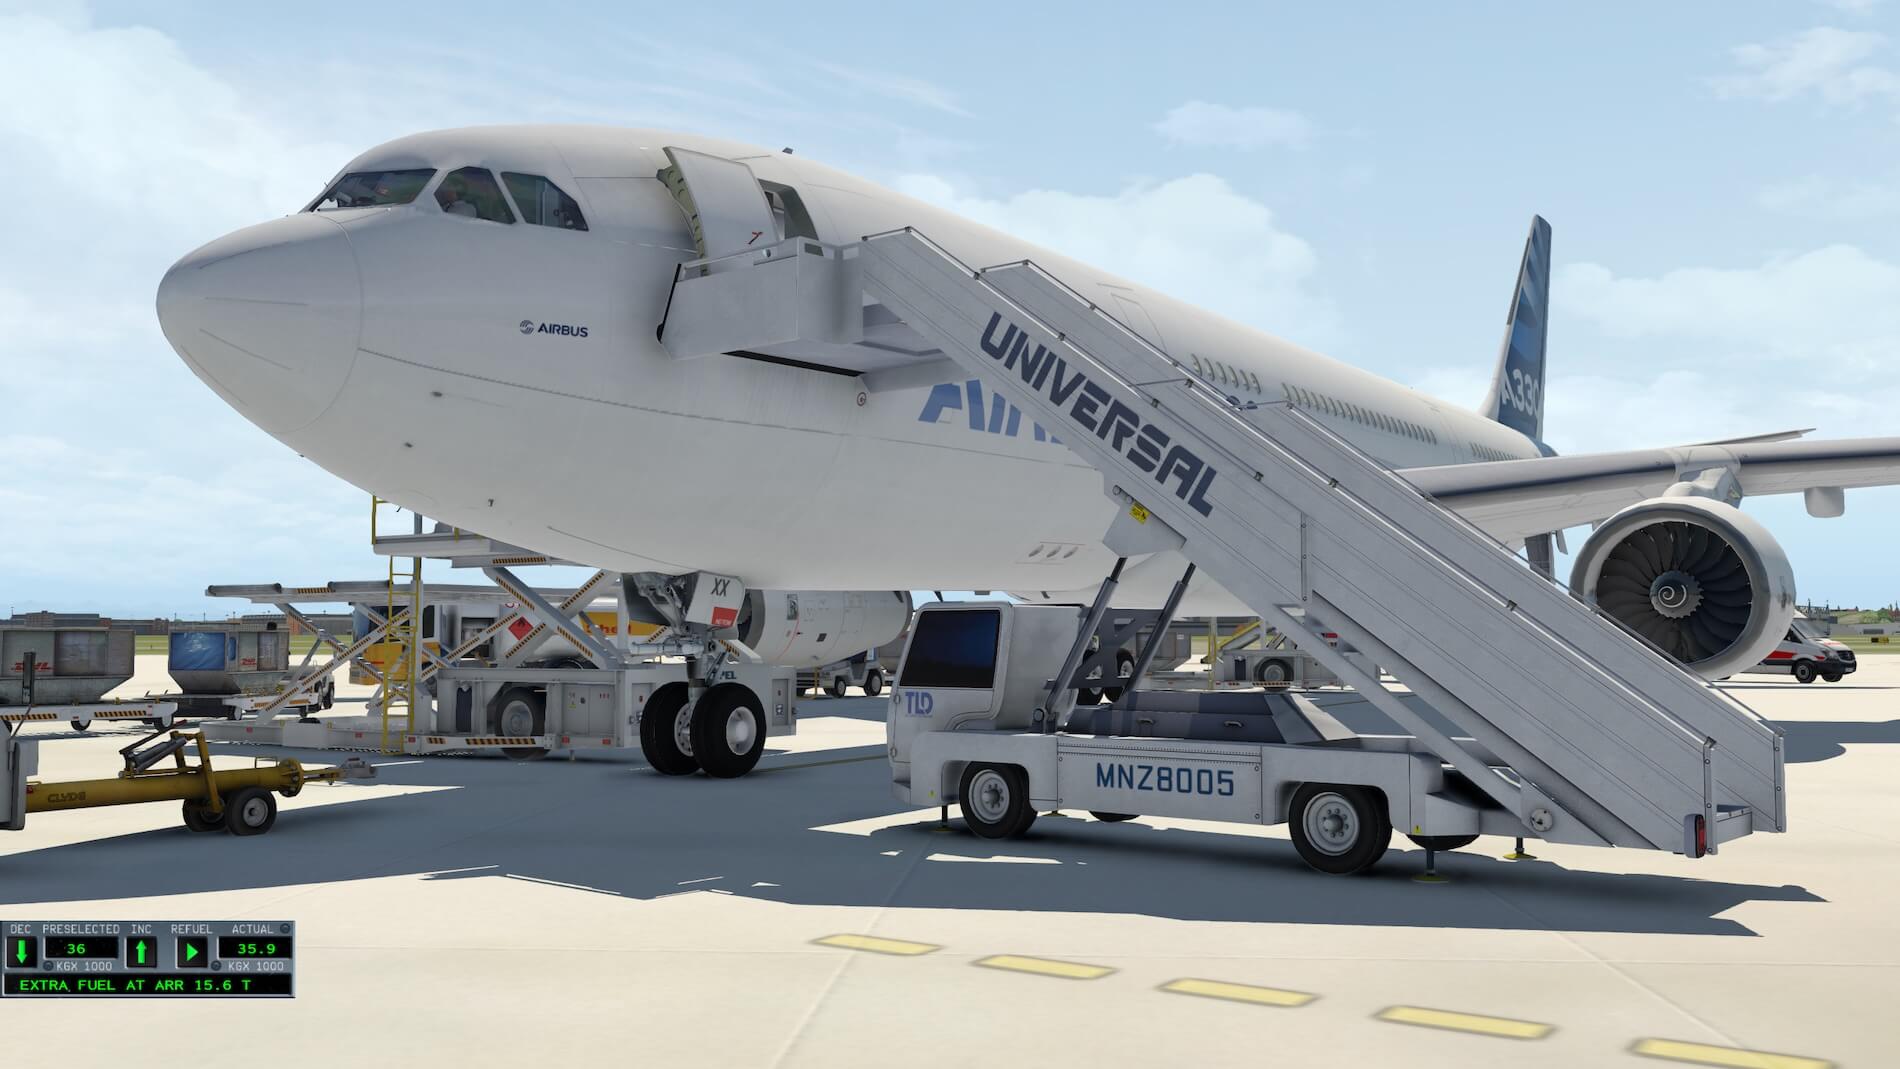
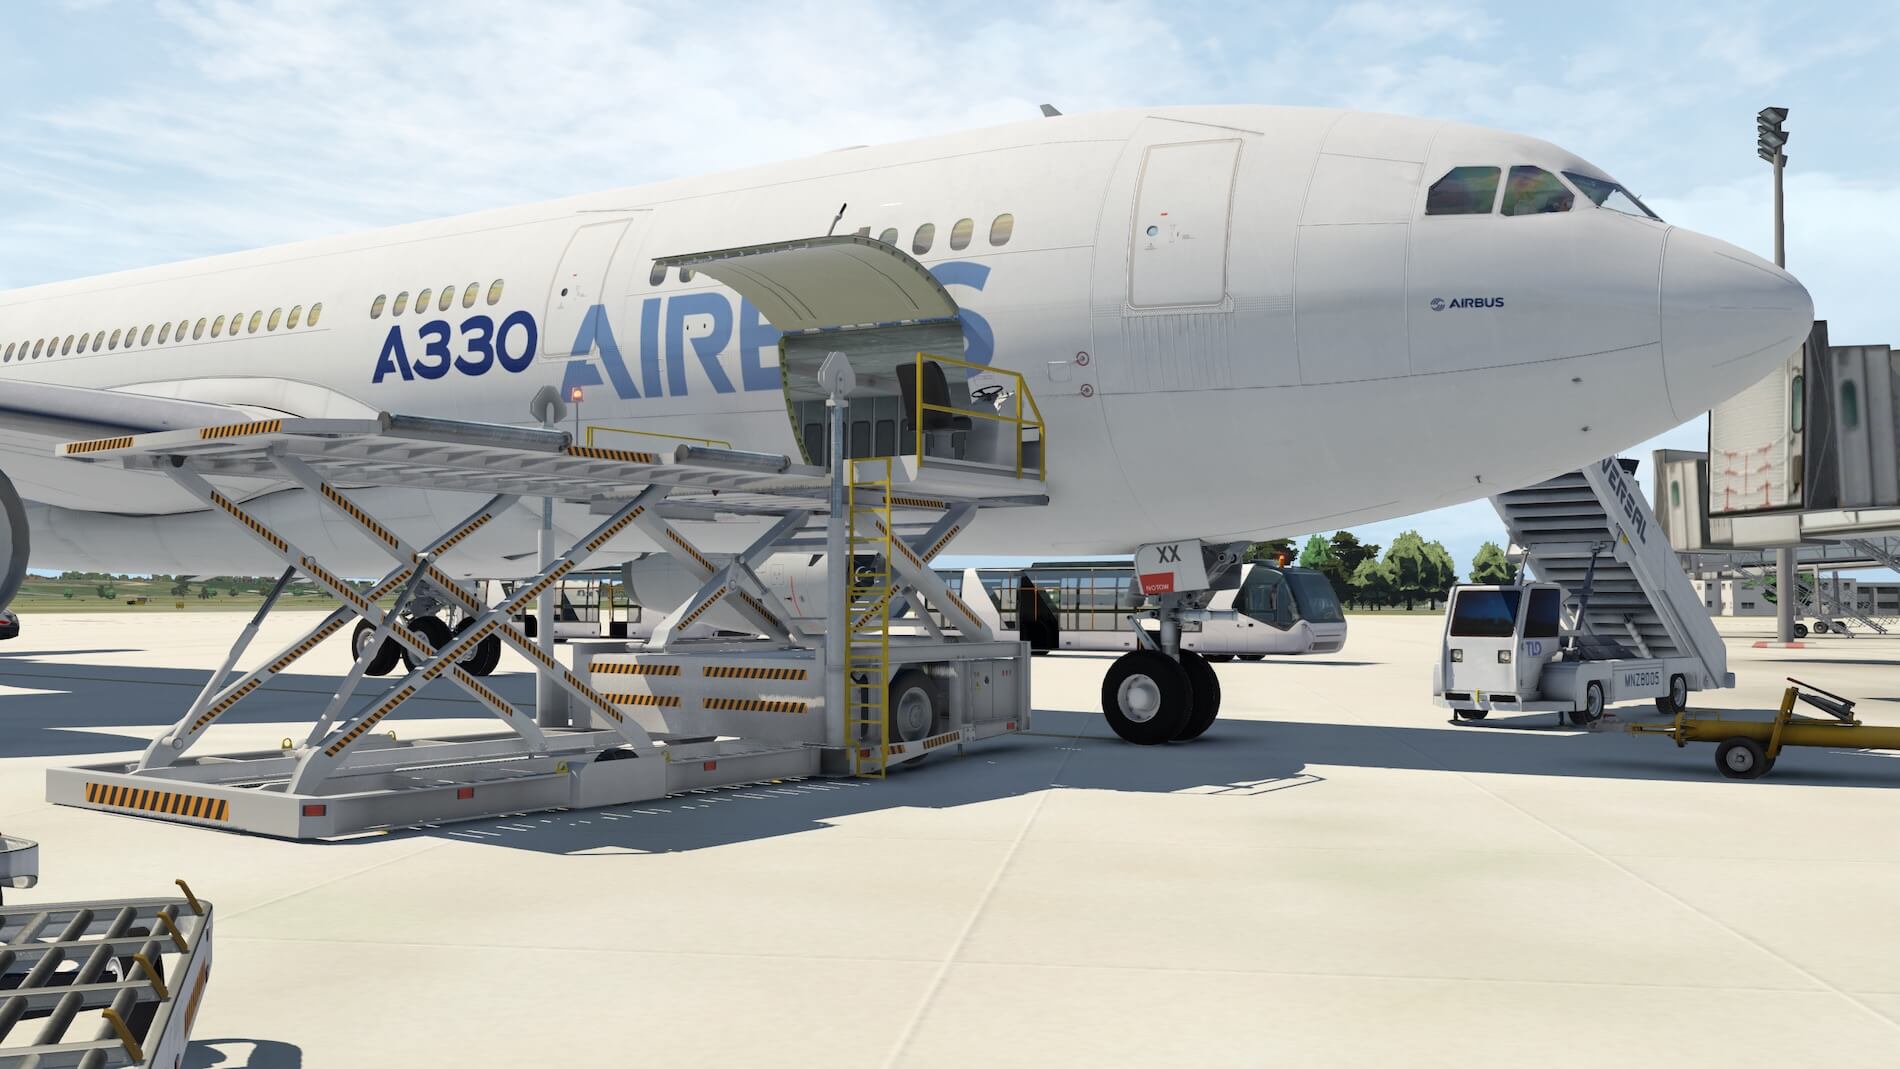
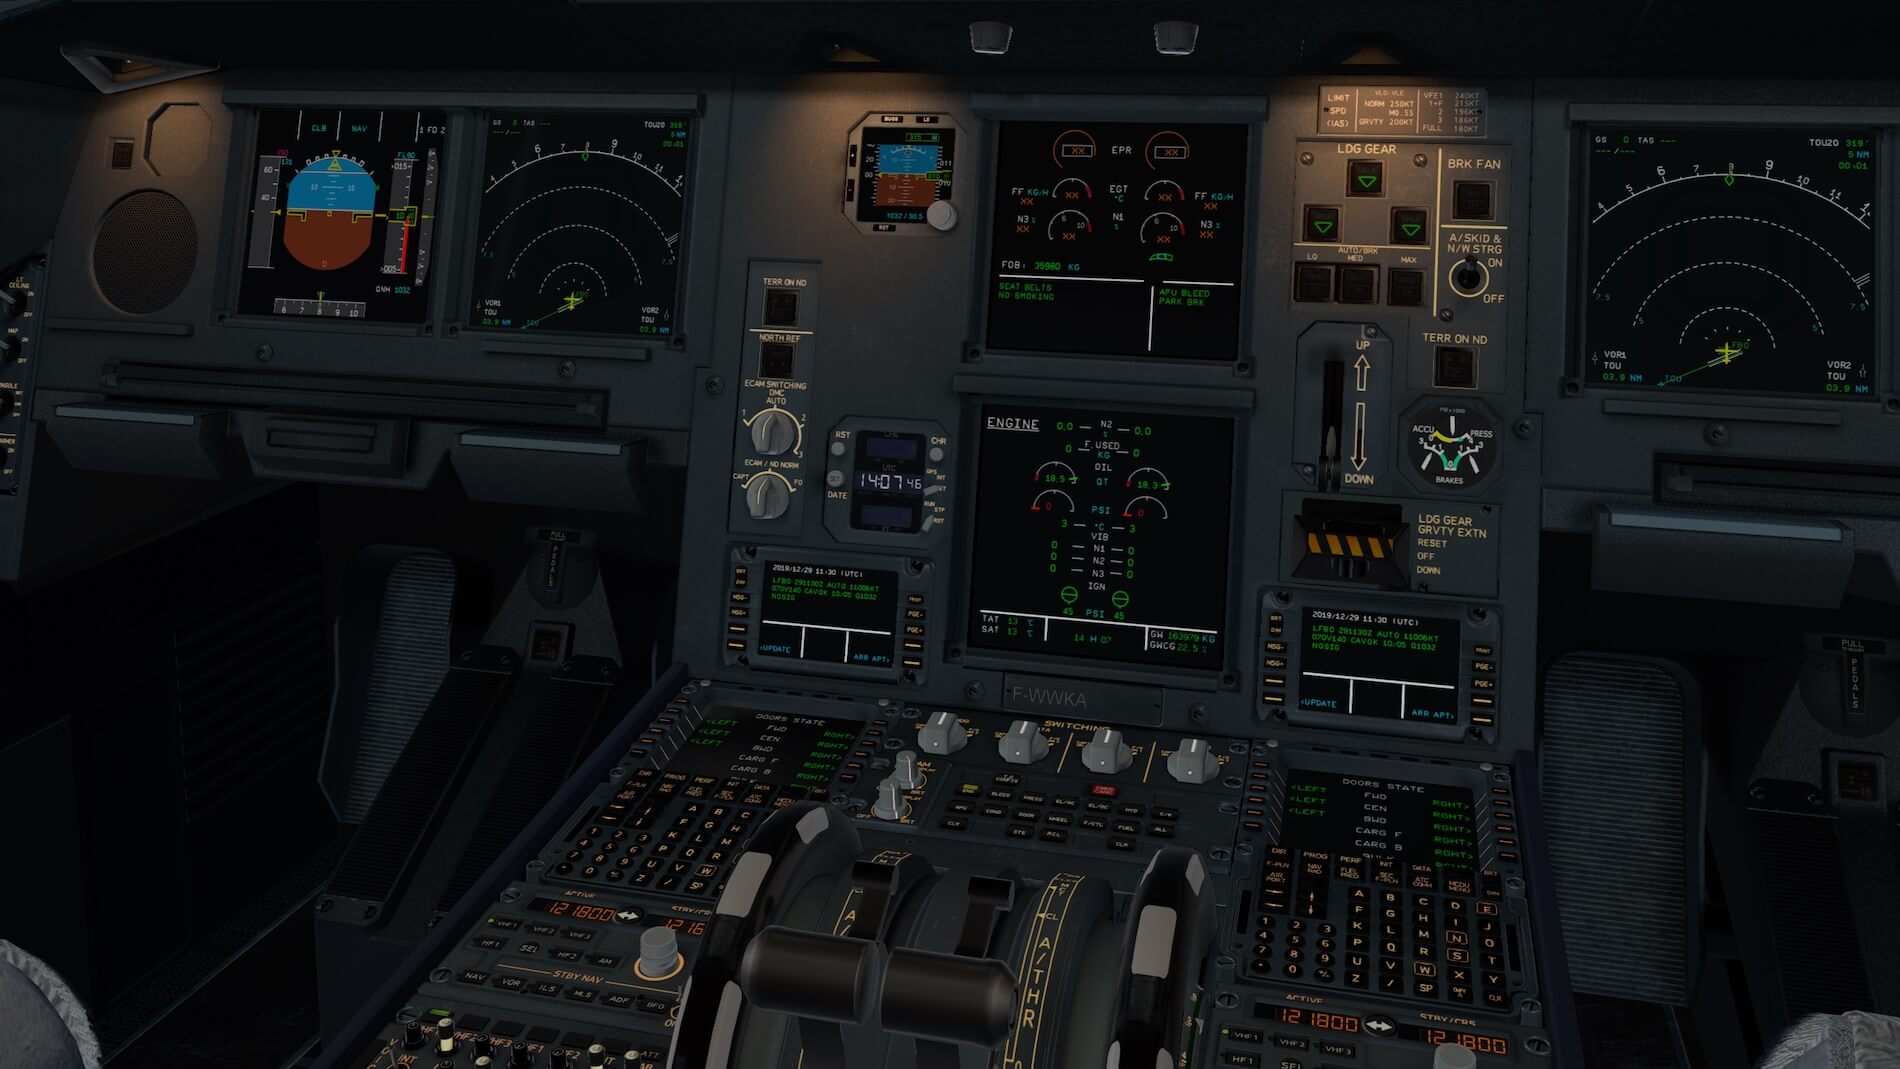


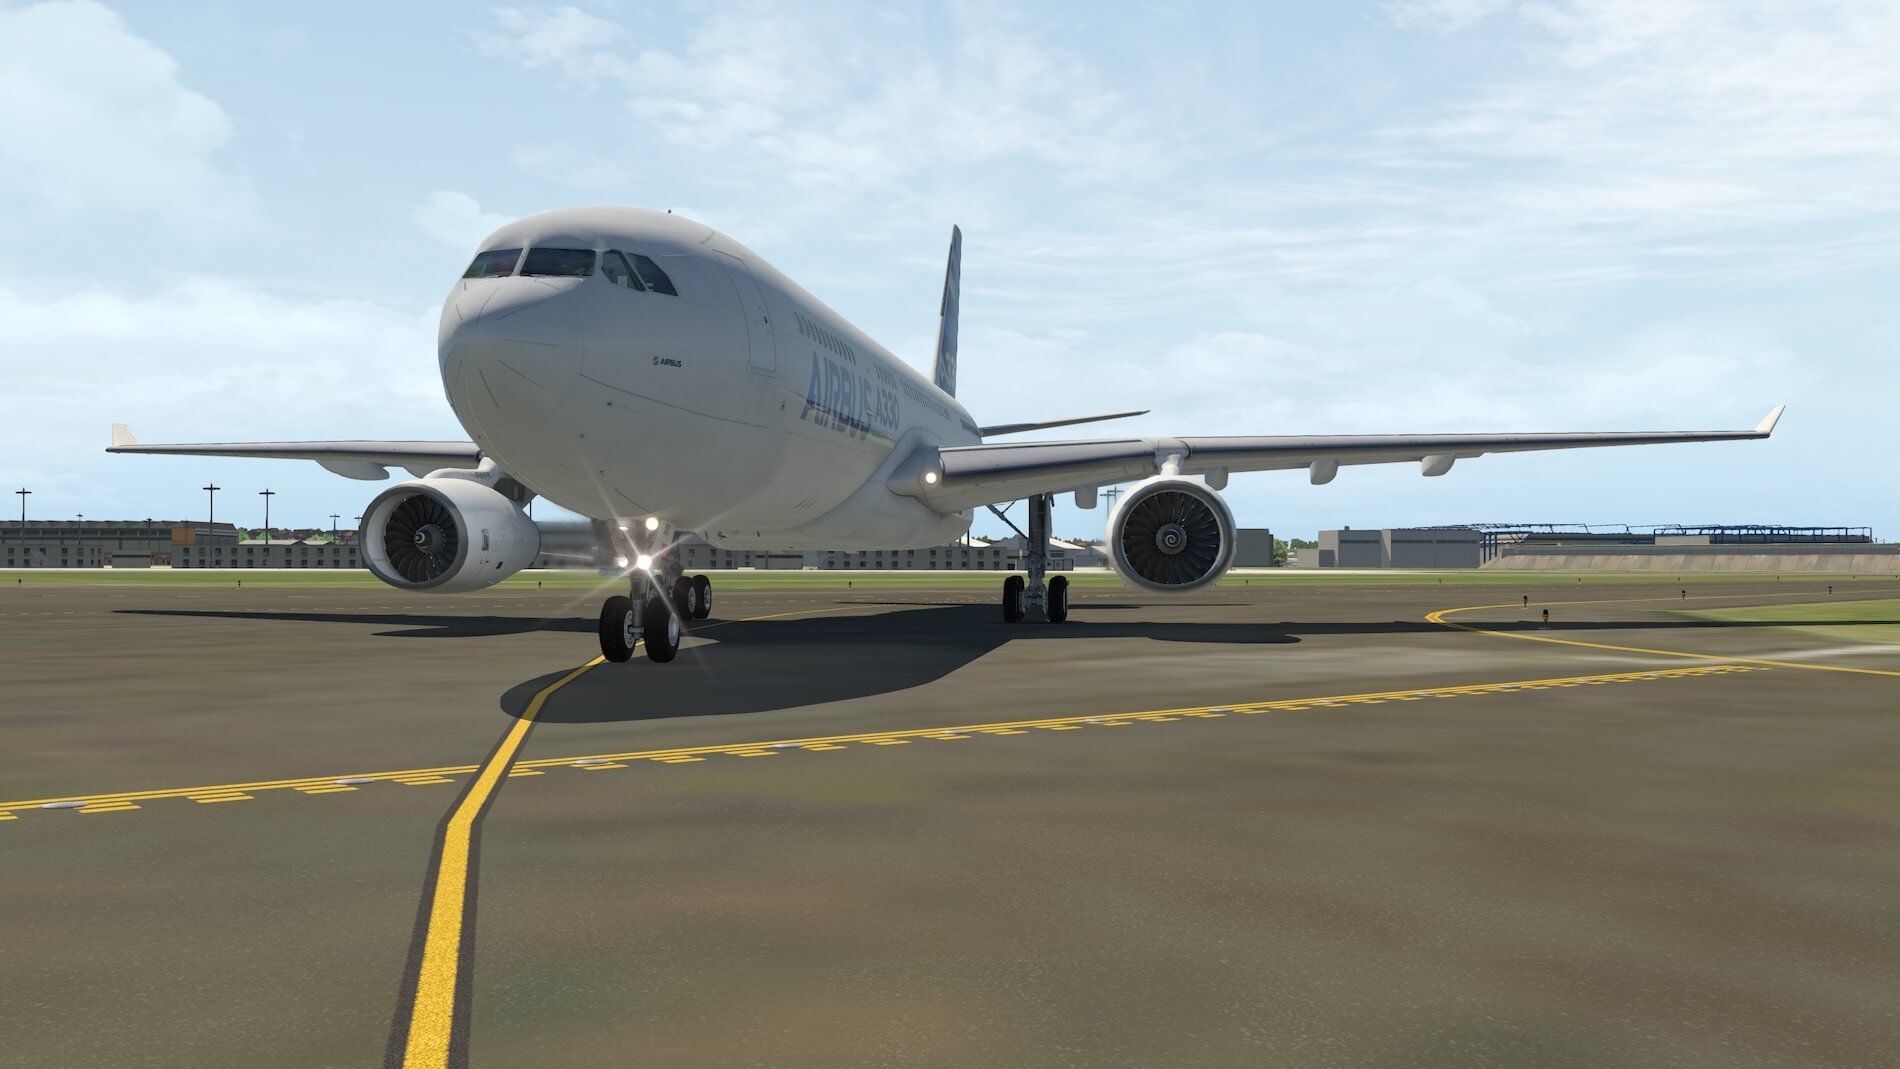

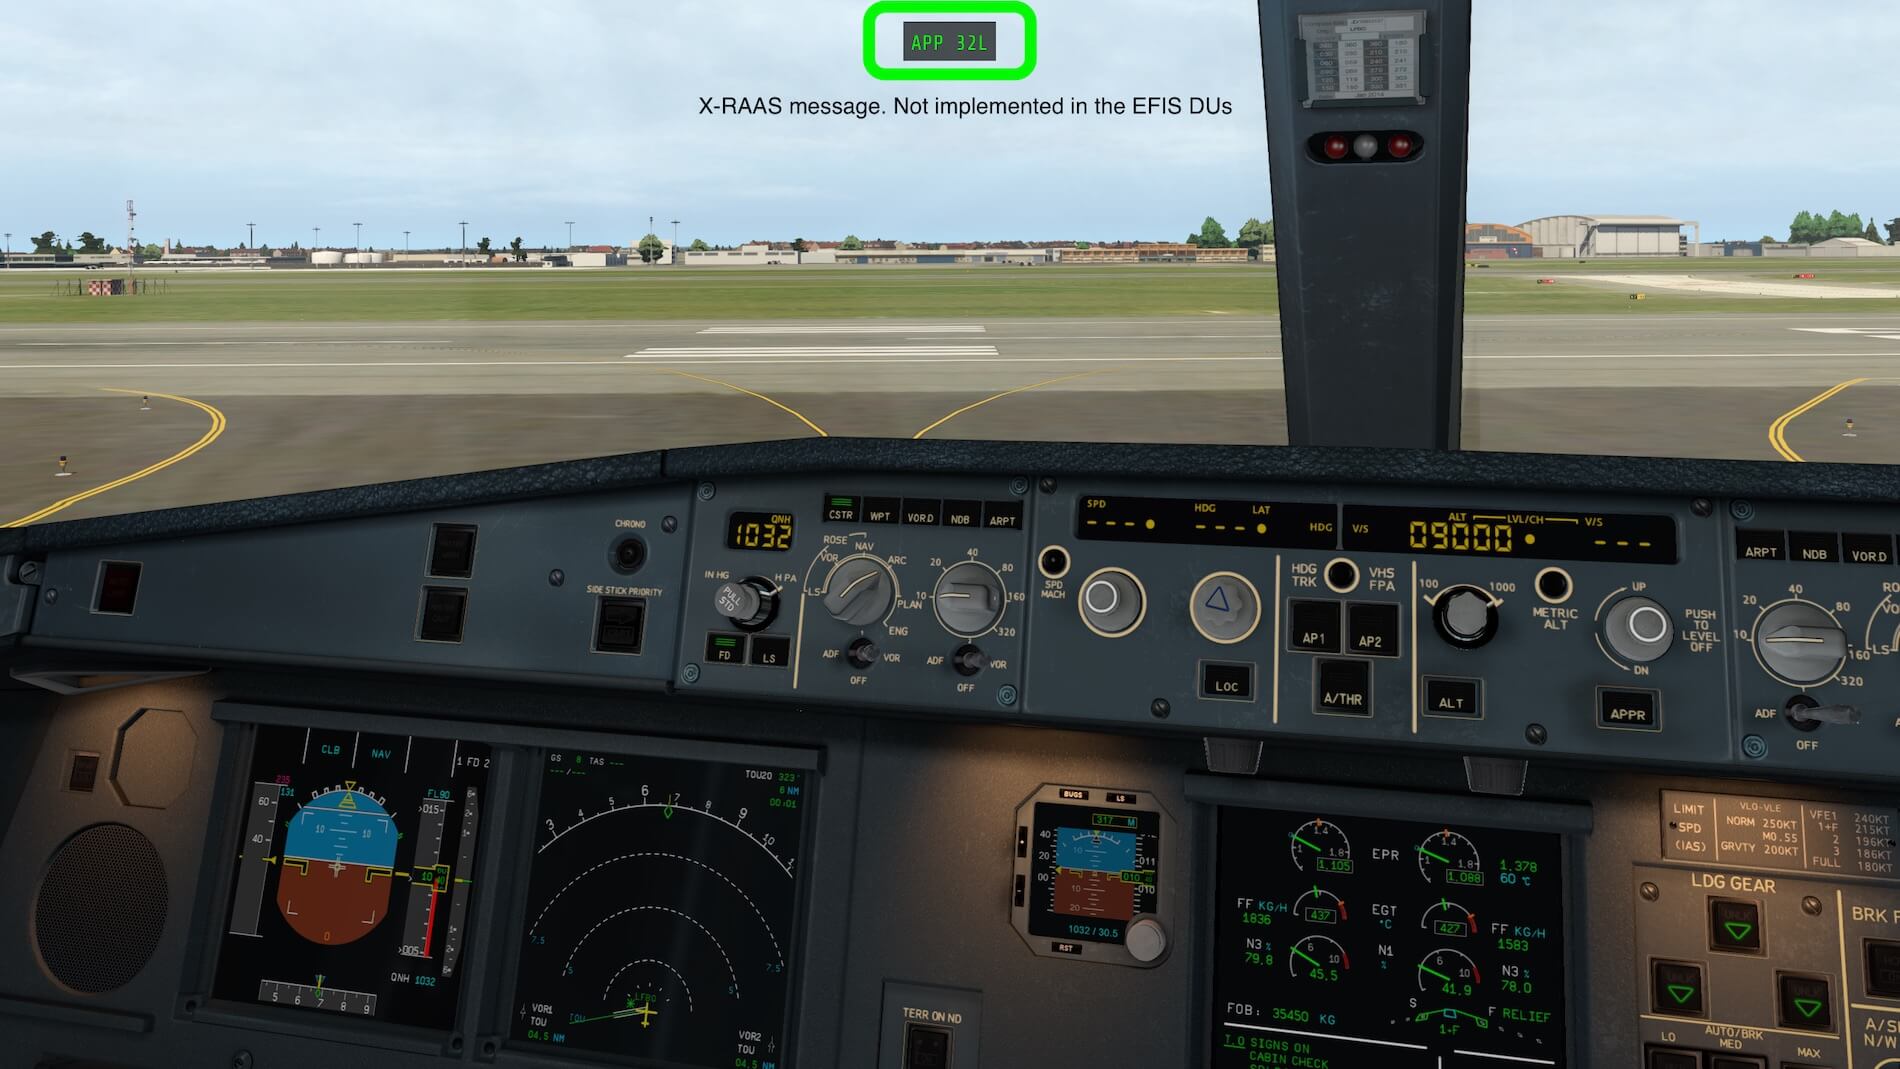


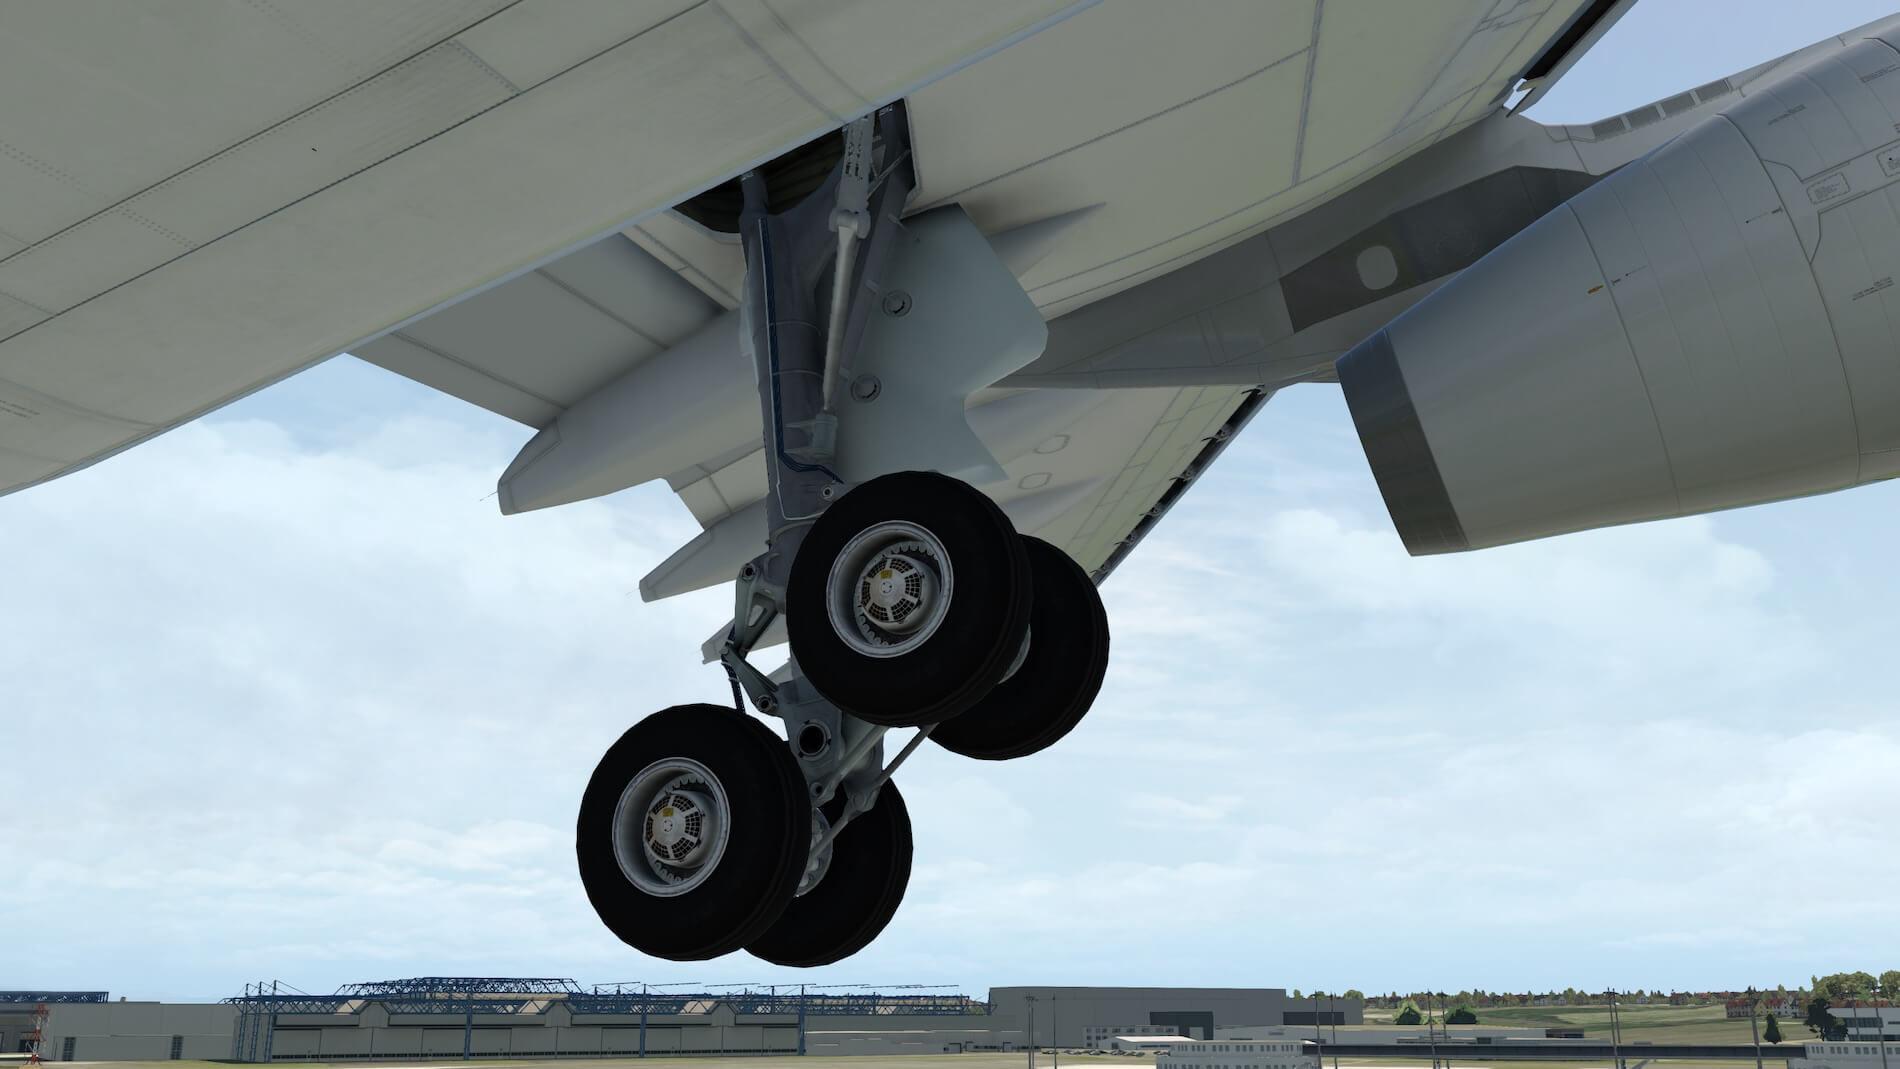
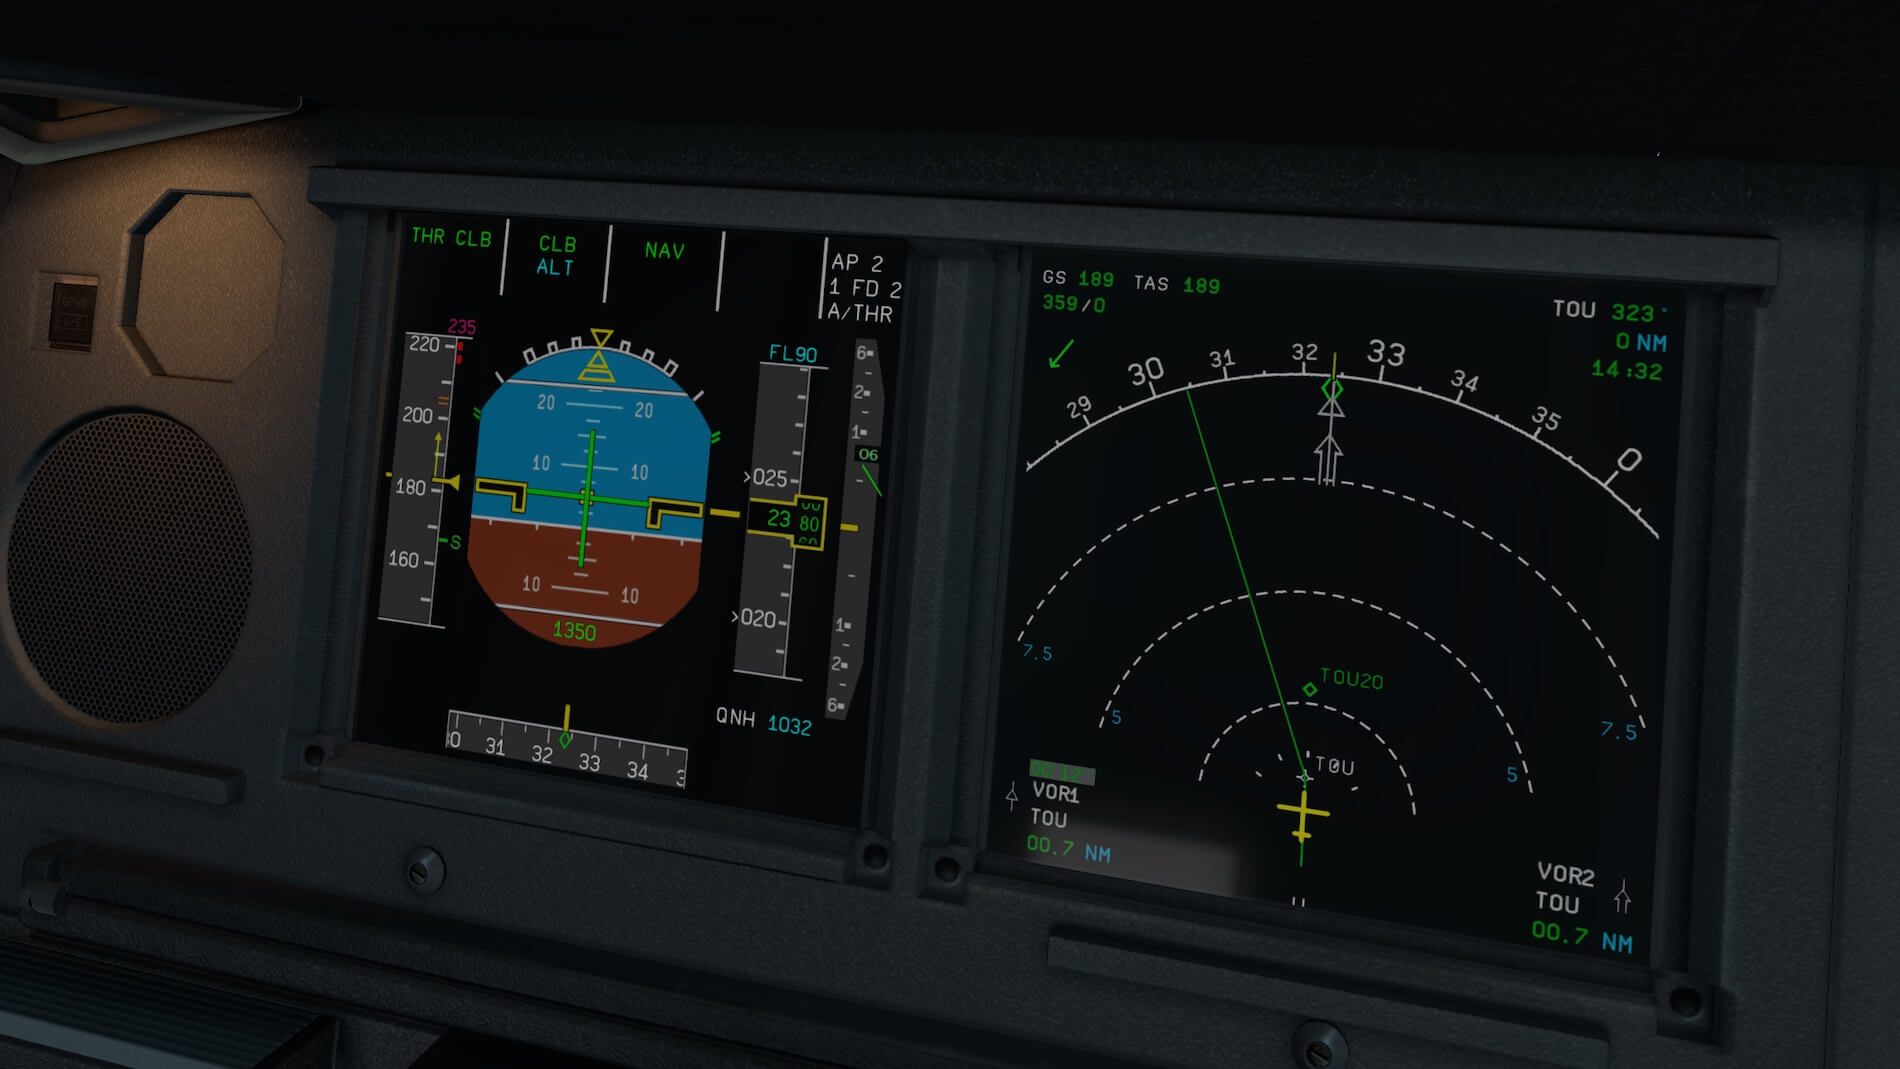

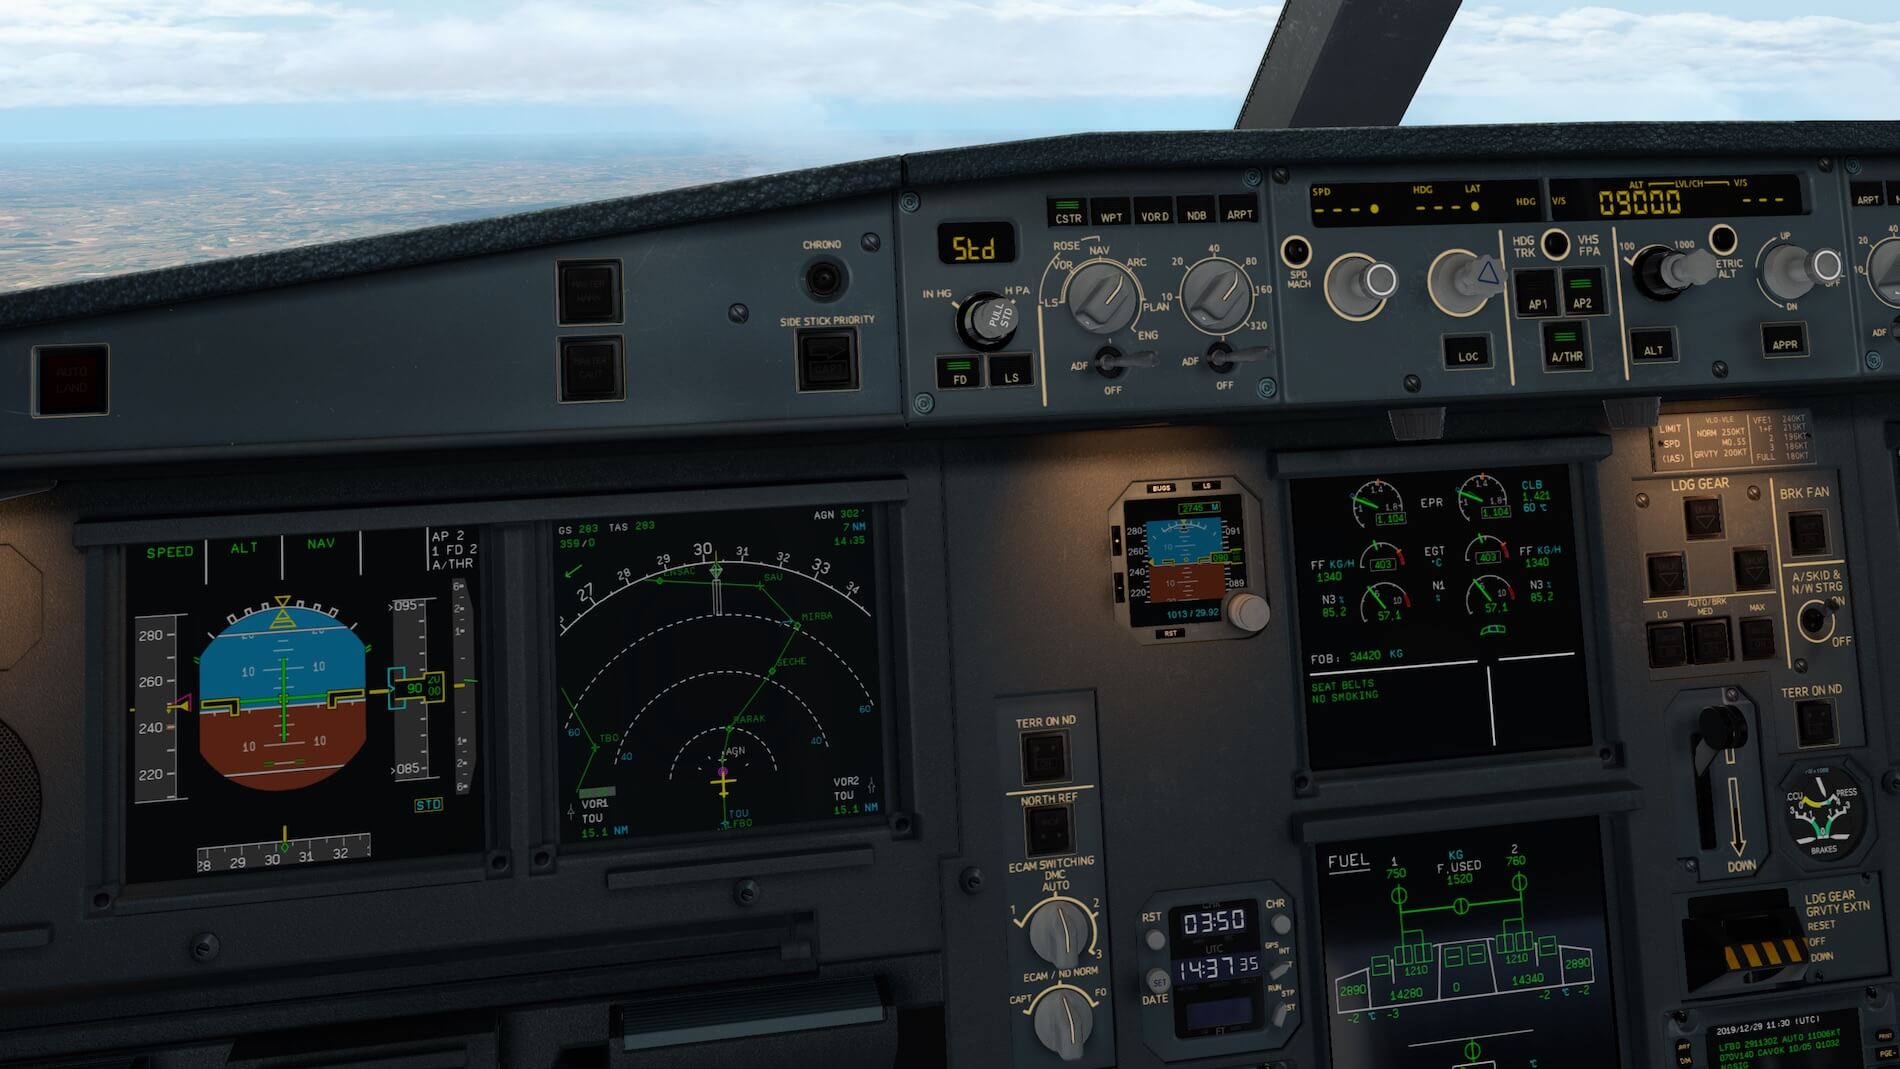
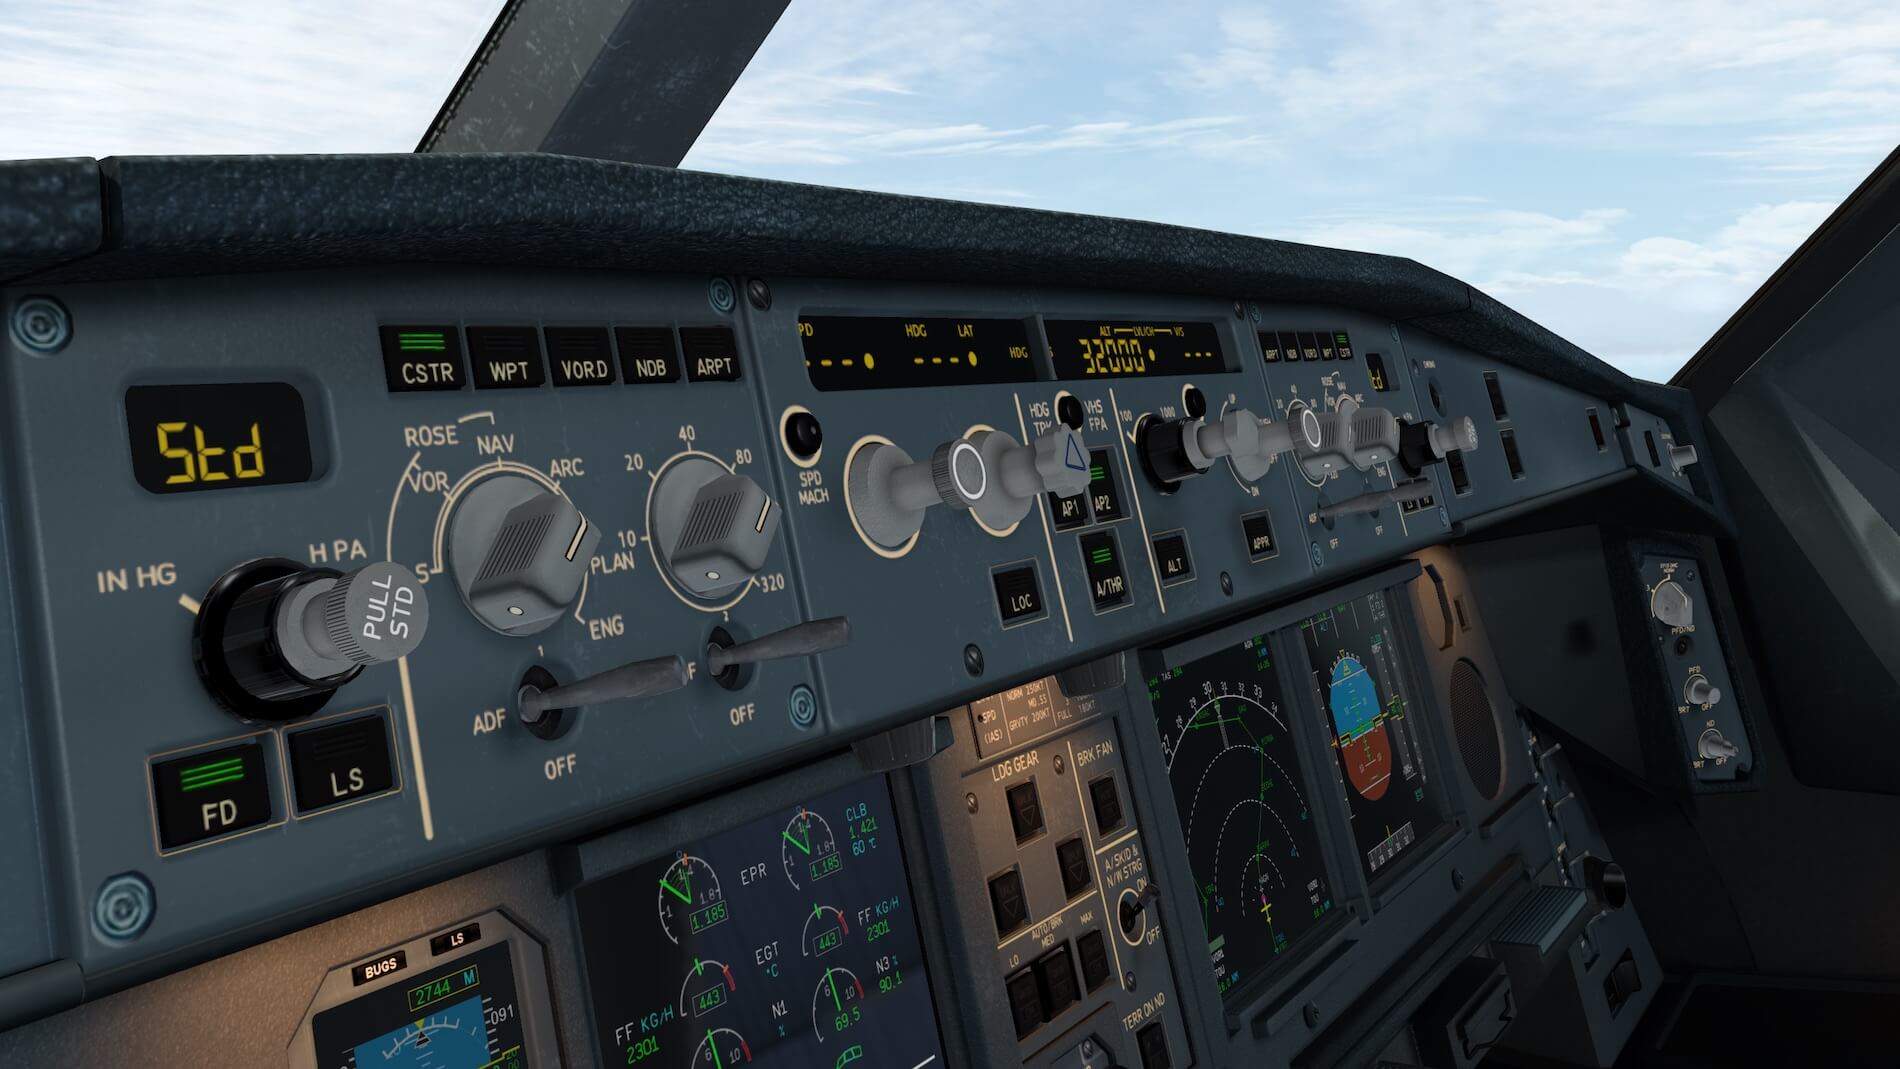
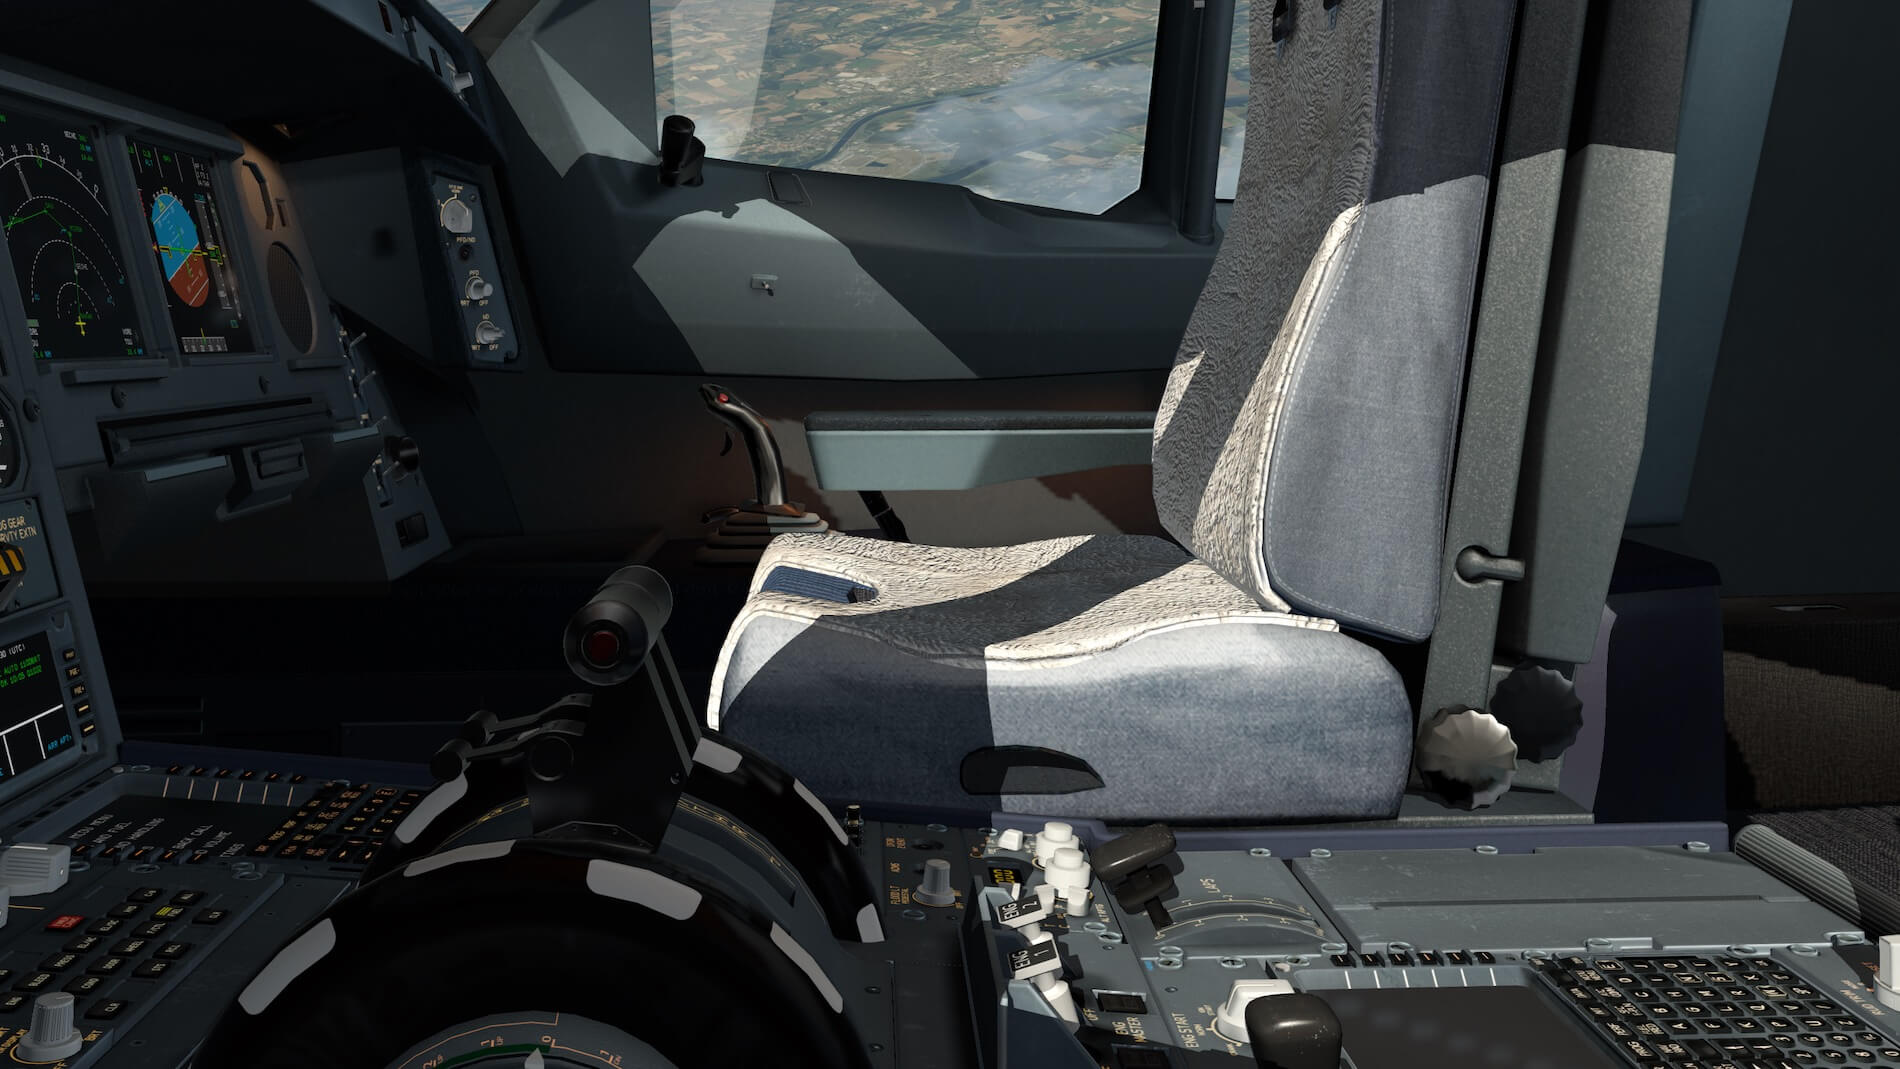
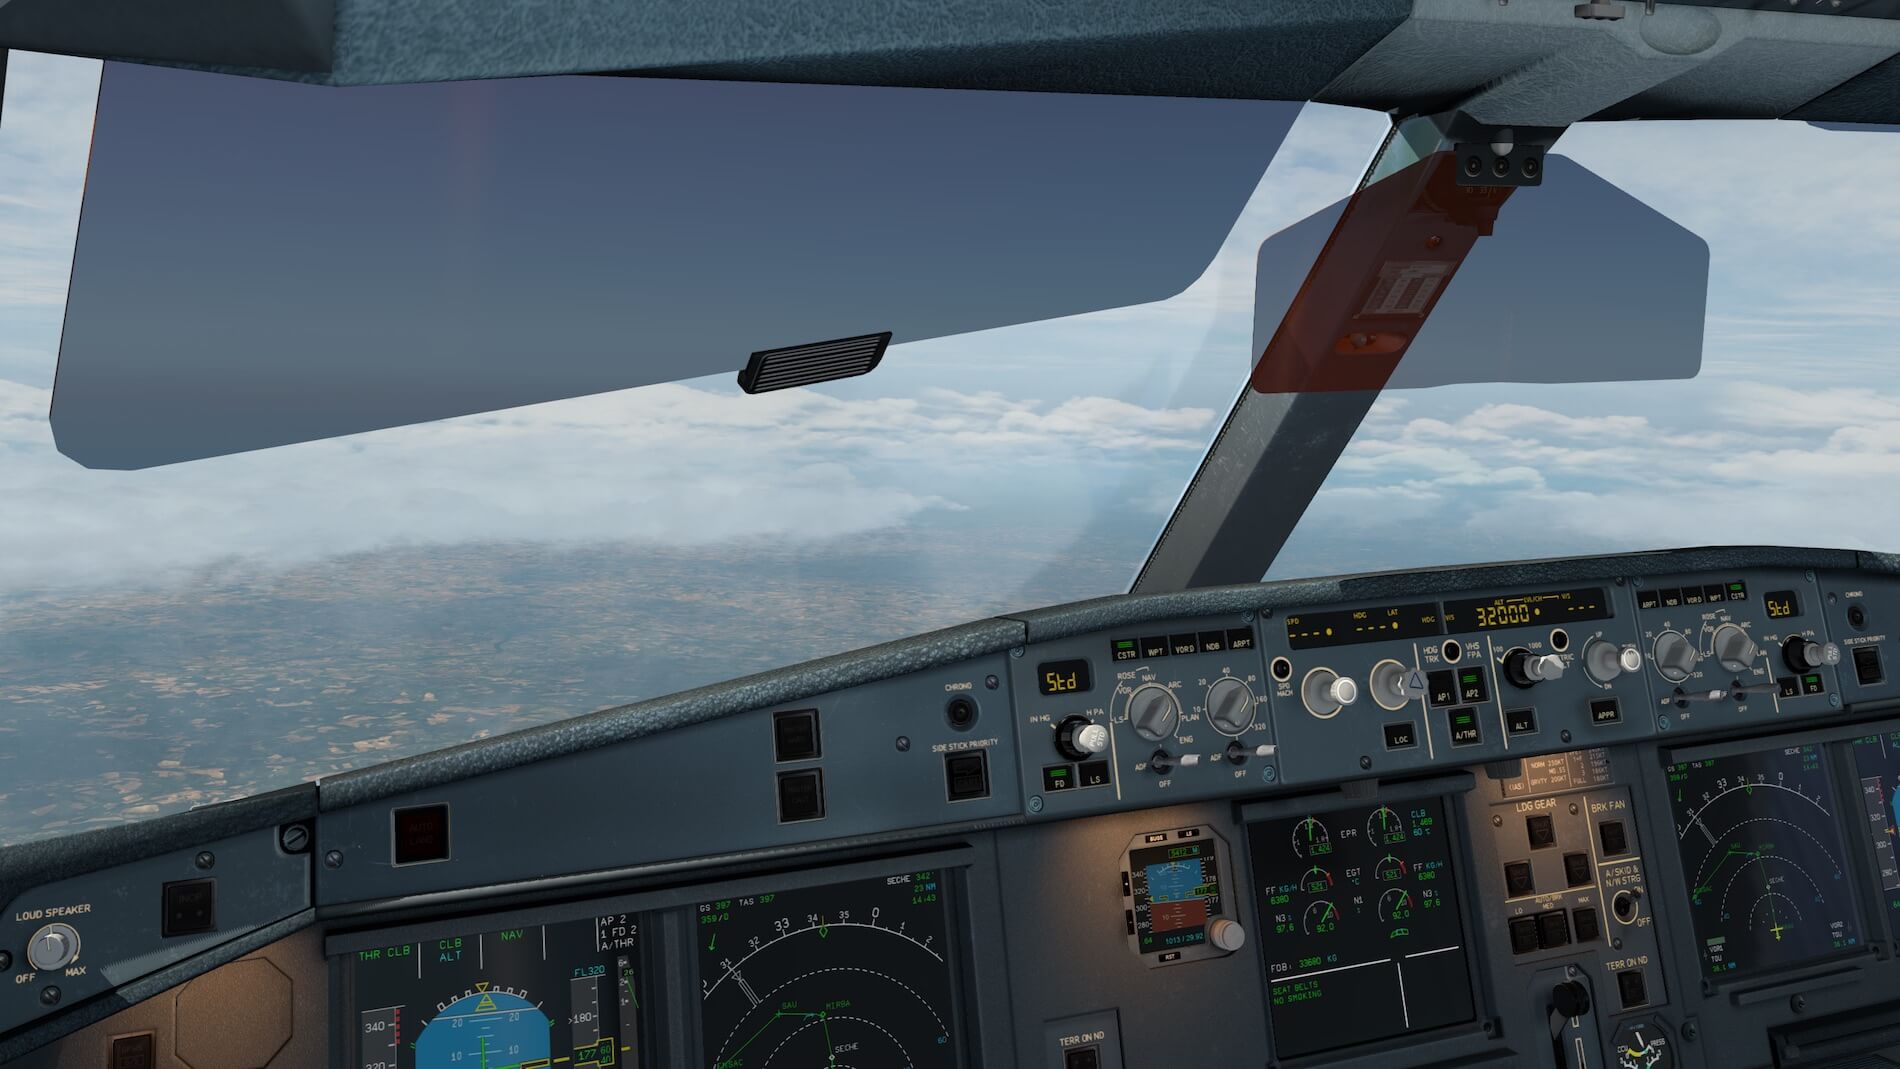

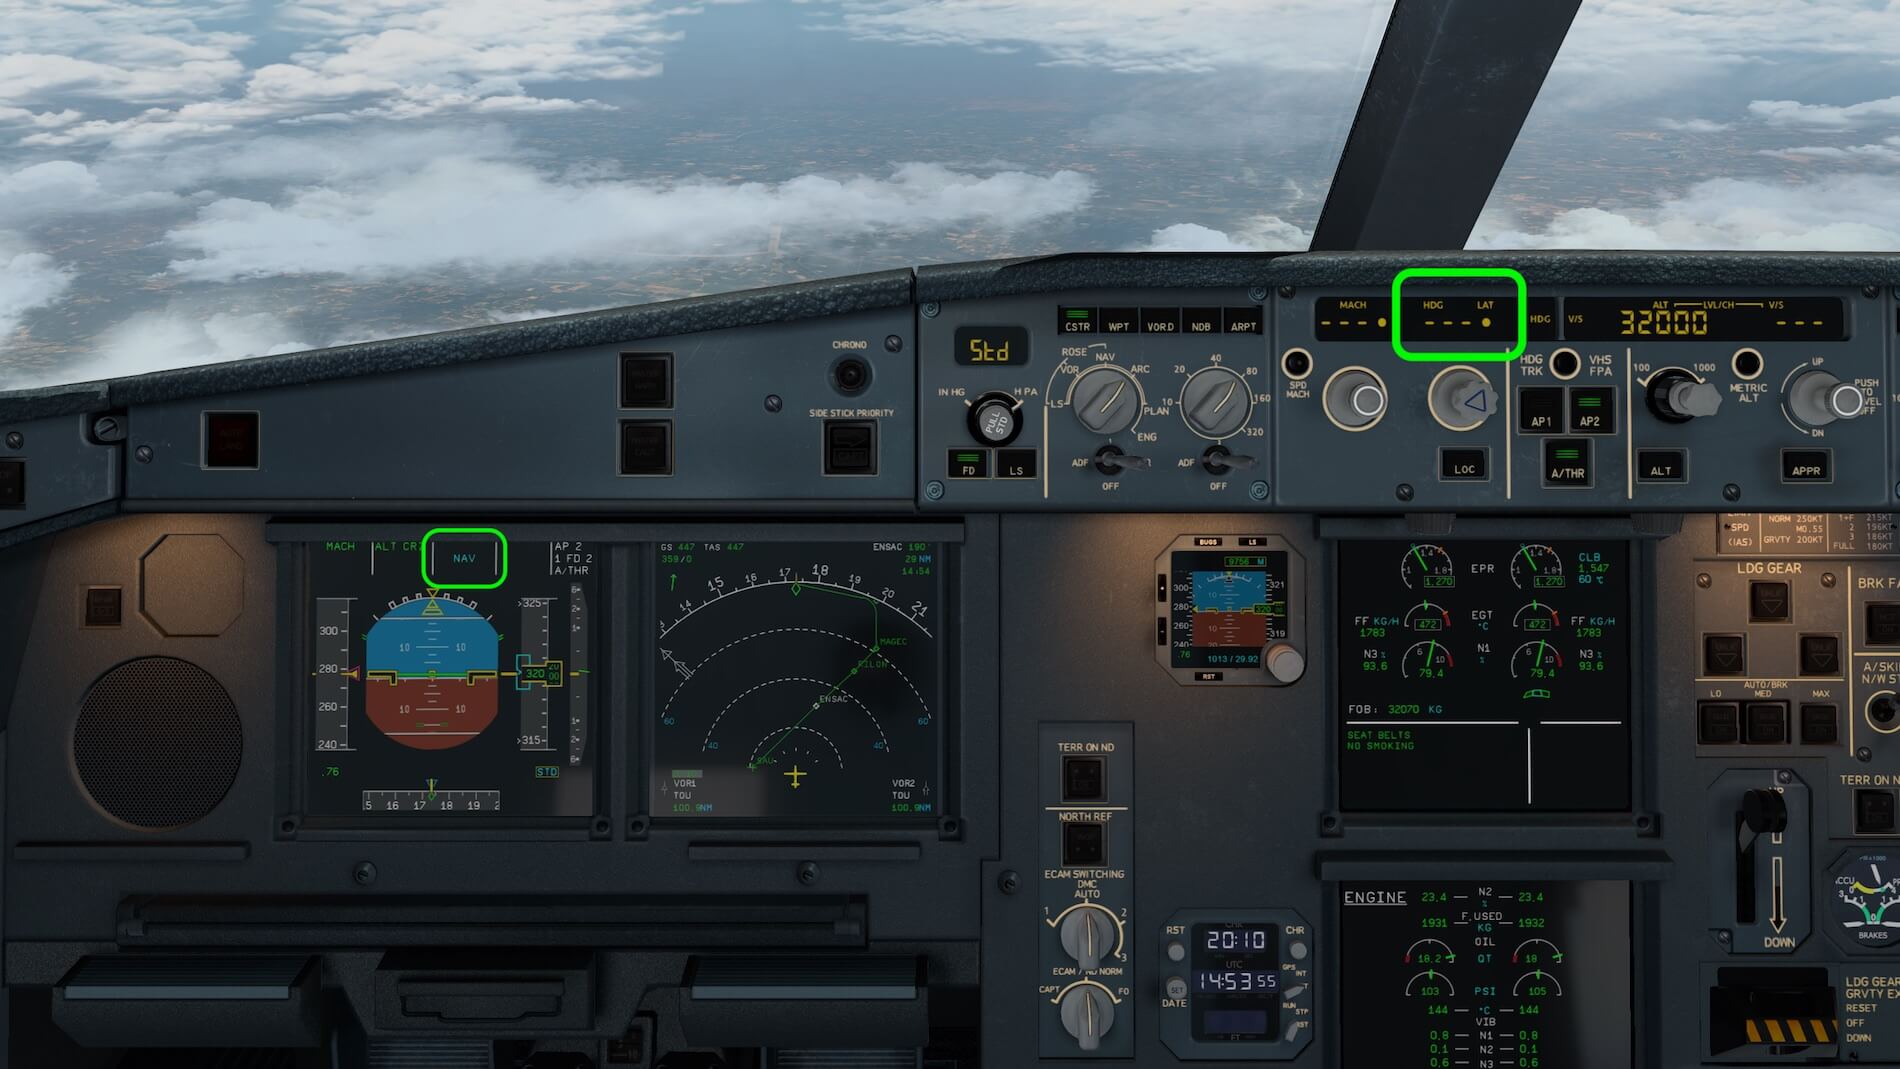


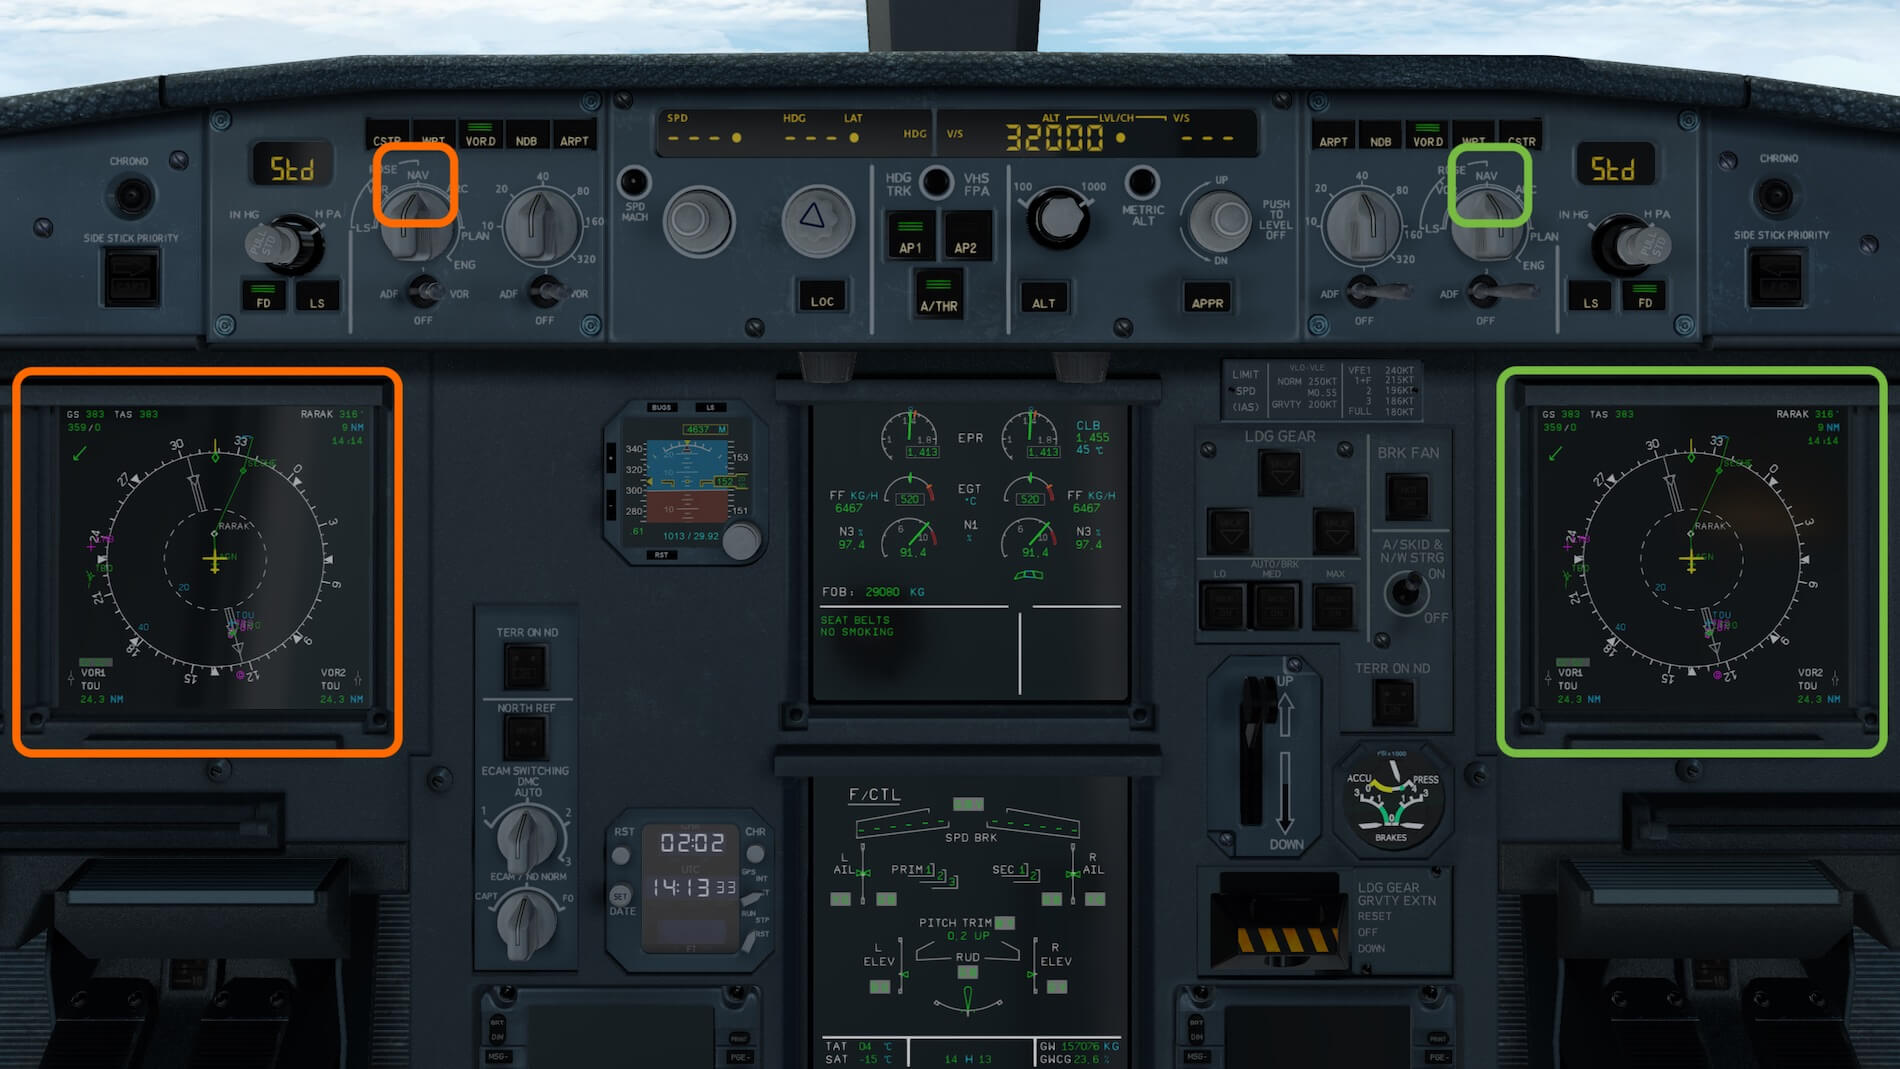


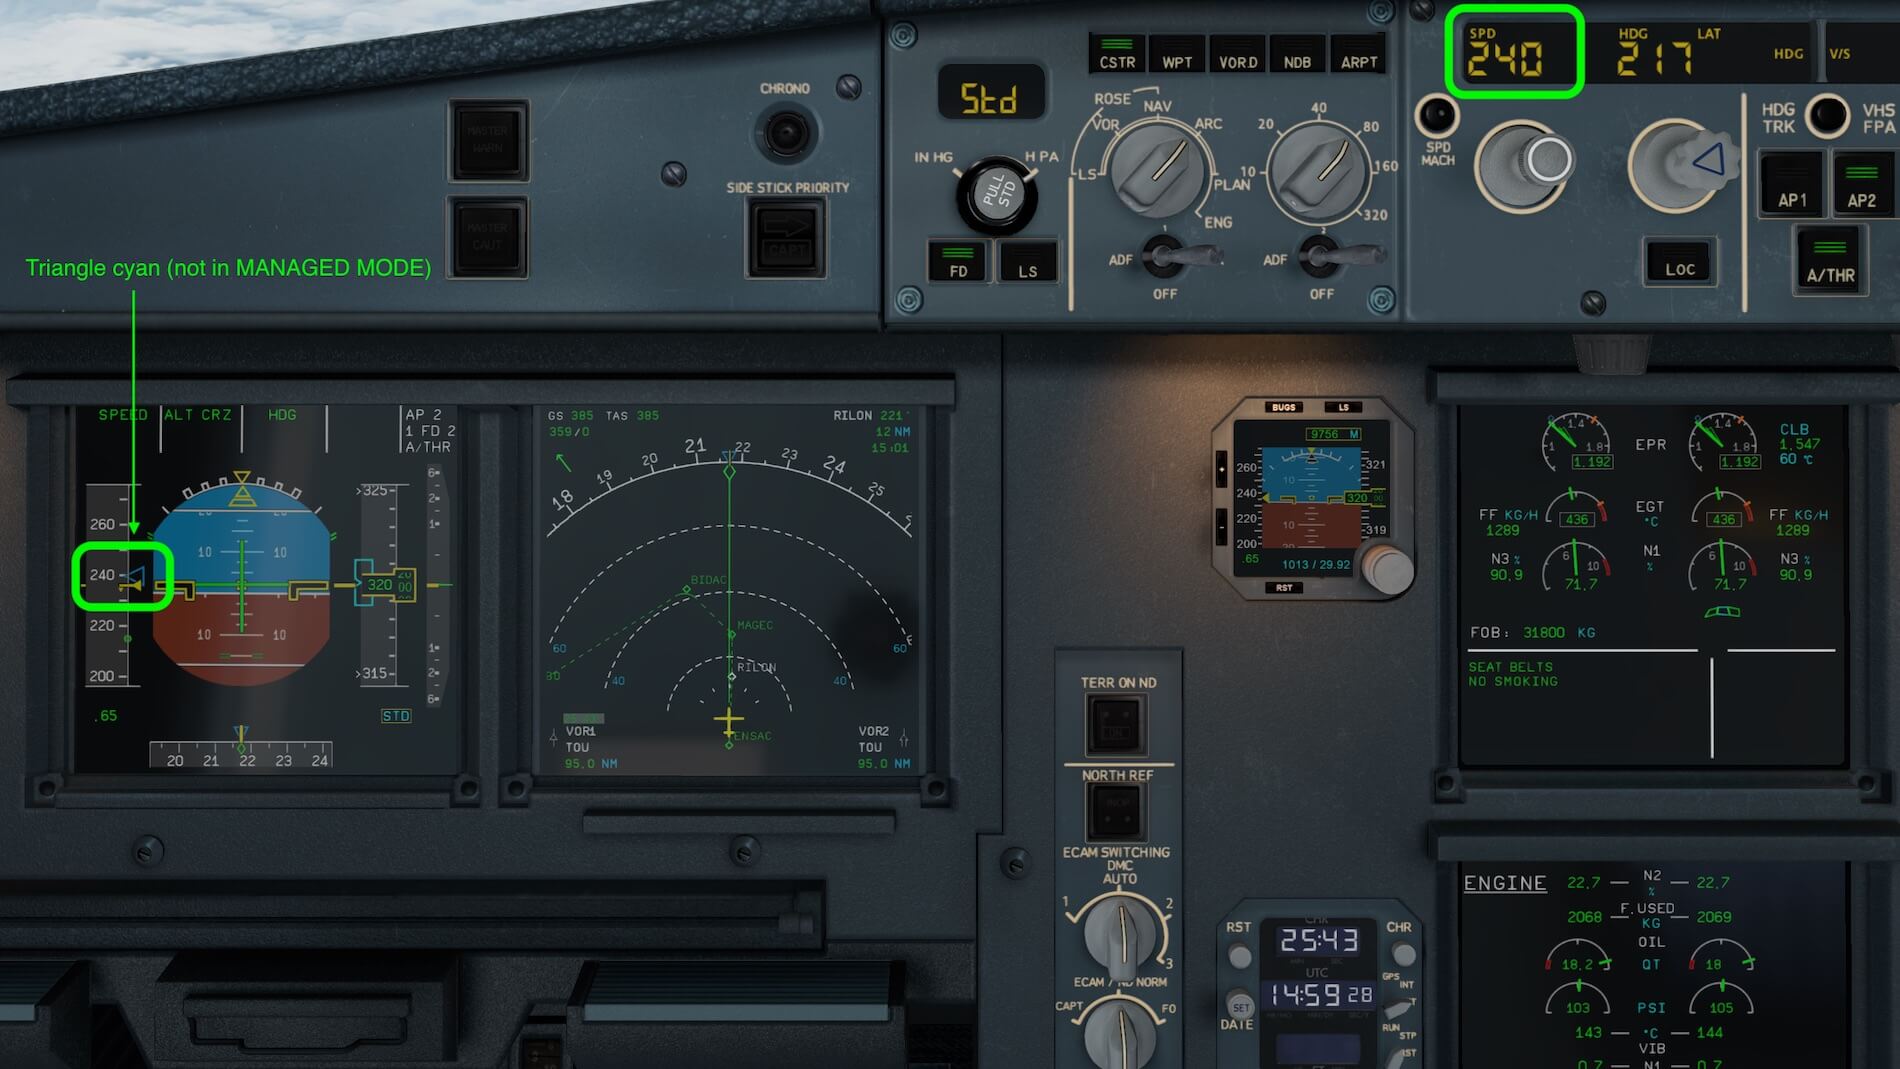
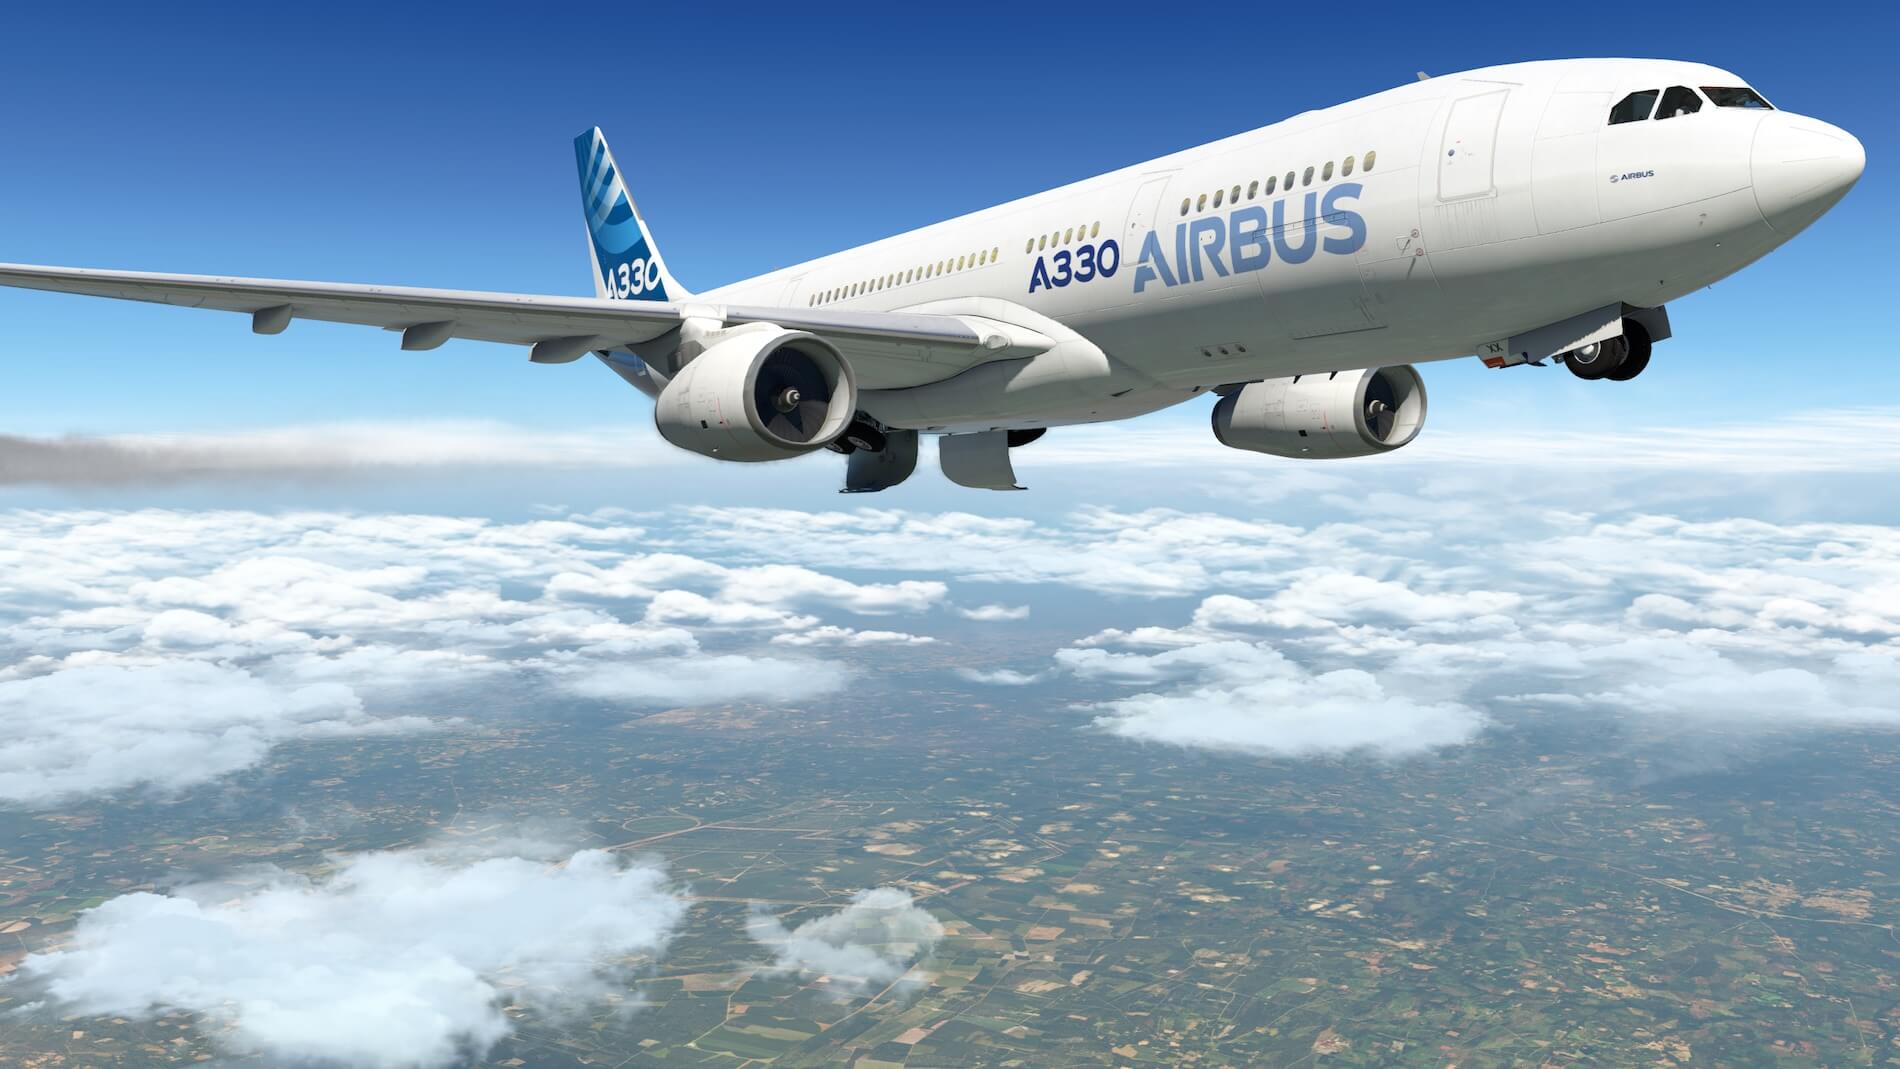

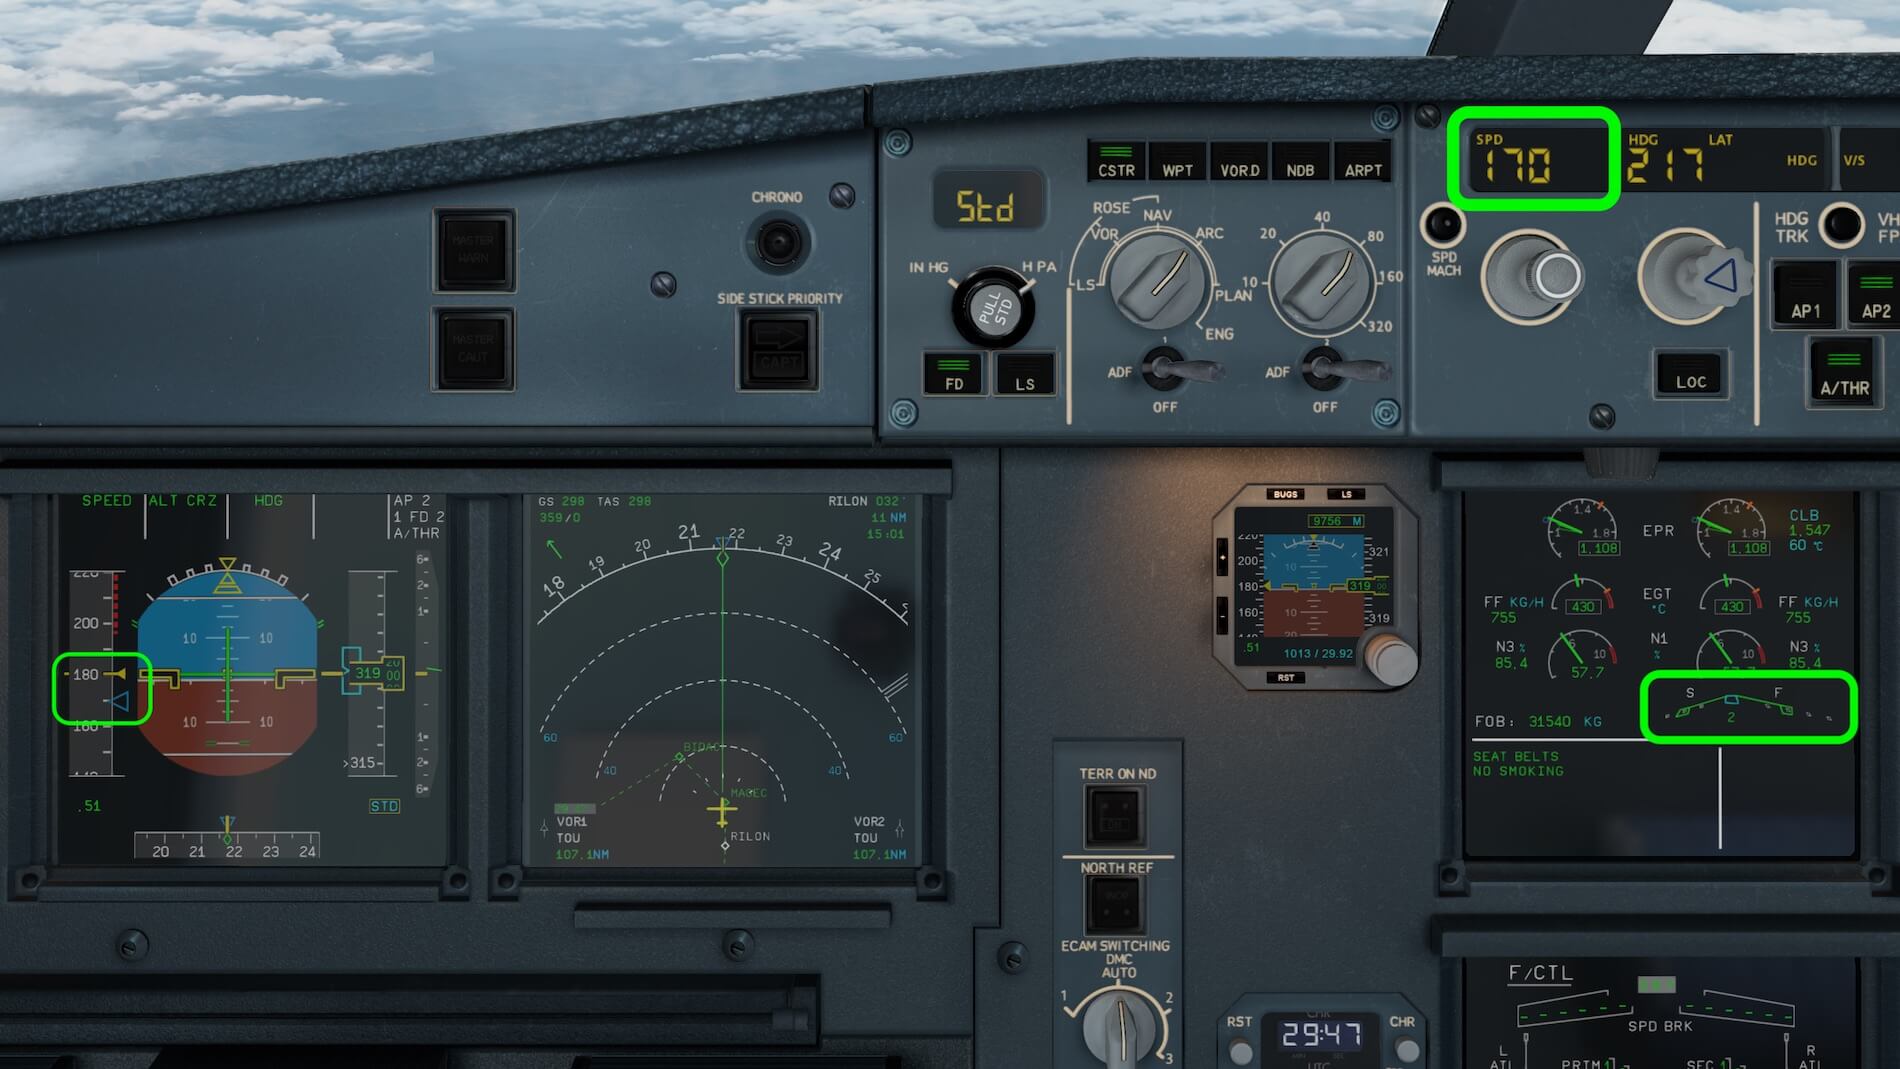


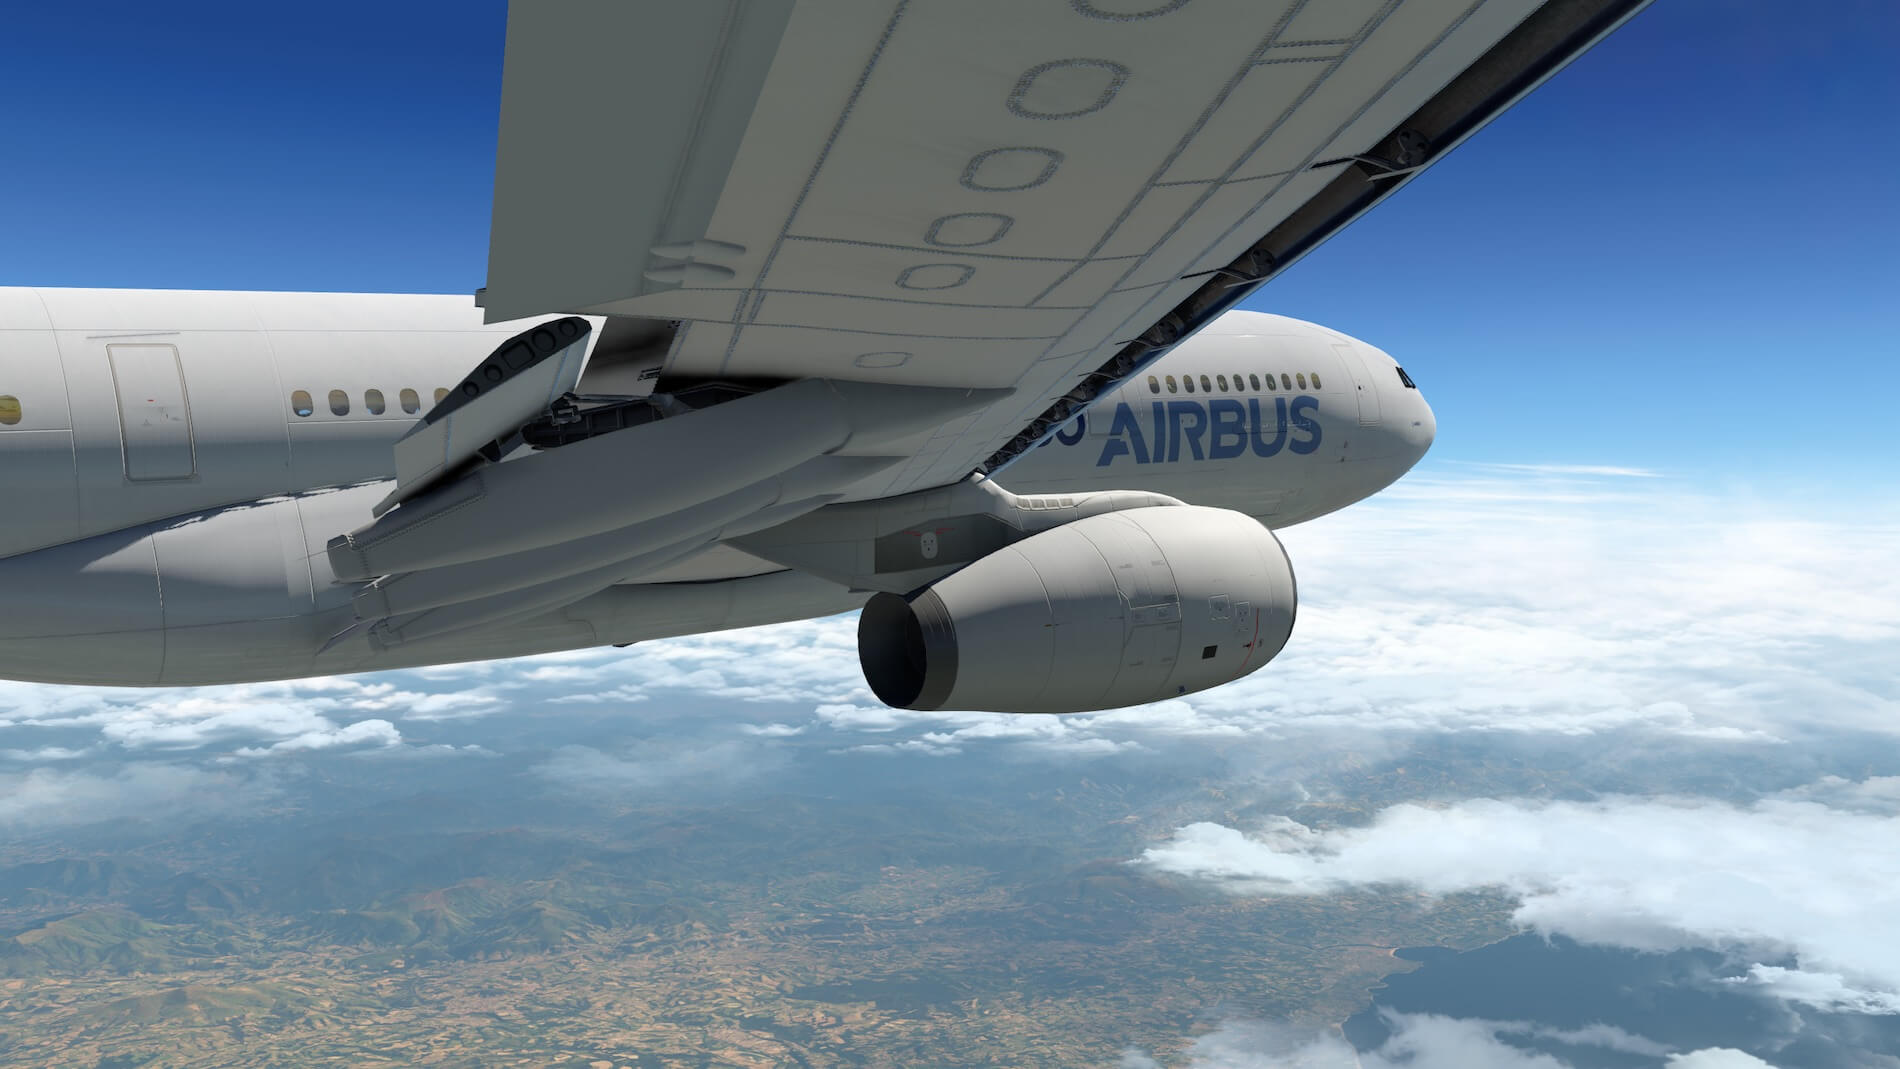


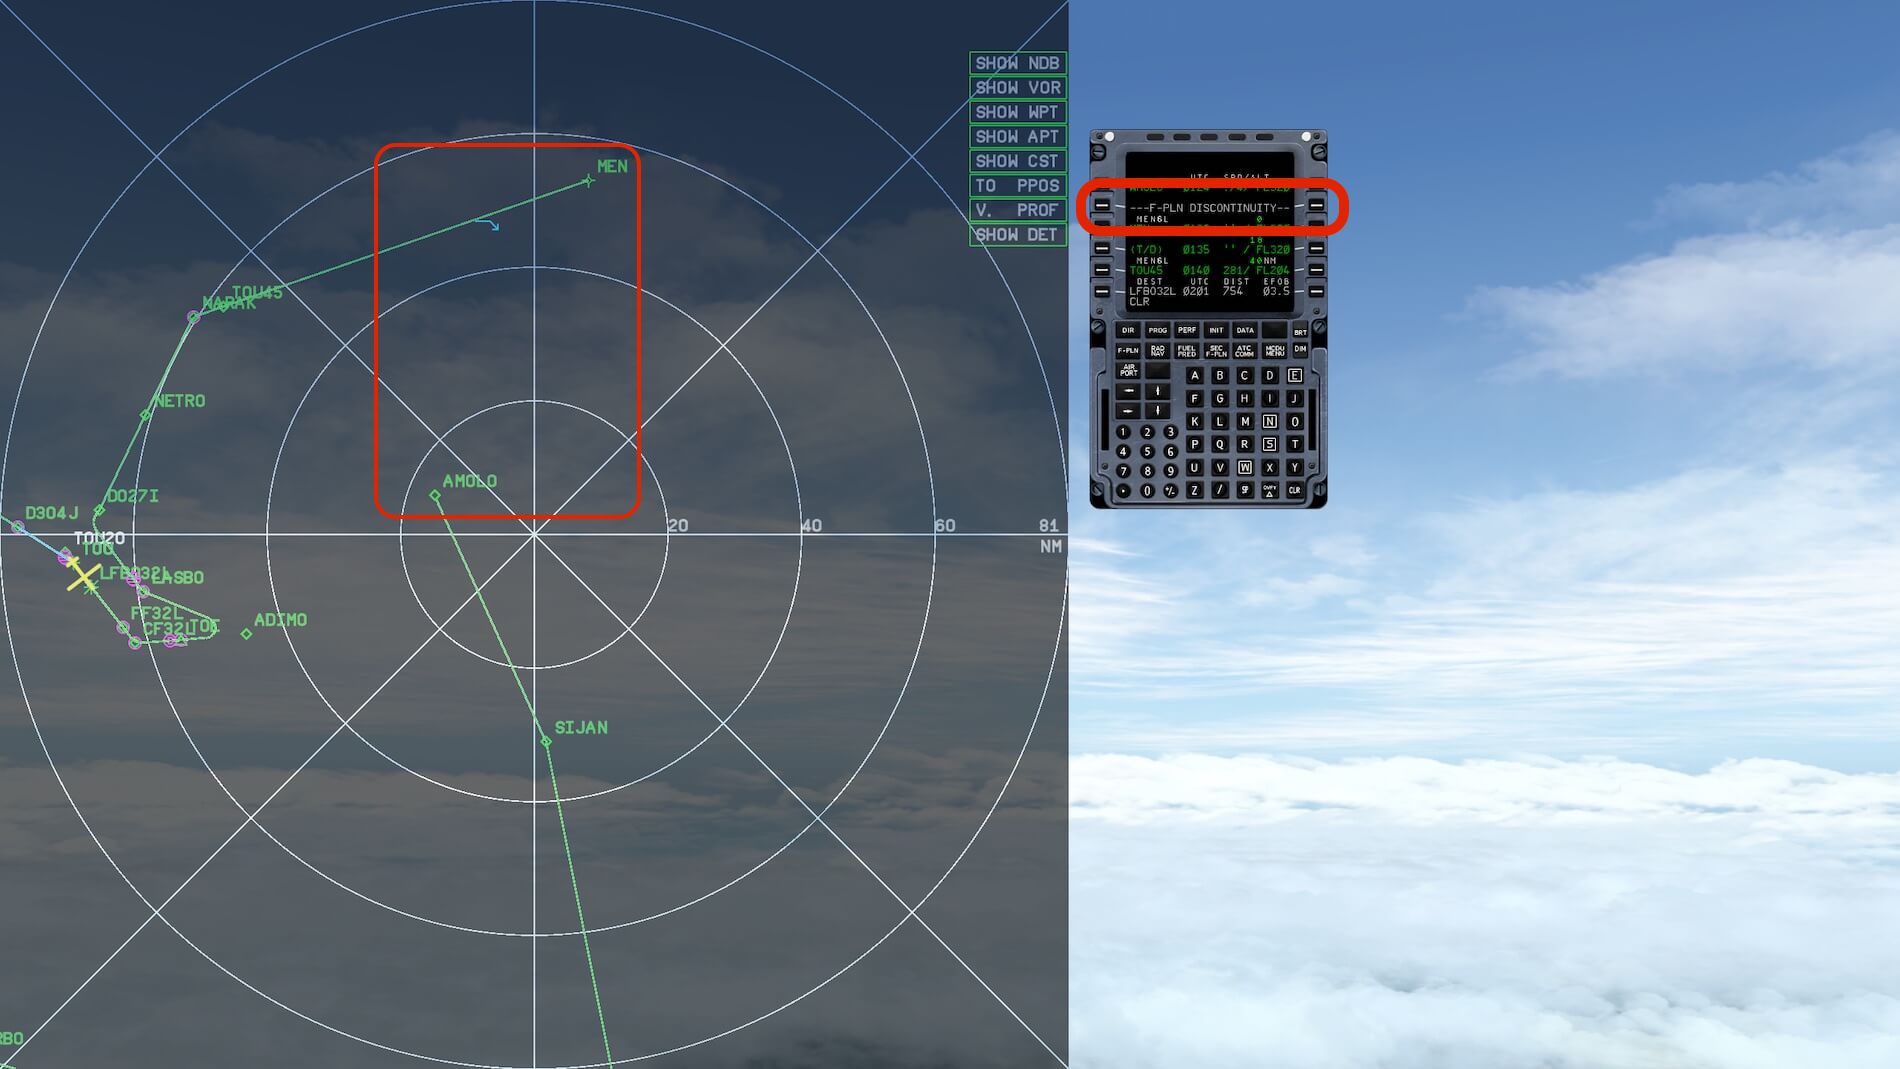
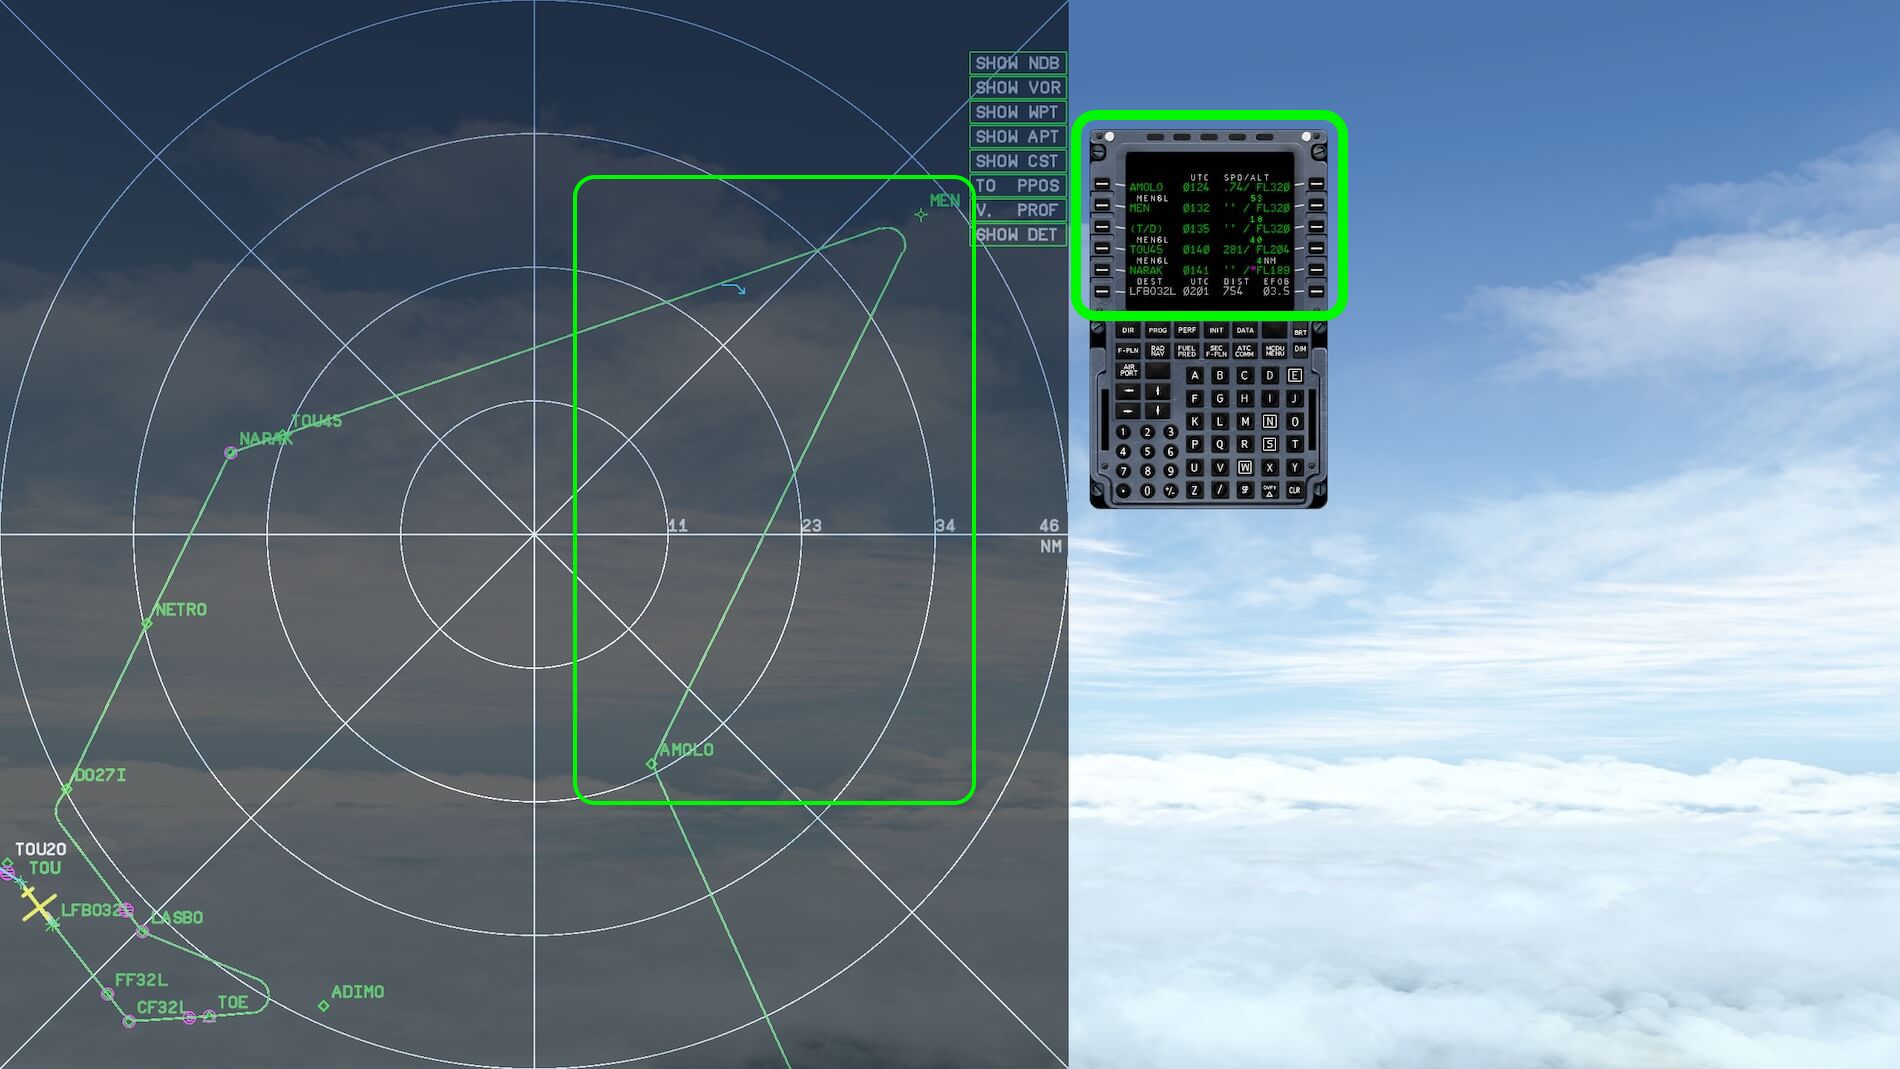
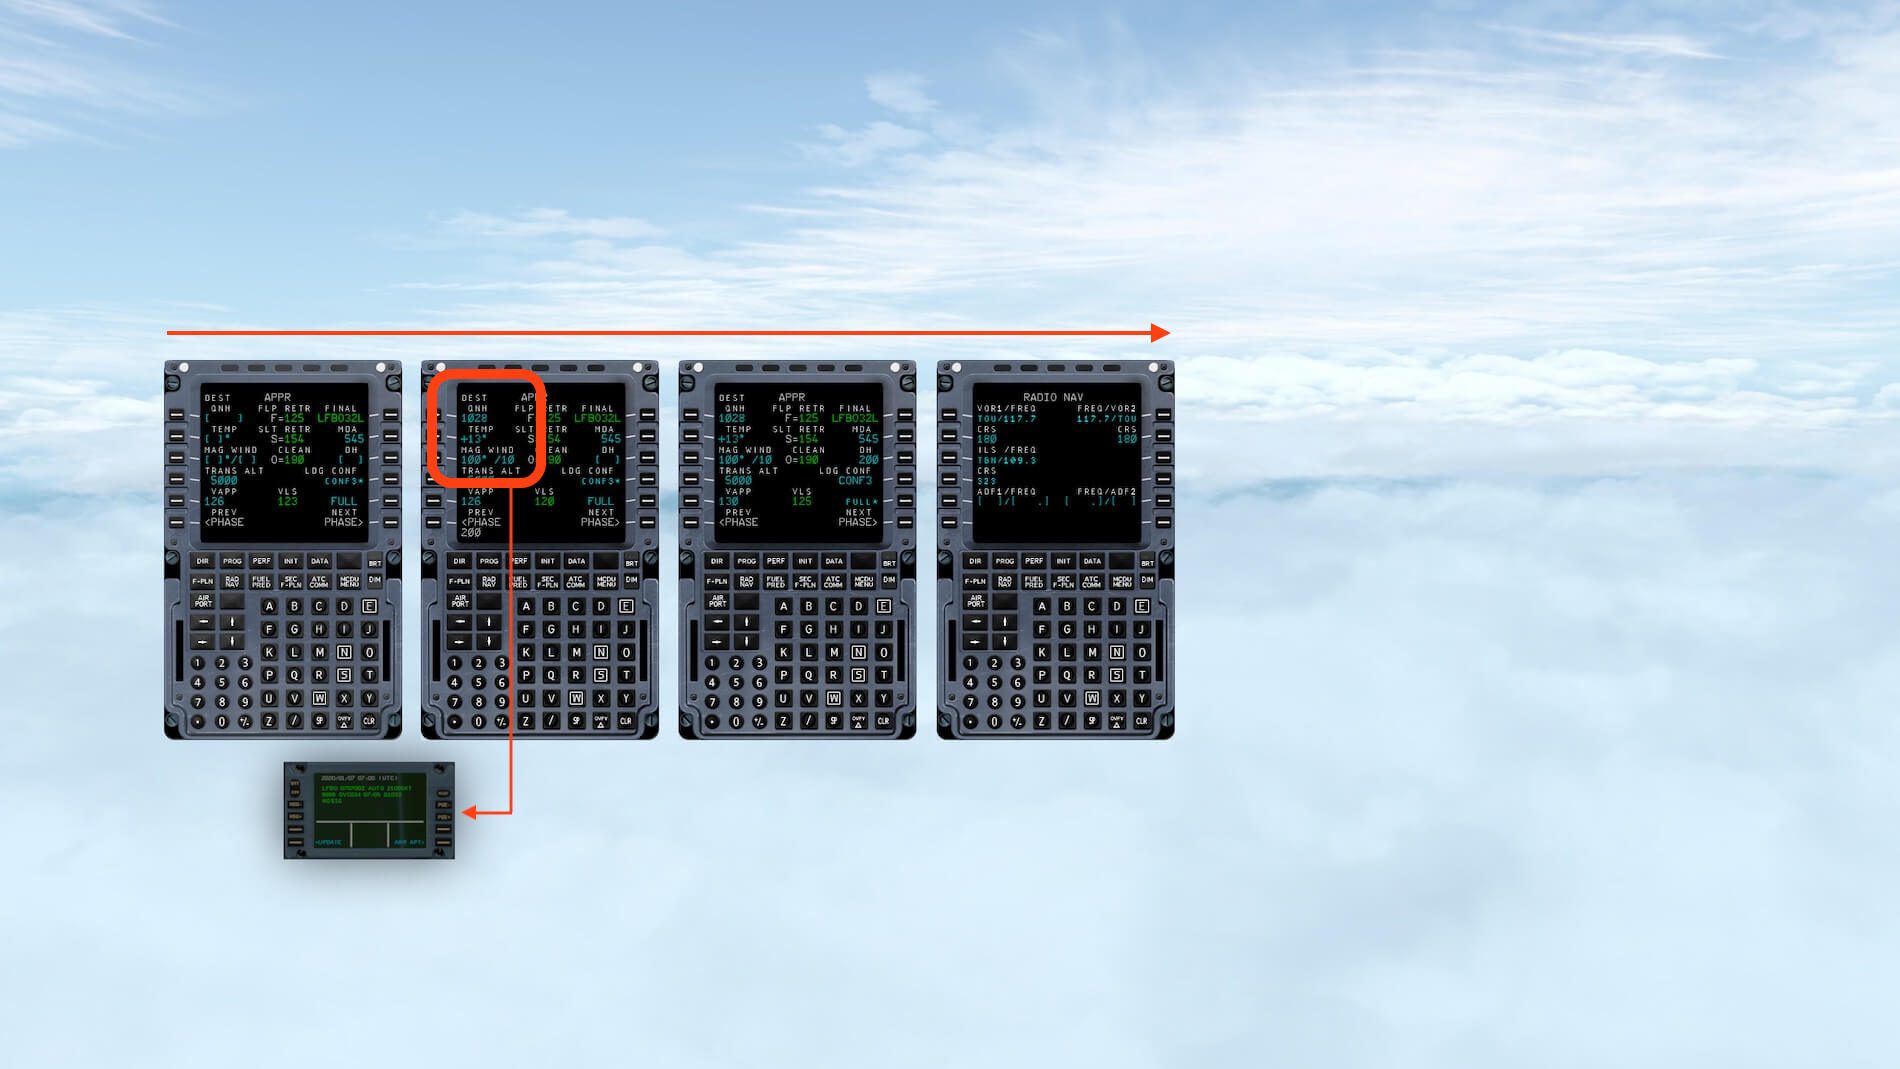
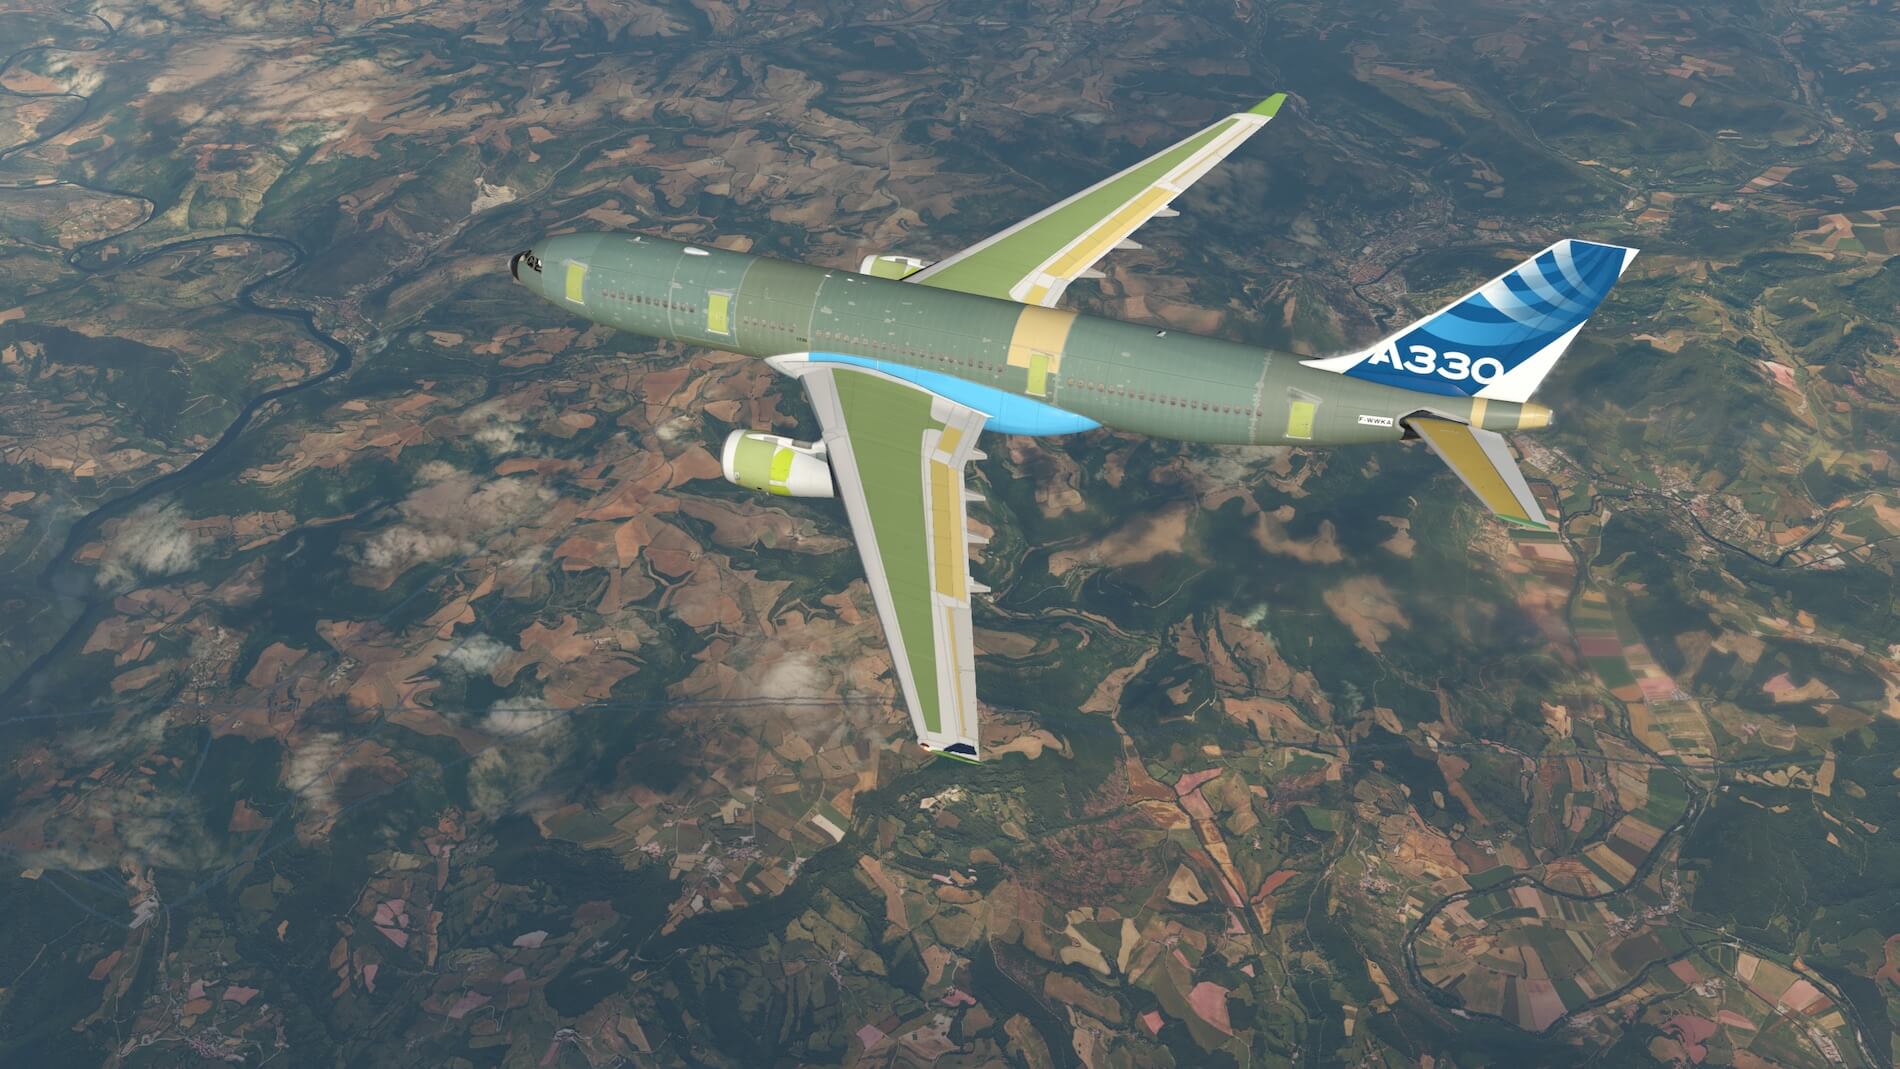
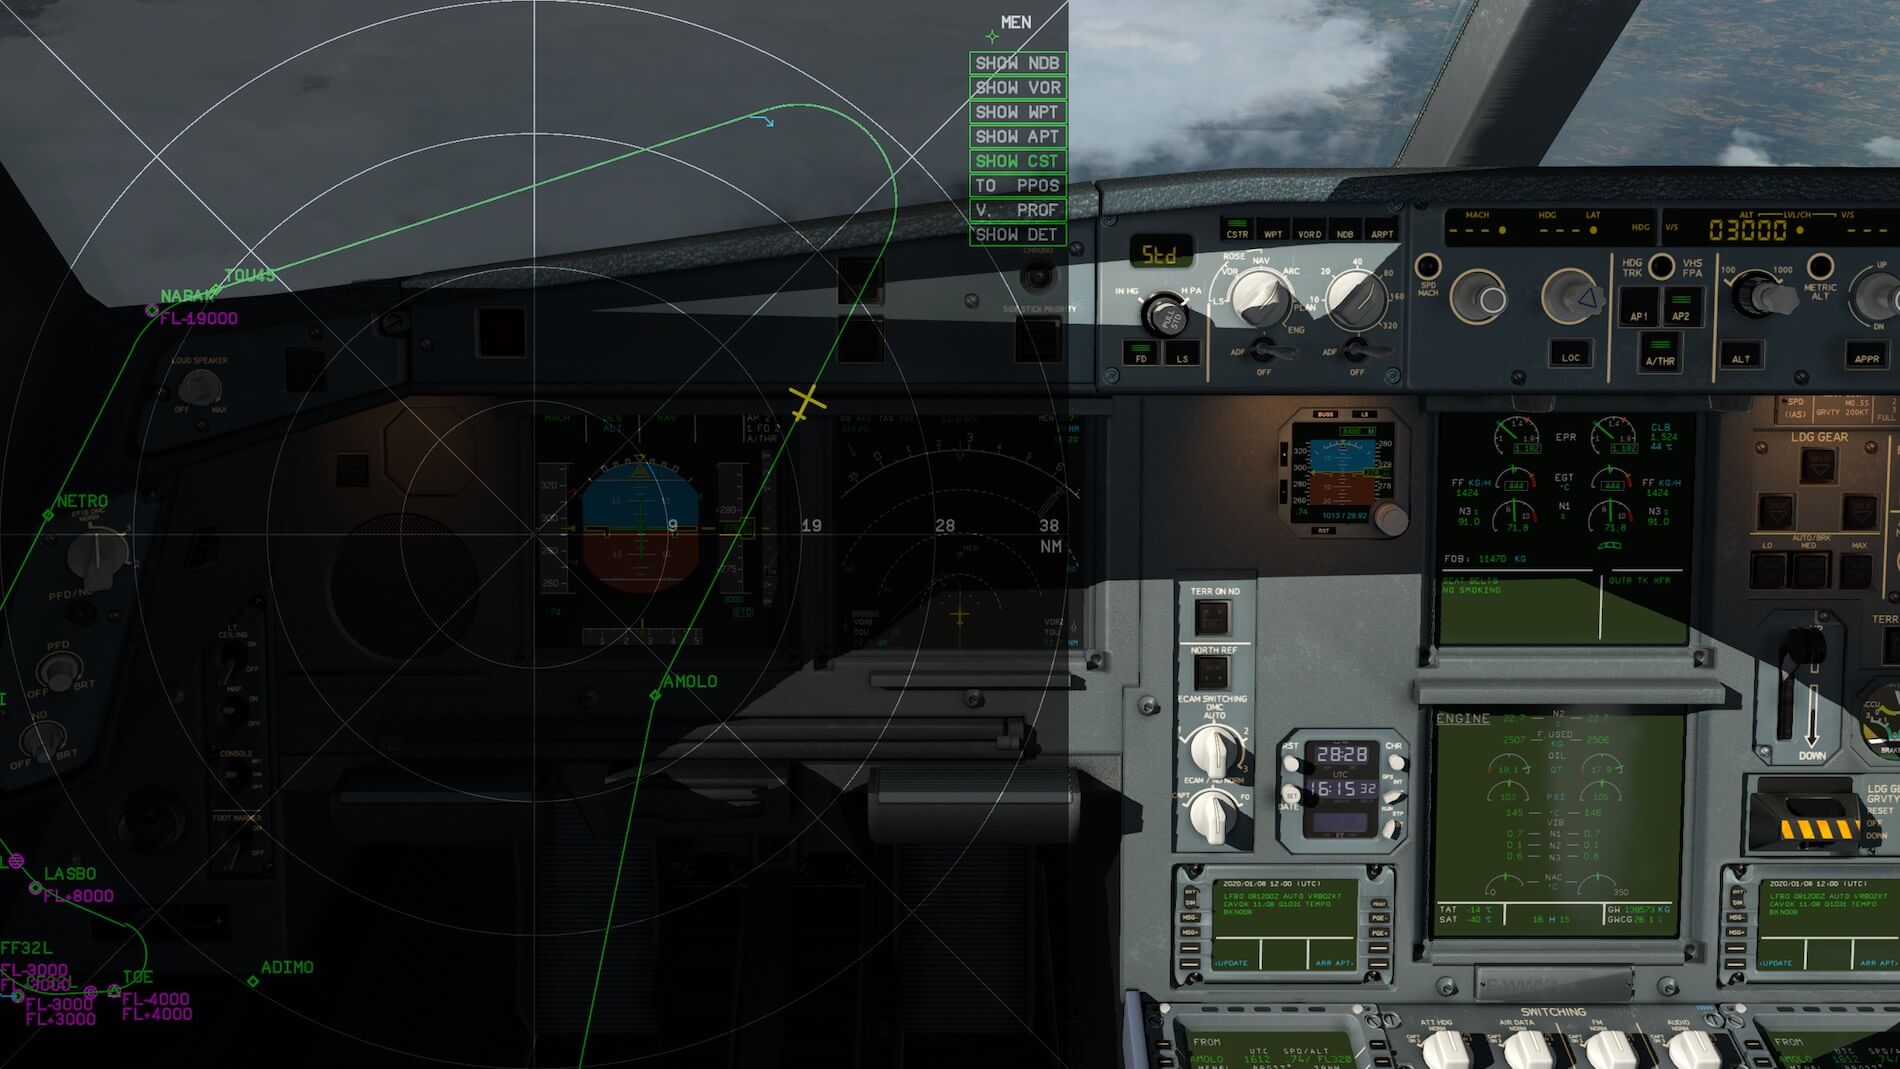


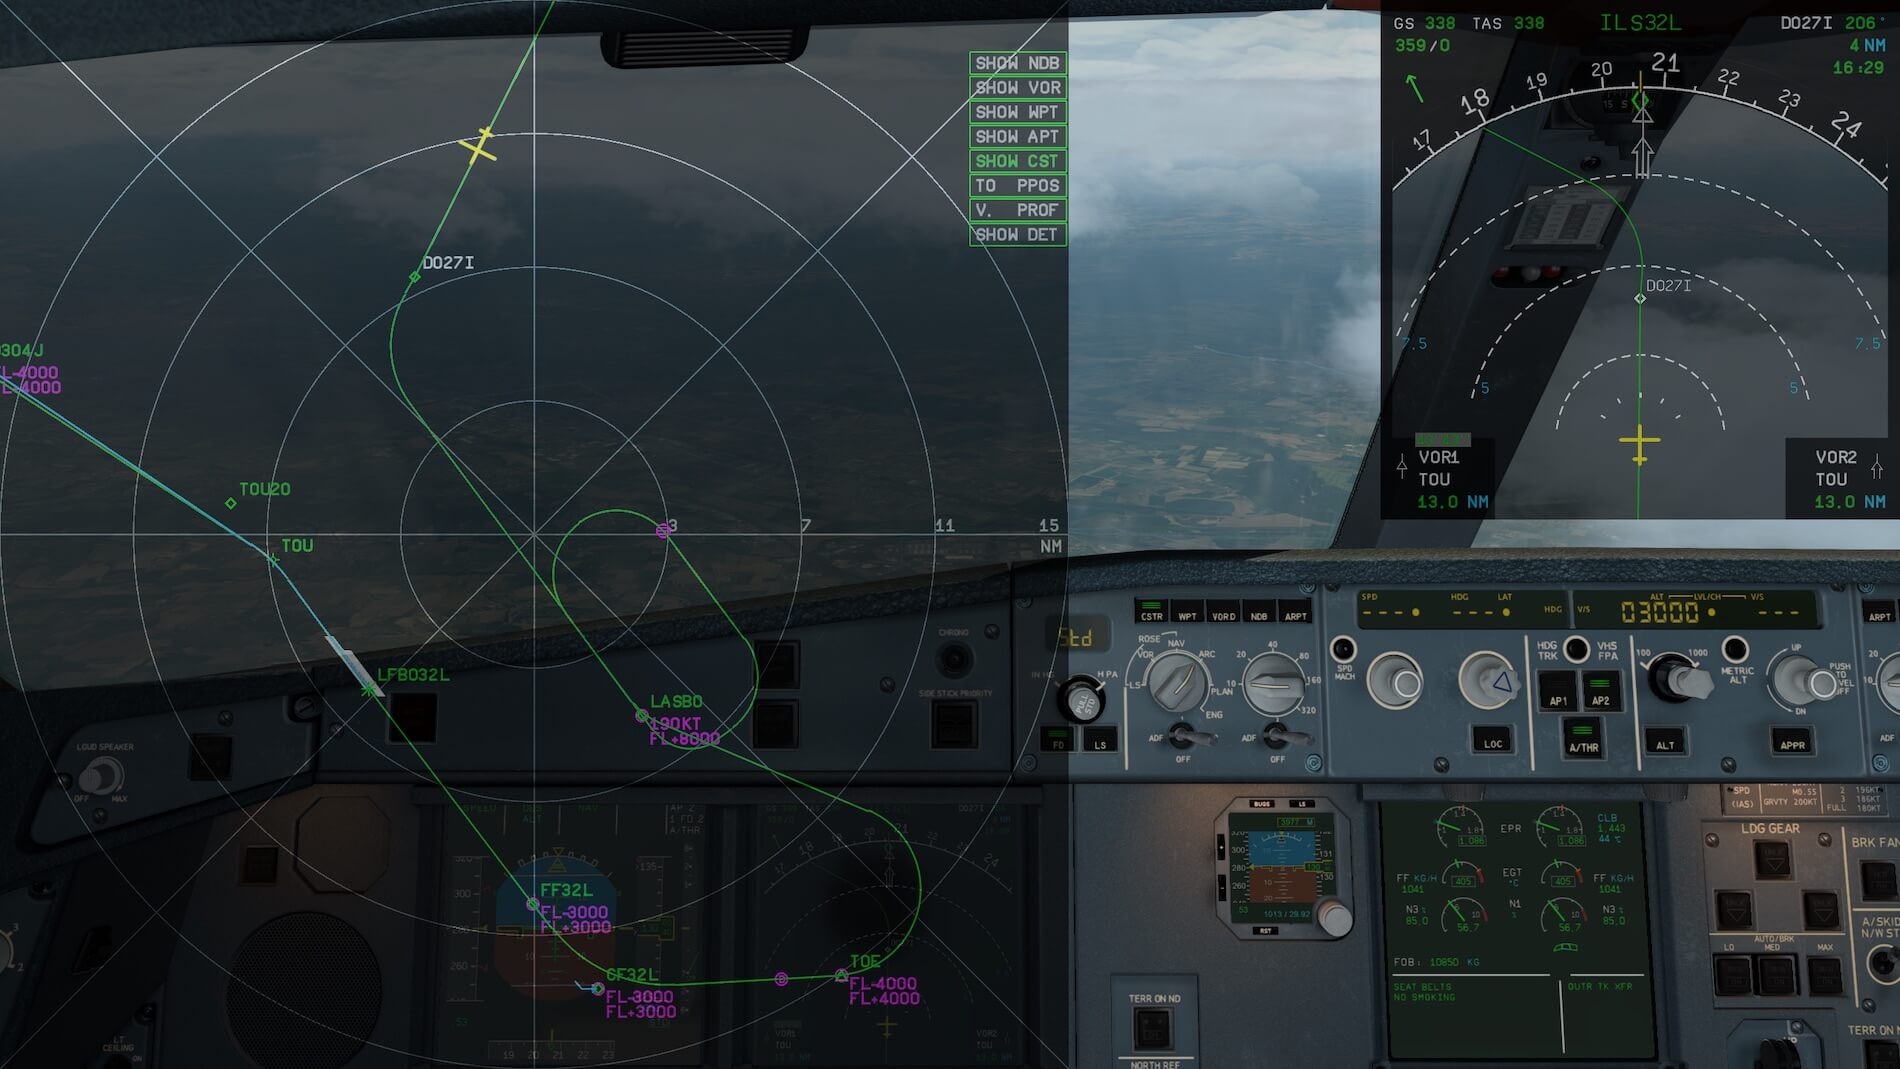

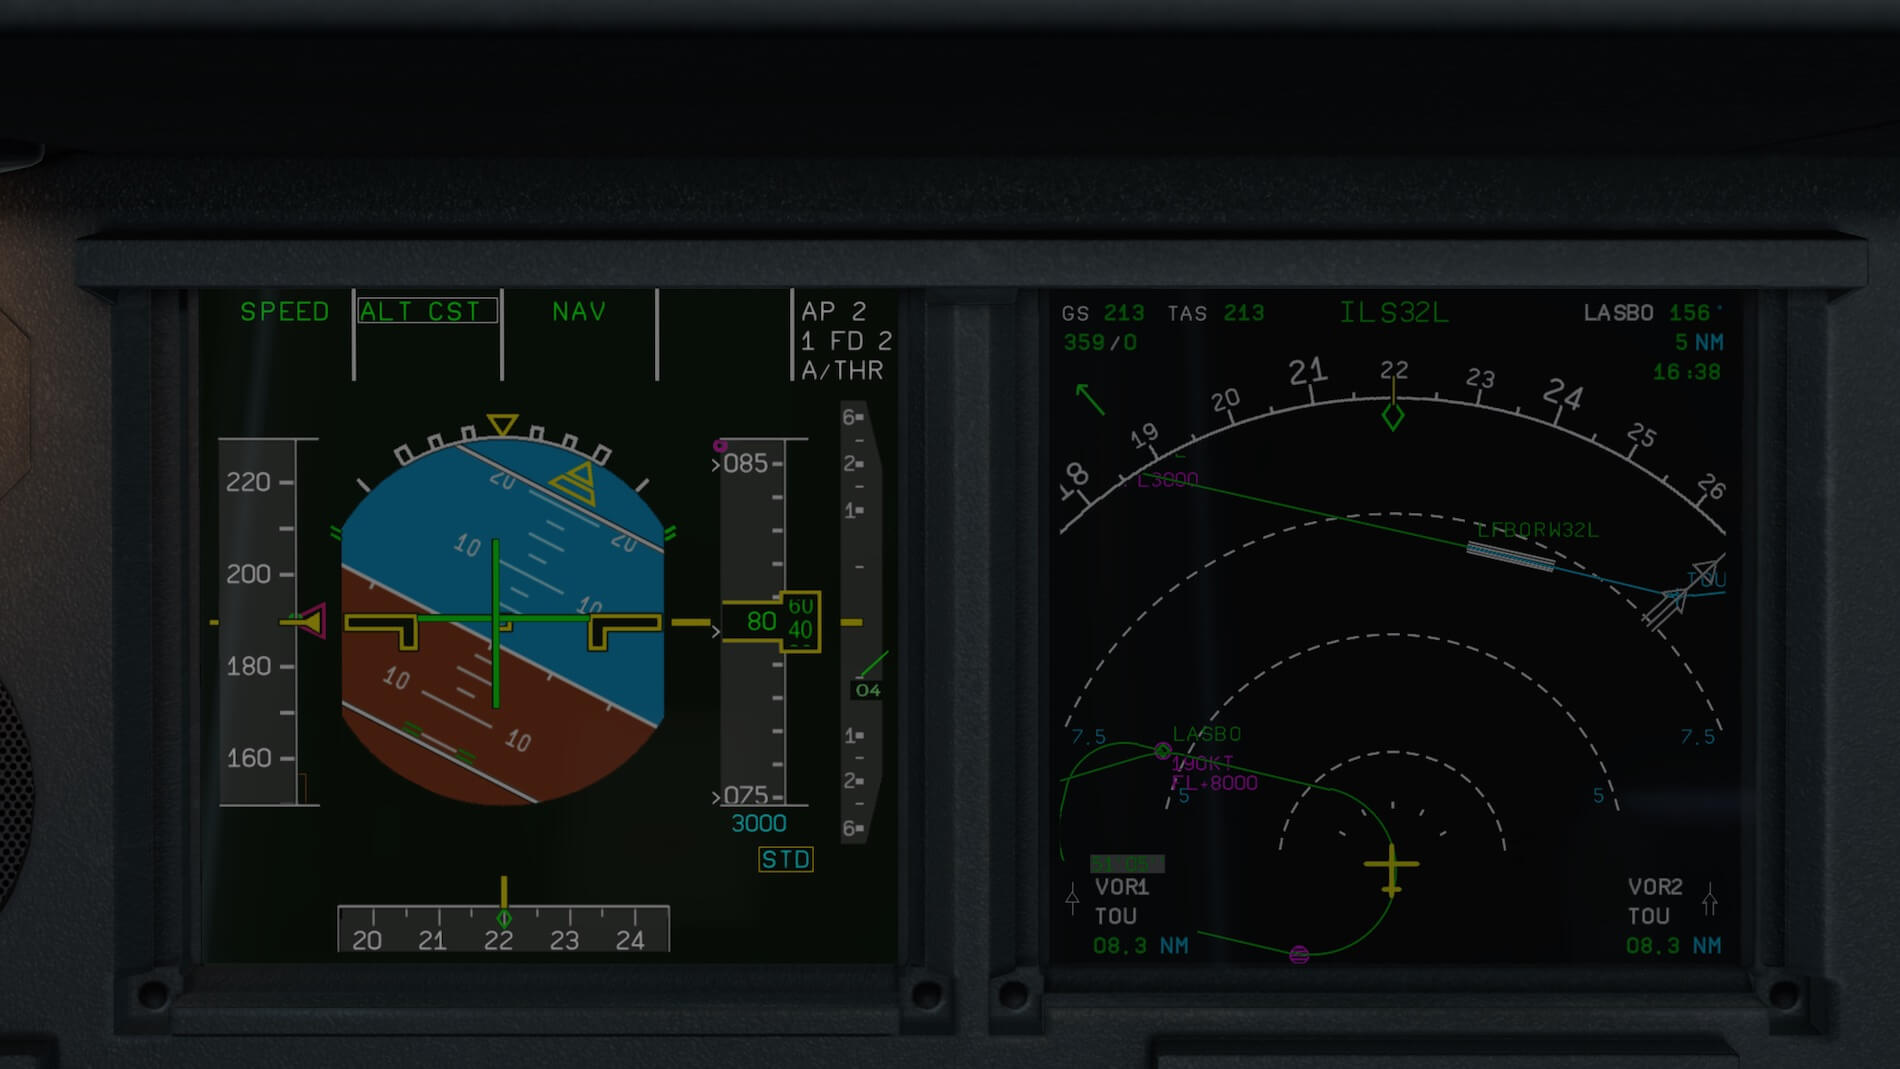


0 Comments