Just Flight “Tin Triangle” … the Vulcan
Introduction
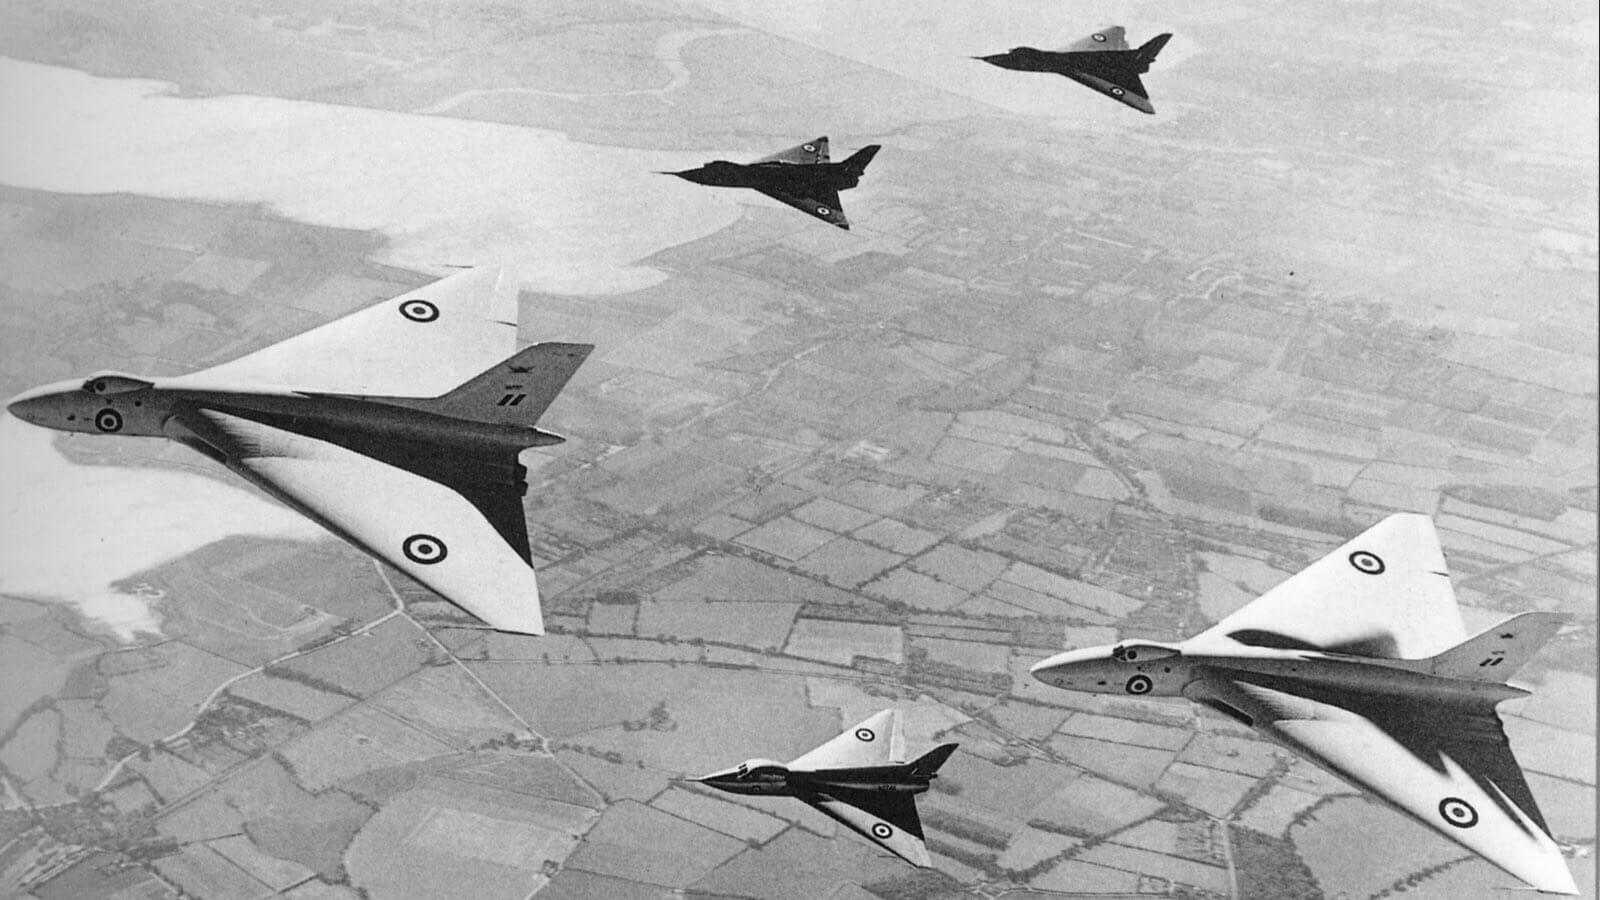
What is that for kind of title “Tin Triangle”? Tin Triangle is the nickname of the Avro Vulcan. The story goes as follows; “the prototype Vulcans (VX777 front, VX770 rear) with four Avro 707s at the Farnborough Air Show in September 1953 gave it quickly the affectionate nickname of Tin Triangle due to the large delta wings of the Vulcan.
OK, now we know that, we from X-Plained.Com are pleased to offer you an in-depth review of the world famous Just Flight, in partnership with Thranda Designs, Avro Vulcan bomber. Perhaps you know this aircraft or have seen it in real or you’re from a younger generation that isn’t aware of the British beauty. And yes, it was a beauty, keeping in mind the time of the 1960’s and up.
That said, Andy Clarke and Angelique van Campen from X-Plained.Com are pleased to offer you this comprehensive review. It will be indeed a in-depth review since the aircraft is worth it. It’s first worth for the real aircraft, but also the modeled X-Plane 11 aircraft. It’s as we say a beautifully modeled aircraft with eye for many details and accurately modelled by the Thranda Design and Just Flight team.
In case you lost it, this historical fighter package covers the Avro Vulcan models B Mk2, K.2 and MRR versions. We’re both very excited reviewing this aircraft in-depth. Andy has seen and touched the real aircraft when he was young while I’m in for all kind of historical aircraft that are modeled with passion.
Britain’s premier V Force Nuclear Bomber
Background Information
But before we begin with the actual review, it’s worth to highlight a bit about the real Avro Vulcan. The following background information is an extraction from Wikipedia although todays BAE Systems (British Aerospace, merged with Marconi Systems) still offers a dedicated web page to the Avro Vulcan. Let us check it out, right?
According to Wikipedia “The Avro Vulcan which became later – July 1963 and up – Hawker Siddeley Vulcan, is a jet-powered tailless delta wing high-altitude strategic bomber, which was operated by the Royal Air Force (RAF) from 1956 until 1984.”
“Aircraft manufacturer A.V. Roe and Company (Avro) designed the Vulcan. Of the three V bombers produced, the Vulcan was considered the most technically advanced and hence the riskiest option. Several reduced-scale aircraft, designated Avro 707, were produced to test and refine the delta wing design principles.”
“The Vulcan B.1 was first delivered to the RAF in 1956; deliveries of the improved Vulcan B.2 started in 1960. The B.2 featured more powerful engines, a larger wing, an improved electrical system and electronic countermeasures known as ECM; many were modified to accept the Blue Steel missile. As a part of the V-force, the Vulcan was the backbone of the United Kingdom’s airborne nuclear deterrent during much of the Cold War. Although the Vulcan was typically armed with nuclear weapons, it was capable of conventional bombing missions, a capability which was used in Operation Black Buck during the Falklands War between the United Kingdom and Argentina in 1982. In the mid-1970s nine Vulcans were adapted for maritime radar reconnaissance operations, redesignated as B.2 (MRR). In the final years of service six Vulcans were converted to the K.2 tanker configuration for aerial refuelling.”

“After retirement by the RAF, the B.2 XH558, named The Spirit of Great Britain, was restored for use in display flights and air shows, whilst two other B.2 models, the XL426 and XM655, have been kept in taxiable condition for ground runs and demonstrations at London Southend Airport and Wellesbourne Mountford Airfield respectively.”
This is only a small collection of what can be found on the Internet about the Avro Vulcan. Just do a search and many, mostly UK, websites popup with gorgeous photos and/or in-depth information.
Installation and Documentation
Although this section may be self-explanatory, the included document is worth to highlight, but first the installation. You either bought the package via the Just Flight website or you got it via X-Plane.Org. Either way is possible while the end result is the same. After you’ve downloaded the package, and unzipped it, you’re ready to install it. We’re – Andy and Angelique – both testing and reviewing the JF/Thranda Design Avro Vulcan on an iMac, so we normally have no idea if the Windows or Linux installation is different, but perhaps Angelique can help you out.
Since she has on her iMac installed VMWare with Windows 10 with X-Plane 11, she’s able to check out what’s different on Windows. Answer is quickly given; none! For all OS platforms the aircraft ZIP package must be unzipped and the folder you end up with must be installed either in the Aircraft folder or you make a sub-folder named Just Flight. That’s a bit up to you.
The JF/Thranda Vulcan package is protected via a serial number which is needed to activate the product. For Just Flight a very common way to protect their X-Plane products. The modeled Avro Vulcan is a dedicated X-Plane 11 only aircraft package. Keep in mind that when you want to use the Avro Vulcan, you need at least a graphical card with 4GB VRAM.
And luckily, the aircraft is made for Windows, macOS and Linux which feels normal, but more and more aircraft from new developers are Windows only. Weird to be honest in my humble opinion. Anyway, the package includes many liveries and although I had hoped I could find some user liveries at the X-Plane.Org, I only found one – May 2020 – and that’s it. Perhaps soon more liveries will become available at X-Plane.Org or somewhere else.
When it comes to the documentation, JF includes a single in-depth operations manual that covers the Vulcan bomber models B MK. 2, K.2 and MRR. The manual is basically split into different section of which the following are very interesting to read. Oops, no, you need to read those sections! It’s a complex and well-modeled bomber with lots of details and systems that are accurately simulated so therefore there’s absolutely a need to read this manual. Good, the sections that are worth the read are:
– Installation, Update and Support
– System- and Panel Guide
– Model options and Flying the Vulcan
– Procedures
I find that there’s a need to highlight a few things in the manual. In the section “Installation, Update and Support” you find a sub section “rain effects”. Me and Andy work both on iMacs thus we use macOS. That said, the rain effects Librian plugin causes a lot of problems with aircraft on macOS. We’ve contacted the developer already about this issue but it seems he’s not able to track the issue why it cost so many frame rates on macOS and not on Windows. It also looks to me that the plugin isn’t modified anymore since January 2019. That said, we didn’t test the rain effects plugin on macOS in combination with the Vulcan for macOS.
The System Guide is worth the read, but it must be said that this is only text. Ok, at the end of this section related to some flight instruments there are three screenshots, but that’s it. I personally had hoped that Just Flight had included when they explain an aircraft system, that they would have added a couple of system diagrams, just to visualise the system layout while it is explained.
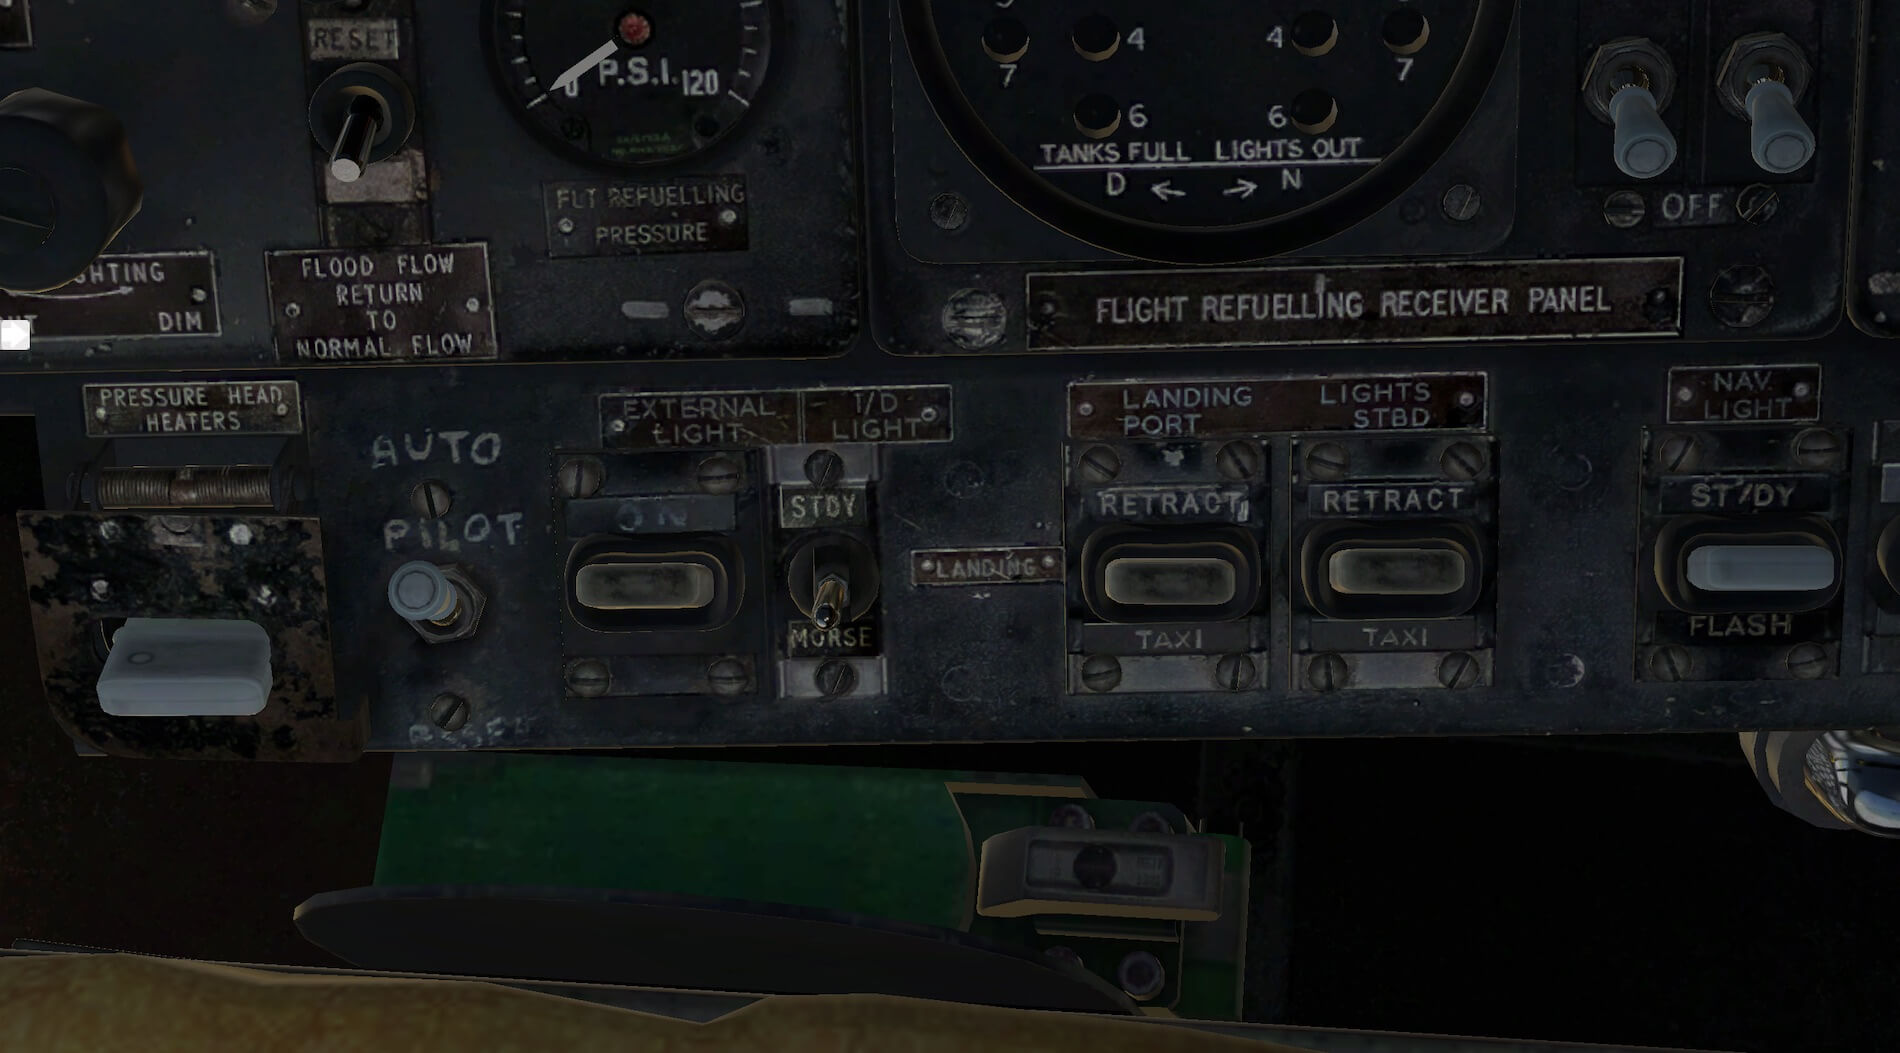
The Panel Guide however is a combination of text with screenshots, but you won’t find any explanation or references to the previous System Guide. So actually these are screenshots of, for example, the cockpit lay-out, sub panels and other popup windows which are whenever applicable, having large ident numbers identifying an instrument, switch, knob, light bulb and so on and separately each number tells you what it is.
Then the section “Flying the Vulcan”.
Actually, this section is a tutorial flight. Not that this replaces the previous System and Panel Guides section, it’s helpful to check out for yourself if you understand the bomber.
So this JF tutorial flight is short – only 80NM – but long enough, according to JF, to understand the Vulcan essential systems. The tutorial flight departs from RAF Cottesmore, located to the north-west of the city of Peterborough in the UK. You will be flying south-west, around the eastern edge of the East Midlands and Birmingham airspace, and overhead RAF Brize Norton before approaching RAF Fairford.
Andy will cover this tutorial flight in more depth, but of what I read and see, it’s a comprehensive description and operation of all that’s needed to reproduce this flight by yourself.
Exterior Modelling
I – yes, it’s me Andy Clarke – have to declare I am a great fan of the Vulcan and grew up between the bases of Scampton and Waddington and Cottesmore, Vulcans often overflew our house and it was not uncommon to see at least four fly over together or one after the other. I have followed the Vulcan closely via airshows and seen them close up in museums. I have never flown in a Vulcan nor am I a qualified pilot.
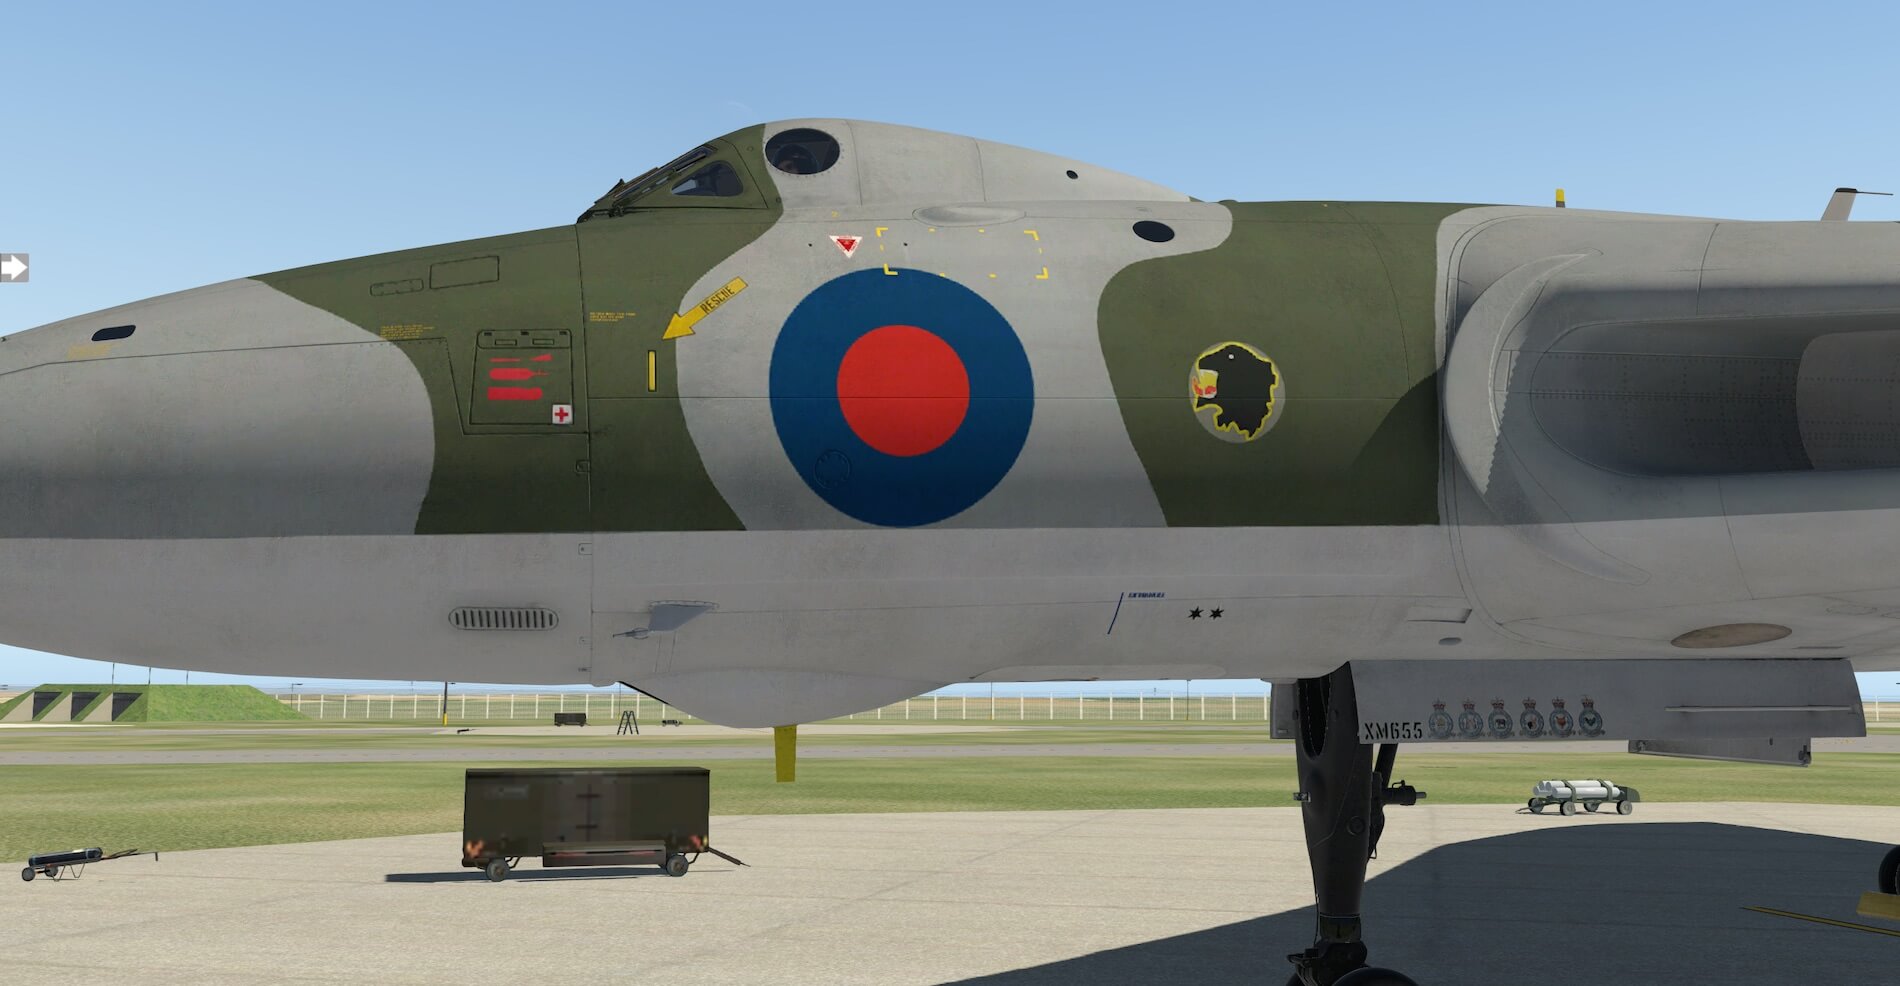
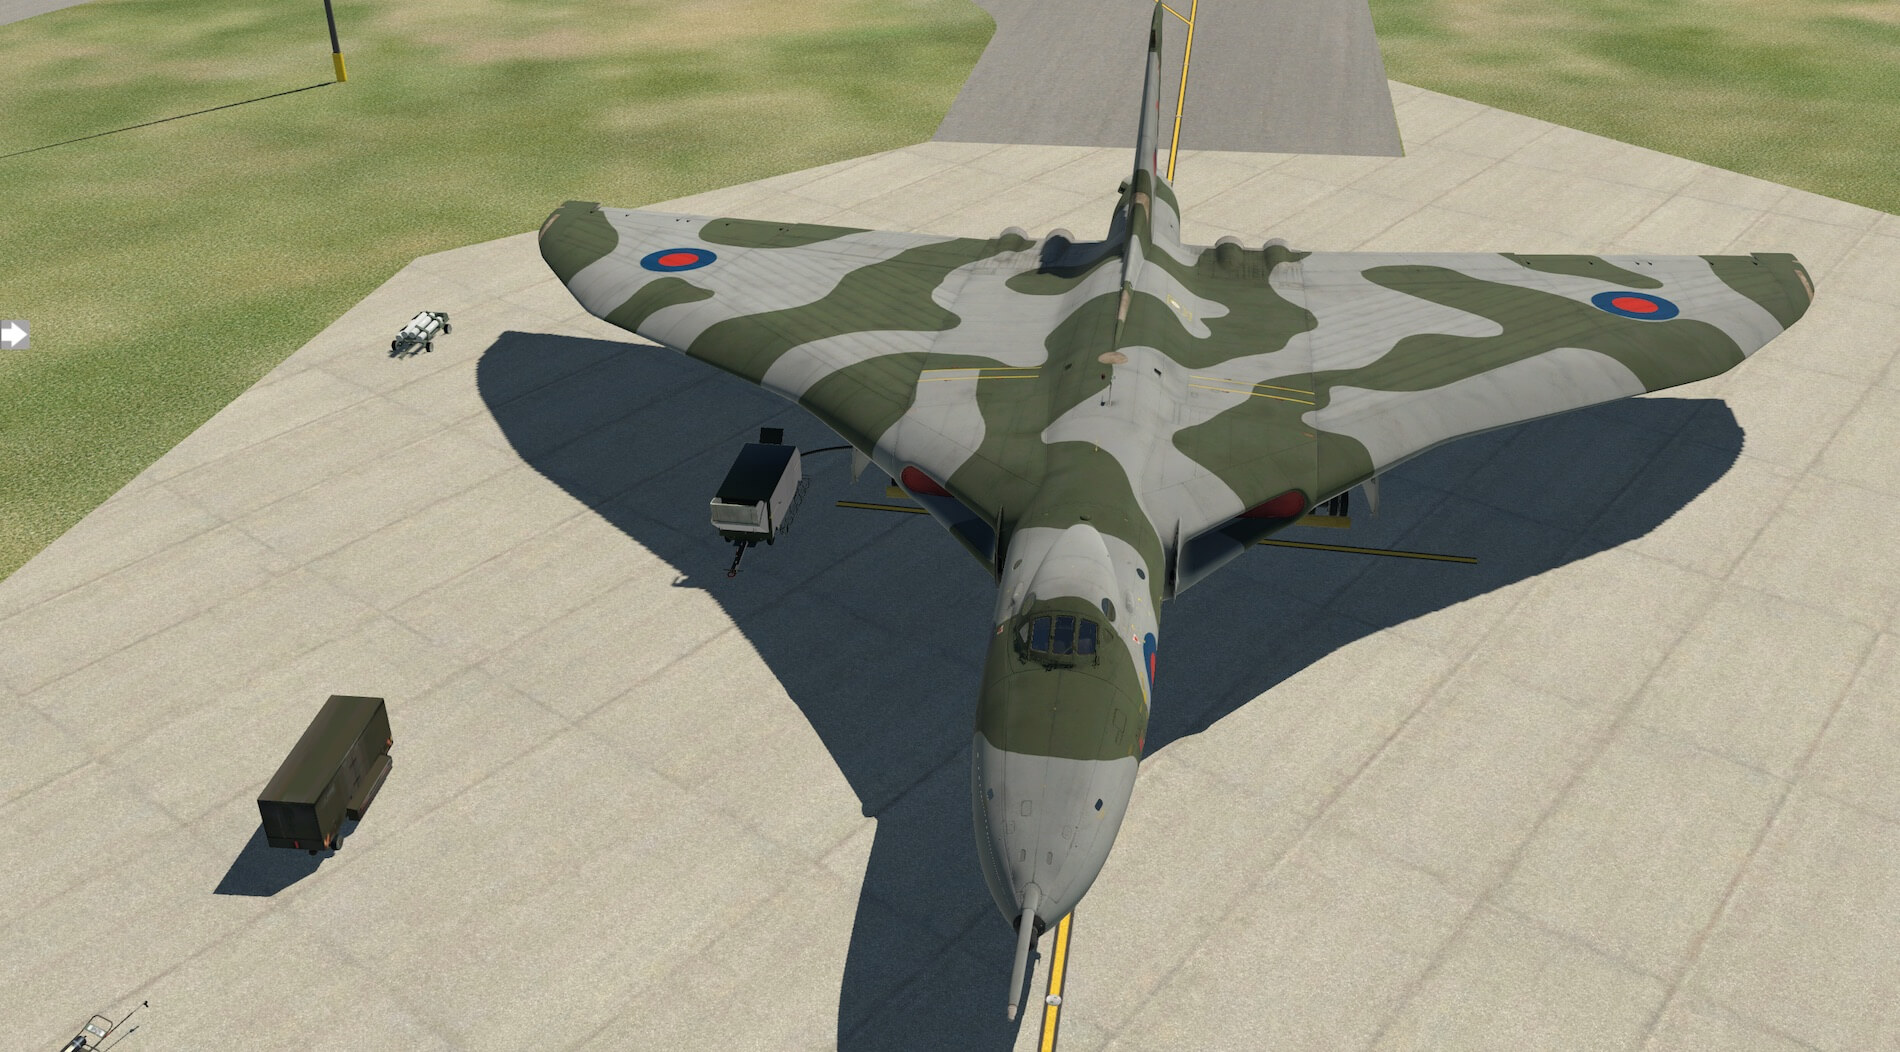
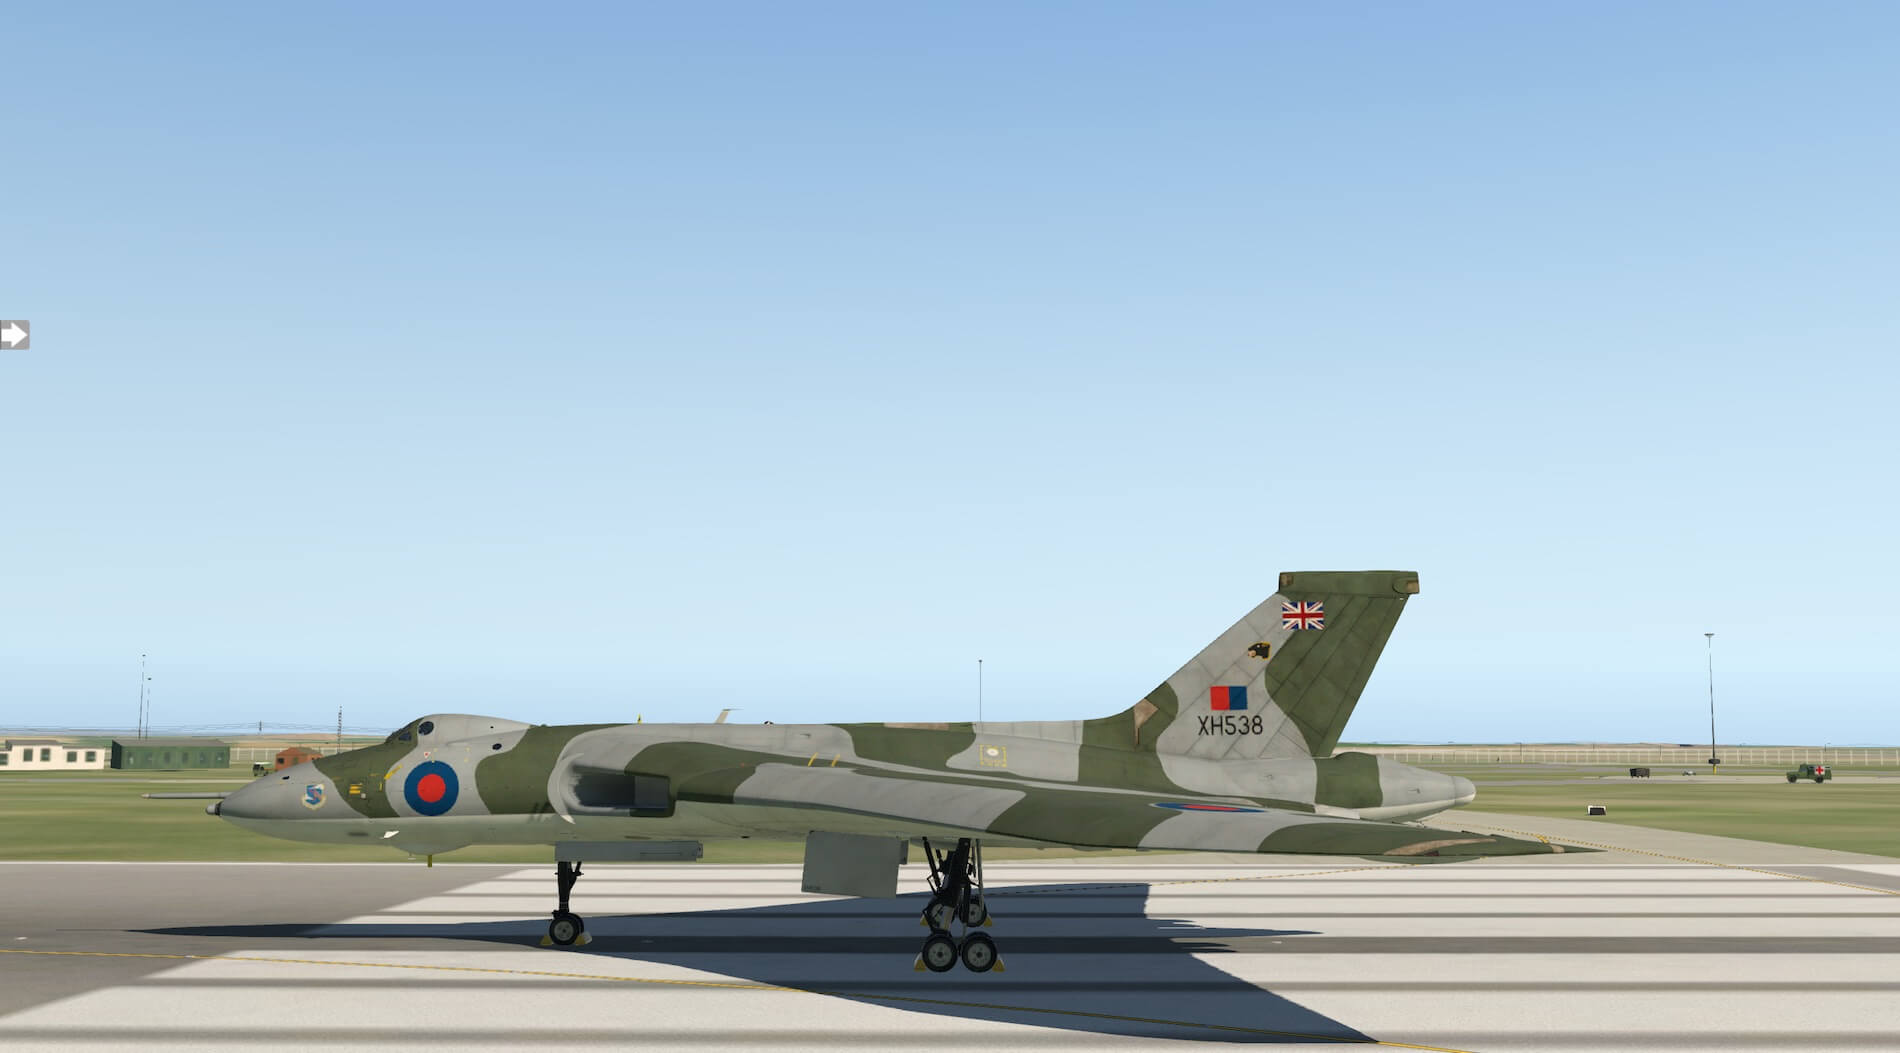
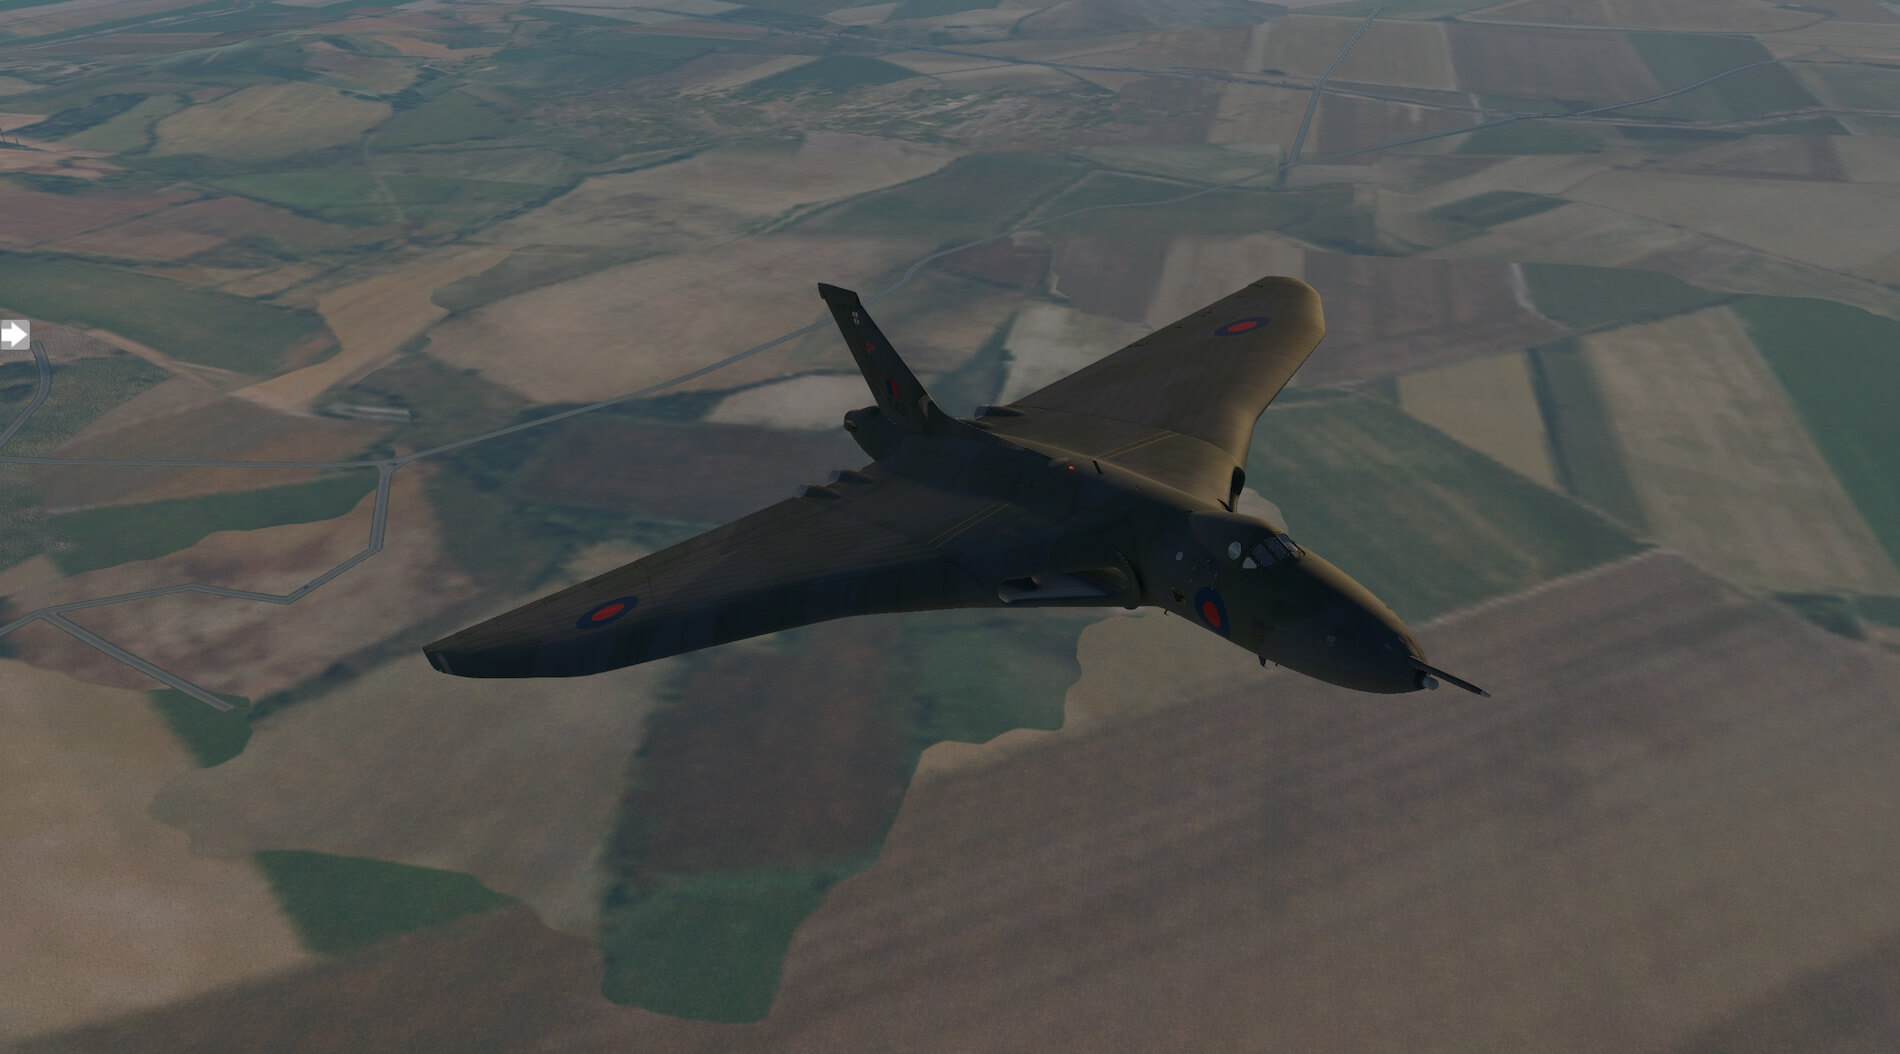
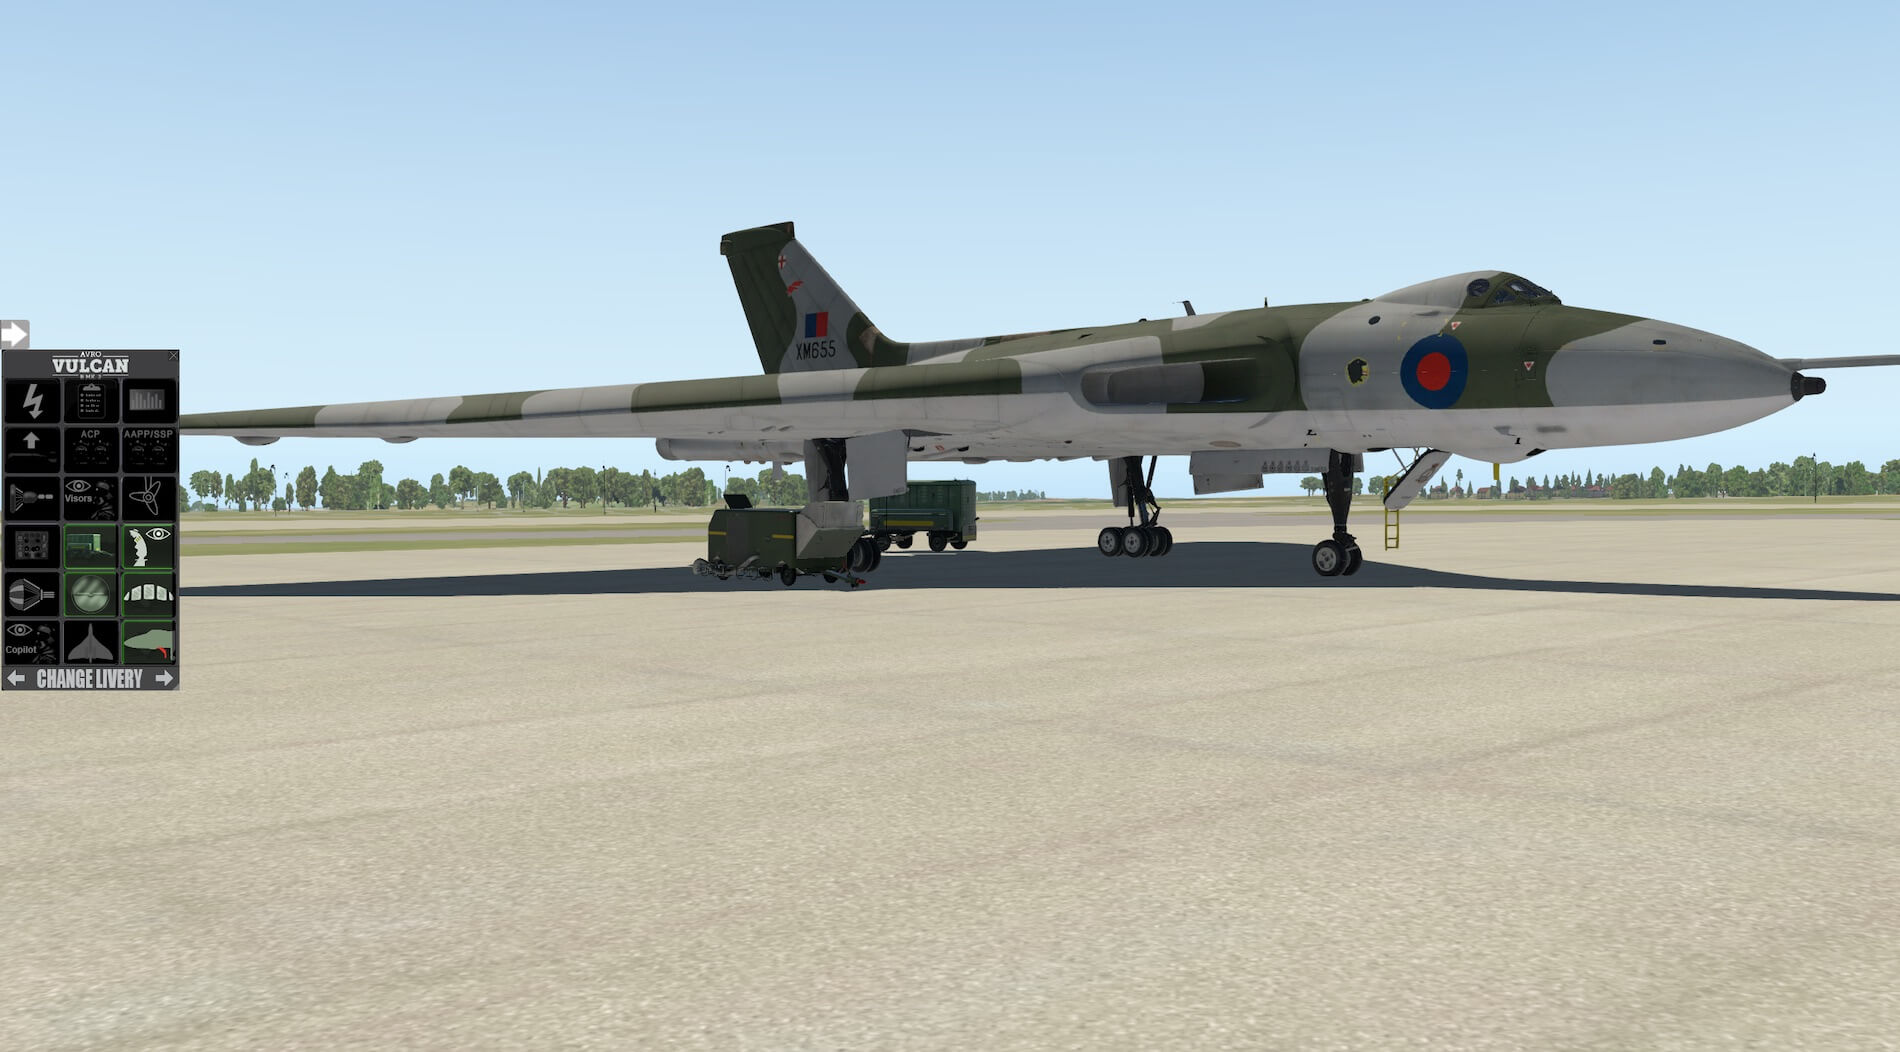
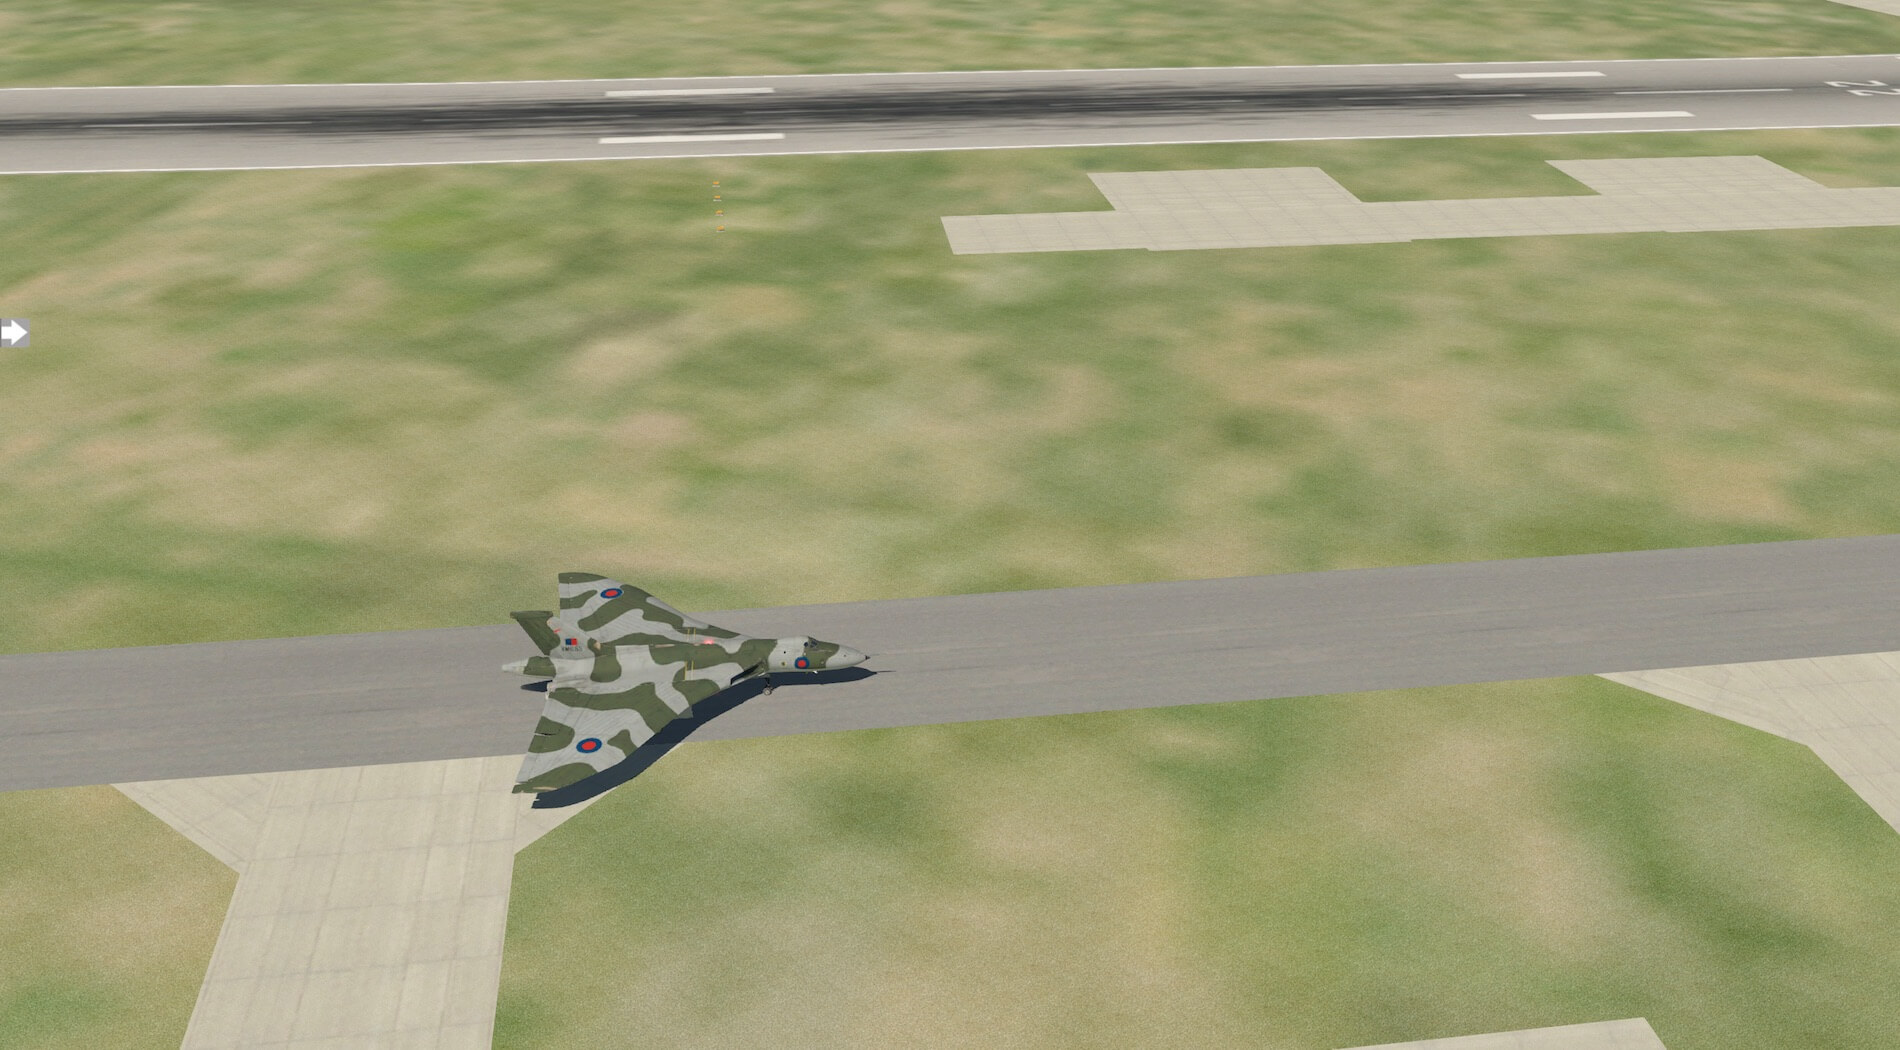
I approached the aircraft from the front left and was immediately struck by the presence the model has and how well the developers have created the sense of the size of the Vulcan. Panelling was created to a high standard and the colours were clear and at just the correct tone.
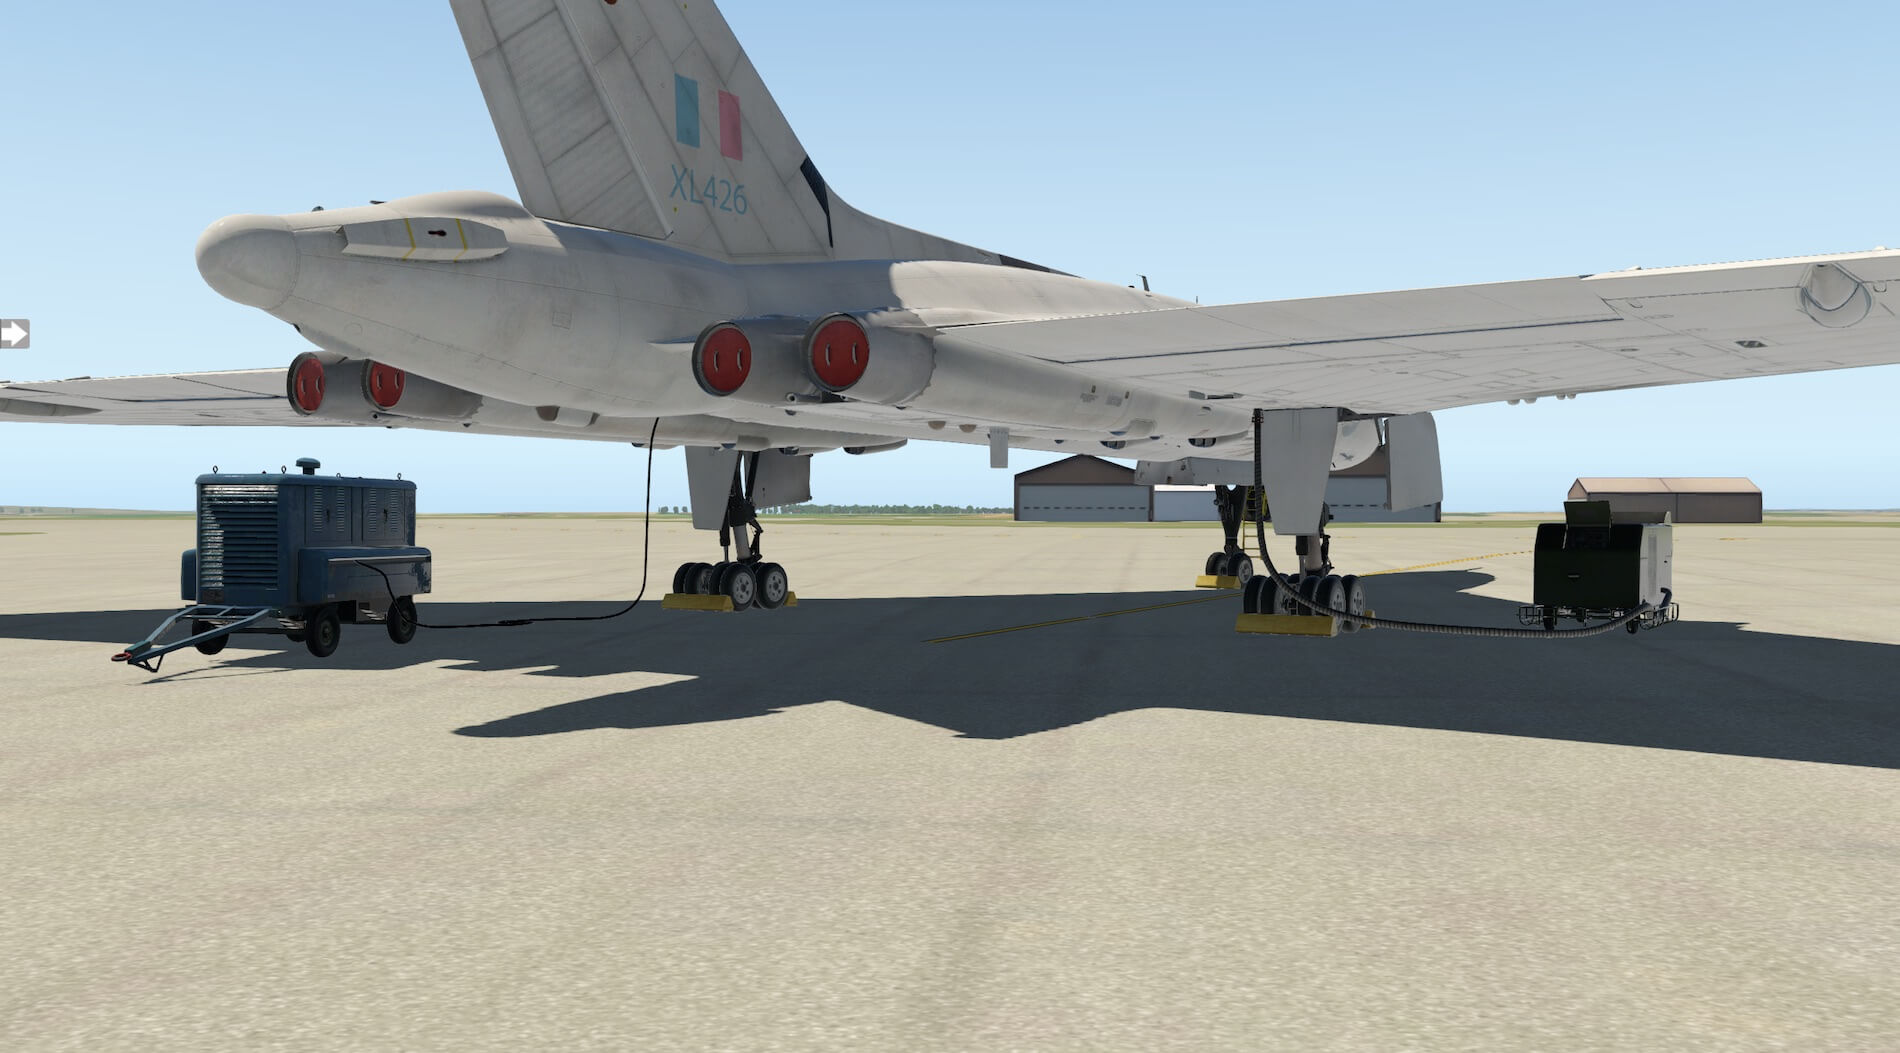
Signage and art work were crisp and clear and the attention to detail was very good. The pilot figure could be seen moving through the side windows of the cockpit. I used the on screen menu to attach ground equipment and also to lower the entrance ladder which was presented in a manner that showed the obvious wear and tear it had to undergo. The nose wheel and strut were modelled to a good quality.
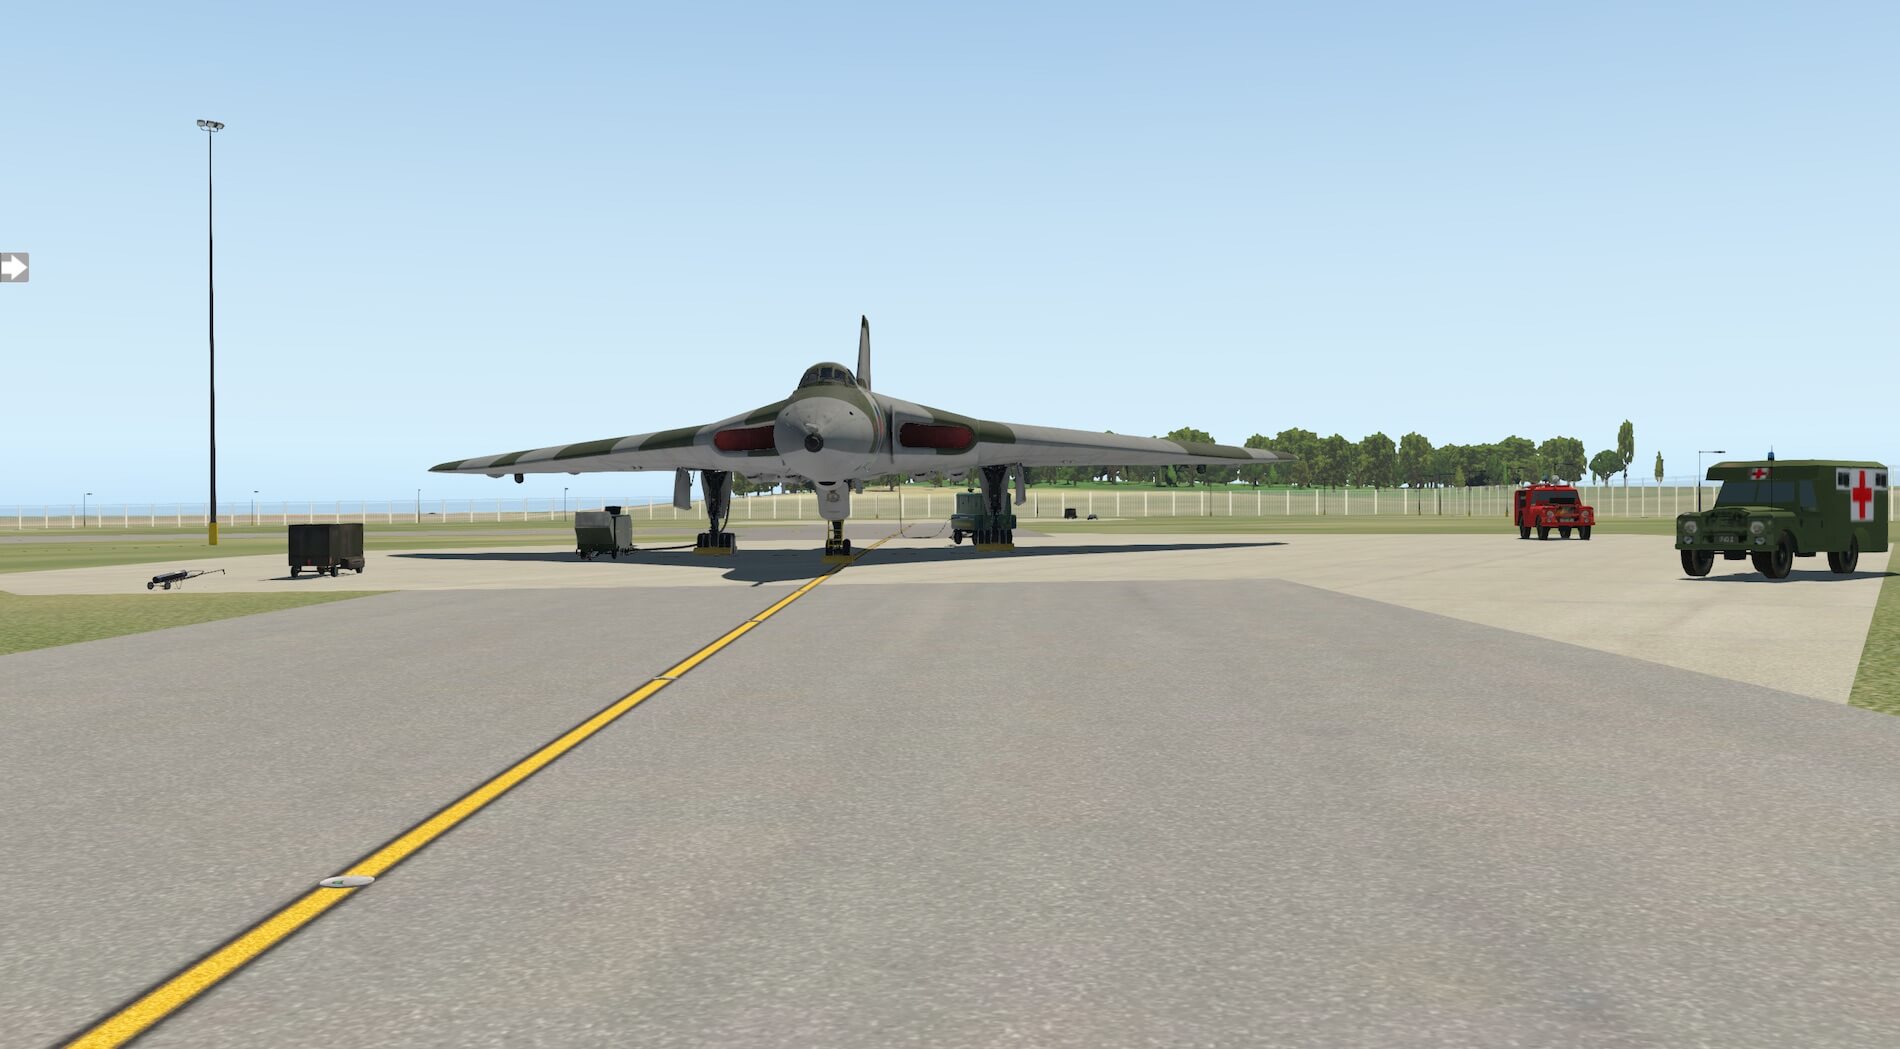

Moving towards the nose of the aircraft antennae and access panels were clear. The model has different equipment depending on which variant is being used and on the first type I viewed the refuelling probe was modelled accurately. Looking up to the cockpit the windscreen wipers were created in detail.
Light and shadow worked well with the livery and surfaces and the textures of the model were very good. Using the magic of being able to move around with the X-Plane view I raised the view to look down from the front of the aircraft and these made the panelling and surface detail of the model very evident, it has been created to a high standard adding a real depth and realism to the aircraft surface.

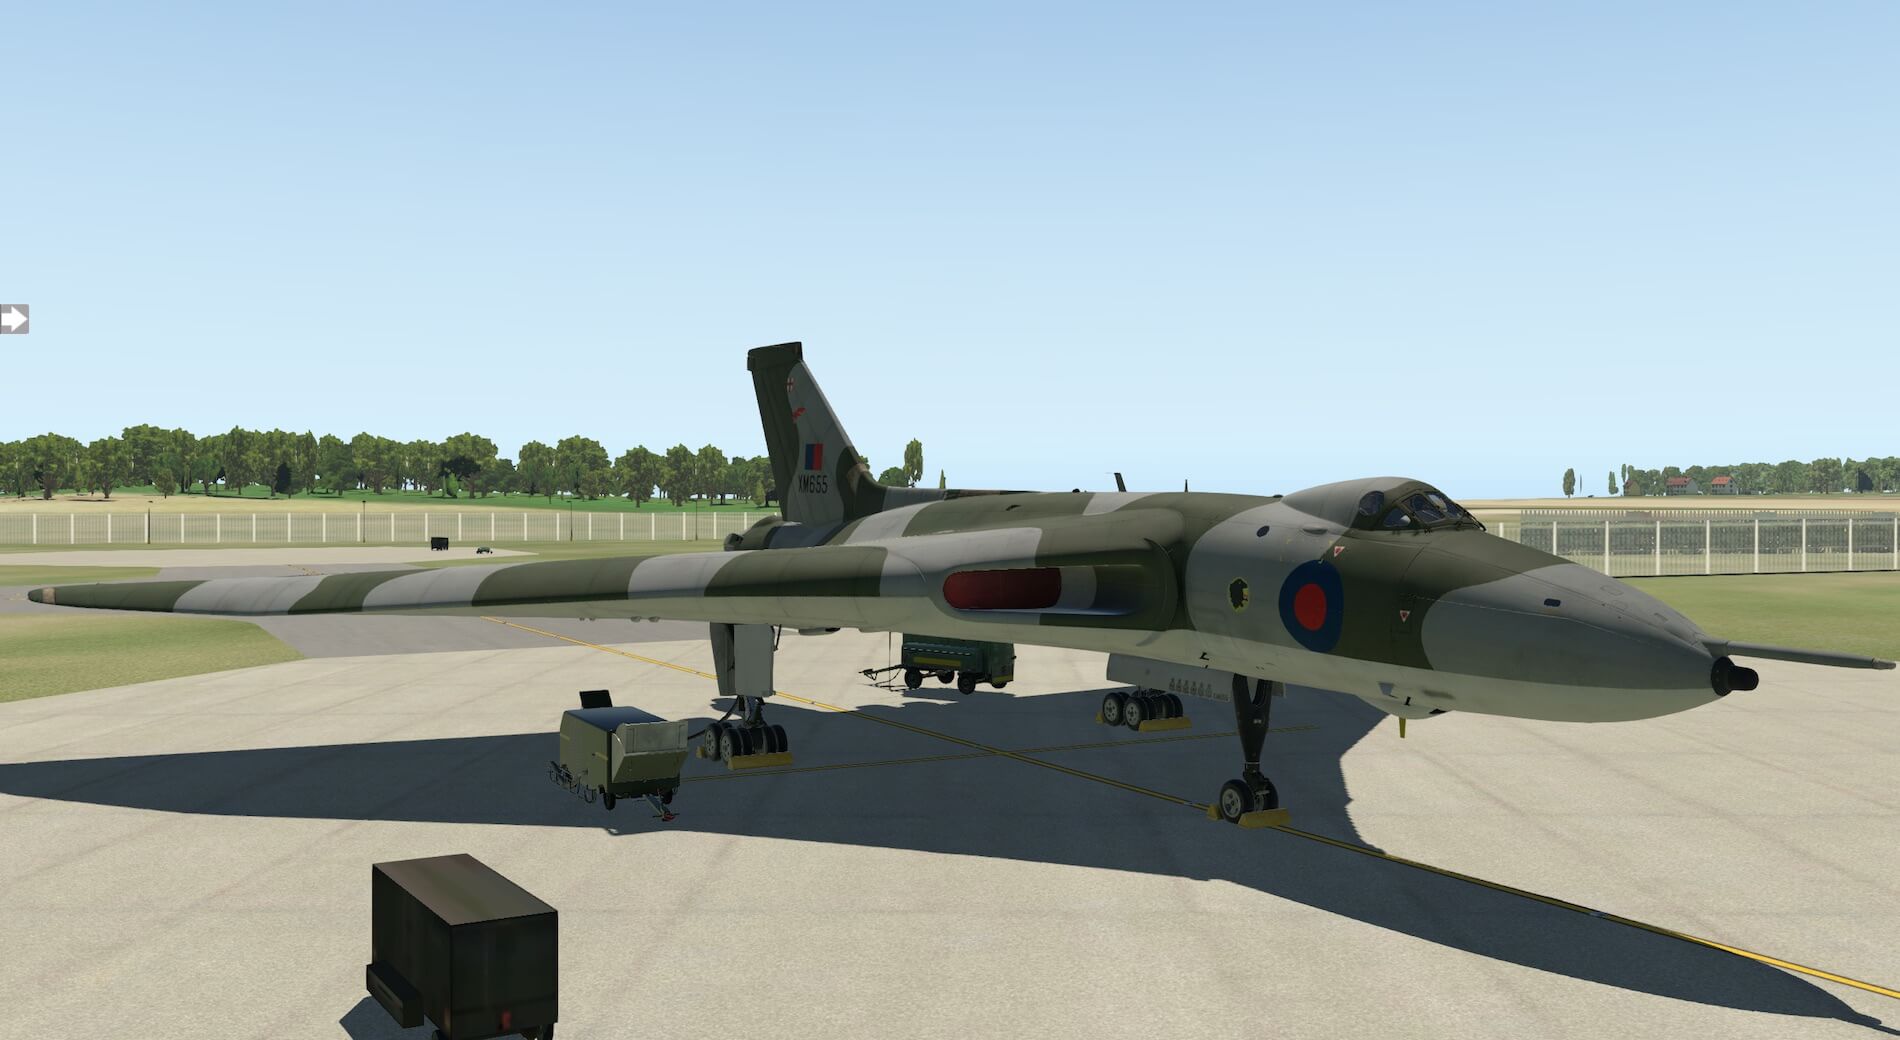
Moving to the front right of the aircraft gives a better view of the ground equipment that can toggled in the on screen menu and are attached to assist with engine start. With the engines off the aircraft is also equipped with engine covers and chocks. I took advantage of the X-Plane cameras to raise the view and look into the cockpit.
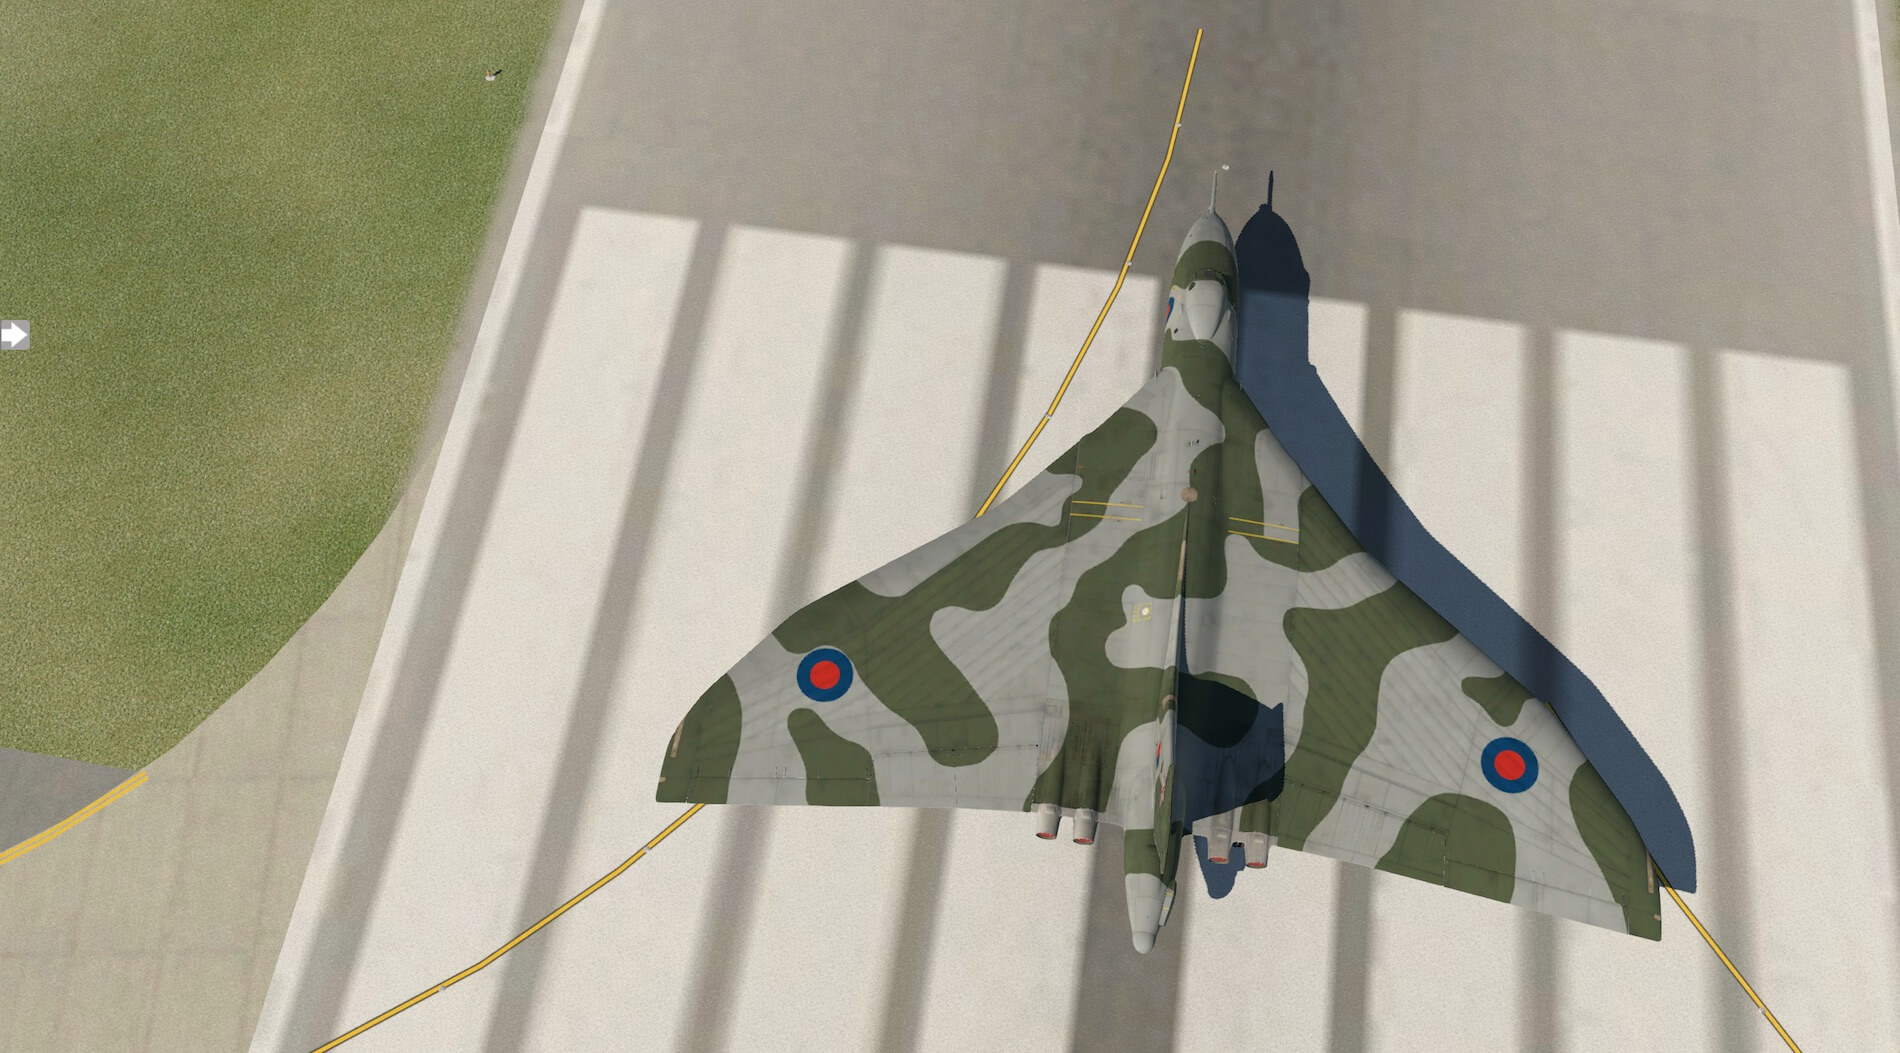
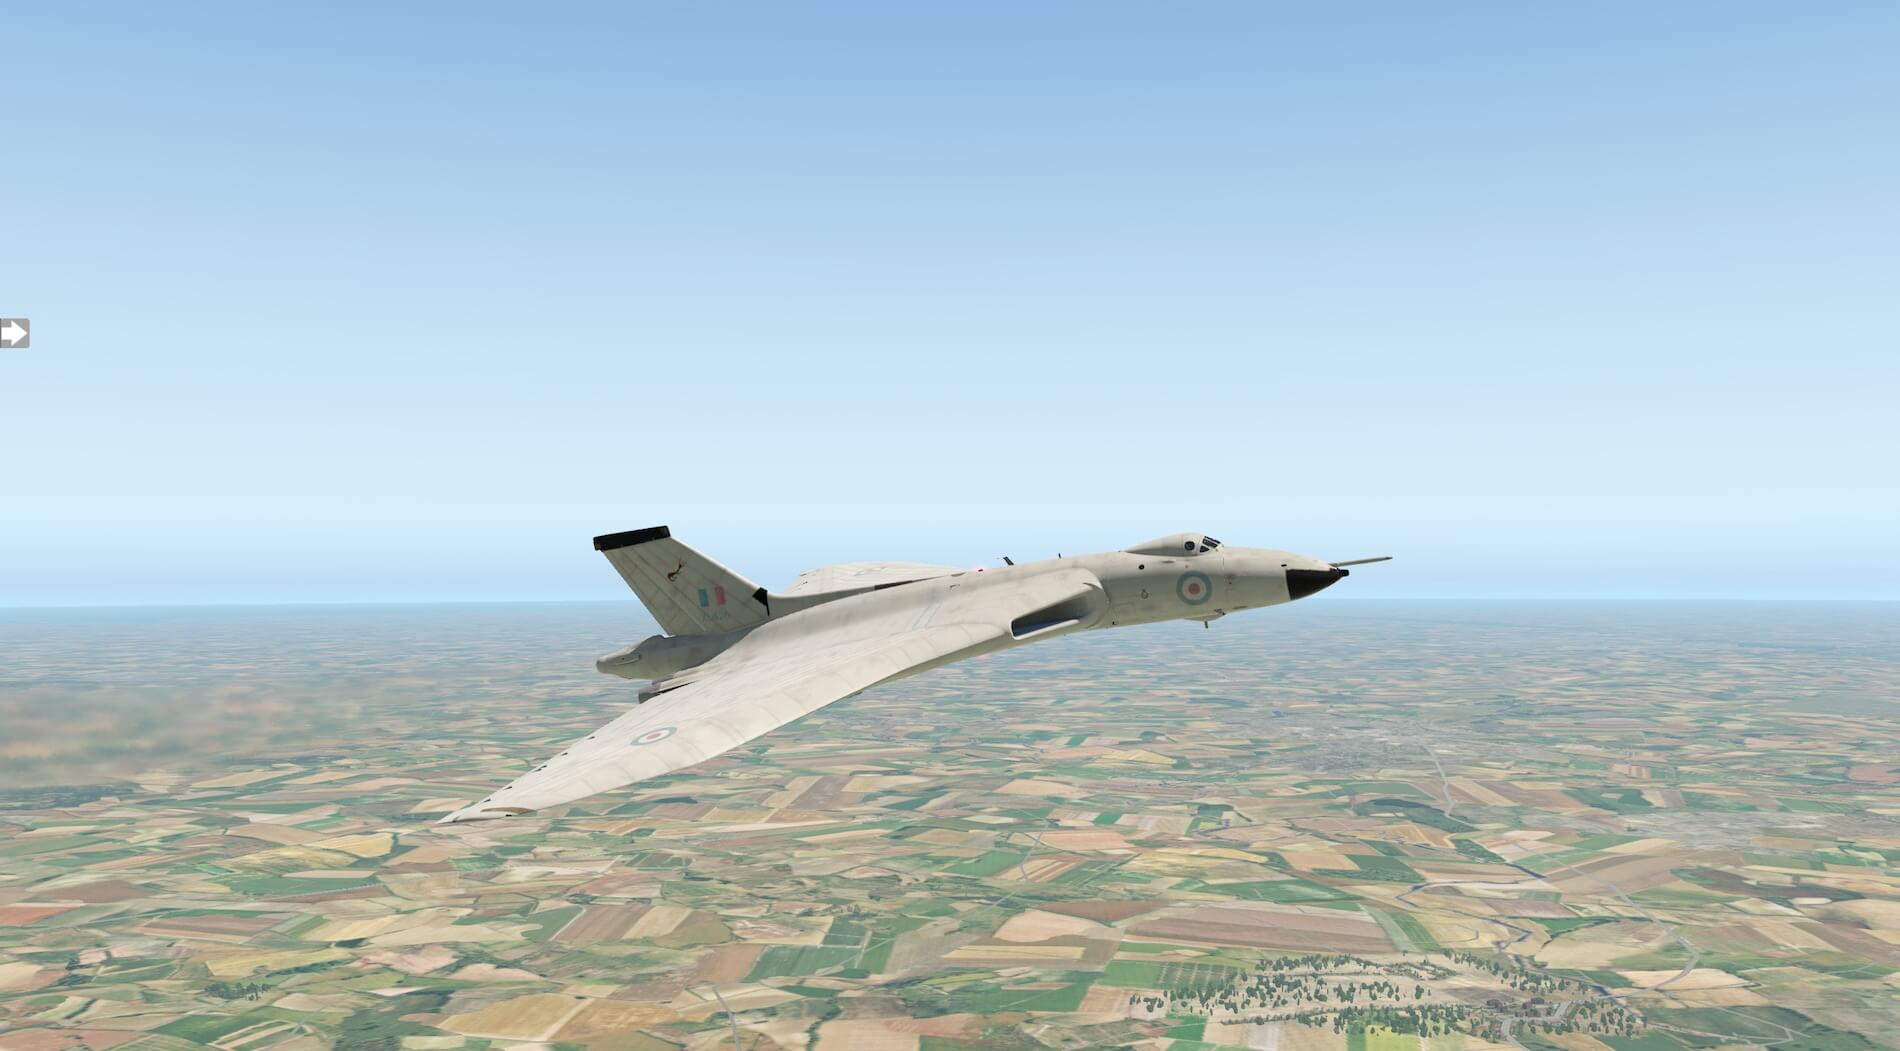
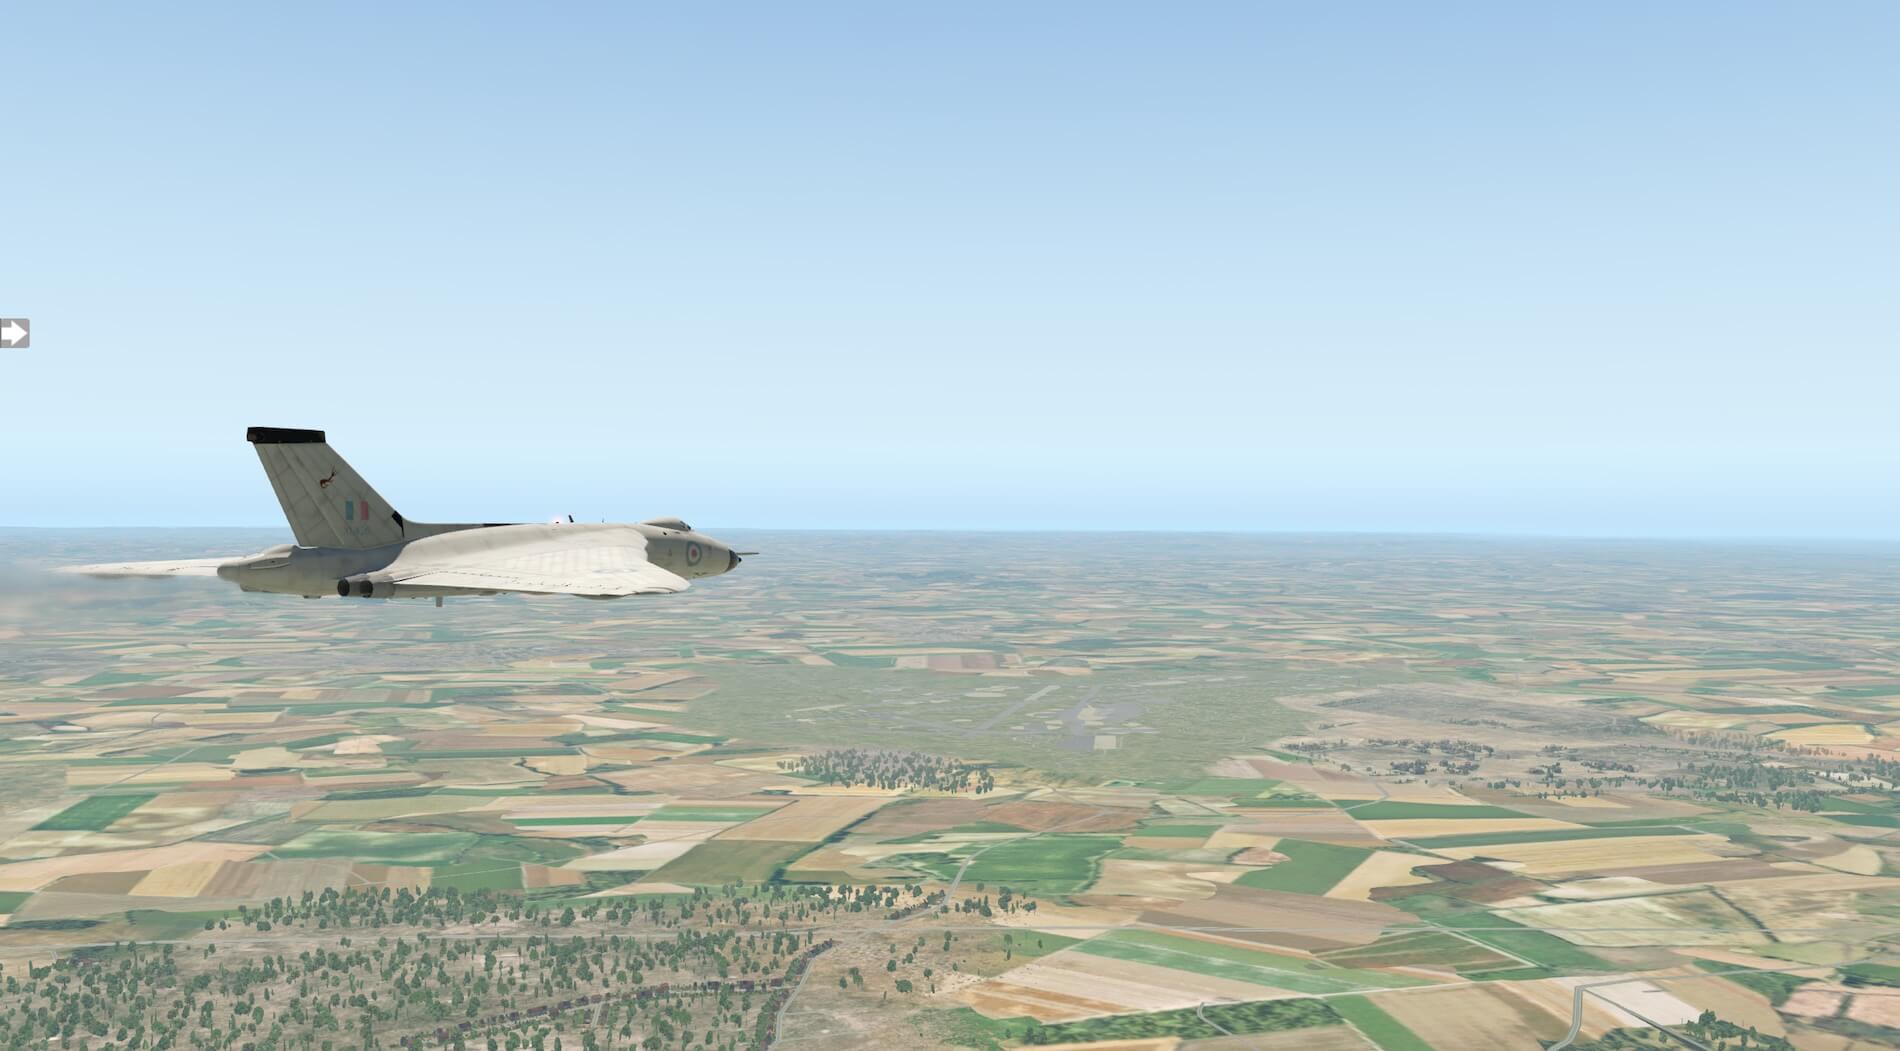
Panel and surface detail is good and the view into the cockpit shows the small windows for a large aircraft and the animated pilot figure looking back out. Again moving around the aircraft the view from the starboard side shows the size of the aircraft and further panel detail. The model sits with the presence of the real thing. Raising the view from a similar view point illustrates the surface detail and the size of that big delta wing.
The colours of the livery are well produced and realistic. Moving the joystick also causes the elevons to become more apparent and these powered control surfaces control the aircraft in pitch and roll.


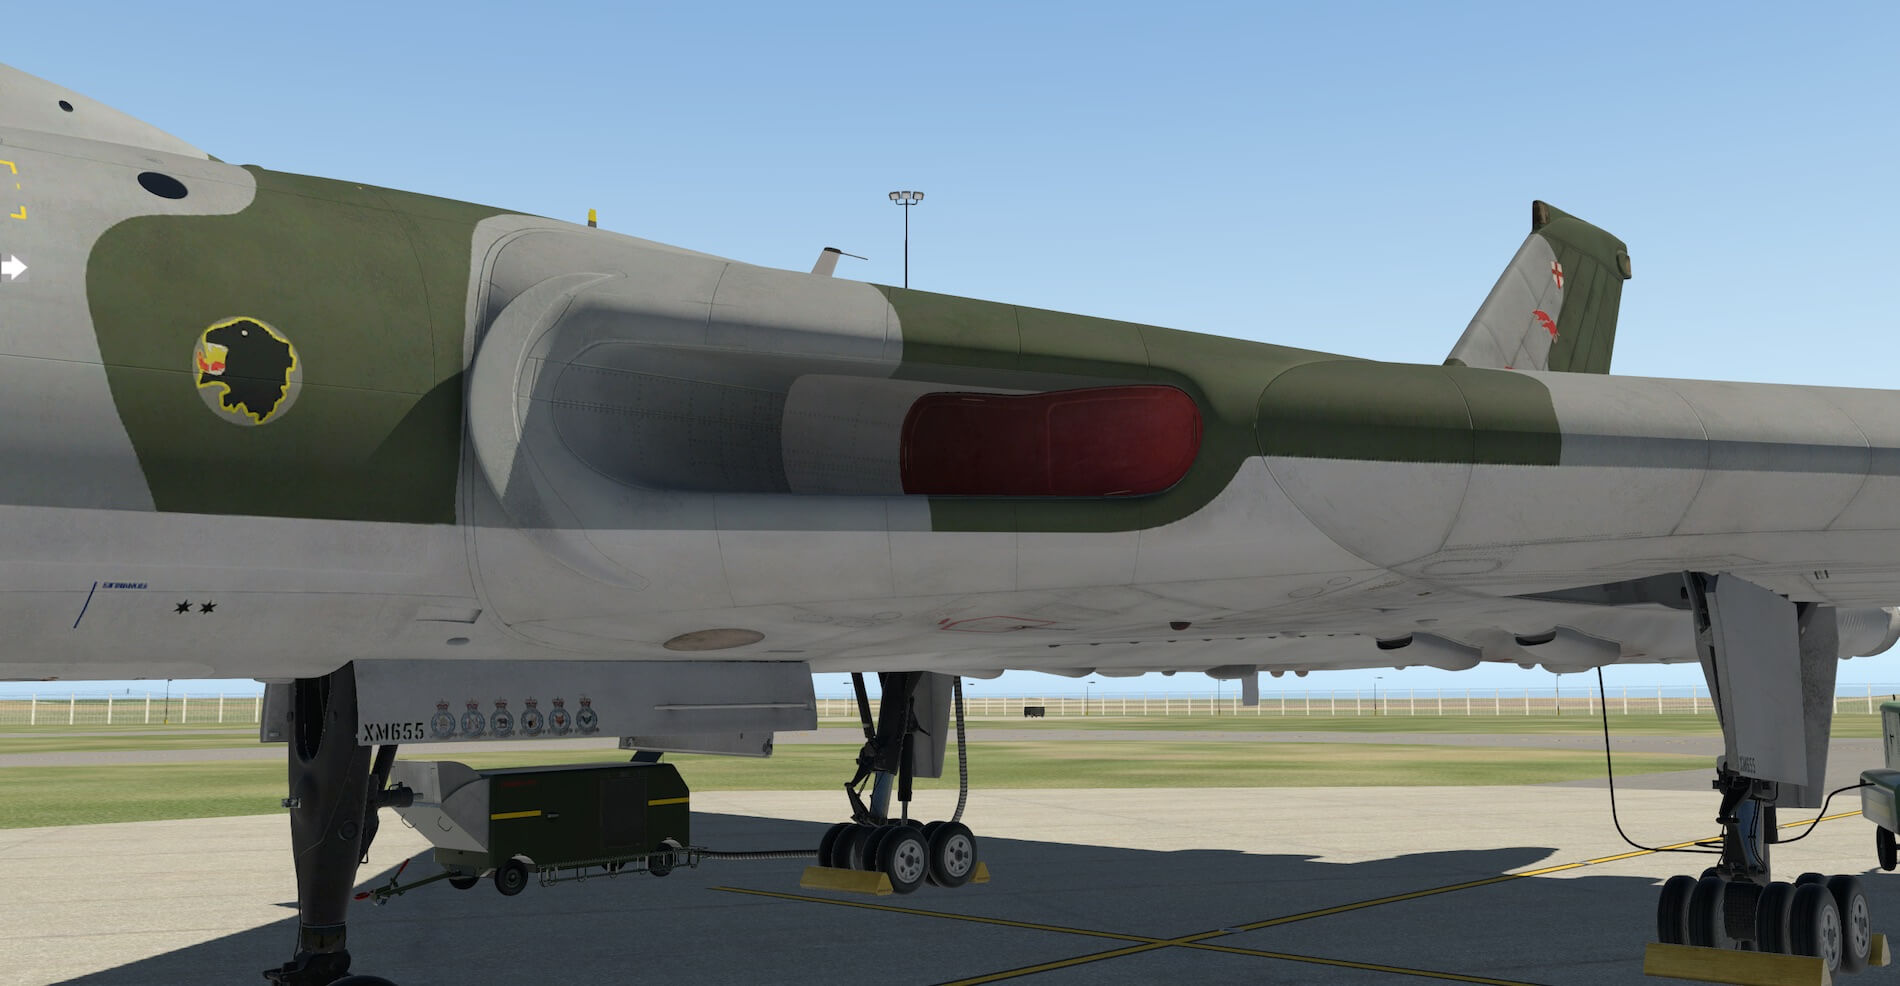
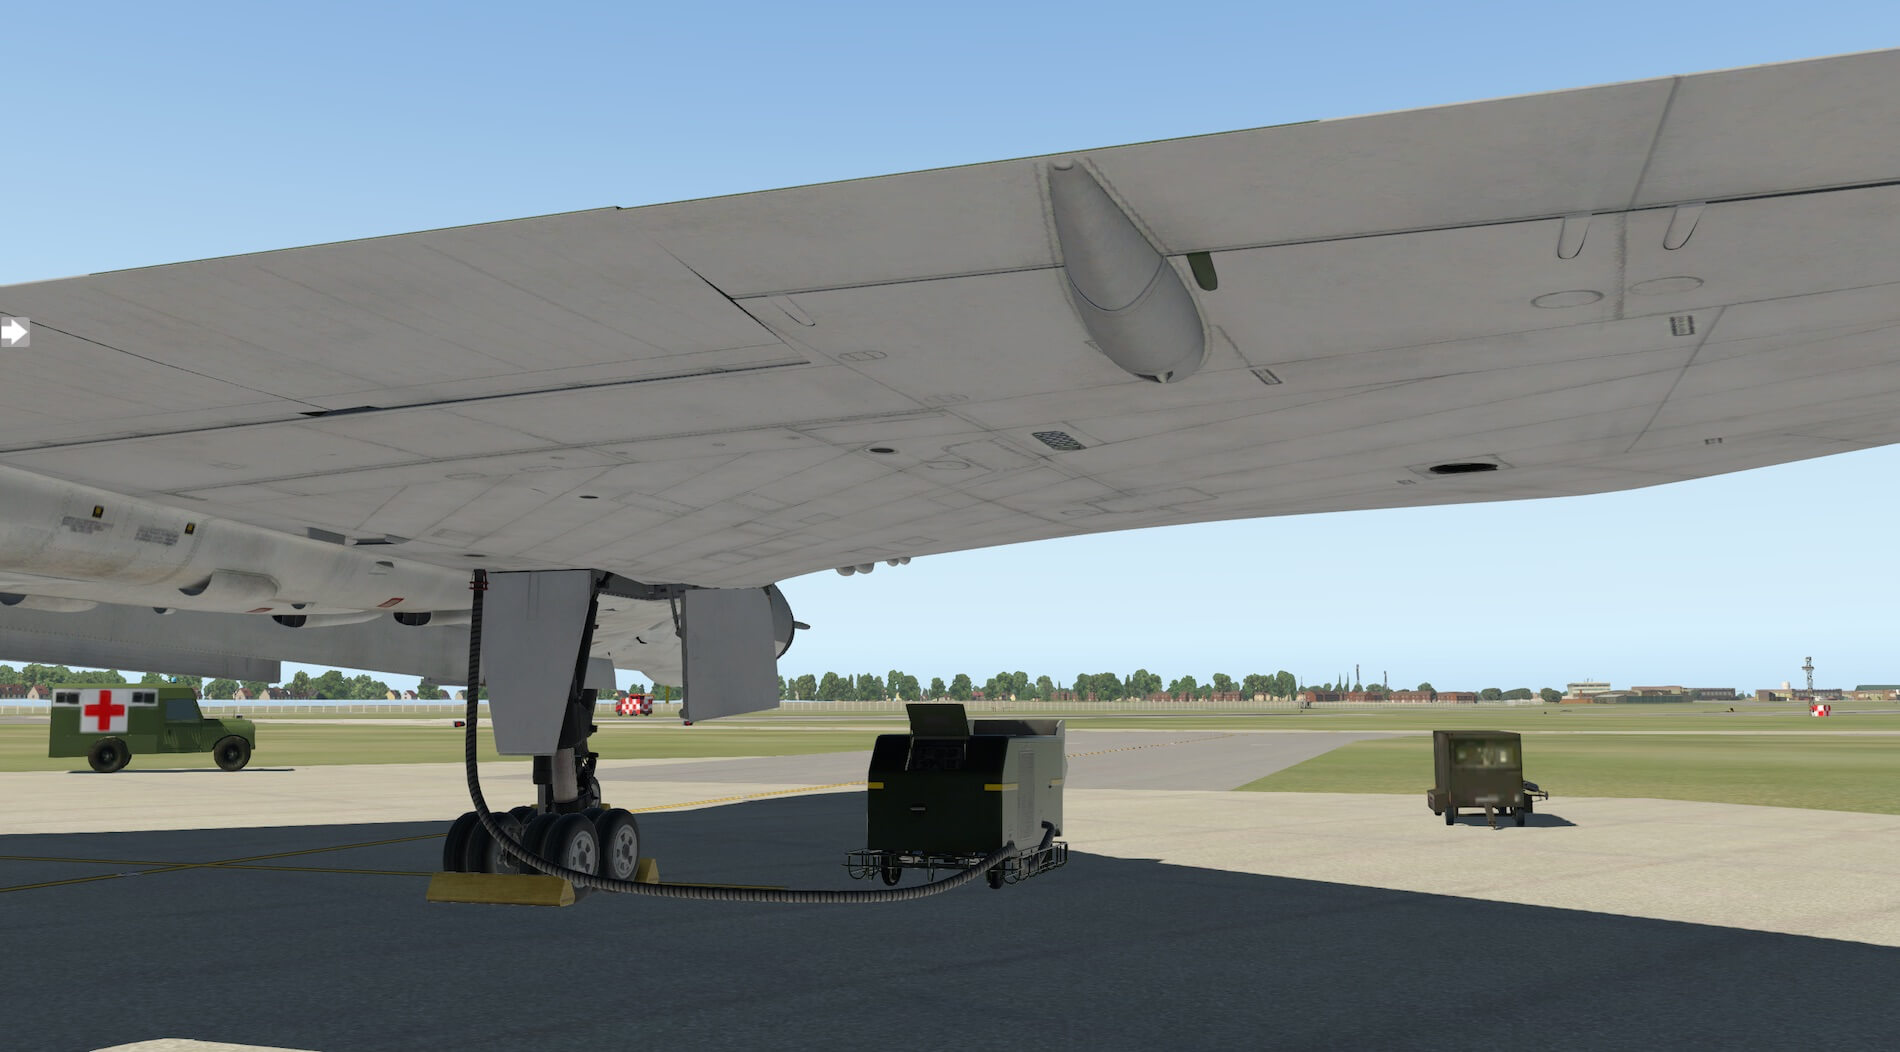
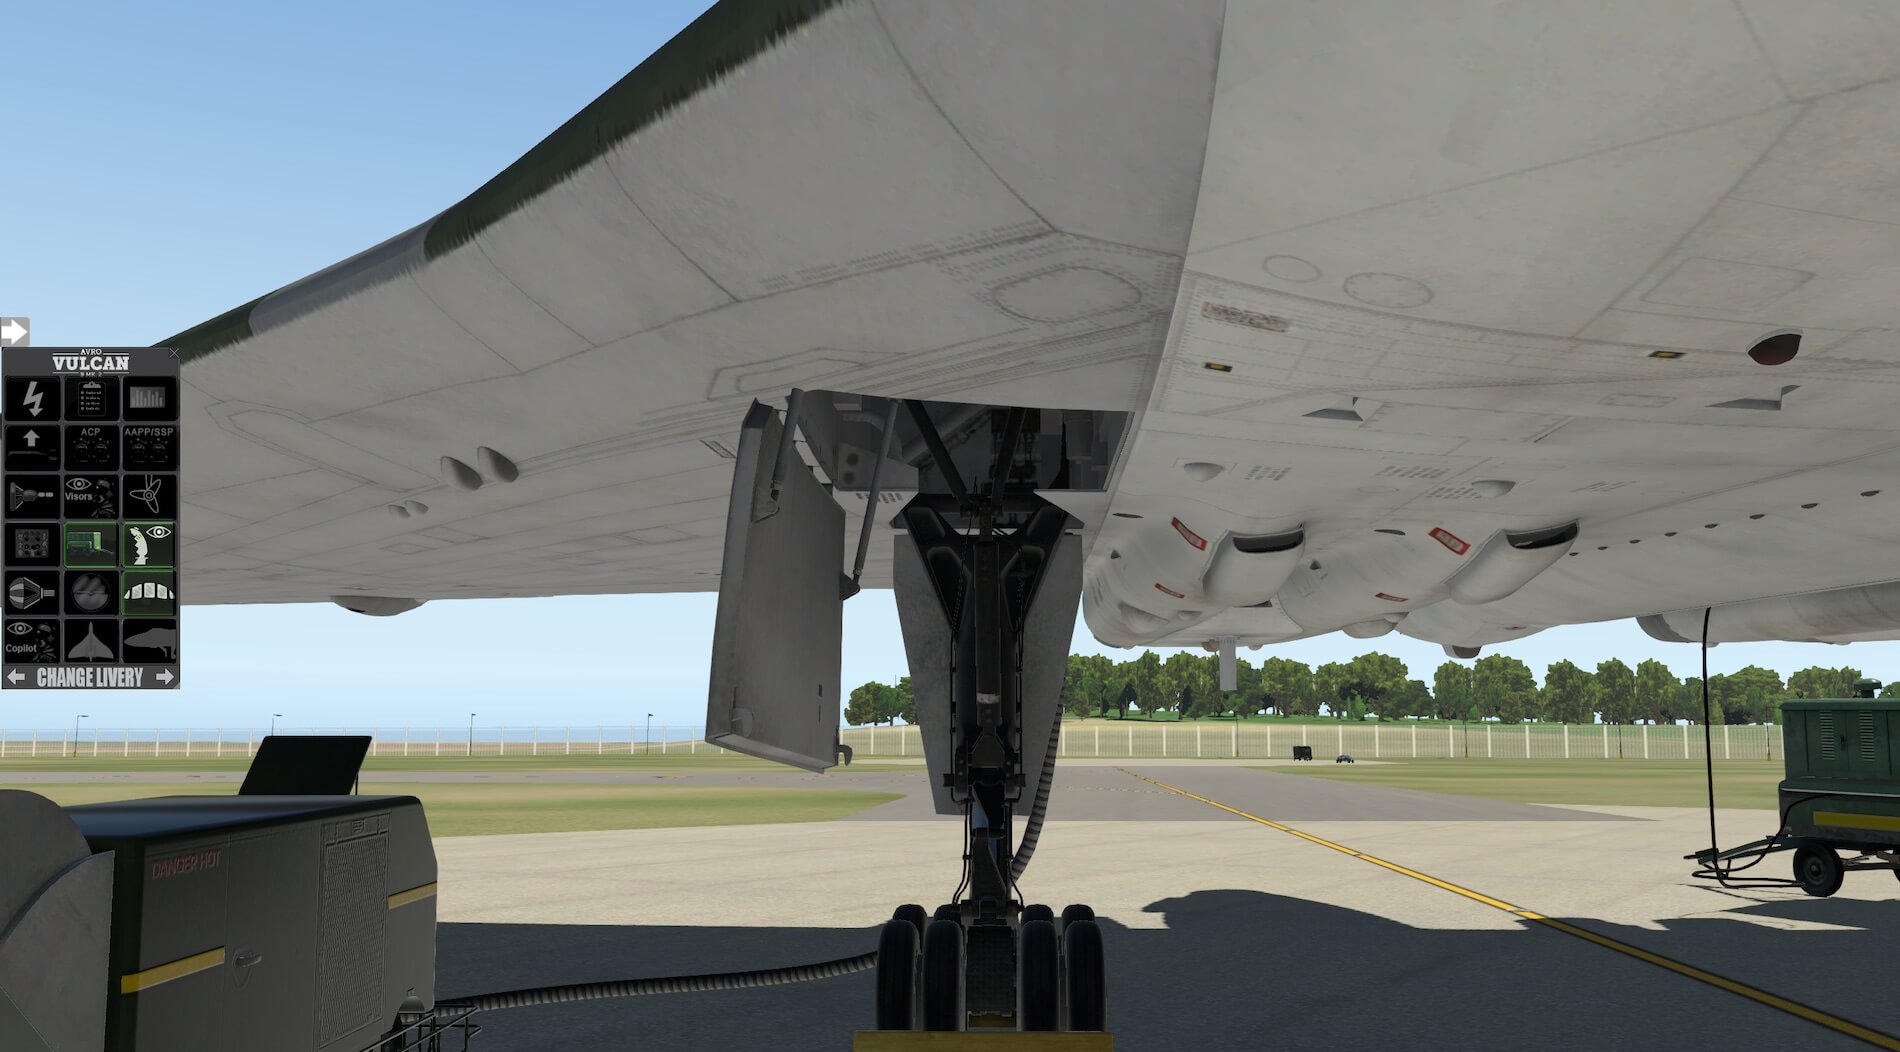
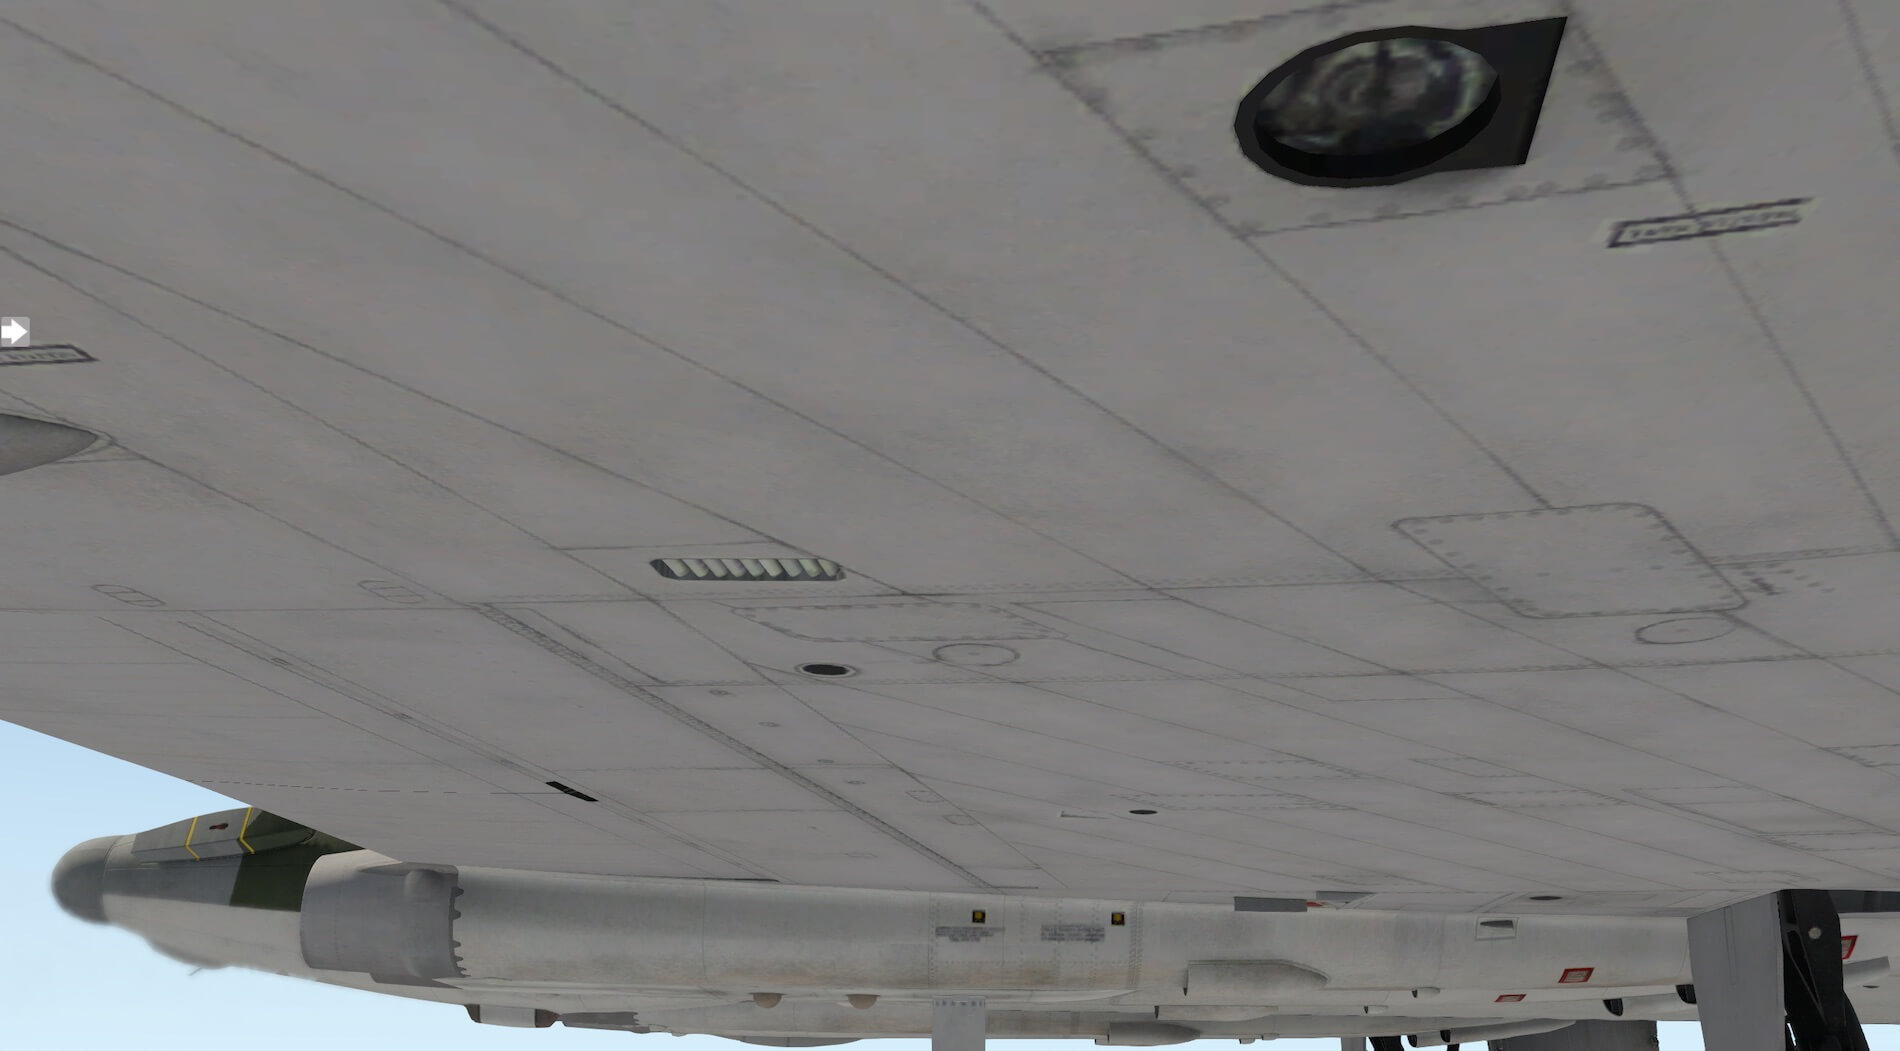
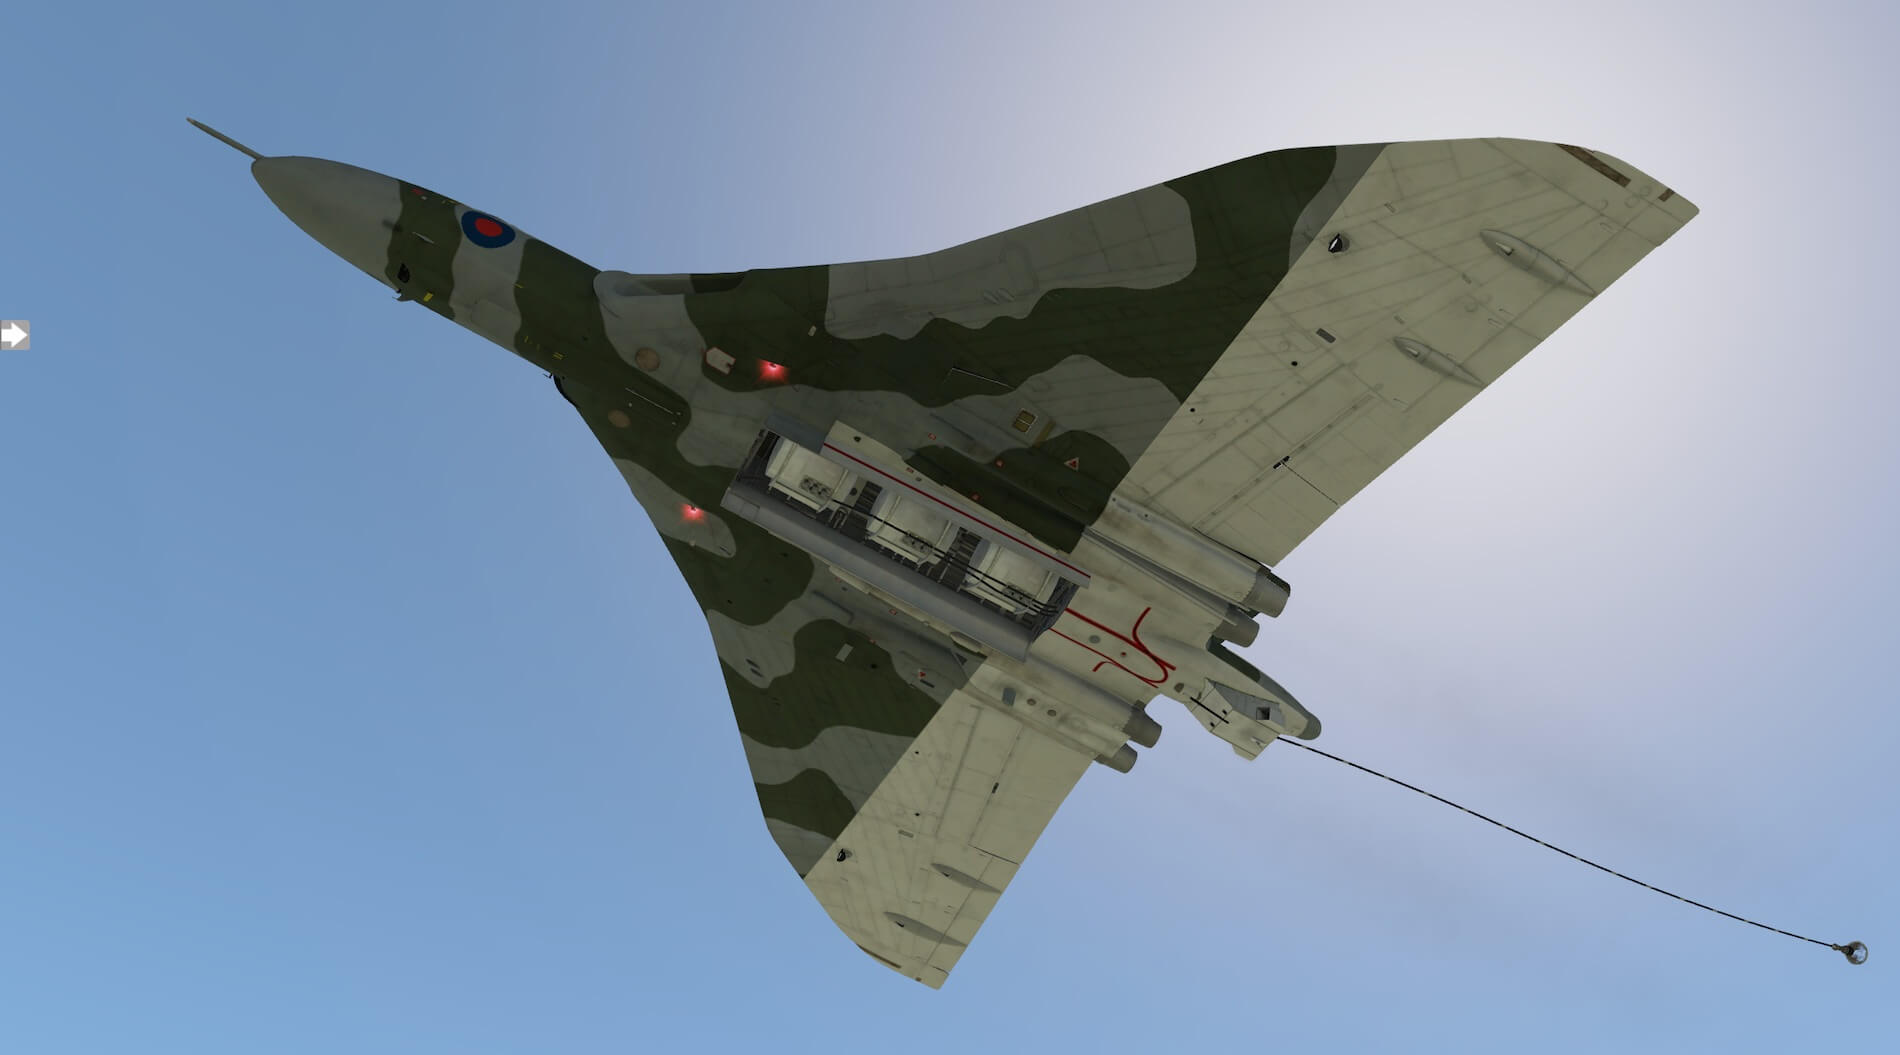
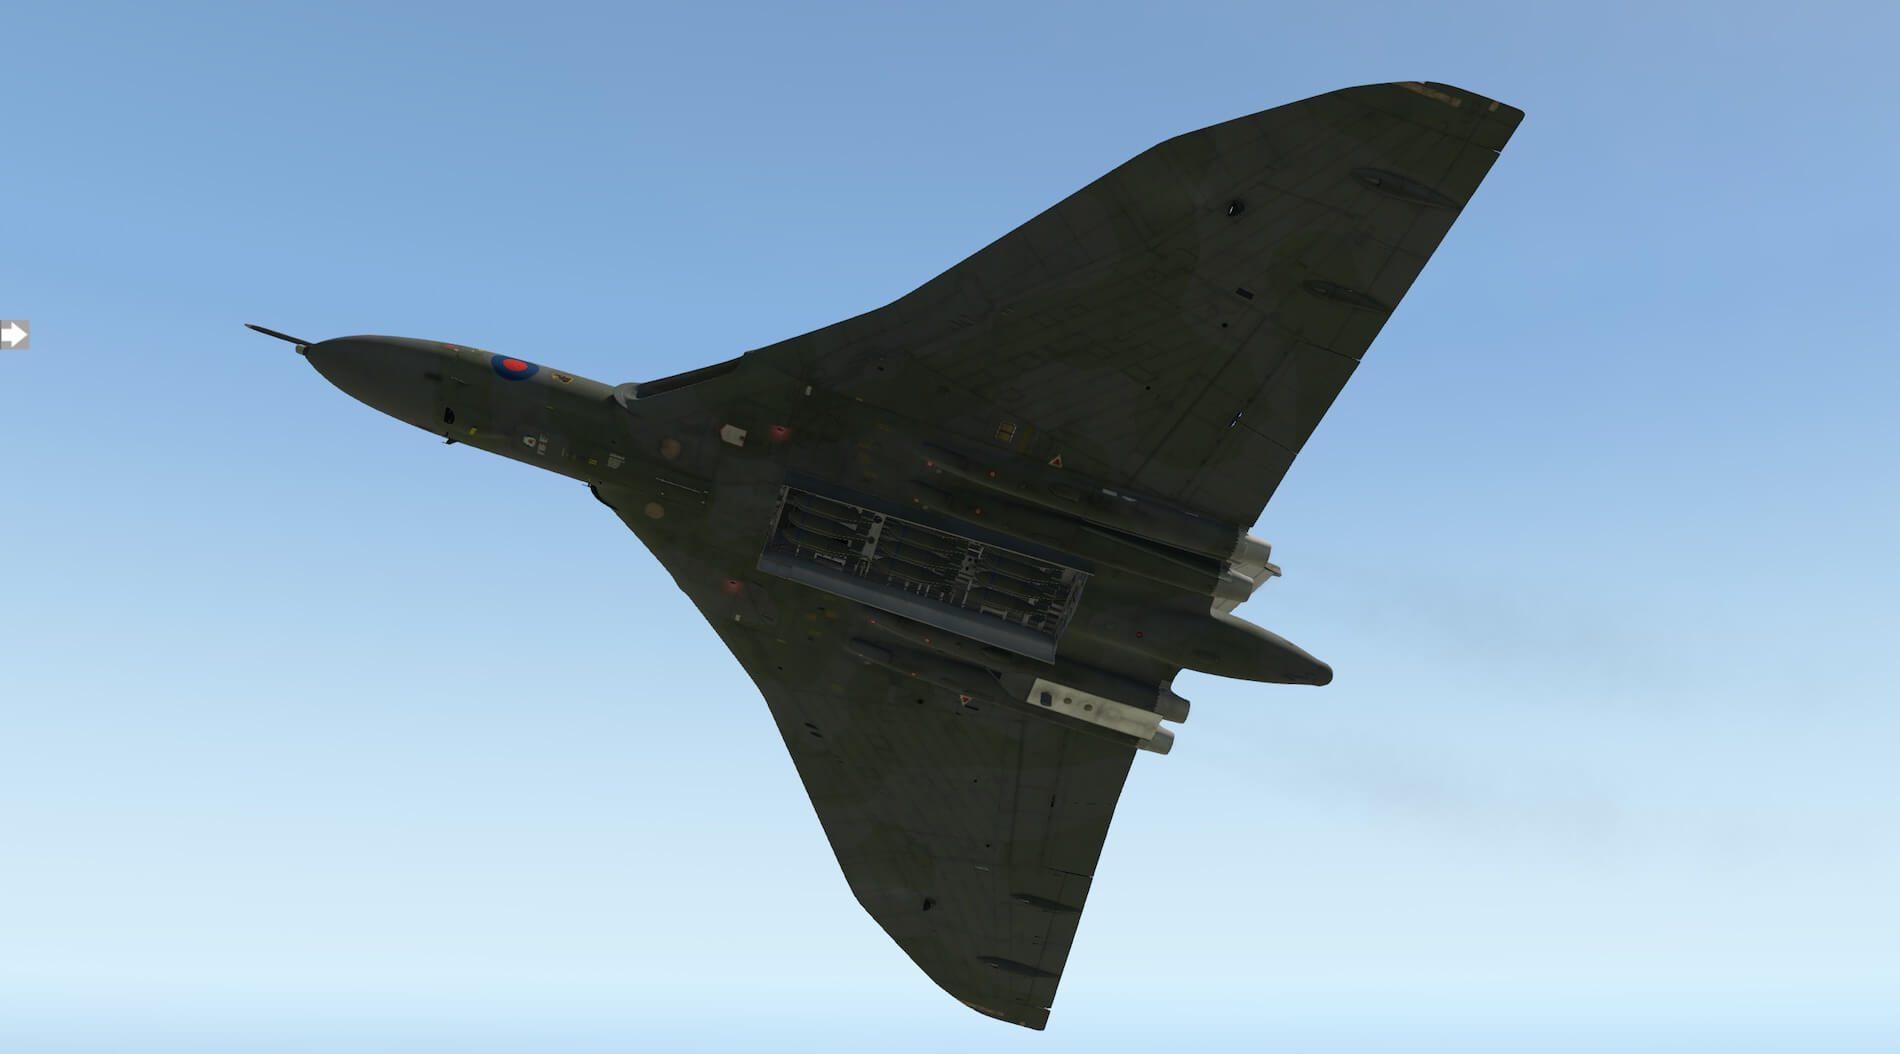
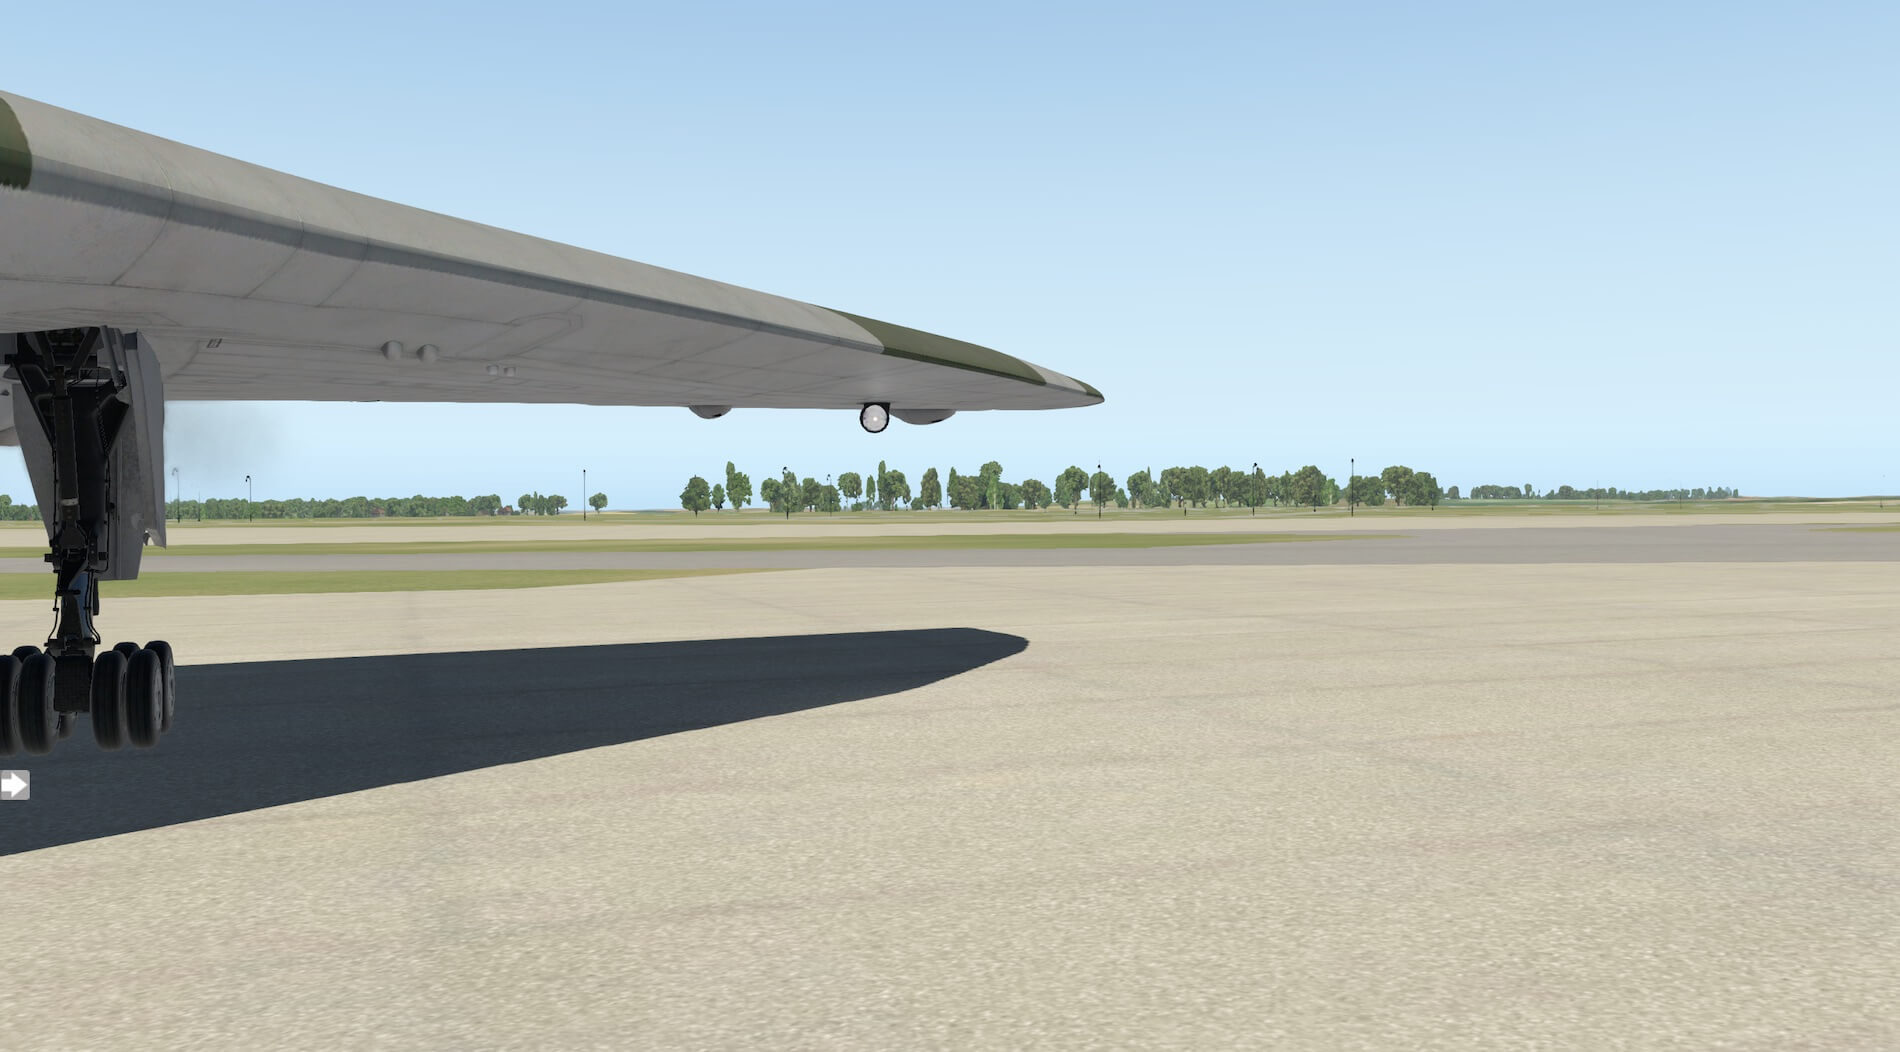
Venturing under the wing reveals the attention to detail provided here and shows another colour in the livery. The weathering and wear marks go well with the model and the panelling and control surfaces are well produced. Going further under the aircraft the main undercarriage, doors and wheel wells are created to a good standard. Again looking across the underside of the aircraft its size is immediately apparent.
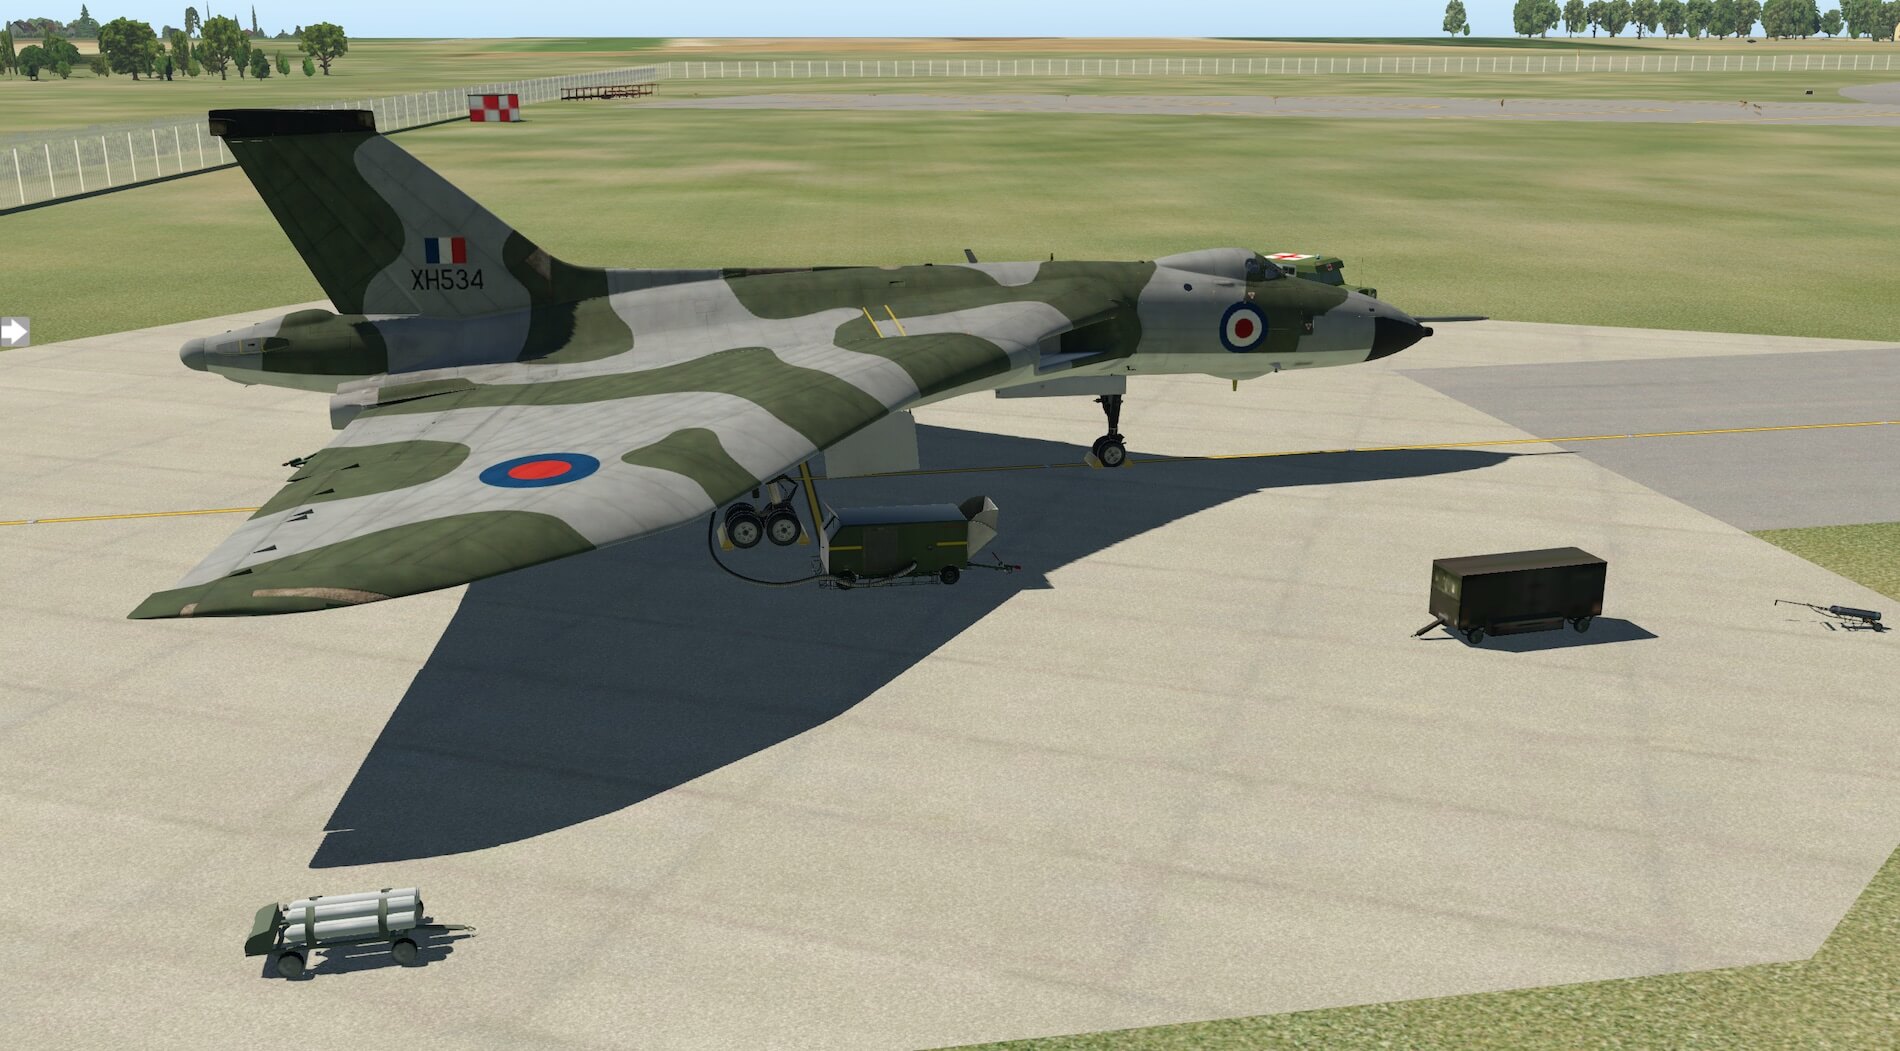
The view from the tail area of the aircraft changes dependent on the variant of the aircraft being flown. This is changed through the livery but is also possible through the ‘config.json’ file. The manual explains “ These files are found inside the individual livery folders, within the Vulcan’s ‘liveries’ folder. A value of ‘1’ will enable the corresponding option.”
I attempted this by clicking on the correct file but found the default was for the file to be opened by Firefox and that I could not change the settings. I opened the file with a text editor and was immediately able to make the changes outlined in the manual. This allows the user to configure the model in a variety of ways.
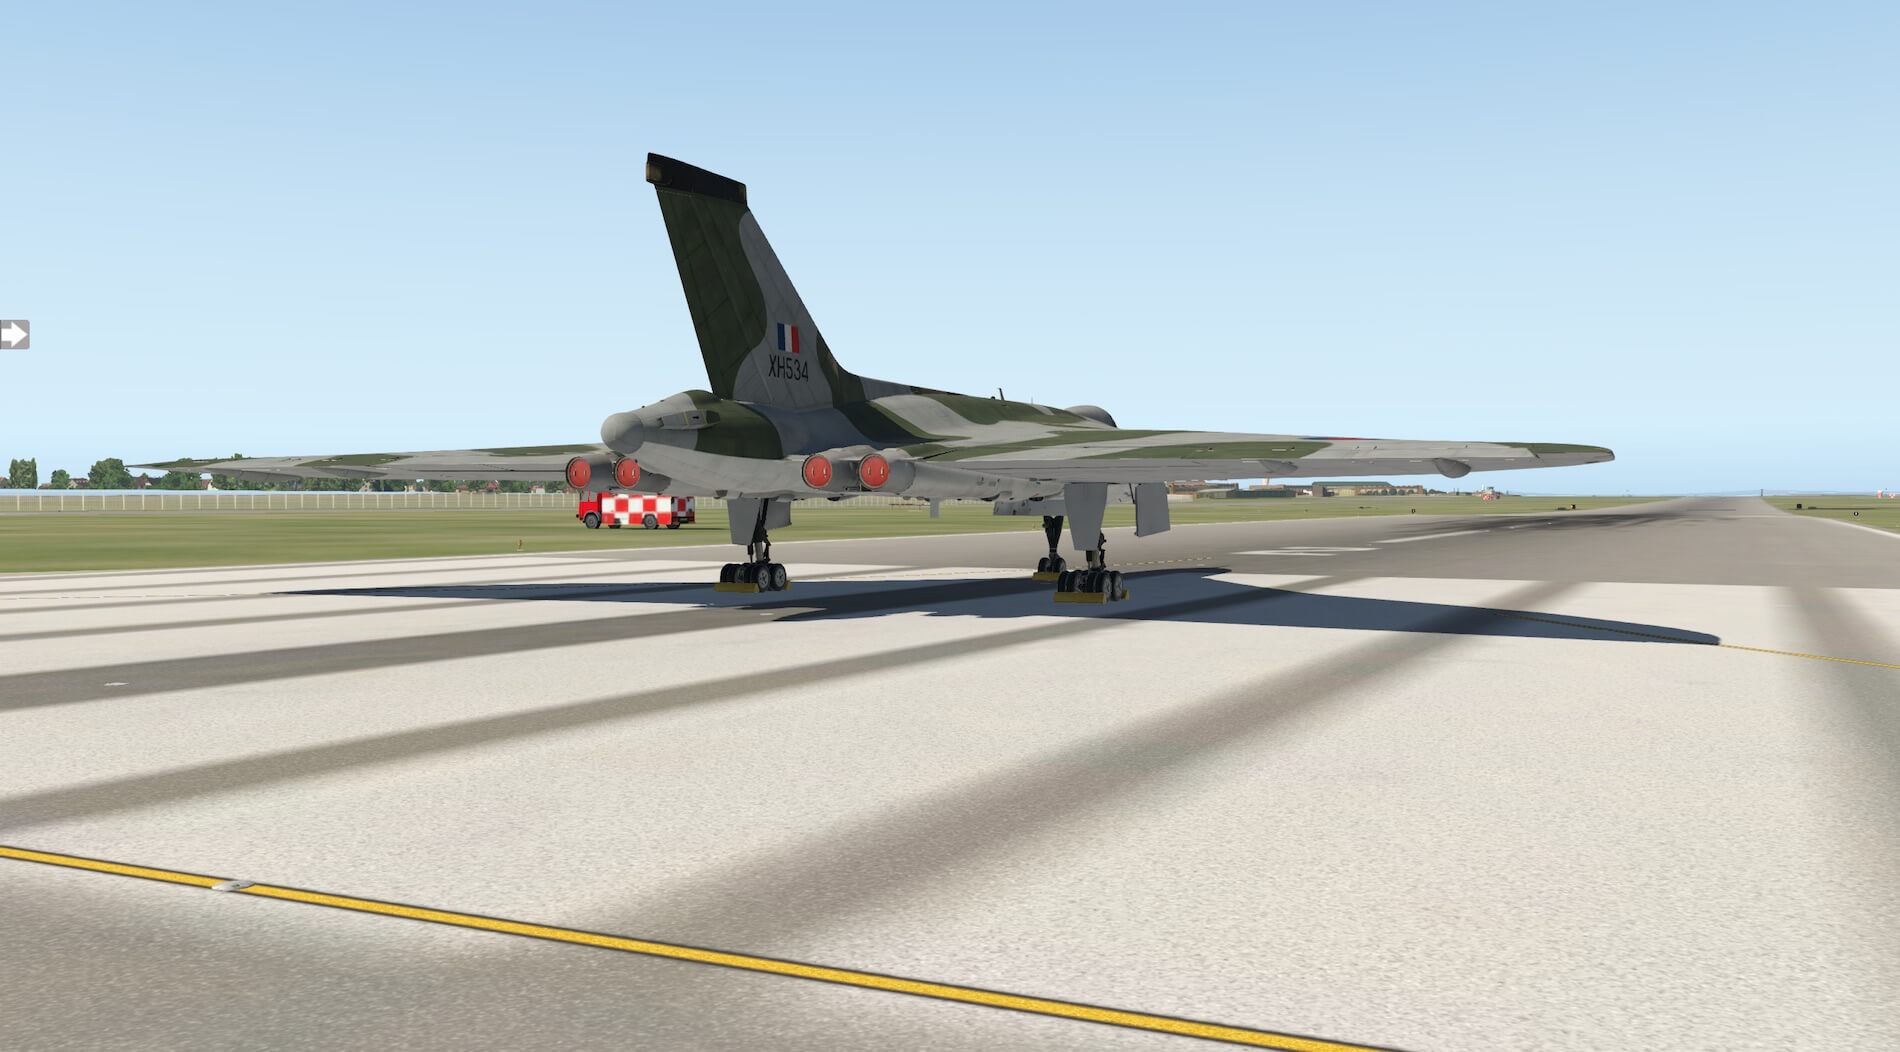
The tail of a B2 variant, such as XH534, is fitted with an ECM pod on the fin, as is the MRR version such as XH560, whereas the K2 version, such as XJ825, has the refuelling hose drum fitted. The change of liveries and variants also alters other external equipment. Whilst the flight model is designed for the Olympus 301 engines where appropriate the variant has engine nozzles for the Olympus 201 and these change with the variant chosen.
Other external equipment that can be changed and adjusted is the fitting of a refuelling probe, a Terrain Following Radar dome fitted to the nose, modern aerials, the ECM pod and MRR air sampling pods and nose blade aerials. This equipment changes automatically with the livery and variant change and the ‘config.json’ file need not be used at all to experience each of these options.


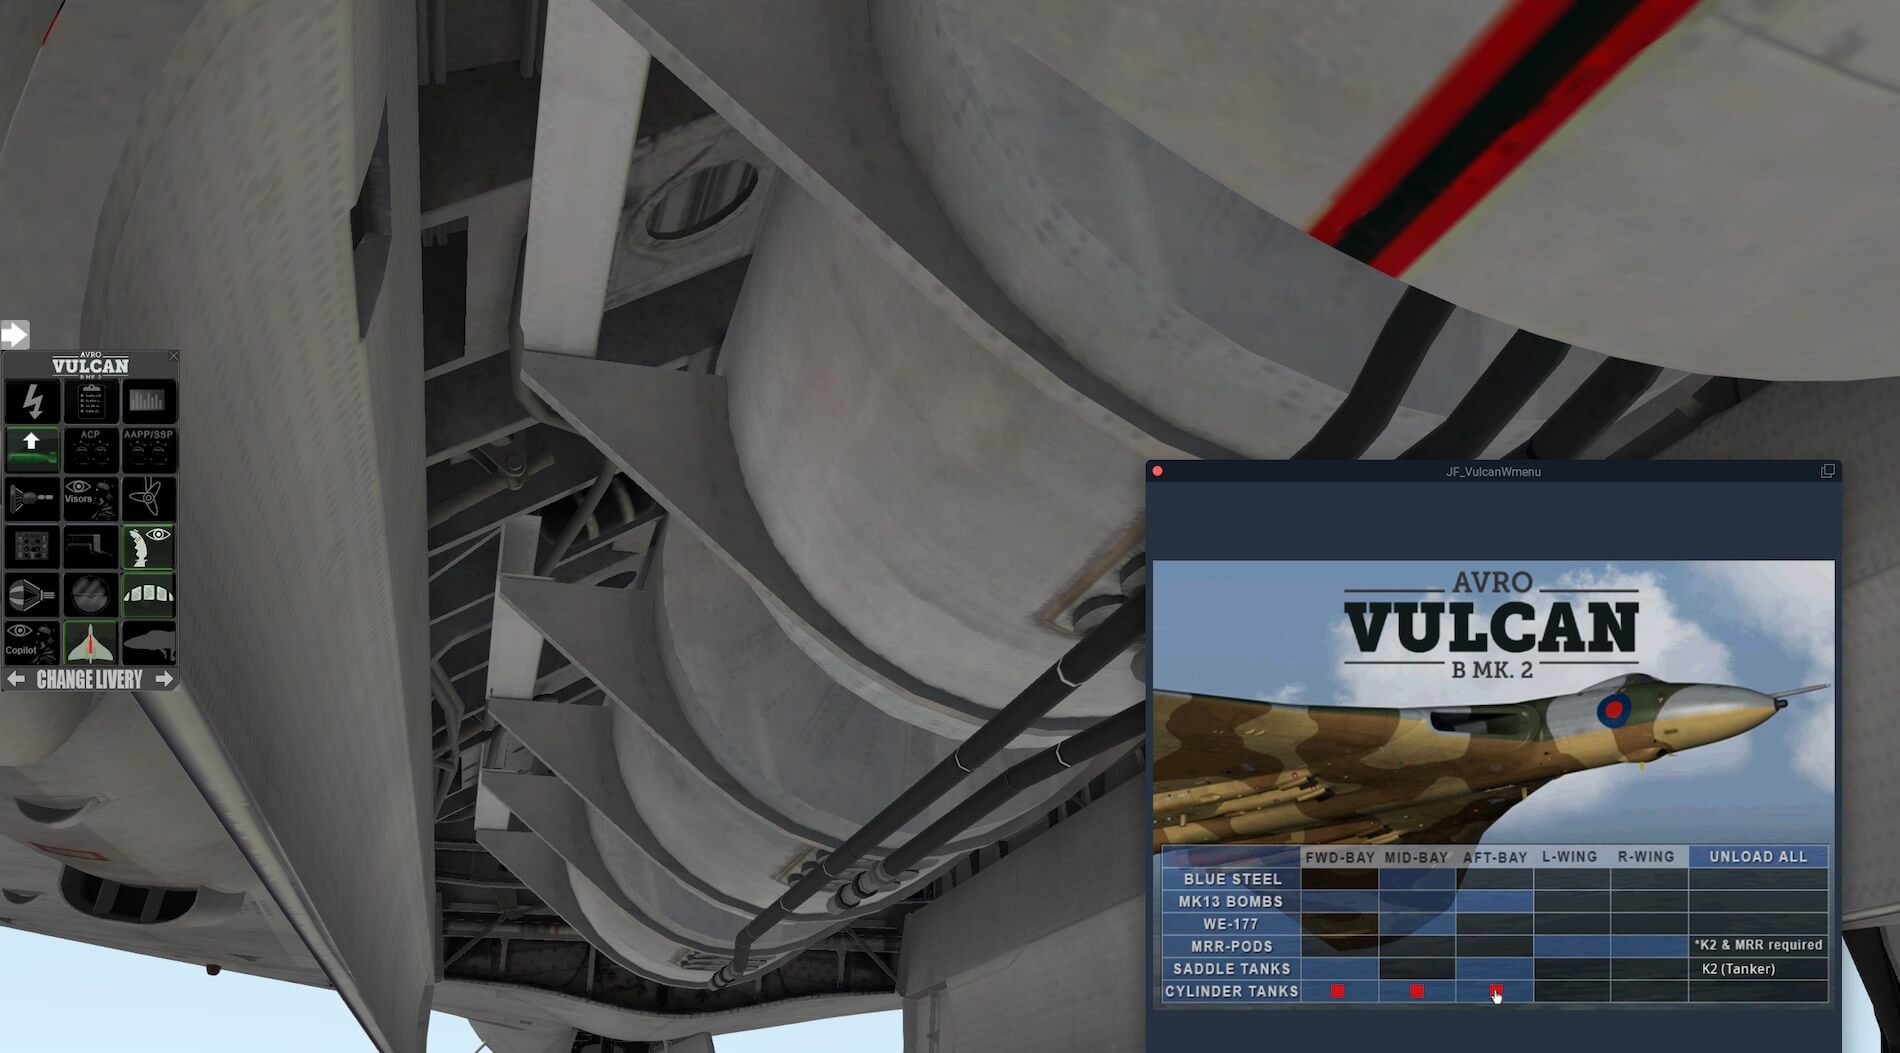
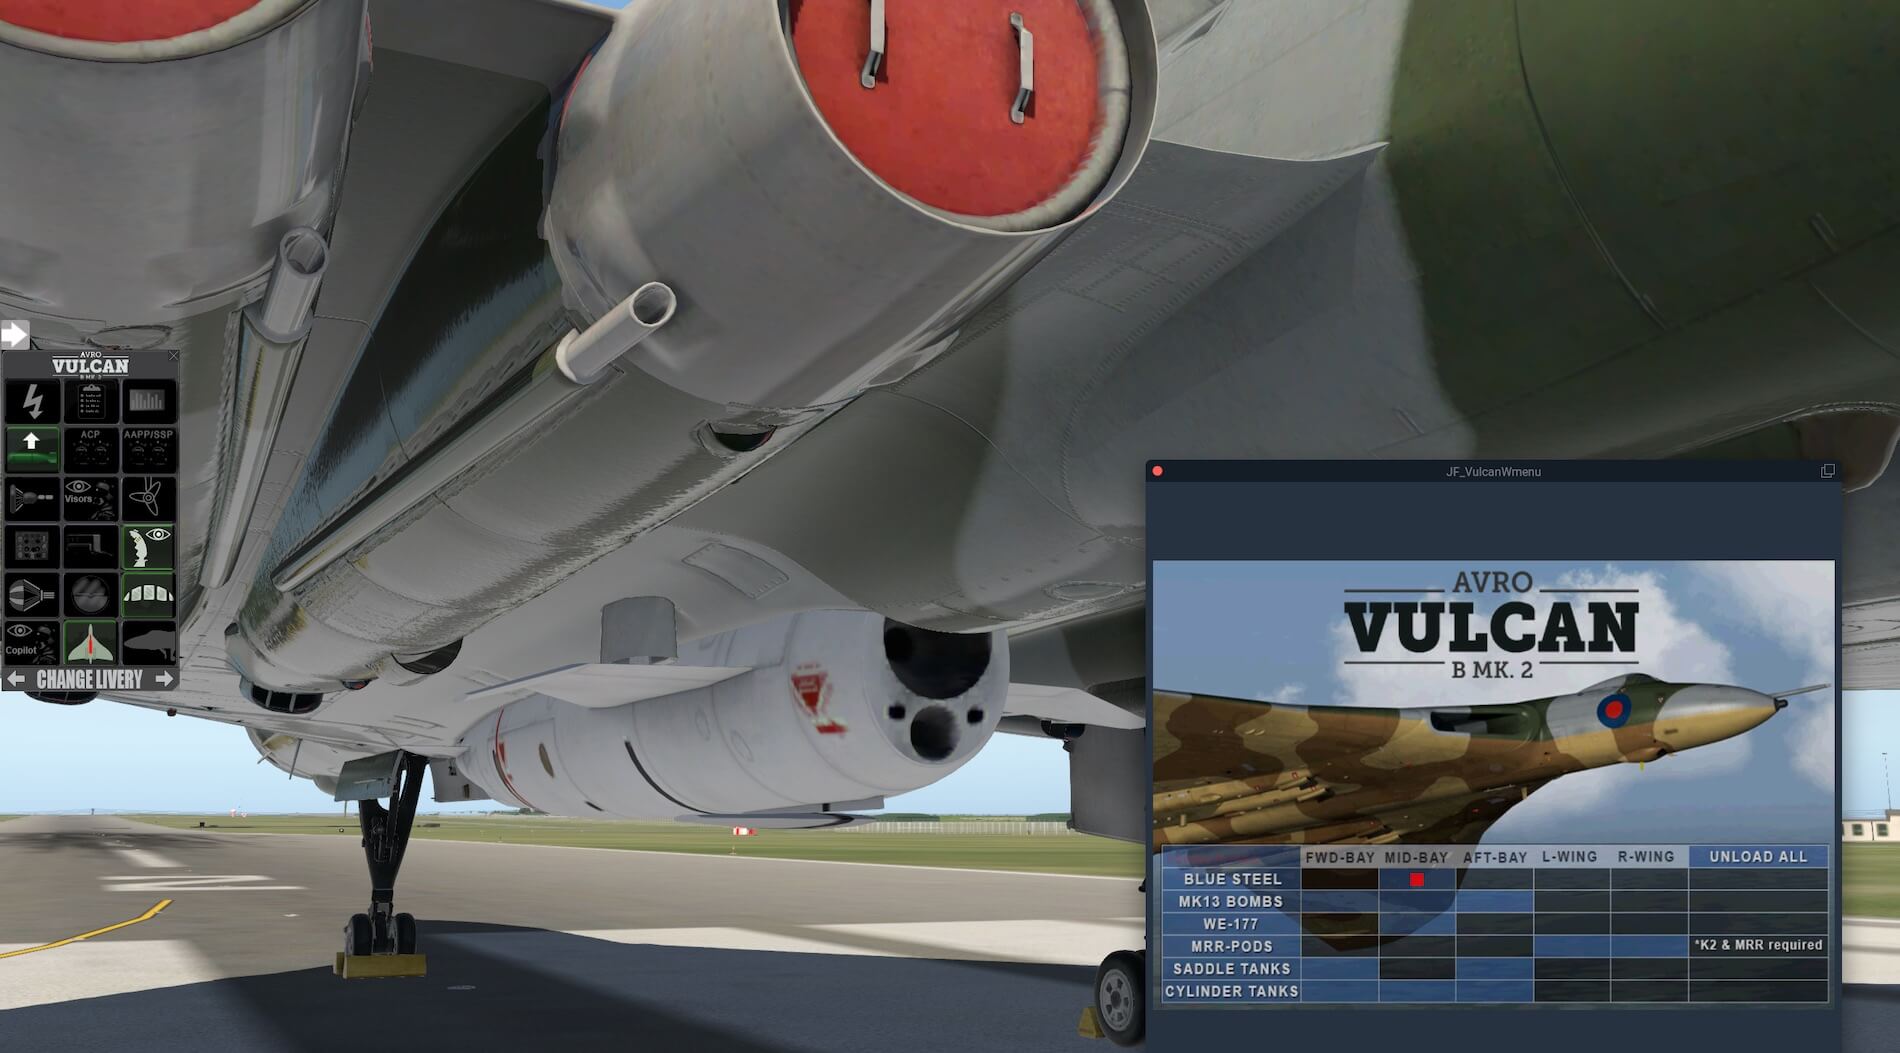
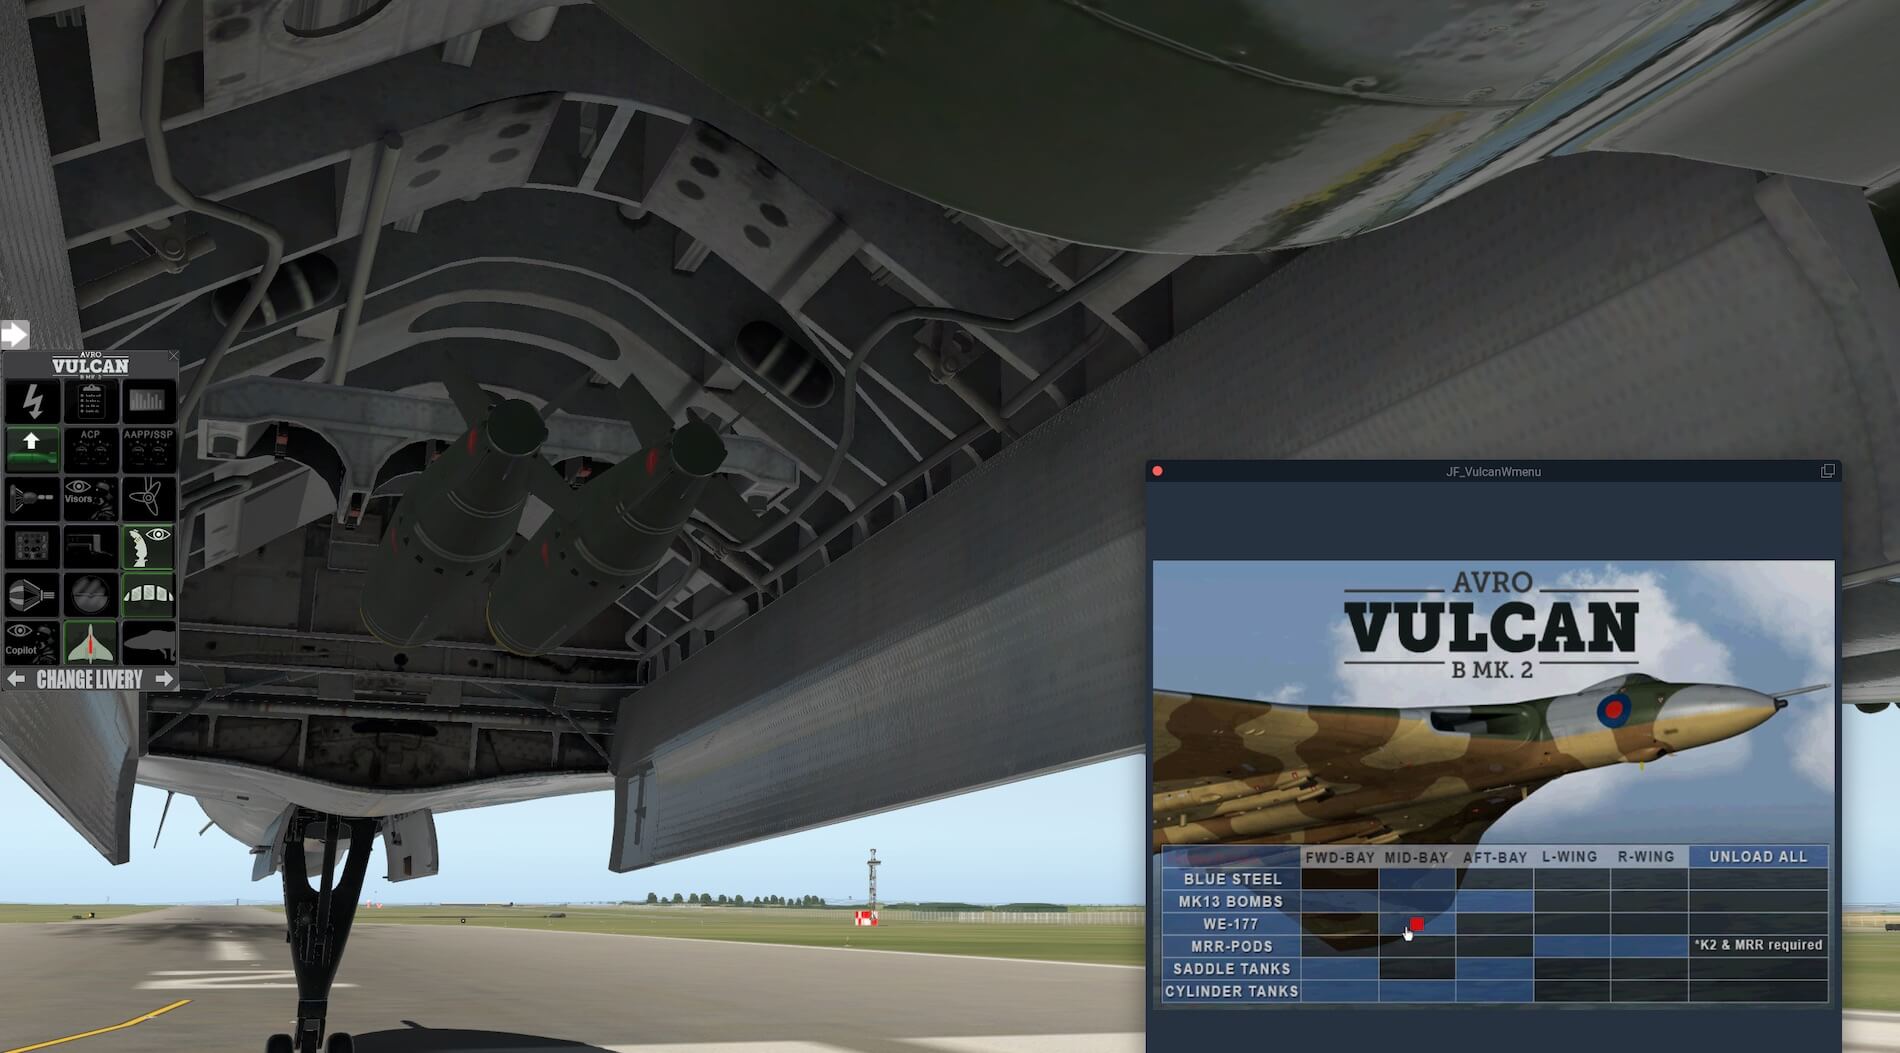
Moving further under the aircraft several options are available for weapons fits, especially within the bomb bay. The bomb bay doors can be opened via the side menu. Also in the side menu is the weapons options panel. Changing the equipment carried is easy with the panel as all options are presented and to use them is a matter of selecting particular options.
Some options are available for particular variants. Saddle tanks are those fitted to the MRR variants and the cylinder tanks for the K2 version. Weapons options are the Blue Steel missile, MK 13 bombs, WE-177 nuclear weapon and for the MRR and K2 versions MRR pods on the wings. This weapons and equipment change is easy to carry out and provides the user with many interesting alternatives.
The change of equipment also adds different weights to the aircraft as can be experienced as the aircraft suspension changes on the ground as different fits are used. The movement of the bomb bay doors is smooth and realistic.


Raising the view to look down on the model not only further illustrates the size of the aircraft but clearly shows the detailed panel work and the way the paint colours really suit the Vulcan. The weathering is also realistic and effective. This also very clear from a left side view. A view from the front of the aircraft shows the Olympus 201 and 301 engine nozzle variations and also shows the extendable/retractable landing/taxi lights in the wings.


In flight the model maintains the presence of the real aircraft. The refuelling hose can be extended through the side menu and with the bomb doors open the weapons fit can clearly be seen. The model looks good in lower light and interacts well with the X-plane scenery and lighting.

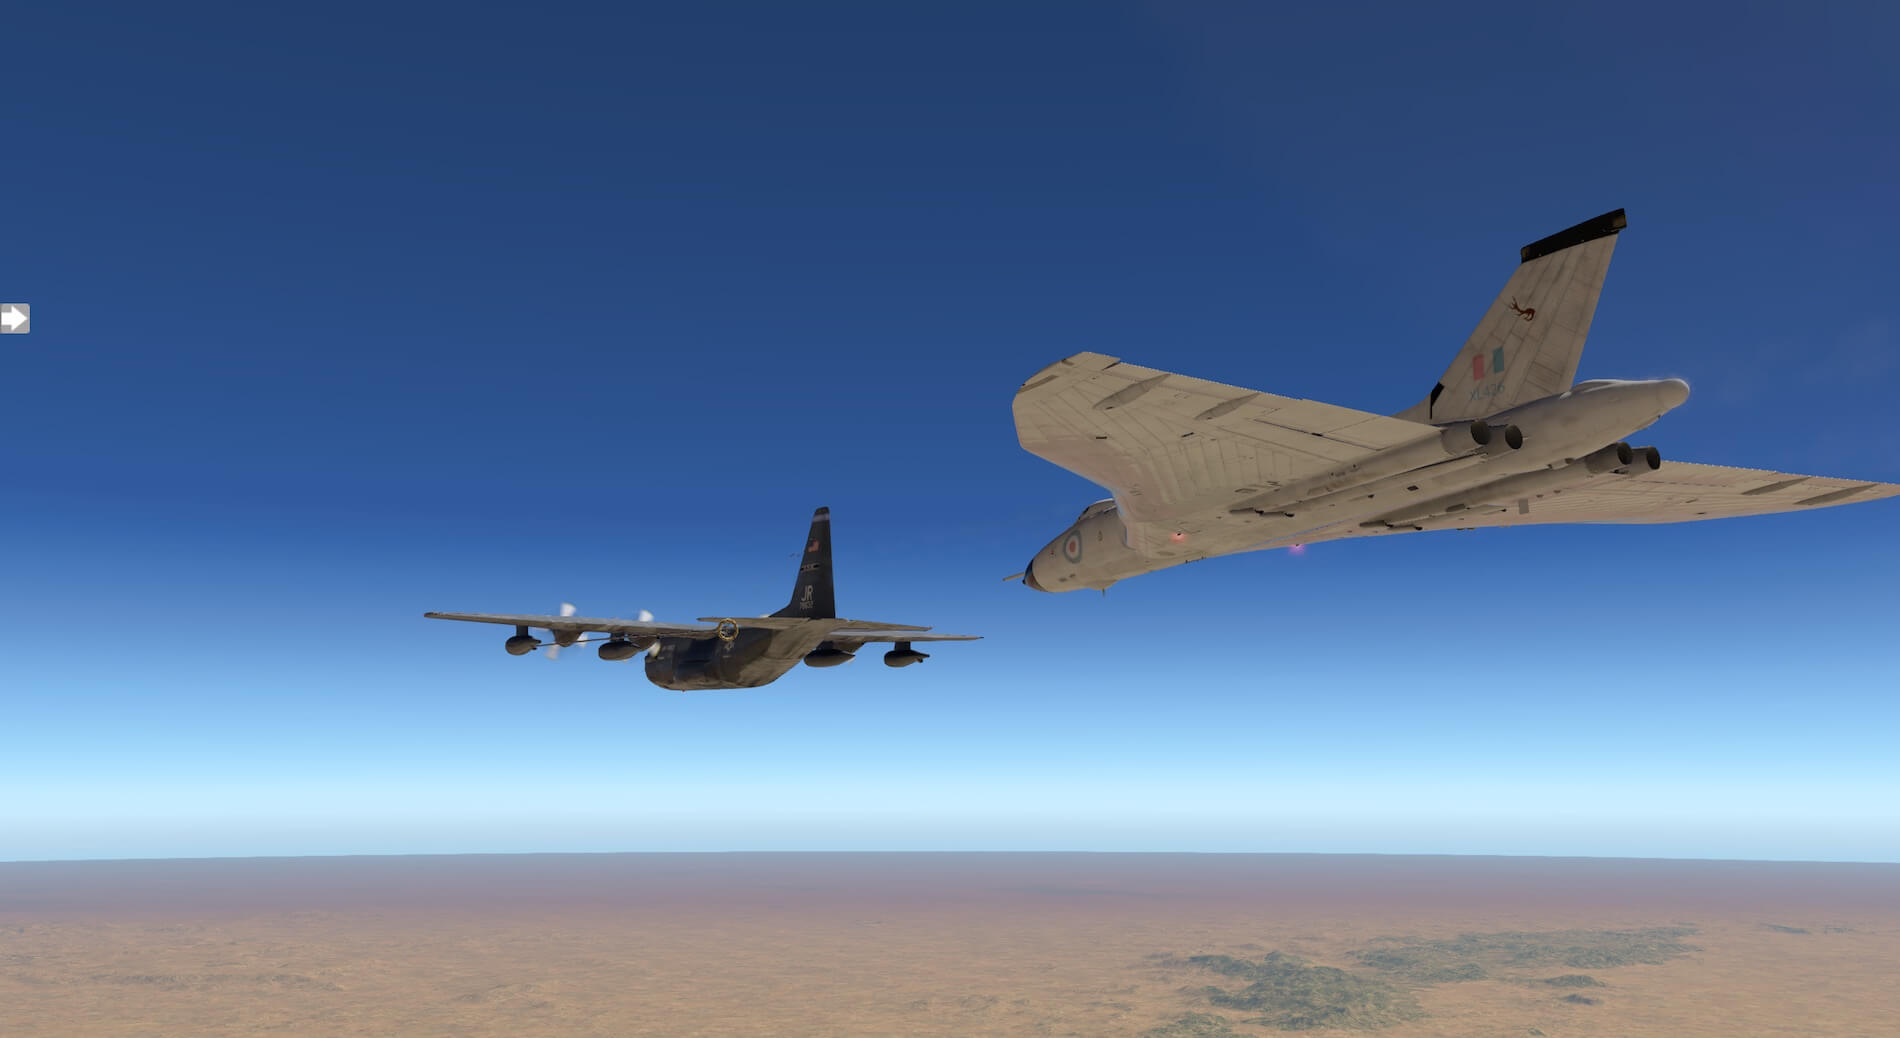
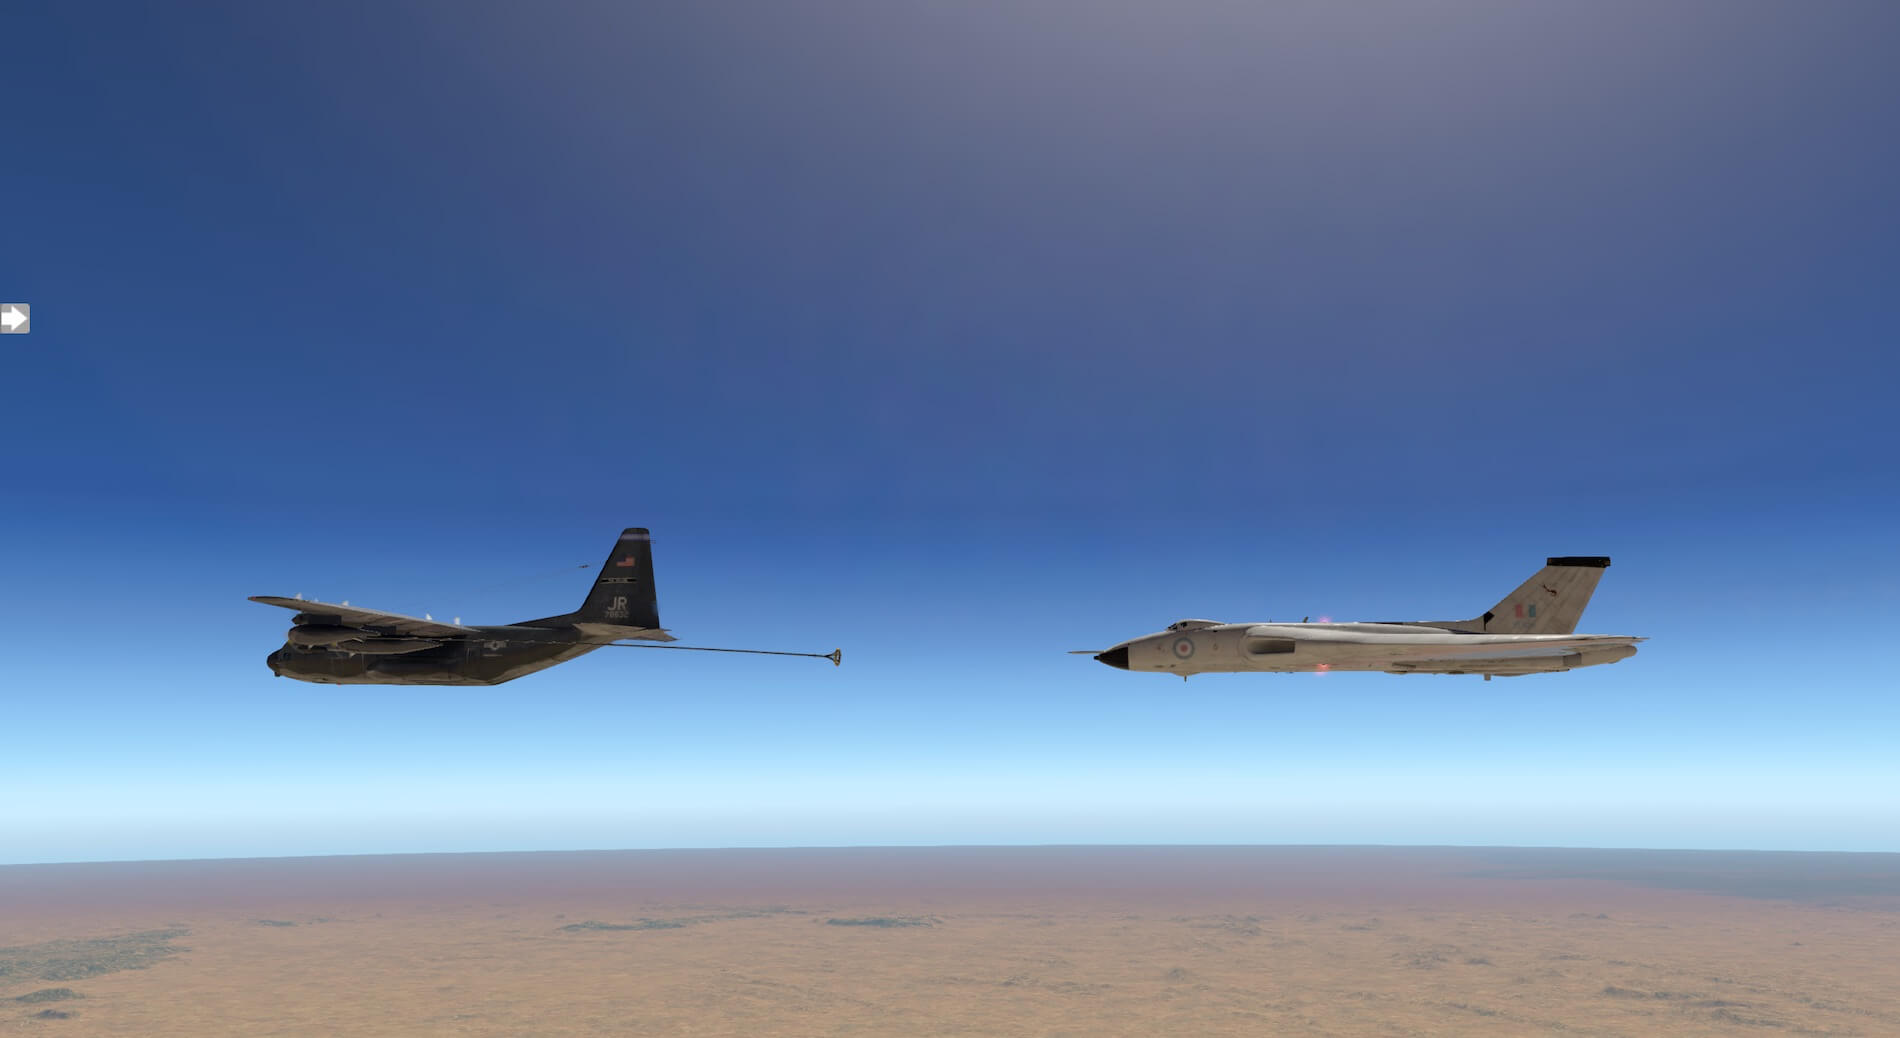
The aircraft is equipped with a drag chute which can be deployed via the side menu. Once the aircraft has slowed to walking pace the chute can be jettisoned by use the chute switch in the centre of the instrument panel. When the model is fitted with a refuelling probe it opens up the option of using the special starts menu in X-Plane and carrying out air to air refuelling. I must admit I find this challenging with any aircraft and the Vulcan is no different, although I found trying to succeed thoroughly absorbing, where did that time go!


This model is highly impressive when viewed from the exterior. Control surfaces and panels are modelled in detail and the option of 17 varied liveries across three variants, and the ability to edit the exterior equipment in those variants, provides numerous possibilities in the presentation of the aircraft.
The addition of further weapon load options and operating bomb bay doors, refuelling hose and brake chute create interest in many different ways. The model maintains its character and iconic presence whether in the air or on the ground. The colours and signage are appropriate to the aircraft type and age.
Interior Modelling
I approached the aircraft and entered by the crew ladder. This can be toggled on and off via the on screen side menu. The Vulcan has crew of five. The pilot and co-pilot sit at the front in ejector seats. The other three crew, Air Electronics Officer, Navigator/plotter and Navigator/radar sit lower down in the cabin.
Should the crew need to abandon the aircraft the pilot and co-pilot could eject but the three remaining crew had to climb down the crew ladder and jump! The manual explains that the cockpit for the pilot and co-pilot has been created but the rear lower cabin is not modelled. Having been inside real Vulcans I can say the cockpit feels very small, especially considering the size of the aircraft, and first impressions from the modelled cockpit show the developers have conveyed this well.


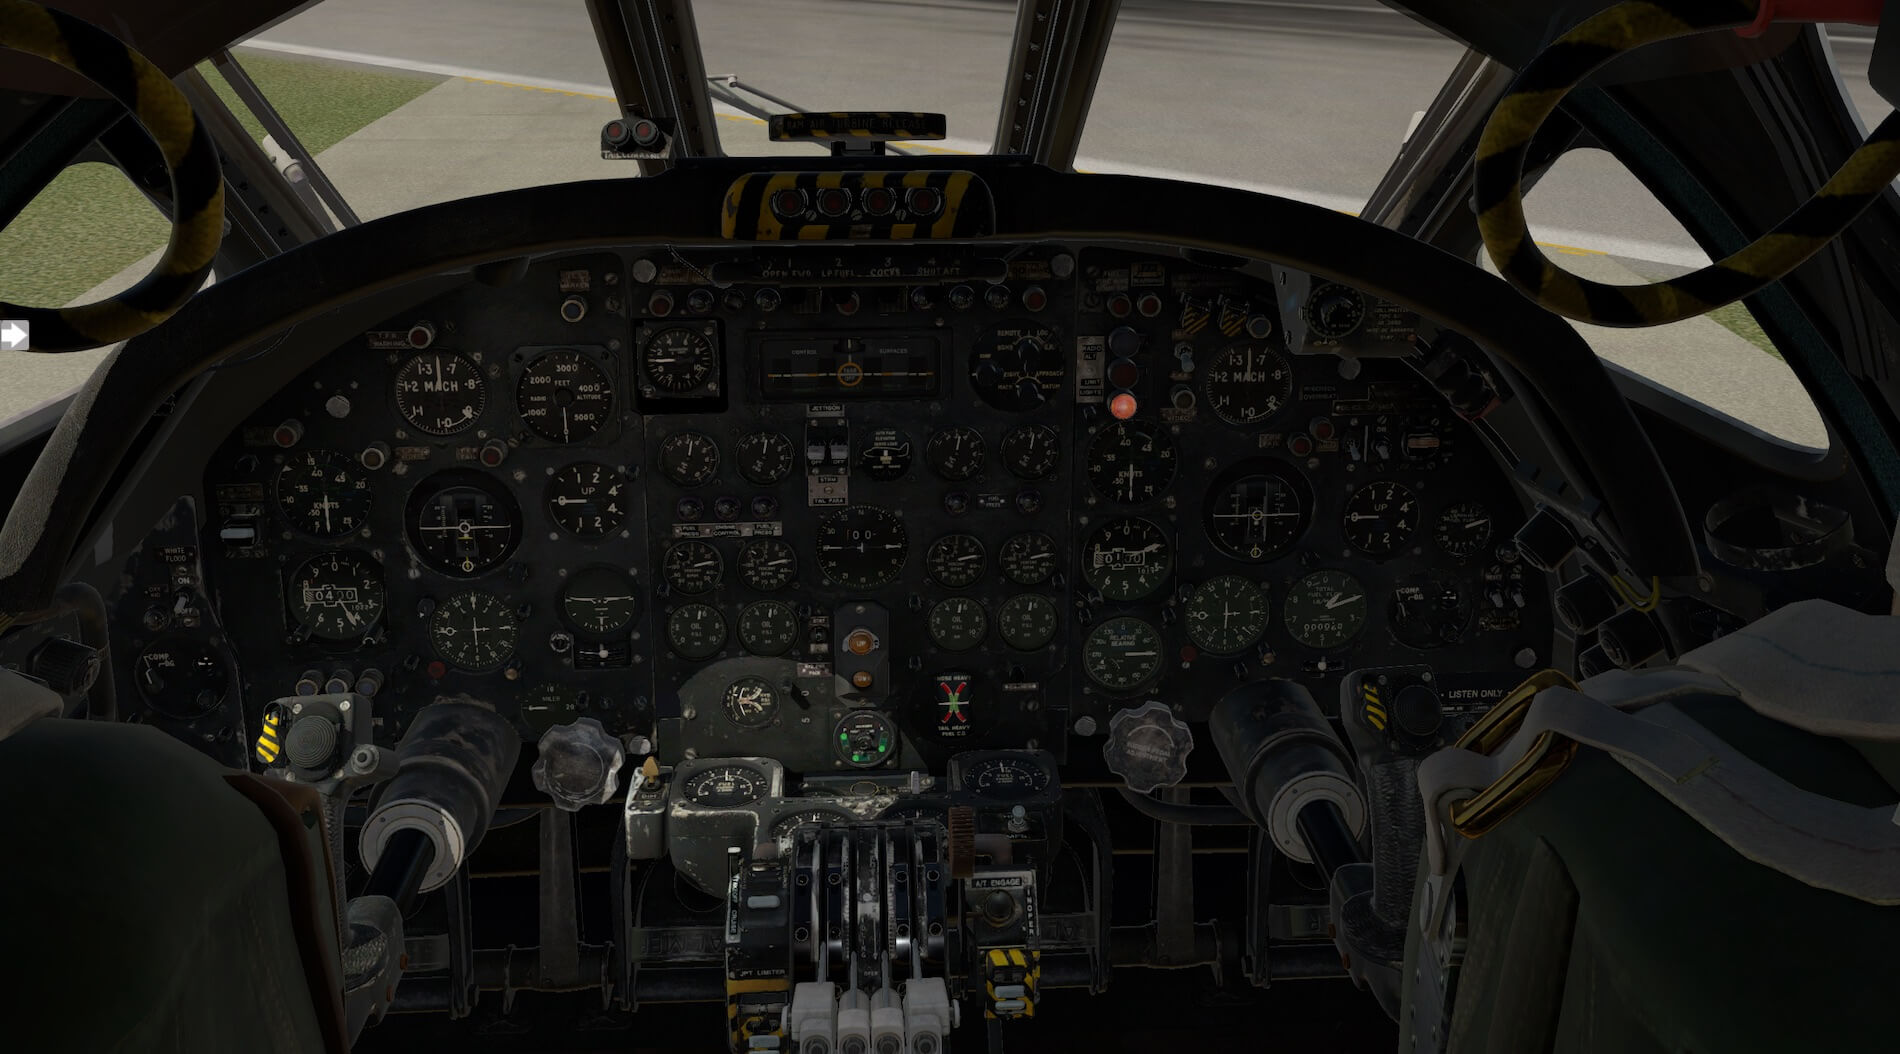


The detail of the cockpit certainly matches the quality of the exterior of the aircraft. Colours and textures are highly convincing and really set the character of the interior of the aircraft and creates a real atmosphere. All instrumentation, switches and controls are produced to a high standard and bear an appropriate level of wear and tear and discolouration.
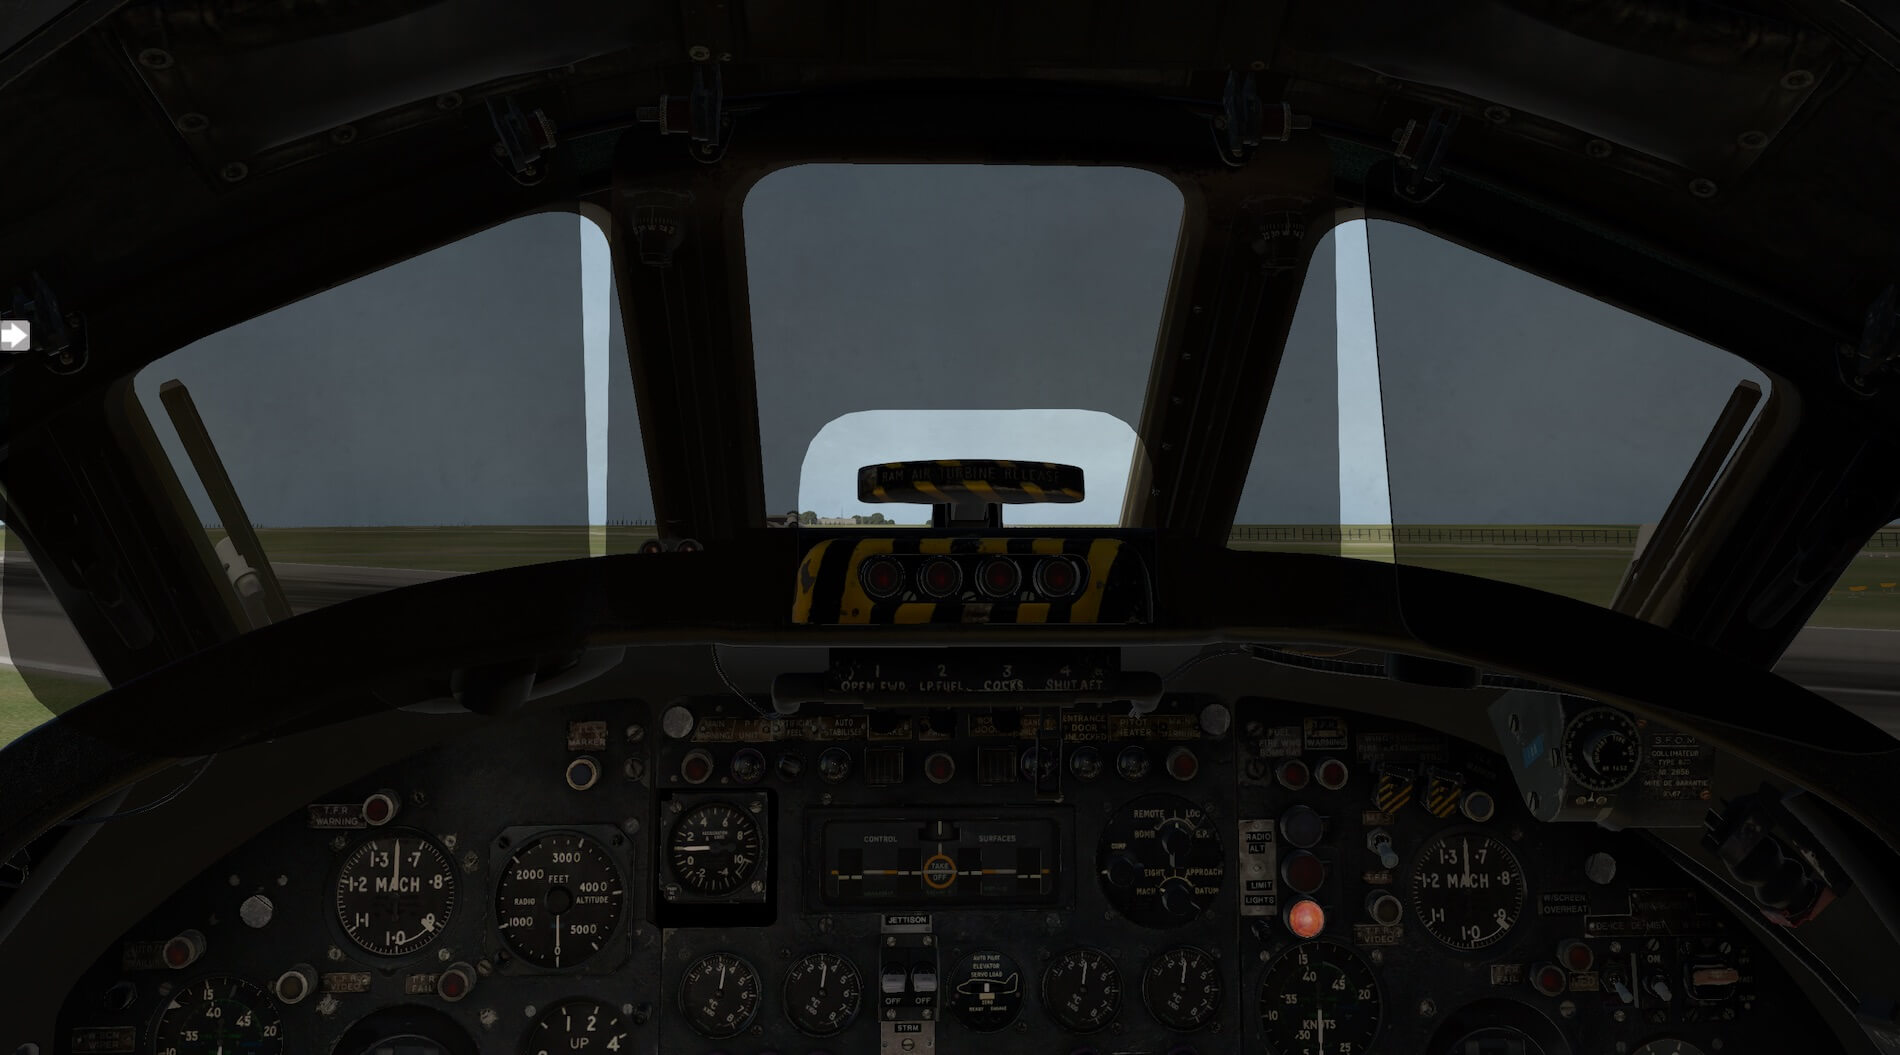
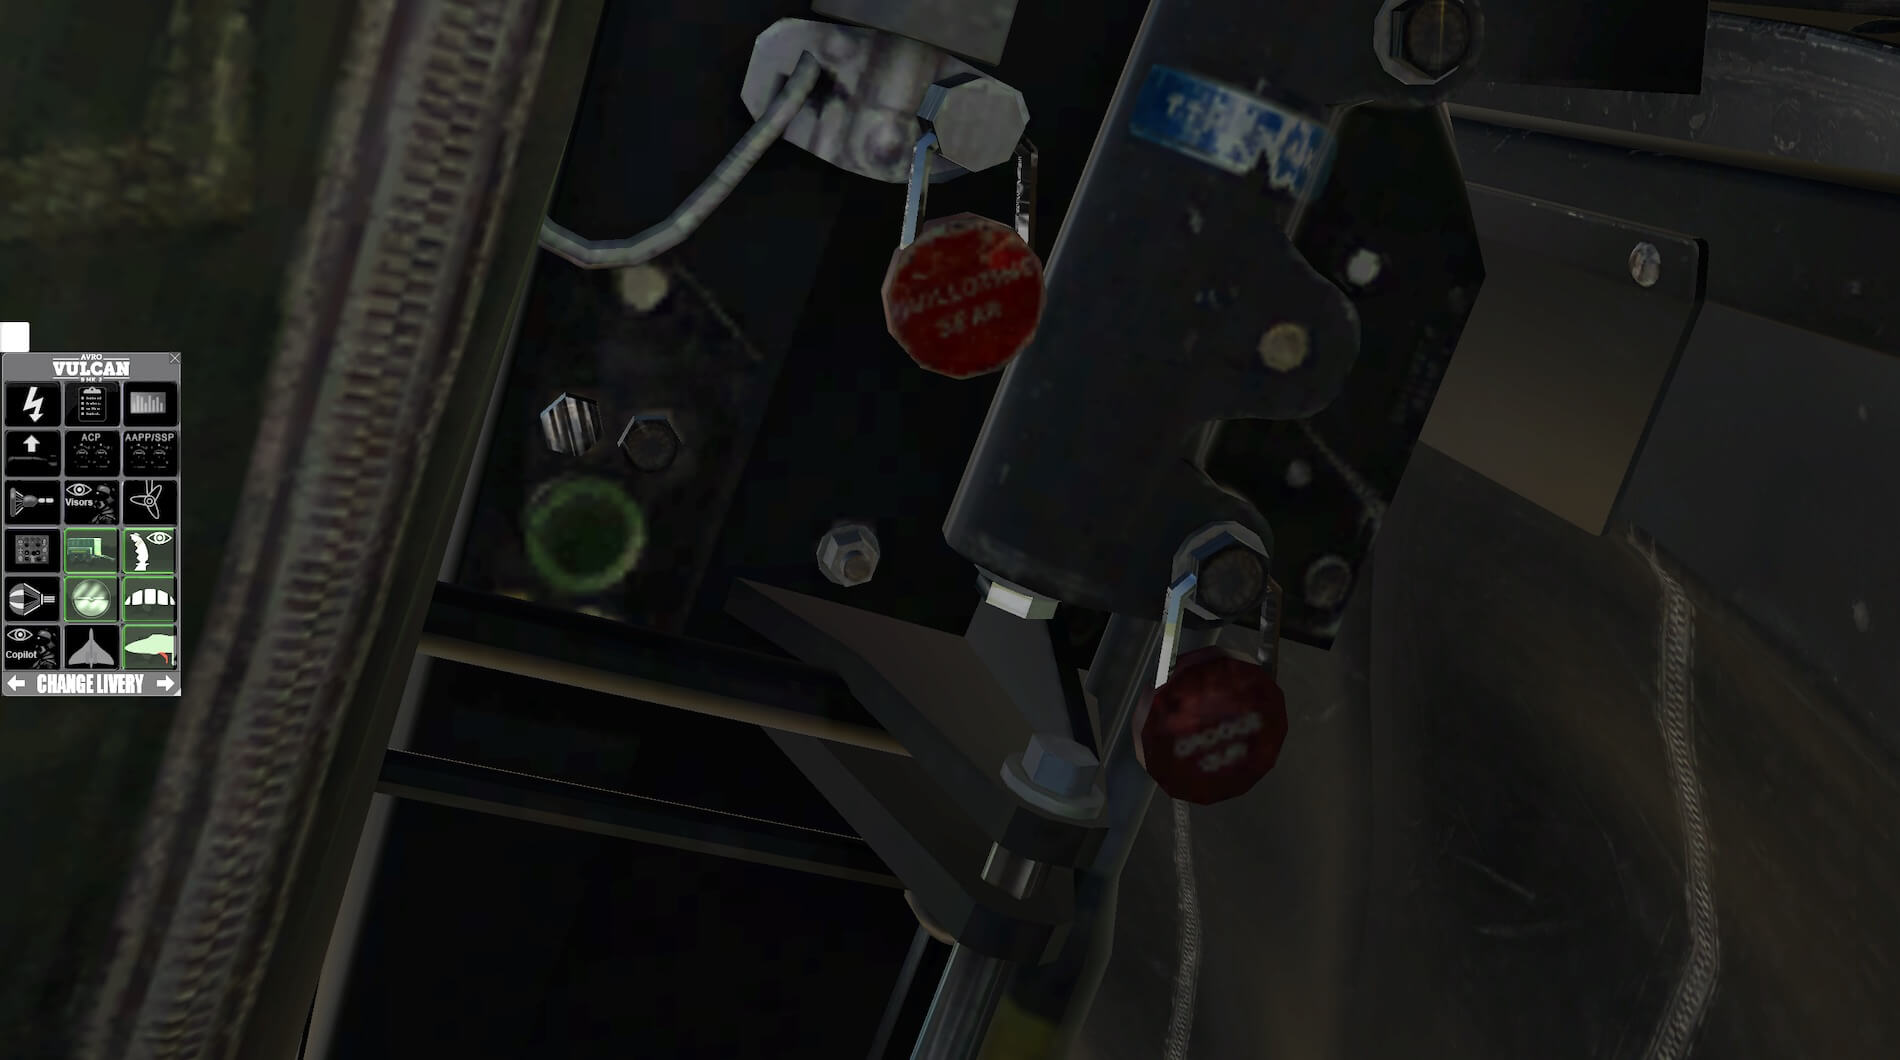
Glass effects are good and all signage and instrumentation is clear and legible. The majority of switches and controls are modelled to be active. Where this is the case there are useful graphics to show how the switch works or is turned. Window blinds can be operated to remove glare and the side menu also allows for the pilots visor to be toggled up or down again adding a further tinting effect.
Great care has been taken to model the appropriate materials and surfaces to recreate a detailed and highly impressive cockpit area. The centre console, between the two seats is extendable and operating the appropriate lever models this correctly. The model was updated from the first version and this included improved cockpit lighting. The cockpit certainly looks just as good in low light with cockpit lighting on.

This cockpit really immerses the user in its realism and detail and compliments the quality of the exterior. Further detail of the pop out panels and equipment available in the cockpit will be covered in the systems section below.
Sound
The engine noise of the model is very convincing and changes with throttle movement and whether heard from inside or outside the aircraft. The sound of the engines spooling up is realistic and impressive, especially in rapid start, and also includes the famous Vulcan howl that is caused by approximately 100 kilos of air per second being sucked into the intakes, when power exceeds 92 percent, the air vibrates onto the “lips” of the intakes, causing the sound to occur.
The switches and switch guards are accompanied by appropriate sounds when operated. The bomb doors open with quite a groan and the undercarriage moves with a reassuring sound. The sound package certainly adds to the realism of the visual presentation.
Simulated Systems
Before discussing the aircraft systems themselves I must mention the systems the developers have put in place to assist the user to fly the model. Whilst it could be argued that these systems mean short cuts for flying the aircraft they are cleverly blended in to the modelling and it should be remembered that the Vulcan has a crew of five and these systems allow the aircraft to be flown realistically by one person, for example whilst the real aircraft was not fitted with GPS a pop up default G430/530 can be opened by using an assigned key or button.
This allows the user track the route taken and serves as a substitute for not having a navigator in the model. I have mentioned the next part of this process several times before when I have referred to the side menu. This effectively reduces the need to set up joystick and keyboard commands as the main actions can be controlled by the side menu which can be opened by clicking an arrow at the side of the screen.

Working through this line by line it controls the following:
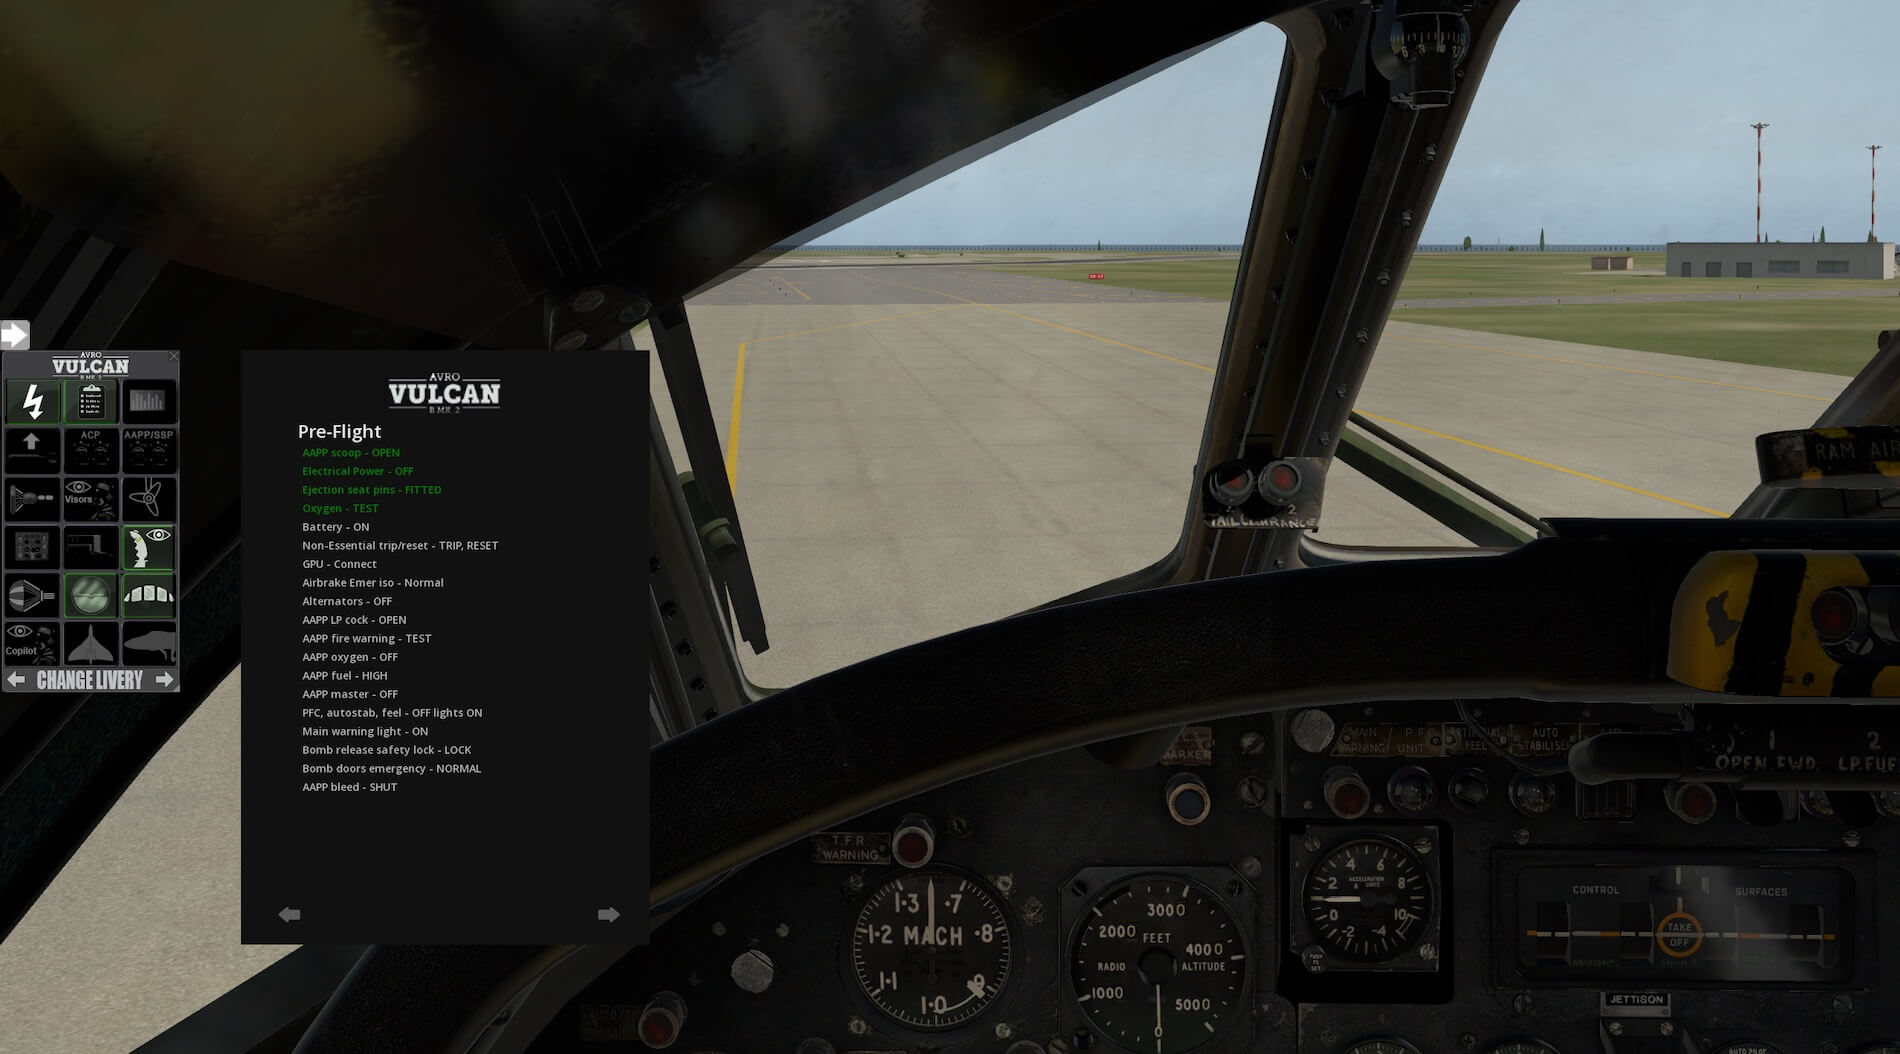
Toggles cold and dark and engines on without having to reload through the flight directory.
Opens a 2d Panel for the checklists. This includes checklists for all phases of using the aircraft and once an item is completed the text will turn green when clicked.
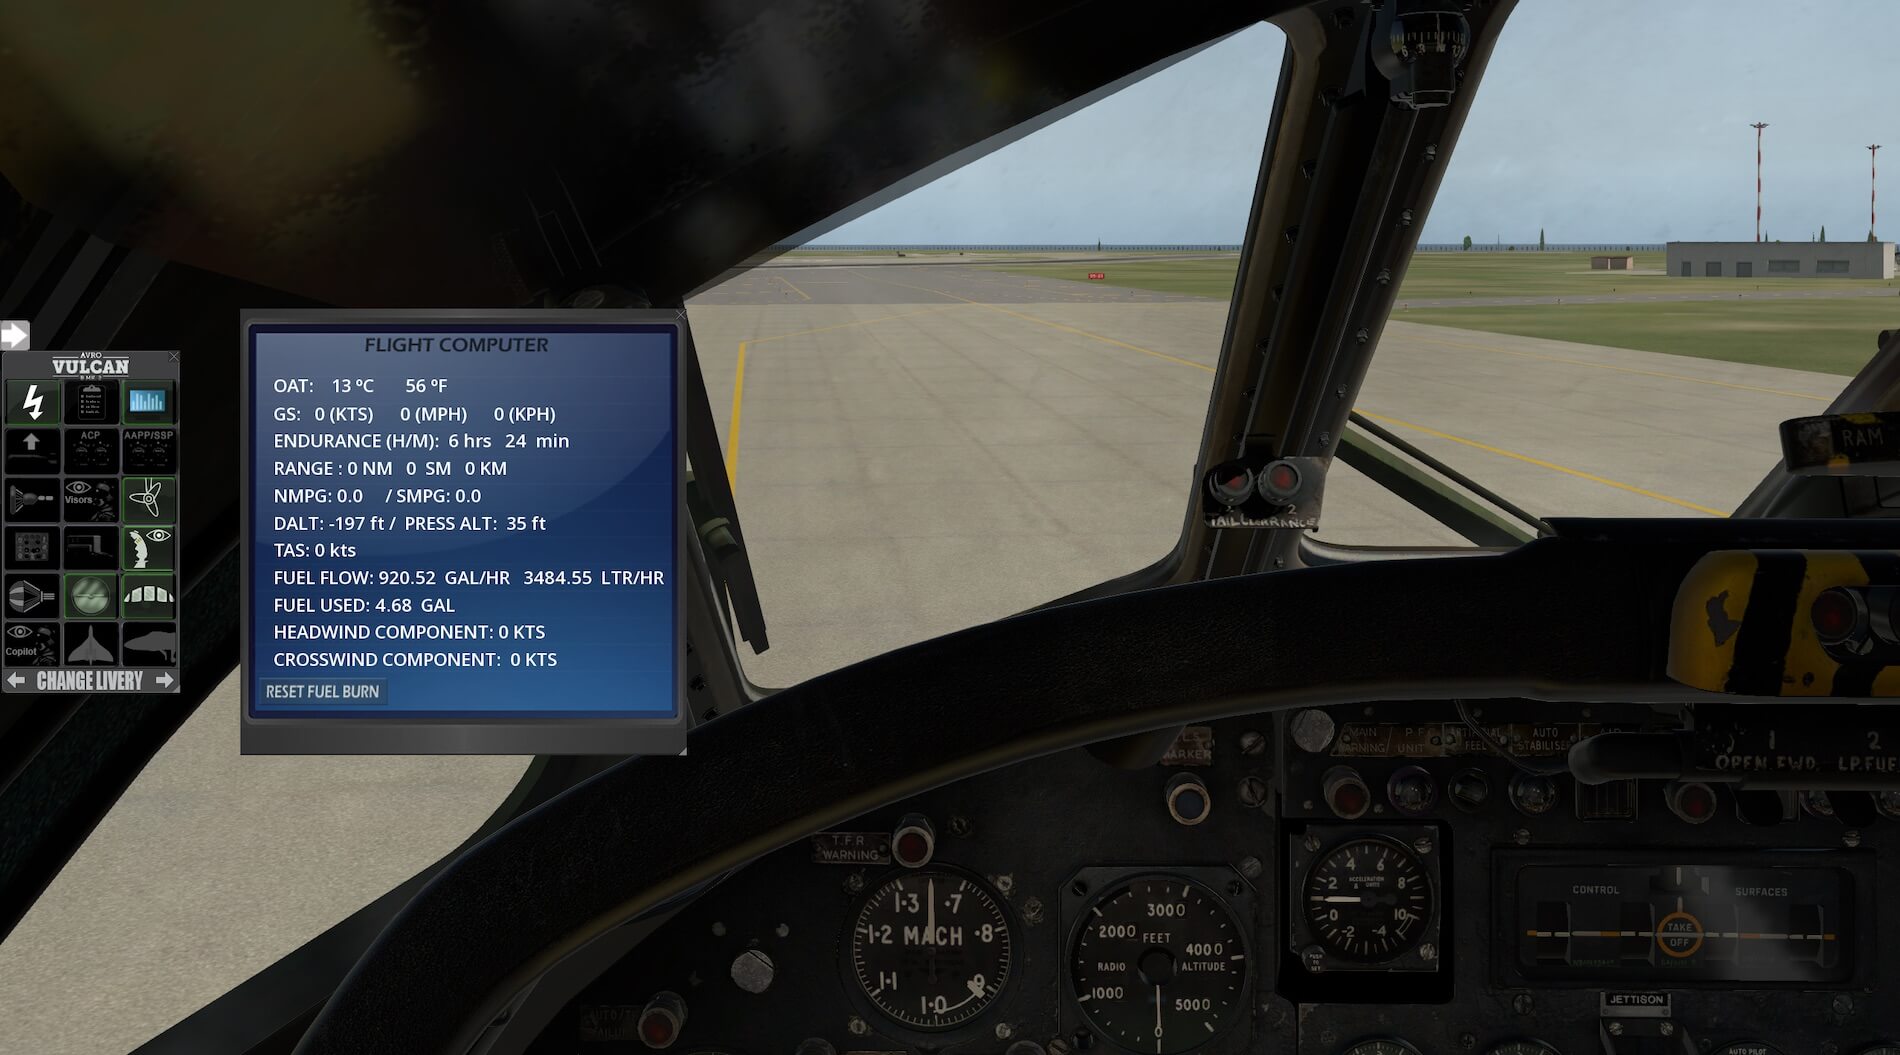
Opens a 2D Flight Computer Panel which shows a considerable amount of information as per the screen shot below.
Payload Menu
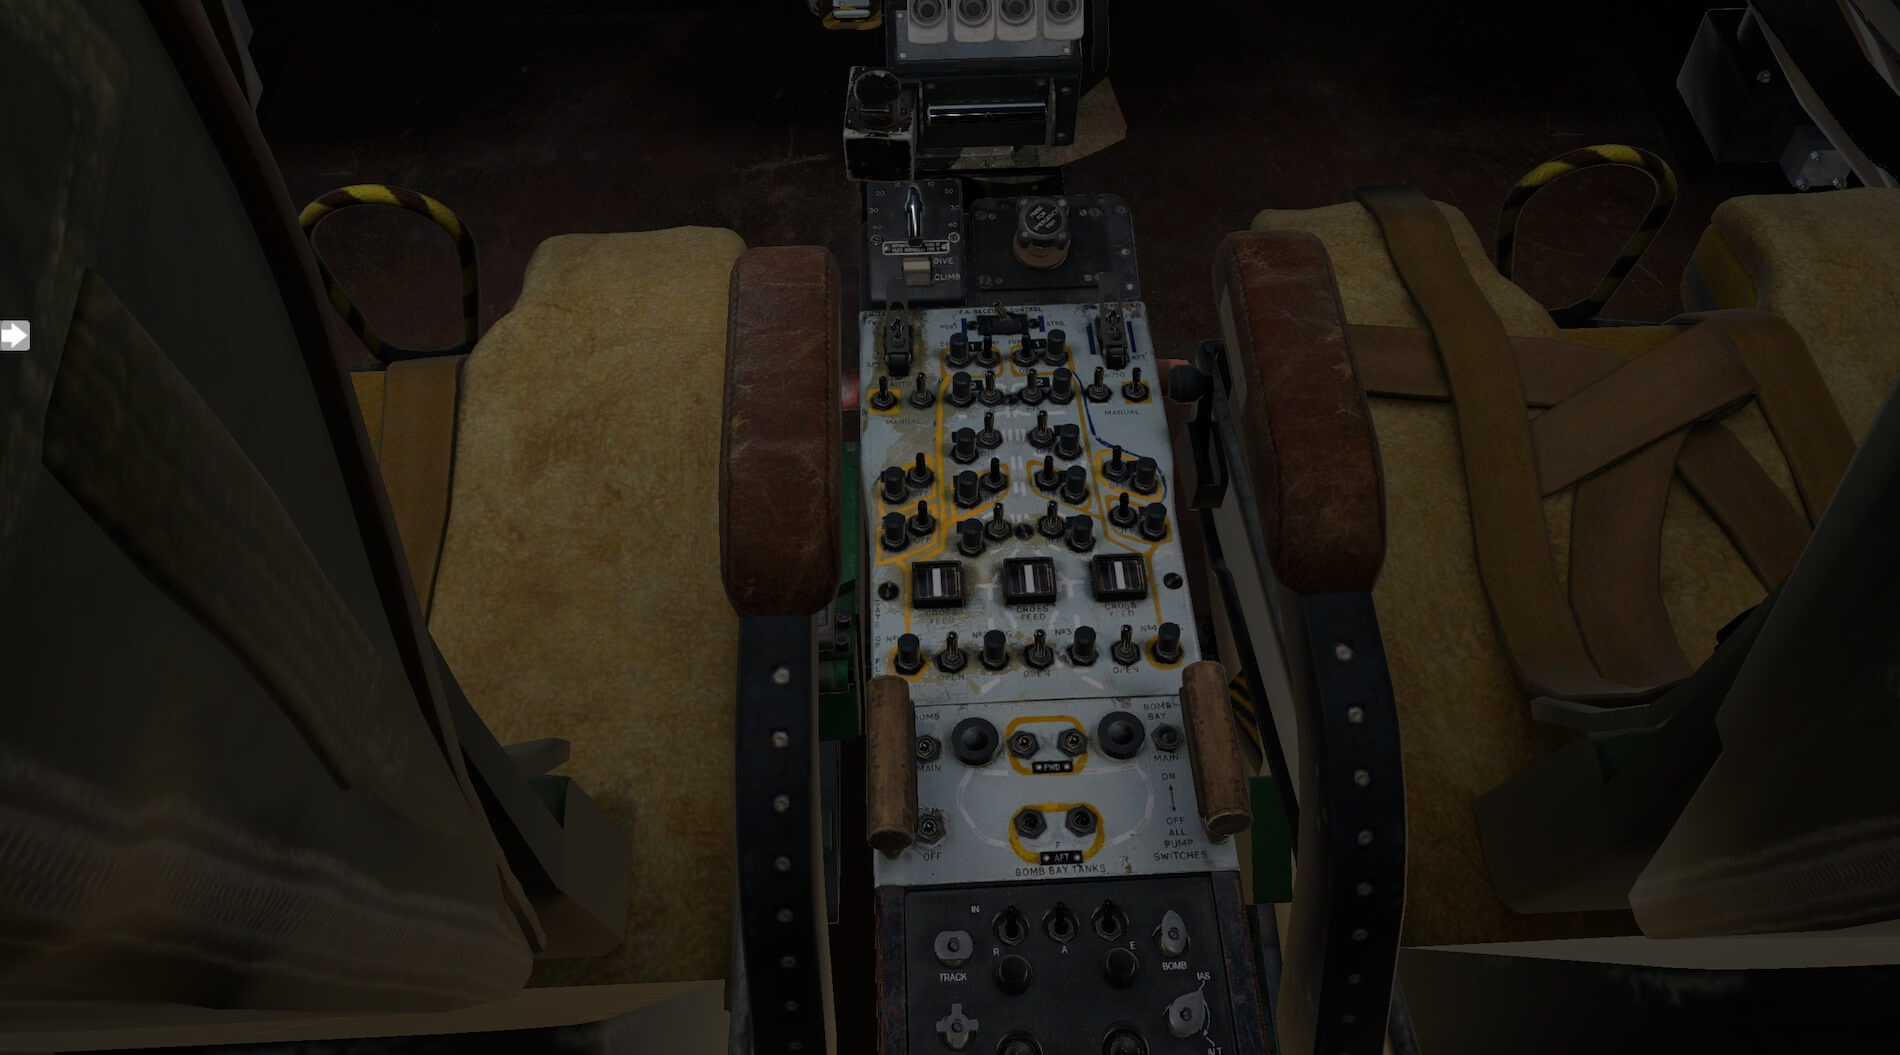
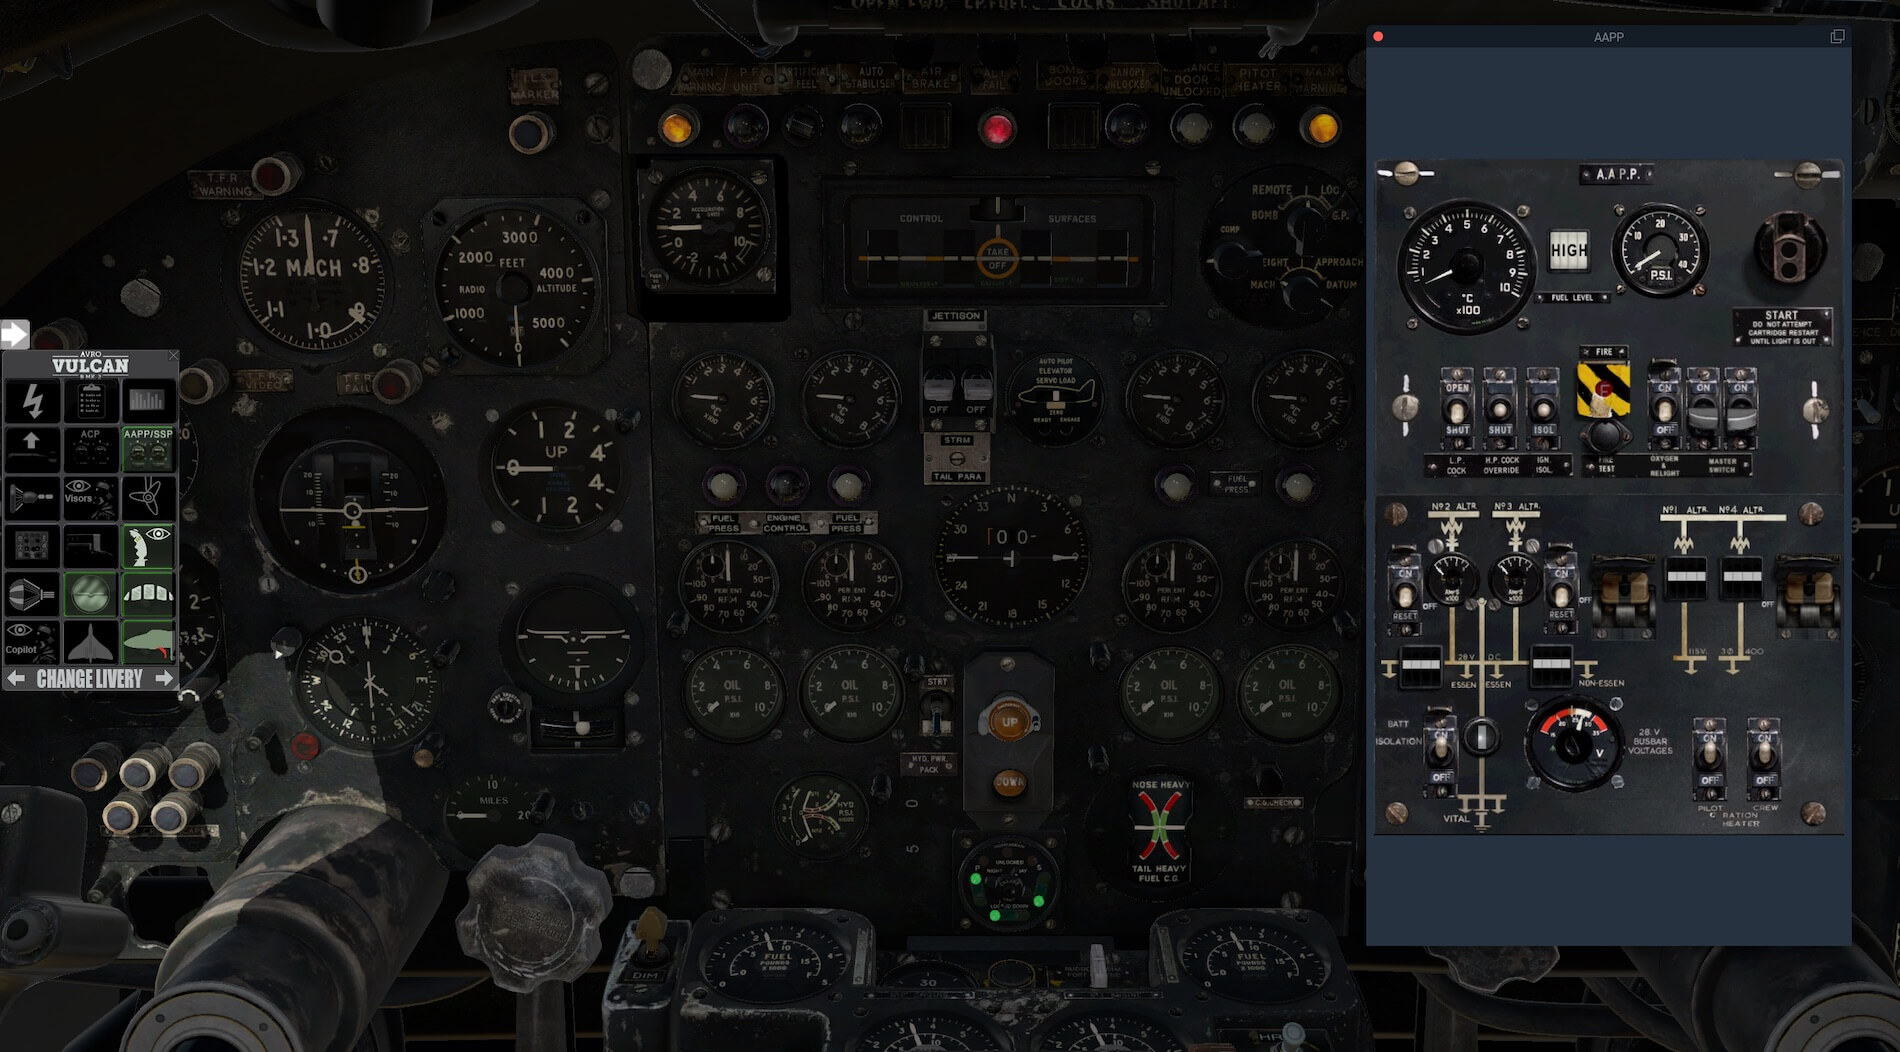
The next two buttons open 2d panels for the Alternator Control Panel and Secondary Supplies/Airborne Auxiliary Power Plant Panel. These two panels are located in the rear crew cabin in the real aircraft so do not appear in the instrumentation actually in the cockpit. These allow the user to fulfil functions carried out by the rear crew in real life.
The next button extends the refuelling hose on the K2 versions
Toggles visors up and down
RAT deployment
Autopilot Control Panel
Ground Equipment
Show/hide control sticks
Deploy drag chute
Instrument and window reflections
Show/hide co-pilot
Bomb bay doors
Open/close crew access door
The side menu really does allow the user to quickly access various functions making the use much easier.
The manual also guides the user through the systems modelled on the aircraft and explains how they work and are interrelated. I will not go in to detail as that would mean simply copying the manual but in order to illustrate what works on the model the available systems are:
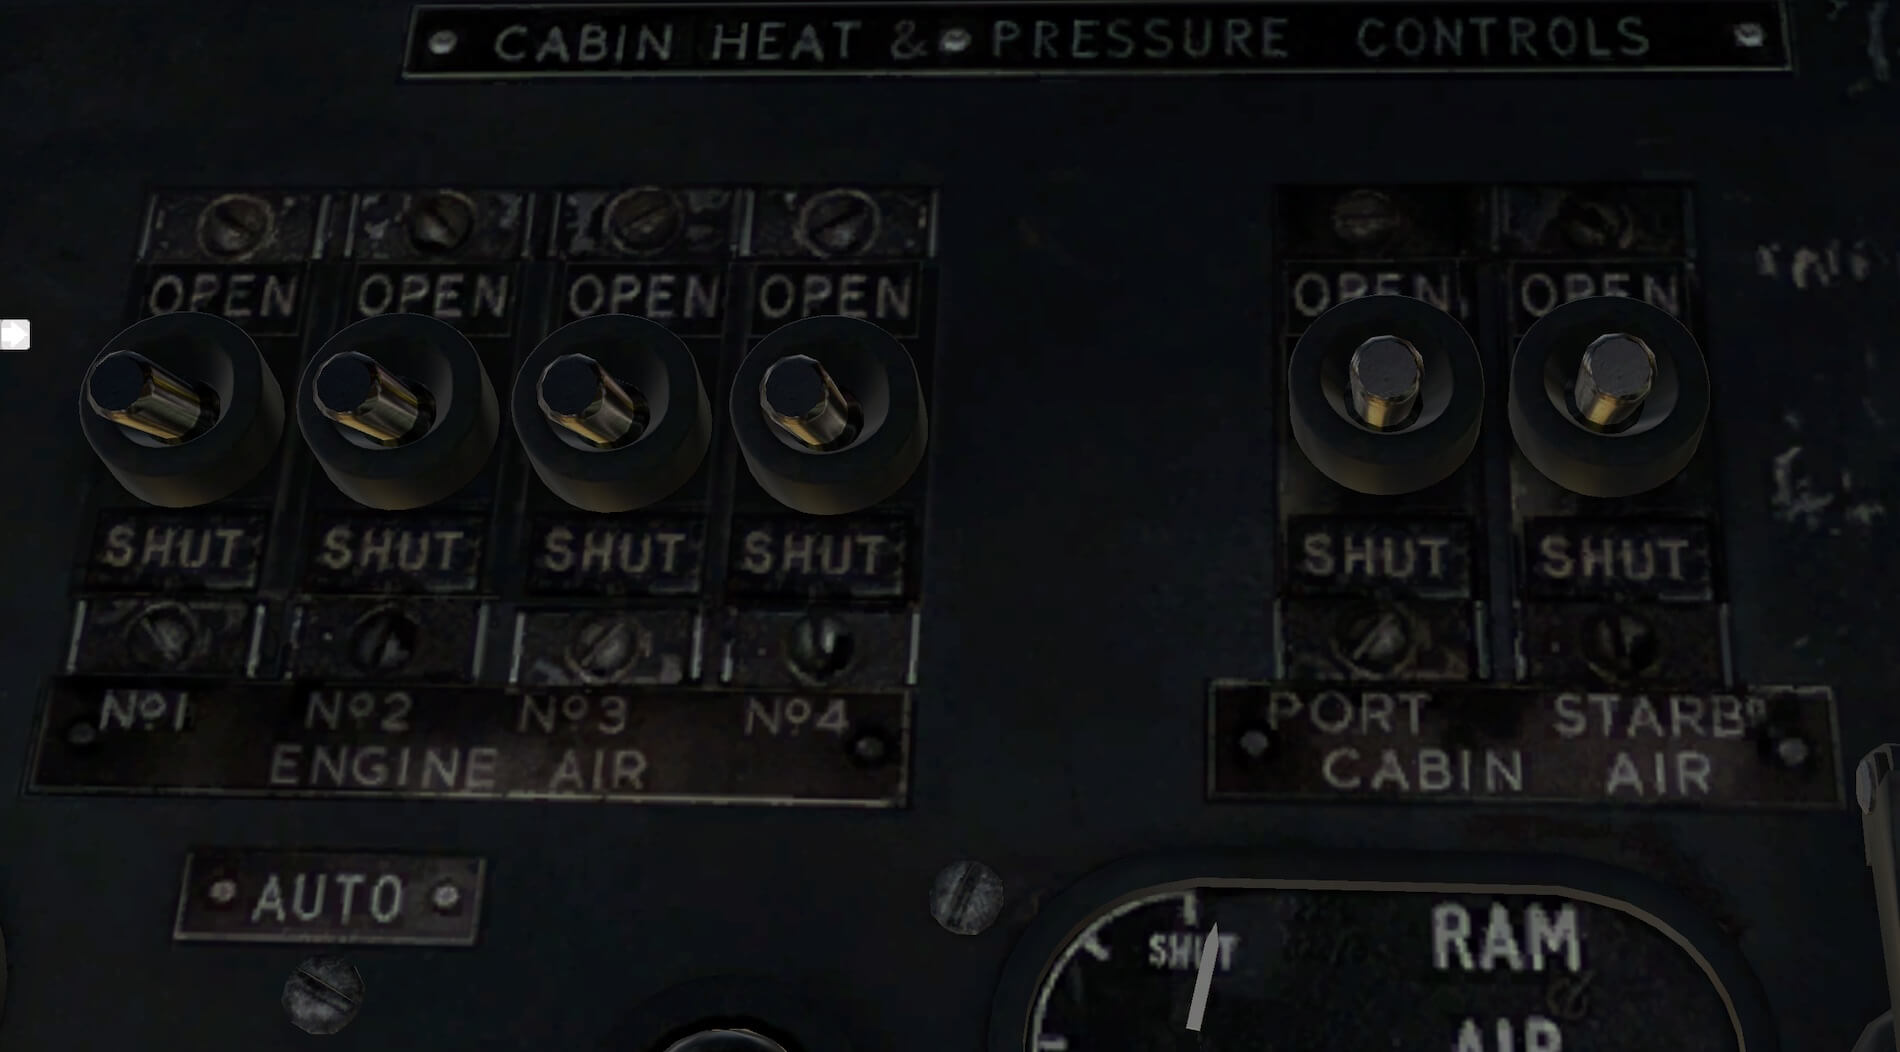
Cabin air conditioning and pressurisation system which also includes windscreen thermal de-misting.
Oxygen system
Electrical system which includes the use of the alternator control panel and secondary supplies/airborne auxiliary power plant panel along with the external power supply included in the ground equipment.
Engines including throttle and fuel cock controls, RPM governor, Jet Pipe Temperature limiter, engine starting system and engine instruments.
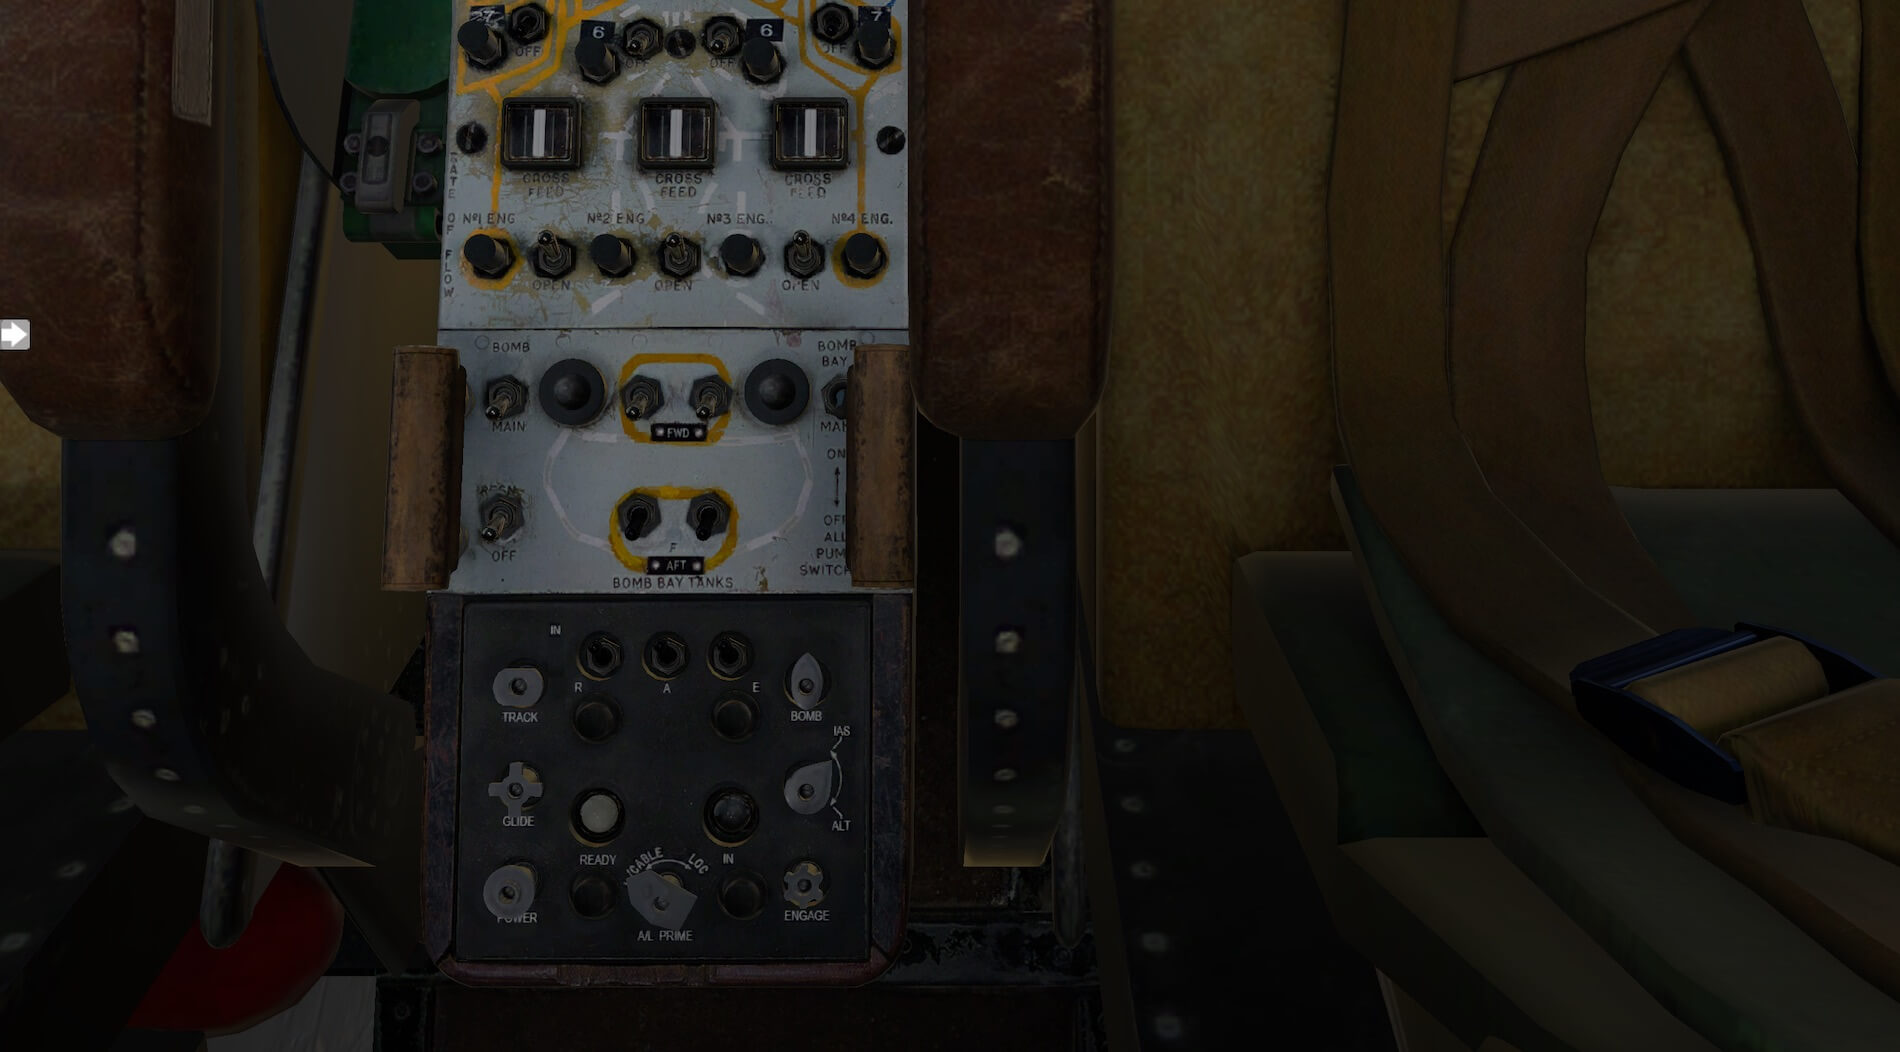
Fire Protection System controls and indicators and fuel management system.
Fuel System
Hydraulic System
Ice protection
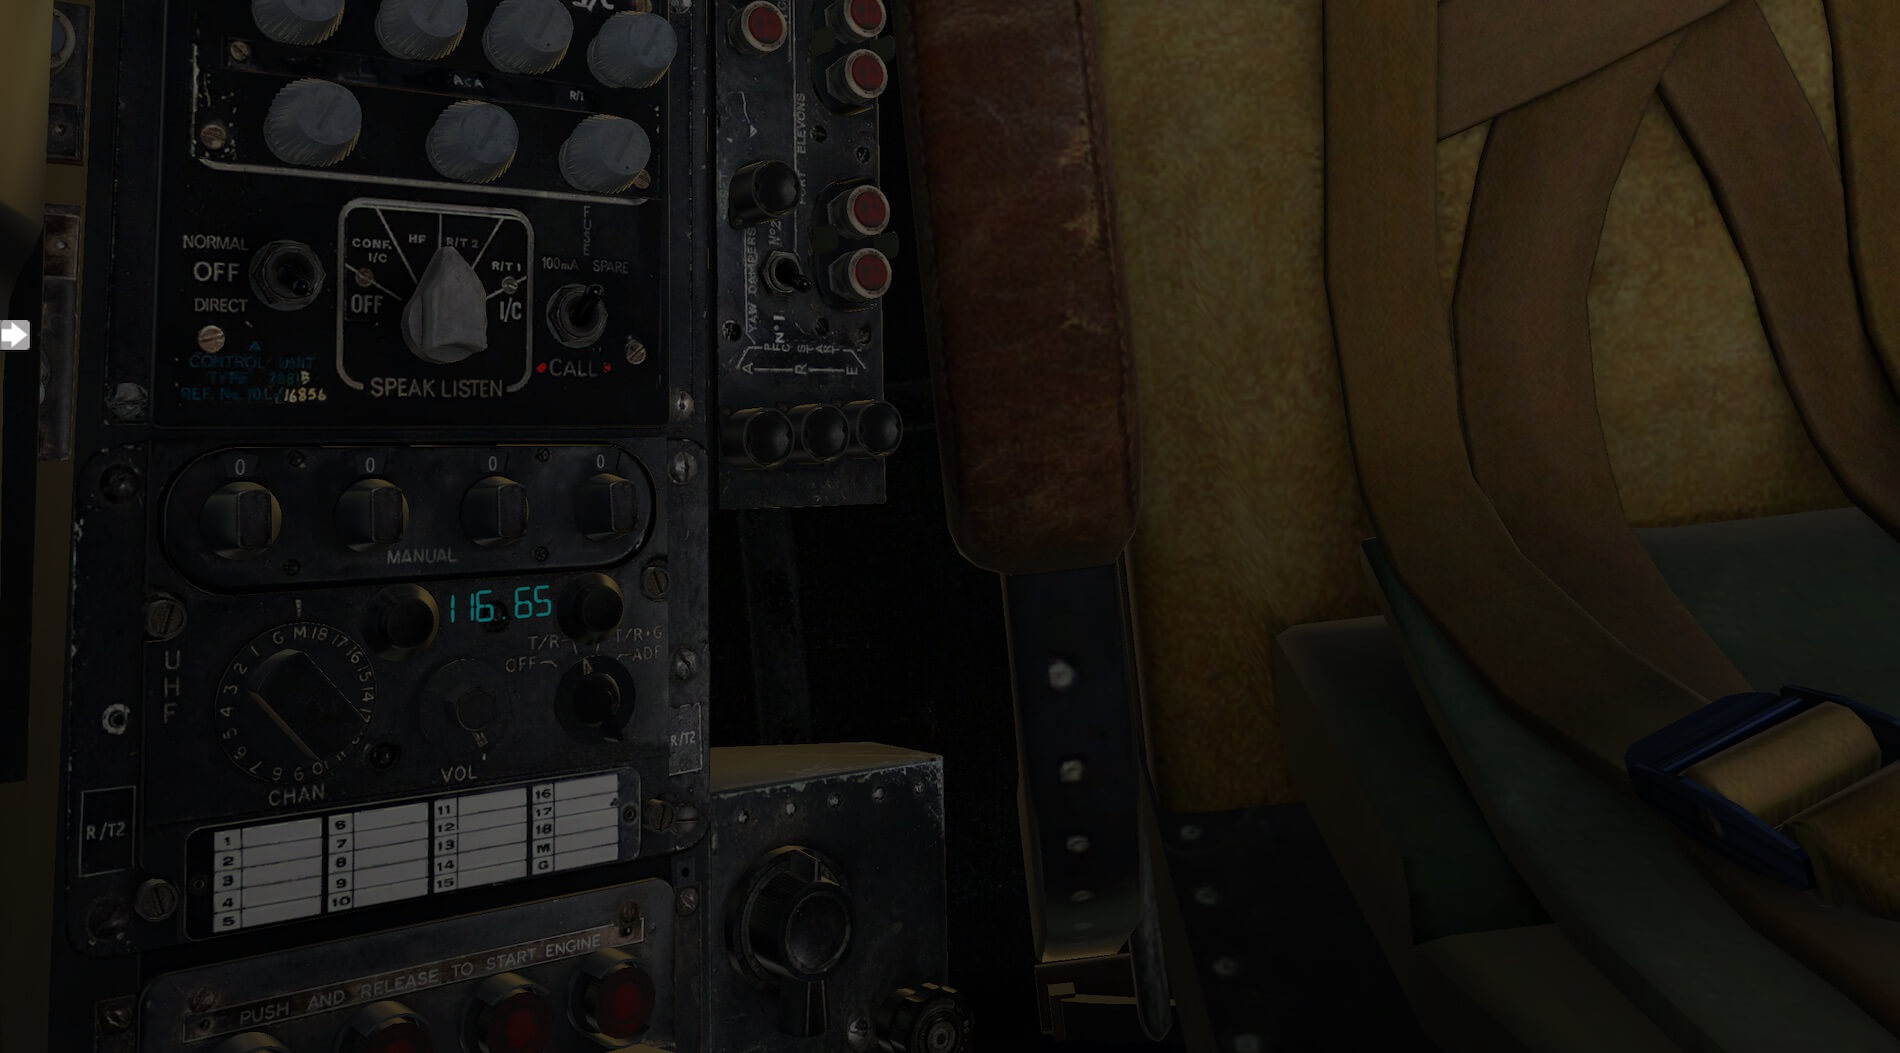
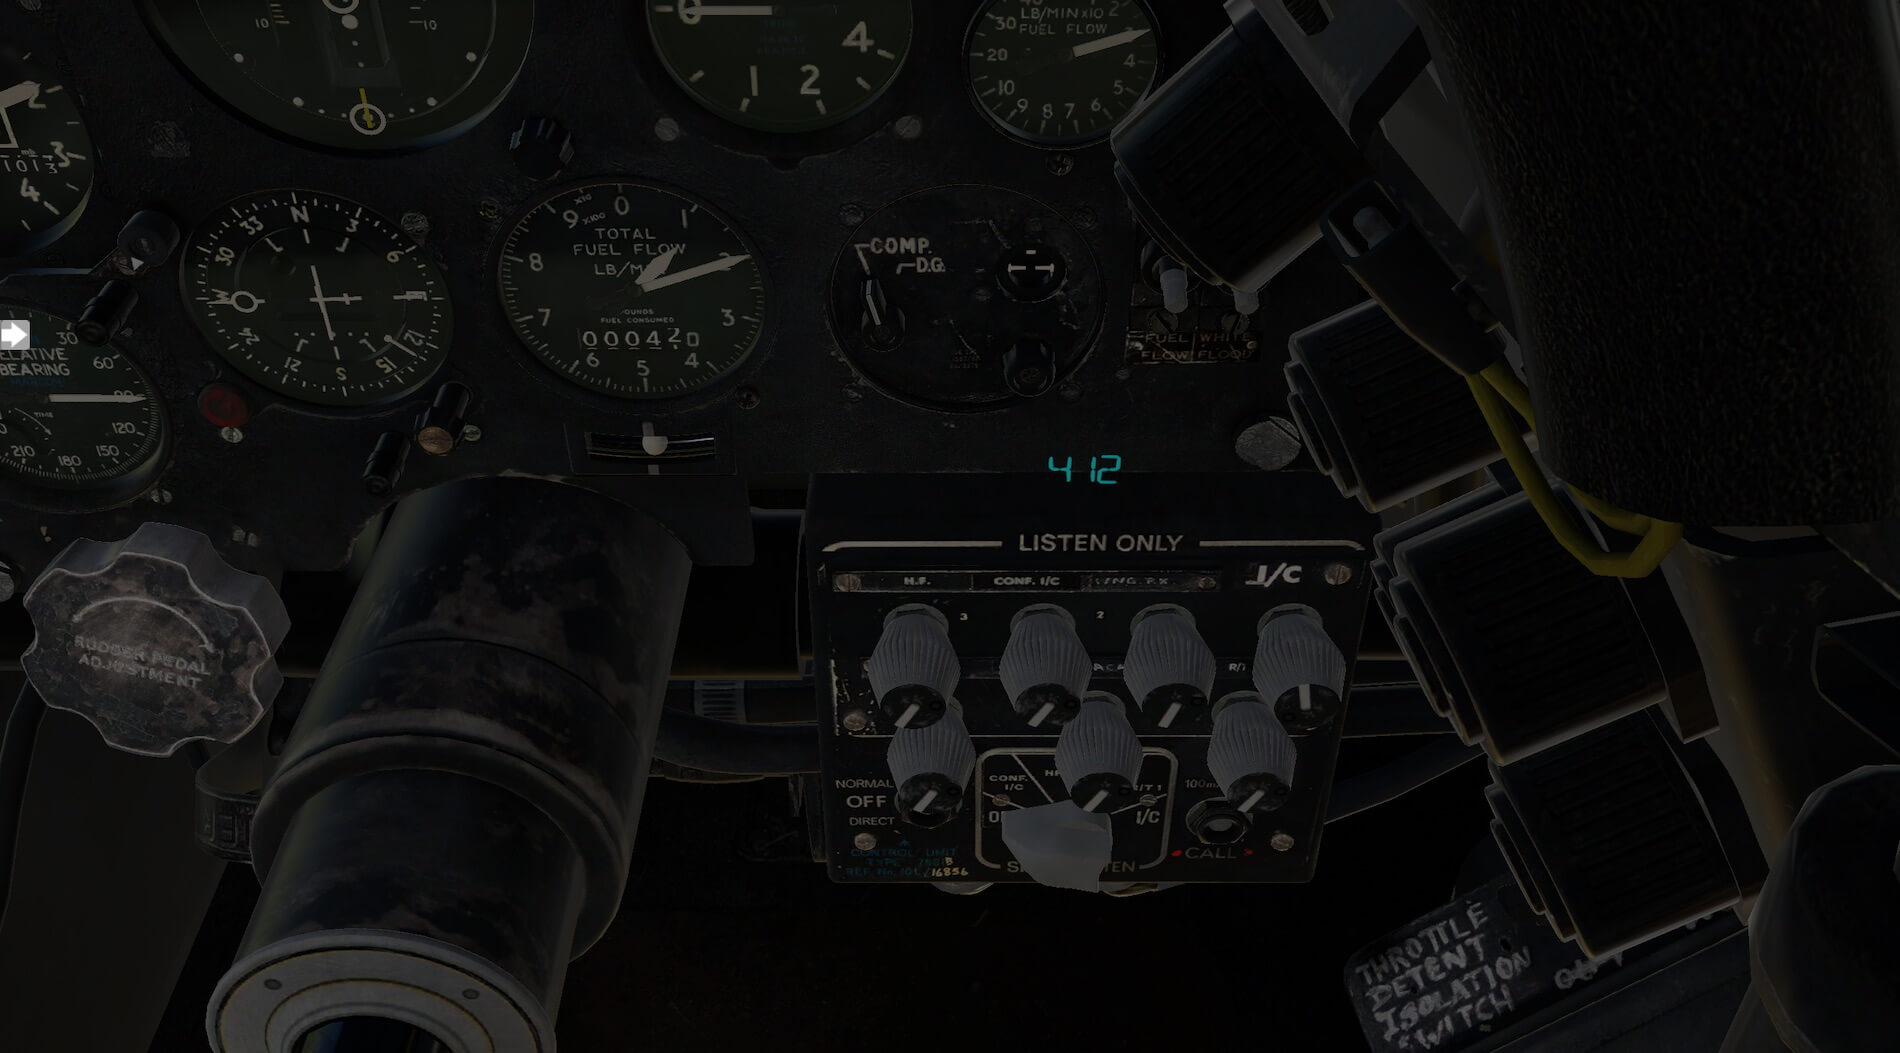
Being a military aircraft it is equipped with slightly different navigation and radio systems from civilian aircraft and these are modelled and explained. The developers have had to adapt the model here as the real aircraft has a UHF radio and X-Plane does not support this.
The radio is presented as a UHF radio that uses VHF channels to control Com1 and Nav 1 frequencies. The com radio has preset frequencies, the guard channel and manual settings. When adjusting the Nav 1 channels, a function usually undertaken by the crew in the rear, a small digital display occurs next to the adjusting knobs and then fades to maintain the realism of the cockpit.
Similarly the ADF control is in the rear of the real aircraft so this can be changed using the knobs on the co-pilots control panel and another digital display appears and fades. The military TACAN indicator is modelled but adapted to be fed by Nav 1 as X-Plane does not cater for TACAN frequencies.
In addition to these systems, and other modelled equipment and operations mentioned in the review, the model also has operating windscreen wipers and ejection seats with ejector seat pins. The seats need to be assigned a key or button in the X-Plane commands section. When the eject button is pressed a verbal “eject” command can be heard and the view moves from inside the cockpit to outside watching the aircraft crash.
Flight Experience
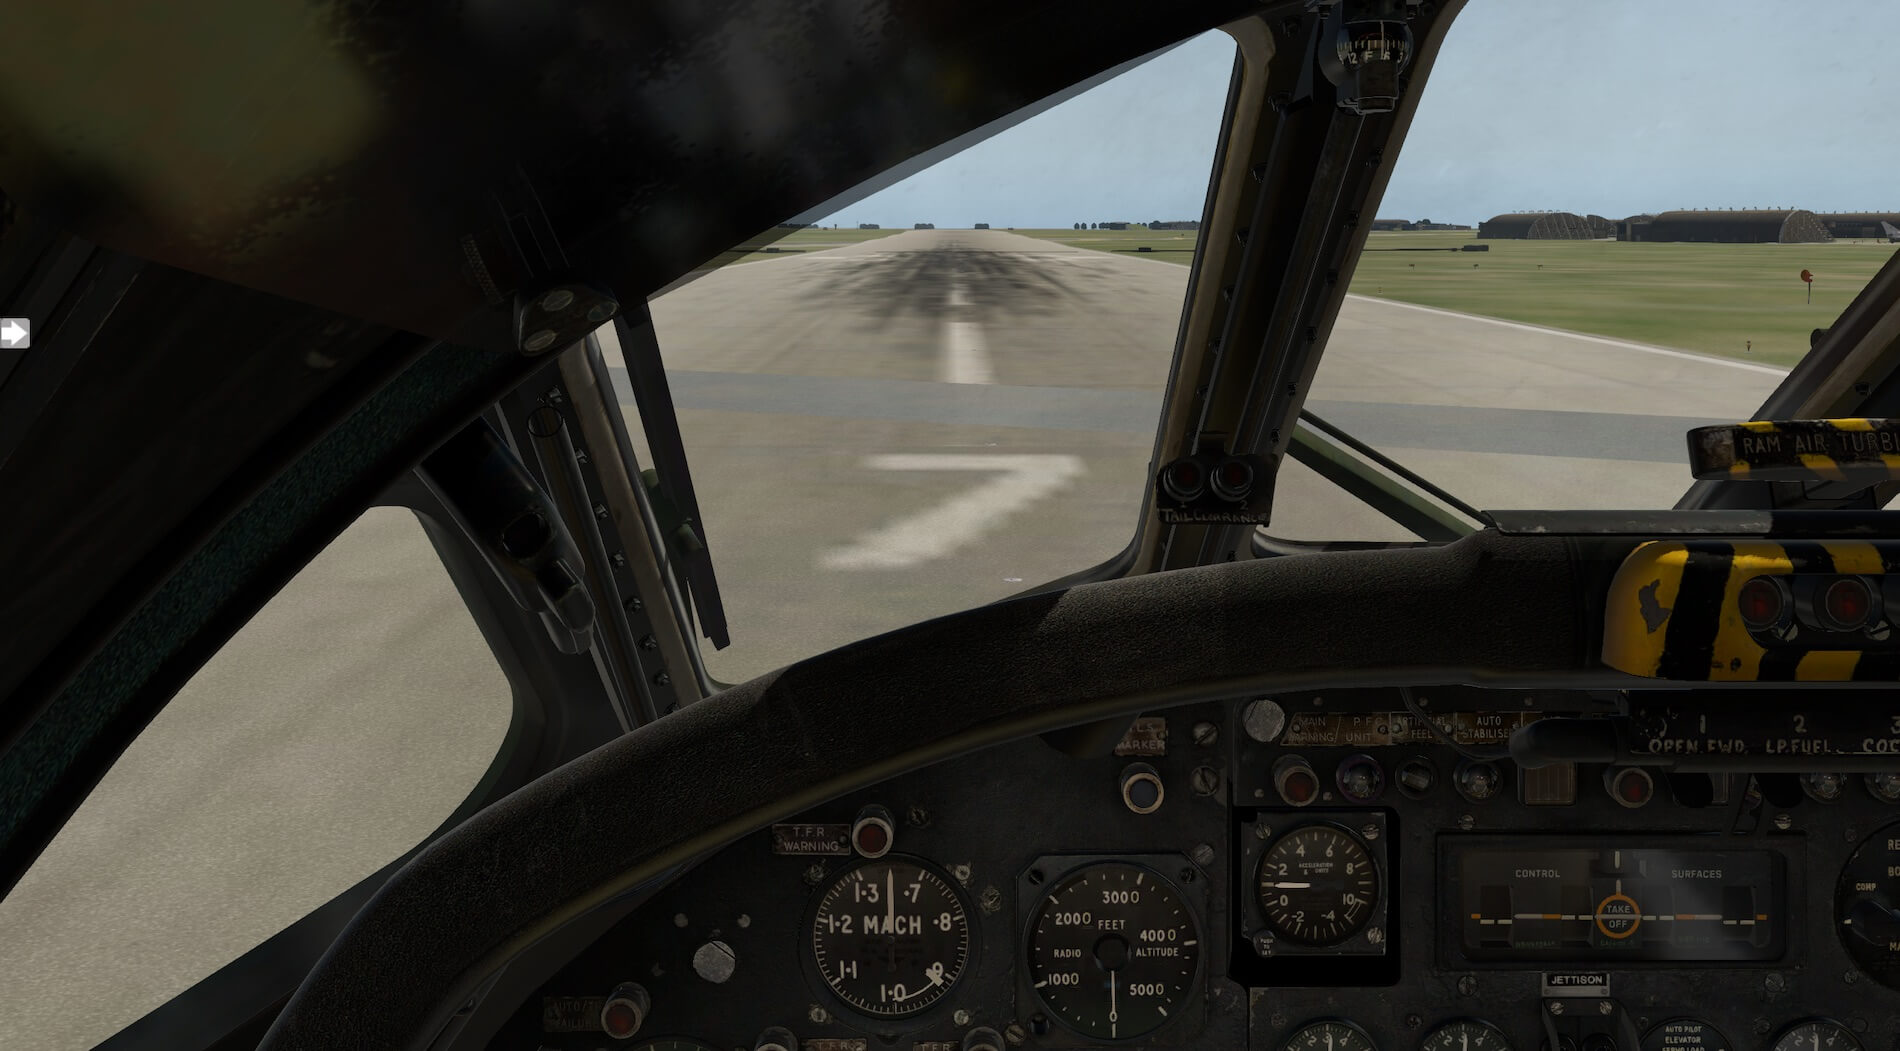
On my first flight I loaded the Vulcan to start at the end of the runway with engines running. I did not refer to checklists and whilst I had read the manual I did not refer to it for this initial flight. I wanted to see if it was possible to just take off and fly. I took off the brakes and increased the throttle.
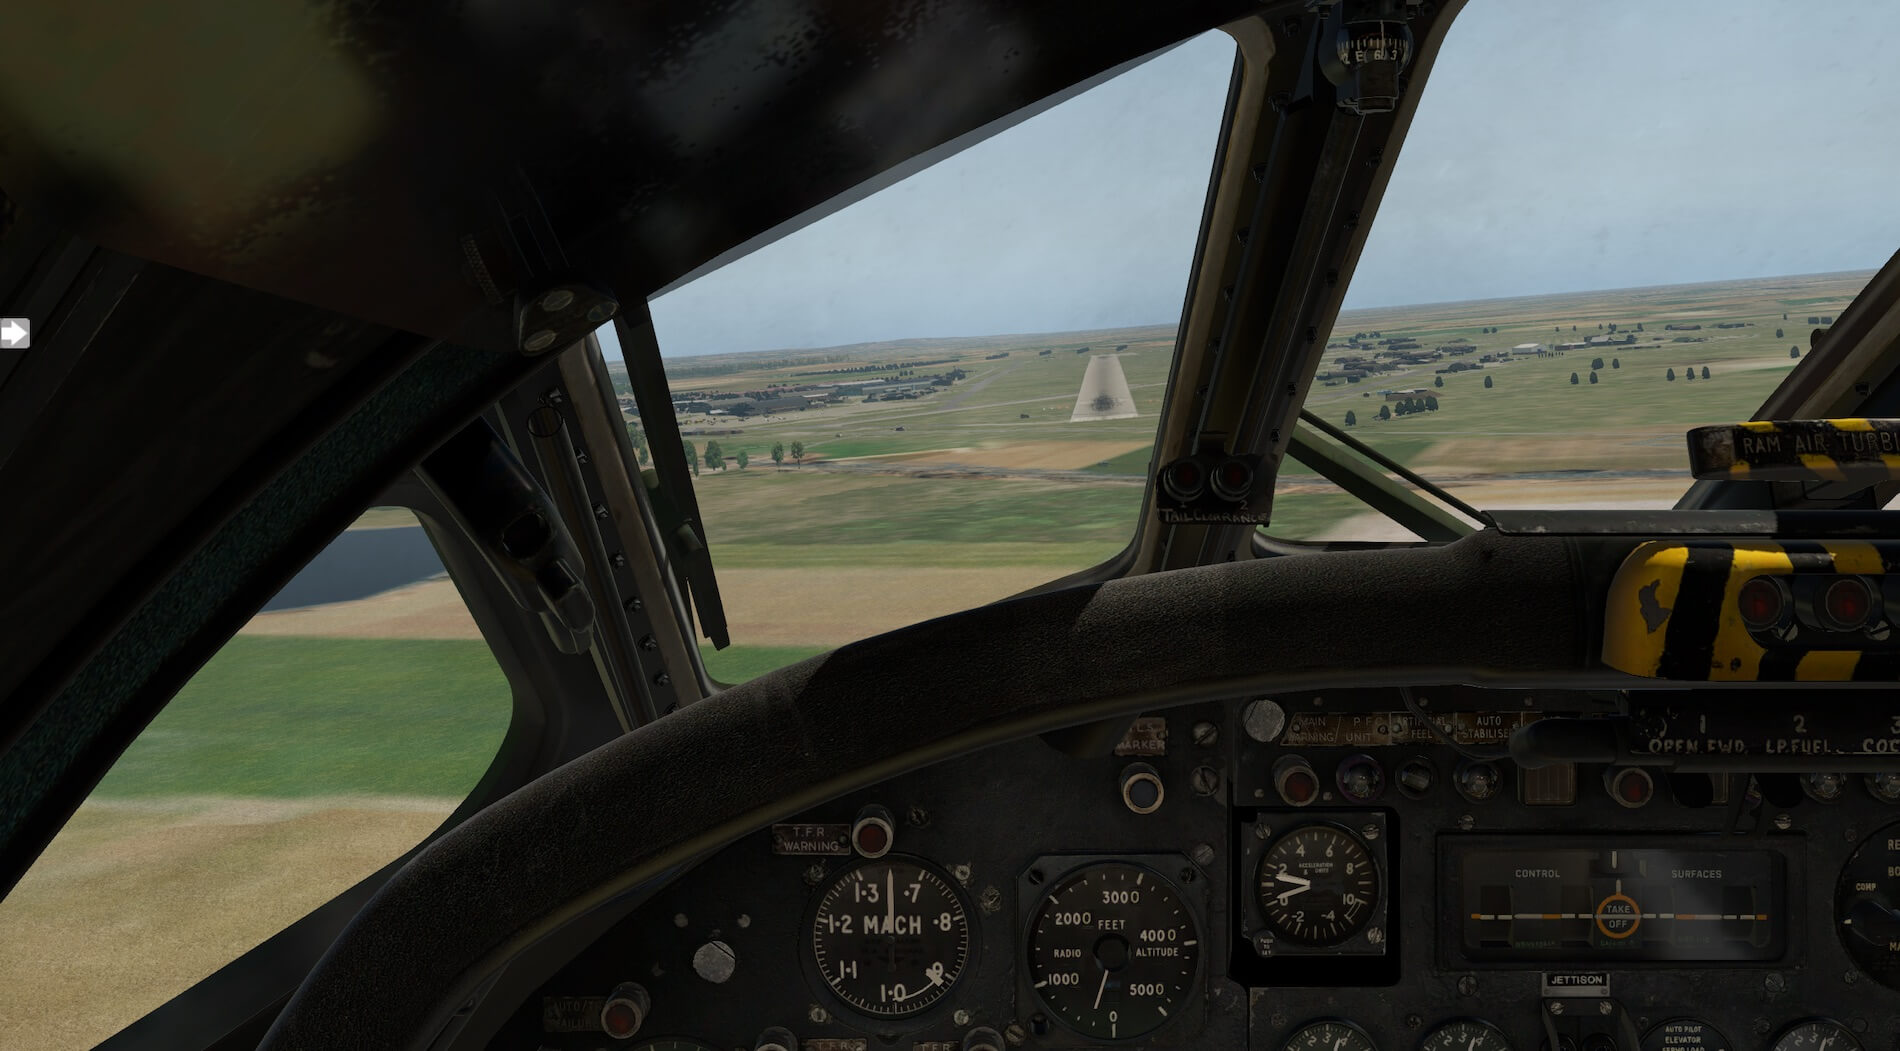
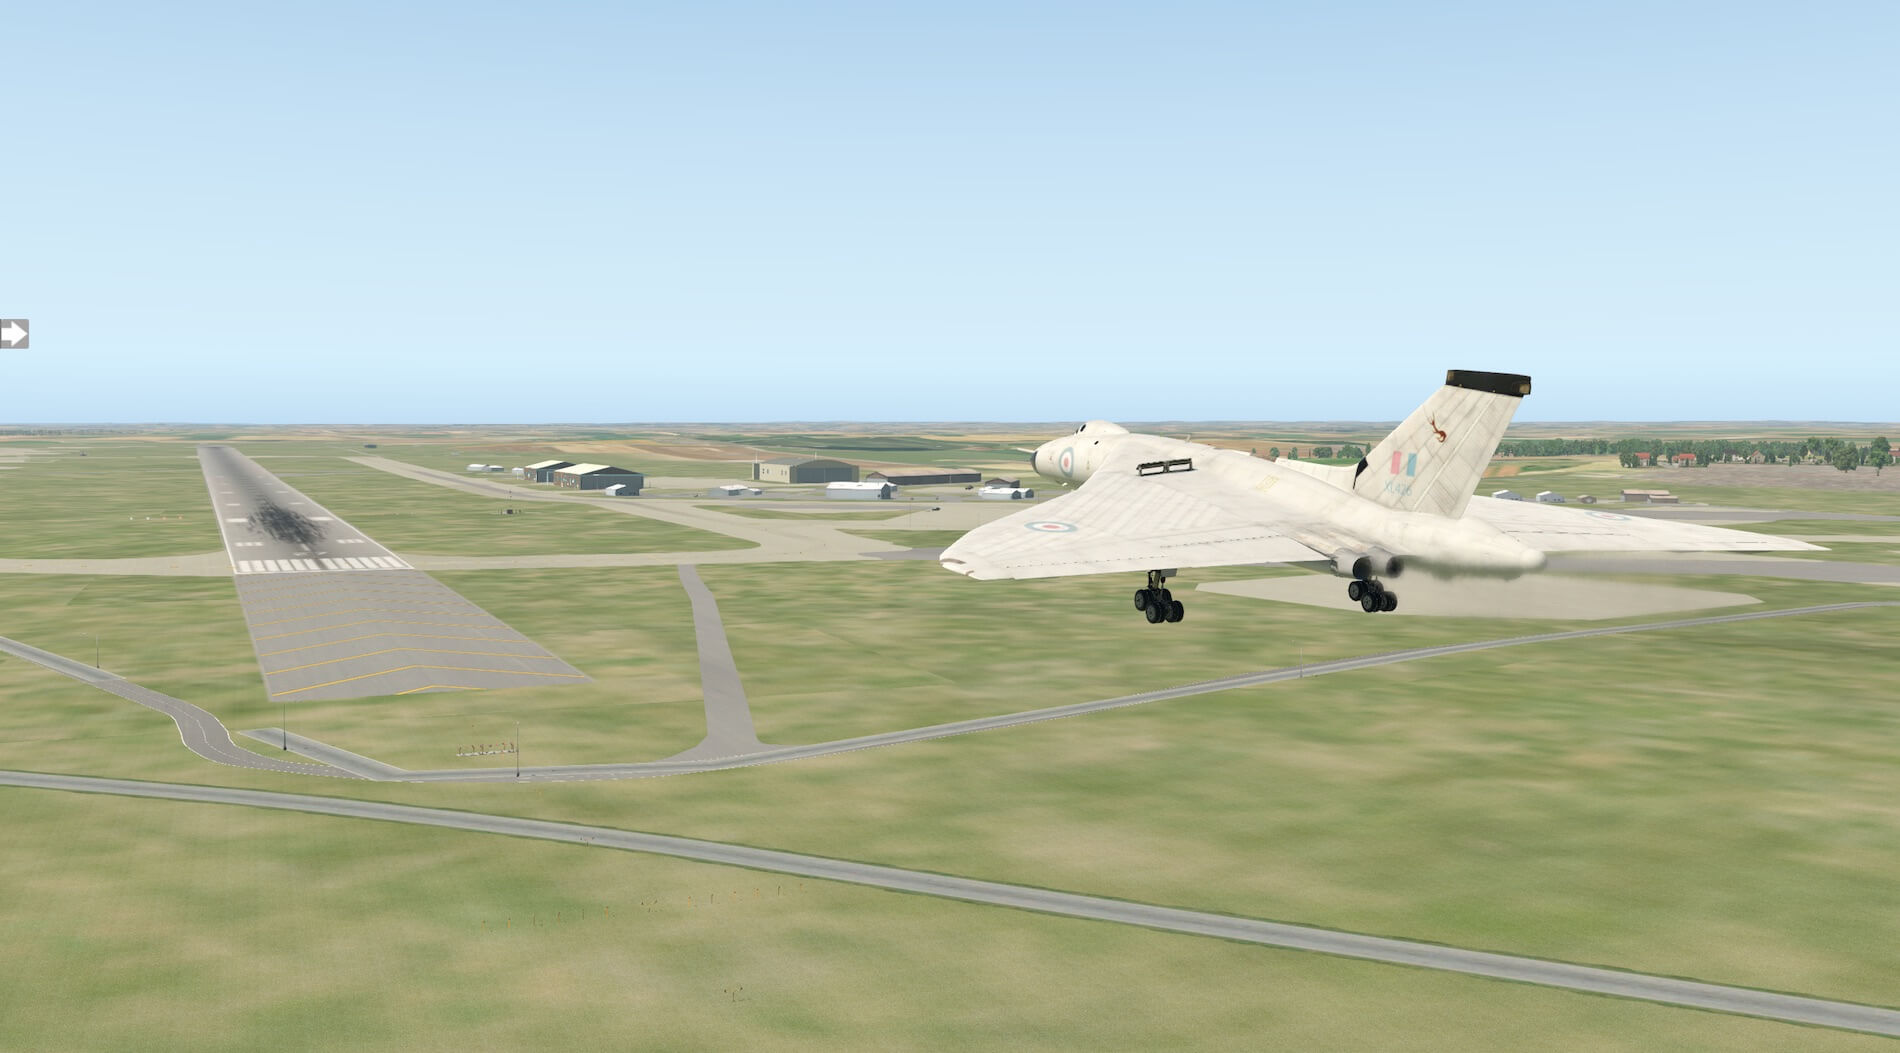
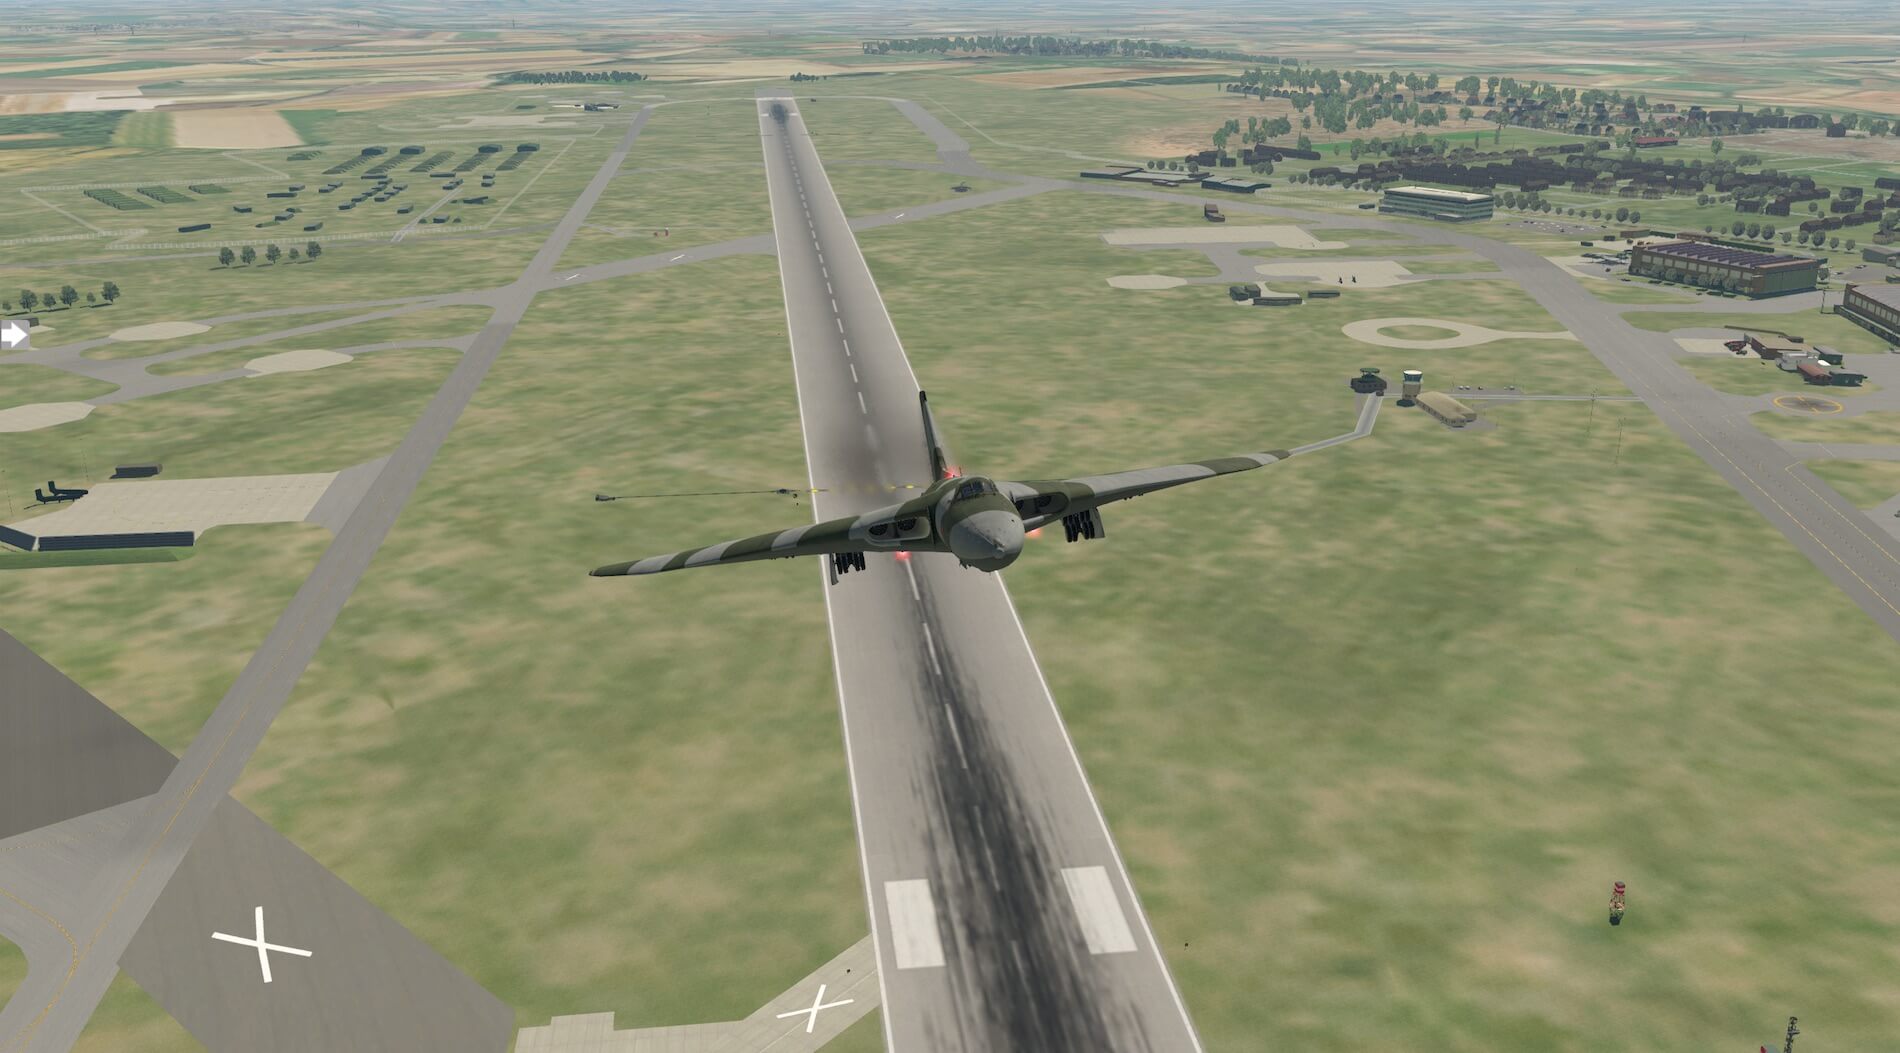
The engine noise was very convincing as I moved along the runway. Unsurprisingly with its huge delta wing, the aircraft wanted to climb immediately and I had to concentrate to keep on the ground to build up speed. I managed a smooth take off and climbed out over the countryside. The Vulcan handled well although I quickly found it did not need big inputs from the controls and it was easy to overdo it. I continued around the circuit and carried out an approach.
Again the aircraft felt like it wanted to continue to lift even when I was trying to descend and I overflew the runway on the first attempt. I also found the stability of the aircraft reduced as speed reduced. None of these comments are a criticism of the model more a reflection of my own ability and an acknowledgement that the flight model has been created so that the aircraft behaves differently in varied situations. My second attempt went better until I touched down and failed to keep the aircraft straight.
My third attempt all came together and I carried out a successful landing and also deployed the brake chute. The aircraft was great and challenging to fly even in its basic form and without carrying out all the correct actions.


I practiced flying the aircraft further both in take offs and landings and also following the refuelling aircraft in the special starts menu. The manual has a tutorial flight within it and as this covers starting from cold and dark and using many of the systems I decided to carry that out for a far more accurate flight experience.
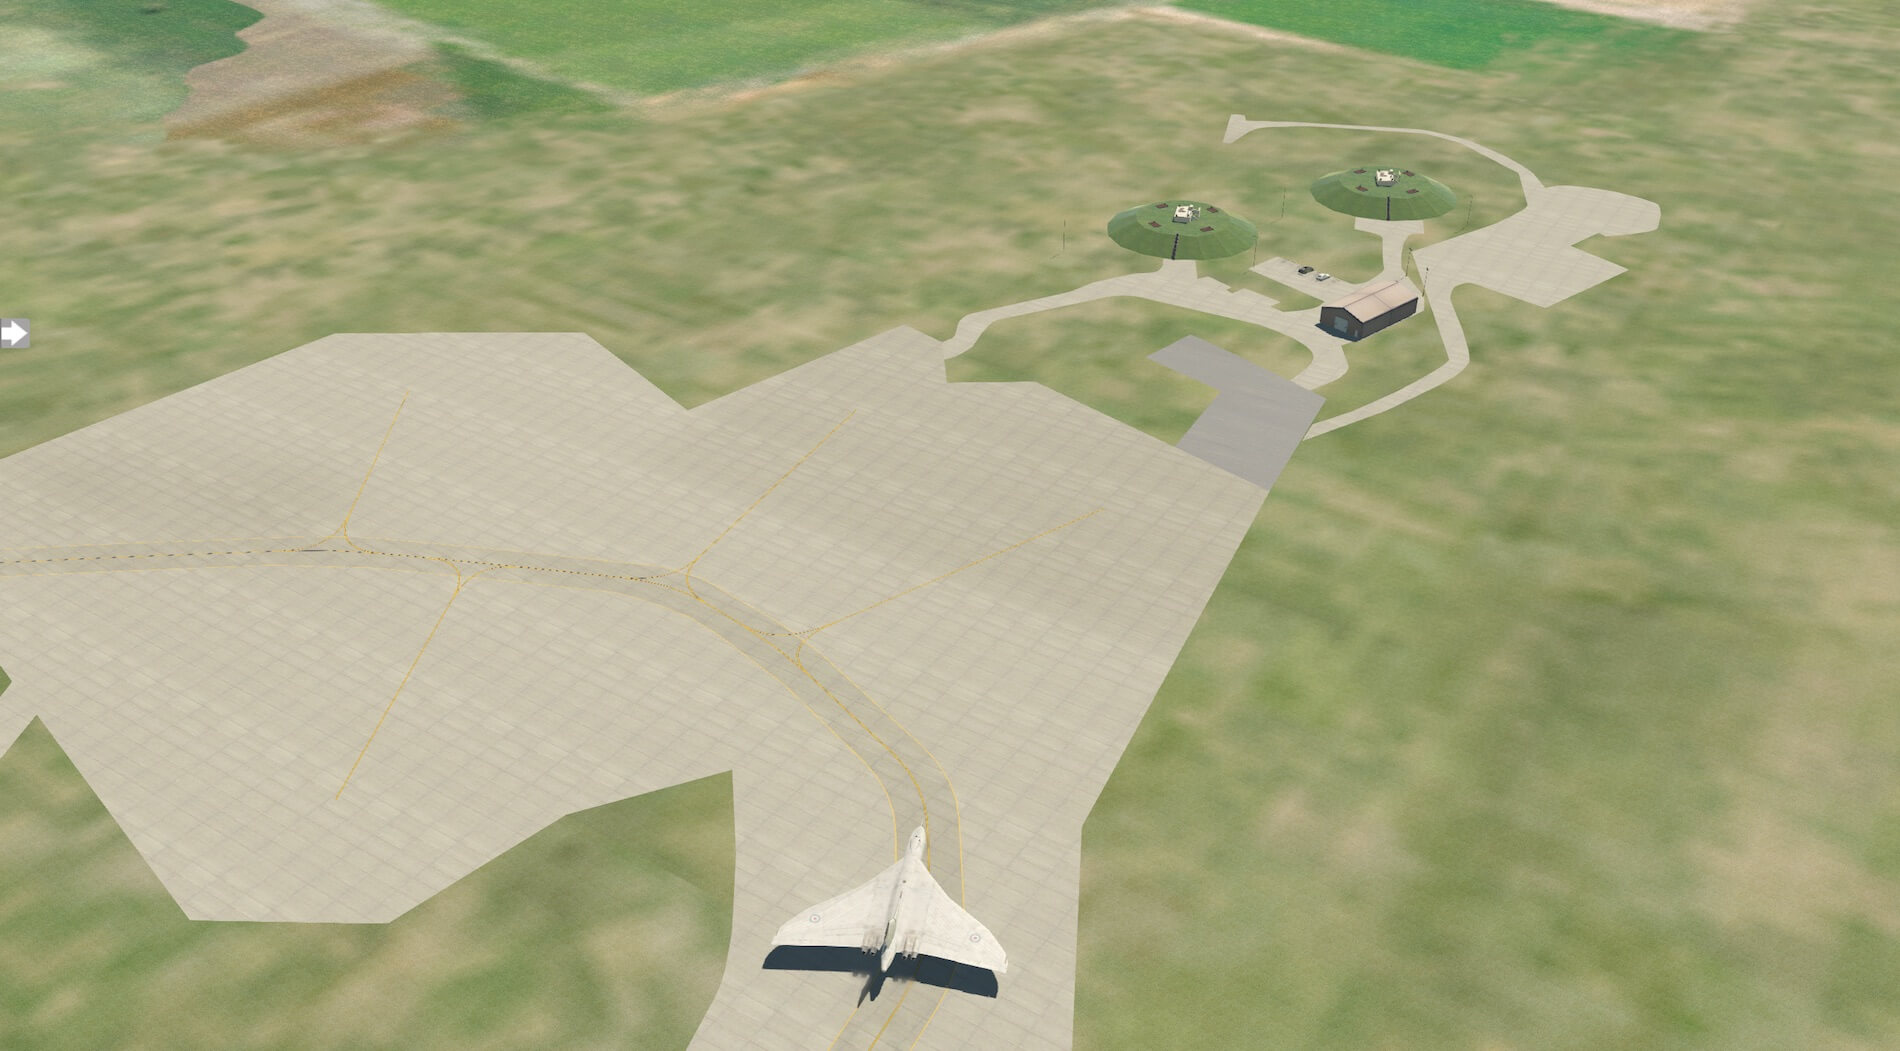
I set up the Vulcan on the ramp at RAF Cottesmore, UK, in the cold and dark condition in accordance with the guidance in the manual. I used the side menu to open the entrance door and confirmed the operation via the indicator light on the central instrument panel. I then opened the secondary supplies 2D panel and switched on the battery and two transformers. This illuminated the instruments and made the cockpit lighter.
The alternator fail light also started to flash red. I checked the parking brake was on and also that the undercarriage lights confirmed the undercarriage was locked down before using the side panel to attach the ground equipment.

I returned to the cockpit view and checked the ejector seat pins were in place and also checked the oxygen flow by the regulator in the left console and ensured the bomb release safety lock was on and the bomb door settings were correct. All of these actions were following the guidance in the manual.

I raised the co-pilots arm rest and switched the autopilot master switch to on, on the right console, and then in the centre console checked the channel switches for autopilot control of rudder, aileron and elevator were in the correct position and switched on the autopilot power. An indicator light illuminated to show the system was ready.
Then, still following the tutorial, I opened the switch guards on the fuel cock switches and moved the switches to open the fuel cocks. I then set the cabin pressure to cruise and locked the lever in place, checked the engine air and cabin air switches were set to shut, the external light master switch was on and the navigation lights were also on.
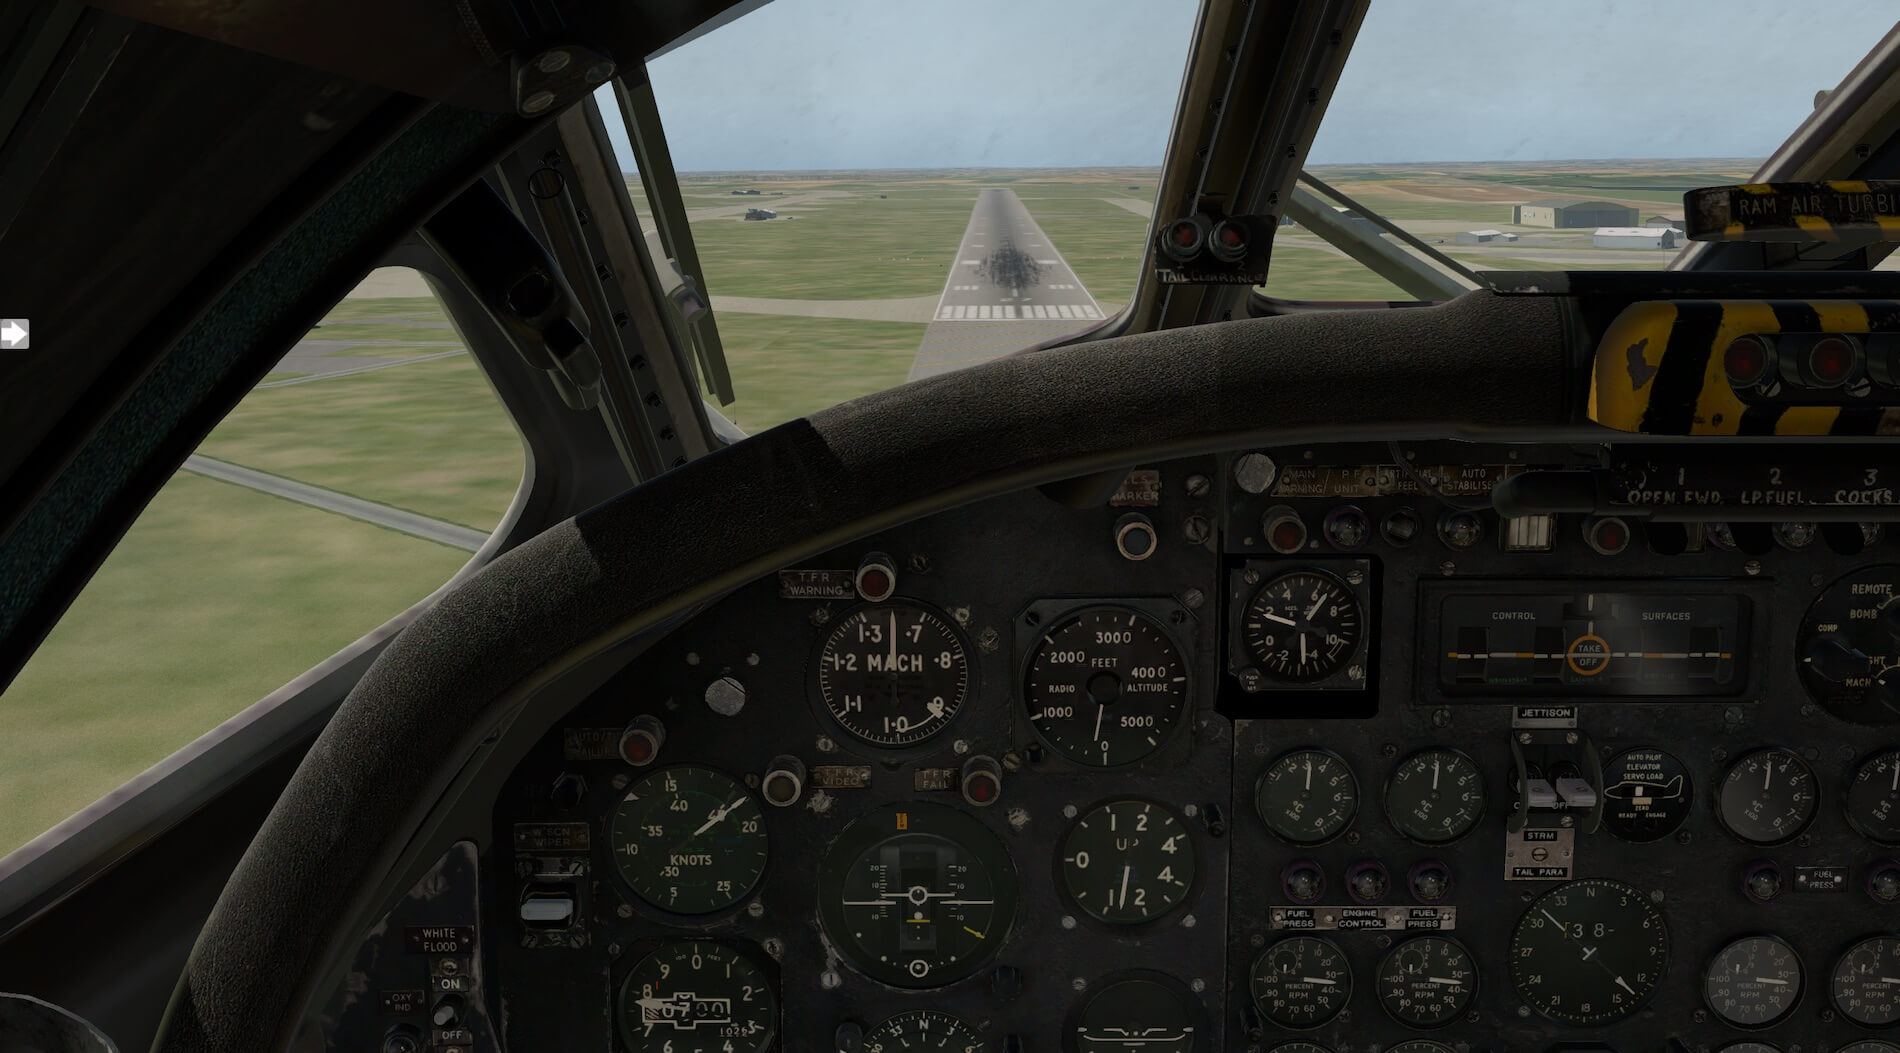
The manual provides really helpful step by step instructions illustrated with screen shots similar to those I have included in the review. I have created these to illustrate the detail on the consoles and instrument panels.


The next step was to start the engines using the rapid start system which the Vulcan is equipped with. Again I followed the manual and set the navigation lights and engine air switches correctly. I switched on the fuel pumps and ensured the correct cross feed settings. I set the throttles to the correct level and then went to the engine start panel in the left console.
I switched on the engine master switch and ignition switch and set the air selector to rapid. I then pressed the rapid start button and listened to the change in tone as I expected the engines to spool up. I used the instrument panel to check this only to find nothing was happening and the engines did not start. I tried again and the same thing happened. I started the whole procedure again to discover that despite clear instructions I had not switched on all the fuel pumps.
Once I corrected this I pressed rapid start and all four engines spooled. It looked, felt and sounded very good. This shows the modelling of the systems is detailed and realistic and if the procedures are not followed they will not work!


It then remained for me to carry out the final configuration of the aircraft by switching on the alternators, the powered flight controls, auto-stabilisers and artificial feel. I checked the airbrakes and bomb doors and as the flight was going to involve the use of the Daventry VOR I tuned in to the VOR appropriately. Finally I switched on and set the radio altimeter, set the pressure head heaters to on and extended the taxi lights. I was ready to taxi.
I released the parking brake and added a little power and the Vulcan slowly moved forward. I turned on to the taxi way and found the model easy to steer and control on the ground. I reached the holding point for runway 23 I extended the landing lights and set the engine and cabin air switches according to the guidance.
The ejection seat pins can be removed and stowed by clicking on any one of them. Having done this I moved on to the runway. I used Goodway to produce the route in map form and I also loaded the route in to the GPS so my navigator knew where I was going!


I released the brake and slowly applied power, trying to use what I had learned in my previous flights. The aircraft wanted to lift almost immediately but the manual said to keep the nose down until the speed was 155 knots which I did and then put in a slight backwards movement of the joystick and I was airborne. I raised the undercarriage and maintained a climb that kept airspeed at 170 knots. I maintained the runway heading initially.
I retracted the landing lamps and used the bearing indicated on the TACAN indicator to turn towards Daventry VOR. I used the GPS device to confirm I was doing the correct thing. I climbed as near to 250knots as I could and, in accordance with the manual, I levelled off at 3000 ft and used the throttle to keep the speed at 300knots. It felt that I was at 3000 feet in no time and it only took minor control inputs to achieve a reaction from the aircraft. It was very easy to overdo changes.
I had problems with sorting out the beam compass to work with the autopilot so saved the flight at this point to try to sort the challenge out. I received great support from Just Flight in trying to resolve what I was doing wrong. I eventually resolved the issue in that I was not using the heading index correctly, in that I did not move it to my required bearing, and therefore the autopilot did not know where I wanted to go.
This was my issue and not any sort of problem with the model. I mention it to help others avoid my mistakes. With this matter sorted I returned to the flight and engaged the autopilot to control altitude and track. I adjusted the engine and cabin air switches so that they were all open and set the oxygen supply.
On arrival at Daventry VOR the TACAN indicator turned to point back towards the VOR and I moved the heading index on the beam compass to 221 degrees to inform the autopilot of the required heading for RAF Fairford. The advice stated I should look out for RAF Brize Norton and sure enough it appeared quite quickly. It was time to begin the descent. I set all cabin and engine air switches to shut and lost the comfort and support of the autopilot by cancelling the engage switch.
I reduced speed to 180 knots and descended to 1000 feet. I saw RAF Fairford and headed south over RAF Brize Norton ready to turn onto the approach to runway 27 at RAF Fairford. This is not a slow aircraft and things happened quickly for a pilot of my experience but things remained manageable.

I reduced airspeed to 170 knots and extended the undercarriage. I used the airbrakes to control the aircraft speed and made a successful landing and deployed the brake chute. I followed the instructions and jettisoned the chute then turned left off the runway. I retracted the airbrakes and set the taxi lights appropriately. It was a thoroughly enjoyable flight with its own set of challenges and a great sense of achievement to have accomplished it. I taxied to a parking area to carry out the shut down procedures.


I parked in one of the aircraft bays and carried out the list of procedures. The guidance said do some of them whilst I taxied but I decided to park first and then complete them. No doubt I will be able to follow the guidance with a bit more practice! I switched off the autopilot and radio altimeter, retracted the taxi lights and switched off the pressure head heaters. The procedures then involved shutting down the engines, switching off the fuel pumps and electrical equipment, attaching the ground equipment and leaving the aircraft.

This model is great to fly and consistently creates challenges. There is a lot to it and whilst I could just jump in and fly trying to follow the correct procedures is such an immersive experience. The tutorial flight from the manual explains it does not cover everything in depth and I still have to consider further options such as using the checklists and the flight computer and whilst working and understanding all of the systems will be challenging it is something the model seems to encourage you to achieve.
Summary
Both Andy and I have flown, tested, read the manual that combines the all parts of the Vulcan. Your personal reporter Angelique van Campen can conclude based on what she has seen and tested, that the Vulcan is modeled with eye for details, comprehensive system modelling, but although the operations manual offers lots of details and background, the lay-out of the included manual could be better. The missing system diagrams in the Systems Guide section are in my humble opinion too text that isn’t comfortable for new simmers. Perhaps it’s also an idea to reduce the size of the ident numbers on the screenshots of the Panel Guide section. It’s a bit over the top I would say!
It’s good that Just Flight included 11 liveries with the package. I’m not sure how many other real liveries or paintings are available for this Vulcan, but if more paintings are available for the real Vulcan, I would say to painters, please add more painting and post them at X-Plane.Org or elsewhere. The review covers model version 1.1 and was tested with macOS X-Plane 10.41 although Angelique did a quick test with X-Plane 10.50b9. The aircraft worked fine with the upcoming X-Plane version, very good frame rates too, but that was it. As long as a X-Plane version is in beta, it’s not a good platform to do a review, therefore we decided to use the stable and current X-Plane of this writing – May 2020 – version 10.41.
Up to Andy’s summary. According to Andy this is a highly detailed and impressive model. The exterior and interior detail really do create the aura of the real aircraft and the textures and colours create a very realistic experience, especially in the cockpit. There are so many pieces of equipment and systems modelled that the aircraft must contain something of interest for any user and challenges for pilots of all abilities.
Using the model is helped by the in depth manual and tutorial flight which take away some of the complexity for the less experienced users. Flying the model is immersive and challenging. It is very responsive for a big aircraft and the user has to be careful with the strength of inputs from the flying controls. The electronic and navigational equipment are not just from an earlier era but are specifically for a military purpose so are different from the various general aviation and commercial aircraft available.
This adds a further dimension to learning and using the model. A thoroughly enjoyable experience that encourages real appreciation for those who flew this iconic aircraft for real and makes the user want to go back for more.

Feel free to contact me if you’ve got additional questions related to this impression. You can reach me via email Angelique.van.Campen@gmail.com or to Angelique@X-Plained.com.
With Greetings,
Andy Clarke and Angelique van Campen
| Add-on: | Payware Just Flight Thranda Design Vulcan |
|---|---|
| Publisher | Developer: | X-Plane.Org | Just Flight |
| Description: | Realistic rendition of Avro Vulcan |
| Software Source / Size: | Download / Approximately 2.54GB (unzipped) |
| Reviewed by: | Andy Clarke and Angelique van Campen |
| Published: | May 31st 2020 |
| Hardware specifications (Angelique): | - iMac Pro - Intel 3GHz Intel Xeon W / 4.5Ghz - Radeon Pro Vega 64 16368 MB - 64 GB 2666 MHz DDR4 - 1 internal shared 1TB SSD (Big Sur 11.x) - 1 internal shared 1TB SSD (Bootcamp Windows 10) - 1 external 2TB LaCie Rugged Pro SSD (Big Sur 11.x) - Saitek Pro Flight System X-52 Pro and X-56 Rhino - Honeycomb Alpha Flight Controls - Honeycomb Bravo Throttle Quadrant |
| Hardware specifications (Andy): | - iMac Intel i5 27" - 3.5 GHz Intel Core i5 - AMD Radeon R9 M290X 2048 MB - 16 GB 1600 MHz DDR3 RAM - Logitech Force 3D Pro |
| Software specifications (Angelique): | - macOS Big Sur (10.15.x) - X-Plane 11.5x |
| Software specifications (Andy): | - macOS Catalina 10.15.5 - X-Plane 11.41r1 - A variety of freeware and payware airports |
0 Comments