Pannon Wings Design Team/NH Adrian L-200D Morava
Introduction
Wikipedia states that in 1955 the newly created design team led by Ladislav Smrcek of the Czechoslovak State Aircraft Factory decided to proceed with a proprietary design for a modern twin engined aircraft with seating capacity of five and powered by a pair of then new 210hp Avia M 337 engines, but as they were not yet available, the prototype made do with the less powerful Walter Minor 6-III engines of 160hp each.
While maintaining similar characteristics of western twin engine aircraft of the time, updated features of the Morava included twin tails, standard thermal wing de-icing equipment and inverted inline engines. Three prototypes were built and the first made its maiden flight on 9 April 1957. During the same year the factory built a run of 10 pre-production L-200s, one of these aircraft undergoing government flight testing in 1958. The program was successful, and the aircraft was ordered into full-scale production.

One L-200 was converted into a prototype of the M-337-powered production model L-200A. This aircraft incorporated minor changes, consisting mostly of new two-blade V-410 propellers, a cockpit lowered by 43mm, a modified tailfin design as well as longer engine nacelles. It was completed in 1959 and shown at the Paris Air Show in July of that year. The aircraft underwent government trials in the fall of 1959, having been fitted with M-337 engines. The trials once again proved successful and were completed the following July. The first production L-200A took to the skies in February 1960.
L-200B and C models were not produced. The second production variant was the L-200D, modified according to Soviet Aeroflot demands. It was fitted with new three-blade propellers V-506 of a smaller diameter and some minor improvements, such as dust filters. It also received more comprehensive navigation equipment. In all, 367 L-200s were built by 1964, including 3 prototypes and 197 L-200D (eight L-200A and the L-200A prototype were converted to L-200D as well).
Aeroflot, who used them as air taxis, was the largest single user of Moravas – 68 L-200A and 113 L-200D, final deliveries taking place in 1966. In the 1970s however, the Soviet Union sold or withdrew its aircraft from use, in favour of indigenous designs. During the Cold War Era, not many light aircraft were exported from behind the Iron Curtain. 144 L-200A were exported to 15 countries. L-200D were also exported to 15 countries. A small number of Moravas are still used mainly in Czech Republic, Slovakia Poland and Ukraine.
Specifications (L-200D). Data from Jane’s All The World’s Aircraft 1966–67
General characteristics
- Crew: 1
- Capacity: 4 passengers
- Length: 8.61 m (28 ft 3 in)
- Wingspan: 12.31 m (40 ft 5 in)
- Height: 2.25 m (7 ft 5 in)
- Wing area: 17.28 m2 (186.0 sq ft)
- Empty weight: 1,330 kg (2,932 lb)
- Max takeoff weight: 1,950 kg (4,299 lb)
- Fuel capacity: 420 L (110 US gal; 92 imp gal)
- Powerplant: 2 × Walter M337 air-cooled six-cylinder straight engine, 160 kW (210 hp) each
- Propellers: 3-bladed Type V506 constant-speed, 1.75 m (5 ft 9 in) diameter
Performance
- Maximum speed: 290 km/h (180 mph, 160 kn) at sea level
- Cruise speed: 256 km/h (159 mph, 138 kn) at 2,500 m (8,200 ft) (econ cruise)
- Range: 1,710 km (1,060 mi, 920 nmi)
- Service ceiling: 5,700 m (18,700 ft)
- Rate of climb: 6.4 m/s (1,260 ft/min)
- Takeoff distance to 15 m (50 ft): 390 m (1,280 ft)
- Landing distance from 15 m (50 ft): 480 m (1,570 ft)
I am not a qualified real pilot and just in case you think that, I have never seen or flown in a Let L-200D. As with many others, I use X-Plane on a recreational basis and I write reviews from that aspect and try to cover points which someone in my position may find useful.
Installation and Documentation
Download speeds vary with internet connection but I found the process straight forward. Once downloaded the aircraft file is placed in the users aircraft folder. When X-Plane is opened the model appears in the flight directory aircraft window and can be selected for loading. On a Mac permission has to be given through security and privacy in settings for the xpl file to operate. Once loaded the aircraft is not fully functional until the serial number is entered.
If the serial number input box is not visible go to the developer tab at the top left of the screen. Click on reload aircraft with art and wait for this to be done. The serial number input box should be visible. Enter the serial number provided with the download. The box will confirm that activation is complete and ask for the aircraft to be reloaded. I have found that with many models that require this process it is better to load another aircraft completely, such as the default Cessna 172, and then load the new model again. Once this is done the model is ready for use. The model has a default white livery and five others.
The aircraft file contains a file named manual. This contains a PDF manual of 17 pages. This contains a history of the aircraft, specifications, installation and control settings, cockpit diagrams, special features, custom commands and a list of the authors with a License agreement. The manual is easy to follow and clearly illustrated with very good diagrams and explanations about the instrumentation and controls.
The manual does refer to a Set Up Sheet, to alter some settings, but is not explicit as where to find the sheet. This is important as the model can be used with the cockpit set up with three different languages Hungarian, English and Czech through the sheet. The model loads in Hungarian by default and whilst I fully respect that language I would have no chance, my own fault, of understanding labels and guidance presented in it. A study of the cockpit diagram shows the sheet appears as book modelled in a sleeve next to the pilots left lower leg.
When clicked the booklet animates to provide the sheet and several checklists. The manual is well worth reading before using the model as it explains how to set up control sensitivity and also how some default X-plane keys are used in a slightly different way from their conventional input. It is clear the developers have tried to ensure the user has the best opportunity to use and understand the model to its full capacity although on using the model I did find some procedures and settings which are not mentioned.
It may be beneficial for these to be added to the manual to provide further information for users and to avoid a degree of disappointment and frustration. I have highlighted these issues throughout the review. This should not be seen as a criticism as the developers have tried to recreate the quirkiness and idiosyncrasies of an aircraft of this age, and produce systems that mirror the real thing, it is just that it is this very quirkiness that makes some of procedures hard to work out without help.

The developers have also created a very useful tutorial video which adds further detail and advice to that in the manual. Check it out right her at X-Plained.Com.
Exterior Modelling
I loaded the model on the stand with engines off to start with. When presented this way the model appears with chocks and ground equipment in place and a cockpit cover in place. I initially tried to use the set up sheet to remove the cockpit cover as there is a check box to toggle the ground equipment on and off. This did not remove the cockpit cover and I could find no instruction as to how to do this in the manual. Further study of the cockpit diagram revealed this is controlled by a small button/screw head on the pilots door just below the window.
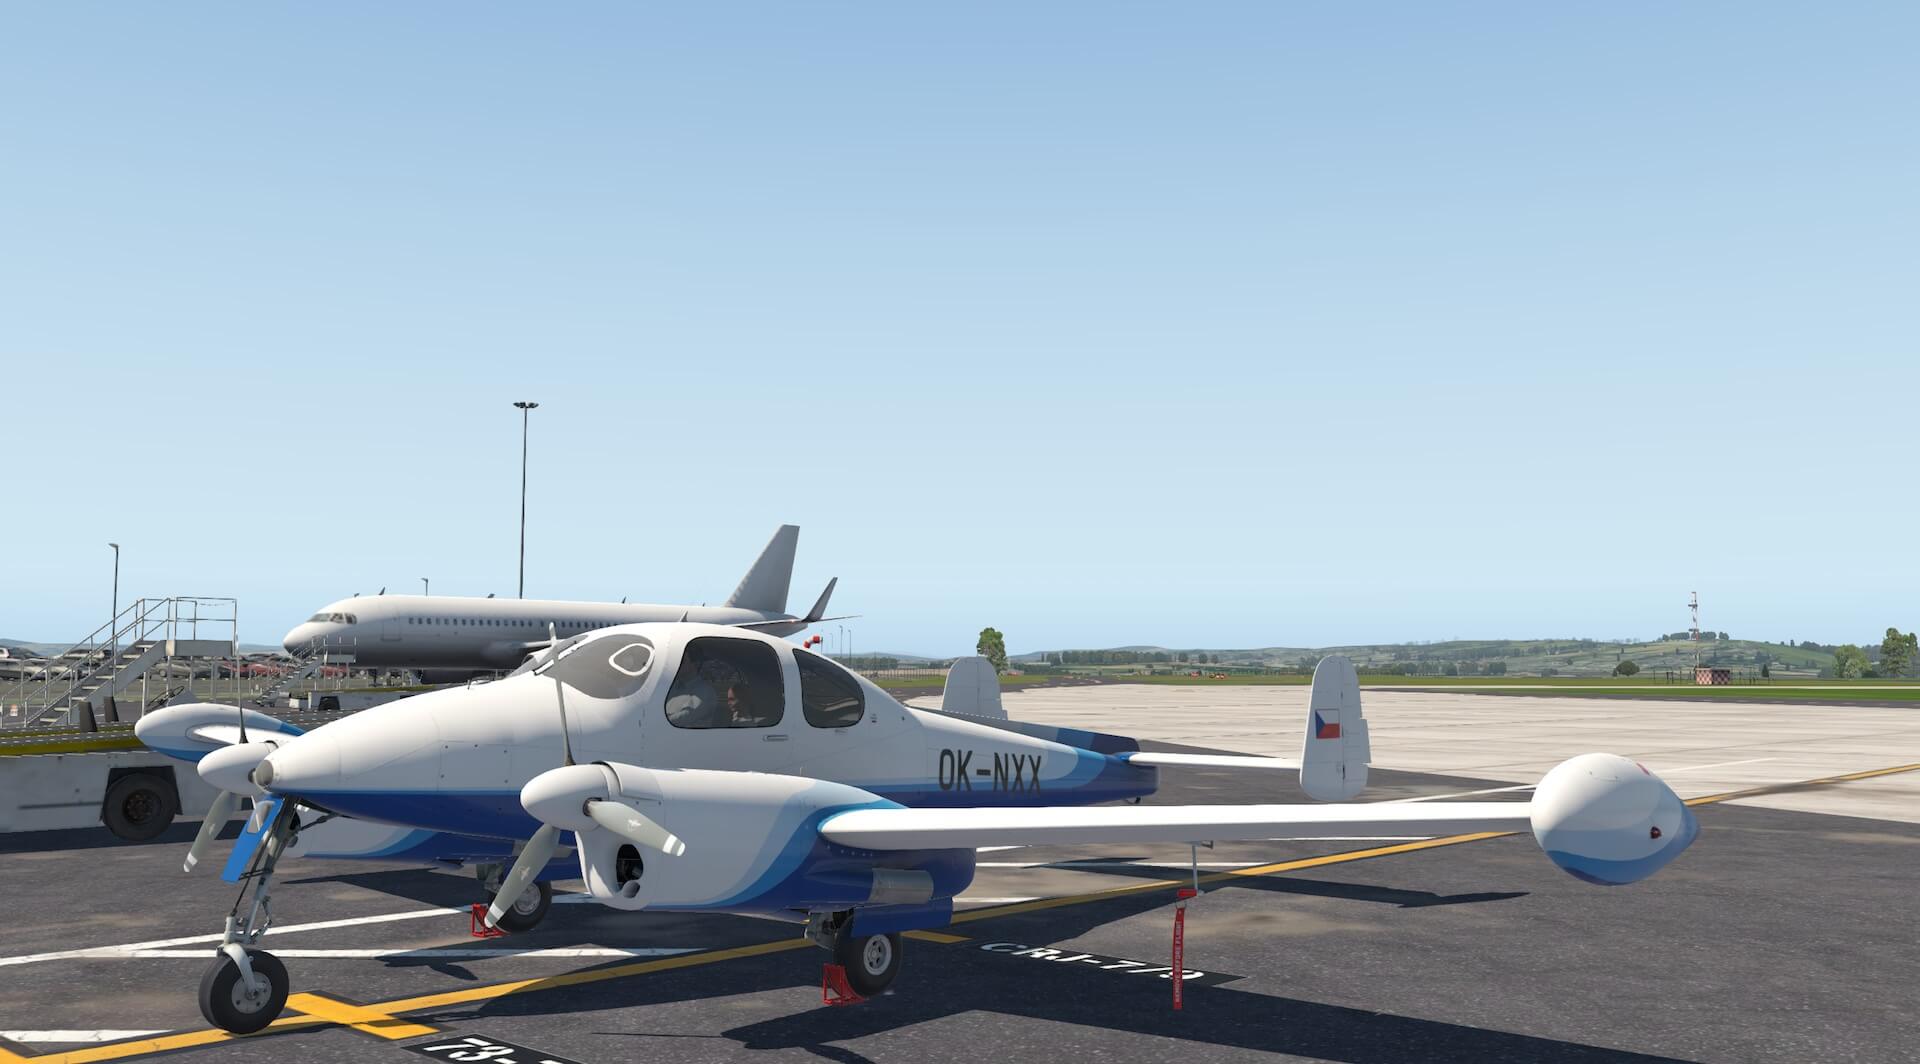
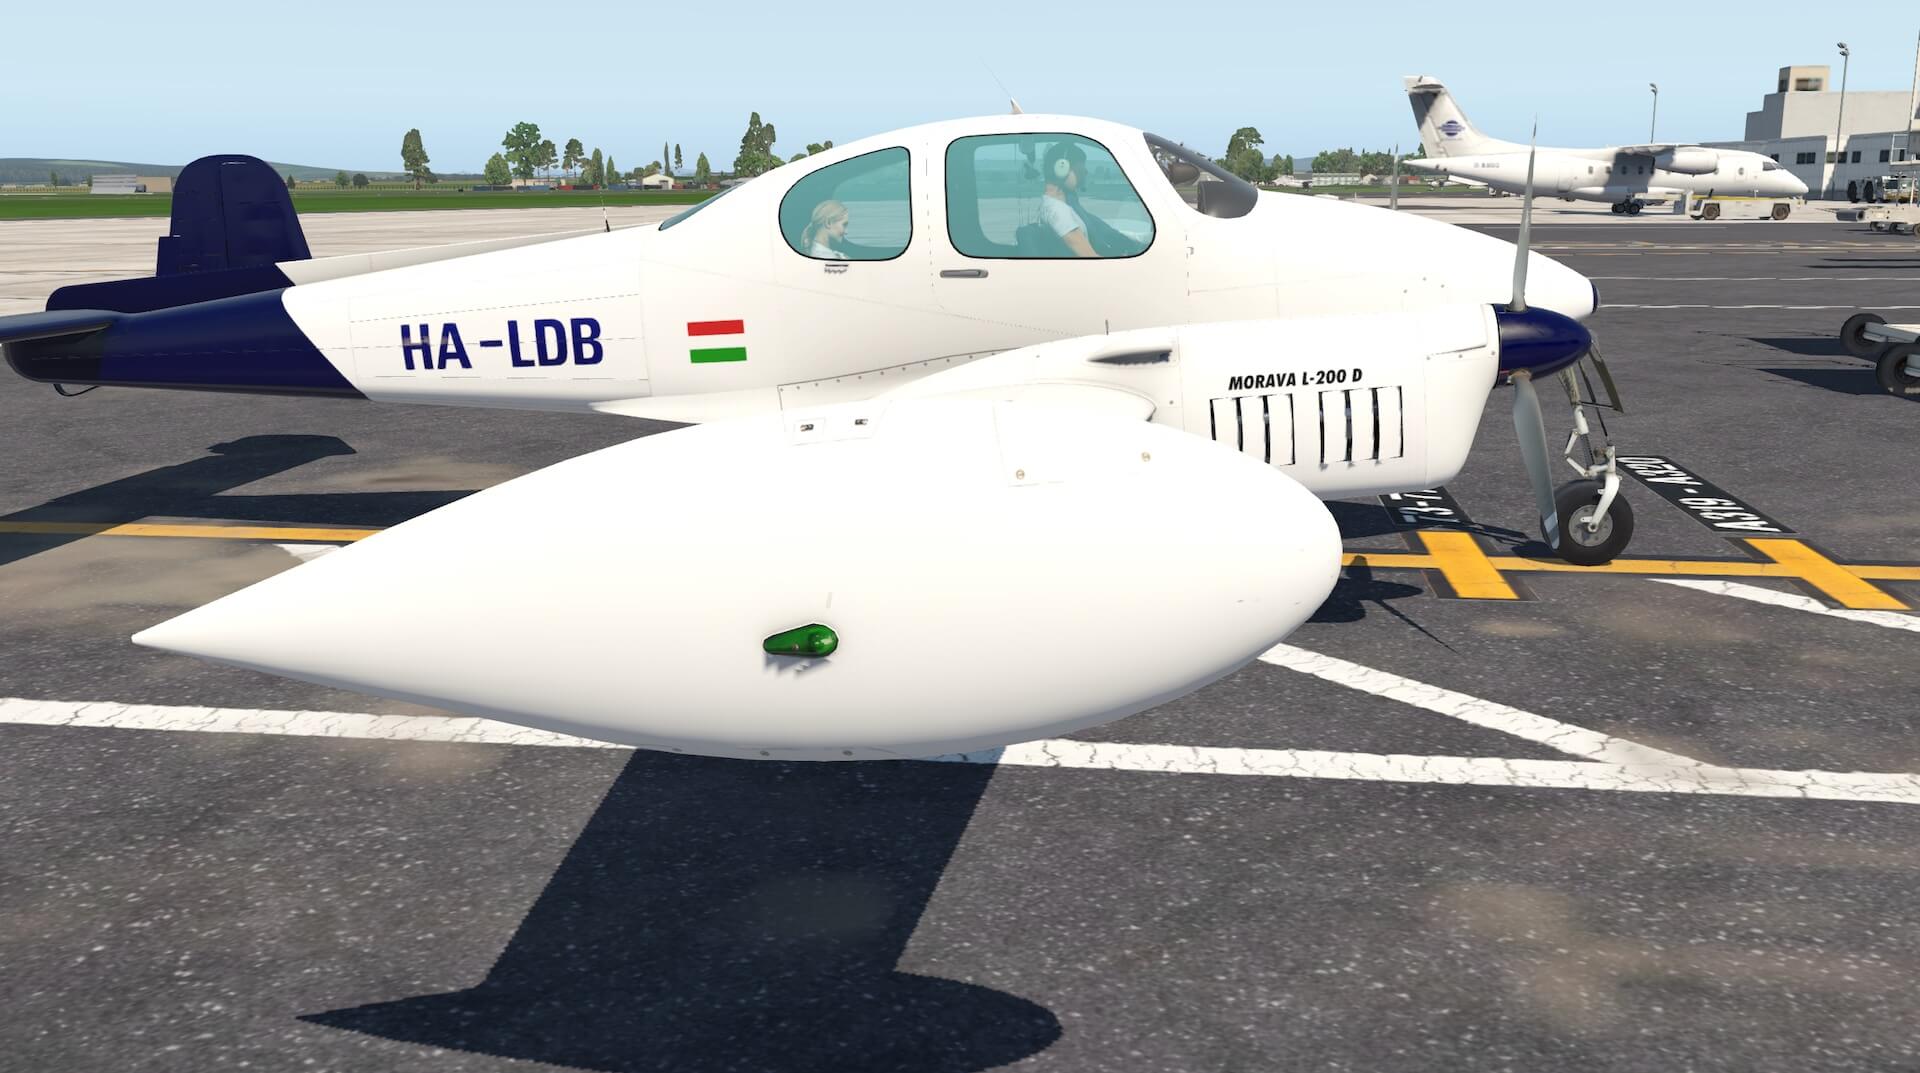
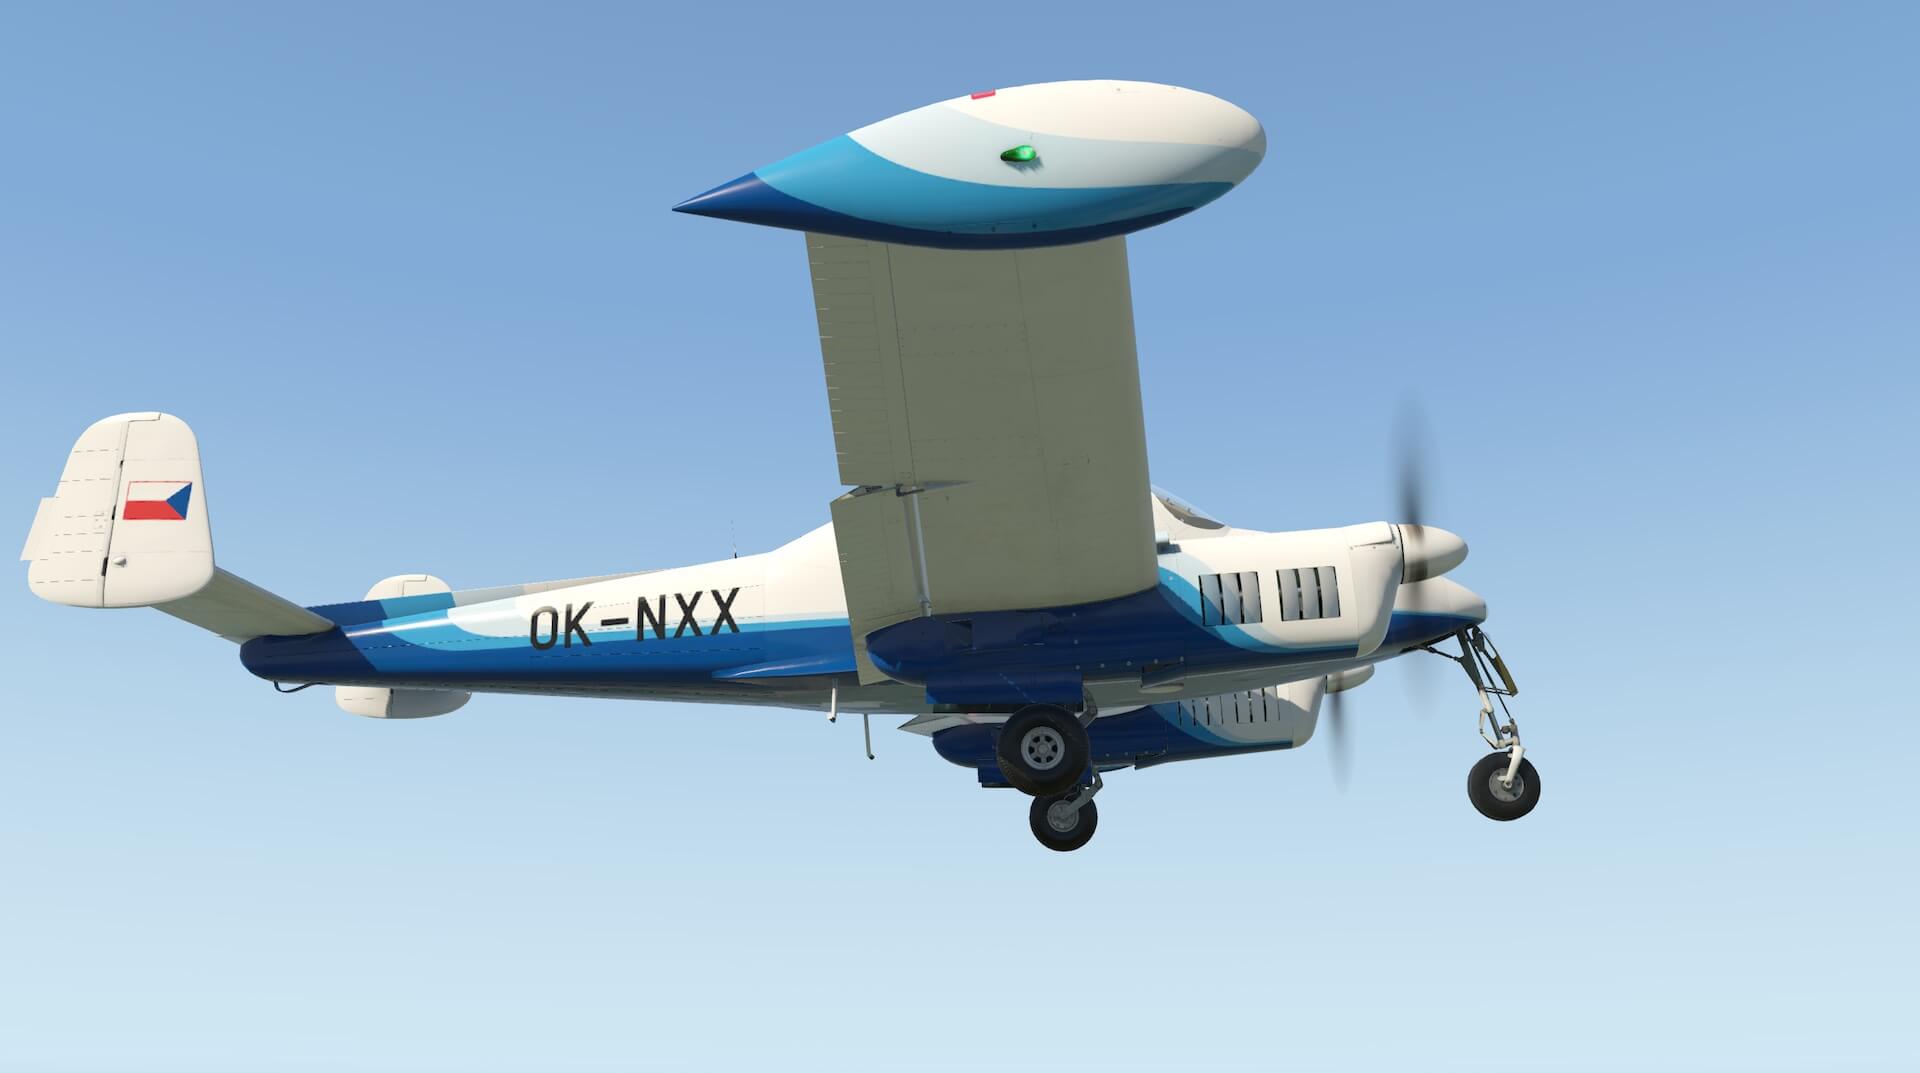
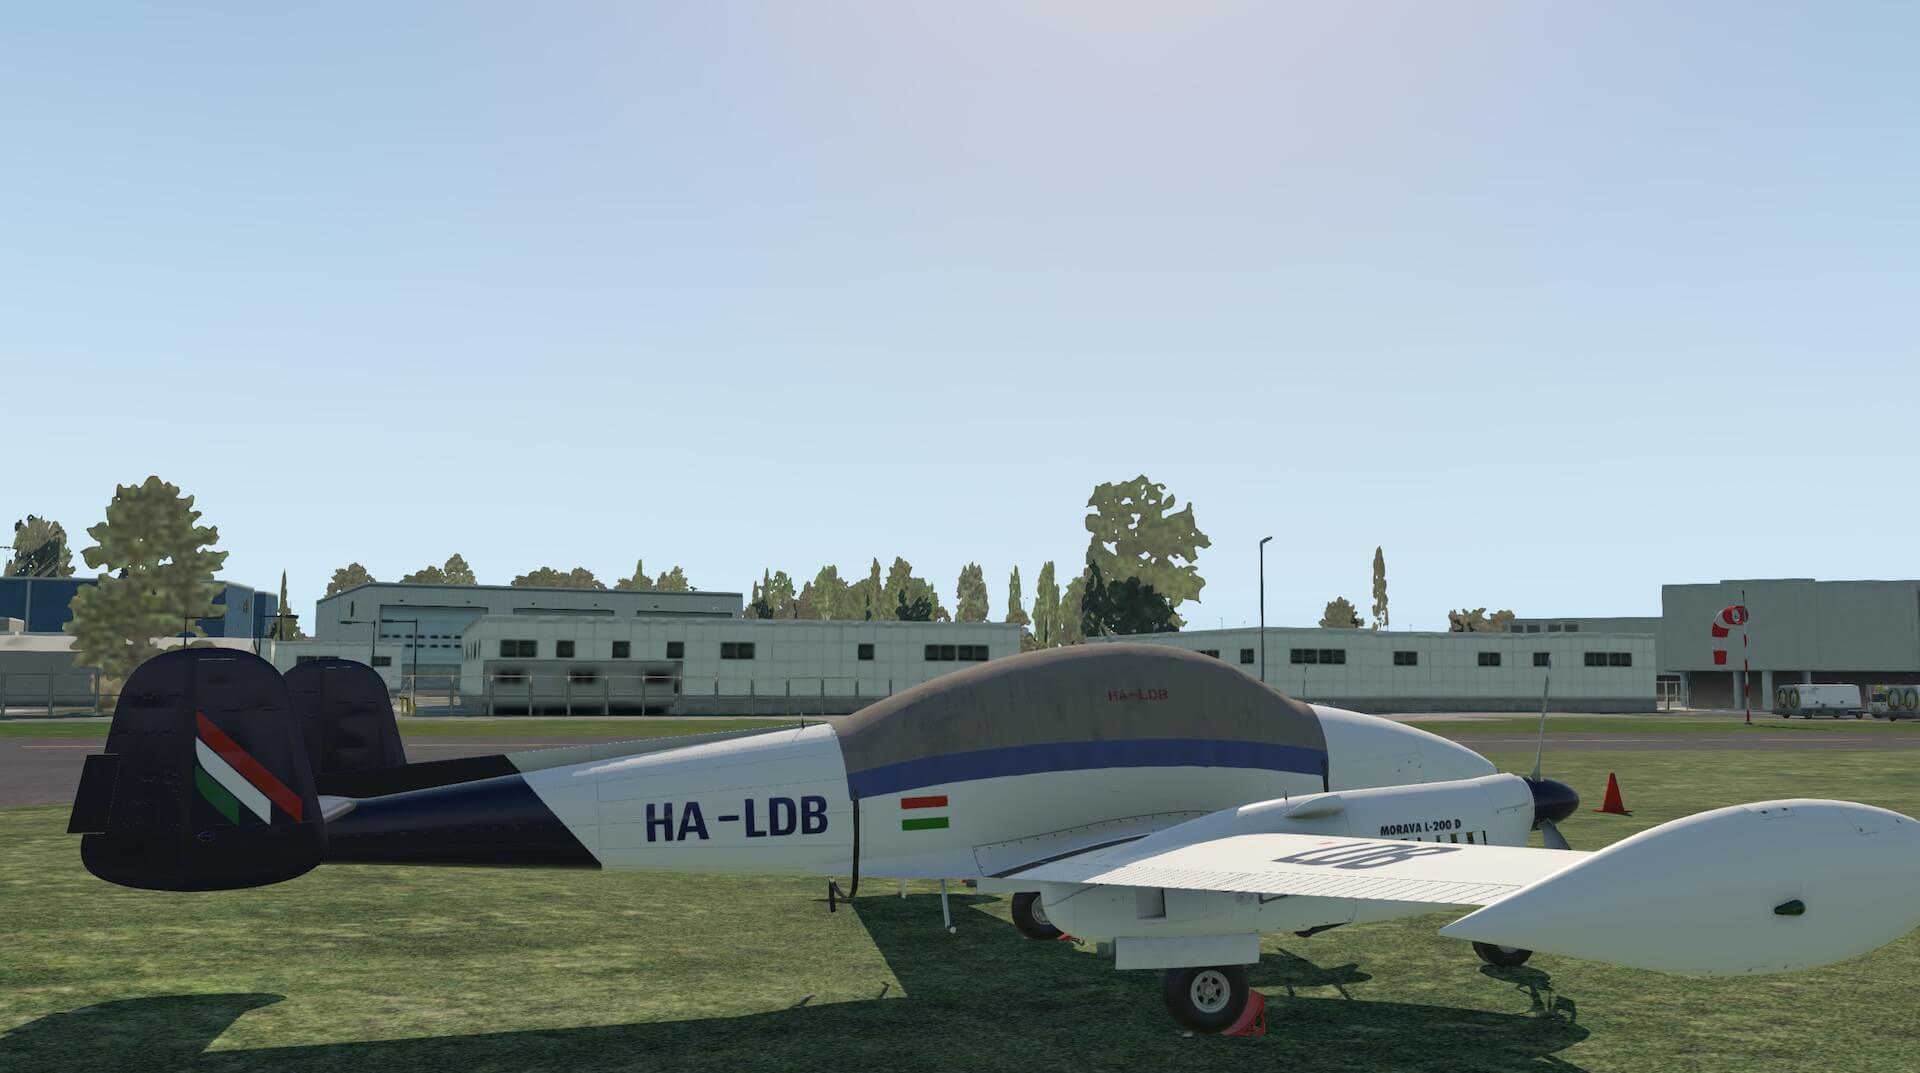
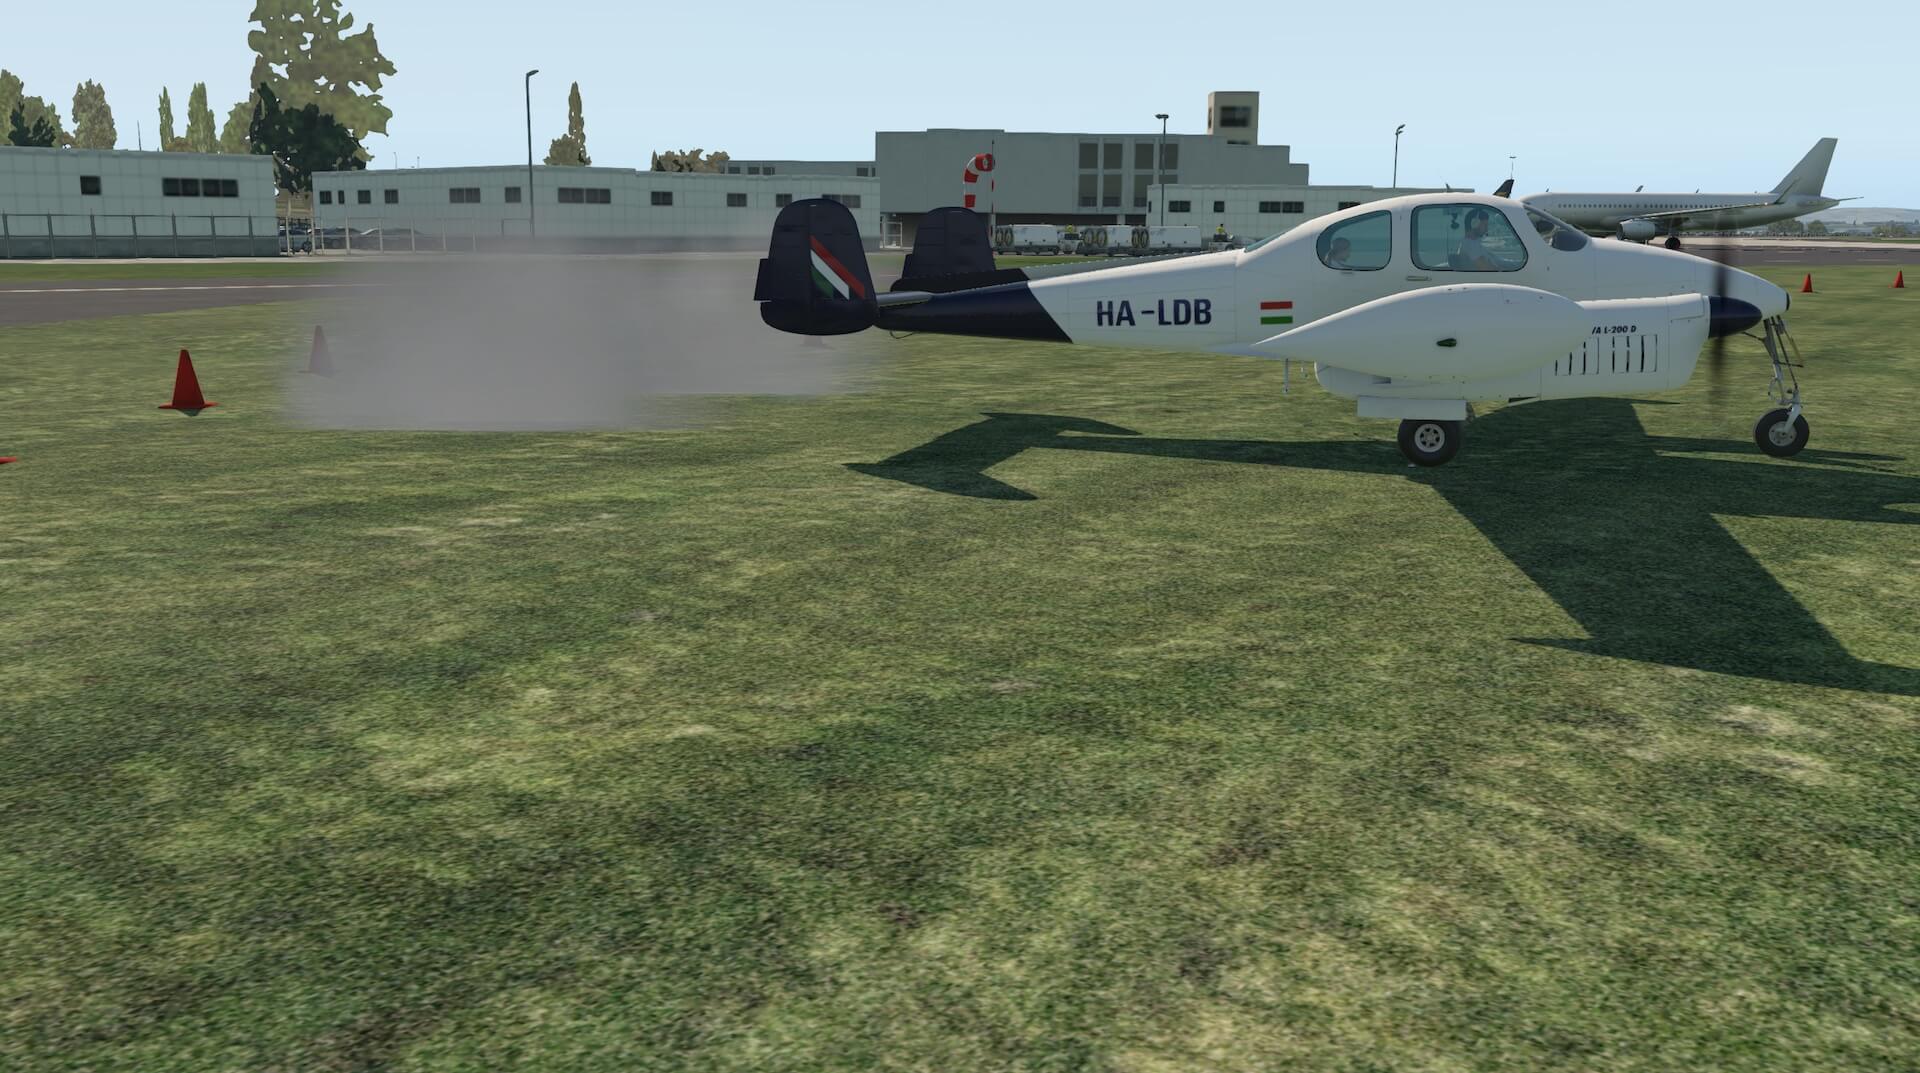
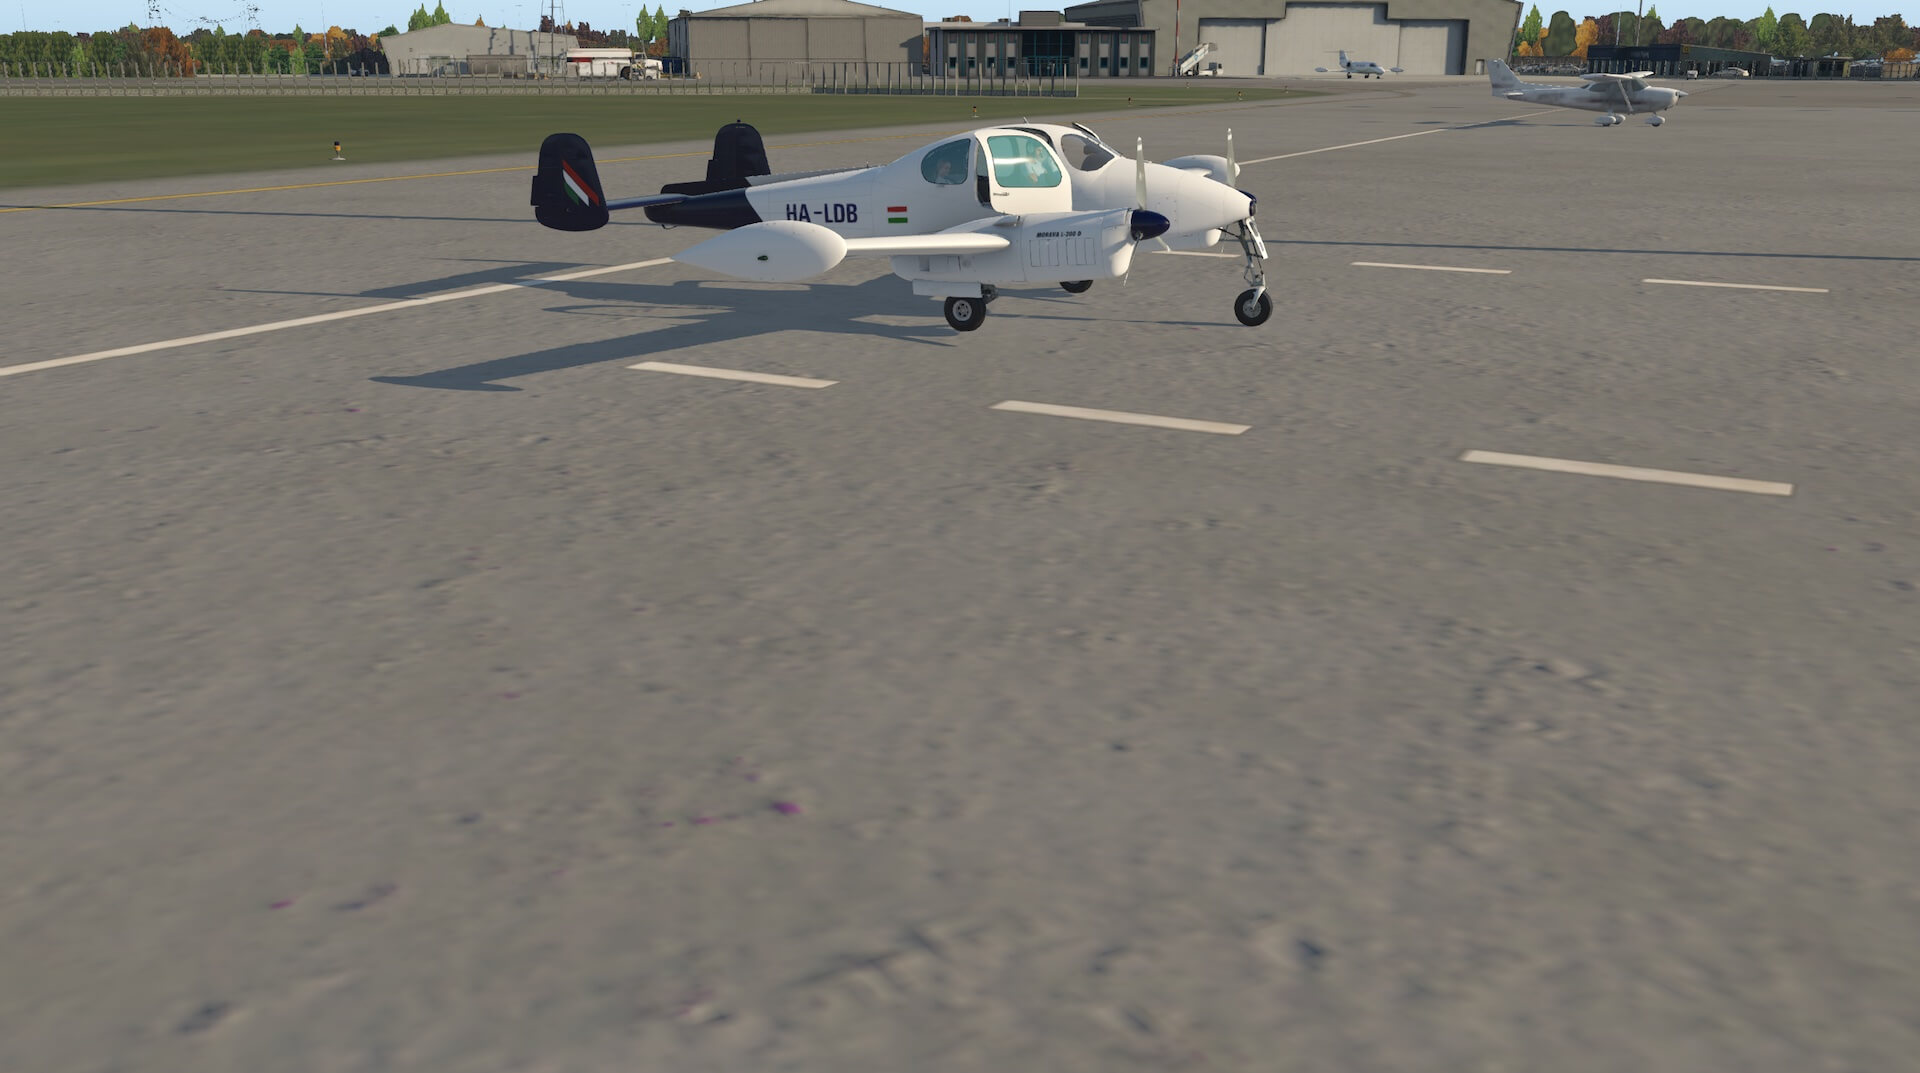
I approached the aircraft from the left front and was immediately struck by its shape and stance. Initially I had the cockpit cover on but then removed it by the method described above. I also used the set up sheet to add a passenger as well as the modelled pilot and co-pilot. The lines of the aircraft are smooth and well defined and the detail and panelling are very impressive. Colours are crisp and clear and the characteristic undercarriage is modelled in detail. Signage is legible and light, shadow and reflections work very well.

The model is provided with engine covers that open individually to reveal the engines and detail inside. Until the most recent update (version 1.3, 8th Oct 2021) this had to be done by staying in the internal view and moving the camera. It is now possible to use all of the external animation in both internal and external views.
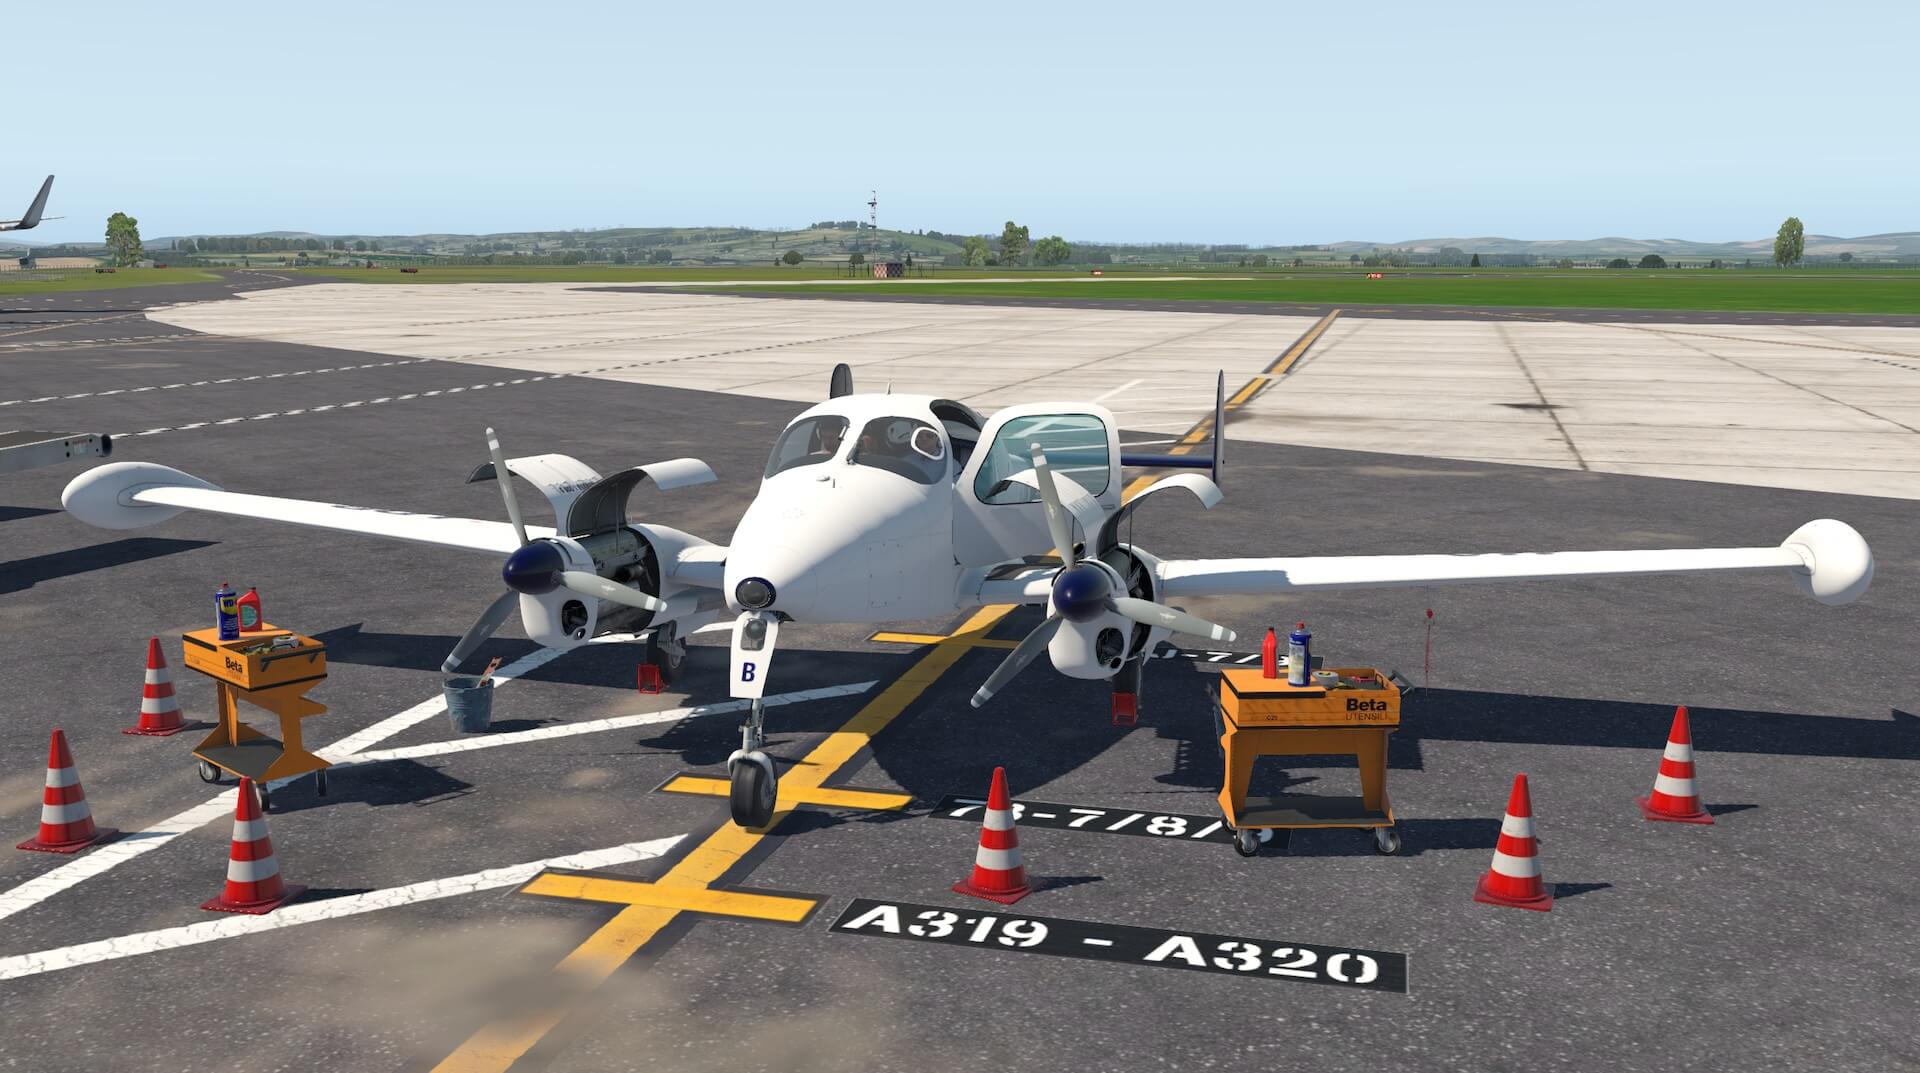
In the internal view, to move outside the aircraft from the cockpit, the door has to be animated to open. Once moving outside clicking on the engine covers animates them to open and also brings service trolleys and tools in to view. The ground equipment can be removed individually by clicking on each piece. The detail inside the engine cowlings is highly convincing and of great quality. These animations really add realism and authenticity to the use of the model.


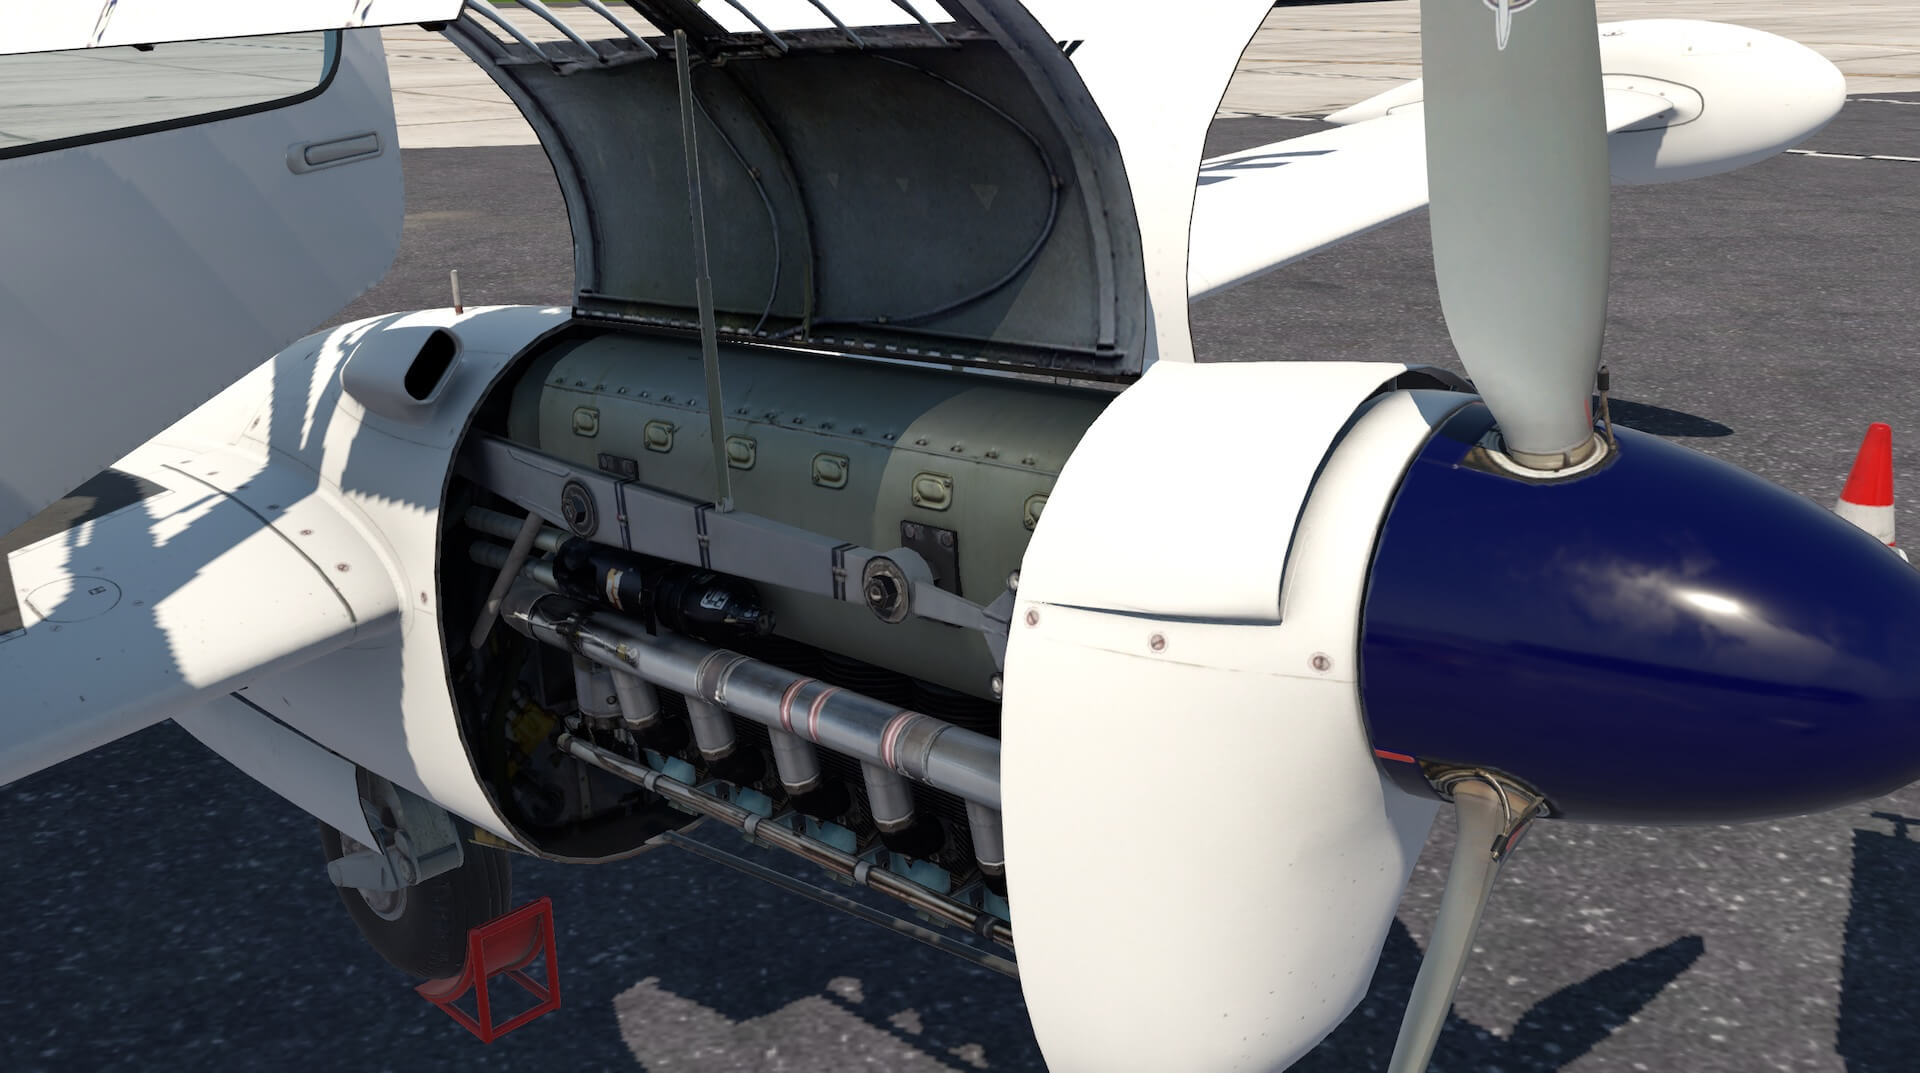
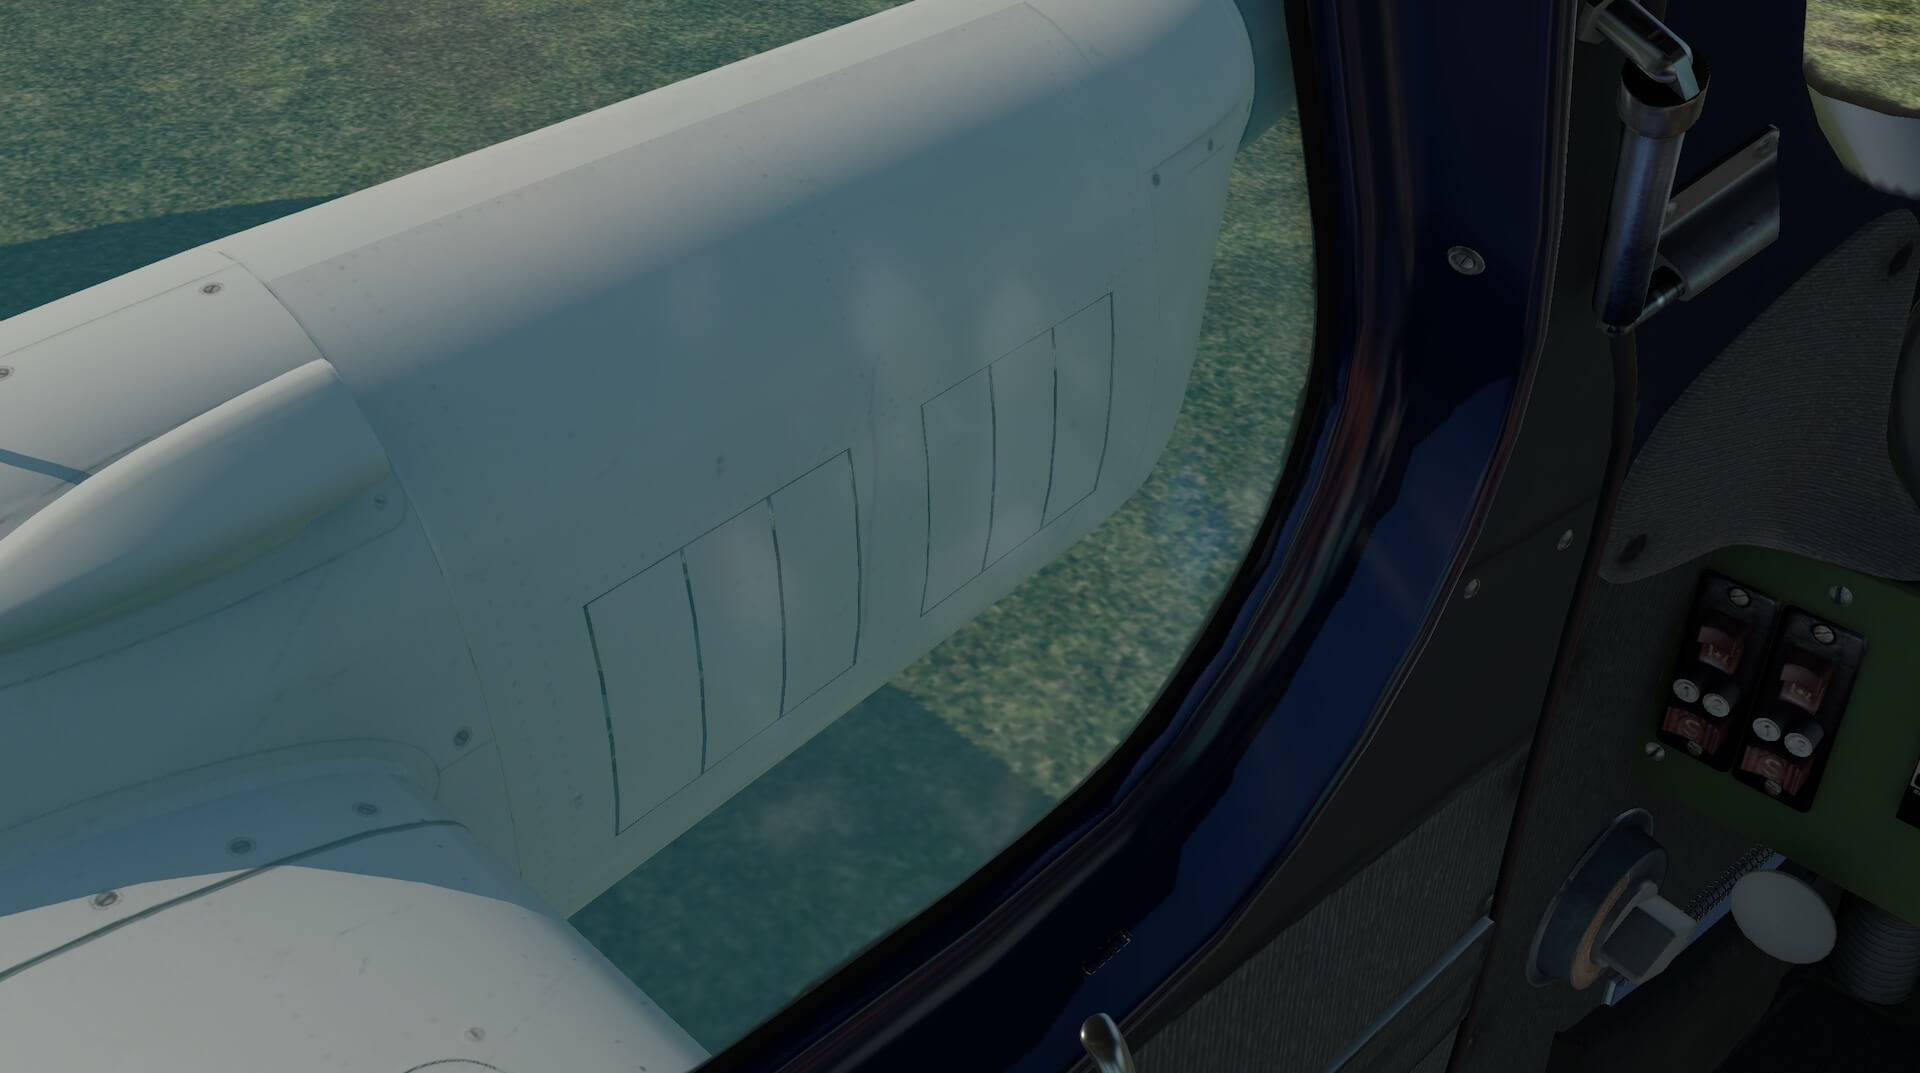
Moving towards the front of the aircraft creates head on views of the engines and propellors. These are modelled in detail with the propellor hub providing authentic reflections and the propellor blades displaying legible makers marks. Panels and fixings are modelled and realistic. Glass and other textures are all convincing including the wear on the tyre tread and the propellor surfaces.
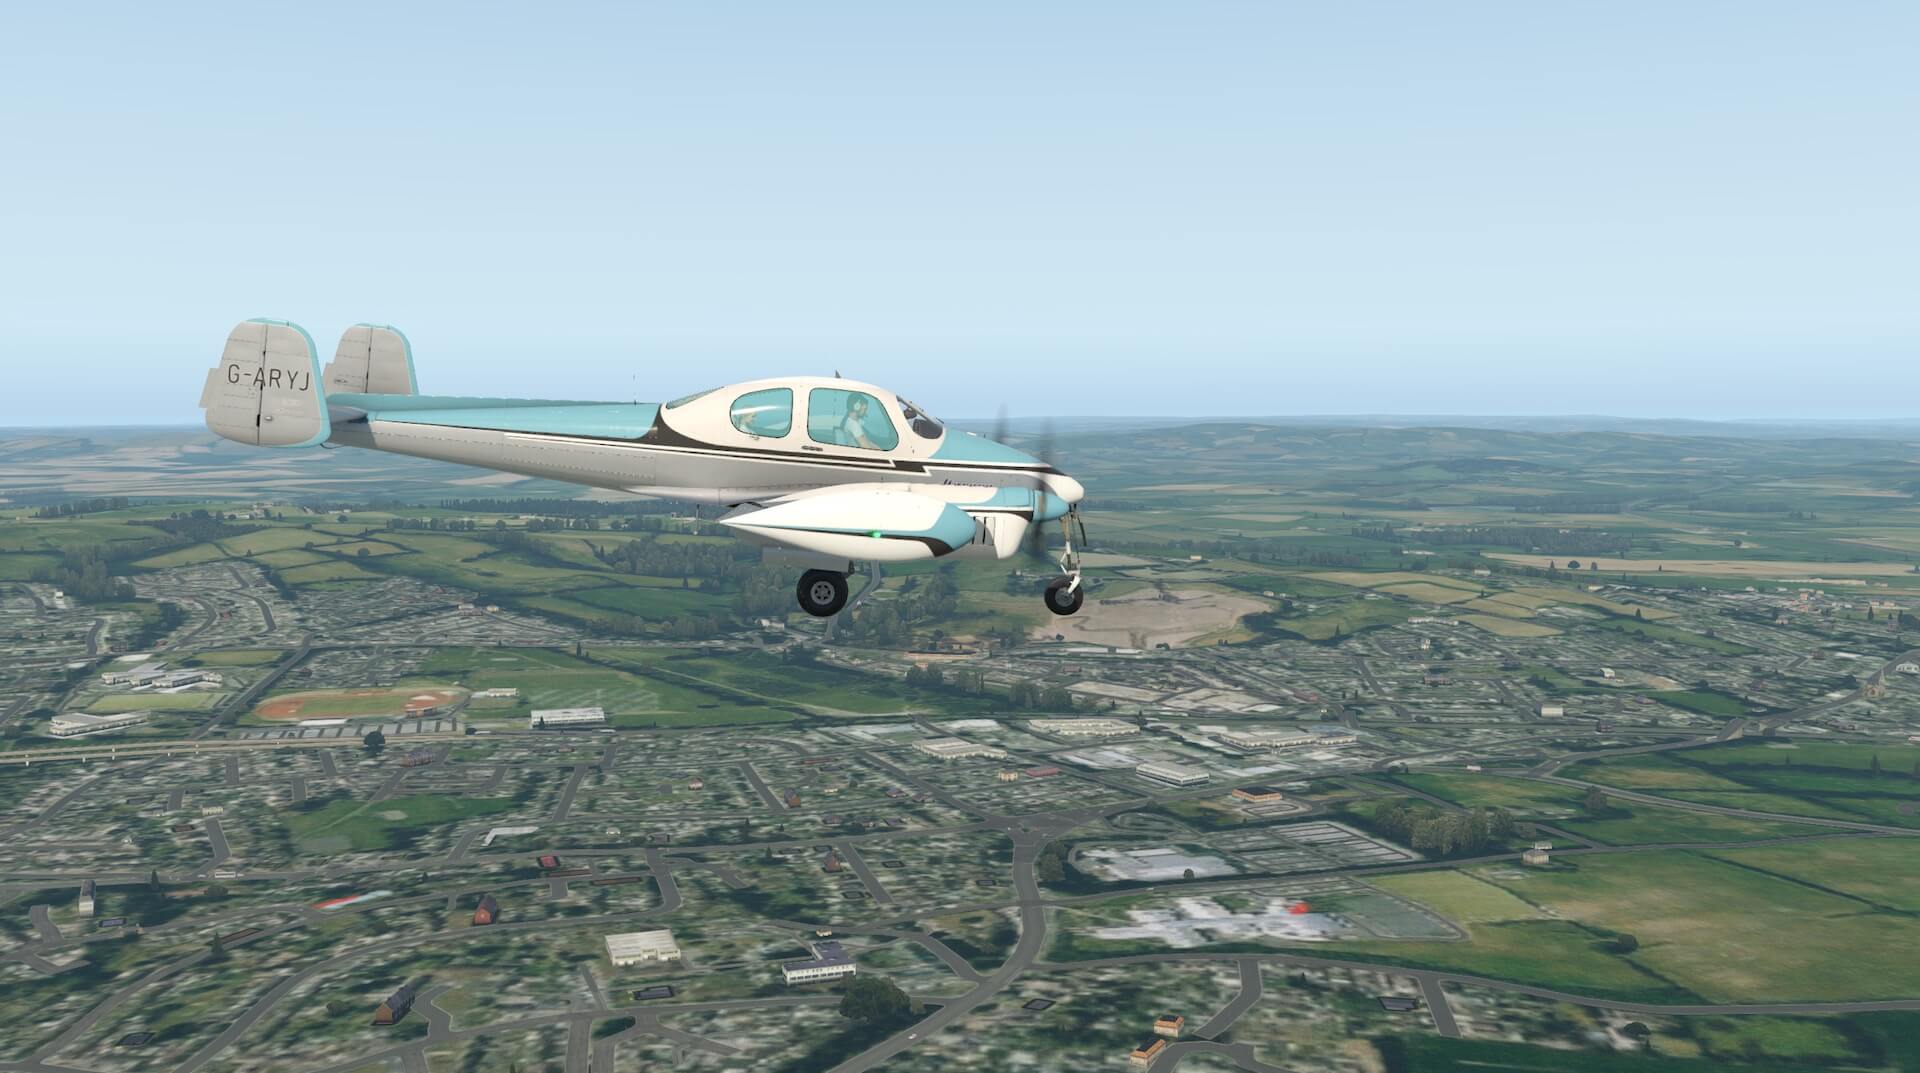
The occupants of the aircraft are individually modelled and visible through the windscreen. Closer inspection of the front landing gear shows a high level of detail with struts and linkages all modelled. A higher view shows the shape of the body of the aircraft and the characteristic twin tails.


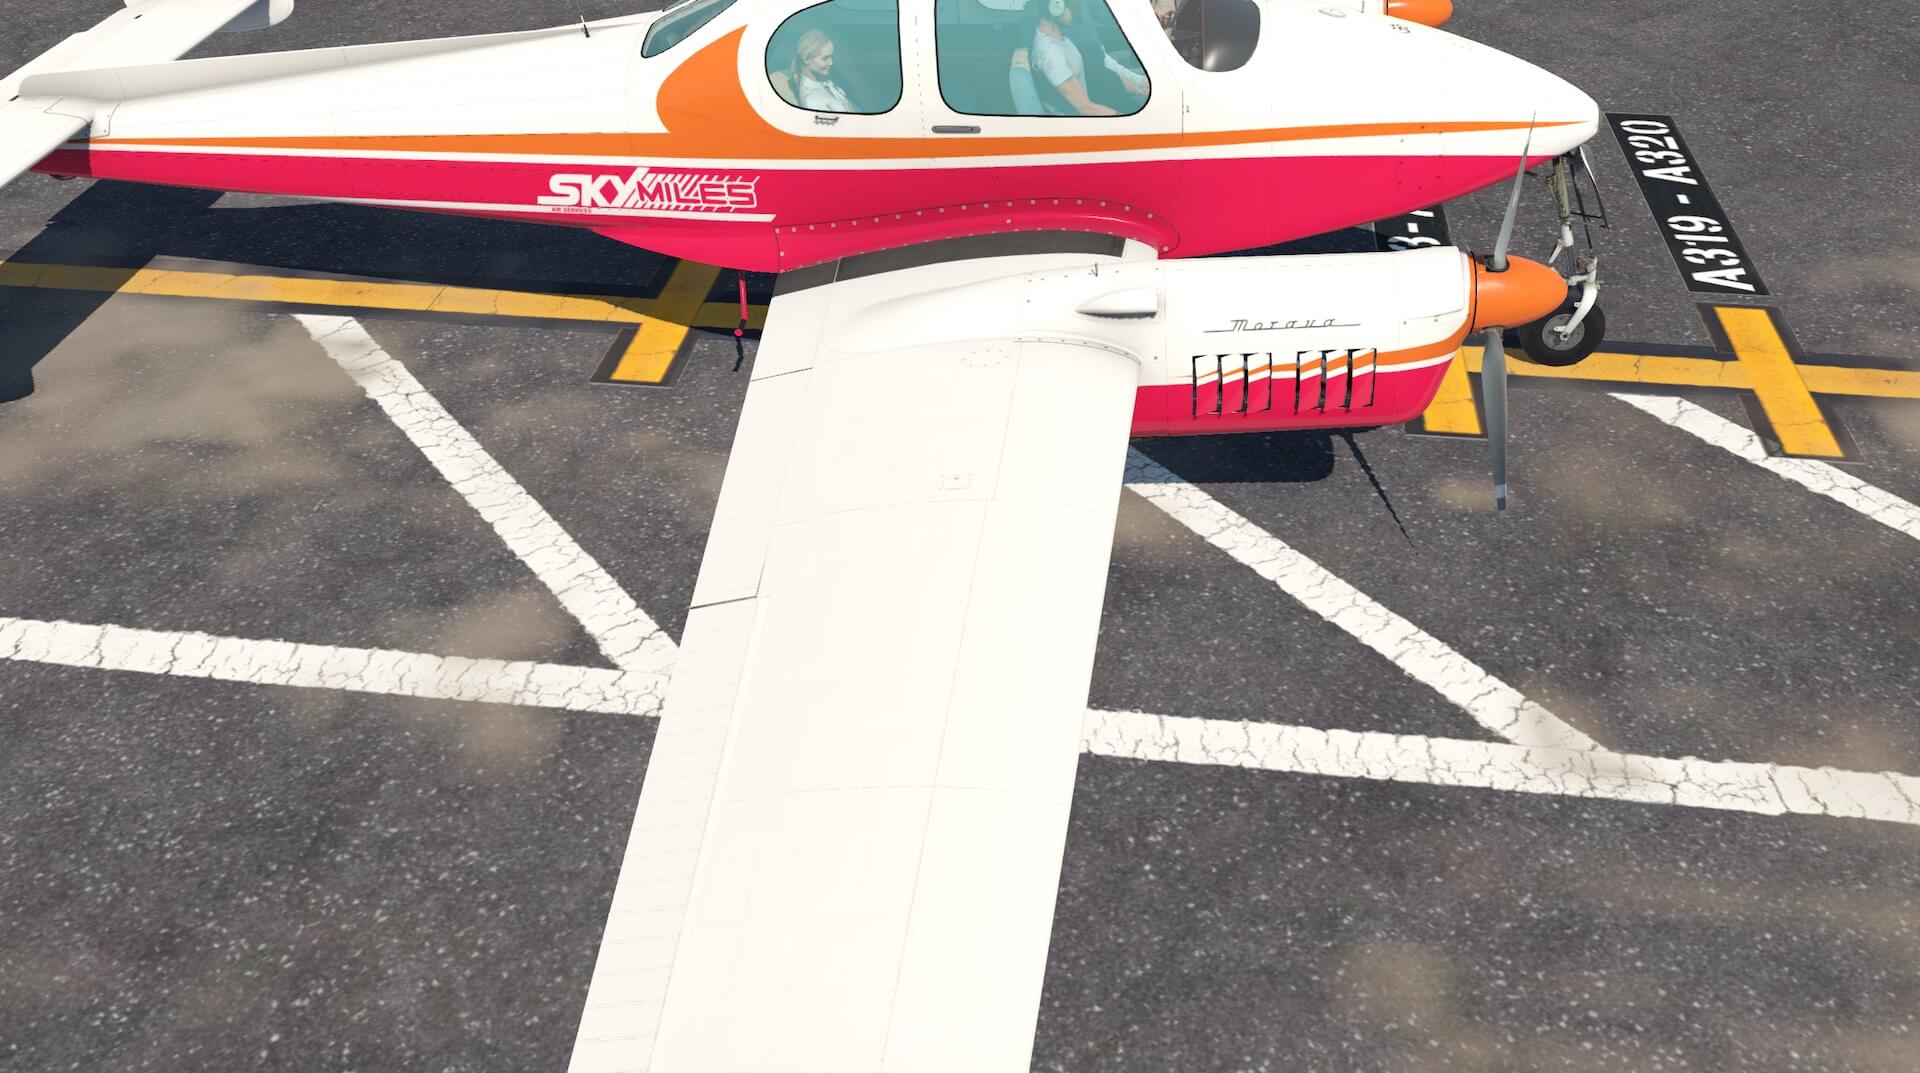
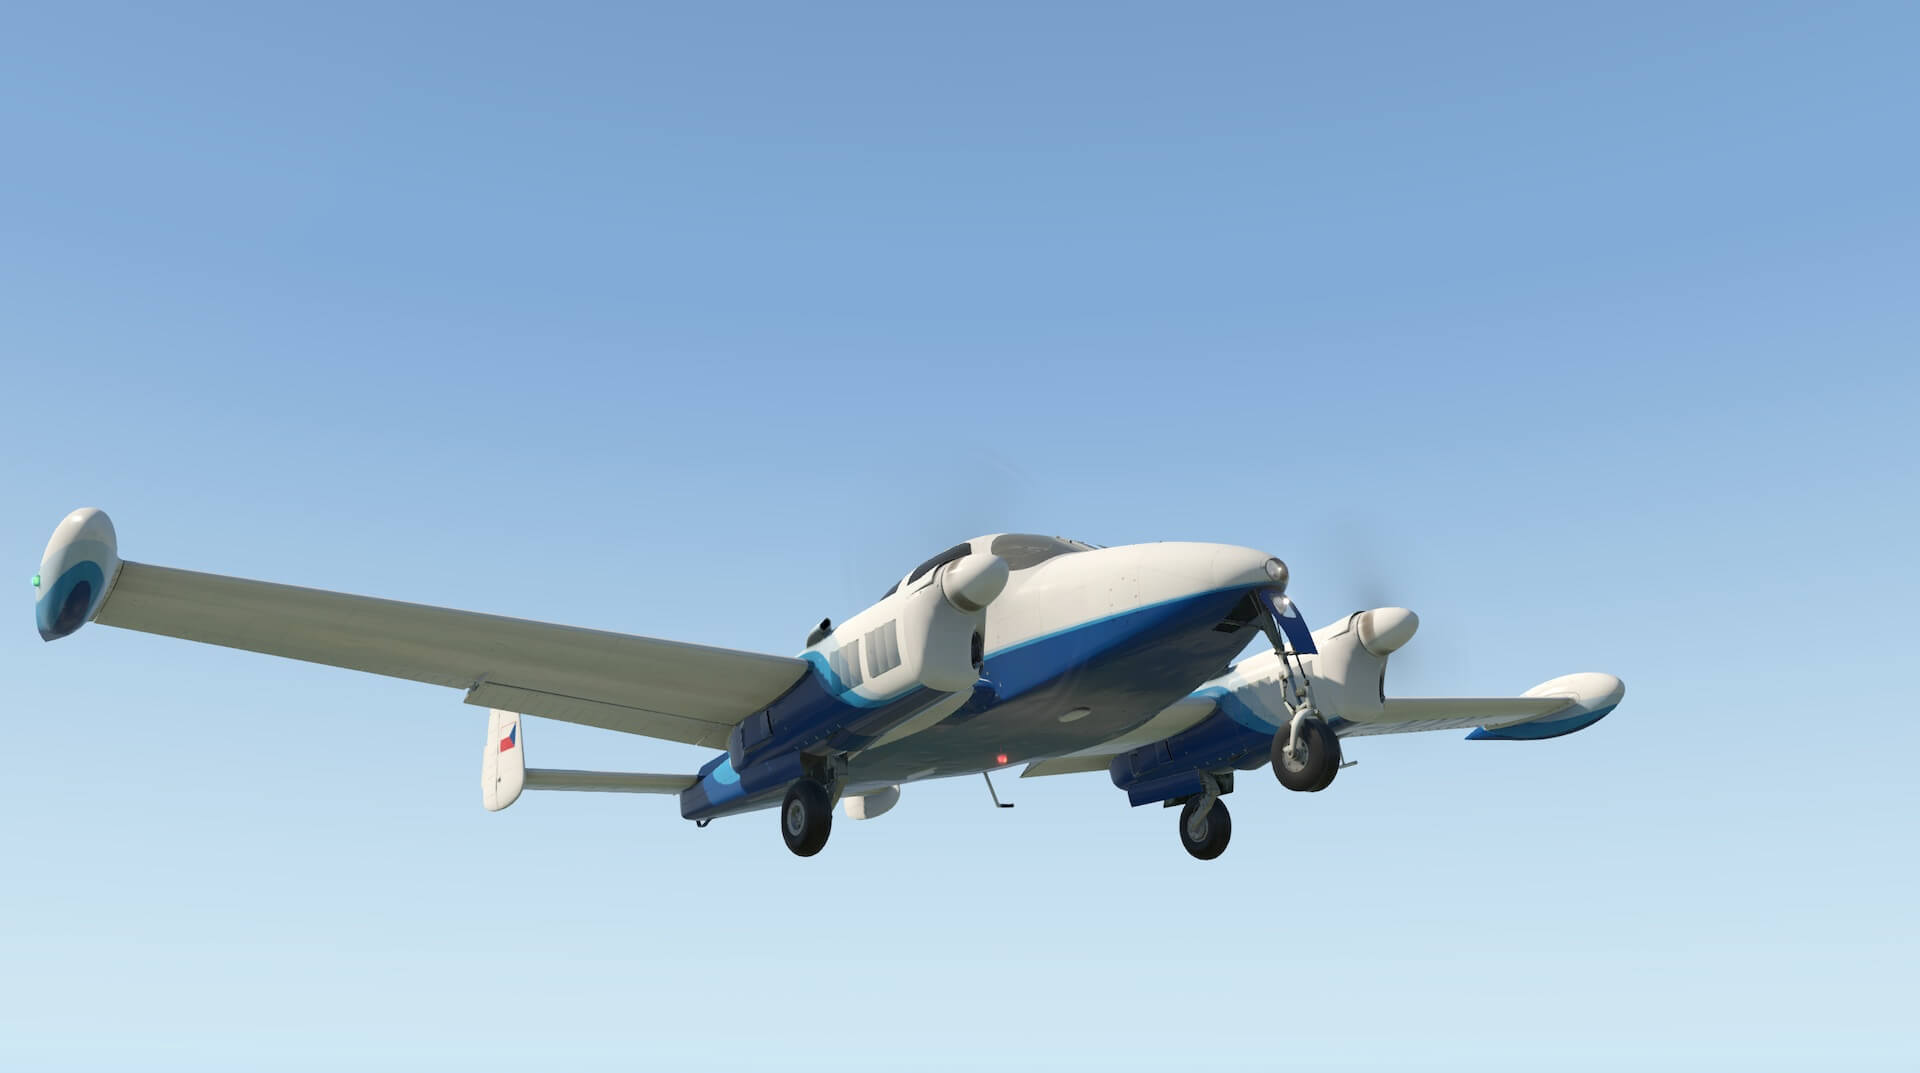
Moving to the front right of the aircraft shows the occupants of the passenger cabin and further panel detail I am not sure the passenger would look quite so relaxed if she knew I was going to fly the aircraft! This view shows the intricate detail such as the roof aerial and the setting of the wipers on the windscreen. A closer view shows the main undercarriage is modelled in the same level of detail as the nose wheel and carries wear and weathering commensurate with this age and type of aircraft.


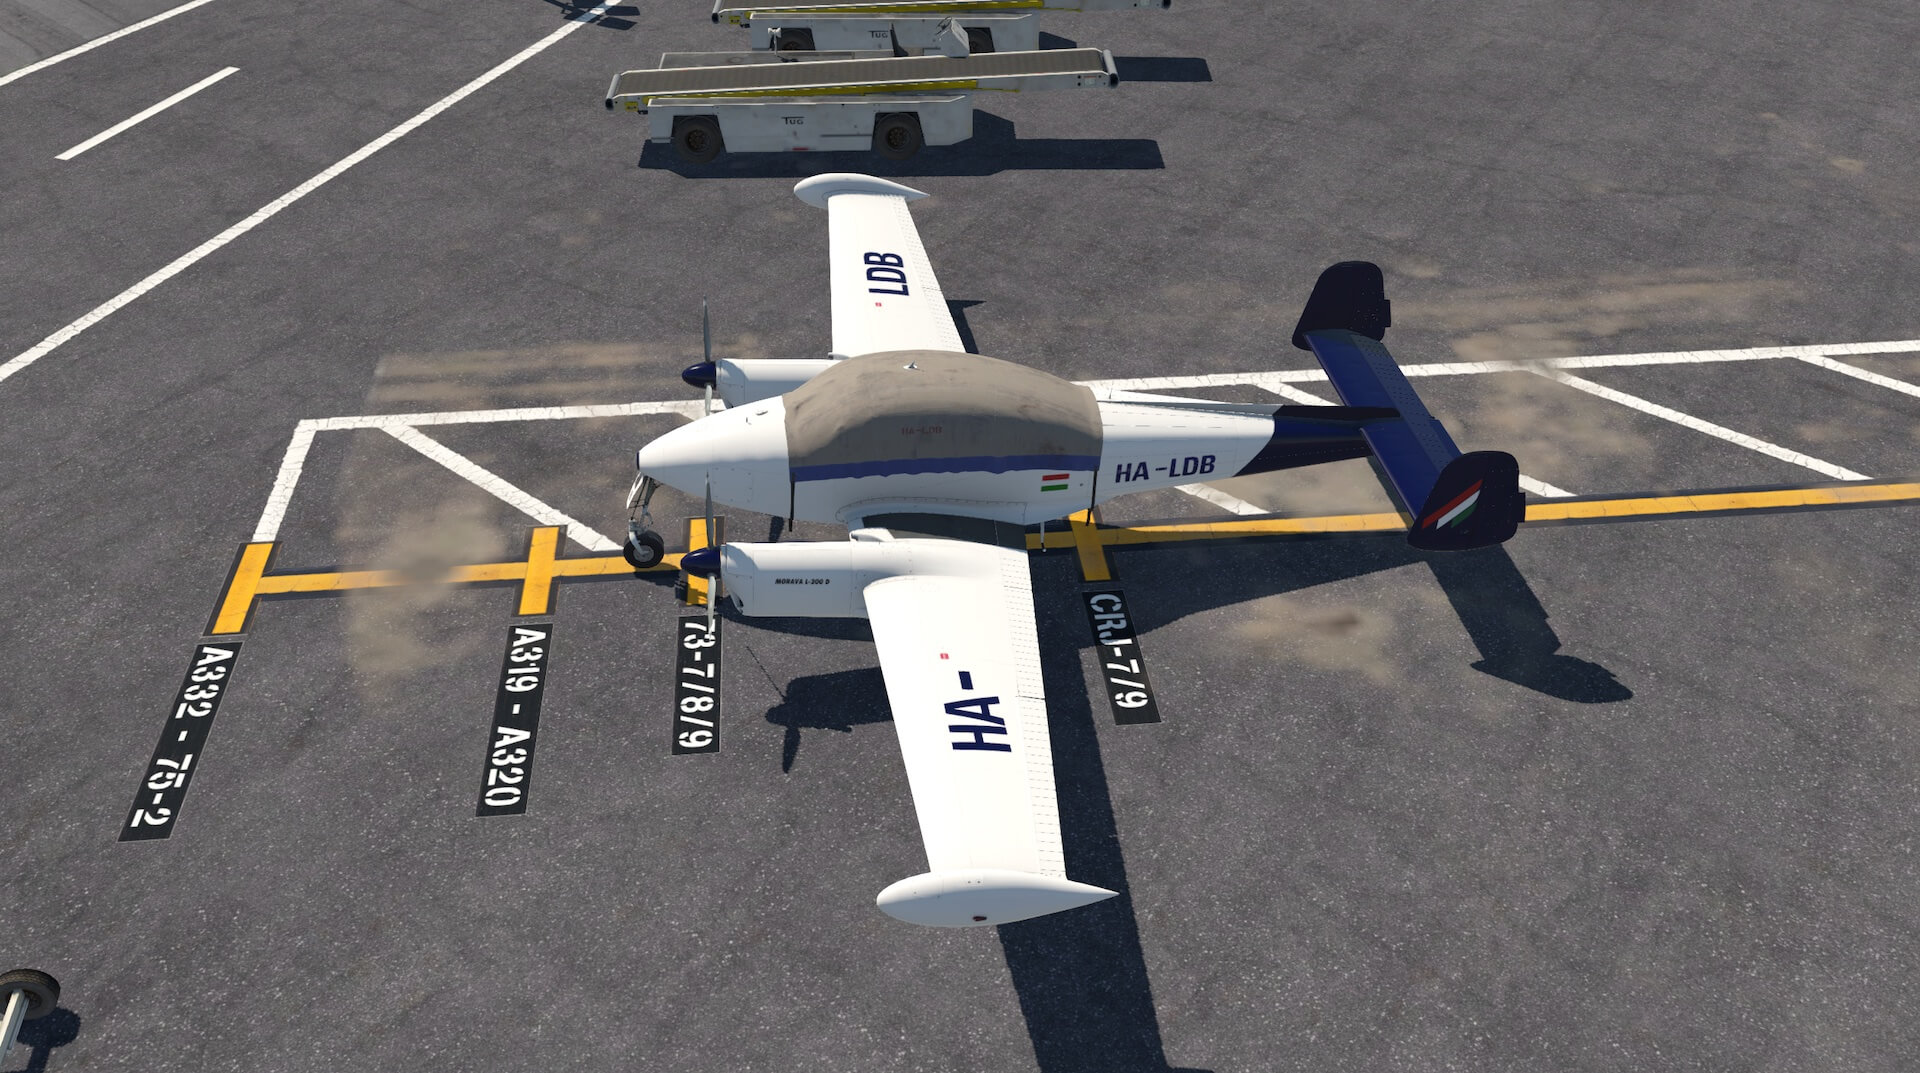
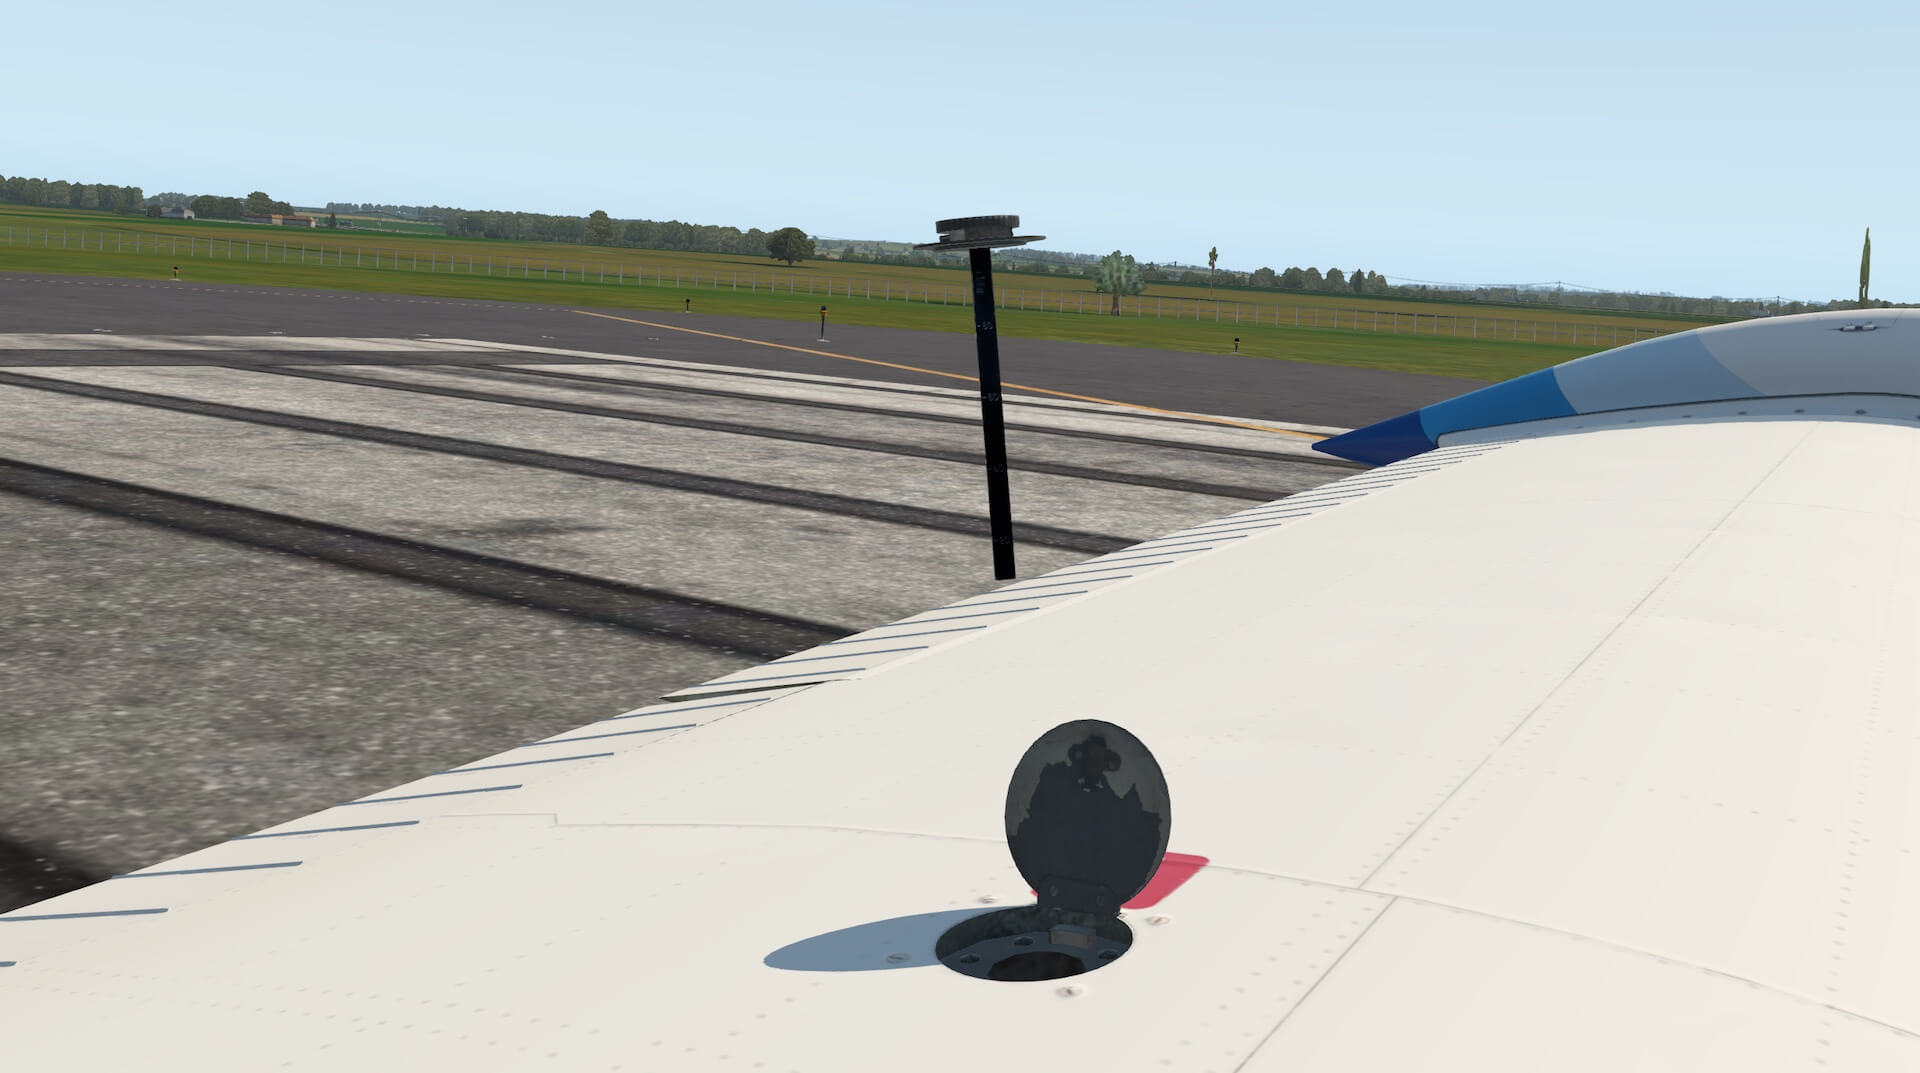
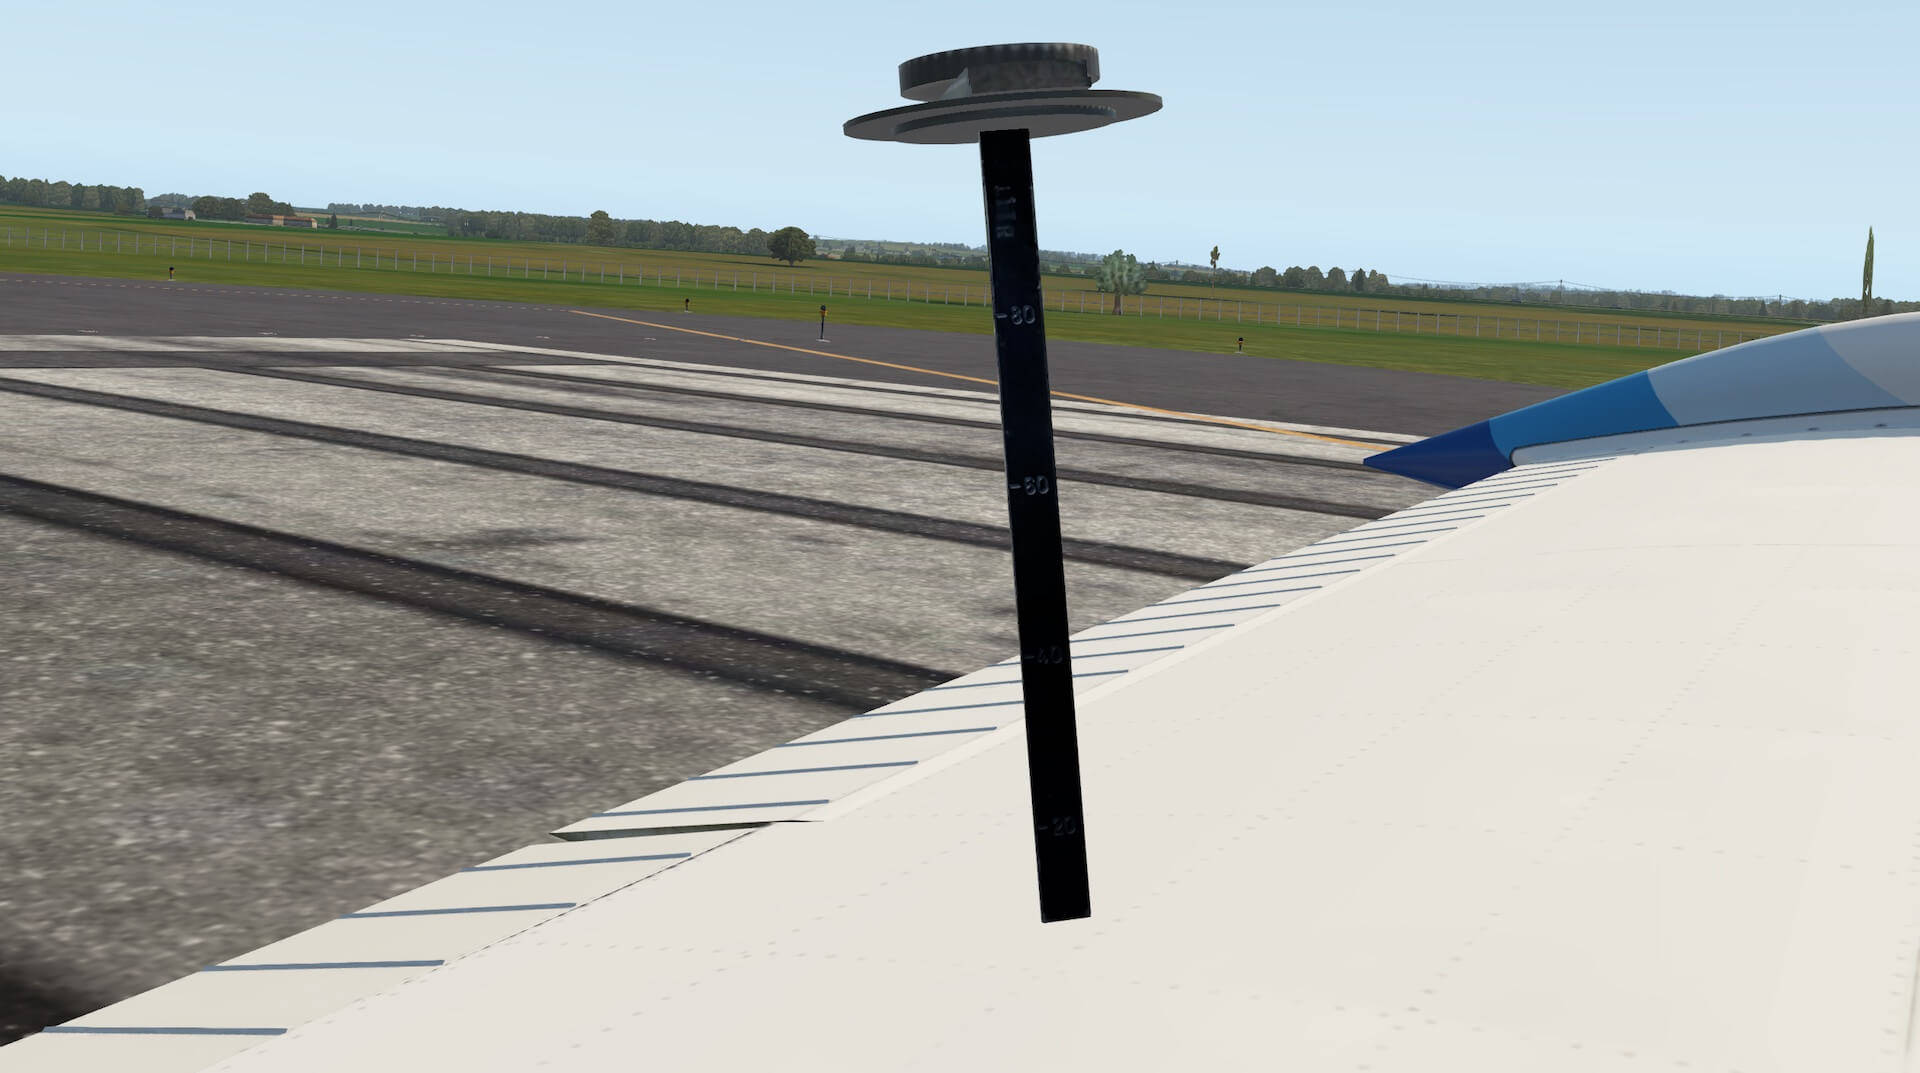
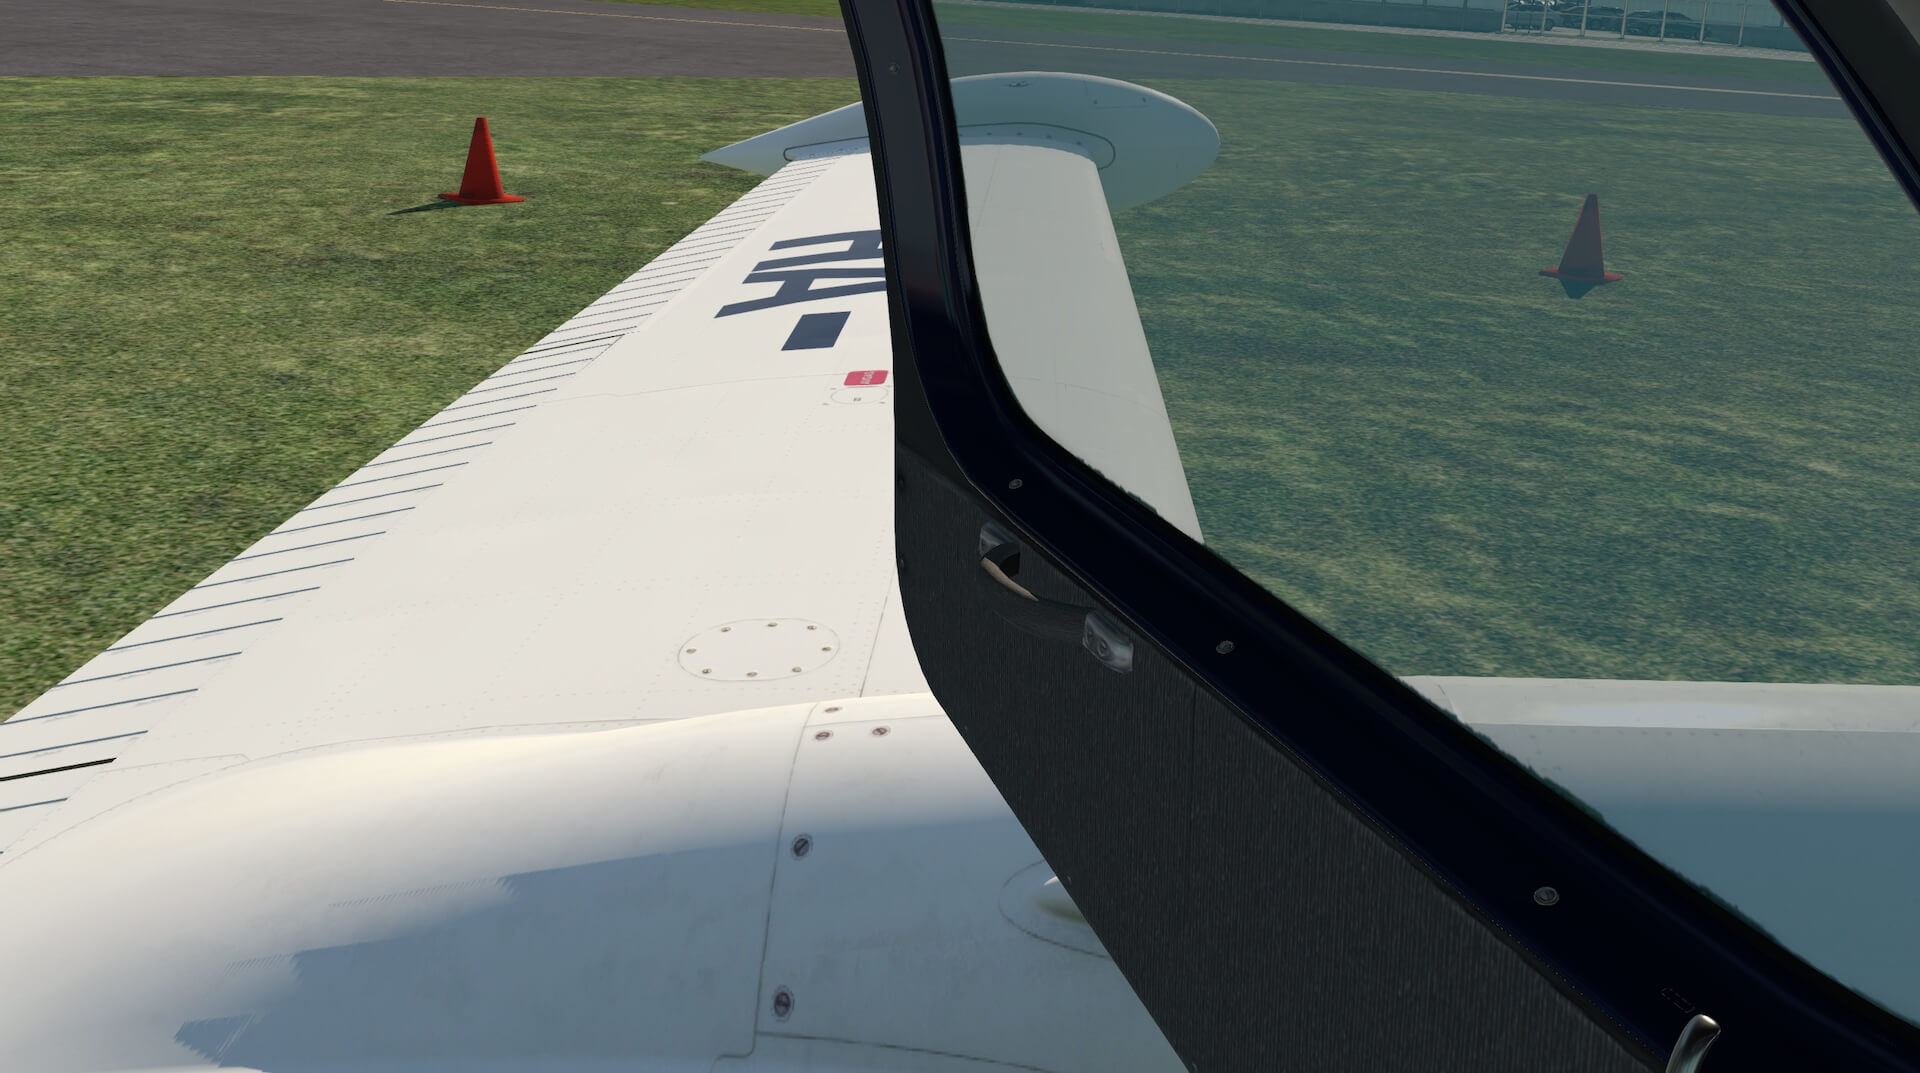
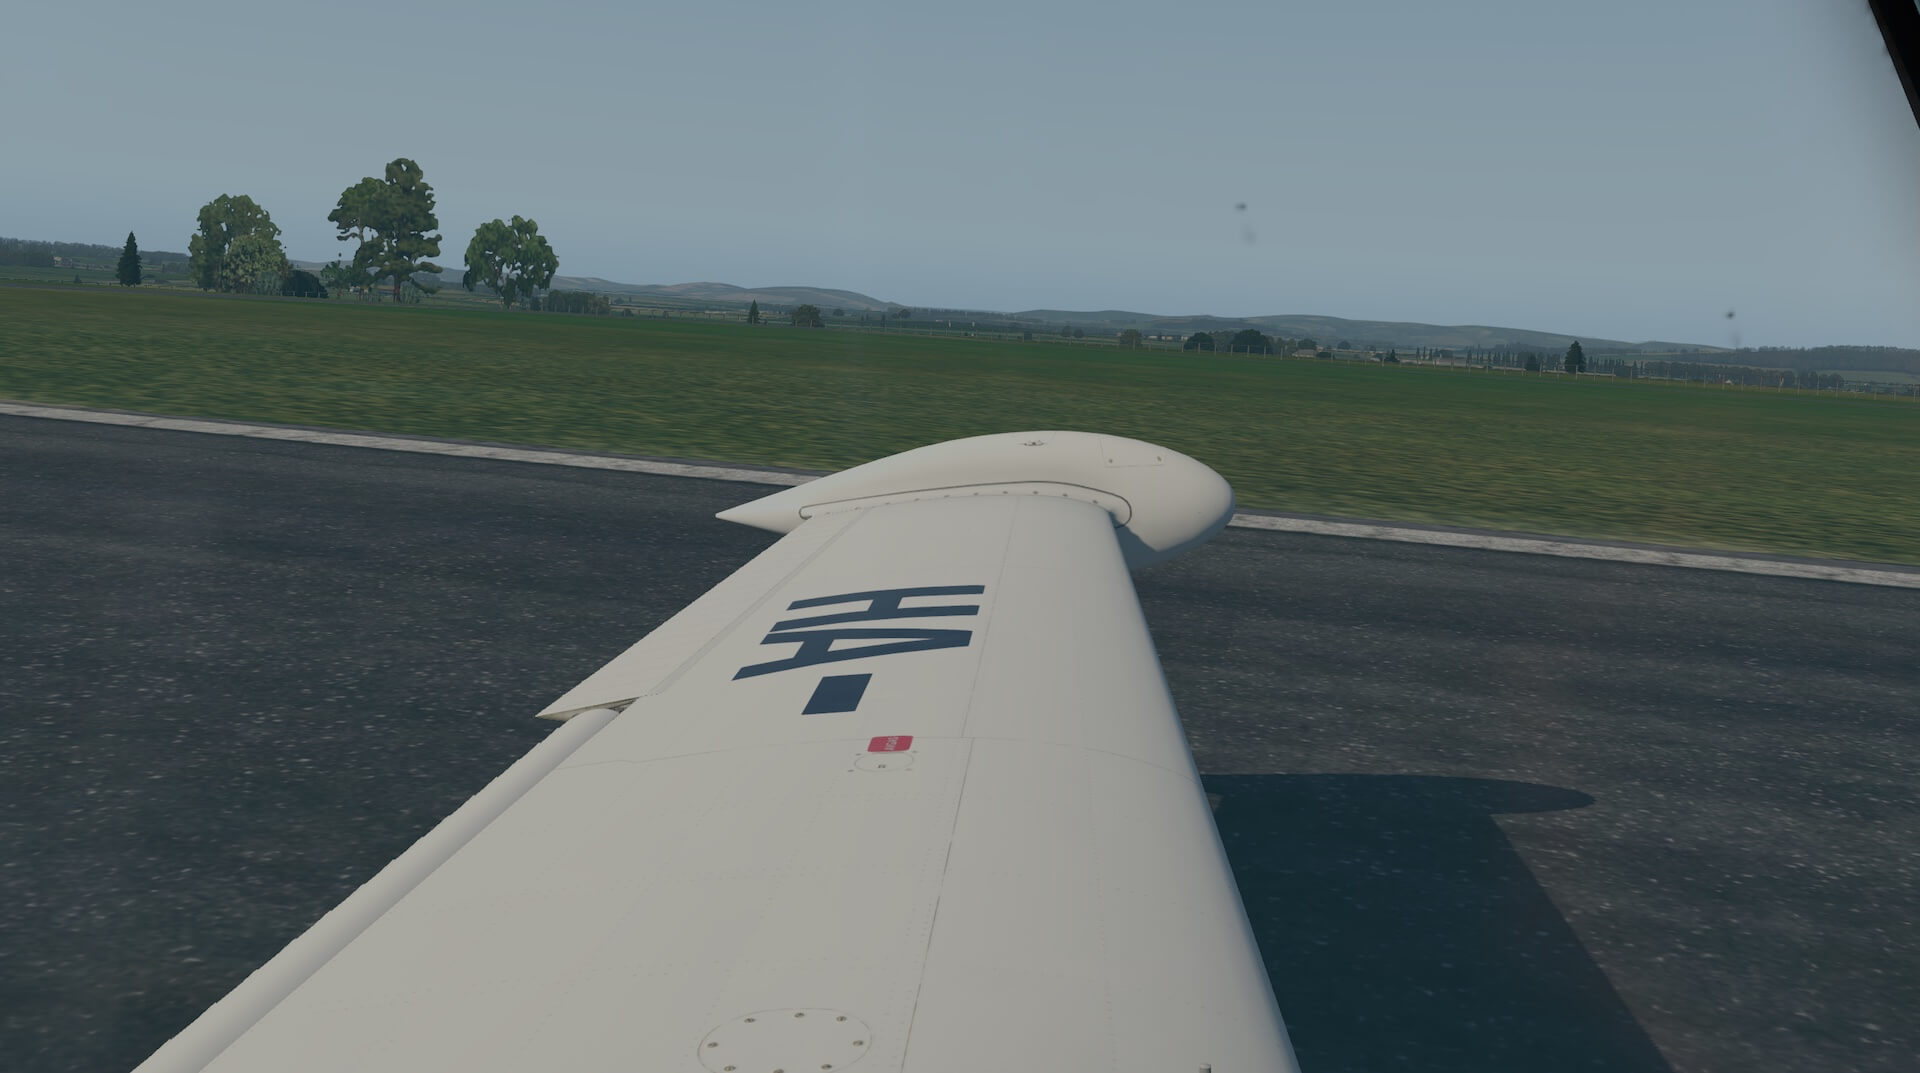
The view from the wing tip shows the light and right main fuel tank in detail and a higher view shows the detail of panels and rivets and how well the various liveries work on the model. Views from the rear right quarter show how the control surfaces look in movement and also how light, shadow and detail are modelled to high standard whatever direction they are seen from. Looking from the rear shows the twin tails, the main fuel tanks on the wing tips and the wider aspect of the passenger cabin.


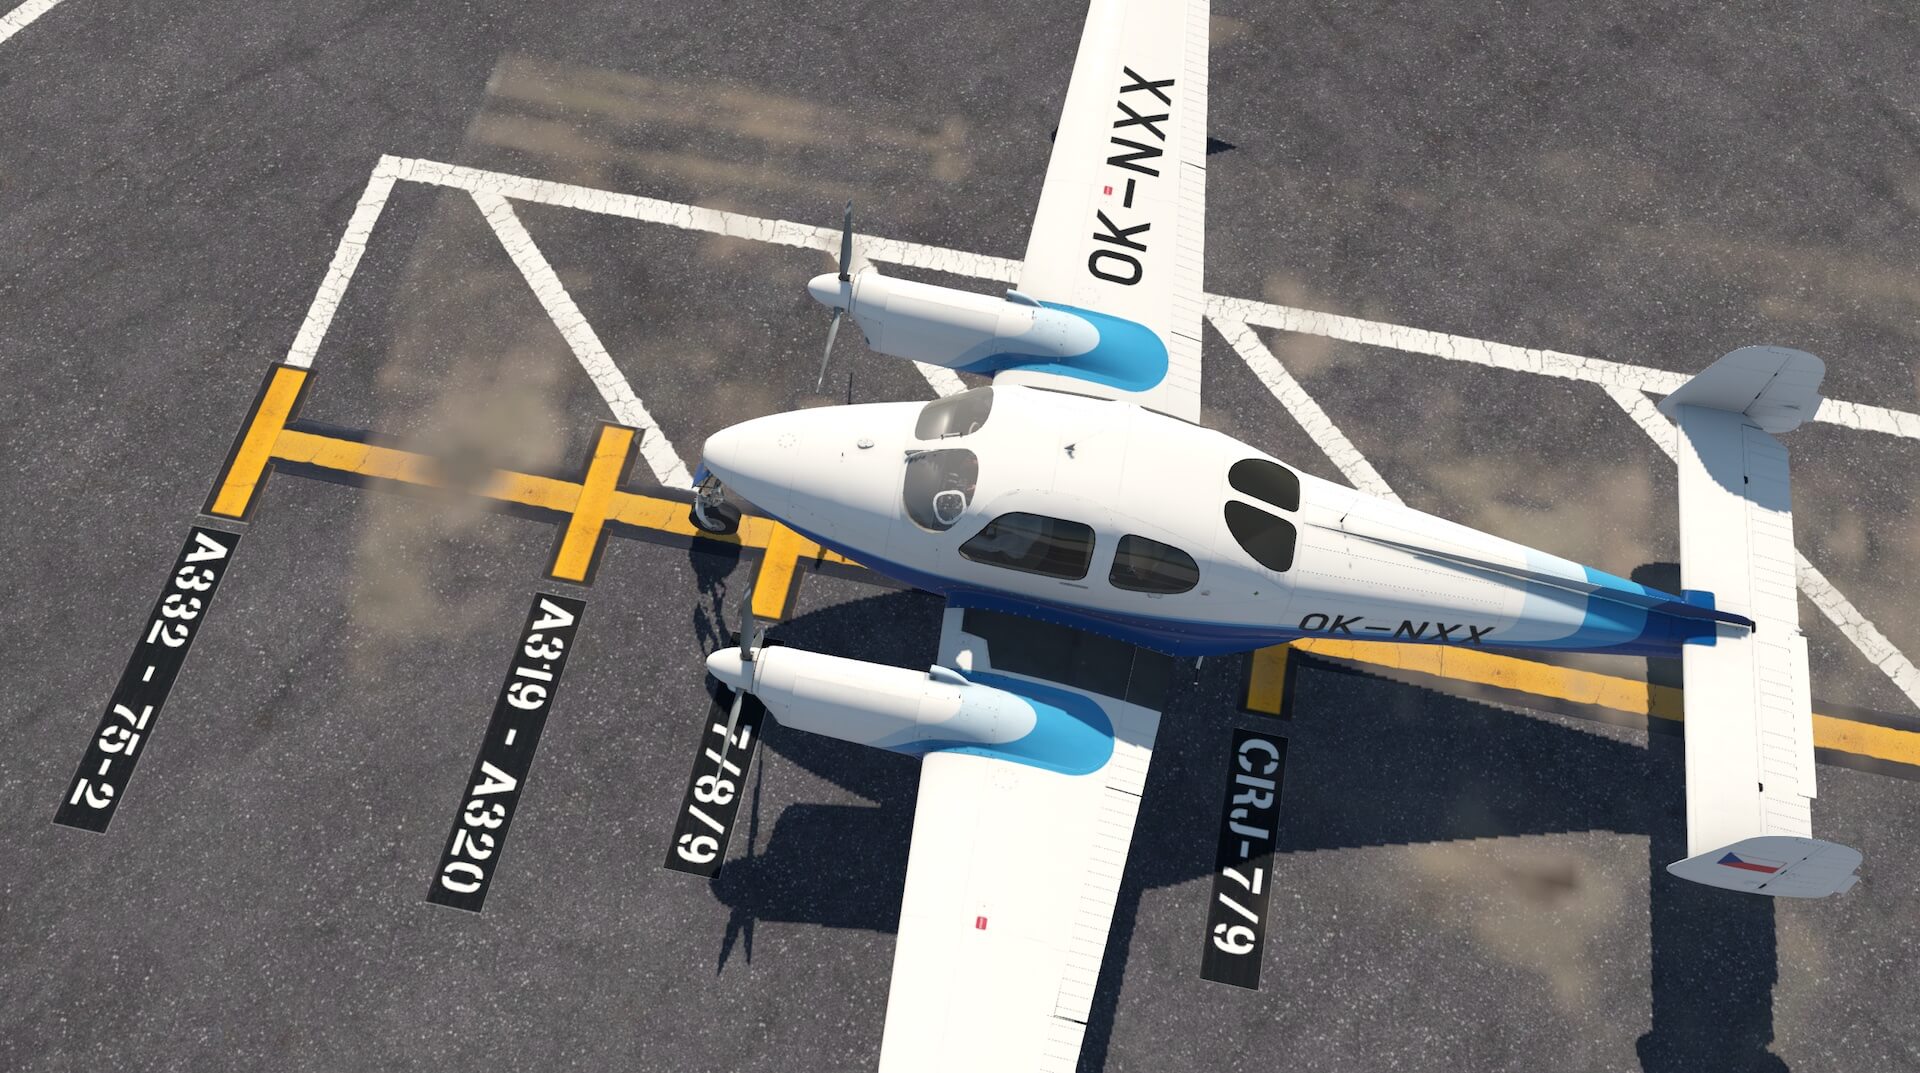
A closer view from the rear left quarter shows further panelling detail and the wear effects modelled on the livery. The clear views in to the cockpit hint at the clarity of view available to the pilot due to the considerable glass areas. The trailing edge detail is also very clear. Moving to the left wing and the signage is clear and further livery really does present the aircraft well. The aircraft sits solidly on the ground and fits well with the X-Plane scenery and surroundings. A higher view again illustrates the panel detail and how light, colour and reflections are very convincing on the model.


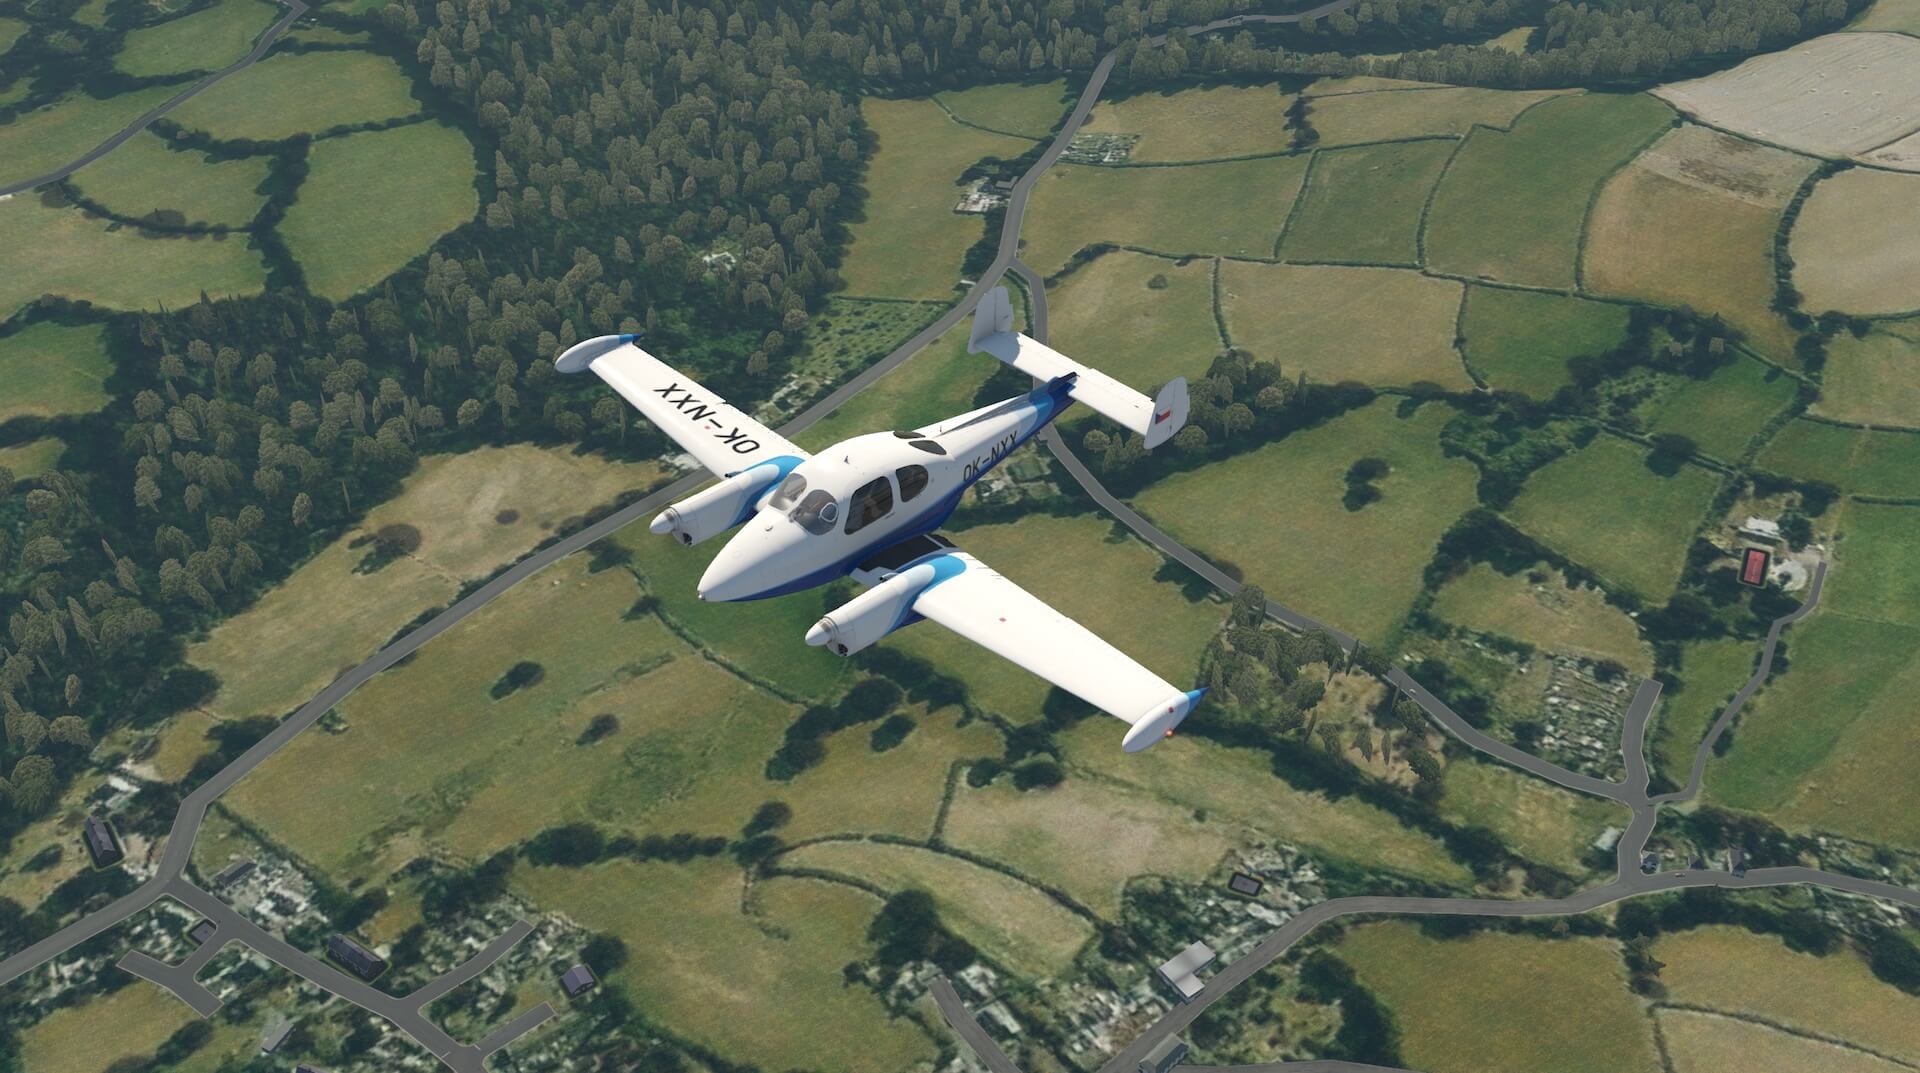
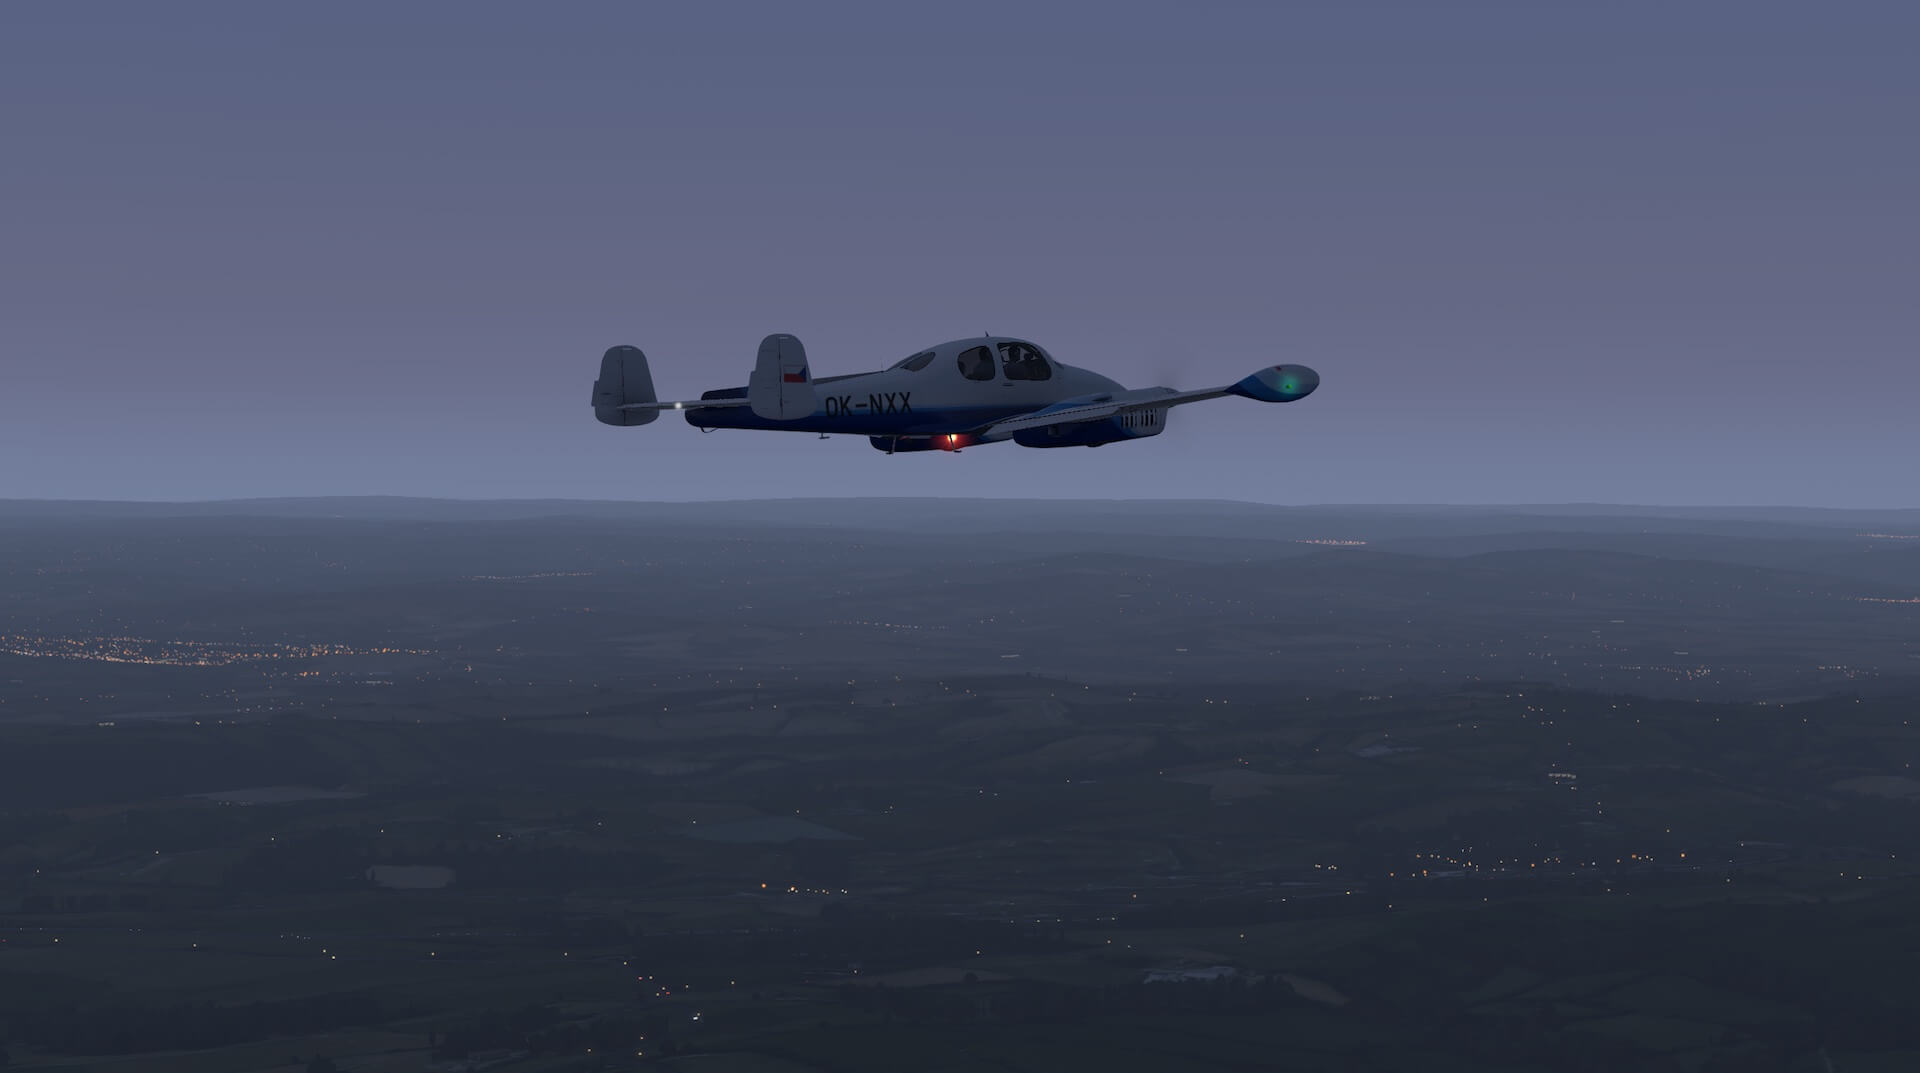
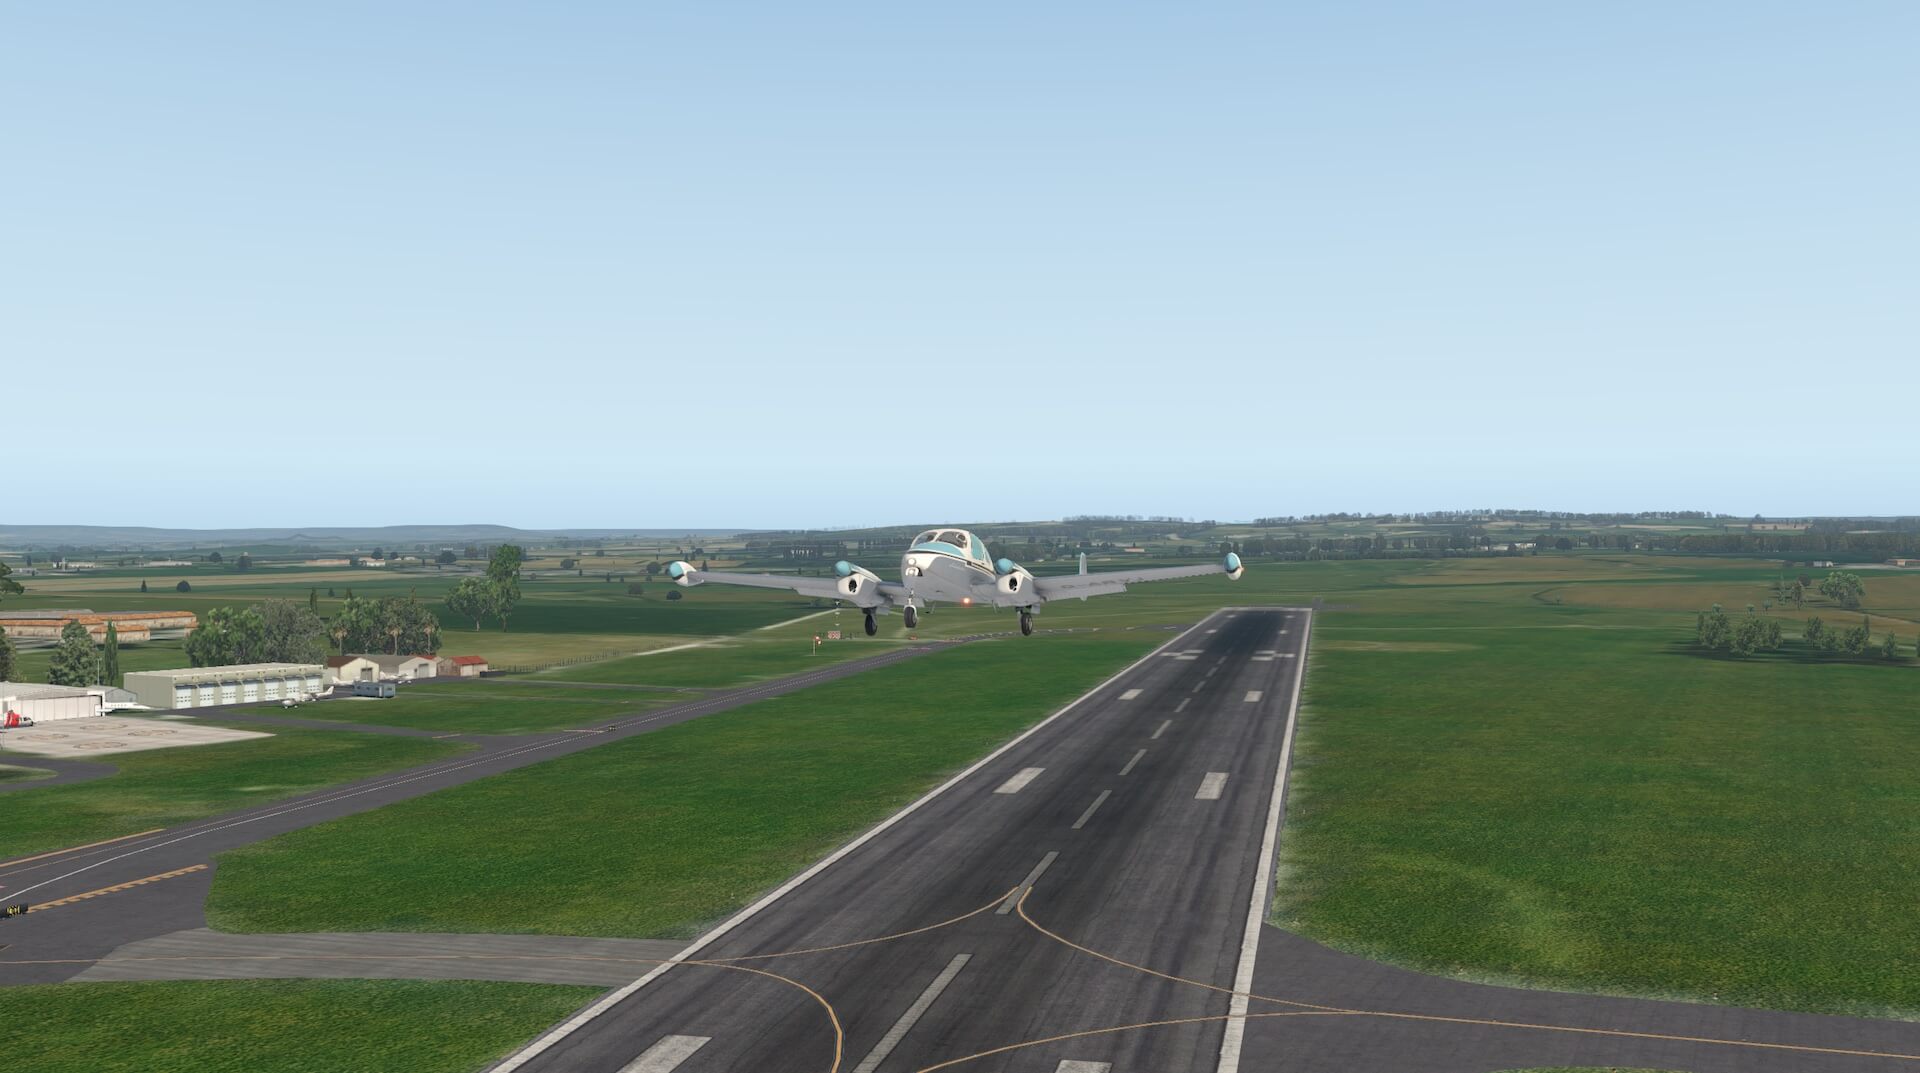
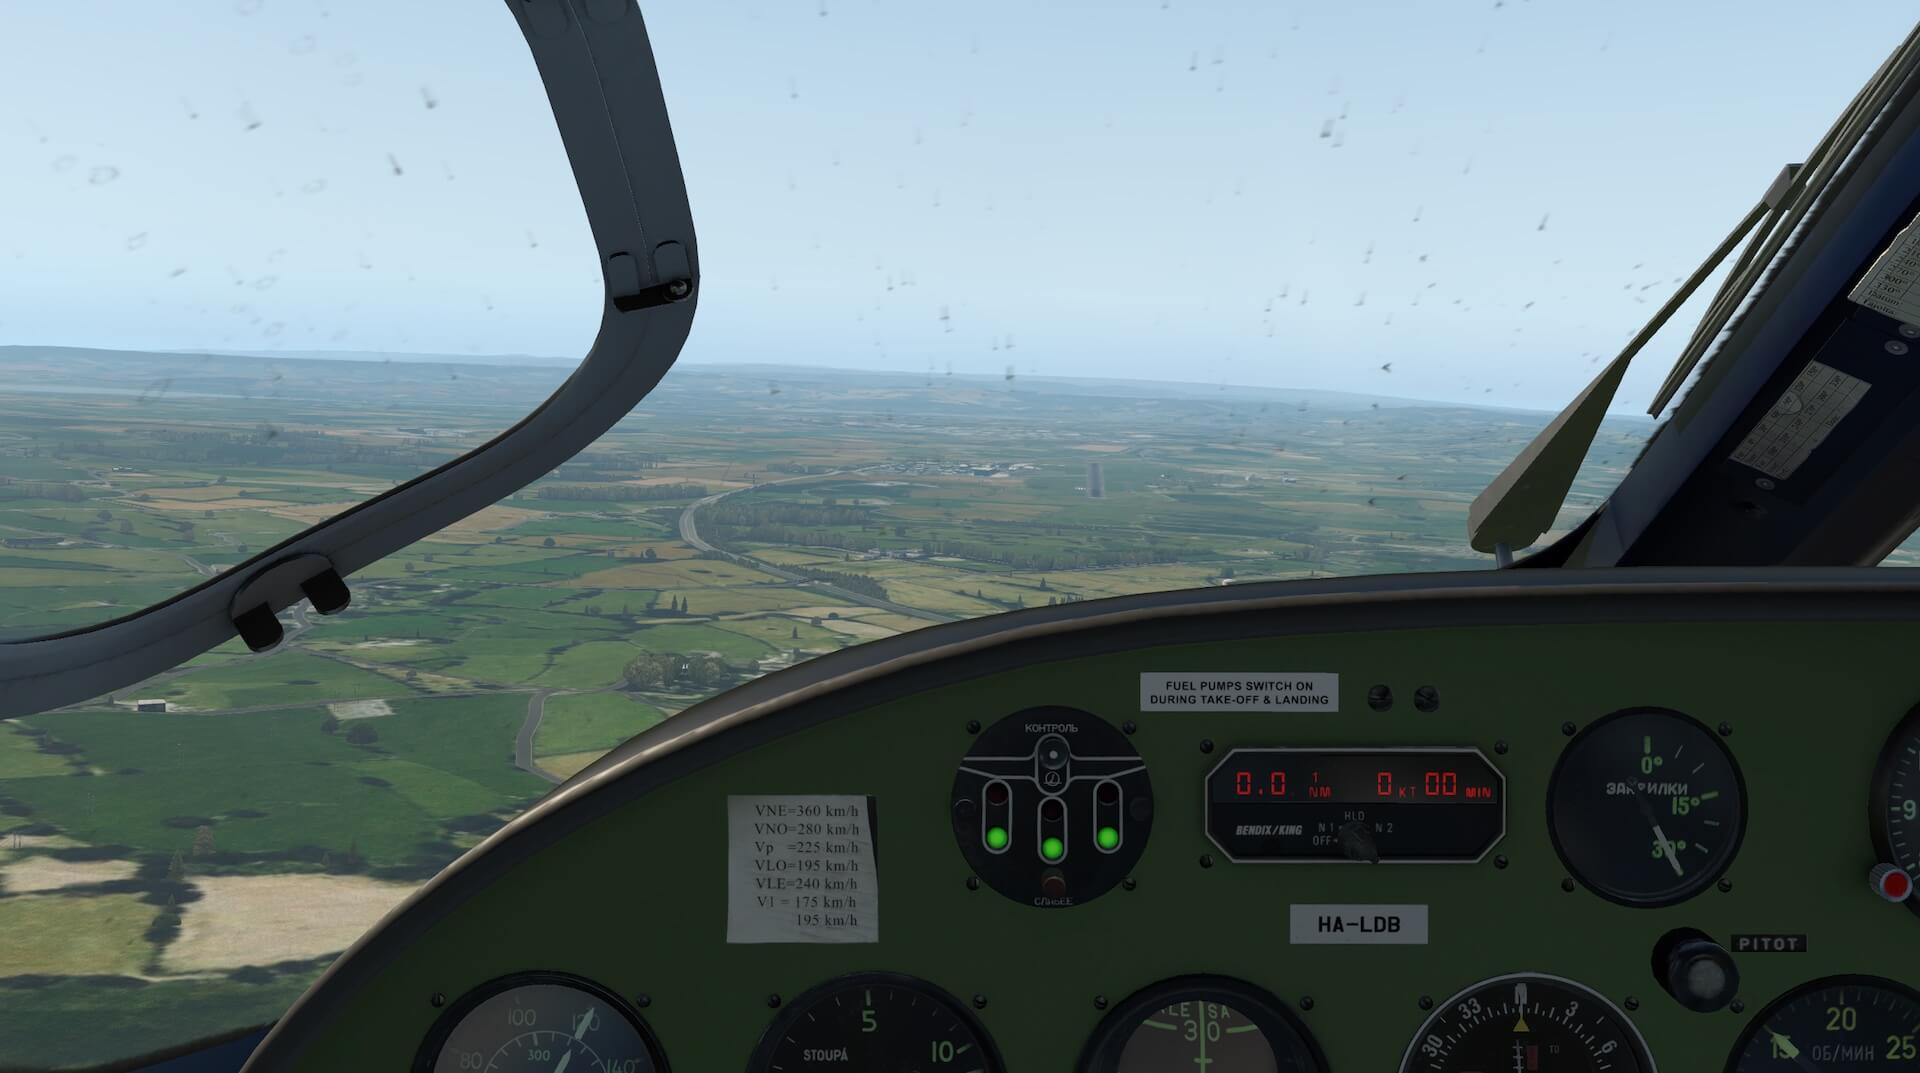
In flight the model looks exceptionally good and its smooth lines and shape are impressive. Colours, signage and the light and reflections all work very well. The aircraft works well in the X-Plane environment and blends with scenery and background. The propellor effect looks very convincing.


With undercarriage extended the detail is very clear as are the engine cooling vents. The lights are crystal clear and bright and the twin tail really adds character. In low light the model maintains its integrity and the lights look very bright.

A great model when viewed from the outside. Detail has been carefully presented and the added interactive equipment increases the enjoyment. The aircraft is authentic and realistic and looks good both on the ground and in flight. Lighting adds to the experience and the colours and reflections add value. The developers have presented a well made model with lots of character.
Interior Modelling
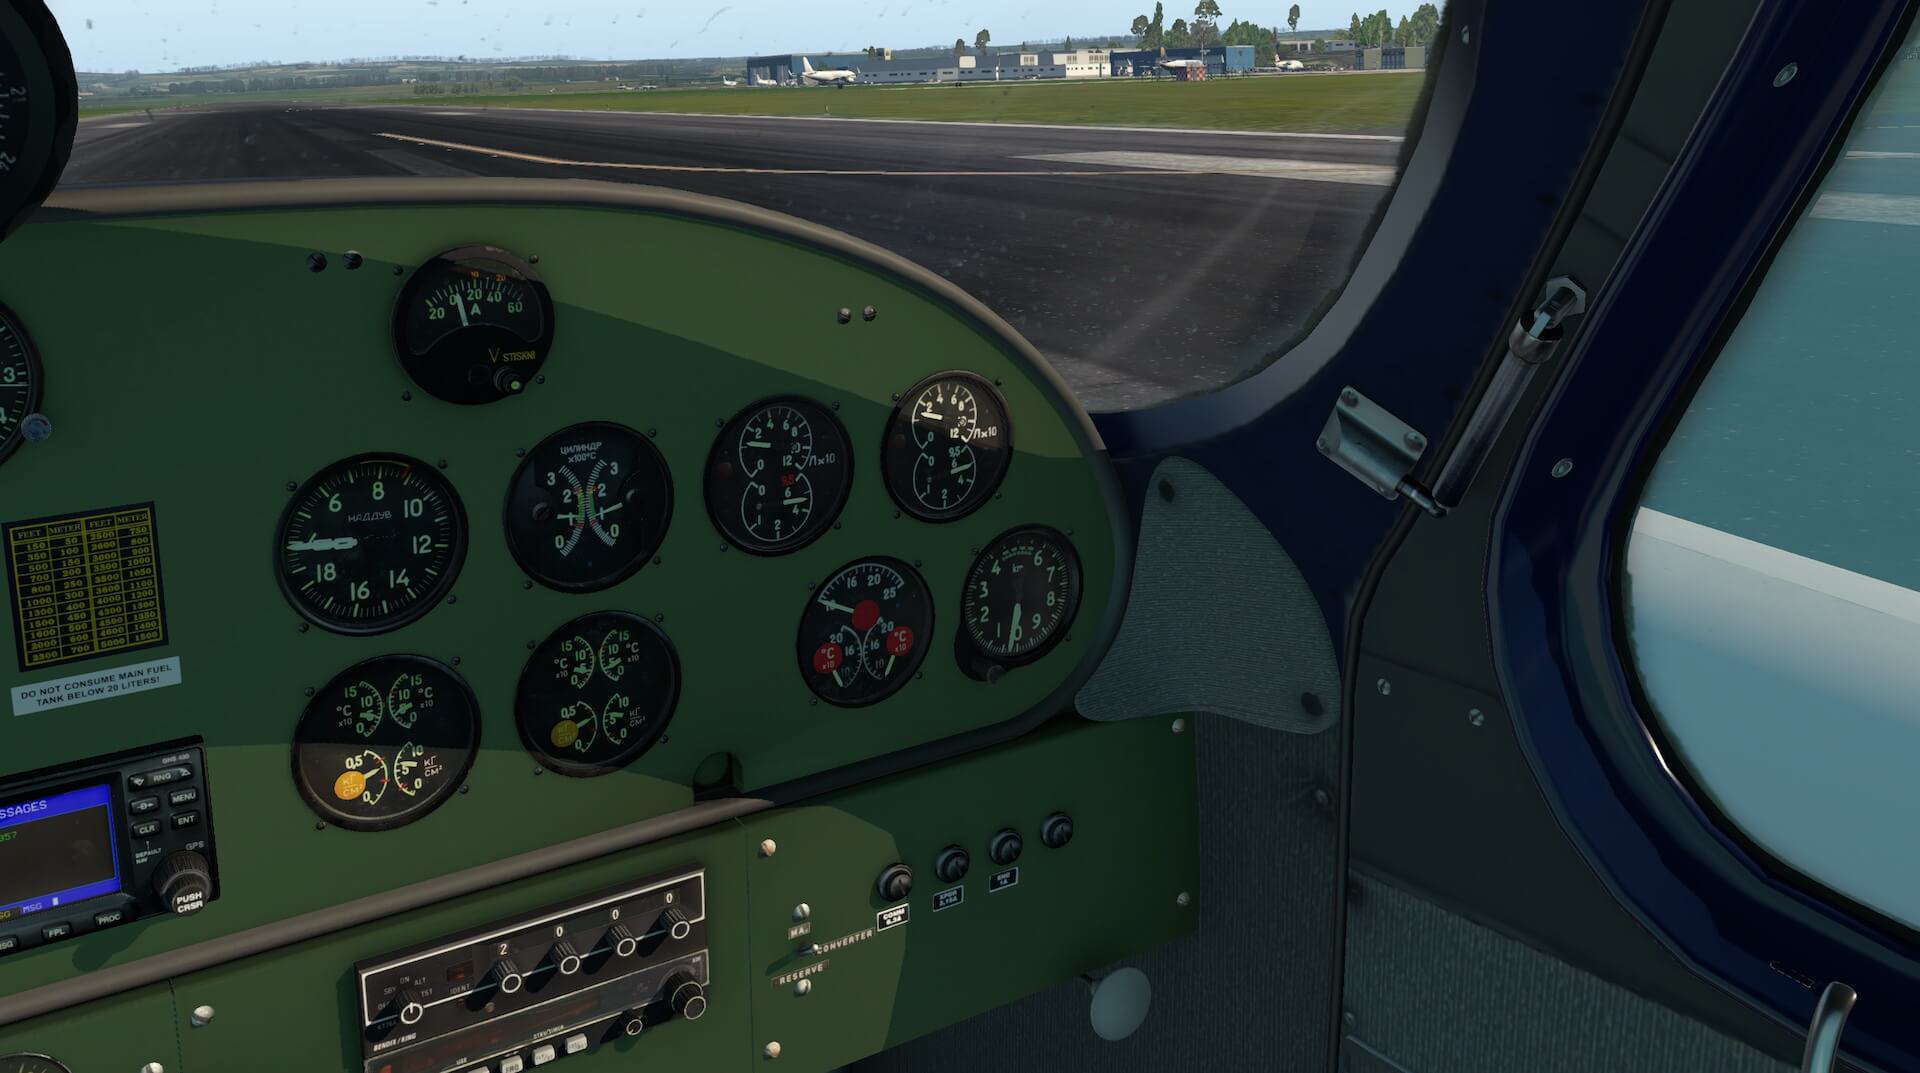
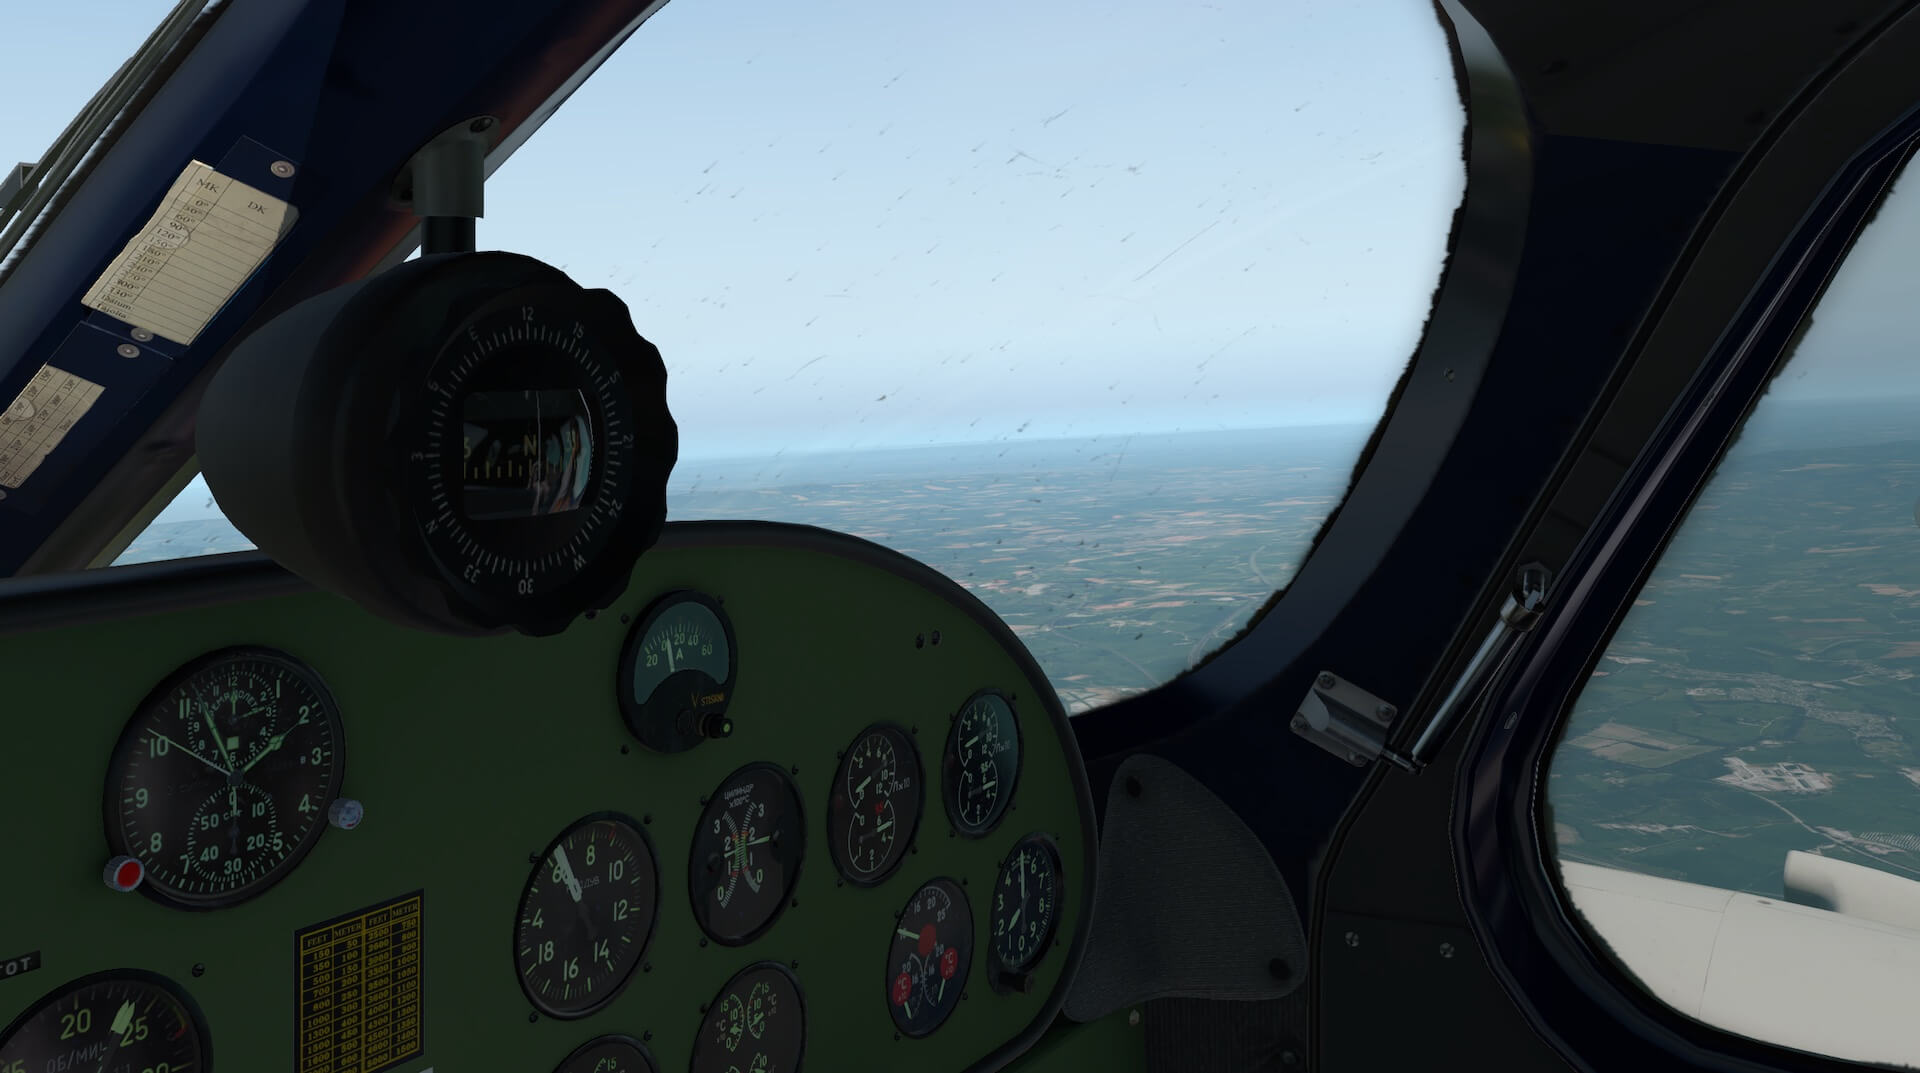
Entering the aircraft through the pilots door the modelled figures are visible and highly detailed. Weathering and wear marks are realistic and proportionate. Colours and light are clear and vivid and instrumentation appears sharp. Moving in to the pilots seat the clarity of the instrumentation is more evident.
I set the cockpit language to English, but as mentioned before it can be displayed in Czech and Hungarian, and I set the units of measurement to imperial rather than metric. The textures of the various surfaces are convincing and varied and the style of the instrumentation confirms the age of the aircraft. Looking around the cockpit the light and shadow continue to work well giving depth to the modelling.
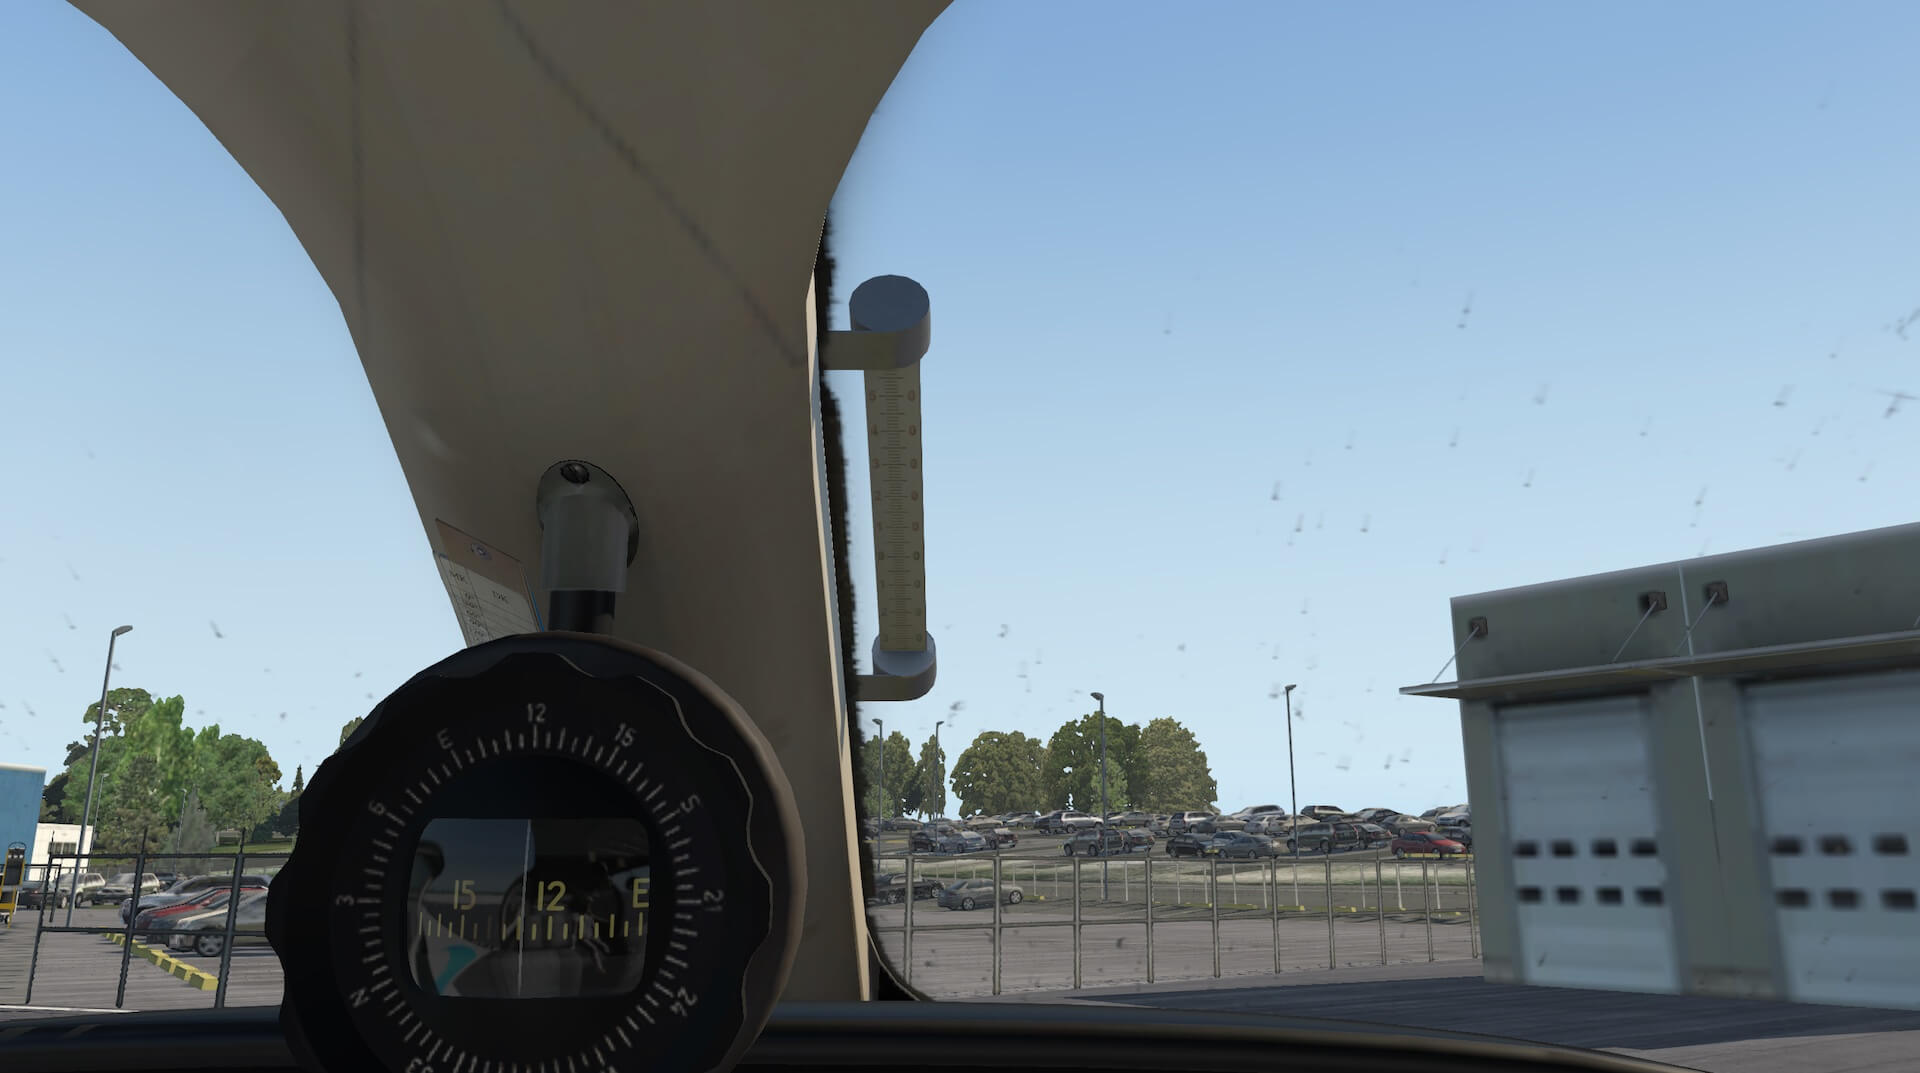
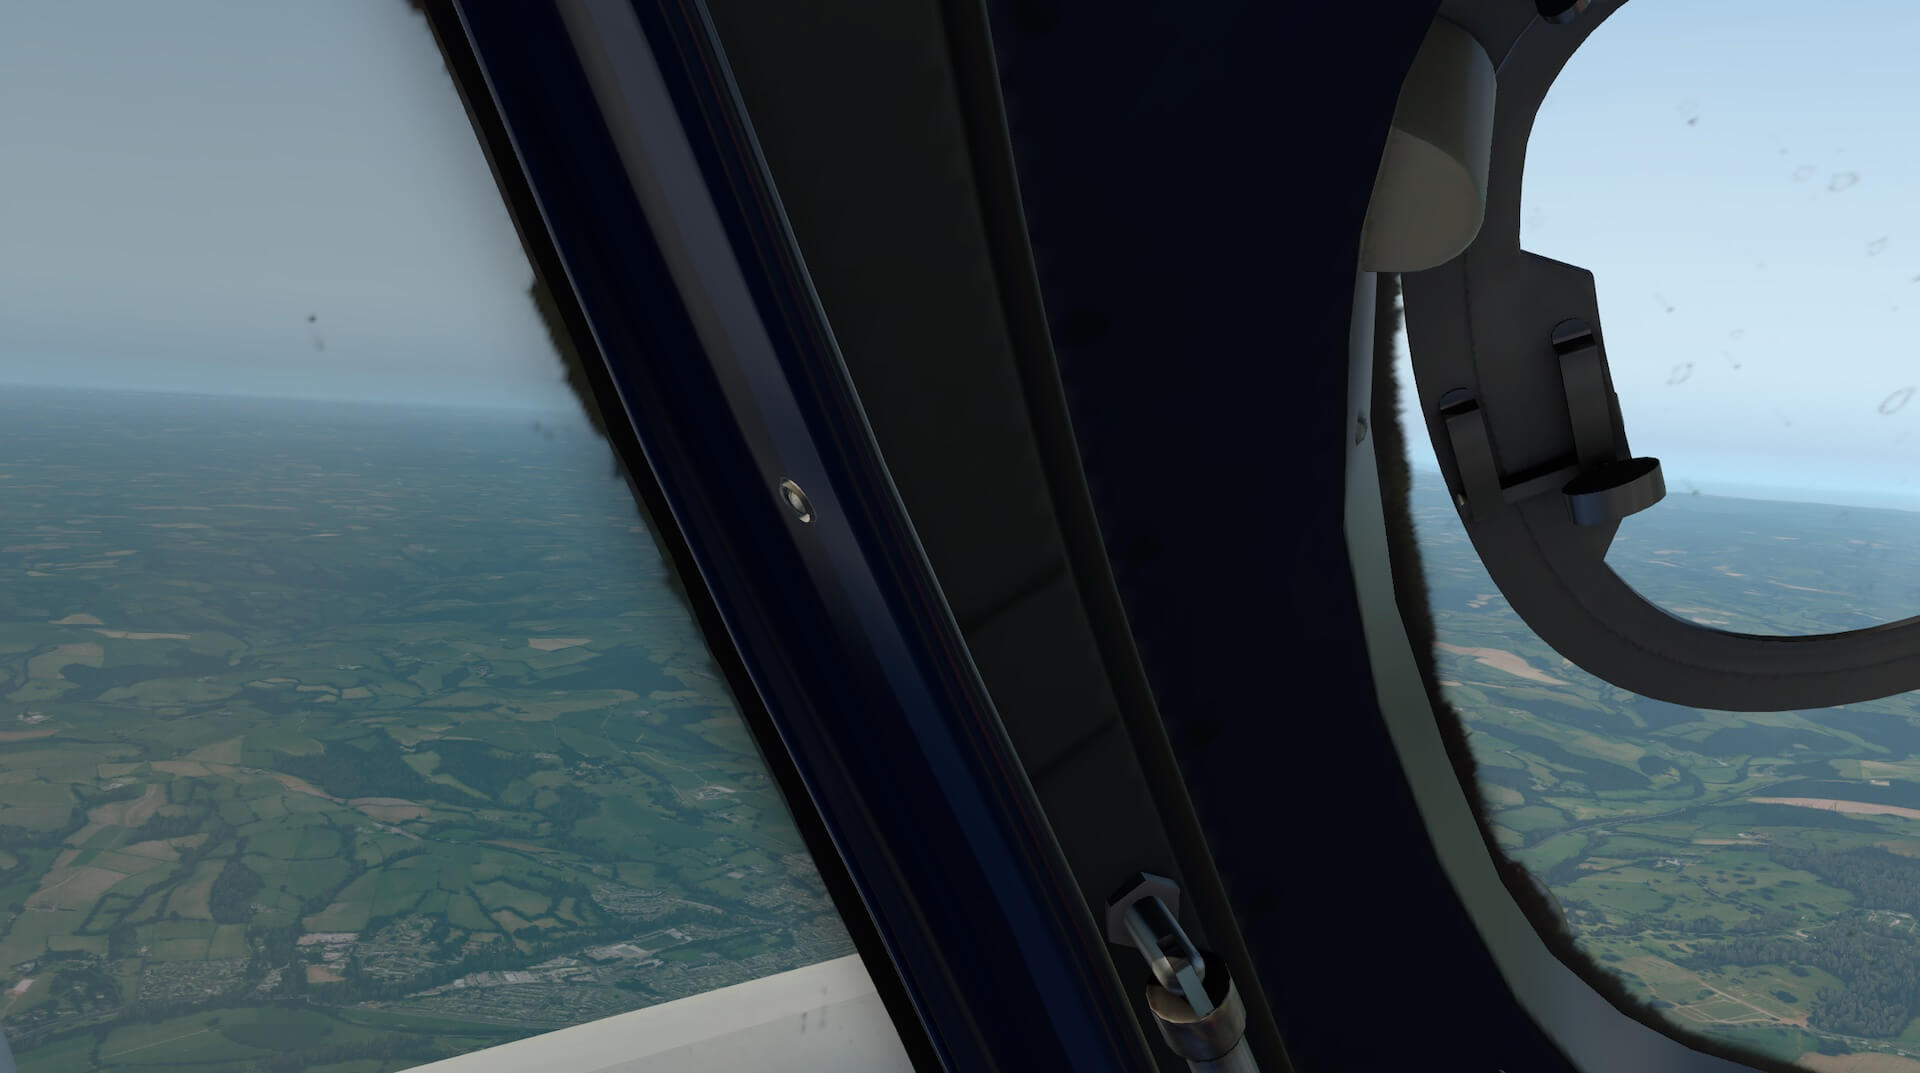
The textures within the rest of the cabin area are also well modelled and detailed. Views out of the cockpit are clear whether through the open door or through the windows which have appropriate wear and marks.


All aspects of the interior are modelled in detail including the overhead switches and pilots headphones and these all work well within the cockpit environment. With engines on the instrumentation comes to life with more bright colours and clear dials and read outs. Views out of the front of the aircraft whether on the ramp or the run way are realistic and convincing.


In low light both the instrument panel and cabin interior look very impressive and the textures and detail work well with the impressive aircraft lighting. The developers have managed to model the interior in detail and bright vivid colours whilst maintaining the character and age of the aircraft.


Sound
The model has an impressive sound package from the moment you close the door on entering the aircraft when there is a realistic and solid thump as the door is shut. Engine sound is very convincing and alters with changes of throttle settings. Raising and lowering of the undercarriage is accompanied by reassuring sounds of movement.
Ground noise is realistic during take offs and landings. Specialist sounds such moving the propellors by hand and the hydraulic system lever are very good. Switches and levers have their own appropriate sounds, making the cockpit environment more immersive.
Systems
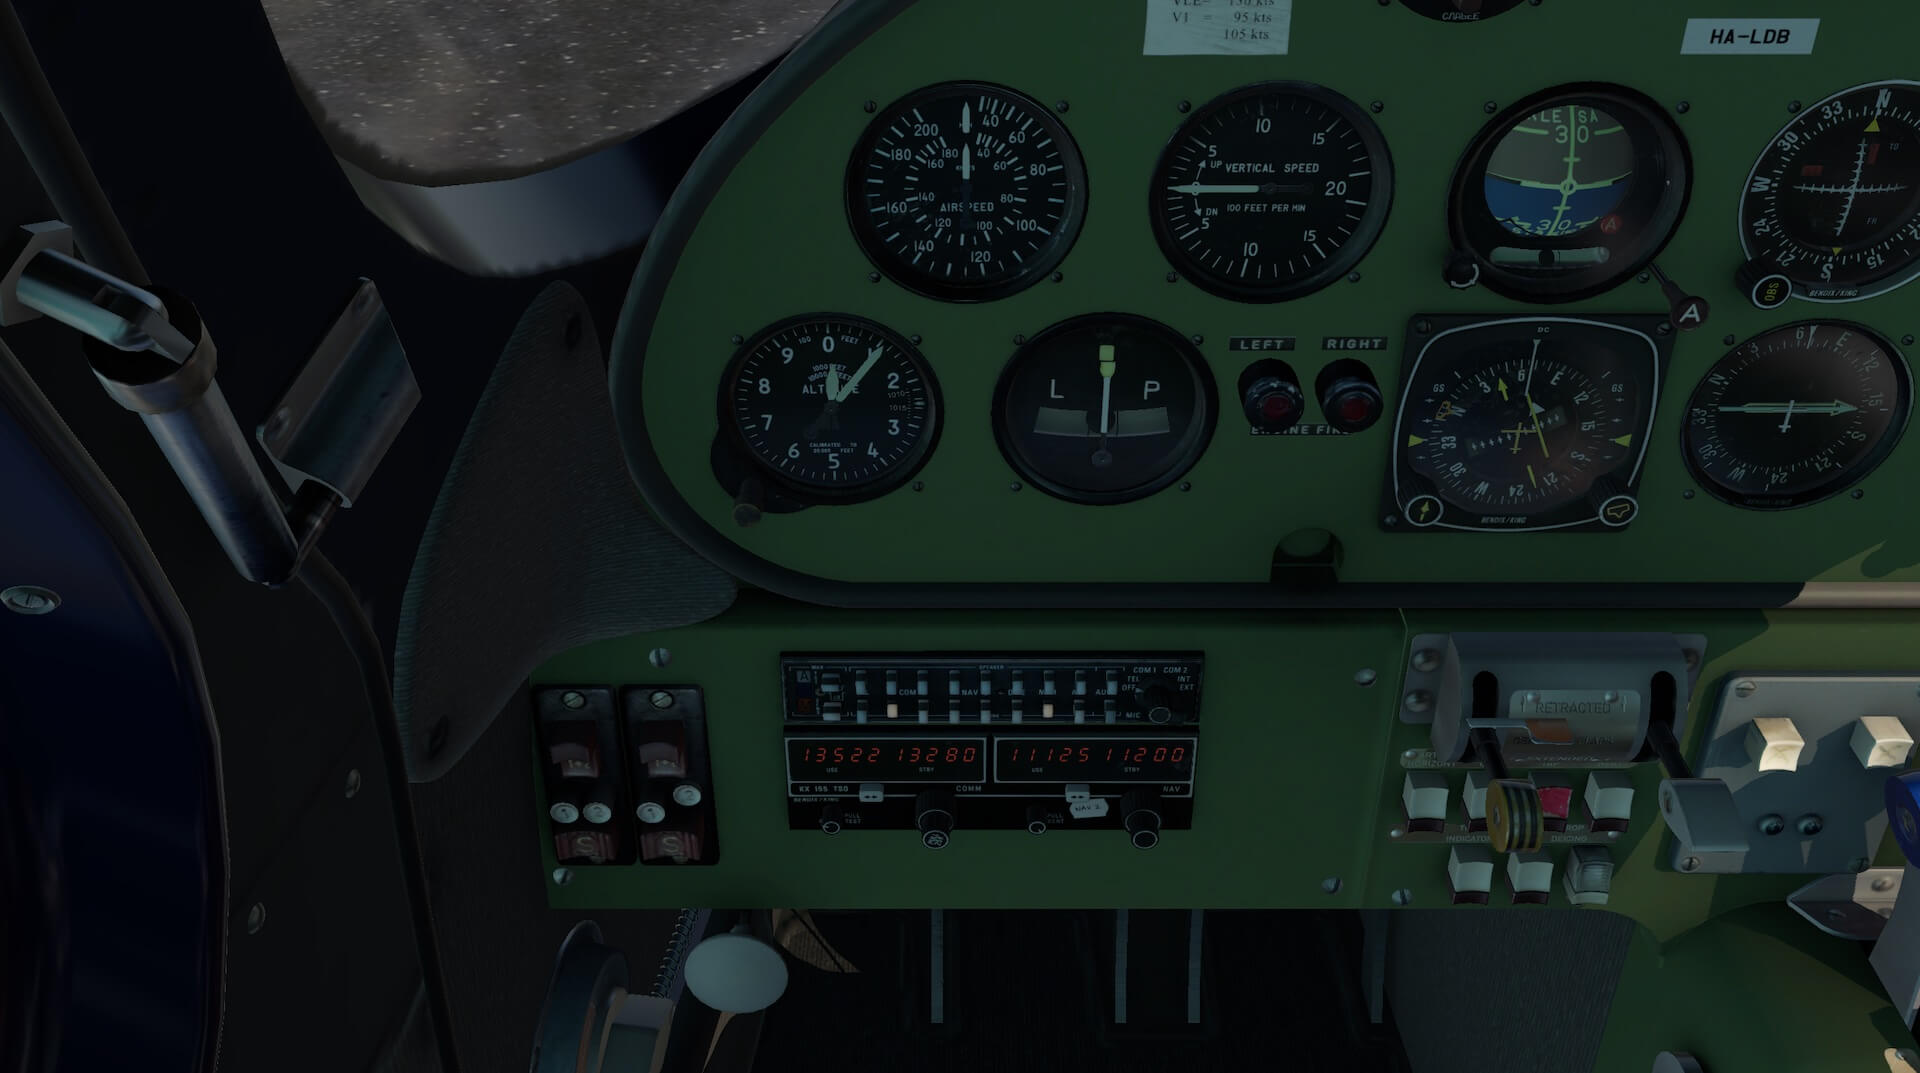
This is an older and fairly basic aircraft and this means the number of aircraft systems for the developers to model is limited. The aircraft is equipped with a Garmin GNS430 system which does help with navigation but there is no autopilot. There is an X-Plane manual for the GNS430. Most of the communication and navigation equipment is modelled on Bendix King instruments whereas most of the engine instrumentation is modelled on that produced by the Mikrotechna company from Prague and designated Lun.

The developers have created many special systems of their own to ensure the user has constant interaction with the model. These are outlined in the manual and guidance video and I will use the manual as a guide to illustrate them.
I have already mentioned the engine covers and static elements but the external realism is continued with the ability to check fuel levels manually and to turn the propellors by hand, a click on the blades, to clear oil from the engine cylinders before starting to prevent damage. I found that, logically, these activities were only functional when the aircraft engines were off. If the aircraft battery is low an external APU can be connected by opening the connector on the right engine.


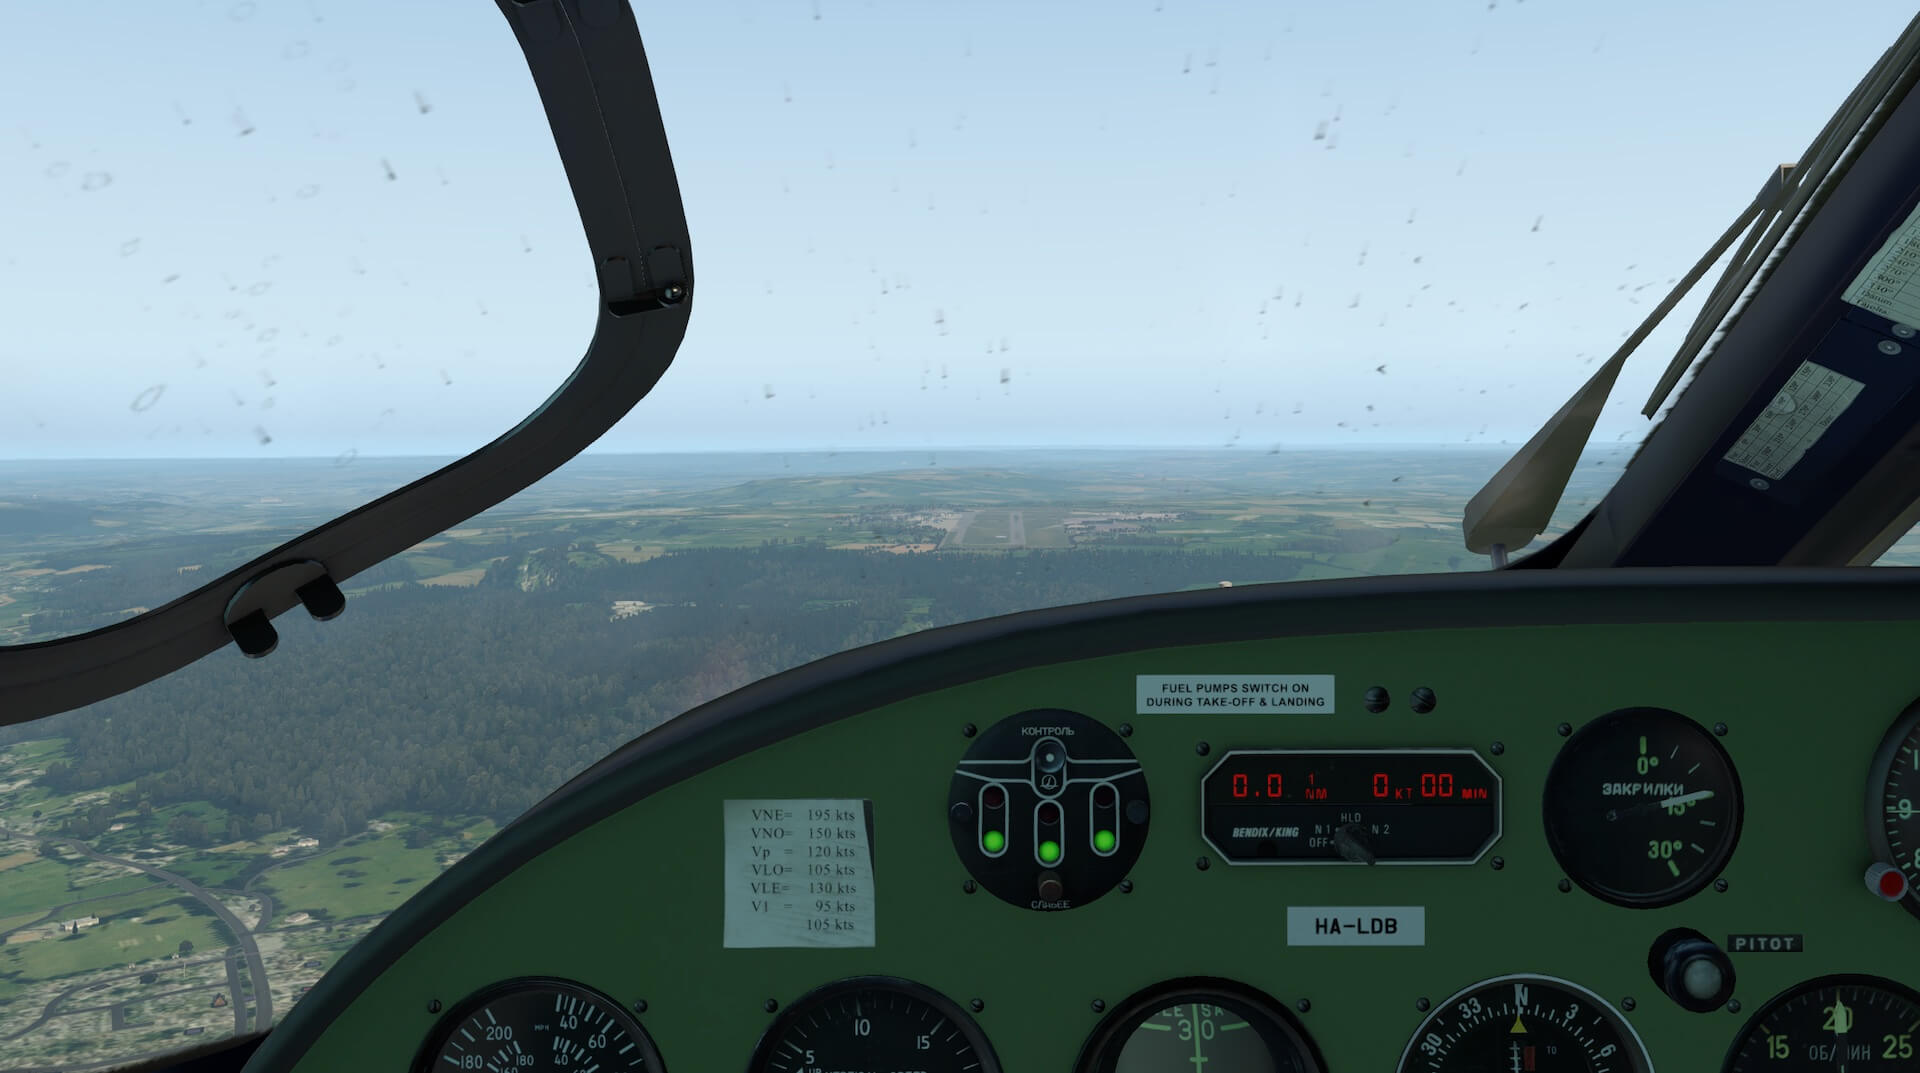
When flying between 50 and 200 metres insects and dirt appear on the leading edge air intakes and cabin front screen and these can be cleaned by way of a slider on the set up sheet.

Changing the luggage weight on the set up sheet alters the amount and type of luggage in the hold and putting on the pilots headphones creates a noise cancelling effect. The parking brake has its own system which involves setting the lever in the correct position and then pumping pressure in to the system, with a lever alongside it, then fixing the brakes in the on position with the brake lever.
I found that when loading the model with engines running it would creep forward slowly even with the throttle set to idle and the brakes toggled to on. I changed my settings to use hold brakes as opposed to toggle brakes and found that this caused the brakes to work, before I stopped all movement by moving the parking brake to the on position.


The manual also outlines the special functions of the hydraulic system, compressor lever, ignition control and prop feathering all of which are modelled to operate correctly. There are also custom commands for some of the functions peculiar to this aircraft and an explanation of specific flap and undercarriage commands so the model operates true to the original aircraft.
The developers have built several layers of interest in to the use and operation of the model to create an immersive experience for the user.
Basic Flight Experience
I initially loaded the aircraft with engines running at the end of the runway so that I could experience a straight forward flight with minimal reference to the manual or guidance video. I wanted to see what the model was like to just jump in and fly for a basic user such as myself. I added some flaps, increased the throttle and carried out a take off. After being airborne I used the X-Plane command ctrl+u to retract the undercarriage but nothing happened. The tree lights remained green and an outside inspection showed the wheels were still extended.
I tried again with the same result. I then went to raise the flaps and found the undercarriage retracted on the first press of the joystick button for flaps. The flaps retracted on a second press of the button. This is because I had the settings of the levers in the wrong place. The flaps and undercarriage both work through the hydraulic system. Both levers have retracted and extended position as well as a central, neutral position.
For either system to work the other has to be in the neutral position. Putting the lever in neutral leaves the flaps or undercarriage in the last position it was set in and does not alter it. It takes a bit of practice but the X-Plane G command moves the undercarriage lever to neutral and once flaps have been moved, one click on the button/key to move the flaps in the opposite direction moves the lever to neutral.
Both levers are in front of the pilot and are therefore easy to check. It would be helpful if this detail was included in the manual.


The aircraft responded well to control inputs and looked great in the air. Views from the cockpit were clear. The aircraft climbed quickly and did not need too much throttle to make good progress. I was able to complete a circuit and lined up with the runway. The aircraft reacted quickly as I altered the throttle settings and I carried out a successful landing.


This was a good first flight which provided several challenges and learning points, good for preparation for a more detailed flight. The aircraft handled well and was fun to fly straight out of the box. I then decided to complete a flight from cold and dark and involving some navigation between airports to try out the various aircraft systems. I intended to follow the checklists on the set up sheet and also the guidance video.
I started with the cover on and removed it by using the screw head on the pilots side window. I moved to the exterior of the aircraft. I clicked on the static elements to remove them and then on the propellor blades, as described earlier, to remove oil from the cylinders to avoid damage. I then returned to the pilots seat. I used the set up page to check the cockpit language and unit settings. I ensured I had enough fuel for the flight. I checked the switches were set to off and that the doors and windows were locked.


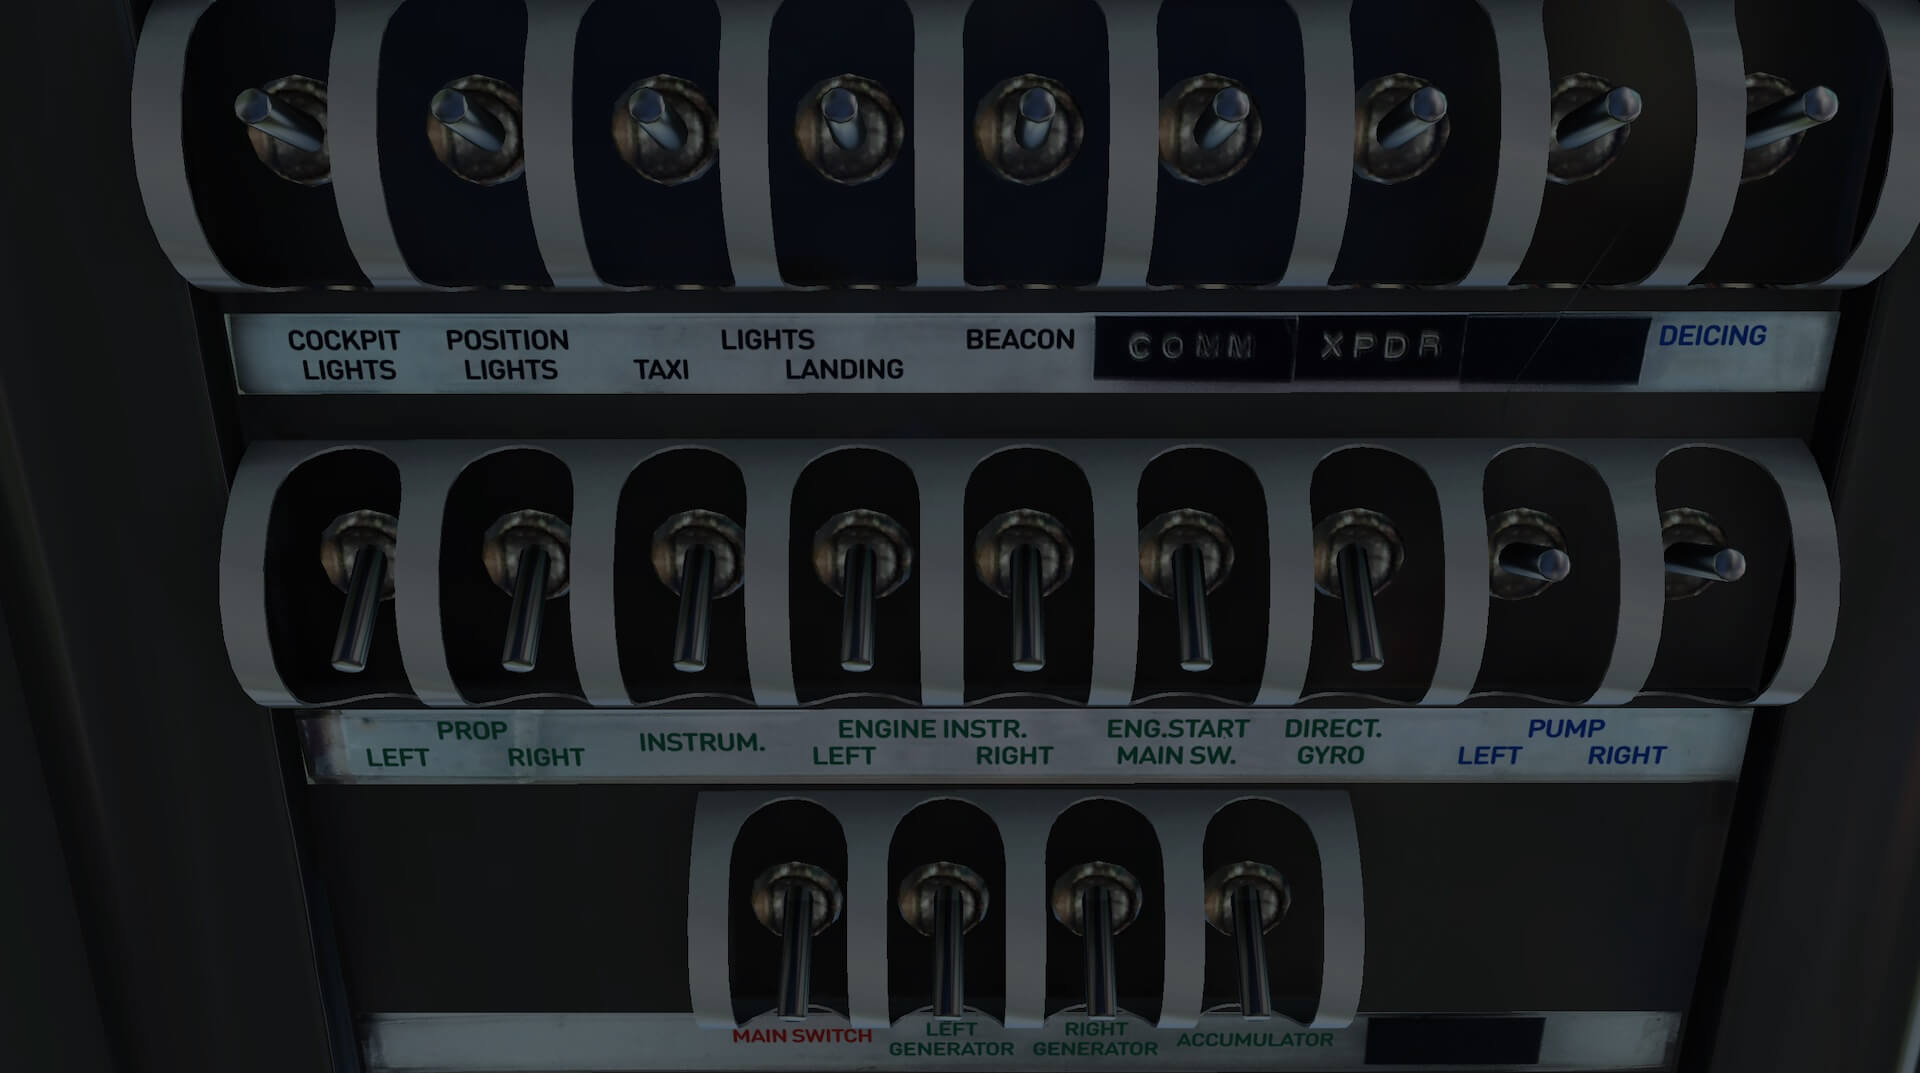
I set the handbrake and the switches that the guidance video illustrated. This meant switching on the main switch, the left and right generators, the accumulator, left and right prop, instrumentation, left and right engine instrument, engine main start and direct gyro switches. This made me realise that the manual is limited on some of these procedures and the guidance video explains much more, making the start up easier and more realistic.
It would be useful to include the full start up procedure in the manual. I set the left engine compressor lever to on. Be aware that the annotation in the cockpit diagram describes this as the supercharger lever but it is the compressor lever referred to in the checklist and video. I set the left engine fuel valve lever to main. I set the propellor pitch for both engines to minimum and the left engines mixture to lean. Back to the overhead switches I set the left engine fuel pump to on.
I then used the starter buttons for the left engine, on the panel to the front left of the pilot to start the left engine. I then turned off the left fuel pump and switched on the right. I carried out the same procedure to start the right hand engine then switched off the right fuel pump.


I closed the cooling vents on the engines to help them warm up. I then went back to the overhead switches and set the switches for the radios, transponder and lights to on then switched on the instruments themselves. I then taxied to the end of the runway where I applied the handbrake, raised the throttle to 1700RPM and ensured the engine temperature was correct for take off.
I also checked the ignition circuits on both engines using the silver buttons located with the starter switches in conjunction with the RPM indicator As the engines were up to temperature I opened the vents in the cowlings slightly.


I lowered the flaps and returned the lever to the neutral position. I turned on the landing lights and also the fuel pumps, both of which should be on for take off and landing. I then released the parking brake, applied power and took off. I retracted the flaps and raised the undercarriage then ensured I had the correct manifold pressure and engine RPM. I then switched off the fuel pumps.


I had set a course in the GPS system and used the readings to turn to the correct bearing for the first waypoint. I used the GPS rather than other instruments in order to allow me to concentrate on flying the aircraft.
The manual is right to create a reminder that the plane is not straight forward to fly as it has no autopilot so my manual flying skills were put to the test, not only in navigation but also with use of propellor pitch and fuel mixture. Views from the aircraft were very good. The aircraft responded well to all control inputs and was fun to fly. It makes good progress and is an interesting model on which to learn twin engined flight.
I used GPS to move from way point to way point and then started my approach to my destination. I extended the flaps, extended the undercarriage and moved the prop pitch levers to minimum. I ensured I had the recommended air speed. I switched on the fuel pumps and landing light. I continued my descent and made a successful landing.
The aircraft was straight forward to control during the landing procedure and as it does not have a multitude of equipment the pilot is not put under pressure by having too many things to do.


On landing I raised the flaps, turned off the fuel pumps and switched from landing light to taxi light. I taxied to the general aviation ramp, brought the aircraft to a stop and applied the parking brake. I turned off the taxi light, the GPS and communication equipment. I returned to the ignition switches to the left front of the pilot and turned them off, stopping both engines, before I set the overhead switches to off. I then positioned the engine and prop levers to their shut down position before exiting the aircraft.


This was an interesting and absorbing first full flight guided by the check list and especially the guidance video. The older, different systems take some practice but are straight forward and become habit. The model responds well and has real character both in appearance and the way the systems work. There are not too many instruments to worry about therefore making the model a good aircraft to learn on. The lack of auto pilot does not, in my view, detract from the model and causes the pilot to work on those manual flight skills and VFR navigation.
Summary
This is a well produced and presented model, created in detail and staying true to the original, both outside and inside. The developers have worked hard to ensure the systems in the model mirror the real thing and this makes it very interesting, although a little more detail about them in the manual may be beneficial.
The set up page is a great extra allowing the user to add variation to settings and flights. Given its realistic lack of complicated systems it is a great model on which to learn and practice twin engined flight. An aircraft modelled correctly for its age and maintaining a considerable amount of character, giving the user a very enjoyable experience once its slightly quirky systems have been learned.
More information can bev found at the dedicated X-Plane.Org webpage (https://store.x-plane.org/Let-L-200D-Morava_p_1461.html). As of this writing, October 14th 2021, the package cost 25.99 USD.
Feel free to contact me if you’ve got additional questions related to this impression. You can reach me via email Angelique.van.Campen@gmail.com or to Angelique@X-Plained.com.
With Greetings,
Andy Clarke
| Add-on: | Payware Let-L-200D-Morava |
|---|---|
| Publisher | Developer: | X-Plane.Org | Pannon Wings Design Team / NH Adrian |
| Description: | Accurate reproduction of the Let L-200D Morava version 1.3 |
| Software Source / Size: | Download / Approximately 2.62GB (unzipped) |
| Reviewed by: | Andy Clarke |
| Published: | October 14th 2021 |
| Hardware specifications: | - iMac Intel i5 27" - 3.5 GHz Intel Core i5 - AMD Radeon R9 M290X 2048 MB - 16 GB 1600 MHz DDR3 RAM - Logitech Force 3D Pro |
| Software specifications: | - macOS Big Sur 11.x - X-Plane 11.5x (64 Bit) Private Use - A variety of freeware and payware airports |
0 Comments