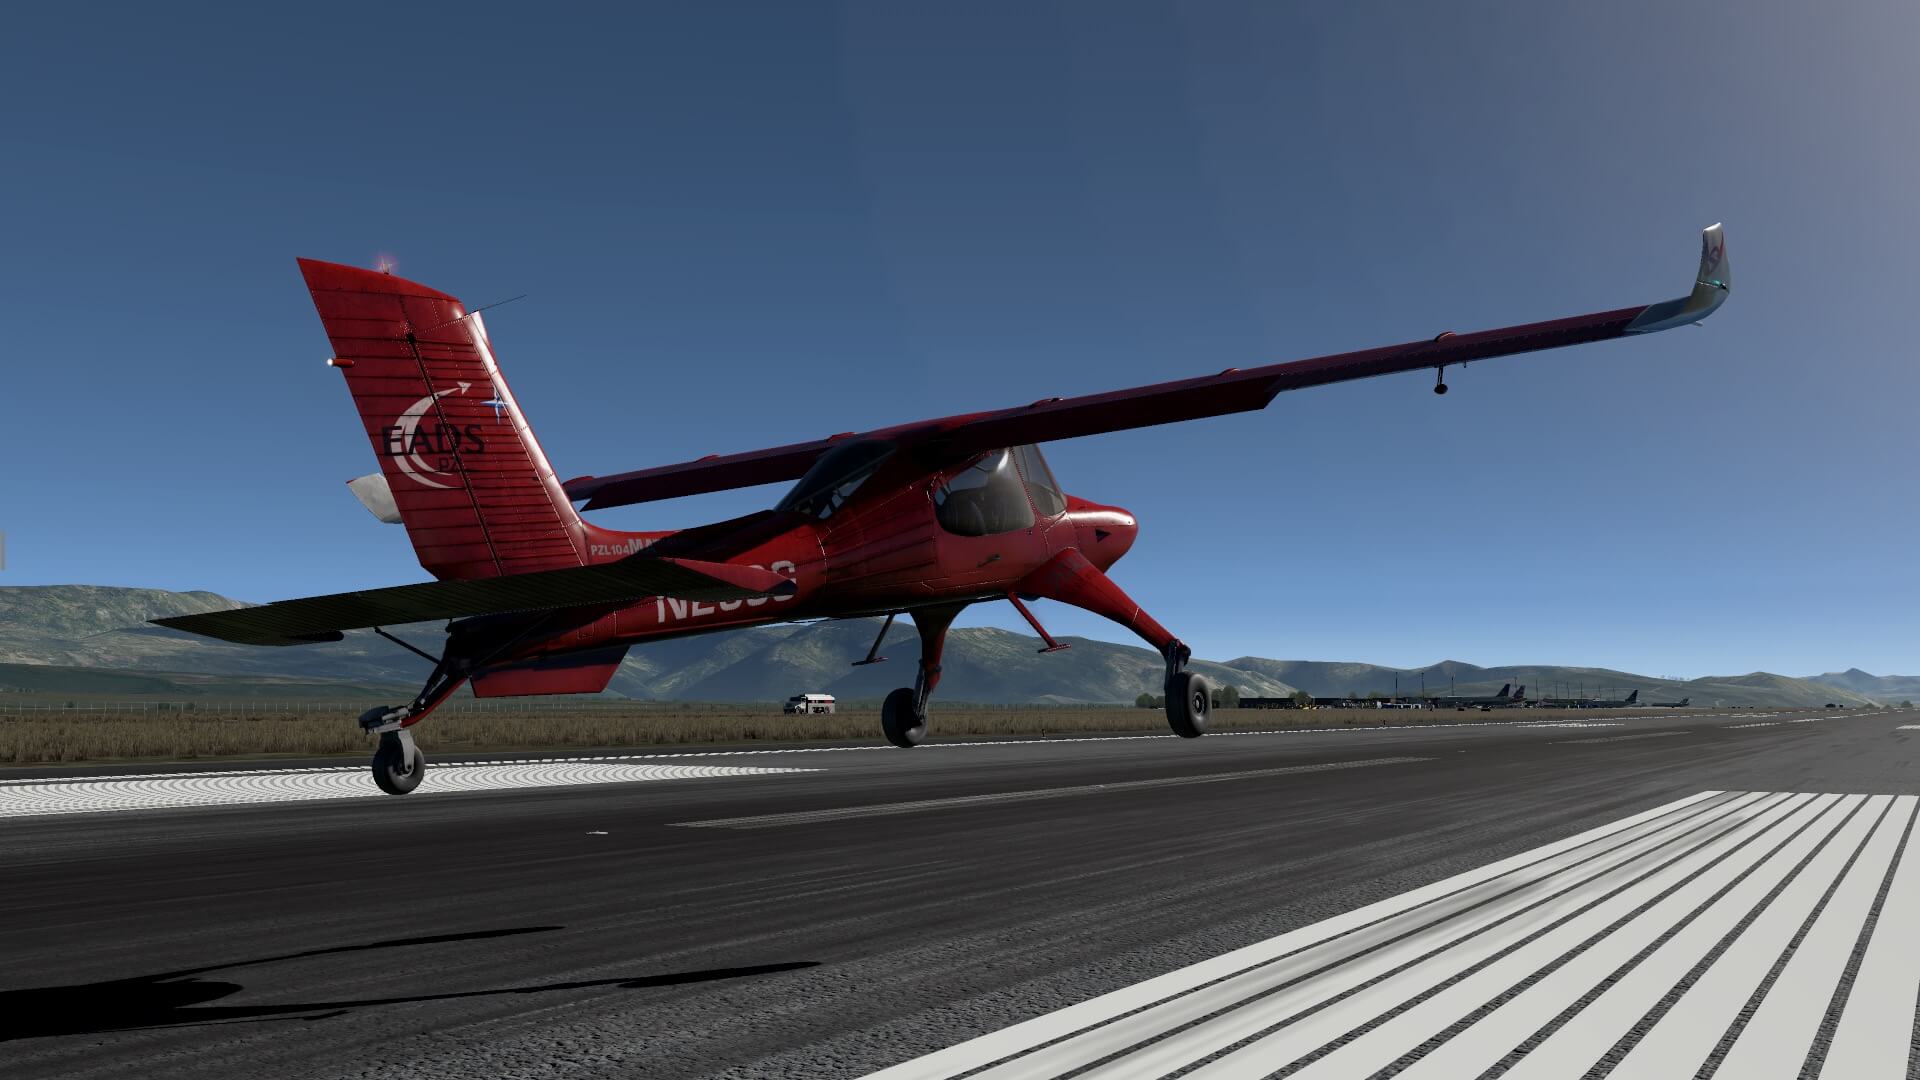
Thranda’s Golden Oriole PZL-104MA 2000
Introduction
Your personal reporter Angelique van Campen is pleased to review this extraordinary original Polish STOL aircraft. She has seen many aircraft models in her aviation period, but this Wilga is weird, very weird. But the way it is crafted by Thranda Design is worth the review, worth Angelique’s her time and effort since it looks so nice, or perhaps she should say “cute”.
First a bit of history, right?
PZL-104 Wilga or also known as golden oriole is a Polish short-takeoff-and-landing (STOL) civil aviation utility aircraft designed and originally manufactured by PZL Warszawa-Okęcie, and later by European Aeronautic Defence and Space Company (EADS), who had acquired the original manufacturer during 2001.
First flown on 24 April 1962 and entering service during the following year, the Wilga has evolved through many ever-improving versions during its continuous production from 1962 to 2006. The type was largely used by civil operators; those military air services that did fly the type typically used it as a trainer and liaison aircraft. In excess of 1,000 aircraft were produced prior to EADS announced on their website that production of the Wilga would cease in 2006.
The PZL-104 Wilga is a high-wing cantilever short-takeoff-and-landing (STOL) monoplane utility aircraft, featuring all-aluminum construction and a conventional layout. The main cabin is constructed of duralumin, both riveted and corrugated, which reportedly increases the strength and durability of the aircraft’s low-mass semi-monocoque fuselage. The rectangular single-spar wing is fitted with slotted flaps and anti-stall slats.
The four-seat cabin is fitted with two large side doors, opening upwards to facilitate large loads, and rapid entry/exit. The main wheels of the landing gear are attached to an articulated, conventional fixed undercarriage, complete with pneumatic shock absorbers and paired with a heavy-duty sprung tail wheel, which was attached to a hook for towing gliders
Early Wilga’s were typically powered by the Russian-designed Ivchenko AI-14R radial engine, which was capable of generating up to 260 hp (190 kW); notably, the engine rotates in the opposite direction to North American standards. The Al-14R would normally drive a two-bladed composite wooden propeller, which was strengthened with bonded metal sections fitted along their leading edges.
The newest models of the Wilga have been furnished with fully metal propellers and are powered by the North American Continental O-470 engine, which rotate in the opposite direction to the earlier Russian engine. Other engines from other manufacturers have also been adapted to power the type. Regardless of the engine fitted, fuel is primarily housed within a pair of 195 L (43 imp gal; 52US gal) fuel tanks, which were located within the aircraft’s wings. The Wilga had different variations, starting with the Wilga 2 and ending with the latest PZL-104MA 2000 Wilga. This Wilga type is the one that is modeled by Thranda.
Want to know more about this weird and at the same time cute looking aircraft? Then check out this dedicate Wikipedia web page.
Installation and Documentation
I could add this section also at the end, but the documentation offers some interesting features that has to be discussed before I start doing my walk-around check and flights, but first the installation.
Downloading the Thranda PZL-104MA 2000 Wilga version 1.1 is done via your X-Plane.Org account. You unzip the package and install is in either your X-Plane Aircraft folder or when you own more Thranda models then probably you’ve created a sub Aircraft folder named Thranda or something like that. In this case, copy and paste the unzipped PZL-104MA 2000 Wilga folder into the Thranda folder. As applicable to all other Thranda aircraft; the Wilga comes also with a skunkcrafts_updater configuration file.
When you’re new to the Skunkcrafts updater, together with this Skunkcrafts plugin you keep your Wilga up-to-date. Read the instruction in the Skunkcrafts updater package how to install the plugin and how the plugin can check at startup for changes or how to do it manually once X-Plane 11 is up and running. Just to clarify this; due to the Skunkcrafts updater there’s not really a need to download the Wilga again and again from X-Plane.Org.
Upon loading the Wilga, you need to enter a serial number which is needed to activate the Thranda Wilga. The serial number is added to your X-Plane.Org dedicated Thranda PZL-104MA 2000 Wilga account.
I could make it myself easy to keep the documentation paragraph short, but that’s not me since the Thranda Wilga-PZL-104 Documentation Acrobat manuals offer lots of interesting info. The Wilga package comes with a DOCUMENTATION folder that has the following files/manuals in it:
- Changelog text file
- Acrobat Thranda Wilga PZL-104 Joystick Settings document
- Acrobat Thranda Wilga PZL-104 Graphics Settings XP11 document
- Acrobat Thranda Wilga-PZL-104 Documentation document
- Acrobat X-Plane G430 Manual document
- Acrobat X-Plane G530 Manual document
The changelog, joystick- and graphics settings documents speak for themselves. Remember that in particular applicable for the graphics settings or X-Plane Rendering Settings, that this depends on your PC or iMac or Mac Pro. It’s an advice to set the sliders as in the Acrobat file, but when your PC or Mac can’t handle it, then set the sliders to a lower value or visa versa.
The last two documents in the above listing – X-Plane G430 and G530 – are not from Thranda, but made by Laminar Research. As with other Thranda models, you can install either Garmin unit so either the GNS 430 or 530 or both. That’s up to you although the real Wilga didn’t had it, but due to world wide aviation regulations it could be that a country requests you to have a navigation device on-board.
Yes yes, I know, I skipped one document namely Thranda Wilga-PZL-104 Documentation. It all turns around this manual, in particular when you’re new to Thranda aircraft since these aircraft come with a lot of fine and nice features, but first a quick look in the manual.
The Acrobat document is 66 pages thick and starts with a table of contents. The manual is basically divided into the following sections:
- Aircraft introduction
- Thranda pop-up menu with the different tabs (Thranda called this “pages”) including a seaplane version
- Aircraft System description and operation
- Flying the Wilga
- Performance charts
- Checklists
- Emergency procedures
There’s no tutorial document or section included that could be used as a tutorial. Hold on, a combination of using the “Checklists” and “Operations – Flying the Wilga” manual sections can be seen as a tutorial. I can tell you based on my own experience, using the checklist pages works in combination with how to fly the Wilga.
Back to the document.
Besides these “Checklists” and “Operations – Flying the Wilga” sections, the aircraft systems and performance charts are as you may expect also important to read. Although saving paper is important these days, you either print this document that helps understanding the modeled Wilga or use a second monitor / tablet to read it from. What I left open till now is the explanation of the Thranda pop-up menu.
As I highlighted already before, when you own other Thranda aircraft, this pop-up menu will be familiar to you, but when you’re new to Thranda aircraft, then this pop-up menu offers lots of interesting features like changing the way your external and internal livery looks like, or creating your own livery on the fly. Further on, changing the way your instrument looks like or adding other modern instruments like the Aspen EFD 1000, or the Garmin GNS430/530 devices and not to forget for Windows users only the Reality XP GTN 750.
Aircraft Configuration
This section deals with the Thranda pop-up menu, but while writing this, I’m wondering what is good to discuss and what not. The pop-up is already well discussed in the Thranda Wilga-PZL-104 Documentation, so is there really a need for me to do it once more. Instead I’ve decided to make a movie and show you real time what happens when you change from a specific livery the internal and external dirt or how it looks like when you add scratches. In other words, dynamically livery modeling by creating weathering or perhaps you decide to make your own livery with the dynamic livery option.
General
But first the General tab although it speaks a bit for itself. It allows you to add external objects to the Wilga like an electric tug, or covers, tie-down, chocks and so on. It also allows you to set the brakes, or to remove/add panel reflection, startup the Wilga with the engine running and set all internal and external lights. All of this is either by moving the slider or by clicking the respective function or you can click the green/red symbol on the Wilga that does the same. Right? Not right, then check out the following movie.
Livery
For those simmers who want a dirt and scratched Wilga or create their own livery, the Livery tab is “the” right place. The Livery tab has two possible livery options namely painted liveries and dynamic liveries. The difference between painted and dynamic liveries is that when using dynamic liveries you can create your own paint layout including the aircraft registration and add dirt and scratches to it while, when using the painted liveries option, you can only add dirt and scratches to the painted model.
Adding this the to dynamic liveries option. When you select this option, you’ll notice that the Thranda Wilga comes with 30 additional paintings. Together with the “painted” livery selection you’ve got more then enough choice to find your preferred livery and if not, then you create your own as I did. More about that later.
How this works is well described in the manual, but the following movie will show you all of this on the fly, so lets go for it.
Weight and Balance
Then you’ve got the Weight/Balance tab. Via this tab/page you can increase/decrease the amount of fuel in gallons/pounds or in liters/kilograms as well as the for each of the four seats and the cargo load in the back. Changing between these two is done by clicking the cyan (sea blue) Kgs or (light green) Lbs text above the LOAD button. The resulted CG (Centre of Gravity) of this can be seen in the graph. The page also shows you the total amount of kilograms/pounds. What is nice to see and yes, I know, it’s logical but still,when you change the amount of fuel in each wing, you see the Wilga moving due to the fuel weight. Check out the following movie.
Camera
The Camera tab allows you to use the custom presets. You can control these presets either by clicking the green dot on the Wilga or the text at the right hand side of the tab/page. With the middle mouse wheel you can change on the fly the FOV (Field of View) to a position you like.


Audio and Slew
The Audio/Slew tab makes it possible to change different sound levels or switch the whole sound OFF. In the past you had several “slew” plugins that allowed you to reposition your aircraft. One of them was called SlewMode and although it hasn’t been updated for a while, it still works with X-Plane 11.55r2, but with Thranda Design aircraft this slew plugin isn’t needed anymore since the right hand side of this Audio/Slew tab/page has a build in slew function that works flawless. When moving the dot or pointer, the Wilga is moved on the fly.

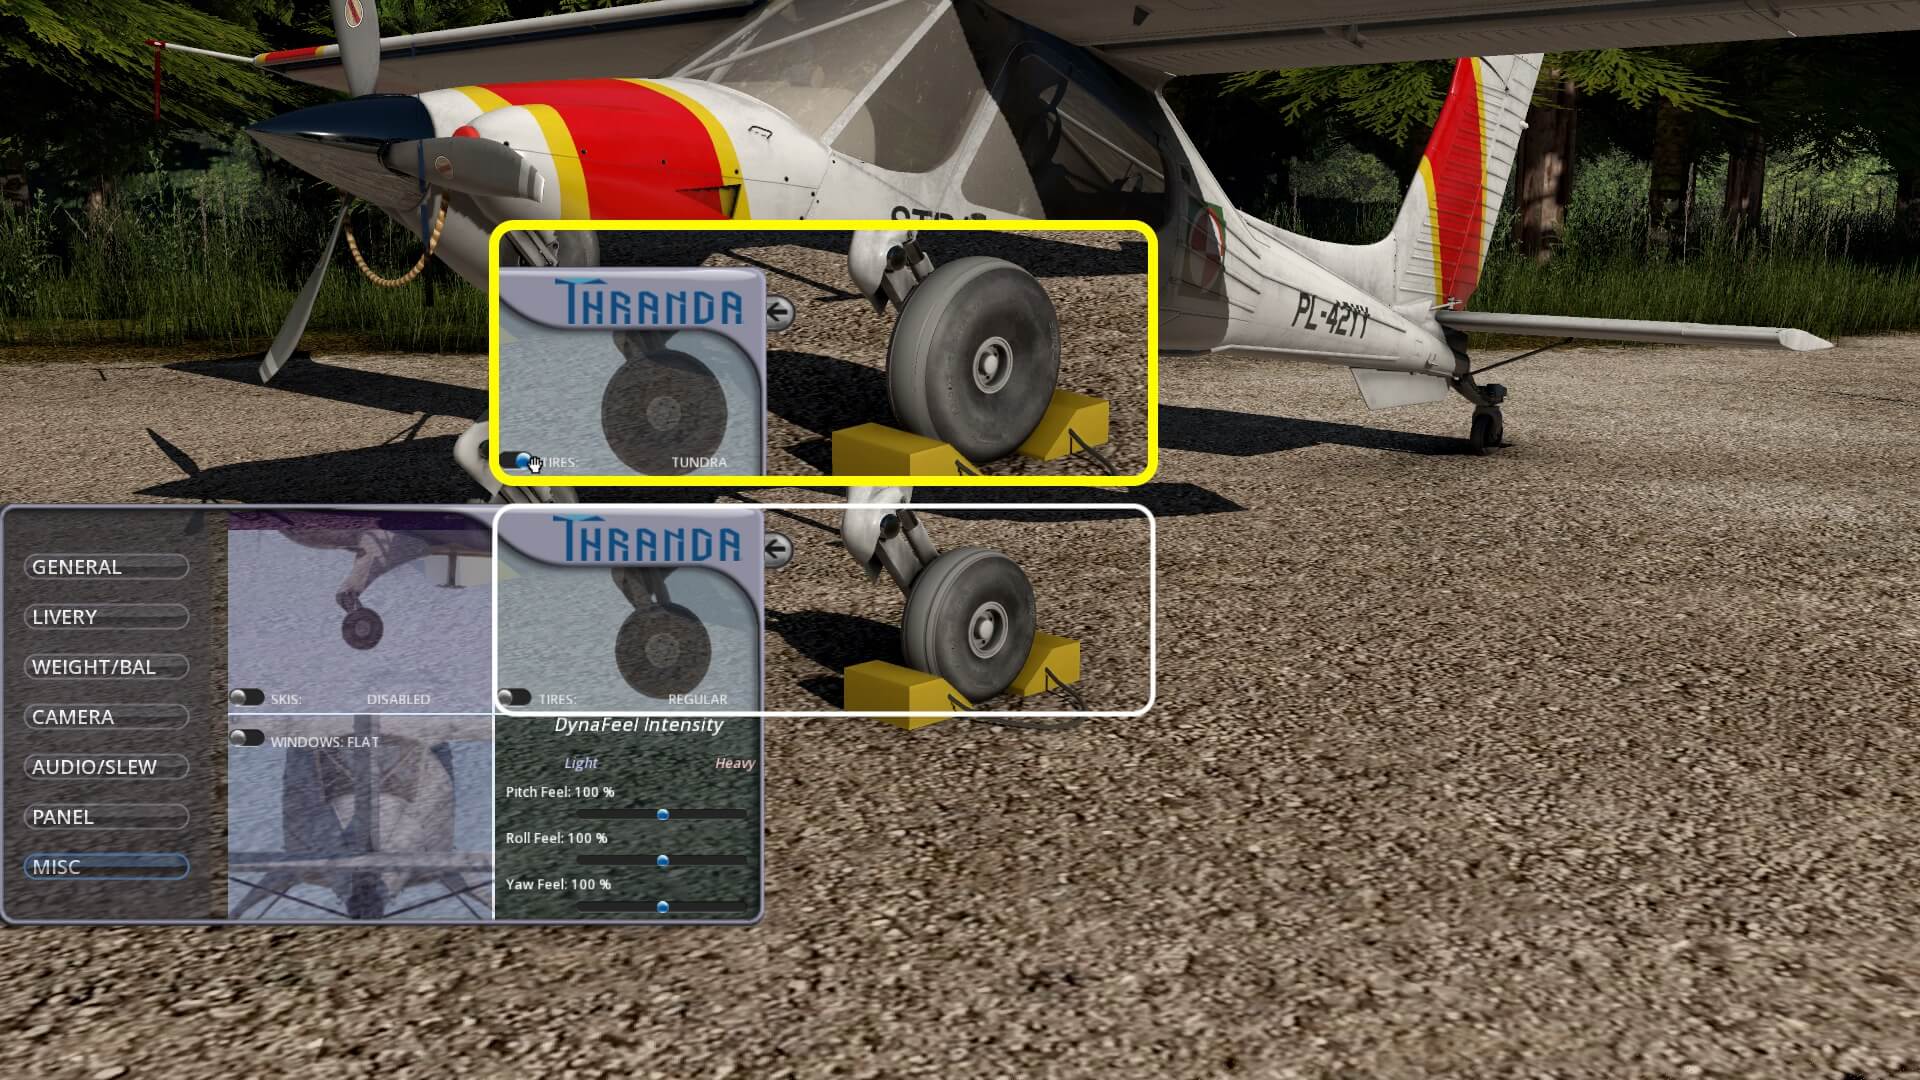
Misc
Before discussing the Panel tab, I’ll first explain the Misc(ellaneous) page. As you can expect, you can change the tires to a tundra size, or add skis to the normal tires, equip the Wilga with bubbled windows and change/modify the DynaFeel intensity for the pitch, roll and yaw channel, but what is DynaFeel? According to the manual “The DynaFeel system dynamically adjusts the rate at which the controls deflect, based on airspeed and how much the control is deflected. This means the controls will feel light and responsive at low speeds and small deflections, but will get progressively heavier as airspeed increases.”

Panel
The so called Dynamic Panel tab/page consist of two options; Layout Page and Individual Instrument page. By default the Layout page is active and shows you how the current panel setup looks like. In fact there are three panel layouts by default available. You can “scroll” thru these by placing your mouse over the PANEL PRESET text line and scroll to panel 2 and panel 3.
You’ve got two options right now. You can either copy a panel layout (so the number of available panel presets increases with one), then modify this layout to what you prefer and save it or you select a panel preset layout and change that one and save it. Disadvantage of the second previous mentioned option is that you’ve changed “a” default panel preset layout, so I suggest that you copy a panel layout and modify that one and save it. Anyway, whatever option you choose, by “enabling the 3D panel edit mode” you can move each indicator, switching panel, control panel or whatever “object” you want to position to a new location.
But the above isn’t complete since you can control the positions of each individual object (instrument/indicator, switch panel, selector panel, Garmin GNS, engine controls etc.) with your mouse. Without the “3D panel edit mode” enabled, notice a red square around an indicator or switching panel or whatever you see. On the lower right hand side you see the text:
– ACTIVE INSTRUMENT : 1 ON
– GPS SLOT 1: GNS-430 ON
– GPS SLOT 2: ON
Everything that is green means active. Every line that is grey means inactive. When the ACTIVE INSTRUMENT is green, you’ll notice a red square around an indicator, panel, or whatever. You’ve probably also noticed that the mouse pointer has changed into a cross with arrows. The red squared object is now movable to any other position. When you want to move another indicator, then place your mouse over the ACTIVE INSTRUMENT text, and turn your middle mouse wheel. The number is changing as well as the red square. Scroll till the red square is around the object you want to move. The same way it works for the GPS SLOT 1 (2).
I could make some screenshots of all of this, but I decided just as I did in the previous sections, to make a movie to visualize it, but first I’ll discuss the individual instrument option.
In the INDIV INST (Individual Instrument) mode you can change the position of all instrument panel objects for either the instruments or GPS. This is done with the toggle selector. When you read this you’ll think “isn’t this the same as what you do with the 3D panel edit mode”? No, it’s different. In the Individual Instrument) mode you can change the X, Y and Z position as well as the tilt of the instrument panel object and its rotation.
Confused? No need. Check out the following movie.
What said in the beginning; the provided manual offers lots of details and examples on how to use the different Thranda pop-up menu pages/tabs. With this section I added something I felt is useful. also due to the included movies. And now, it’s time to do our walk-around check and then flying out, right?
But what when you had selected the Wilga seaplane configuration?
In that case what I explained in the above sections for the land plane version it is more or less the same except that the MISC is slightly different. When you load the seaplane model on solid ground, then the wheels on the floats are extended, the so called amphibian Wilga version. And when you load the seaplane at a docking station, then the Wilga floats on the water and is equipped with plain floats. I’ll discuss this a bit more in detail later in this review.
Walk-Around Check
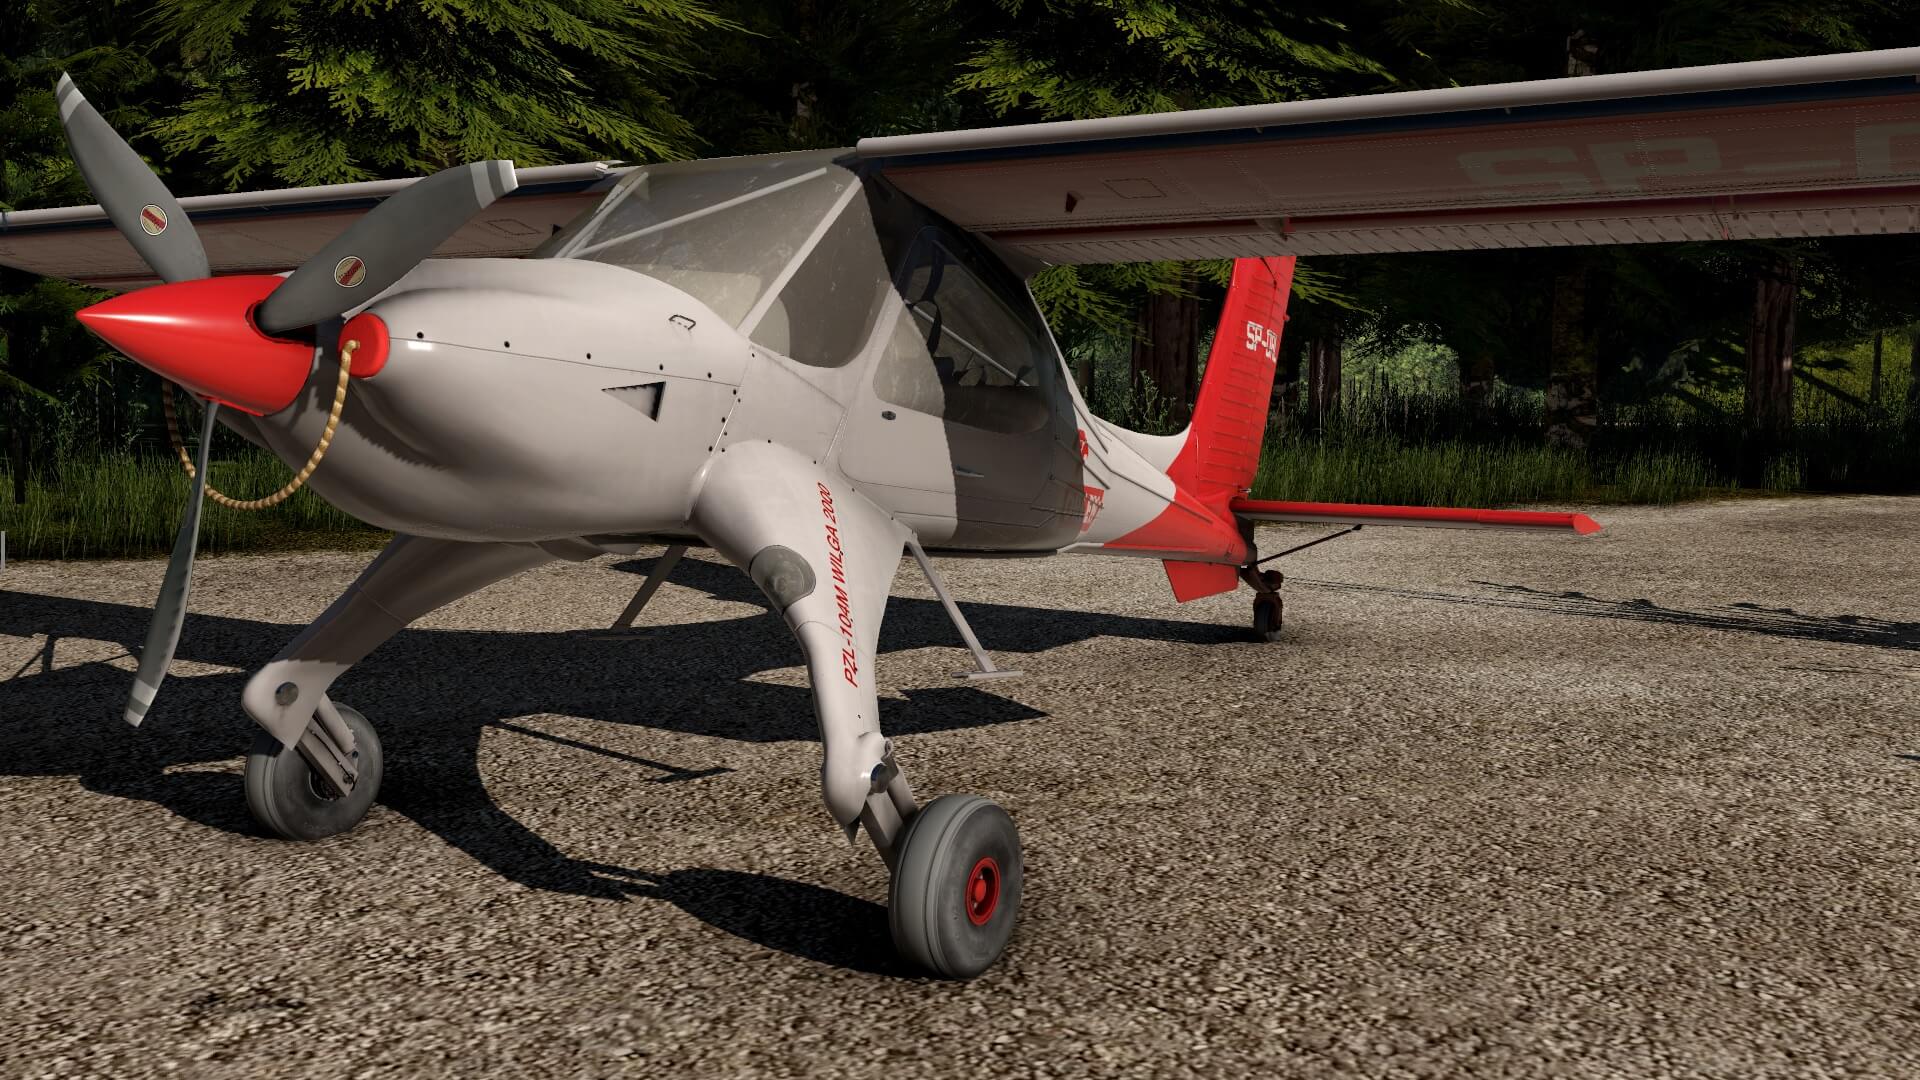
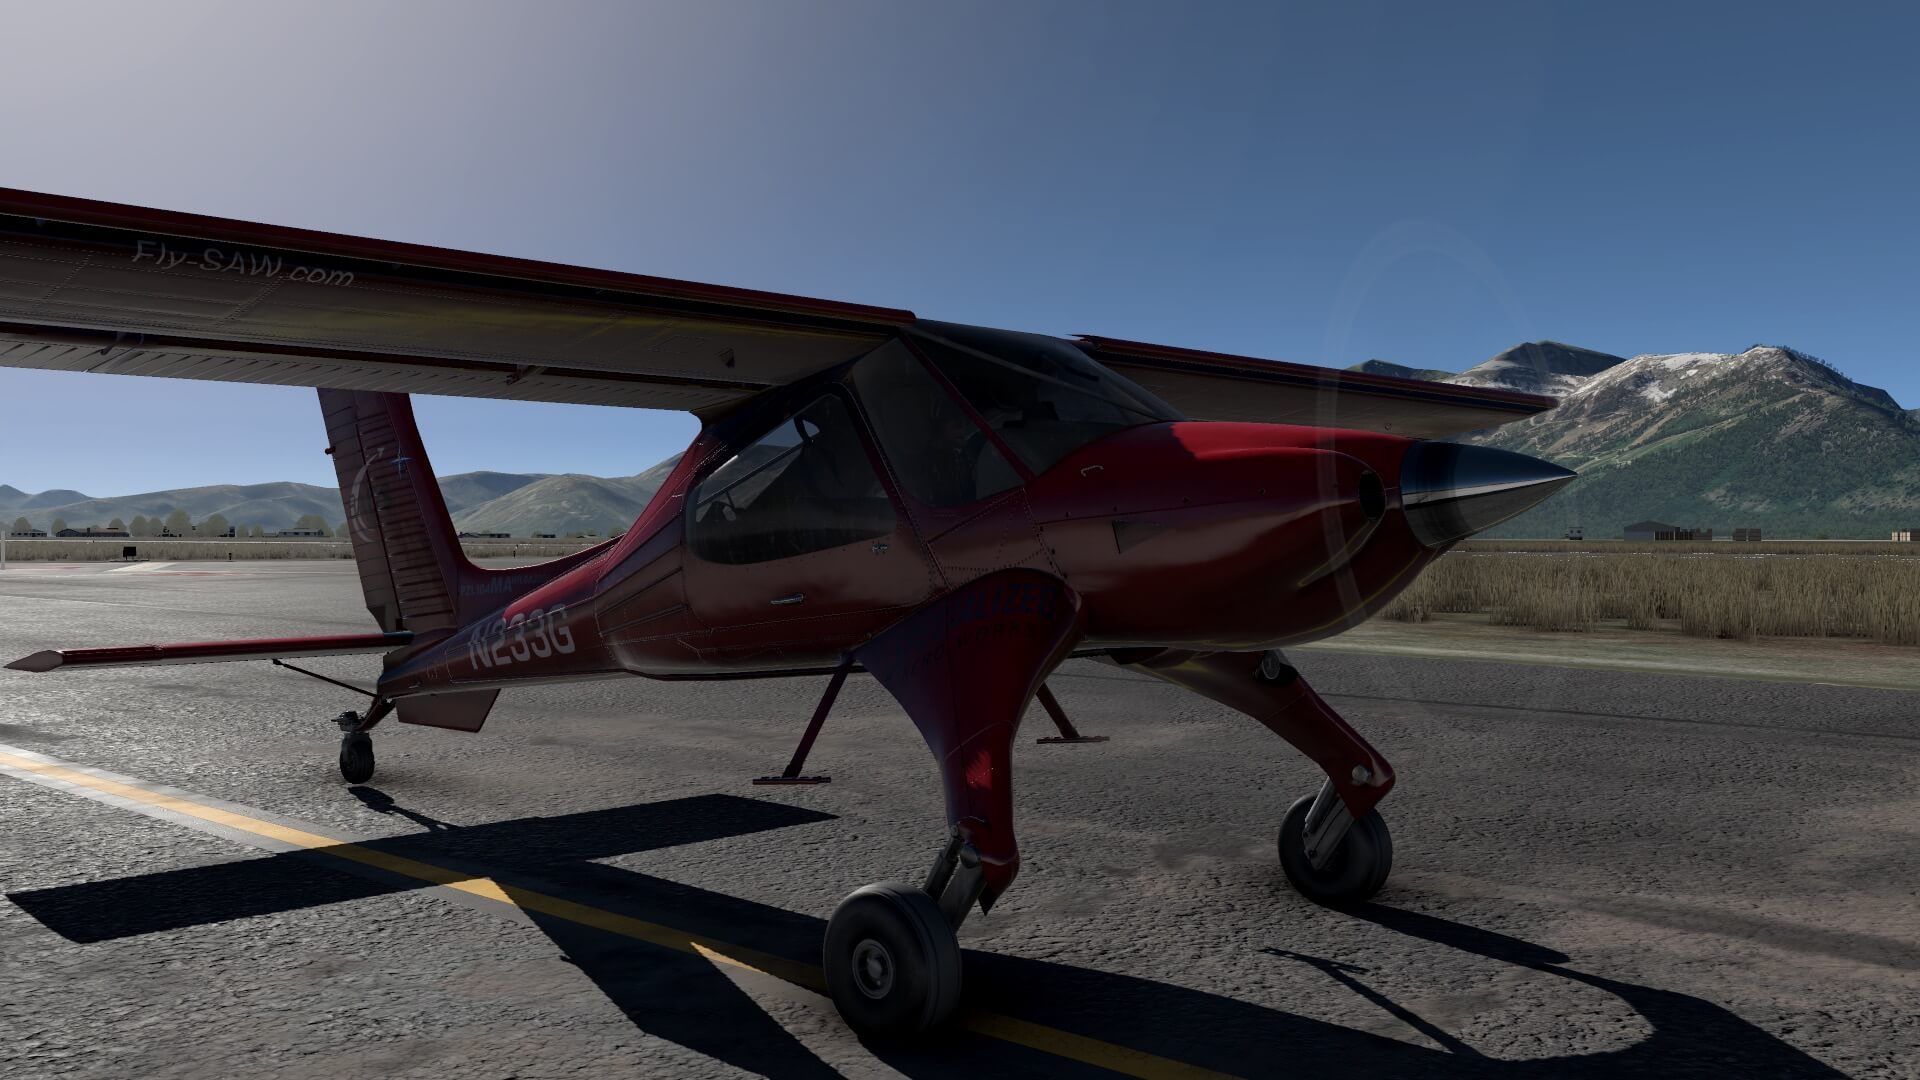
I’m impressed by the modeled Wilga and thus what the 3D modelers have created. And yes, some of you will say “that’s logical since it’s a small aircraft, so, it’s not difficult to include many tiny details”. My reply on this “thought” is yes and no. It’s still up to the developer or 3D modeler how and where to add all tiny details and how to use the polygons in an effective way. Also large aircraft can have lots of details and therefore using lots of polygons and still having acceptable FPS (Frames Per Second).
That said, the modeled Wilga comes with a lot of tiny details and “round objects” look indeed “round” so either many polygons are used or a special technic is applied. Whatever it is, I’m impressed by the overall 3D modeling.
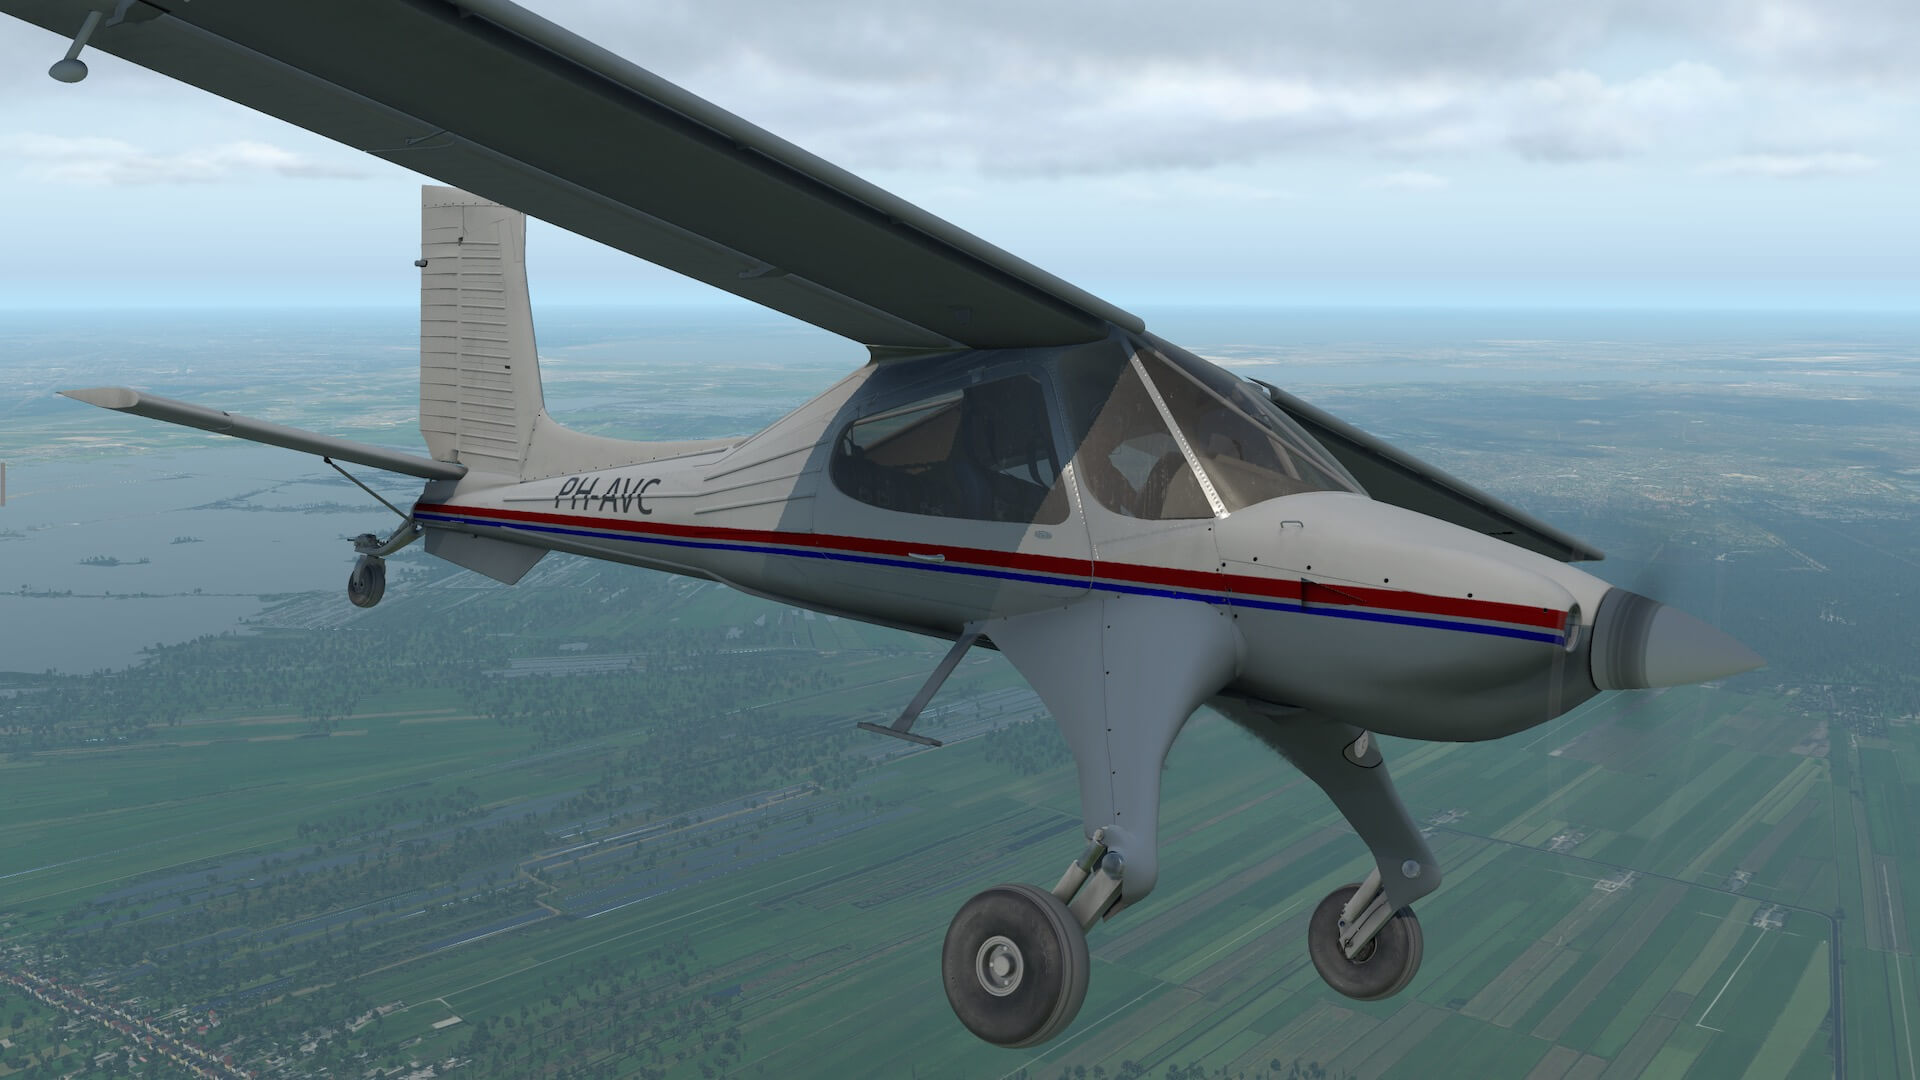
I start my walk-around check at the fuselage nose section and that means I start with the propellor. Although I added dirt and scratches to my livery, it seems that the propellor blades are kept clean with no scratches. That propellor blades are kept as far as possible clean and without hardly any scratch isn’t weird since any dent, scratch or even dirt can lead to performance decrease. The Hartzwell stickers on the propellor blades are sharp enough, so that’s good news.
The spinner cone can be configured a in a way that it’s not painted, so it’s to me made of stainless steel or was it made of Aluminum? Perhaps the only small remark on the spinner cone is that no screw is visible which should be since the cone is screwed to the construction. All ground equipment has been installed so the cooling inlets are blocked and connected to each other with a rope. Looks very realistic.

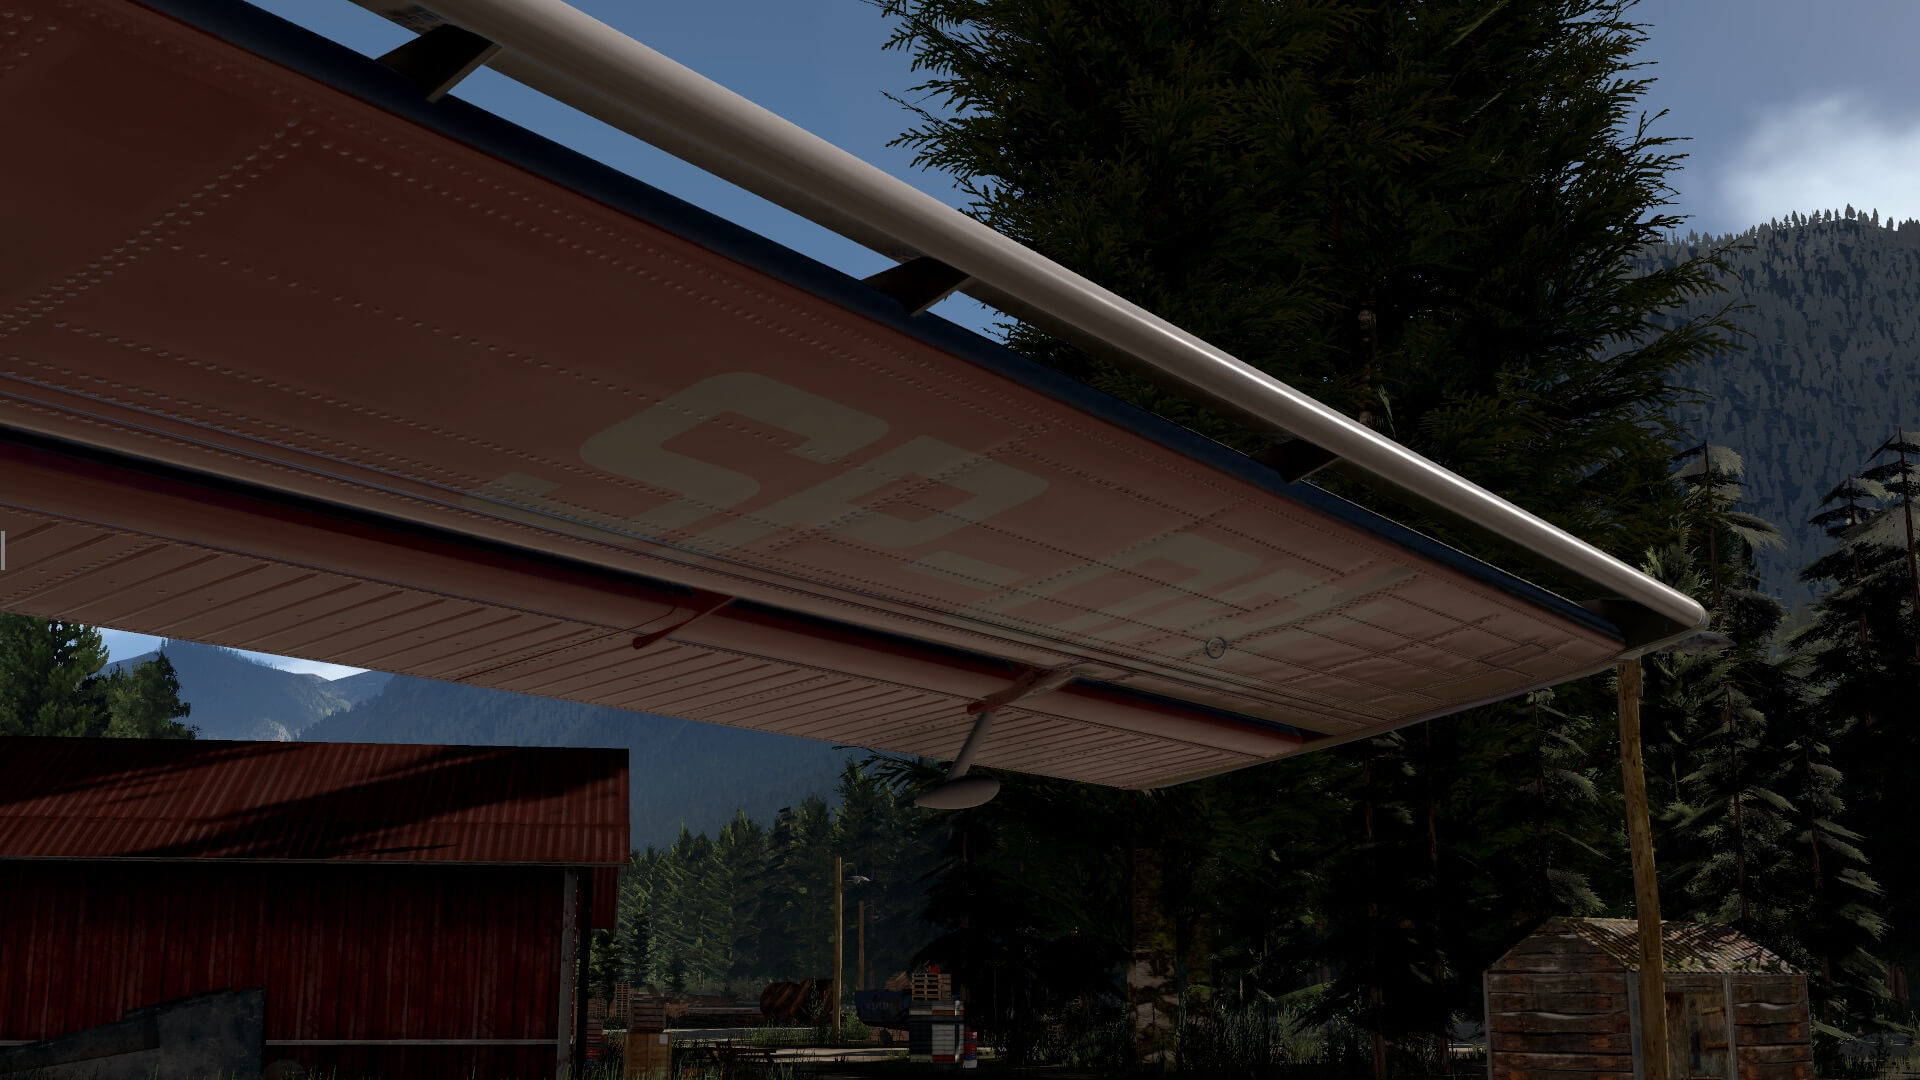
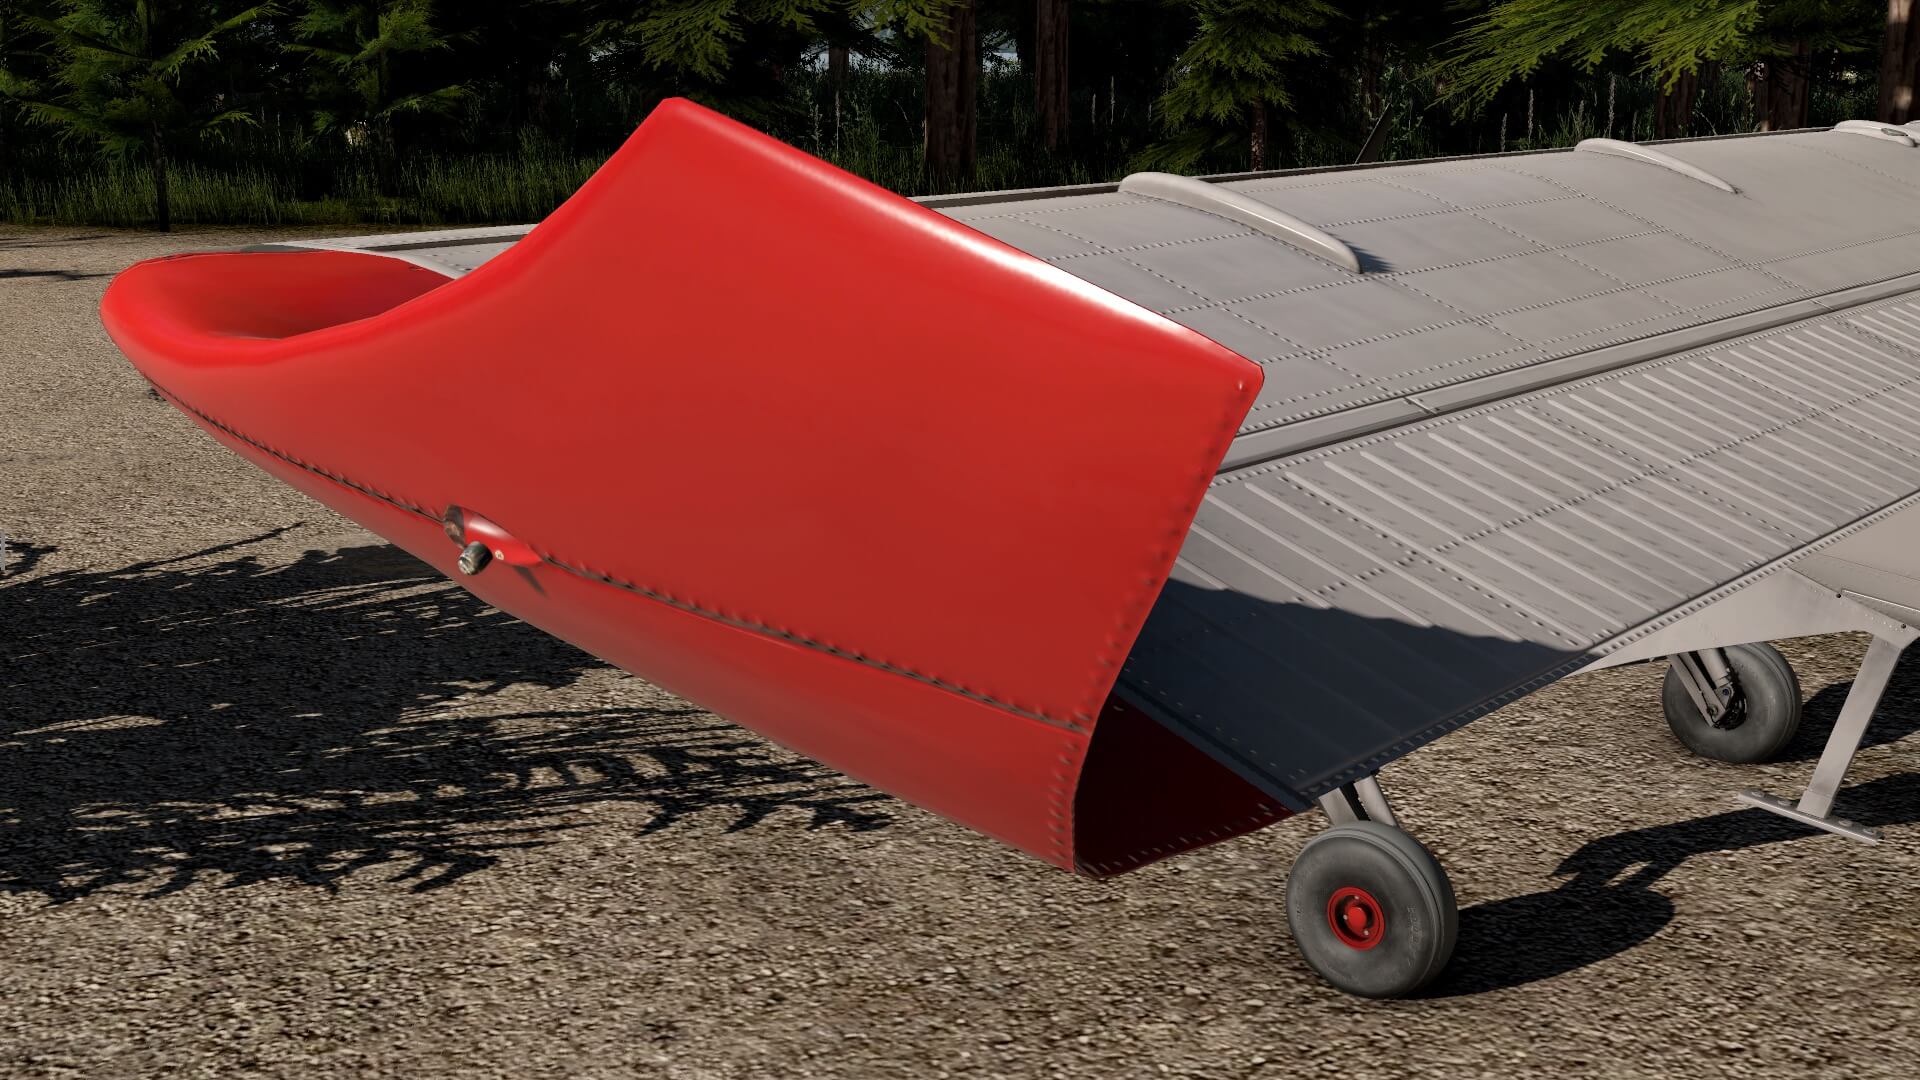
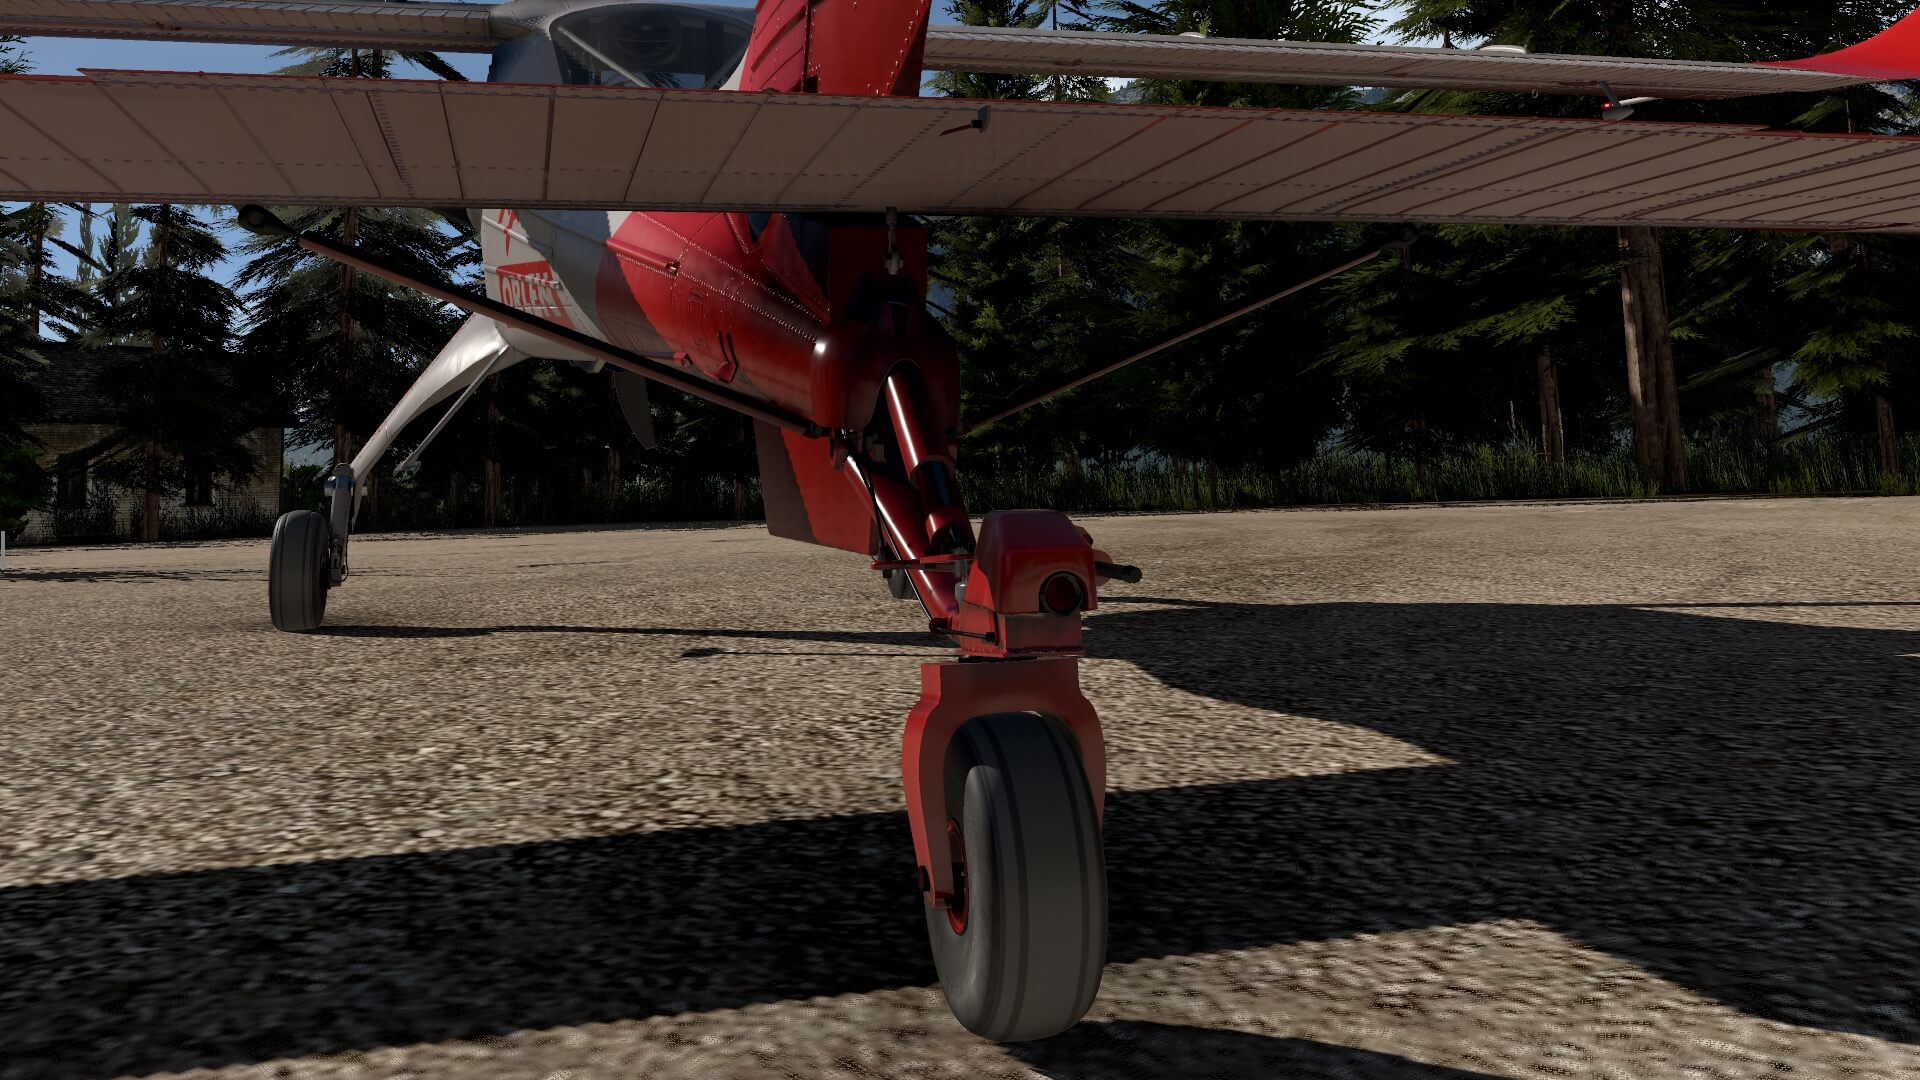
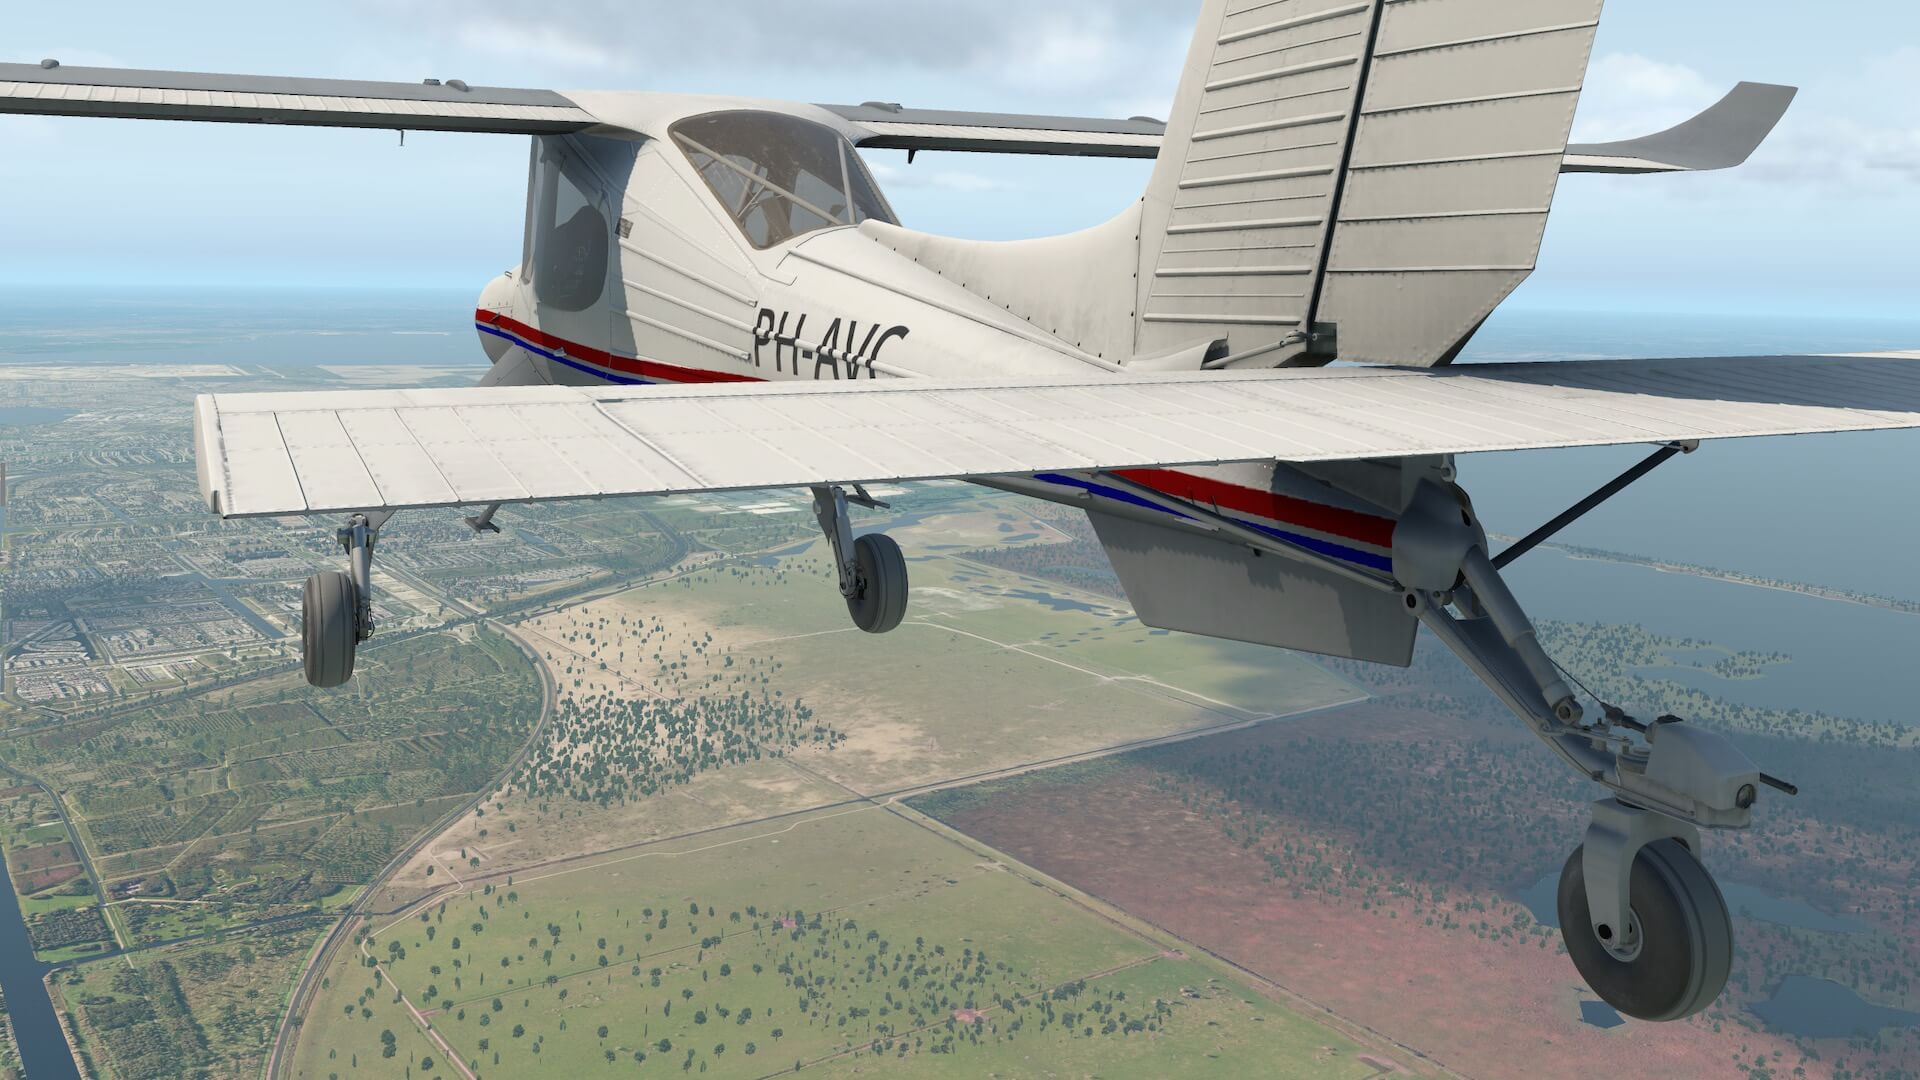
The fixed landing gear looks massive and as real as it gets, especially when looking to the build in left-hand taxi light at the front as well as the lower part of the strut with brake and wheel assembly. The tire is nicely covered with real photo material or hand painted and hardly any polygons can be seen so the tire really looks round to me. On the inside of the strut you can clearly see the well modeled brake with brake line and the shock absorber. On my way to the wingtip I spot the fixed slotted slats, the wing structure, and near the wingtip at the left hand front only, the landing light, mounting behind a plastic cover. Connected to the aileron the external balance weight is well modeled too.
Depending on the amount of dirt you added to your painting/livery, the less transparent and weathered this “plastic cover” looks like. The wingtip fence is very nicely modeled, but what I miss around the wing tips and trailing edge as well as on the tail section are the static dischargers. It could be that there are no static dischargers at all, so time to check with Thranda about this. According to Thranda “Oops, nobody had so far even mentioned it. I think we’ll be able to add it at the next update… shouldn’t be too big of a problem.”
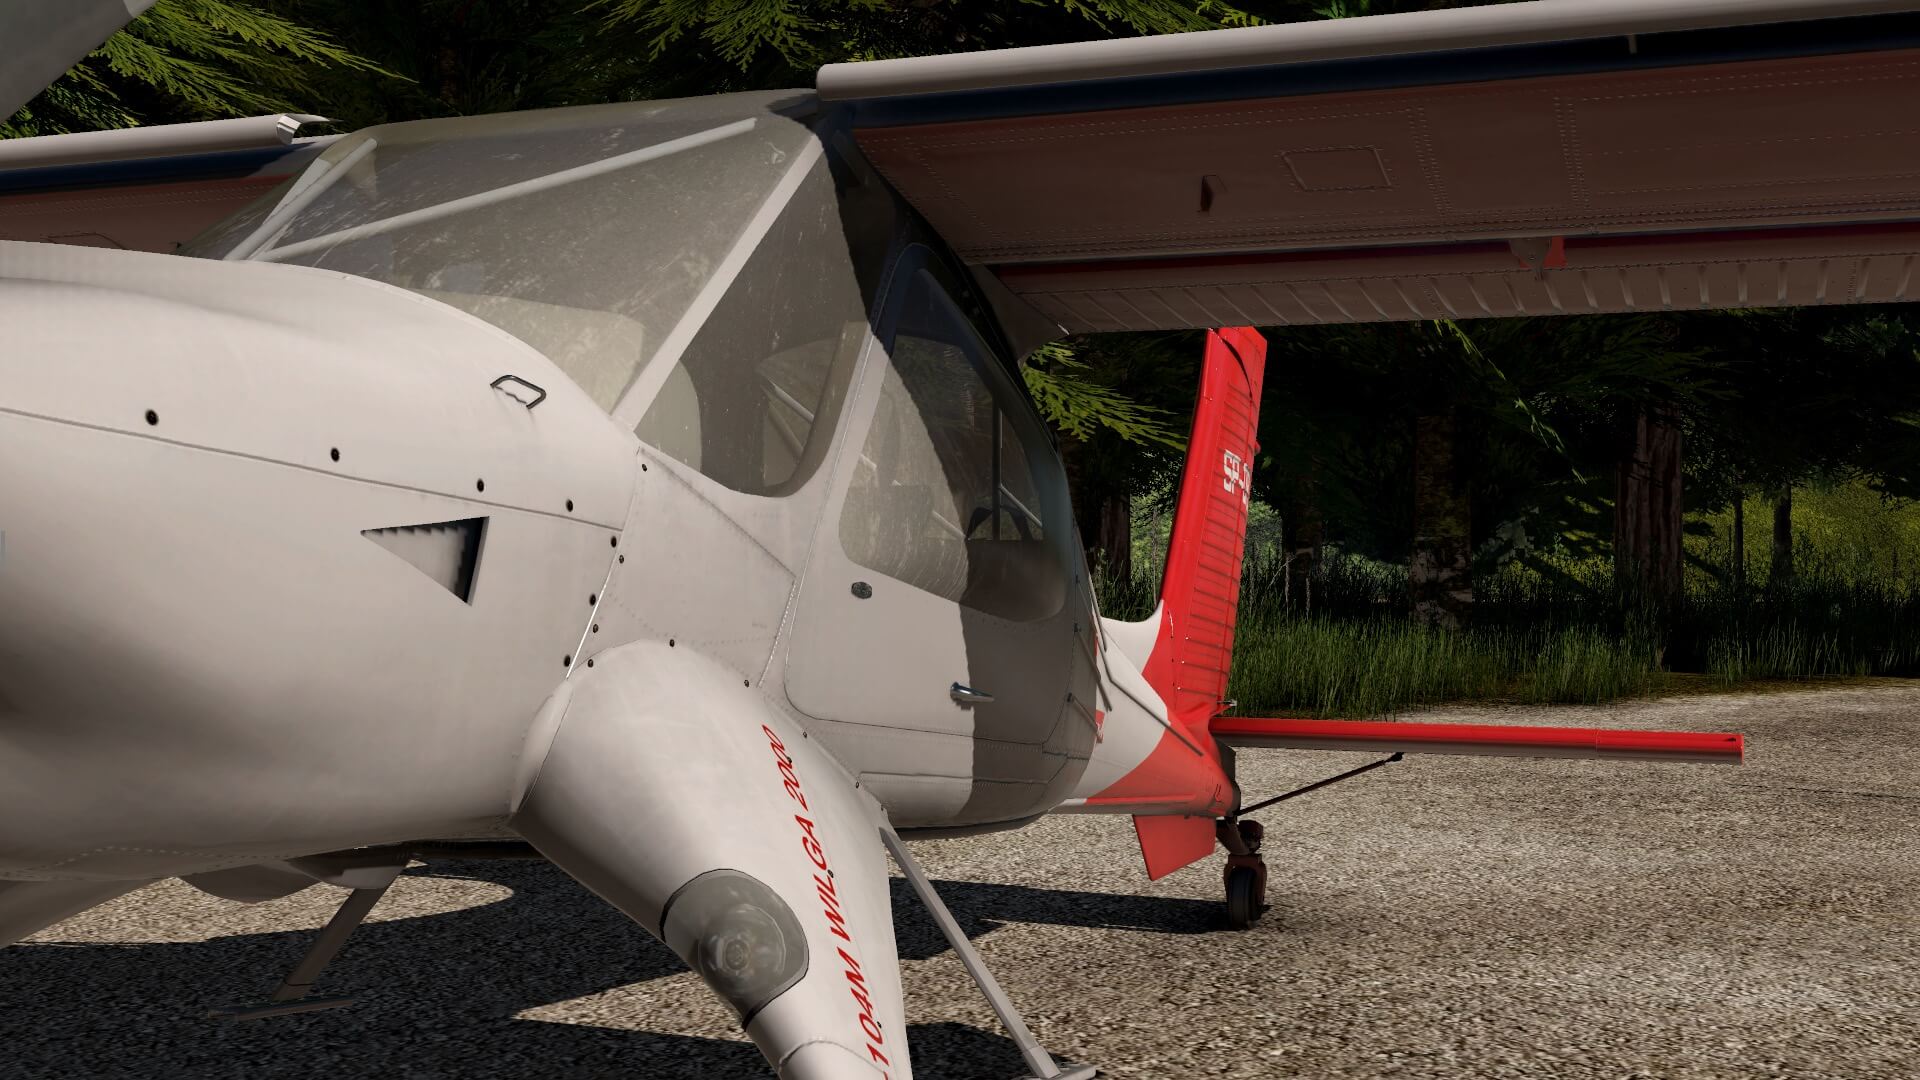
Before moving to the tail, I’d quickly open the left hand entrance door. One huge door that open and closes gently. As previously discussed, you can open/close these doors either via the Thranda popup menu, but also by clicking the door grip where the mouse pointer changes into a hand. This gives you access to the pilot seats and passengers seats.
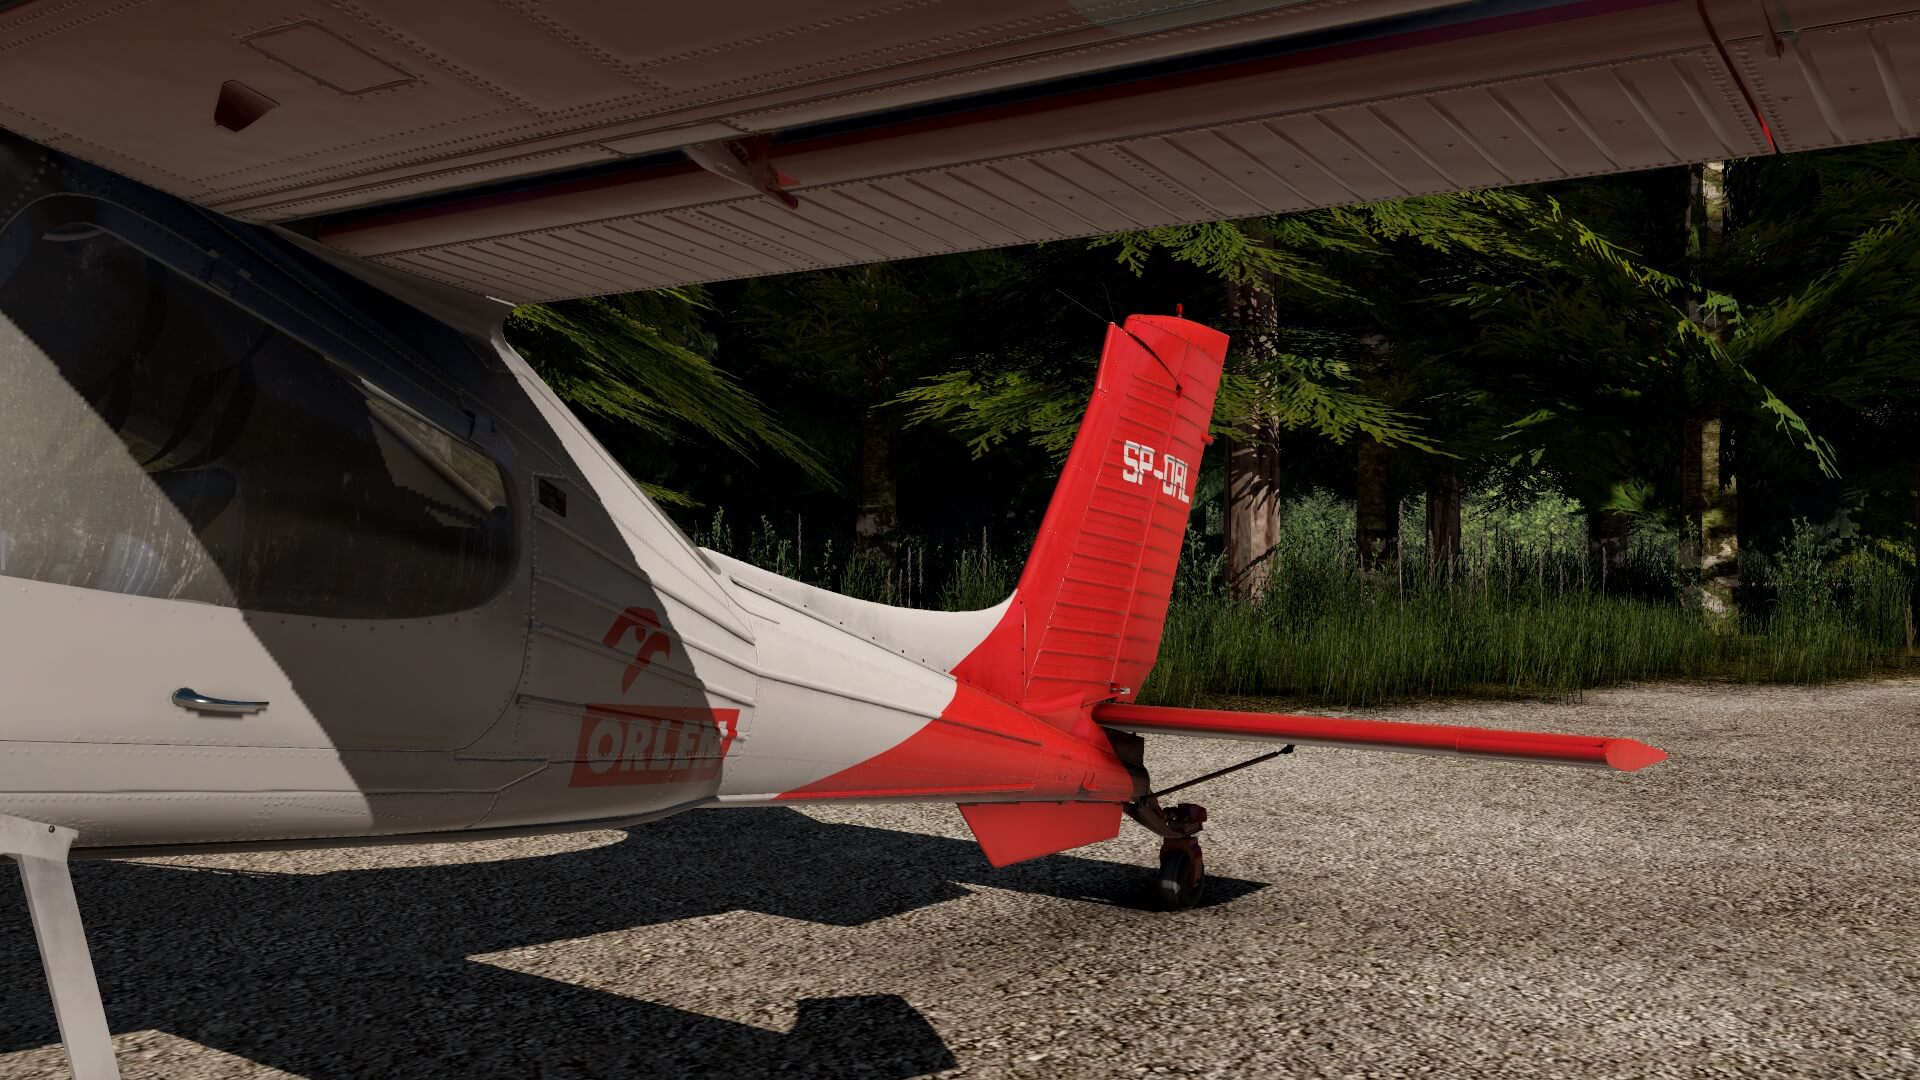
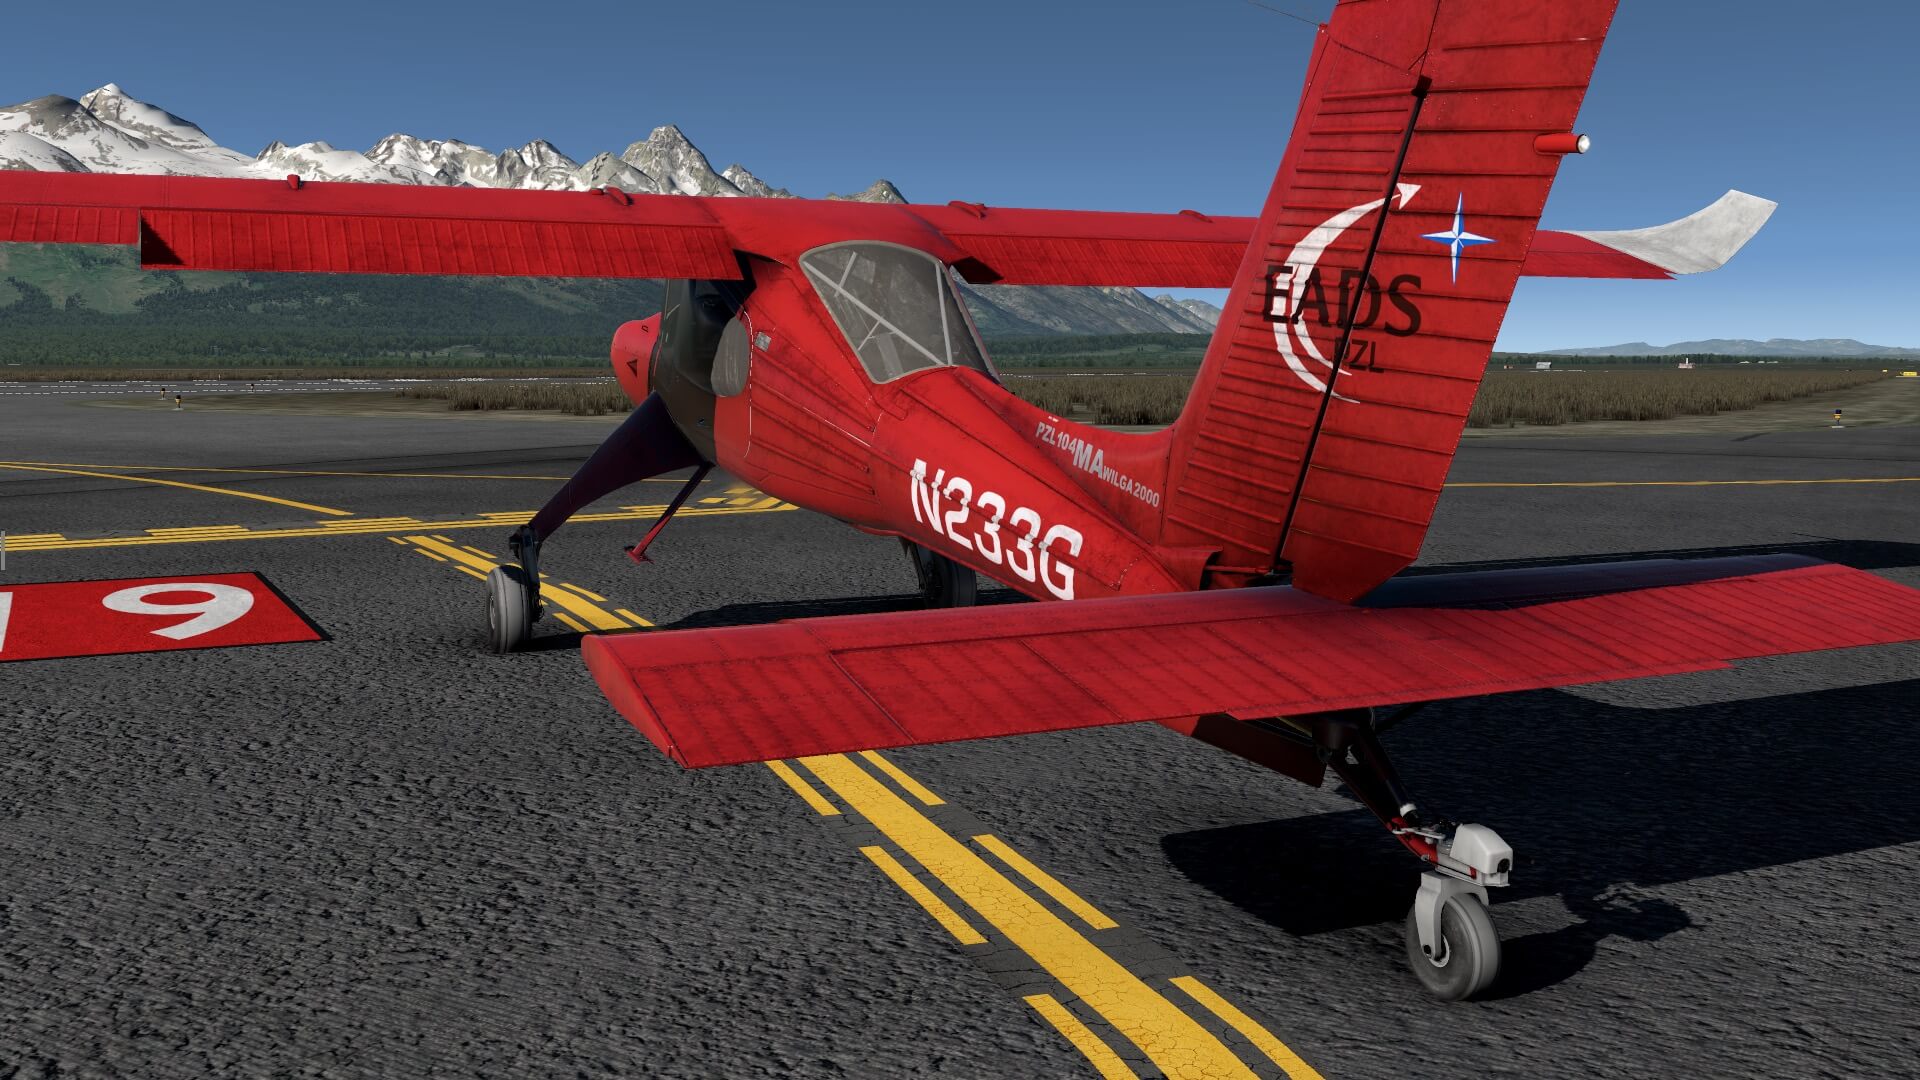
Just behind the left hand door, you’ll find the stainless steel aircraft ID plate riveted to the fuselage skin. The tail with the horizontal and vertical stabilizers, the flight controls and tail gear are modeled with eye for tiny details. Check out the following screenshots of the tail wheel assembly.

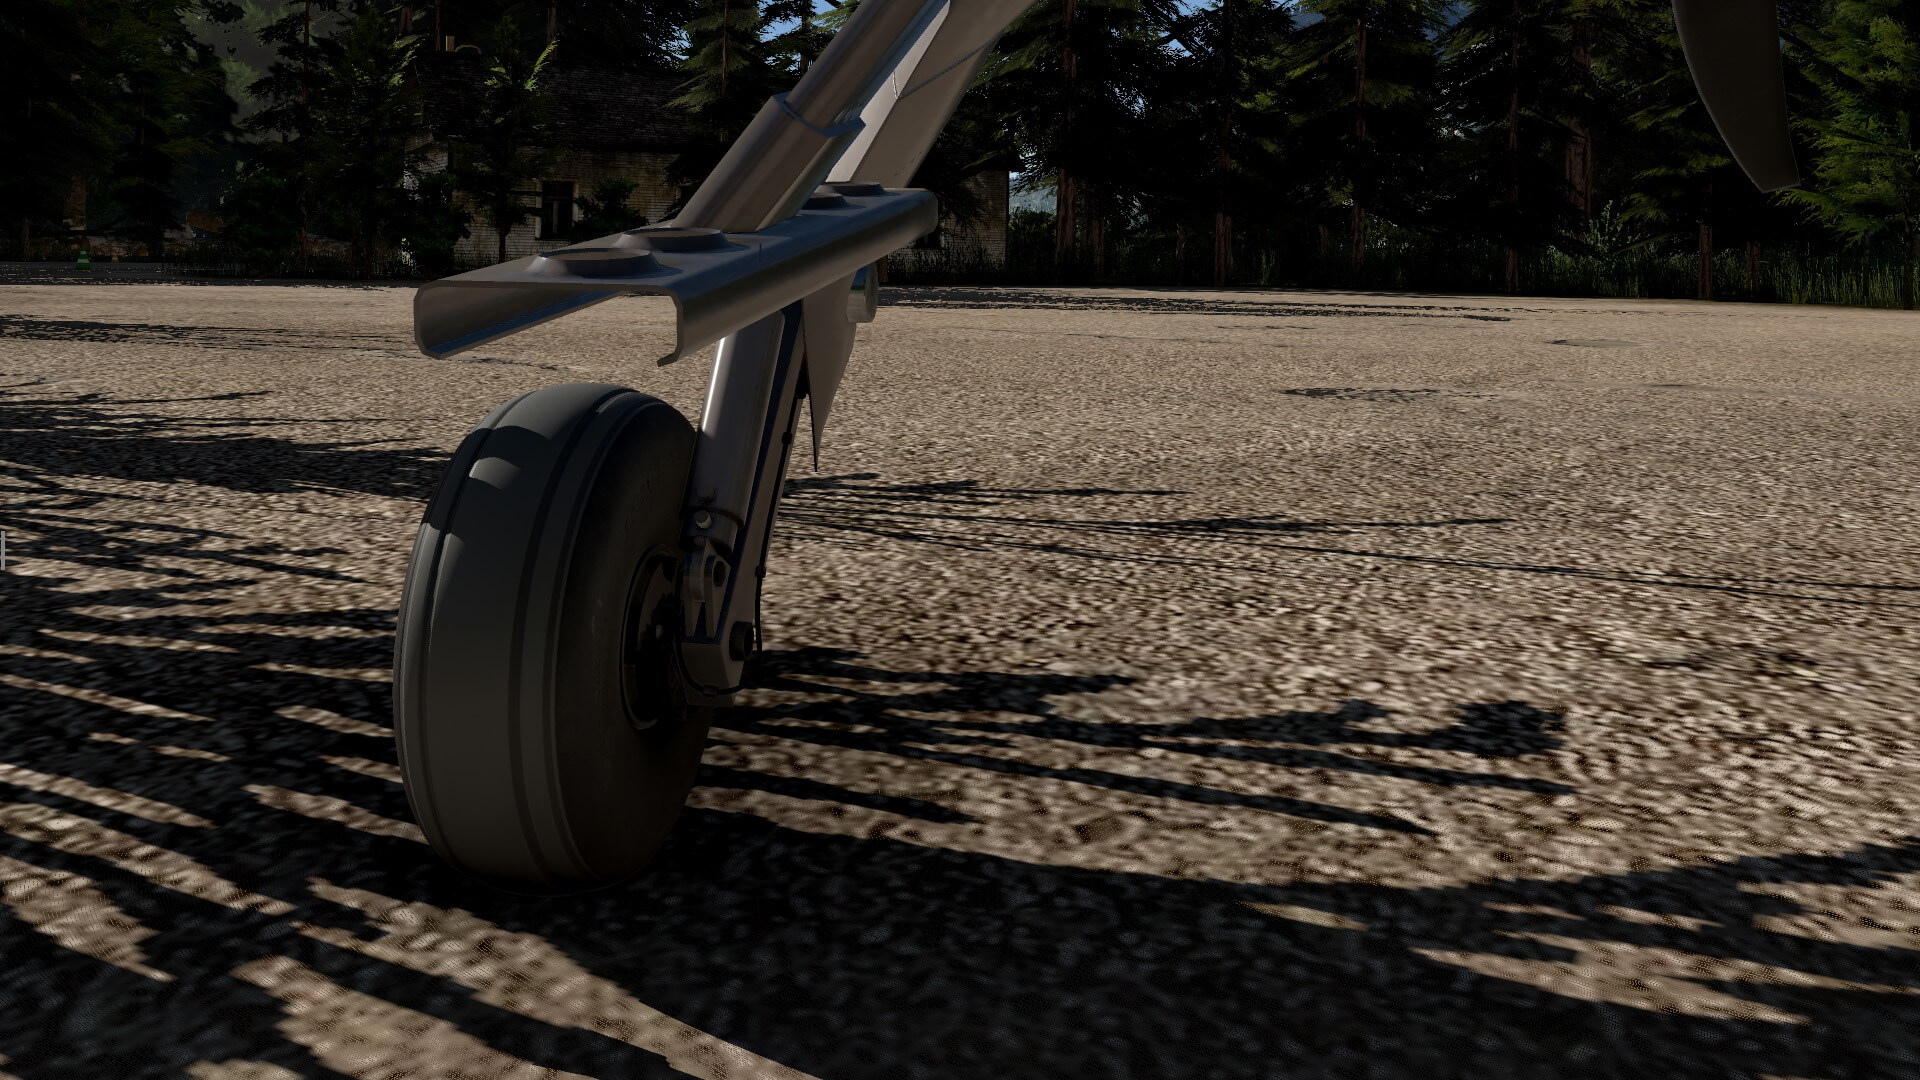


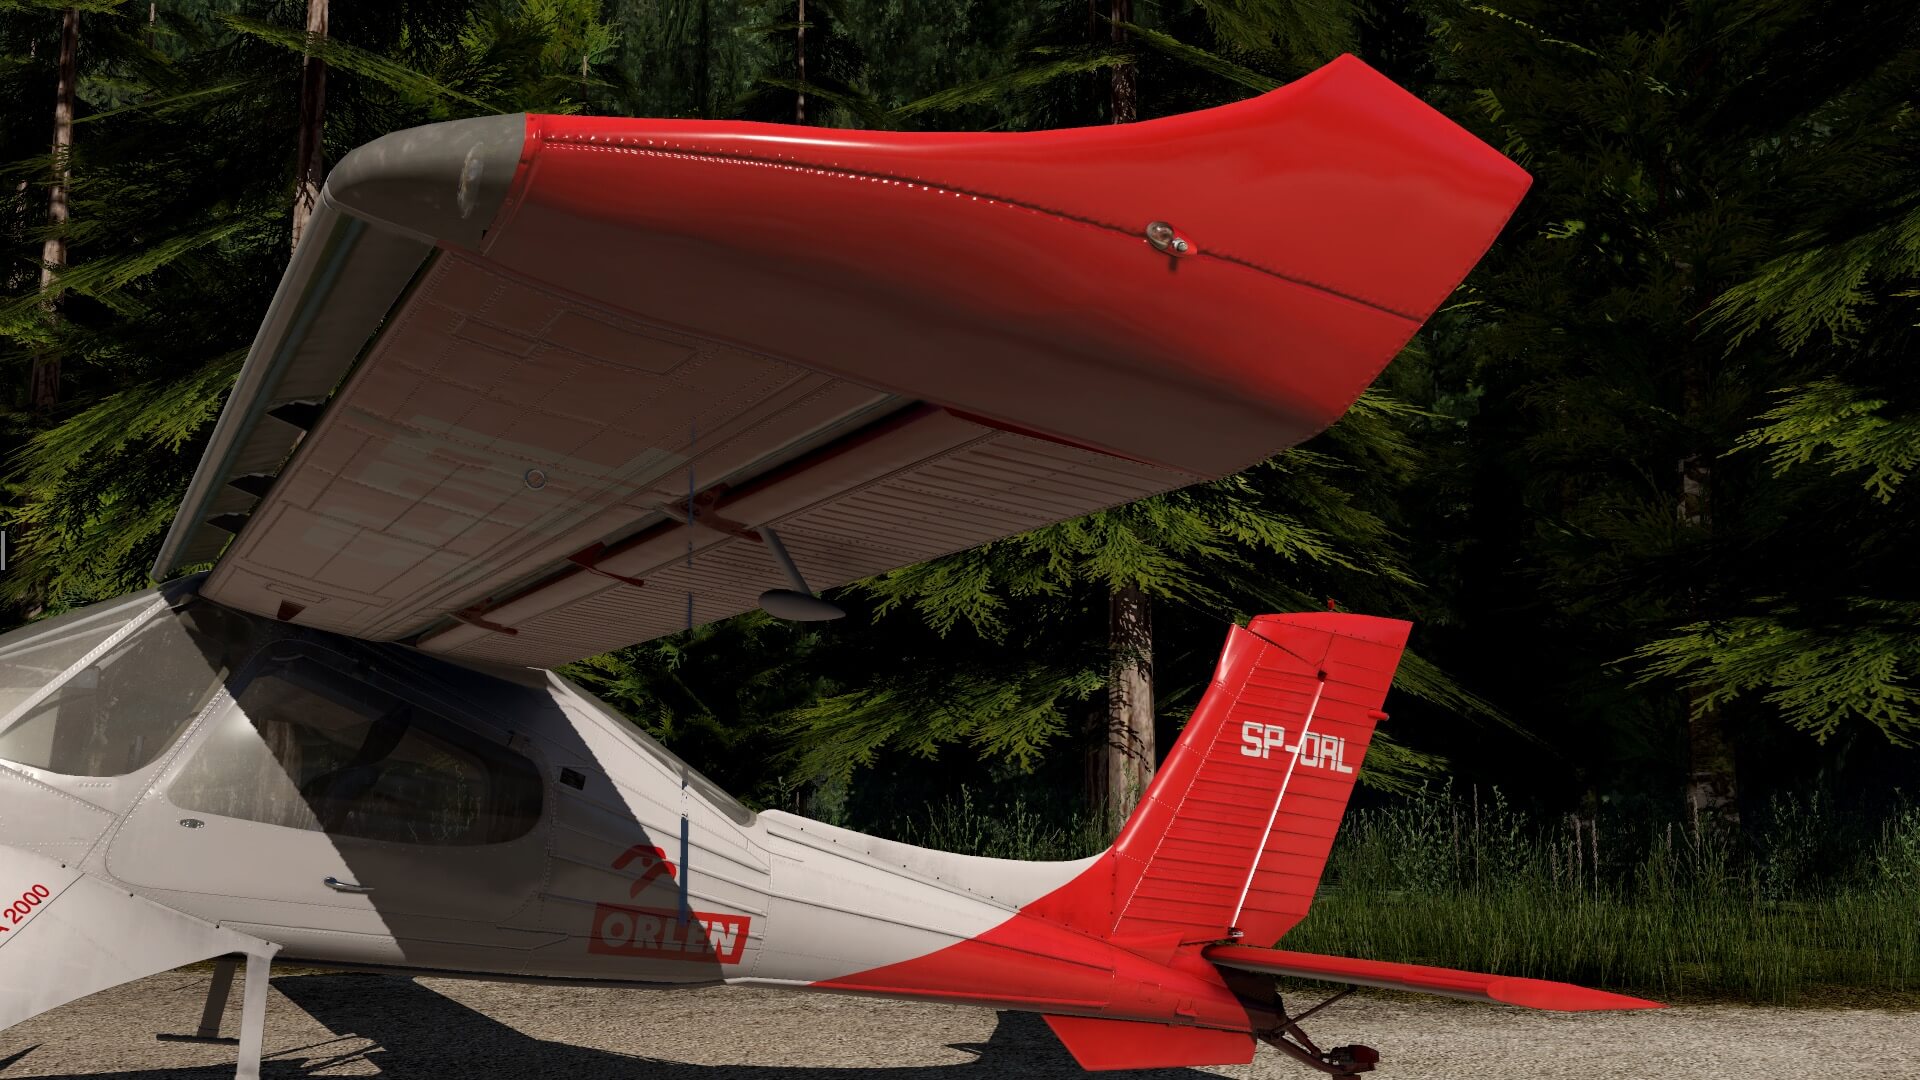

The horizontal stabilizer has supporting struts on the bottom, and the so called elevator trim including the control rod and linkages. This is the same for the rudder control, visible via a linkage on the left hand side, and as stated in the manual, the rudder has no trim option. And I shouldn’t forget the tail wheel assembly which is modeled with great detail. Gorgeous to check this out!
Via the right-hand side I return to the nose section. Although this is the same as what I’d seem on the left-hand side, it’s always different. You see the Wilga from a different angle. All together a lovely and beautiful modeled 3D Wilga.


Check In and Fly Out
Which checklist?
Oops, didn’t I forget anything or can we just fly out?
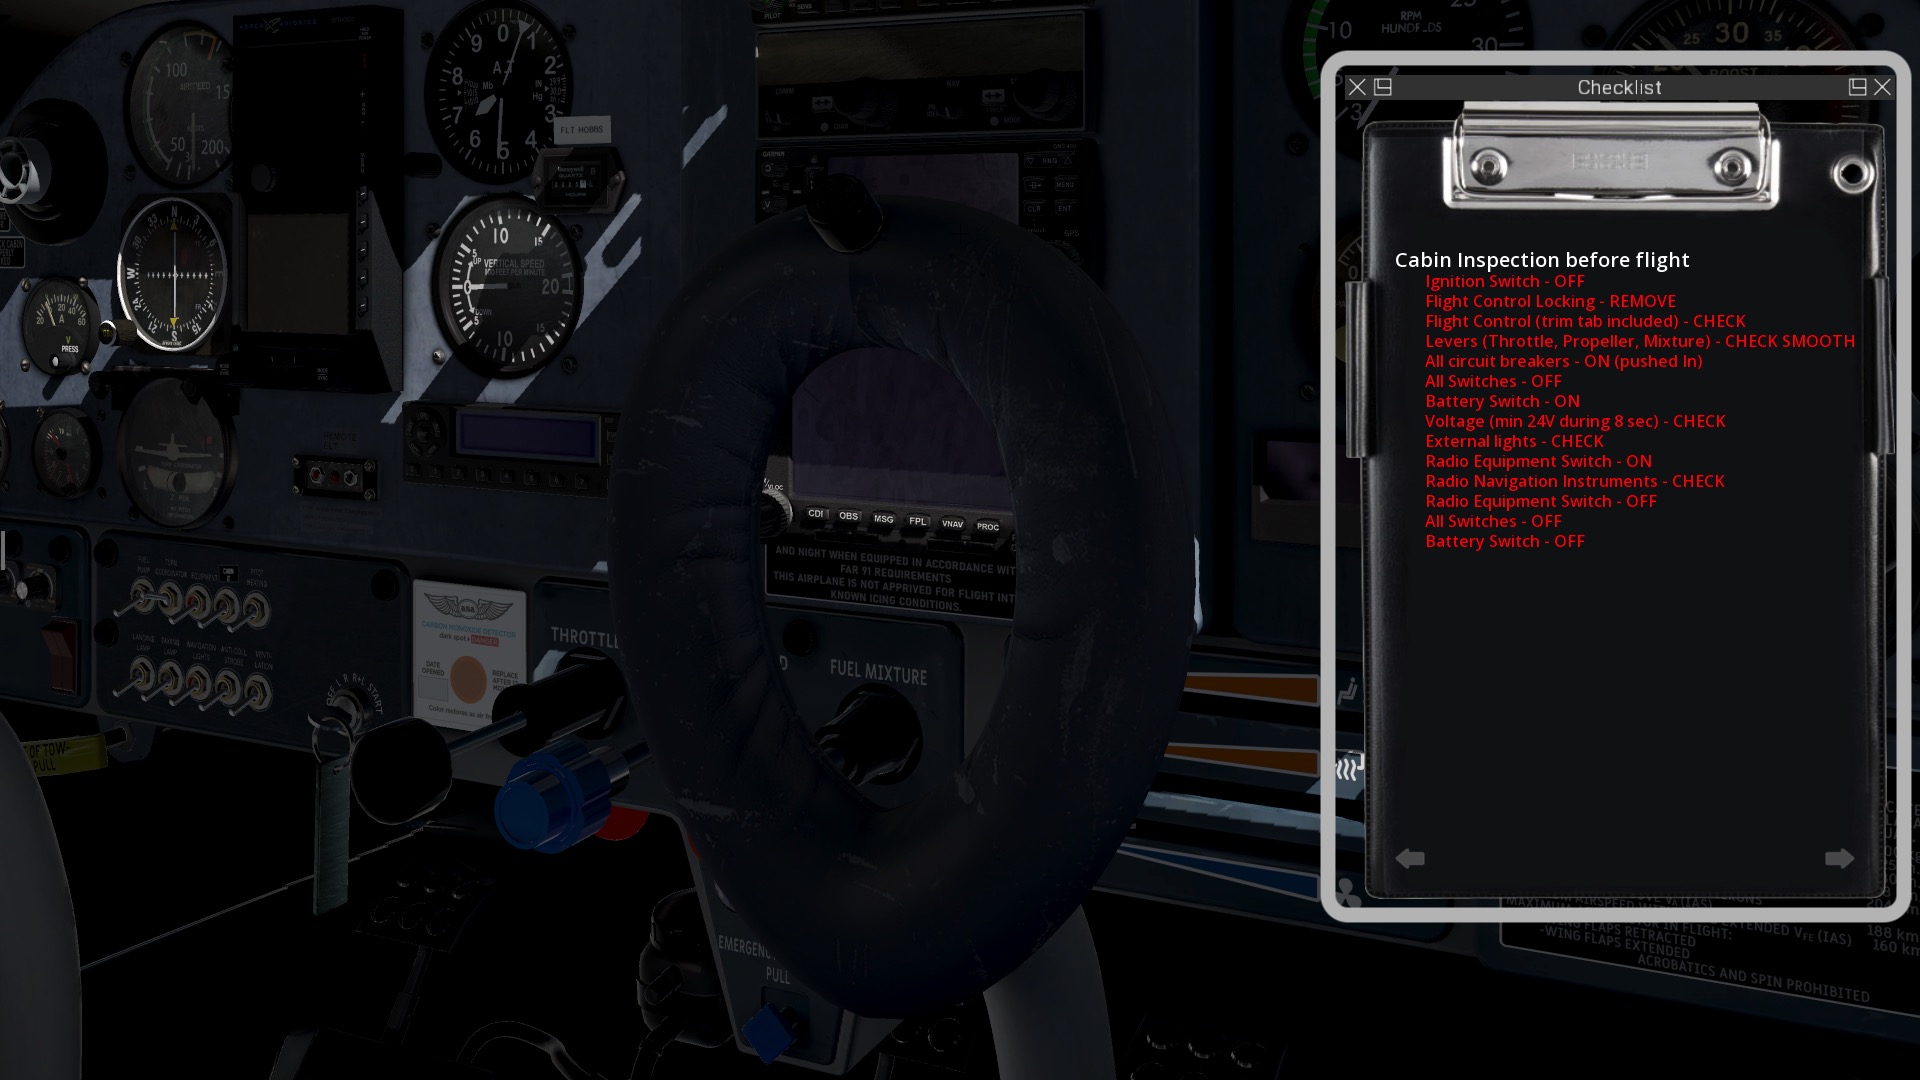
Even though the Wilga is an easy aircraft to fly, some preparations are needed as well as to familiarize yourself with the Wilga. For that you can use the build in checklist accessible via the Thranda page “General”. At the right-hand lower corner tick “Show/Hide checklist”. You can leave the checklist as a floating panel within your active X-Plane window or you can change it to a checklist board that can be moved to another monitor or for iMac simmers, to you iPad or other type of tablet or even your iPhone.
Anyway, the very first page is “cabin inspection before flight”. All items are red and when you tick on a line, it turns green meaning you’ve check and performed it, or whatever is applicable. Keep in mind that this is not an interactive checklist meaning that there’s no logic behind that checks – if applicable – if you’ve selected something or performed an action.
You can also download the dedicated Wilga clist text file from X-Plane.Org member GoofyJP for use with the XChecklist plugin from X-Plane.Org member sparker.

Both checklists are OK, both can be used, but it’s also a bit up to your personal preference what You like. Perhaps more important when you use the dedicated Thranda checklist or the clist text file, You absolutely need to read the Wilga-PZL-104 document. And yes, of course, you can start the Wilga with engines up and running, but that’s not realistic, right?
Cockpit Familiarization
I first have a thorough look into the cockpit with cabin although “cabin” is just the seats behind the front pilot seats and a storage area. I’m aware when writing this down that the Wilga is a small GA aircraft with easy systems, no fancy or complex aircraft systems installed like EFIS, ECAM, EICAS or FMS, but let’s not forget that this Thranda Wilga comes with lots of other features.
What other feature … like the previous discussed on-the-fly changing the external and internal dirt/scratches as well as changing the layout of your instrument panel and not to forget, creating your own livery. These “things” are I dare to say, unique. I haven’t seen them with other developers, in particular the instrument panel modifications. Add to this the well modeled 3D external model and the 3D cockpit with cabin interior, and you understand why I felt in love with this very nice, but weird looking Wilga. And to make this clear, weird is only mend because of the real model!
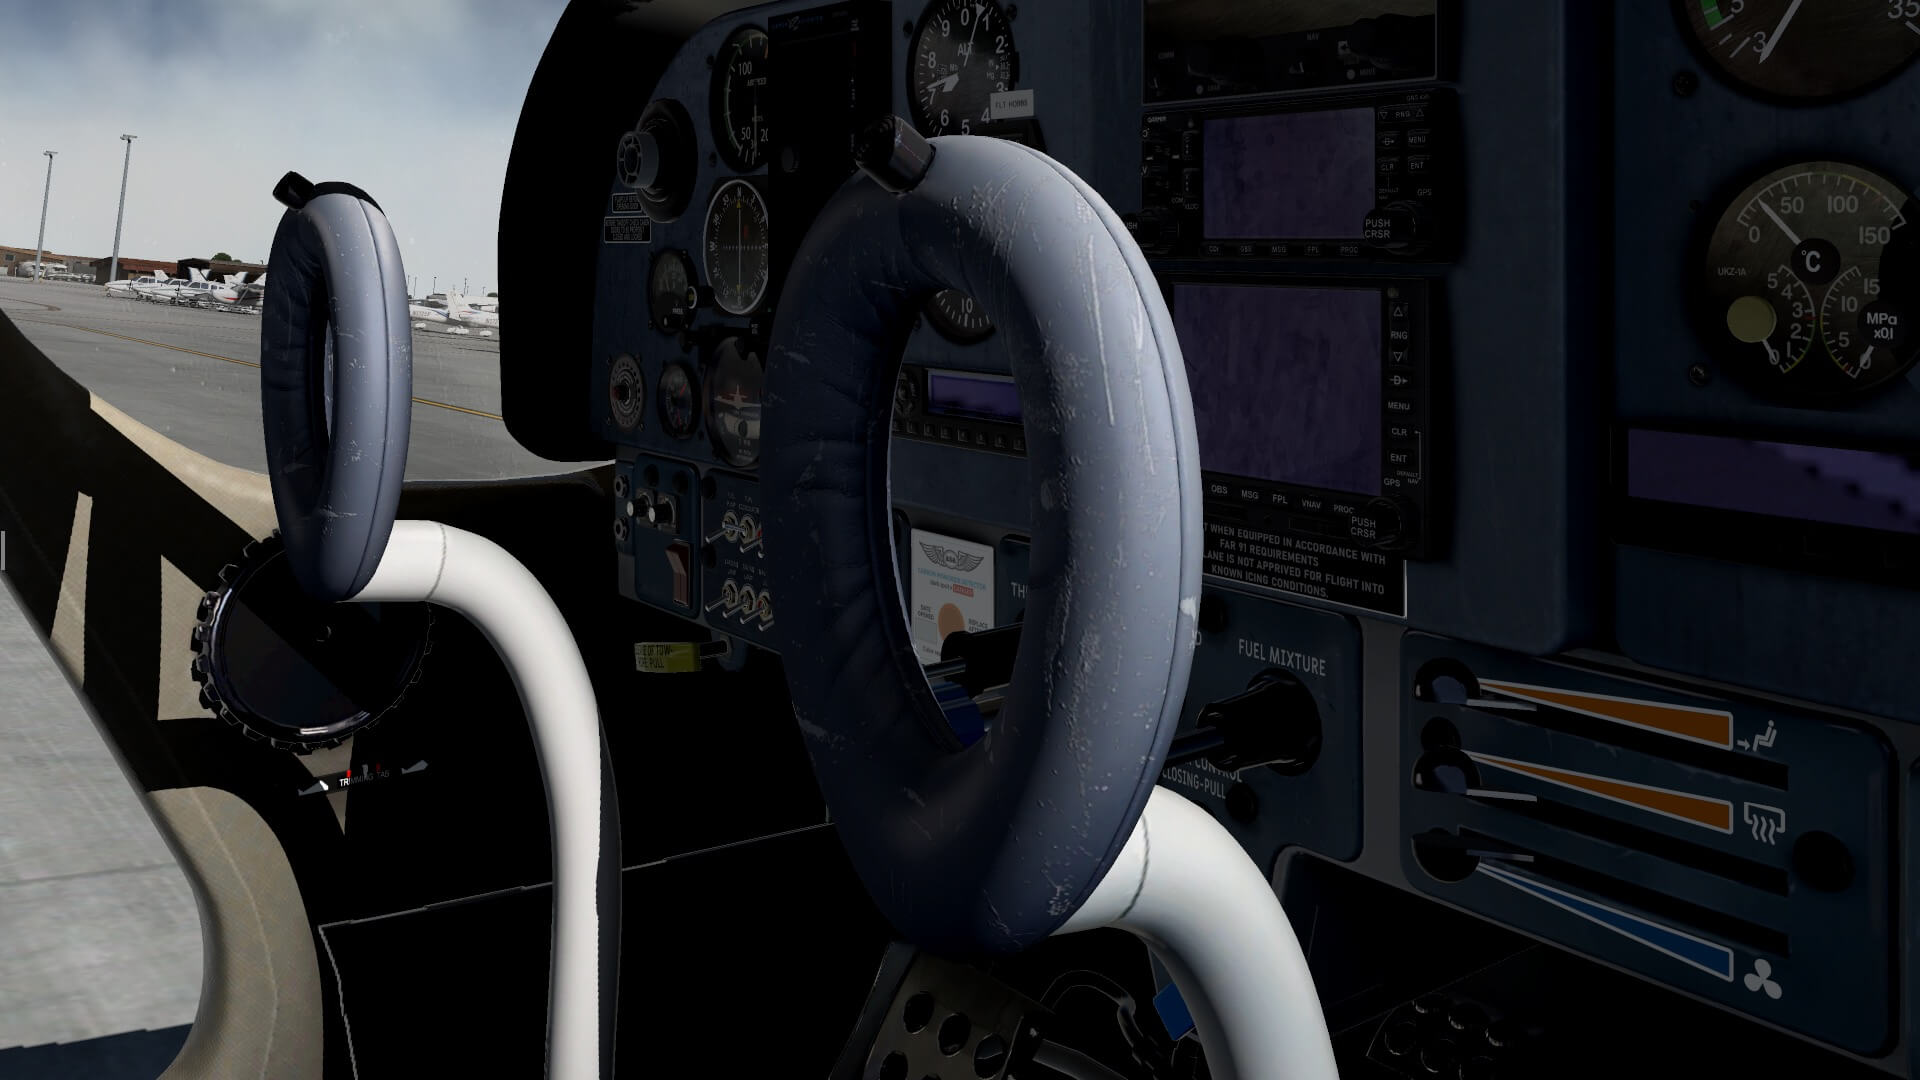
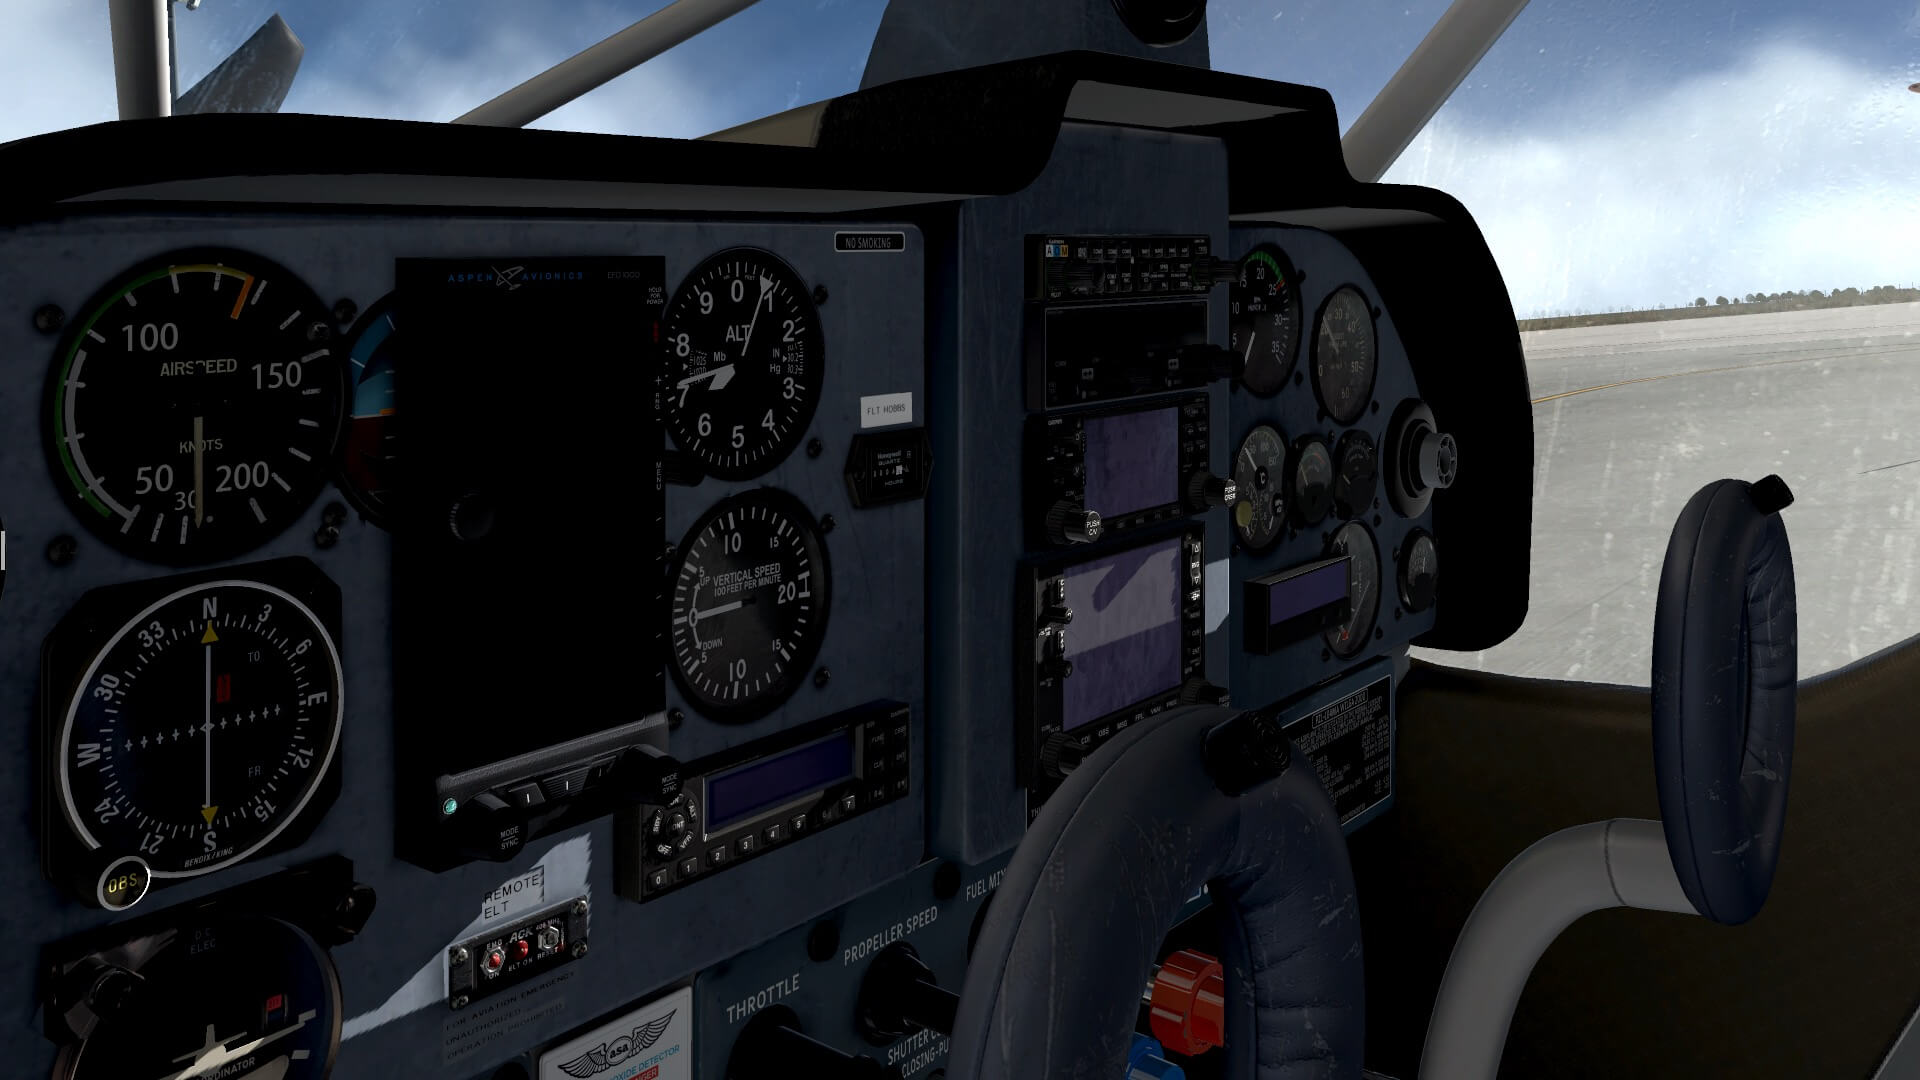
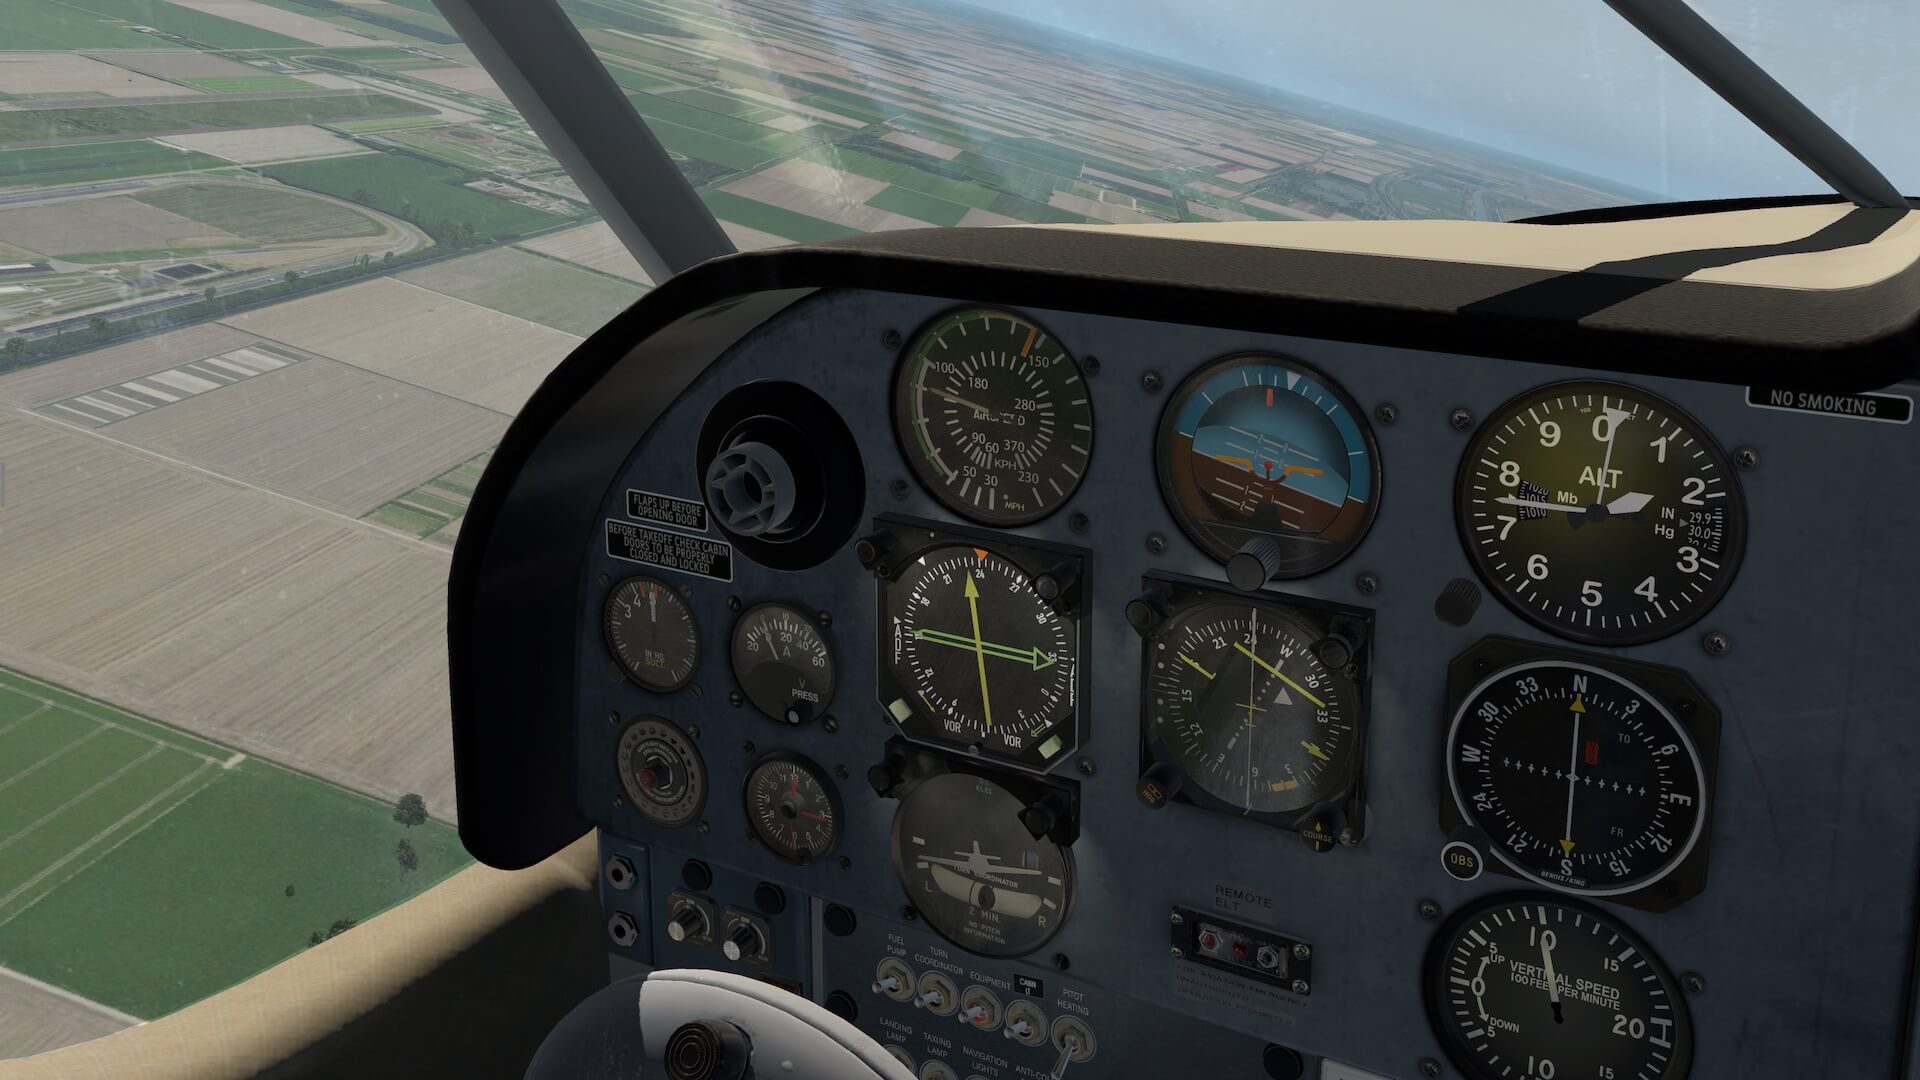
Anyway, whatever instrument layout you have, all what I see on the instrument panel, the seats, the floor, the windows – I love the windows – so actually, I’m in love looking to the overall interior. By the way, why do I love these virtual plastic windows? Let me first show you a picture, that helps for me too.
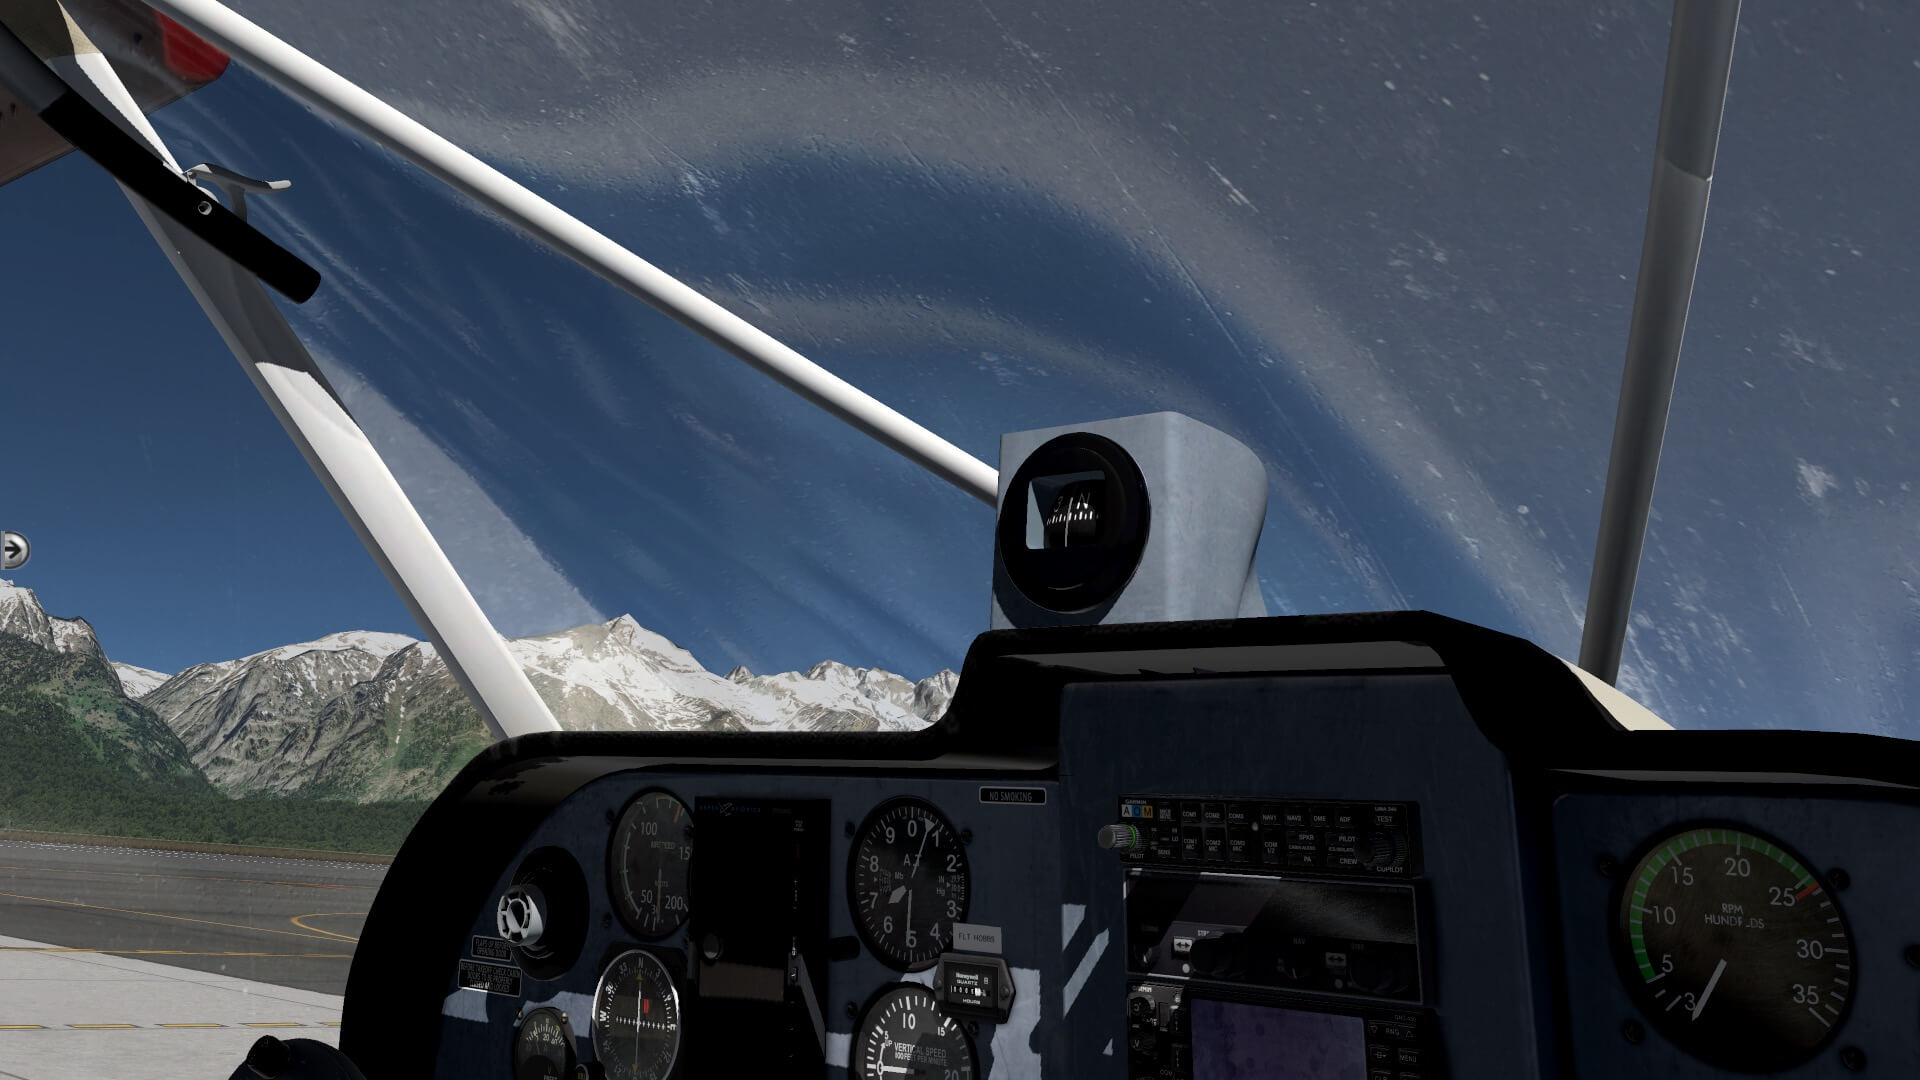

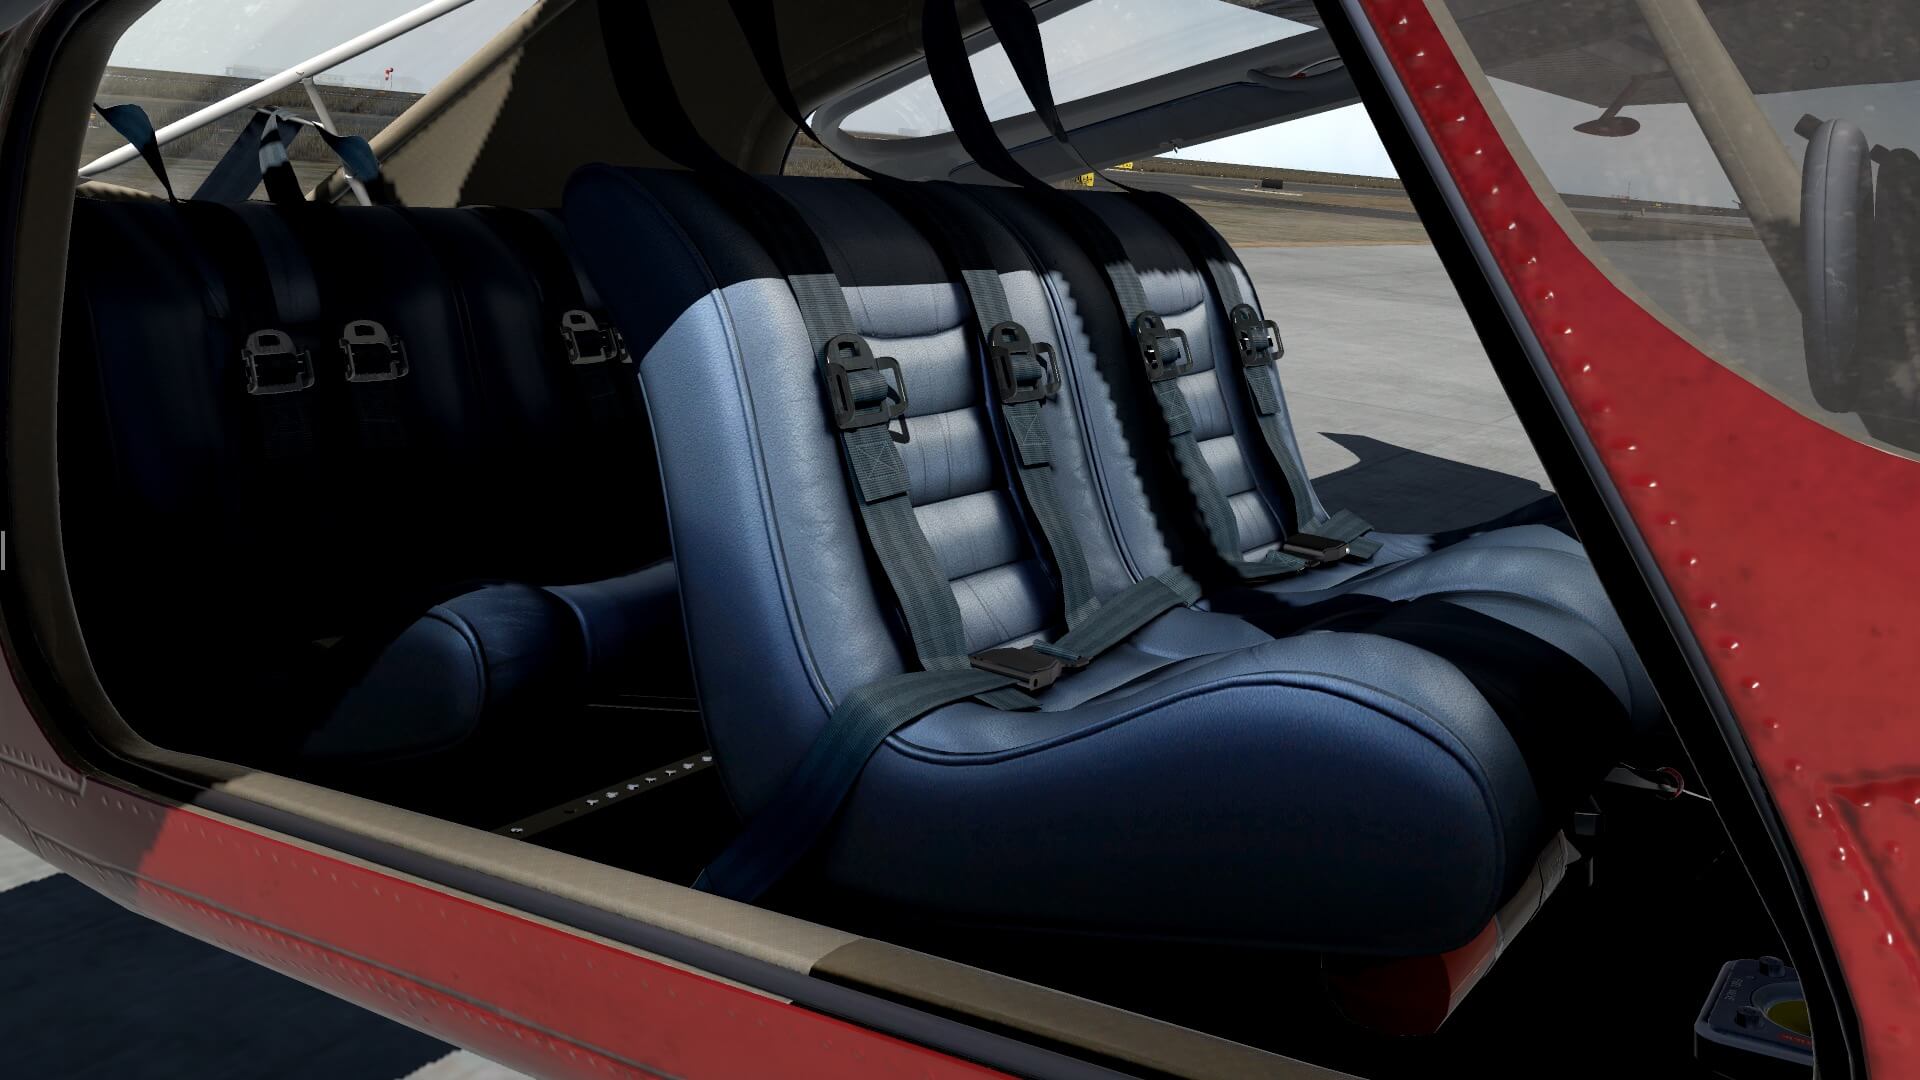
As you can see on the screenshots, the windows – front and side – are made of virtual plastic, yeah, that’s logic isn’t it? All these windows are dirty, also full with small scratches, and the virtual plastic looks like that it is made of an average quality. It makes it so real, so unbelievable how this is done and that for only windshield panels. This Wilga offers you also the possibility to make your own internal dirt modifications. That said, you can change the look and feel of the instrument panel with more or less dirt. With the left- or right-hand doors opened, you have access to the tiny, but well modeled interior. Even the smallest details can be found, even at places you don’t expect.
Let me give you a couple of examples; under the instrument panel looking to the rudder and brake pedals – covered with real photo texture material or painted by the paint artist – with the brake reservoir and hydraulic lines, the floor, the seat construction, the firewall between the cockpit and engine compartment as well as the sidewalls. There’s no pedestal or something that’s between the two seats, so it’s all one area and modeled.

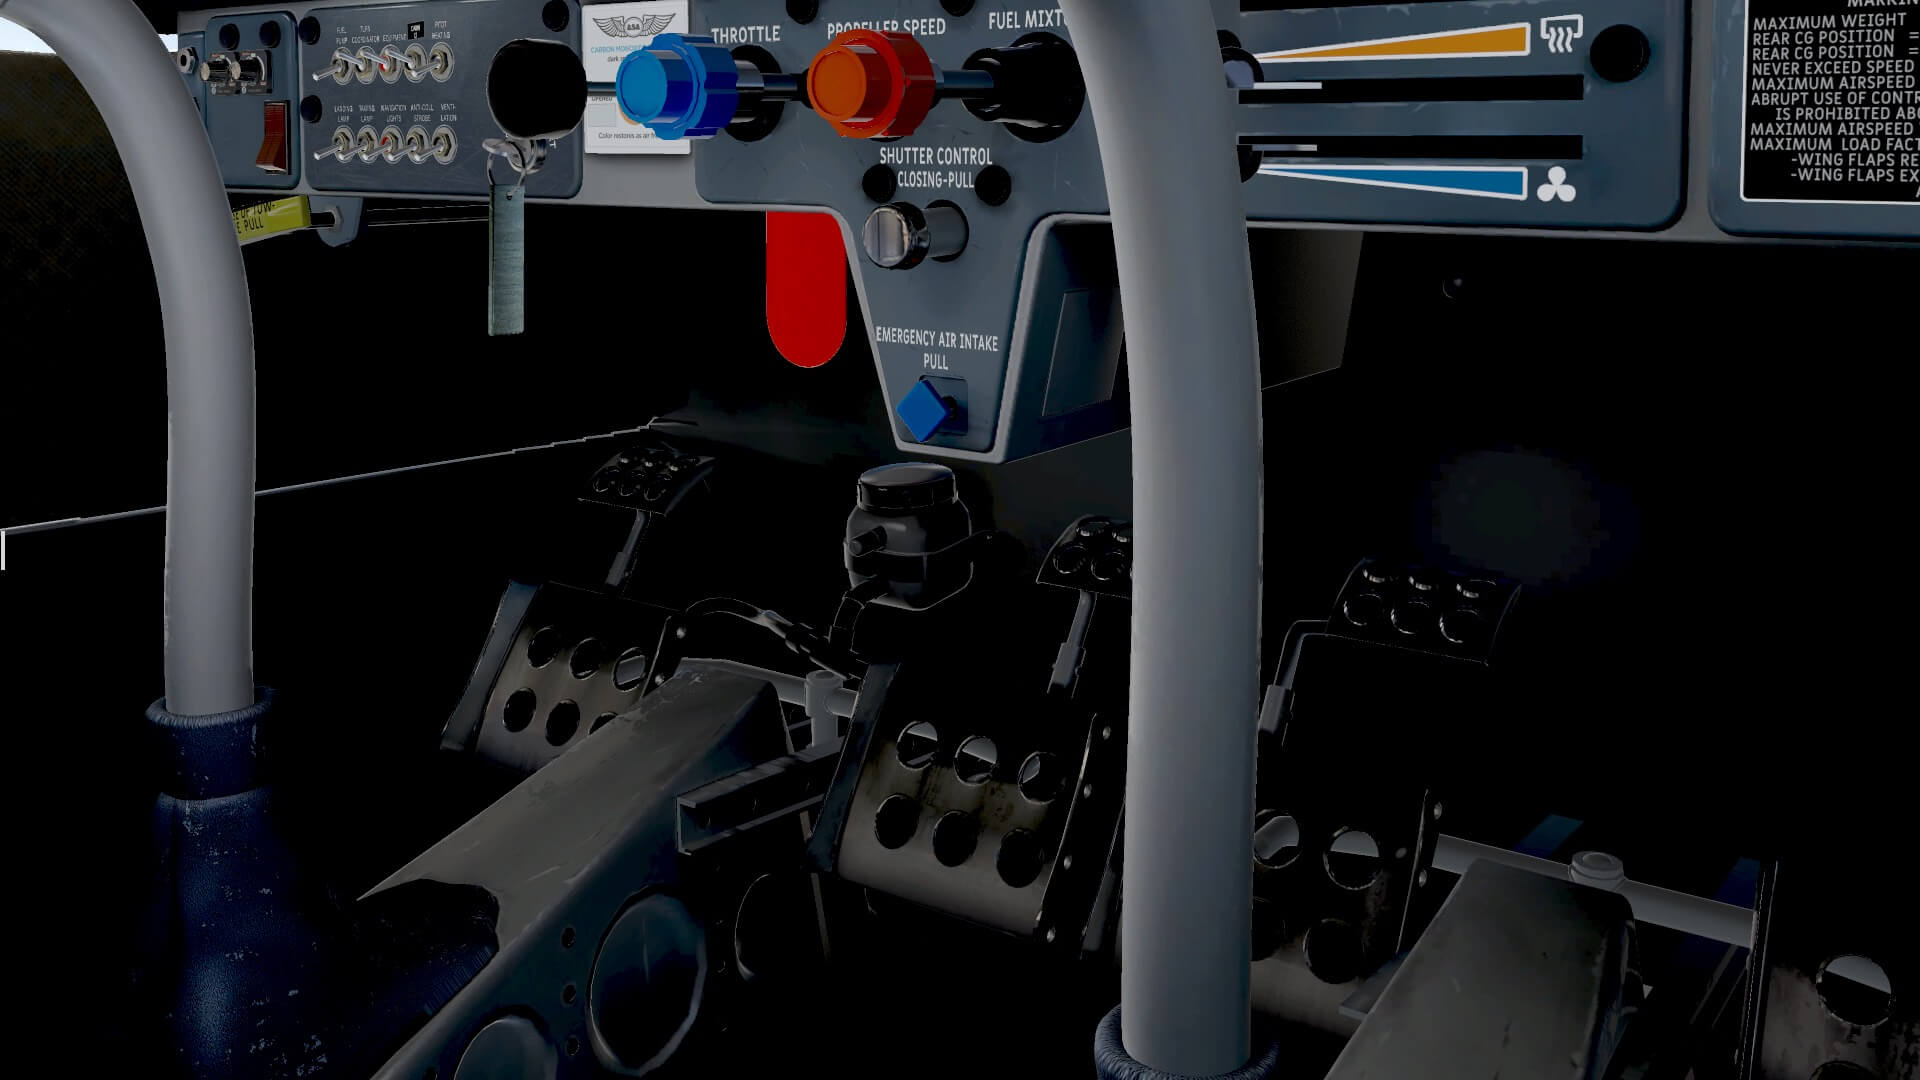


The instruments or indicators are all sharp, no, razor sharp I would say. When you look from a reasonable distance to it, it looks OK, but even when you zoom in, it still looks great. Even the simple things like the switches at the switching panel on the left-hand side of the instrument panel. My goodness, these are well done as well as the text near each switch, but what do you think of the fully functional circuit breakers behind the flap. Move the flap down – click on it – and check the CBs if one is popped out.
And what about the flight control sticks. I’s seen something in fighters, but didn’t expect this in such a GA aircraft. Expected or not, it shows me a fully weathered/used stick and via a sleeve, perhaps virtual leather, connected to a floor bracket.
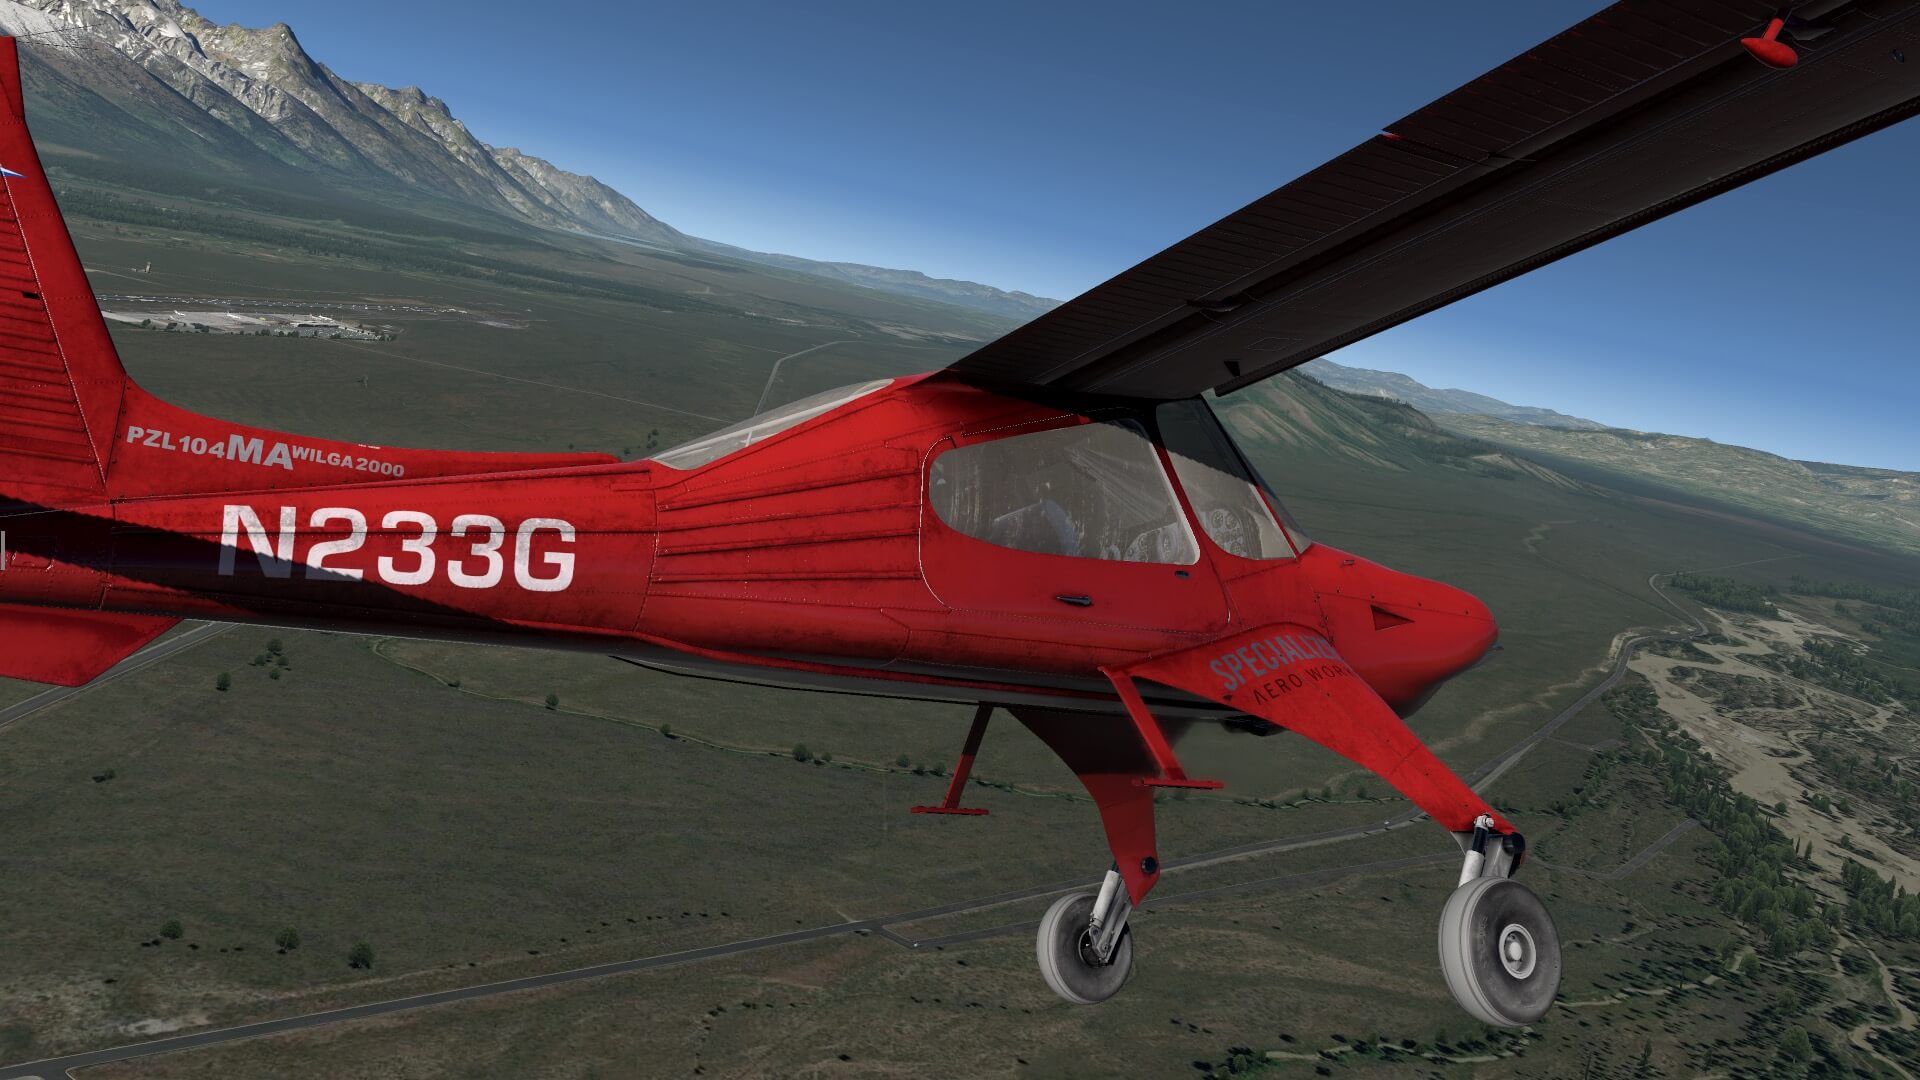
A VFR Fly Out
On this first short flight impression I don’t use any navigation equipment, so I just taxi, make the takeoff, follow a VFR pattern and land again. Let me first try to get the right feeling how this Wilga beauty flies. I decided to test this with the tailwheel in “simple” and “realistic” mode. Personally I found the realistic mode acceptable to taxi and to make a takeoff or make the landing. The only thing to keep in mind is that you use the YAW channel gentle else it turn around it’s own axis.
I didn’t assign any other TRIM except then of course PITCH TRIM. But what was my first feeling, my first impression?
It flies great after I first checked many real flight Wilga movies. I noticed for example in these movies that when the Wilga lifts off, it starts floating immediately so altitude gain happens straight away without or hardly pulling your flight stick. I also noticed that the Wilga is a bit “nervous” while flying. When you’re not used to this, you can easily oversteer. So this was all in real I’ve seen, but how does the Thranda Wilga behave?
Surprise … the same way!
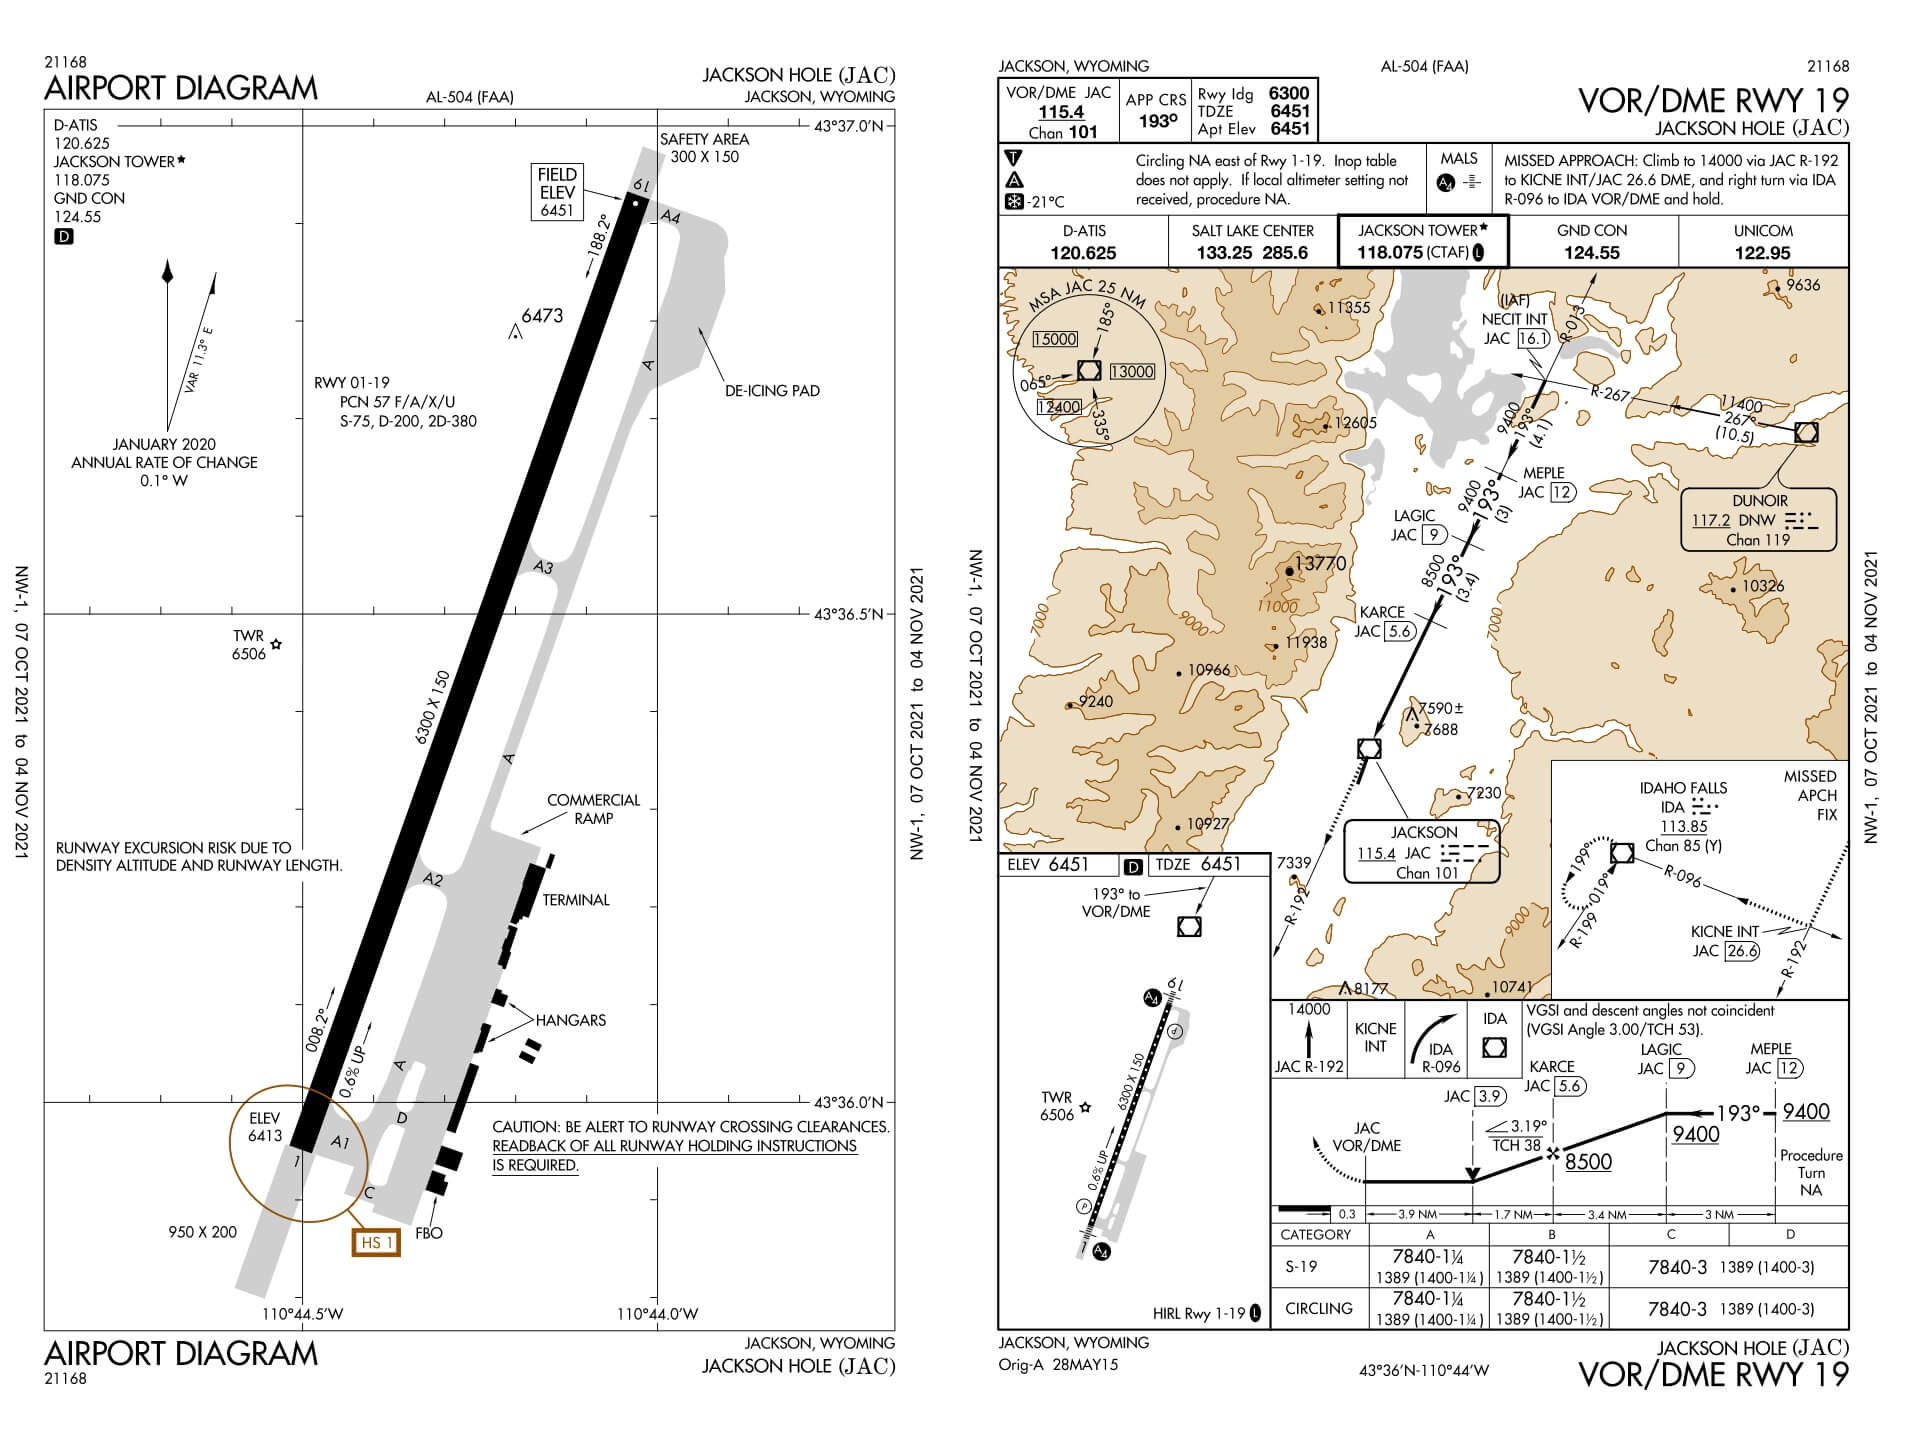
From my parking spot at KJAC – see screenshot below – I taxi via D – A – A4 to the beginning of runway 19. If I want to, I can use VOR/DME JAC (Jackson 115.4) but since this is a VFR pattern, I can also do it on visual. So after a while I make a left-hand turn to crosswind. Then after a short distance I turn to downwind. Unless the weather is terrible – but in case you don’t see anything you’re not allowed to fly under VFR conditions – but since I fly parallel in the opposite direction of the runway, I see the runway and at a certain point I turn to base and then finally to final.
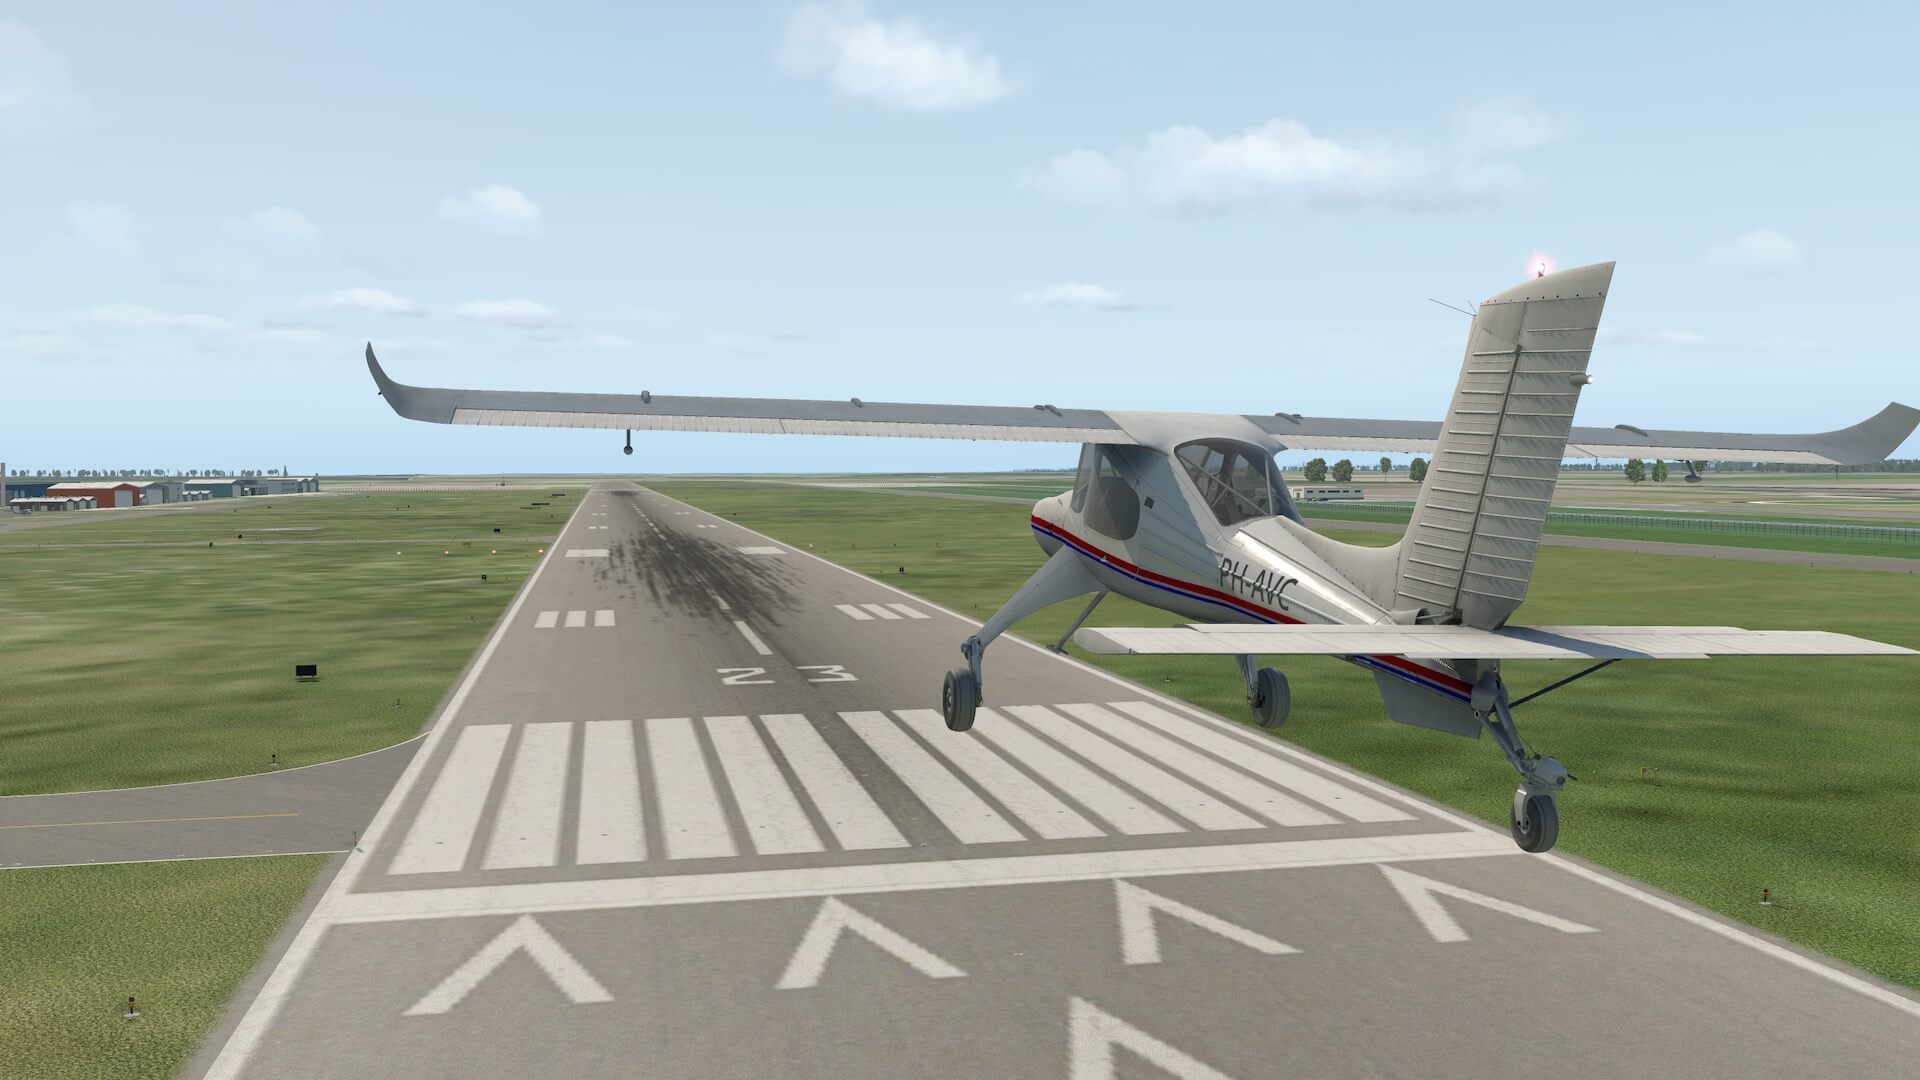
As you know and not surprisingly, the Wilga is a tail dragger and normally these aren’t the easiest aircraft to taxi or to keep them on the runway centerline, but for some reason, when you steer gently and keep focused on that, it turns out that it’s not so difficult. Lucky is also that your forward sight is acceptable. This means you’ve got a relative good forward view during taxi. Ok, I can tell you that I’ve flown the above VFR pattern several times. Not because I crashed, but because I wanted to get the right feeling. Based on that right feeling, I can write this section from the bottom of my heart.
Taxiing goes easy. Keep correct control of the YAW, but overall, slowly apply the throttle, and see what happens and I can tell you, that’s the best and right way. Such a long taxi distance from my parking spot near the FBO to the beginning of runway 19, when I can manage that, then I’m a certified taxi pilot for the Wilga.
Before turning onto runway 19, I set the brake, do all the necessary checks with the help of the build in Thranda checklist, and of I go. I apply some throttle, taxi slowly to the centerline and apply more throttle. When it’s rolling, to max throttle and now it’s a challenge to keep it on the centerline or near the centerline. What I miss from the moment the engine is running and also while taxiing, is that nothing in the cockpit is shaking or vibrating. Now it’s all steady, no movement seen in the cockpit, and that feels a bit weird.


What said before, at a certain moment – no no, I don’t do anything, the Wilga lifts off and steadily climbs out. When I’m around +1000 feet above KJAC elevation, I try to reduce the throttle, trim to stop any further pitch and start thinking about my VFR pattern. Since I’ve selected real weather conditions, I do have some winds, but no clouds. Lucky as I am, but the wind can cause some problems however, the wind is more for higher altitudes.
Once the Wilga has leveled off, it’s still a bit nervous, but I also see that as a challenge to fly and master the Wilga. By the way, I go for a left-hand pattern. While on downwind, the longest part of the pattern, I focus on my heading and of course to maintain my altitude. When you’re new to patterns, the runway is almost 190 degrees, so the first turn to CROSS WIND is +100. Then DOWNWIND which is 010, so almost “N”. For BASE I need to steer to 260, and finally, for FINAL to 190. That’s what I learned during my PPL lessons, focus on the Whiskey compass to steer more or less in the previous headings.
Before I reach my point for BASE, I slowly decent, turn to BASE and a bit later to FINAL. When I’ve done it right, PAPI should show me at least 3 white and 1 red light, better would be 2 white/2 red. I select the FLAPS, reduce the throttle and aim for a landing on the spot of runway 19. Oversteering is possible, so watch out for that, but after a couple of times you get the right feeling and then, it’s fun to fly and master the Thranda Wilga.


Although you can select panel option 2 which comes with a S-Tec Fifty Five X basic AP (Auto Pilot), I prefer on this initial VFR flight to do it all myself. Flying manually and trimming can be good and enjoys the overall Wilga flying experience. Oh yeah, you need a bit more attention and a bit more focused on what’s happening while flying the Wilga. During my C152 PPL lessons I also had no AP, and I finally managed that too.
I did the VFR pattern as I described above several times and more and more I started loving the modeled Thranda Wilga. Although at first the Wilga feels or behaves a bit nervous, you start to understand that, and you start to correct for that and at the end, you love it!
Dutch Wilga IFR Adventure
For my next flight which will be an IFR flight, I move to my home country, the Netherlands. For that, I depart from EHLE or also known as Lelystad Airport. It’s not yet an international airport, but making an IFR flight will be nice due to the amount of VOR/DME beacons and/or using the Garmin equipment. My cruise level will be 4000 feet which is too high versus real altitude regulations, but in X-Plane offline we can do that without any problems. But first, before I can start with an IFR flight we need to do a couple of things, so lets start with ……
Flight Planning
First, creating a flight plan.
I could do that by entering waypoint by waypoint in the Garmin GNS530, but you can also create a flight plan via one of the many online or offline flight planning programs. You can use Simbrief, or the offline Little NavMap program, but you can also use SkyVector.
Many options are possible. It’s not really my task to explain all possible options and how to create a flight plan, but I would like to highlight a few. The first one which is used for real flight planning is SkyVector. When you’ve used it before, then I assume you have an account. Please register for SkyVector, it’s free, and it allows you to save flight plans and send them you your given email address. When you’re new to SkyVector, then this URL will help you understanding how SkyVector works.


Anyway, perhaps the biggest disadvantage of SkyVector is that you can only save your flight plan in “fpl” format. That’s nice, but not for us since we need a flight plan with format “fms” since that’s what is needed for the Thranda Wilga since it uses the default Garmin GNS navigation equipment. To convert the “fpl” file to “fms” format you need to search for X-Planetools.Com. Surf to this website and click the “Convert Online Flightplans” button and enter the data from your SkyVector flight plan. When you’re new to this online program, scroll to the bottom and check out the YouTube movie “Using Flight Plan Converter”. At then end you will save it to fms format.
Another possibility is using the offline and therefore the downloadable package from Alexander with his Little Navmap. Since the flight plan is known, you’re basically doing the same as what I did with the SkyVector program. You enter your departing and arrival airports including all the waypoints. Then save it within Little Navmap and export the created flight plan as X-Plane 11. A note to this is that try to keep your AIRAC cycles for X-Plane 11 and Little Navmap up-to-date and of the same cycle number. Actually, you don’t need to keep the Wilga Garmin GNS Data Base (DB) up-to-date, you need to keep the X-Plane 11 AIRAC up-to-date since the Thranda Wilga doesn’t use an own AIRAC DB.
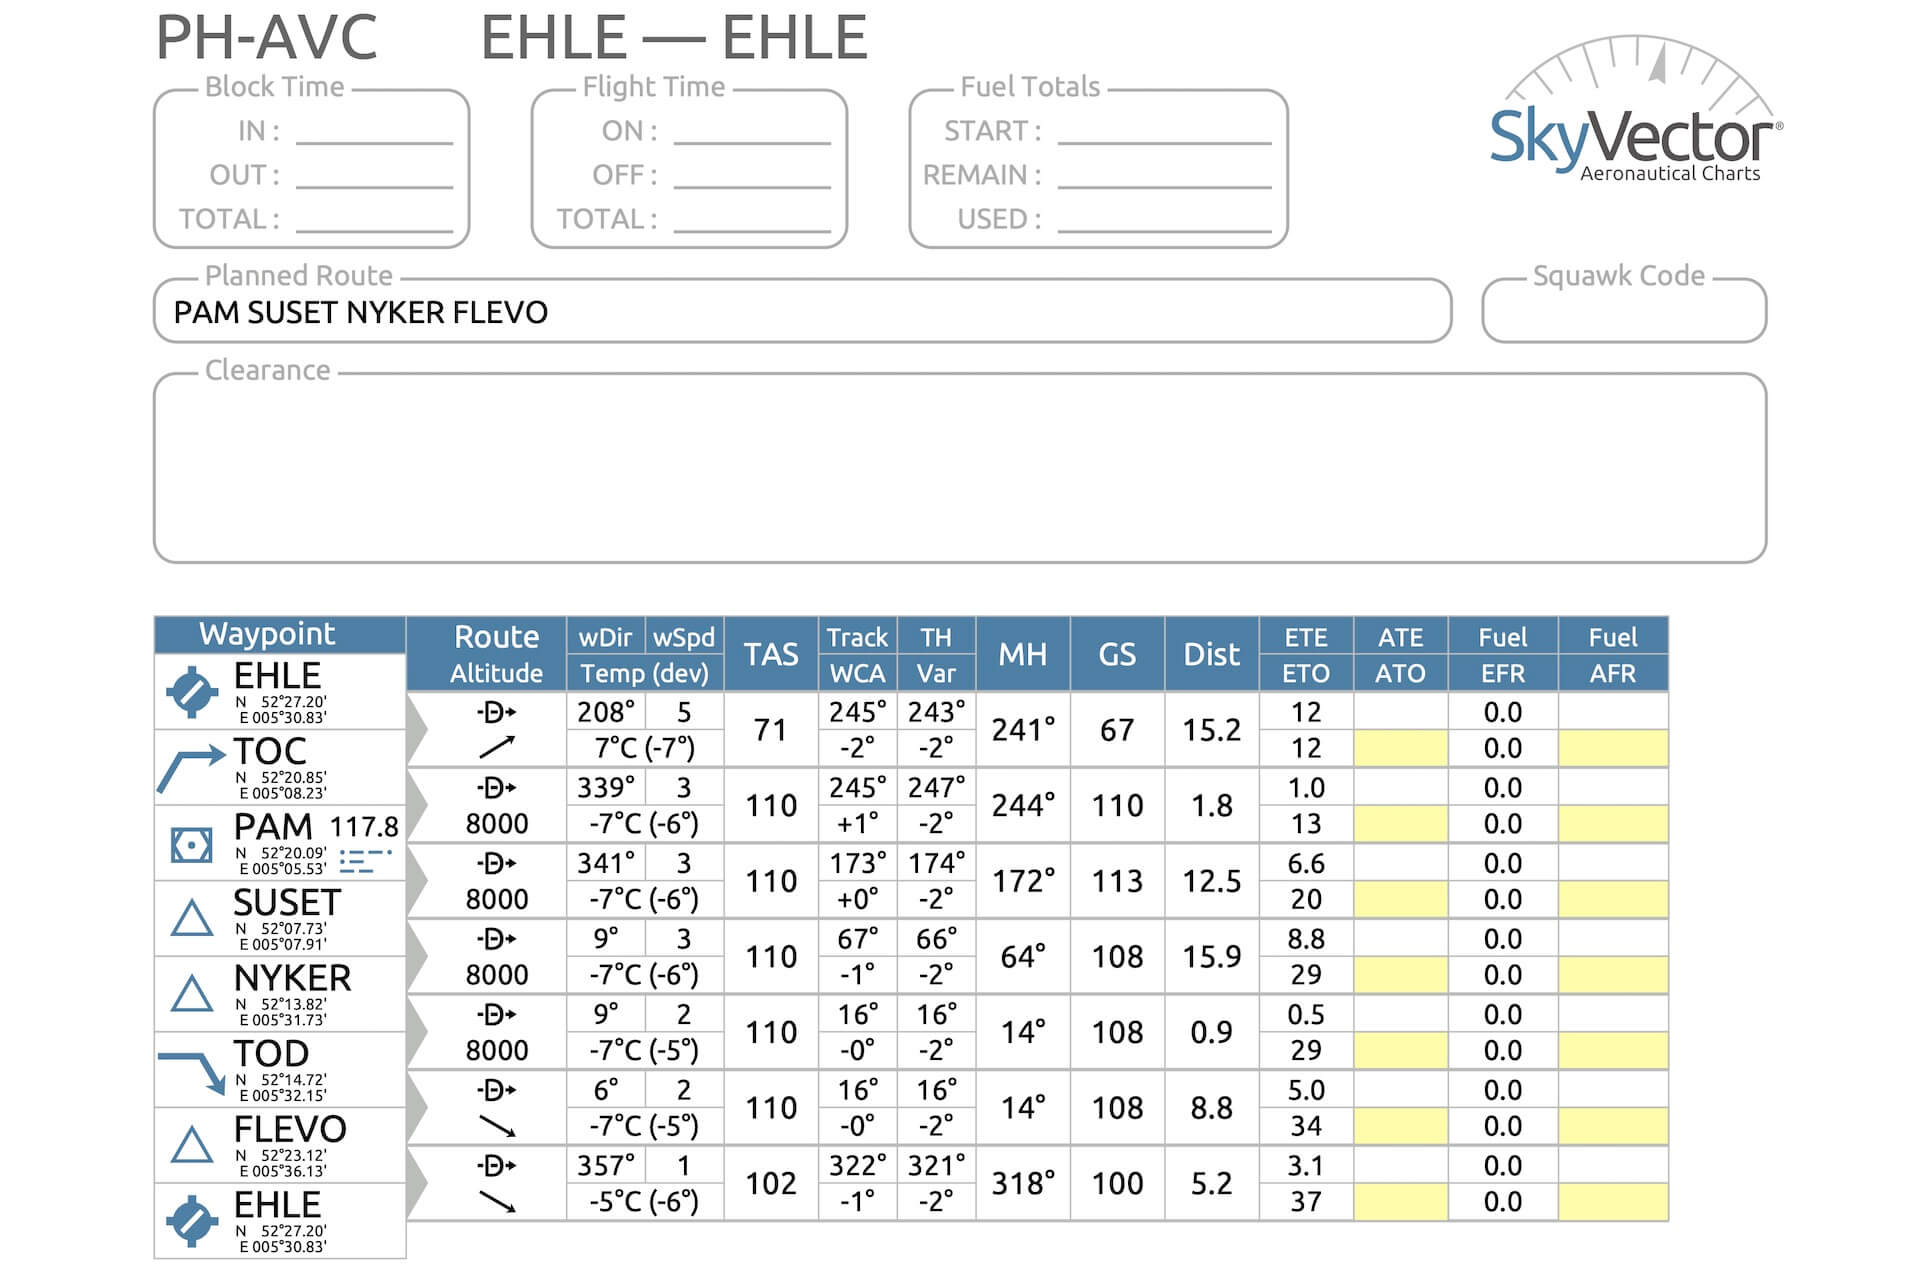
I’m not 100 percent sure if this is for everybody the same, but when I select panel option “2” I have the S-Tec Fifty Five X basic Auto Pilot panel installed. If the real Wilga also had the option of this AP, I’m not sure, but for a bit longer flights it’s handy to have this basic AP onboard. I created with Little Navmap for this IFR flight a short flight as can be seen on the following screenshot. As you can see, I use only one VOR/DME beacon while all others are waypoints. Lucky that I have the Garmin GNS 430 onboard which allows me to load the fms flight plan and let the AP follow the plan from the Garmin.

And do you know how to load the flight plan in your GNS430 or perhaps you’ve modified your instrument panel and added the GNS530 in it or replaced the GNS430 with a GNS530? On page 42 from the Laminar Research GNS430 Acrobat manual you can read how to load your flight plan. In case you have the GNS530, then look in this manual starting at page 49.
The Actual Flight
I had already flown the Wilga from KJAC, so I know a bit what to expect. That I use on this Dutch adventure a different instrument panel with AP and the GNS 430, makes my life a bit easier and to try out a different panel layout. It doesn’t mean by the way that I won’t fly the Wilga all the time with the AP connected. No no, I will definitely fly the Wilga also manually as I previously said, once the Wilga is in the air, it flies like a charm.
So, here we go.
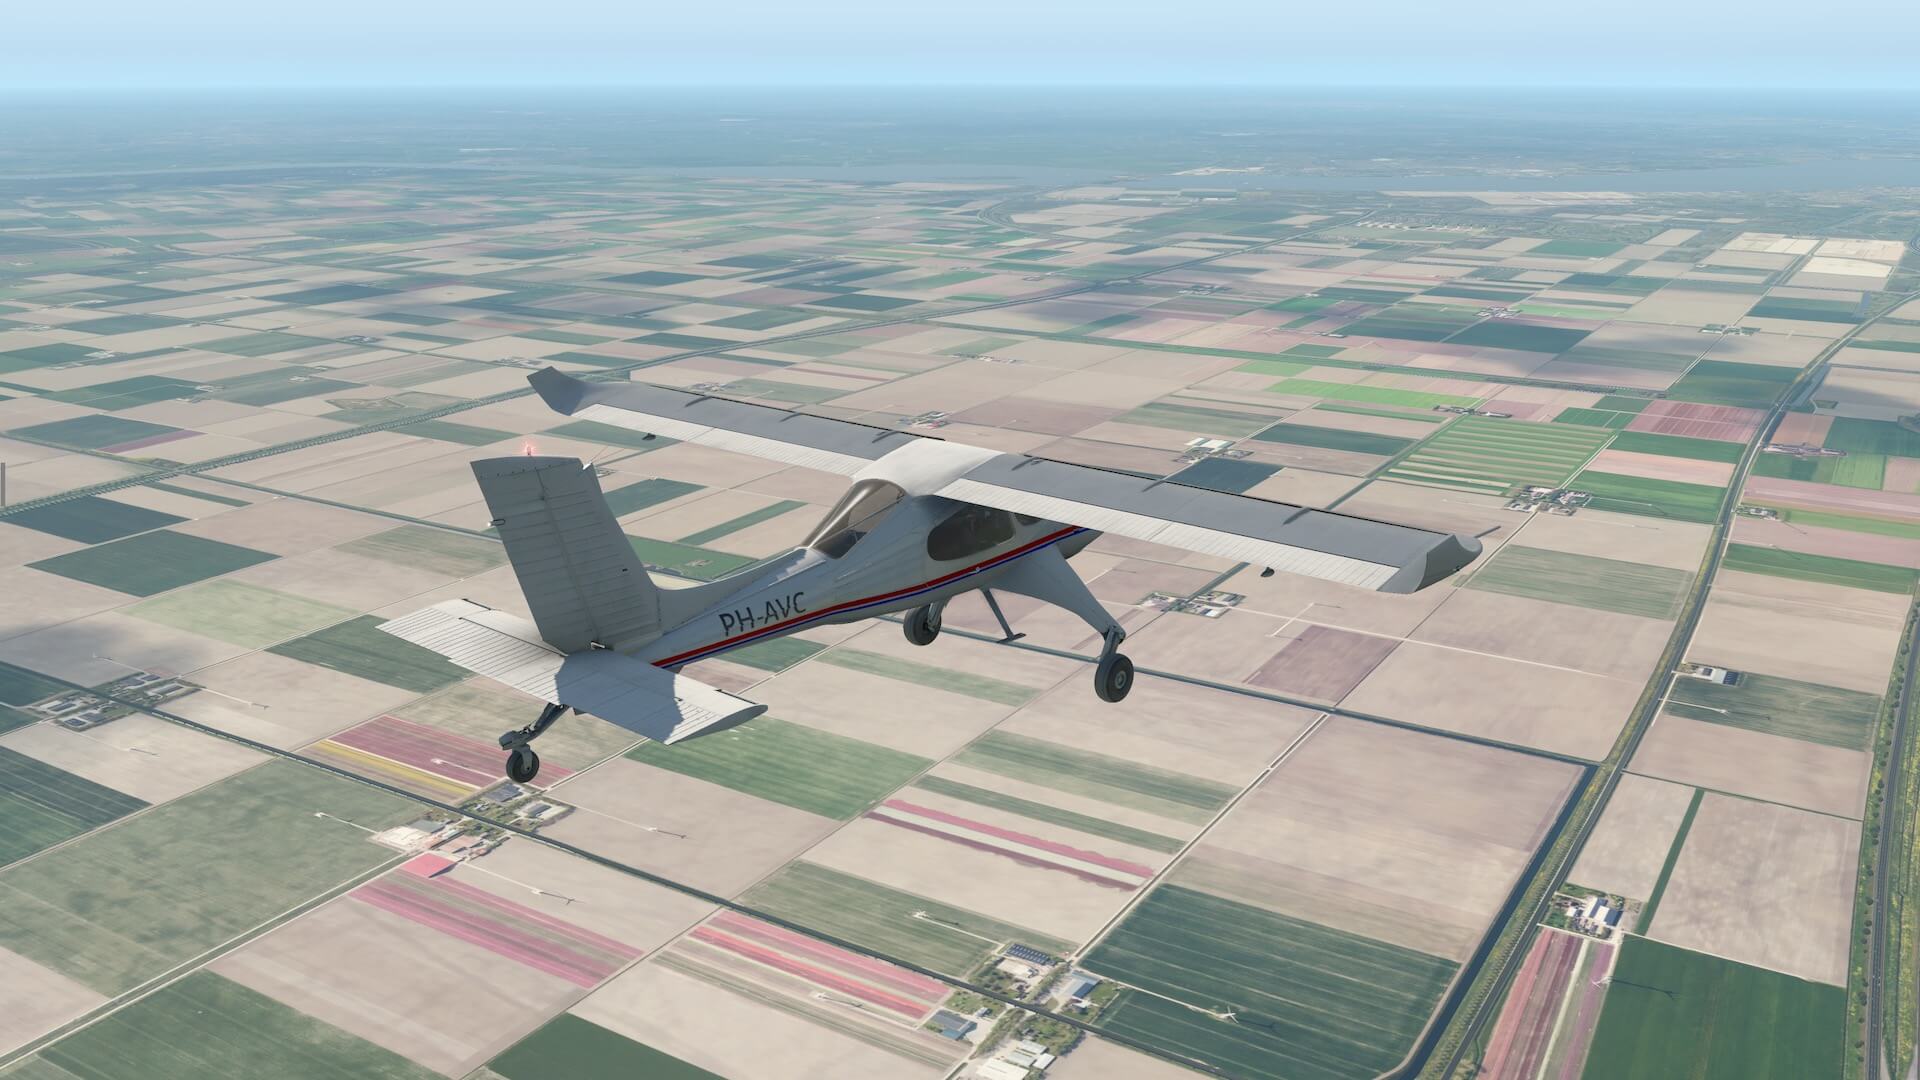
I’ve parked my own created Dutch dynamic livery with registration PH-AVC somewhere along the taxiway in front of a hangar. There’s not really a good and accurate scenery, but the one I found at the X-Plane.Com Scenery Gateway is good enough. More important for the real feeling and visualization is that I also installed from Zones-Photo ZL16 photo-real or ortho textures from the Netherlands. For those who are familiar with the Netherlands and Zones-Photo, you only need tile +52+005 in relation to this IFR flight, but feel free to download other tiles too.
Basically this flight is, in respect to the aircraft behavior, very similar with the previous VFR flight except that I use a different panel layout namely panel 2. It seems a bit old fashioned since most instruments are old, but it does come with an Auto Pilot and yes, it’s a basic AP, but perfect for this flight. Together with the Thranda checklist, I load my flight plan in the GNS430. I’m aware that I mentioned this before, keep in mind else you run into an error, that the flight plan in Little Navmap is made with the same AIRAC cycle as is used in X-Plane.
Underneath the AP panel you find a small panel where you can set the cruising altitude. For this example flight I enter 4000 feet and ARM the ALT mode. Not that you see anything of this, but believe me, it works.
Depending if you’re online or offline, you need to set a squawk code and set the ATC transponder to ALT (itude). Further steps to perform can be found in the checklist. I planned my takeoff from runway 05 which is not in the direction to VOR/DME station PAM, but it’s also good to make a left-hand turn along the highway to the city of Almere. That said, I decide to use real weather which means, I’m lucky today, that I’ve chosen a perfect day with clear sky, but with some windy conditions. This time the taxi from my parking spot to the runway is short and as I mentioned before during my longer taxi in KJAC, I don’t feel or see any “shaking” effect while taxiing.
Doing my last checklist items including aligning the heading bug to the runway heading, and then I’m out in the sky. I forgot to select my flaps, but with such a long runway it takes a bit longer before the Wilga lifts off. She climbs out steady and I decide to set the AP by clicking the HDG button. Since I had aligned the heading bug with the runway it nows the way to go. I had on engaging the HDG button an average vertical speed – VS – of 800 feet/minute which means that the AP locks at this VS. If I want, I can change the vertical speed, but for now that’s OK.
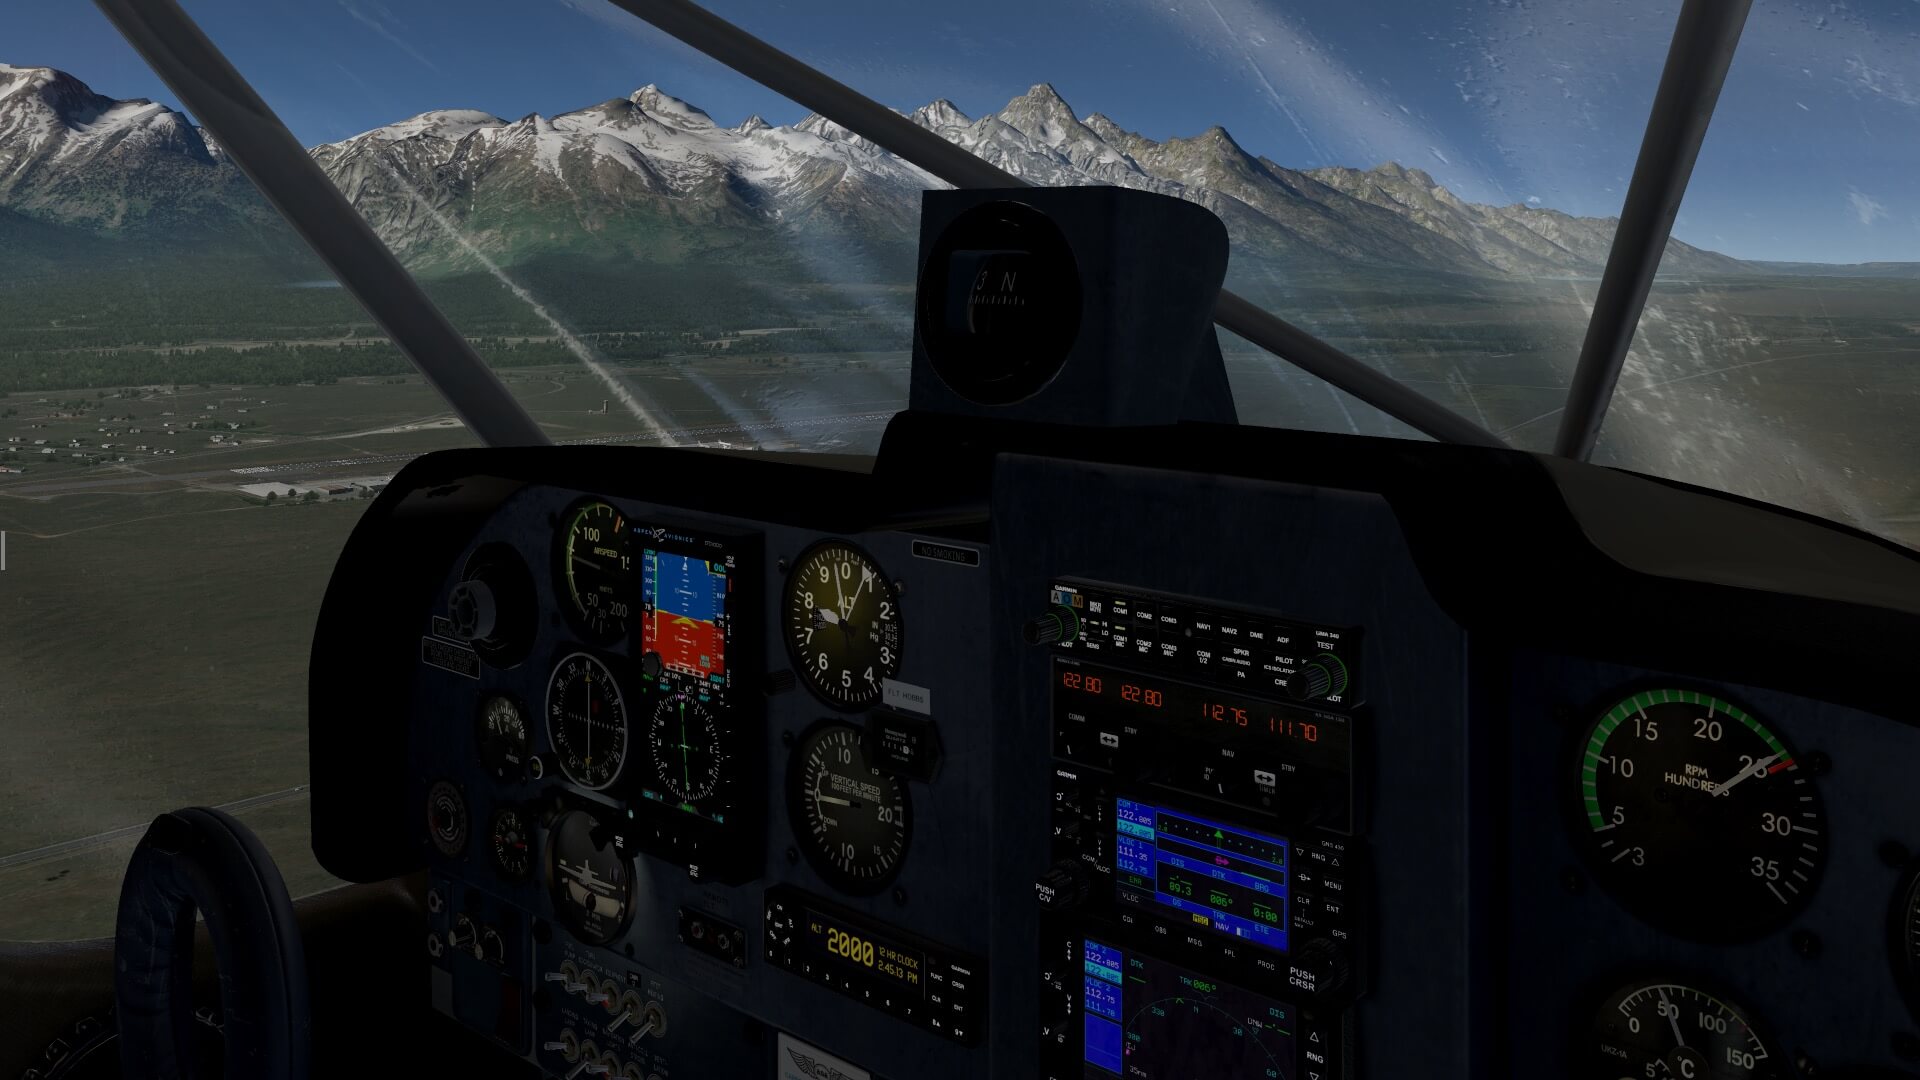
With the AP connected in HDG, VS and a preselected altitude of 4000 feet, the Wilga will stabilize and follow the climb flight path. Beautiful how it is, I press the NAV button since I want to follow my flight plan, but to do this correctly, I need to select on the GNS430 the CDI button to GPS. After this the Wilga makes a nice and gently left-hand turn while climbing further to 4000 feet. It doesn’t take long before I’m approaching my cruising altitude.


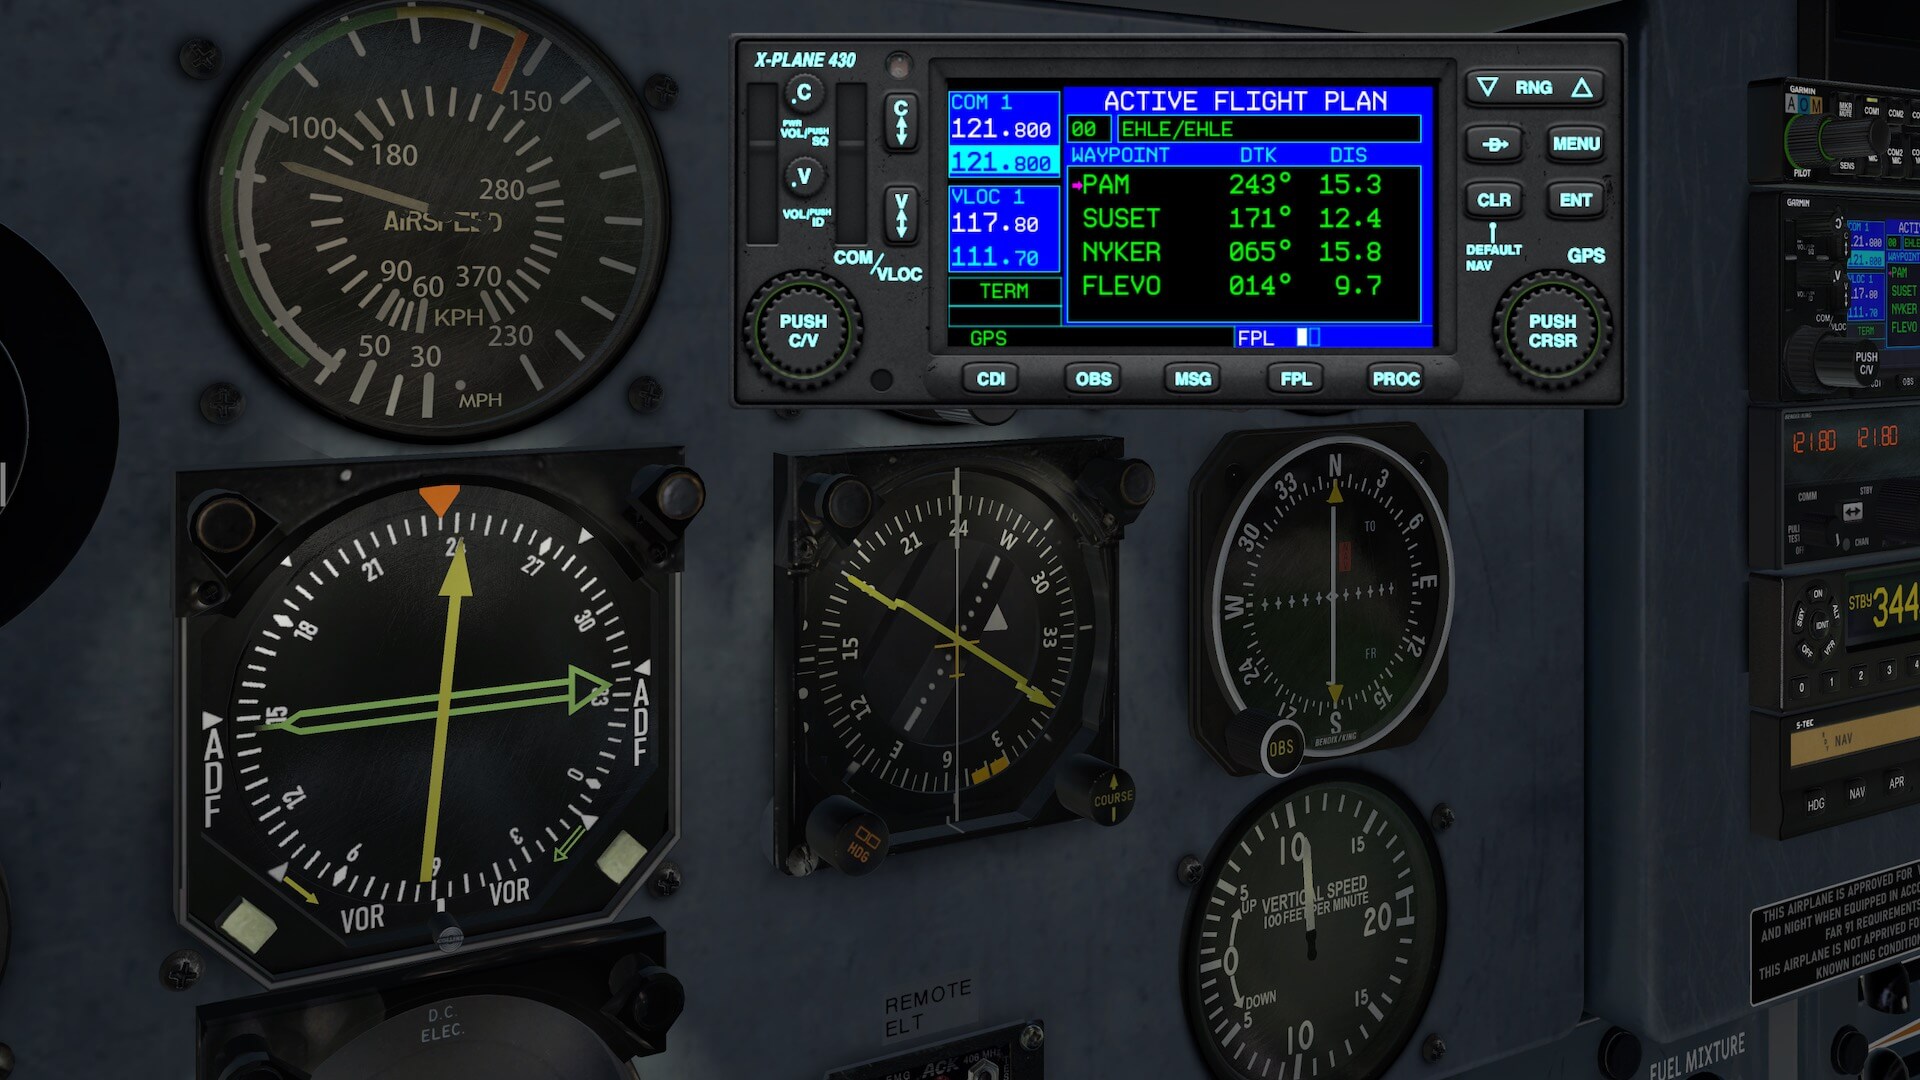

It’s great to see how nicely the Wilga is leveled off at 4000 feet. Smooth and easy. And yes, we’re heading for our first waypoint in the flight plan which is the previous mentioned VOR/DME PAM. Since the Wilga is now at cruising altitude, IAS (Indicated Air Speed) set, I’ve got some time to try out several features. That the GNS 430 has a 2D popup doesn’t surprise you and me since this is from Laminar Research, but you also have a 2D popup from the S-Tec STEC55 AP panel, the GTX327 ATC transponder and not to forget the small ALT select panel.
But there’s more to see. Due to the different lighting in flight, I’ve got a great view under the instrument panel with the pedals, the linkages, the hydraulic lines and a brake hydraulic reservoir. All of that modeled with great detail and let me not forget the pitch trim wheel on the left-hand sidewall with the decal. But there’s so much. Let me introduce you to the flap lever in the ceiling. You’ll see that a bit later in one of the screenshots. In the main time I’m passing PAM and flying into the direction of waypoint SUSET. It’s all not that far from each other. To SUSET it’s around 12.4NM, and from there to NYKER it’s only 15.8NM. Then to FLEVO and not long after that we can see EHLE again.


Although I kept the AP connected till now, I can and will also fly the Wilga myself. It’s easy to do that although you have to concentrate to keep it along the intended track. Probably you won’t fly as accurate as the AP does, but it’s possible. The disadvantage of flying the Wilga manually is that you can’t thoroughly check out the 3D cockpit compared when the AP is connected.
After waypoint NYKER the flight plan brings us to waypoint FLEVO. From now on I decide to set a VS of -500 feet, monitor the IAS and correct it when needed.
While approaching FLEVO, I can see already EHLE and decide to align the heading bug first with the current heading and then I select the HDG button on the AP panel. Then I give the Wilga a right-hand turn while it’s further descending. When I’ve reached approximately 1500 feet AGL, I disconnect the AP and fly further on manually. I need to make a last turn for a landing on runway 23. For some reason PAPI (Precision Approach Path Indicators) seems not to work since all lights are white while I should see also, at least, one red light. Is it me or am I really to high? No, I believe I’m OK, but when you control the Wilga gentle, you can control her nicely down to the runway. I had selected the FLAPS for the landing although with this long runway I could have to it without it.


This was, same as I experienced during my VFR pattern flight, fun. Taxiing isn’t easy, but that’s mainly because of the tail dragger. On the other hand, once the Wilga is in the air, it’s easy to control her. Although the real Wilga has no roll (aileron) trim, it is implemented in the modeled Thranda Wilga which makes it a lot easier together with the pitch trim. Overall … fun!
Floating Impression
The Floats
Since version 1.1, the Wilga can also be equipped with floats or actually I should write with either amphibious- or regular floats. Wow, these floats are relatively big compared to the sleek Wilga. What you see on the screenshots below are the amphibious floats that allows you to start from any paved ground. Each float is equipped with at the front a small wheel with a construction that can halfway retract and midway of the float there’s a large wheel that is fully retractable. On the top of each float you find clearly marked with a yellow plate a mechanical indicator if the wheel is correctly retracted which is important before landing on water.
Besides this tiny detail, each float are well modeled with eye for many tiny details of which one was the already mentioned yellow “on water landing versus the main wheel” decal, but there are more tiny details that are included like the construction of each float, the individual panels, the thick crossbars, the steel cables that hold the construction, the water rudders with their construction at the back of each float to steer and the wooden pedals on the inside of each float.
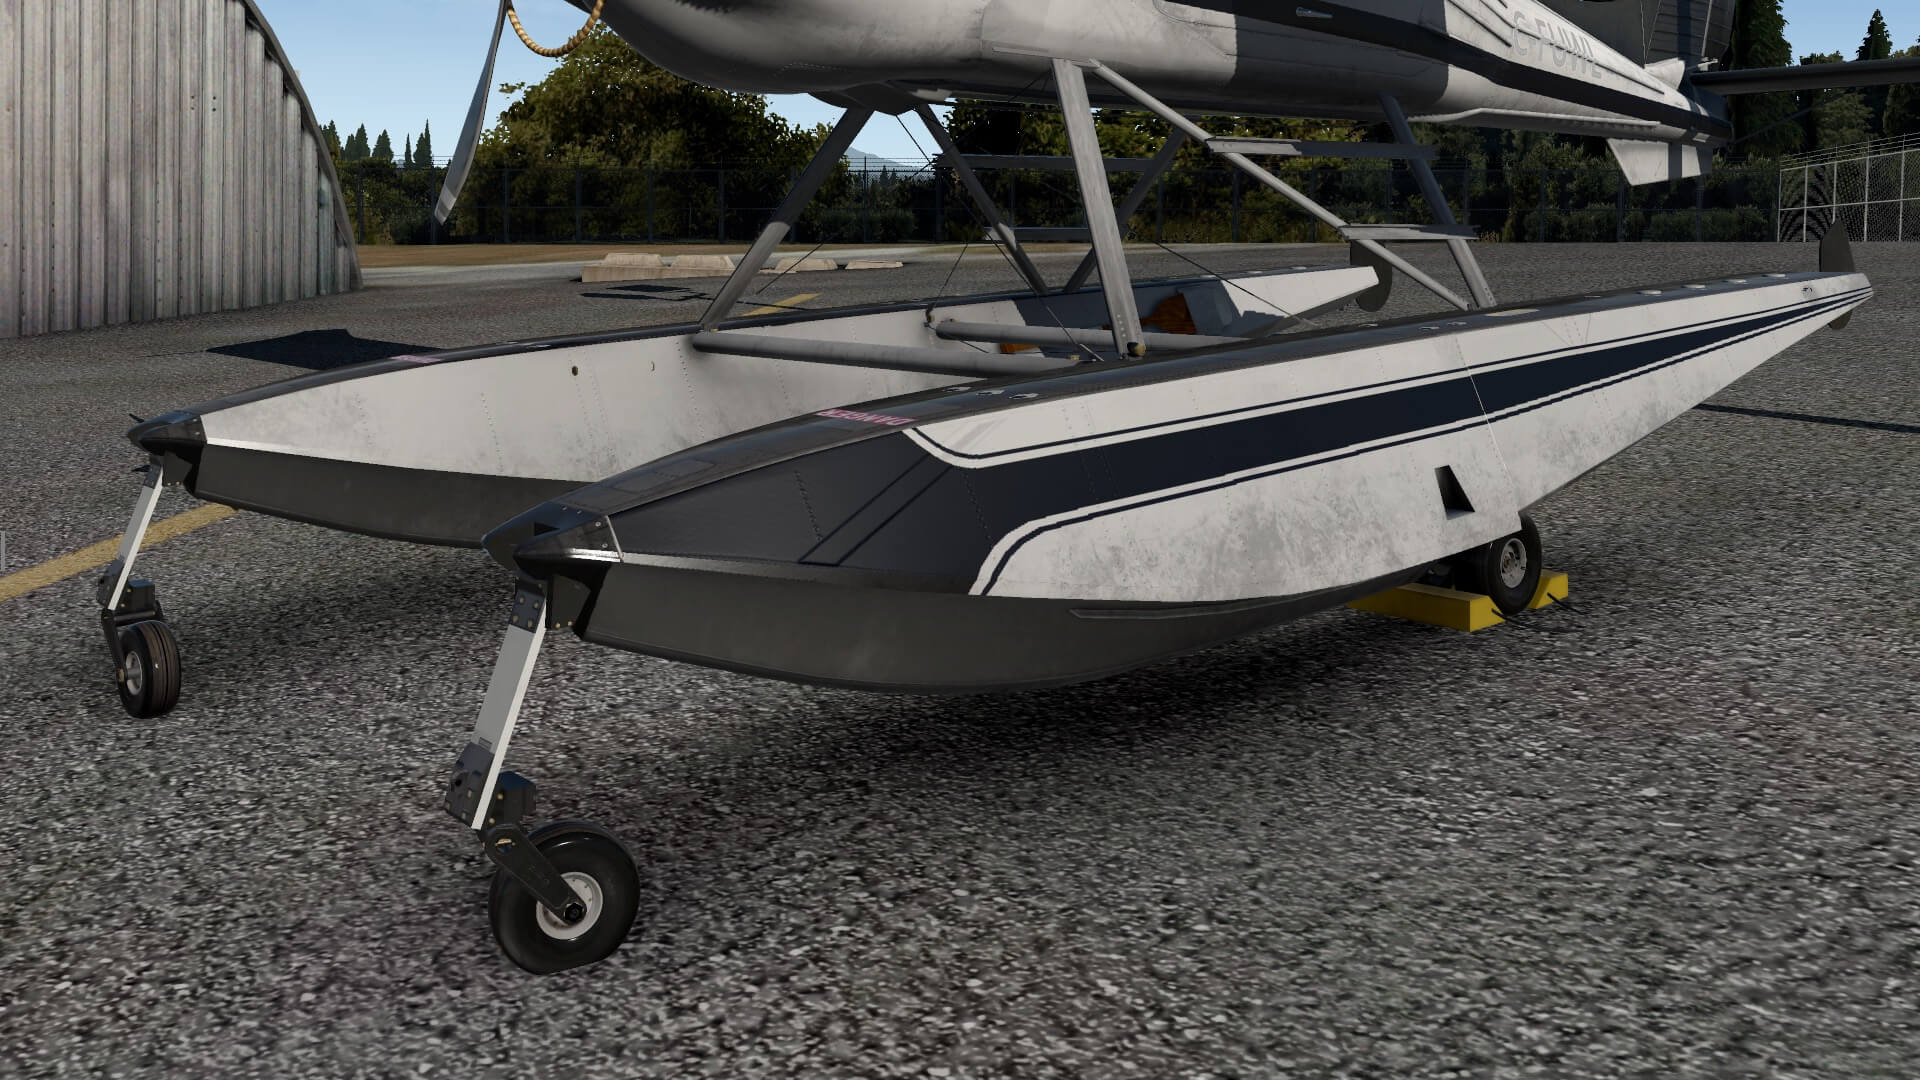
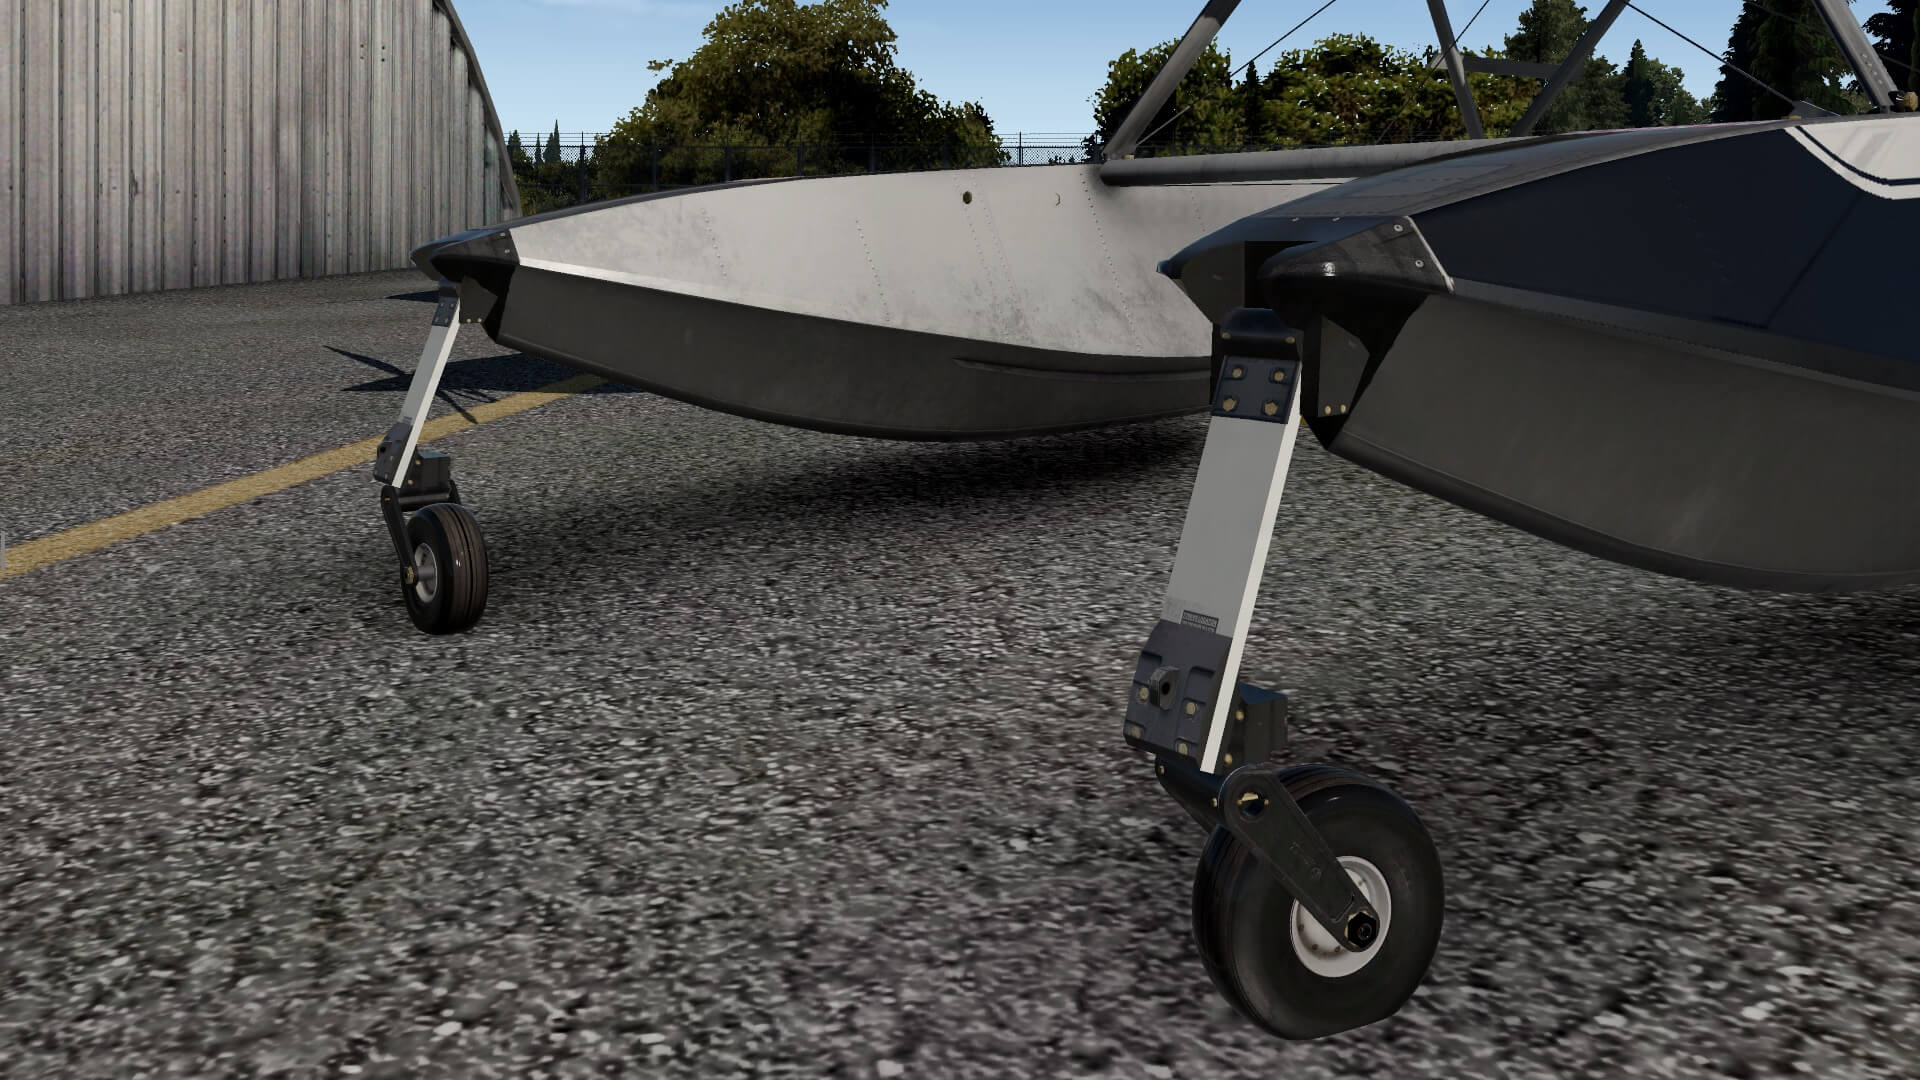
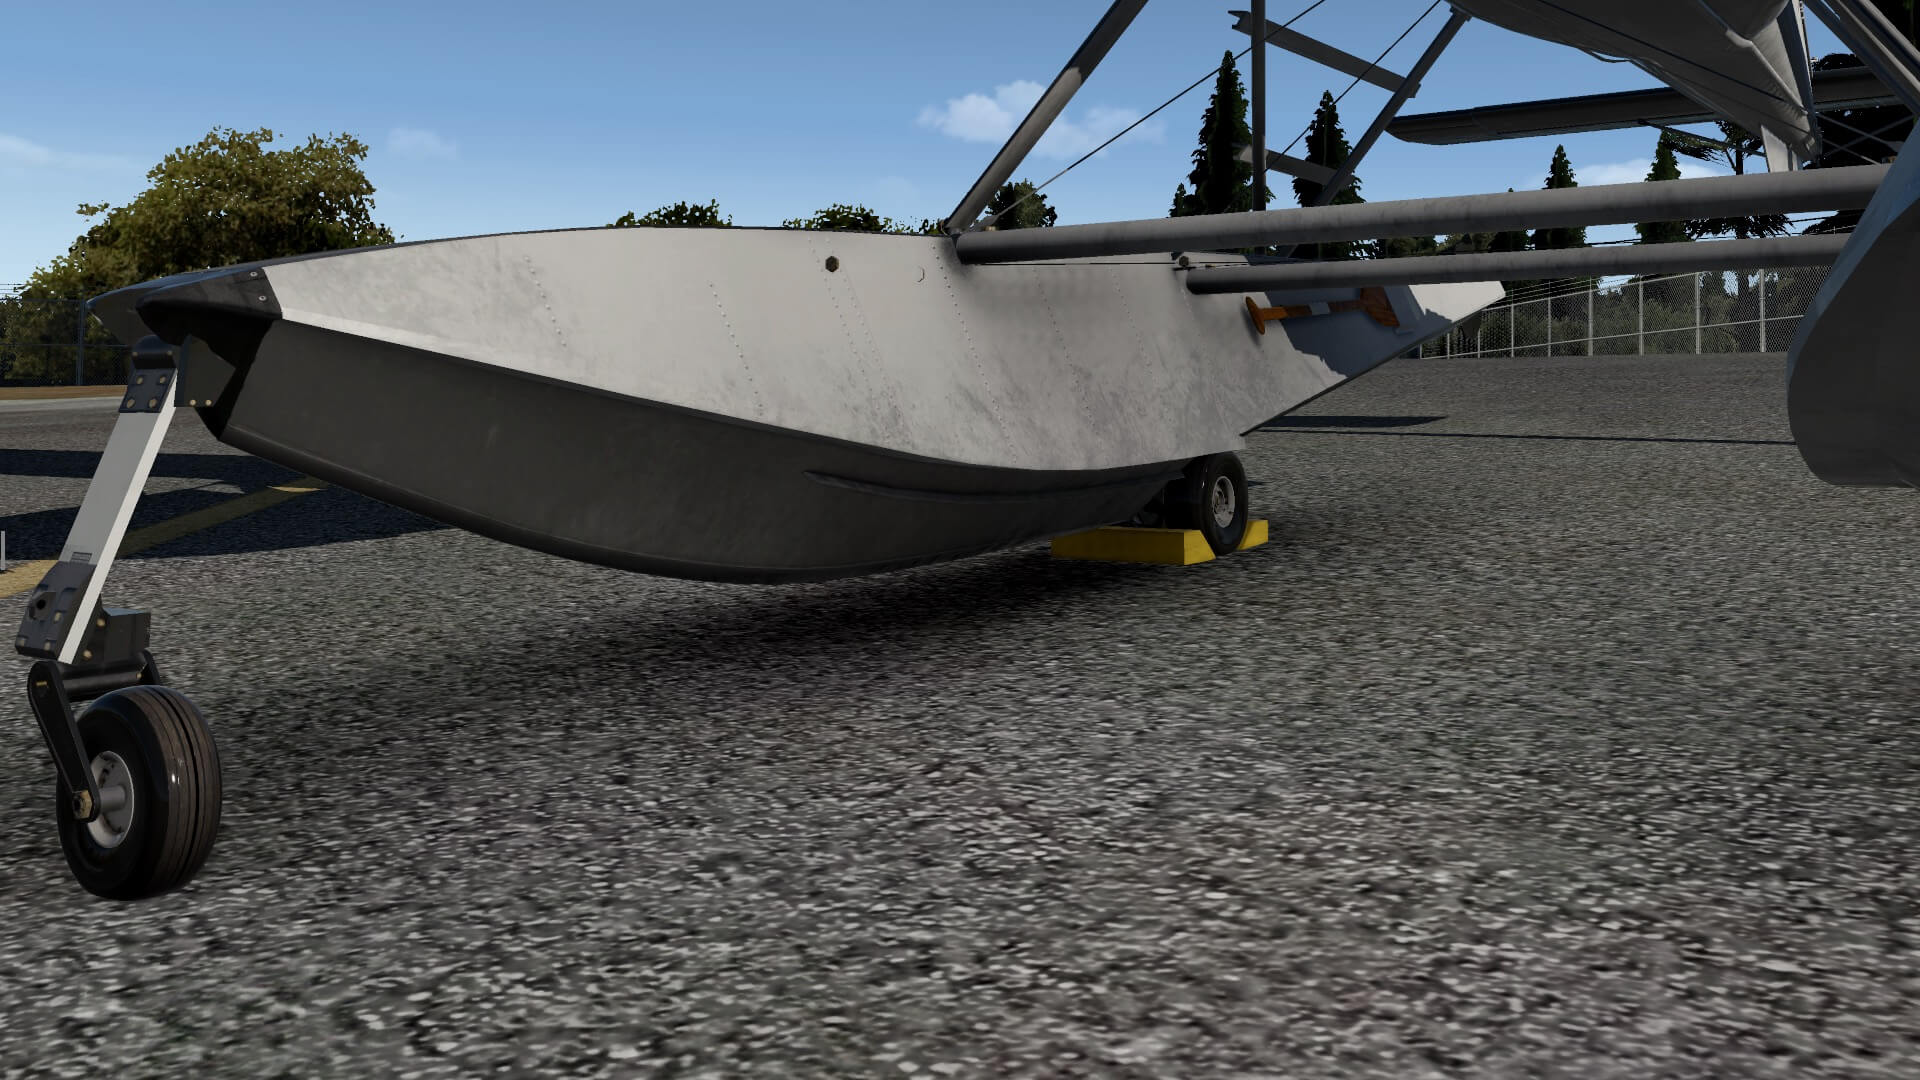


My favorite are not only the small front wheel constructions, but also the large wheels underneath the floats. I’d a close look to the wheel assembly and noticed that the wheels are really round as I mentioned also before during my walk-around check. Awesome! And finally, the stairs – ok, not really stairs, but more a bit of virtual Aluminium bars – to climb into and out of the Wilga.
Thranda Seaplane Misc
How to select the seaplane model?
You first select from the “Aircraft Models” the Wilga PZL 104 Seaplane. Most likely when you load the Wilga seaplane, you end up with a loaded Wilga with plain floats which means, when you’re on land, you can’t do much with this configuration since you need the amphibious floats version unless you selected a harbor with landing place for seaplanes.
Lets assume you load the Wilga seaplane on land and end up with the wrong floats, you select the Thranda page “Misc” and you’ll notice that it’s the same popup window when you selected the “land” Wilga, however, this time this page/tab is dedicated to the Wilga seaplane.
Some of the changes you can make in this popup window are self-explanatory while others are new and need some additional explanation. First, you can switch between amphibious floats or regular floats. I think I mentioned already the difference between these two type of floats. When you select the amphibious floats the Wilga can depart or arrive from a paved airport while with regular floats, you need water to start and end your flight.
Let me quickly highlight the water rudder option. The water rudder can be extend or retract as you can also see on the Misc page animation. The moment you’re in the water and moving around with slow speeds, you can extend or lower the water rudder and control the YAW within the water. For higher speeds like takeoff, landing and other manoeuvres, you retract the water rudder.
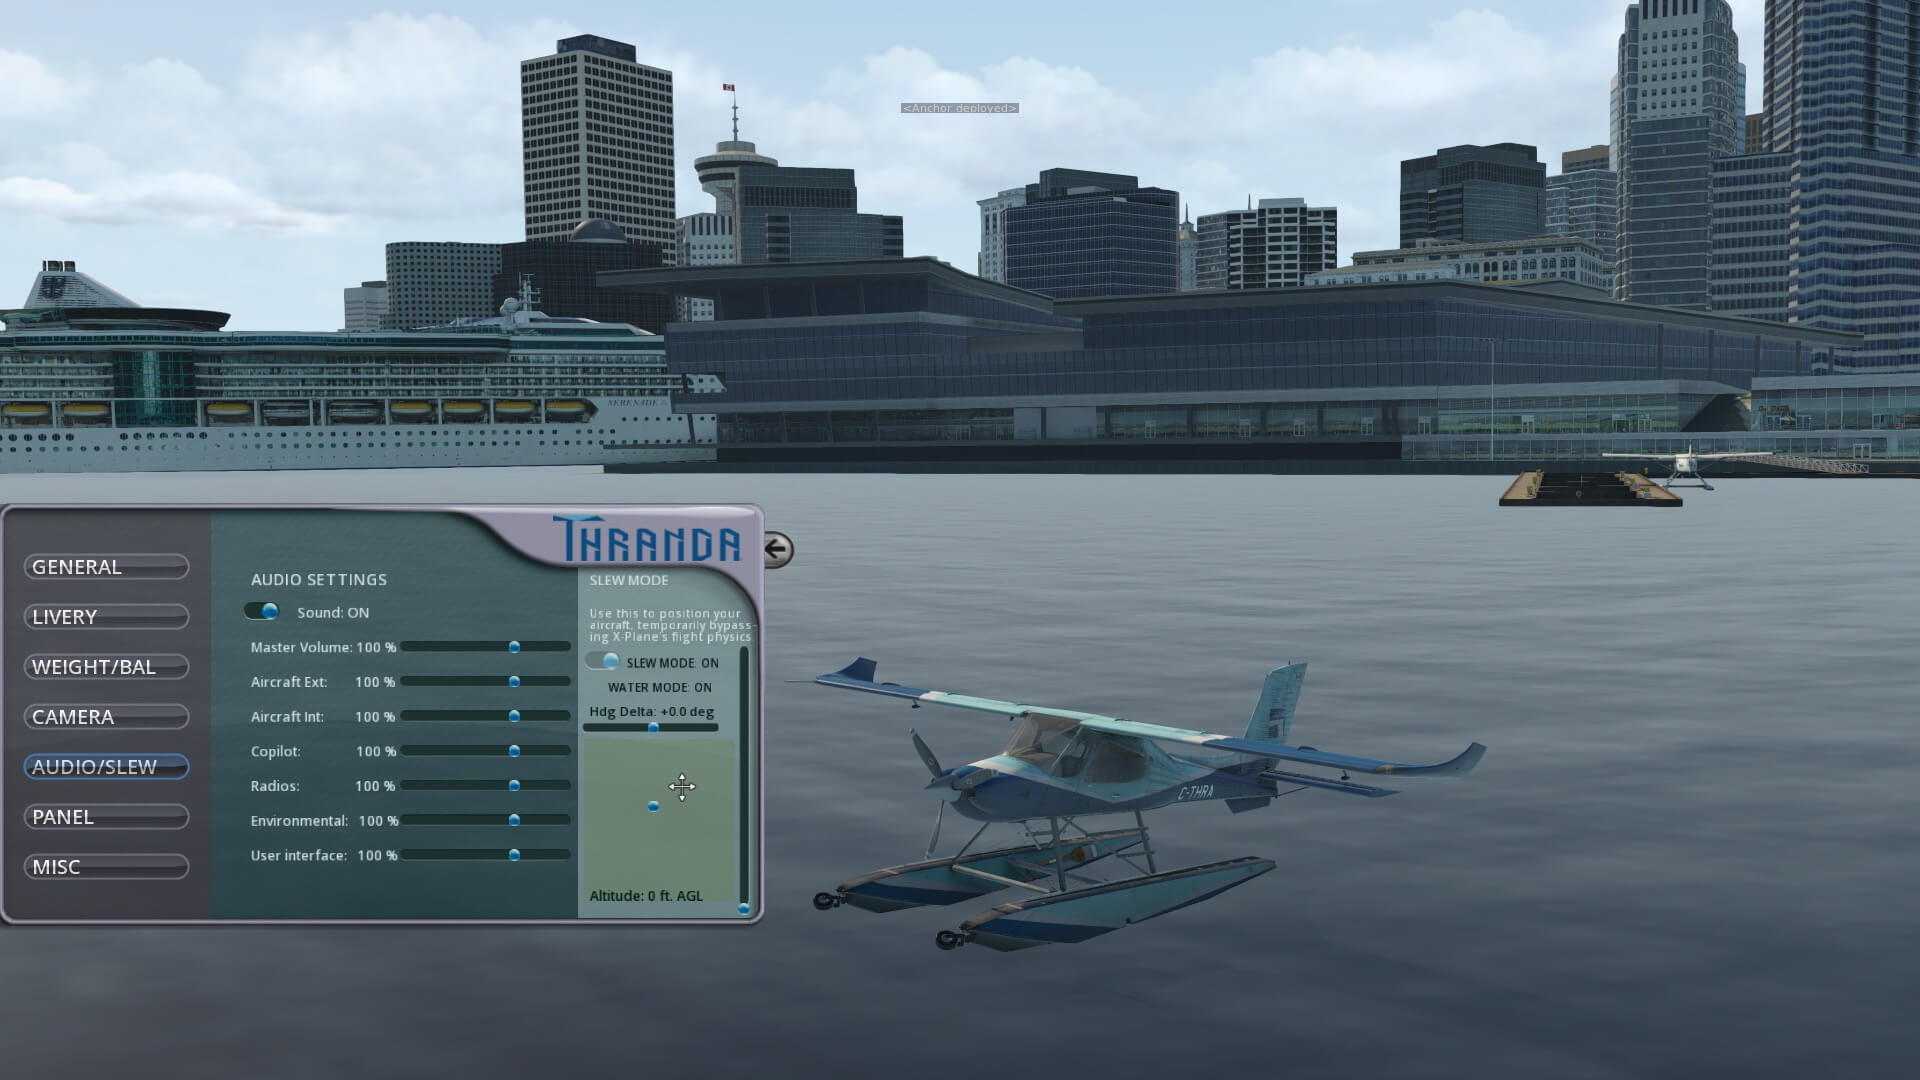
The docking hold.
When you’re not in the water, this option isn’t active. It is greyed out. Not active means you can’t slide the DOCKING HOLD slider from OFF to ON and this stays like this as log as you’re on paved ground. So, first you install the regular floats, select a harbor airport where you want to depart from, and then select the DOCKING HOLD slider to ON.
Immediately this Misc page closes and it’s replaced by the Audio/Slew window. The reason that this happens is because you’re now able with the SLEW mode to slew your Wilga to a docking location whatever you have in mind. With the slew FWD-AFT-HDG you move your Wilga to the docking of your choice. In other words, you need to be near a docking place like you can see on the screenshots, I installed the harbor from Vancouver.
I would like to highlight one thing in respect to the docking. The Thranda Wilga package doesn’t come with a 3D docking object. The docking function only allows you to slew your Wilga to a docking which could be a part of the 3D harbor scenery you intend to go to. Then the docking-slew function allows you to slew and hold the Wilga along the “add-on” docking object.
When your Wilga lies along a docking place as you can see on the screenshot below, you need to leave the DOCKING HOLD slider in the ON position. This prevents the Wilga from drifting away from the docking. When you select the slider to OFF, you’ll see that after a while the Wilga is drifting away from your docking, but it allows you to start the engine and off you go!


Summary
I could add a section dedicated to FPS (Frames Per Second), but this beautiful aircraft produces enough frame rates even though lots of tiny features are included. And yes, I know, it’s a small GA aircraft thus it doesn’t need much frame rates. It is small, no doubt about that, but there’s still a lot of programming calculation behind the scenes and to simulate all of this, that will cost frame rates. So that’s good news.
When you’re familiar with other Thranda Design aircraft, you know that they create nice and good looking GA aircraft of high quality with lots of features. But Thranda Design is in partnership with Just Flight, also responsible for larger fighters and historical commuter or commercial aircraft, like their latest production, the BEA 146 Professional.
Anyway, this Wilga is another master piece I would say. There’s eye for all kind of tiny details as well as great 3D external and internal modeling. As is applicable for the Wilga and earlier Thranda Design models, it can be kept updated by using the Skunkcrafts Updater.
With such an in-depth review, I really don’t know what else to write in the summary. Ok, one word … awesome! Although I do like all other thranda Design aircraft too, this weird looking Wilga is so weird, that I felt in love with it. Great job!
More information can be found at the dedicated X-Plane.Org store page, but you can also check it out at the dedicated Just Flight store page. As of this writing, the first week of November 2021, the Wilga cost you 34.95 USD or 28.95 Euro.
Feel free to contact me if you’ve got additional questions related to this impression. You can reach me via email Angelique.van.Campen@gmail.com or to Angelique@X-Plained.com.
With Greetings,
Angelique van Campen
| Add-on: | Payware Thranda PLZ-104MA Wilga 2000 |
|---|---|
| Publisher | Developer: | X-Plane.Org | Thranda Design |
| Description: | Realistic rendition of the PLZ-104MA Wilga 2000 |
| Software Source / Size: | Download / Approximately 1.6GB (unzipped) |
| Reviewed by: | Angelique van Campen |
| Published: | November 10th 2021 |
| Hardware specifications: | - iMac Pro - Intel 3GHz Intel Xeon W / 4.5Ghz - Radeon Pro Vega 64 16368 MB - 64 GB 2666 MHz DDR4 - 1 internal shared 1TB SSD (Monterey 12.x) - 1 external 2TB LaCie Rugged Pro SSD (Big Sur / Mojave) - Saitek Pro Flight System X-52 Pro and X-56 Rhino - Honeycomb Alpha Flight Controls - Honeycomb Bravo Throttle Quadrant - Honeycomb Airbus Throttle Pack - Thrustmaster TCA Captain Pack Airbus |
| Software specifications: | - macOS Monterey (12.x) - X-Plane 11.5x |
1 Comment
Submit a Comment
You must be logged in to post a comment.
Thank you Angelique for this detailed excellent review.
For me at least the Xplained in depth reviews become part of the manual resources I keep for each plane and in fact at times become the manual I go to for information.
Very well done and again Thank You.
Cheers
TinkerNZ