VSkyLabs Gooney Bird or just C-47 Skytrain
Introduction
What …. Gooney Bird?
It was the right moment to review this time something else, something that has a huge history behind herself. I present to you the Douglas C-47 Skytrain, but hold on, what is that name …. Gooney Bird?

On behalf of the DC-3/Dakota Historical Society, Inc. I, Angelique van Campen from X-Plained.Com, present to you the Gooney Bird. According to this society “Most people remember and still call the C-47 the “Gooney Bird”.There are several versions of how it got that name.Some say the name came from the South Pacific where small atolls were the home of the wandering albatross, the giant seagull-like bird noted for its powers of flight, and sometimes unflattering but safe landings.Some GIs said the C-47 looked like the bird, with a heavy body and long wings, and mimicked the bird in its struggle to get off the rain-soaked dirt fields.”
But this is just one of the nicknames the DC-3/C-47 had. “Americans called it the “Gooney Bird”, “Doug”, “Dumbo”, “Old Fatso”, “Charlie 47”, “Skytrain”, “Skytrooper” and “Tabby.” The British called it the “Dakota” and the “Dak.”The RCAF called one squadron of Dakotas “The Flying Elephants”.Civilian pilots called it the “Three”, “Old Methuselah”, “The Placid Plodder”, “The Dowager Dutchess”, “The Flying Vagrant” and the “Dizzy Three.”

Want to know more about this gorgeous aircraft? Then check out the DC-3/Dakota Historical Society, Inc. website.
Uhh … DC-3 versus C-47
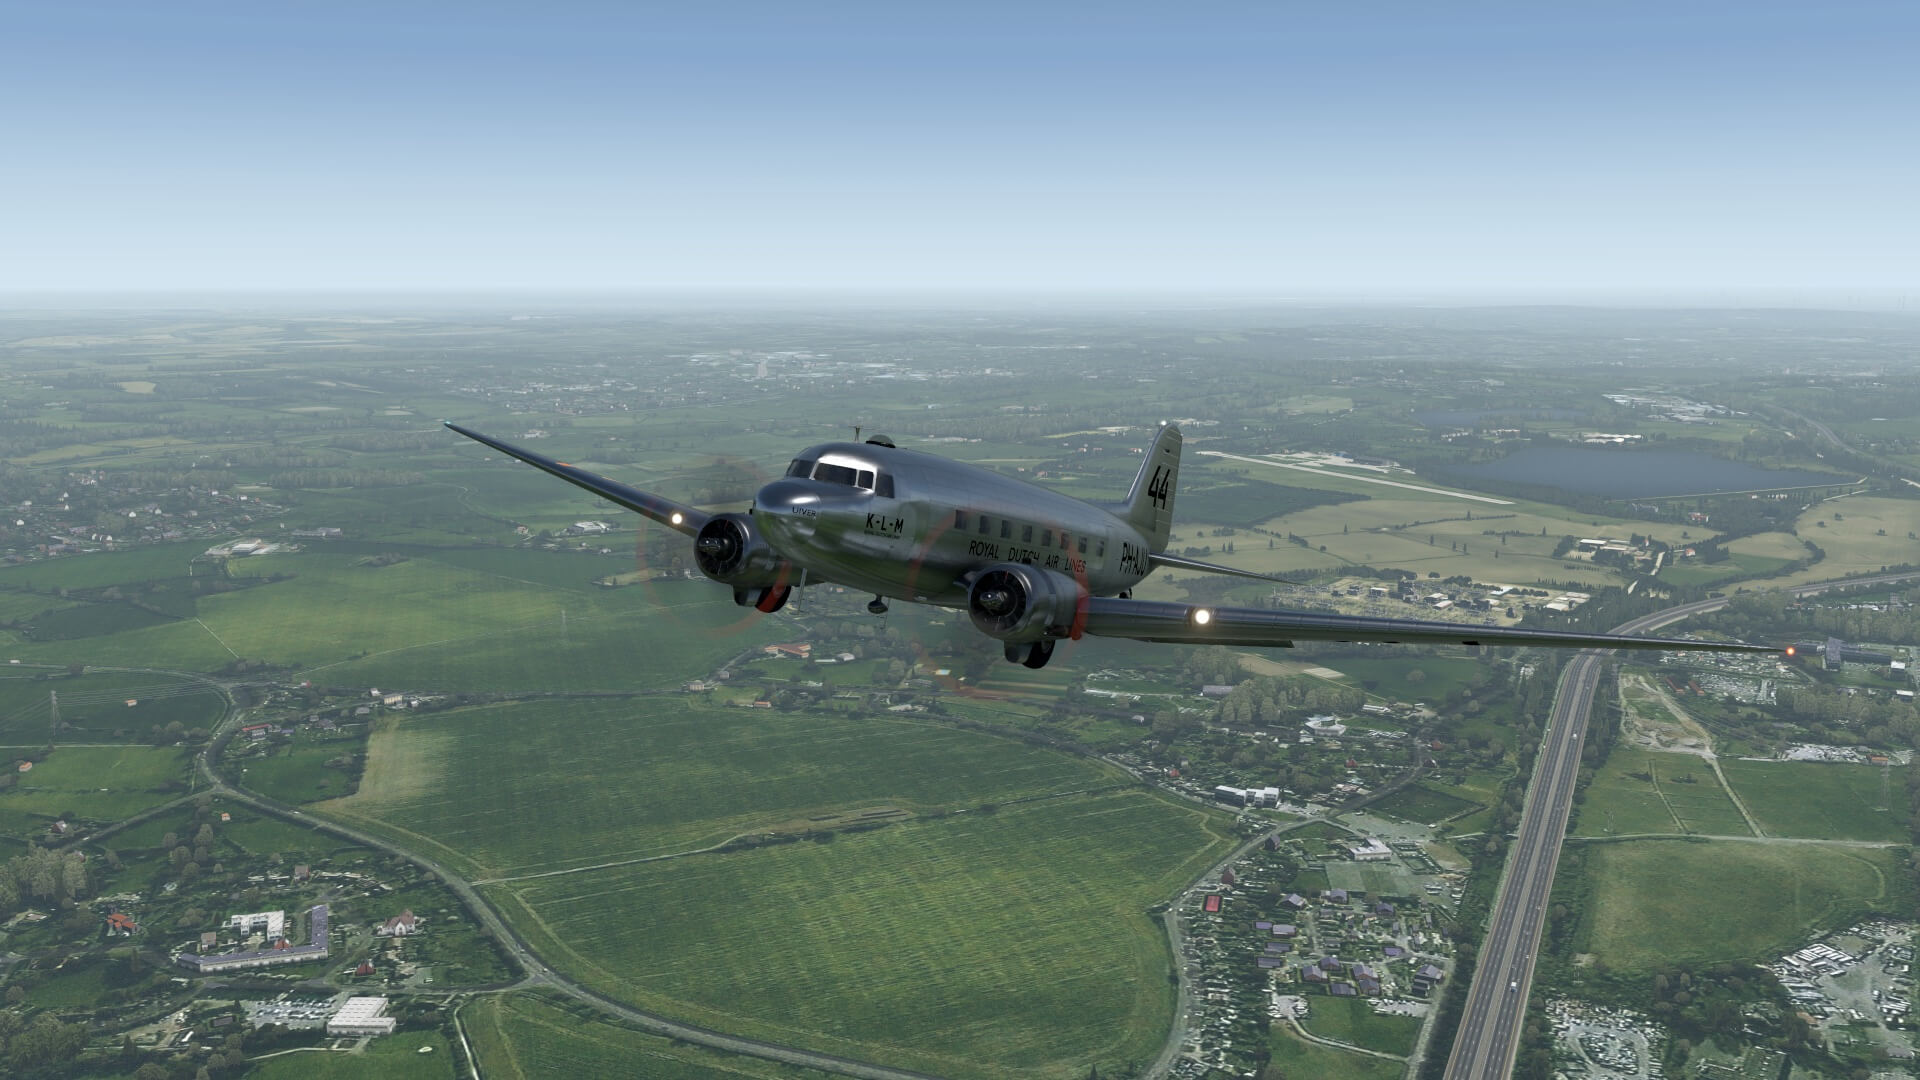
Perhaps you own already the VSkyLabs (VSL) C-47 Skytrain Flying L§ab Project, and perhaps you’ve been flying around with it for a while or you wasn’t aware of this VSL C-47 model at all and only knew the Aeroworx C-47 freeware model. Just to make this clear; this review deals with the VSL C-47 Skytrain and I’ve got no intentions to compare the flight dynamics with the Aeroworx model nor how realistic the 3D external model including the 3D cockpit is versus the Aeroworx. No, the only reason I took this historical aircraft is because I love the way it’s made and being Dutch, having great memories with old historical aircraft like the DC- Uiver or PH-AJU.
But what’s the difference between a DC-3 and C-47?
According to flugzeuginfo.net “The Douglas DC-3 is a twin-engined short-to-medium-range Airliner with a capacity of maximum 32 passengers and a military utility transport aircraft produced by the US-American manufacturer Douglas Aircraft Company. The military main-variant was the C-47 Skytrain.
The DC-3 is a development of the Douglas DC-2. The DC-3/C-47 was produced in countless variants. After WWII thousands of surplus C-47 Skytrain were converted to be used as civil airliners. The Lisunov Li-2 was a copied variant of the DC-3 with production in the Soviet Union. The DC-3 was also license-produced in Japan as Nakajima L2D. Today – wow, that’s a long time back …. 2010 – many DC-3 remain in commercial operation. The Basler BT-67 is one of the turboporp conversion variants of the DC-3.”
And this is just one site of the many websites that offers DC-3/C-47 information.
Brought to you by the DC-3/Dakota Historical Society, Inc. …… some statistics?
Five hundred thousand rivets (500.000) were used in the manufacture of the Douglas DC-3 airplane. The average size used in the manufacture was approximately 3-8 inches long, and if laid end-to-end, the rivets would cover a distance of 15,625 feet or more than three miles.
The lighting system of each DC-3 plane was sufficient to light an eight room house. More than 90 lights were used in each plane. 1,517 watts are required. To light an ordinary room in those days only 100 watts was required.
Approximately 6,000 men and women were employed in building a DC-3.
The total length of the control cables used on the DC-3 was over 2,850 feet, more than 0.5 mile.
Material used for sound insulation in the DC-3 weighed 240 pounds. Blankets and mattresses weighed another 195 pounds.
3,900 feet of tubing, 8,000 feet of wire and approximately 13,300 square feet of sheet metal were used in the construction of each DC-3.
I’m looking forward to explore the VSL C-47 Skytrain although to me it’s also the DC-3. As of this writing, April 2021, the model has been updated to version 3.0c. I test the C-47 on an iMac with macOS Big sur 11.2.3 and X-Plane version 11.53r1.
What to Expect?
Planning and Navigation
Here’s the plan for this VSL C-47 review.
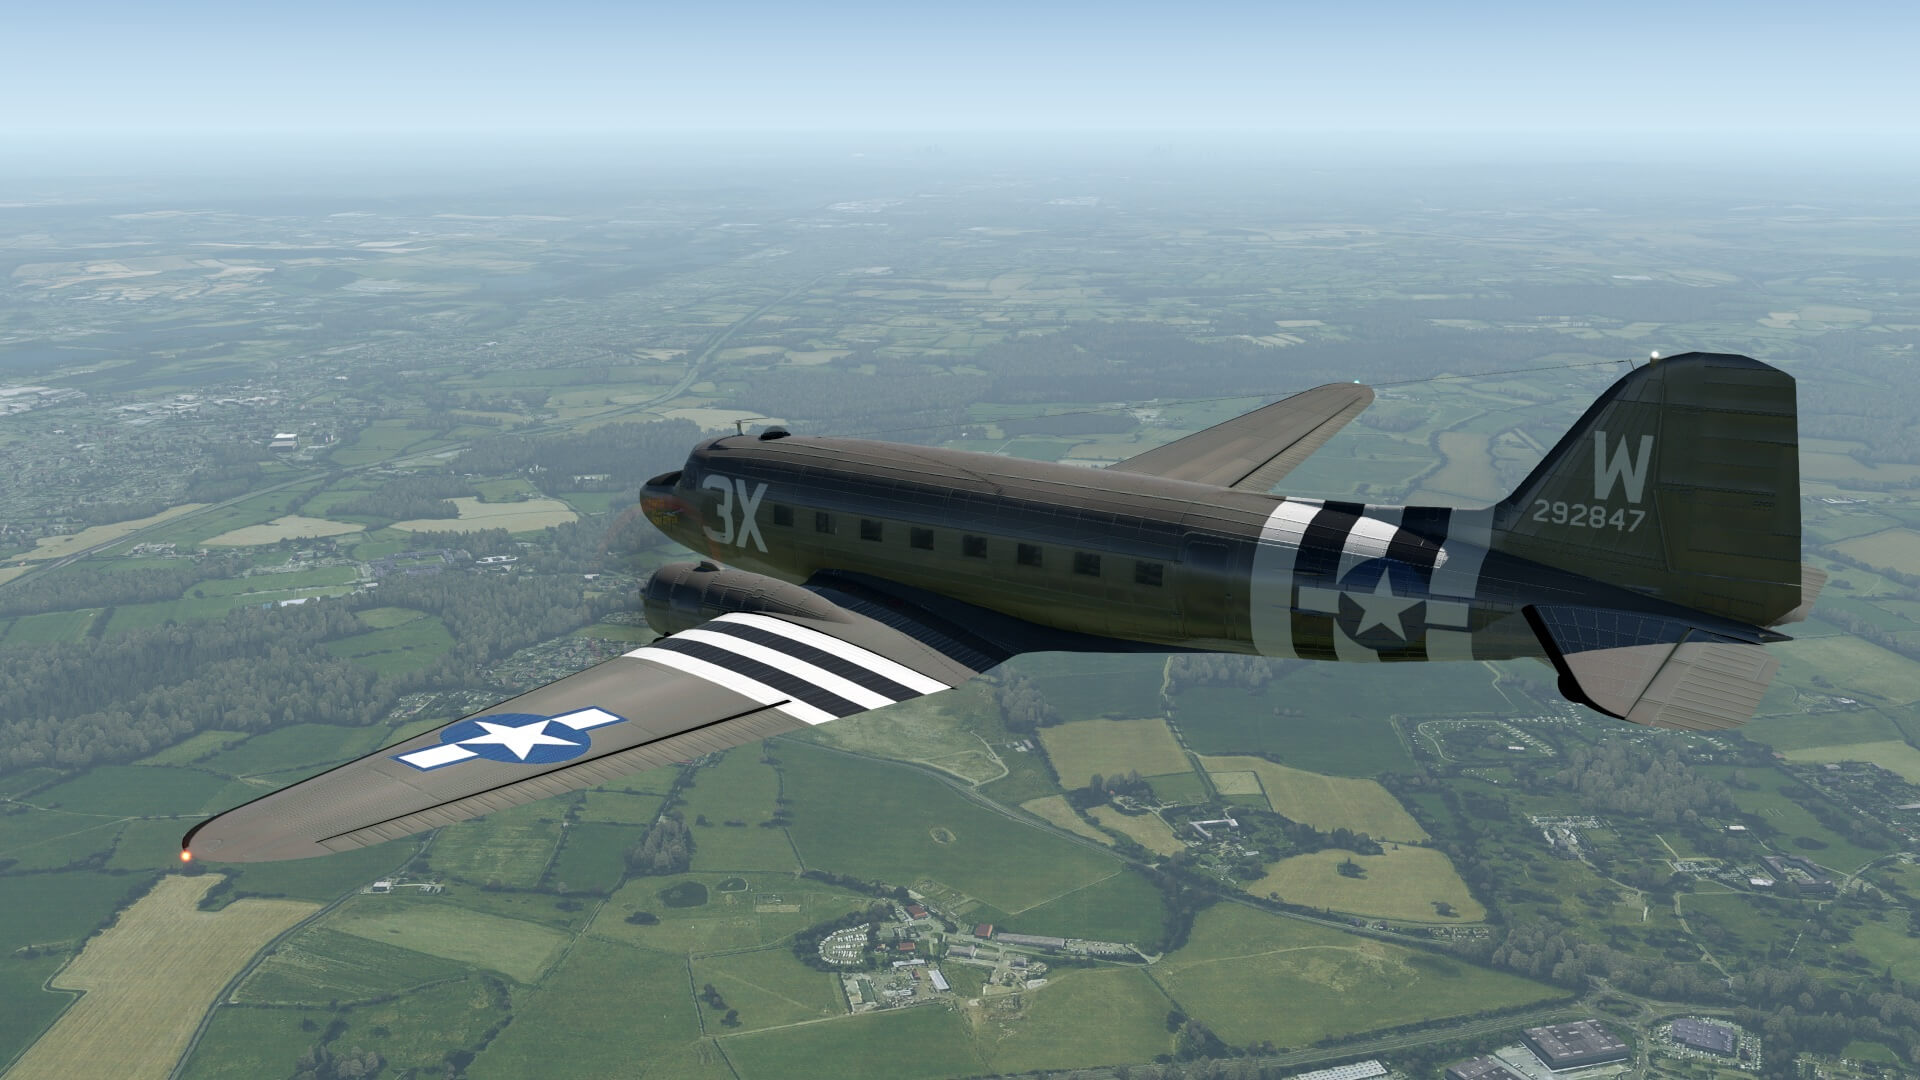
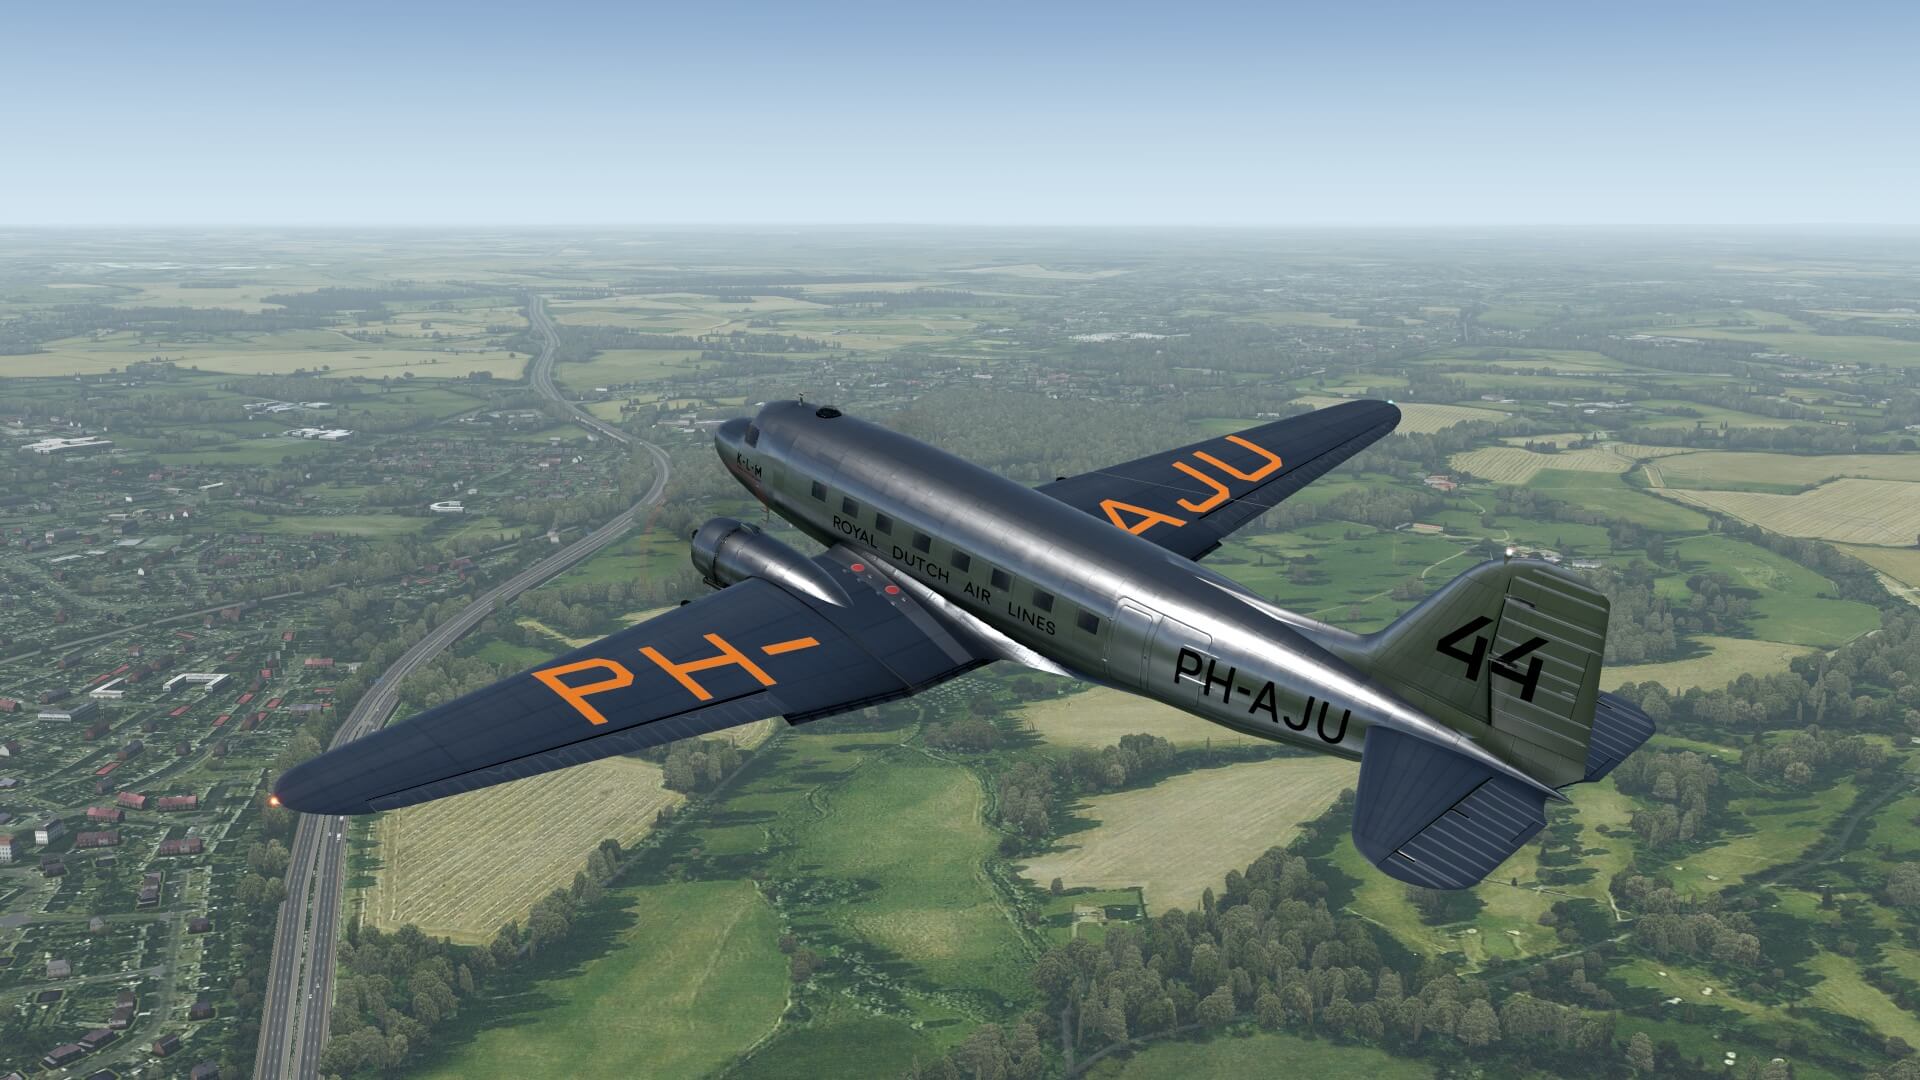
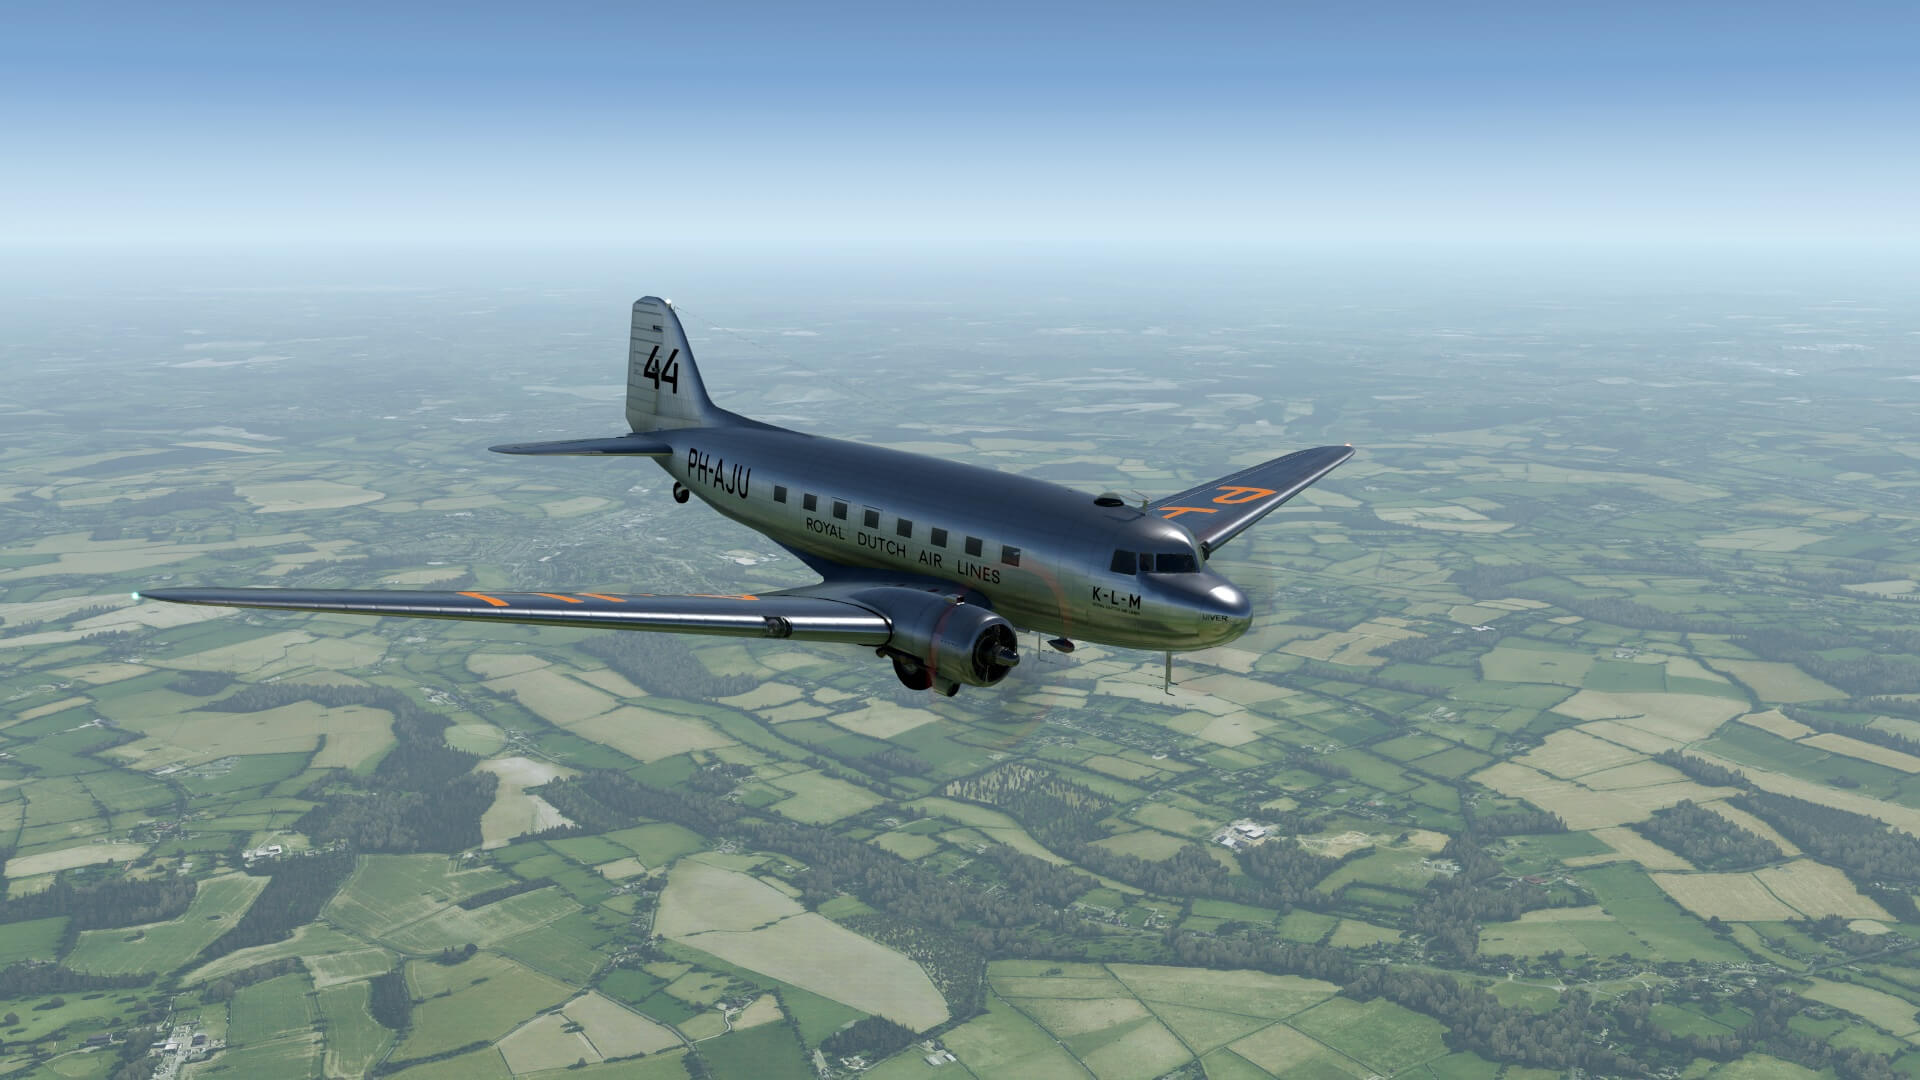
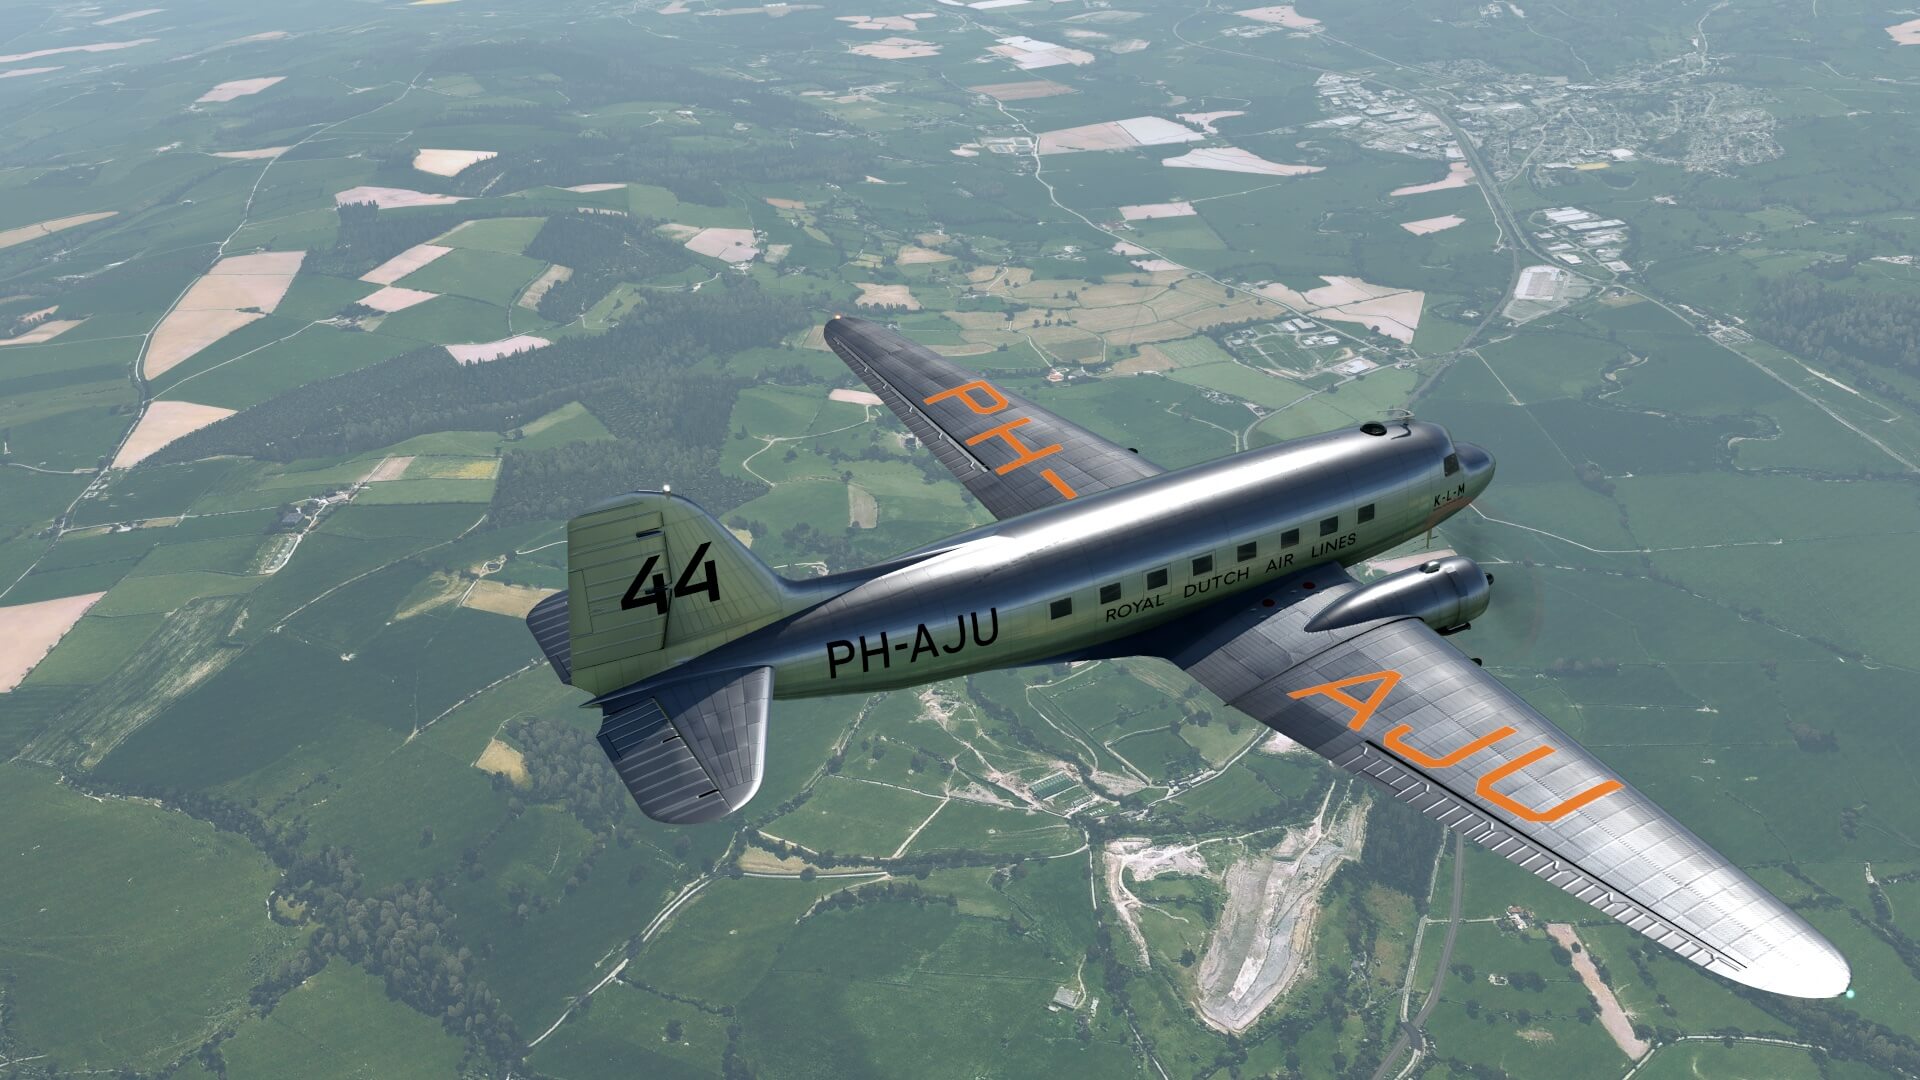
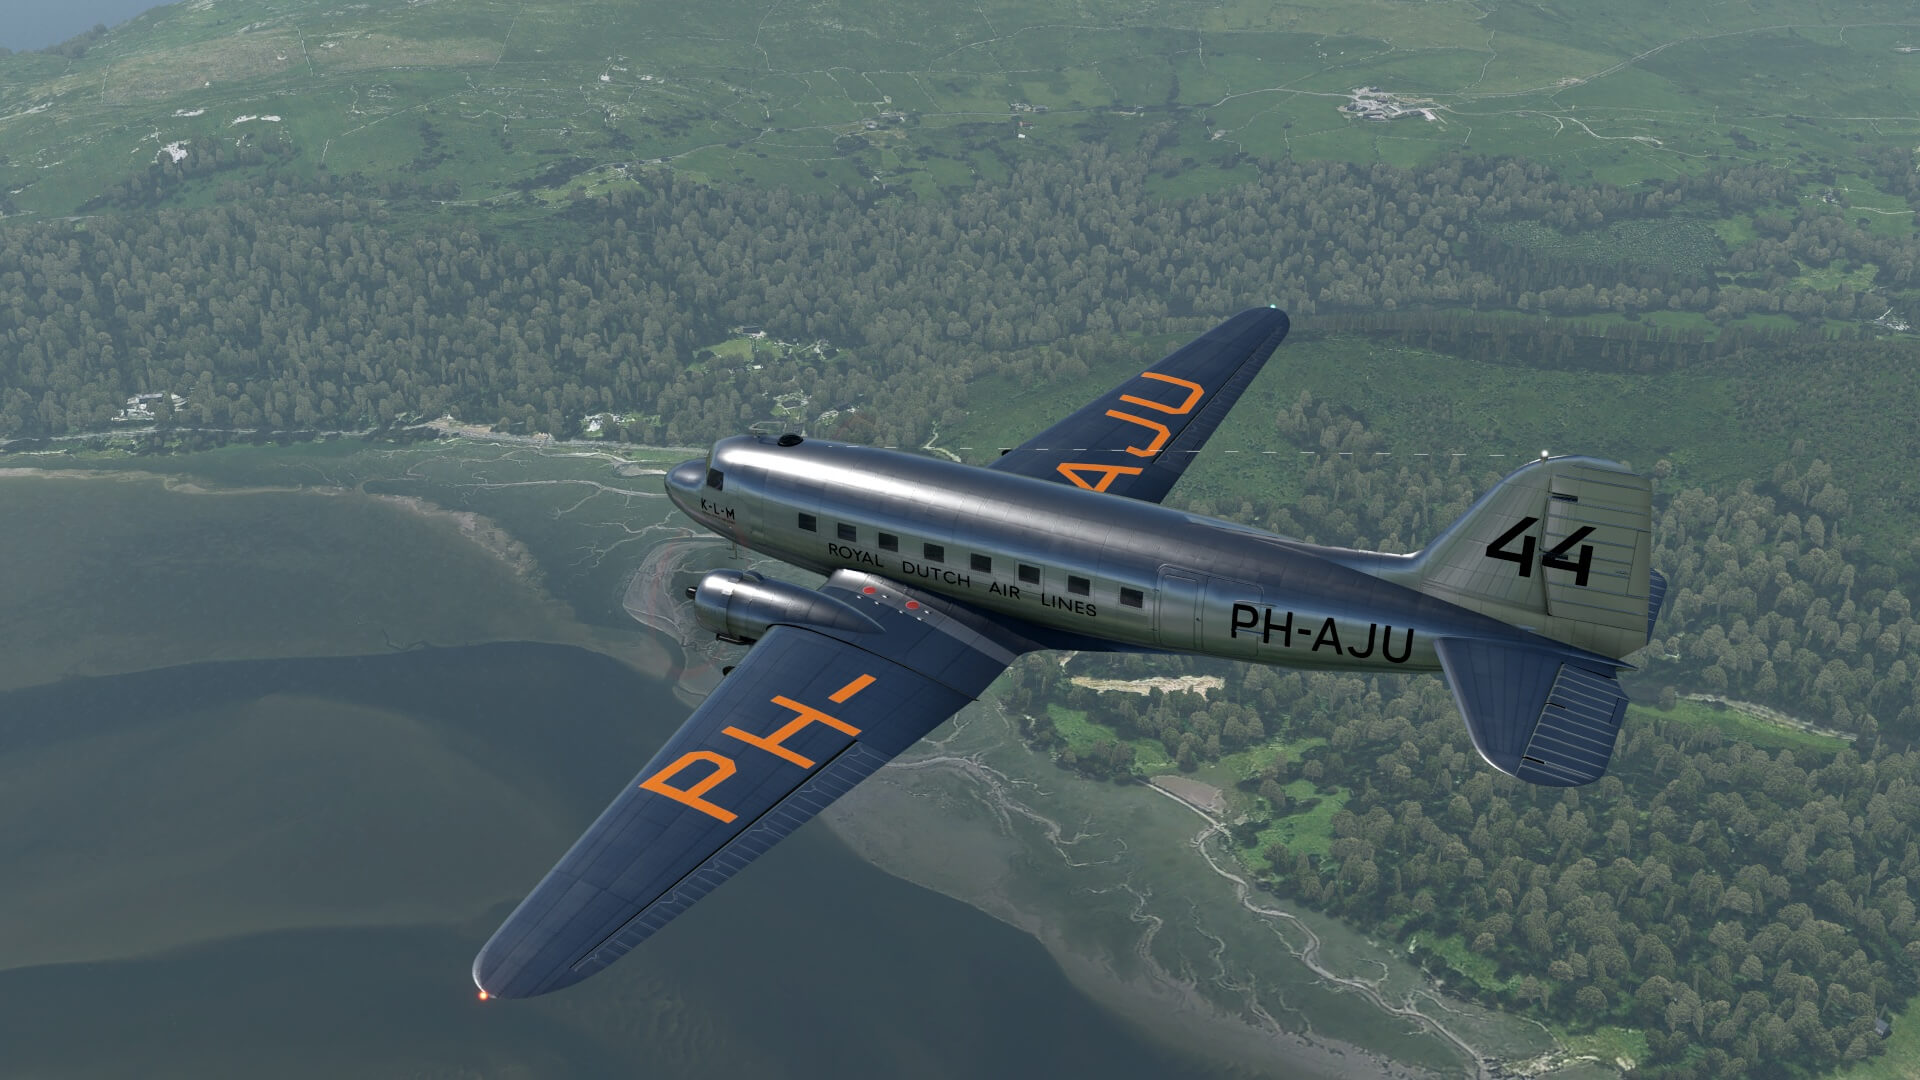
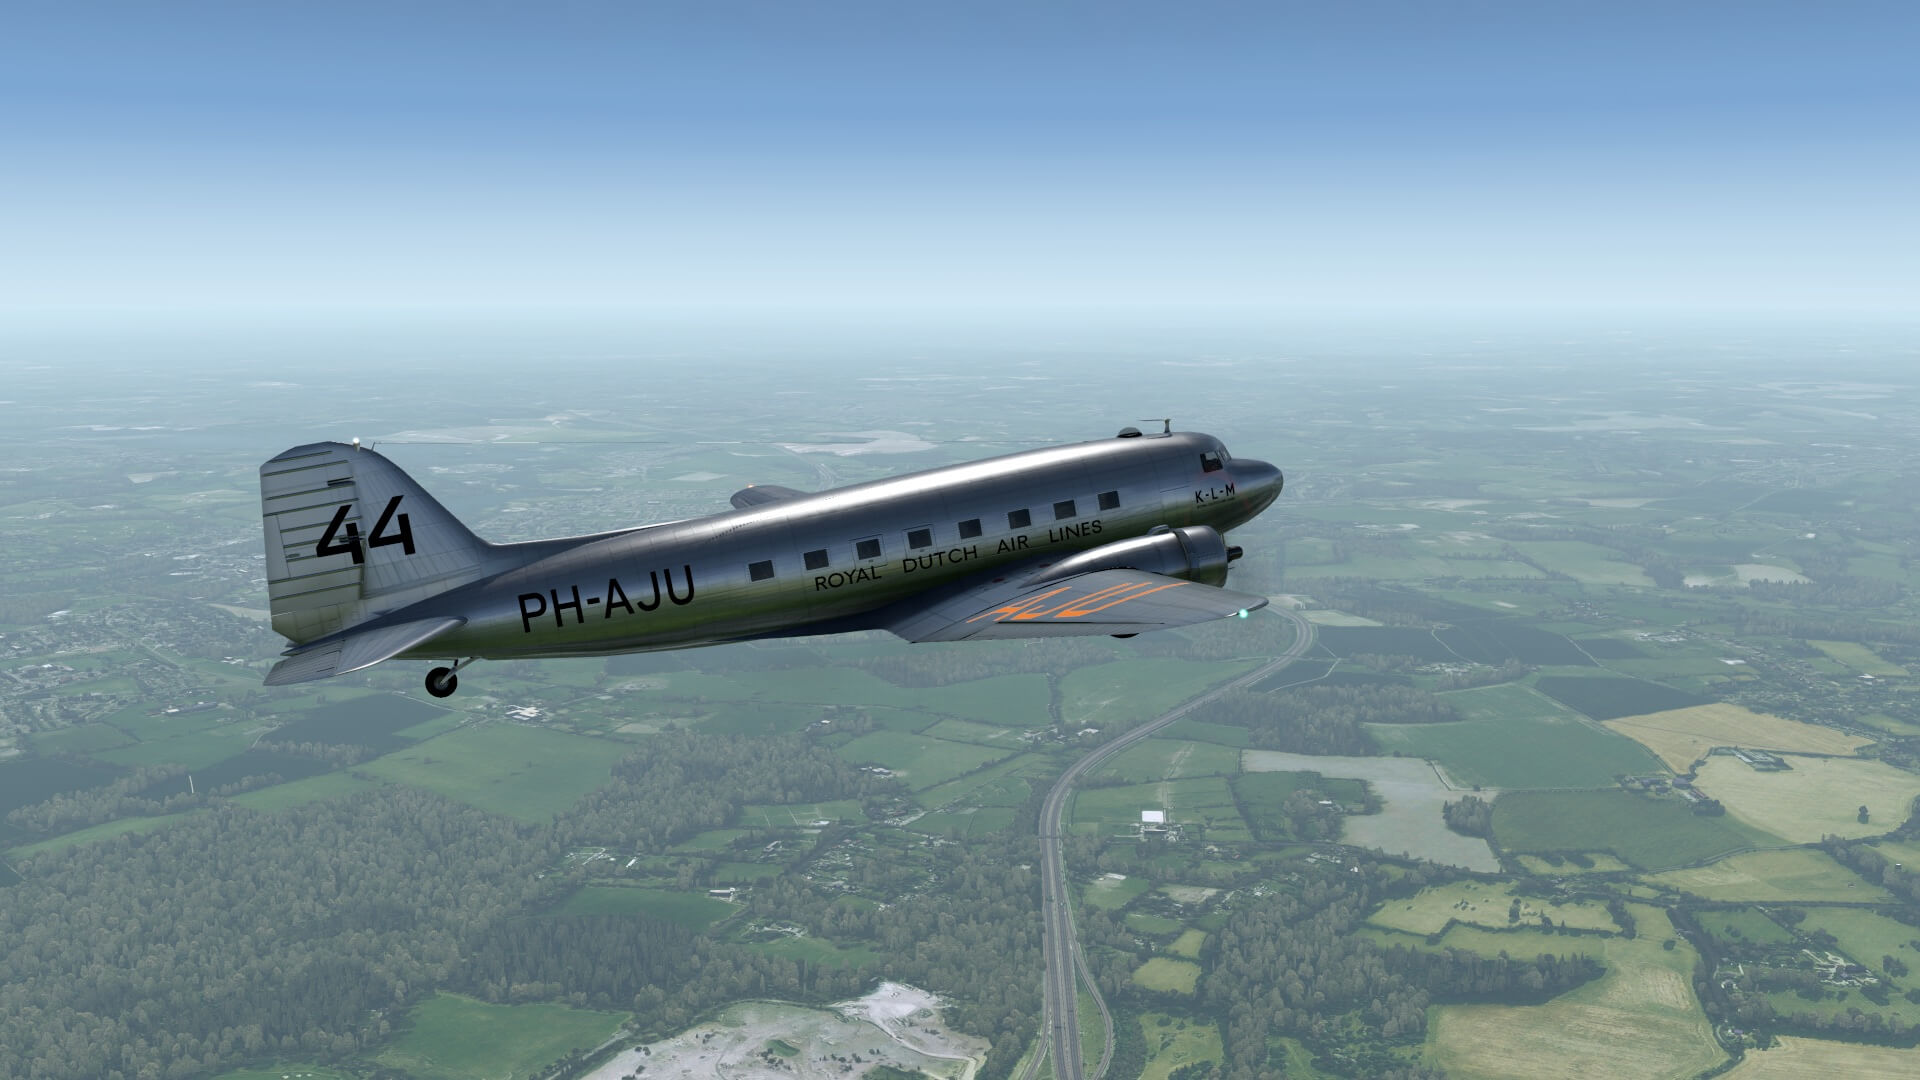
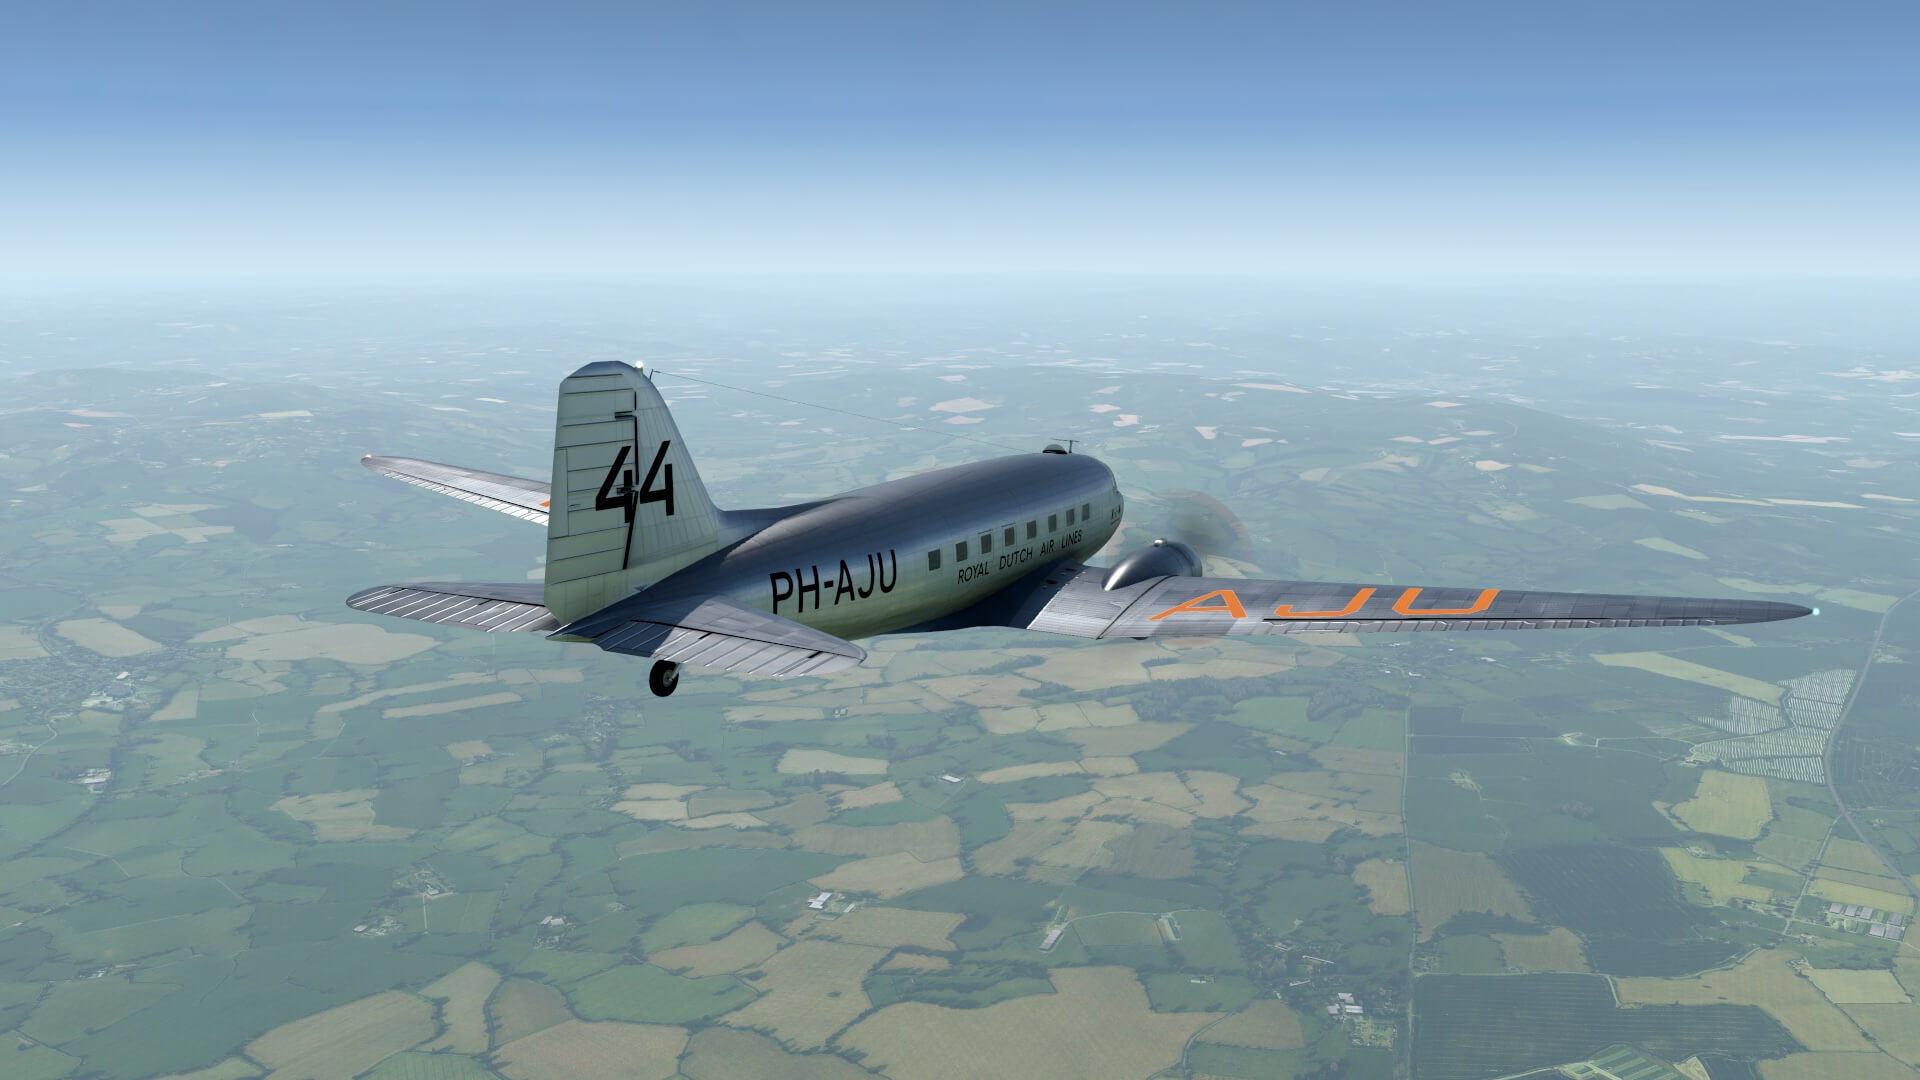
Starting with …. I love Orbx TrueEarth GB South, Central an North scenery packages and because of this, I’ve decided to fly the aircraft with, specially painted for me by X-Plane.Org user/painter amerrir, the KLM PH-AJU Uiver livery and fly around in the United Kingdom. Yes, I know, the PH-AJU had as nickname Uiver and was originally a DC-2, but I felt in love with both the DC-2 and the DC-3.
Yes, you read it correctly. KLM Royal Dutch Airlines, a famous Dutch company that had its homebase at Amsterdam, Schiphol, the Netherlands. As I said before, the PH-AJU was originally a Douglas DC-2. The story goes as follows “Built by Douglas as DC-2-115A with Constructor’s Number 1317. First flight August 16, 1934. Sold to Koninklijke Luchtvaart Maatschappij (KLM) Royal Dutch Airlines as a civilian airliner as their first DC-2.”
“During the MacRobertson Air Race between London and Melbourne during October 1934, KLM entered this aircraft. Out of the 20 entrants, this DC-2 finished second behind only the purpose built de Havilland DH.88 racer Grosvenor House. During the total journey time of 90 hour and 13 min, it was in the air for 81 hour, 10 min, and won the handicap section of the race.”
“On the morning of December 20, 1934, while operating on a flight from Schiphol to Batavia, the aircraft crashed at Rutbah Wells in Iraq, killing all seven on board. This was the first loss of a DC-2, and the first fatal incident involving the aircraft type.”

Anyway, back to the flight planning and preparations for the VSL C-47.
During my UK flights I try to find out how this VSL beauty flies, how easy it is to land as well as to make takeoffs, and how well it’s modeled. That is a bit weird “how well it’s modeled” since it’s payware so you may expect a well modeled aircraft and 3D cockpit.
Next, navigation equipment.
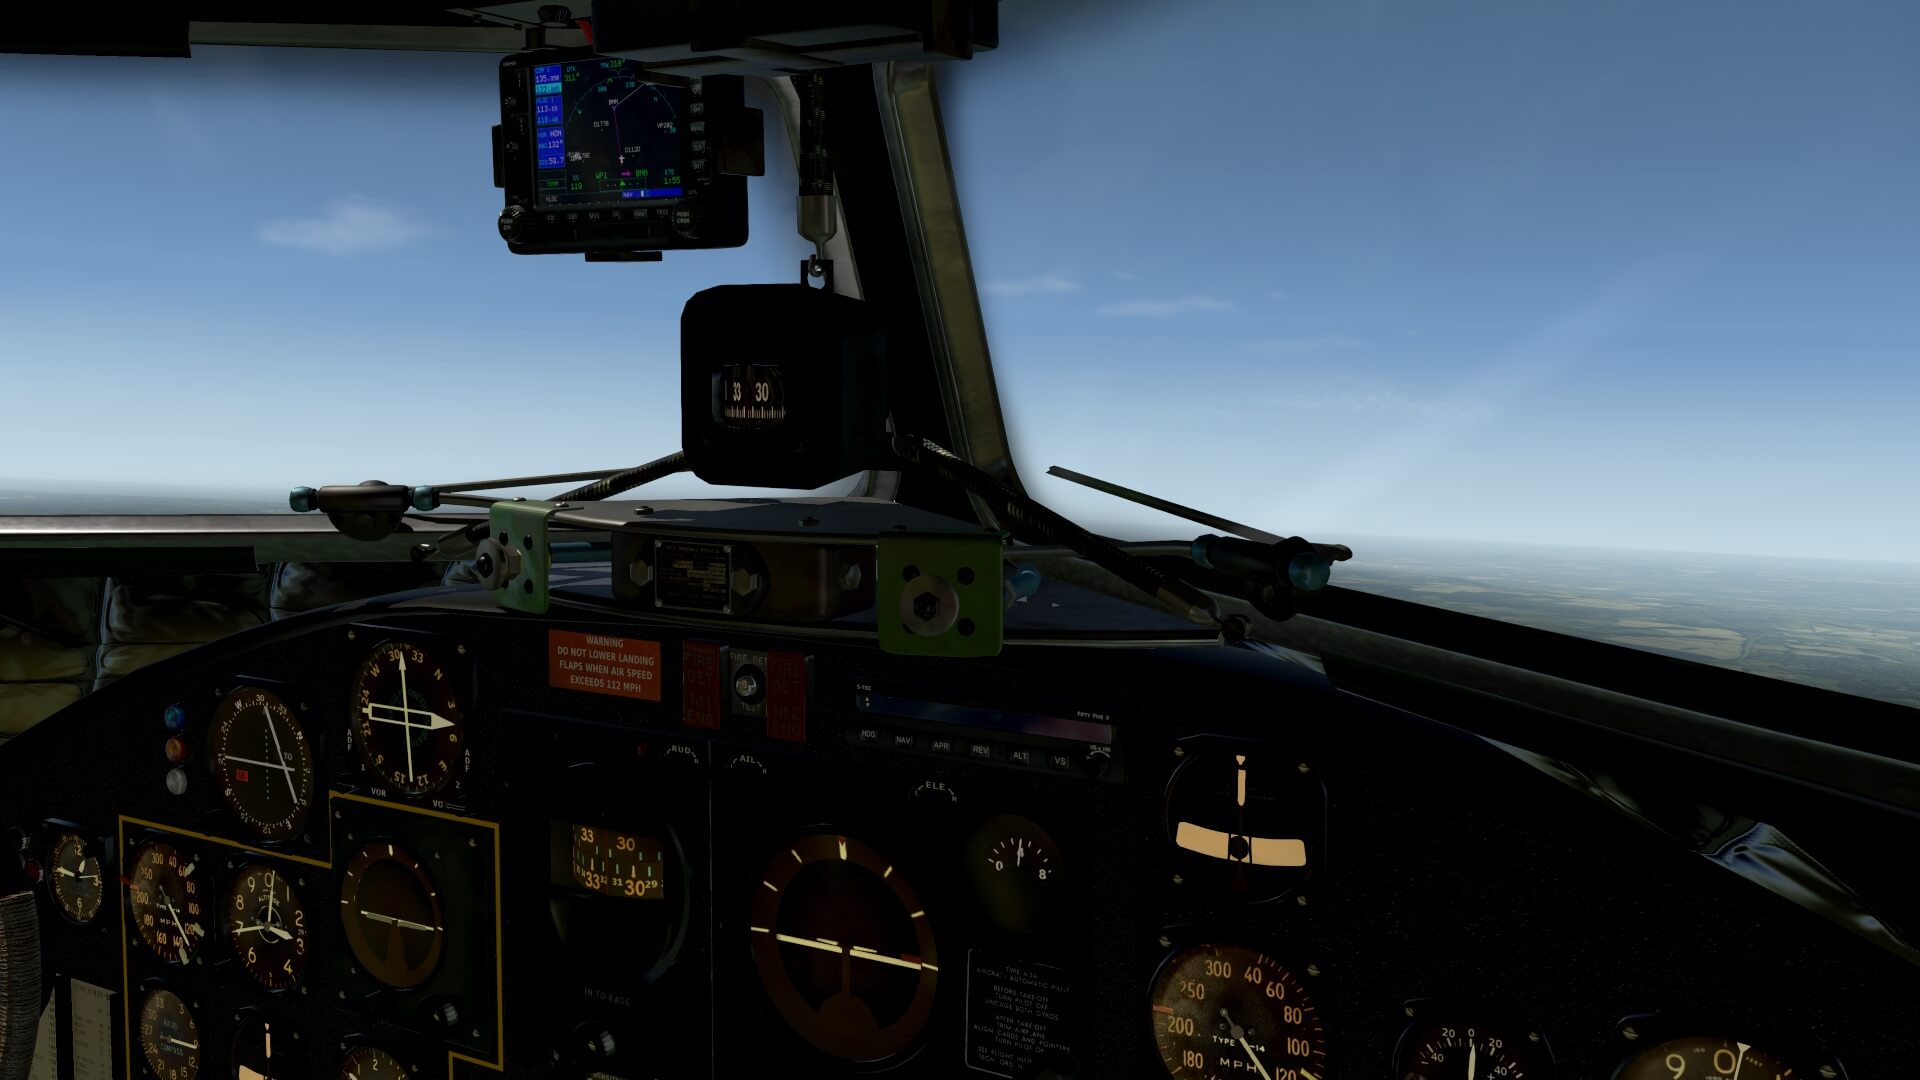
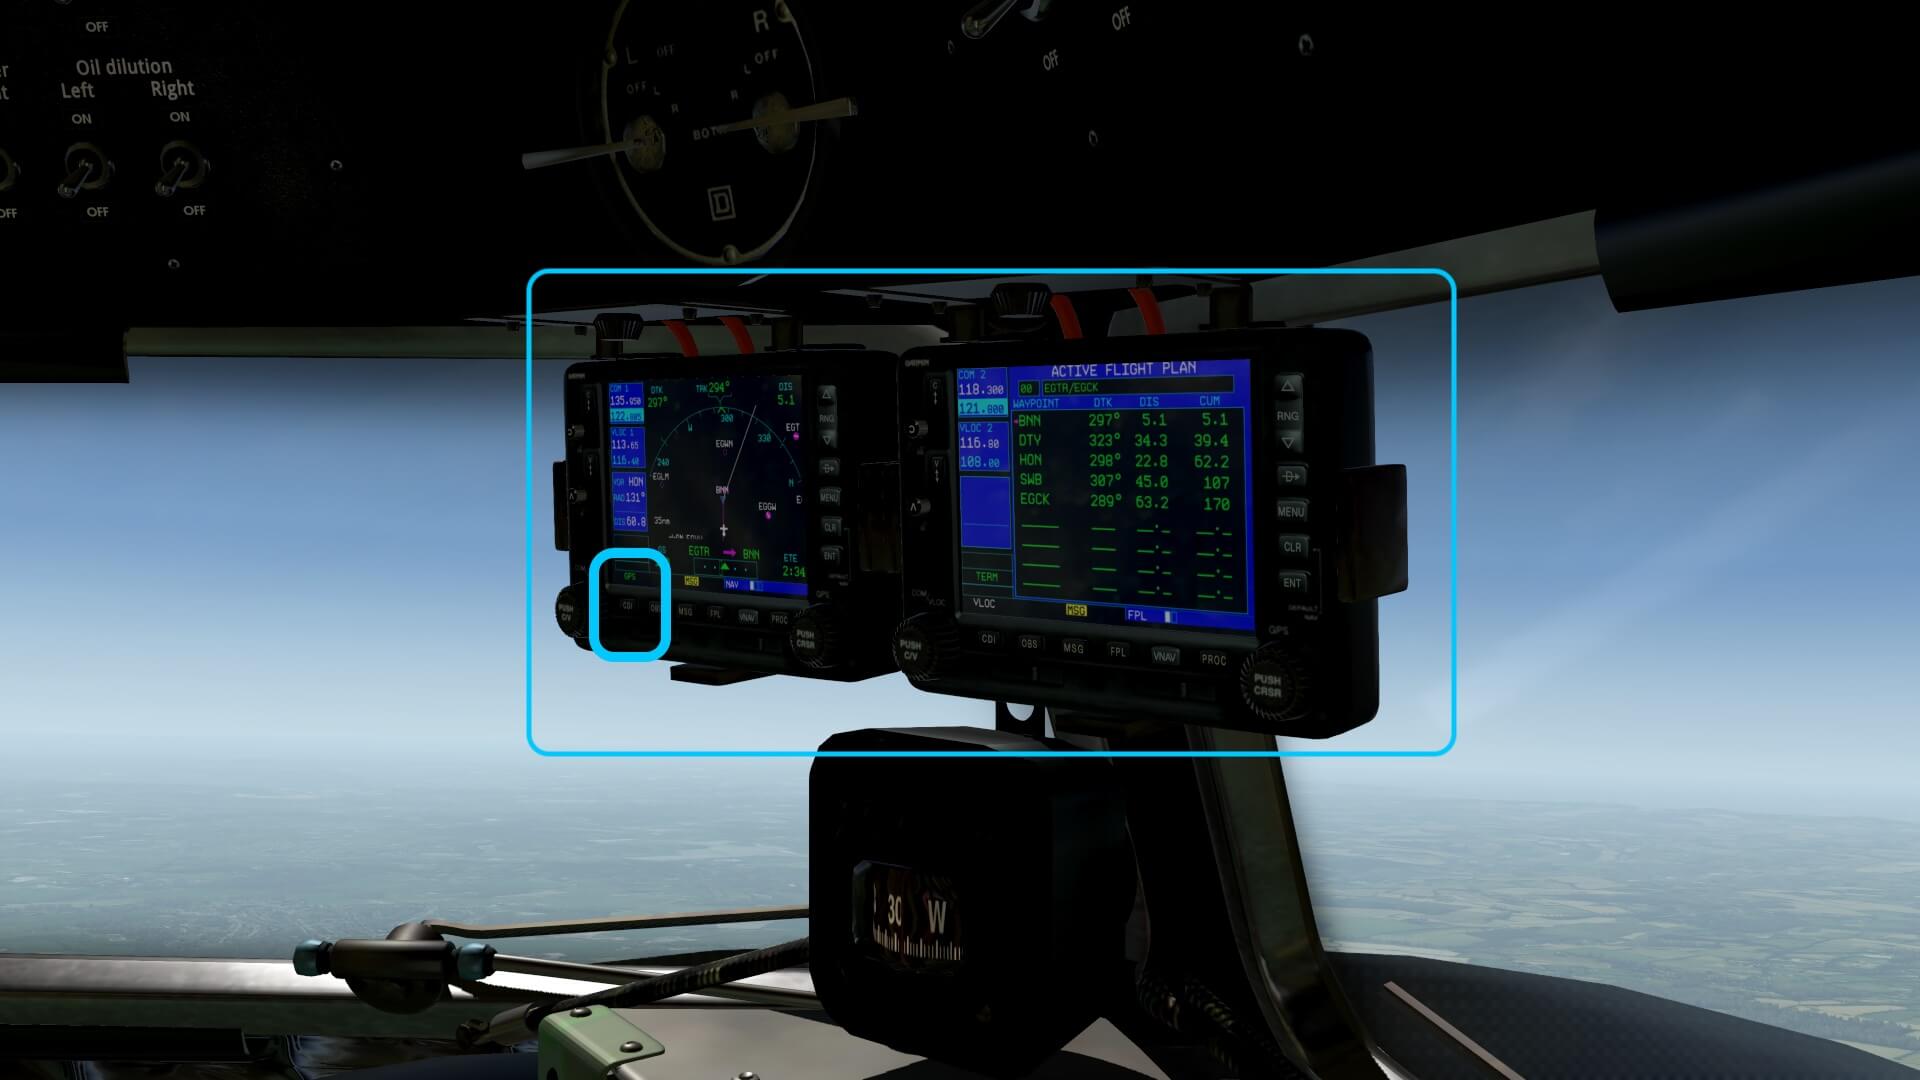
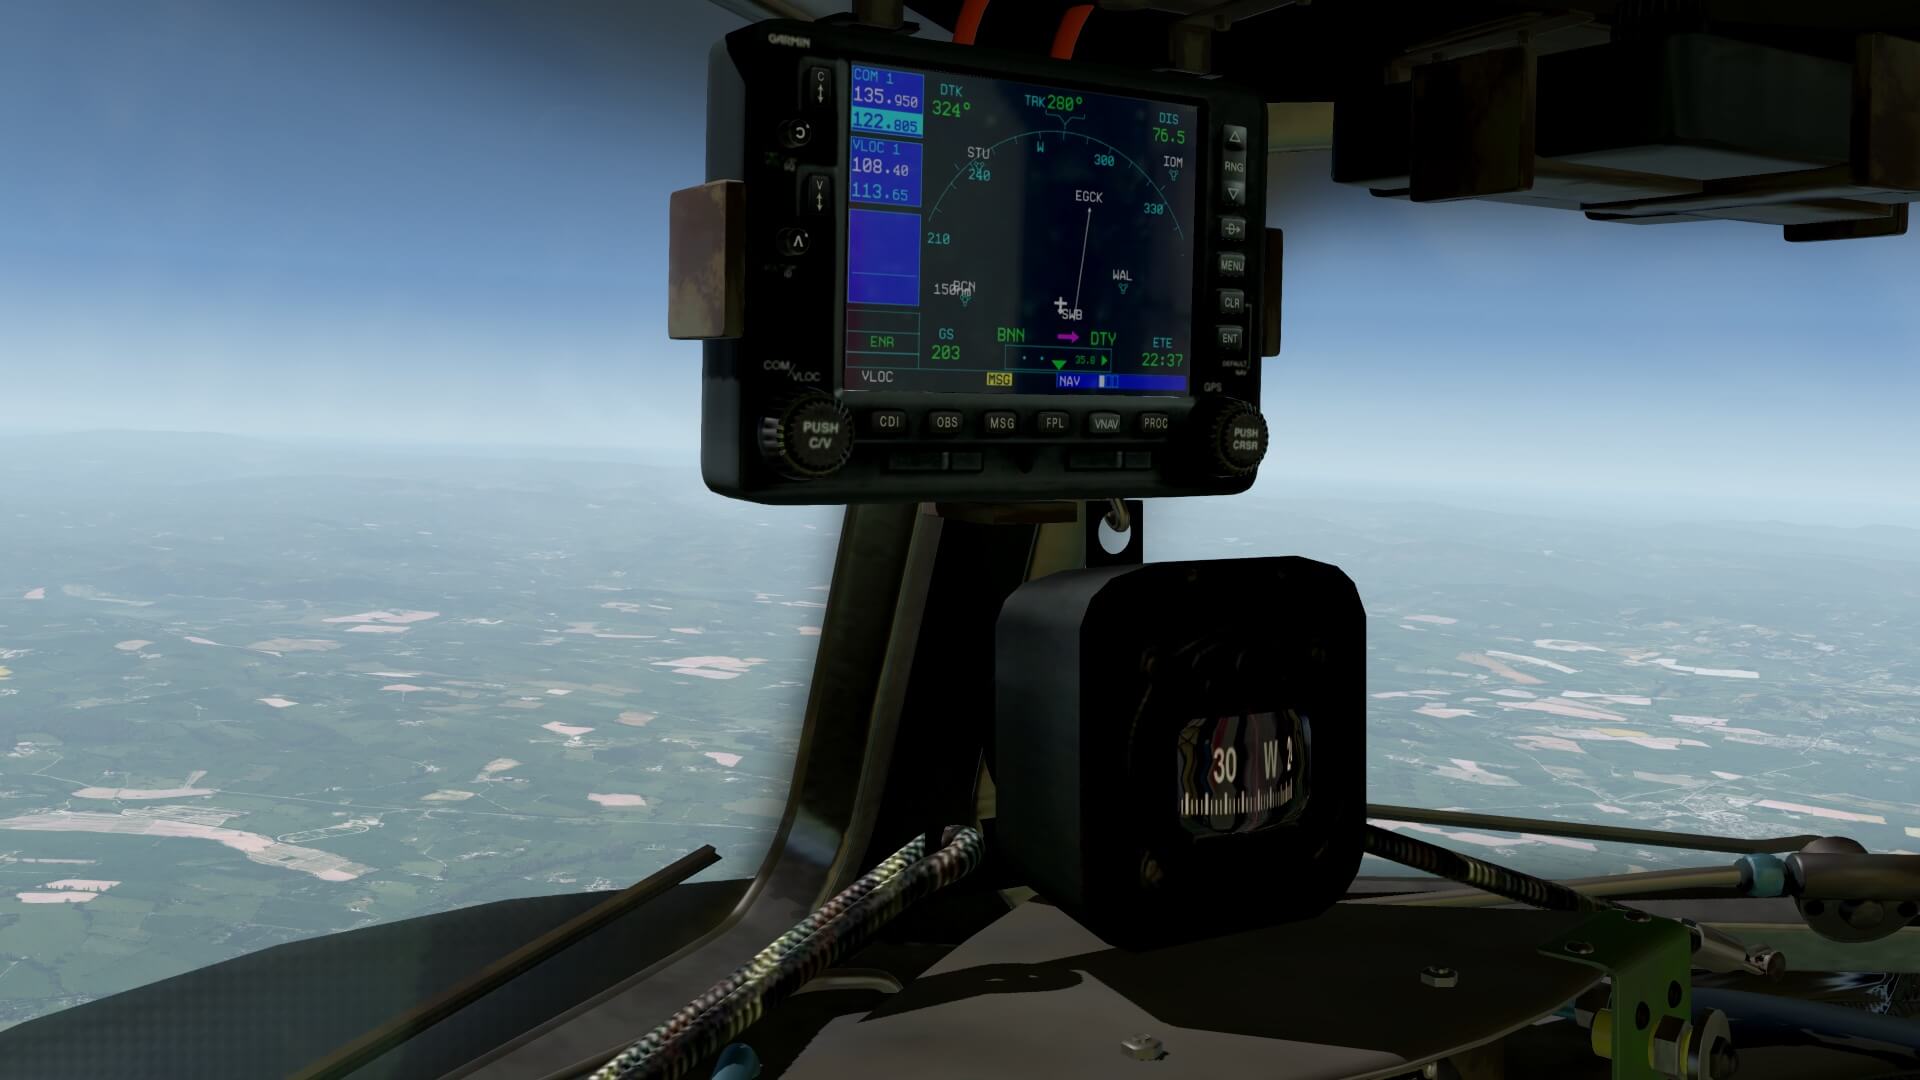
The original DC-3/C-47 didn’t had of course modern navigation equipment. It was only equipped with VOR/DME and ADF, and Garmin stuff as we know today, no, that was future stuff. Knowing this, I can tell you that the VSL team did a nice job in building-in simulated Garmin equipment in an elegant way. No, they didn’t build anything in the instrument panel, instead, it is located near the mid windows strut and can be flipped individually down.
And when one X530 isn’t enough, there’s a second one too. What said, the way it is modeled is something I like and not weird since todays DC-3/C-47 models NEED, I repeat NEED modern navigation on-board. That could be a Garmin X430 or a 530 or even newer models. Just to clarify for those who are new to X-Plane. The VSL C-47 uses the Laminar Research X530 that simulates the Garmin GNS 530 navigation equipment.
With that knowledge I searched the Internet to show you what is possible and found out, oh my goodness, soo many different cockpit configuration from very old fashioned till fully restyled panel configurations. The following screenshot is just one of the thousands I’d seen and shows you the build-in Garmin equipment.

I’ve got two options when it comes to navigation. Either I only use on my flight VOR and/or NDB beacons or I create a flight plan that mainly consist out of waypoints with a couple of VOR/DME beacons. In other words, either option is possible. I will give it a try to see if with only VOR/DME beacons I’m able to fly my stretch from EGTR (Elstree Airfield) to EGCK (Caernarfon Airport) by using only VOR/DME beacons. I can tell you already that this isn’t easy. I hardly find VOR/DME beacons on this stretch, but enough to navigate to the West coast. My flight plan is as follows: EGTR – BNN (Bovingdon 113.75) – DTY (Daventry 116.4) – HON (Honiley 113.65) – SWB (Shawbury 116.8) – EGCK

And of course I could make another flight plan that only consists out of waypoints. I’ll do this for my first flight, but will not connect the flight plan to the Auto Pilot. I will only use the flight plan to see where I’m flying. The EGTR-EGCK flight plan is saved as “fms” format (default flight plan format for X-Plane) and can be loaded in the X530. And yes, I can always tune separately for the VOR/DME station while using the X530 in GPS mode. And yes, you’re aware that when the X530 is in GPS mode, it can be connected to the Auto Pilot to fly the stretch via the flight plan.
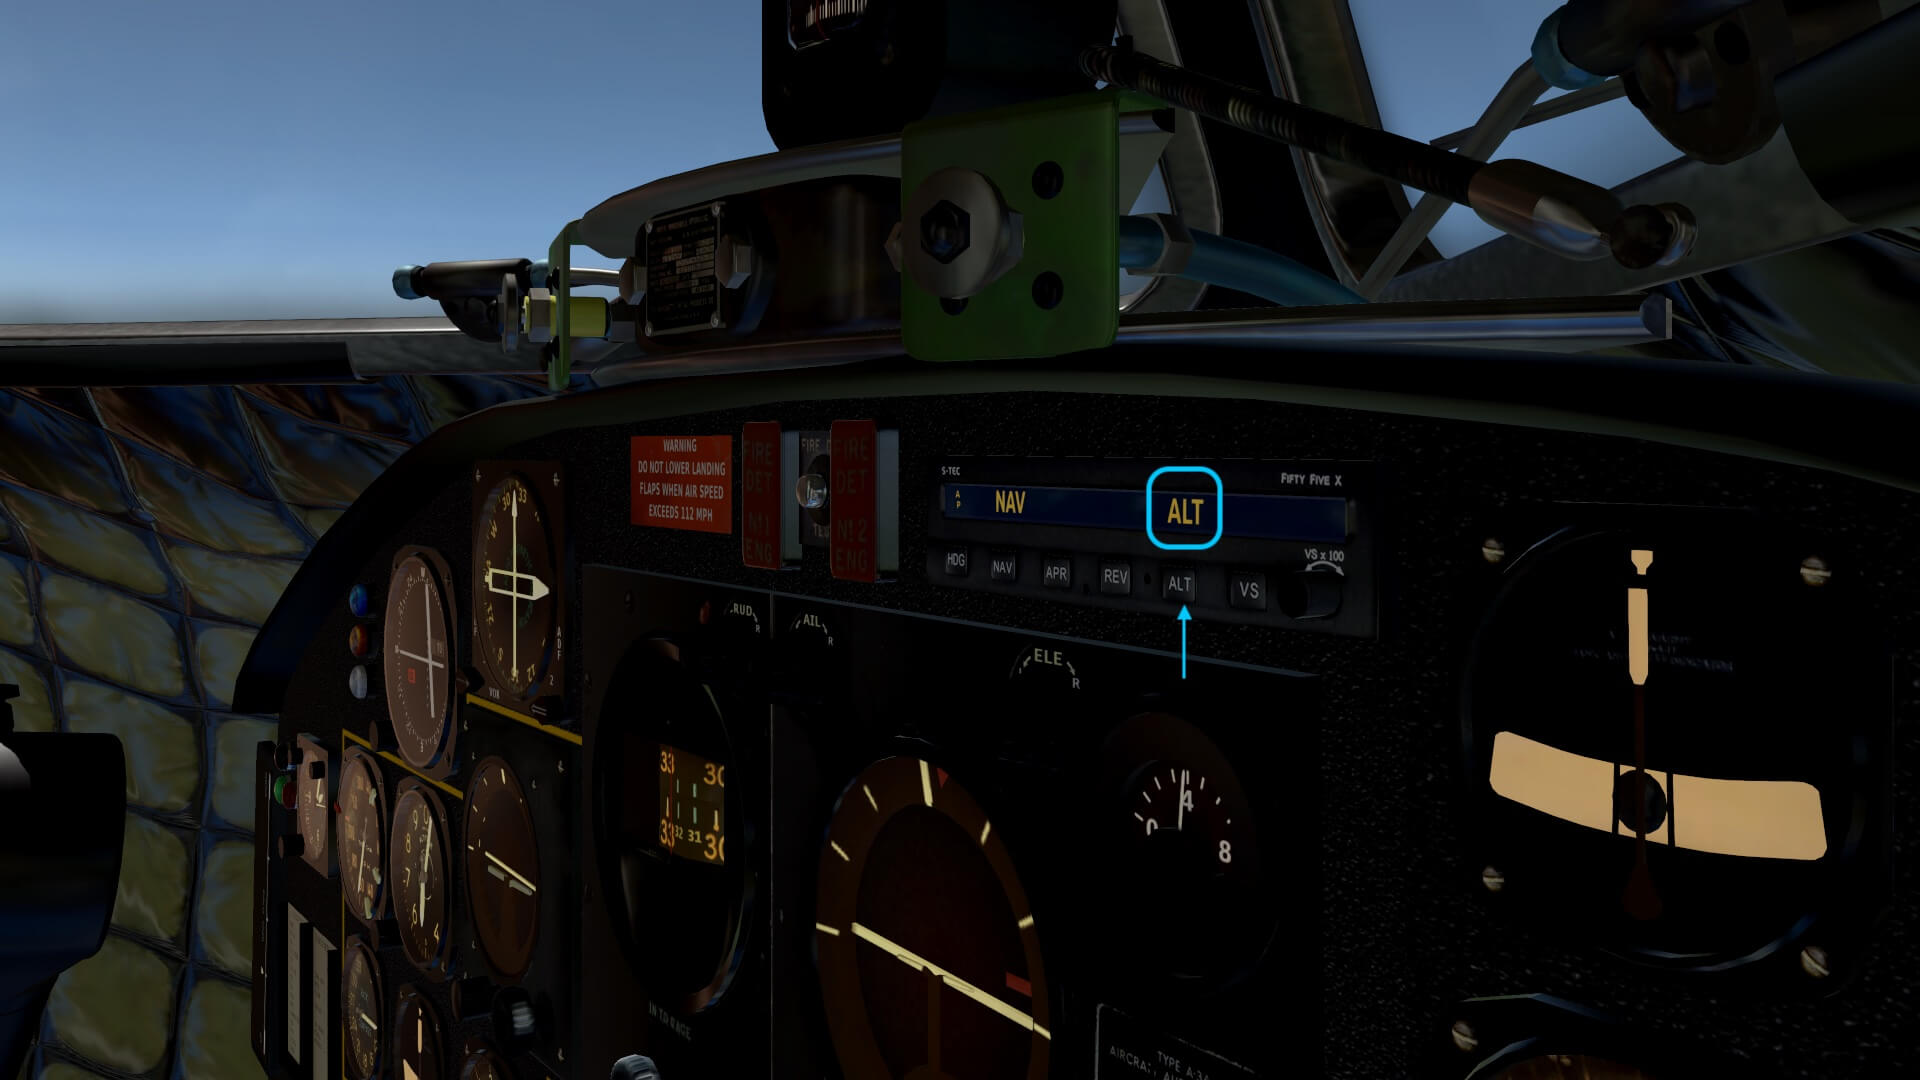
But before doing this IFR cross-country flight and using the modern Sperry S-TEC 55 Auto Pilot, I will make a short flight from Elstree (EGTR) and see how this baby flies and behaves as well as testing out the original modeled basic Sperry AP. That will be described in section First Flight Impression.
Preparations
Installation and Documentation
Before you can do anything, you need to buy / download the VSL C-47 Skytrain either from the VSkyLabs store or from X-Plane.Org. Unzip the package, and install the complete folder in the X-Plane Aircraft directory or if you own other VSkyLabs products, you can also create a sub-folder VSkyLabs or any other name you like and paste this C-47 folder into this sub-directory. That’s all! No serial or whatsoever is needed.
The C-47 folder comes with two Acrobat files; VSKYLABS LICENSE COPYRIGHT AND DISCLAIMER and the VSKYLABS-C47-Pilot Training Manual. The first manual is just one page and not so shocking, but the second manual is a very interesting one. Literally everything you need is in this manual except “how to control the doors”. I think, no, I’m quite sure, this manual is a compilation of the original old manual and stuff that’s related to the modeled C-47 Skytrain. As of this writing, April 2021, an updated Supplemental manual will be available that covers the latest features in respect to model version 3.0c.
XChecklist and clist
You can try and find a checklist in the manual, or you can use an electronic checklist file (clist), but since it’s not included in the VSL C-47 package, it will be a challenge to find one, but lucky, I did find a “clist” specifically for the VSL C-47 Skytrain. The clist file from X-Plane.Org user St54Kevin can be found via this URL. The clist file, for those who aren’t aware of it, need to be placed in the root of the VSL C-47 folder. While writing this review, I’m also working on a new clist for the VSL C-47, but not sure if it will be finished when the review is done. Keep and eye on our news!
To use this clist file you and I need to download the XChecklist plugin created by Sparker from X-Plane.Org. Unzip the package, and install the complete plugin folder under Resources/plugins folder. This will, at startup of the VSL C-47, automatically present you with the electronic clist or checklist.
Using this clist.txt file is a good moment to become familiar with the modeled systems.
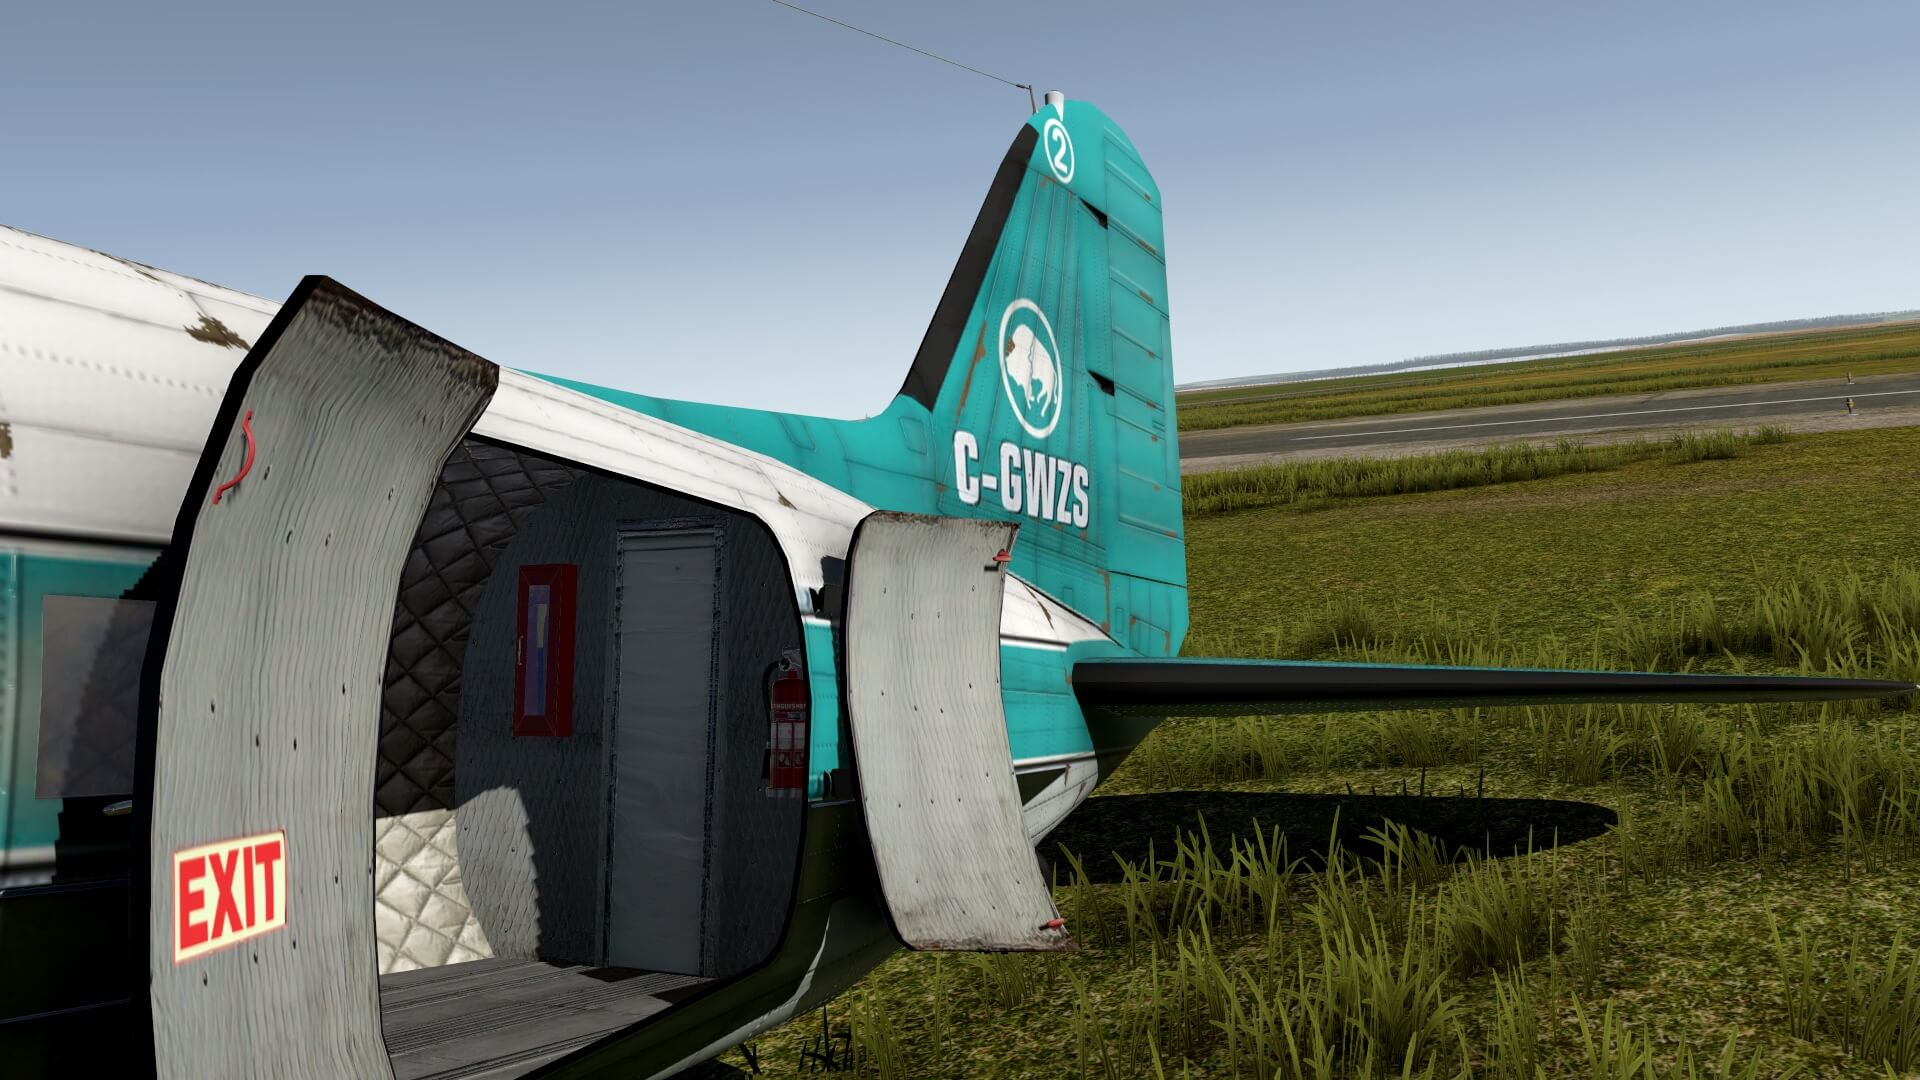
Doors
Since I couldn’t find this in the manual, I decided to add this in this paragraph. As far as I’ve seen, the modeled C-47 comes with two animated doors. One for the AFT cargo doors and one for the FWD cargo doors. Remember, the simulated model is a C-47 and not a passenger DC-3. That said, that’s the reason I use the words “cargo” doors. Assigning doors is a basic X-Plane function. You go to the X-Plane Settings – Keyboard menu, type in the search field “doors” and assign with keyboard keys the doors 1 and 2, as you can see on the following screenshot.


As you can see in the first screenshot, I took a couple of keyboard combination that where already assigned to something. When you feel you don’t need the original assignments anymore, then you can use e.g. the same as I did. Opening and closing the doors is now possible. I only hope and yes, that’s my personal feeling, that the speed in which the doors open or close could be a little less. It’s very fast to be honest. Once the doors are open, it’s a pleasure to see that the internal of the doors isn’t forgotten. They are covered I think, with real photographic textures. And with the front cargo door in the open position, the inner wall of the fuselage entrance isn’t forgotten.
Cockpit Familiarisation
Intro
It’s perhaps good idea to print the complete manual or, when you don’t want to waste any paper and ink, then transport the Acrobat manual to another connected monitor, or to your tablet or iPad. This familiarisation section as a DC-3/C-47 rookie has two functions. First I would like to explore the 3D cockpit, and the cabin, but I also would like to see how easy it is to follow a checklist, and then in particular using the clist.txt file.
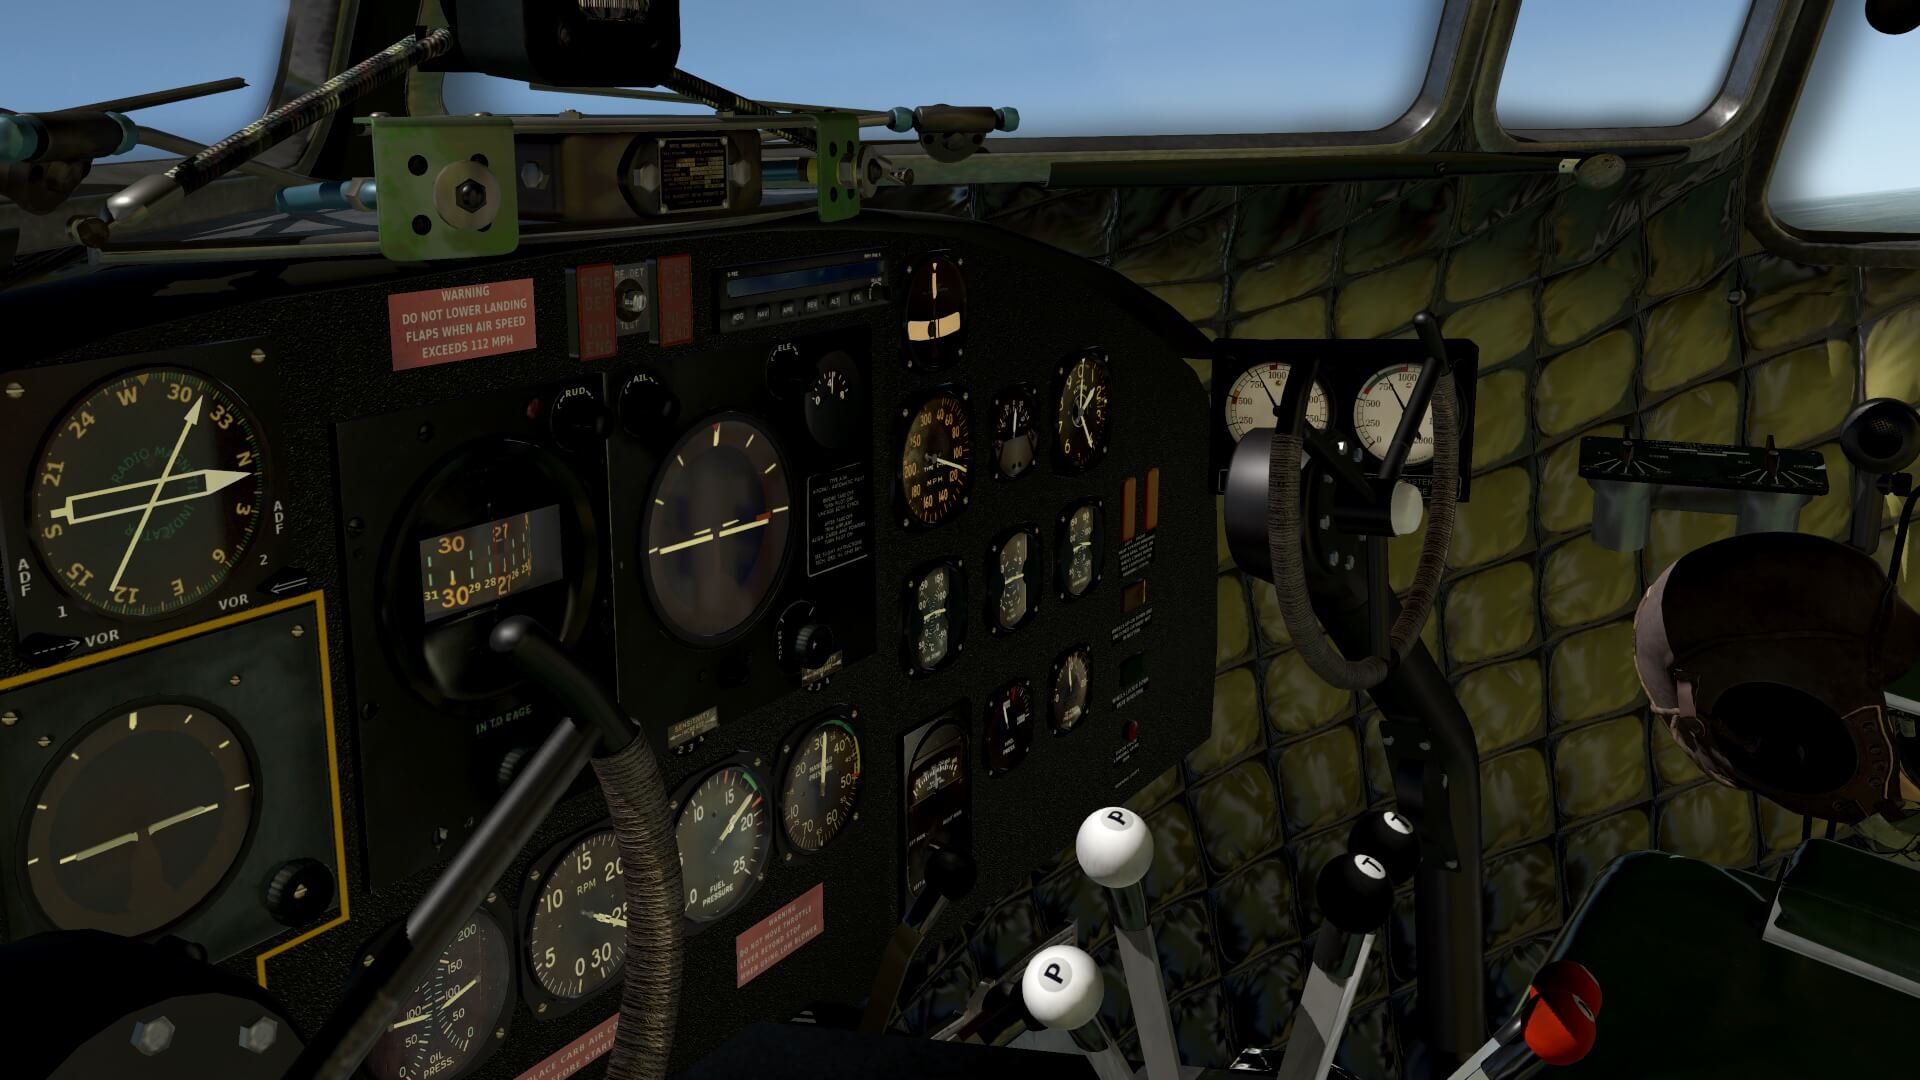
I said in the beginning, I won’t compare this C-47 with the Aeroworx C-47, but I would like to tell you how I felt when seeing all the original old panel textures versus the mix of old and own created panel textures in the VSkyLabs C-47. Normally I’m a favorite when real photos or used to cover every 3D objects provided all the photos are of a suburb quality, right? And that’s also a bit the problem when you only use old photos that aren’t always of a good quality. And that’s why I personally like that the 3D cockpit textures are a mixture of real and own creation. The end result is a balanced old fashioned 3D cockpit with a mixture between real photo textures and own painted ones, but honest is honest, there are still many improvements to do to lift the overall quality of the cockpit textures.
Virtual Cabin
I’ve opened the AFT cargo door from the outside with the keyboard key combination which when not assigned as previously explained, you can always open these doors from the inside. Anyway, I place virtually a stair outside and climb into the cabin. The overall quality of the virtual cabin is OK, but not exceptional. Although not for me, but for some simmers this may be a disappointment. As said before, it comes with overhead racks, ceiling textures, seats, tracks, carpet, a toilet door, a fire extinguisher and an axle. So it seems everything is there, but it must be said that all cabin objects are of an average quality. And since I mentioned that I need a stair to climb into the cabin, the VSL model doesn’t come with authentic ground equipment like a stair, a DC power unit and so on.

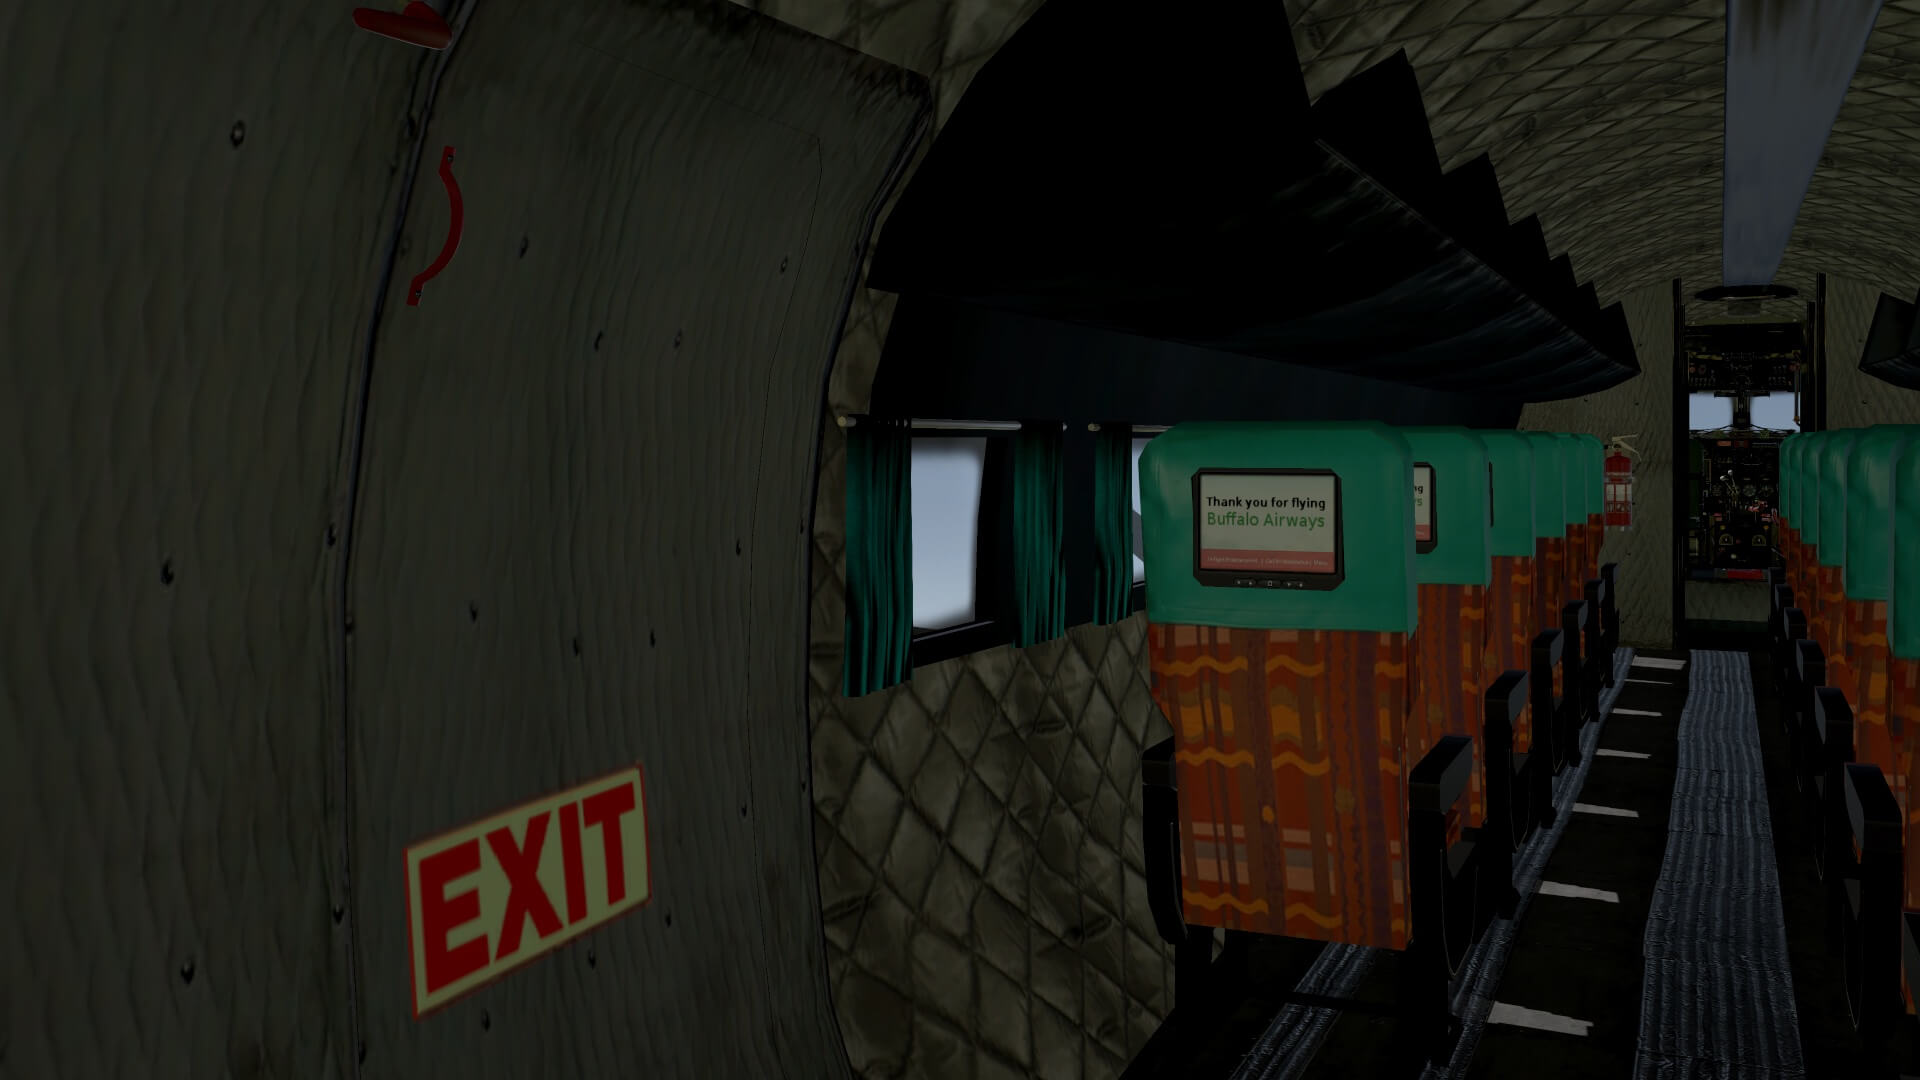

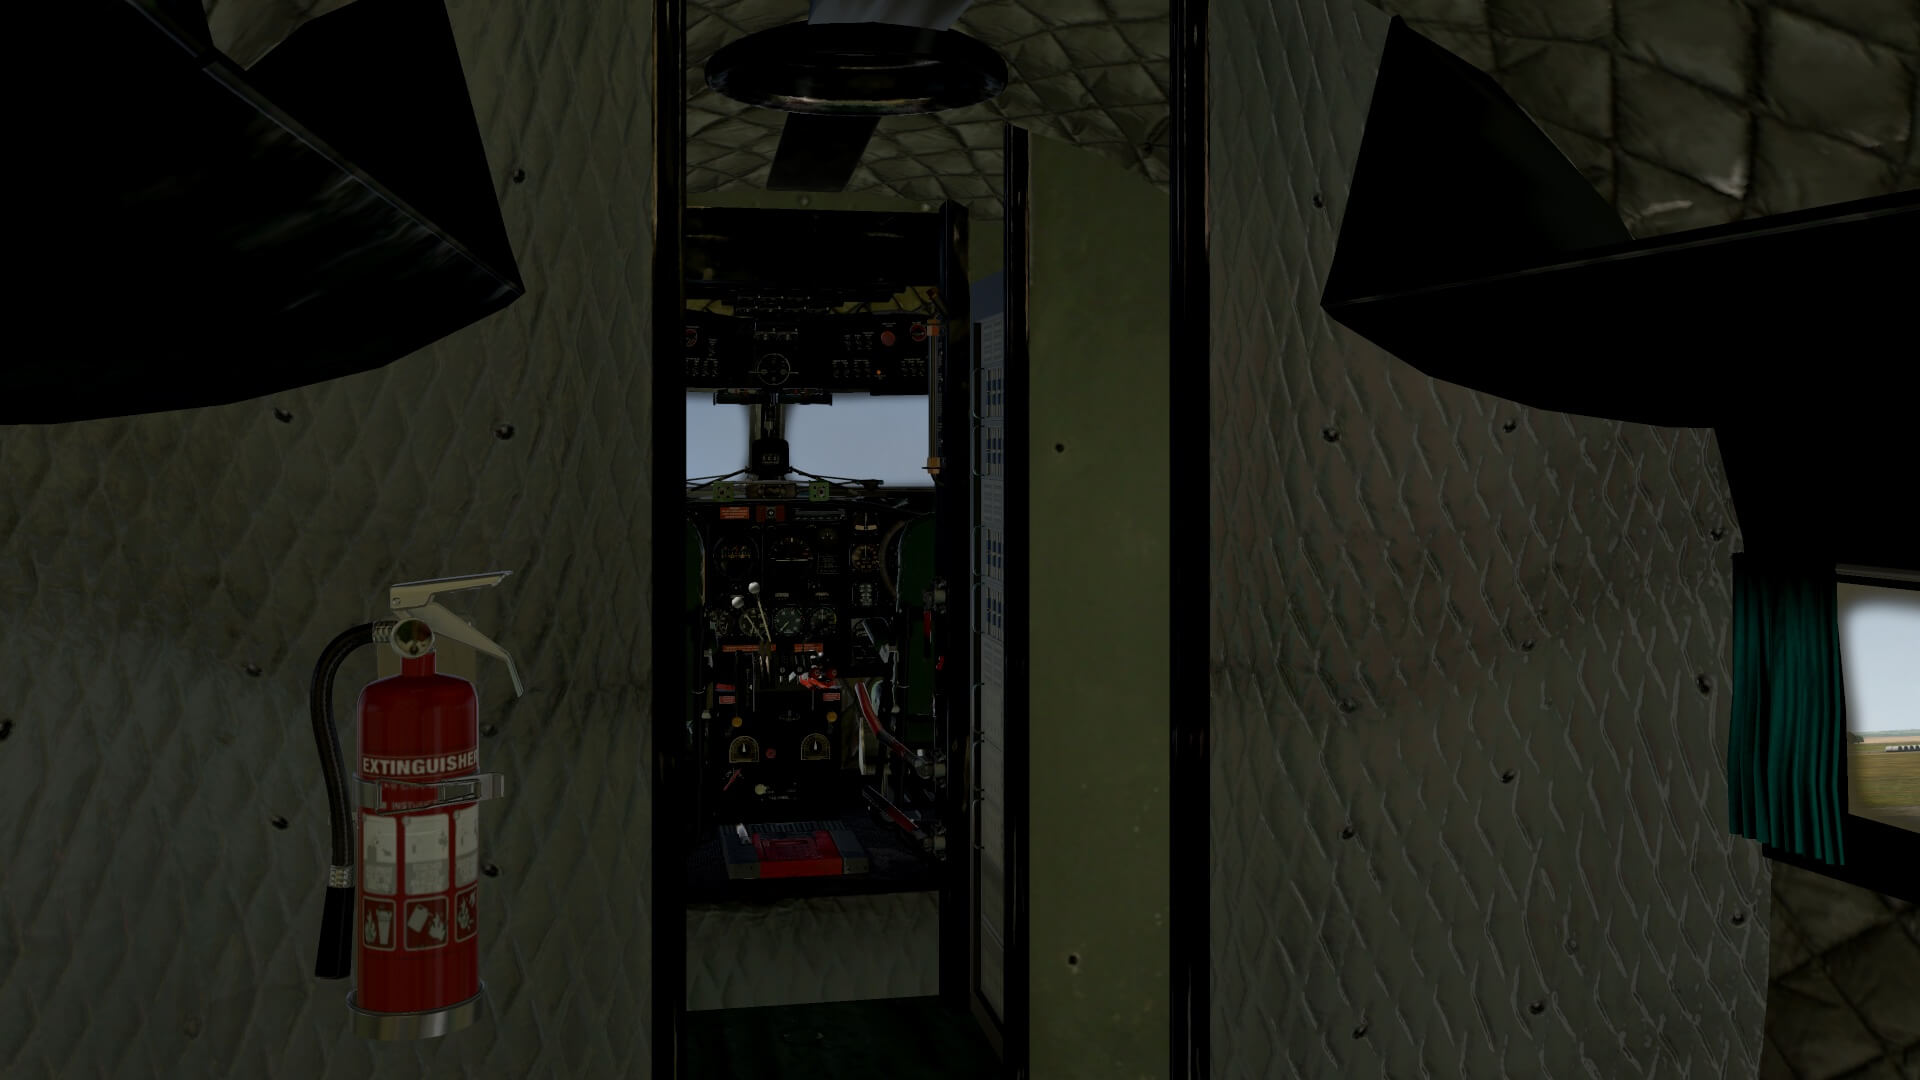
On the other hand, keep in mind that every small virtual cabin detail means more polygons and more polygons means less available frame rates and that’s not what you and I want, right? While walking thru the cabin to the cockpit, I pass on my left-hand side the FWD cargo door which is, the same as the rear doors well modeled and also covered with real photo material. On the opposite of the FWD cargo door which is just before the cockpit entrance, I see something that’s a bit weird. I see computer racks. Ho ho, hold on, this is a C-47 and in these days they didn’t had those computer racks …. or do I mistaken?

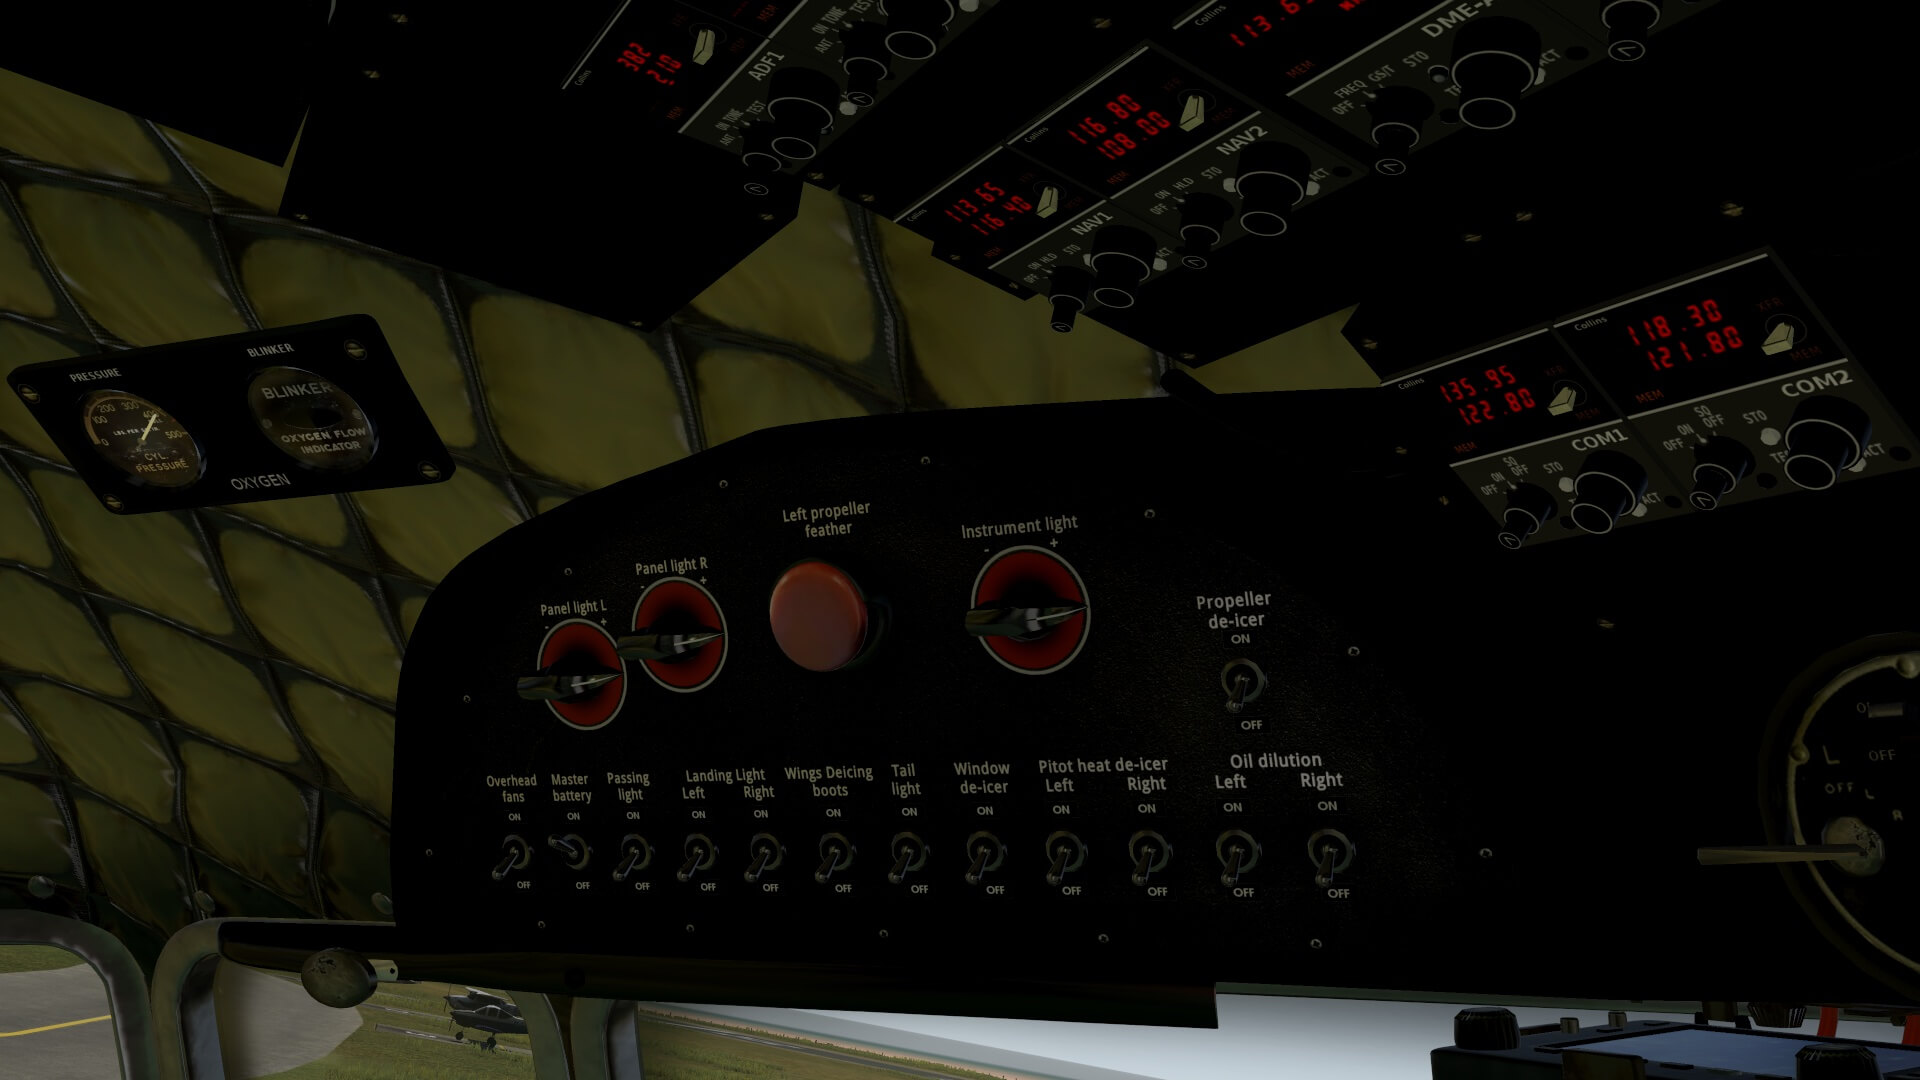
Old Fashioned Cockpit
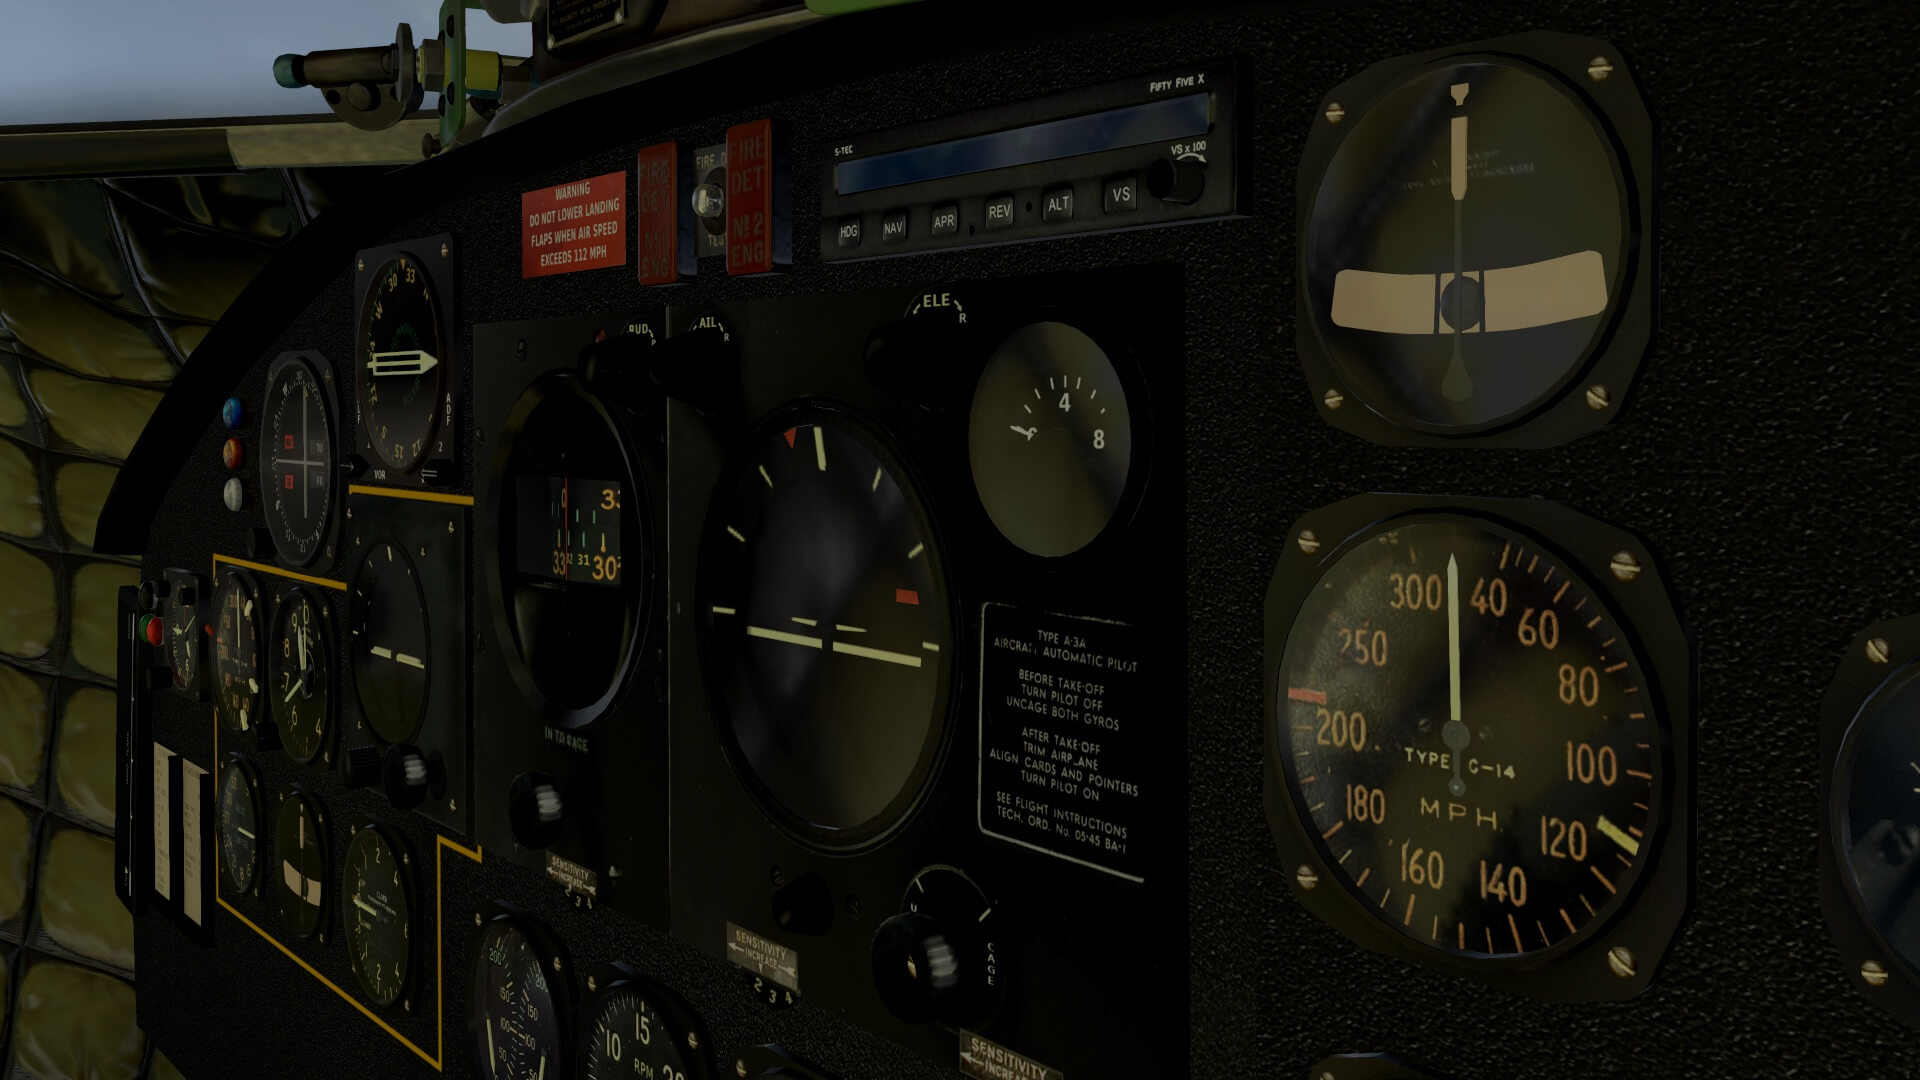
And then, I’m ready to enter a very old stinky cockpit although the sticky you don’t smell, but old fashioned, yes, this is true. No, I don’t call it a flight deck. This is where real pilots dreamed from, and current licensed DC-3/C-47 pilots still do. I mentioned this before, the modeled VSL C-47 comes with “a” cockpit layout. “A” because I’ve seen hundreds of different real configurations. That, for those who know the Aeroworx C-47, means this is different and I wrote before, it has in my humble opinion well integrated X530 units. When you have flipped them down, you can do everything with them and, since these are the default Laminar Research X-Plane 530 units, you can click on them and a popup 2D version appears.
What I said before, some parts of the instrument panel, sidepanels or ceiling are covered with real photo textures while others are made or painted by themselves. I could give you many examples of this, but a good example of own textures are the prop, throttle and mixtures handles or the brake and rudder pedals. On the other hand, most of the instruments in the instrument panel have razor sharp indicator plates while the outer part with screws are relatively new, at least no weathering is visible. One other example; the red decals with white text placed below the engine instruments are perfectly readable, and do have a slight weathering.


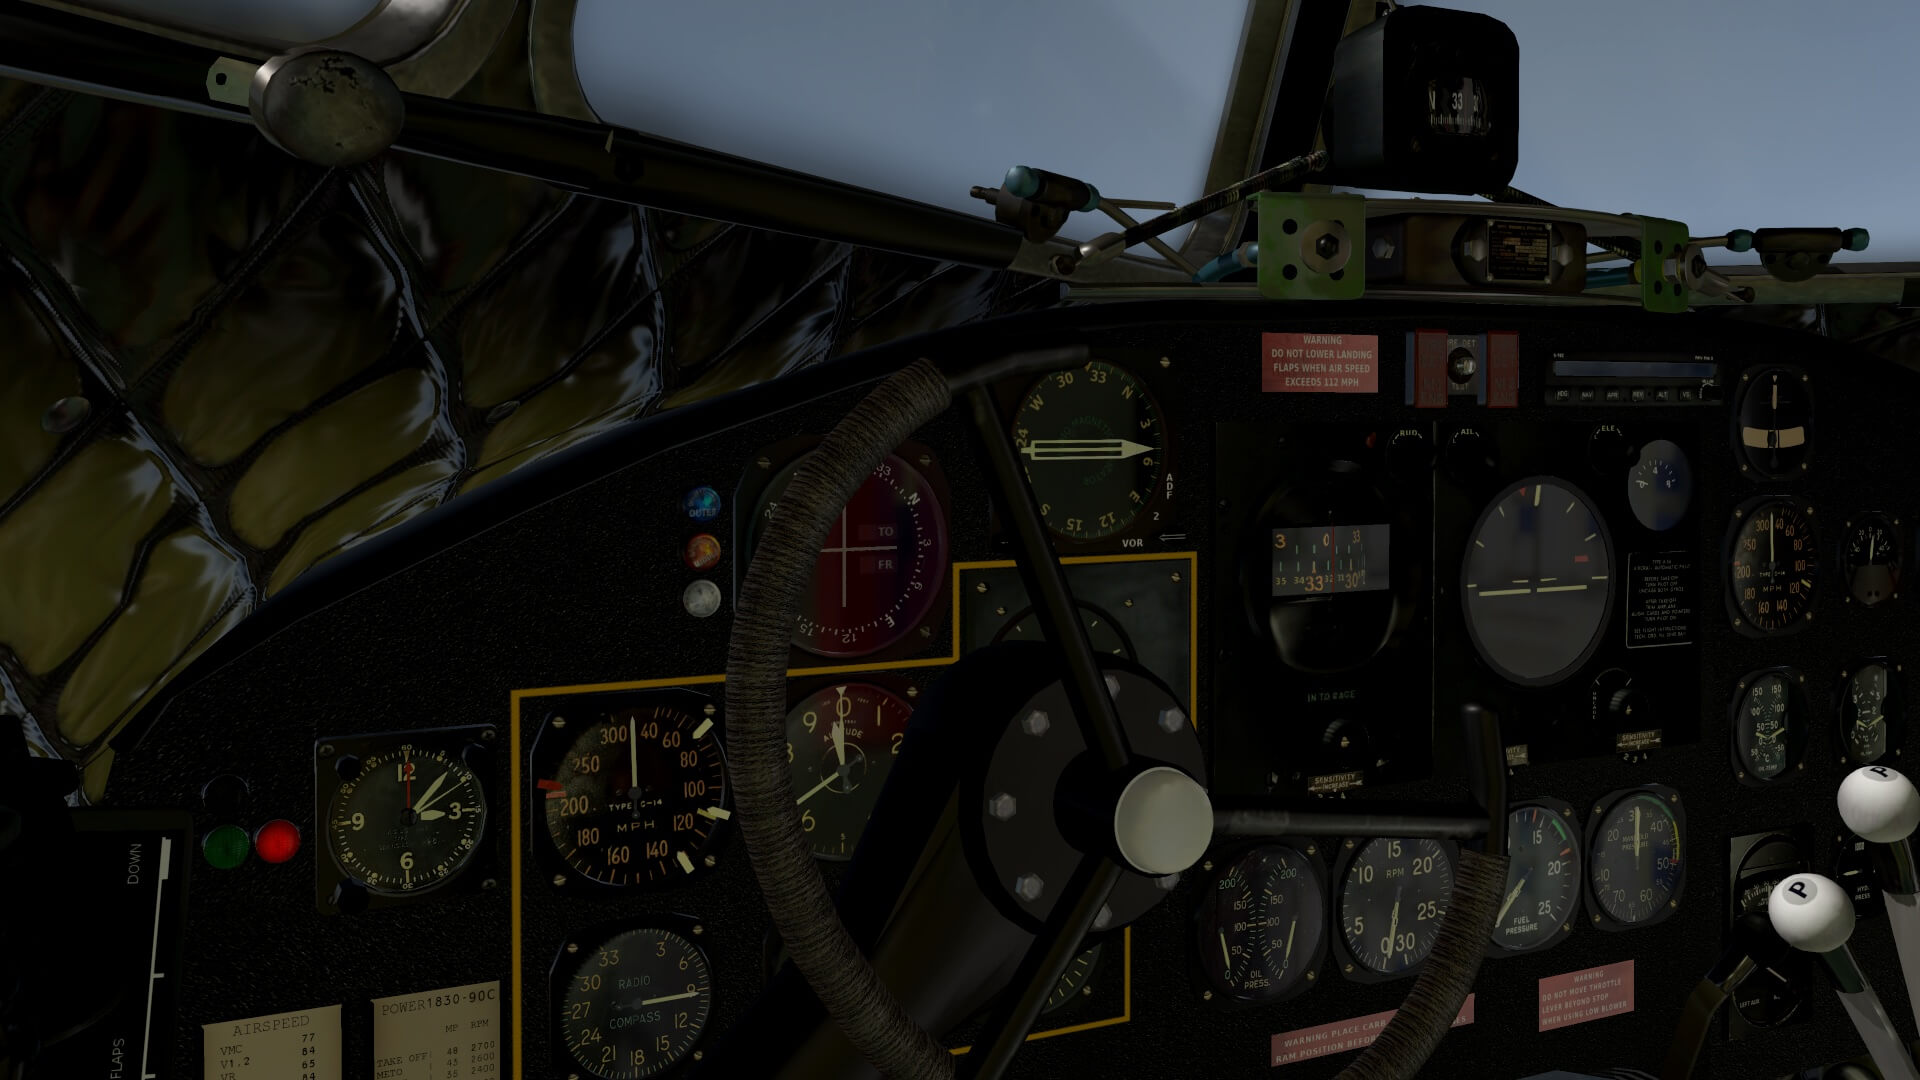
I really like the handwheels – just like in a ship – but they are very well modeled while I double checked there shape and size with many photos. Although a pilot seat is just a pilot seat, I do like the way they look like as well as all the adjustments and seat track. The green leather on both pilot seats is not real photo material, but painted or created by themselves and I must admit, it looks nice.
And then, when I look up to the ceiling and to the split panels which are surrounded by the typical waffle insulation textures. Overall I can’t complaint how the 3D cockpit is modeled, but personally I would love to see a bit more weathering on the panels or instruments, and higher quality graphics although I know this is easier said then done.
However, a beautiful 3D cockpit is one thing, but what’s it all worth when the flight dynamics are not good, right?


The same as with my VSkyLabs Robinson R44 review, I again decided to contact Huss to hear his story. According to Huss “There is a version 4.0 of the VSkyLabs C-47 in the “oven”, which will be a huge leap forward, especially in terms of graphics/modeling. It should be ready later this year. When it comes to flight dynamics and real experience I can tell you this; In the late 90’s I flew DC-3/C-47’s, and also was in charge of a flying DC-3/C-47 “fleet”, and the VSKYLABS C-47 project reflects a lot of my personal memories. The project represents the “classic” late 40’s/early 50s’ C-47… so this part was quite interesting during development as I was flying in a converted C-47 aircraft, not the original US C-47’s.”
Basics : C-47 Flight Controls
This section is not directly related to the modeled VSkyLabs C-47, but more a bit of basic C-47 knowledge. It deals with the way the primary flight controls – ailerons, rudder and elevators – are operated. All flight controls except for the flaps, are mechanically controlled and operated as can be found in small GA aircraft like for example a Cessna 152 and 172.
Mechanically controlled means that via linkages, rods and cables, turnbuckles and the control column or pedals the elevator, rudder and ailerons are operated. Full manual force is needed to move them, so no full hydraulically powered nor hydraulically assisted. I’d expected to find in the maintenance manual balance tabs on the flight controls, but no, nothing of that. However, one trim tab can be found on the rudder, on each elevator and on the right-hand aileron only. Again, these trim tabs are also mechanically operated and controlled from the cockpit via a cable system although the trim tabs itself aren’t simulated. According to Huss the trim tabs itself will be simulated with the next update.
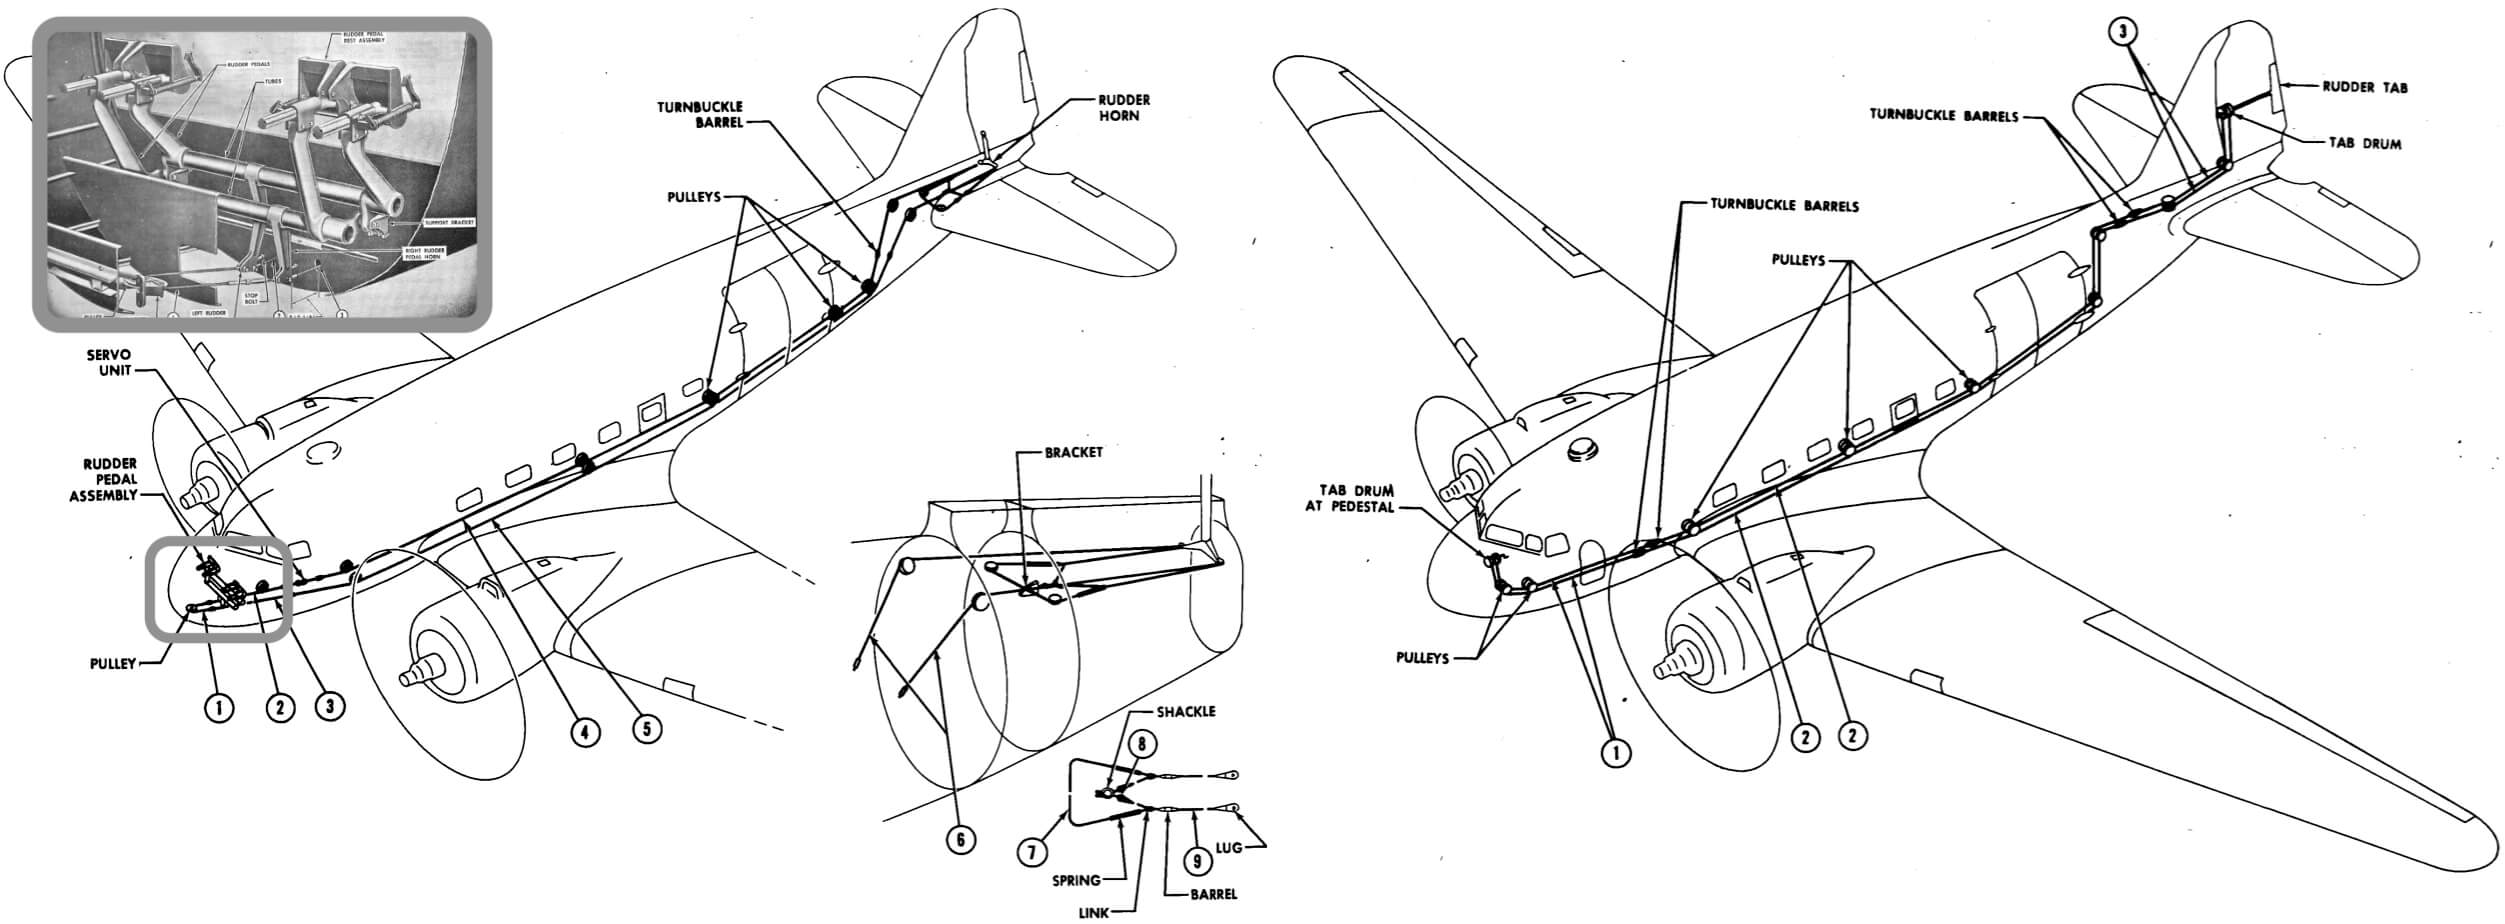

Another flight control is the flap system although I personally would call it the secondary flight controls since you can fly/control the aircraft without flaps. The DC-3/C-47 flap system is a hydraulic operated and mechanically controlled. It is controlled by a handle near the cockpit floor between the pilot seats that operates a hydraulic operating valve. Hydraulic pressure controls a single hydraulic actuator which in turn moves a mechanical shaft system while the flap tape indicator – left-hand cockpit instrument panel – receives mechanical feedback from the actual flap position. The handle has three positions and the flap system itself does have a flap load relief system. Some flap details can be found below on the coloured picture.

Cockpit checks with XChecklist “clist”
Lets go back to my cockpit adventure.
Although the included manual – VSKYLABS-C47-Pilot Training Manual – also has a checklist, I personally prefer the electronic clist. It is based on the modeled VSL C-47, so you’re not missing anything. Following the checklist is easy as long as you’ve prepared yourself. An advantage of the checklist “clist.txt” file and XChecklist plugin is that the virtually co-pilot helps you checking the steps. That said, the co-pilot will check for you if the checklist step is already OK and if so, it will tell you that the system/switch/knob or whatever it is, is in the correct position.
While using this clist with in front of me the printed original checklist, I found out that many items are either double or not at the right place or the checklist doesn’t continue because the value it has to reach won’t fulfil. That said, the clist is OK, but not perfect and because of that, I started to make my own VSL C-47_clist while writing this review. Ah, what does it matter, enough time to finish this review. No, I can tell you, this review will be again a massive in-depth review with lots of personal tips, tricks and basic C-47 information.
First Flight Impression
What’s the idea?
This will be my first flight with the modeled C-47 and it’s also a flight to get the right feeling of the modeled VSL C-47 and of course, to write it down. In this section I’ll try to cover as much as possible although I will make a longer 2nd test flight. It’s also my intention to figure how the basic C-47 Sperry Auto Pilot works and since I will fly a kind of circuit, as guidance I will use one of the build-in X530. I will load the flight plan although this is just as reference to see where I fly.
I assume you’re aware how to load a “fms” flight plan and if not, please check the official Laminar Research X530 manual, starting at page 49. Are you ready?
Engine Start Procedure
Checking the clist for the engine start procedure is a bit confusing, so I found it better for now to use the VSL manual since that’s the pilots C-47 bible, right? At page 41 and up of the included VSKYLABS-C47-Pilot Training Manual the engine start procedure is well explained. Assuming the engine start procedure is correctly simulated, I need according to the manual, keep my mixture at CUT-OFF till the engine fires, then move it to AUTO RICH or click on the pedestal the decal “AUTO RICH”. The official C-47 manual says when it fires move the mixture to AUTO RICH.
Next, before doing anything, set the throttles to 1100 rpm and wait till the cylinder heat temperature shows at least 100C. The indicator is installed below the amp indicator on the RH side of the instrument panel. As written in the manual and explained to me by Huss, every tiny detail of the real C-47 system is modeled. That said, these radial engines need time to warm up.
Powering them up too quick can damage them, so even in the simulator, take your time. Out of experience I can tell you that this won’t take any longer then 5 minutes max. In that time you can double check your flight plan if you have one, or do the necessary takeoff preparations and rehearse them what to do or be happy with a cup of coffee offered by your cabin attendant.
But it felt to me that the engine start procedure is much easier then I’d expected so time to contact Huss from VSL to help me out. According to Huss “the radial engine is not being simulated in a way that covers the whole start-up process. Actually, the VSKYLABS C-47 uses the simplified X-Plane engine start-up algorithm.” Knowing this, I sincerely hope that with the updated v4.0 model this “realistic” engine start sequence is implemented.
Here’s something interesting I found for those who read our review and want to see and to know how it goes in real. The following movie is presented by Buffalo Joe, demonstrating how to start a DC-3/C-47 from start till and including the end. As you can see in the movie, he’s doing it all alone. Ok, he’s an experienced pilot, but still, a lot of actions have to be taken to ensure proper engine start. And yes, the real engine start procedure may not be implemented yet, because of the didactical value of it, I found it worth to share this movie with you.
by Mikey McBryan
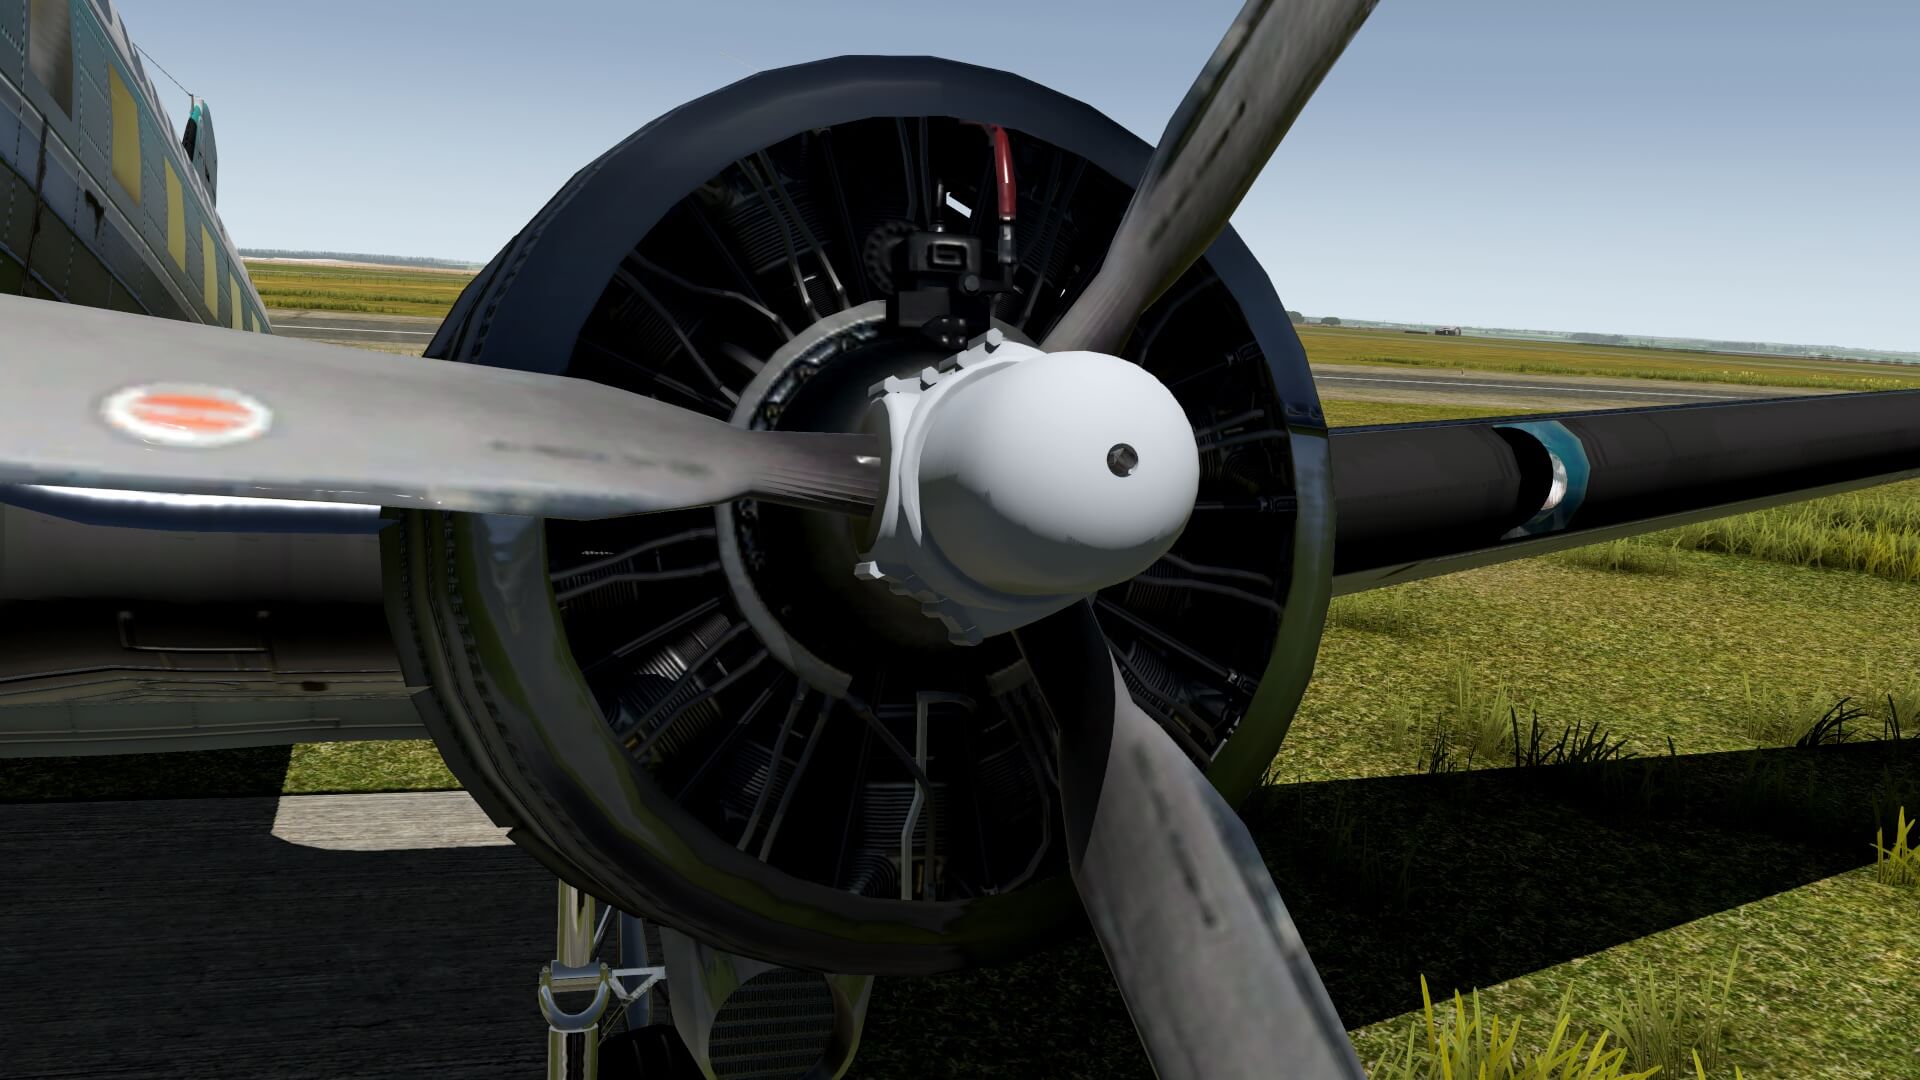
Basics : C-47 Twin Wasp R-1830 Series
According to the Dakota Hunter “The most common windmill for the DC-3 / C-47 was this Pratt & Whitney R-1830 type piston engine with its 14 cylinders stand in 2 rows of 7 around a central crank case. The denomination R-1830 of the type stands for Radial with 1830 cubic inches of displacement (nearly 30 liters). Divided over 14 cylinders, that brings more than 2 liters per cylinder, yielding massive pistons when compared to automotive standards.”

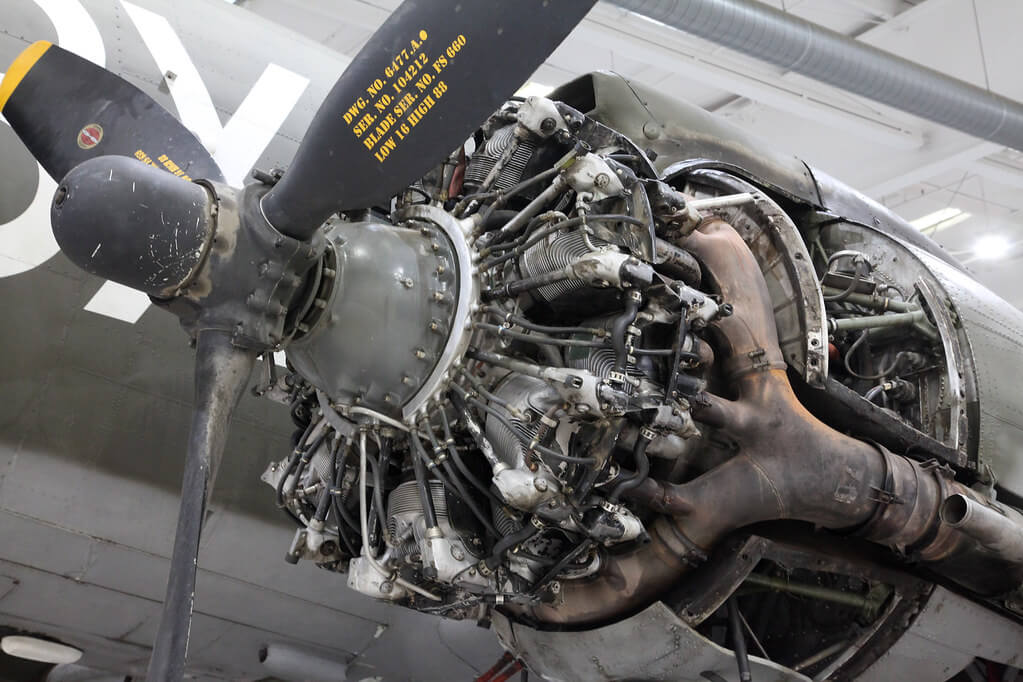
“This R-1830 cranked out a max of 1200 HP at take off on sea level for a short burst of a full throttle during the take off run in order to get airborne as quickly as possible. This full throttle run was only allowed for a very short period, normally some 60 seconds, after which the aircraft was supposed to be flying at such altitude that it could safely throttle down to lower revolutions for sparing the engine against thermal and mechanical over stress. This R-1830 engine was a most reliable, but intricate machine with thousands of moving parts as rods, 14 pistons, ball bearings, 28 valves, rocker arms, valve springs, pumps, plus the hydraulic lines, electric wiring, double ignition system, the carburetor etc.” (Courtesy of Dakota Hunter)
Some additional notes from Huss regarding his real life experience in respect to the Wasp engine and then in particular the engine starting precess. Huss starts that “In general, when the wasp engine did not run for quite a while, engine oil accumulated in the lower cylinder, and could cause an hydraulic lock during a cylinder compression process, such an event can lead to engine replacement. So the propellers had to be pulled as part of flight preparations (not related to the actual start-up process, but say during pre-flight, or twice a day etc…).”
“During engine startup, 12-15 blades count (using the starter) are meant for making sure that the engine is clear and got good lubrication before ignition. The blades count varied depending on how much time the engine was shut-down before the actual startup. After 2 hours being shut down, a full 12 blades count was needed. It could get down to 8 blades if the engine was started prior to two hours from the last shut down. This count thing is made using the starter.”
“Priming: its purpose is to assist in the startup process by injecting fuel into the upper cylinders. Priming is not mandatory, as well as oil dilution. In the checklists, under Starting Engines, prime action is “As required”.”
Taxing
My first actual check is to test how easy it is to taxi the modeled C-47. It’s, not surprising, a tail dragger and I’ve never been a favorite of such aircraft. I find it, especially when you have no forward visibility, very difficult to taxi with these type of aircraft. I must admit that when I adjusted myself in the VSL pilot seat, I still have a reasonable forward view of the taxi way. But then comes the question; which flight sim equipment should I use and should I go for a free tail wheel or the novice tail wheel mode.
First, I don’t have any rudder/brake pedal hardware ….period! Knowing this lack of equipment, I used for this C-47 review a mix of the following hardware; my Honeycomb Alpha and Bravo equipment and other moments the Honeycomb Bravo in combination with my Saitek X-56 Rhino. And yes, I know, both combinations aren’t perfect although using both Honeycomb devices is OK except that I don’t have rudder/brake pedals, but X-Plane is clever enough to automatically assign to my Honeycomb Alpha the yaw function thus rudder deflection to the control wheel movements. Of course, it was better to have pedals, but this solution works too.
For those C-47 rookie pilots who also decide to use their Honeycomb Bravo Throttle Quadrant with the VSL C-47, keep in mind that throttle levers in the DC-3/C-47 aren’t placed on the left, but in the middle with on the left the prop levers right the mixture levers. By doing this, I figured out that you run into problems when you try to use the original GA black Honeycomb levers. That said, you need to use the Boeing look like throttle levers 2 and 3 since the left black GA lever interferes with the right engine prop lever.
I decided to do twice taxi tests. One taxi will be with a free movable tail wheel thus tail wheel unlocked and one taxi will be in the novice mode. As stated in the VSL manual the big difference between these modes is that the tail wheel is either free to swivel or act like a steerable tail-wheel. Lets find that out.
Taxiing the C-47 wasn’t difficult although some power is needed to move the modeled C-47 from its place, but ones it moves, you need to reduce the power. I must admit that using the unlocked tail wheel mode is much more difficult then using it in the novice mode. When the tail wheel is unlocked, making turns with the YAW channel on the Saitek X-56 Rhino or with the Honeycomb Alpha is OK, but the C-47 has a bit problems with yaw lagging while when in the novice mode when releasing a yaw input, the steering is more or less quickly stopped and gives me a better, and overall easier taxi control.
During taxi this behavior isn’t really a problem due to the slow speeds, but it will or could become a problem during the takeoff run. Then it will be a challenge to keep it on the runway. Hold on, during the takeoff run or landing, the tail wheel has to be locked and runway centerline control will be achieved by the rudder. For those who didn’t read the manual yet, a couple of convenient features regarding PARKING BRAKE ON/OFF, novice tail wheel mode and LOCK/UNLOCK tail wheel are implemented on the LH side of the instrument panel.

Takeoff and initial climb
All set, ready to go. Is it difficult to keep the C-47 during the takeoff on the runway centerline? That depends. When you loose your attention you won’t keep it straight, but on the other hand, when you concentrate, apply slowly more and more power, you can. Handy and perhaps worth to write these figures down, on page 51 of the provided VSL manual, you find a couple of settings for the different flight phases. When I start my takeoff, I clock for approximately 60 seconds. Why, I wrote this before that a maximum of 60 seconds is allowed to prevent overstress of the engine although I don’t know if this is valid for the modeled engines.
While increasing speed, I see or I’d better say “feel” the tail coming up and at roughly 80-90 mph I pull the control column slowly to me. No no, it’s not a modern commercial aircraft so do it slowly while climb out. Suppose I’d tested it on a short runway I would probably set and hold the brakes, apply some engine power to around 25-30 Hg manifold pressure, let the engine stabilise and then release the brakes.
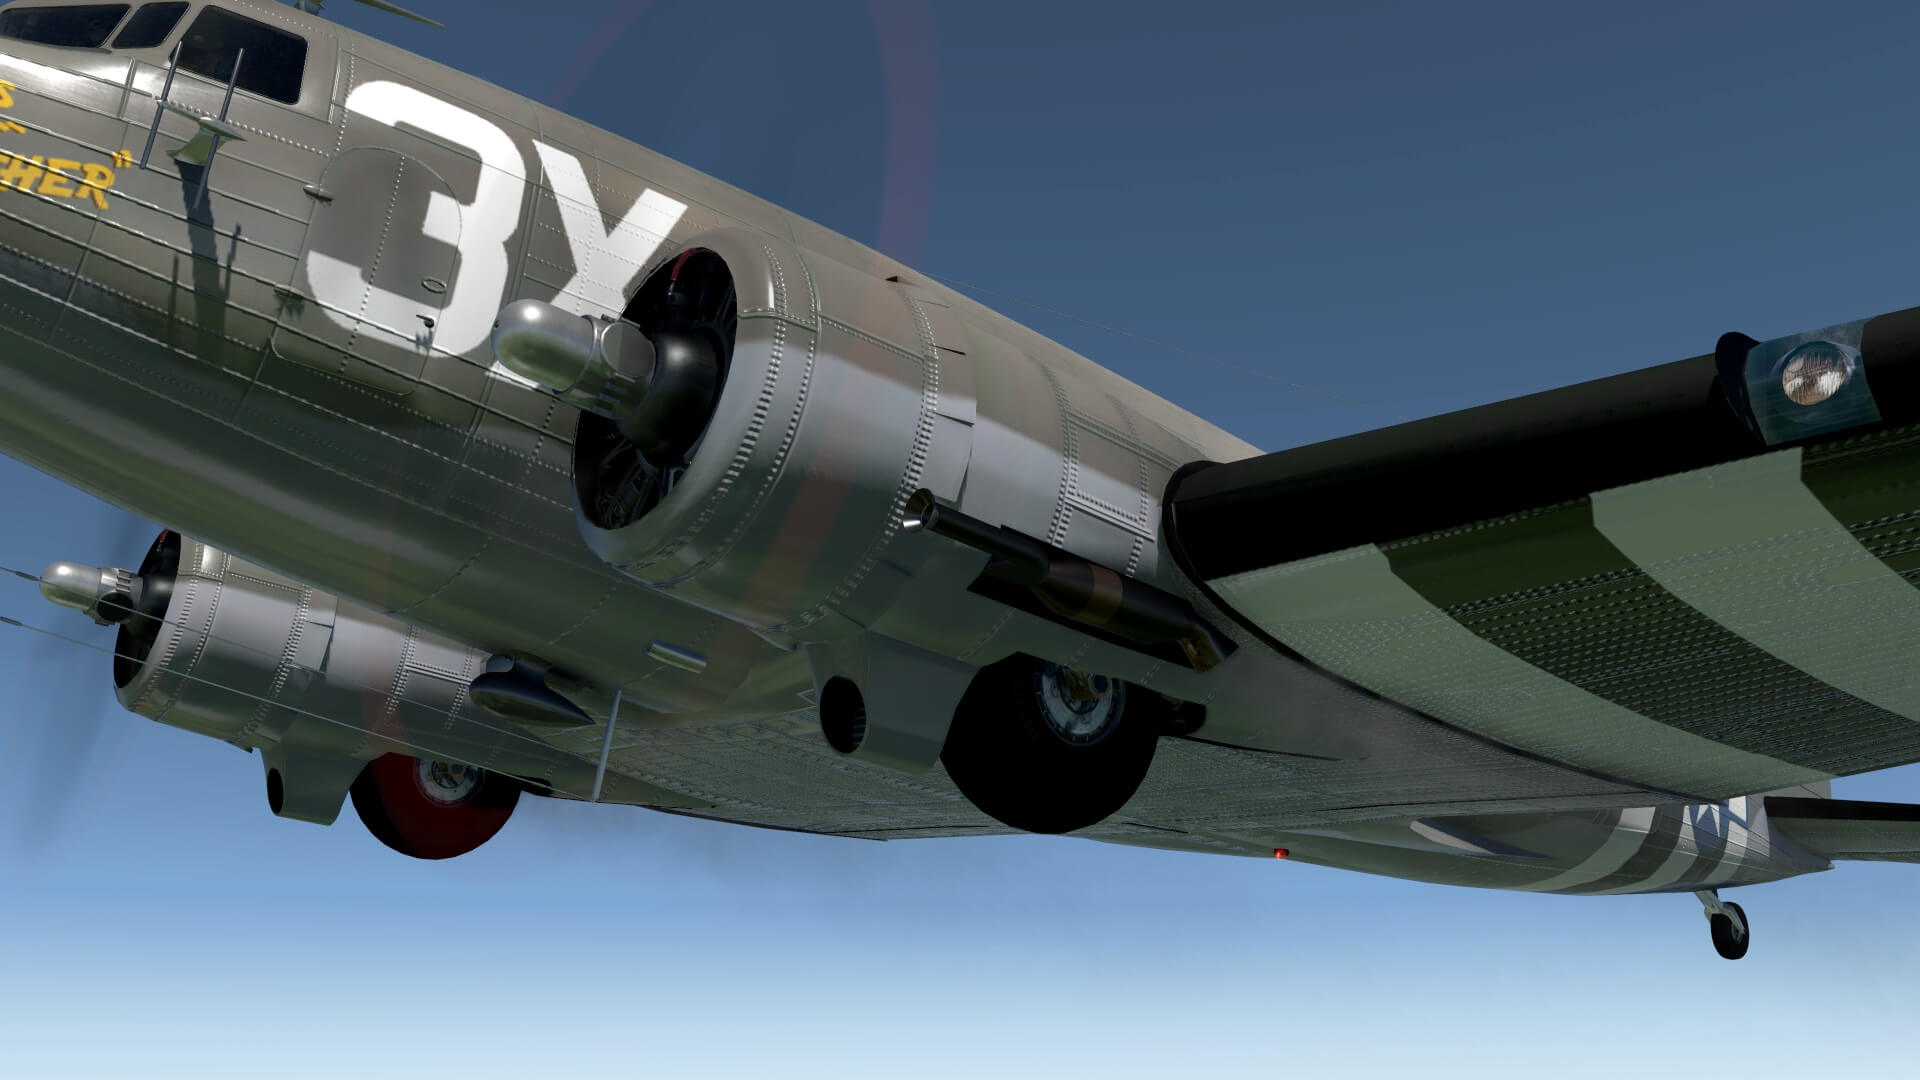
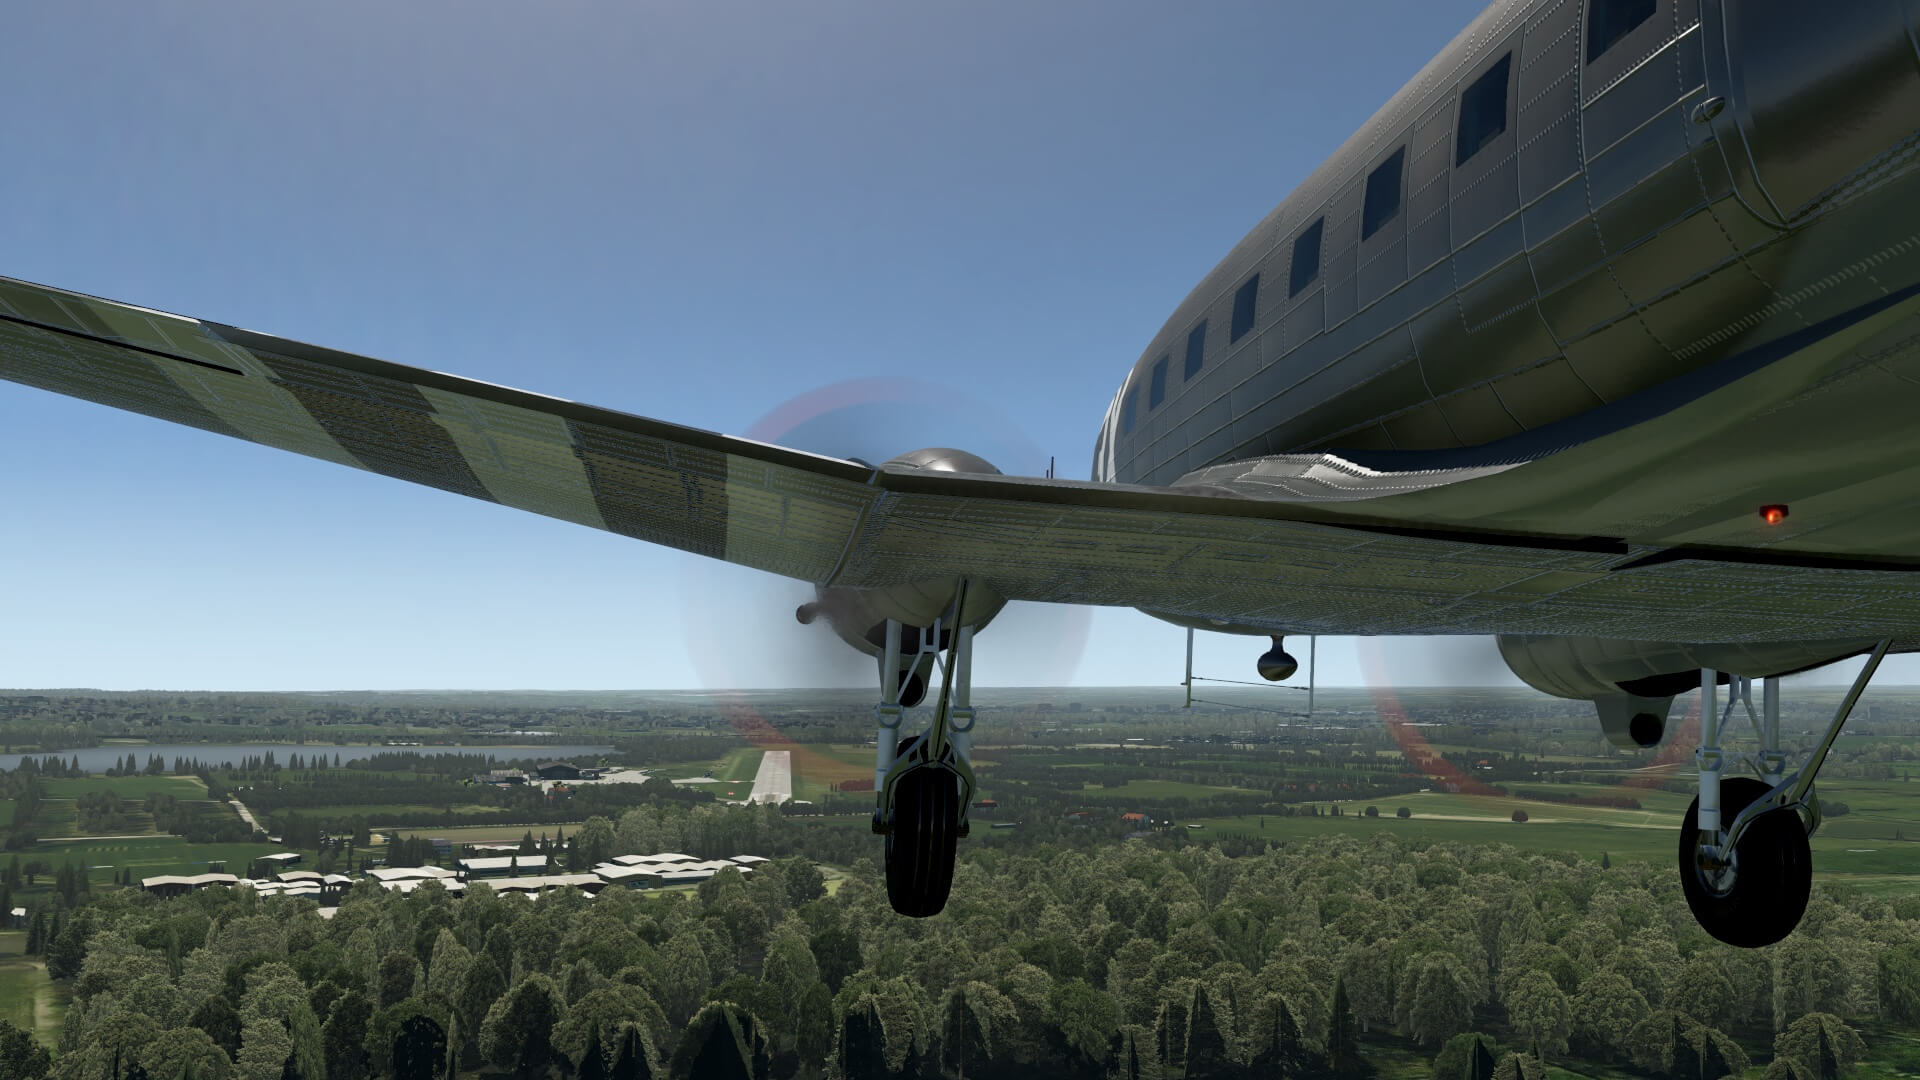
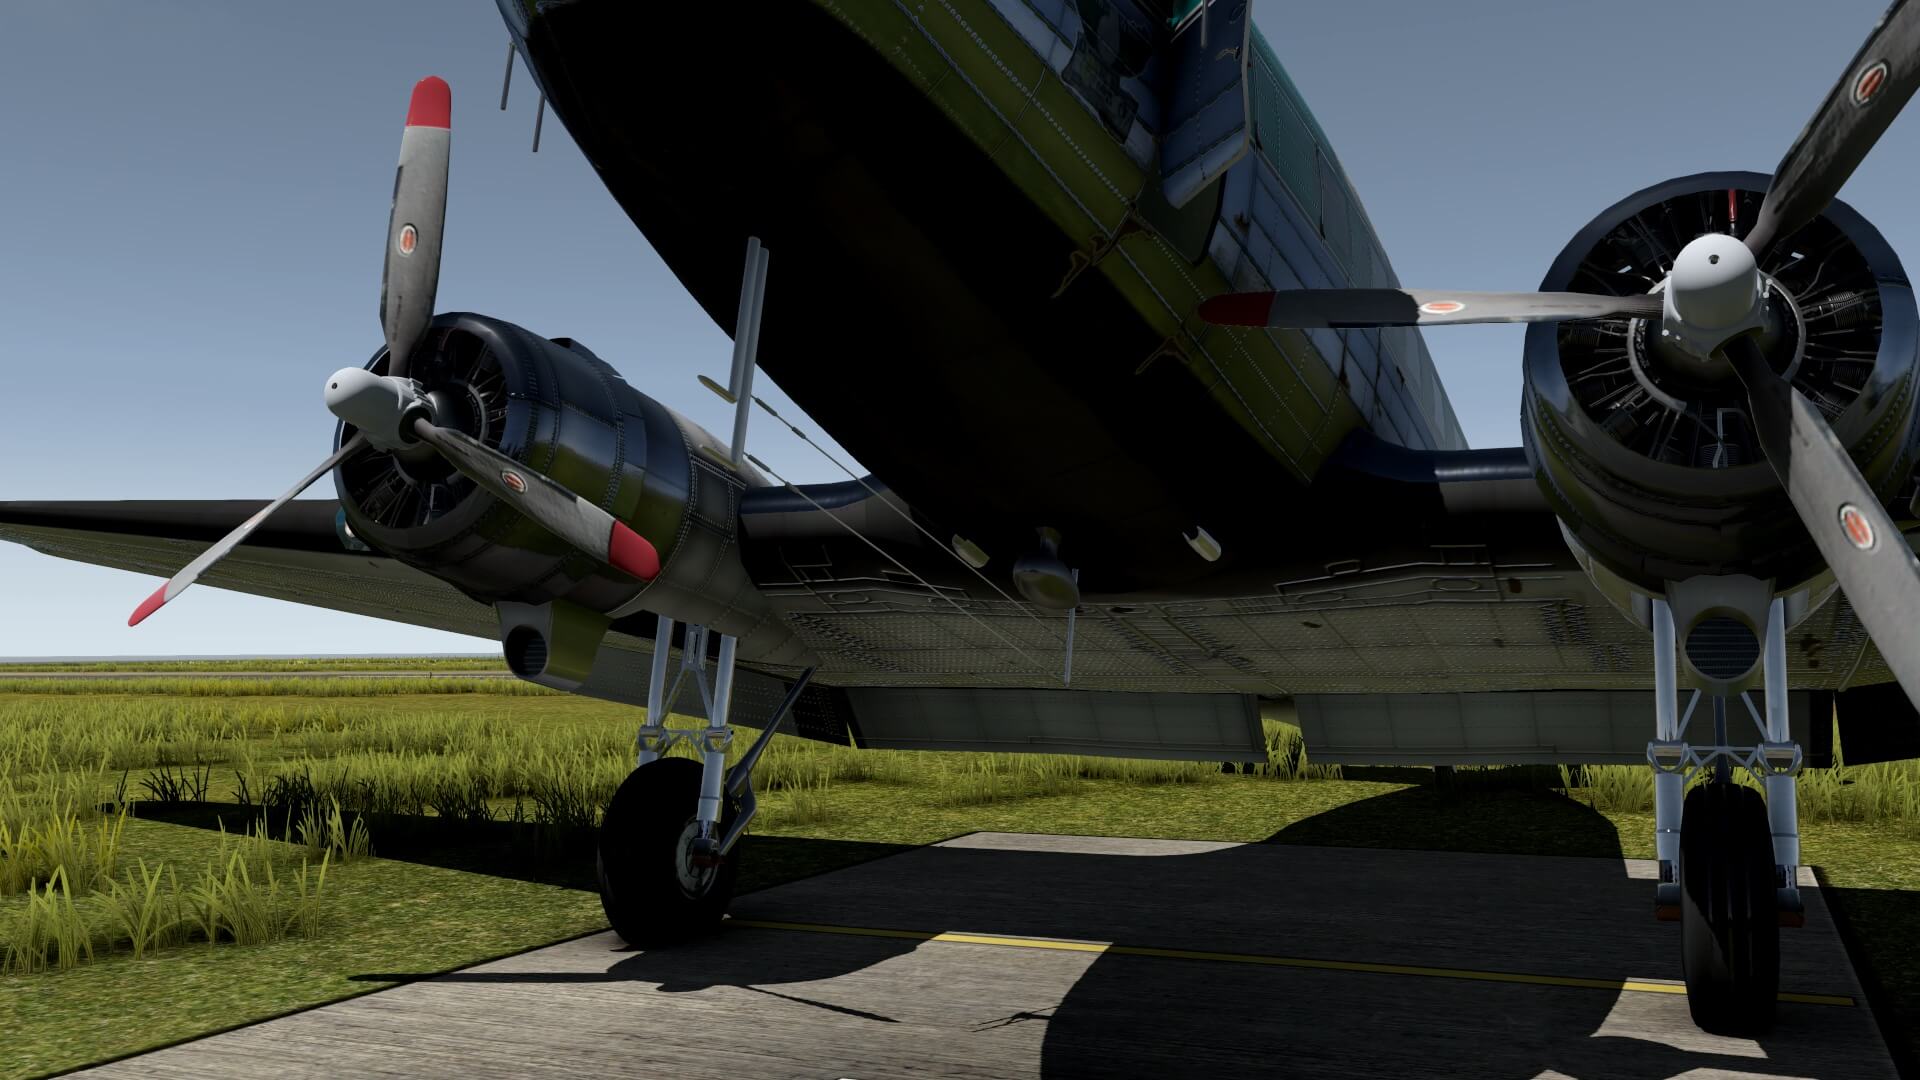
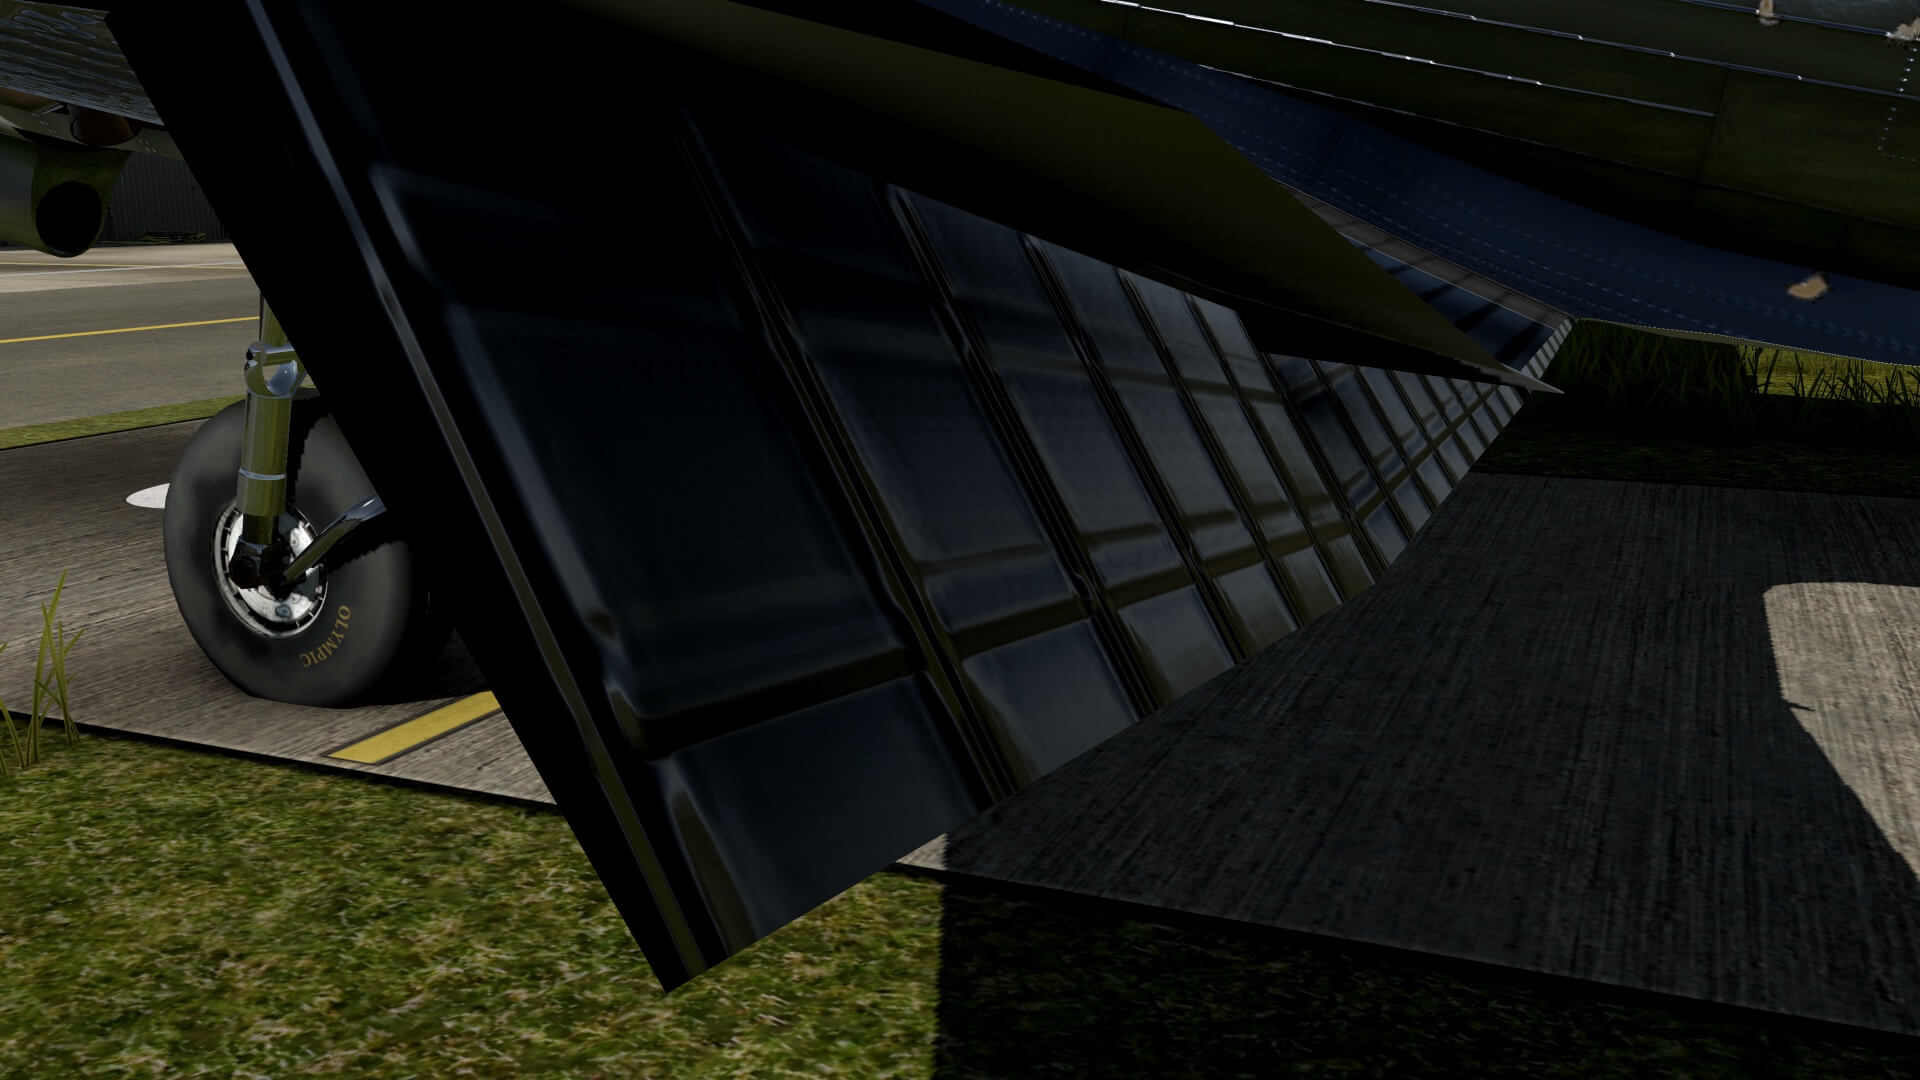
Just after lift-off, apply enough pitch for a smooth climb, followed by retracting the main landing gear. The main landing gear retracts, but a part of the main wheel stays visible since it doesn’t fit completely in the nacelle. The tail wheel is not retractable. By the way, time for some basics?


Basics : C-47 Landing Gear
The main single-wheel landing gear retracts forward and up into the nacelle of each wing. Each main landing gear consists of oleopneumatic struts, links, a yoke rear brace strut, a hydraulic actuating cylinder, a bungee, or compensator, a safety latch, warning light switches, wheels and brakes. When the gear is fully retracted, the projecting ends of the axles are held against rubber bumpers built into the sides of the nacelles and only a small portion of the tire protrudes below the lower contour of the nacelle.

The main landing gear is extended and retracted by two hydraulic actuating cylinders, one located in each nacelle, and is controlled by means of a 4-way control valve located on the hydraulic control panel. When the control valve handle is moved to the UP position, the valve directs fluid to the UP chamber of the hydraulic actuator. Trapped fluid pressure in the actuating cylinder maintains the landing gear in the retracted position. To lock the fluid pressure in the actuating cylinder, move the landing gear control valve handle to the NEUTRAL position.
A spring loaded mechanical safety latch is installed in each nacelle on the forward side of the wing front spar. The unit automatically latches when the landing gear is fully extended by engaging a slot in the lower end the actuating cylinder piston rod. Latches for both gears are controlled simultaneously by cables connected to a single control handle located on the floor to the right of the pilot’s seat.

Ground locks are provided to prevent collapsing of the main gears. The locking pin is inserted down through the ear and fitting attached to the nacelle wall. The ground locks are stowed in the canvas pocket on the AFT bulkhead of the main cabin compartment.
Climb
While climbing out and trying to follow the checklist items, I felt it not that difficult to maintain a certain heading although constant attention is needed. After I’ve set the power settings for my climb, it’s also a good idea with these settings to trim for pitch and roll, knowing when that is OK, I’ve got a trimmed aircraft and a bit more time to check the other items I need to do. Don’t forget to retract the flaps and set the cowl flaps as required, whatever that “as required may be”. Ho ho, hold on … cowl flaps as required?
Something to highlight; normally you can close the cowl flaps since opening them or leave them in a more open position will have a buffeting effect on the tail.


Since I’ve never flown a DC-3/C-47 myself and although I know that Huss from VSL did, it’s still not easy to figure how real it all feels. I did check many movies from different DC-3/C-47 flights and all what I hear is that it wasn’t an easy aircraft to fly, but it was not something that was impossible. With that knowledge I started this adventure and also these test flights.
Basics : C-47 Sperry Basic Auto Pilot
On this first test flight I want to check out a couple of things, but first this. I contacted Huss if he can tell me if the modeled Auto Pilots are dedicated developed by VSkyLabs or that the C-47 use the default X-Plane Auto Pilot. According to Huss “The Sperry (the basic look alike C-47 AP) and the Sperry S-TEC 55 (the modern AP) autopilots are using X-Plane default commands. Since there is no possibility to run two different autopilot types in a single aircraft in X-Plane, the autopilot system is configured to replicate the Sperry autopilot. On top of that, there is the Sperry S-TEC 55 panel that allows more features. So the Sperry S-TEC 55 panel is simply an extension of the basic original look alike C-47 Sperry. It has the default S-TEC modes, with the sluggishness of the Sperry behavior.”
The basic Sperry old fashion ed AP is really a basic one compared to the S-TEC 55 and far more basic then modern MCP or FCU controlled Auto Flight panels. This basic Sperry DC-3/C-47 AP allows you the configuration of the elevator for pitch and the aileron for the bank angle. The rudder channel is not incorporated or does this need some more information since I don’t see yet any heading mode? It’s worth to go a bit deeper into this and find out how and what to expect from this basic C-47 AP.
According to the VSL supplemental manual “The Sperry Autopilot which was used in the C-47 in the late 40’s and 50’s featured 3 knobs: ailerons “hold”, rudder “hold” and pitch “hold”. I wrote “hold” because the autopilot was in fact a gyro-pilot, and the axes were coupled to the relevant gyro axis. Maintaining a desired pitch angle or bank angle using a gyro-pilot is easy to understand.”

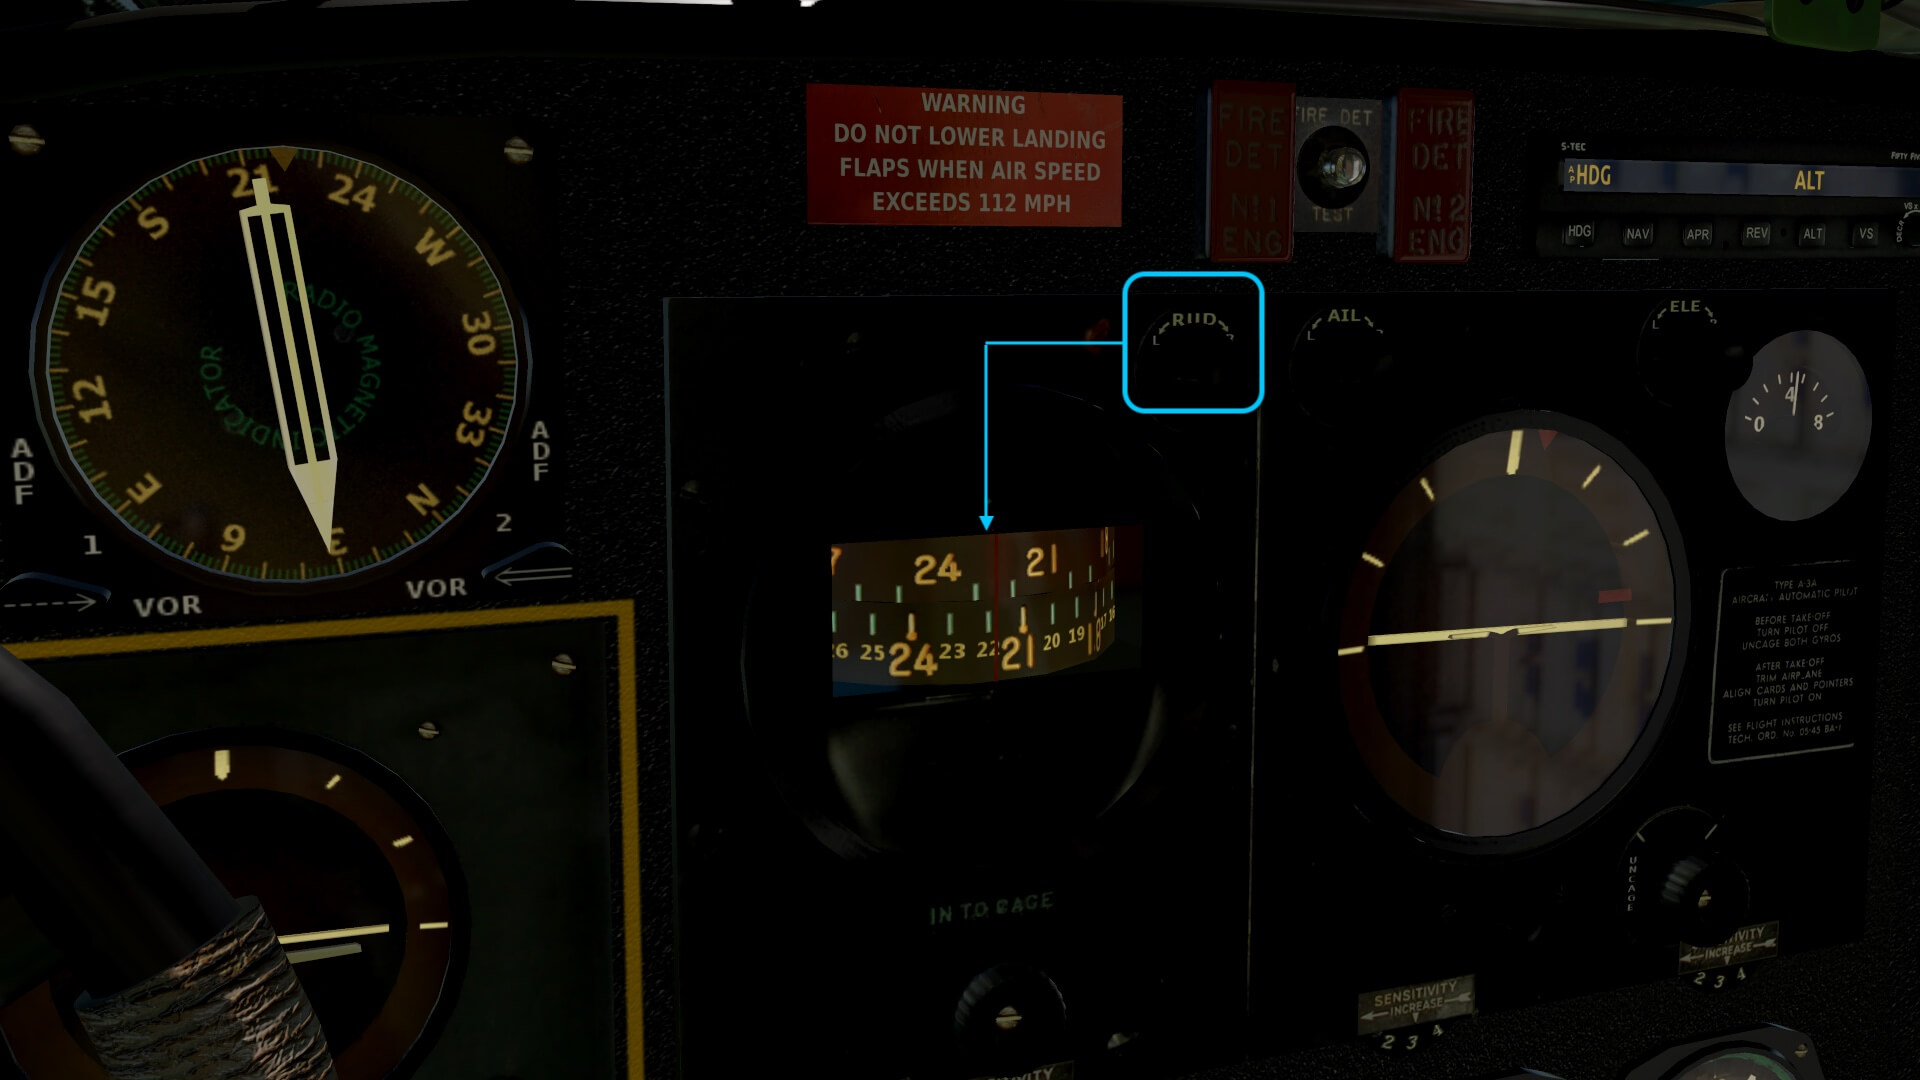
Huss from VSL would like to put some light about the “rudder” knob, and the compass/setting scales that are related to it in the autopilot panel. “In the autopilot panel (see the screenshot below) there is a compass scale window (lower scale is actual aircraft heading, and upper scale is a setting scale, biased to the “rudder” knob in the autopilot panel). The “human” pilot maintained a certain heading with his trimmed aircraft before engaging the autopilot. Then he used the rudder-knob to set up the upper scale to match with lower scale which presented the current aircraft heading (stable heading as the aircraft is trimmed). Then, the human pilot engaged the autopilot and the autopilot could maintain this heading with rudder control (gyroscopic attitude of the heading and not magnetic heading). So, in fact, while the autopilot could maintain a certain “heading”, it could not turn into a new heading and then to maintain it.”

Cruise
Now that you and I know a bit more about the original basic Auto Pilot – and yes, I left many technical details out of this explanation – it’s time to see how it works in the modeled C-47. And yes, I also know that the other additional modern S-TEC 55 AP will be much easier to use and one that offers much more modes.
I’m leveling off at my planned altitude of 3000 feet, and trim the C-47. I noticed and I assume this is the same as with the real C-47, that pitch trim works effectively and more or less immediately, but for roll trim the aircraft is slow in responding. Not that I feel this is not correct, no, the only reason I highlight this is that when you apply roll trim, give the C-47 the time to respond. In other words, give some trim input, and wait. Not a couple of seconds, but at least 30 seconds or longer. Then, when you need more roll, give a bit more and wait.


The other thing we need to do is to fly the heading we want. As written in the previous section (Basics : C-47 Sperry Basic Auto Pilot) we must fly the heading we want since we’re not able to change the heading ones the AP is engaged and active. When we fly the heading we want, we only need on the AP panel to set/turn the upper heading scale to match the value with the lower scale. Remember, the lower scale represents the actual heading we’re flying.
Now that the C-47 is trimmed and both scales on the compass (directional gyro control unit) match each other, it’s time to engage the AP. Look down to the aft pedestal and select the red AP lever to ON. The moment the AP engages it maintains the current roll, pitch and heading. Assume that there’s a small vertical speed, then click left (L) or right (R) of the ELE (vator – pitch) till the aircraft vertical speed indicator (VSI) shows 0 feet/minute. Keep in mind that this simulated AP isn’t as accurate as the modern Auto Flight systems. That said, the response time of such an old Auto Pilot is lower then the highly accurate modern systems. And this was already mentioned by Huss as having a sluggish response.
The same I see with the ROLL channel or I should say the same as in the supplemental manual, BANK or the AIL (eron) selector above the bank and pitch gyro control unit. When the C-47 slowly drifts away from the intended heading, click the left (L) or right (R) of the AIL (eron) selector. But when you decide to change your heading completely, then you disconnect the AP with the red lever down below the AFT pedestal, steer to the new heading, match the upper scale indication with the lower scale by clicking and thus turning the left (L) or right (R) of the RUD (der) selector and then engage the AP.
This is even for me very old fashioned. Very basic, but I must admit, it works. With the basic Sperry AP connected, I could check again the modeled 3D cockpit, but I will recheck the modeled cockpit on my flight to the West of England.
Hopefully you can remember in the very first paragraph of this section – What’s the idea? – that I use as reference only one X530 to know a bit where I am and in which directions to fly to. With the left-hand (or right-hand) X530 folded down and the flight plan visible, I know a bit in which direction I need to steer the AP. By the way, when you have a second monitor connected, you can also click on the 3D X530, and then transport the popup 2D X530 to a second monitor. And for those who fly X-Plane on an iMac, you can use SideCar with macOS Catalina and up and transport with your mouse the X530 as undocked device to your Apple iPad.
I could use also some VOR stations or NDB beacons if they are nearby, but I need to keep in mind that my cruising altitude is roughly 3000 feet and the lower you and I fly, the more difficult it will be to receive a VOR beacon.
I can tell you that flying the modeled C-47 manually thus by hand is fun. A lot of fun to be honest, but you need to keep a couple of things in mind. Manual flying is nice and the sluggish behavior of the C-47 is well modeled. As mentioned before, ones I levelled off at around 3000 feet, I trimmed for pitch and did small roll corrections with the aileron. When you make a turn using ailerons because the flight plan on the X530 shows you that, don’t forget to add some pitch or even easier, trim a bit of pitch before and don’t forget to trim the pitch back when the wings are level again.
Yes yes, it sounds all so logic since this is basic knowledge, right, but before you know, you oversteer and then the C-47 becomes uncontrollable. Oh yeah, I didn’t mention that before. Keep in mind that if you want click away the control column because you want unlimited view on the primary instruments, this feature is not implemented. You need to life with the fact the the control column is always in view. And something else what I miss in my humble opinion; I miss the shaking effect!
Oops, what do I mean?
This aircraft will most likely in flight shake/vibrate due to all the vibration produced by the Wasp engines and that’s something I miss or I don’t see it during my test flight. The funny part is that the Whiskey compass is shaking or is simulated to shake around and simulating means that there’s a lot of vibration, at least, I assume it’s not as steady as it is modeled. So personally I would love to see that when you fly and sit in the captains or co-pilots seat, the 3D cockpit is not so steady as it is now unless I’totally wrong with this thought.
Just a tip what I found nice and easy; on my Honeycomb Alpha Flight Controls device I had assigned on the right-hand horn lower momentarily switch ROLL trim (ailerons) and to the upper momentarily switch YAW trim. And, on the left-hand horn either momentarily switch (left or right) PITCH TRIM UP/DOWN and not to PITCH TRIM A/B because that doesn’t work.
While following the flight plan it’s a good idea to remember that the C-47 slowly responds, not only in this modeled C-47, but also in real. When there’s a need to add a roll, do that far before you reach the actual waypoint of beacon so don’t wait too long. When you wait till you’ve passed or reached almost the waypoint, I can tell you, you’re too late. And something else, I advice you not to oversteer! Add gently pitch or roll inputs, ok? Give the C-47 the time to reply and don’t think you’re sitting in a fighter or modern Boeing 777 or Airbus A320 or whatever. It’s a C-47, an old historical aircraft that should be flown with respect.
Descent and Approach
Oh oh, that means, I’m almost reaching the end of this first test flight. As I mentioned before, it was so much fun, but I can tell you that the descent and approach aren’t easy. When you know what to do and, I mentioned this before, that you prevent oversteering and relax, and take your time to align with the runway centerline. Remember, as with many other aircraft, at landing speeds with flaps extended and gear down, any aircraft including the C-47 becomes slow, sluggish if you want and when you think you can quickly apply a roll to align the C-47 with the runway, I can tell you, you can forget that!


When the first approach fails, no worries. I had that too and since I don’t have somebody next of me like perhaps Huss who is an active C-47 pilot, I did approach after approach till I got the right feeling. Till I understood how far before the runway I needed to be aligned and then you’ll succeed. A good tip is that you check either while still in flight or you studied it before the flight; check the BEFORE LANDING section on page 55 of the included manual and up, and read how and what to do including if flaps are needed for the approach and landing. The manual also speaks about three kind of landing, but I decided only to do the wheel landing which means main wheel first and when the speed on the runway is slowing down, the tail will ultimately drop.
Second Flight : Elstree (EGTR) – Caernarfon (EGCK)
Intro
During this second flight impression I concentrate myself on the use of the additionally installed modern Sperry S-TEC 55 Auto Pilot. Although it doesn’t have the same features as Auto Flight systems that can be found in modern Boeing and Airbus aircraft, it is a huge step forward versus the original installed basic AP. As explained before, this Sperry AP isn’t installed in the real C-47, but it makes longer flights convenient and offers a bit more then just pitch and roll.
Another advantage of the Sperry S-TEC 55 is that when you click e.g. the HDG (heading hold) button, the AP will automatically engage. That said, there’s then no need that you move down to the AFT lower pedestal and select the red AP lever to ON to engage the AP. But first, some more information about the default X-Plane modelled S-TEC 55. Hold on, before I forget it, I’ll first do my walk-around check. Are you ready to help me out with this?
Walk-Around Check
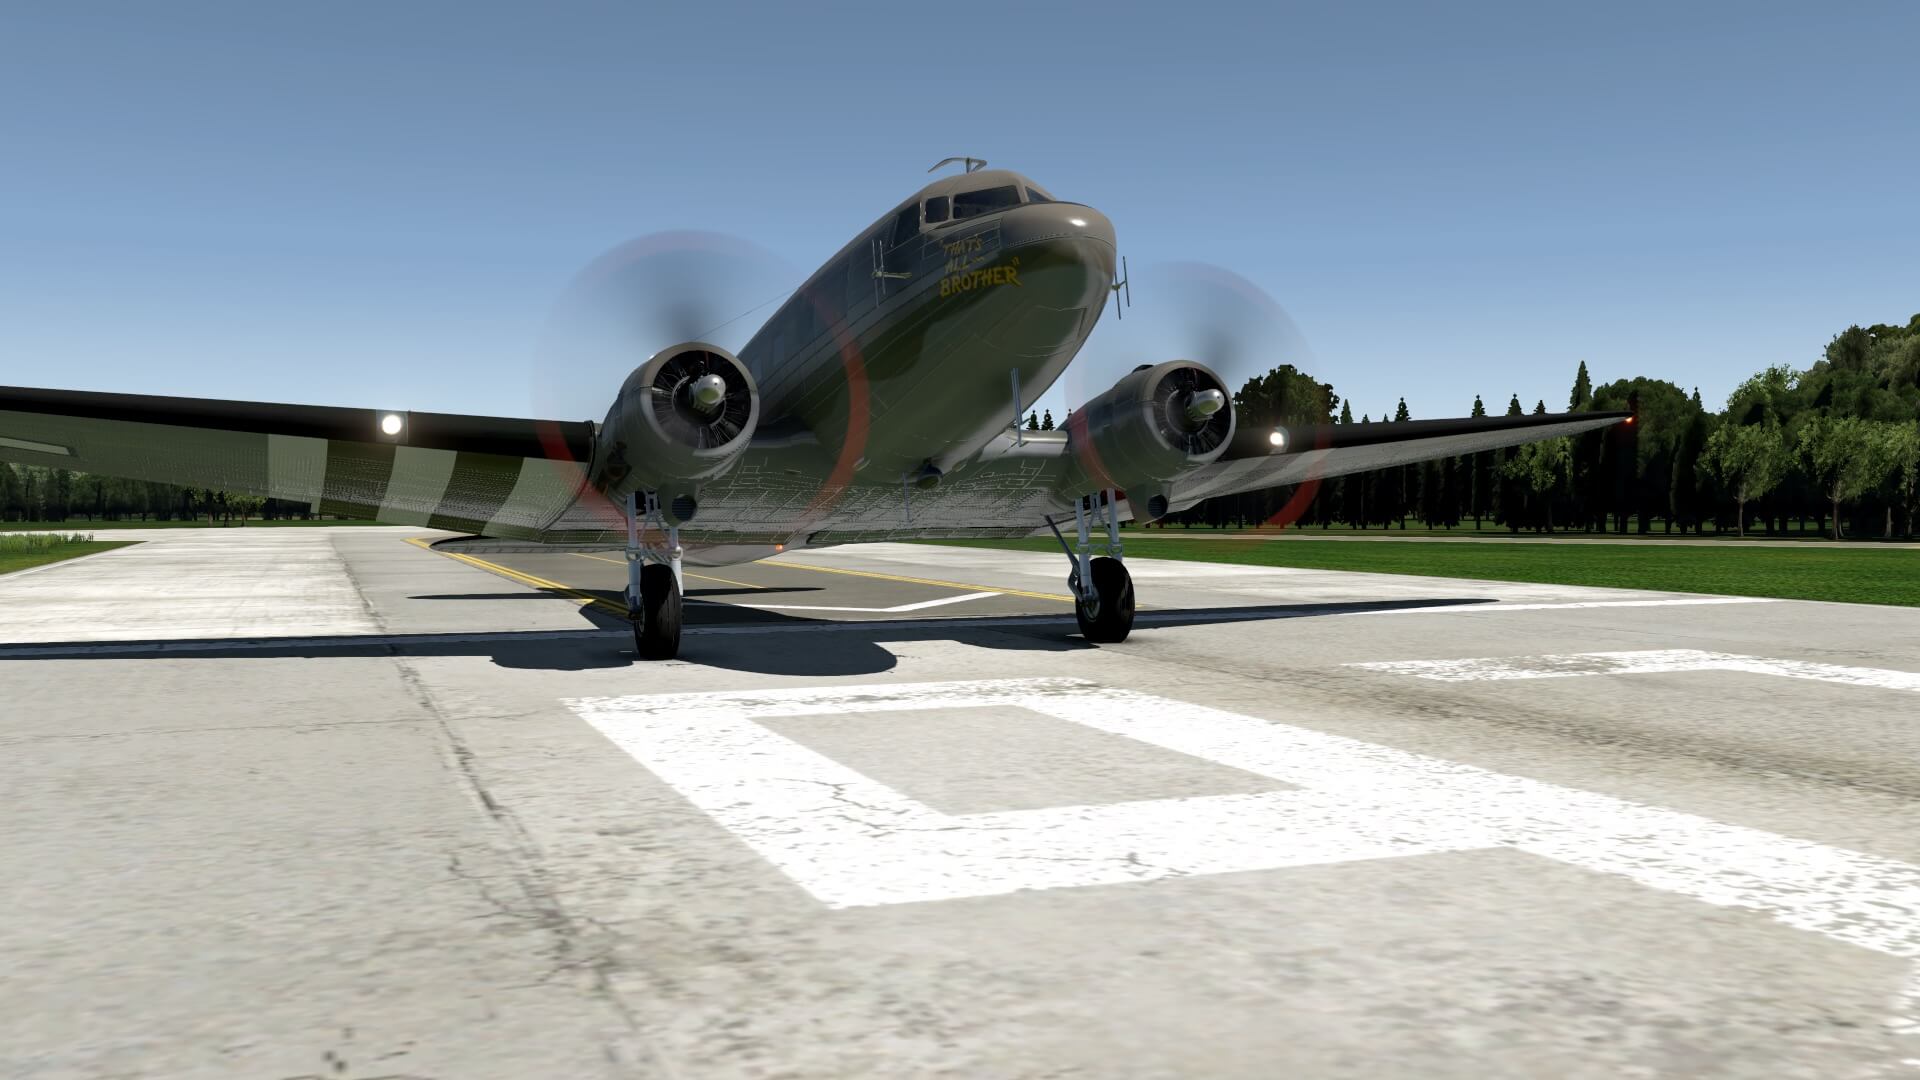
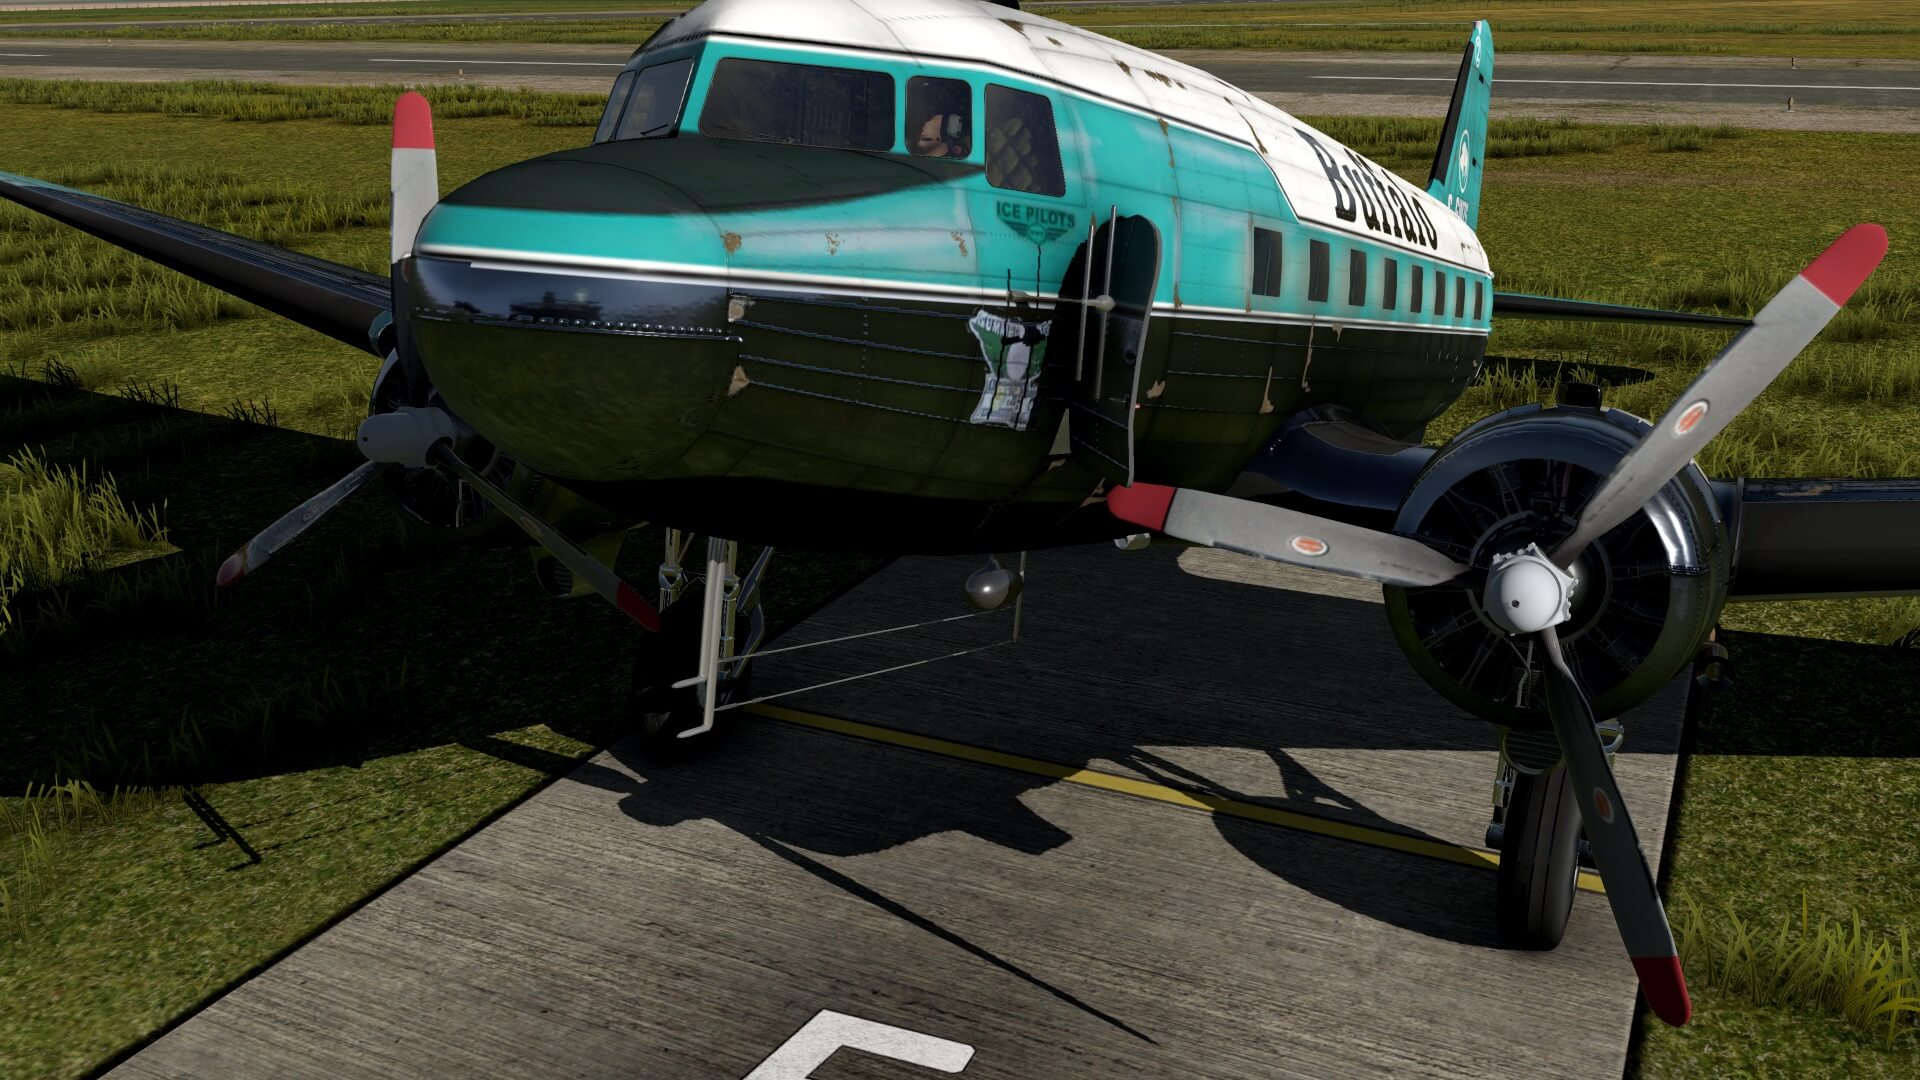
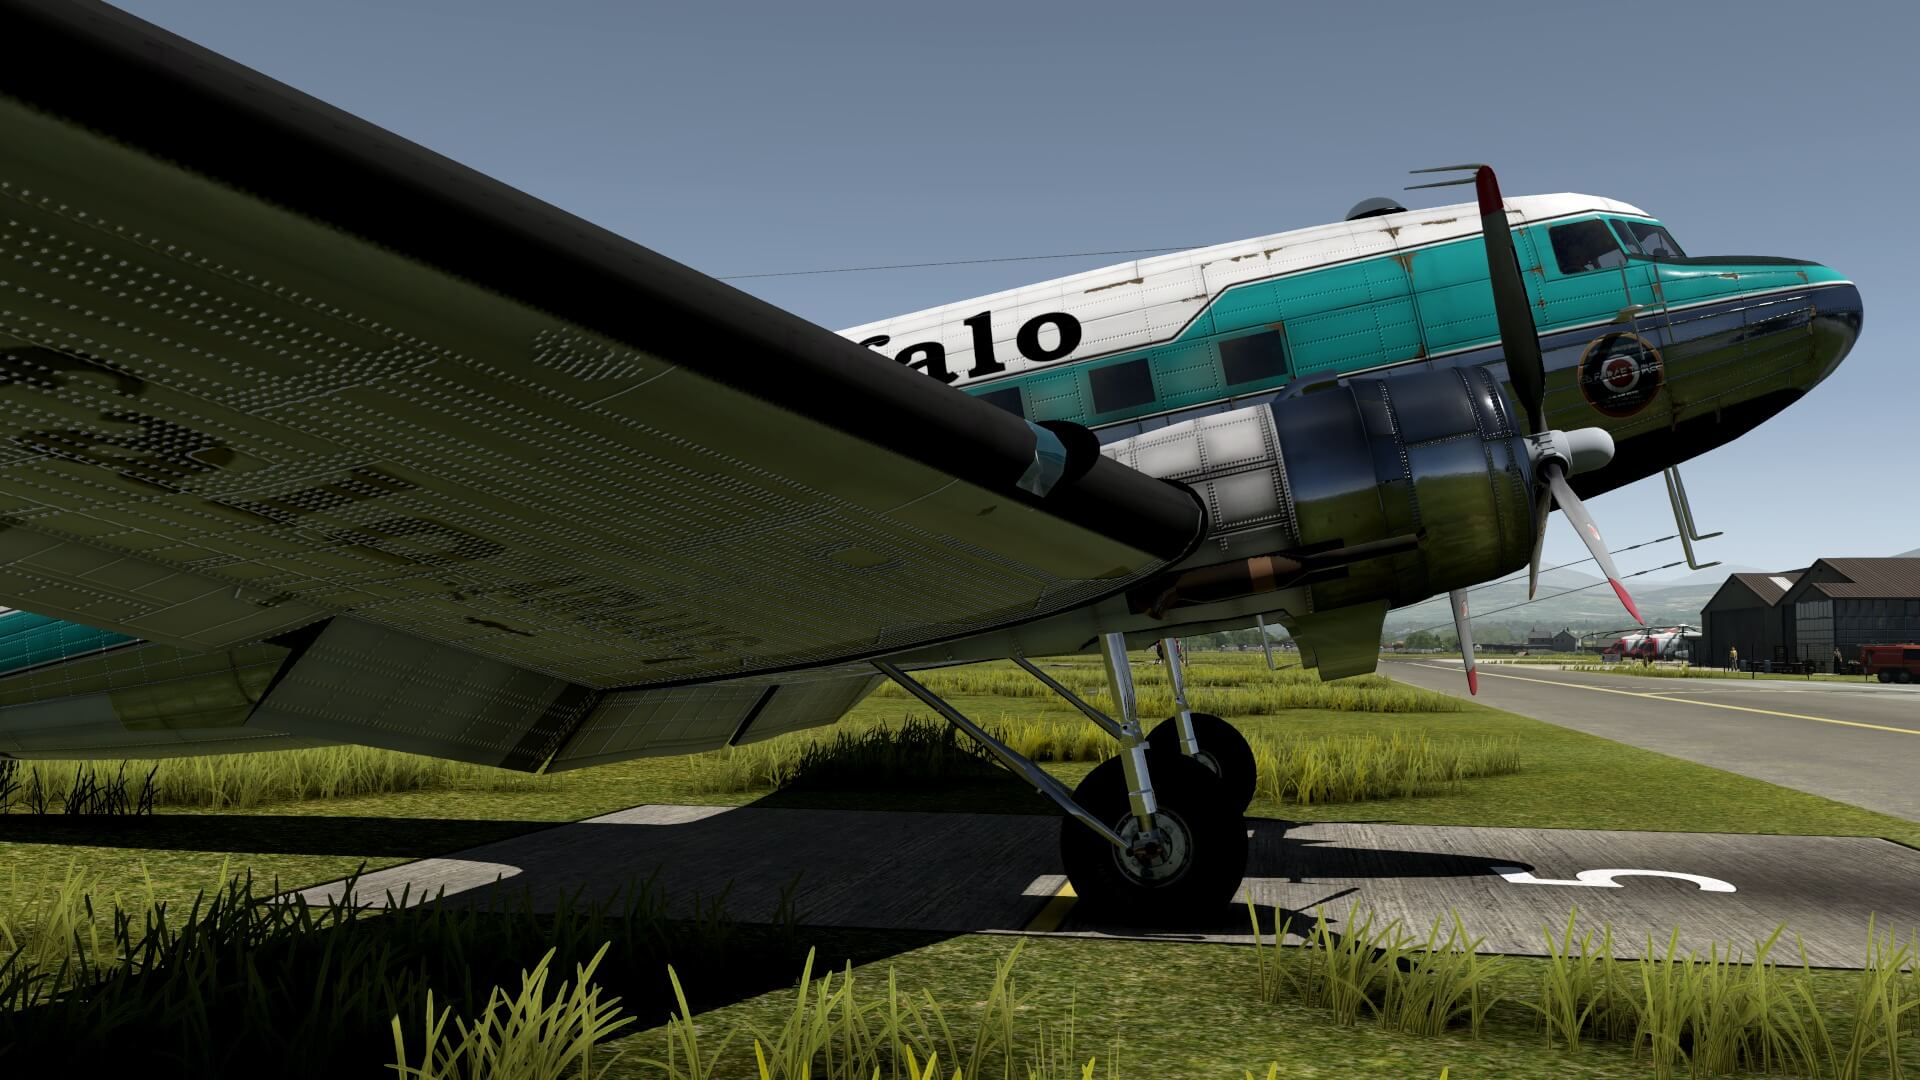
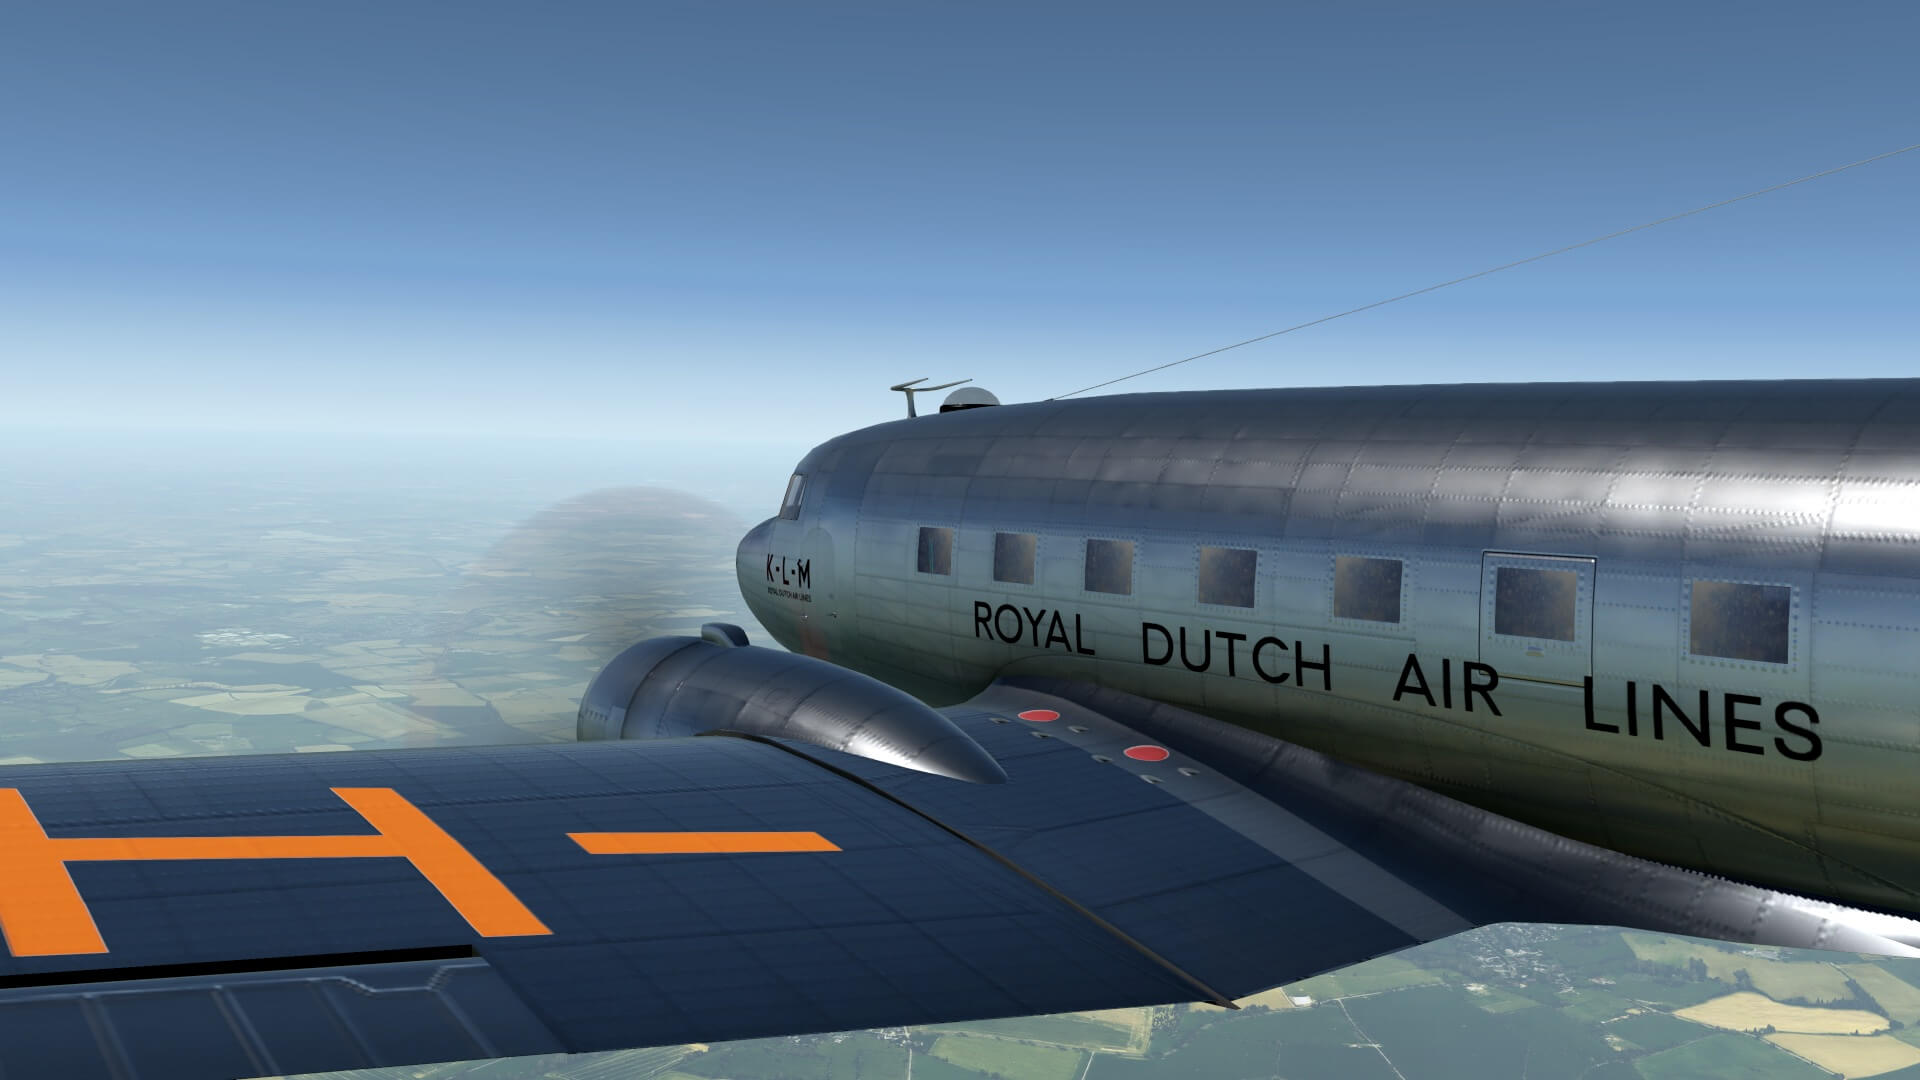
Almost forgotten to do my walk-around check, but better late then never. Irrespective of the livery I choose, they are all showing me a more or less a non weathered DC-3/C-47, although I must admit that the Buffalo Airways livery has some dirty spots here and there or paint that’s missing however, the belly is well polished. I’d seen many real photos of the Buffalo Airways DC-3 and although this active group of people maintains it with a lot of love, the real DC-3s or C-47 looks a bit more weathered, but the belly is also polished. The paint is not new, the Aluminum skin has dents and/or “accepted” scratches and so on and these things are a bit missing in my humble opinion.


Anyway, it’s always a matter of taste, not only what simmers like, but also what the developer likes or dislikes and if that is adding to simulate weathering to the 3D model, or adding scratches, or adding oil leakage etc. Therefore I started this section that irrespective of the livery you choose, I hardly see signs of weathering, oil leakage, dirt or scratches. I’m aware or I can imagine that privately owned DC-3/C-47 models are kept as new as possible, but whatever DC-3/C-47 you see, the engine skin is, even if they are constantly polished, dirty and the exhaust pipe is a bit rusty. But the same is with the main landing gear. They are well modeled, with lots of details, but as clean as it mostly never looks like. I would love to see “dirty and old” landing gear textures.
I’m aware that dirty or weathered paintings can be made for each livery, but I’d preferred that the bare C-47 model had all these old looking tricks already on it. Enough about this, time to check out the external 3D model. I checked the modeled C-47 versus real photos, or drawings and must say that many tiny details aren’t forgotten.
I started my walk-around check at the nose, via the left-hand engine and wing to the left-hand main landing gear, via the opened AFT doors to the tail, and then my way back to the front. What can’t be missed when you stay lets say 10 meters from the nose is the realistic shape of the DC-3/C-47. I did the inspection on purpose on the Buffalo Airways and I must say, I like it a lot. I like the old Buffalo colour scheme, the presence of the pitot tubes, with its wire antenna, on top above the cockpit the localizer and VOR antenna and so on. It seems that all antennas are modeled.
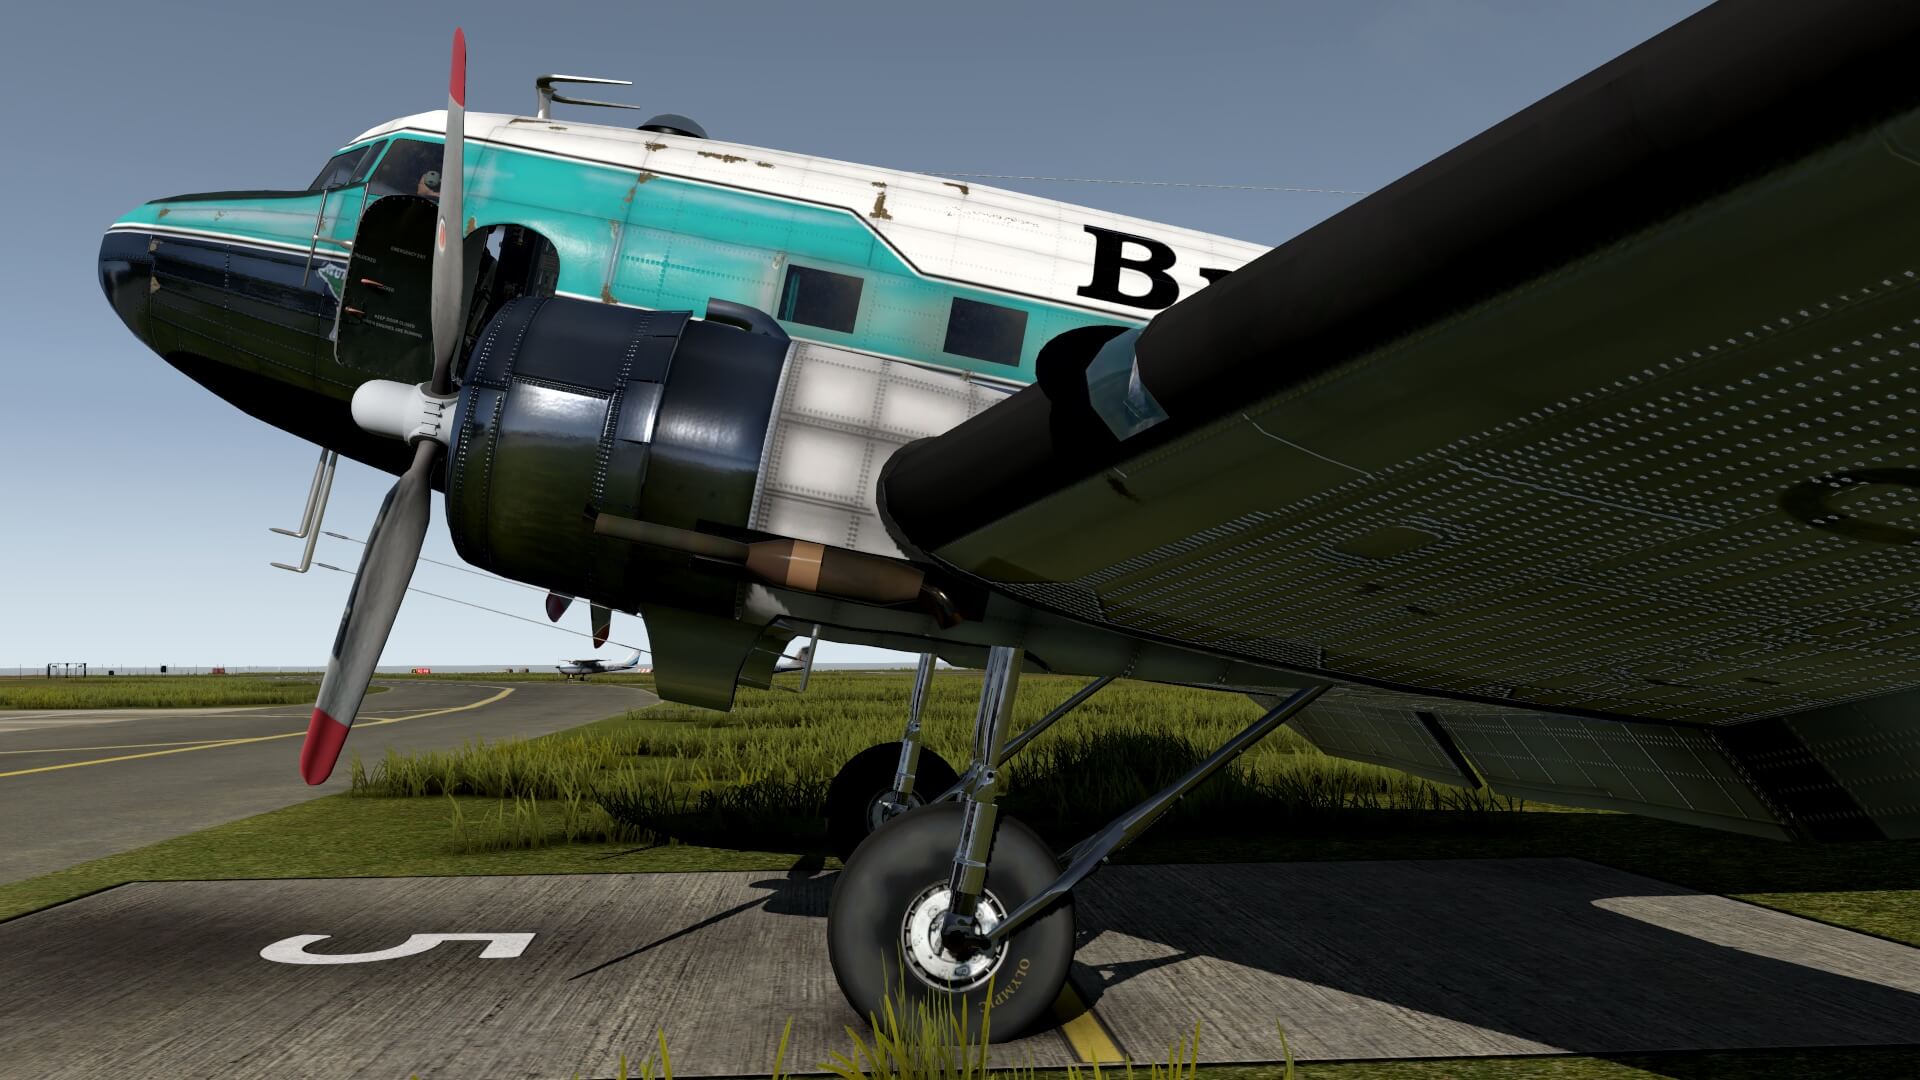
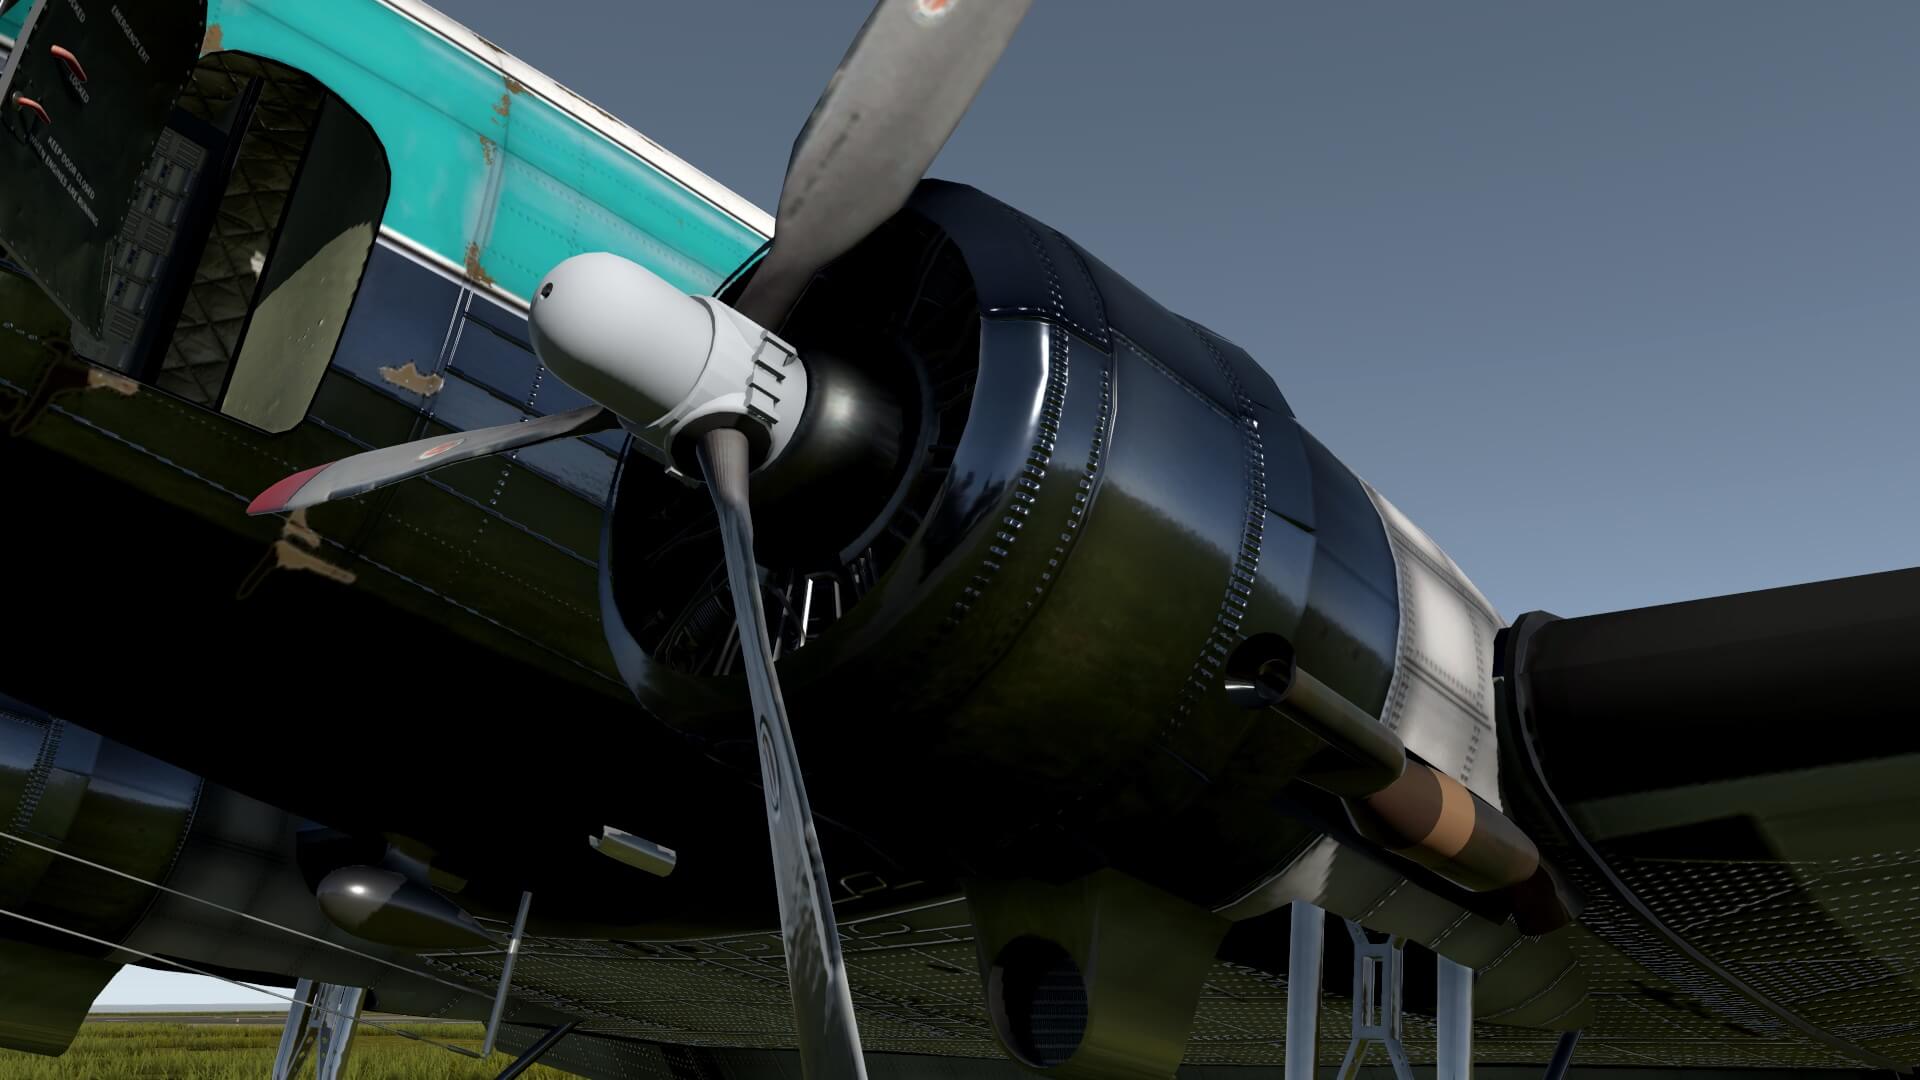
I can’t miss the engine with it’s shiny look – for the Buffalo Airways at least – and it three blade propellor. The propellor assembly looks OK, but it would be great when the decals on the propellor, most likely from Hartzell, are updated to sharper decals since the current decals are blurry. And what I mentioned before, the engine looks in my humble opinion a bit too clean, too new, so towards the developer, please, if possible with an updated version, adding some weathering to the engine nacelle/cowling would be nice.
The main gear itself as well as the wheel assembly are nicely modeled although not all tiny details are visible. On the other hand, the rim of the wheel assembly is looking good, but if all tiny details are modeled or not is a matter of taste and not to forget, it will have a negative influence on the frame rates, since more polygons for tiny details means less FPS (Frames Per Second). The same I see with the tail wheel assembly. Its modelling is OK, but tiny details are missing.
For my check I extended the flap down to get an idea how this is made. The flaps are hinged at the front and drop down while the wing structure stays the same. When the flaps are fully down I got an idea of how it’s modeled and although it looks OK, I would love to see a bit more dirt and some weathering. Now it’s not as real as it gets and I was hoping for this.


I think mentioned it before and will repeat it because it looks different; the flight controls are not covered with an Aluminum skin, but with fabrics. Simulating fabrics is difficult, but how it is done on the VSL, you can see it on this modeled C-47. The skin textures looks different then e.g. the wing or horizontal and vertical stabilizers. And of course, there are no rivets so that’s already different, but you can see the ribs, a bit depending on the illumination angle that’s shining on them.
Then, and I noticed this before during one of the many test flights I did, the trim tabs on the right-hand aileron, the rudder and both elevators are visible, but not simulated. This means that when you trim, I’d expected to see the trim tab moving up/down, but instead, the whole flight control is moving. I’m aware that this is a very small detail I noticed, not something to worry about.


Before ending my check, I would check once more the engine inlet of the Twin Wasp. As we know from the beginning, you can only see the first row of the Wasp Twin engine and I can tell you, that first row of cylinders look gorgeous. Of course, not all tiny components are added, but the cylinders itself are great. While looking closely to the engine inlet with propellor and hub, I see – yes yes, I mentioned this before – the blurry propellor manufacture decals. I know from others developers, this can be better. Overall I’m happy.
Flight EGTR – EGCK
Preparations
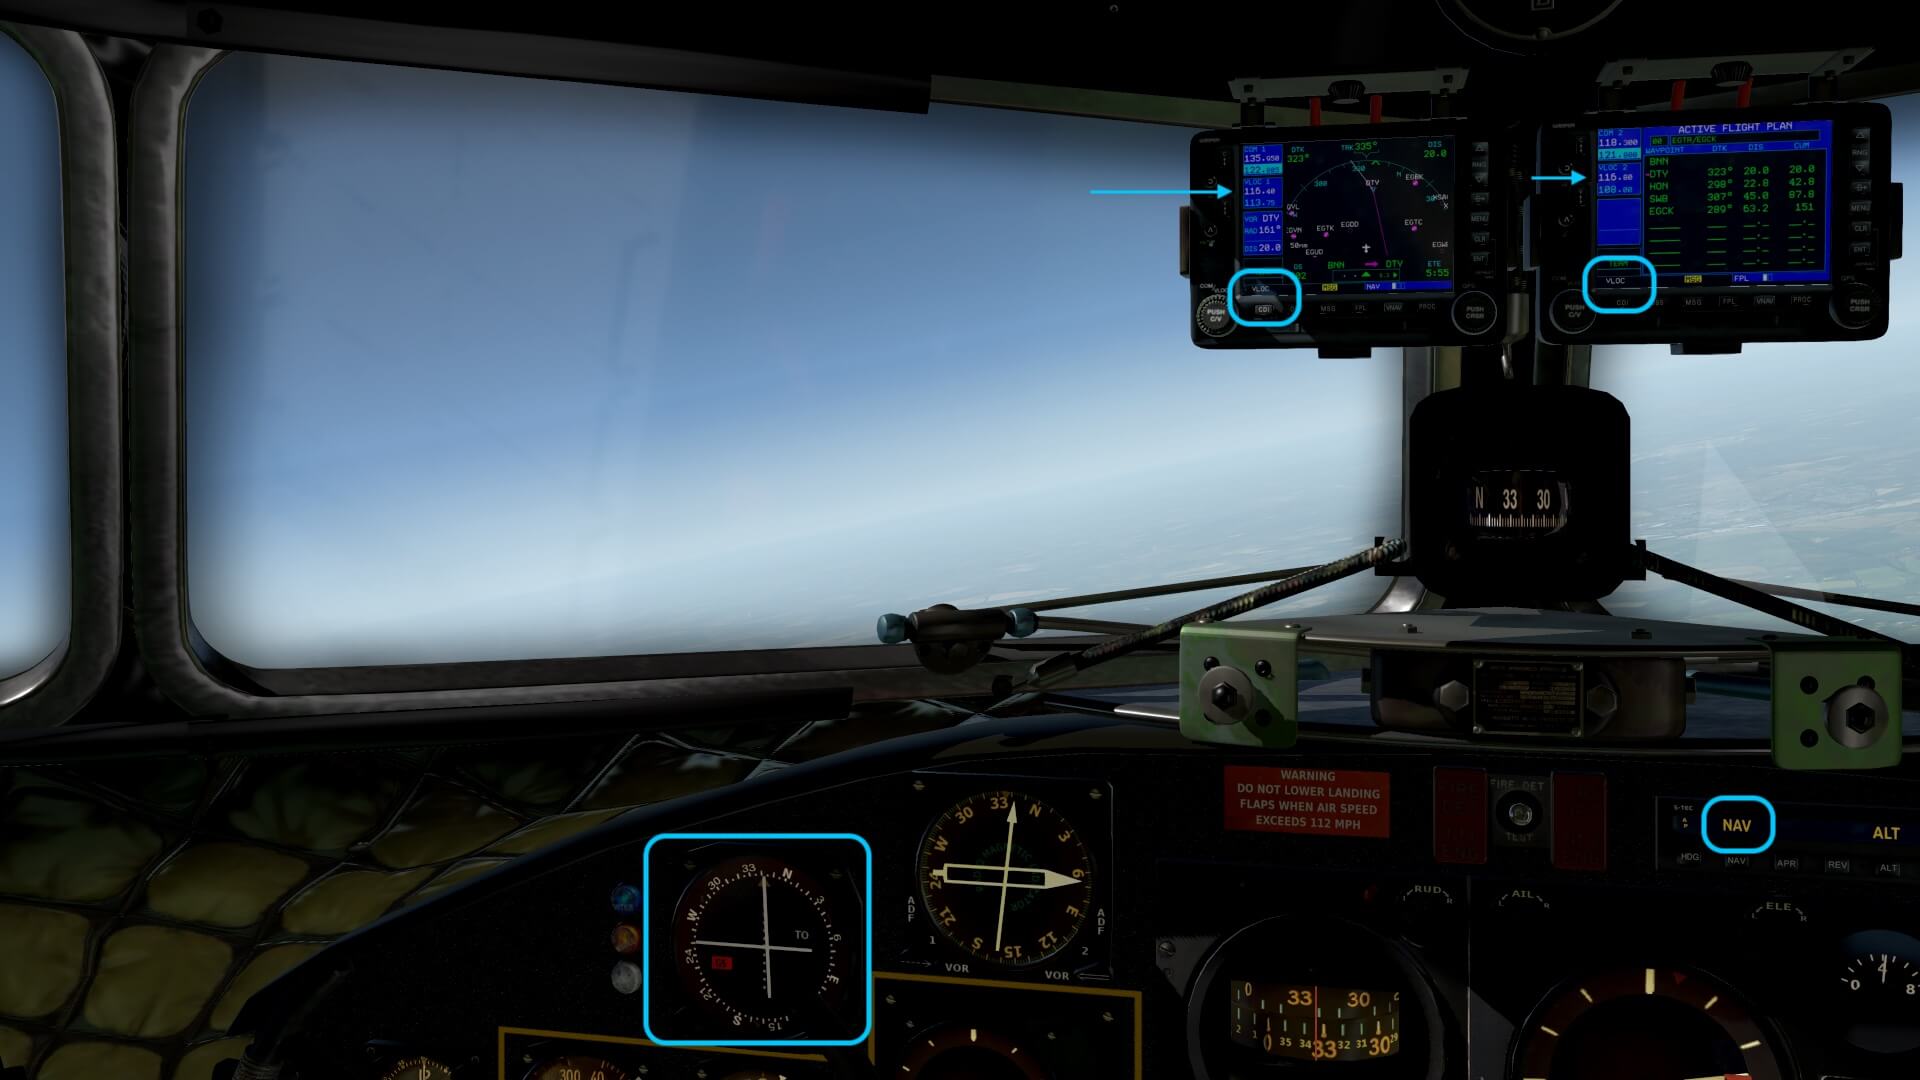
For this flight I’ve decided to take full advantage of using both X530 Garmin units. In the left-hand X530, identified as X530 unit 1, I load the flight plan and zoom in on the map while – yes, you have to do this twice – I load the same flight plan in the 2nd X530, identified as unit 2, but select it in a way that I have all the waypoints on screen including their distances and the cumulative NM (Nautical Miles). I mentioned before, when you click on the 3D display of the X530, a 2D X530 popup appears. You either leave it like it is, or when you have a 2nd monitor connected to your X-Plane computer transport it to this monitor or via macOS SideCar you transport the 2D X530 to your iPad or Tablet.
Since you and I will use the Sperry S-TEC 55 Auto Pilot and using the NAV mode, don’t forget to select on X530 unit 1 the CDI button and set it to GPS. When it’s in VLOC, then the NAV AP mode on the S-TEC 55 mode won’t connect to the flight plan, but I’m sure you’re aware of this. A quick reminder before you’ve forgotten it. This was the flight plan : EGTR – BNN (Bovingdon 113.75) – DTY (Daventry 116.4) – HON (Honiley 113.65) – SWB (Shawbury 116.8) – EGCK.
Weight and Balance
The included manual offer from page 85 and up a section related to the weight and balance. It’s good to read this background information even though you know all about the aircraft weight and balance. As seen with other developers, but the modeled VSL C-47 doesn’t come with a popup or other window where you can enter the amount of passengers, their luggage and perhaps some cargo and not to forget the amount of fuel, so no VSL Weight and Balance app.
Since there’s no add-on program available, you and I need to use the X-Plane own weight and balance feature. The overall distance is roughly 200NM, then some additional fuel for taxi, an alternate airport in case off, so add for around 3 hours of total fuel in the C-47. That should be enough. The flight from EGTR (Elstree, UK) to EGCK (Caernarfon) will take roughly 2 hours.
Modeled S-TEC 55 Auto Pilot
Before using it, it a good idea to highlight this AP device; “the S-TEC 55 is a high-performance autopilot that controls roll and pitch, to reduces pilot workload through all modes of flight. The device is fully IFR-capable and may be used in conjunction with ILS and GPS-based approaches. The device is capable of extremely precise hands-off GPS navigation, and features ‘Control Wheel Steering’ – a system that allows for the pilot to provide control input, without de-coupling the autopilot. At the end of the pilot’s maneuver, the autopilot resumes authority.”
“The included VSL C-47 S-Tec 55 is actually the model programmed by Laminar Research. The X-Plane 11 S-TEC 55 has been developed to resemble the real model, both in appearance and function. However, the capability and operation of this device in the simulator may differ in some areas to the real product. This manual describes only the capabilities, and functions of the S-TEC 55 as modeled in X-Plane. More information can be downloaded via this URL.”
The Flight itself
The Start
This flight starts from EGTR runway 26. How I did the engine start, the taxi and takeoff, that can be found in the first flight impression. As well as that I need to load the saved flight plan. Since it’s a fms X-Plane format, it is stored in the Output/FMS Plans folder. I need this flight plan since I will use on this second flight the two Garmin look alike X530 units. And on this second flight I will also use the S-TEC 55 Auto Pilot control panel.
After climbing out, I steer the C-47 in a direction found on the left-hand X530. Perhaps it’s not perfect, but for the moment it’s OK and I need to trim the aircraft to reduce the workload. That sounds a bit ridiculous “workload” but believe me, the workload is much more then with a modern aircraft. When climbing out and trimmed it in a way I can relax a bit, I take a closer look at the modeled AP.
S-TEC 55 NAV and V/S Modes
So a small rehearsal … after takeoff, I retract the landing gear and flaps, trim the aircraft that it reaches a stable climb condition, double check if the left-hand X530 CDI button shows on the display GPS, and if so, I click on the S-TEC 55 control panel the NAV and V/S buttons. For the NAV it means that the Auto Pilot is connected to the X530 and thus to the flight plan. The V/S pitch mode will become active and it shows me also the actual V/S you have before engaging. By the way, the Sperry S-TEC 55 has no 2D popup version like you know now from the Laminar Research X530 units.

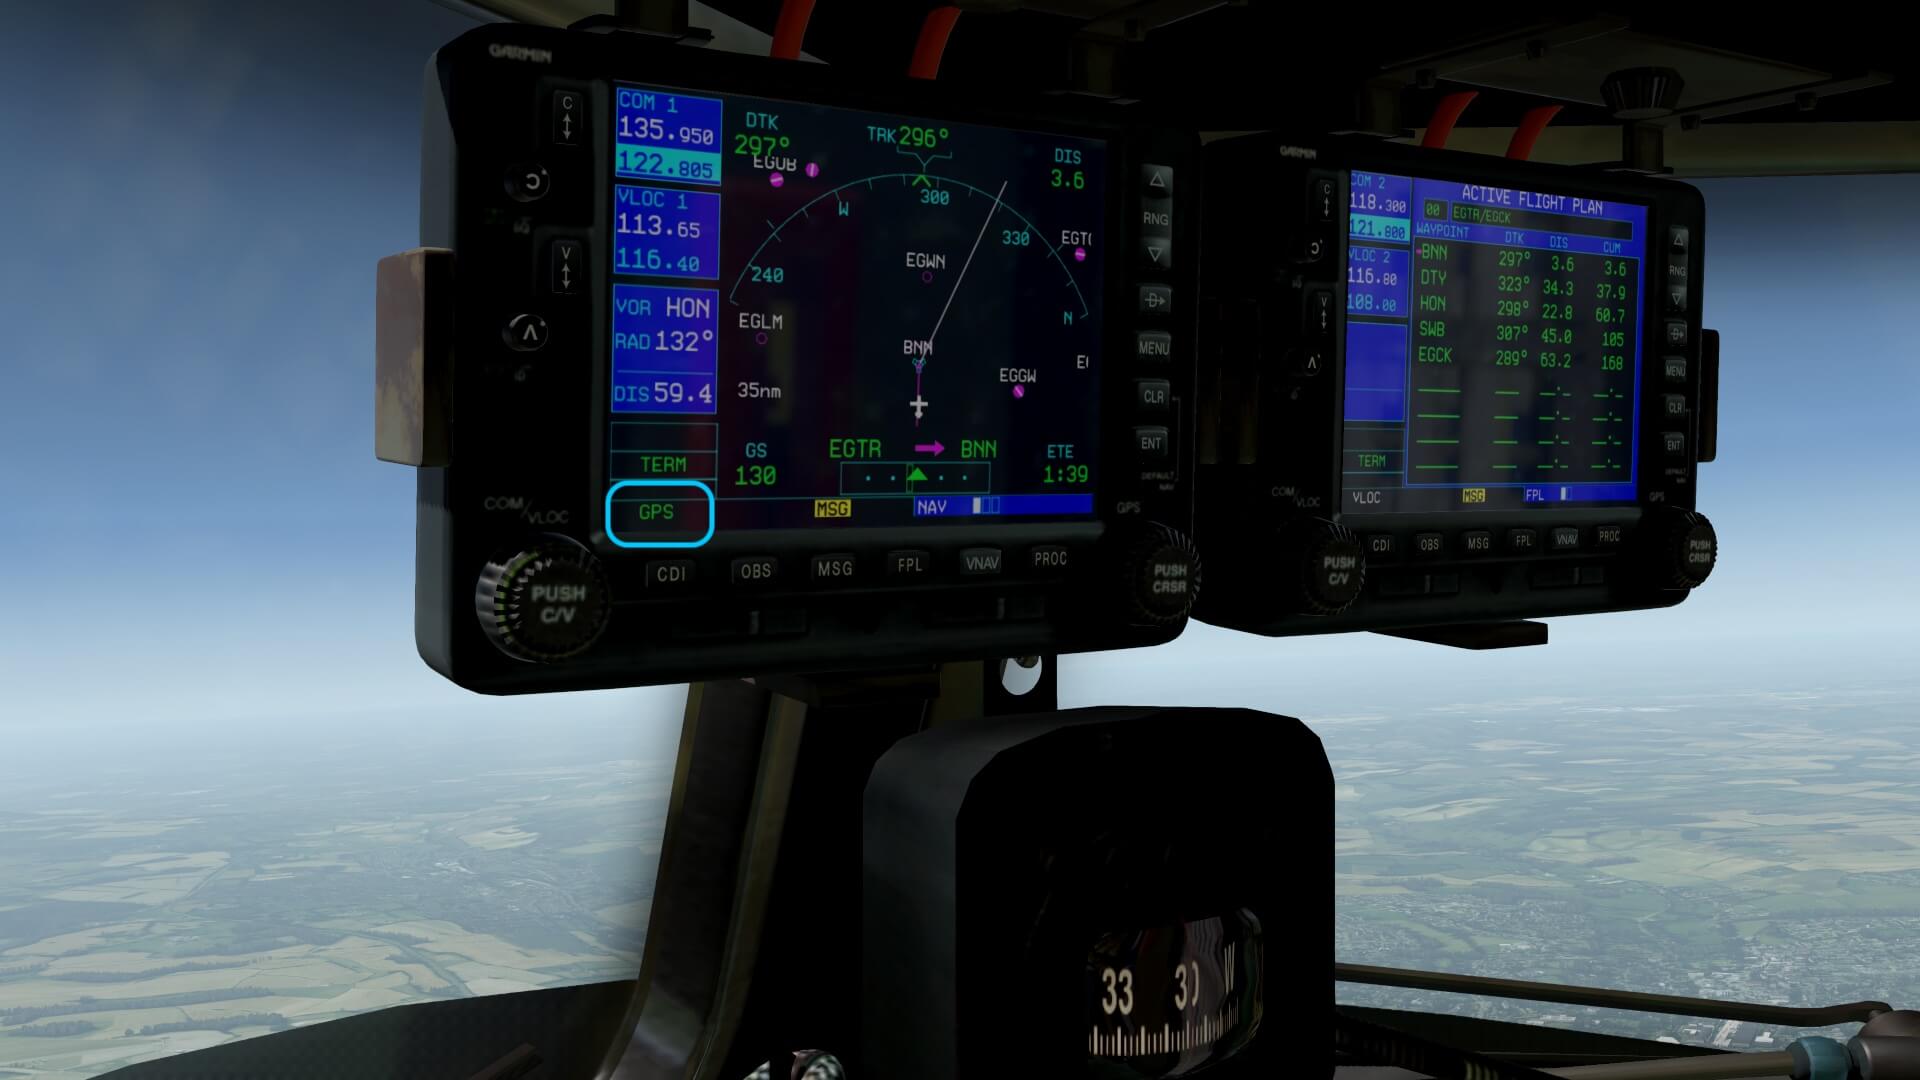

Just in case, for those simmers who are new to the X530 navigation device, when the X530 shows GPS is means that the flight plan is connected to the Auto Pilot when selected in NAV mode. And worth to highlight, the Auto Pilot is only connected to the left-hand X530, so only on the left-hand X530 the CDI should show GPS. The right-hand X530 is not important. That one may show VLOC in the CDI window.
Ok, when NAV and V/S are clicked, the Auto Pilot is automatically engaged. This can be seen by the illuminated AP light in the left-hand upper corner of the S-TEC 55 panel. I’ve witten it before, but let me highlight this once more; when using the S-TEC 55 AP panel there’s no need to engage the AP via the red lever on the lower AFT side of the pedestal. It engages the moment you select either mode on the S-TEC 55 however, disconnecting the S-TEC 55 has to be done by selecting the red AP lever to OFF.
S-TEC 55 ALT (HOLD) Mode
As far as I’ve seen, there’s no ALT(itude) preselection possibility. There’s however a rotary knob on the right-hand side of the S-TEC 55, but that’s only for adjusting the actual V/S UP/DOWN. That said, I would like to cruise at around 6000 feet, so when I reach 5800 -5900 feet, I click the ALT button on the S-TEC 55 panel which means V/S mode is lost and ALT HOLD becomes active. Although the ALT mode becomes active, the C-47 responds sluggish, but this is completely normal and simulated in a way the real C-47 also did.


S-TEC 55 HDG Mode
But what happens when you want to select HDG (HOLD) and set a new HDG. Normally we speak about HDG SEL (select) and HDG HLD (hold). The only possibility to change the HDG in case you’ve selected the HDG button is by using the RUD knob on the basic Sperry AP panel. This knob allows you to change the current HDG, so is that then the HDG SEL or HOLD mode? Normally, HDG SEL reverts to a new selected/preset HDG while a HDG HOLD means that the current HDG is maintained.
S-TEC 55 VOR (VLOC) Mode
And since we’re talking about HDG, let me also highlight that on the OBS you can change the COURSE with the course knob. It all depends if you have VOR/DME beacons on your flight else you can’t do much with the OBS. We can either via the overhead panel or directly on the X530 enter the VOR1 for BNN or DTY. When I’ve entered this and made NAV1 BNN the active (thus on the left-hand X530) frequency, the OBS shows the direction to or from the beacon, so I need to turn the COURSE knob till the line is hanging vertical down (it is hinged at the top) and TO shows me in the window and not FROM.
On the RMI, right of the OBS, provided the RMI selector is set to VOR1 is set and not ADF1, I can also see the direction to the beacon. Further on, I can also check it on the X530 with the entered BNN VOR since it shows me the ID of the station as well as the slant distance to the station, provided that the VOR beacon also has DME information which his the case with VOR beacons BNN and DTY. Perhaps the most important thing the moment you not want to use the flight plan in GPS mode, is that you select on the left-hand X530 the CDI back to VLOC.
It is fun playing around with these different modes; NAV (GPS), VLOC or HDG. That the S-TEC 55 has many other modes like APP (approach) mode makes it even more interesting although an APP mode which means that you can make an ILS landing with the C-47, no no, that goes a bit too far. See it as a challenge that you try to land the C-47 yourself and not using the APP mode.
After all of this you could have the impression that it’s now time to sit back and relax, but that’s not the case. When you use the HDG, VOR or even GPS modes, you still need to keep an eye on what the C-47 is doing. On this flight I use real weather and although the forecast for this part of England is good, I do see clouds, and clouds means turbulence and that means that the C-47 will move a bit around the intended track.


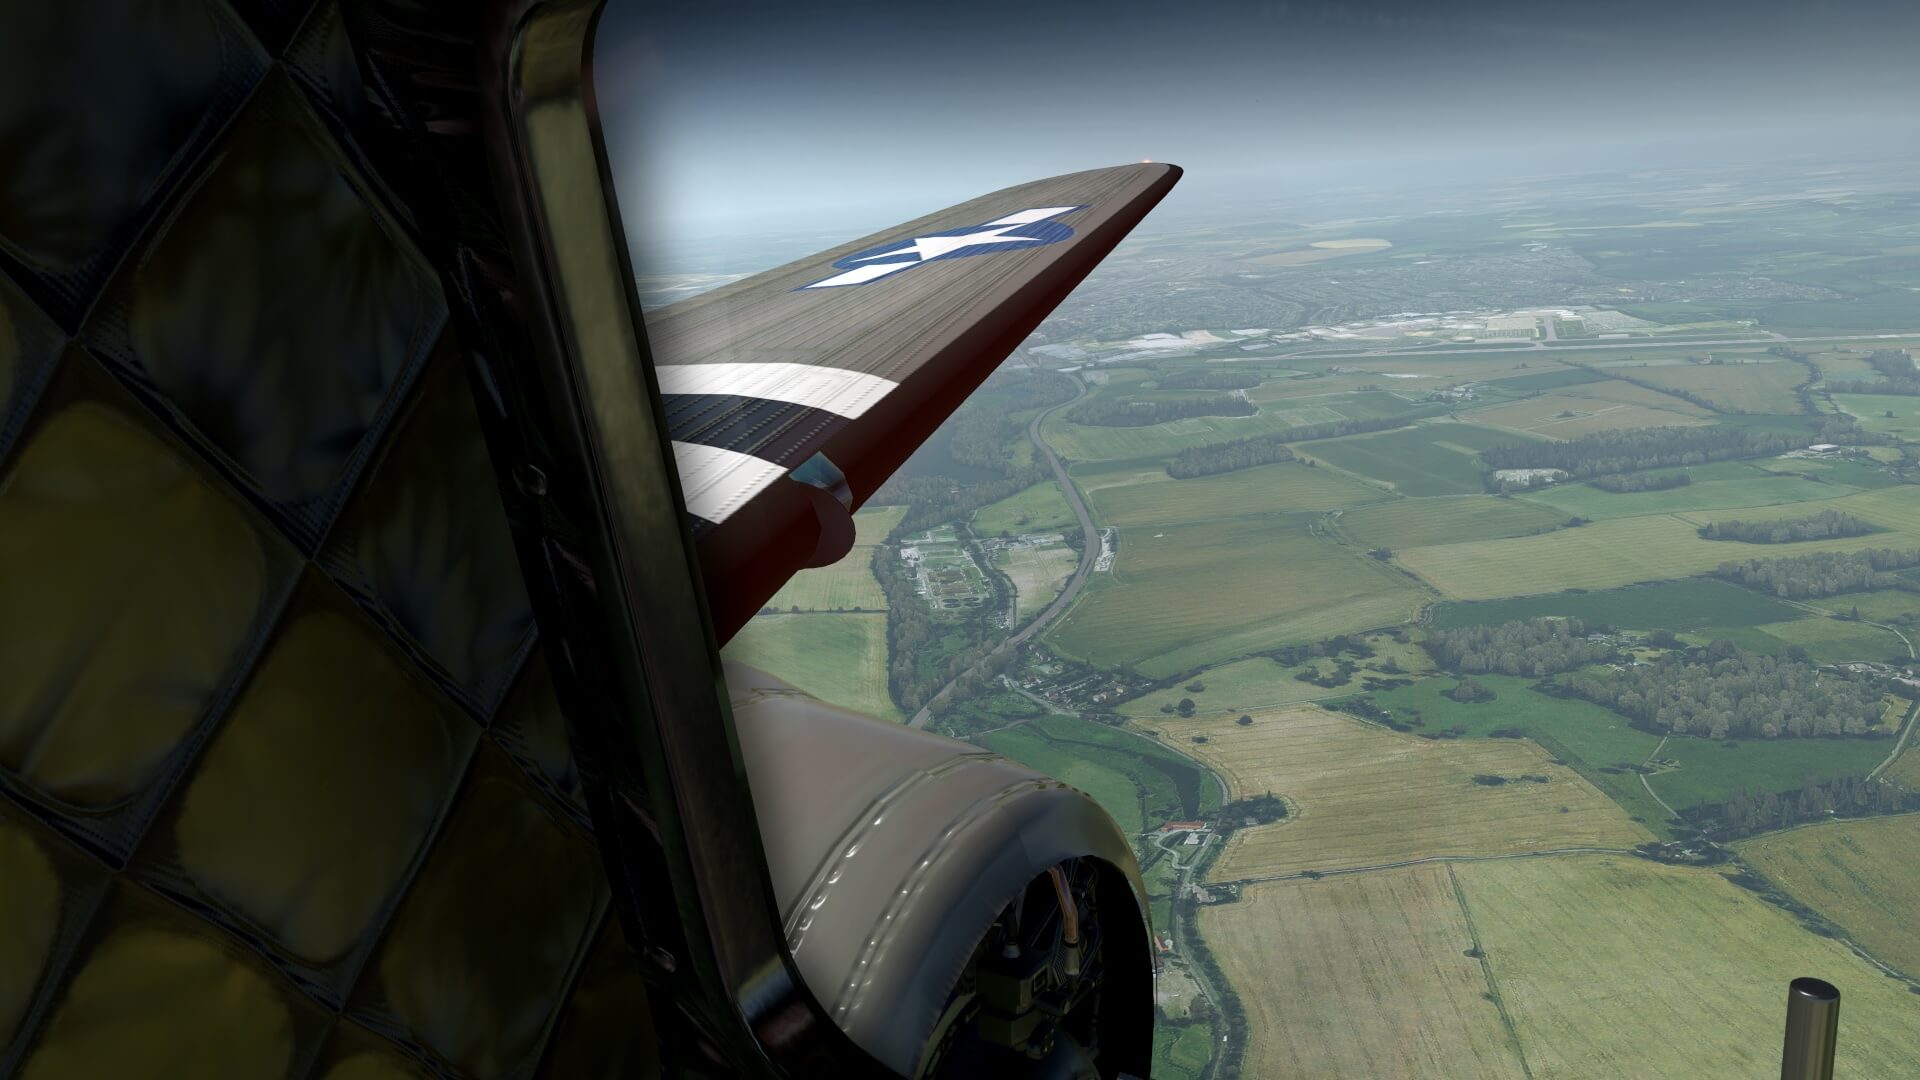
For the remainder of this flight I try to relax a bit. I try to enjoy the flight itself, I did check the modeled cockpit and cabin, but there’s no need to add more then what I wrote already. I place myself outside the 3D model which is the beauty of X-Plane, and make some nice shots of the external model.
Descent, Approach and Landing
Since I’m not 100 percent confidential with the C-47, I decide to make on the last stretch a bit of a detour. A detour means in my case that around the TOD (Top Of Descent), I move from the GPS mode to the HDG mode and steer towards the city of Porthmadog. That’s roughly on a HDG of 225. With Porthmadog in view, I’ve descended also to 3000 feet. From here on a HDG of 290 I reach the other side of the peninsula and aim for runway 02 EGCK. This would be easy since I’m flying in from the south while following the coast and under normal conditions I should be able to see EGCK.
It’s good to do some preparations in respect to the approach and landing. In the included manual starting on page 55 it starts with the BEFORE LANDING section. It feels to me that something is missing like the descent and approach. Therefore I’d a look in another FOI (Flight Operating Instructions) manual and found the following pages. It’s offers a bit more info and these pages – combined to one sheet – including the one in the VSL manual should help you and me with the approach and landing.

I could do a straight-in approach as I wrote before since I’m flying in from the south, but perhaps it’s also a good idea to follow a circuit before turning to final. I’ll see what happens and what’s possible. EGCK lies at an altitude of 0 feet and I need to try to keep my final approach speed somewhere between 85-95 knots. If this works out, I don’t know yet. If it fails, then I won’t hesitate to make a go-around and try it again. Although I did mention that flaps can be used, it also depends on the runway length what’s really needed. The included manual speaks about “Flaps … As desired”.
After passing Porthmadog and reaching the coast, I’ve turned to a northern direction by simply following the coast. slowly the C-47 descents, but not further then 2500 feet till I see EGCK. I double check all the items I need to do, descent any further to 2000 feet and leave the flaps UP for the moment. Remember what I said before, having the landing gear and flaps full down results in a huge drag, ok, that’s fine, but due to this the roll characteristics are not so good anymore, in particular when you need to make too many corrections to align with the runway. Therefore, I leave the flaps UP, gear down and mixture back to AUTO RICH.

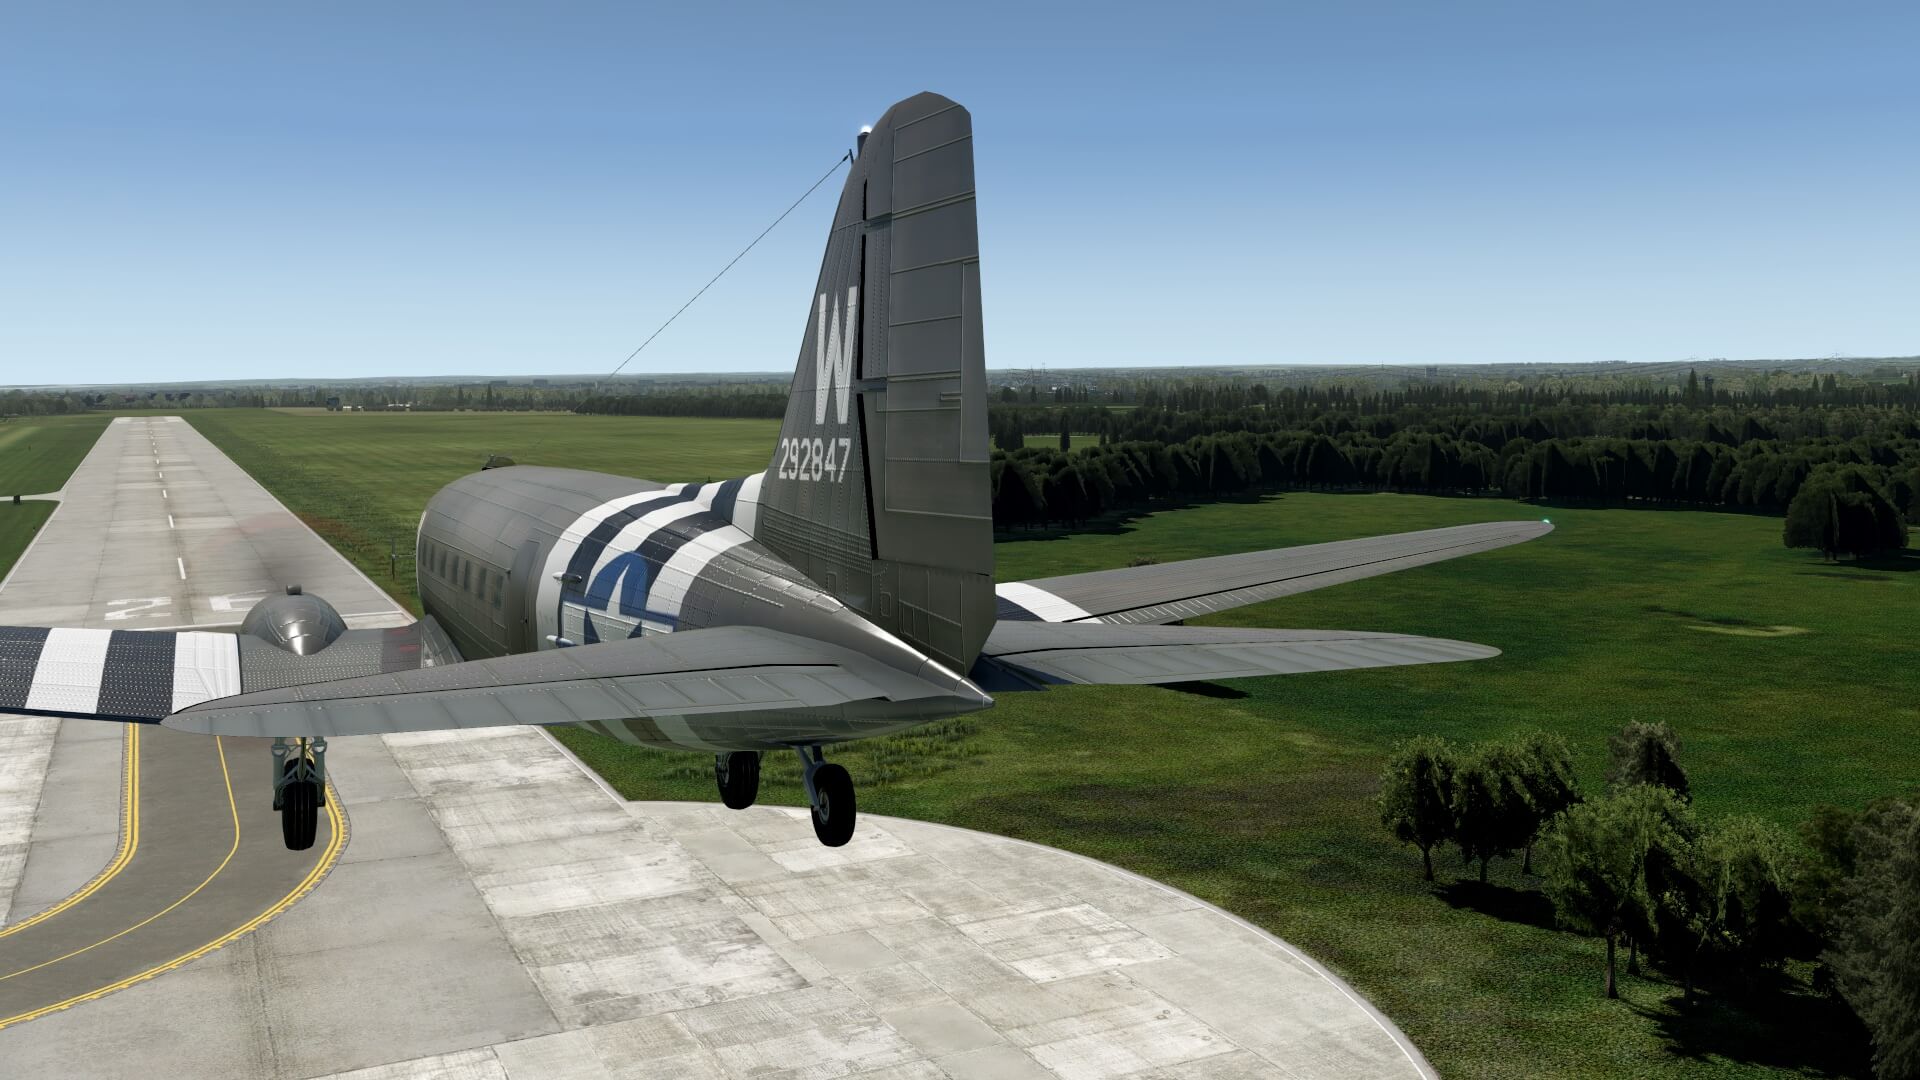
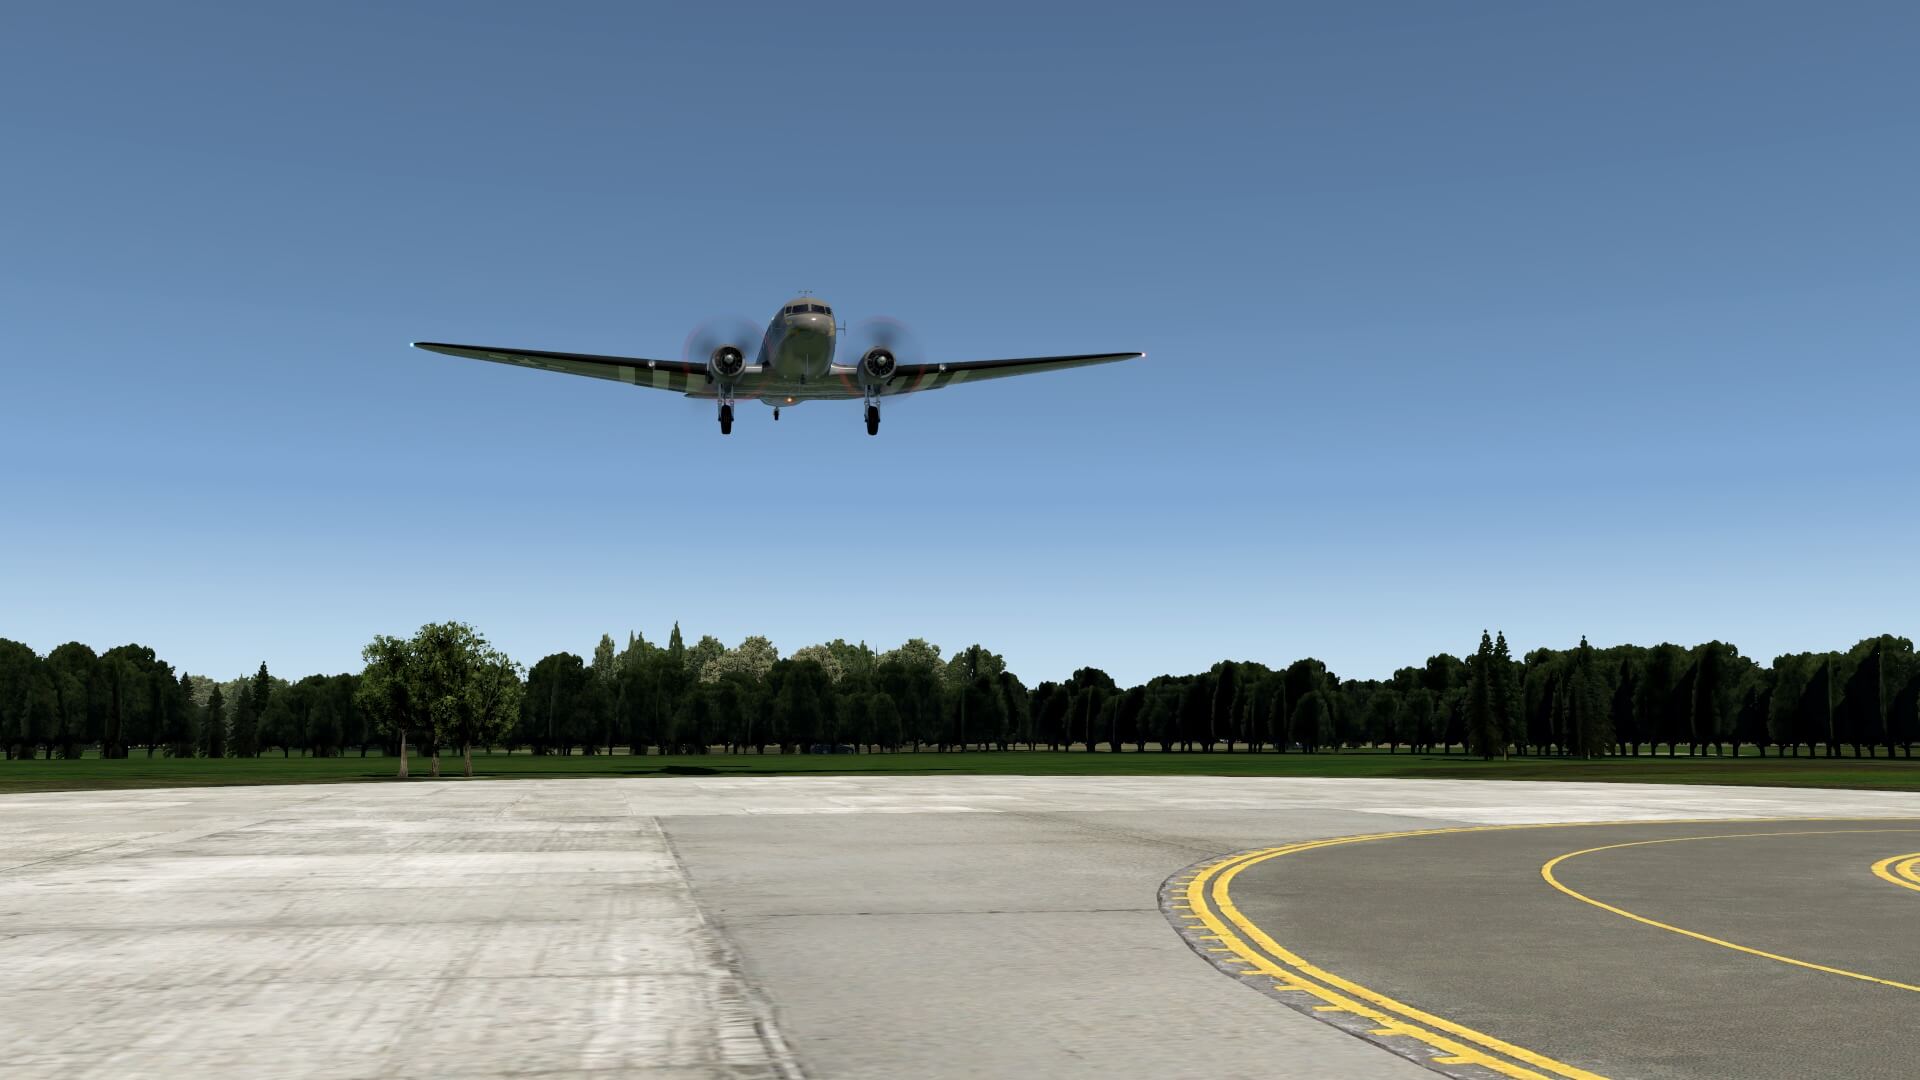
It feels OK as it goes. Slowly the C-47 descents while I’m still aiming for the runway centerline. The weather forecast is good, hardly any wind, so I should be able to make it. It’s not easy to be honest, but I manage it and before I know, I’m safely on the ground. I’ve survived my C-47 adventure. Welcome at Caernarfon Airport.
Conclusion
Oh oh, this review is a bit longer then intended. That’s partly because I like old fashioned aircraft like this Douglas DC-3, and because I’ve grown up in the aviation with Douglas airplanes. I starting my career with the DC-9-15, then the DC-9-30 and up with as latest model the DC-9-82 or also know as the Super 80, later renamed to MD80 Series. During this review and studying the maintenance manual old technics are popping up.
And due to all the pages I’d seen in the maintenance manuals, I decided – this was the first time I did it – to add some real basic knowledge of the DC-3/C-47 in this review, just for background information. Most of the information I added was coming from the official Douglas Technical Manual Maintenance Instructions, so as real as it gets I would say, but what I added is just a fraction of what I’ve seen and read.
Did I cover every part of this well modeled and realistic C-47?
Oh no, I missed several parts. It may be an old aircraft with not so many systems, but it has so many different systems in it, that it’s hardly impossible to discuss every tiny section. On the other hand, I think I’ve offered some background information, included my own tips and tricks and how to deal with the simulated systems and yes, not every system is modeled as in the real DC-3/C-47, but perhaps with the new update these are also included.


And ….. did I cover the C-47 with skies or modify the C-47 into a seaplane? No, you won’t find anything of that, but that’s also done on purpose. Flying in snowy areas doesn’t change much upon the overall model. Flying the C-47 as being a seaplane, ok, that’s slightly different, but not in a way to decide to add that behavior and look and feel too.
Finding a model that is perfect is in my humble opinion almost an illusion. Either the 3D modelling is not exceptional in terms of details and textures, but then the flight dynamics and the simulated systems are of a high standard and almost the same as the real one, or the modeled aircraft has suburb textures and 3D modeling, but lacks of real flight dynamics. I think you got the picture, right? The VSkyLabs isn’t the newest model although it has seen many improvements since version 1.0. As of this writing, the current model version is 3.0c and – I hope I may mention this – a new update version 4.x is around the corner. It will come with newly modeled systems and improved textures.
For this review, I used besides the payware VSkyLabs C-47 Skytrain the following payware and freeware packages:
– Payware Orbx TrueEarth Great Britain
– Payware Just Flight Global Traffic for macOS
– Freeware VSL C-47 livery KLM PH-AJU Uiver from X-Plane.Org user amerrir
– Freeware X-Plained.Com flight plans EGTR-EGTR and EGTR-EGCK
– Freeware Laminar Research DataRefEditor
– Freeware FlyWithLua NG 2.7.28
– Freeware FlyAGI Tweak Utility 1.15
– Freeware SAM Suite
For me as long time reviewer, an ex-ground engineer and having a frozen FAA PPL I always like models that more or less reflect reality, as far as I can judge about that. That I added in this review a couple of basic DC-3/C-47 technical background is something I like and I hope you too, but I’m also aware that I couldn’t cover every system.
I don’t think I need to answer the following question; was it worth my time and is it worth the product?
With such an in-depth review with lots of other interesting paragraphs of the C-47 basics, I think you can imagine how I feel about this modeled C-47, and yes, as with many models, I would like to see for this flying model several improvements like better 3D cockpit-, entrance- and cabin textures. The implementation of the real Sperry basic Auto Pilot is great although it users the default X-Plane Auto Pilot, but the sluggishness of the real C-47 is felt and seen and that makes me happy. It would also awesome when the realistic engine start procedure could be implemented instead of using the default X-Plane engine start, but that’s just me.
One thing I didn’t test is the Virtual Reality option. The modeled C-47 Skytrain is “VR Ready”, but since I’m reviewing this beauty on an iMac, I have no possibility to test it with VR since there’s no manufacture who makes macOS compatible VR equipment.
I would like to thank Huss from VSkyLabs for helping me out with questions and offering me background information of his real life pilot C-47 experience. Many thanks Huss for your assistance.
You can buy the C-47 Skytrain via the VSkyLabs Storeshop or via the dedicated store page X-Plane.Org. Irrespective which store you chose, the price is 29.95 USD.
Feel free to contact me if you’ve got additional questions related to this impression. You can reach me via email Angelique.van.Campen@gmail.com or to Angelique@X-Plained.com.
With Greetings,
Angelique van Campen
| Add-on: | Payware VSkyLabs C-47 Skytrain Flying Lab Project |
|---|---|
| Publisher | Developer: | X-Plane.Org | VSkyLabs |
| Description: | Realistic rendition of the Douglas C-47 |
| Software Source / Size: | Download / Approximately 416MB (unzipped) |
| Reviewed by: | Angelique van Campen |
| Published: | April 24th 2021 |
| Hardware specifications: | - iMac Pro - Intel 3GHz Intel Xeon W / 4.5Ghz - Radeon Pro Vega 64 16368 MB - 64 GB 2666 MHz DDR4 - 1 internal shared 1TB SSD (Big Sur 11.x) - 1 internal shared 1TB SSD (Bootcamp Windows 10) - 1 external 2TB LaCie Rugged Pro SSD (Big Sur 11.x) - Saitek Pro Flight System X-52 Pro and X-56 Rhino - Honeycomb Alpha Flight Controls - Honeycomb Bravo Throttle Quadrant |
| Software specifications: | - macOS Big Sur (10.15.x) - X-Plane 11.5x |
0 Comments