VSKYLABS / PAC CT/4E Airtrainer
Background
In 1952, the Royal Aero Club of the United Kingdom sponsored a commonwealth-wide design competition for a two-seat, light aeroplane that was “suitable for air touring; economical to construct, operate and maintain, and easy to fly.” The Chief Aerodynamicist for the Australian Government Aircraft Factory at that time, Mr. Henry Millicer, and his team were one of 103 competitors who submitted designs for the proposed aircraft. In March 1953, Mr. Millicer’s Entry Number 97, named the Airtourer, was announced the winner of the design competition. While the winner was promised financial support for building prototypes of the winning design, the support never came to pass and the project stalled.

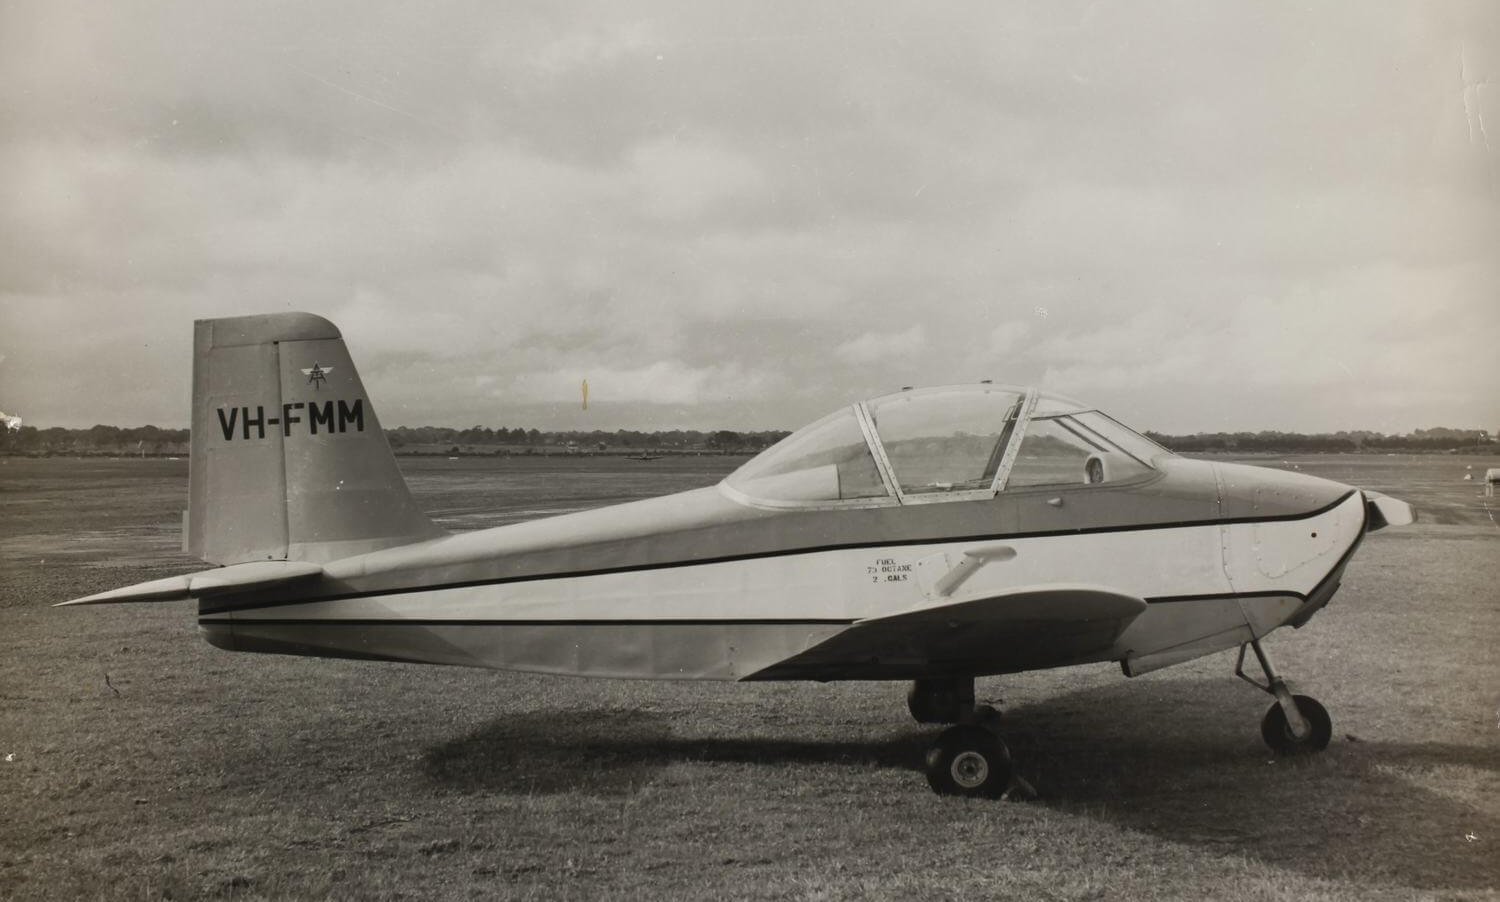
It would not be until 1955 when the then Australian Ultra-Light Aircraft Association along with others assisted Mr. Millicer in creating the first Airtourer prototype. VH-FMM, known as “Foxtrot Mickey Mouse” made its maiden flight in March 1959, six-years after the Royal Aero Club design contest. Development of the aircraft would come under Victa Consolidated Industries Aviation Division where Mr. Millicer was appointed the Chief Designer. The aircraft became an instant success with a total of 168 being built from 1962-1966 with many still flying today. Unfortunately, internal support for the aircraft waned and in 1966, the aircraft division was shutdown. However, this would not be the end of the story.
During the Airtourer production period a new prototype, the Aircrusier, was being developed by Victa. This four-seat prototype was envisioned with more powerful engines and other airframe changes. The first Aircrusier made its first flight in July 1966. However, with the demise of the Victa Aviation Division, the rights to both the Airtourer and subsequently the Aircruiser were sold to Aero Engine Services Limited (AESL) of Hamilton New Zealand.
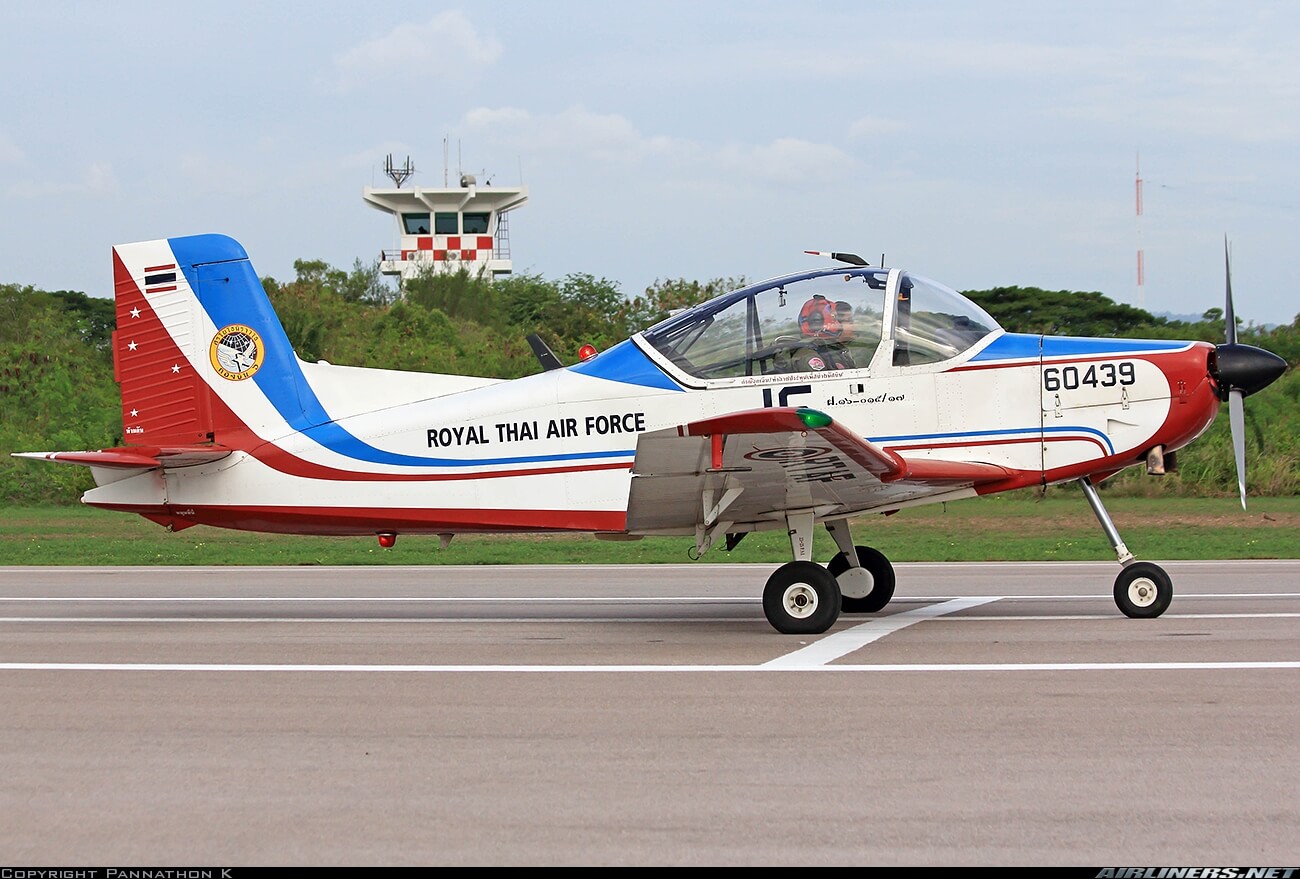
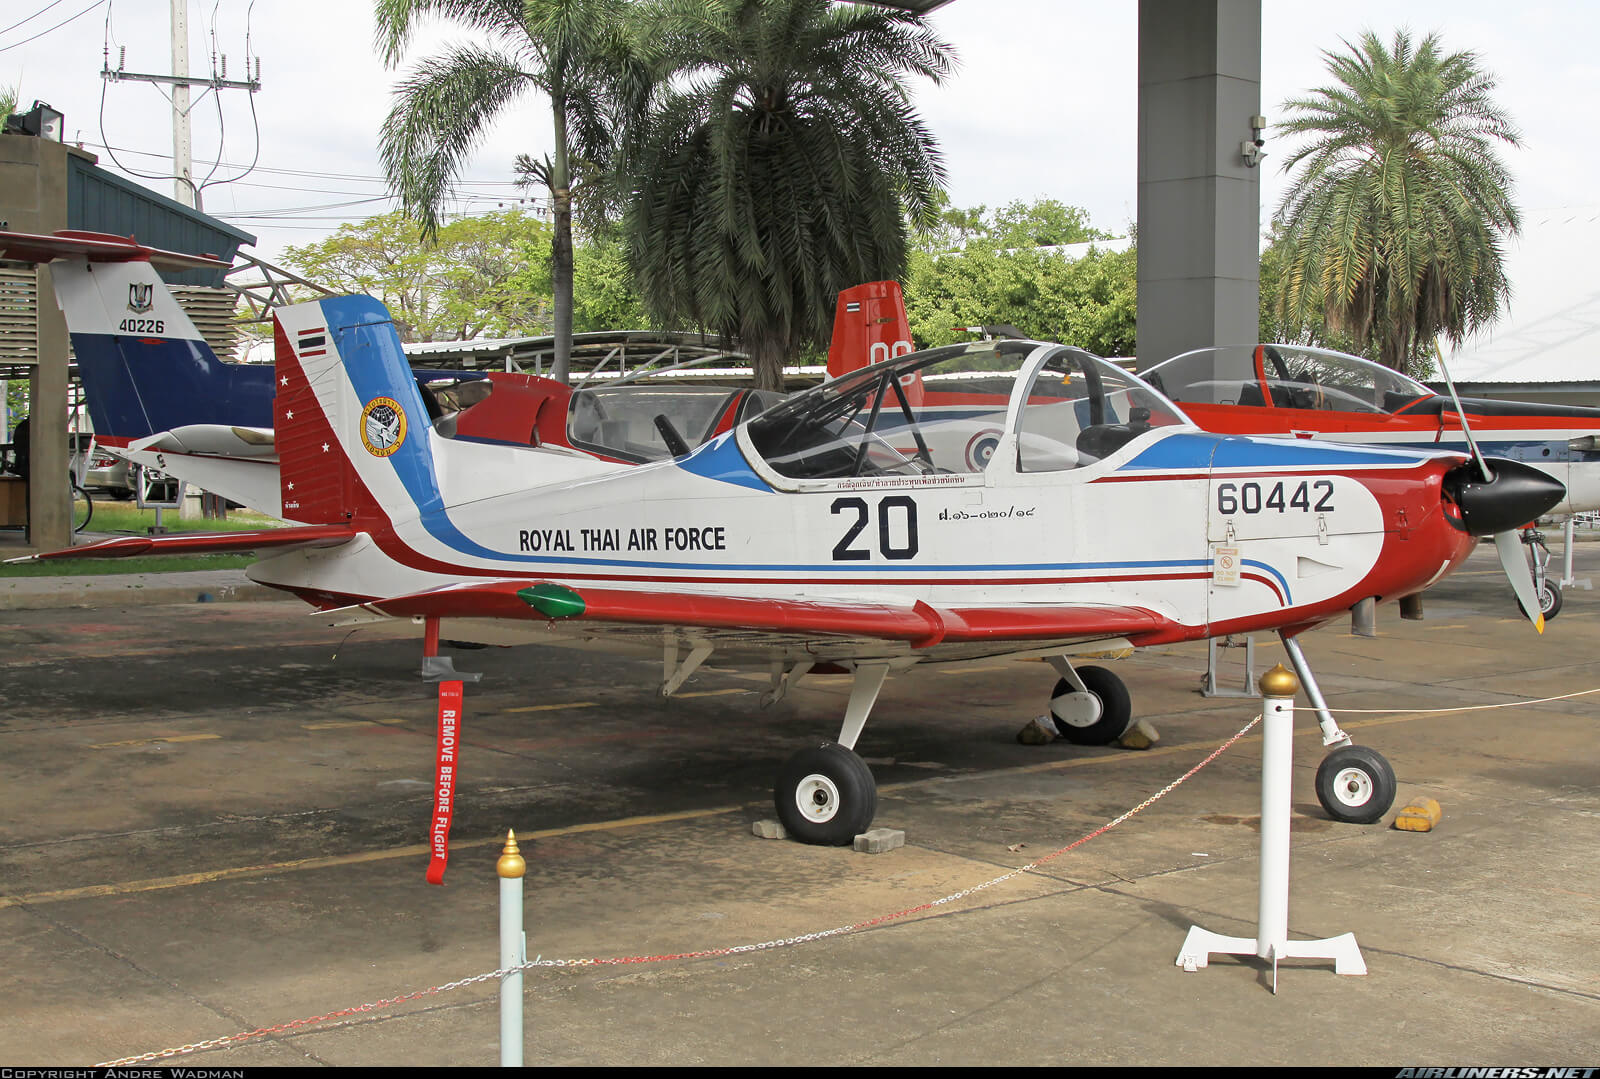
AESL went on to build 80 more Airtourers between 1967 and 1974. However, in 1971, AESL transformed the Aircruiser into the CT-4 Airtrainer which made its maiden flight in February 1972. There have been seven variants of the widely successful CT-4 Airtrainer with more than 150 aircraft developed for the Royal Australian Air Force, the Royal New Zealand Air Force, the Royal Thailand Air Force, and others for use as a primary flight trainer. In 1973, AESL merged with other manufacturers and ultimately became the Pacific Aerospace Corporation (PAC) in 1982 which continued to produce the CT-4 Airtrainer until 2008.

Introduction
The PAC CT/4E basic trainer is an all-metal, two-seat, single piston-engine, all metal aircraft with a fixed tricycle undercarriage that is capable in operating in both VFR and IFR conditions. The CT/4E is equipped with the powerful 300 hp Lycoming engine and three bladed propeller and is fully aerobatic. You can read more about the aircraft via the following link to the PAC website.
“Virtual Sky Labs” (VSKYLABS) Aerospace Simulations has lovingly recreated this iconic military training aircraft that was even considered by the USAF for their Enhanced Flight Screener Program. Development of the virtual VSKYLABS Airtrainer project for X-Plane was approved by PAC, however, as discussed in the documentation, it is an independent VSKYLABS project which is not related, affiliated and/or endorsed with Pacific Aerospace Corporation. The aircraft is fully VR capable and is compatible with Vulkan. For more information, go to VSKYLABS website.

It should be noted that IRIS simulations have also developed the CT/4F Akala for use with FSX/P3D. A comparison between the VSKYLABS CT/4E for X-Plane and the IRIS CTR/4F for FSX/P3D was not been considered since each aircraft has been developed under a different flight simulation platform. Additionally, I am not a real-world pilot, however I have been involved in the aviation industry for a very, very long time. As with many others, I use X-Plane on a recreational basis and I attempt to approach my reviews from the standpoint of what a beginner to advanced person might find useful while reading the review.
VSKYLABS and the “Test-Pilot” Series
VSKYLABS was created in 2015 by Huss who is a retired professional pilot with thousands of flight and instructional hours in various types of aircraft from pistons to turboprops to high performance jet aircraft. Per Huss, VSKYLABS was created out of curiosity and excitement and all of the VSKYLABS projects are “experimental” projects in terms of internal engineering and development techniques, as well as the flight performance aspect. VSKYLABS is very-well respected developer within the X-Plane community.
All of the VSKYLABS projects are part of the ‘Test-Pilot’ series, although some projects receive the “Test-Pilot”’ tag name later than others. However, the idea behind the series is simple: “Test-Pilot” completes or continues the idea of flying an aircraft in a sophisticated flight simulation sandbox using X-Plane’s native experimental flight model features.
When asked the reason for deciding to develop the PAC CT/4E, Huss stated that several aircraft categories had already been previously developed including Light-sport aircraft (LSA), Powered gliders, Hang Glider Trikes, Helicopters, Autogyros, WW2-era aircraft, etc. As part of extending the variety of aircraft in the VSKYLABS hangar, it was decided to develop a classic basic trainer with a military orientation. The classic CT/4, based on its history, was an obvious selection.
Additionally, each VSKYLABS project, including the CT/4E, have a unique “feature” in its features list, which is: “highly responsive VSKYLABS support forums.” VSKYLABS offers continuous professional support from aircraft related aspects (operating and flying) to X-Plane technical support. Basically, this “feature” invites the users to interact with VSKYLABS via support forums to practically ask any sim or aircraft related questions; from aircraft operations and technical aspects to flying techniques and practices and so forth. Interacting with the community is a major part in VSKYLABS on-going support activities and it is done with a professional and educational approach based on a very wide-base of real-world experience.
Aircraft Specifications
The specifications of the PAC CT/4E Airtrainer, sourced from Wikipedia from data taken from Jane’s All the World’s Aircraft 2003–2004 and the VSKYLABS PAC Pilot’s Operating Handbook and Flight Manual for the CT4-E Airtrainer are as follows:
General characteristics
- Crew: two
- Length: 7.201 m (23 ft 7.5 in)
- Wingspan: 7.92 m (26 ft 0 in)
- Height: 2.59 m (8 ft 6 in)
- Wing area: 11.98 m2 (129 sq ft)
- Aspect ratio: 5.2:1
- Empty weight: 770 kg (1,700 lb)
- Gross weight: 1,180 kg (2,600 lb)
- Max takeoff weight: 1,180 kg (2,600 lb)
- Powerplant: 1 × Lycoming AEIO-540-L1B5 flat-six piston engine, 224 kW (300 hp)
- Propellers: Hartzell Propeller HC-C3YR-4BF / FC7663-2R
Performance
- Maximum speed: 387 km/h (240 mph, 209 kn) at sea level
- Cruise speed: 282 km/h (175 mph, 152 kn) at 2,590 m (8,500 ft) (75% power)
- Stall speed: 82 km/h (51 mph, 44 kn) (flaps down)
- Never exceed speed: 387 km/h (240 mph, 209 kn)
- Range: 963 km (599 mi, 520 nm) (max fuel, 75% power)
- Service ceiling: 5,550 m (18,200 ft)
- Rate of climb: 9.3 m/s (1,830 ft/min
Installation
The installation was straight forward and typical of X-Plane aircraft add-on installations. The aircraft download was very quick with a compressed file size of approximately 228 MB (download speeds will vary based on your internet connection). Once downloaded, the aircraft was extracted into a temporary folder and then copied to the X-Plane\Aircraft folder. Upon loading X-Plane, load the aircraft, input the serial key then reload the aircraft.
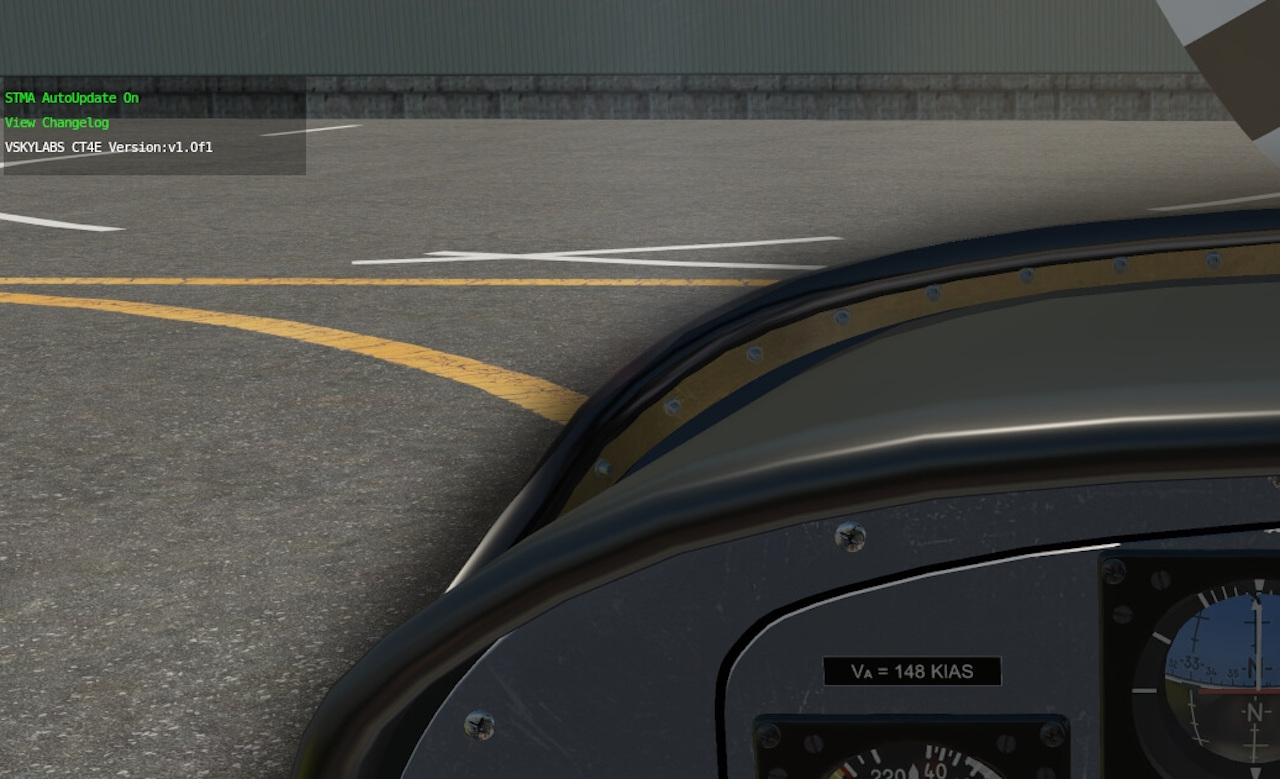
The aircraft is VR-ready and capable of using Vulkan. In case you did not know, Vulkan is an Application Programming Interface (API) that provides a connection between computer programs or computers. Vulkan provides a modern method of how graphics appear on your monitor and is intended to replace OpenGL which provides the same type of function but is really old. Additionally, keeping the aircraft up-to-date is easy as the aircraft uses the Shade Tree Micro Aviation (STMA) unique AutoUpdater which automatically downloads any updates to the aircraft when it’s loaded into X-Plane.
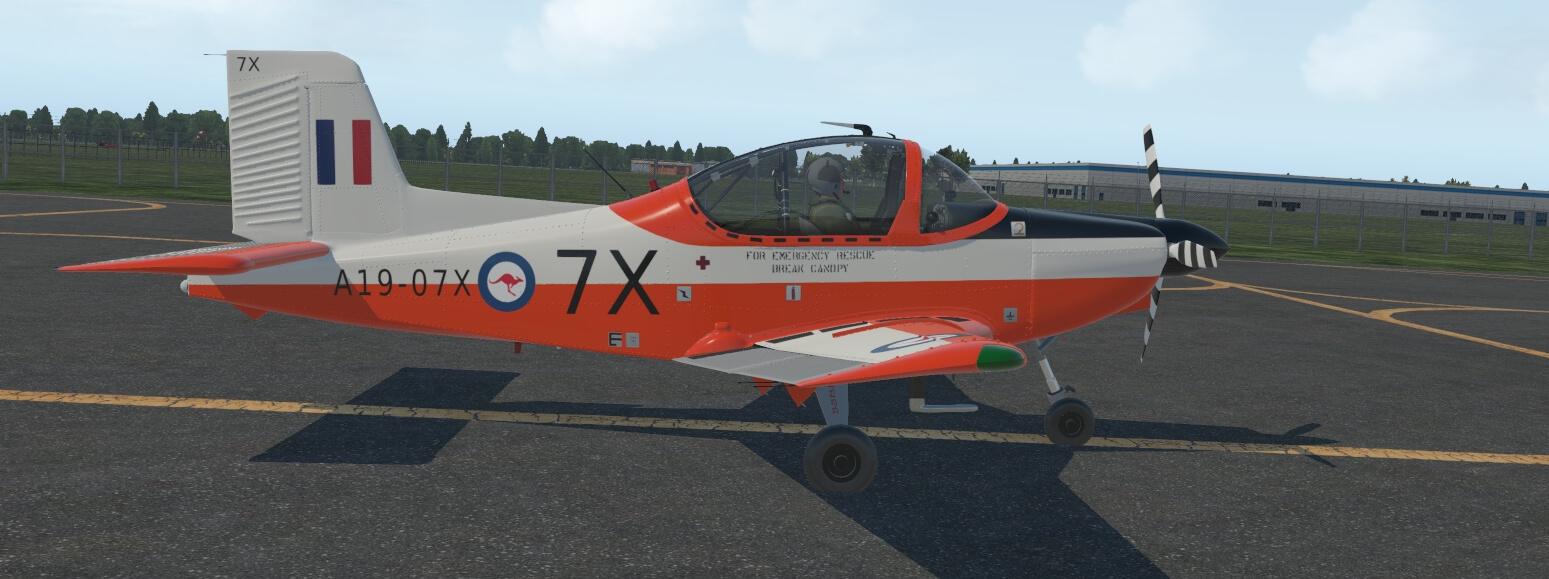
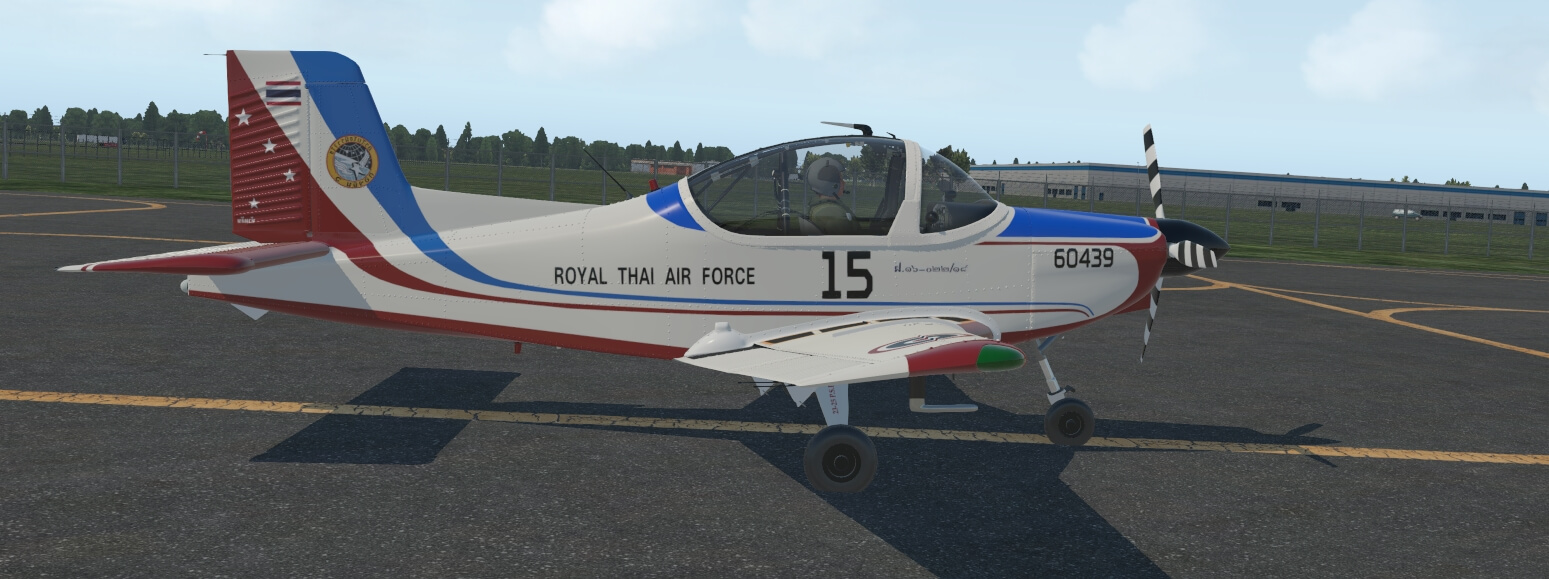
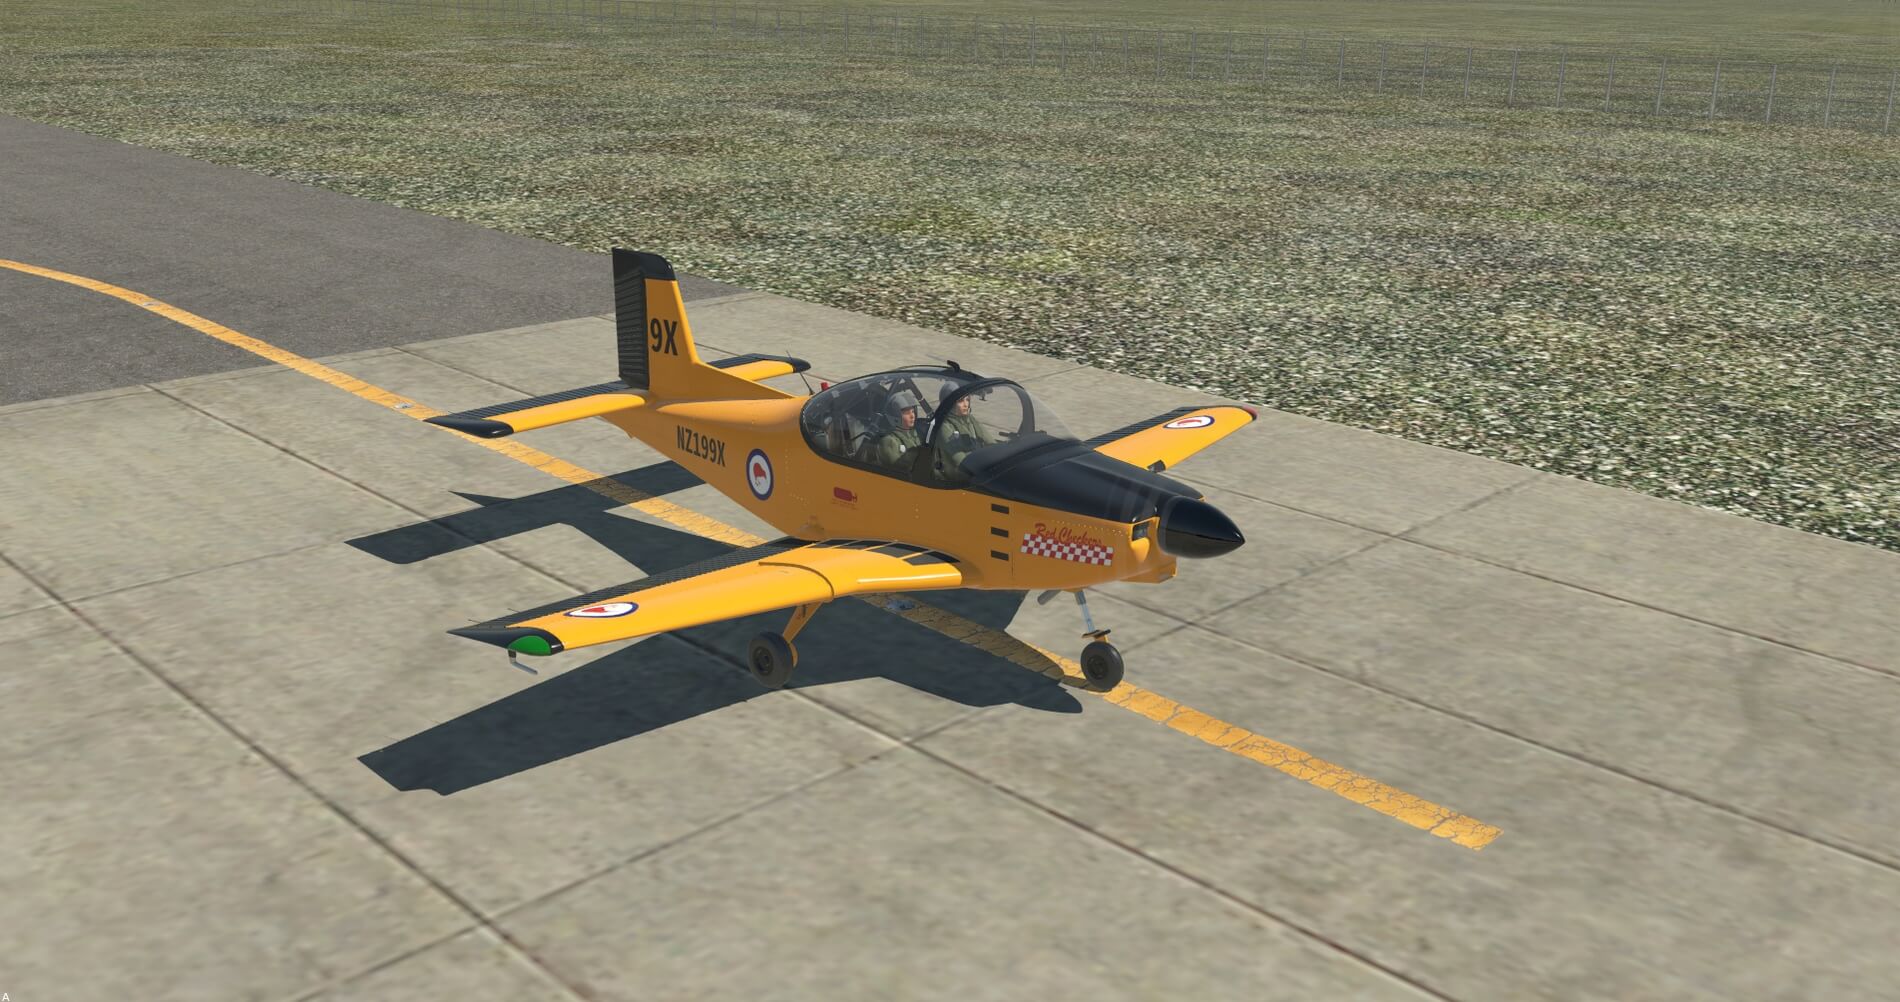
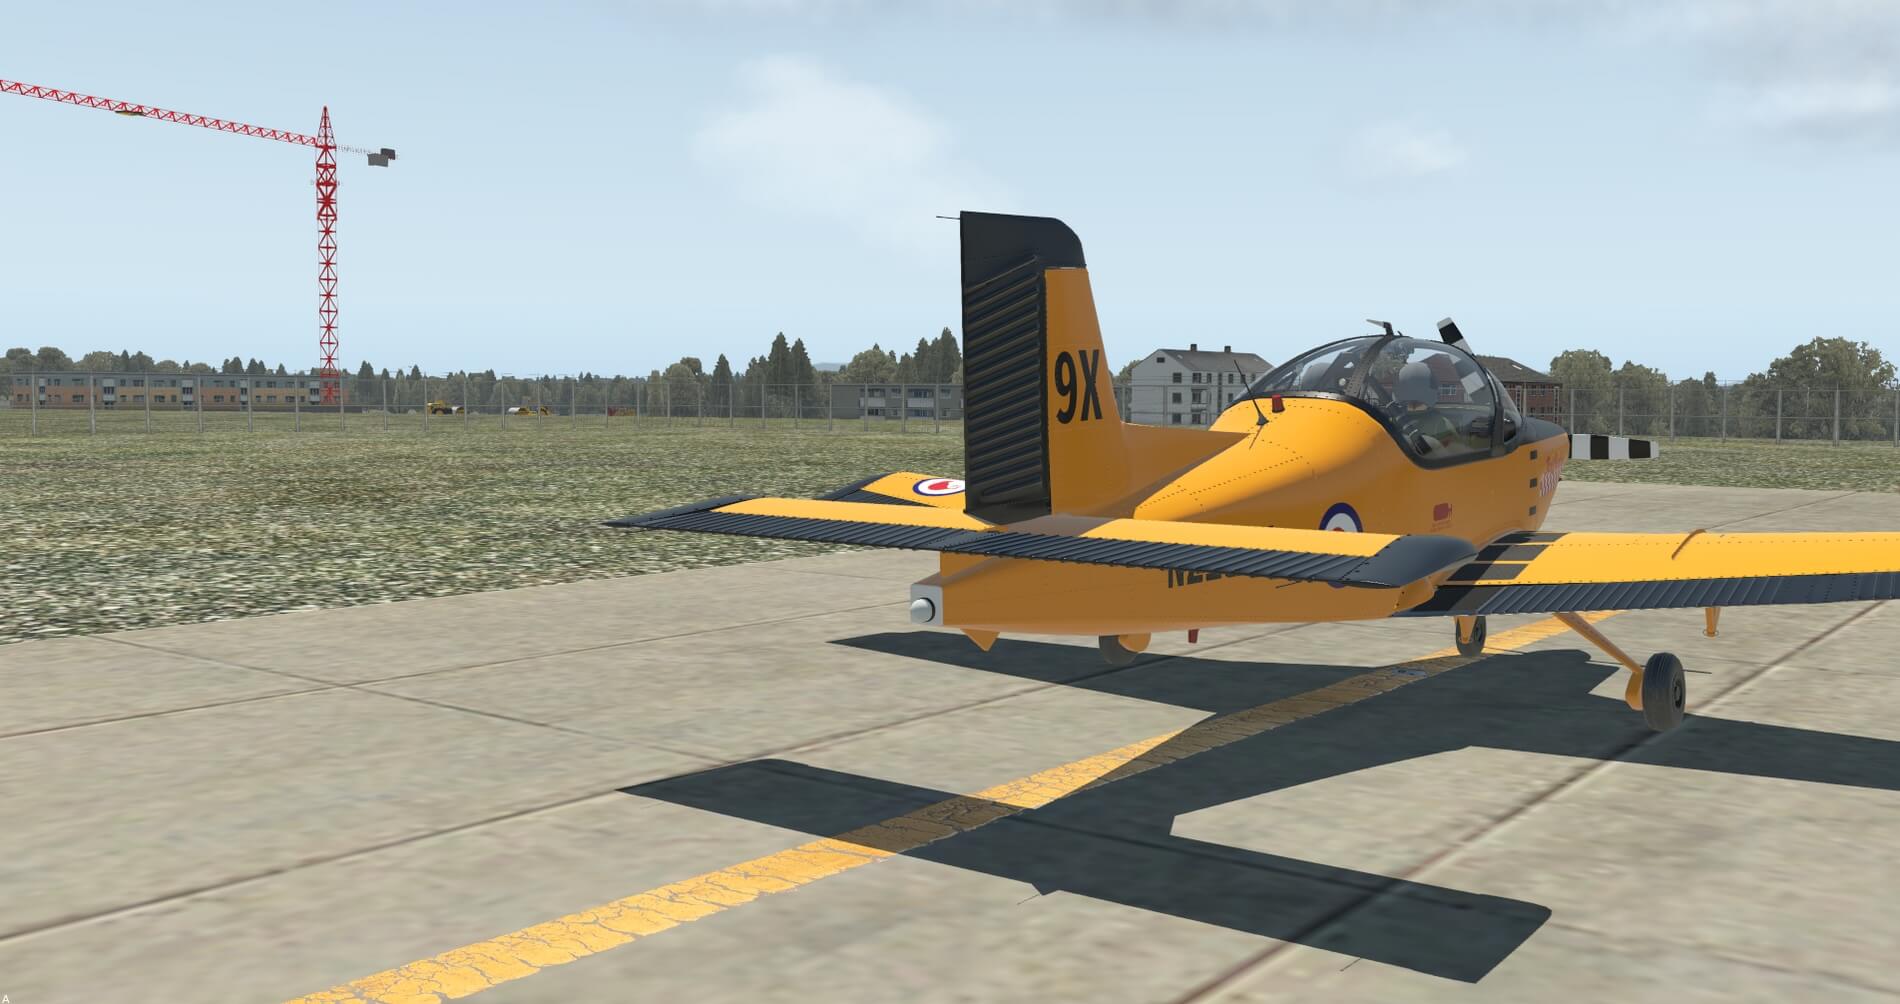
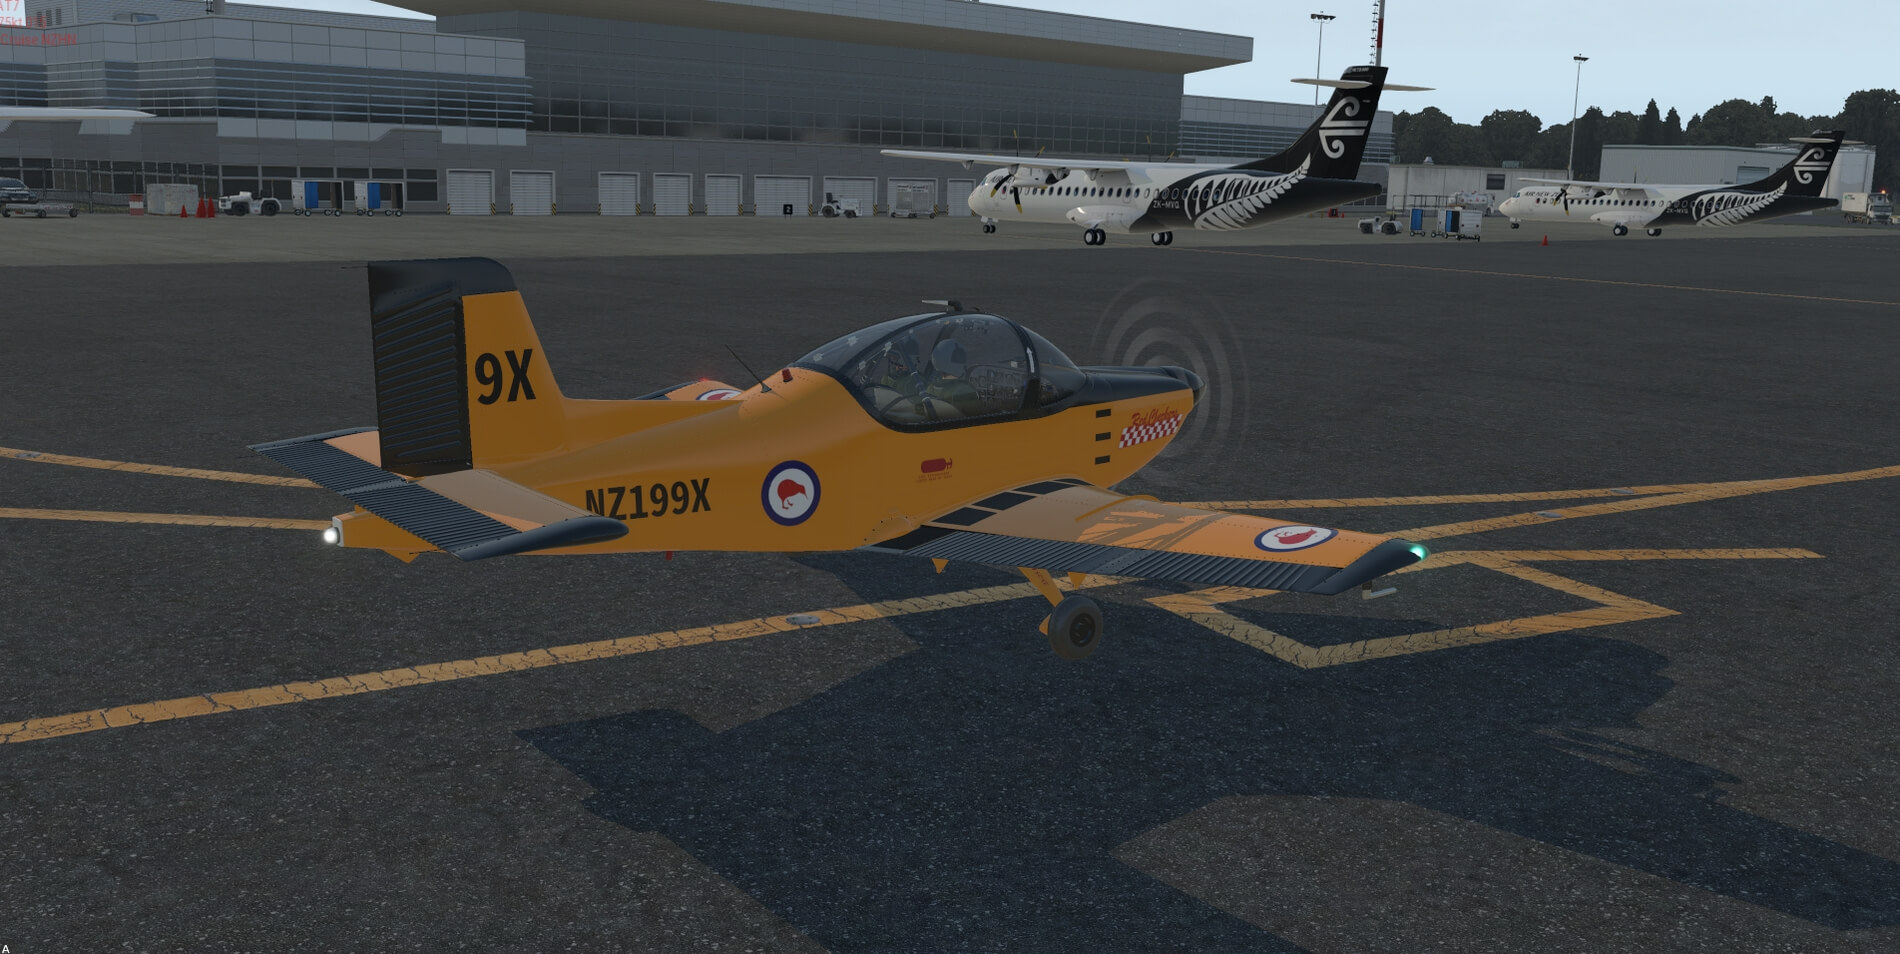
Finally, the aircraft comes with three liveries: The Royal Australian Air Force Trainer, the Royal Thailand Air Force Trainer, and the Royal New Zealand Air Force Red Checkers Precision Flying Team livery.

Documentation
The documentation that comes with the Airtrainer consists of 40 pages and contains eight (8) main sections:
- Introduction
- Project Main Features
- X-Plane Setup Notes
- VSKYLABS CT/4 Assignment Summary
- Other settings
- VSKYLABS CT/4E Cockpit and Interaction
- Aircraft Systems – Main Components
• VSKYLABS CT/4E Manual Section
The VSKYLABS CT/4E Manual Section is like a mini–Pilot’s Operating Handbook consisting of General, Limitations, and Normal Procedures. The information appears to be comprehensive and is easy to follow. The only items not contained under this section include a pseudo-preflight external inspection check, emergency procedures, and weight and balance loading, and performance chart information. Some sim-pilots may frown upon these items not being included in the documentation; however, the lack of such information does not take aware from realistically flying the aircraft as the Manual and Performance sections provide excellent guidelines for operating the aircraft.
The manual is very easy to read and contains all the information needed to get started with the aircraft. While most people may want to just dive in and start flying the aircraft, it is important that you take a moment to really go through the X-Plane Setup Notes section of the document. It is clear VSKYLABS has taken the time to ensure that the user has the best opportunity to use and understand the model to its full capability. The section is only seven pages long and it will really help you in getting things setup in order to experience the aircraft in a very true and realistic way. I will discuss this further in the review.
While I do like how the documentation is presented, there are couple of items that I think would be welcome additions to the manual. I think an acknowledgement and brief refresher related to the default X-Plane avionics suite would be very helpful. Also, a flight tutorial designed to point out key important areas and the normal flow of flight operations would also be beneficial to users. Overall, however, the documentation gives pilots of all skill levels the information they need to successfully operate the aircraft.
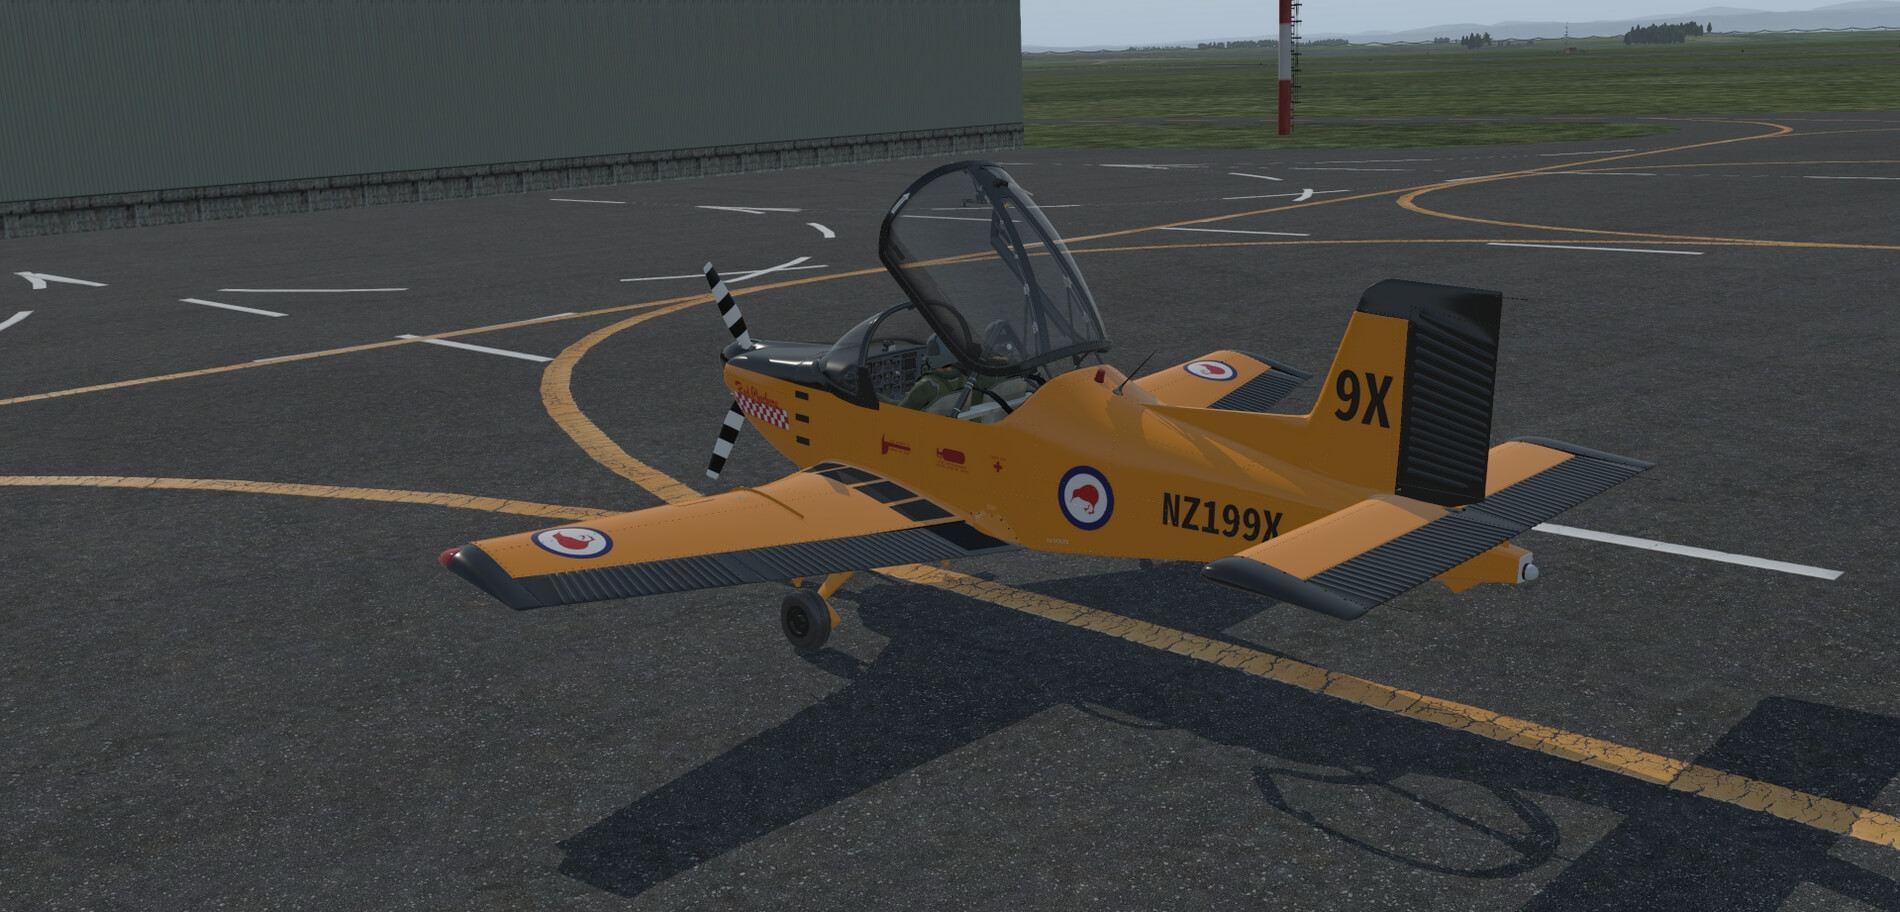
Exterior Modelling
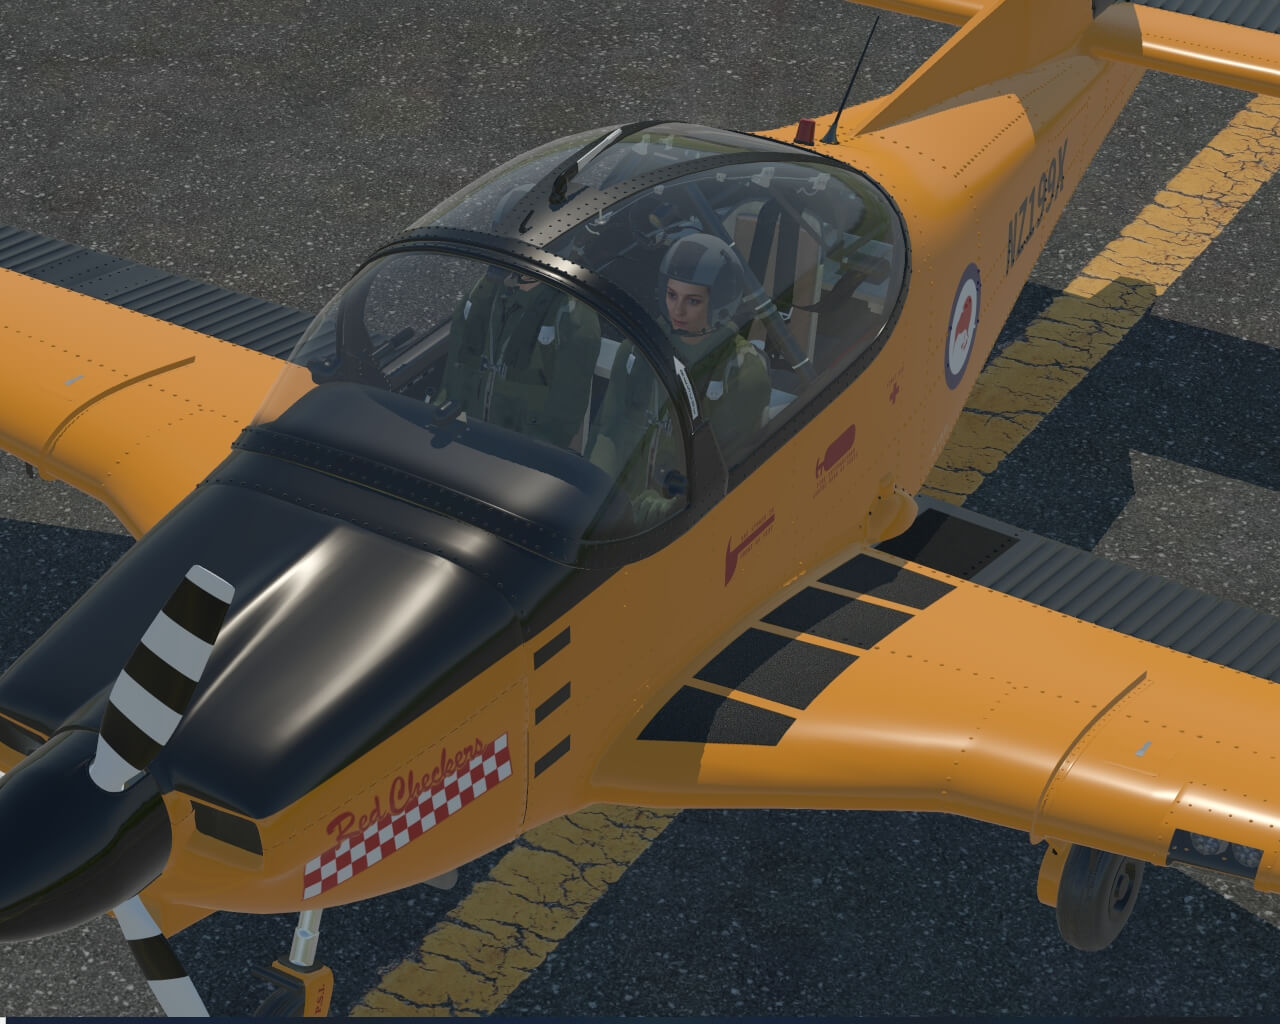
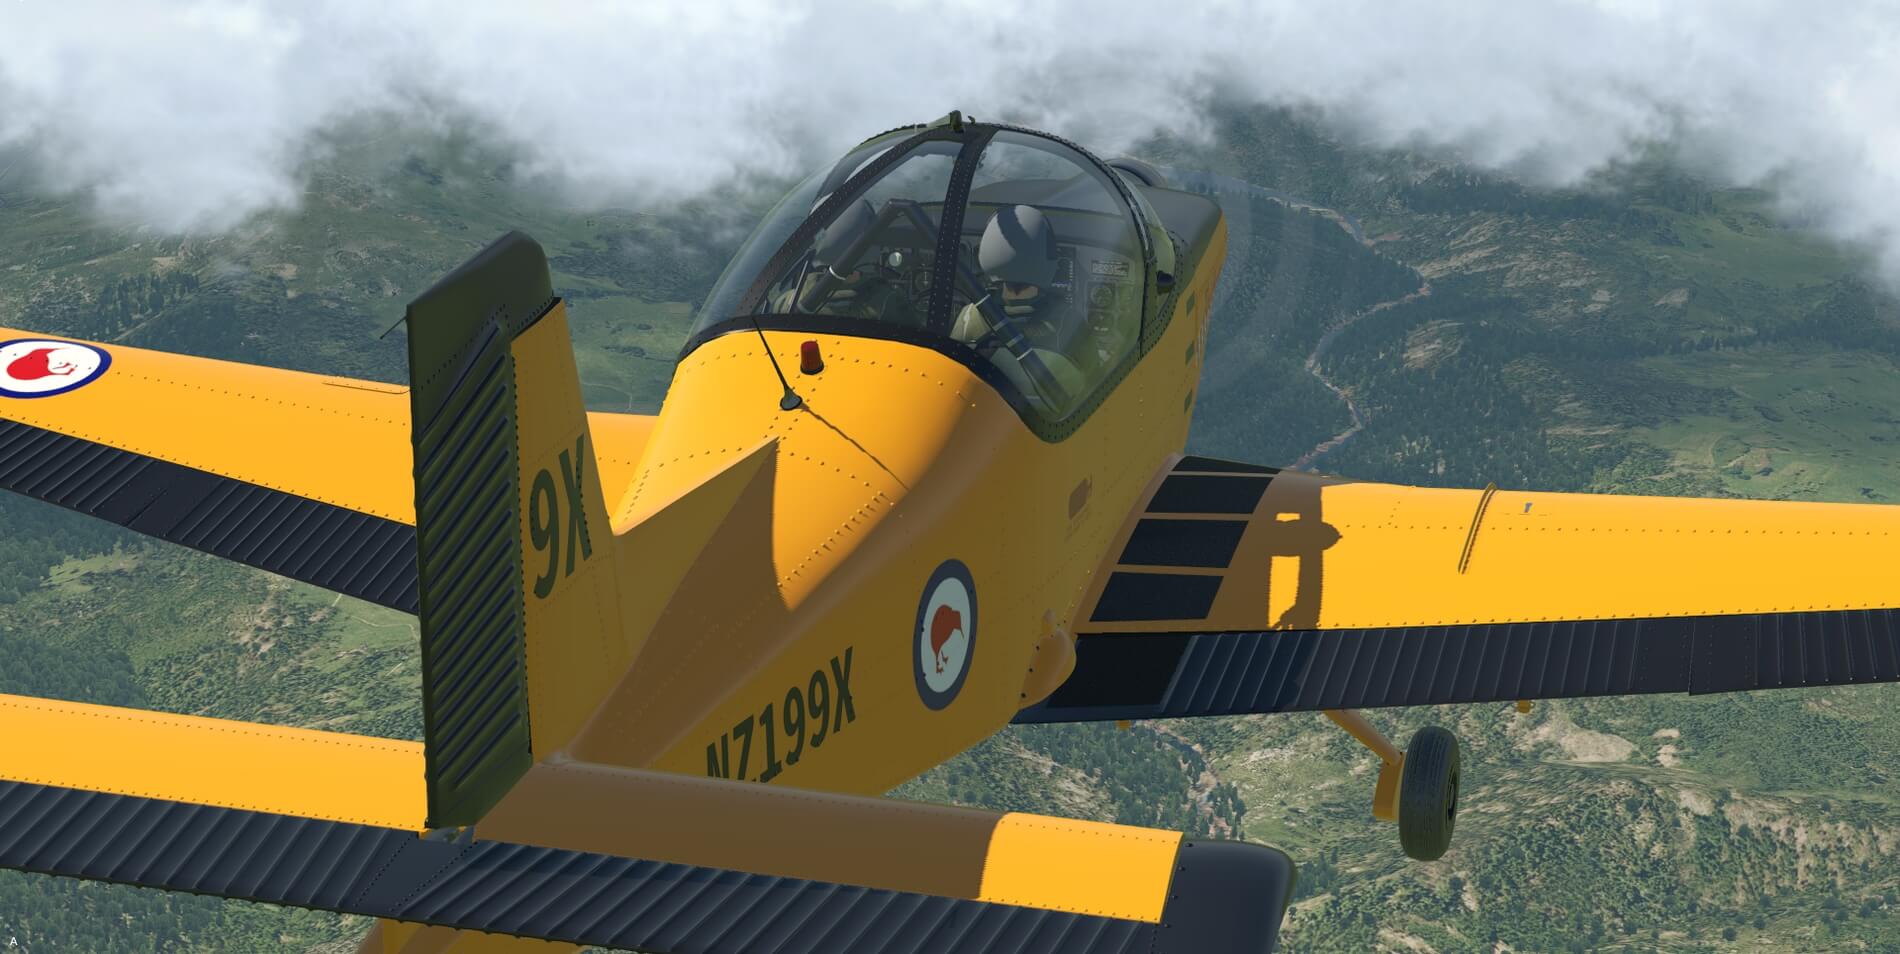
When you first load the aircraft, you will be presented with a visual treat. The aircraft exterior modeling is very well done. VSKYLABS has done an excellent job in recreating the external look of the aircraft right down to the rivet details and aircraft markings. When comparing the aircraft to their real-world counterpart, there are some minor visual differences but not enough to take away from the excellent work done on the exterior of the aircraft. The colors and markings are very much true to life. For example, the Royal Thailand Air Force model is a spitting image of the real aircraft, even down to the tire pressure written on the gear struts.

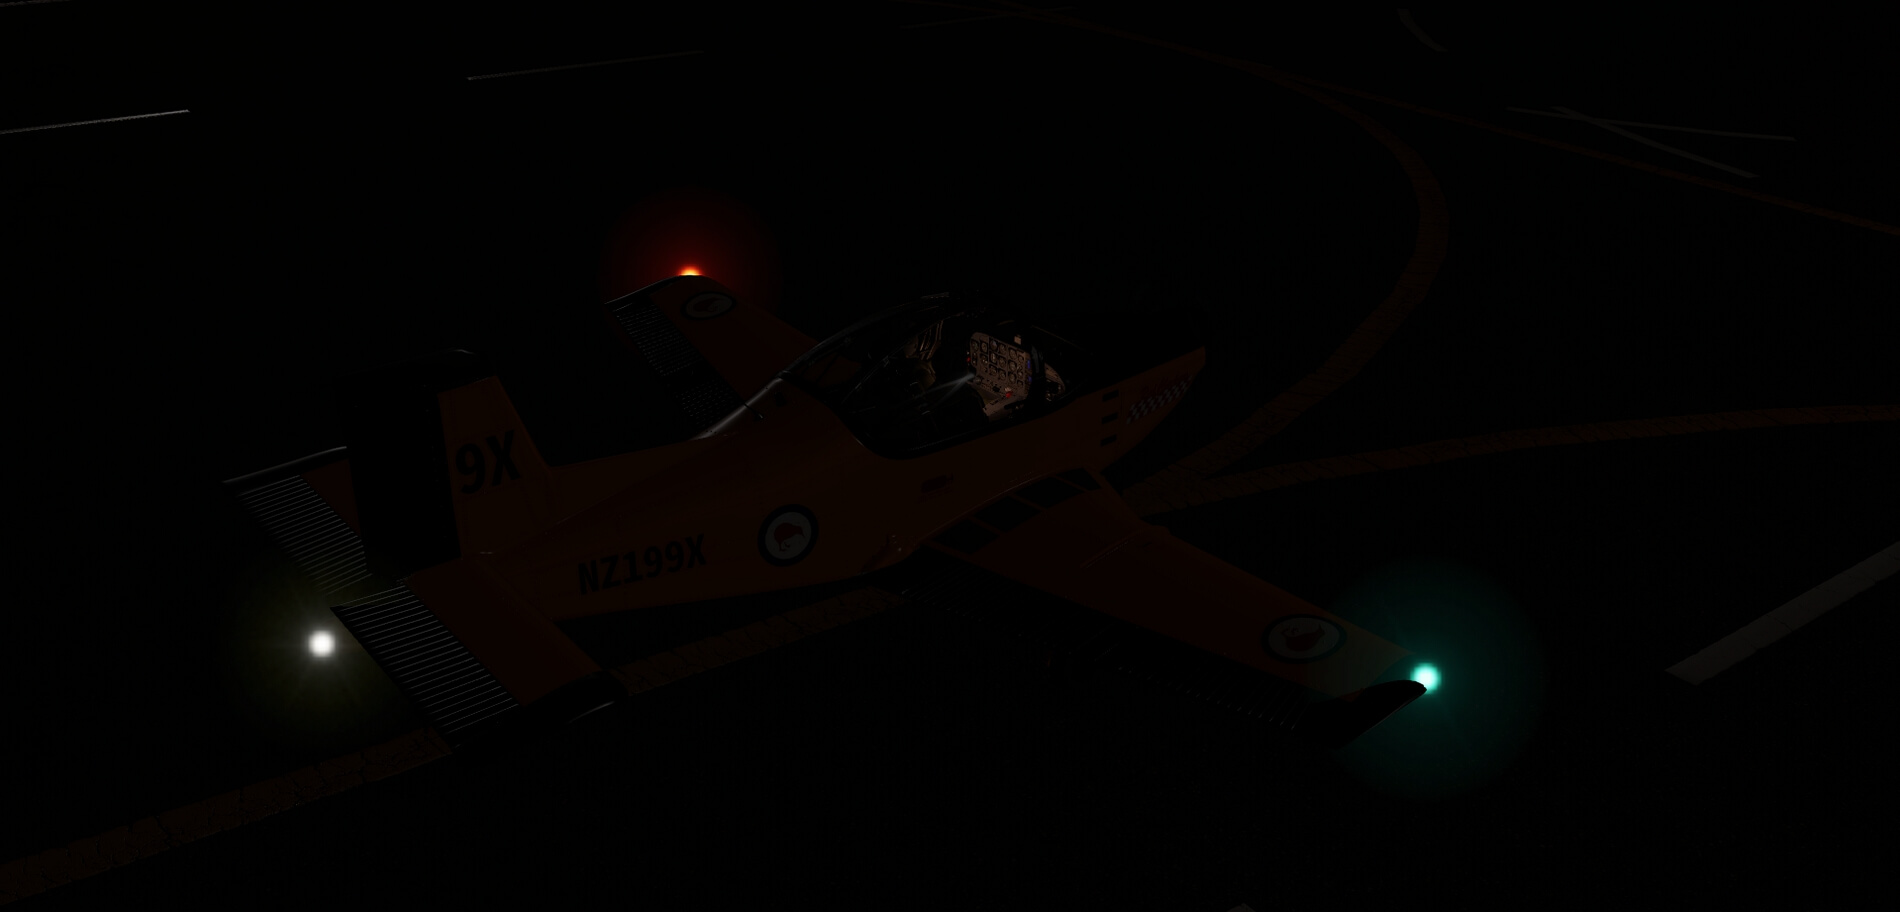
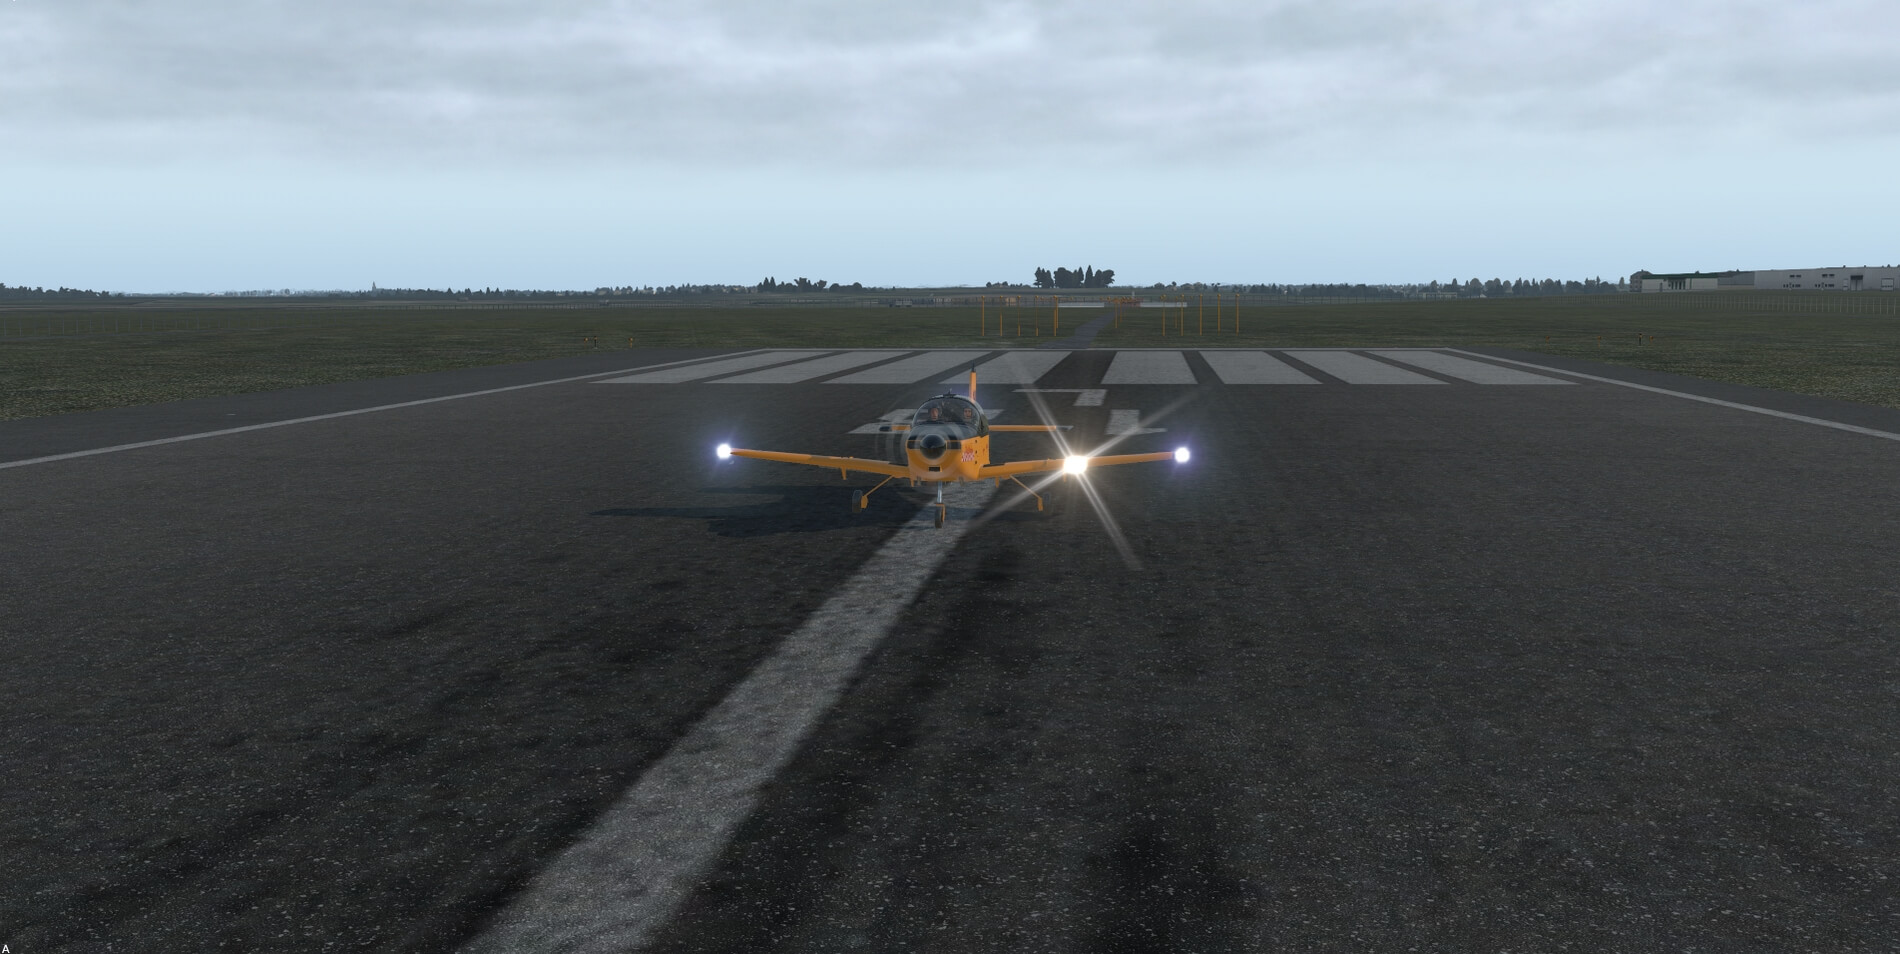
The exterior lighting is good, though the globes appear to be a little large which makes the lights look out of place at night. The navigation lights on each wing may not appeal to some as the lights appear colored in and not transparent. However, when comparing photos of the real aircraft, the dullness of the colored lights is recreated in the simulated model. The beacons lights do appear to be more squarish in their presentation and not rounded like their real-world twin. But to me, this does not impact the overall modeling of the aircraft.


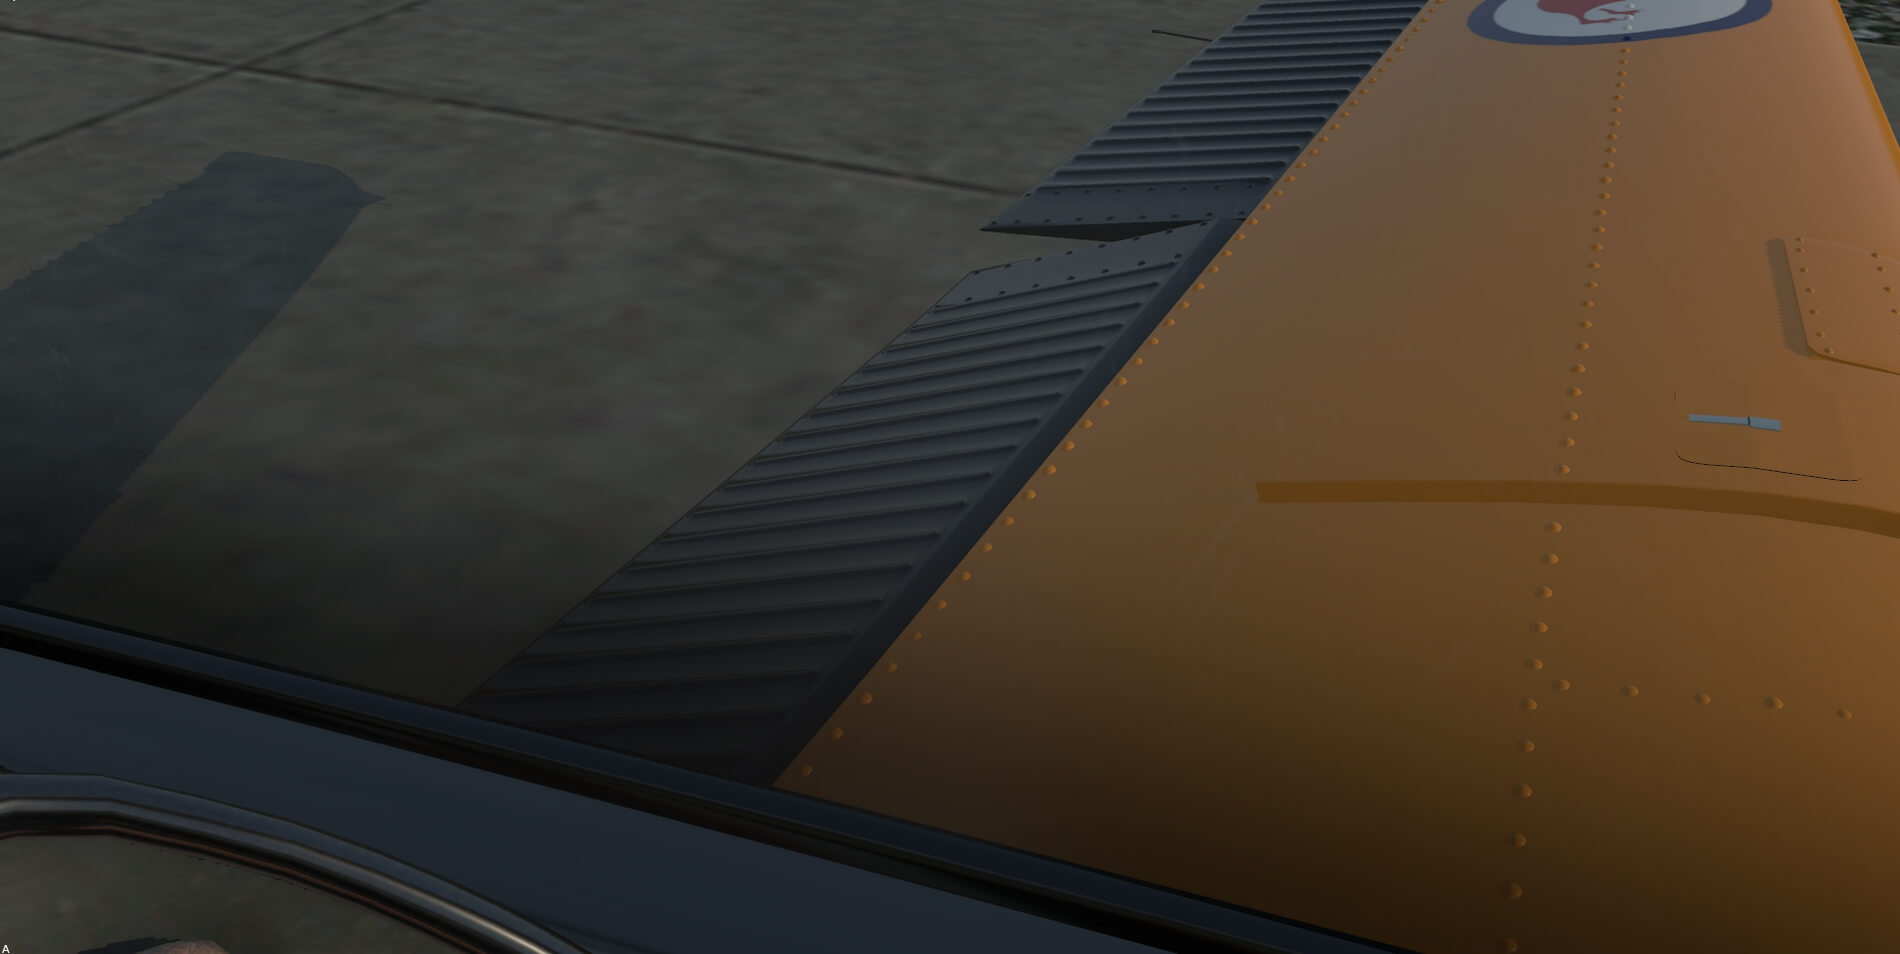
Looking at the engine cowling at the front of the fuselage gives the impression of gaps in the airframe. Again, looking at the real aircraft, the gaps provide the simulated reference to the opening of the engine covers. The only thing missing are the engine latches. Since the aircraft does not include the ability to open the engine cover, these were probably left off on purpose. The same goes for the fueling caps. There are non-simulated latches on each wing but nothing to tell you that the fuel filler caps are located there. Finally, the engine intakes and exhaust pipes look the same as in the real CT/4E. It should be noted that earlier models of the real CT-4 had intakes located to the side of the front engine cowling with triple exhaust pipes extending from the bottom.


Looking at the rear of the aircraft is where there is a minor issue as it relates to the aircraft model. The section of the fuselage where the tail sections come together on the frame is blocky and appears cutoff which causes the white strobe to appear large and out of place. I believe this has more to do with the model itself and it does stands out a bit when seated in the more colorful liveries. In the real aircraft, the transition to the end of the aircraft has a smaller taper as it approaches the tail light. This might be something that the developer may want to look at in the future.
There are no chocks, engine inlet covers, tiedowns, or static port and pitot tube covers modeled with the aircraft. The additional eye-candy would provide more immersion, however, there are other well-done models that also do not provide these types of items so I don’t view it as a negative. Ultimately, it boils down to what the user feels is important in their flight simulation experience.
The shadows and dynamic shine associated with daytime is excellent. Moving about the aircraft you can see that a lot of effort went into the physic-based rendering and dynamic lighting to provide a realistic representation of the aircraft in all kinds of lighting conditions.
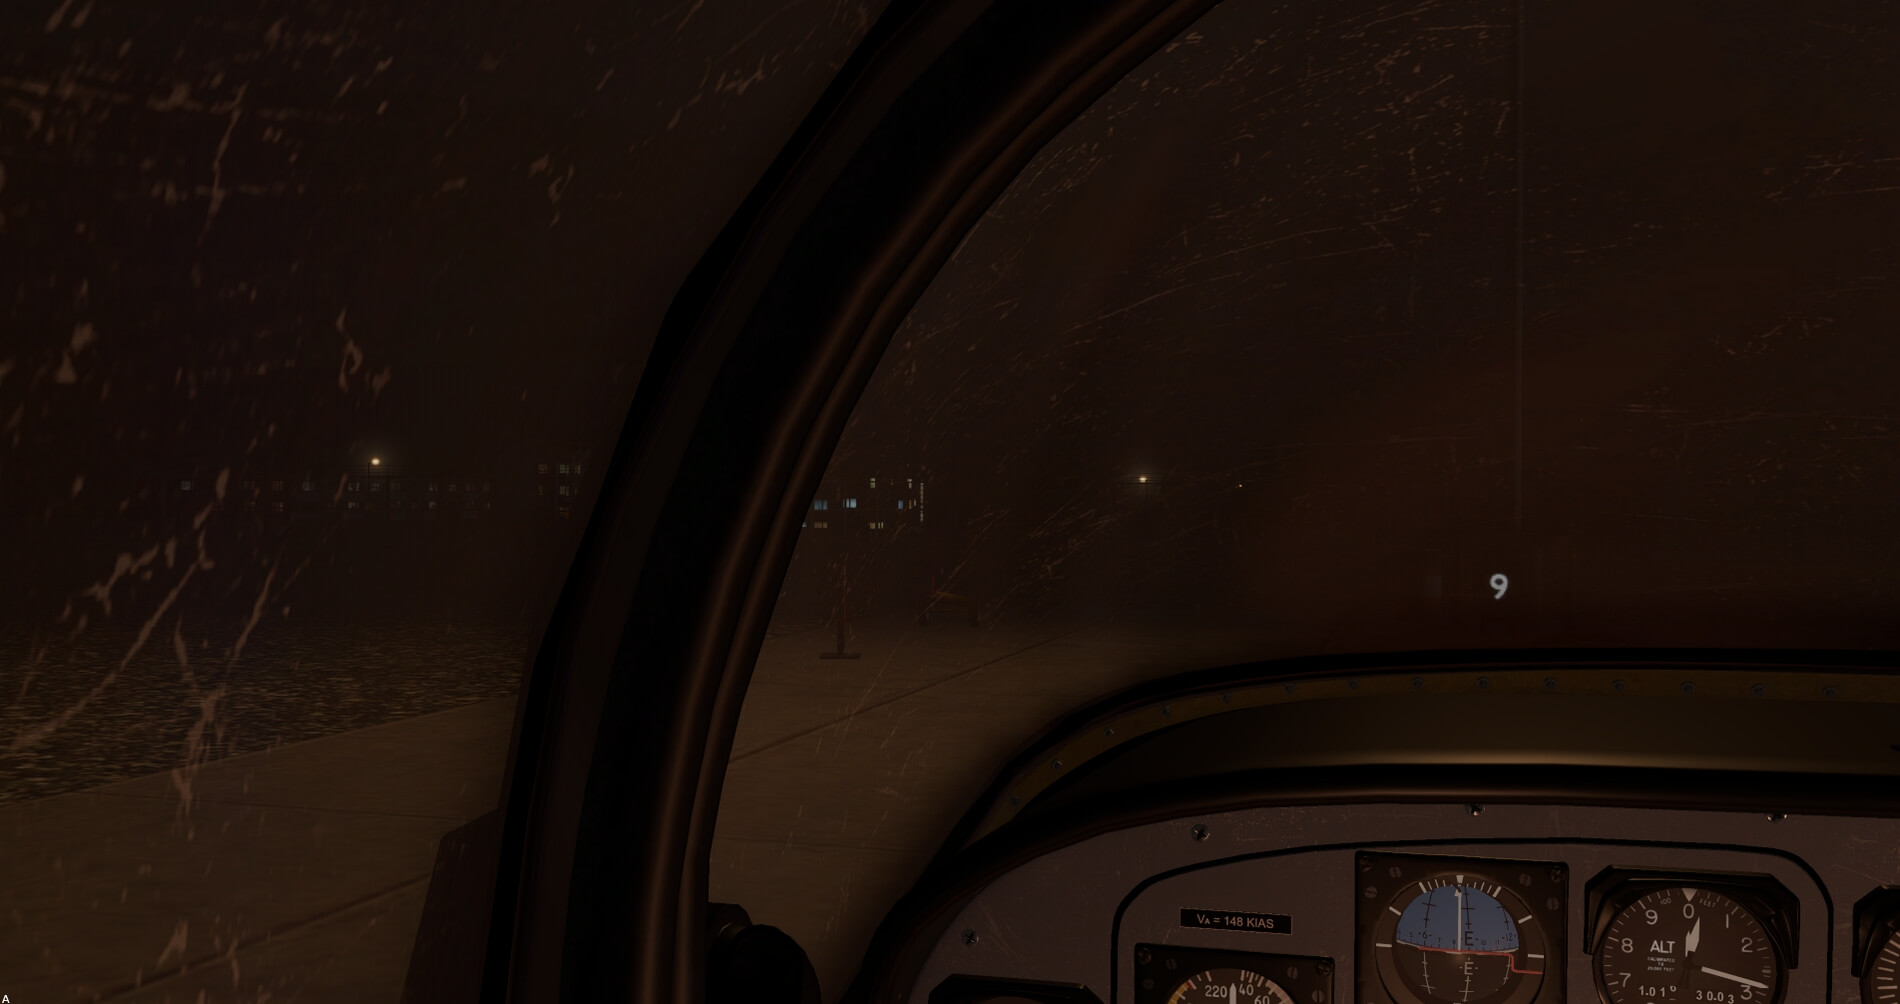
The transition from daytime to nighttime and the movement of the shadows is excellent. The canopy glass is a work of art as you can see scratches and small blemishes on the glass itself. The canopy movement is impressive. It does not open and close quickly like you see in other models. The canopy simulates the use of pneumatic resistance and you can see the actuators at work slowing the canopy movement down while opening and closing it. The canopy locking mechanism also provides the external and internal indications of a locked canopy just as the real aircraft does.
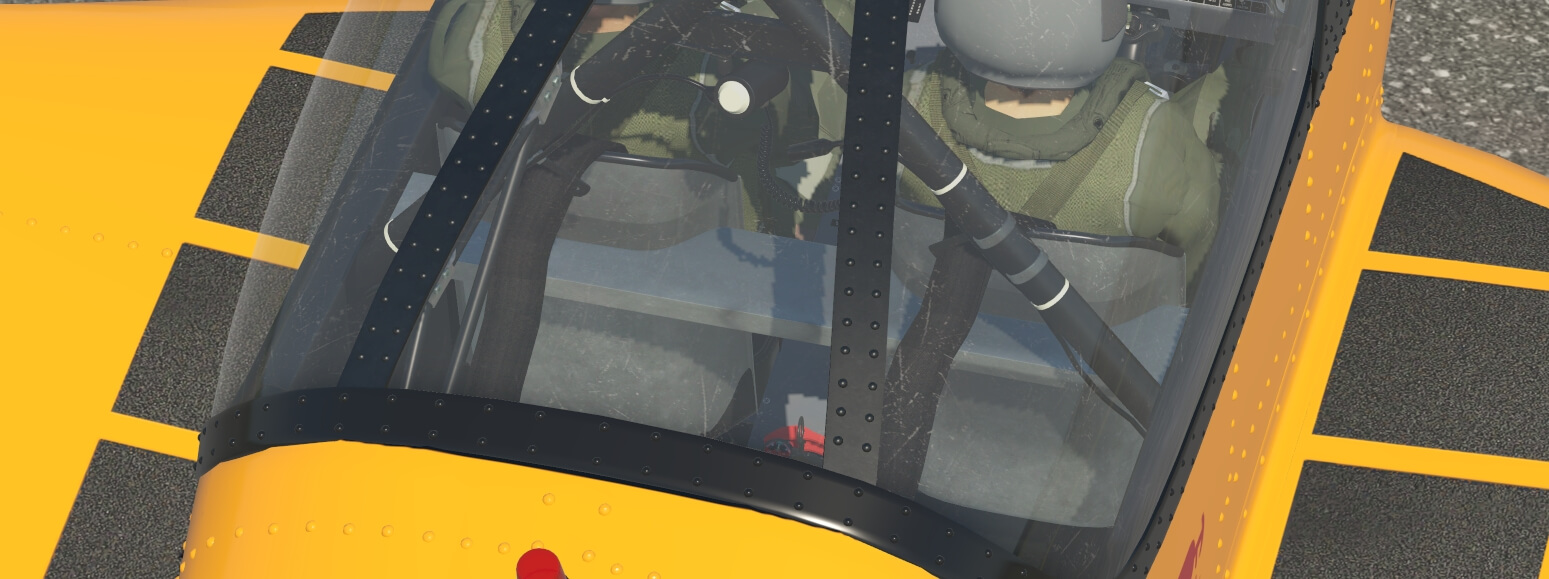


There are very good detailed pilots modeled with the aircraft. The glow of the instruments at night on the pilots is represented very well. Even the left-seat pilot is shown with their hands on the flight controls and throttle which both move as you move those controls. Impressive. Additionally, the ability to show one or two pilots is based on the payload weight of the aircraft and this is detailed in the documentation. By using the Payload Weight slider located in the Edit Weight and Balance submenu under the Flight Menu in X-Plane, you can add an additional 176.4 lbs (80 kg) of payload to the existing load which will make the second pilot visible.
In summary, the exterior of the aircraft, in my humble opinion, is very well done. The decals and text are clean and legible and you can tell that a lot of time and hard work went into making the exterior a true representation of this well-respected and beloved military trainer. The aircraft lines are very clean and the dynamic shine, graphics rendering and shadows are excellent. I especially appreciate that VSKYLABS acknowledges in their documentation that while there may be some noticeable differences between the simulated CT/4E and the real Airtrainer, they have worked tirelessly to bring these differences simulation and the real-world to a minimum and within reasonable margins, and it shows.
Interior Modelling
The interior of the aircraft is special. The care taken to truly represent the aircraft interior, day or night, is remarkable. As previously mentioned, the canopy glass shows the results of wear and tear over time and the canopy tint designed to reduce the glare from the sun into the cockpit works as it should. The instrument and side panels show scratches and wear and the knobs on both Garmin systems show their age. Portions of the seats also show some wear and fading.

Not all areas show wear and tear, however. For example, the center pedestal area between the flap section down to the fire bottle is very clean. The rudder pedals and “no step” control linkage and flight controls are also very clean. Some of you may feel that this takes away from the aircraft model, but again, I believe it is personal preference. To me, these minor nuances do not take away from the overall excellent interior modelling.
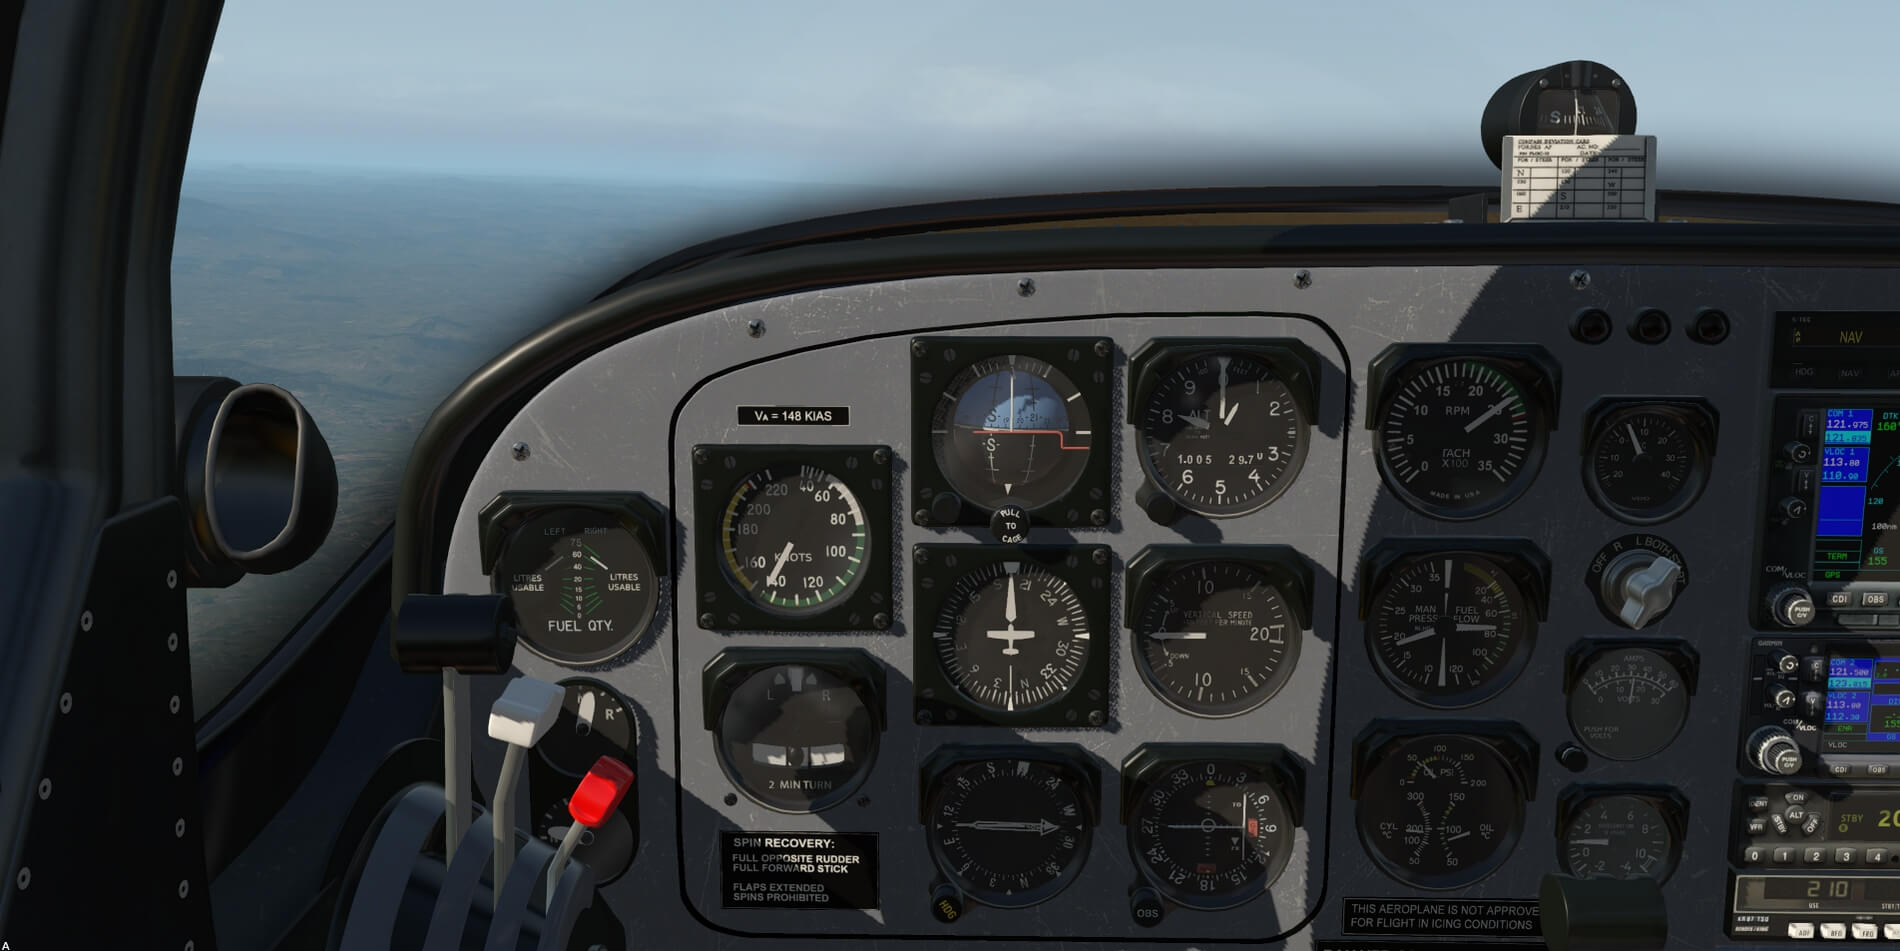
Other interior textures complement the aircraft and are very true to life. The various placards in the interior are clear and crisp and the instrument gauges are readable in both day and night conditions. There are reflections on the instrument glass as well. At night, turning up the interior cockpit lighting can cause increased glare reflecting in both the instrument panel glass and canopy. Adjusting the lighting to comfortable levels reduces the glare just like a pilot would adjust lighting at night. This is very well simulated. The instrument gauges are also backlit and dimmable.


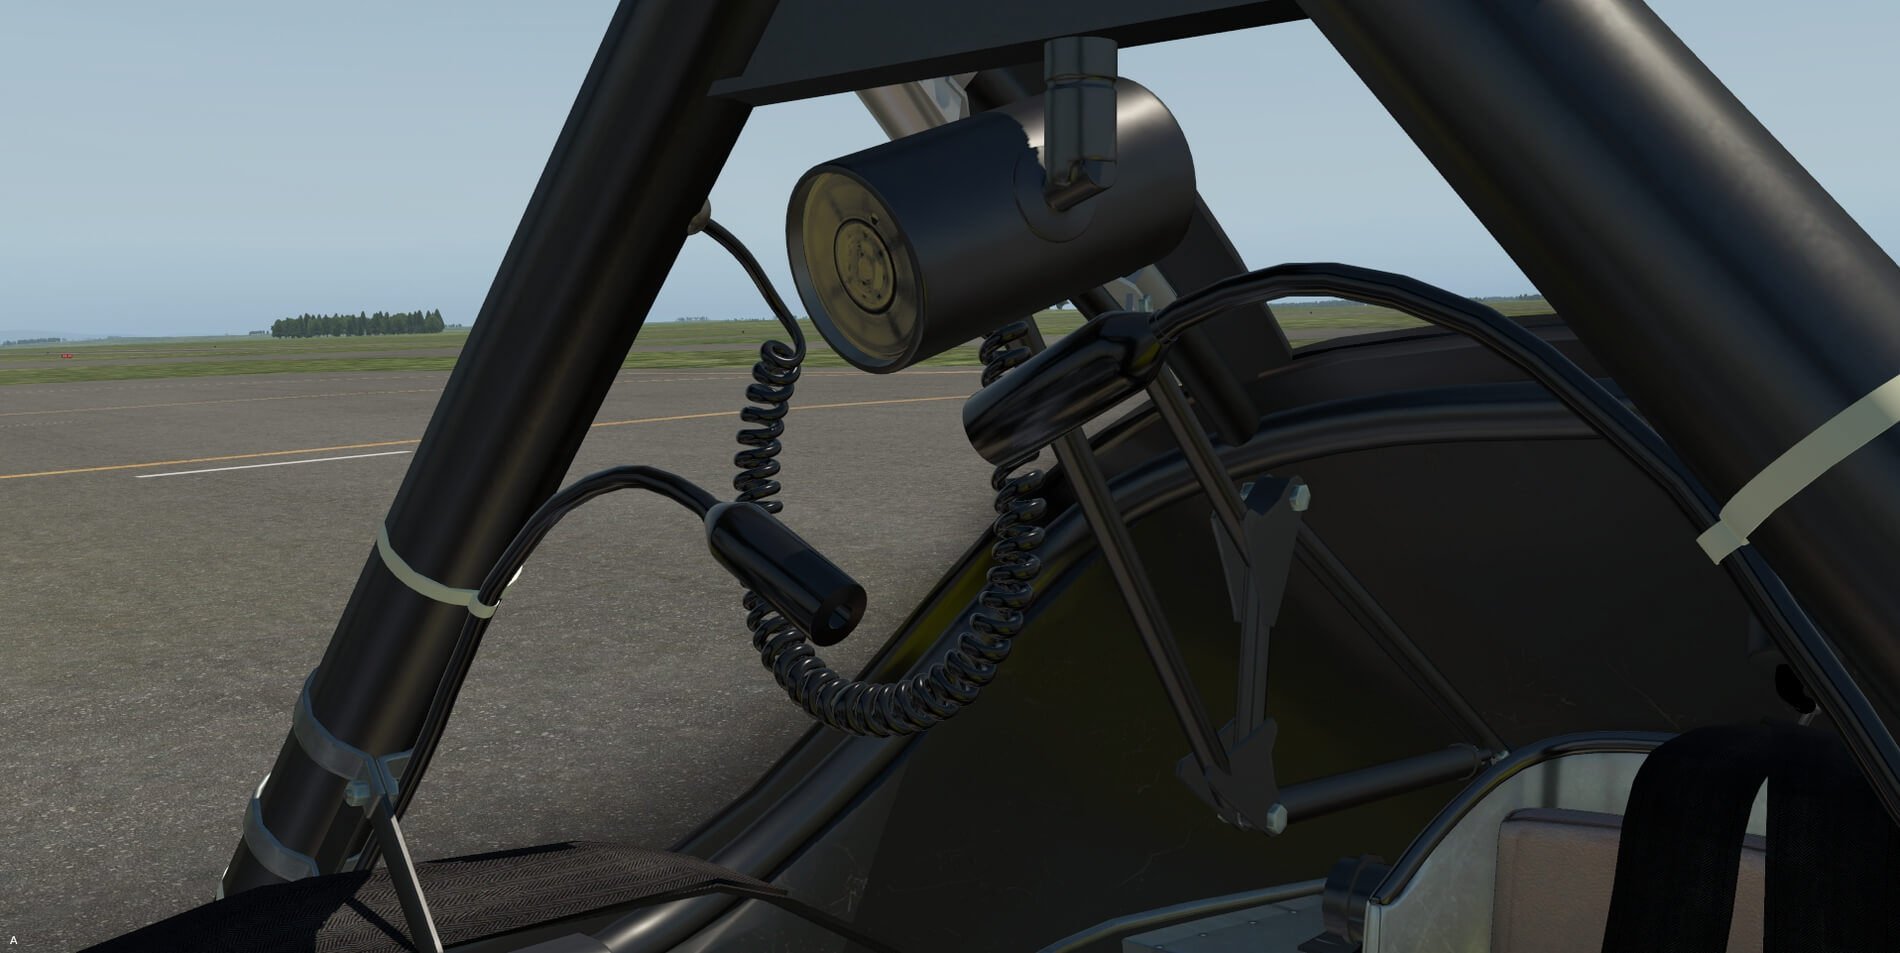
Just above and behind the pilot seats is a Utility (Wander) Light that activates the white aviation flashlight used in X-Plane, simulating the real wander light that is used in the aircraft. Just below the utility light is what appears to be two gooseneck lights. Those are actually the flight helmet microphone jacks. That would be a cool easter egg in the future to see the externally modeled pilots plugged in to the radio system via the jacks. Maybe in the future.
The real-world CT/4E Airtrainer has the ability to include a small cargo area or an additional third seat behind the pilot seats. The VSKYLABS model comes with the additional third seat which adds to the aircraft realism. An additional occupant is not shown; however, the seat is a nice, authentic touch. And if you were wondering about the thick gray bar behind the seats that extends from one side of the interior to the other, that is actually the aircraft’s cross-beam.


Overall, the interior of the aircraft does mimic its real-world counterpart and is visually appealing. While not all parts of the interior exhibit wear and tear, the overall feeling inside of the cockpit is of a good, well-worn aircraft that is just ready to go. The textures used with the placards and instrumentation are very clean, crisp, and easy to read both during the day and at night. I really like the view from the cockpit when looking at the areas outside the aircraft. The cockpit visibility is very sharp and you get a sense of scale as your look at the world outside. This is especially important for formation and acrobatic flying. VSKYLABS has done a great job in capturing the interior look and feel of the real aircraft and it shows.

Sound
The sounds in the aircraft are good using a multilayer FMOD sound pack. The various whines, thumps, and clicks are representative of what is heard in the aircraft. For example, when clicking on the Master Switch to bring the aircraft to life, you hear the slow pitched whine of the cooling fans and other equipment powering up. When turning off the master switch, the same gear spool down slowly and not instantaneously which is really nice.
Other sounds are heard through the aircraft such as the fuel on/off valve, the various switches at the front of the aircraft, and the start of the engines. With the engines started you do get the 3D sound effect as you move your view around the aircraft. The reduction of sound when the canopy is closed is also represented in aircraft.
The engine sounds are good for the aircraft. Inside the cockpit, the engines sounds are a little loud and sound different than what I had previously listened to watching videos of the aircraft. However, the engines outside of the aircraft sound much like the real-world aircraft. Overall, the sounds that come with the aircraft do complement the overall flying experience. Since, I have never seen or flown a CT/4E in real life, I can only gauge the sound quality from what I have heard via YouTube videos of the aircraft and I like what I hear.
Systems
The systems modeled with the aircraft is what truly makes the aircraft a joy to fly. The systems are very realistic with a couple of modifications present due to the limitations of the sim. However, those modifications do not diminish how the actual aircraft operates and you can tell that VSKYLABS took the time to really study the aircraft systems and functions.
For example, in the real aircraft, setting the parking brake is a two-step process involving the toe brakes and parking brake handle. This is recreated in the aircraft for those who use rudder pedals in their setups. For those that do not have rudder pedals, you can simply assign a “toggle brakes” function or click on one the rudder pedal touch zones to set the parking brake.
The aircraft’s instrumentation is also straightforward and replicates what is in the real aircraft. A couple of the modifications include the fuel system quantity gauge just showing the fuel amount in each tank in the model whereas the real-world CT/4E has a digital fuel monitoring system. The electrical system circuit breakers, while present, are not modeled. There are two harness lock levers located on either side of the cockpit that are functional, however, that function is designed to simulate the locking of the harness before flight.

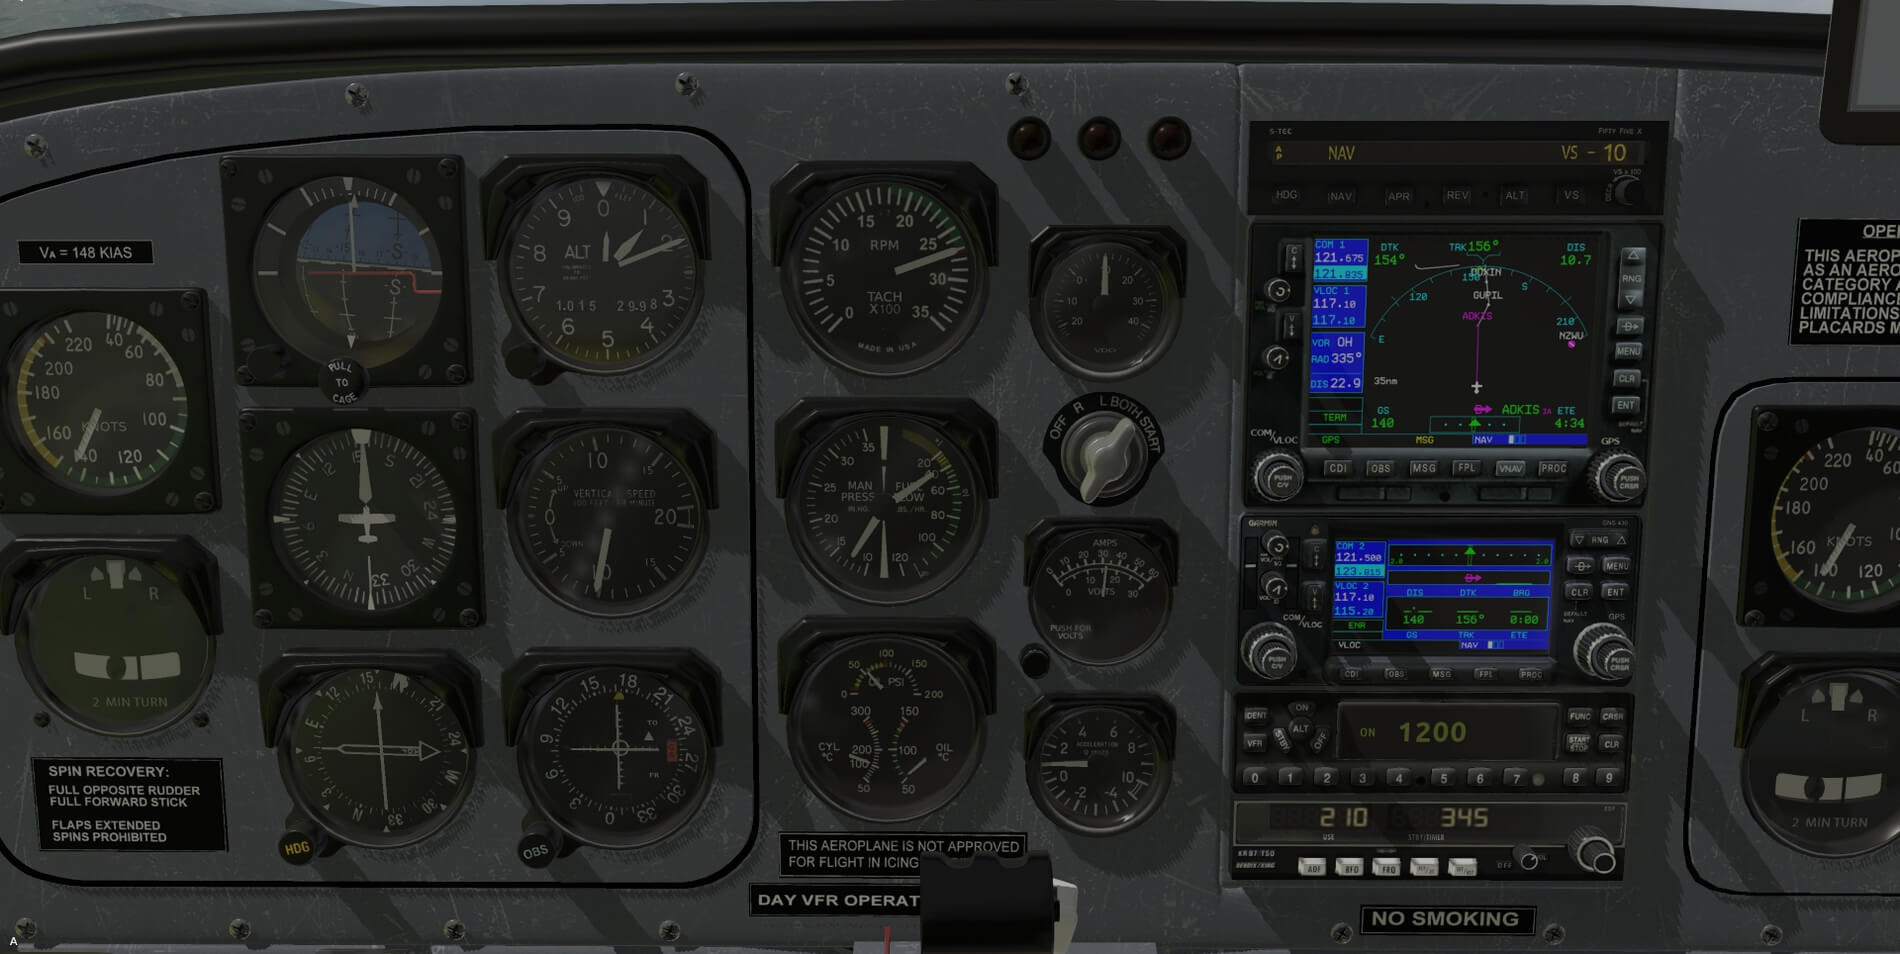
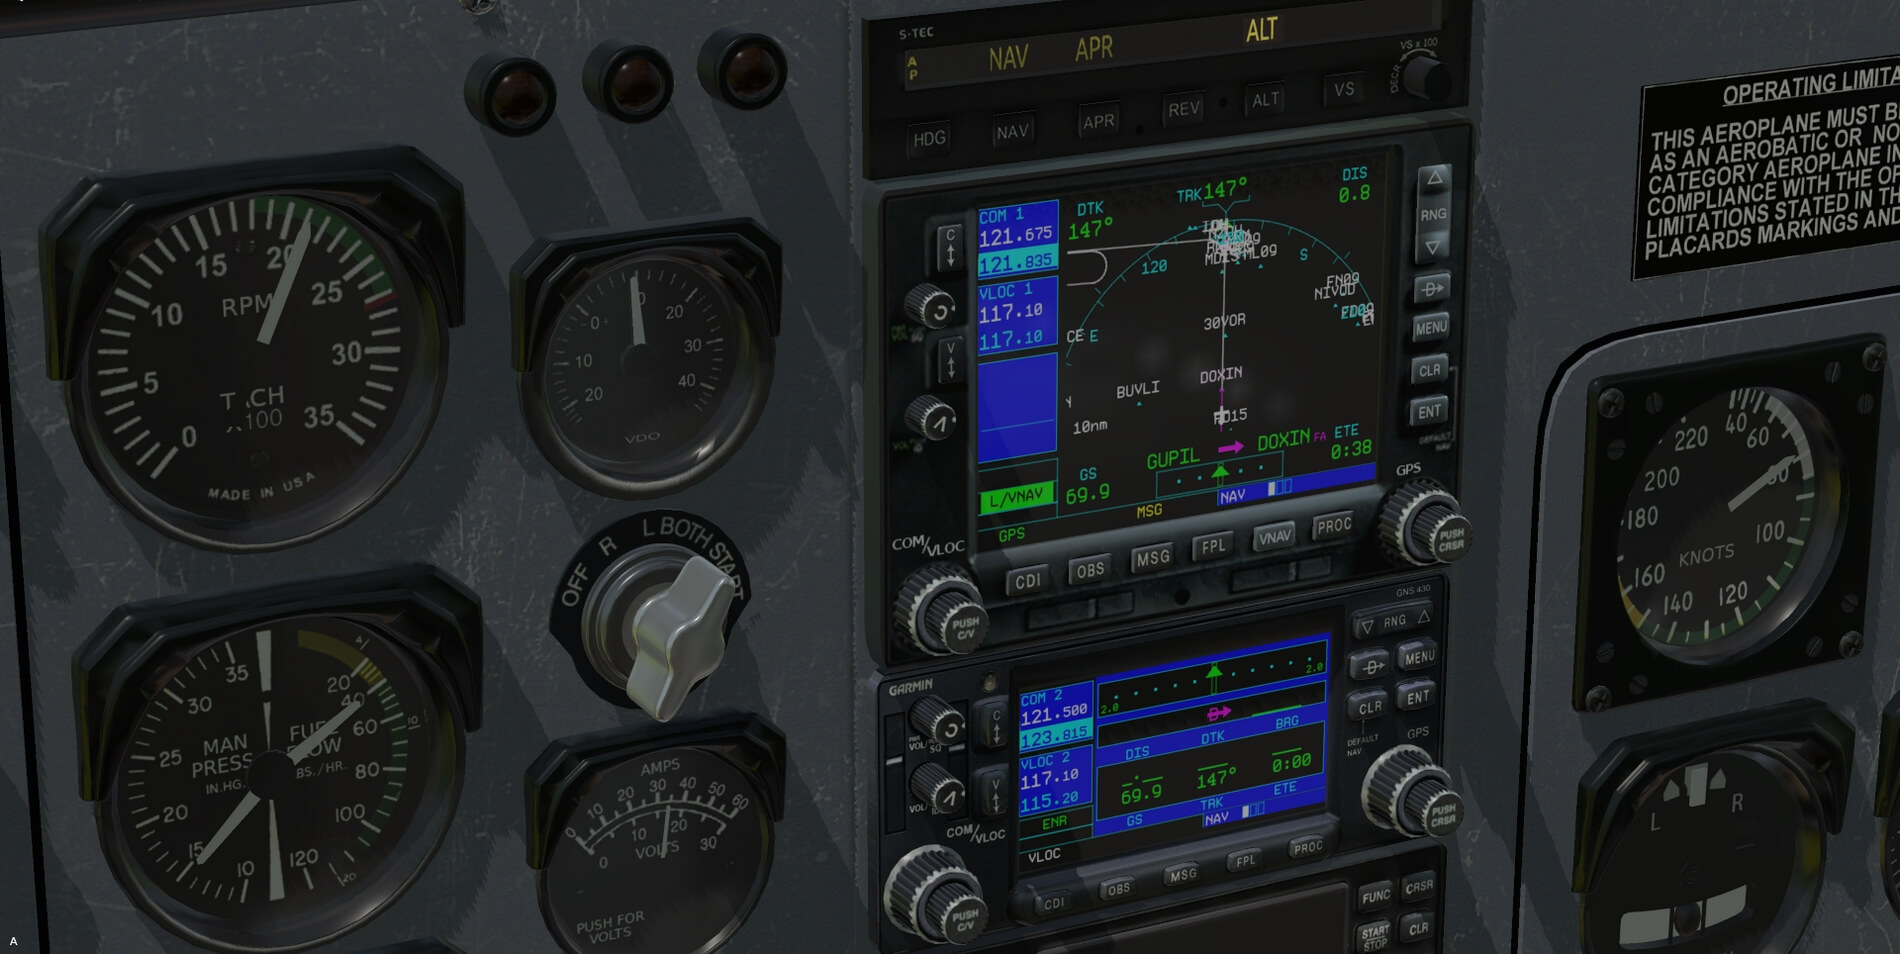
The avionics suite consists of the default X-Plane simulated S-TEC 55 Autopilot and the Garmin GNS 530 and GNS430 GPS/Nav/Comm systems. In the real-world, GPS-based navigation systems and upgraded autopilot systems were starting to be installed into the aircraft to replace the old communication and navigation equipment. The systems work as they should and there were no issues when using the equipment. I was able to create flight plans, execute VNAV descents, and conduct both precision and nonprecision approaches using the systems with no issues.
For those wondering, the RealityXP GTN 750 also worked with the aircraft with no problems observed. Be forewarned that there is no function to replace the default X-Plane systems equipment in the instrument panel with the GTN. Thus, using the GTN will be via its popup window. VSKYLABS has indicated that the CT/4 future development road map includes an additional variant equipped with the Garmin G1000 avionics suite.
The aircraft also integrates the popular AviTab plugin. The AviTab plugin is not part of the CT/4E installation and must be downloaded separately. The AviTab tablet can be installed or removed via the vacuum-hold touch zone located at the lower right corner of the canopy. A hardware assignment can also be assigned to install or remove the tablet.


Many features related to hardware control inputs and aircraft systems testing have been modeled in the aircraft. For example, the Run-up Checklist contained in the documentation works as advertised and there are other small procedural items that work correctly, thereby enhancing the realism even more. The documentation does an excellent job in explaining the data references, control inputs, and special key assignments that can be used with the aircraft. I will explain more in a moment.
Additionally, the documentation also provides information along with graphics examples for those who fly using VR headsets. The graphics show the VR interaction zones along with identifiers for each zone. It is important to note that the VSKYLABS CT/4E was designed for full VR experience. VSKYLABS commented that VR flight-testing the aircraft was one of the most exciting moments in developing the aircraft. I must note that I do not own a VR headset so I am unable to test and review this functionality.
One system that is very important to understand is the aircraft’s trim system. It is key in learning to fly the aircraft. In the real CT/4, the hat switches on top of the control stick are activating pitch and rudder trims (unlike other aircraft that activates pitch and aileron trims…usually…). There are a few You Tube videos of the real aircraft where you see the usage of the trim system in flight. Check out Dib Destiny’s CT/4E training videos while going through flight training with the Royal Thailand Air Force.
The documentation does a great job in explaining how to use the trim system and how to set up your controls. If you are looking for that “real as it gets” feeling, then ensuring you have a proper trim system setup is critical to favorably flying the aircraft. I set up the aircraft’s trim functions using my secondary HAT switch on my X52 Pro controller and with the help of Huss from VSKYLABS, I was able very quickly understand the nuances with the trim system and fly the aircraft properly.
VSKYLABS has developed a model that definitely takes advantage of what the experimental side of X-Plane has to offer. All of the systems worked as advertised, including the system tests that appear to be modelled after the real CT/4E. The trim system works as advertised and the avionics performed with no issues. I even followed along with a You Tube video CT/4E preflight check and I could mimic all of the functions shown along with receiving the appropriate equipment feedback. Very impressive!
Basic Flight Experience
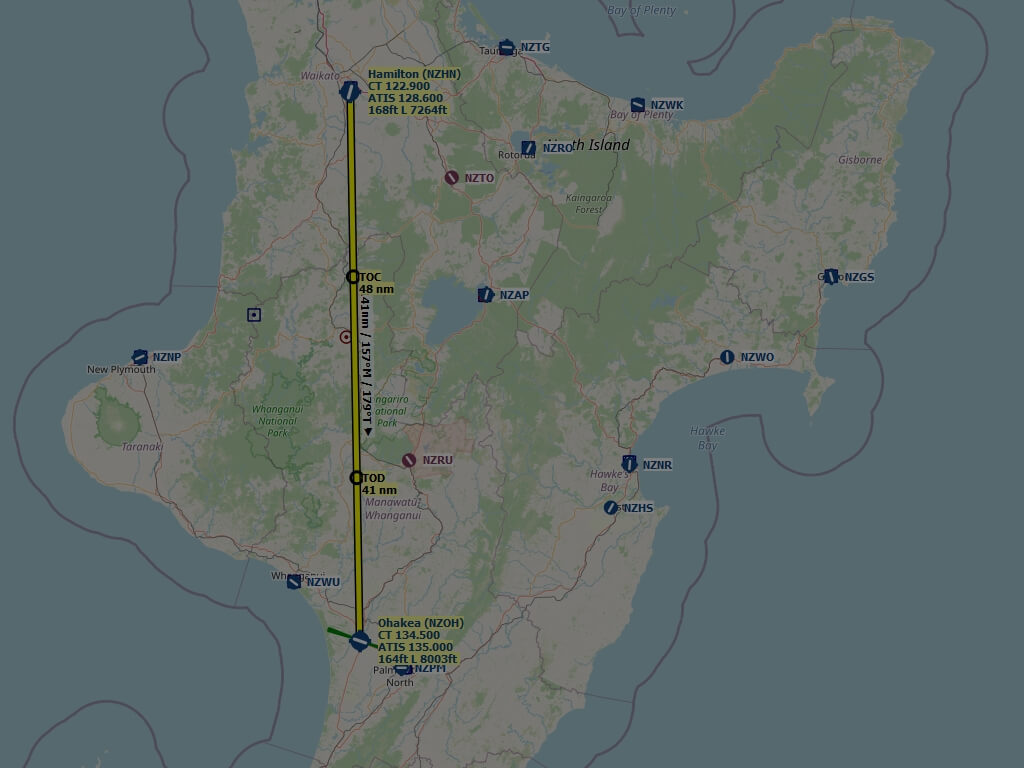
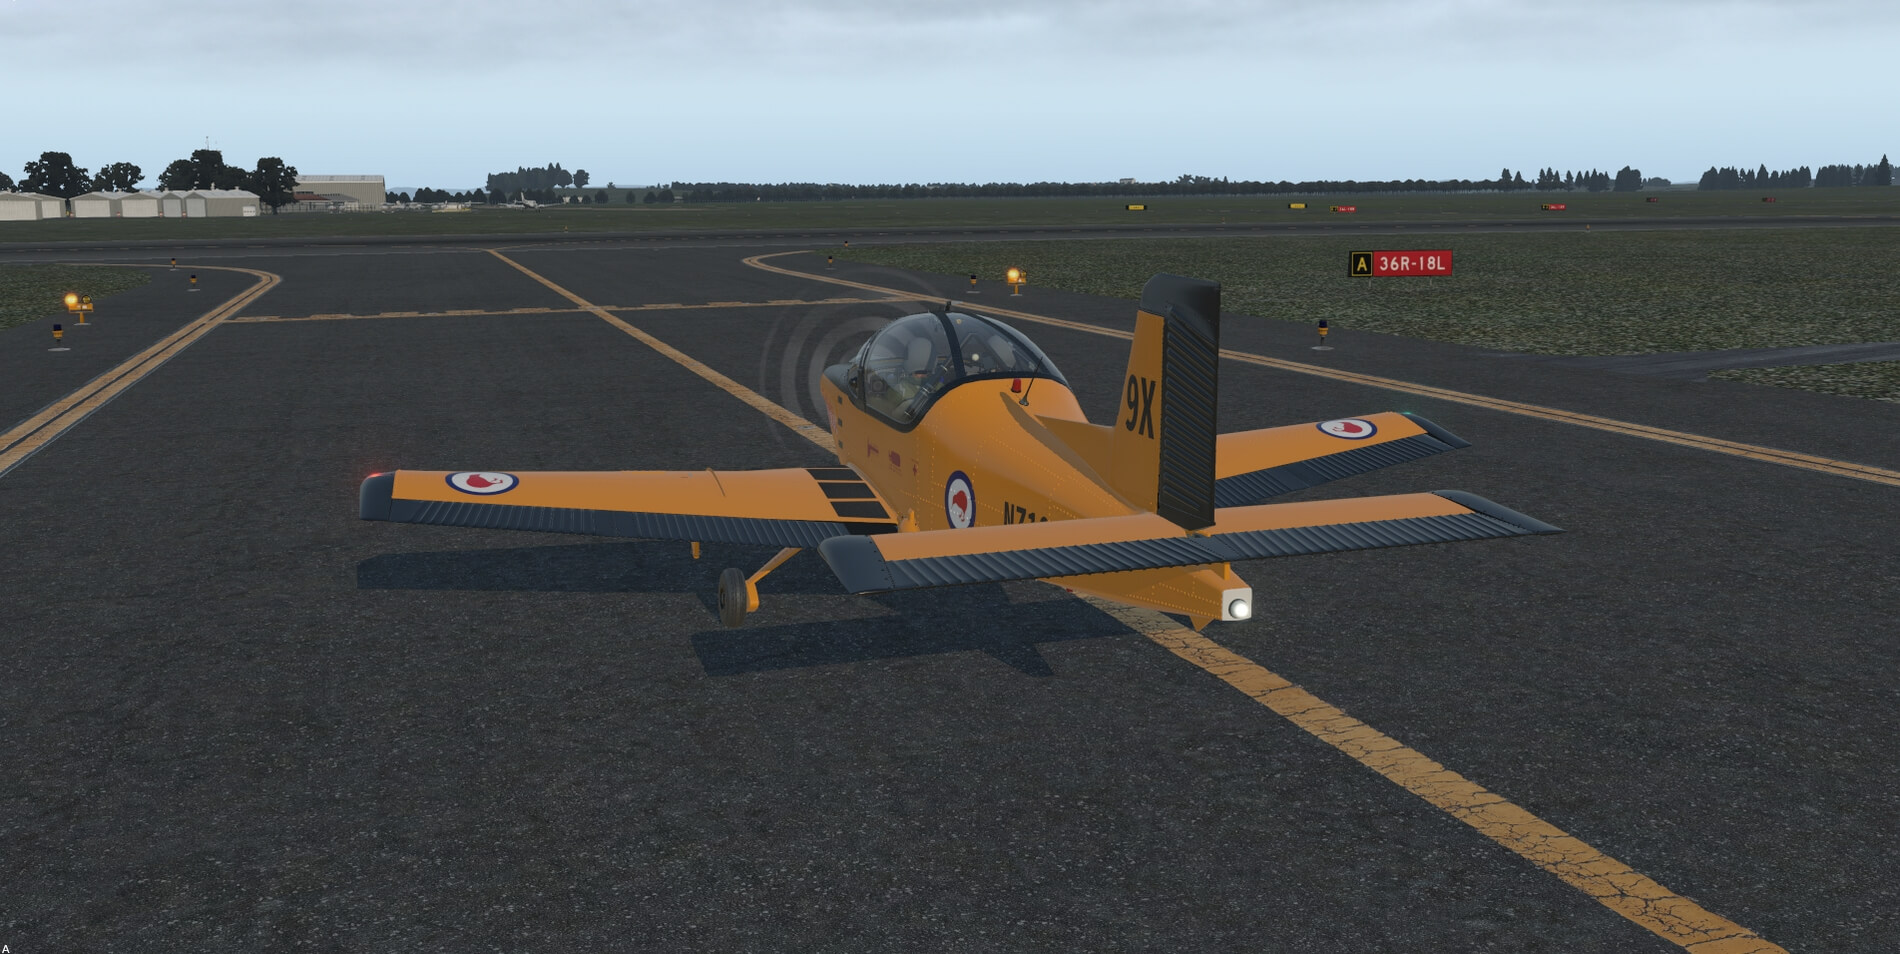
I decided to recreate a flight from Hamilton Airport in New Zealand (NZHN), home of Pacific Aerospace, to RNZAF Base Ohakea (NZOH) which is the home of the former Pilot Training Squadron (now No. 14 Squadron). The flight leg distance is approximately 150nm. I also did the flight in VFR conditions as, unfortunately, my flight placard only allows day VFR conditions only. Not to fret though, the aircraft is equipped and approved to fly both IFR and night operations. Since the aircraft is in the RNZAF Red Checkers livery, however, day time would be appropriate.
I used the default avionics to set my flight plan and approach parameters and then followed the checklist that is provided in the documentation. Fuel and payload are loaded using the default X-Plane weight and balance dialogue. The maximum takeoff and landing weight is 2,600 lbs (1180 kgs), and the maximum fuel capacity appears to be 150 liters (330 lbs).
Having completed all of the proper weight and balance paperwork, I commenced my preflight, before start checks. I click on the master switch and start to hear the whine of the cooling fans and other instruments. I finish up the before start checklist and I am now ready to start the engines. I follow the steps in the Engine Start checklist and the aircraft starts to comes to life. I make sure I am at 1,200 rpms and observe the OIL/P light go out. I continue with the checklist, turning on the avionics and then testing the flaps.


I set up my flight plan, choosing 8,000 feet as my cruise altitude. Avionics all set, it is time to taxi out and get airborne. The winds are favoring Runway 18 at Hamilton. It does not have a full-length parallel taxiway, so a back-taxi will be needed. I completed the runup checks per the checklist and advised ATC that I am ready to taxi. I complete the before takeoff checklist at the hold short making sure that the trims are set per the documentation. Per ATC, I then proceed to the approach end of Runway 18 in preparation for takeoff.
I start the takeoff run and start to lift the nose at 60 KIAS. The aircraft responds and starts to rotate. The aircraft can be a little slippery on its takeoff run so I make sure that once airborne, I adjust the trim, keeping the aircraft stable. I then activate that autopilot passing 1,000 feet and continue up to my cruise altitude of 8,000 feet. Once level, I adjust my speed so that I am cruising at 145 KIAS.


Since the aircraft is also aerobatic, I tried my hand at a couple of the maneuvers that are listed in the documentation. Just some quick fun before settling back for my flight. The aircraft handles aerobatics with ease and I can see why the CT/4E was used by the RNZAF Red Checkers from as far back as 1980 until 2015.


The only item that I seemed to have trouble with was the manifold pressure. While the manual advises to set to 23.0 ins Hg manifold pressure, I consistently hovered between 15-20 ins Hg with the propeller set to 2,500 RPM in order to maintain 145 KIAS while in cruise. Also, be forewarned, like any other light aircraft, it is susceptible to turbulence so be careful.

I start to get things ready for descent into Ohakea (NZOH). The manual recommends descent between 67 and 147 KIAS. Using the VNAV feature in the X-Plane default GNS 530, I plan a gentle 1.000 fpm descent toward ADKIS which is one of the initial approach fixes for the RNAV (GNSS) Runway 15 Approach. I start my descent with the plan to be at ADKIS by 2,500 feet.

I activate the approach to Runway 15 and continue descent to 1,500 feet with the plan to be level and in landing configuration by 2 nm from DOXIN, the final approach fix for the RNAV Runway 14 approach. I get the aircraft into its final landing configuration and begin descent at DOXIN. The recommended final approach speed is 75 KIAS while on final.

Crossing the threshold, I slow to 70 KIAS and gently touchdown on the runway, though I was lined up a little left of centerline. Oh well, at least I landed safely. I clear the runway and taxi back to the apron area and then shutdown. I was glad to arrive just in time as a thunderstorm was starting to build up near the airport.

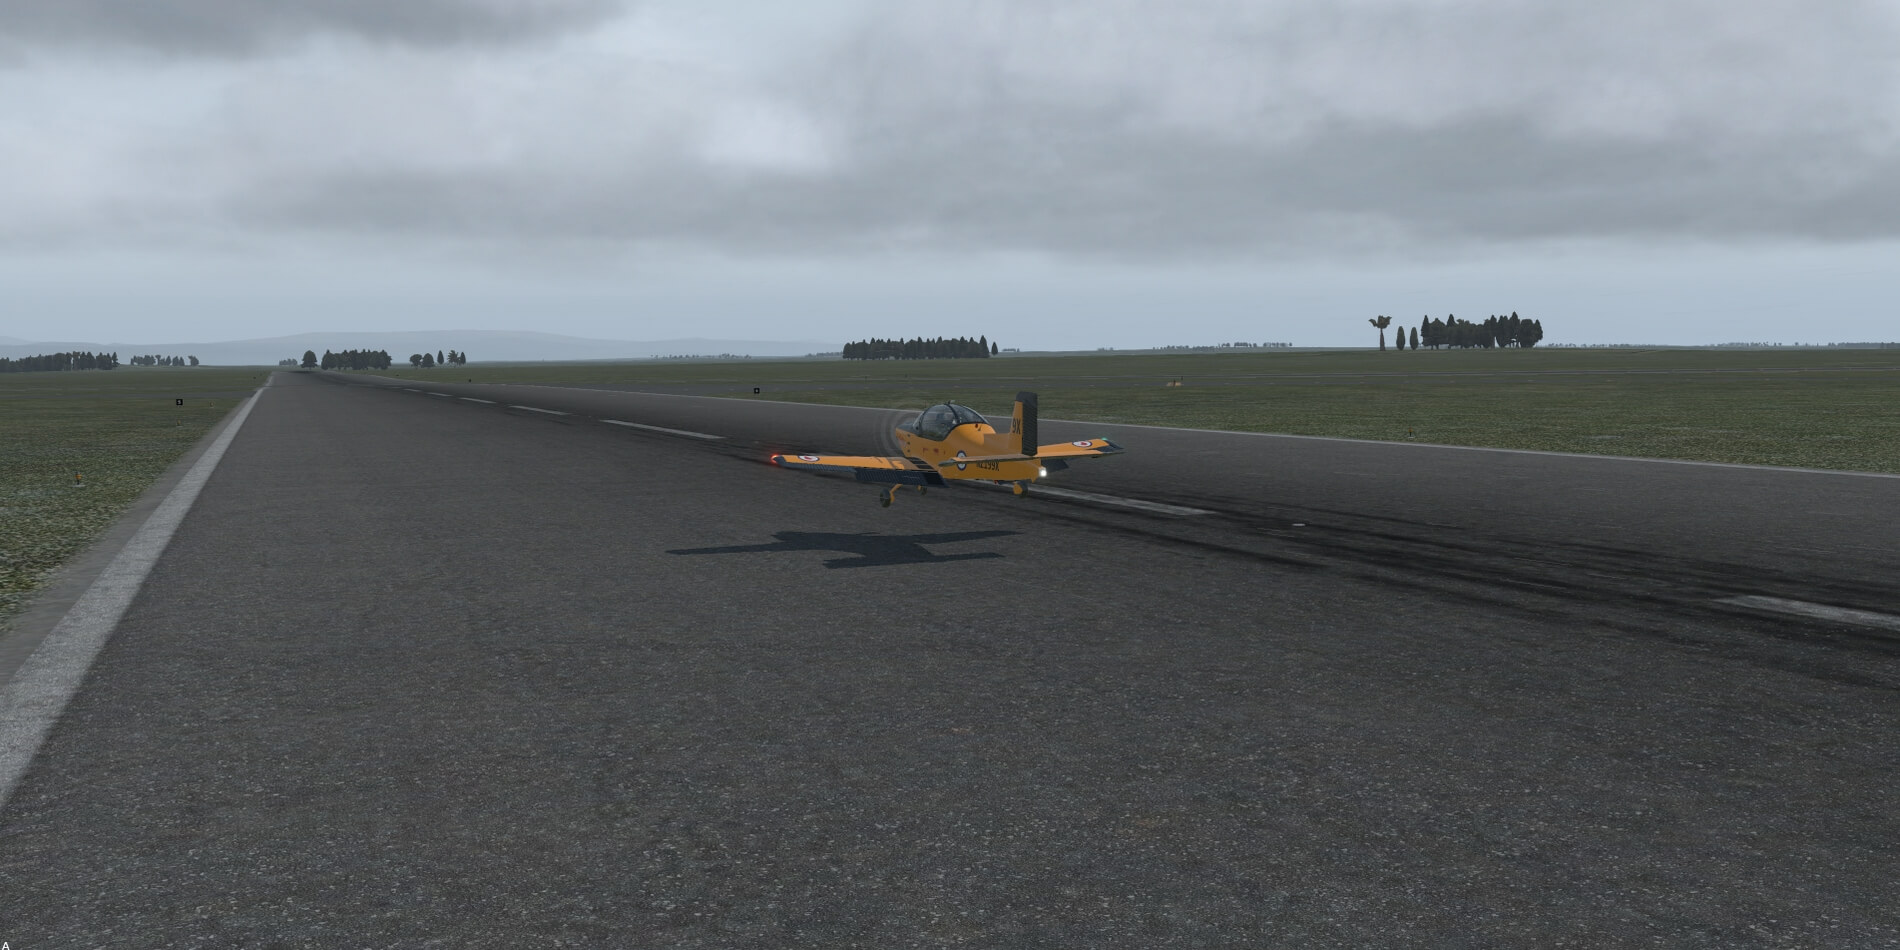
I thoroughly enjoyed the flight. Using the real-world procedures and operations was a challenge. The aircraft handled the RNAV approach as designed and once I disconnected the autopilot at the DA, I still had to make sure that I adjusted the trims appropriately just like in the real aircraft and then land. The engine torque is evident so the aircraft can weave if over controlled via the rudder. However, once you get a couple of flights under your belt, you will be pleasantly surprised by the handling.

Summary
VSKYLABS development approach has always been focused on aircraft performance and handling qualities, and thorough flight dynamics development processes. The aircraft they develop are designed to work in X-Plane’s native experimental environment, without the reliance on any 3rd party dependencies (such as external coding and plugins). This is a core feature of all VSKYLABS aircraft. Each and every project is the result of hundreds and thousands of working hours of research, engineering and development effort and it shows with the PAC CT4/E Airtrainer.
The installation is straight forward and the aircraft comes with three liveries representing the branches of the military that predominately used the aircraft. The documentation is short and sweet and is a must read in order to fully enjoy the aircraft. While not tested, the aircraft is fully VR-capable and the documentation outlines using VR to its full ability.
The aircraft exterior modeling is very well done though the lights seem a little large for the aircraft. While the fueling latches could have been identified, it did not take away from the beauty of the exterior model. The decals and paint are very clean and crisp and truly represents the real CT/4E. The interior modeling is exceptional and really makes the aircraft special. The view from the cockpit is very sharp and the sense of scale is very realistic. The sounds overall are good and appear to be mostly representative of the real aircraft.
The aircraft systems and the overall flight model are realistic based on my research and observation of real-world flights of the CT/4E via You Tube. The systems are modeled as designed and the default X-Plane avionics, as well as the RealityXP GTN 750, worked flawlessly. Flying the aircraft is also fun and I had no frame rate issues. Taxiing the aircraft can be a little challenging, but ensuring that my flight sim hardware was properly calibrated and adjusted to work with the PAC CT/4E helped to overcome the issues I was having.
Finally, the “highly responsive VSKYLABS support” was there. I received immediate responses to all of the questions that I asked, and was even helped through a software issue not related to the aircraft that was impacting my ability to update the model. Huss helped me until the resolution was found and the problem resolved. I am a very big stickler when it comes to customer service and I am very impressed with the support that VSKYLABS provided me while testing the aircraft.
I recognize that every person that is involved in this hobby looks at an add-on aircraft based on what their own personal requirements and expectations. For me, the aircraft has proven to be a worthy addition to my hangar as it provides me with a good challenge while also allowing me to have fun. I am also very appreciative of the hard work that Huss and his team has put into the model and it definitely shows with their systems programming and their beautiful exterior and interior modeling.
More information can be found at X-Plane.Org Store. The current developer’s price is $32.95 USD and the aircraft does go on sale from time to time.
Feel free to contact me if you’ve got additional questions related to this impression. You can reach me via email Angelique.van.Campen@gmail.com or to Angelique@X-Plained.com.
With Greetings,
Todd C.
| Add-on: | Freeware / Payware VSKYLABS CT/4E Airtrainer |
|---|---|
| Publisher | Developer: | X-Plane.Org | VSkyLabs |
| Description: | Realistic rendition of the PAC CT/4E Airtrainer |
| Software Source / Size: | Download / Approximately 367MB (unzipped) |
| Reviewed by: | Todd C. |
| Published: | January 7th 2022 |
| Hardware specifications: | - 3.6 GHz Intel Core i7-9700K - NVIDIA RTX 2080 8 GB GDDR66 - 32 GB 3200 MHz DDR4 RAM - Samsung SSD 860 EVO 2TB - Saitek Pro Flight System X-52 Pro - Razer Tartarus Chroma |
| Software specifications: | - Windows 10 - X-Plane 11.5x (64 Bit), Private Use - A variety of freeware and payware aircraft and plugins |
0 Comments