Fairey’s Great West Aerodrome to London Heathrow
Who doesn’t know EGLL?
Perhaps this ICAO code alone doesn’t mean much to some people, but when I say London Heathrow, then you recognise it immediately. Heathrow is not just a regular large airport, it is also huge and it comes with so many terminals, runways (only two to be exactly), an extensive taxiway system, cargo and maintenance areas and lots of other interesting aspects.
To review Aerosoft’s London Heathrow for X-Plane 11, I must split the modelled airport into several sections otherwise you and I will be lost before we know it! When you think about it, it is very strange for such a big airport to have only two runways – 27L/09R and 27R/09L – but five terminals which are even divided into “A” and “B”. Then you’ll find the maintenance area on one side of the airport near the runways 27R/27L. Half way along runway 27L/09R and just to its south, there’s the cargo area and, north of runway 27R/09L, the hotels, car rental operations and offices are situated.
All of this is packed together in a relatively small area. Nice challenge! Oops, I almost forgot all the taxiways that link the runways, terminals etc together.

If you want to find out all the ins and outs of the real EGLL, it’s the best to visit the NATS Aeronautical Information Service website. There are large numbers of useful charts on this site including aircraft diagrams and SIDS and STARS and ILS approaches, as well as a helpful airport diagram. Good, time to pick up the virtual EGLL and have a look at it!
Complex Installation?
No, no … not really.
You first need to download the installer which is by the way version 1.10 as of this writing February 2019 (AS_AIRPORT-LONDON-HEATHROW_XPLANE11.zip). I got it from X-Plane.Org, but you can also buy it and download it from Aerosoft.
Although I’m reviewing the product with macOS Mojave, the unzipped package is the same for other platforms thus for Windows and I assume for Linux too. The package comes with 2 unzipped folders namely:
– Aerosoft – EGLL Airport London-Heathrow
– _DefaultStreets London-Heathrow
According to the included manual page 13; “for this scenery to be shown correctly it has to be above any other scenery you have installed for the same area, and in the following order:
– SCENERY_PACK Custom Scenery/_defaultStreets London-Heathrow/
– SCENERY_PACK Custom Scenery/Aerosoft – EGLL Airport LondonHeathrow/”
That’s all. For those who are new to X-Plane and the way the scenery_pack.ini file works, copy and paste the 2 folders to the “Custom Scenery” folder in X-Plane, start X-Plane and once up and running, stop it. Sorry, I can’t help it that you need to check it this way. Then check if the two newly installed EGLL Aerosoft links are in the correct order of the scenery_pack.ini file. If not, change there order with, for example, a text editor.
When you prefer static airplanes, in case you like this above using World Traffic 3 or JARDesign X-Life, download their free “static aircraft” package. You can find it under following link. Note: that for the static airplanes the free library OpenSceneryX is required!
And last but not least, the Autogate or as Aerosoft names it the Safegates plugin. The EGLL manual covers this on page 14 with “In order to use the Safegates you need the free AutoGate Plug-in (Version 1.60). You can download it for free using this link After the installation of the AutoGate Plug-in you have to activate the matching dsf file in the scenery folder. To do so, you need to change into the directory „X-Plane\Custom Scenery\Aerosoft – EGLL Airport London-Heathrow\Earth nav data\+50-010\“ and rename the file „+51-001.safedock“ in „+51-001.dsf“. It is recommended to make a backup of the already active dsf file. Just rename the „+51-001.dsf“ in „+51-001.no_safedocks“ before you do the step above.”
Just a note; I believe that the current version of the Autogate plugin is not version 1.60, but version 1.72. More information can be found at the dedicated X-Plane.Org download page. As of this writing, February 2019, a newer plugin with a lot potential is available, namely SAM (Scenery Animation Manager). I’m not sure if SAM works with this updated EGLL. I assume it won’t, but SAM works with their other updated EDDF (Frankfurt Main International Airport).
It should be noted that the airport has been updated from X-Plane 10 to X-Plane 11, therefore the version number 1.1(0). I did review this X-Plane 10 airport a long time ago and wondering if something has been changed, renewed or improved. We’ll see when we move along the airport. Oner thing is for sure; there’s still no third runway!
Where and how to begin?
As I said, London Heathrow is big, very big, so let’s look at EGLL piece by piece.
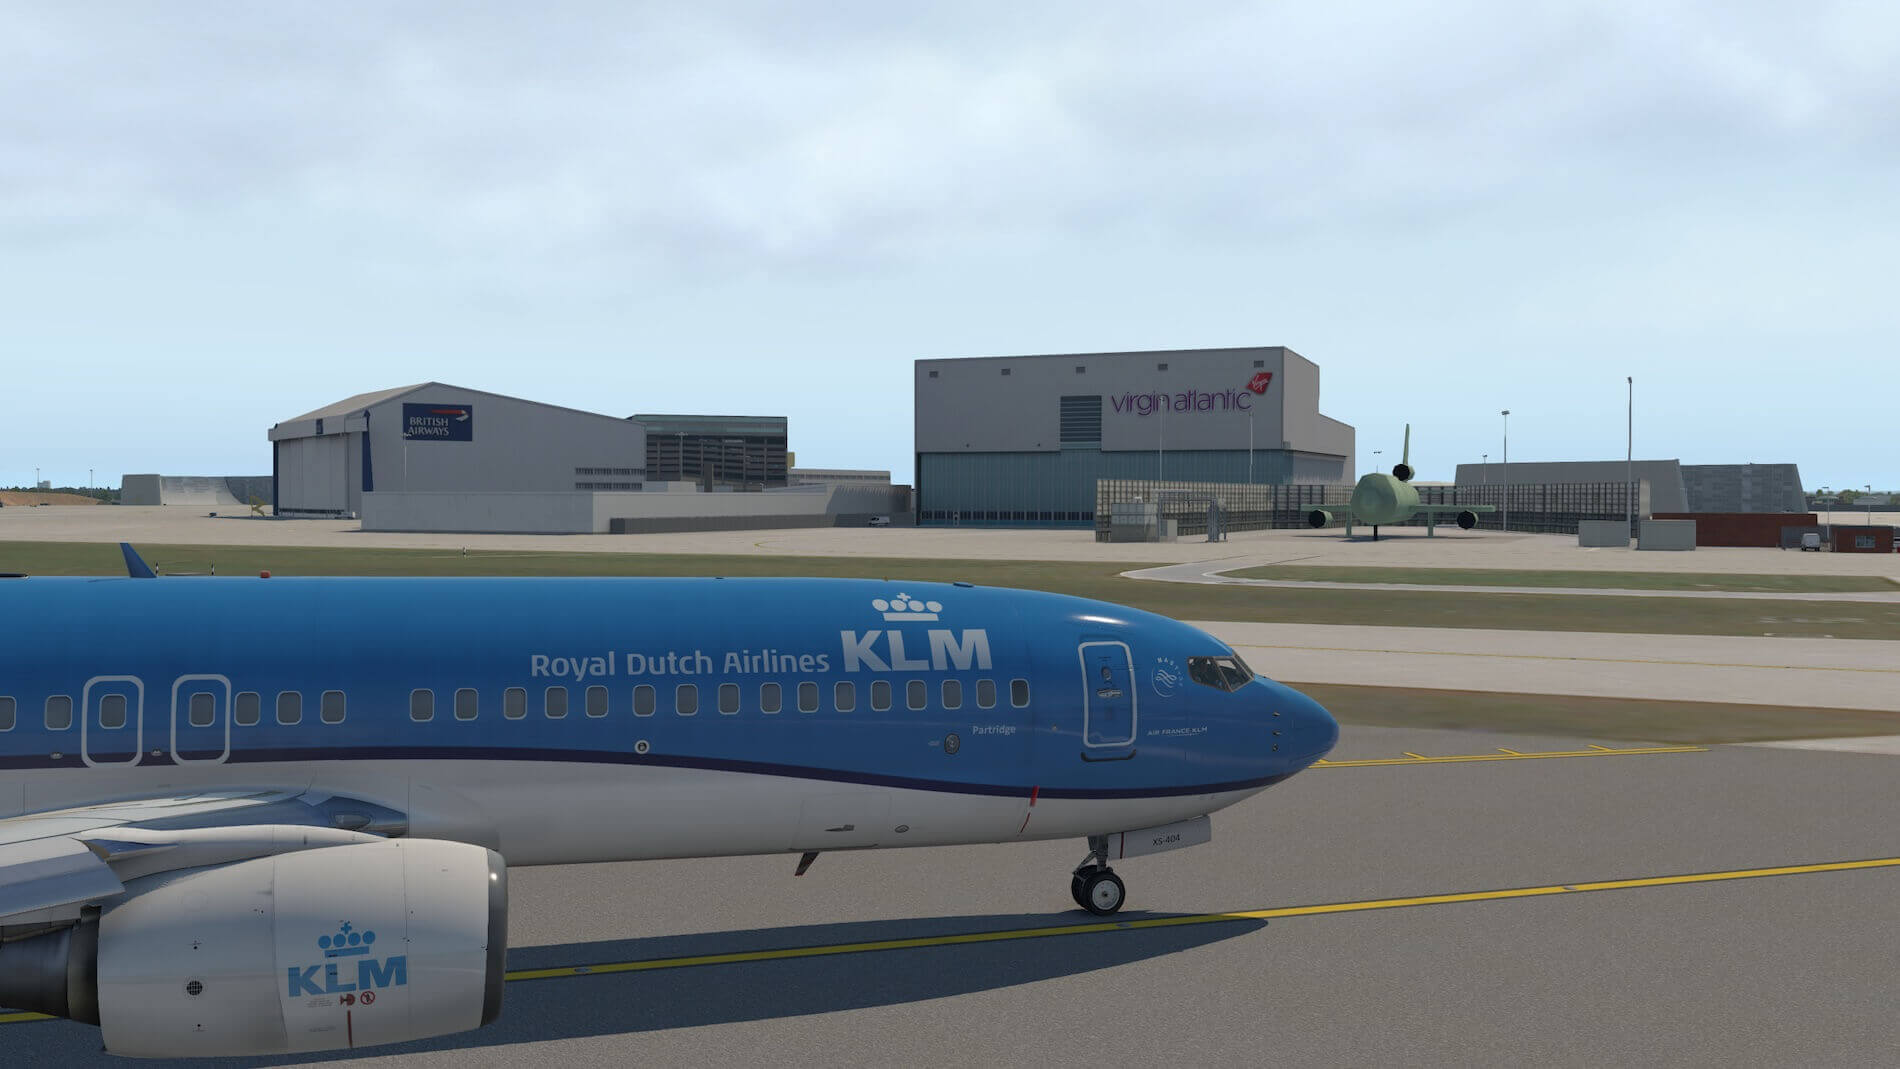
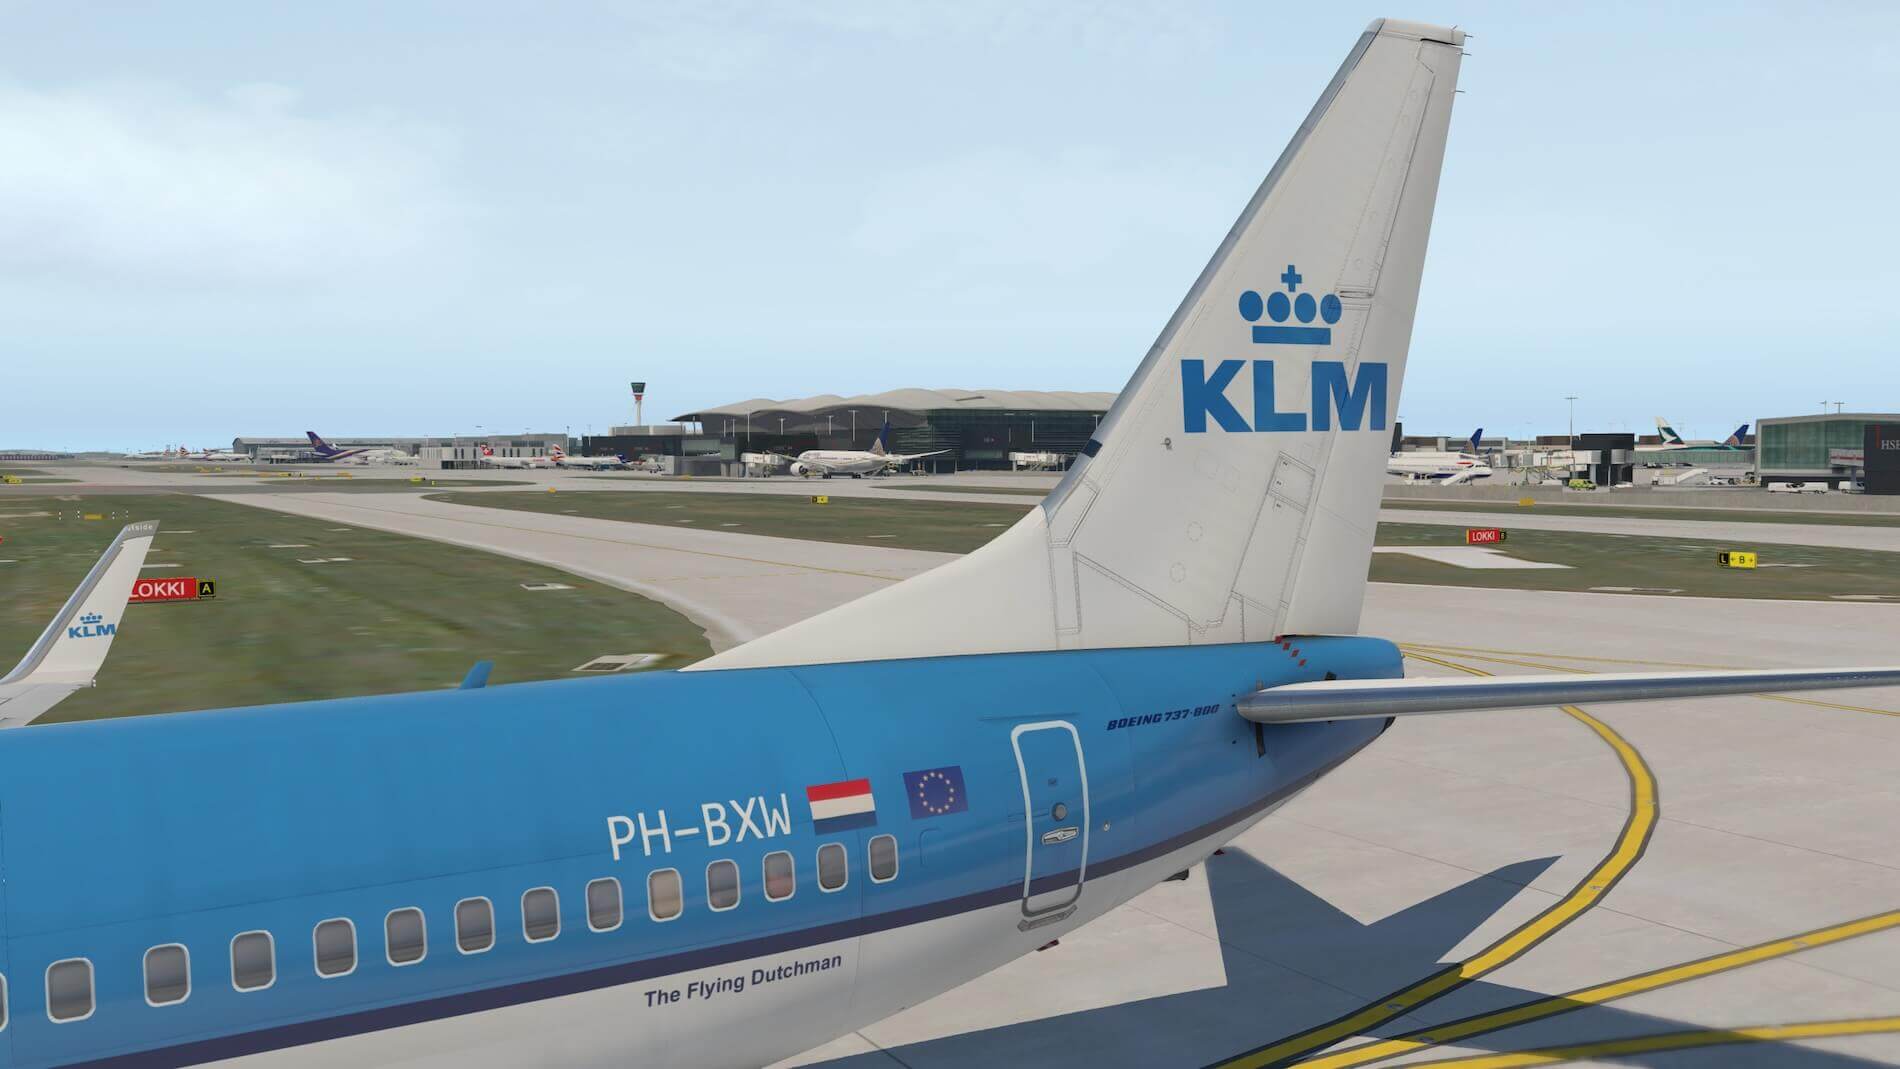
I’ll arrive from Amsterdam with KLM and land on – let’s make it easy for myself – runway 27R. The problem is then that I need to taxi to Terminal 4. Not a big distance from the runway, but the crossing of runway 27L could take some time. No, no, this really could take some time. I’ve faced it myself. A waiting time or holding time before crossing a runway can easily take up 10 to 15 minutes! Can you imagine? I couldn’t, therefore I’m highlighting it and perhaps I had bad luck that day and tiem of the day!
So yes, I encountered this during one of the many flights I made to EGLL for my employer while working at the NHS hospital in Frimley. Anyway, my airport investigation will start at Terminal 4, but hold on, while taxiing to this terminal, I’ll pass the maintenance area too, so a quick impression would be a good idea.
After Terminal 4 it’s time to check the cargo area and then, via taxiways S and Y, it’s my challenge to reach Terminal 5A, following 5B and 5C. I can tell you already that Terminal 5A will be quite impressive. In reality Terminal 5A looks great, but the modelled 5A is outstanding too, but more about that later.
After all the ins and outs of Terminal 5, it’s time to check out Terminal cluster 1, 2, and 3, with of course the unmistakable control tower at the end of north end of pier 7. Is this all then? No, there’s even more to discover. Remember there is the rental area, hotel and offices situated north of runway 27R/09L.
So, you’re still with me? Let me briefly highlight the steps to follow:
– Arriving for EGLL 27R
– Maintenance Area, situated east of taxiway L
– Terminal 4
– Cargo Area
– Terminals 5A, 5B and 5C
– Cluster terminals 1, 2 and 3
– Control Tower
– Car rental, hotels and offices north of runway 27R/09L.
Ok, let’s go ……
Arriving EGLL, with a landing on 27R. Approaching EGLL tells me that this is more than just an X-Plane 11 airport scenery because, as well as the presence of the orthophoto ground textures, the boundaries are stretched far out before you see them blending with the default X-Plane ground textures. I know, in case you would think this, having ortho textures included is quite normal these days with small, medium and large airports.
Anyway, when coming closer, you’ll see the massive modelled airport. And yes, the massive size and well modeled objects also result in possible lower frame rates compared to other large airports. This is either due to the “way” the developer made all objects and his/her skills to reduce the amount of objects and so on. So in other words, EGLL needs a lot of CPU and GPU power!
But what makes EGLL International Airport so special, seeing it from the air?
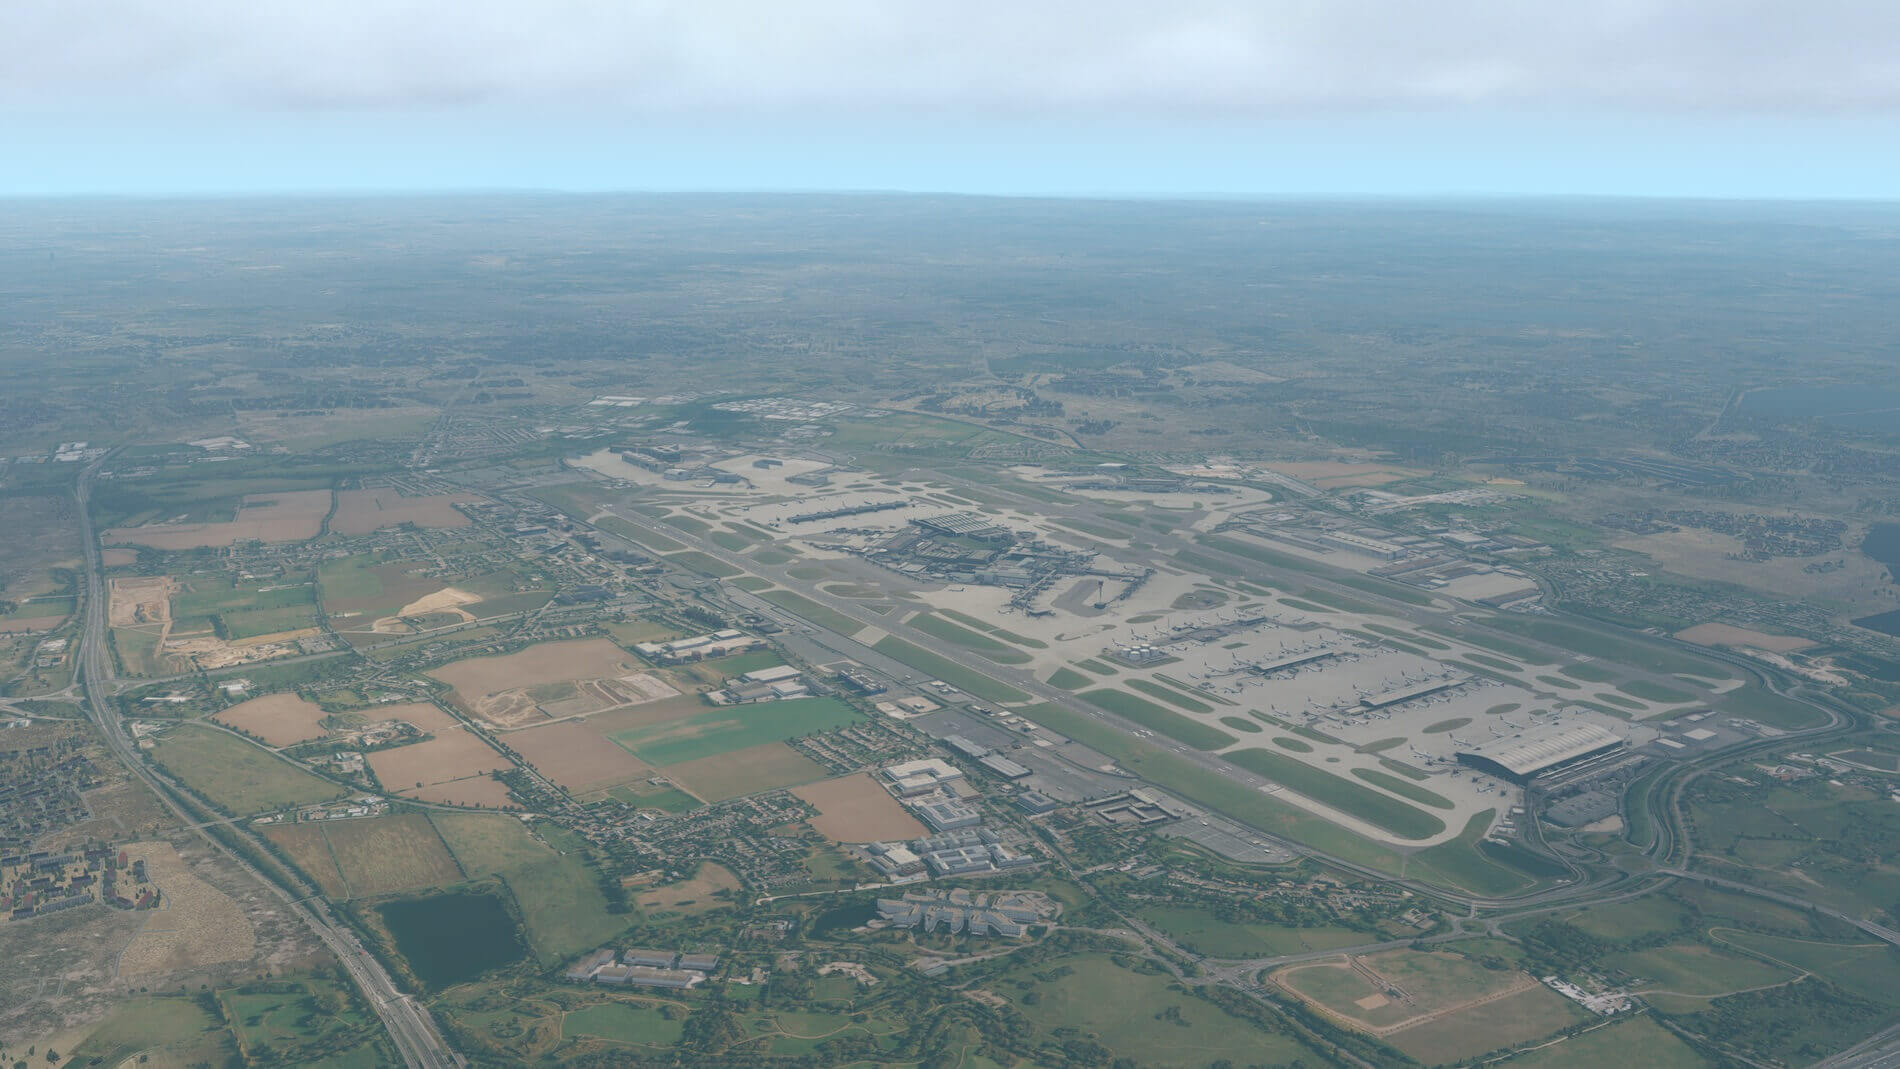


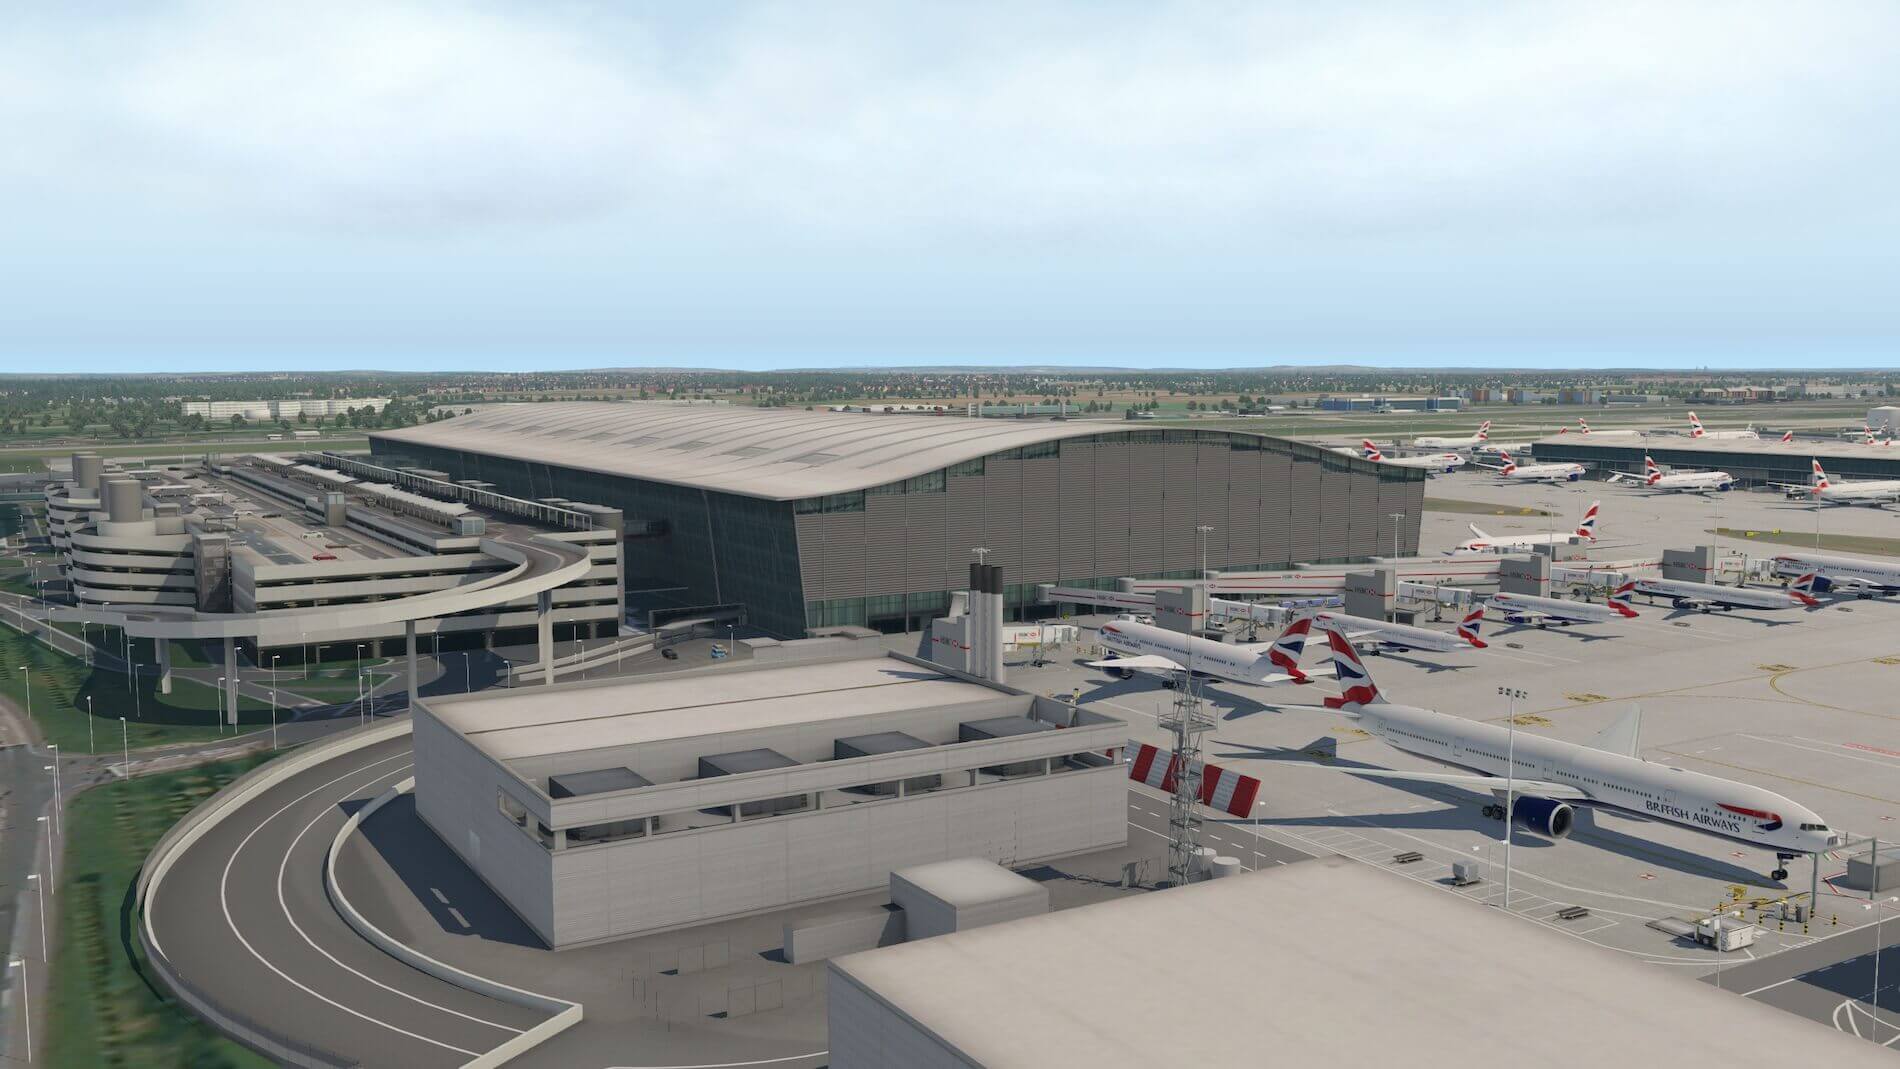
EGLL comes with many different terminals, some old and others modern and they are all packed together. The taxiways and surrounding tarmac looks realistic, as well as the taxiways, runways and road signs. The terminal cluster 1, 2 and 3 with their piers is a mess. Oops, I don’t mean that it is badly modeled! In reality it’s a collection of old and new buildings ‘messed’ together, with Terminal 2 being quite new and modern, but the overall look is very nice.
OK, back to my approach and what I all see. While picking up the ILS of runway 27R, and hovering outside the aircraft, EGLL looks almost a real as it gets. I’m impressed to be honest, but it must be said that you need to fiddle around a bit with your X-Plane rendering settings to get acceptable frame rates. While following the ILS glide slope path, I can already see on the left-hand side the maintenance area with the engine run up test facility and the four large hangars, one of which one is clearly marked British Airways.
In addition, the photoreal ortho ground textures, the large parking lots and the several roads within and outside the airport fences follow the OSM (OpenStreetMap) structure. Despite not yet being clearly visible, this airport clearly covers a huge area. You can – and yes this is perhaps recommended if you like – install the separate Aerosoft or MisterX static aircraft package, but I would suggest to go for either JARDesign X-Life or for World Traffic 3. When one of these real aircraft traffic packages is active, it gives the modeled EGLL the realistic look and feel is deserves.


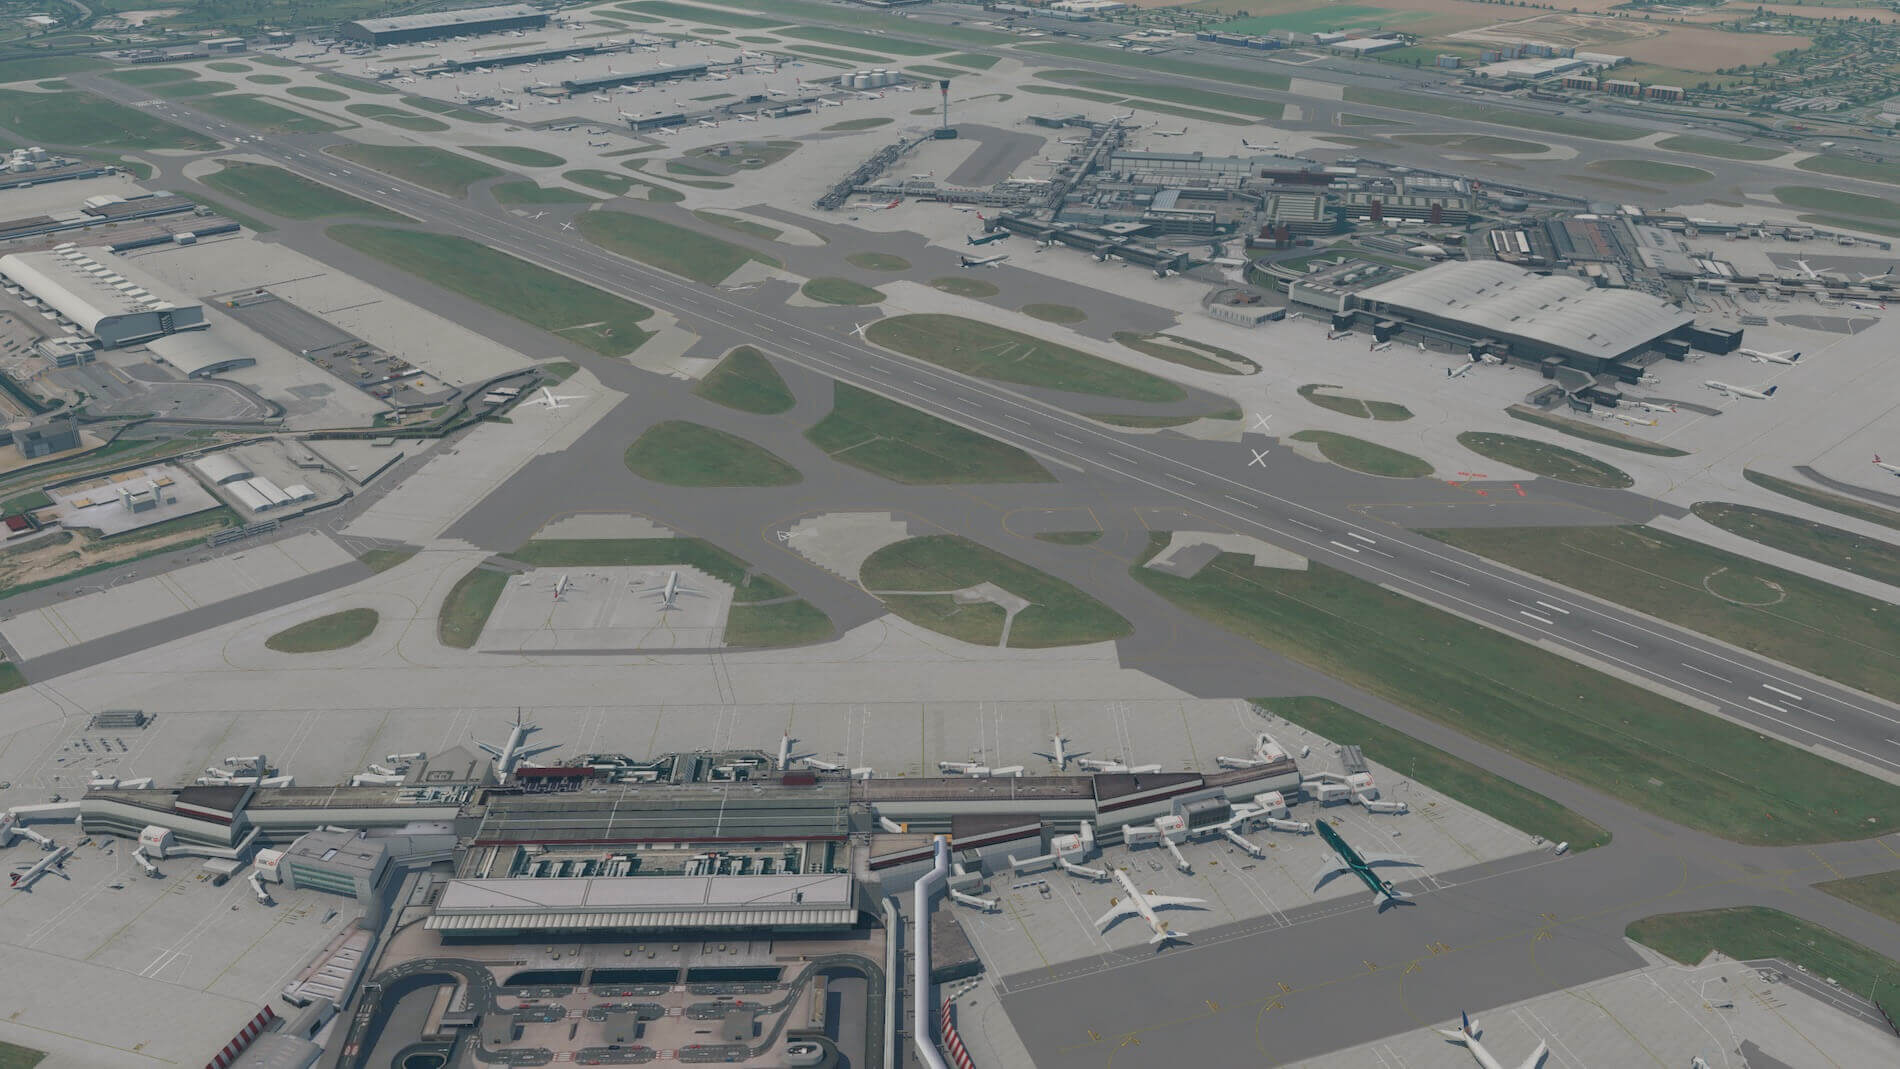
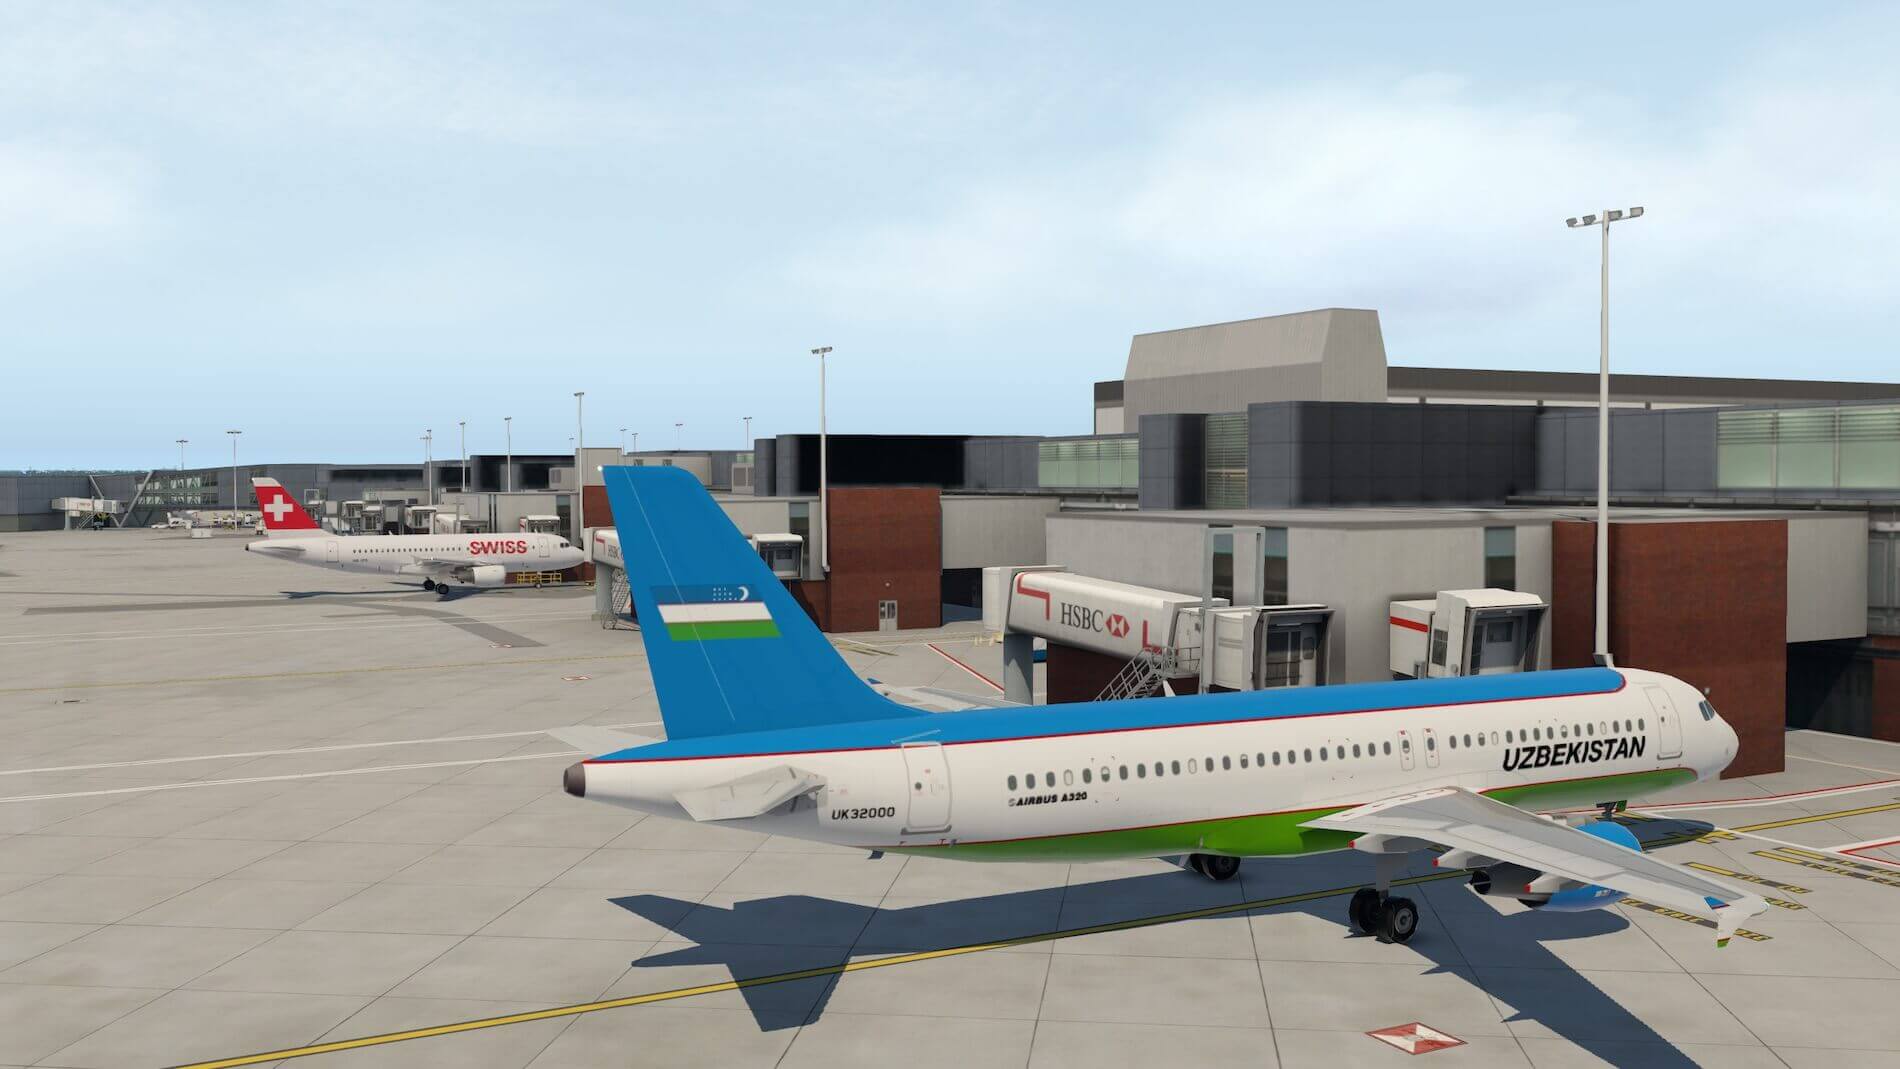
Via runway exit A7 I turn on to taxiway B (LINK 13) and a little further to the right on taxiway B. While this taxiway runs parallel along Terminal 1 piers 4 and 4A, I have a great impression of the modelled gates, jetways and, while still on runway exit 7, the airport radar too.
That looks breathtaking to be honest. Although there’s still quite a distance from the taxiway centerline to pier 4 and 4A, I can clearly see the many add-on objects that are included in the airport scenery which all contribute to giving EGLL the look and feel of the real airport.
For example, there are baggage carts, LD3 containers with trolleys, airport authority vehicles, stairs, catering trucks, pushback trucks, baggage belts and what else I’ve forgotten? So much has been added to this airport scenery.


While passing the north side of Terminal 2B, I see more or less the same level of detail as the real EGLL. Even though the terminal is still far away from taxiway B, everything I would expect to see is there: besides that I see aircraft controlled by World Traffic 3, I also see a lot of ground objects, even vehicles like the yellow airport authority SUVs.
Yes, I’m impressed seeing all of this sort of fine detail. Right now, I’m passing taxiway L, but I’ll continue along my taxiway B. However, I will have to leave you for a moment while I am picked up by an airport authority vehicle to make a sightseeing tour at the maintenance area.
But I also noticed, yes, I’m aware the airport has been updated from X-Plane 10, that there’s no grass, the green area around the taxiways are blurry or is it with others also blurry but due to the grass you don’t see it?
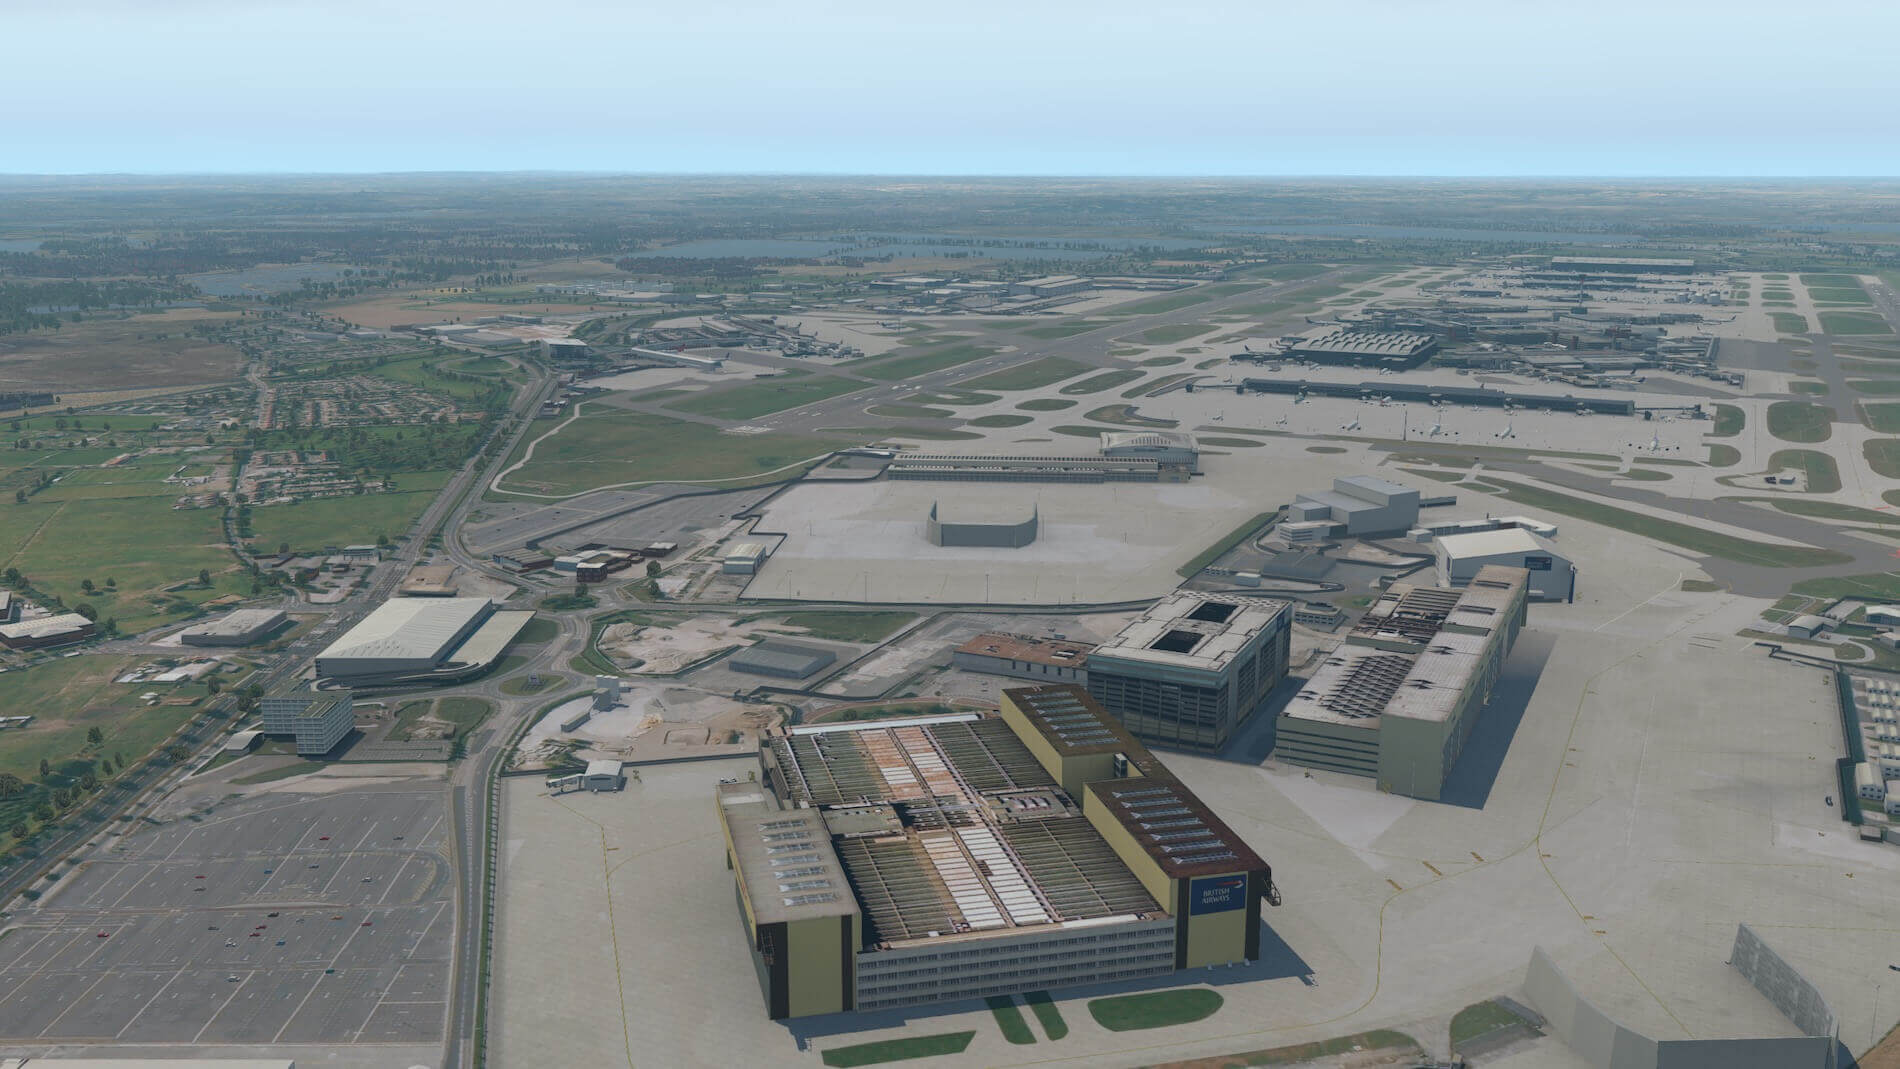
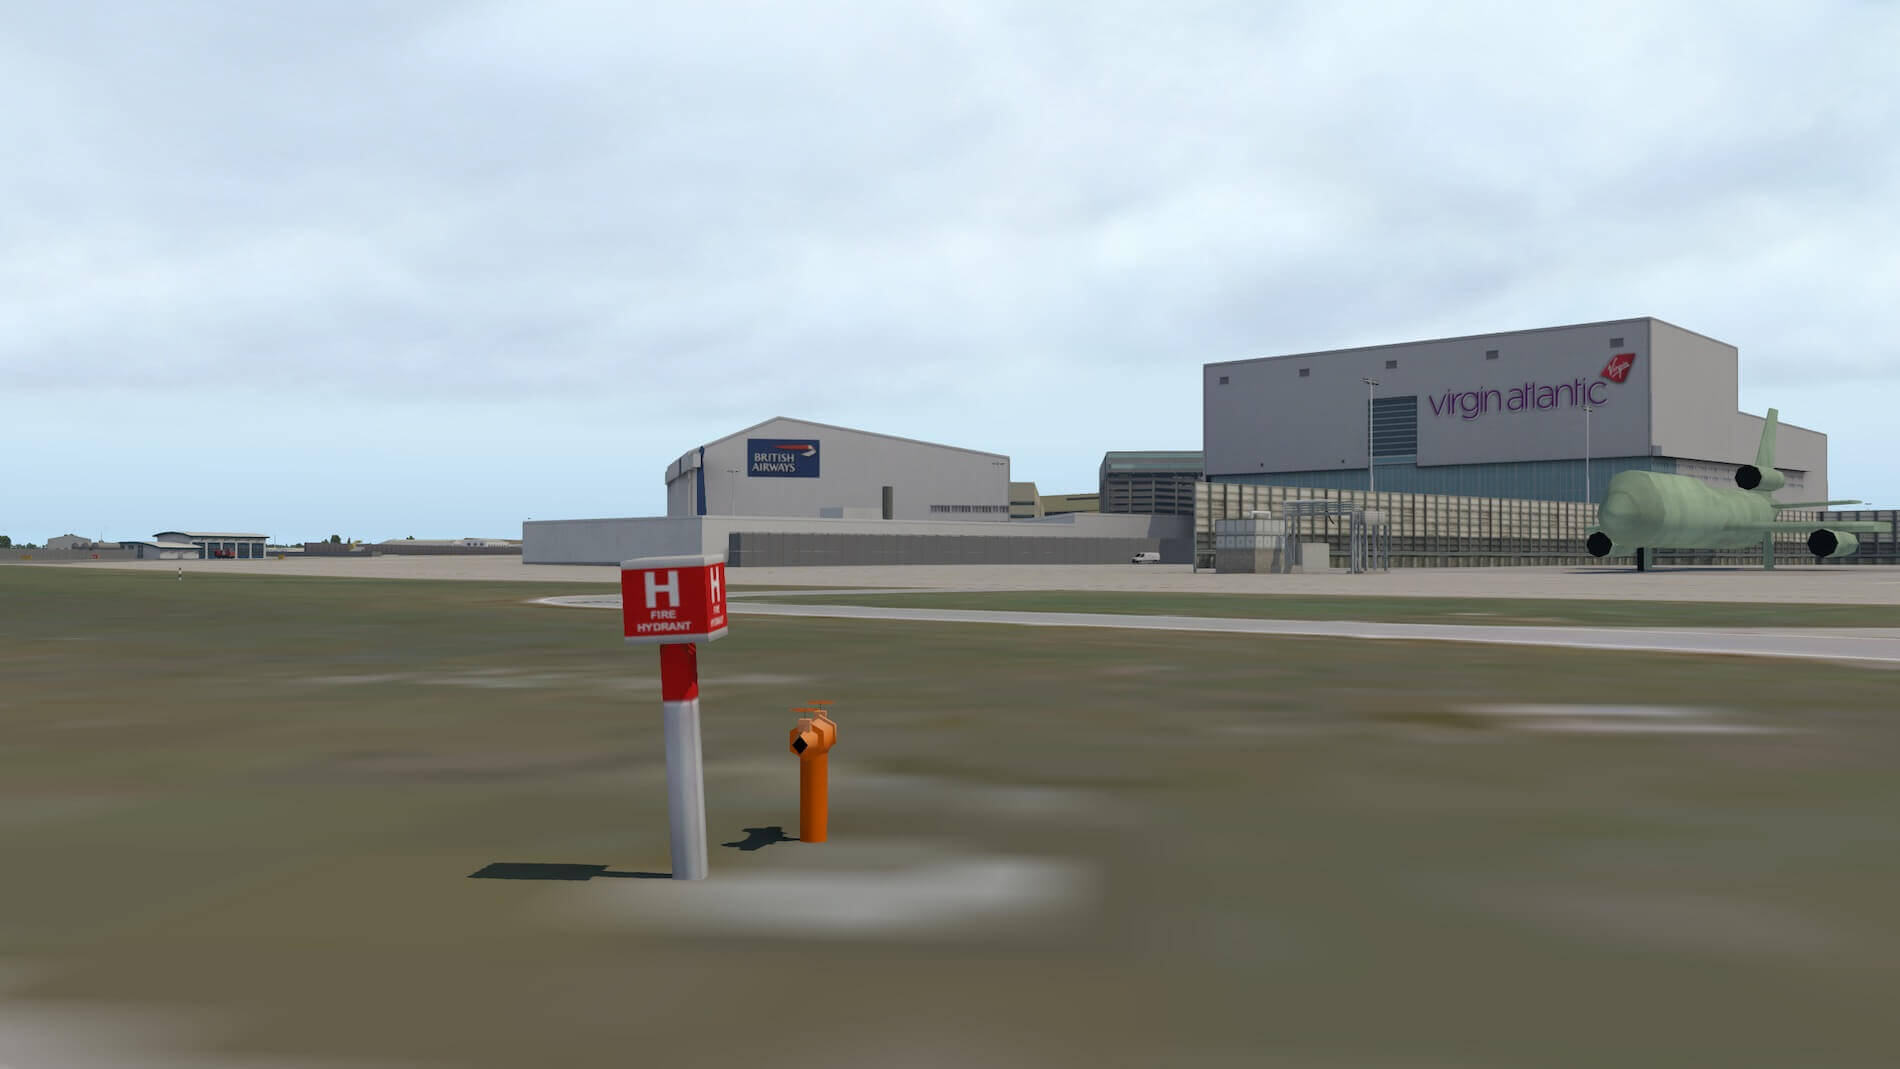
Maintenance area
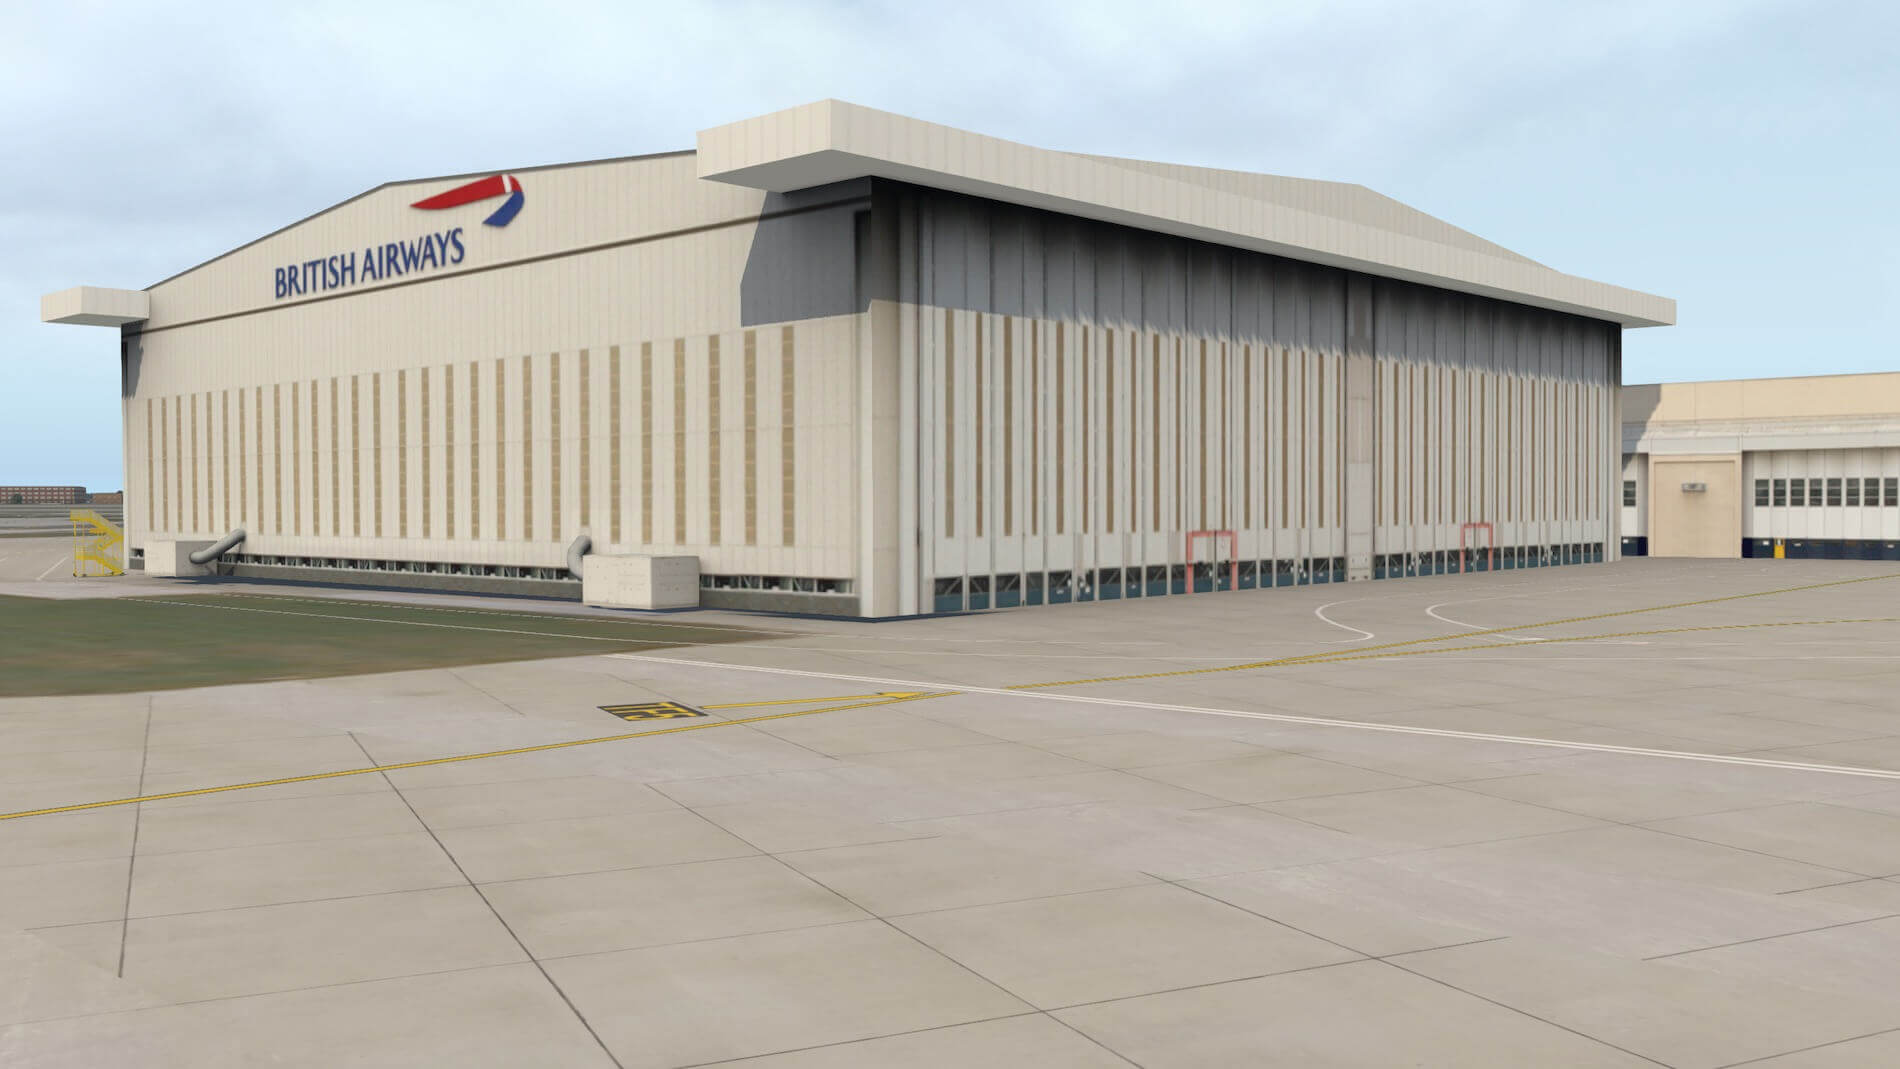
Although earlier I had a quick ‘air-to-ground’ look at the maintenance area, a walk-around would provide me more details. While in the middle of taxiway LINK 23 I got a good look at the well-modelled Virgin Atlantic and British Airways hangars with, to right of the Virgin hangar, the aircraft fire bridge test facility. Be honest, a bit blurry objects can be seen here!
Most of the time these are old aircraft models, but this one looks rather like a short DC-10. Anyway, whatever it is, it looks right, as does the surrounding fence to protect the areas around it. I’m not sure what the hangars should look like in real life, but knowing the rest of the airport facilities, I’m quite sure that they are perfect replicas. As with many actual hangars, the aprons in front of them are pretty much free of any objects and any ground equipment is parked at a nominated spot.
In front of the large beige yellow hangar I can see nothing but I know that when you have a static aircraft package installed, you will see some static aircraft parked here. When you have World Traffic 3 installed or JARDesign X-Life, it could be that you will see something here too. It depends! The rest of the apron areas are empty to help facilitate great and structured maintenance. Aircraft shouldn’t stay waiting for maintenance in front of a hangar! That’s’ not good. They should be flying!
Besides that, I can’t say much more, other than that I’m very happy with the end result. A little further I can spot the engine run-up test facility that I saw earlier during my final approach. Being a simple device, I must admit that it’s well modelled and even the sound-reducing plates in the concrete construction are visible, but I feel they are a bit blurry.


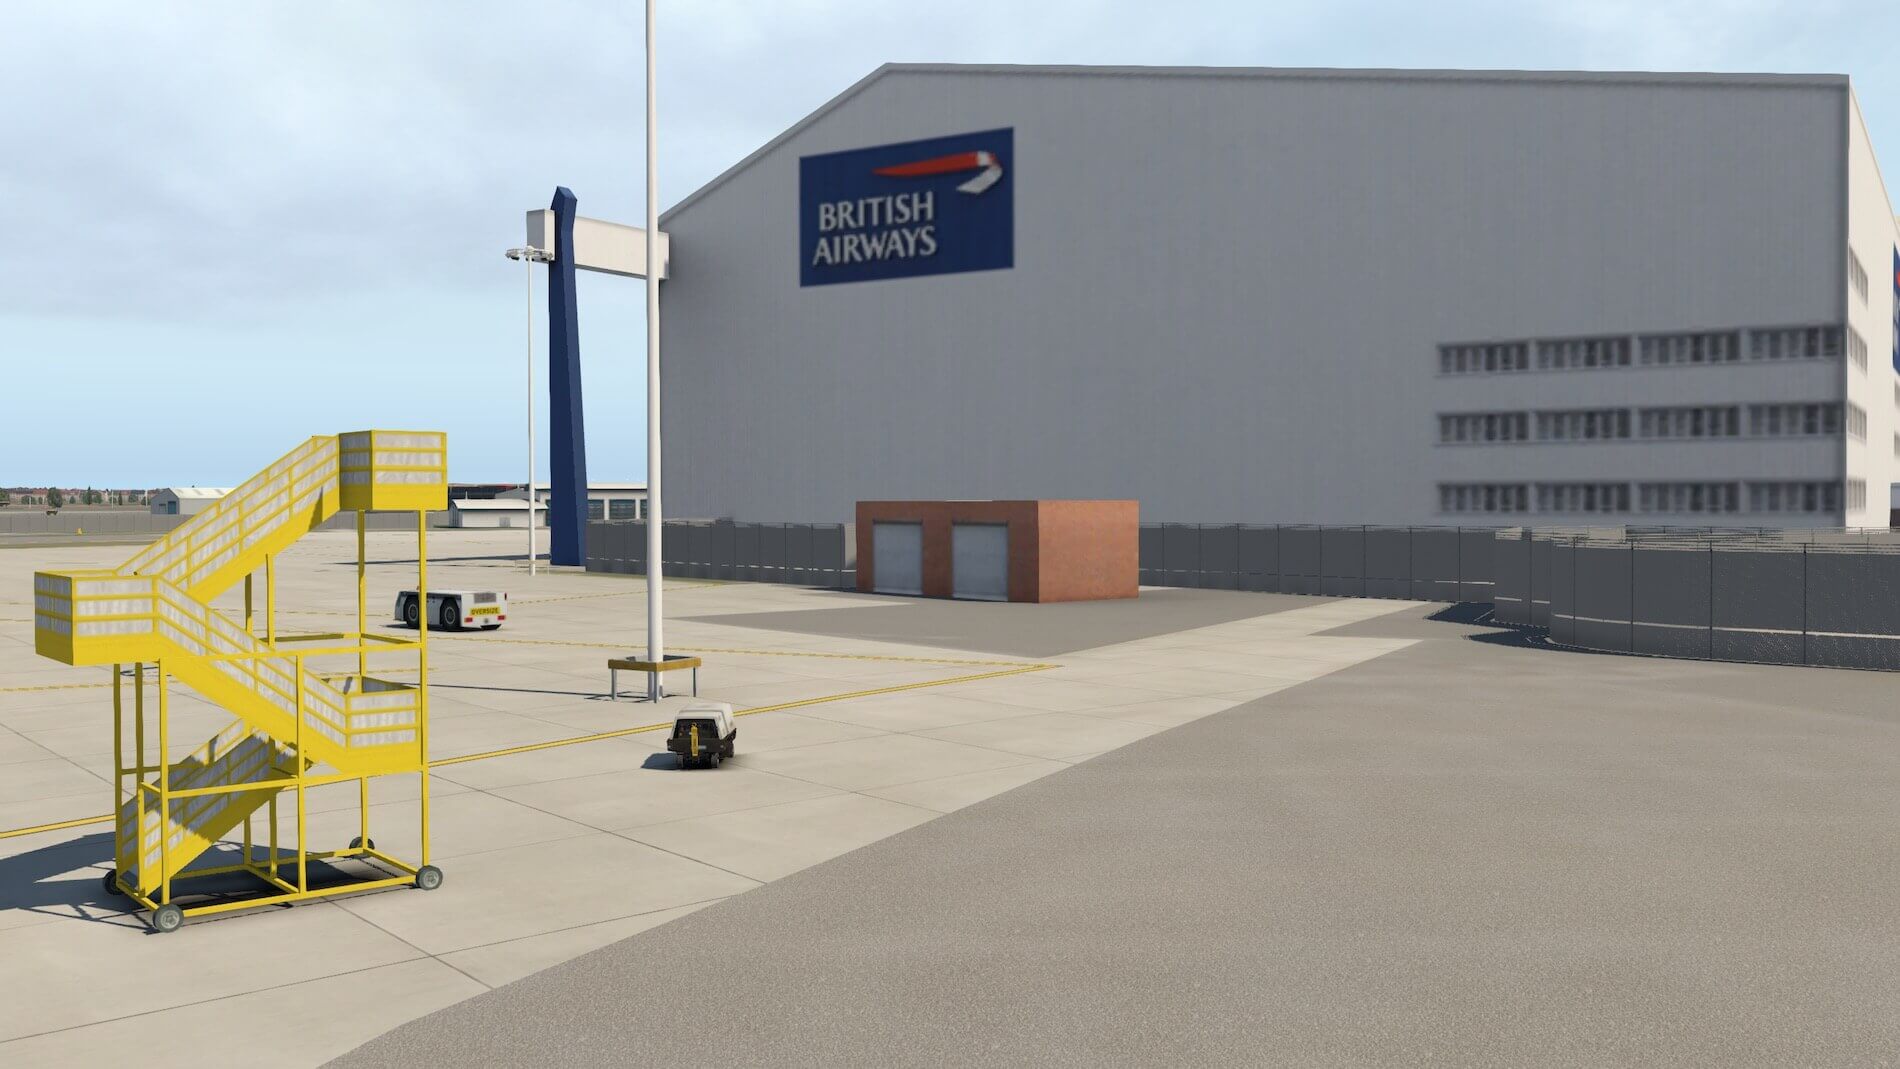


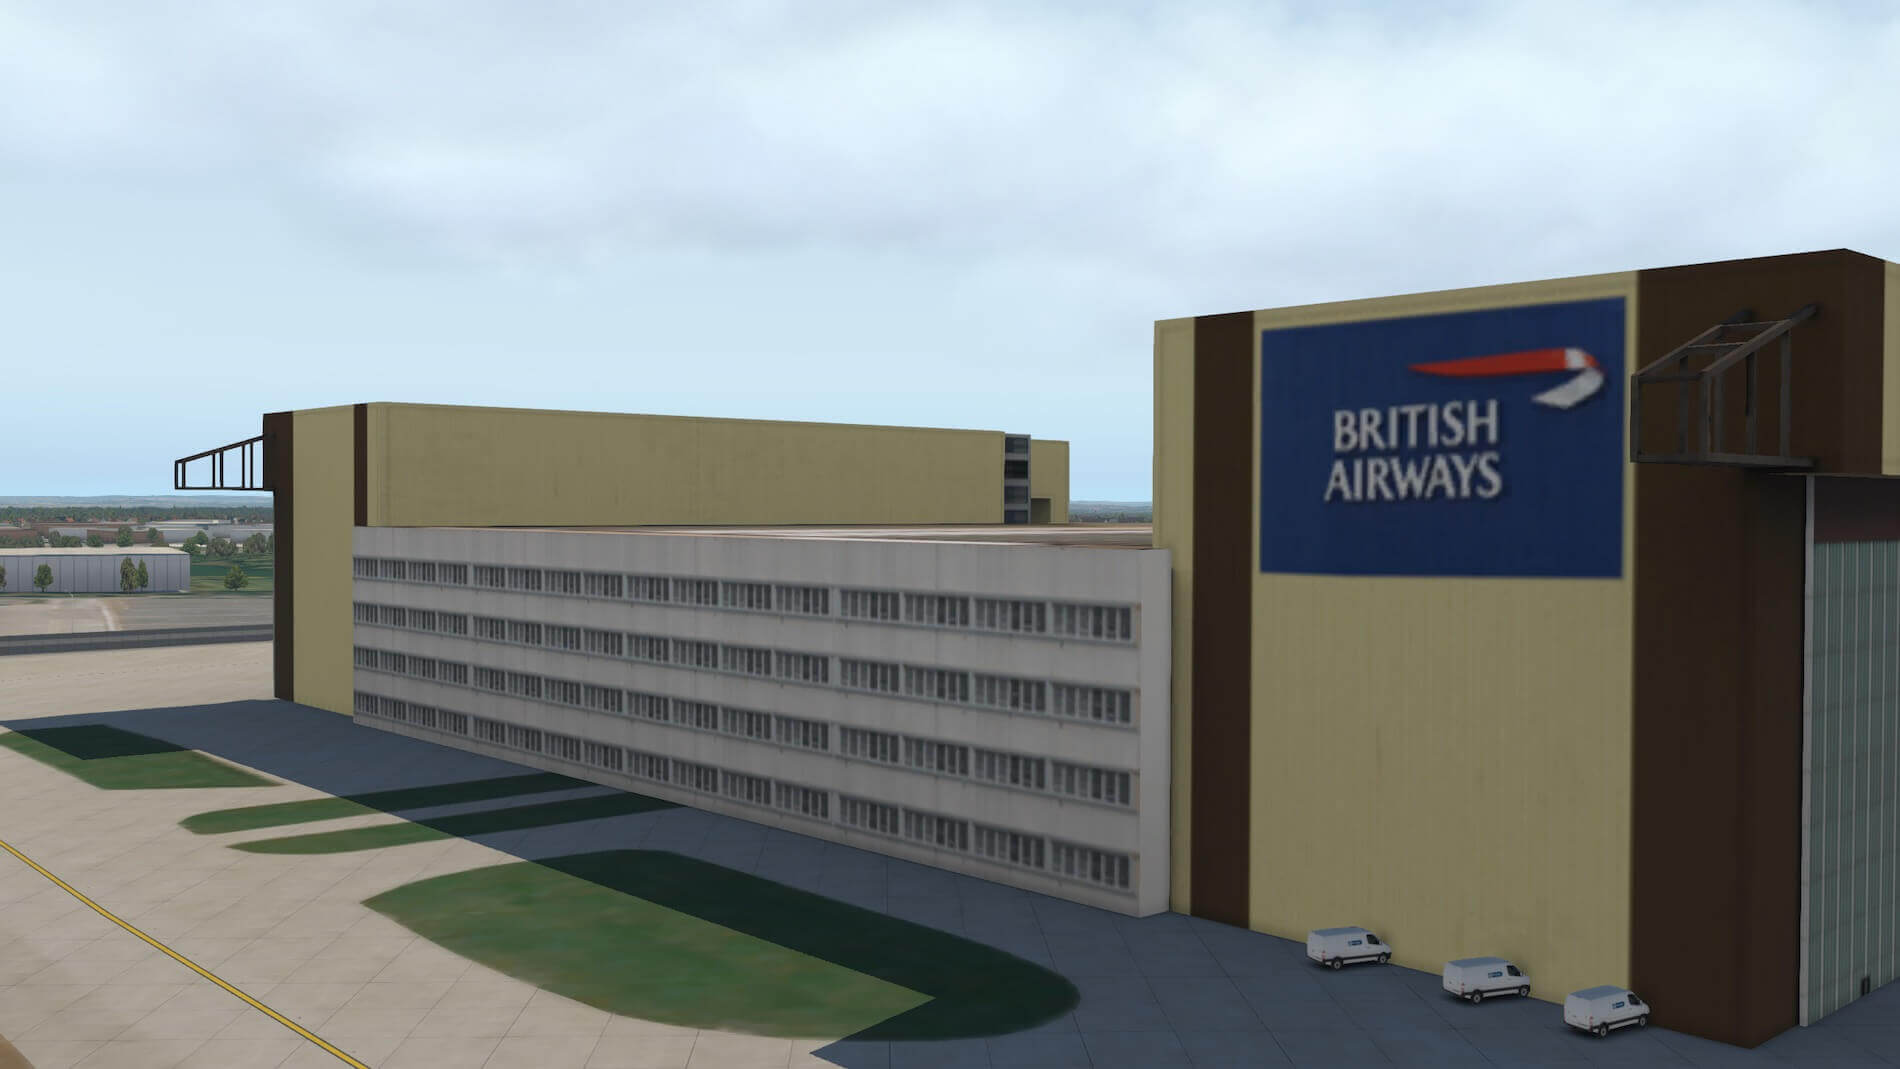
The next large building is a mix of offices and, on each side of them, hangars or at least, that’s what they look like to me. The office is covered with real texture material, but to be honest it would be better if this could be a little crisper.
Of course, I’m aware this is just a maintenance area and not of the greatest importance compared to the terminals, but still the covered walls are a bit blurry. On one side of the offices, I noticed a pedestrian bridge that connects the offices to a huge car park. It seems that the parking area belongs to British Airways, although I have to say that the sign is not as sharp as it should be. This is basically for all hangars textures. I’ve seen sharper object textures with other developers.
At the so-called ‘Bealine Base’ you’ll find a kind of ‘flight or maintenance line’. I’m sure that’s not the right term but it’s an area consisting of several aprons with a small hangar, a large maintenance facility building, and the historic “blurry modelled” Concorde. Although this maintenance area may not be of the greatest interest, it is crafted with accuracy and an eye for tiny detail.
I need to add something to this section and that deals with the option “Rendering Settings – tab General items tick “Runways follow terrain contours”. With this ticked which is quite common with all add-on airports, almost all hangars and other objects in this area are slightly floating above the ground. With this option unticked, the problem is gone and all hangars etc. are on the ground without loosing any parts of the hangar, but then the scenery doesn’t follow the runways anymore.
Strange thing is that all other building at the airprot are with or without this option ticked, always firm mounted on the ground. Just to be sure, I also checked the manual, but no sign if you need to tick or leave the “Runways follow terrain contours” unticked. What said, most airports have this option ticked!
Terminal 4
Yes, we made it … we have arrived at Terminal 4.
For those who aren’t familiar with Terminal 4 although it looks modern, I think it is an old building that has been updated a while ago. From the center you have two ‘gates’ with many jetways. This lies along taxiway T. By the way, the cargo area starts on the other side of this taxiway. Anyway, each gate has parked spaces on each side, so all together there are a lot of jetways.
Oh yes, this is probably worth mentioning at this point: Terminal 4 offers parking facilities to international airlines such as Alitalia, KLM, Saudi Arabian, Vietnam Airlines, Aeroflot, Royal Jordanian, Air France and many more.
The big question is … how does Terminal 4 look like?
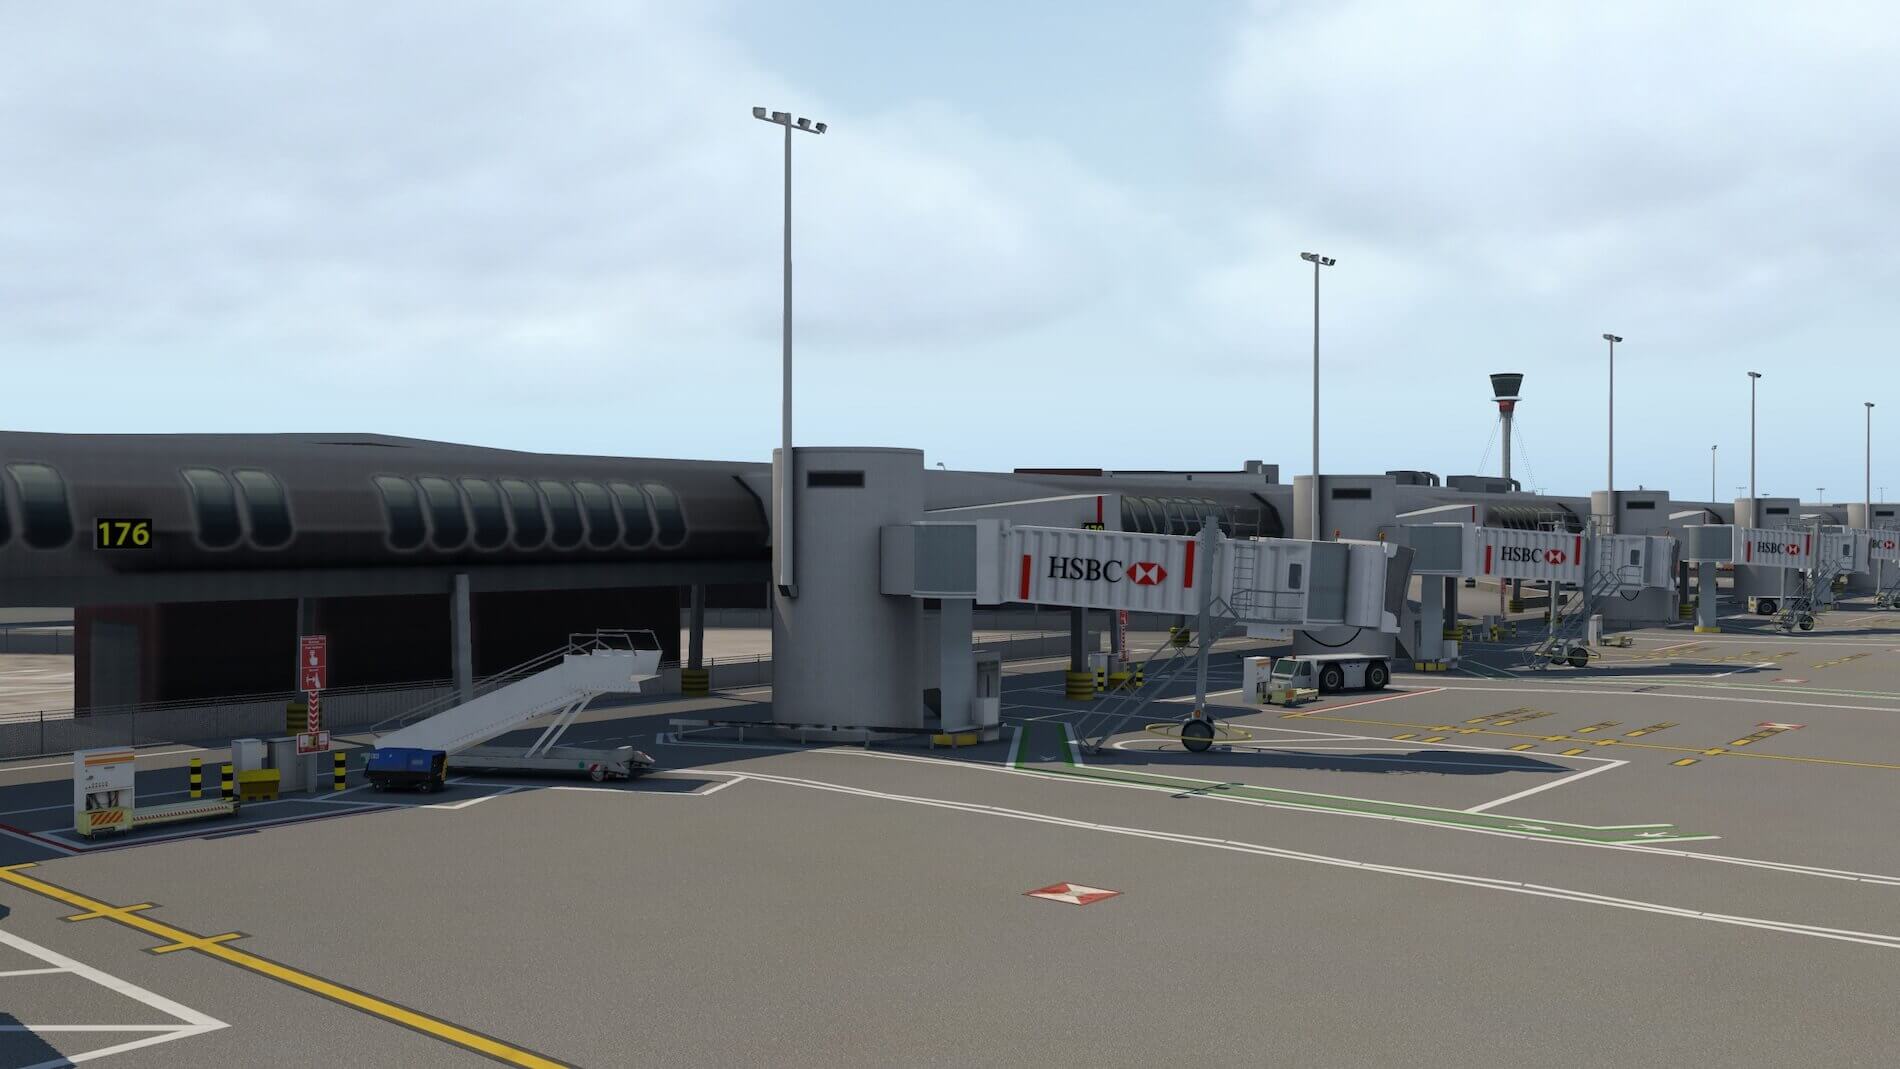
How has it been modelled, does it have the ‘right look and feel’ etc? Yes, I can confirm that it is worth parking there or taxiing by. Real photo textures have been used and the walls are made in such a way that you really do get the right feeling of what it looks like in real life. The jetways, basically very similar on all terminals, are realistic; they are sharp, with an eye for tiny detail.
Every gate position has the correct ground marking; on each spot you’ll find some ground equipment (hi-loaders, movable stairs, baggage carts, baggage trolleys, movable GPU connections) and if you’re lucky, you’ll see some moving objects too. In other words, while driving from one gate to another and following the contours of Terminal 4, I can tell you there is nothing really to complain about.
Perhaps there is just one thing. All the concrete parking spots are as clean as if they are brand new. I noticed this, but in my view this is not necessarily a big issue. Another issue is in my humble opinion that most of the textures I’ve seen are blurry which I know from other developers, is not needed anymore. Wall textures, ground textures, objects textures can be sharper. Either real high quality material can be used or the many sources where textures are available.


I could walk, if I wanted to, for hours along Terminal 4 and see all the nooks and crannies, but it must be said that even this old terminal building is made with great precision. Looking to the passenger departure entrance including the large car parking area next to it, I must say that this all looks very familiar to me.
While at the departure entrance, I can see many modelled buildings and roads as well as the pedestrian bridge that links Terminal 4 to the Hilton Hotel. The bridge is very nicely modeled as well as the Hilton itself , but the wall textures of the hotel could be in my opinion be a bit sharper. Sorry, time to move on. Next on my EGLL tour is the cargo area.
Cargo area
The cargo area is the same as you’ll find at other large airports, huge! If you have no interest in freighters, you won’t understand this, but if you do, you’ll appreciate why cargo areas are so extensive. Income from freighter airlines is constantly increasing and to follow that growing market, cargo areas are getting bigger and bigger. The same is also true for EGLL.
The cargo area offers many parking locations. As usual, I notice the presence of ground equipment and this time not in an excessive way. You’ll find stairs, hi-loaders, trolleys for LD containers, pushback trucks, GPU control stations, different models of tow bars, etc. As at Terminal 4, the ground markings and signs are all included as well as the park guidance equipment. And yes, where do you store all the LD containers?
Right, in a open building that looks like a car park, but designed for LD containers. So, what did I do? I crossed the apron from Terminal 4 to the cargo area and drove from this via taxiway W and S to the large cargo apron. At the corner of the two taxiways I had to stop by for a moment to drink a cup of tea at the Royal Suite. Not exactly the place where you would expect the Royal Suite, but it is a quiet area far away from the terminals.


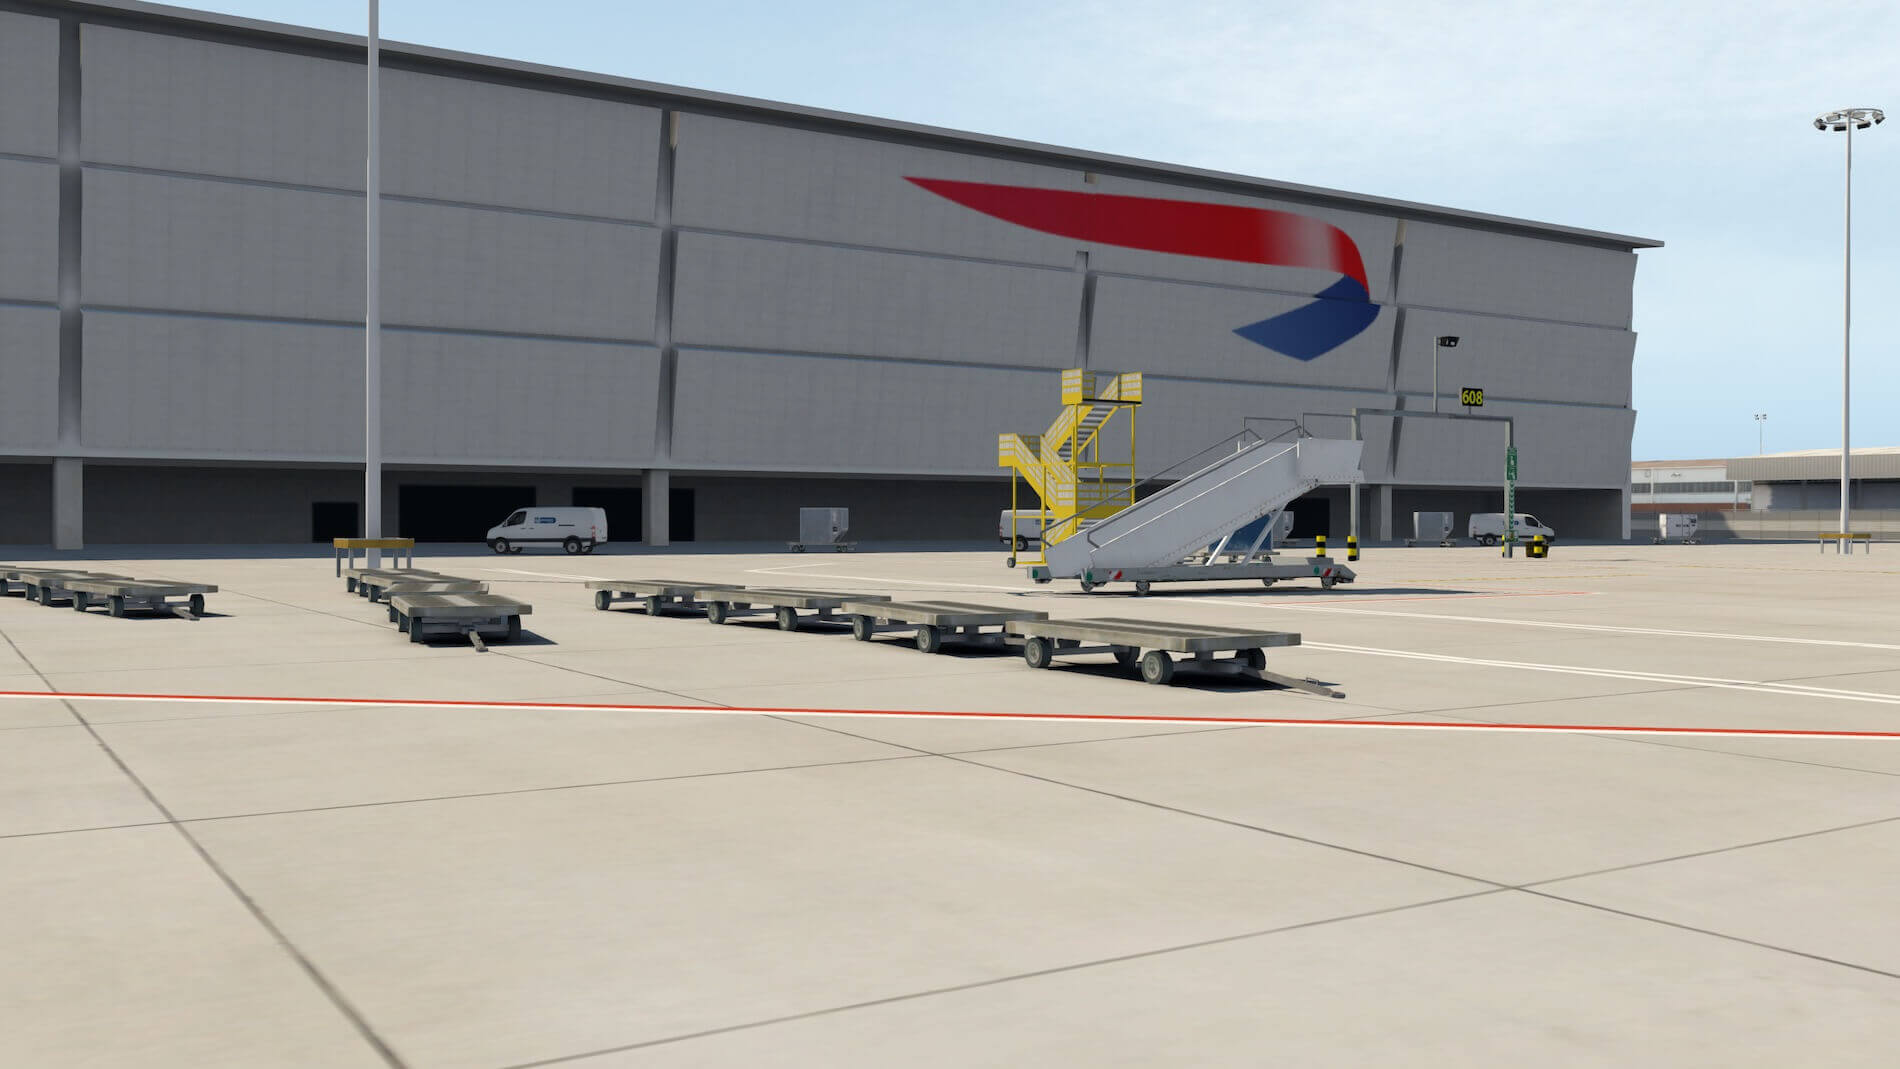

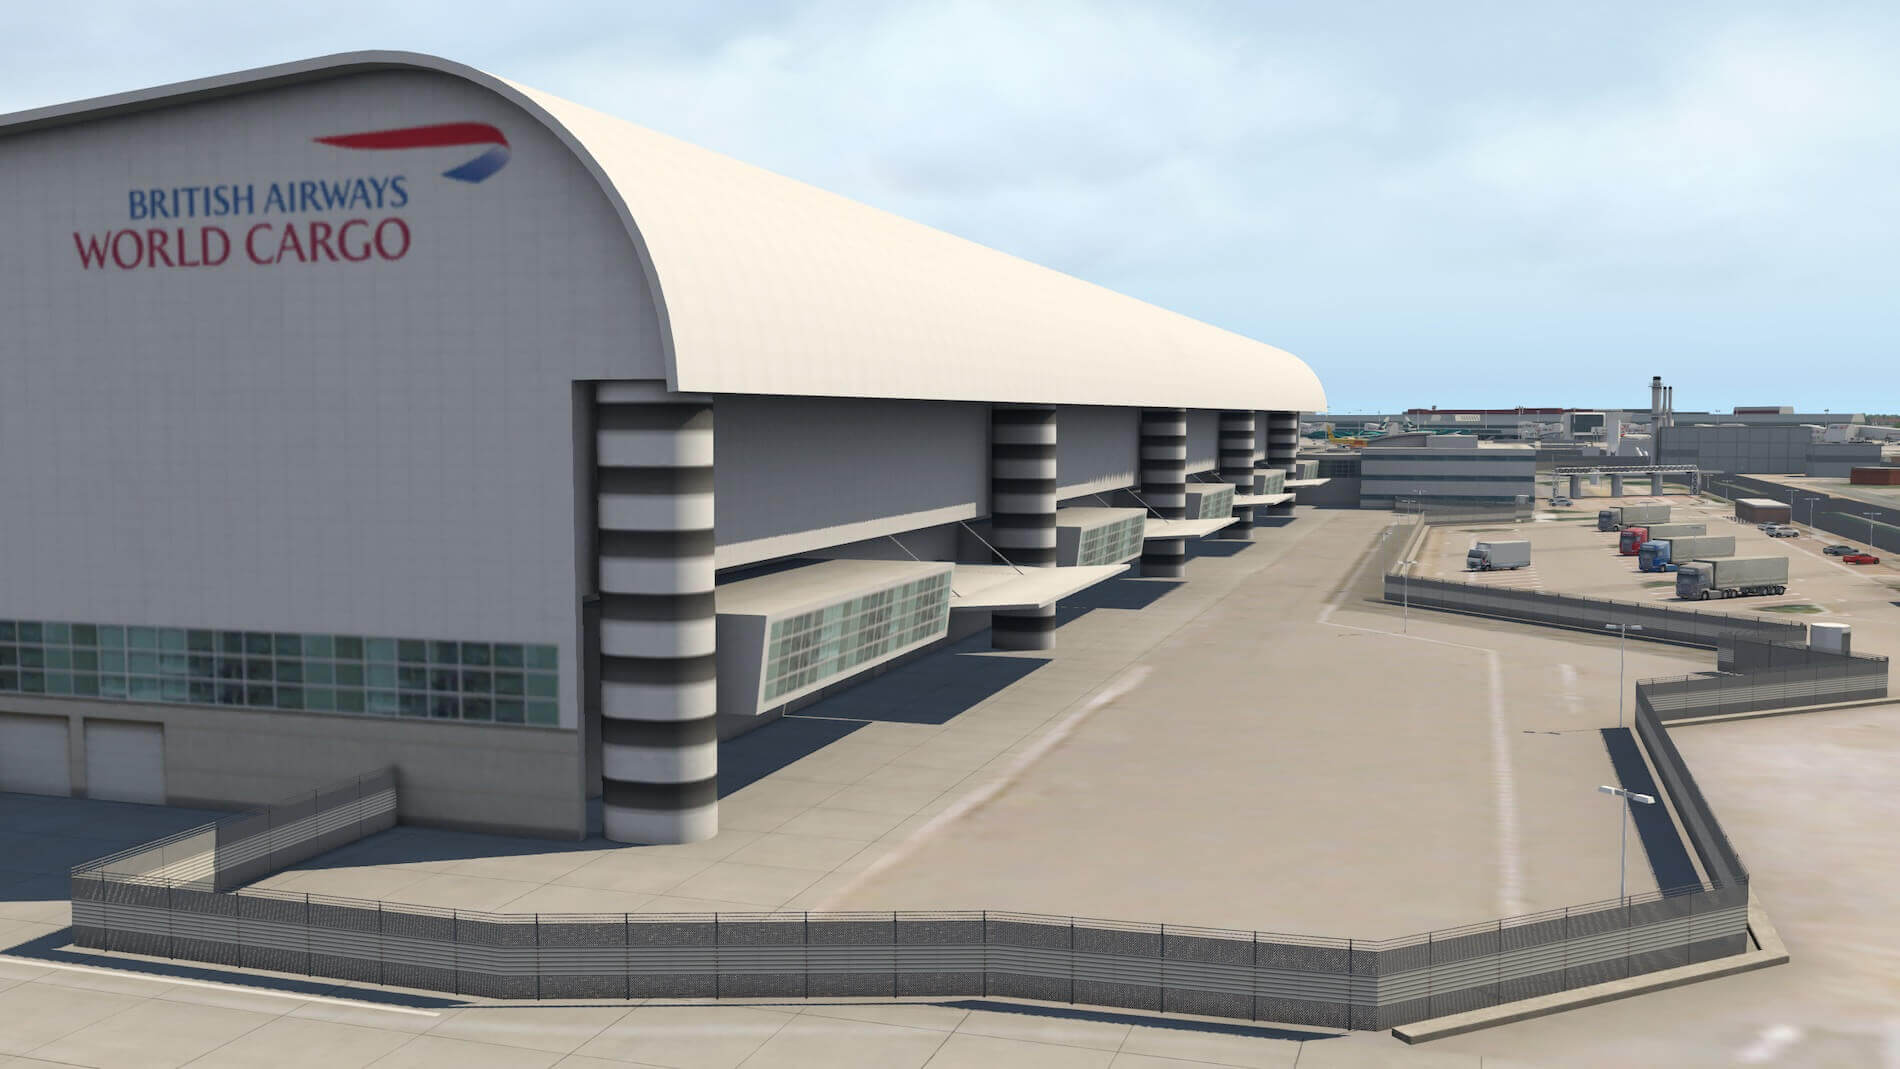
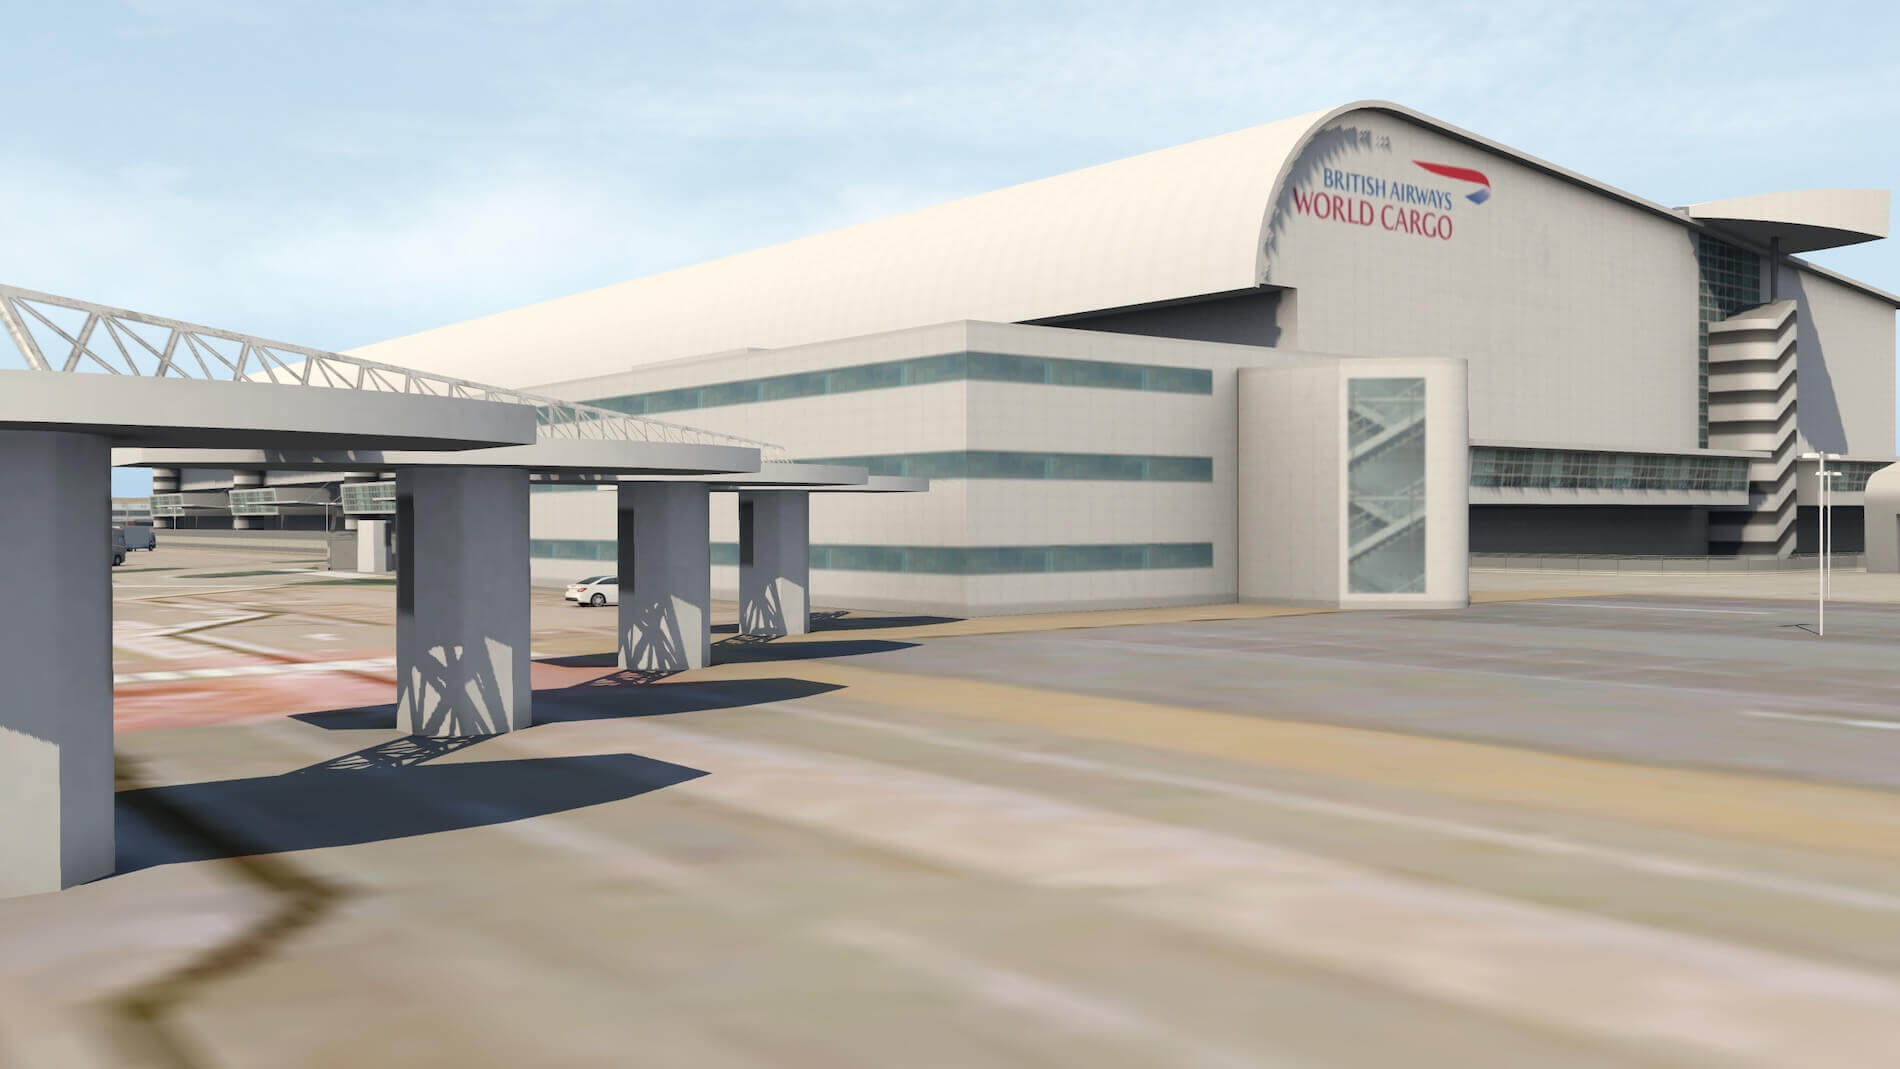
Along taxiway S there’s a stretch apron with many parking spots, and ground equipment. By the way, the hangar – may I call this a hangar – looks gorgeous. It’s certainly a very modern design, the same as you will see later with Terminal 5A. The whole hangar is a nice example of 3D modelling I think, but I’m not 100 percent sure, that real textures are used to cover the walls and even the ‘British Airways World Cargo’ text is good.
And, you must not forget the many buildings, ground equipment and other static and moving objects behind the hangar. When you’ve landed and parked your freighter near the BA cargo hangar, and you look behind, you will see what’s all been modelled. It’s worth a quick visit in its own right: you will come across many different buildings, trucks, cars, entrance gates, heating facilities and car parking lots. But I’ve said it before, most of the textures I’ve seen are blurry.
And also applicable for this area, some moving objects. Along this cargo area there’s a road, situated outside the airport fences but even here, you’ll find on the other side of the road some modelled buildings. I can’t recognize them all, but they are definitely handmade and yes, I see a building that belongs to Virgin Atlantic Cargo.
As I said earlier, the cargo area is massive, but it seems that the developers have put a lot of time and effort into it to making this part of the airport as real as you could expect it, or to give it ‘a real as it gets’ look.
Terminals 5A, 5B and 5C
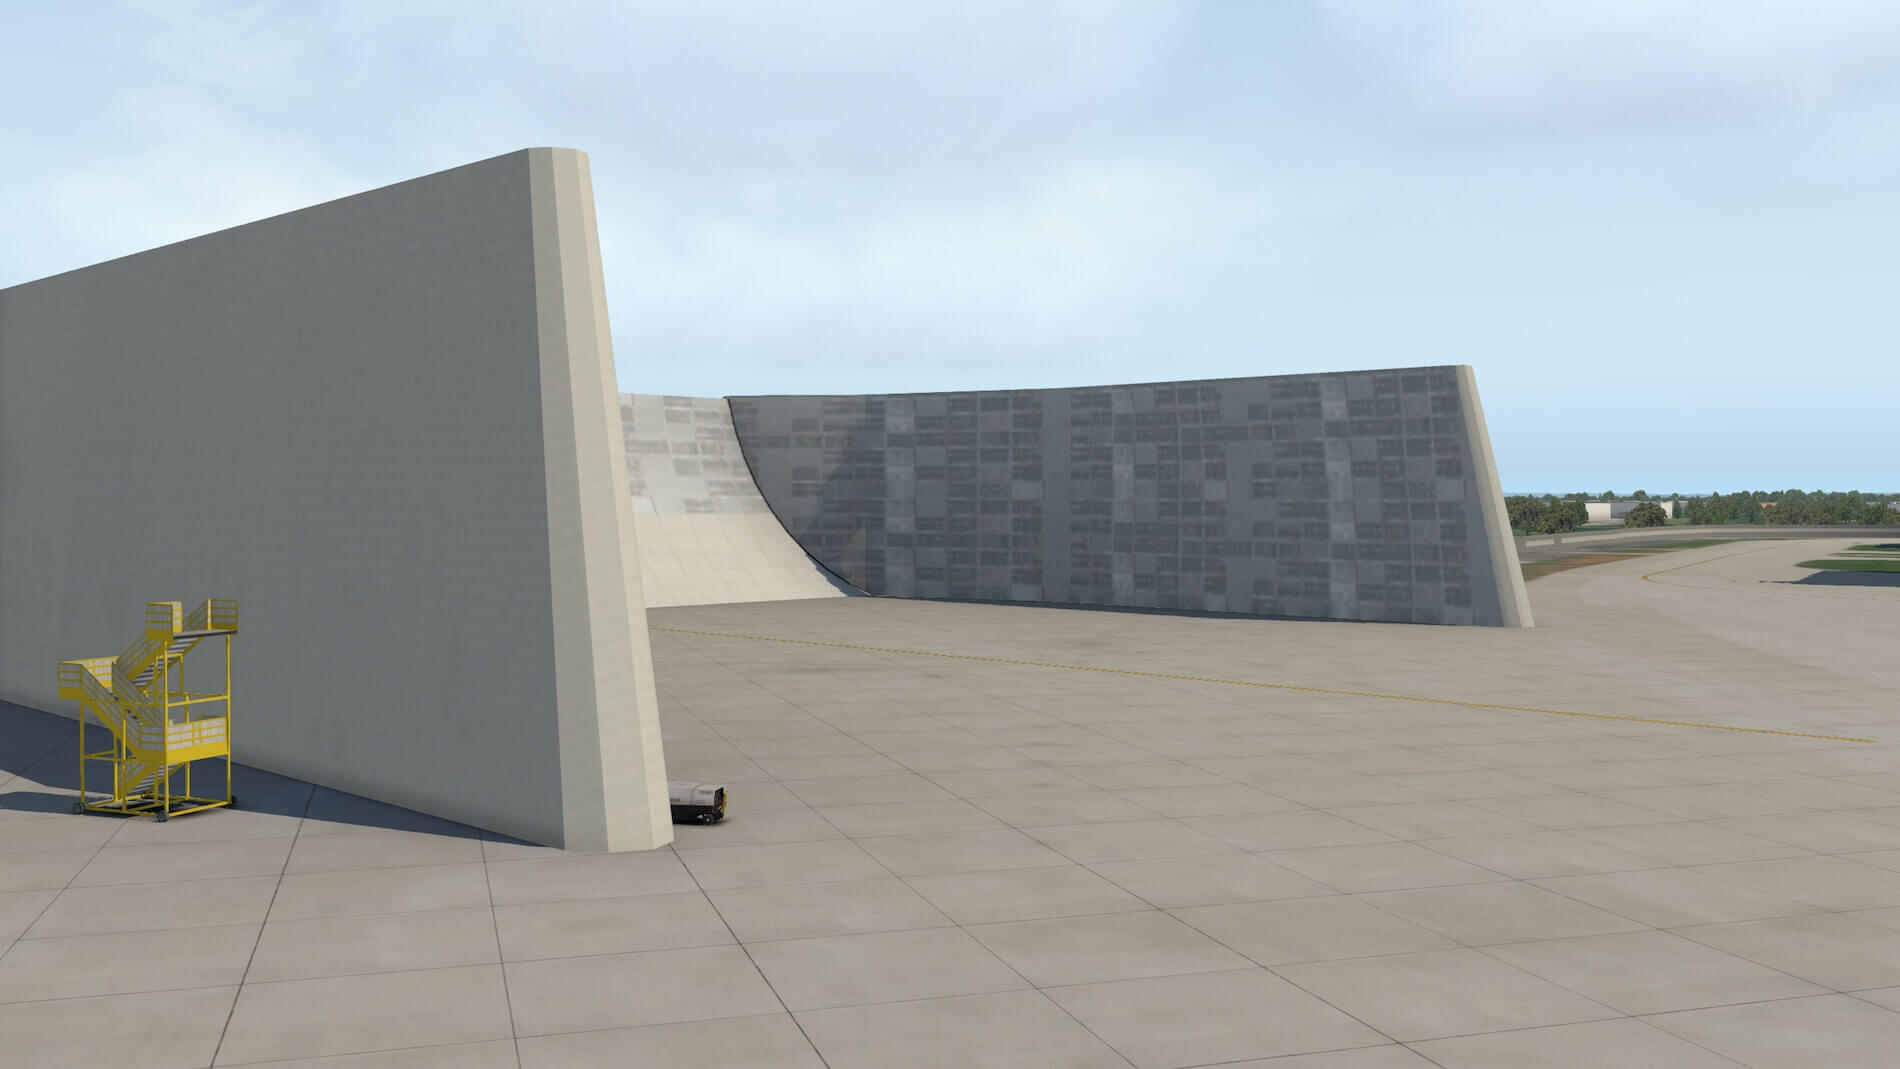
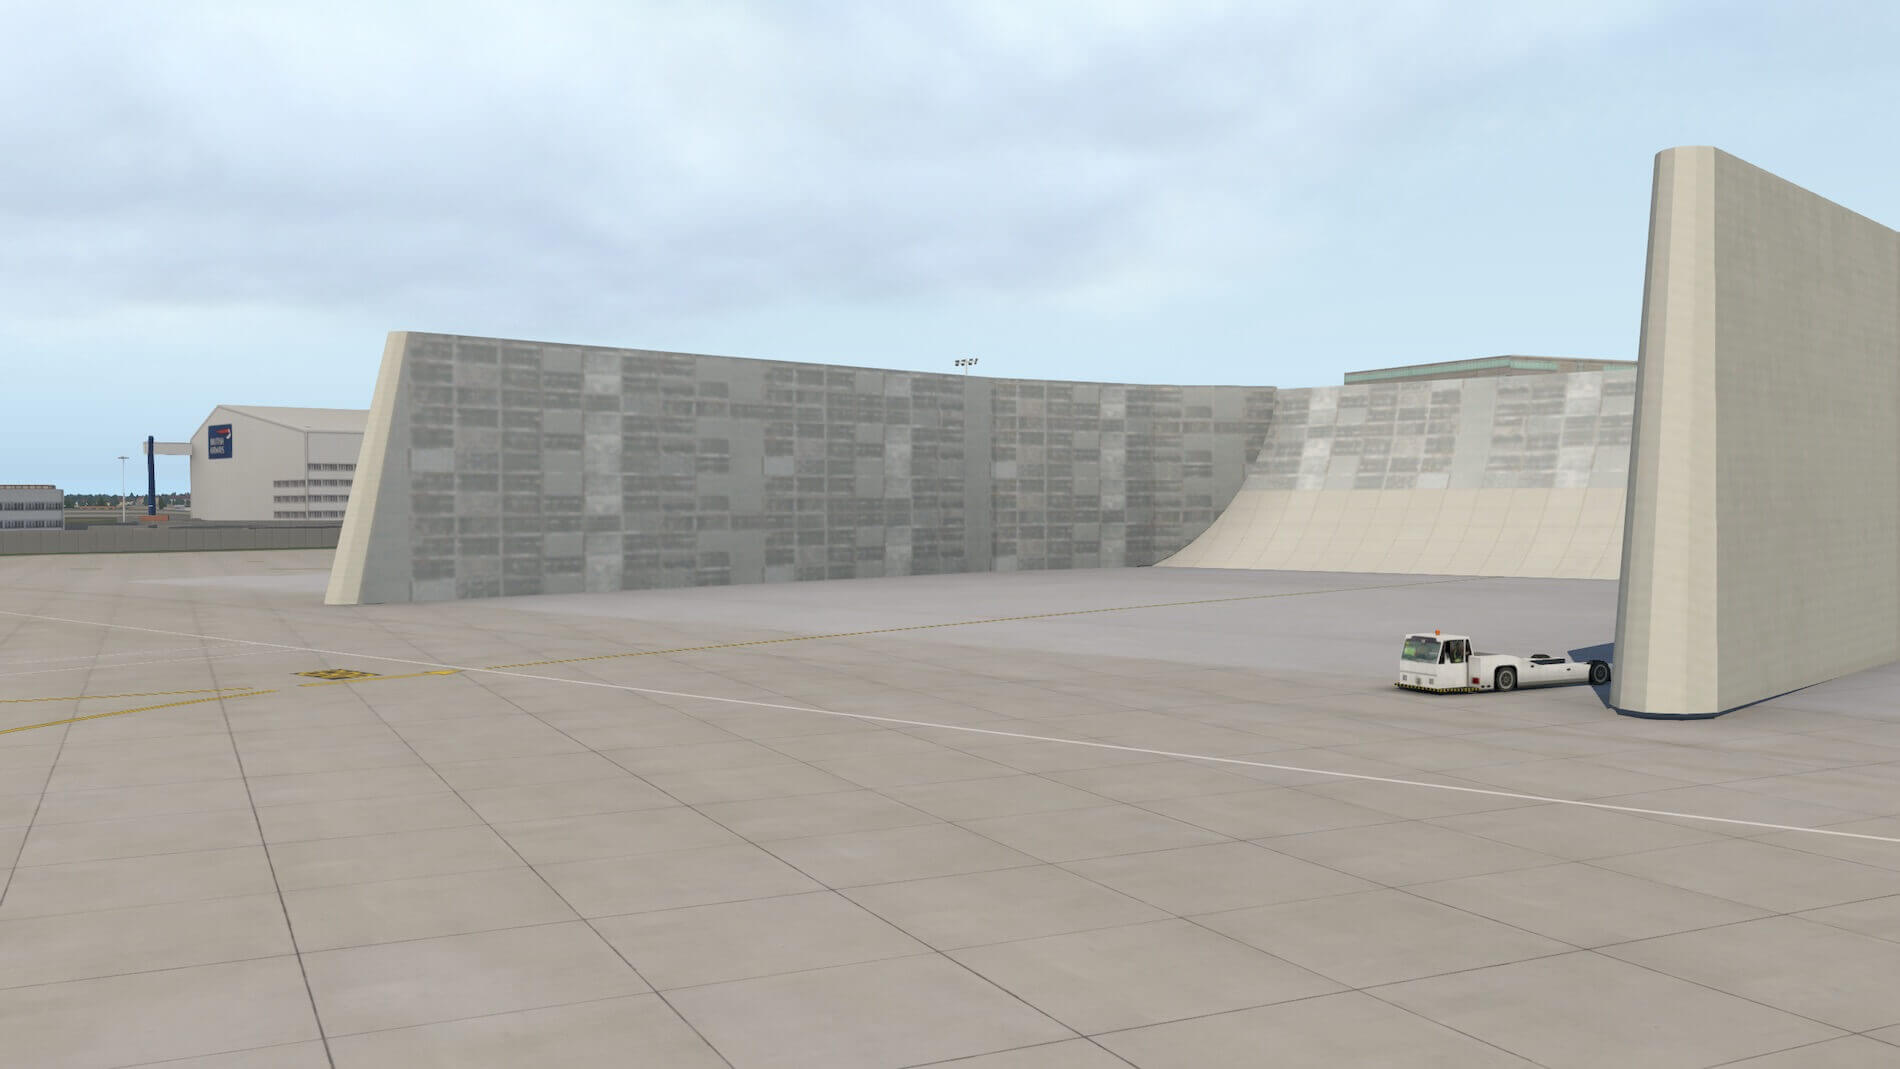
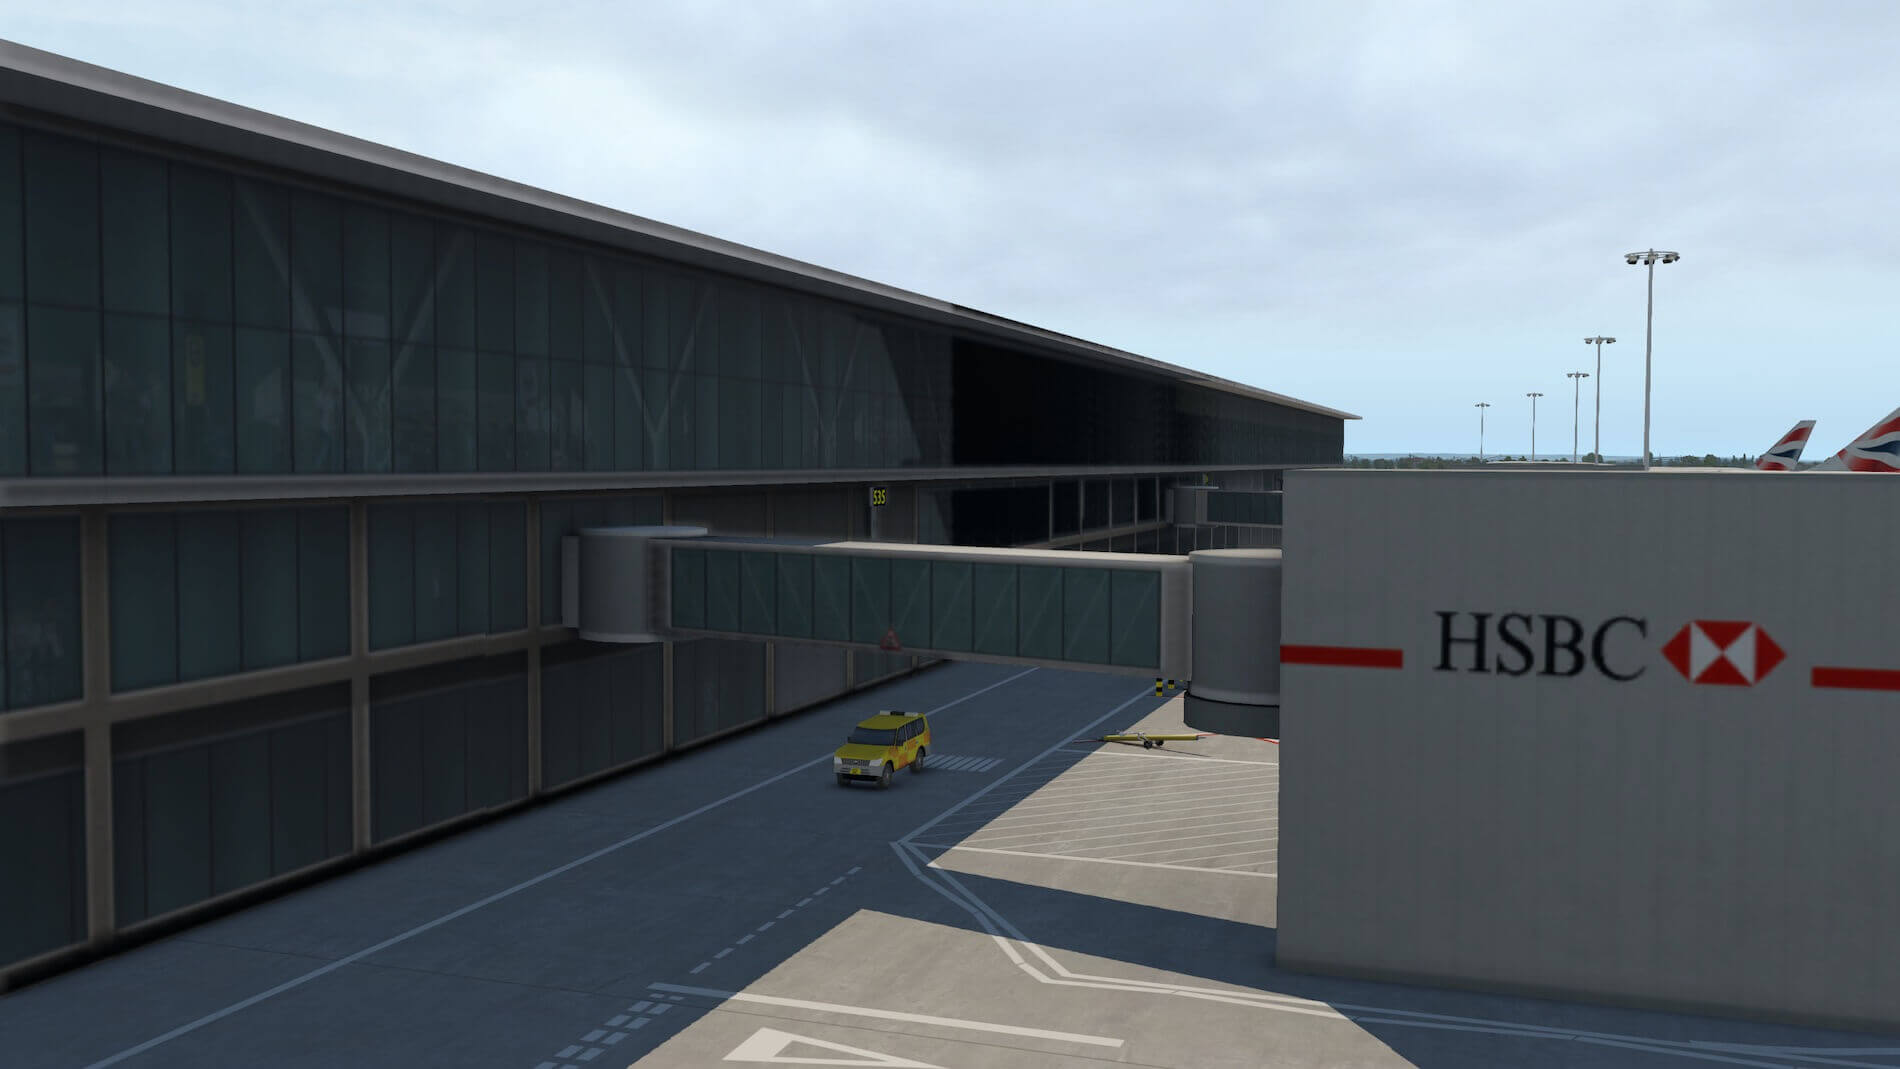
To reach Terminal 5A, I decided to drive via the ring road to the departure area. This means that driving along the road, I won’t see much of what’s happening in the airport since it’s bordered by a high anti-sneaking wall. Of course, this is not the official name of it. But the intention is that you can’t see anything that’s on the other side of the wall. OK, while I’m approaching Terminal 5A, the only things I can see right now are the huge and very well modelled, multi-storey car parks.
It’s still a long drive before I can find the entrance bridge to the Terminal 5 departures. I’ve left all the multi-storey car parks and offices behind me and at the second roundabout I will drive at last in the direction of Terminal 5. Although the road textures towards the departure entrance are somewhat blurry, the 3D modelling is gorgeous. Now I manage to get a good idea of how this Terminal is portrayed. By the way, Terminal 5 itself houses the gates for Terminal 5A, while the gates 5B and 5C are not directly linked to this building.
And it’s not only the terminal itself that is impressive; at the end of this side of the terminal you can see the jetways from your car and once again they are made with the same precision that I commented on when reviewing Terminal 4. It’s really a pleasure to see this level of quality and like the other places mentioned, there’s a lot of ground equipment and animated buses or airport vehicles.


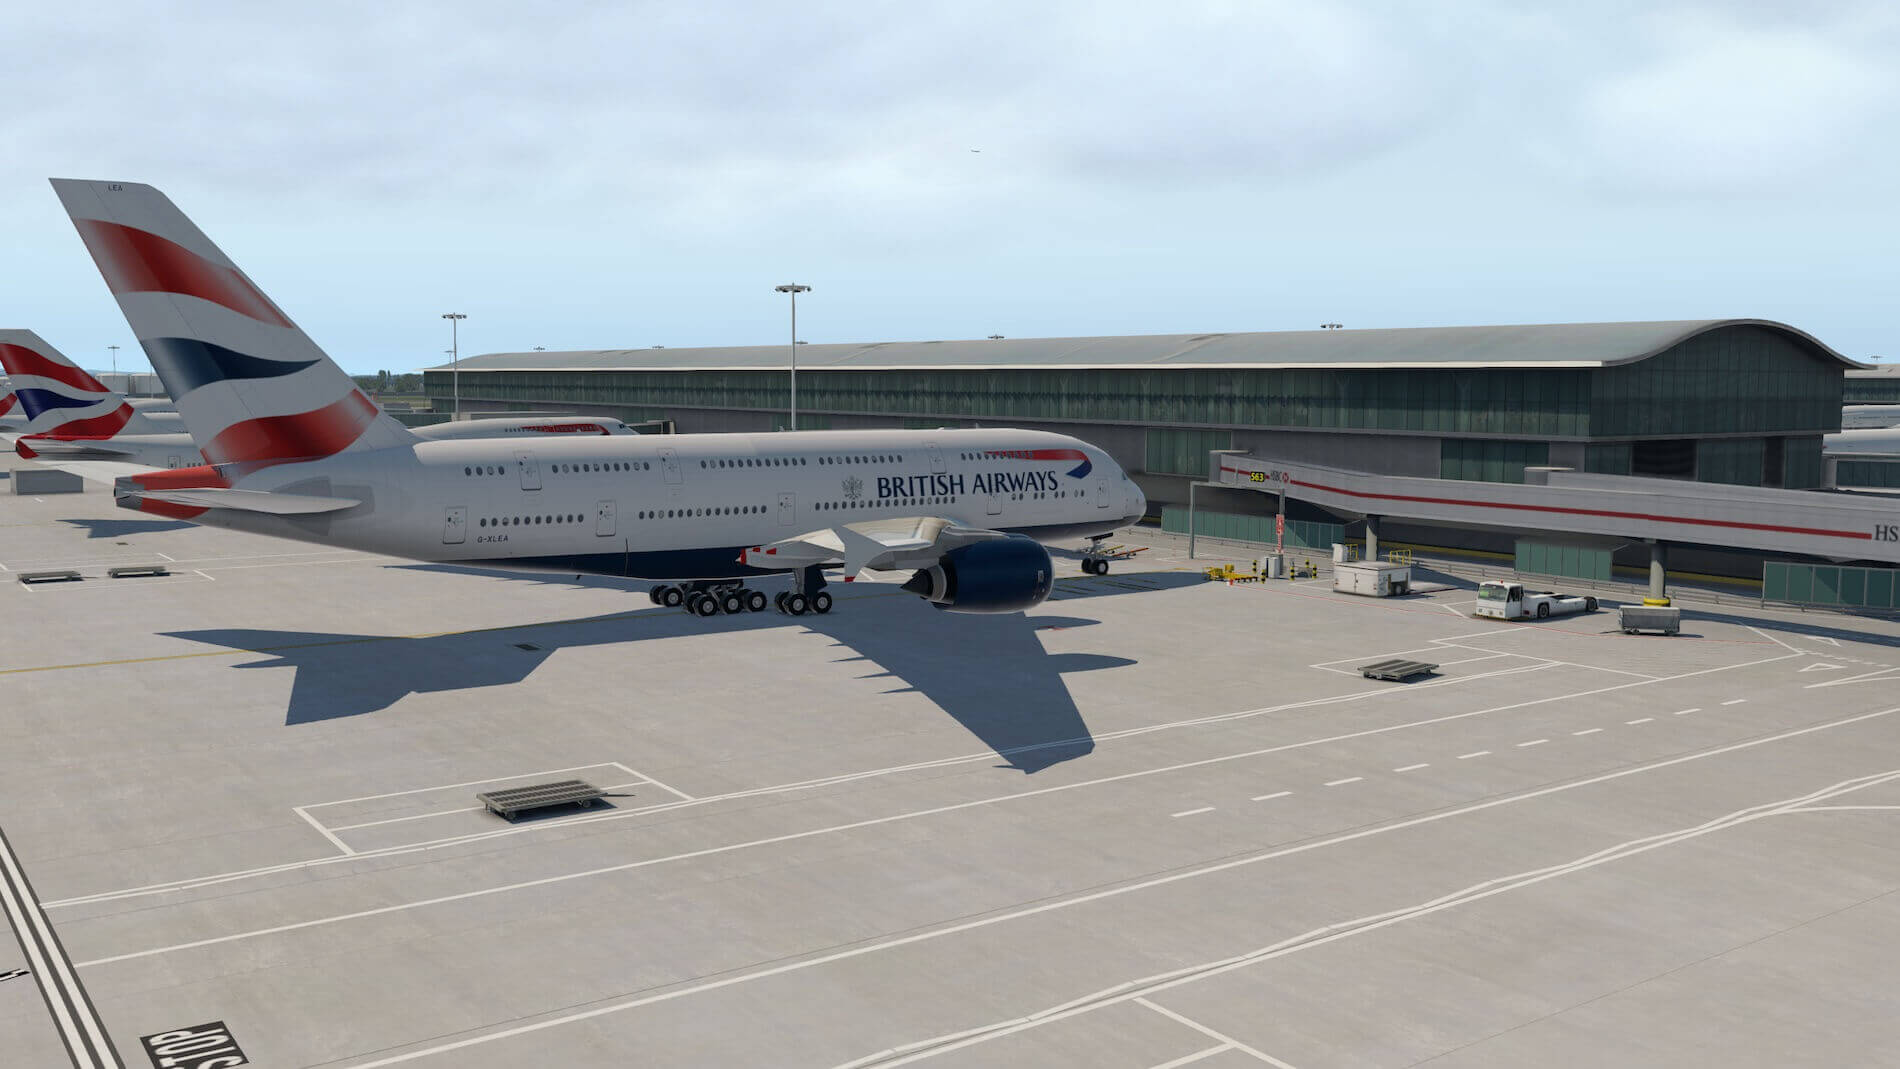
As mentioned, Terminal 5 is the central passenger location for Terminals 5A, 5B and 5C. You may experience some frame rate drop at Terminal 5A, with so many modeled objects, ranging from jetways, ground equipment and the gorgeous terminal building itself.
There’s no need to highlight again the presence of a vast amount of static ground equipment and some moving objects like passenger buses etc. The ground markings and signs are, as far as I can see, all taken into account. When inspecting Terminal 4, I made a note that the concrete areas near the gates weren’t dirty. Here at Terminal 5A they are. Not all the same, but yes, here the concrete has dirty marks from aircraft tyres, oil leaks and wear and tear from weather.
Jumping over to the Terminals 5B and 5C, you’ll notice that the main buildings look very similar to Terminal 5A. They are a little bit smaller in size, but nevertheless full of tiny detail. And yes, they all have ground equipment parked in several places, together with the same gates with jetways and so on.
The terminals look so impressive and not only that, they look so real as well. Add the ground textures of the taxiways and parking locations, the markings and signs and you have the “perfect” modelled airport. As Terminals 5B and 5C offer parking locations for the big jets, many gates have two jetways and, because they are made with great accuracy, they look as real as it gets. Let me go into more detail and see for yourselves in the screenshots below.


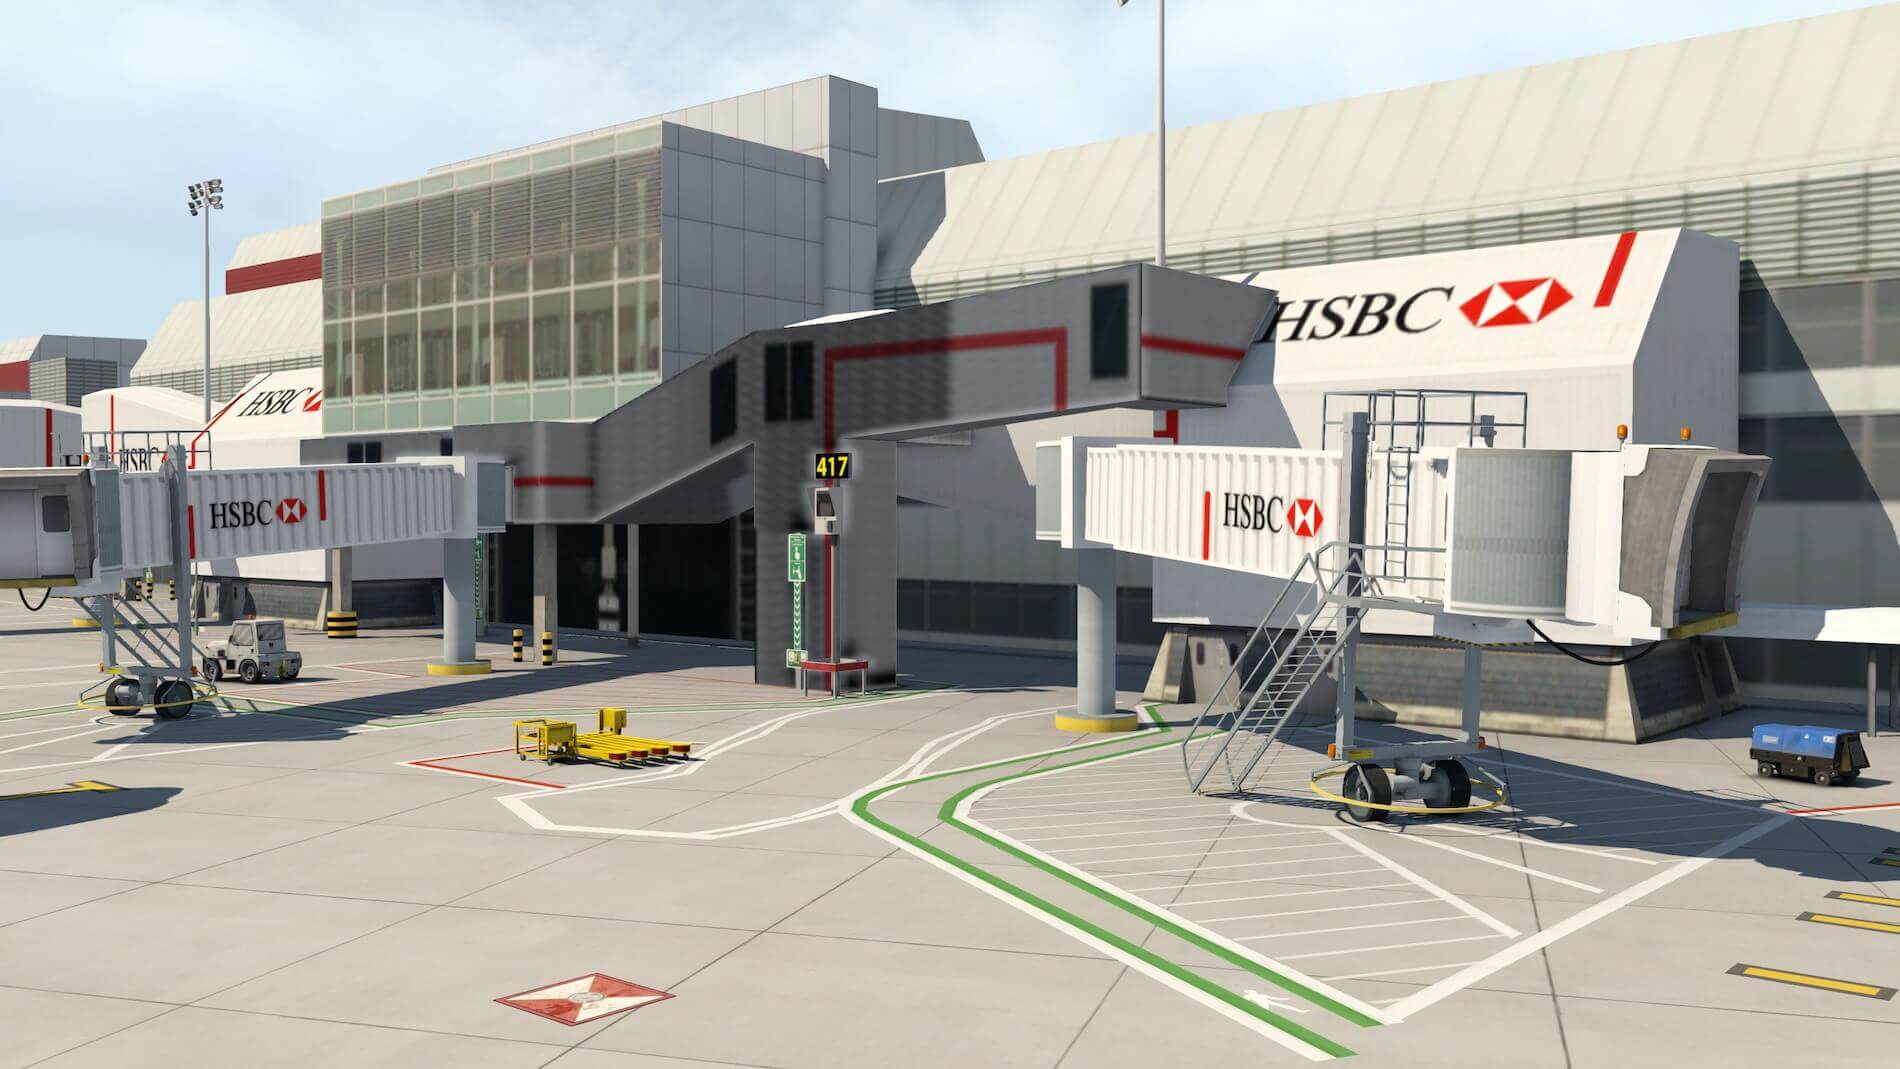
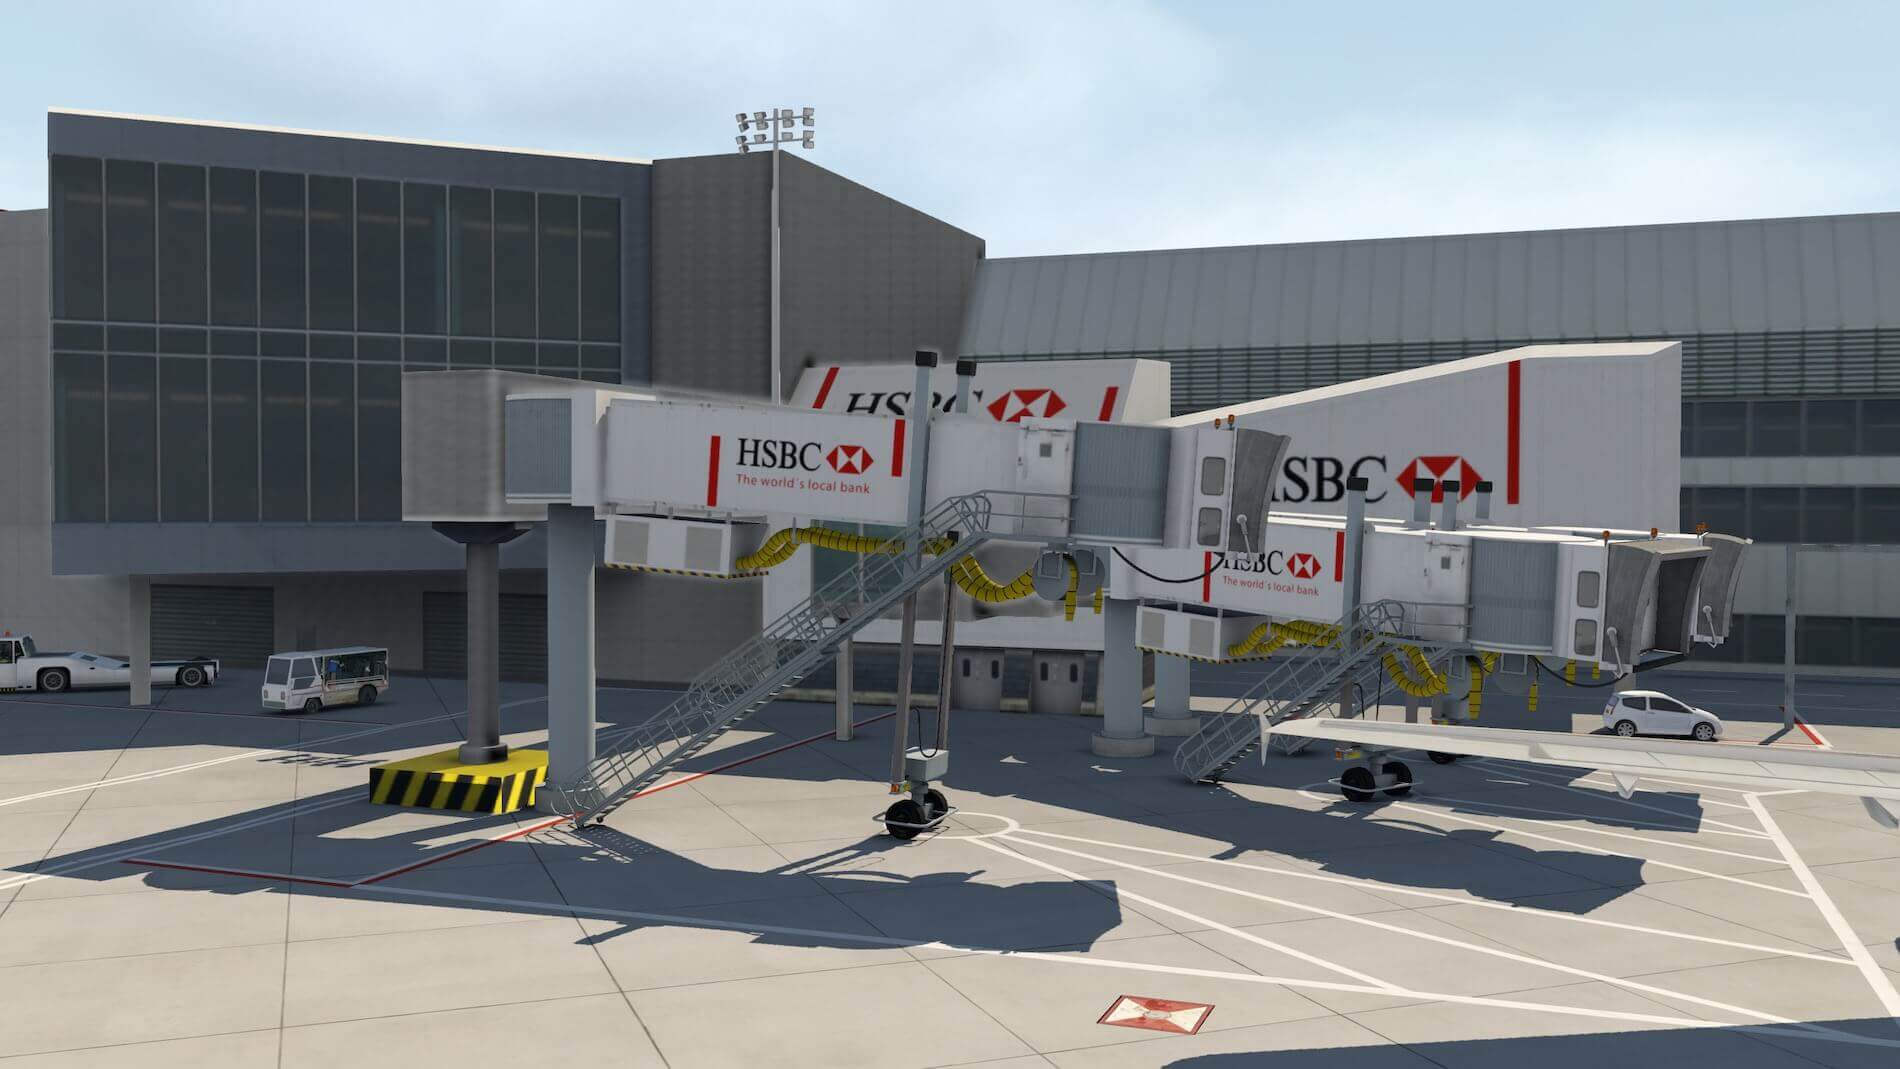
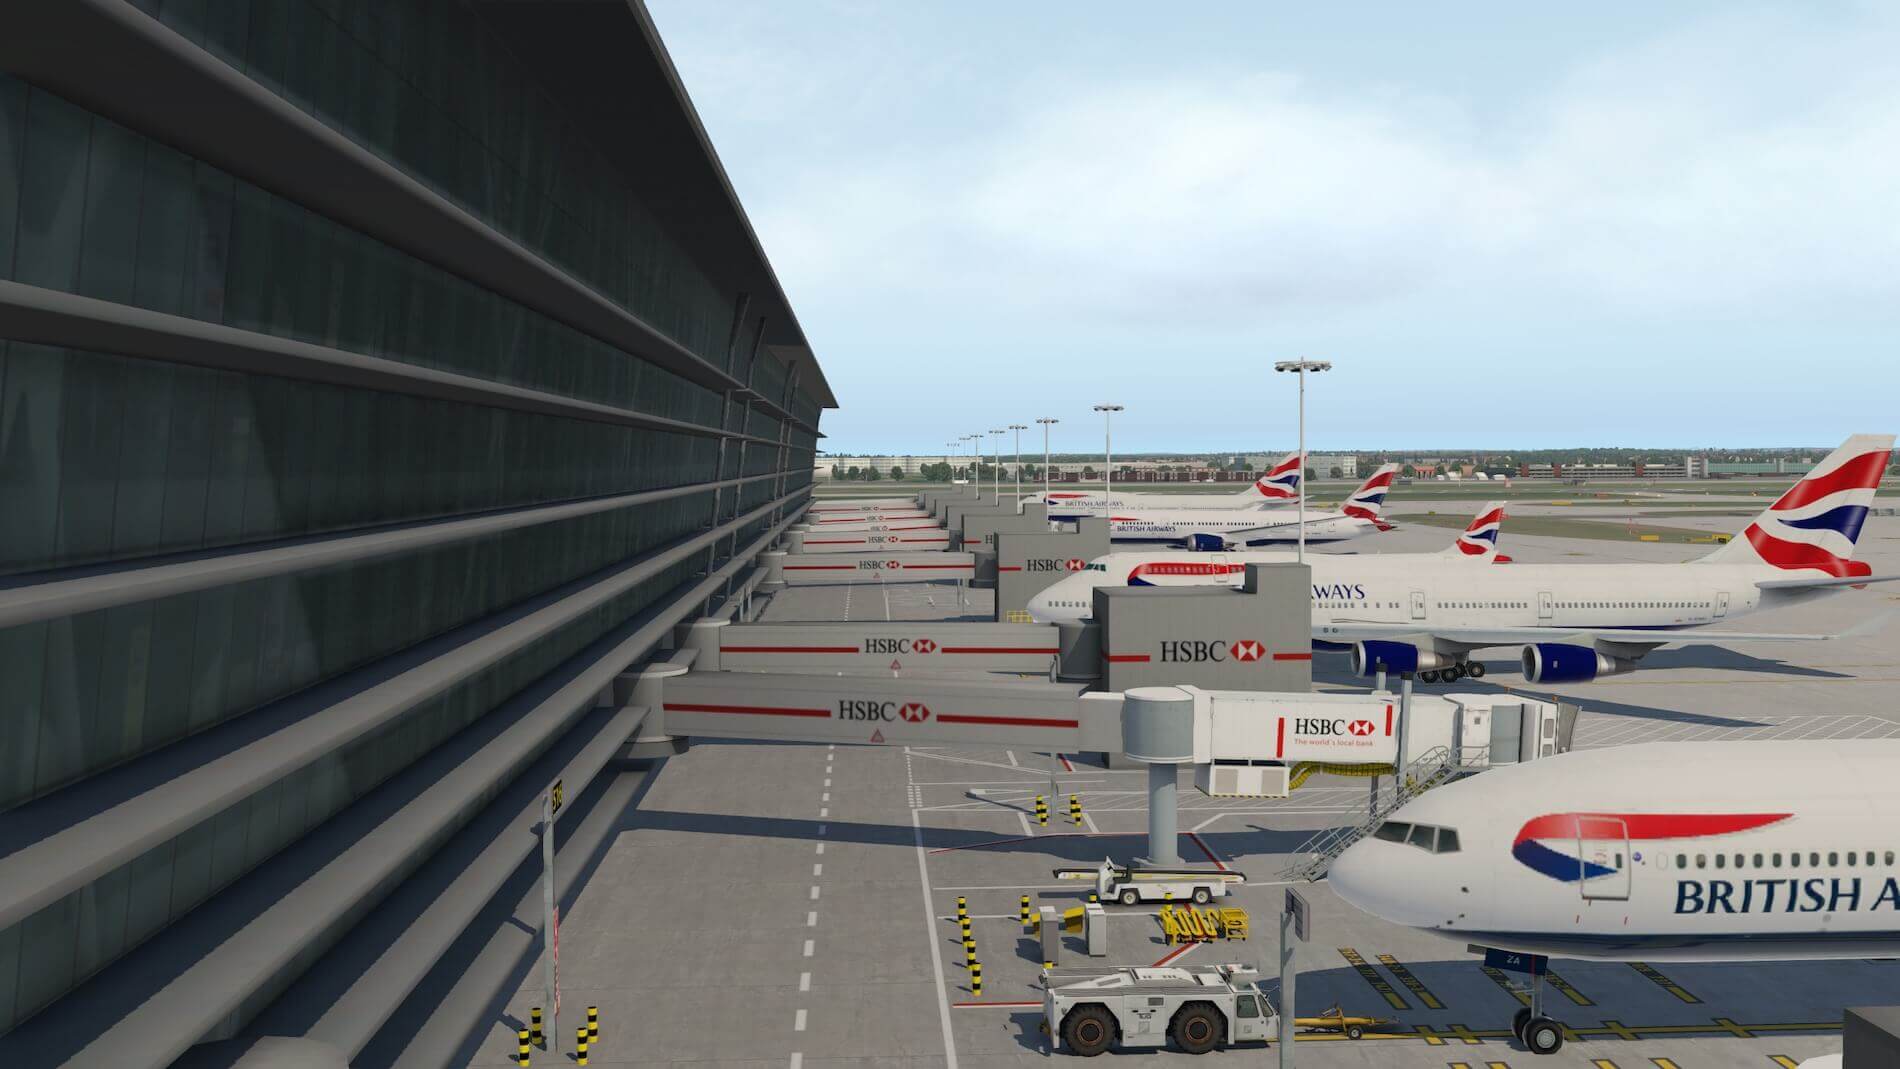
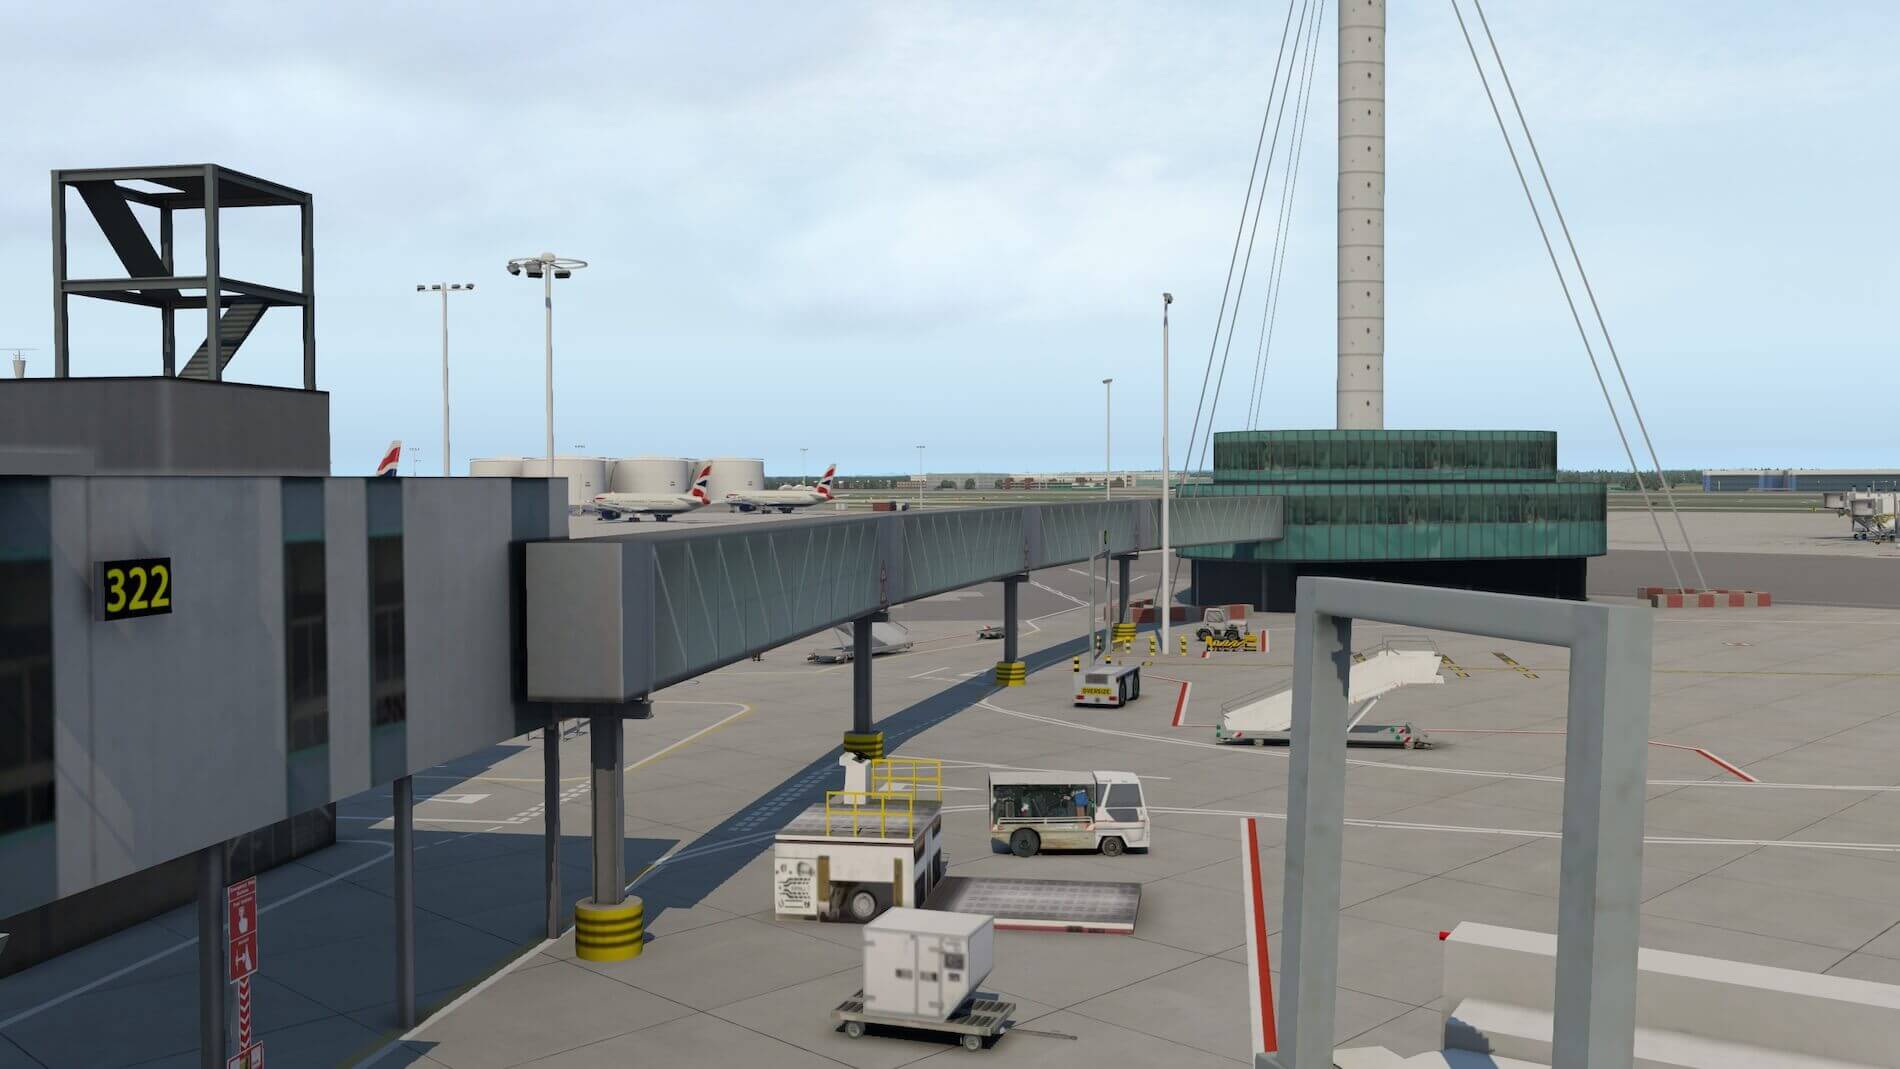
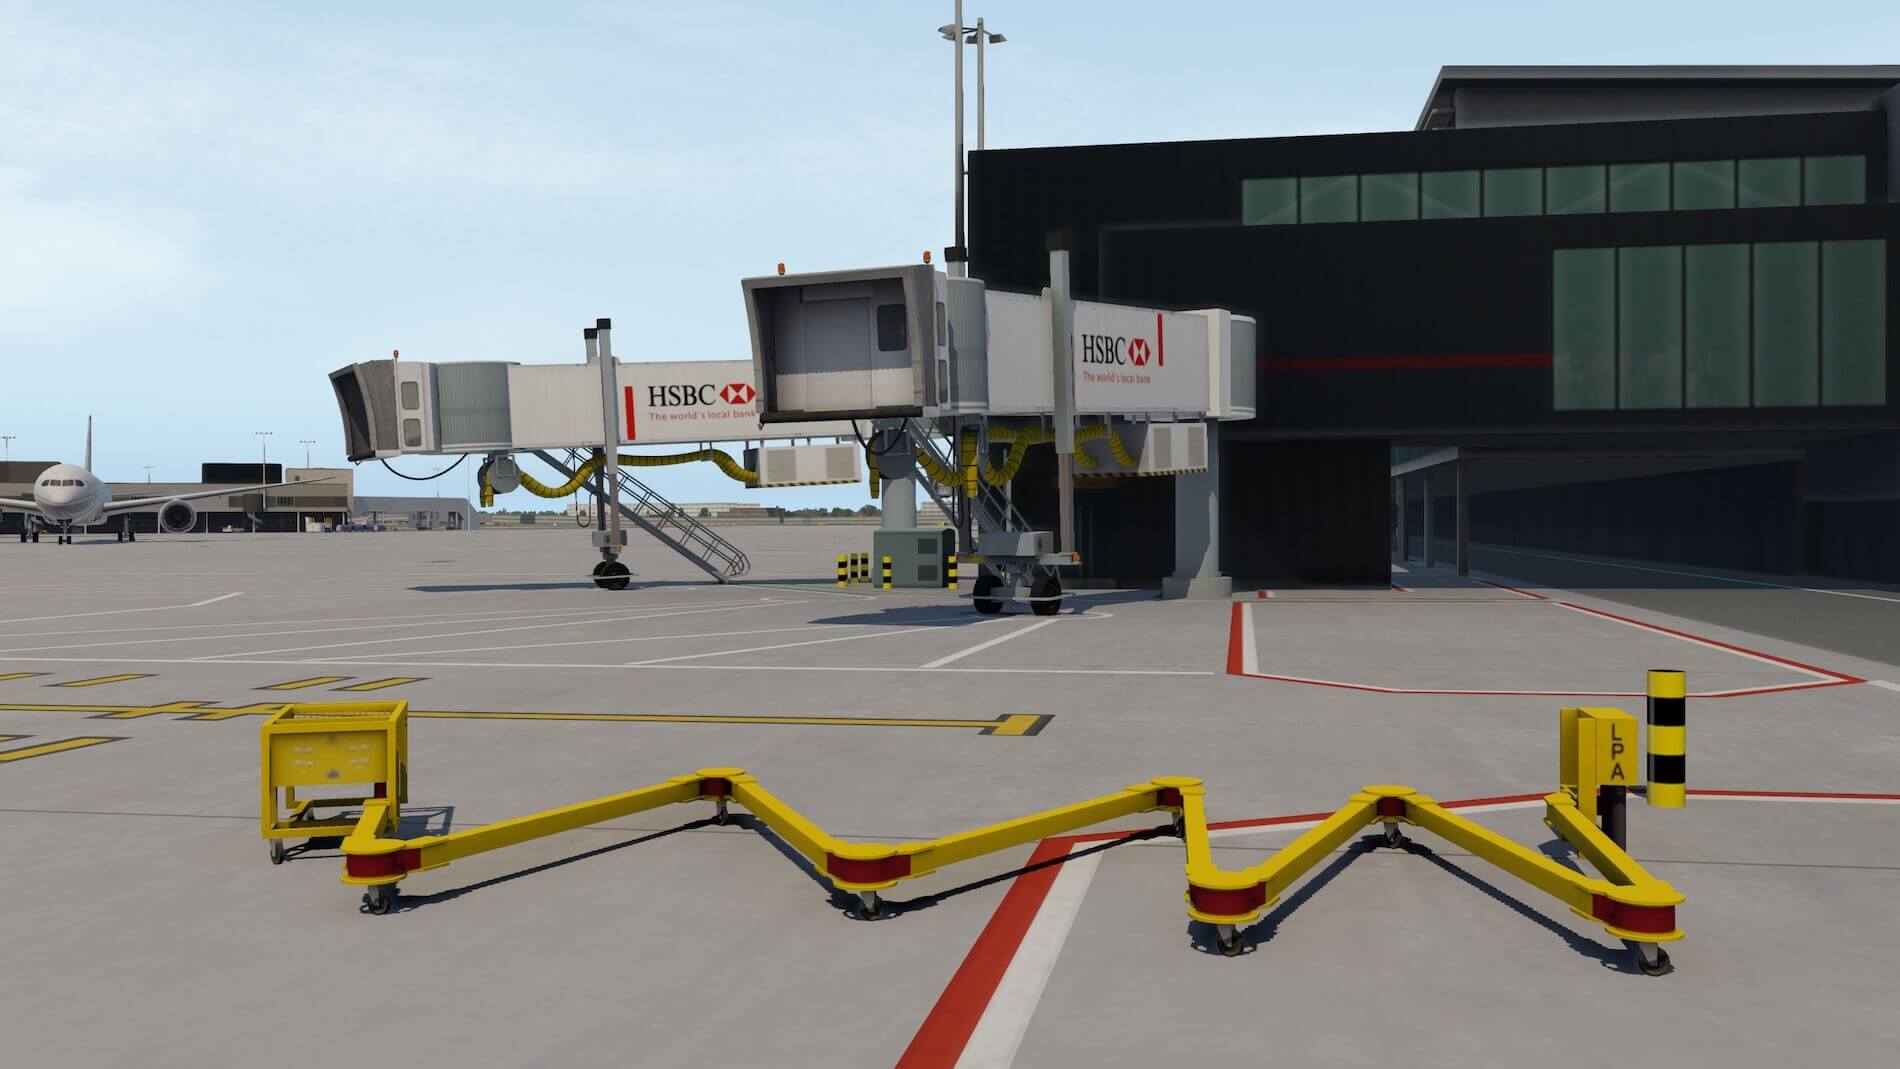
The actual jetway starts from the terminal building, ends in a concrete structure and from there splits into two jetways that can be connected to the aircraft. The jetway itself is covered with photo-real textures, but all the tiny details have been added. Take a look at the base of the jetway, the wheels, the control box, the stairs, the air supply hoses etc. Are Terminals 5A, 5B and 5C impressive? Without doubt … yes! Now up to the next outstanding icon of the airport, the control tower.


Fire Station, Control Tower
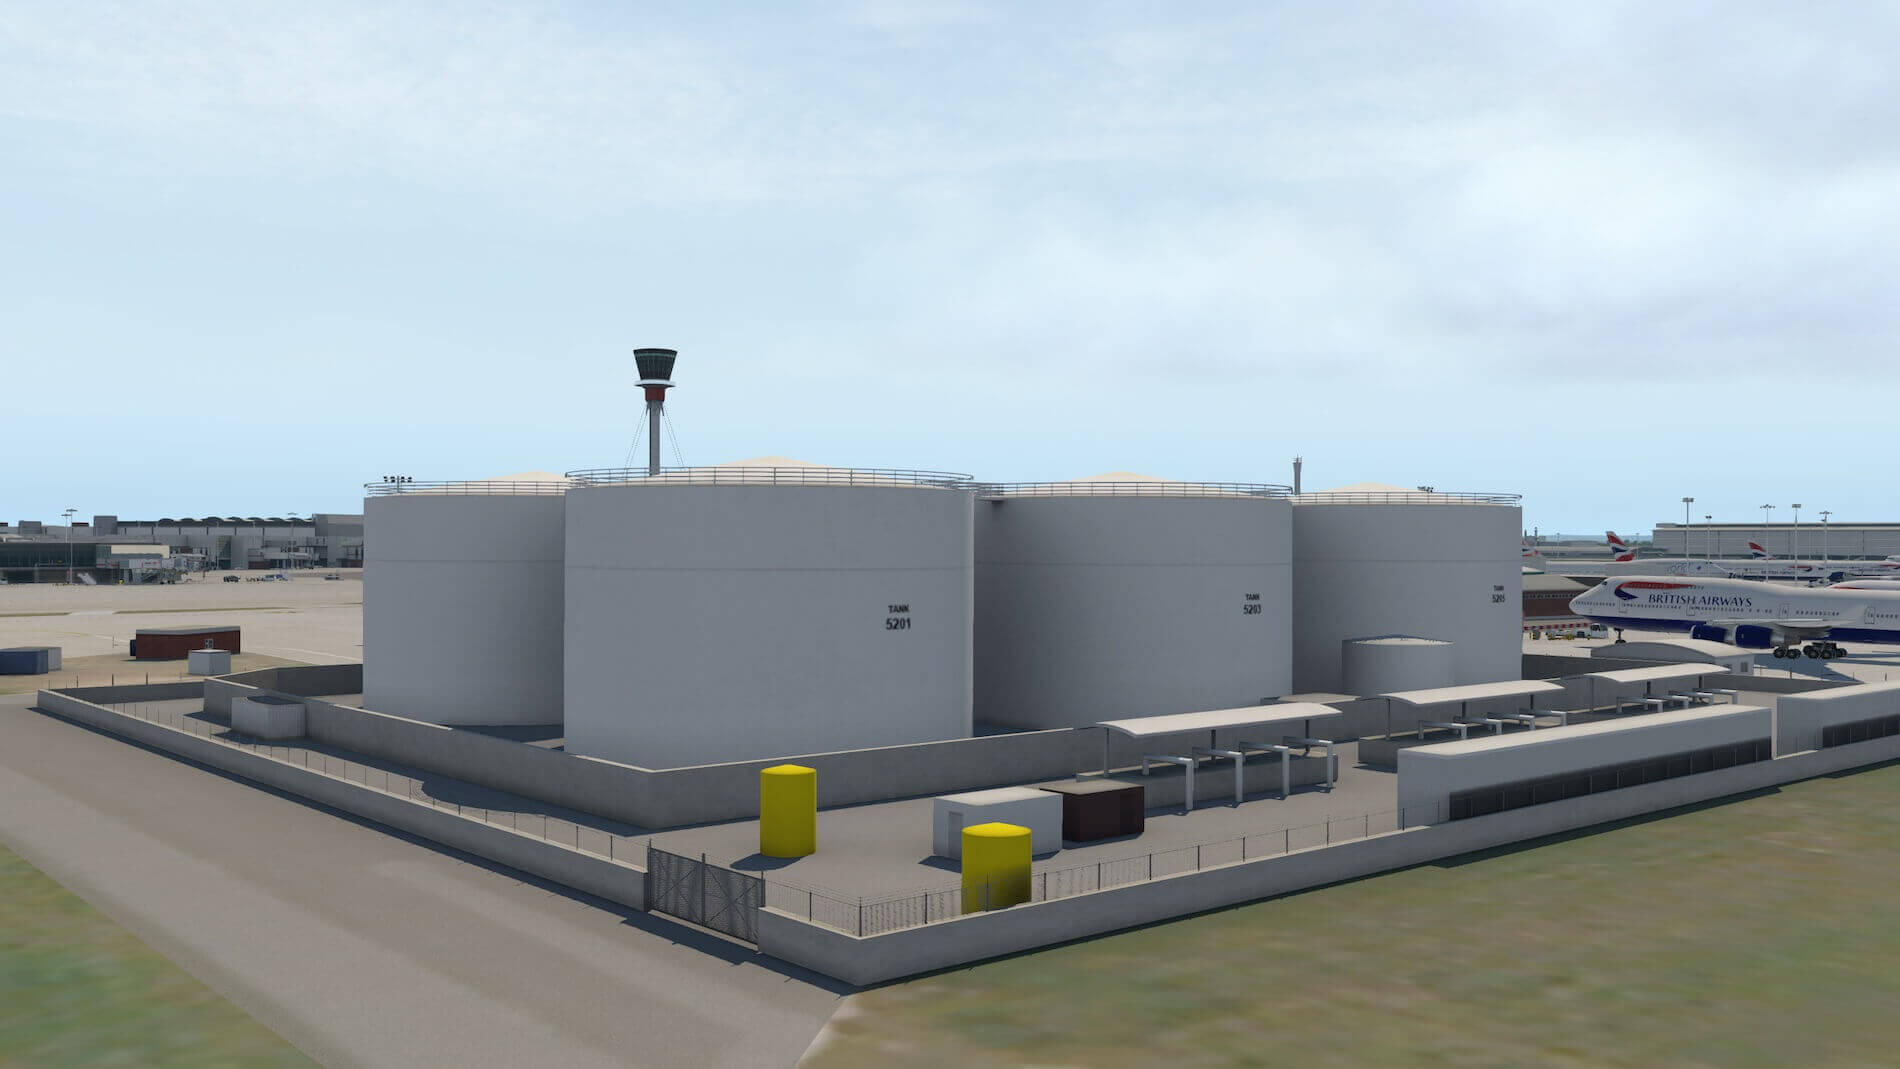
Moving in a westerly direction from Terminal 5C, you’ll find a large apron with possible parking locations for aircraft, the fire station, the so-called northern fuel farm and a little further west the magnificent, majestic control tower. The control tower itself isn’t a standalone building. It’s situated at the end of pier 7 from Terminal 3. Anyway, the fire station area and aircraft parking locations are quite straightforward. There’s not much more to say about them, except to point out that the buildings and fuel farm are all high-quality 3D modelling.
While moving around the airport so much, I occasionally noticed that the concrete textures are very different, or made of a variety of “weird” shapes. However, there’s a very good explanation for this. Take a look at Google Earth or Bing or any other program that offers you actual views of EGLL and you’ll see for yourself.
You’ll notice straightaway that on many taxiway crossings the concrete is different and that various shapes are visible. So in that respect the modelled EGLL ground reflects reality very accurately. OK, now on to the wonderful control tower.
I leave the area between the taxiways E and D behind me. The control tower may look simple, but compare the modelled tower with some real pictures and you’ll see with your own eyes that no details are missing. The green glass base construction houses the pillar with, at the end and high above the ground, the actual control section. Because of its length, the pillar is held in position by six cables running from the top to the ground.
In this way, it won’t go anywhere! Looking from the ground upwards to the top of the control tower you don’t get any impression how high it is, until you decide virtually to move up to the same height as the control center. Then suddenly you see everything around you. It doesn’t make any difference which direction you look – north, south, east or west – from this height you can monitor everything on EGLL.

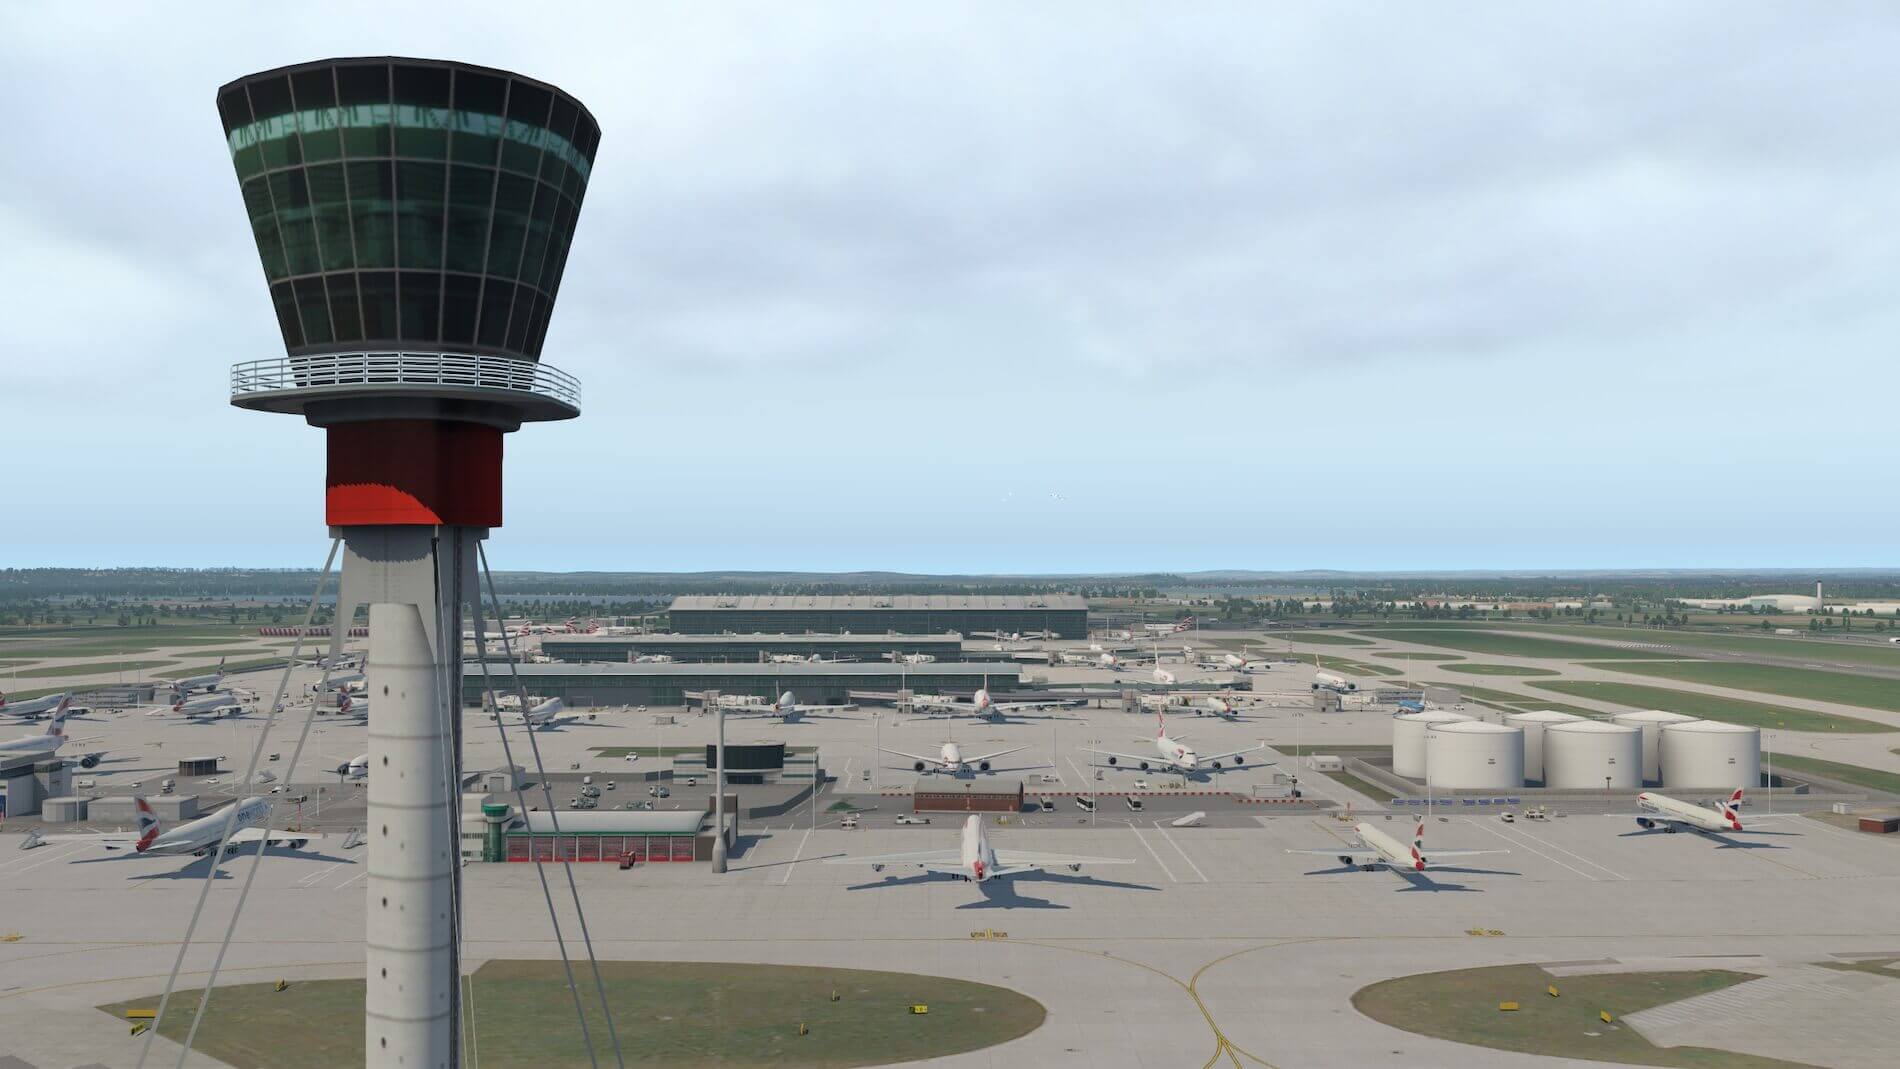


From up here you can clearly see that the control tower base is linked to pier 7 via a walking bridge. That said, time to move on to Terminal 3 with the piers 5, 6 and 7.
Terminal 3 – piers 5, 6 and 7
These piers all belong to Terminal 3, and are not the latest design. Old-fashioned or not, the modelling is good and modeled with great precision. Certainly you should check these out. I’m not absolutely certain that the jetways are the same as used on the other terminals, but they look very similar to me and that’s good news. Together with the aircraft markings and signs, the static ground equipment and some moving objects, you feel once again that you at the real EGLL.
Although Terminal 3 main building may be separate and not linked to Terminals 1 and 2A, the area of these three terminals looks like one single cluster. Opposite Terminal 3 with its piers, you’ll find Terminal 1 with piers 3, 4 and 4A. Pier 4A appears to be a new extension for Terminal 1 and, looking closely, it seems like one large tube with gates and jetways.
Besides the tube design the other aspect that looks different is the apron. All the other parking position related items are of the same quality. By this, I mean that the jetways are the same, as are the static ground equipment, the markings at the parking positions, and the moving objects etc. It may sound boring, but it isn’t and what’s the same in real life is the same here.
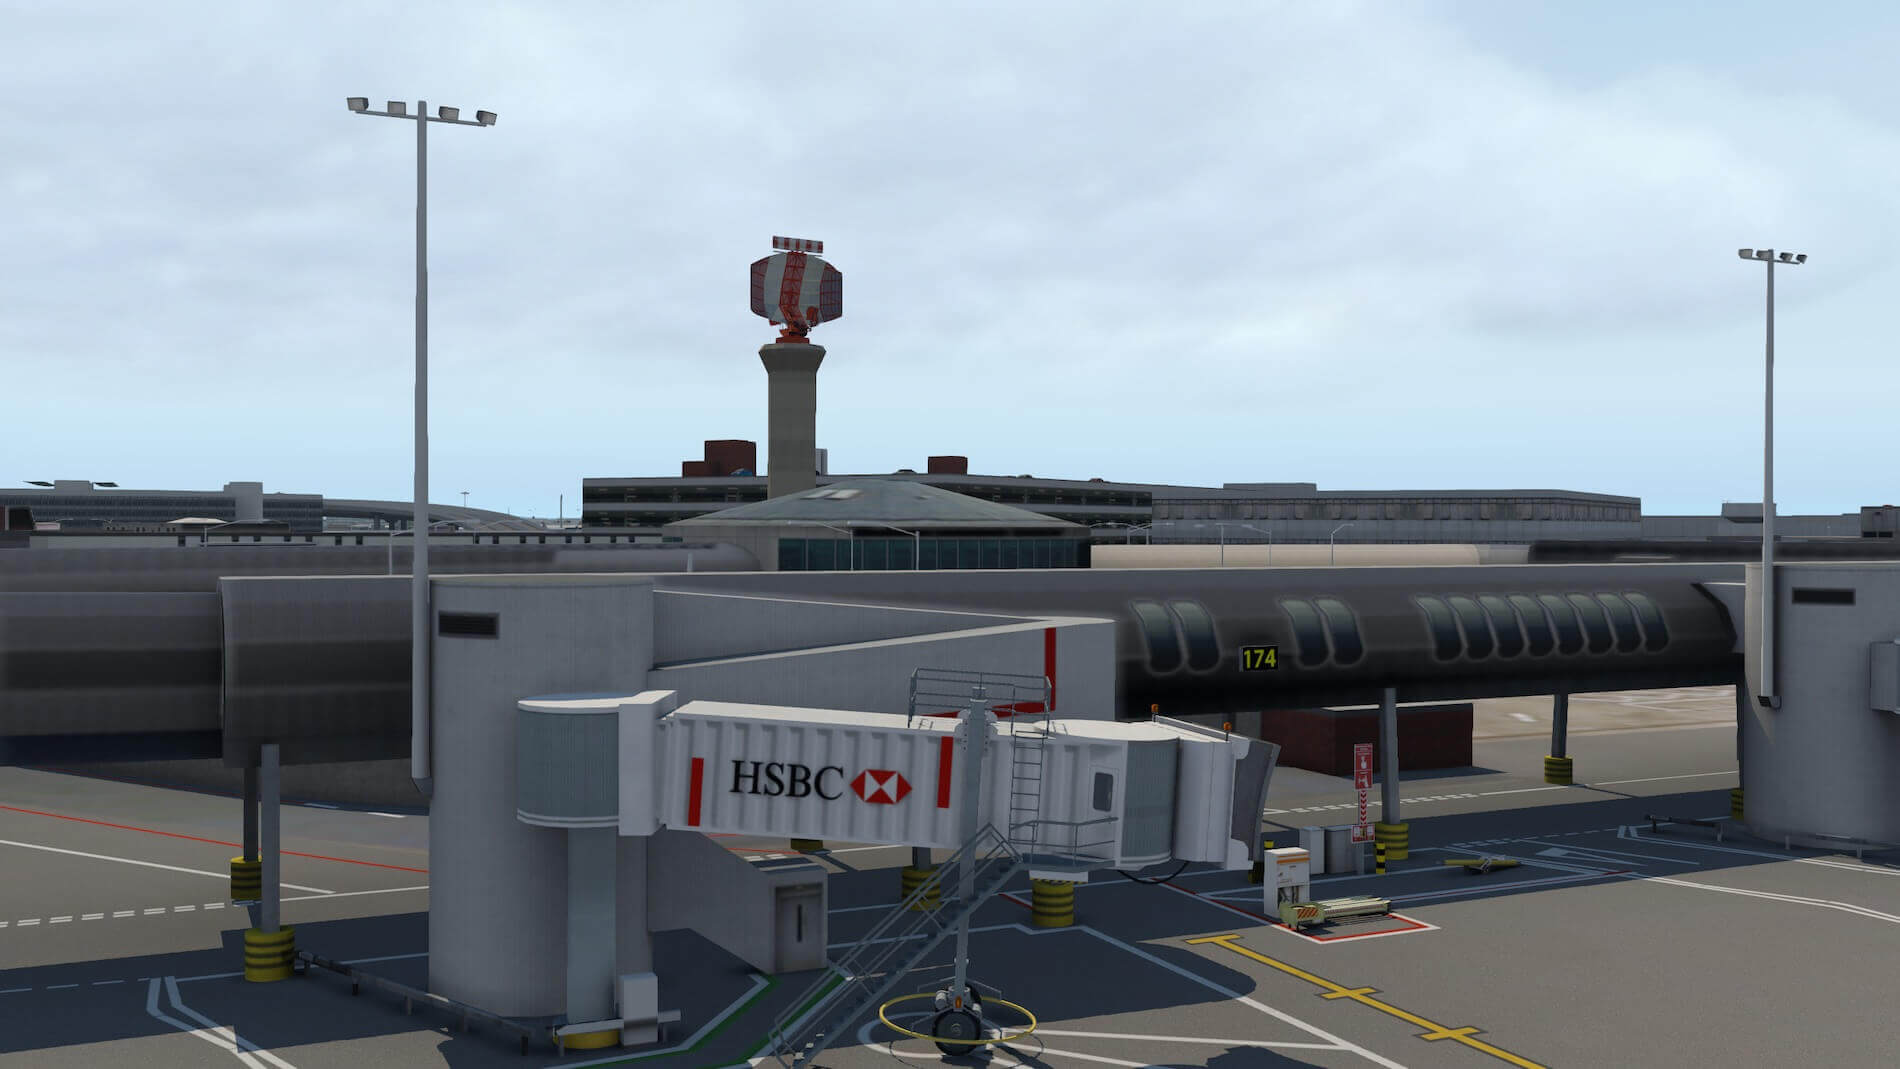
From this position anywhere along pier 4A or taxiway B, you can’t miss the radar. There’s no need to write down anything else other than ‘radar’, since this is the airport radar tower. Although it’s just a tower with the radar on top, it’s unbelievably detailed. Not only from a distance from also from close-up.


The other two piers – 4 and 3 – are of another quality. Oops, not another modelled quality as such, but another design. It seems to me to be a much older collection of buildings that make up piers 4 and 3. These piers may look different from the others, but the overall quality is perfect, nothing to complain about. When you have seen the other piers and terminals, these might look a bit of a mess overall in real life. But as said before, they are modelled from reality with great precision and accuracy.


Terminal 2A and 2B
Actually, this is rather similar to Terminal 5A, 5B etc. Terminal 2 is divided into Terminal 2A, which is a part of the main Terminal 2 building, and a separately located Terminal 2B. Terminal 2 looks like a new building. Perhaps the main building (Terminal 2A) is already a couple of years old, but definitely newer and much more modern then Terminals 1 and 3.
I like the way the main terminal building 2A is modeled. It’s what I said – modern, with a wave looking roof, black walls, clean apron and with the usual jetways, ground equipment, moving objects, etc. Worth highlighting – and I’m almost repeating myself here – is that each parking position has its own GPU with accompanying controls.
It surprised me that, at some parking locations, there are end stop aircraft identifications displayed while at others these are omitted. Have a look for yourself, for example, at the gate positions 224 and 223. Not a big deal and also I am not at all sure they should not be portrayed this way anyhow. It’s not that unusual to have positions with and without aircraft type parking identifications.
I must say that the overall impression of Terminal 2A and 2B is outstanding. By the way, this time Terminal 2B isn’t a small replica of the Terminal 2A building. More noteworthy is the way the 3D modelling has been executed which like so much I have seen so far is worthy of a big compliment.


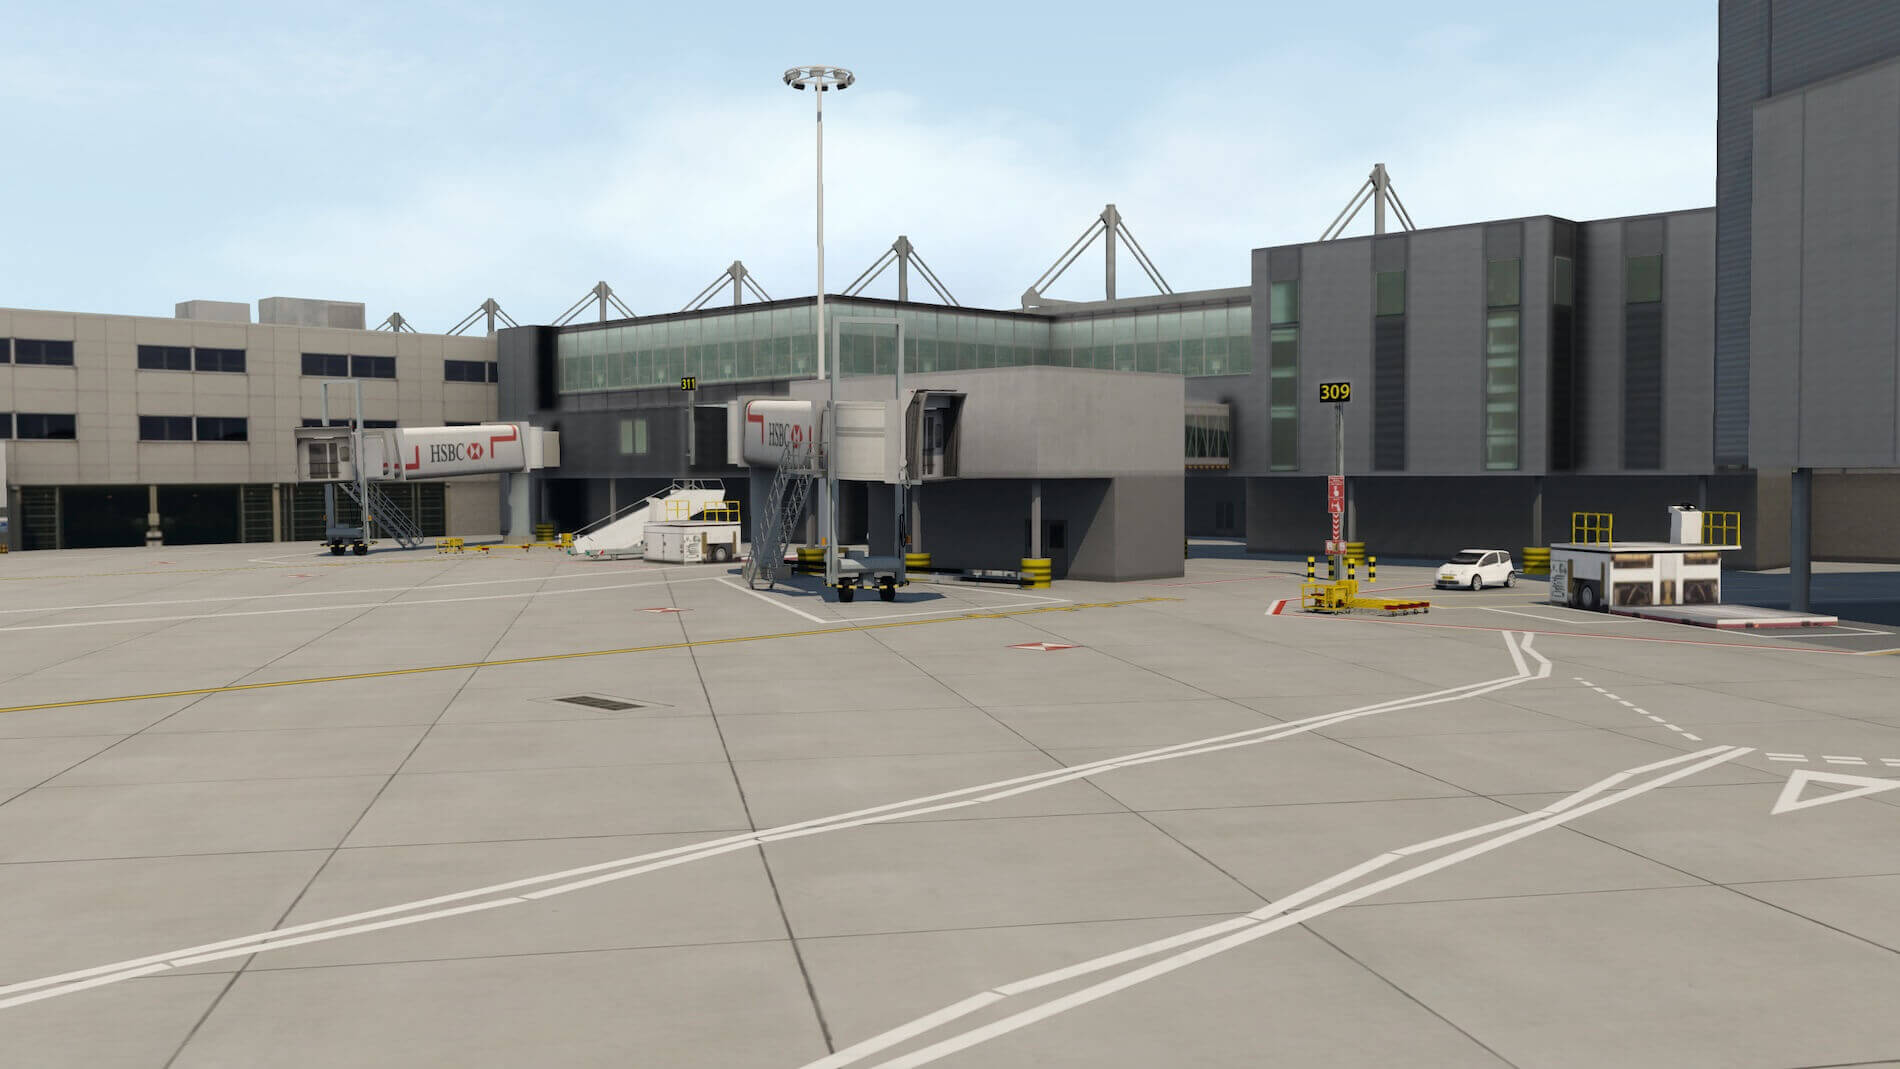
The Terminal 2B building may look different, but the way the jetways are connected to the terminal is much the same. Let say it’s from an Italian designer! Why is it like this? I’ve got no idea, but it looks both modern and impressive. The gates and jetways are connected via a black construction to the actual jetway and, as you can expect, these are of the same overall high quality as I’ve seen with all the other terminals.
And what else is there? Let’s check it out!
Rental Area, hotels and other areas
The last location I haven’t seen or inspected yet is not so spectacular, but still worth checking out … the car rental companies, some hotels and offices and tons of car parking locations, all north of runway 27R/09L. Along these secondary airport facilities runs a road that goes around the airport border. You may remember that we discussed this road briefly when we drove from the cargo area to Terminal 5A.
This same road runs along the previously mentioned facilities and ends close to the maintenance area. About halfway you’ll find a model of the Airbus A380. No, not a real Airbus A380, but a smaller replica.
I think that covers most aspects.
Let me see if I’ve forgotten anything… frame rates perhaps? I’ll cover that in my summary section, and of course that so much depends on your computer and your rendering settings. However, there’s something else that needs to be brought to your attention … the airport at night.
EGLL by Night
Being at EGLL around sunset, sunrise, or whatever evening/night lighting condition you prefer, is enormous fun. Is there any particular place I would like to highlight? No, not really. All places look amazing by sunset. The overall airport lighting is modelled is such a way that it looks real, although I have to admit that I’m not sure how it compares with the actual EGLL at night. Check out these sunset screenshots.
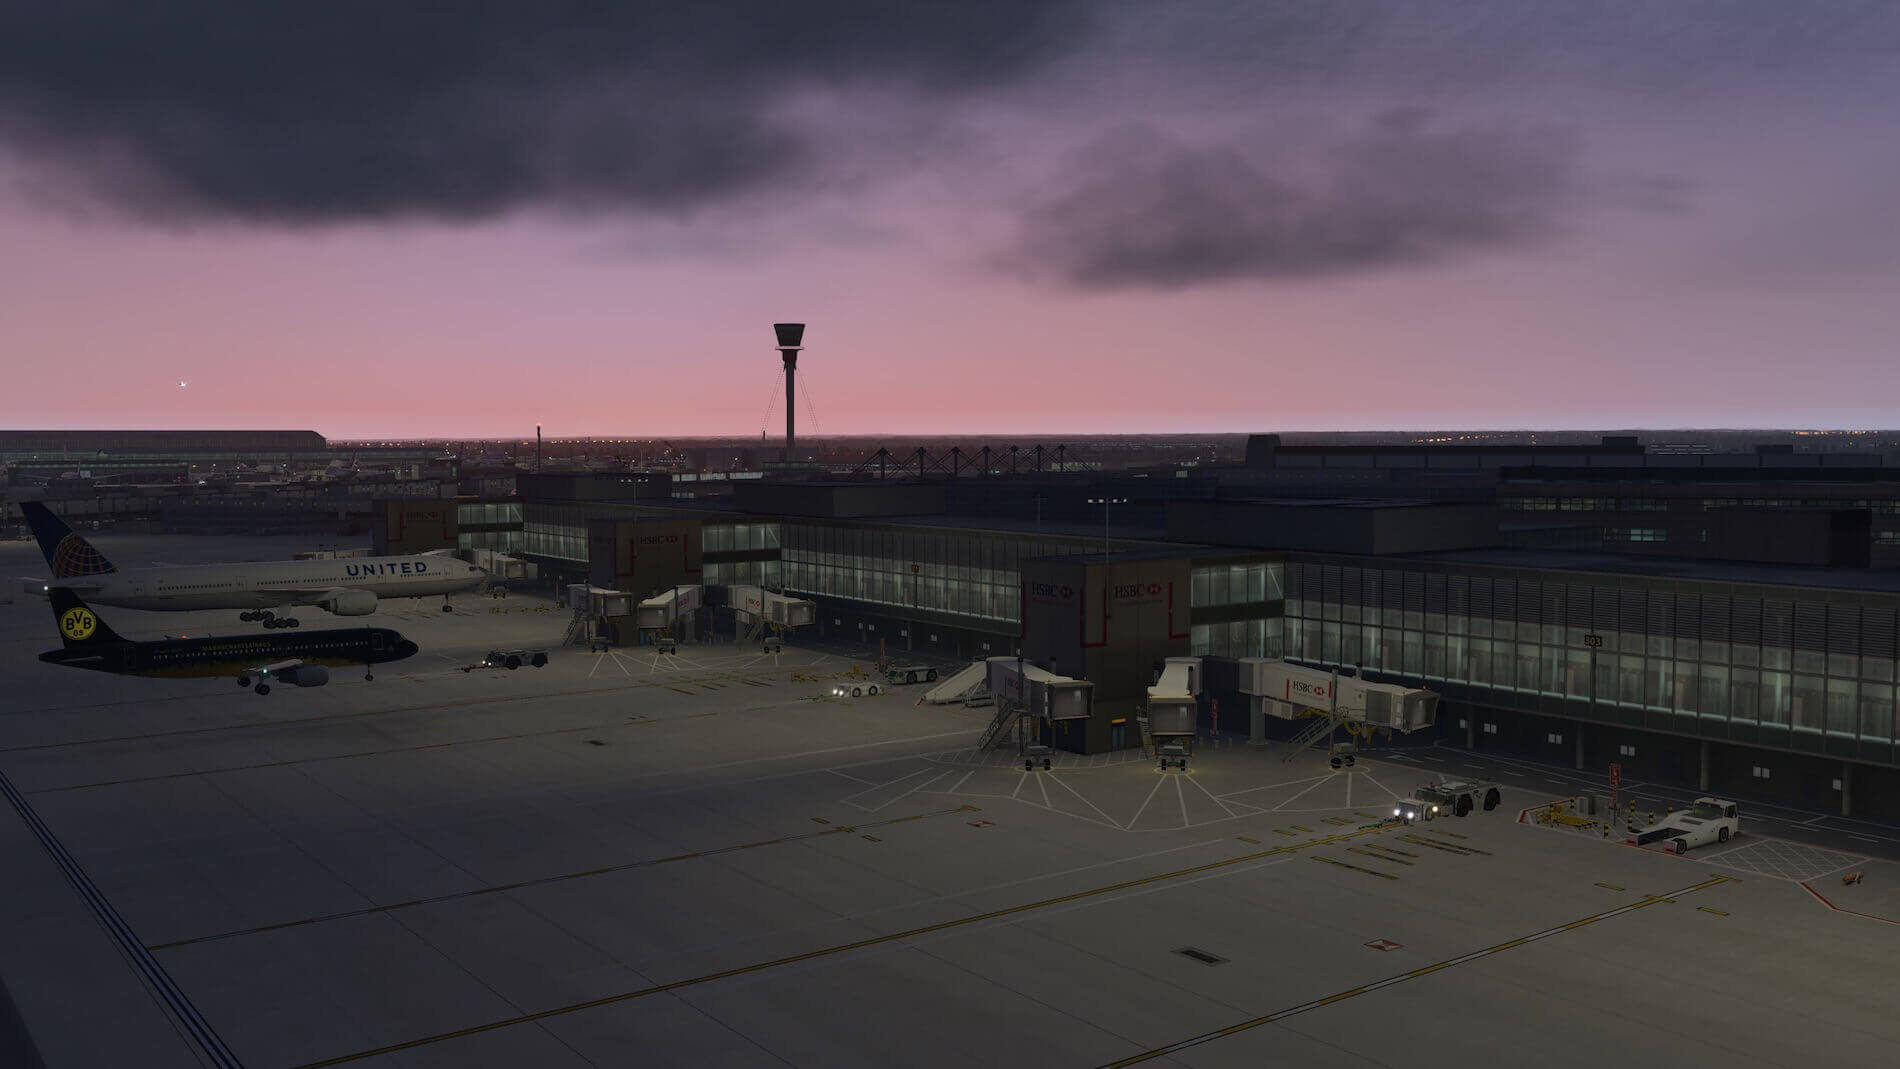

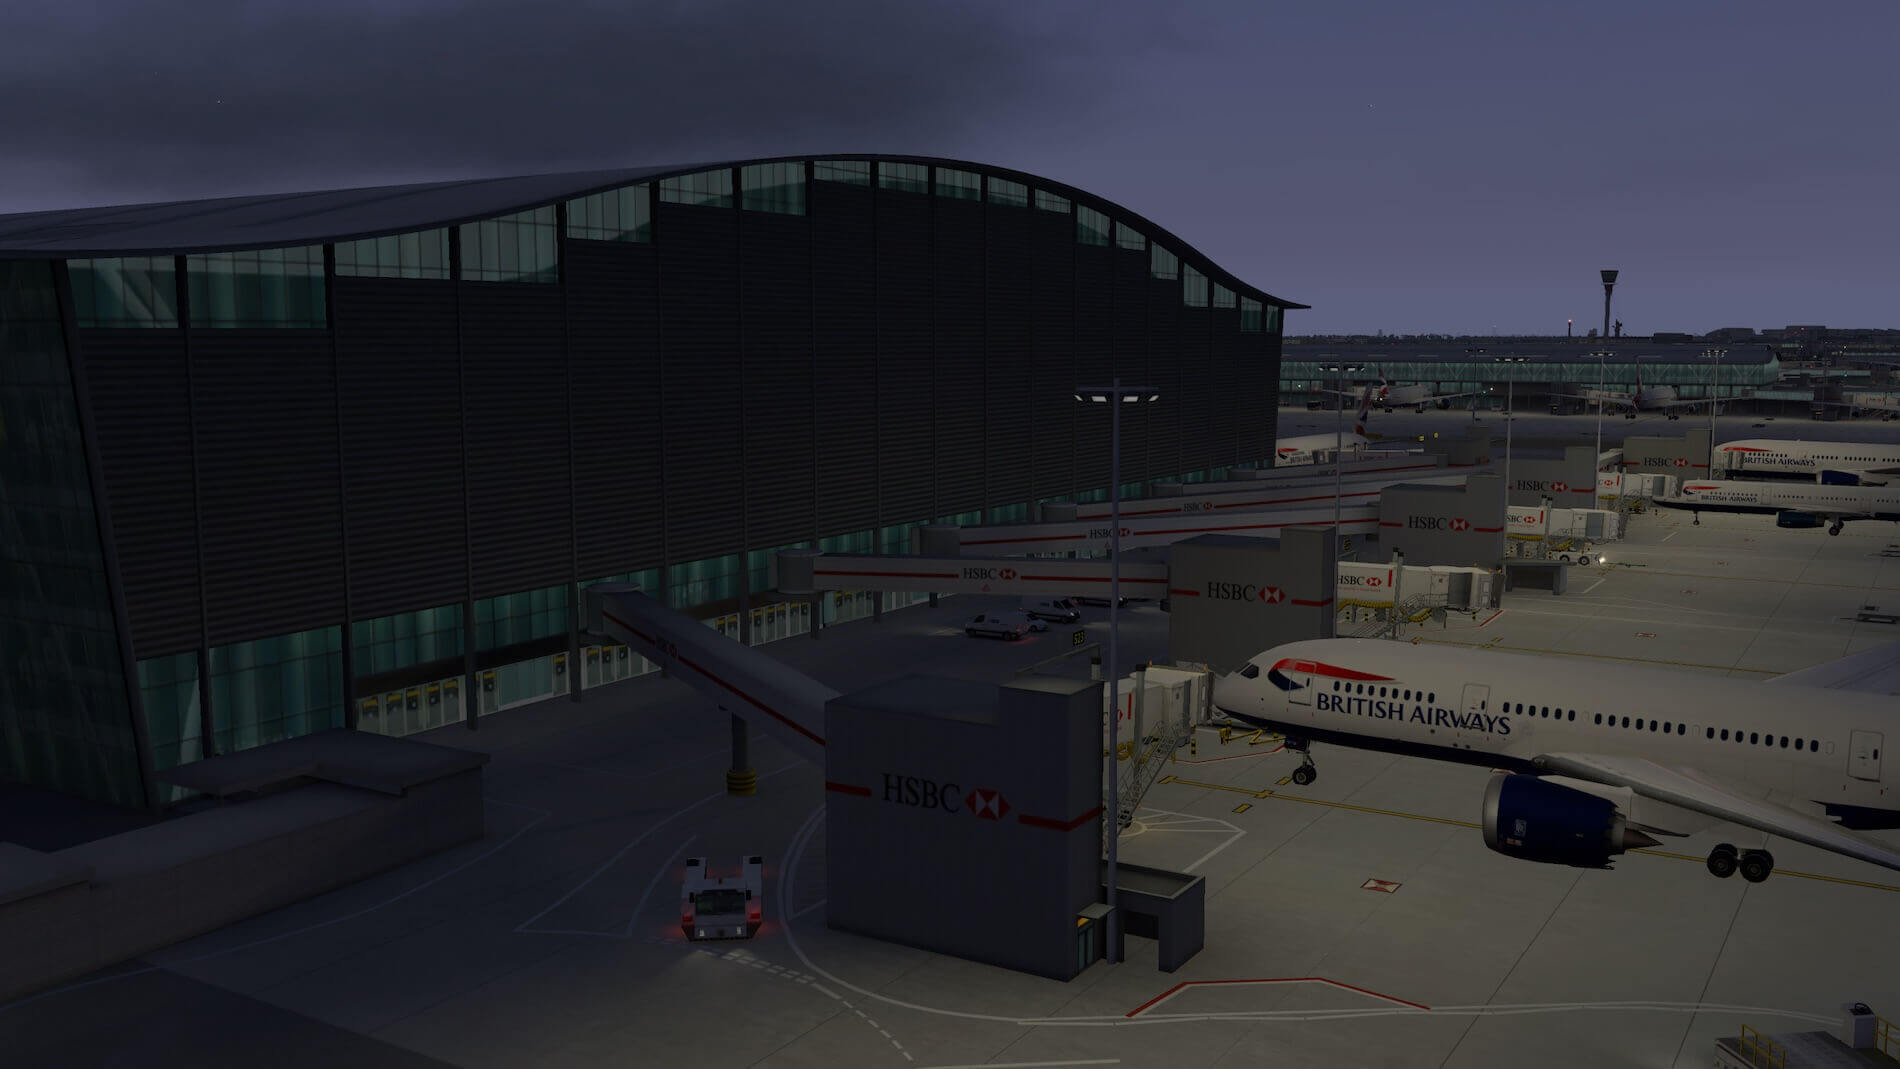
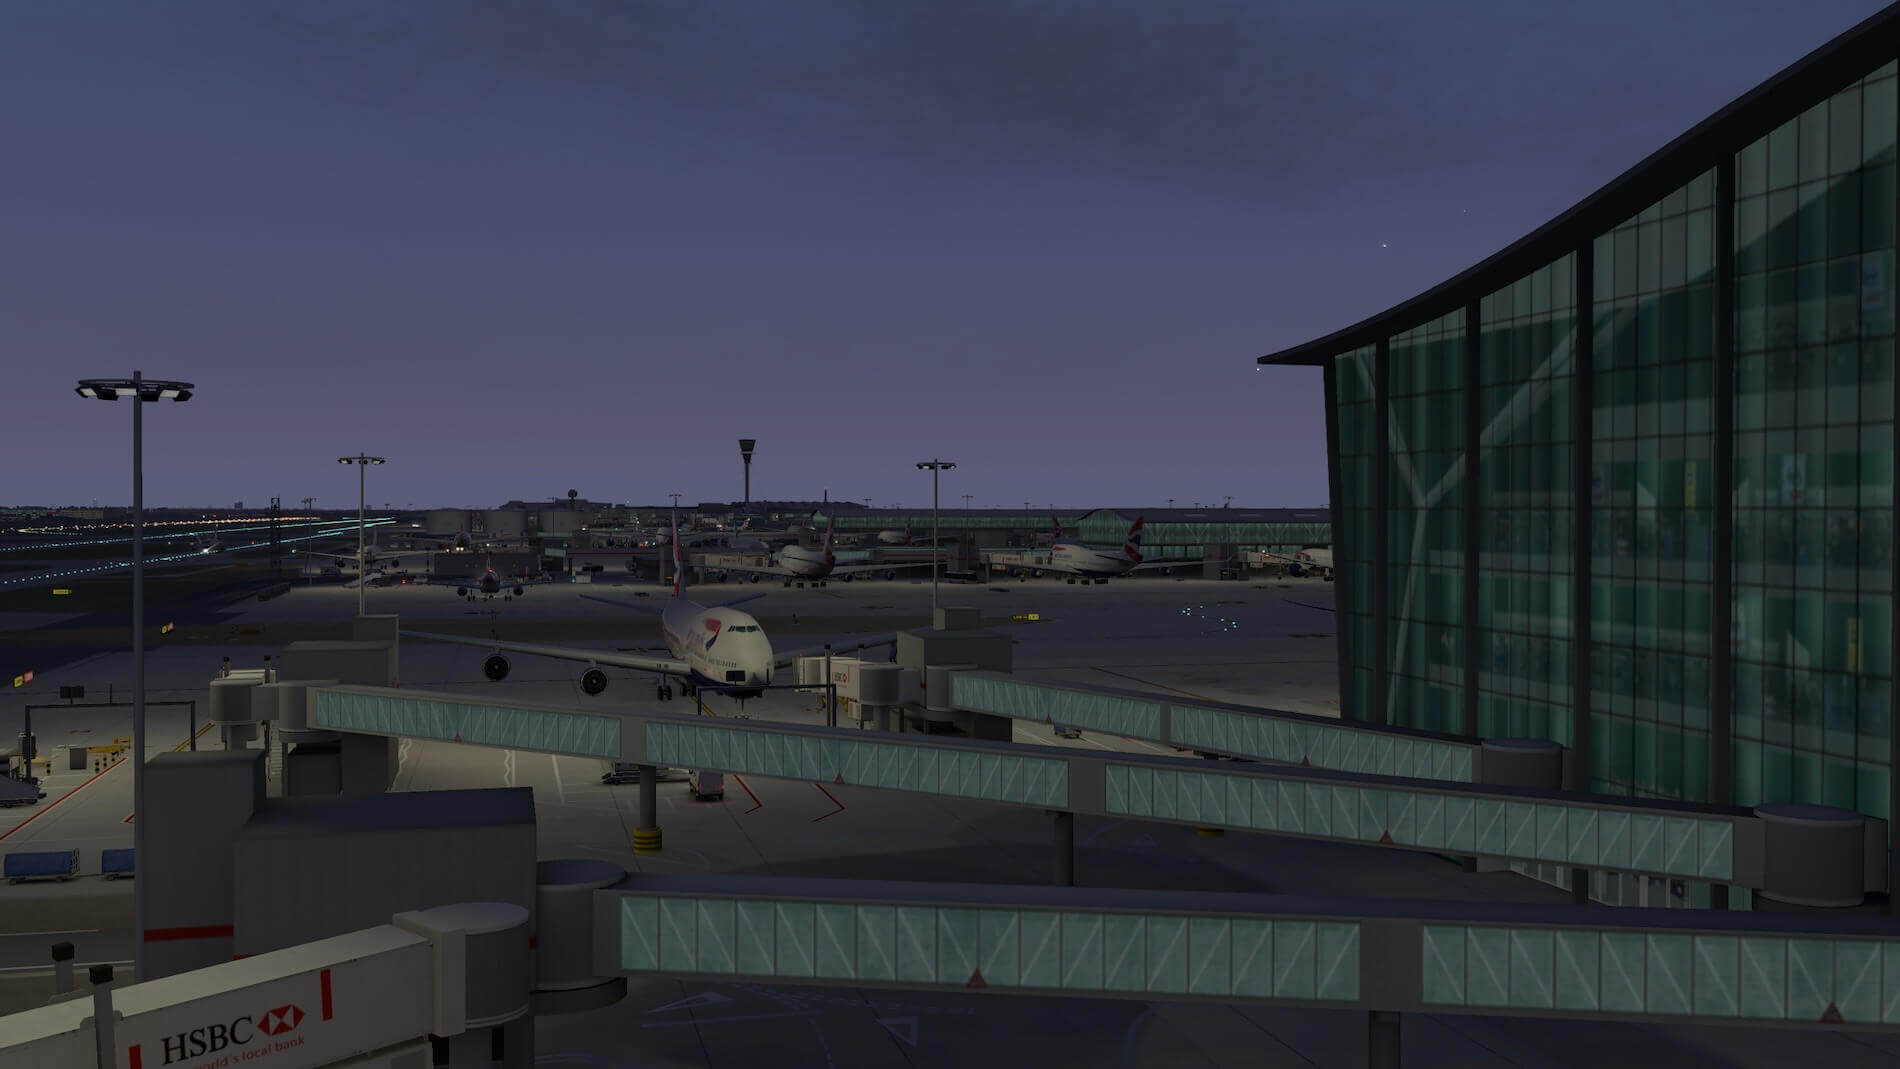
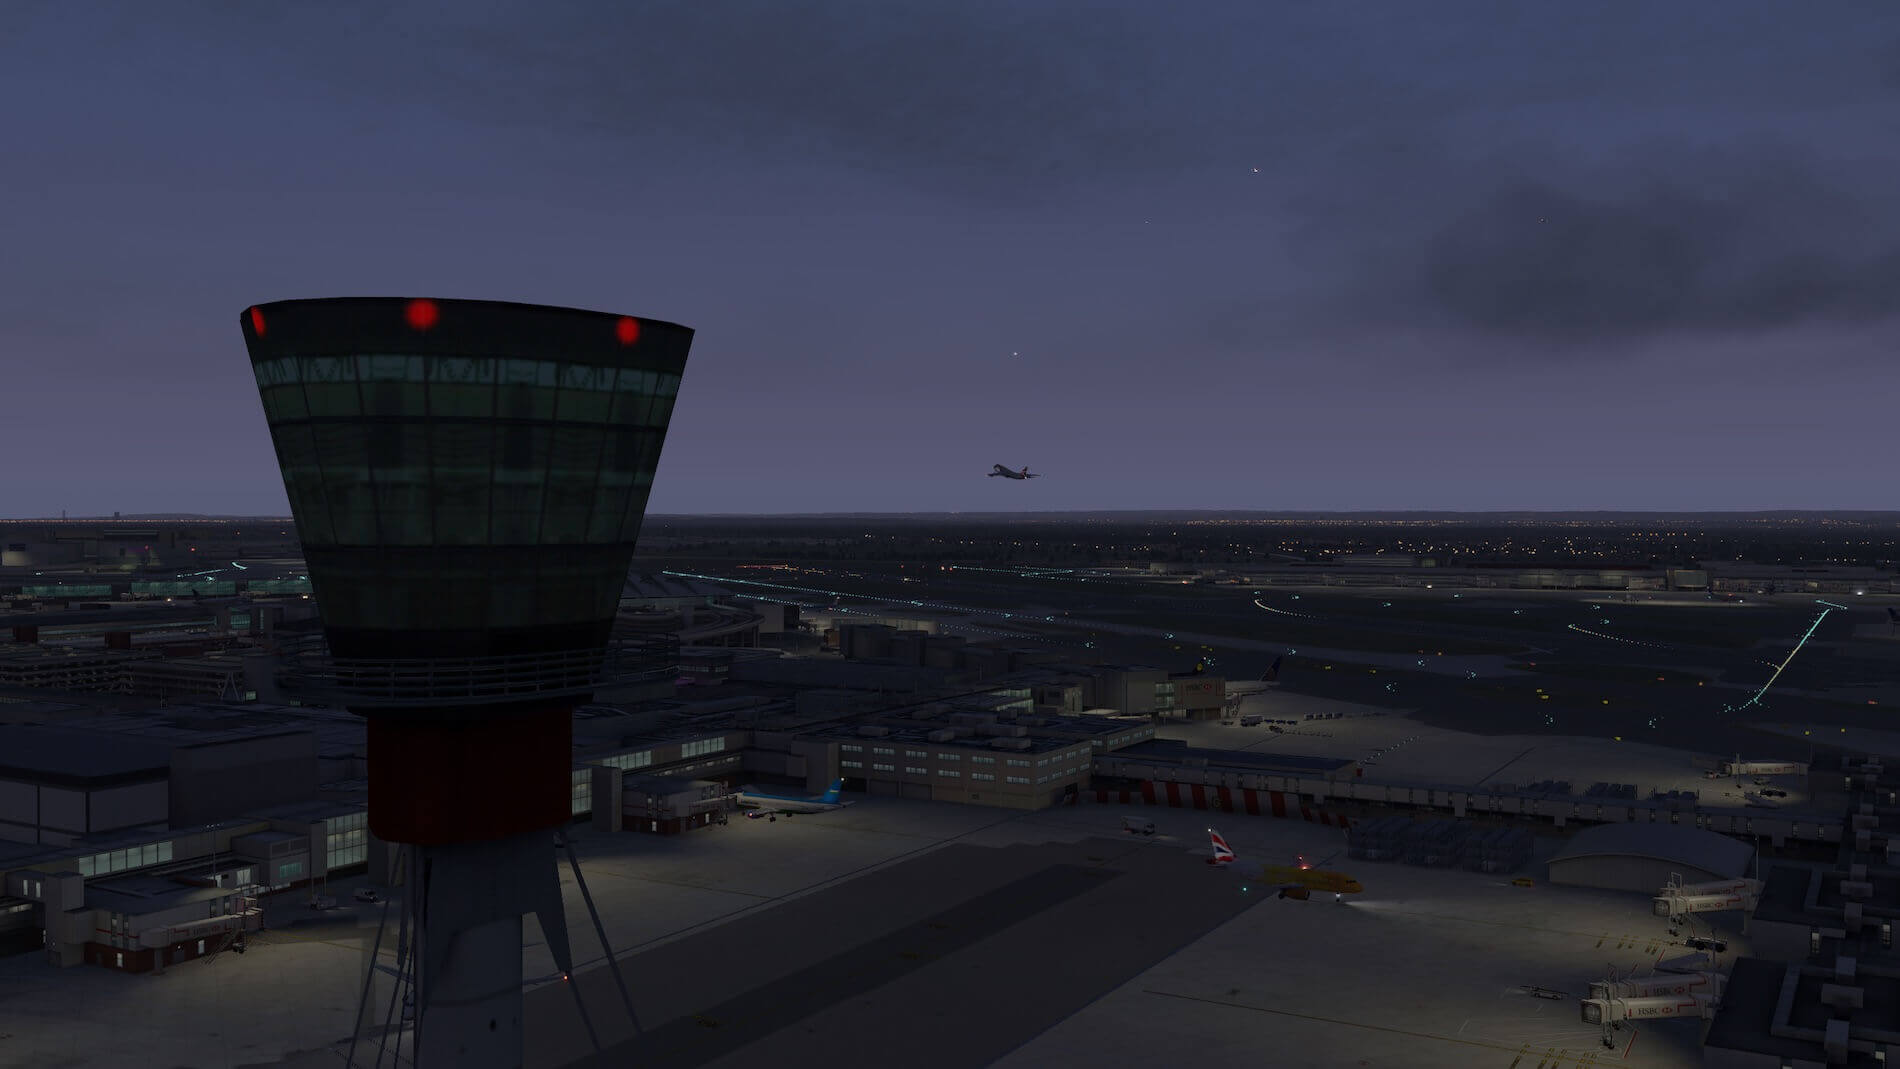

Happy with these sunset screenshots? I am, but that’s not so important. You should like them too, but I’m quite sure you will.
Summary
After writing long reviews, I often reflect whether or not it makes sense to do a summary. The answer is yes and no. No because there’s already tons of information to be taken in, but on the other hand there is so much it is possible you might have missed something.
OK, let me try to keep things simple. I will begin with the obvious: ‘is it worth purchasing such a large European airport?’ That question is quickly answered, YES!
It is worth the money since it covers an important airport within the European airports. If you prefer to fly long stretches to the United States of America, the US offers you many superb airports, but also within Europe there are some extremely high quality airports too, the recent released ShortFinal Design EDDM, another Aerosoft EDDF, and so on.
What mentioned several times in the review, depending on your PC or Mac, you might need to adjust your rendering settings to get good frame rates. Remember, EGLL is a large and complex airport with lots of animations, a large number of static ground equipment and high quality buildings and other objects. Put that all together and it does, no I’m quite sure it will have an impact on your frame rates. Once you adjusted the sliders of your preferences, you’ll enjoy EGLL in the same way I did.
Another option is using additional FlyWithLua freeware add-on plugins like 3jFPS-wizard | Enjoy Smooth Flying Version 1.3 X-Plane 11 or FlyAGI Tweak Utility Version 1.09f. Oops, almost forgotten … FlyWithLua for X-Plane 11 NG version 2.7.9.
Anything else? With an airport of this size, it’s very easy that to forget an aspect, but I think I have covered just about everything. At least the review should give you a good idea of what to expect. Some last words; it was certainly worth the waiting that this airport has been updated to X-Plane 11.
More information about London Heathrow for X-Plane 11 can be found at the dedicated X-Plane.Org store page or at the dedicated Aerosoft page.
Feel free to contact me if you’ve got additional questions related to this impression. You can reach me via email Angelique.van.Campen@gmail.com or to Angelique@X-Plained.com.
With Greetings,
Angelique van Campen
| Add-on: | Payware Aerosoft London Heathrow |
|---|---|
| Publisher | Developer: | X-Plane.Org | Aerosoft |
| Description: | Realistic rendition of Heathrow International Airport |
| Software Source / Size: | Download / Approximately 2.47GB (unzipped) |
| Reviewed by: | Angelique van Campen |
| Published: | February 20th 2019 |
| Hardware specifications: | - iMac Pro - Intel 3GHz Intel Xeon W / 4.5Ghz - Radeon Pro Vega 64 16368 MB - 64 GB 2666 MHz DDR4 - 1 internal shared 1TB SSD (Big Sur 11.x) - 1 internal shared 1TB SSD (Bootcamp Windows 10) - 1 external 2TB LaCie Rugged Pro SSD (Big Sur 11.x) - Saitek Pro Flight System X-52 Pro and X-56 Rhino - Honeycomb Alpha Flight Controls - Honeycomb Bravo Throttle Quadrant |
| Software specifications: | - macOS Big Sur (10.15.x) - X-Plane 11.5x |
0 Comments