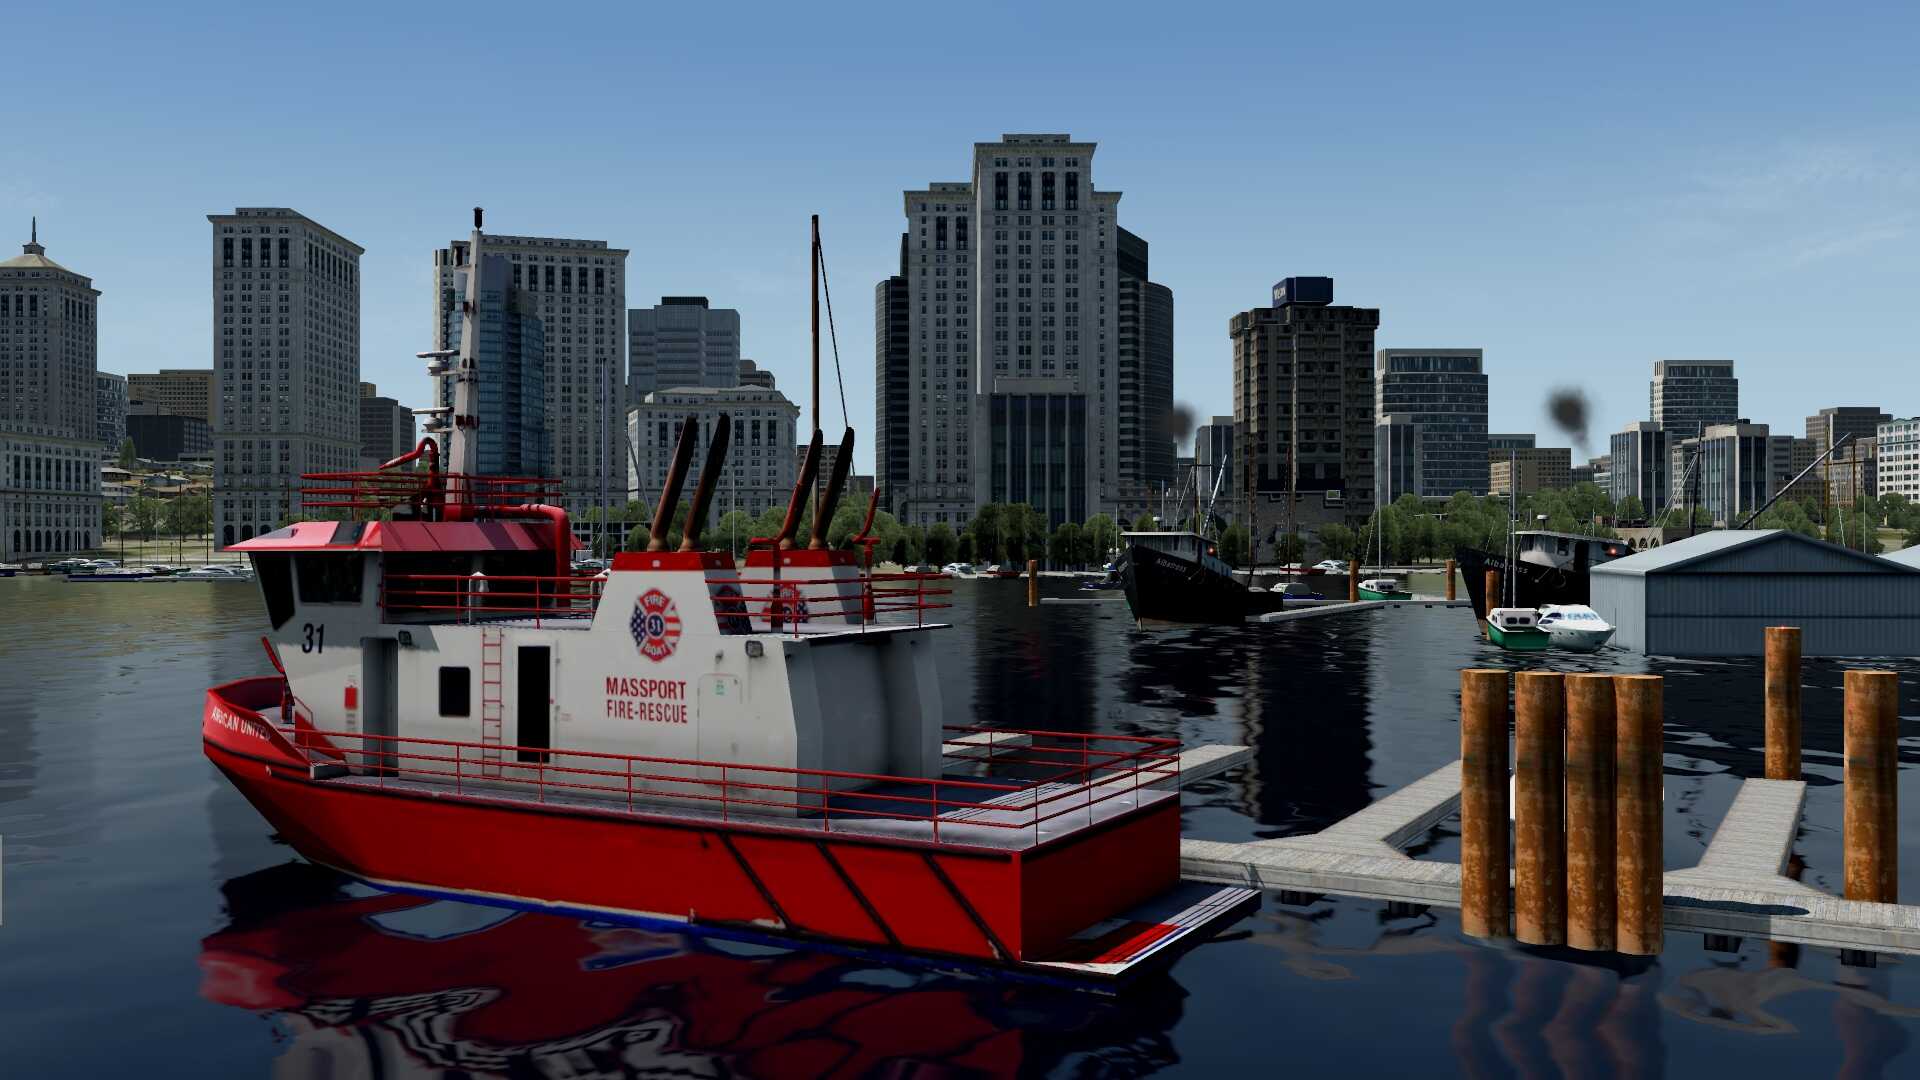
Canada4XPlane Welcomes You at CYVR
Introduction
In case you’ve got no idea where the abbreviation CFXP stands for, CFXP stands for Canada4XPlane and in case you think “this is a new developer” then the answer is, no, this developer group are already for a while on the market. They offered initially via their own website lots of freeware Canadian airports or city scenery packages, but since a while also large sized payware airports too that can be bought via X-Plane.Org and FSimStudios.
But what or who is CFXP? According to their website “At Canada4XPlane we develop high quality add-ons for XPlane 11. In addition, our website is a collection of many other Canadian add-ons from other developers, organized neatly in our categories. Our goal is to create the largest site for Canadian Add-ons for XPlane 11.”

What I’ve seen so far – based on screenshots – from their latest Vancouver International Airport I must admit that it looks indeed impressive, but more about that in a minute or so. By the way, CFXP is not the only developer who loves Canadian Airports. One other developer that pops up in my mind is Globall Art who developed already several large international Canadian airports. But for now and related to this review, I’ll have a thorough look into Vancouver International Airport and briefly highlight their freeware Vancouver downtown package which can be downloaded separately from X-Plane.Org or Threshold, but first, the installation and documentation.
Installation
The installation process is simple and therefore, straightforward. You download the CFXP – CYVR_1.0.zip package, unzip it and install it in your Custom Scenery folder or you create a shortcut or symbolic link in the Custom Scenery folder. More in-depth information about the scenery_pack.ini file and order can be found in our dedicated scenery_pack.ini review.
There are however a couple of things I would like to highlight first which can be found by the way also in the included document (Manual_READ_ME_FIRST.pdf).
First, seasonal textures. As stated at page 3 “CFXP – CYVR ships out of the box with winter, deep winter, spring, summer and autumn textures built into the scenery. If you want to be able to change seasons, SAM season is required to change quickly in sim from season to season.”
The next item to highlight is to enable/disable the terminal interior. By default the interior is enabled so you can literally walk as a passenger thru the terminal buildings, but you can also disable it. To disable it you search in the root of the airport package for the Terminal_INT_Delete.zip file. Unzip it and follow the instructions in the instructions.txt file.
The last item I want to highlight is a bit up to you if you’re using WT3 (World Traffic 3) or Just Flight Traffic Global. In case you use one of these AI aircraft packages, then it’s in my humble opinion not very useful to download the dedicated CFXP static aircraft package which also includes the WT3 file. As I’m testing the airport with macOS, I can’t use yet WT3, but I can use Traffic Global from Just Flight.
Just to be sure about using WT3 or JF Traffic Global with their static aircraft package, I contacted Patrick from CFXP. According to Patrick “If you use JF Traffic Global or WT3, do not use the static aircraft package. It is meant to be for users who do not use Vatsim, JF Traffic Global, and WT3. Also, make sure you delete any old CYVR WT3 files before opening it in the sim. If you don’t delete them the old WT3 files will still be based off of the default airport. Deleting and recompiling the WT3 files for CYVR will give you all the proper gate placement according to each airline, as well as all the correct taxiway routes for the AI to travel upon.”
Documentation
The included Acrobat document (Manual_READ_ME_FIRST) does offer all the information how to install the scenery as guide lined in the scenery_pack.ini file, the installation of the seasons textures, the contents of the package, the free static aircraft package as previously explained and some things to look head in version 1.5. What I miss is either a link or aviation charts like an airport diagram with the taxi ways, ILS approaches, STAR, SID and so on.
Let me see if I can find something for you. This NAV Canada link brings you to the Operational Guides page of NAV Canada while this dedicated link downloads all Canadian airport charts. It is disappointing that for some reason I only could get the CYVR ground charts, but no possibility to get information about the runway ILS approaches, STAR, SID and so on. But I found these sources – link I and link II – and although they cover what I had in mind, these charts are from 2009. You and I would suggest to have a look at SkyVector or AirNav, but non of these sources offer Acrobat files with detailed approach, or SID/STAR information. However, when you own a Navigraph or Aerosoft NavDataPro subscription that includes charts, you’re settled else you need to accept that you use the older charts.
Terminal Information
Before starting with the modeled CFXP CYVR, I would first like to highlight the following since it is worth to know when you virtually depart or arrive from CYVR. Vancouver Airport (YVR) has two main terminals that serve international and domestic flights, along with the smaller South Terminal. It’s as follows divided:
International Terminal
While all other international departures are made from Gate D of the international terminal, USA departures are made from gate E in the international terminal. The international terminal is also home to a comprehensive Business Center located on the Arrivals level.
Domestic Terminal
Canada departures are from Gates A, B, or C in the domestic terminal of the Vancouver International Airport. In addition to all the other modern facilities, level one of the domestic terminal also includes a pharmacy, a medical clinic, a dental clinic and a dry-cleaning center.
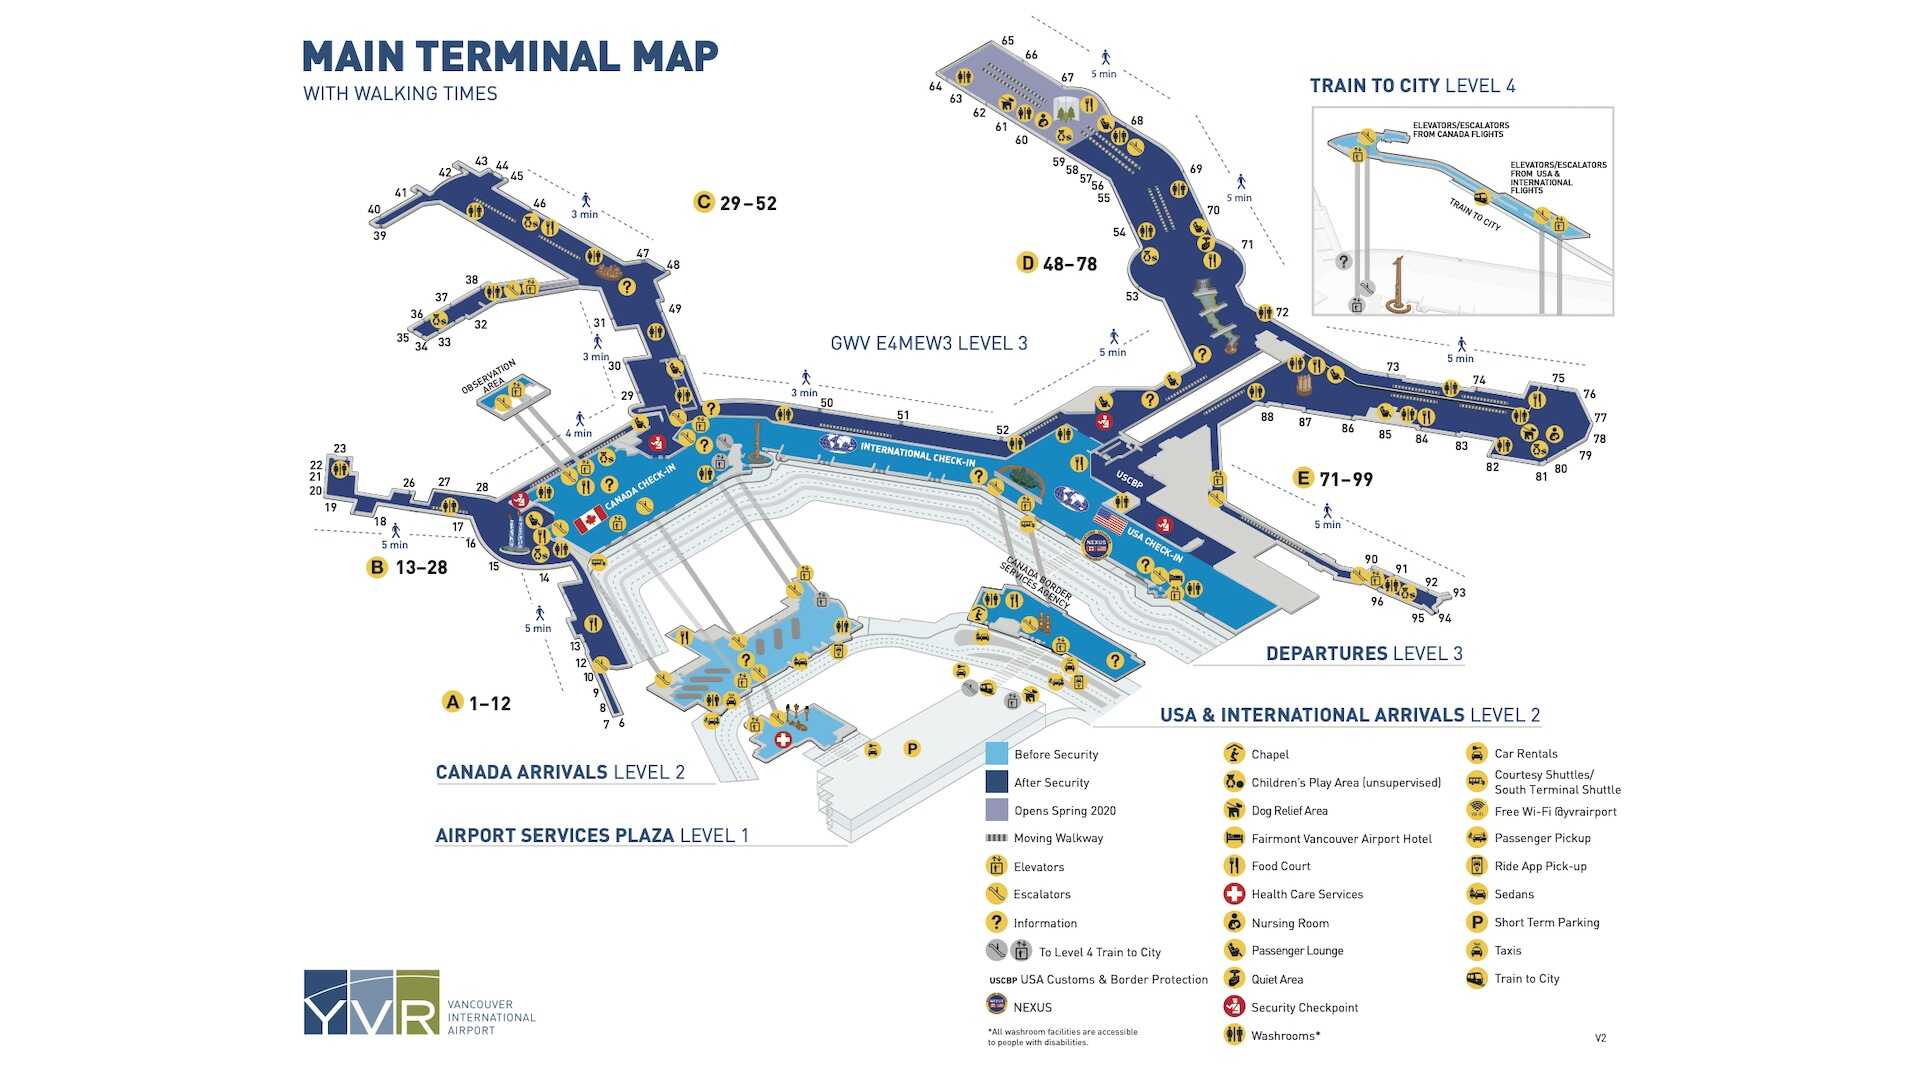
South Terminal
Pacific Coastal Airlines operate from the south terminal at Vancouver International Airport. A courtesy shuttle to this terminal runs between the ground floor of the departures level and the arrivals level of the international terminal. And very important for those who like to use seaplanes, at the South Terminal you also have Harbor Air with their docking places for seaplanes as well as lots of maintenance General Aviation related companies.
First things first
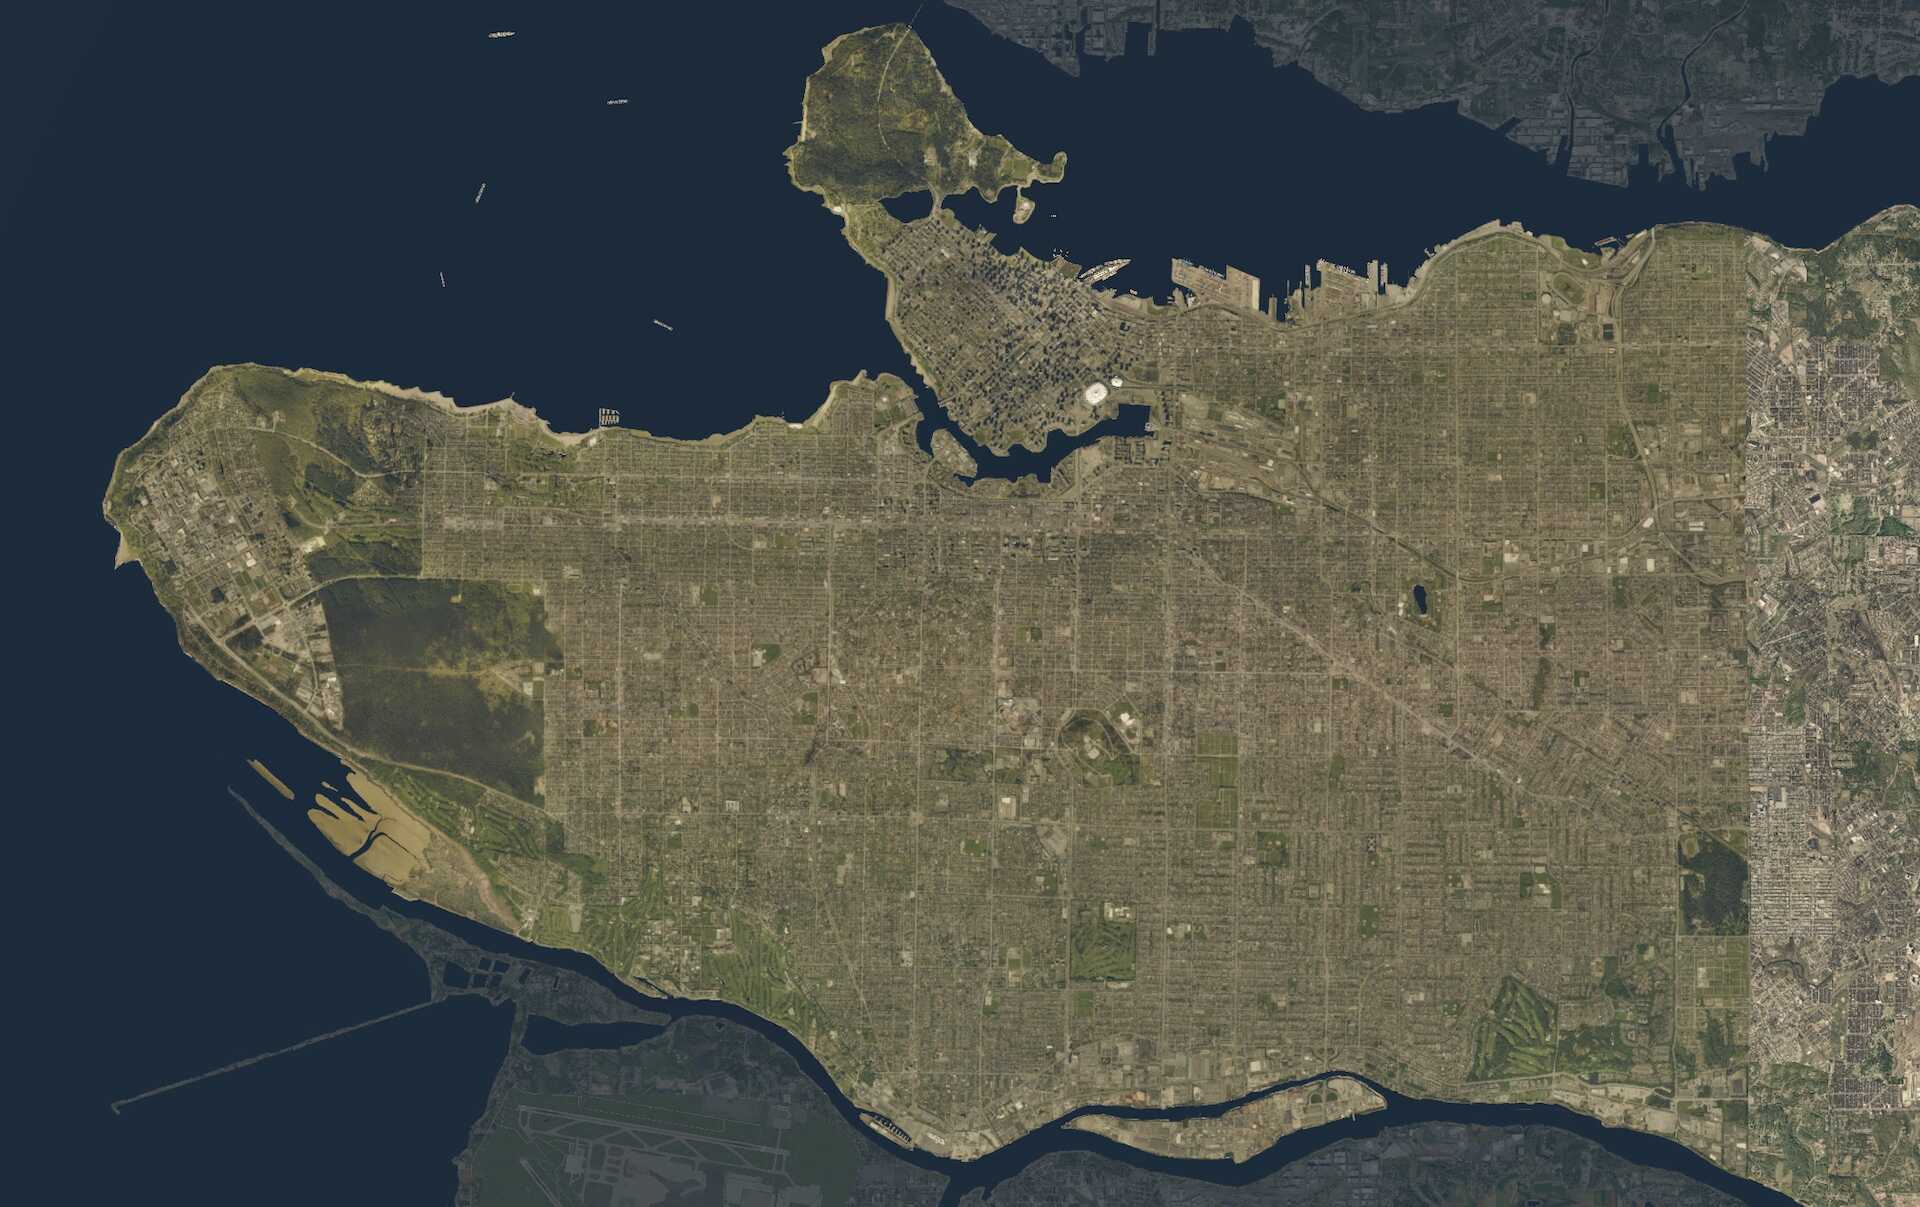
Before starting to explore the modeled airport, let me quickly check how the airport and all what belongs to it, looks from the sky. The whole area that is modeled covers Sea Island. Several border sections with the north and middle arms of the Fraser River are as they are which means the borders are default from Laminar Research. At some parts of the island border I see ortho texture that are correctly implemented while at other places it is not.
A good example of border blending is the west coast of the island, but perhaps even more important; the whole Sea Island is covered with ortho ground textures of high quality. That it feels good is also something that can be found in the manual where is written “30cm per pixel colour corrected orthophotos for the entire area of Sea Island.” Besides this single sentence, don’t forget to read this one too “Custom Models for every building on Sea Island as of October 2020.”
So yes, you will see with the CFXP airport package installed still some default X-Plane borders and not the nice blended borders belonging to the CFXP CYVR package. I double checked this with Patrick from CFXP and according to Patrick “Yeah, that looks about right with the coastline and the HD mesh. I personally don’t mind those transitions too much as it is default X-Plane, but if you do look for it, it can stand out. Meshes in X-Plane, as I’m sure you know, are terrible things to work with.” To clarify this paragraph, check out the following example screenshot where I marked some places with the CFXP border blending and the default X-Plane borders. Although Patricks answer is clear, I still hope that with an update all borders of Sea Island are well covered with ortho border textures.

I would like to add three things. First item; since I couldn’t find any dedicated CYVR scenery mesh file – there’s no mesh file included in the package according to Patrick – you should use the Alpilotx.net HD and UHD scenery mesh package version 4.0 for X-Plane 11. Most of you who read this review are known with Alpilotx.net, but in case you’re not familiar with this, please check it out. The correct links of the respective pages are provided.
As an example I would like to share with you in case you’re not familiar with how to install different packages in the scenery_pack.ini file and for those who are on macOS else for Windows users you can use xOrganiser. Below I highlighted in bold the CFXP related packages as well as the scenery mesh packages from alpilotx.net and of course, the correct order of these packages.
SCENERY_PACK Custom Scenery/CFXP – Vancouver City/
SCENERY_PACK Custom Scenery/CFXP – CYVR/
SCENERY_PACK Custom Scenery/Aerosoft – EDDF Frankfurt/
………
………
SCENERY_PACK Custom Scenery/Global Airports/
SCENERY_PACK Custom Scenery/KSEA Demo Area/
………
SCENERY_PACK Custom Scenery/X-Plane Landmarks – Chicago/
………
………
SCENERY_PACK Custom Scenery/zzz_uhd_global_scenery4/
SCENERY_PACK Custom Scenery/zzzz_hd_global_scenery4/
Then – second item – I would like to suggest that you also install Vancouver City from CFXP. There’s a reason that I mention this. If you like the city or not, is not directly my argument. The reason to install this too is because CFXP Vancouver city comes with ortho textures that covers the whole area from Vancouver city to Sea Island and thus the airport. So even if you’re not interested in how the city is modeled – you really miss then something – you will see during your approach or departure from sea on your left or departing over sea on your right a beautiful area with ortho textures and with a nicely blended coastline. That said, is it worth to show you the difference when you don’t have the free CFXP Vancouver installed? Oh yes, it makes a huge difference. Check out the following screenshot.
As a side note, even after so many years writing reviews, it’s always difficult how to start writing and thus reviewing an airport, or I ask myself always the question where to start, or how to approach – literally approaching from the air – or whatever you may think of. While I can think about that, I can give you a first impression of what I see, and how it feels.
And the last and third item; during my first top-down look I noticed that the airport aprons are very clean. Not only the apron, but also the taxiways and then in particular at turning points where you normally will see a lot of rubber due to the friction of the wheels. I’m aware that Google Maps photos or even those from Bing Maps aren’t always the best source to compare with, but the real photos showed me a much more weathered aprons, taxiways and so on then the one modeled in the CFXP CYVR scenery.
Check out the following compilations. On the left you see the modeled CFXP CYVR with on the right the real Google Maps photo. Ignore the grass, but look to the aprons and taxiways. The modeled CYVR is much more cleaner and less weathered then the real photos although I never know how realistic the real Google Maps photos are.

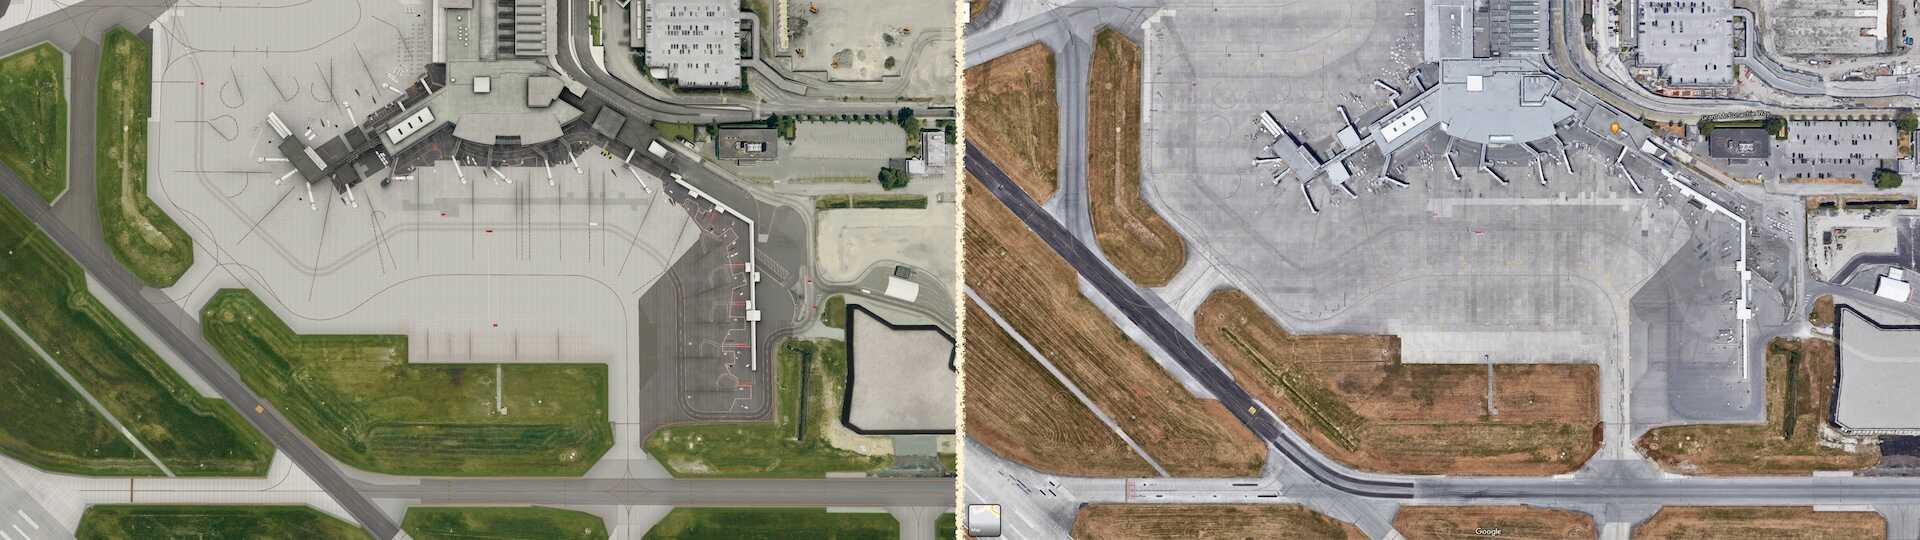
I found this weird and therefore I contacted Patrick from Canada4XPlane. Patrick told me that “The reason I didn’t put too much grunge into the photo is that, the airport is regularly cleaned around the terminal. Especially when they finished the new terminal extension. I know Google Earth also makes some colours contrast a little more than real life. From the ortho we got from the city, the aprons are much cleaner than they are in Google Earth.”
In other words, it seems more or less the reality in the way it is modeled in the Canada4XPlane CYVR. Since I don’t live there, I have to accept this argument and thinking back to my ground engineers days at EHAM, Lufthansa had every night an overstay at EHAM and I was always surprised how those aircraft where kept as new .. simple answer; at the homebase Frankfurt or Hamburg they where cleaned on a regular base! That said, it doesn’t surprise me that an airport authority tries to do the same. Anyway, you’re now aware of the clean ground textures!
An Overview
Before I actually start with my virtual airport tour, I would like to share with you a couple of comparison screenshots. It’s just to give you a quick overview on how much time and effort is put by the CFXP team to model each tiny detail and each corner of the airport. As previously said the overall quality of the ortho texture is 30 cm/pixel, but don’t forget all the dedicated objects. Too much to mention in just a couple of sentences, but first, check out the following screenshots.

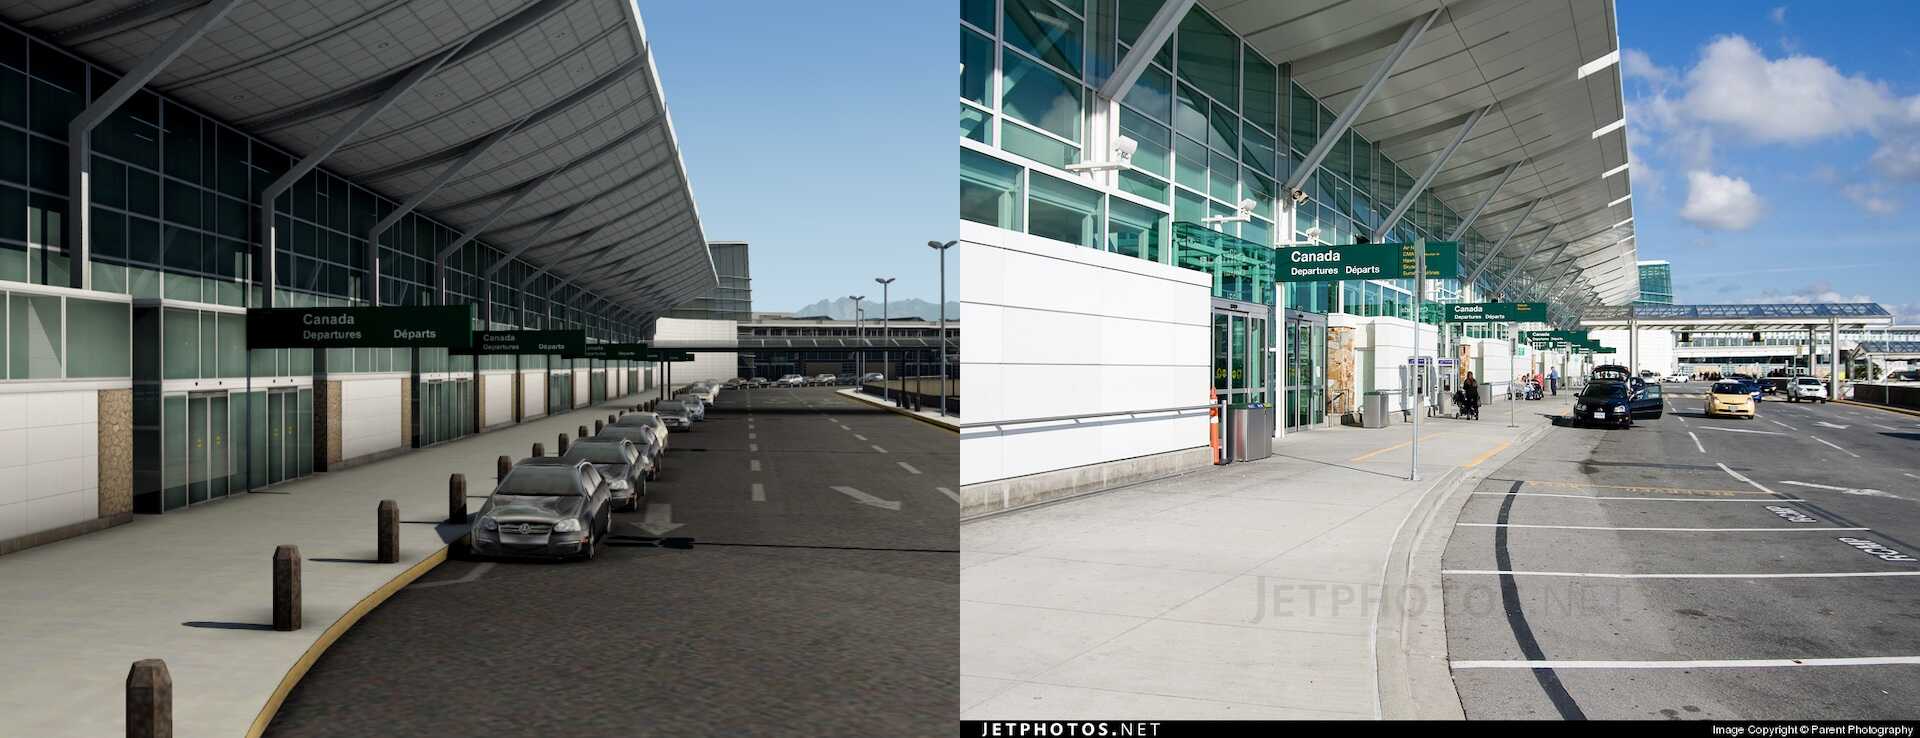
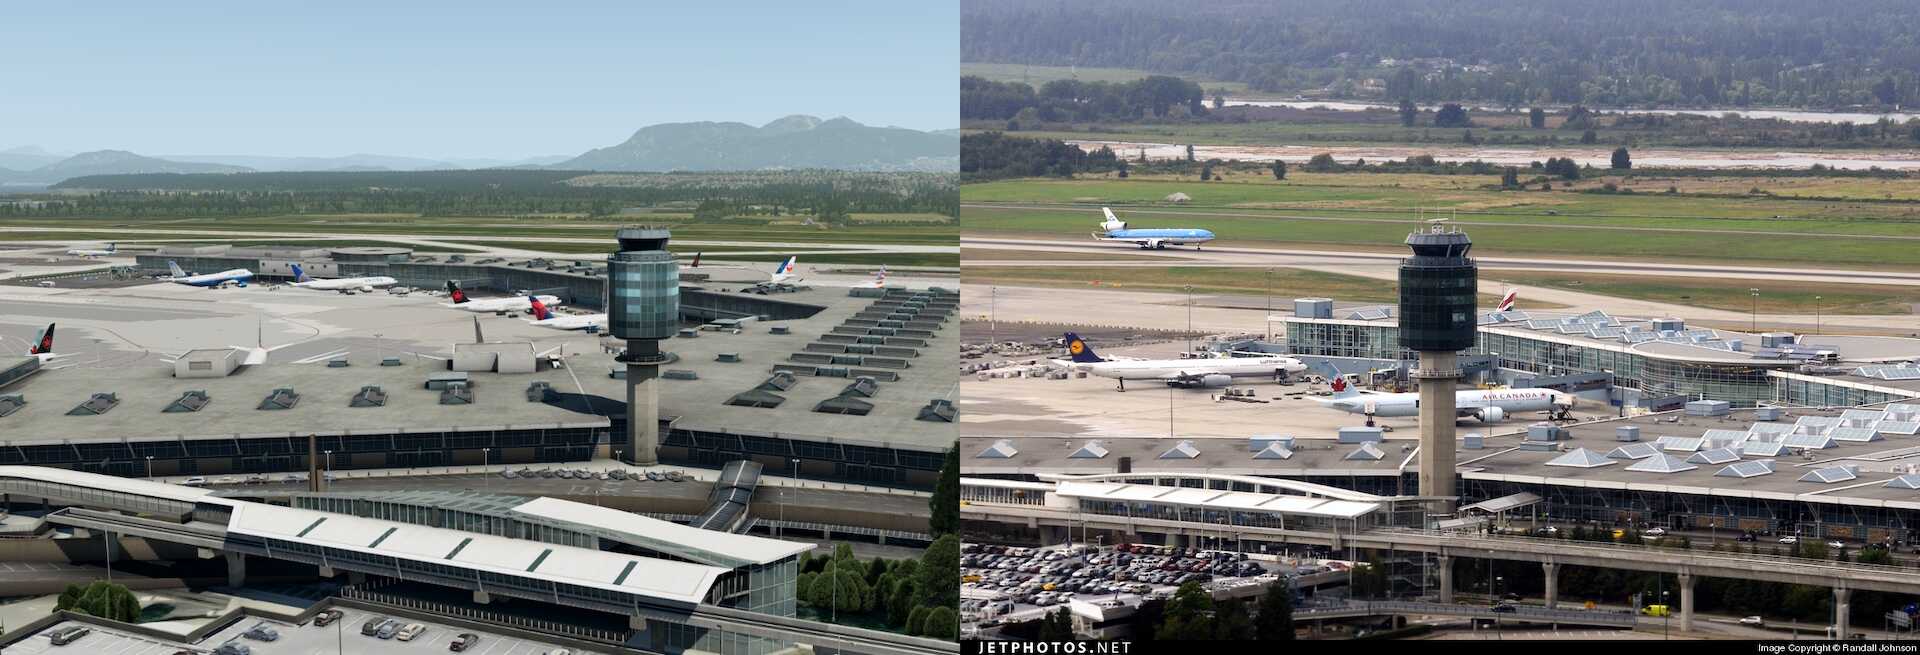
On the right side of each screenshot/photo compilation you see the JetPhoto.Net photo with on the left side the more or less same shot taken in the Canada4XPlane CYVR airport scenery. I’m impressed to be honest! And there’s more to come. This was just to warm you up!
I start my airport impression by jumping into an airport authority car and drive around the international and domestic terminal. Then I cross runway 08R-26L and drive to the south terminal before inspecting the taxiways and runways. But there’s so much more to see. What do you think of the cargo areas and Air Canada hangars and maintenance areas? By the way, while driving around at CYVR I’ve installed and activated Just Flight Traffic Global to give it the best and realistic experience in how an airport should be. When you don’t own JF Traffic global nor WT3, then you can use the static aircraft package from CFXP as previously explained.
Ready to join me?
Checking out the modeled CYVR
International- and Domestic Terminals
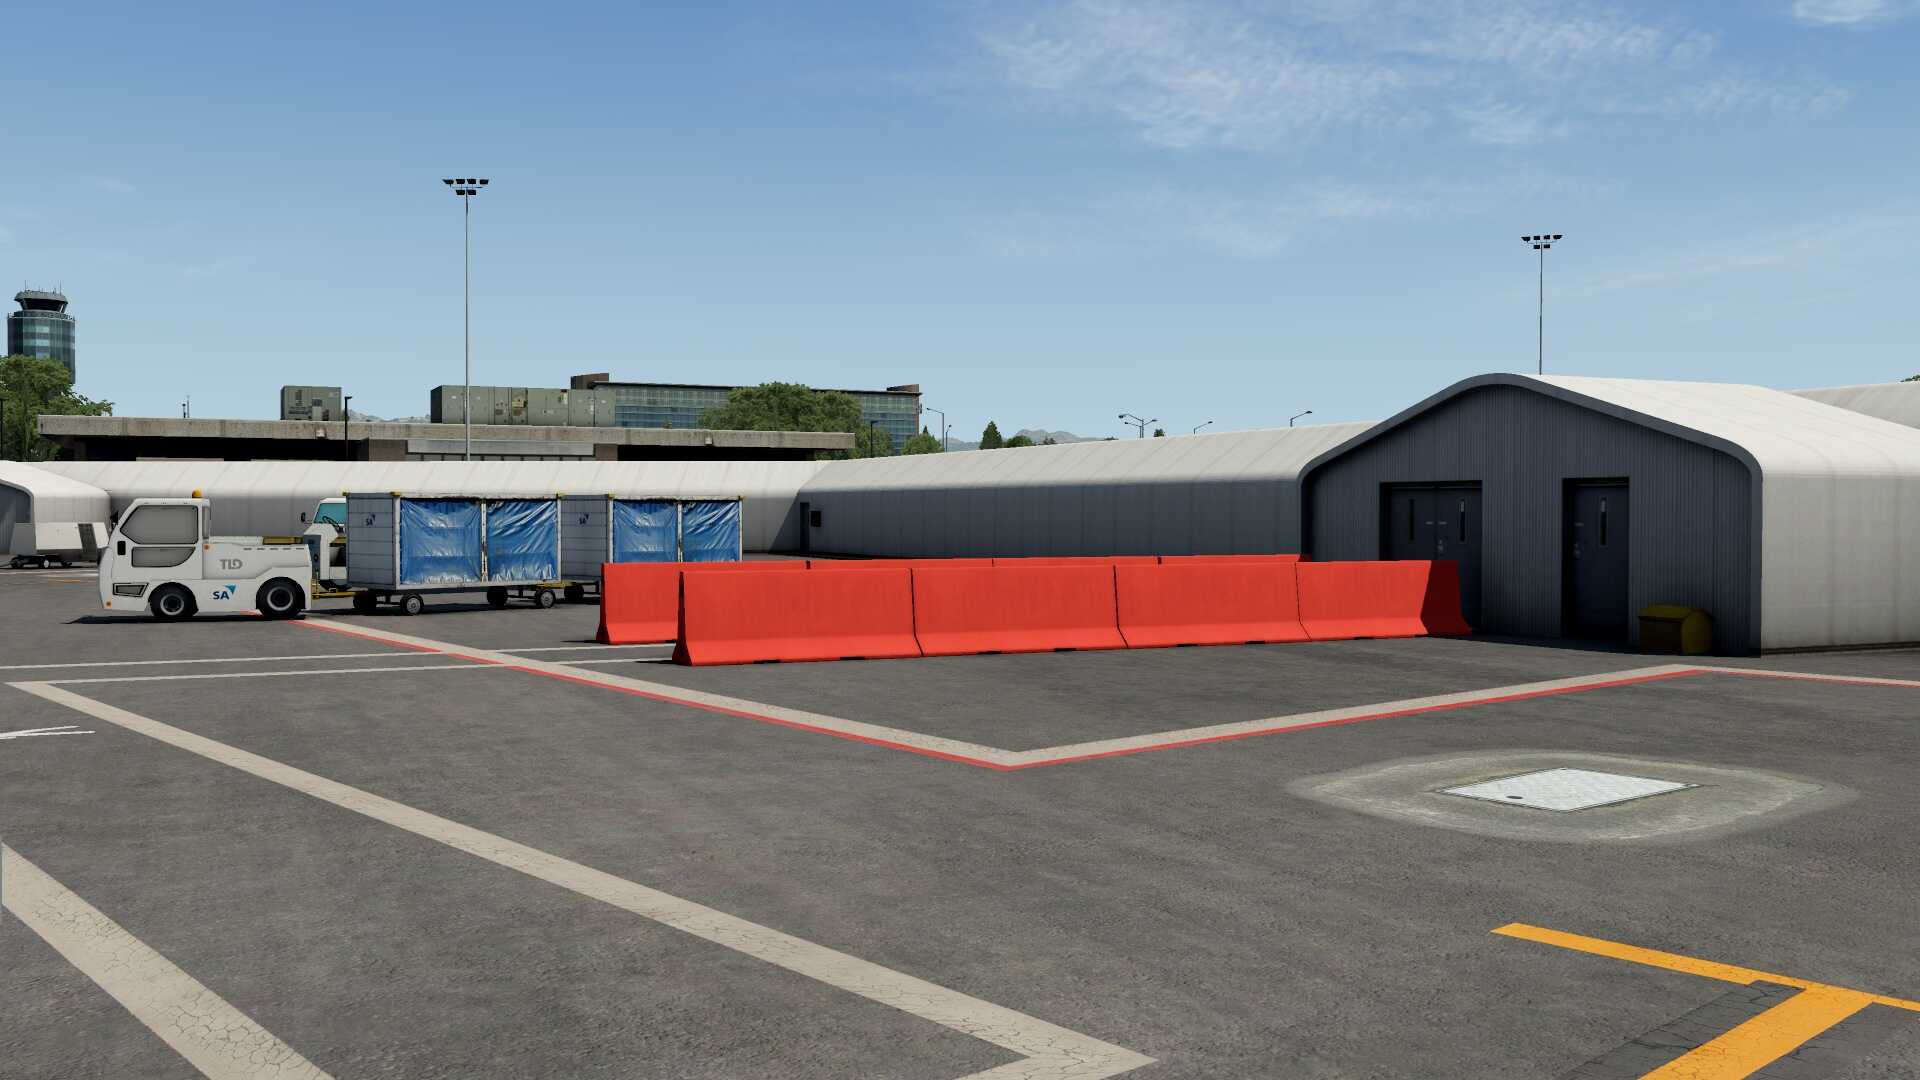
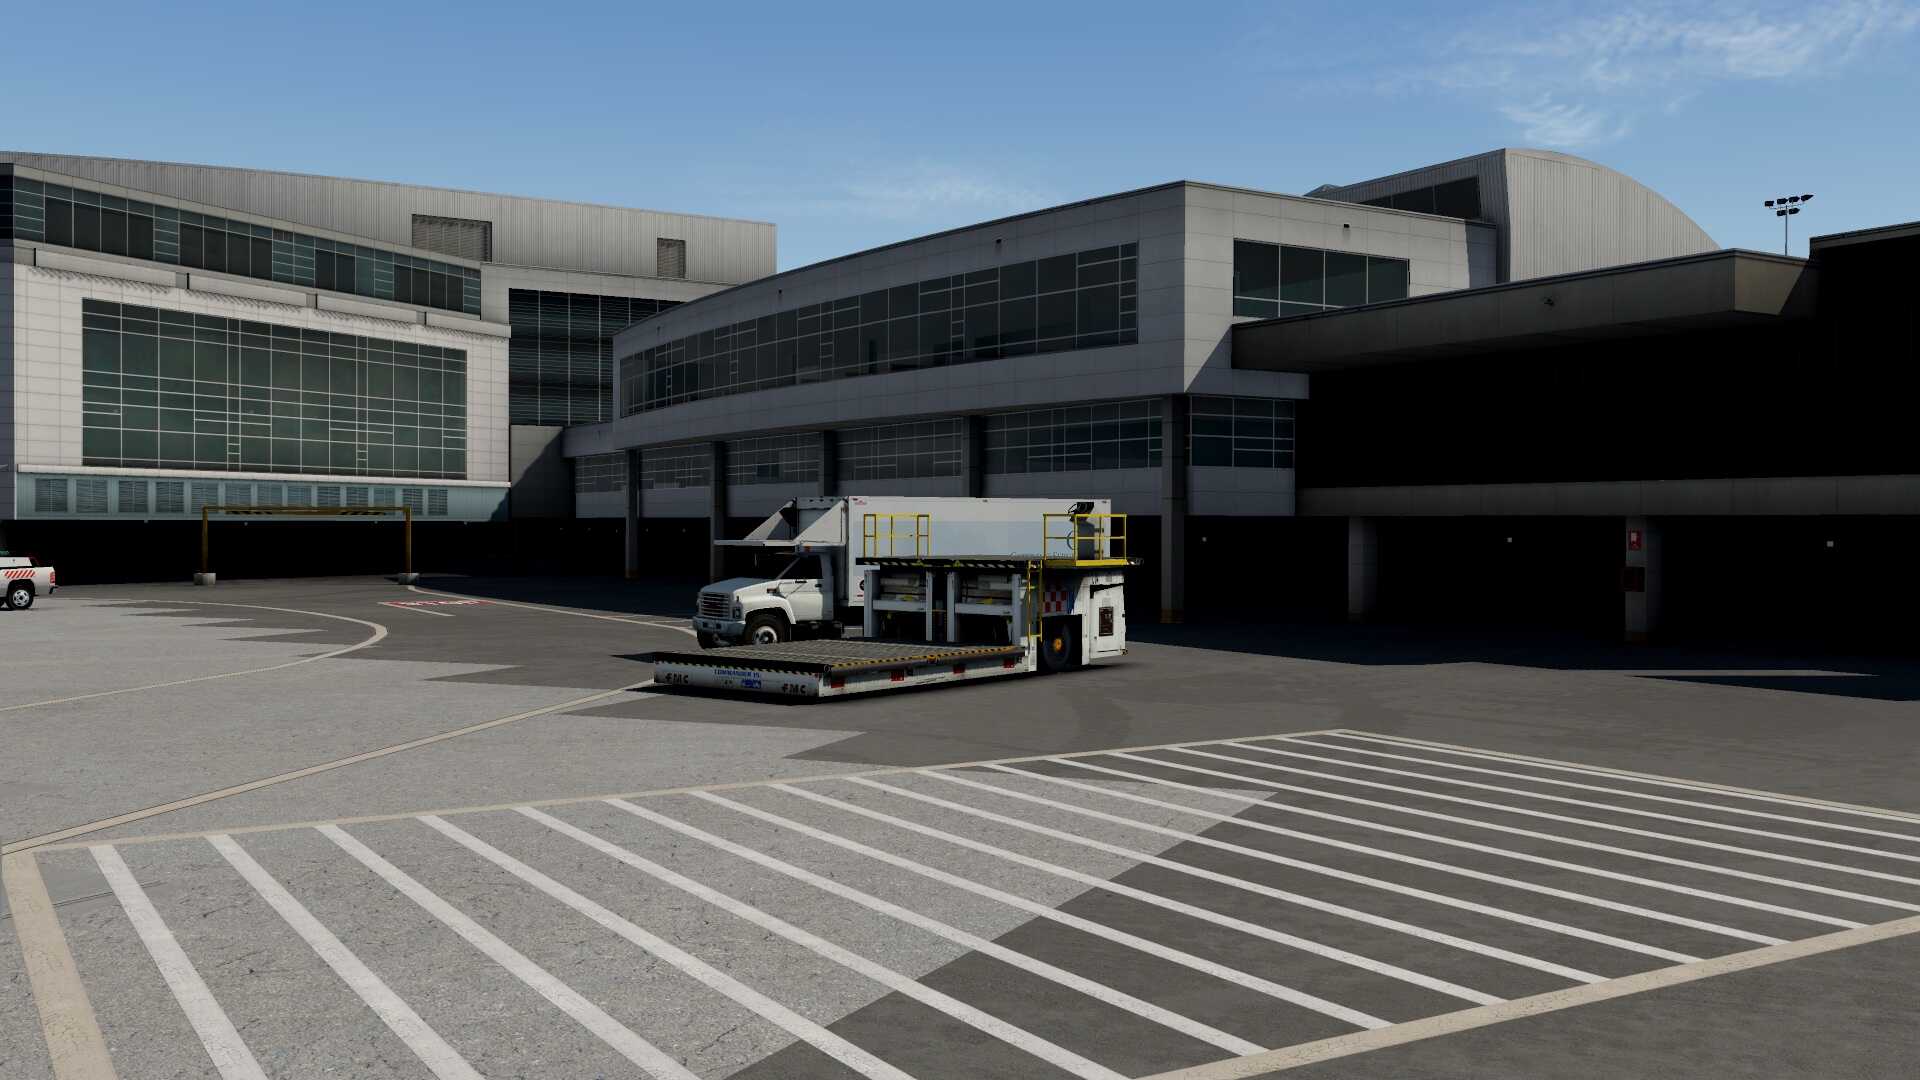
Since I’m not familiar with CYVR, it took me a moment to find an official entrance. With an official entrance I mean a gate that offers a security check that allows me to enter the apron so the area that’s behind custom control. Lucky, I found one. It’s the security entrance near the cargo area, to be more precise; I’m entering the security area near cargo apron VIII. Passing the gate, I can either drive to the left which means checking out the cargo area first, and then the maintenance area or I turn right which means to the gates and that’s what I want to see first.
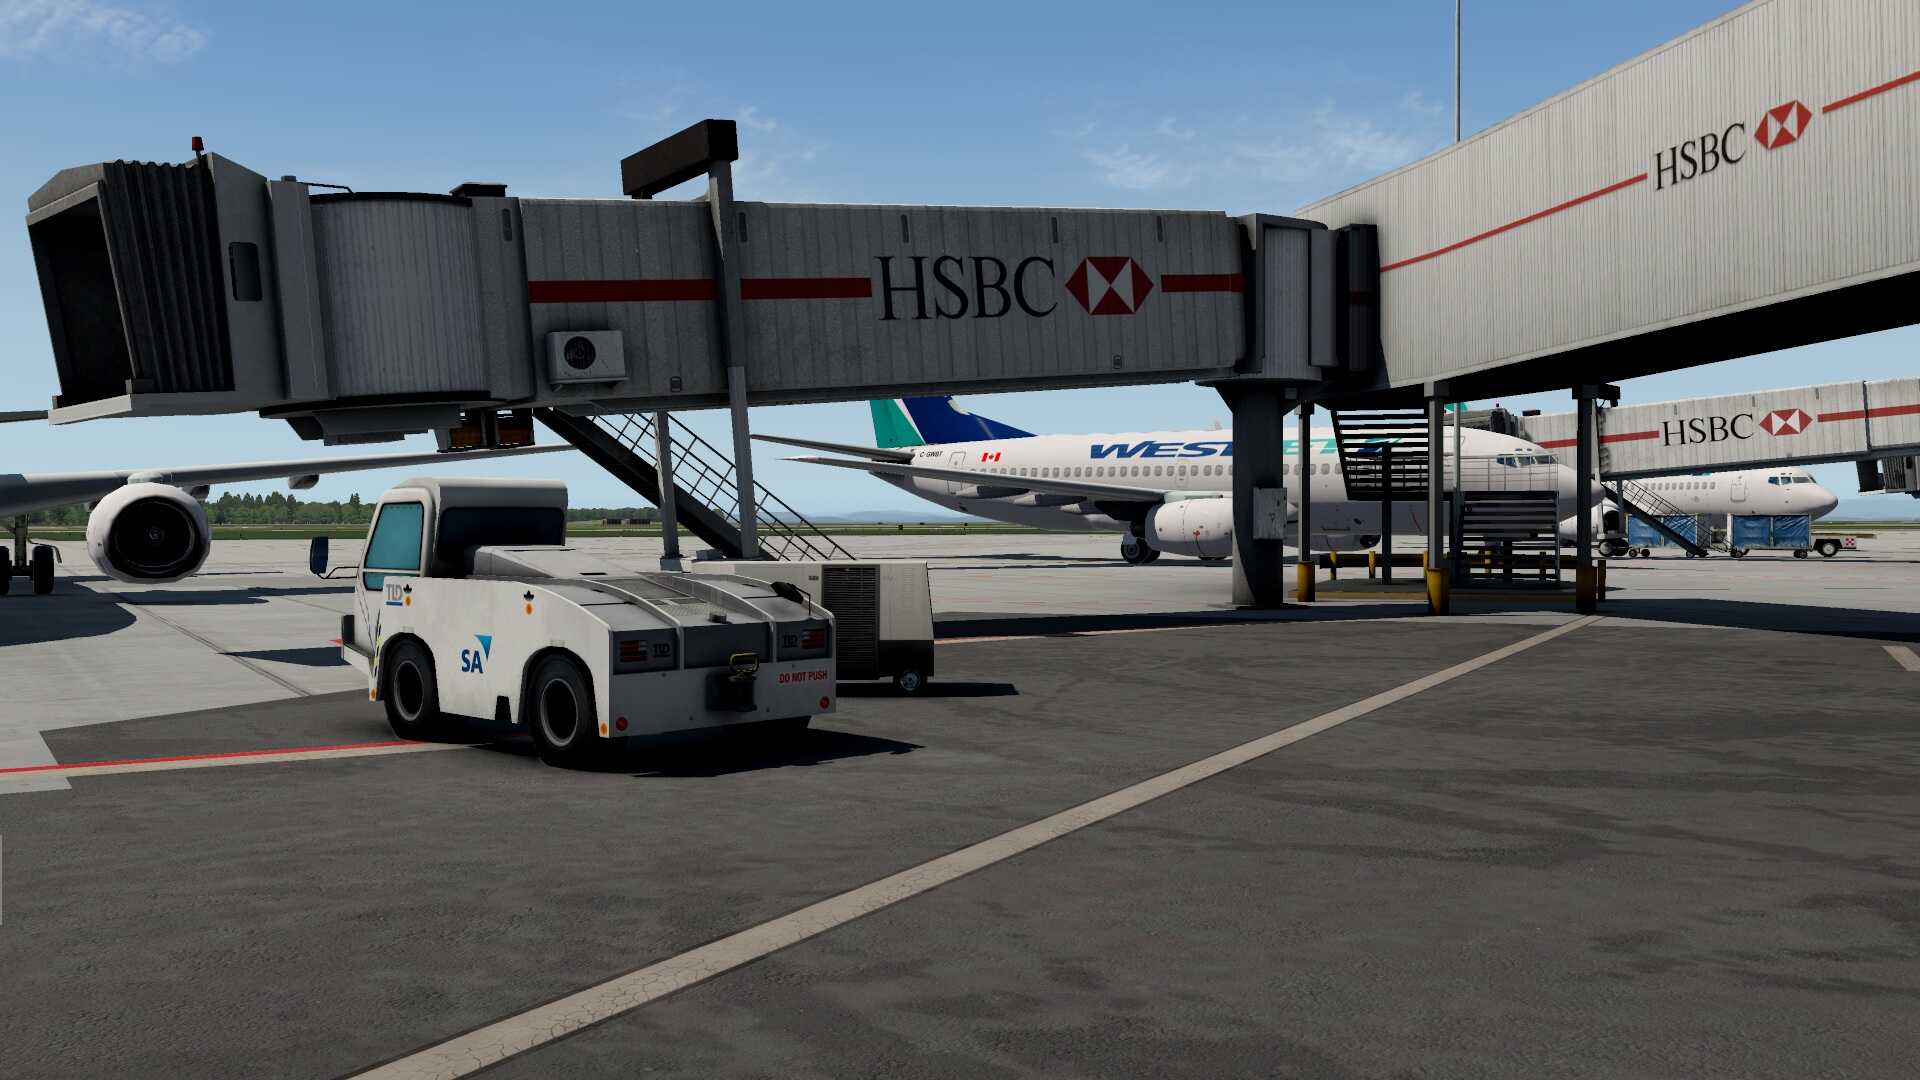
As previously said, I will first visit the gates and belonging terminals. I feel it’s well modeled with eye for all those tiny details. This starts already by approaching gate A although gate or building/terminal is a big word. It’s clearly an area for the commuters. Yes, I’m aware that the gate itself seems basic, but it isn’t. It is well modeled and it does reflect how the real construction looks like which is actually no more then a close corridor to the actual terminal building.
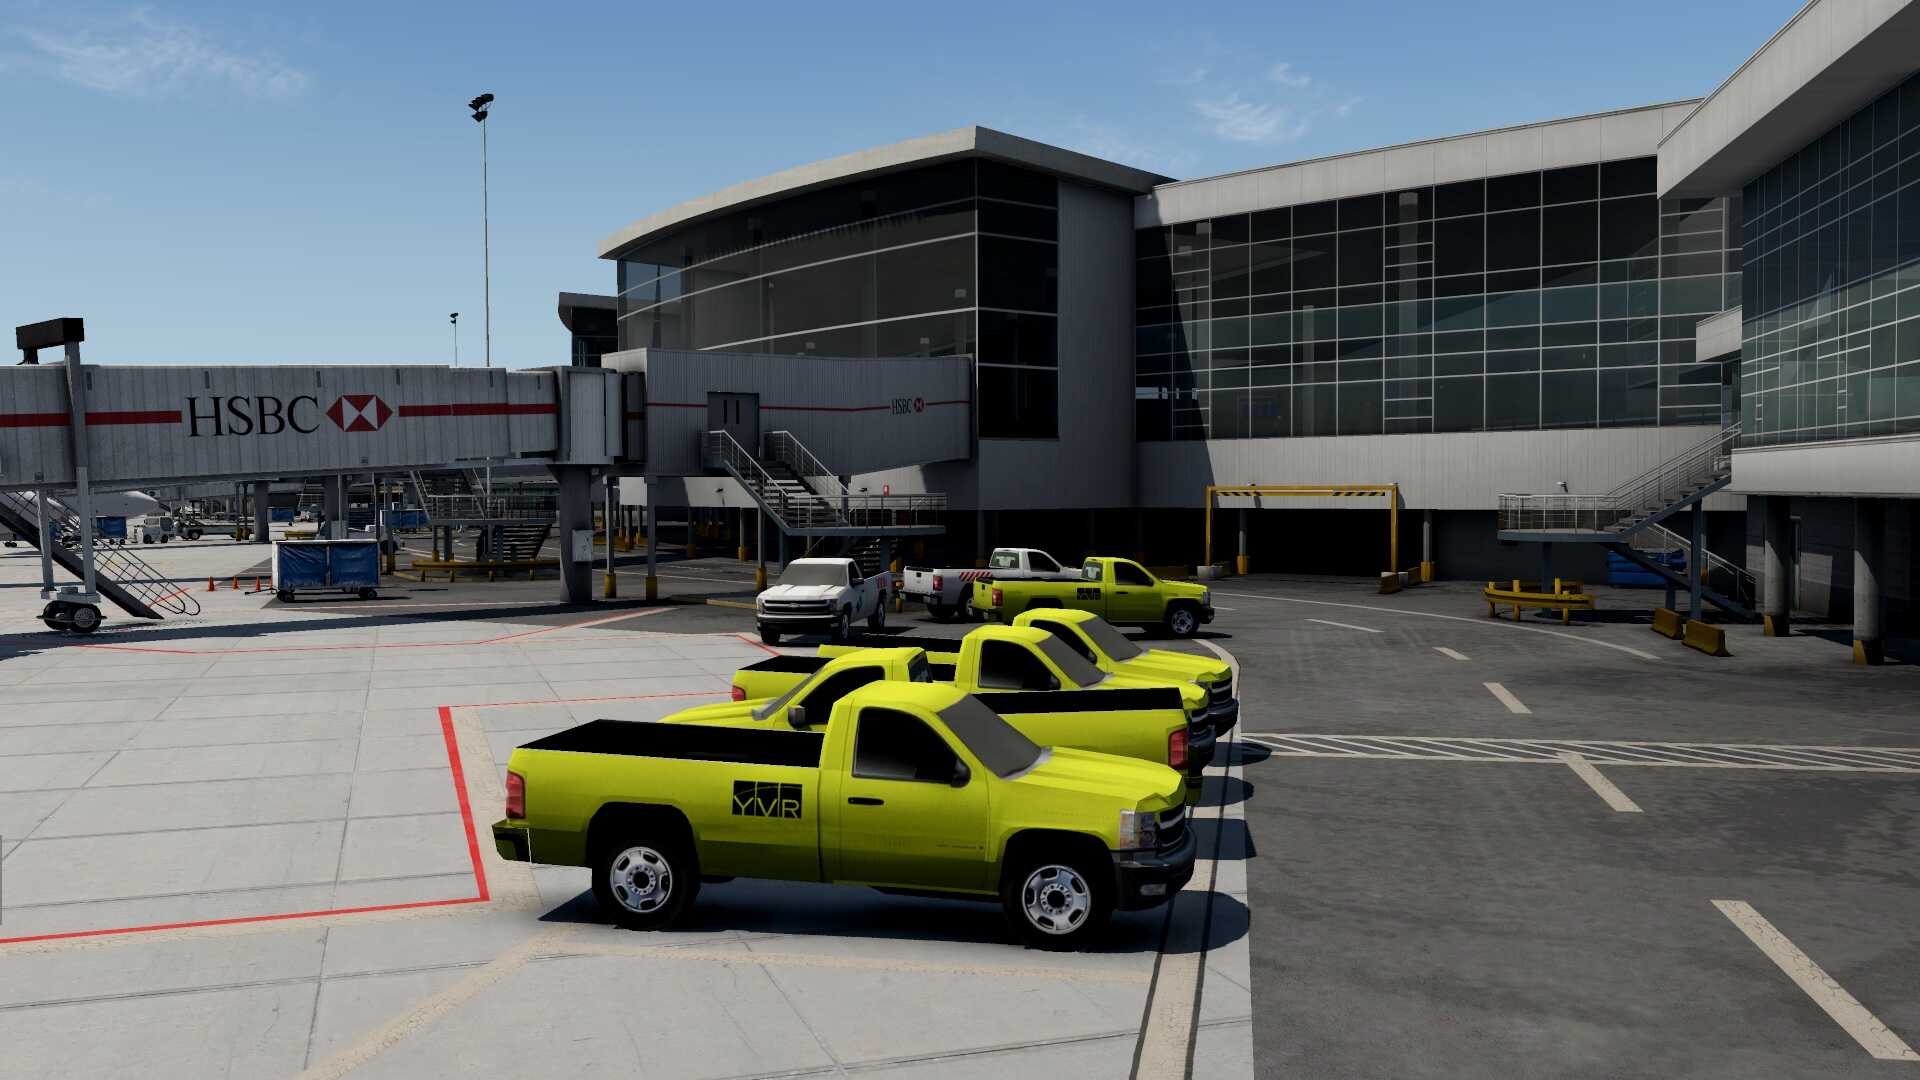
And it’s not only the overall area. It’s also the ground equipment that is parked everywhere, as it is in real. One of the things you can’t miss are the red painted barriers that guide passengers to/from the aircraft to the close corridor. Personally I had hoped that these red barriers where a bit more damaged or weathered. As they are now modeled, they look brand new although I’m aware that this is just my feeling and my thoughts.


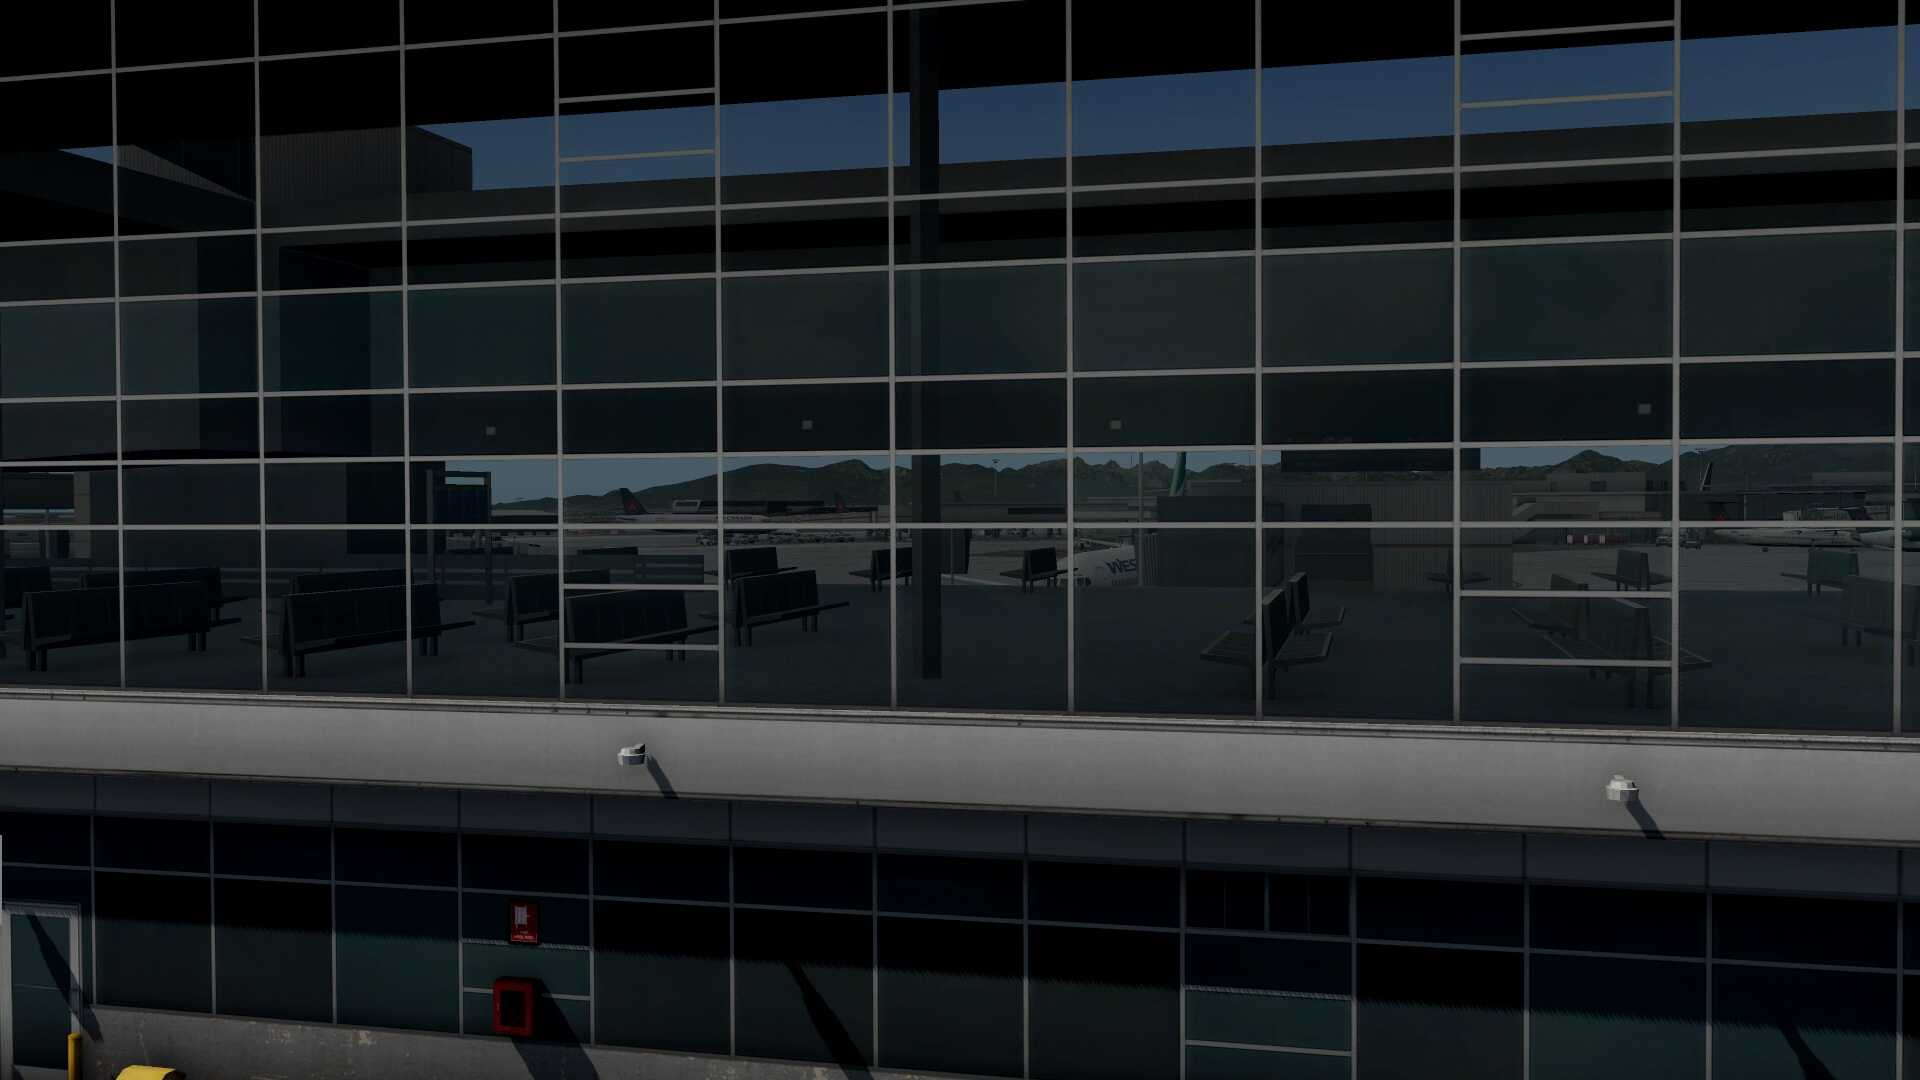
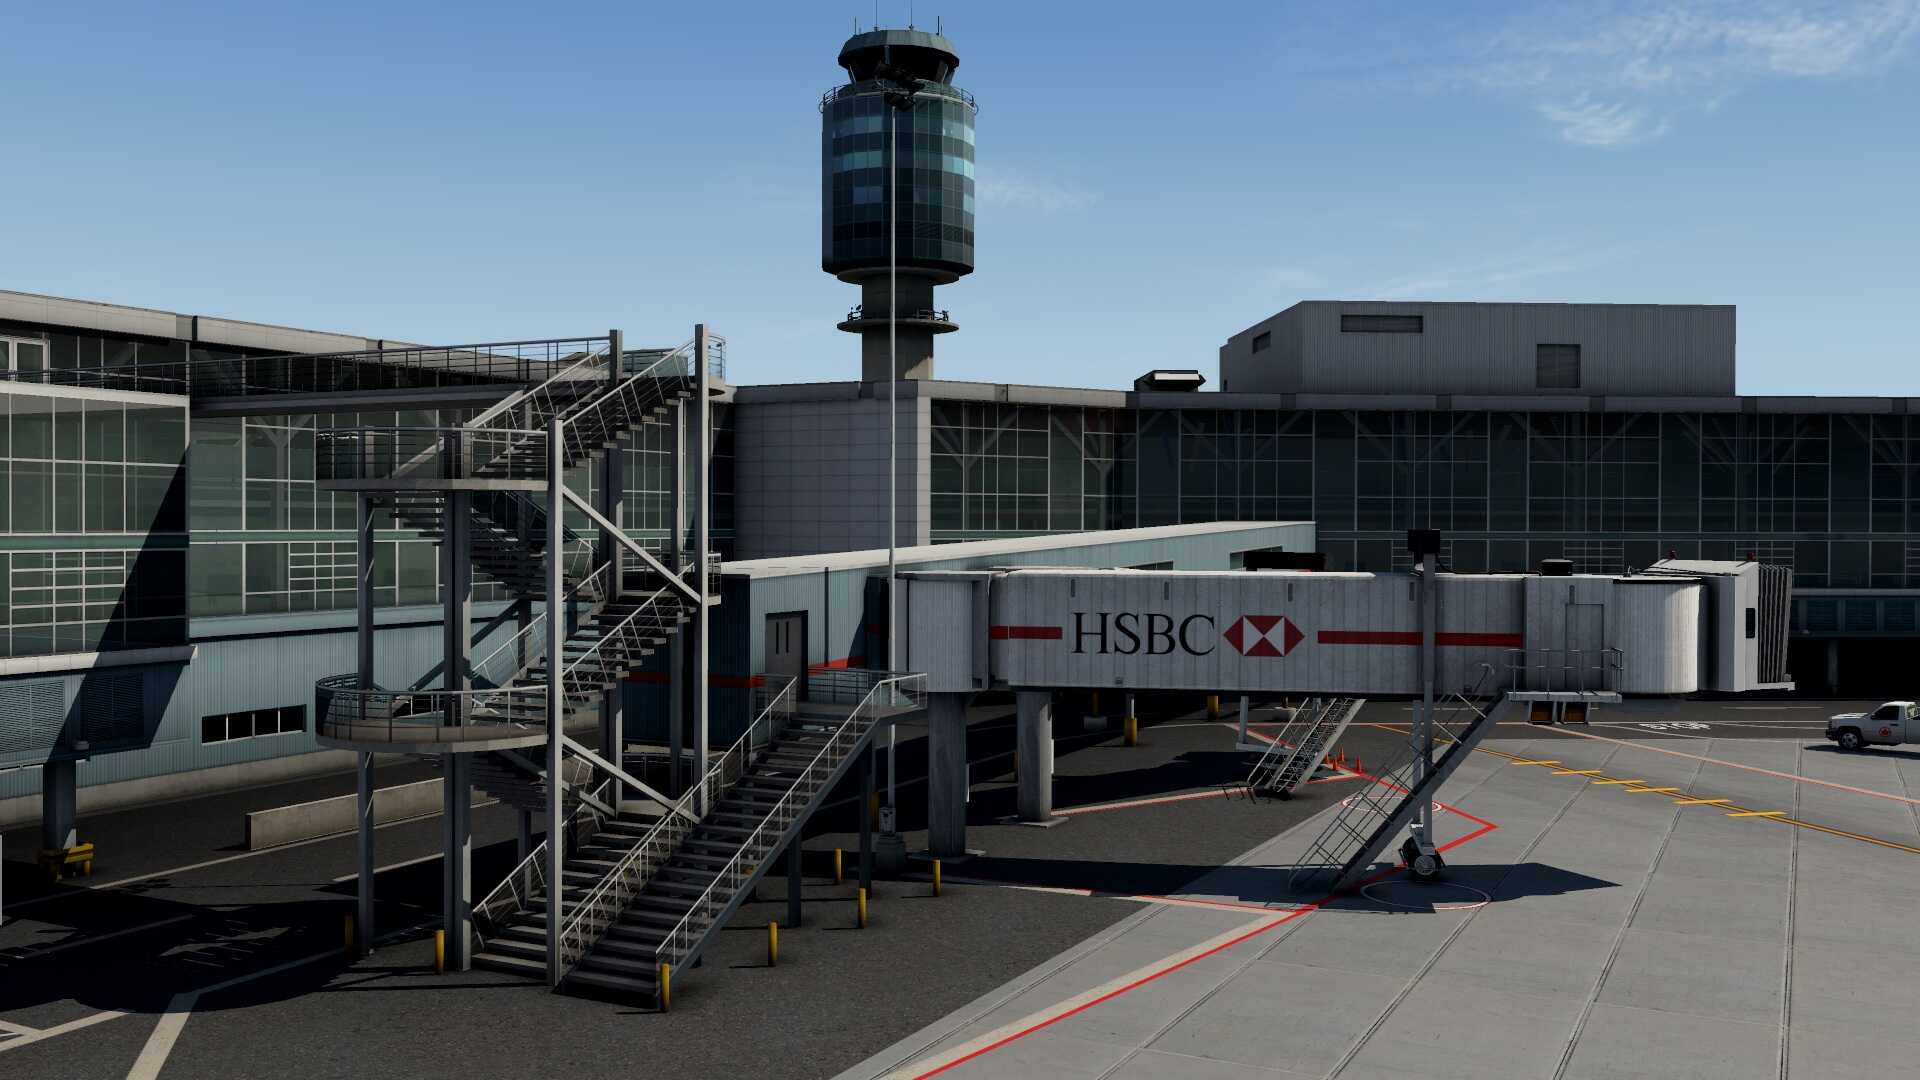
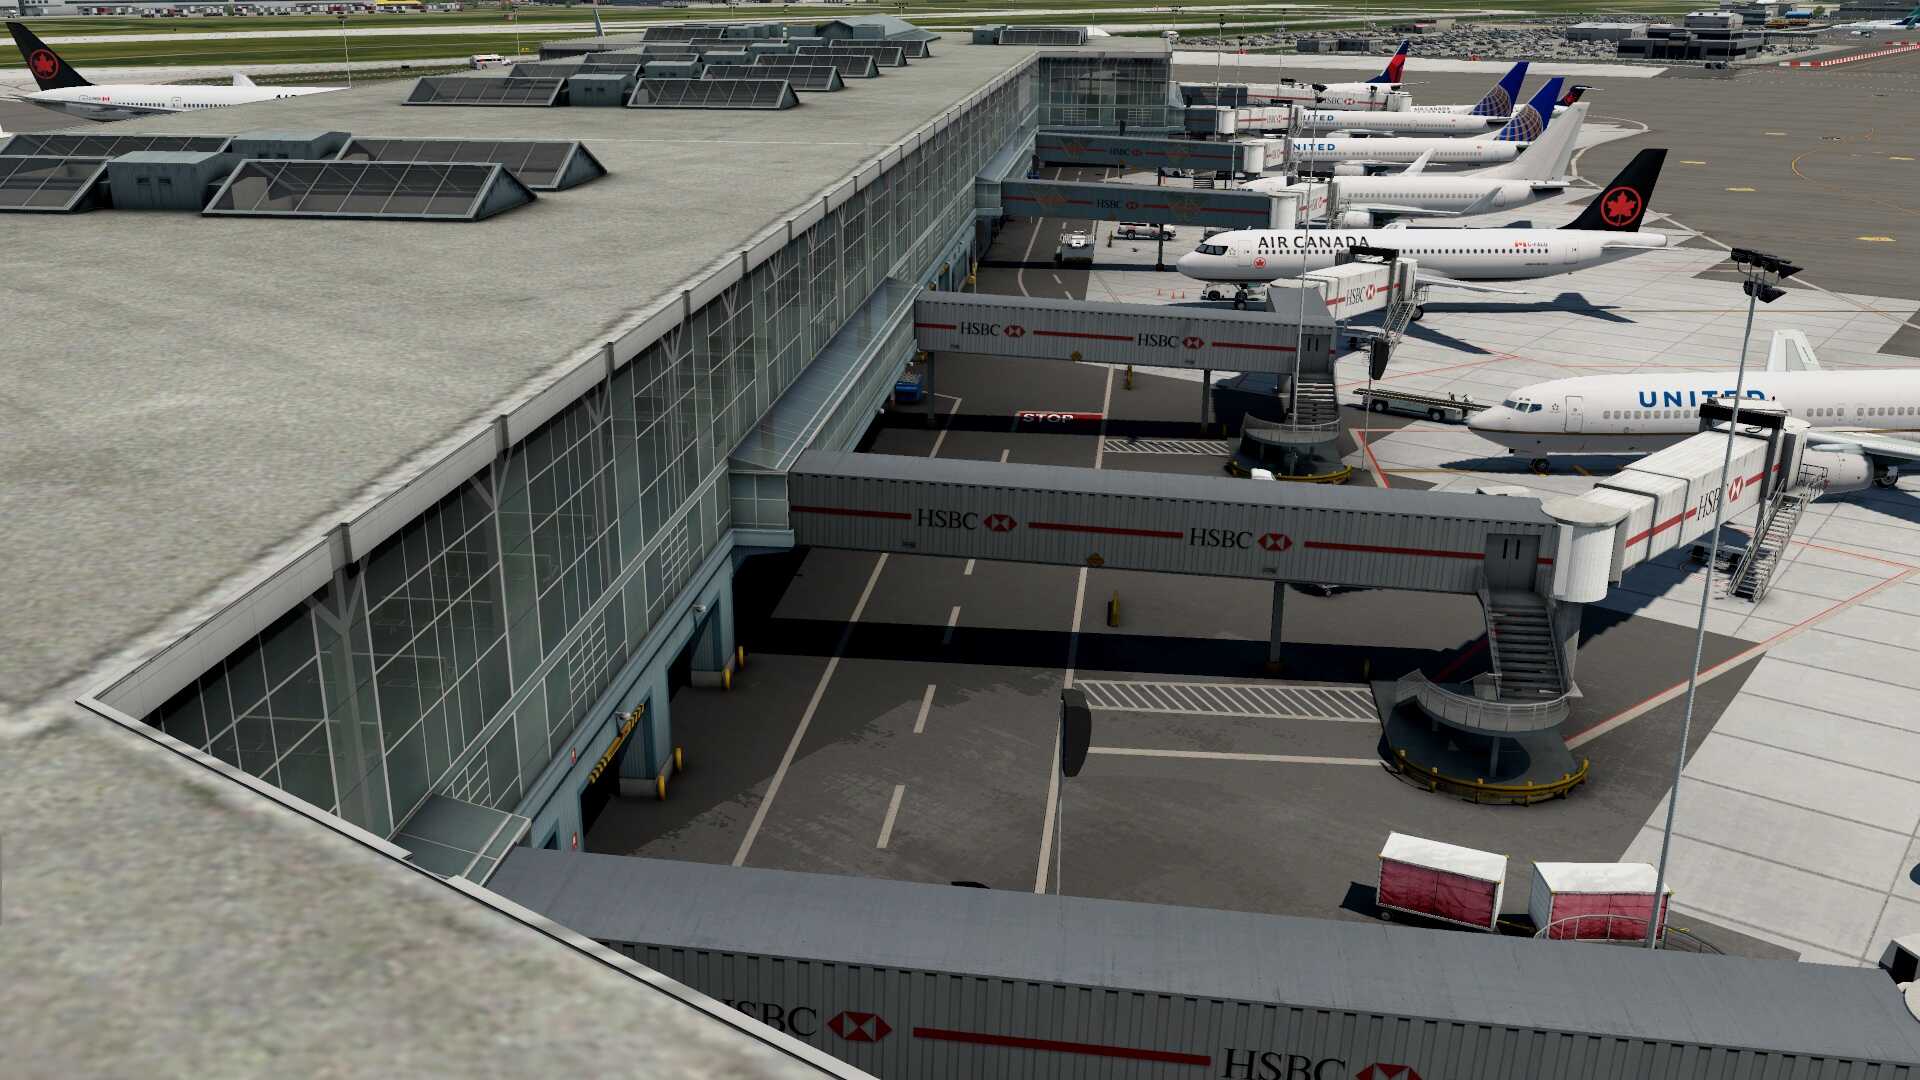
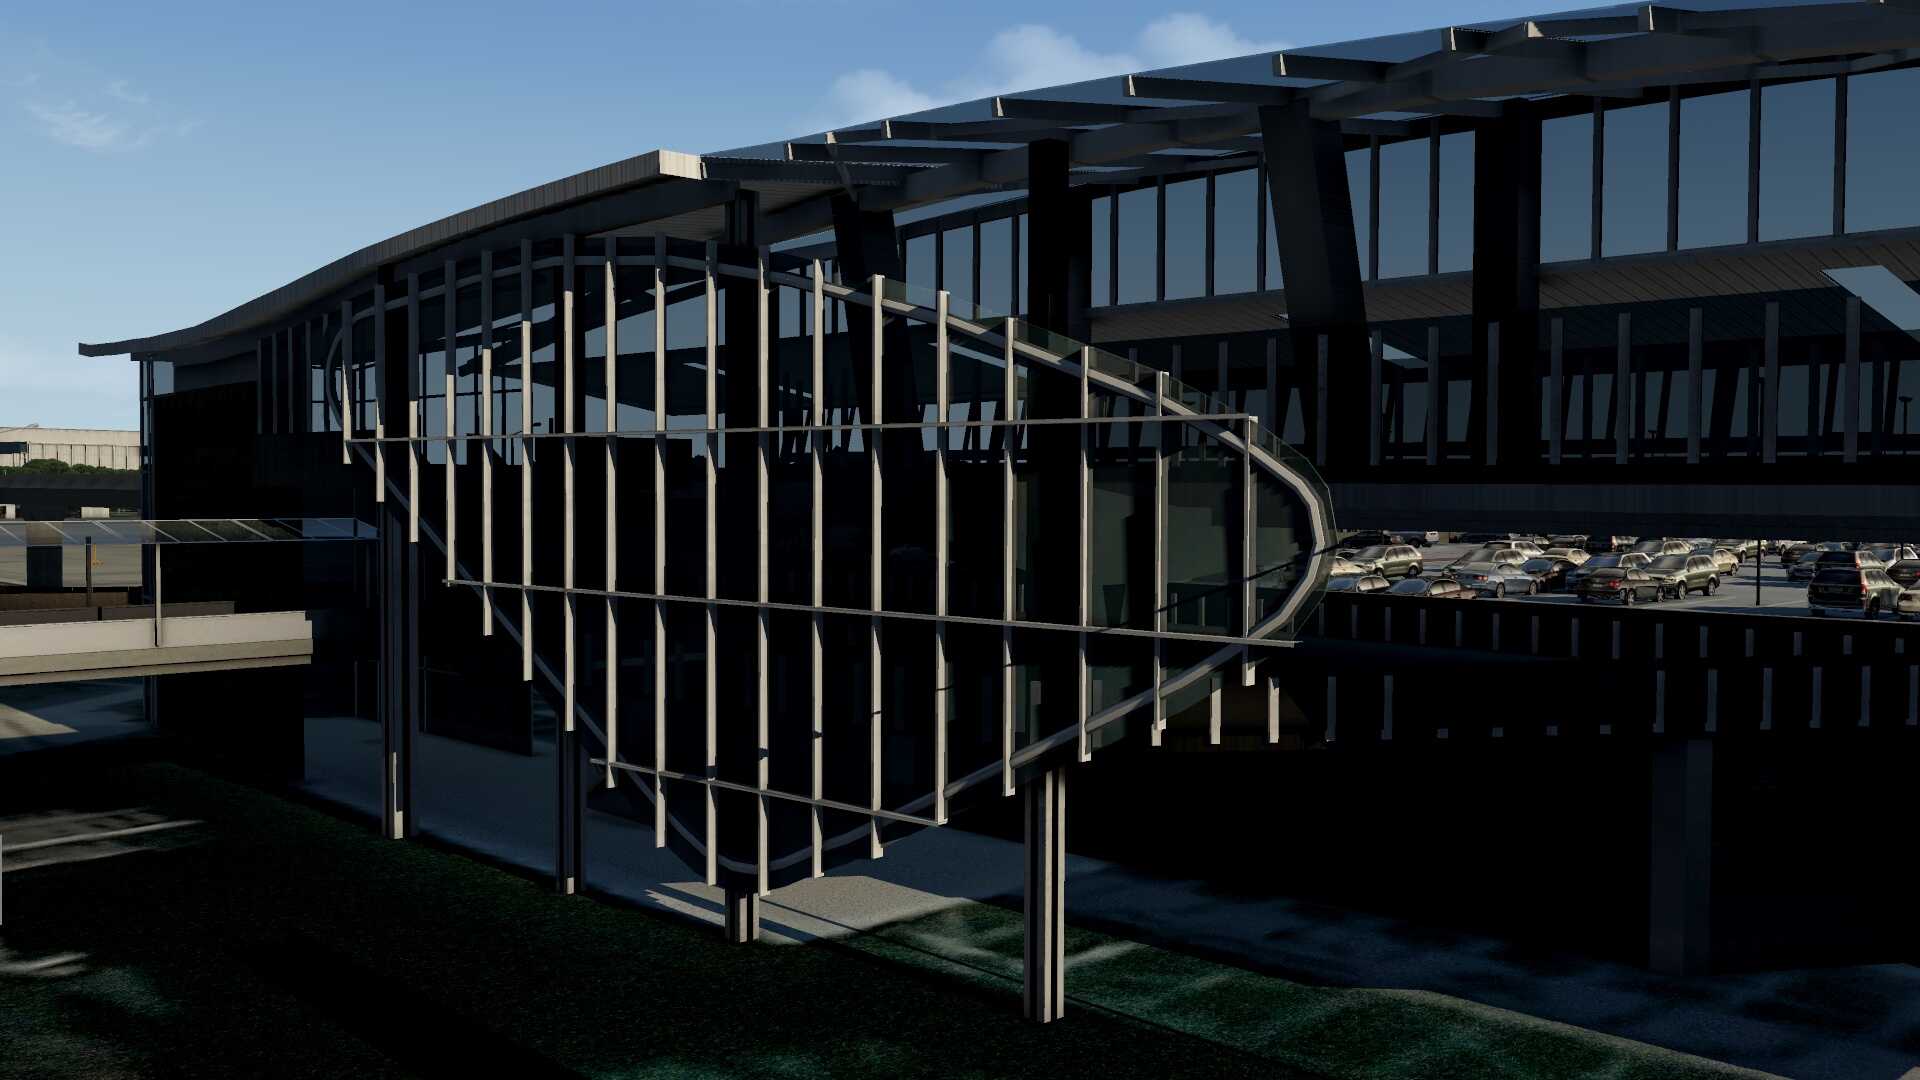
While driving further along the road I pass the gates or jetways belonging to the B section. All what I see looks gorgeous like the way the stair constructions to the jetways are made, but also to the terminal building itself. There’s a slight weathering implemented which gives the overall terminal building a bit more realistic look and feel. The simulated glass in the terminal is very well done in a way that you can look thru it although the glass panels/windows have a tint and since there are aircraft parked at the other side, I can see these thru the tinted windows.
But that’s not all. When I look again to the inside, I can see a complete modeled interior with seats, signs, desks and so on. I explained before that you can disable the interior to save frame rates in case it is needed for your computer. But even with all the twisters and bells active, the frame rates are absolutely good, so there’s not directly a need to disable the interior.
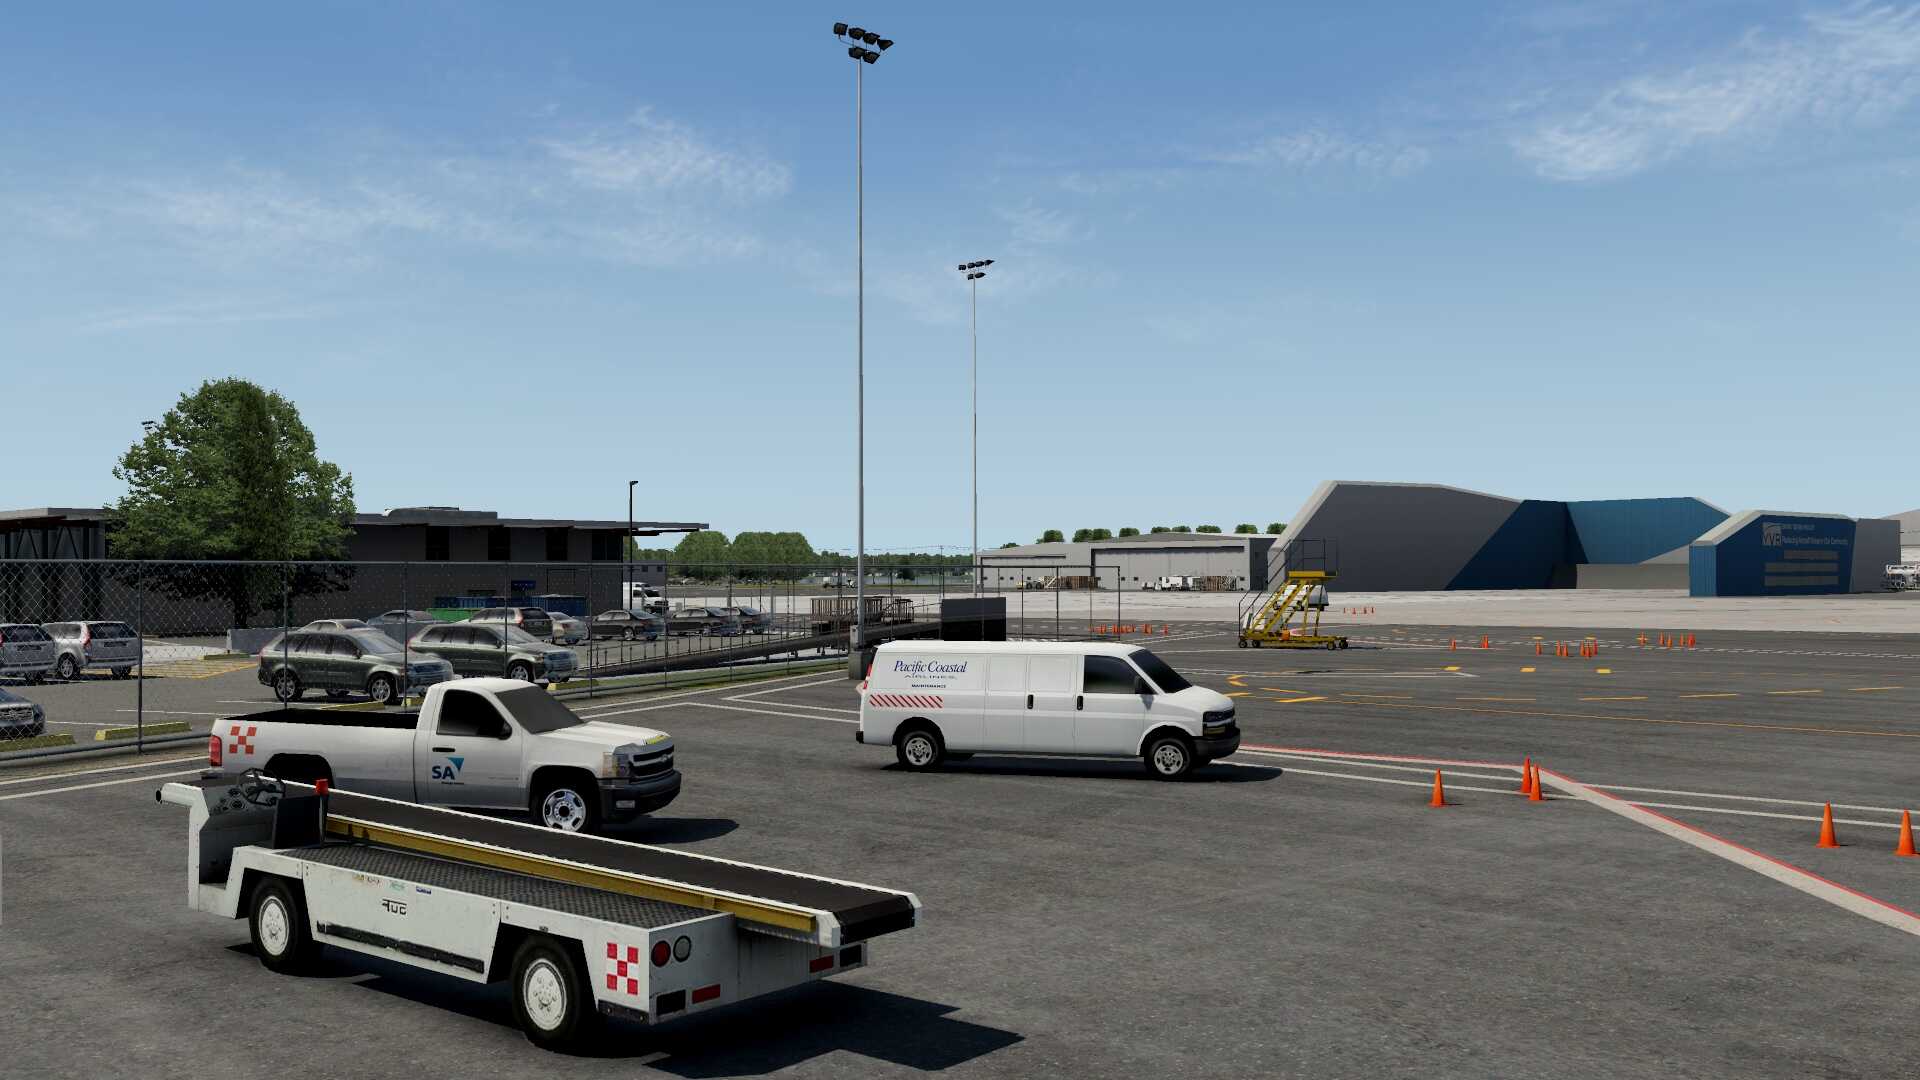
And there’s more. Knowing the years I spend at EHAM as ground engineer, I see the same here. Every where you find ground equipment and animatic objects like moving trucks, catering trucks, cars and so on. Besides those animated objects it’s full with static objects like stairs, baggage carts, trucks, airport authority cars, container trolleys, GPU (Ground Power Units) and much more. It is however, although with all those objects on the apron, well organised.


The modeled CFXP CYVR supports SAM World Jetways which means that they are animated the moment the SAM conditions are fulfilled. SAM World Jetways is a part of the SAM Suite. When you’re new to SAM World Jetways, please check out our in-depth review. It’s worth the reading!
For years and still available we used for animated jetways the freeware package from Marginal – AutoGate – while SAM World Jetways is a part of the SAM Suite and offers much more then just jetways. Many free and payware features are packed in the suite like the season changes. Anyway, having animated jetways is one of those nice airport implementation that creates a more realistic environment.
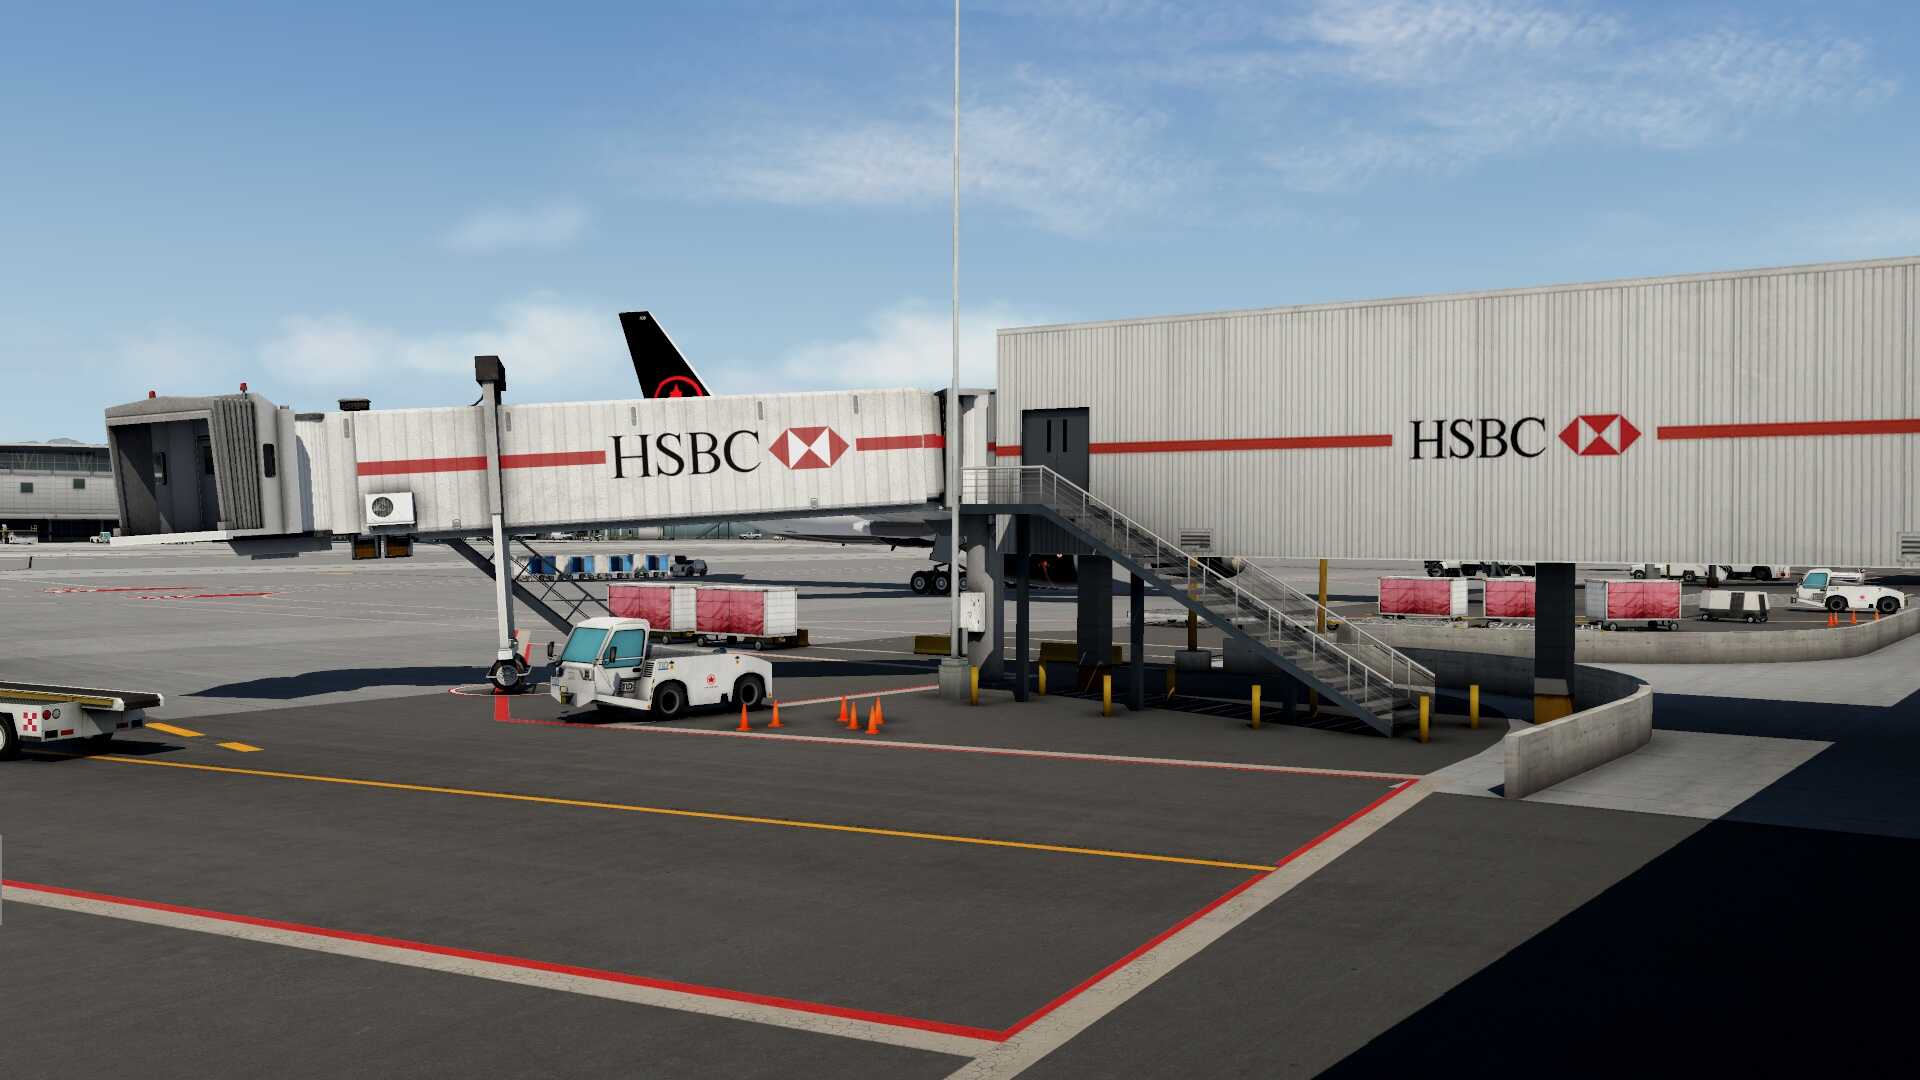
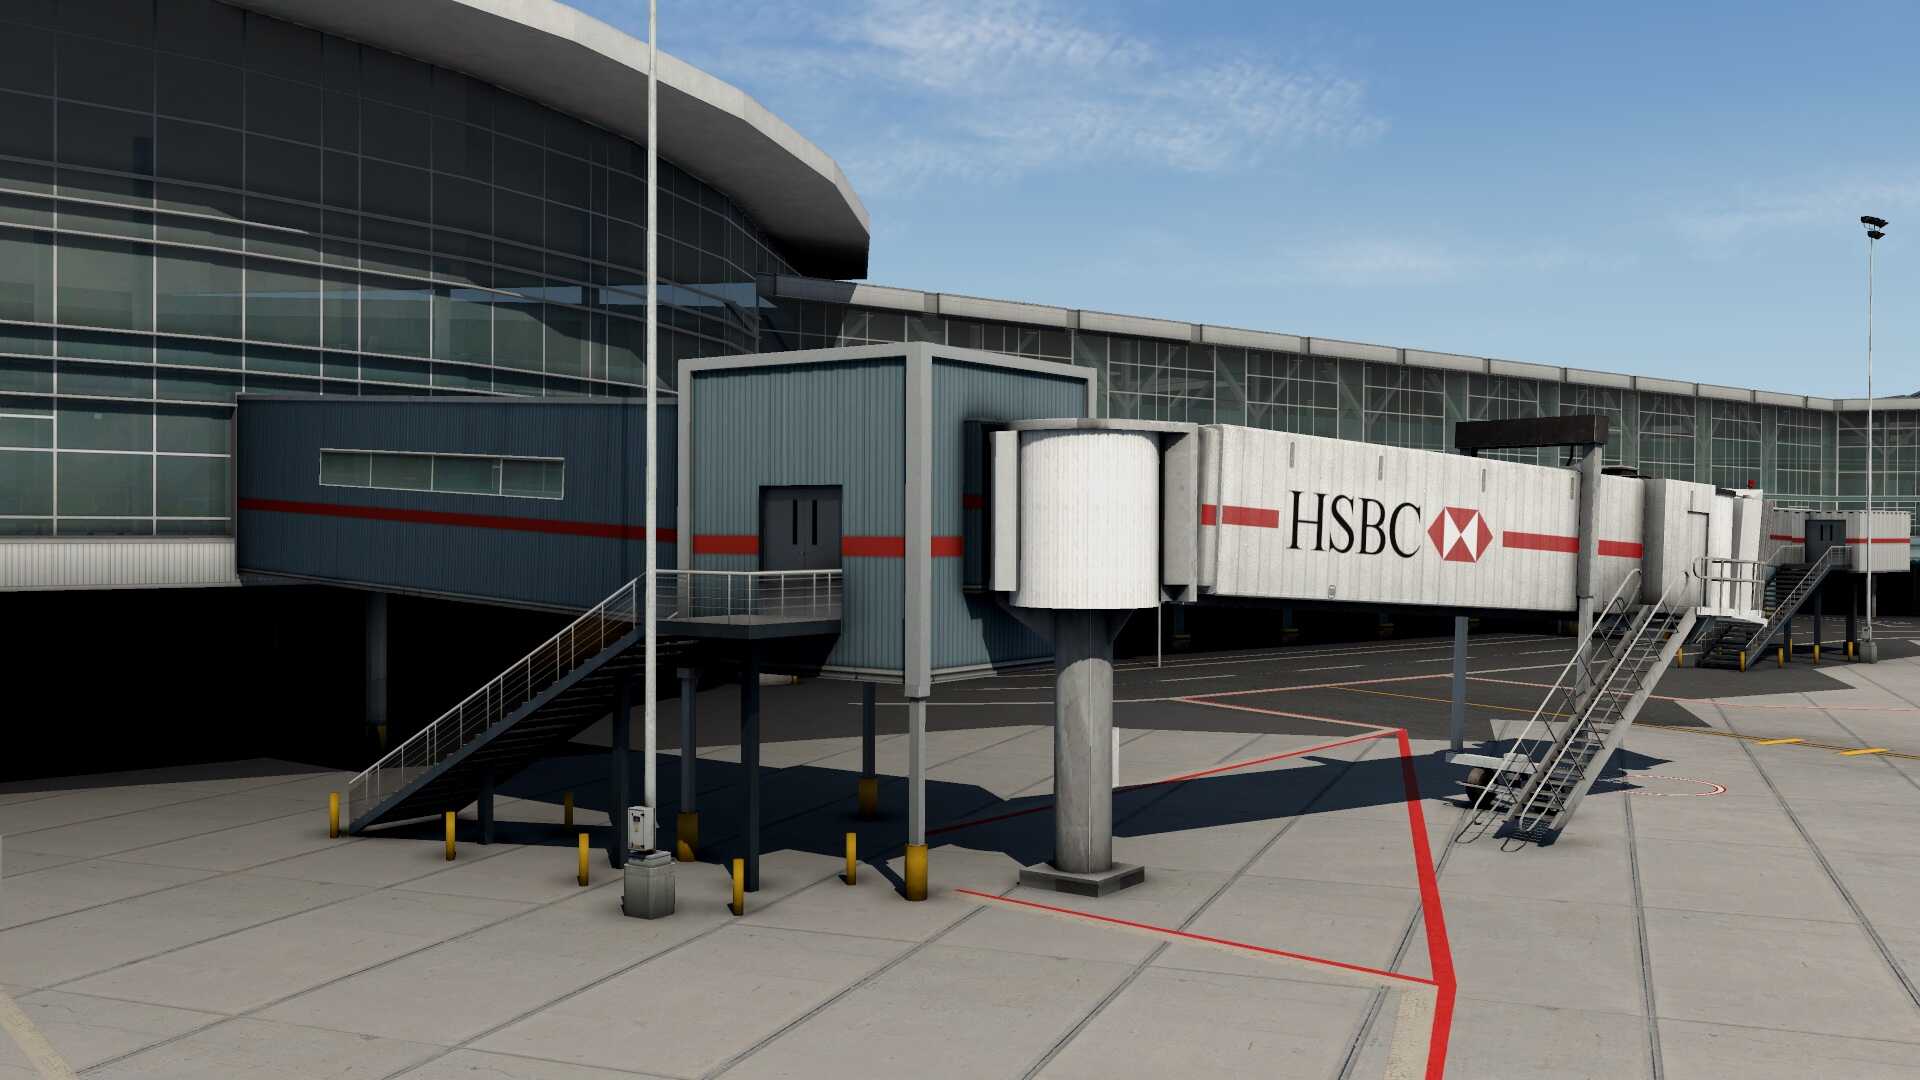
As seen on real photos, the airport has different jetways as is the same in the modeled CFXP airport. They are all a bit weathered, and depending on their location, they are either directly connected to the gate or terminal or there’s a fixed jetway section between the gate/terminal and the movable part. And then you’ll also find different jetway constructions. Some have straight windows in the jetway, others have a kind of triangle section or you will see closed constructions. Check out the following screenshots that represent a bit of these different jetways found all over the airport.


Back to my round trip inspection.
I’m approaching gate C and following the road along the terminal buildings towards gate D. Gate D is one of those buildings that is really new, literally new since it’s the last and recent part added to the real airport and also included in this modeled CFXP CYVR. Besides that I like the way the objects are modeled, I also like the semi transparant glass which shows me the modeled interior. I’d seen that before in another terminal, but it’s basically the same idea and same setup on how these glass panels with interior is modeled. Add to this the ground textures, the ground equipment, the slightly weathered look on the terminal textures, and don’t forget to check out the roofs of all the different terminals, and you’ve got a happy reviewer!


Driving along the northside of the gates D to E is quite impressive. It is huge, it has a lot of different objects and all those objects together give it a realistic look and feel. Then add to this all the different ground textures including all the ortho textures with green sections and grass, and it’s all complete. The overall apron looks gorgeous, lets be honest with that! When you add to this real aircraft movements like I’m using Just Flight’s Traffic Global, then it’s a well balanced virtual environment.
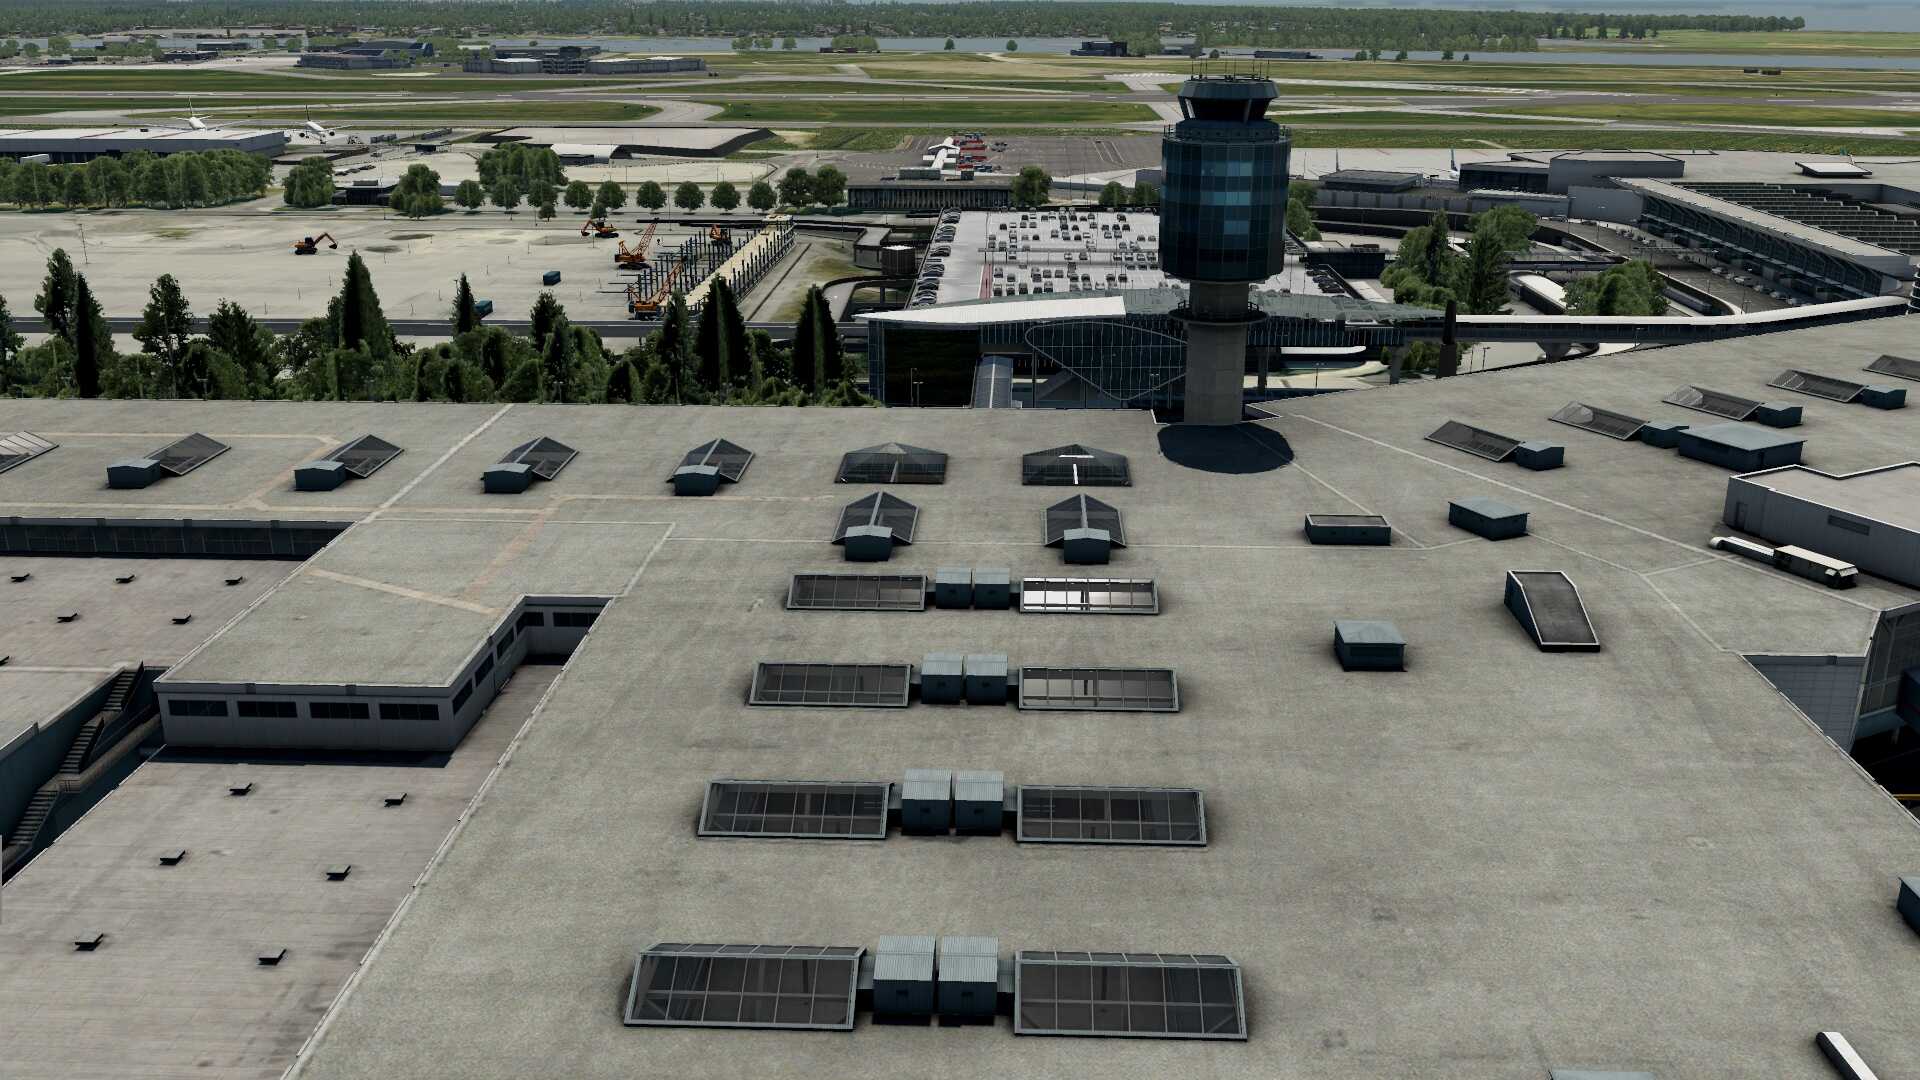
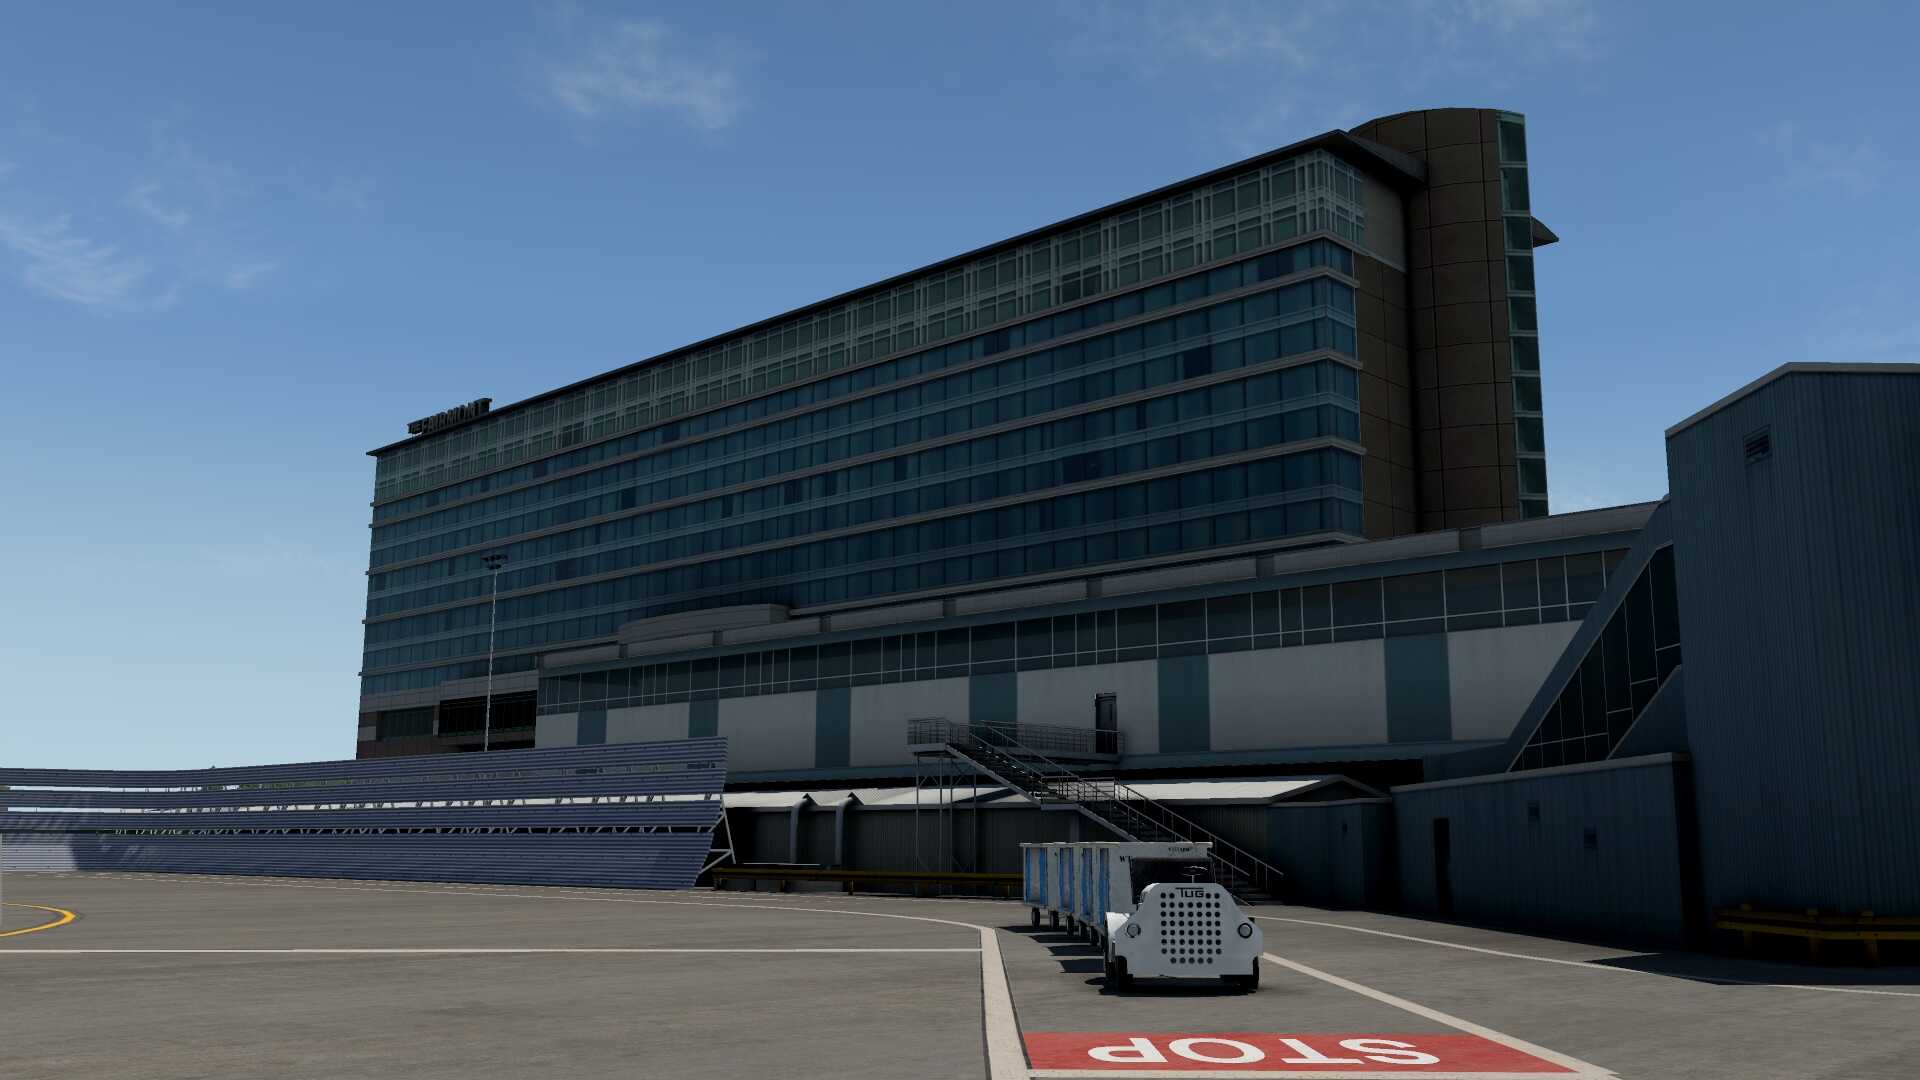
While driving up along the gates 82 to 96, I see another masterpiece. It’s first the characteristic control tower with the Fairmont airport hotel. Wow wow wow, but perhaps a small improvement could be added although I think this will cost some additional polygons and more polygons means less FPS. The green roof of the Fairmont hotel entrance has lines which simulate the way the roof is build, but there’s no 3D effect visible of these individual green roof plates. Perhaps you would ask “is it so important to have a bit more 3D effect of the individual plates on the roof”? It’s a matter of taste, and in this case it’s for me to highlight what I see. At the end it’s up to Patrick if it is worth to add this 3D effect, if it is worth to add more polygons to it knowing that it will cost frame rates.


Before driving to the South Terminal I would like to check while I’m still here, the additional aprons for aircraft parking and the deicing area. So at the end of gate E and the previous mentioned Fairmont hotel you’ll see large car parking areas mostly belonging to car rental companies, a large area for aircraft parking and a place with Swissport fuel trucks. Behind that I see a huge Air Canada hangar, but that’s for later.
I first checked these aircraft- and car rental parking areas with real photos and then I compared it to the modeled areas. The conclusion is simple, what I see right here in the modeled CYVR is what I saw on the photos. So I must say that it looks very nice with eye for many details and it’s realistic too. Even though it’s just an area with several small buildings, cars and an aircraft apron which is in my case on this time of the day filled with aircraft, it offers that what I expected. Ok, it’s time to move on and to check out the South Terminal, but first passing along the deicing area.
Deicing Area
While approaching the end of the latest build section of gate D, I quickly have a look at the deicing area. It’s not so spectacular as you might think since the area is no more then a couple of static deicing trucks, but the overall is modeled with eye for details and, as is applicable for the whole airport, the ground textures or graphics of this deicing area is well done. I double checked the airport readme document that’s included, but I didn’t see that the deicing area is equipped with a animated deicing trucks. So what I see are a couple of static trucks, some other equipment, lights and that’s it. And now, on my way to the south Terminal and belonging area.


South Terminal
What said before, I’ll drive all the way back to gate A and via taxiways E, crossing runway 08R/26L, then continue via taxiway H and via A, I reach the South Terminal. When you see this area from the sky it’s a mix of all different kind of buildings, hangars, aprons, car parkings etc. It looks like it’s not really an organised area and it looks like that every time something was added to it making a mess of unorganised aprons, buildings, hangars and what else more can be found. And that is exactly what I like about the South Terminal and General Aviation maintenance area. It really reflects how this real area looks like.
Looking to the passenger area apron I see lots of static equipment ranging from baggage carts, stairs, tow bars, trucks, fuel trucks, cars, containers, bagage belts, and perhaps other objects I missed. Together with my Just flight Traffic Global active, I see several commuters, but, parked at the nearby hangars, also larger commercial jets. The south terminal itself – thus the building for the passengers – is simple, but that’s the reality. It’s a small building although well modeled with a car parking area in front of it, and from the security area passengers can walk I assume to their aircraft. But there’s more.

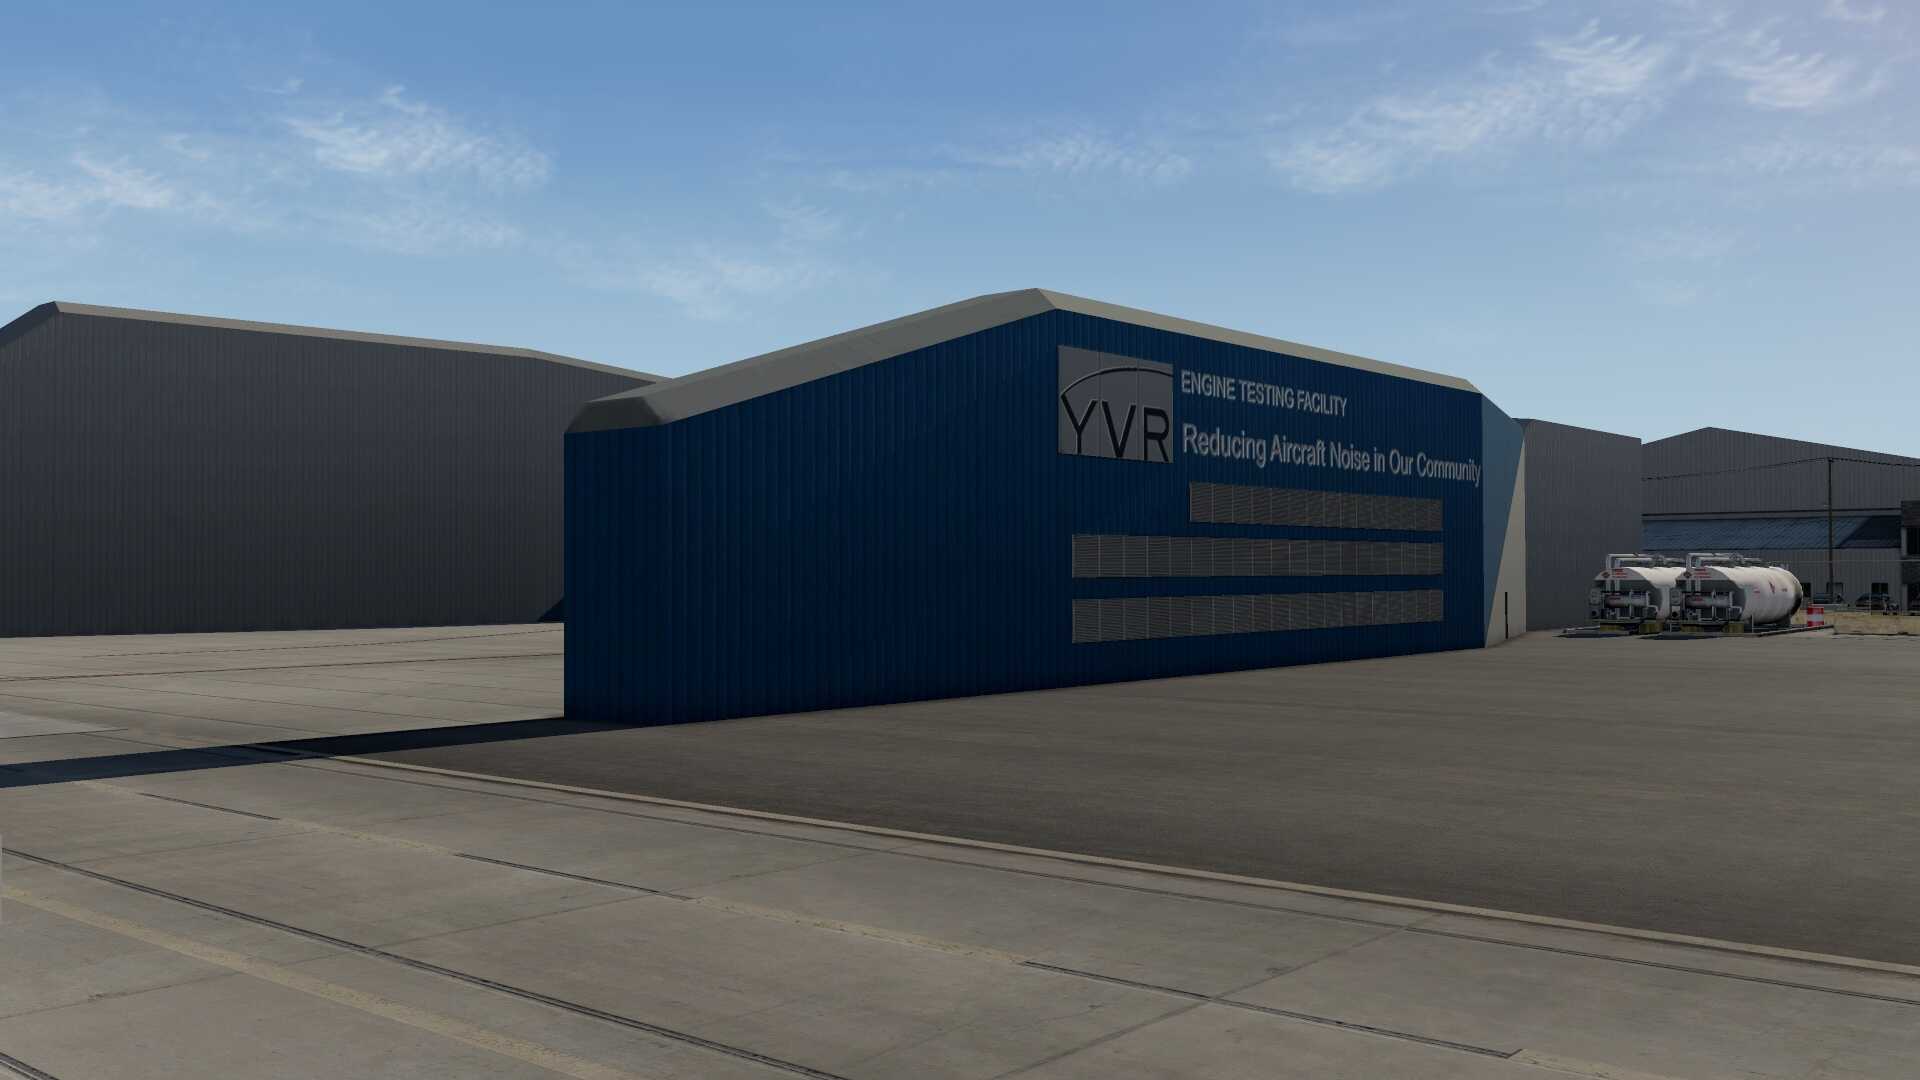
On the south side of the south terminal apron you find a huge engine testing facility. When I write huge, I mean HUGE. That you can do engine test runs at this location seems to me a bit weird since I’m wondering if this is only for commuter engine test runs. I sincerely think it is also used for commercial aircraft or perhaps I’m mistaken with that idea. Anyway, it looks great, well modeled and together with a couple of other nearby offices it completes the south terminal area.


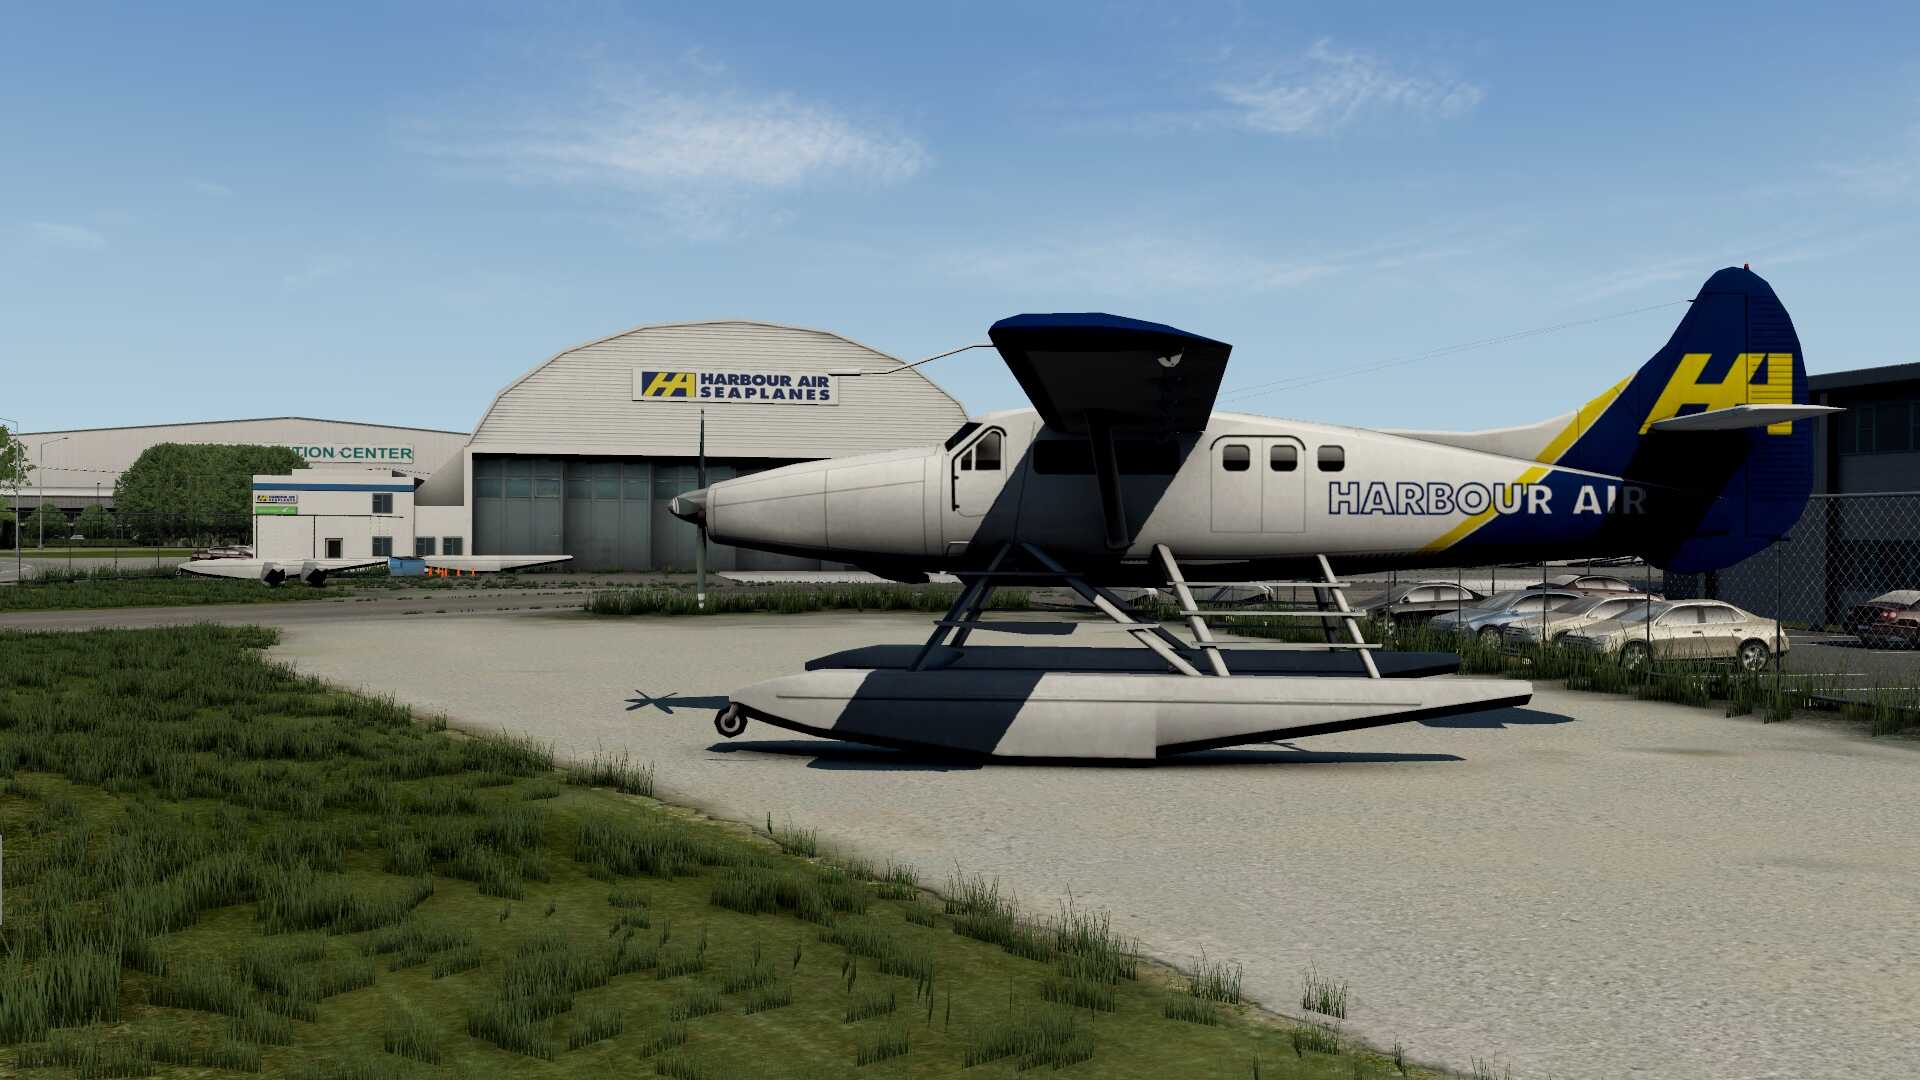
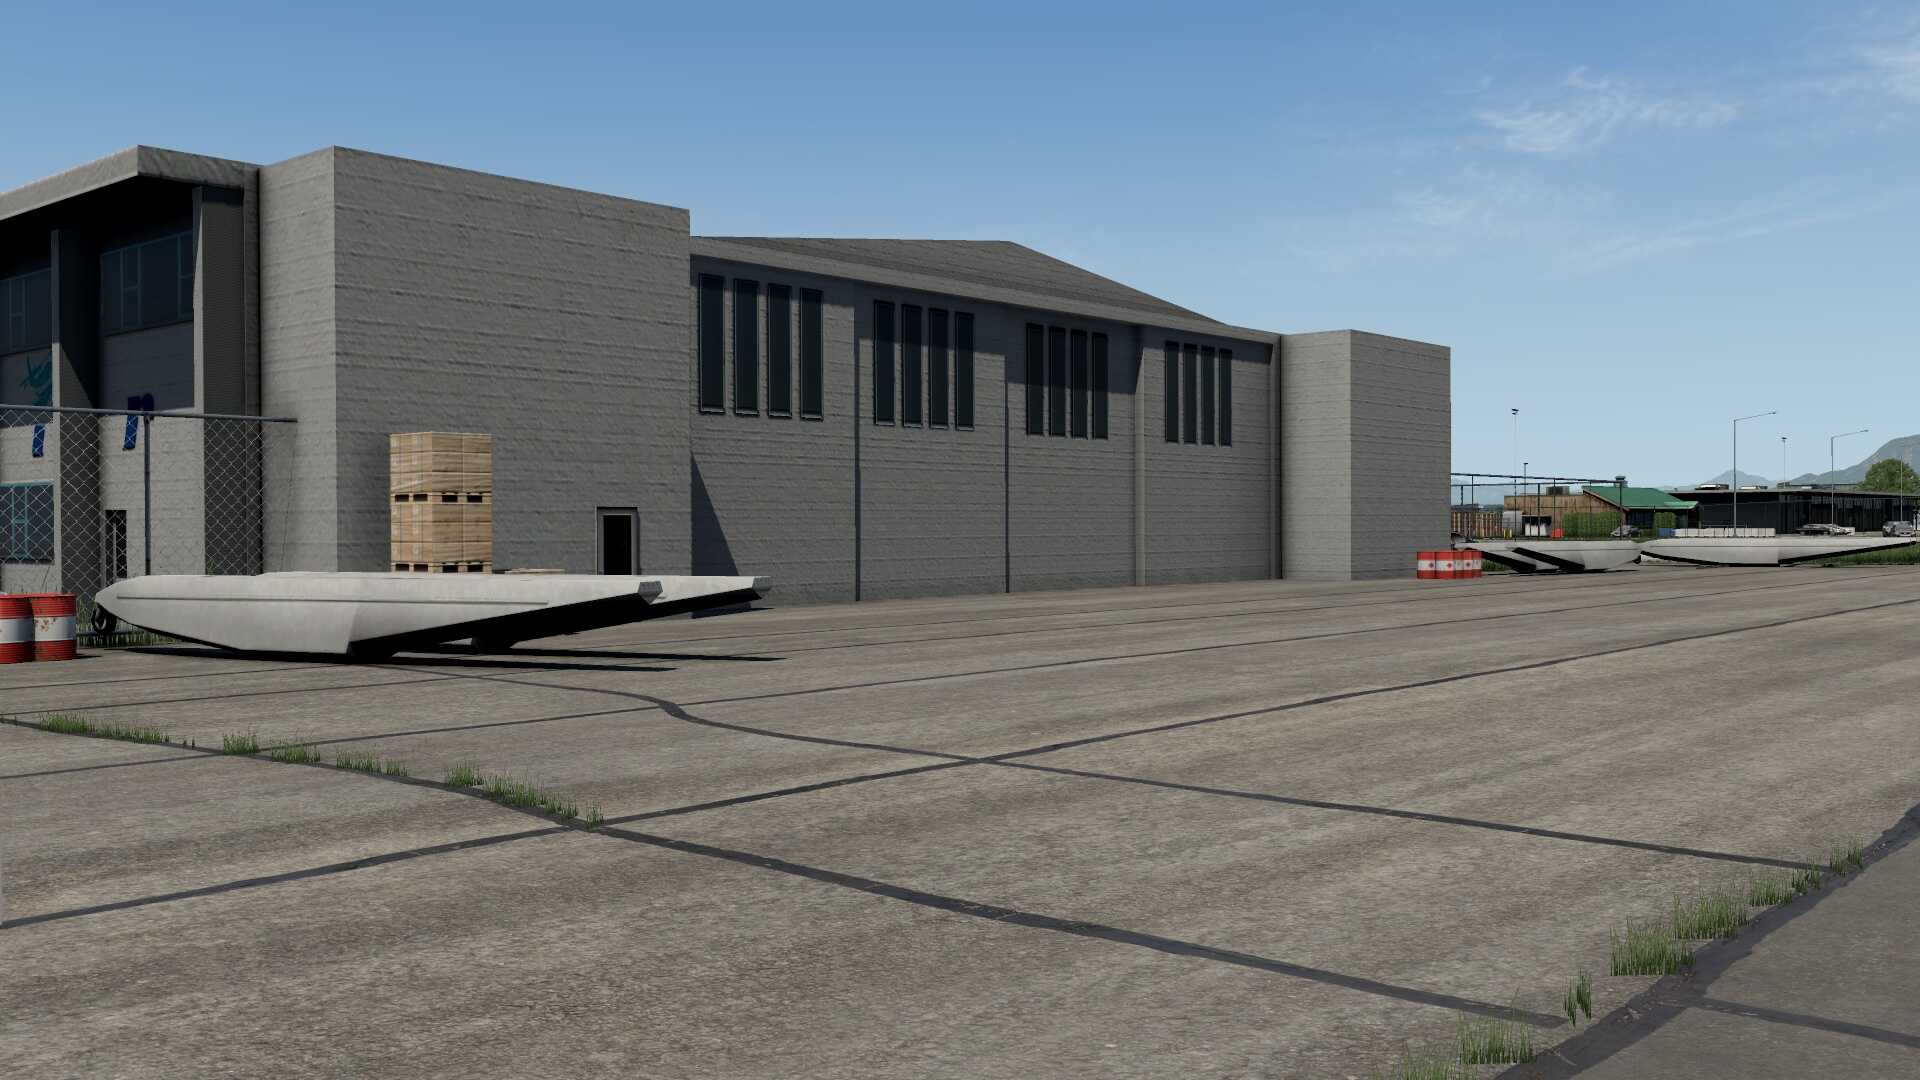
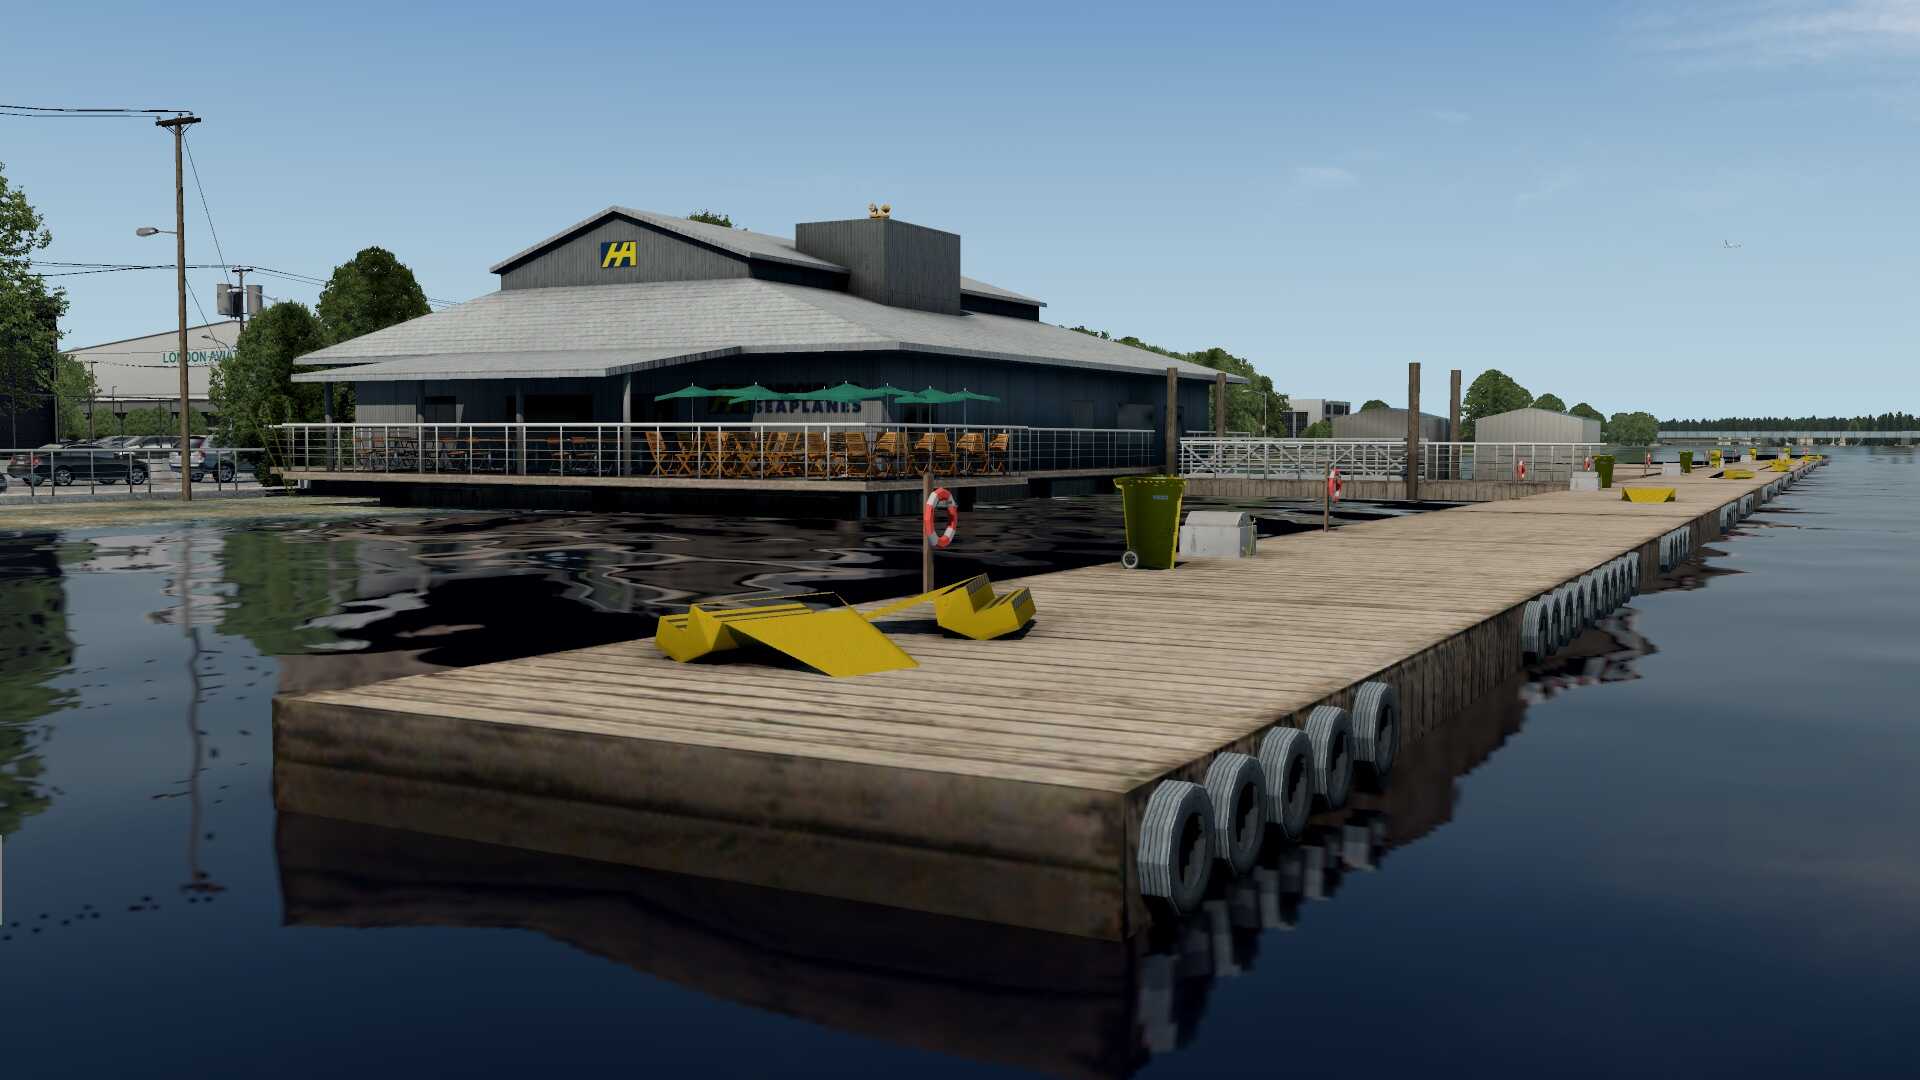
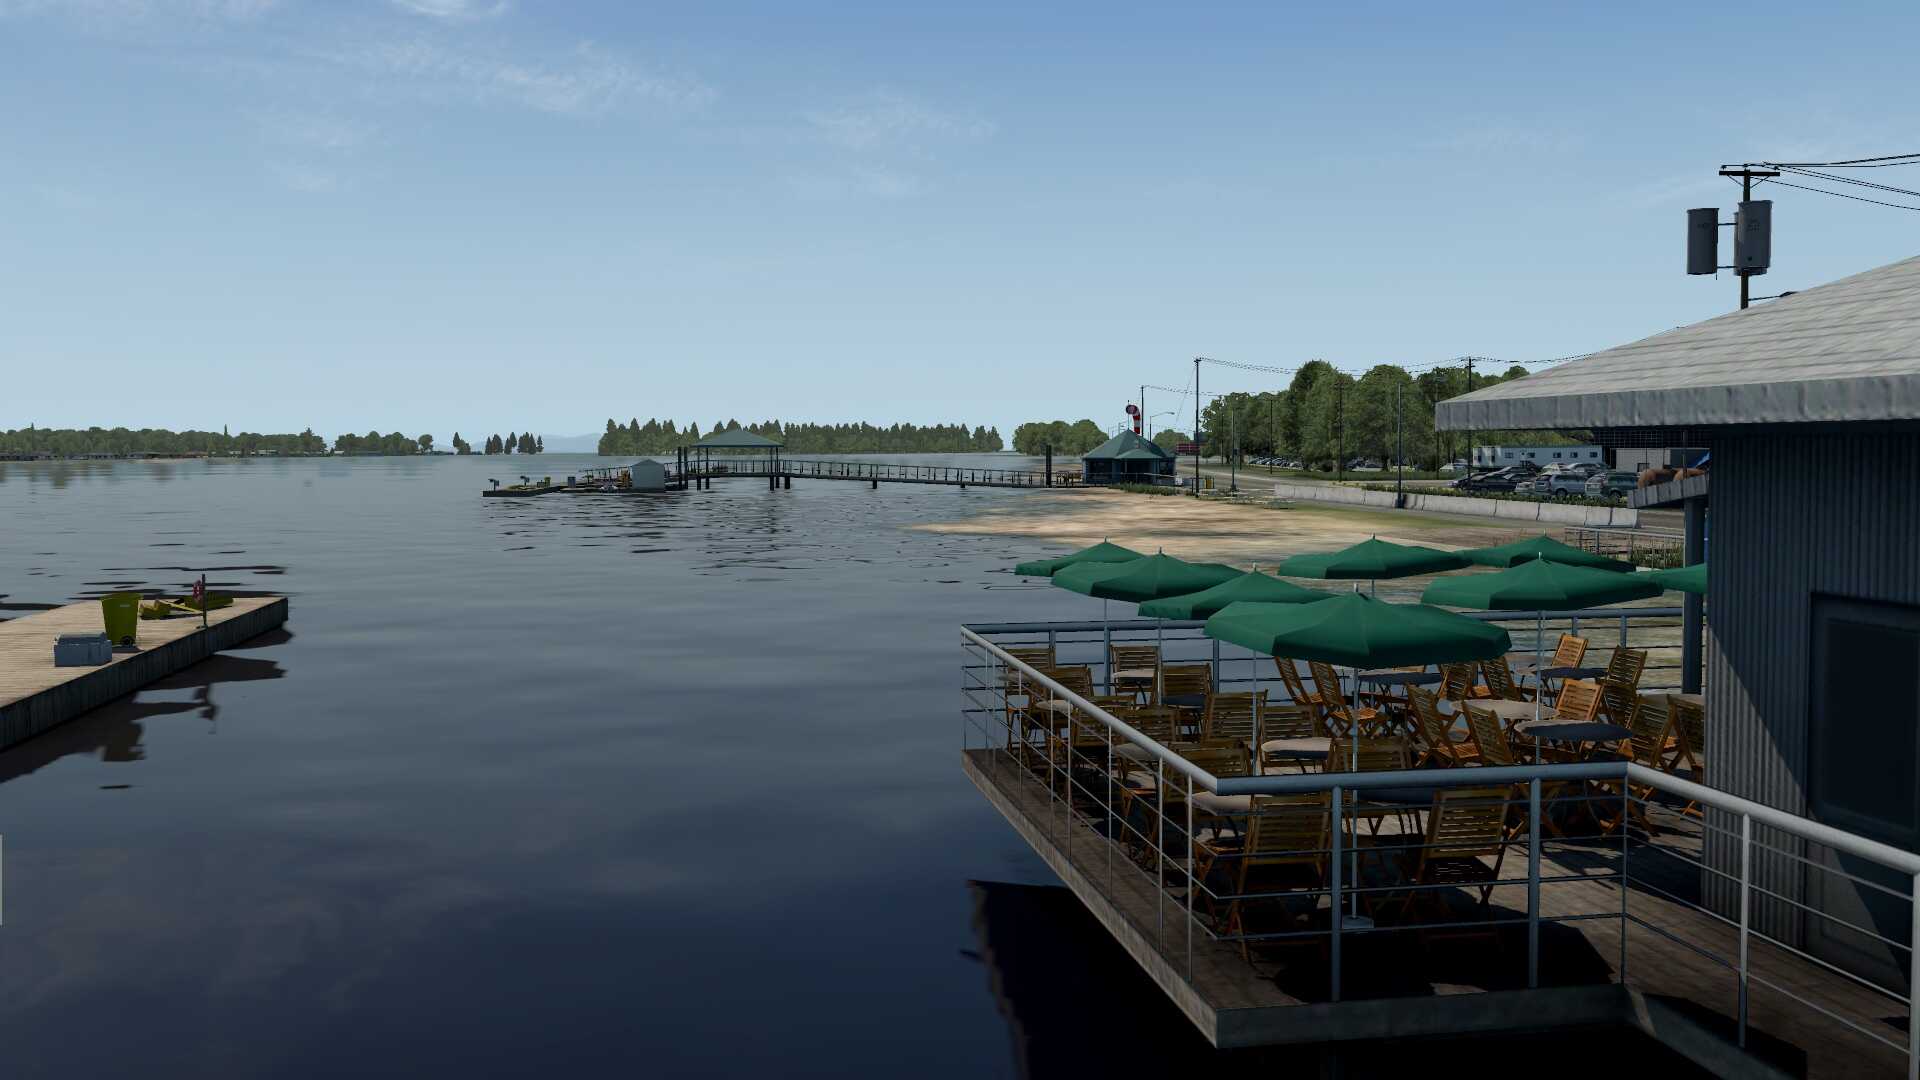
But there’s more and that’s the area that goes to the Harbor Air Seaplanes hangar, apron, and seaplane docking. There’s a path or a kind of taxiway from the south terminal apron that runs to the Harbor Air Seaplanes hangar with in front of it the apron and from there you go to the docking facilities in the river Fraser including a Harbor Air restaurant and the belonging terminal building. The apron feels so good, so realistic, but why is it so real .. since every corner at the apron is filled with something. Everywhere you find something and that something are either seaplane floats, pallets, stairs, tow bars, containers, old fuel tanks and in-between the concrete apron plates there’s also some grass, and finally, a concrete barrier with of course the fence that divides the public area from the security apron.
I’d had a quick look in the Harbor Air restaurant and terminal, but they didn’t had anything on the menu that I liked. In case you stop by and find something, then please, take a moment to sit outside in the sun enjoying the seaplanes and enjoy the very well modeled building.


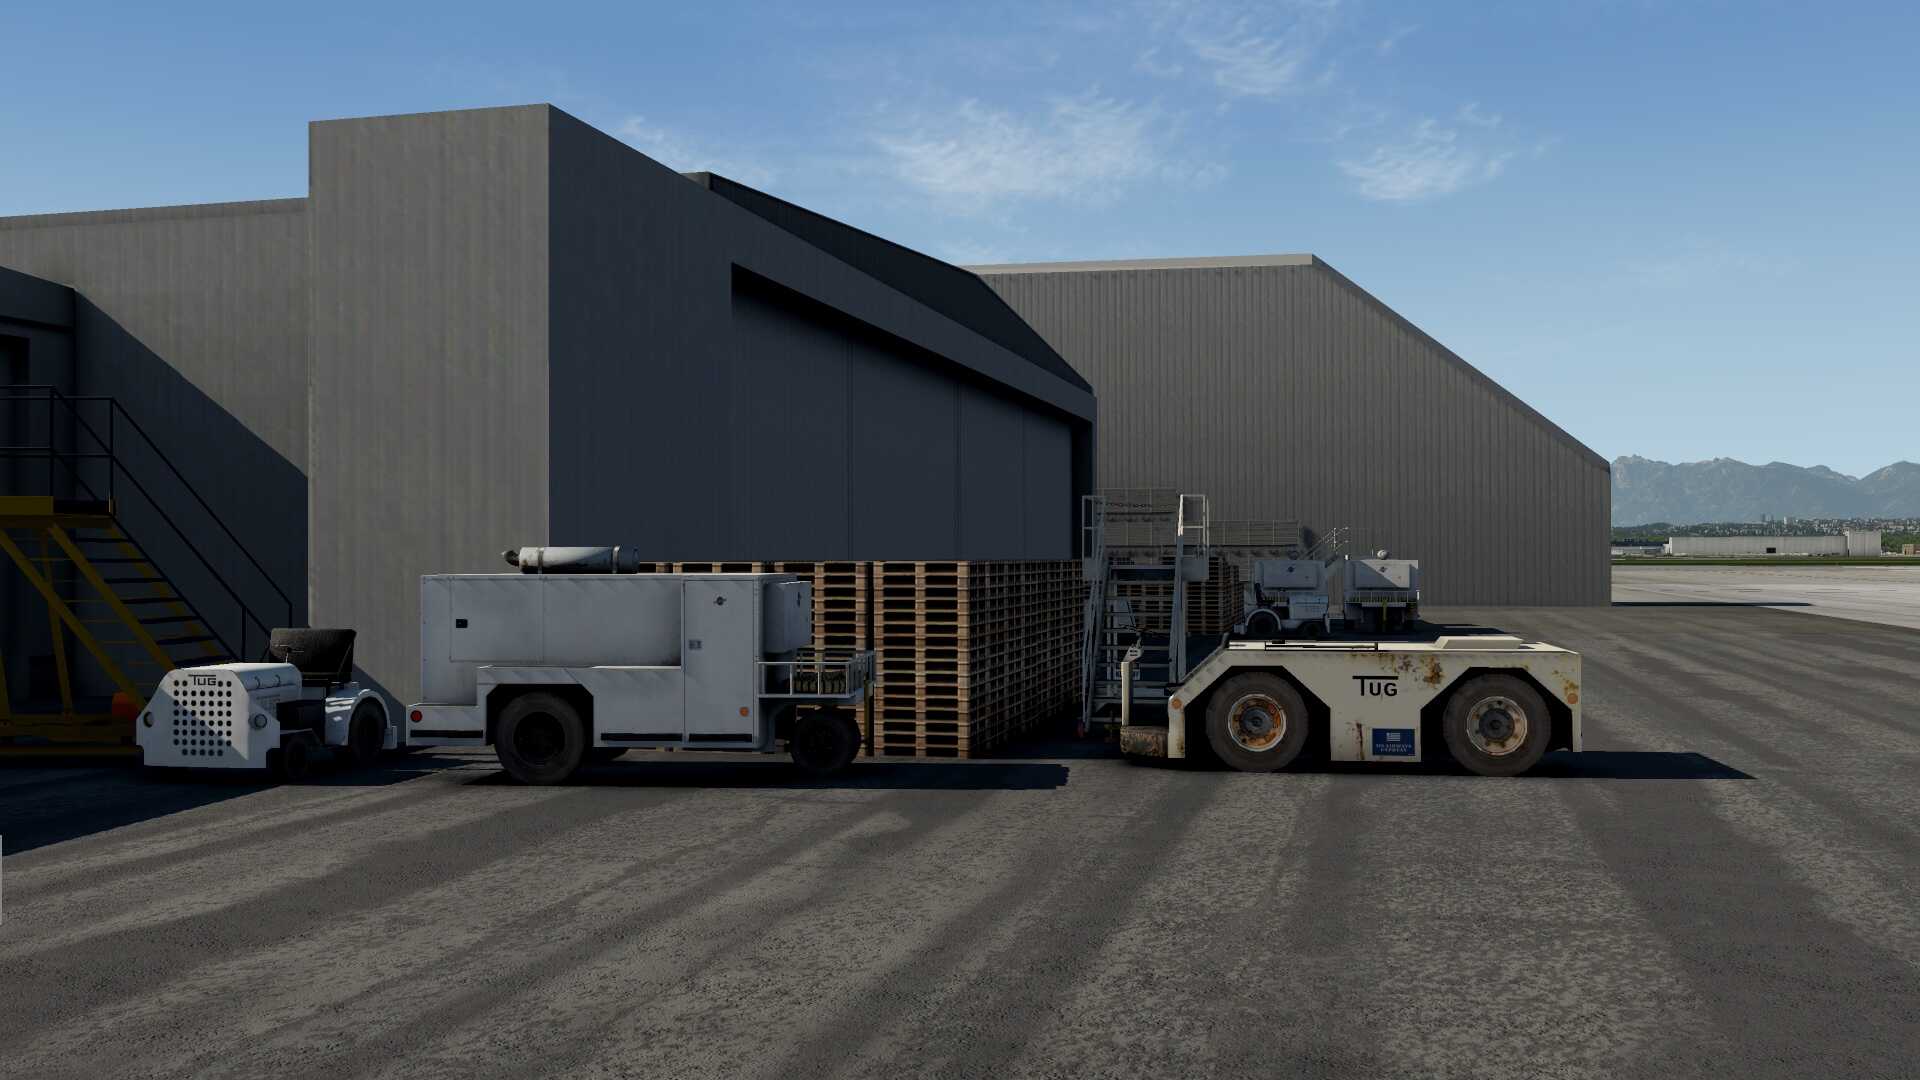
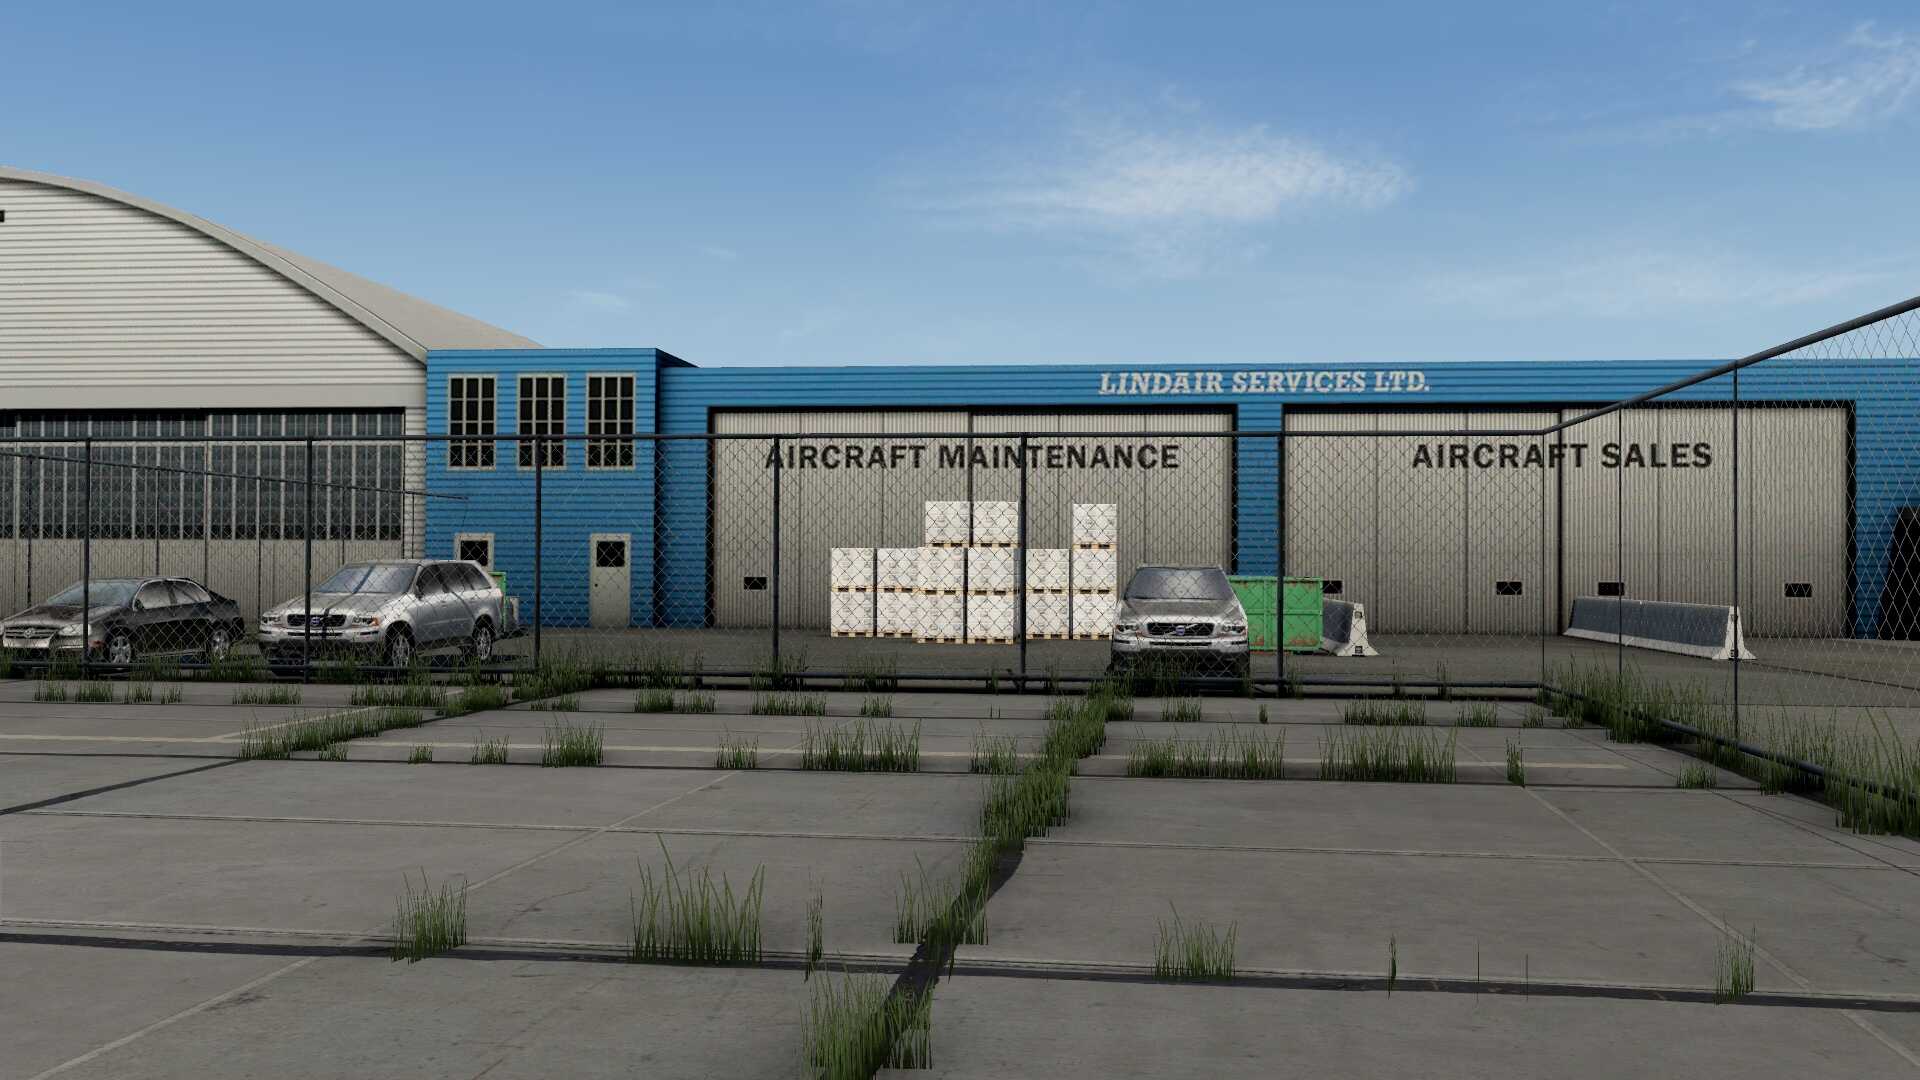
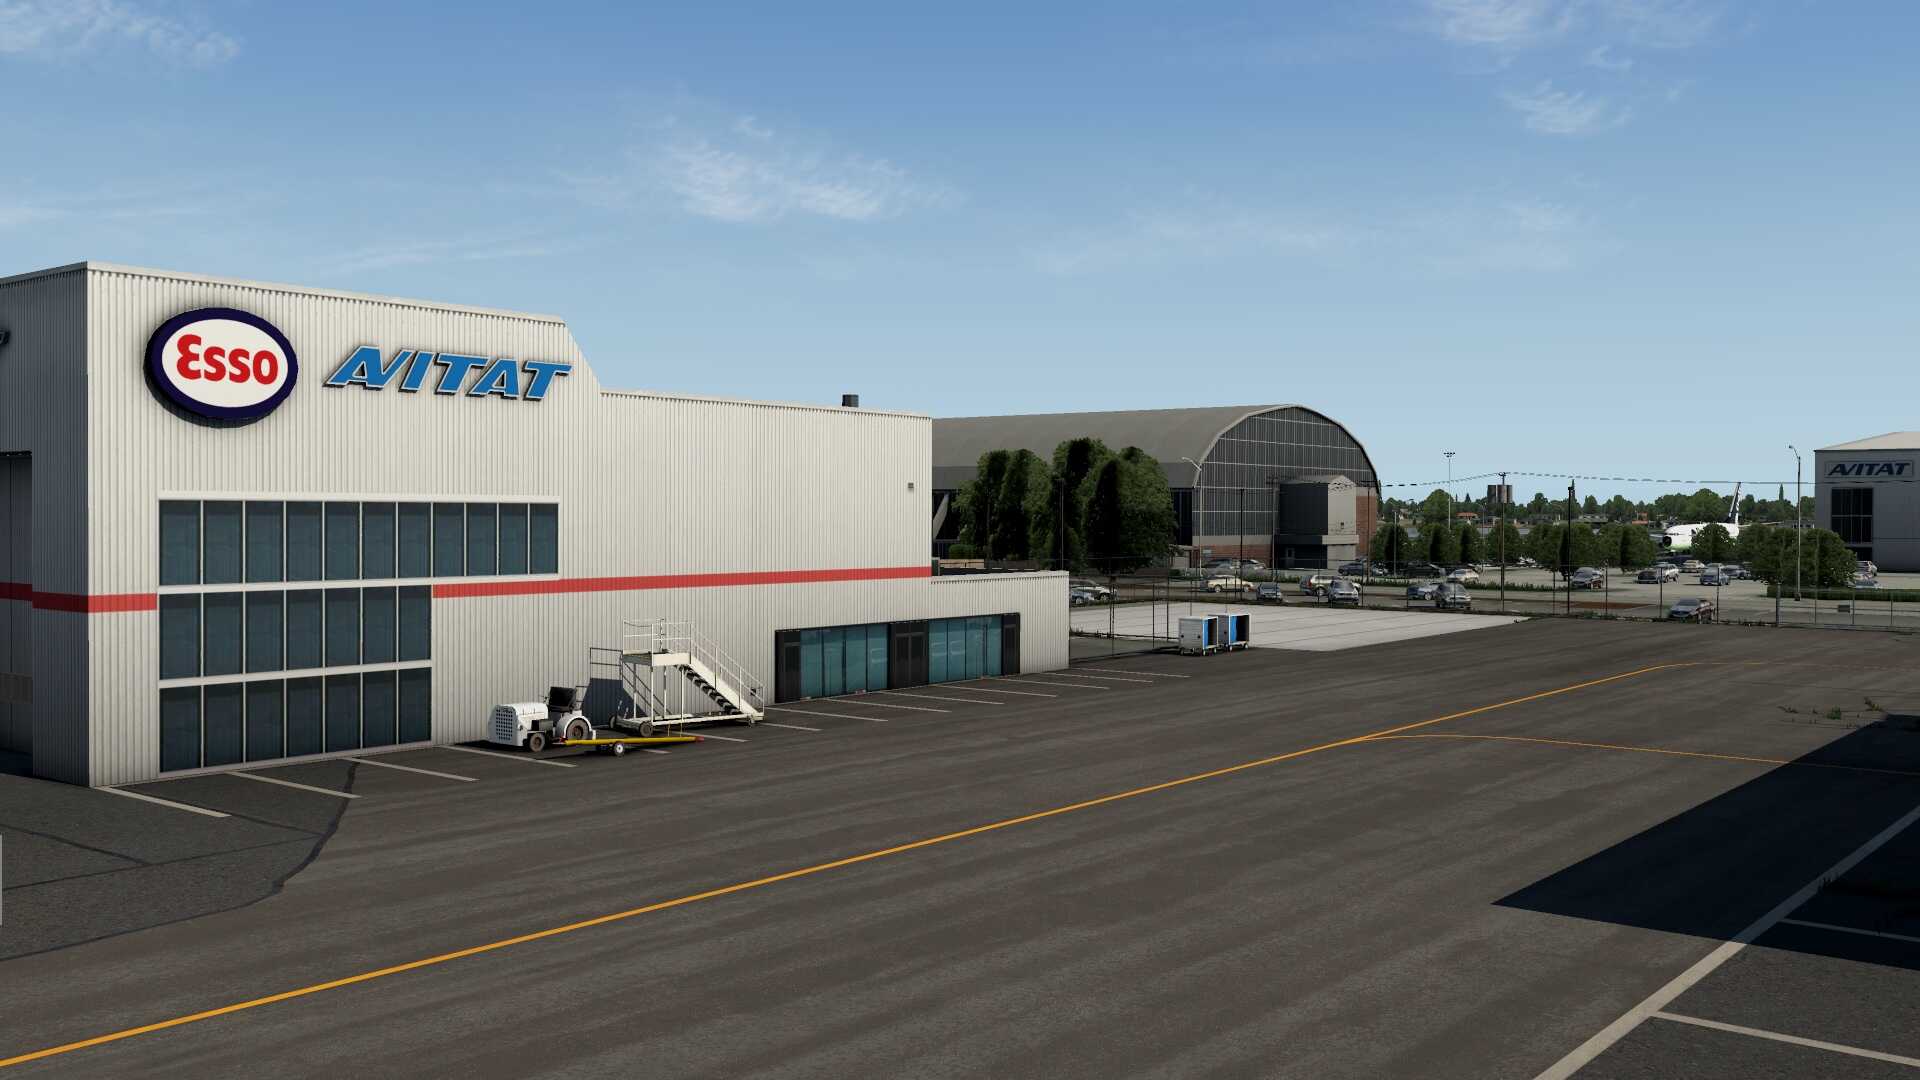
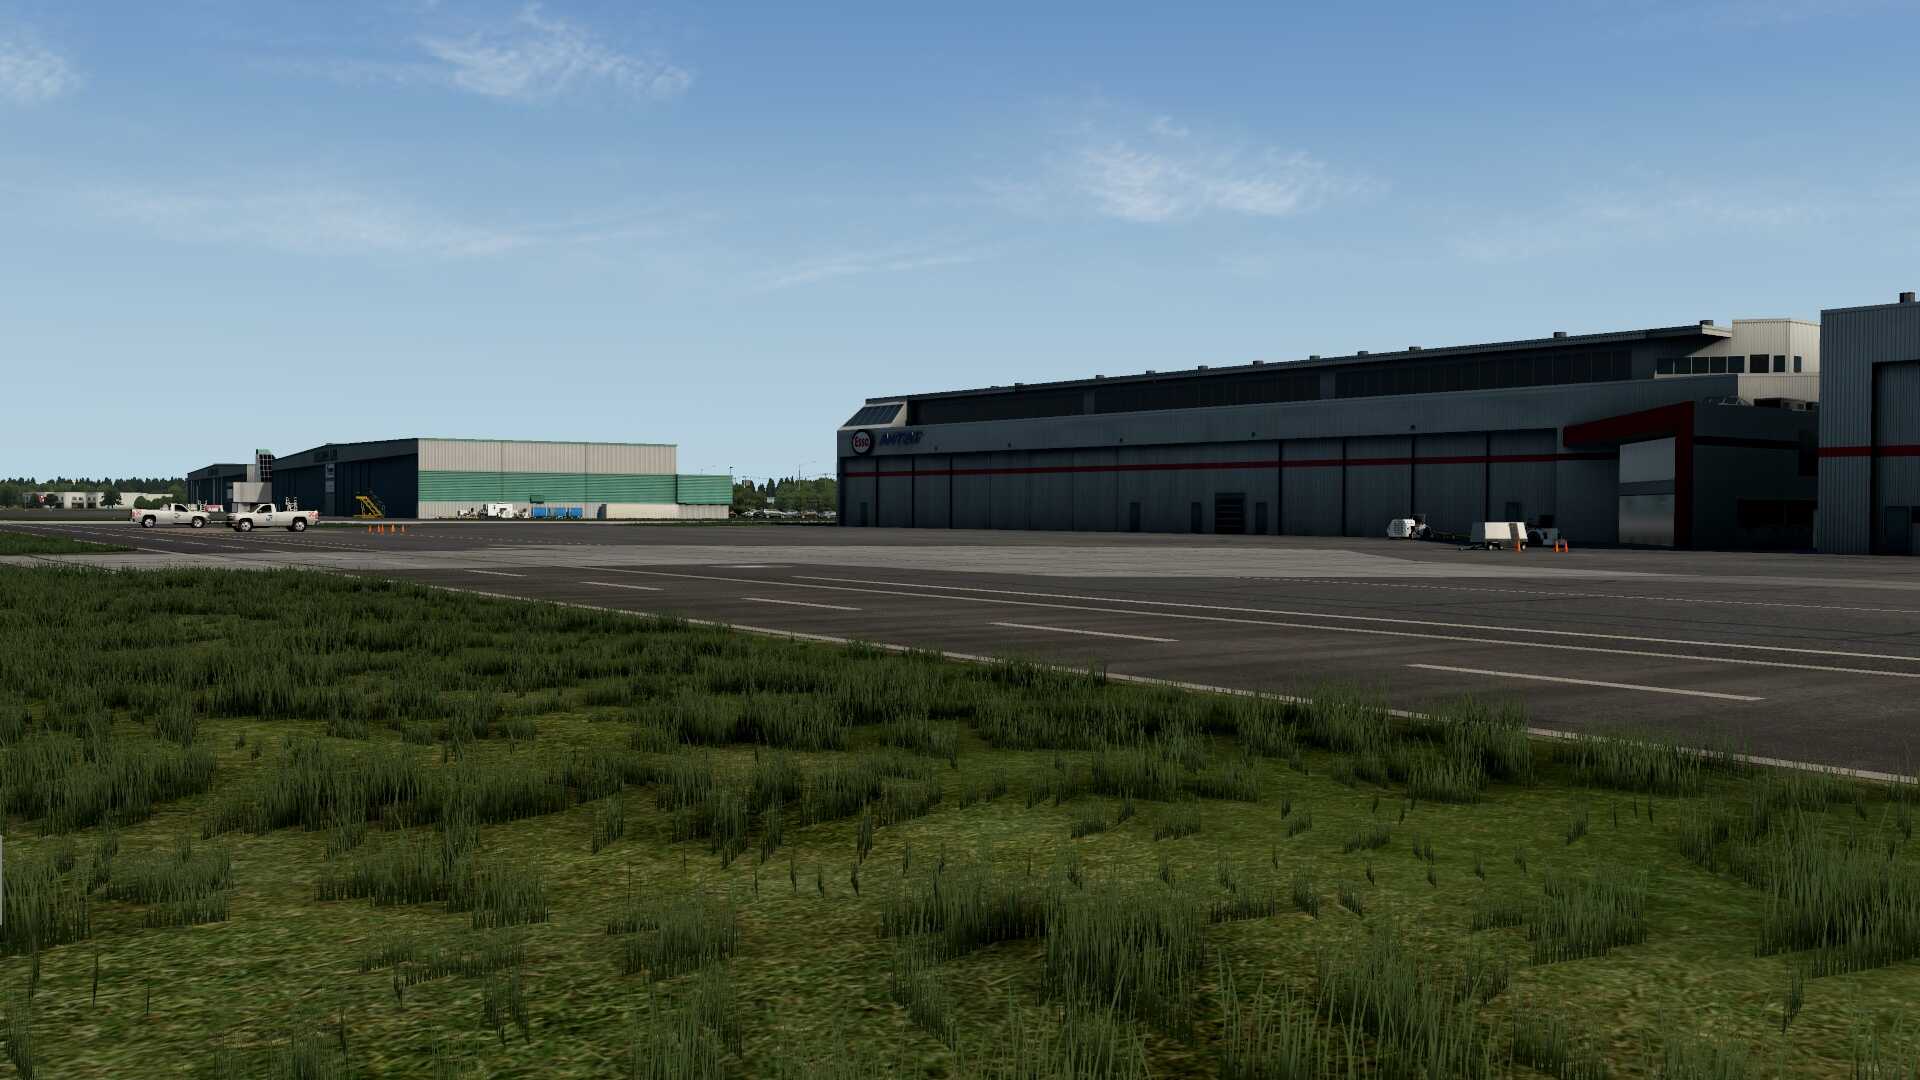
Actually, the south terminal is a large area where you will find all things that deal with General Aviation. That said, you’ll find the nicely modeled Lindair Services Ltd. hangar and belonging aprons, the huge and accurate modeled hangar from Esso Avitat. This Esso Avitat hangar is completed with its own apron and again simulated cracks can be found in the concrete apron and further on many static objects like pushback trucks, tow bars, and so on are included. A bit further along the road I spot another well modeled hangar from Million Air.
It’s almost impossible to cover everything part or object I see in the south area. It’s actually too much. In other words, this south terminal and GA area is modeled with so much love. You absolutely need to visit CYVR with a commuter and see what’s all going on here.


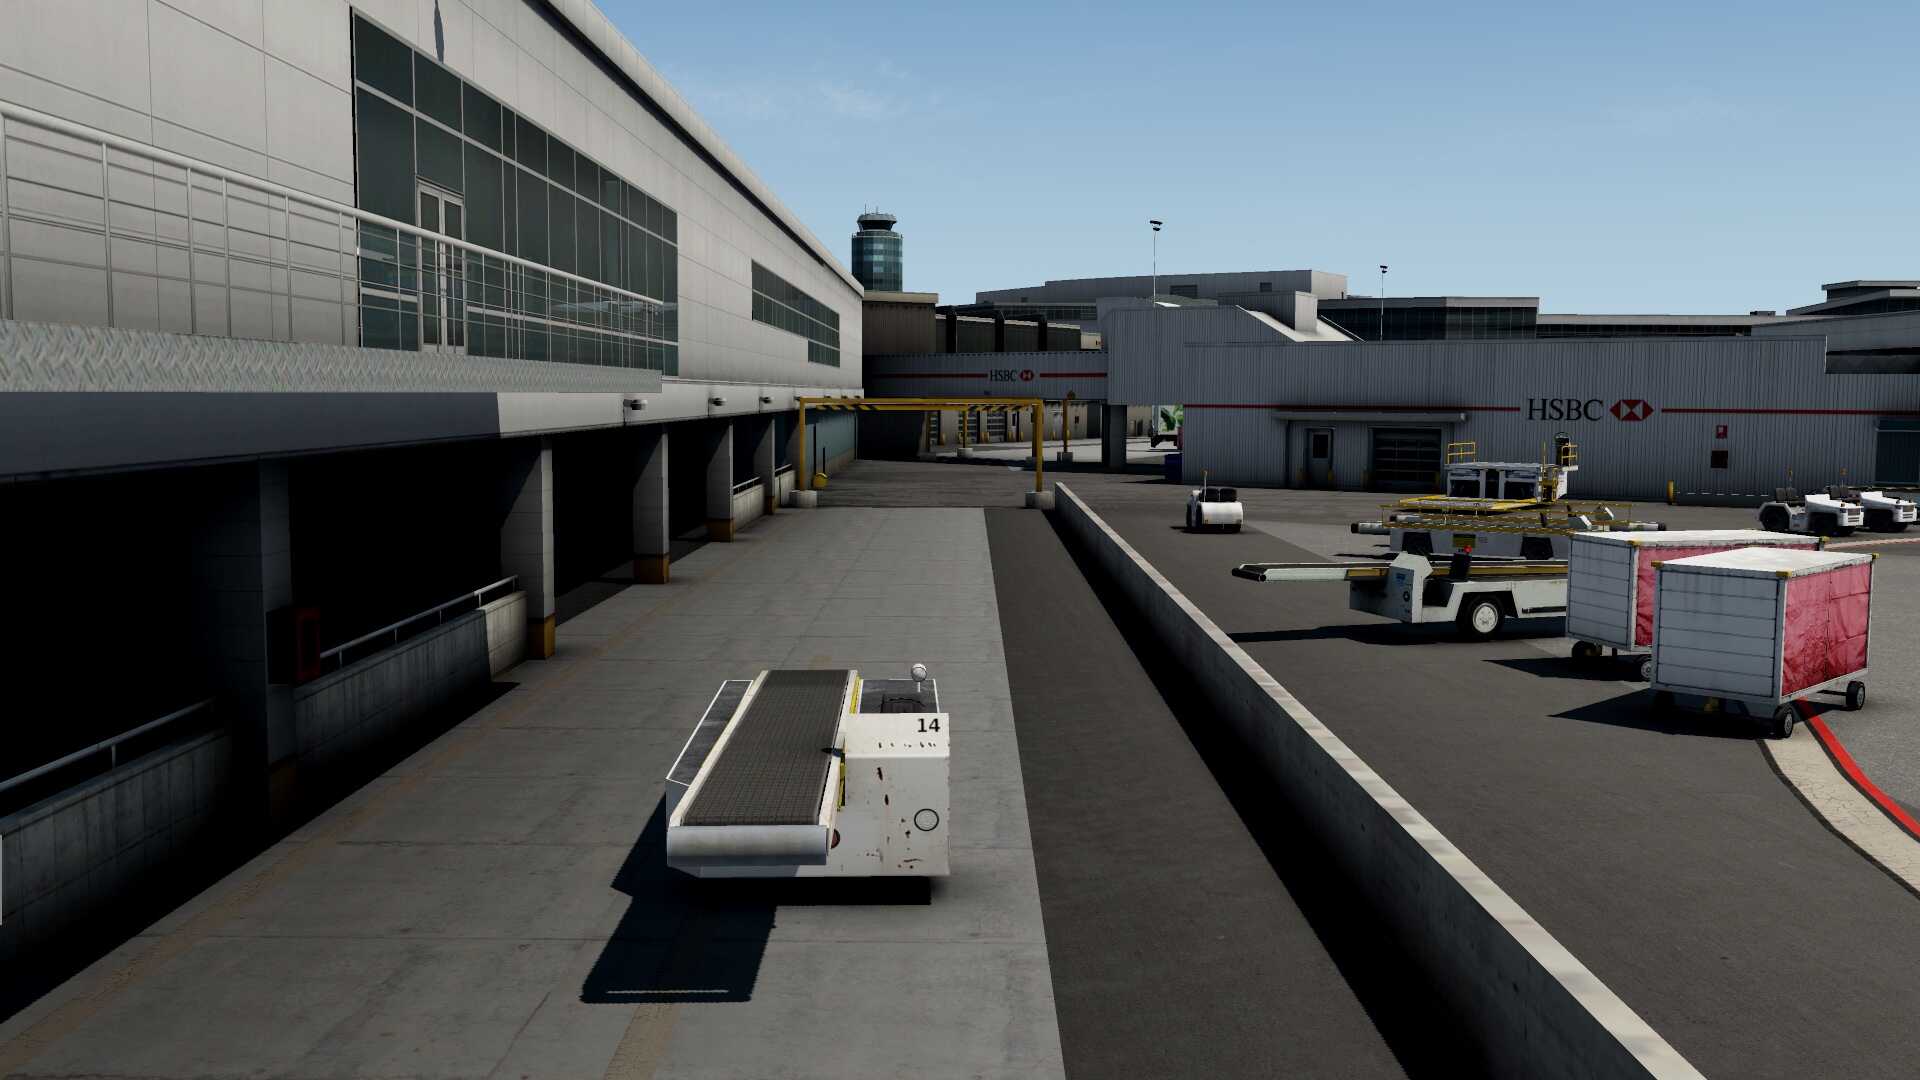
Maintenance- and Cargo Areas
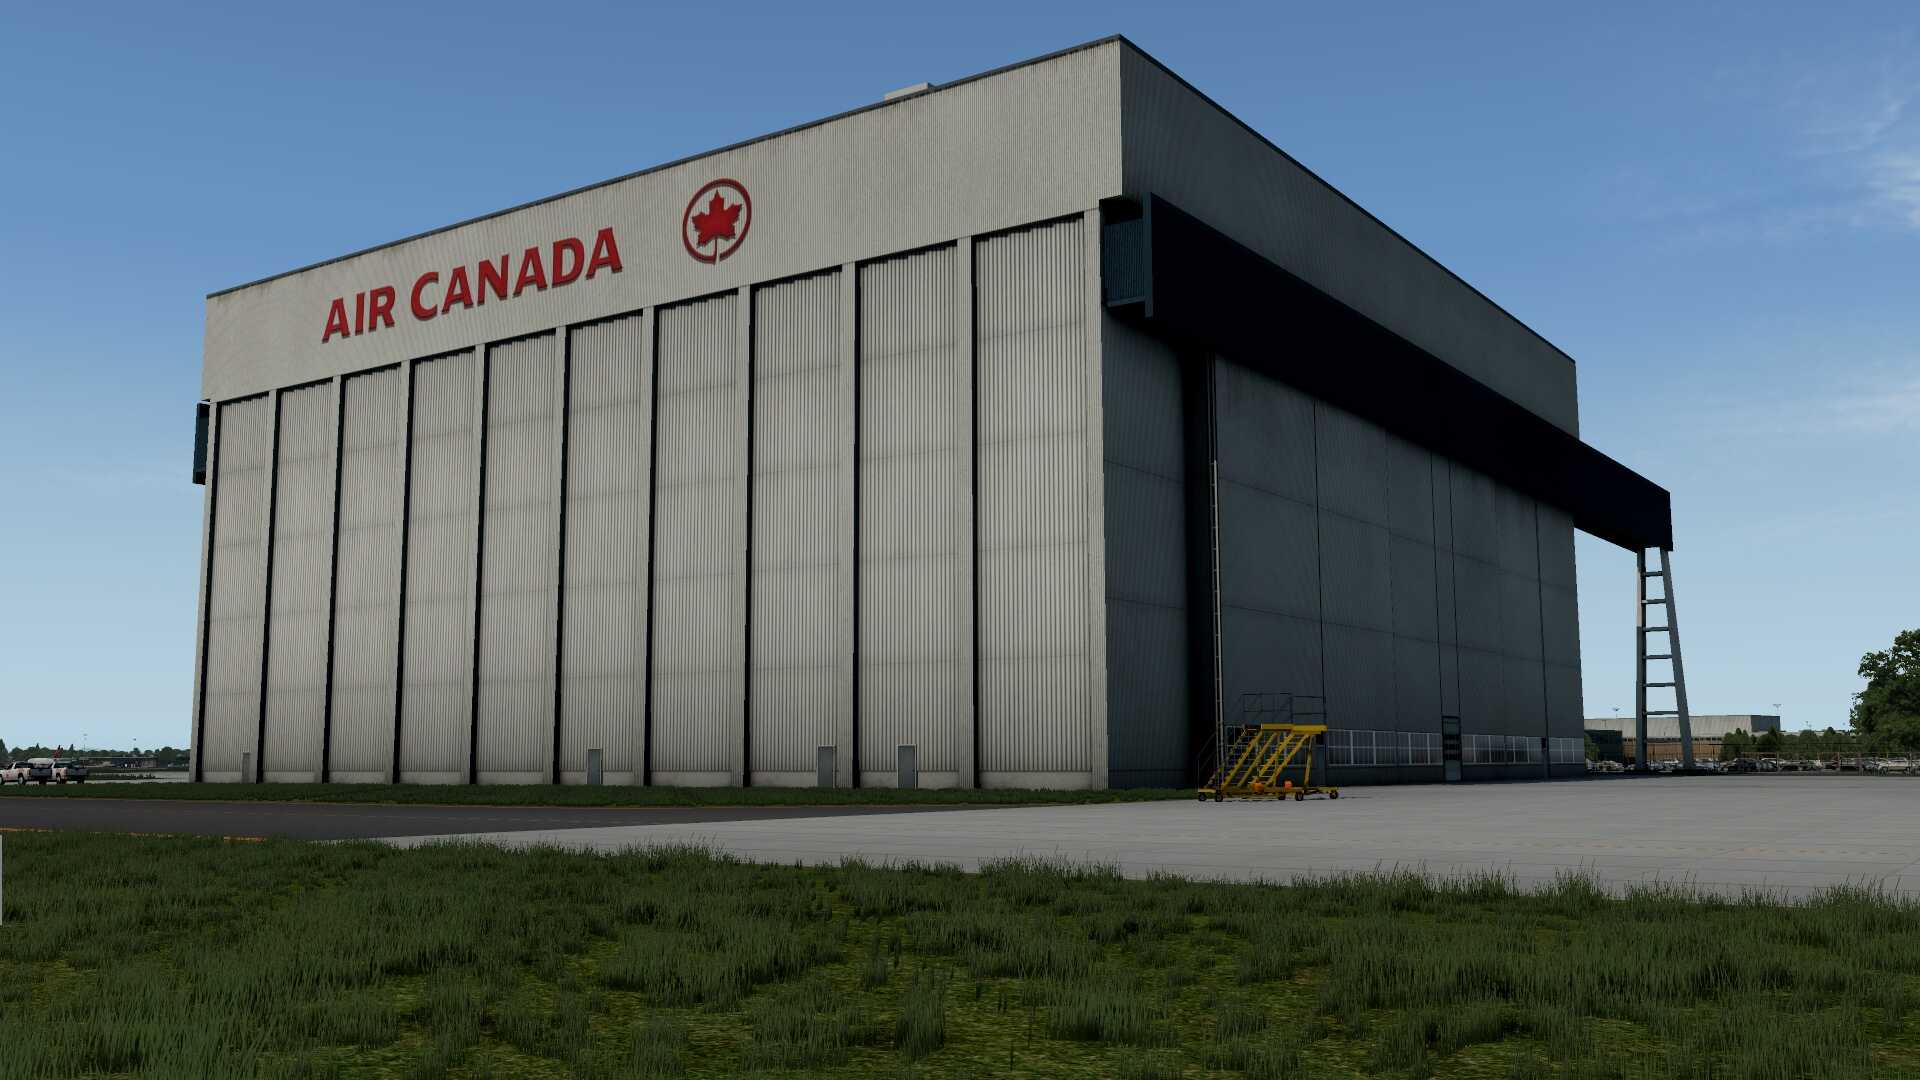
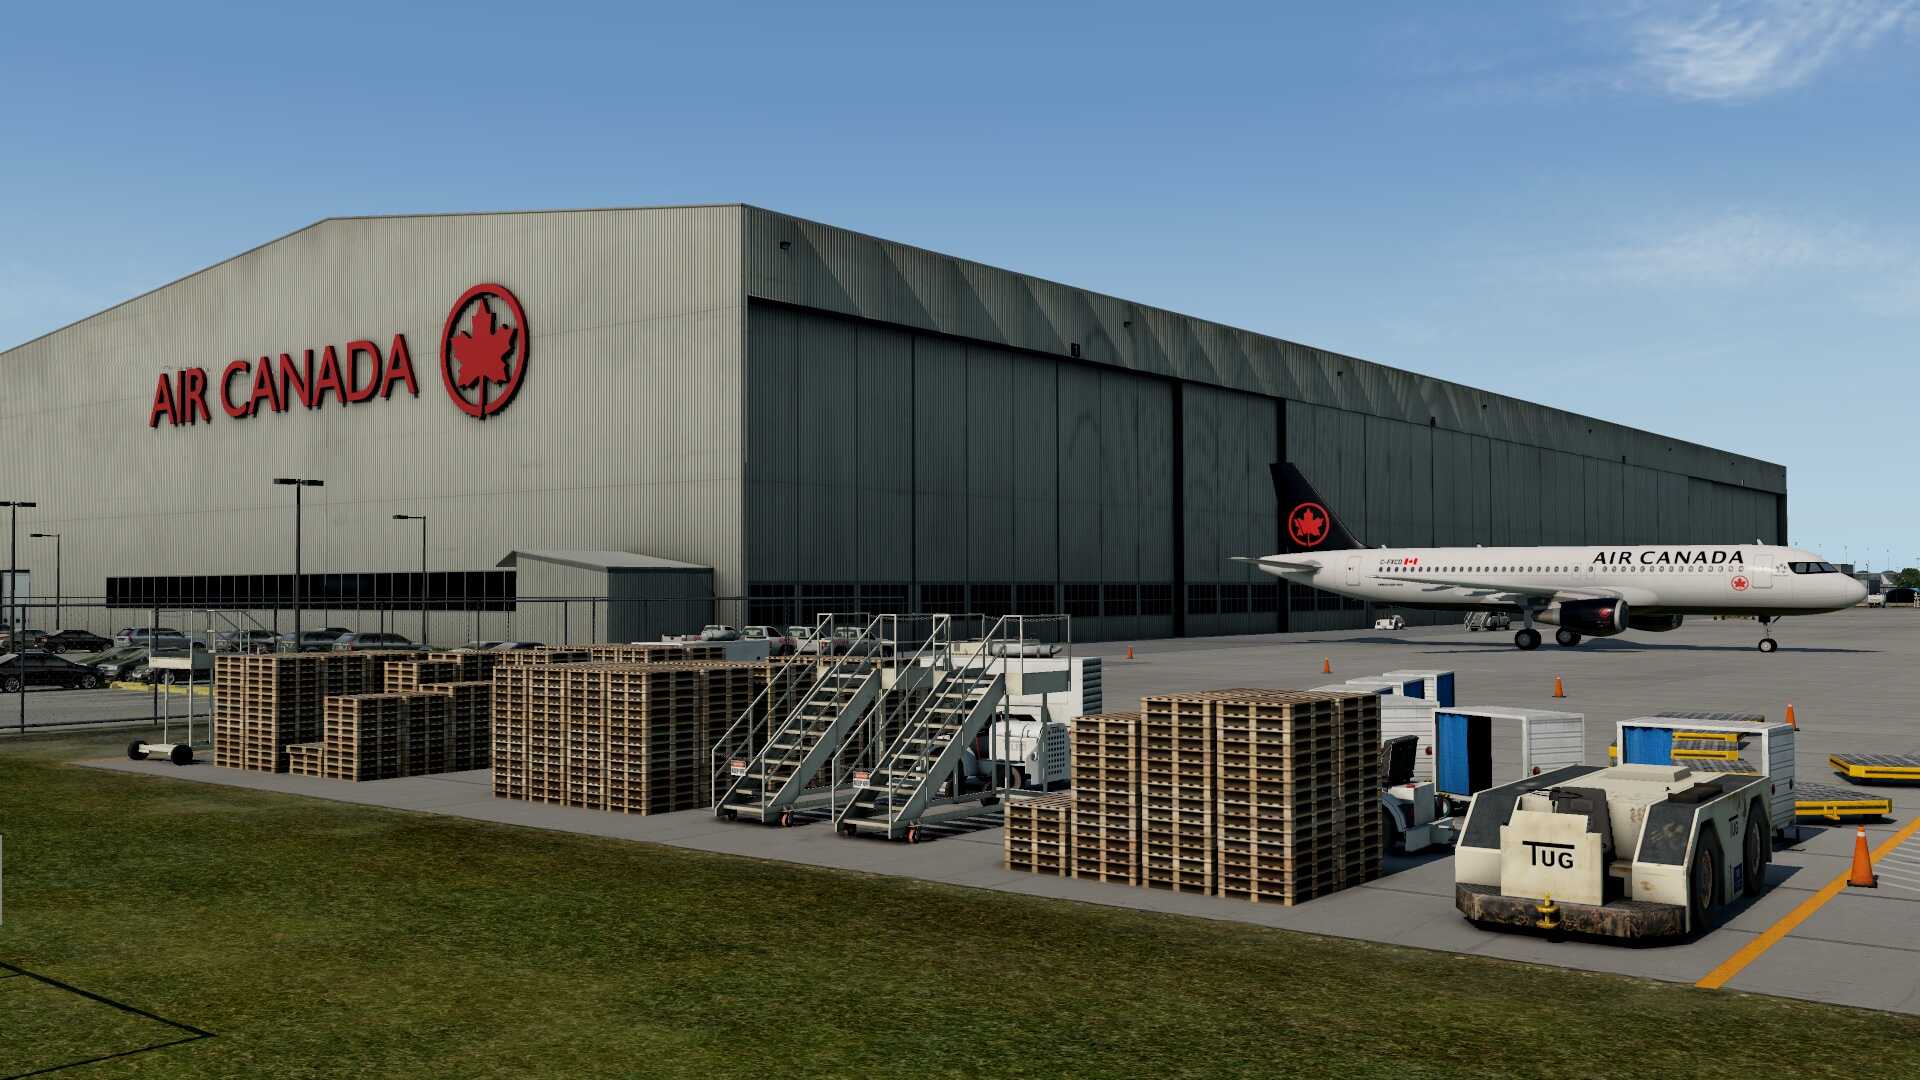
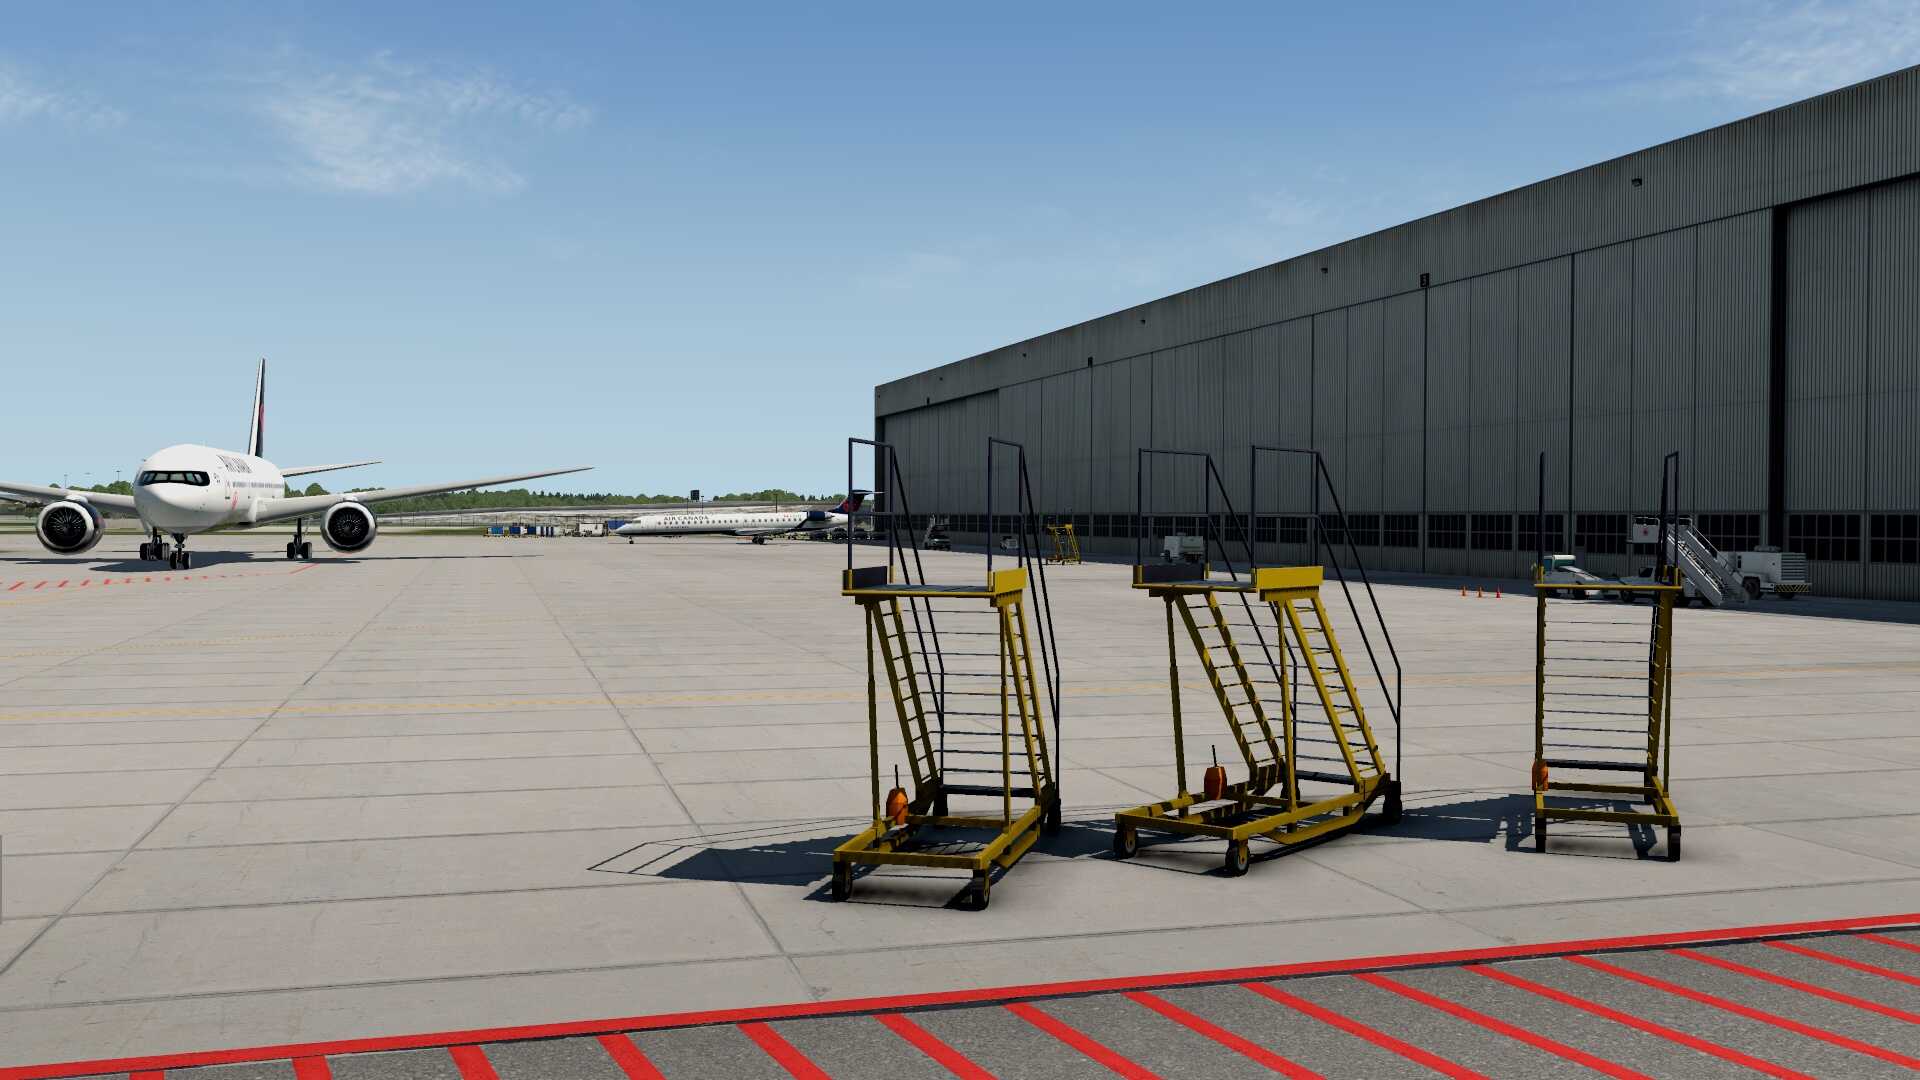
I write maintenance areas since CYVR has actually two large hangars, each nearby the thresholds of the runways 26L and 26R. And nearby one of the Air Canada hangar is the large cargo complex. That said, via taxiway C I’m heading for the cargo areas although you can’t miss the impressive Air Canada hangar. Just to be clear, this is near runway 26L. The cargo areas with their own aprons are as we saw before, well modeled and mostly every hangar or building is covered with photo real textures, in particular the roofs of each building as well as the maintenance hangars. Not that you’ll look to every roof of each building and checking out how it’s made, but it looks so realistic and since the textures or graphics are of a high quality, it gives me the feeling that the CFXP team did a great job.
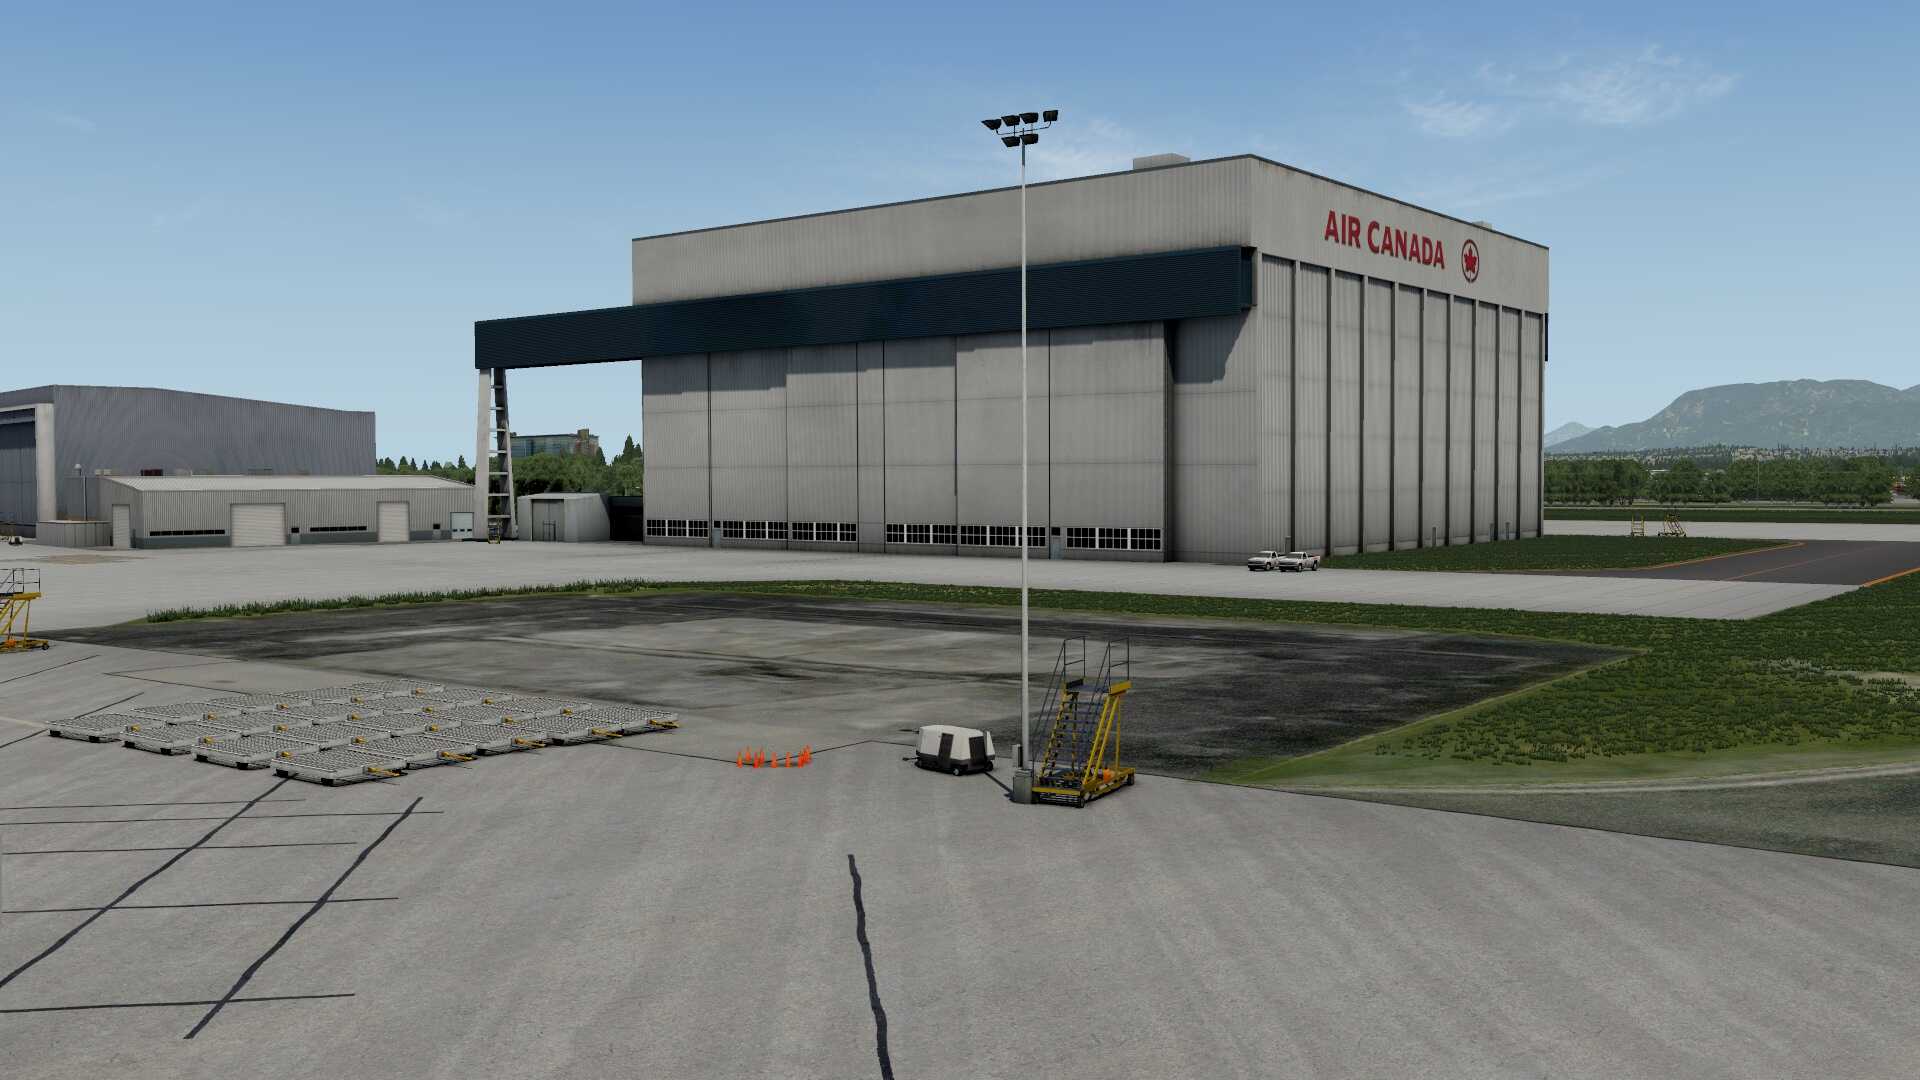
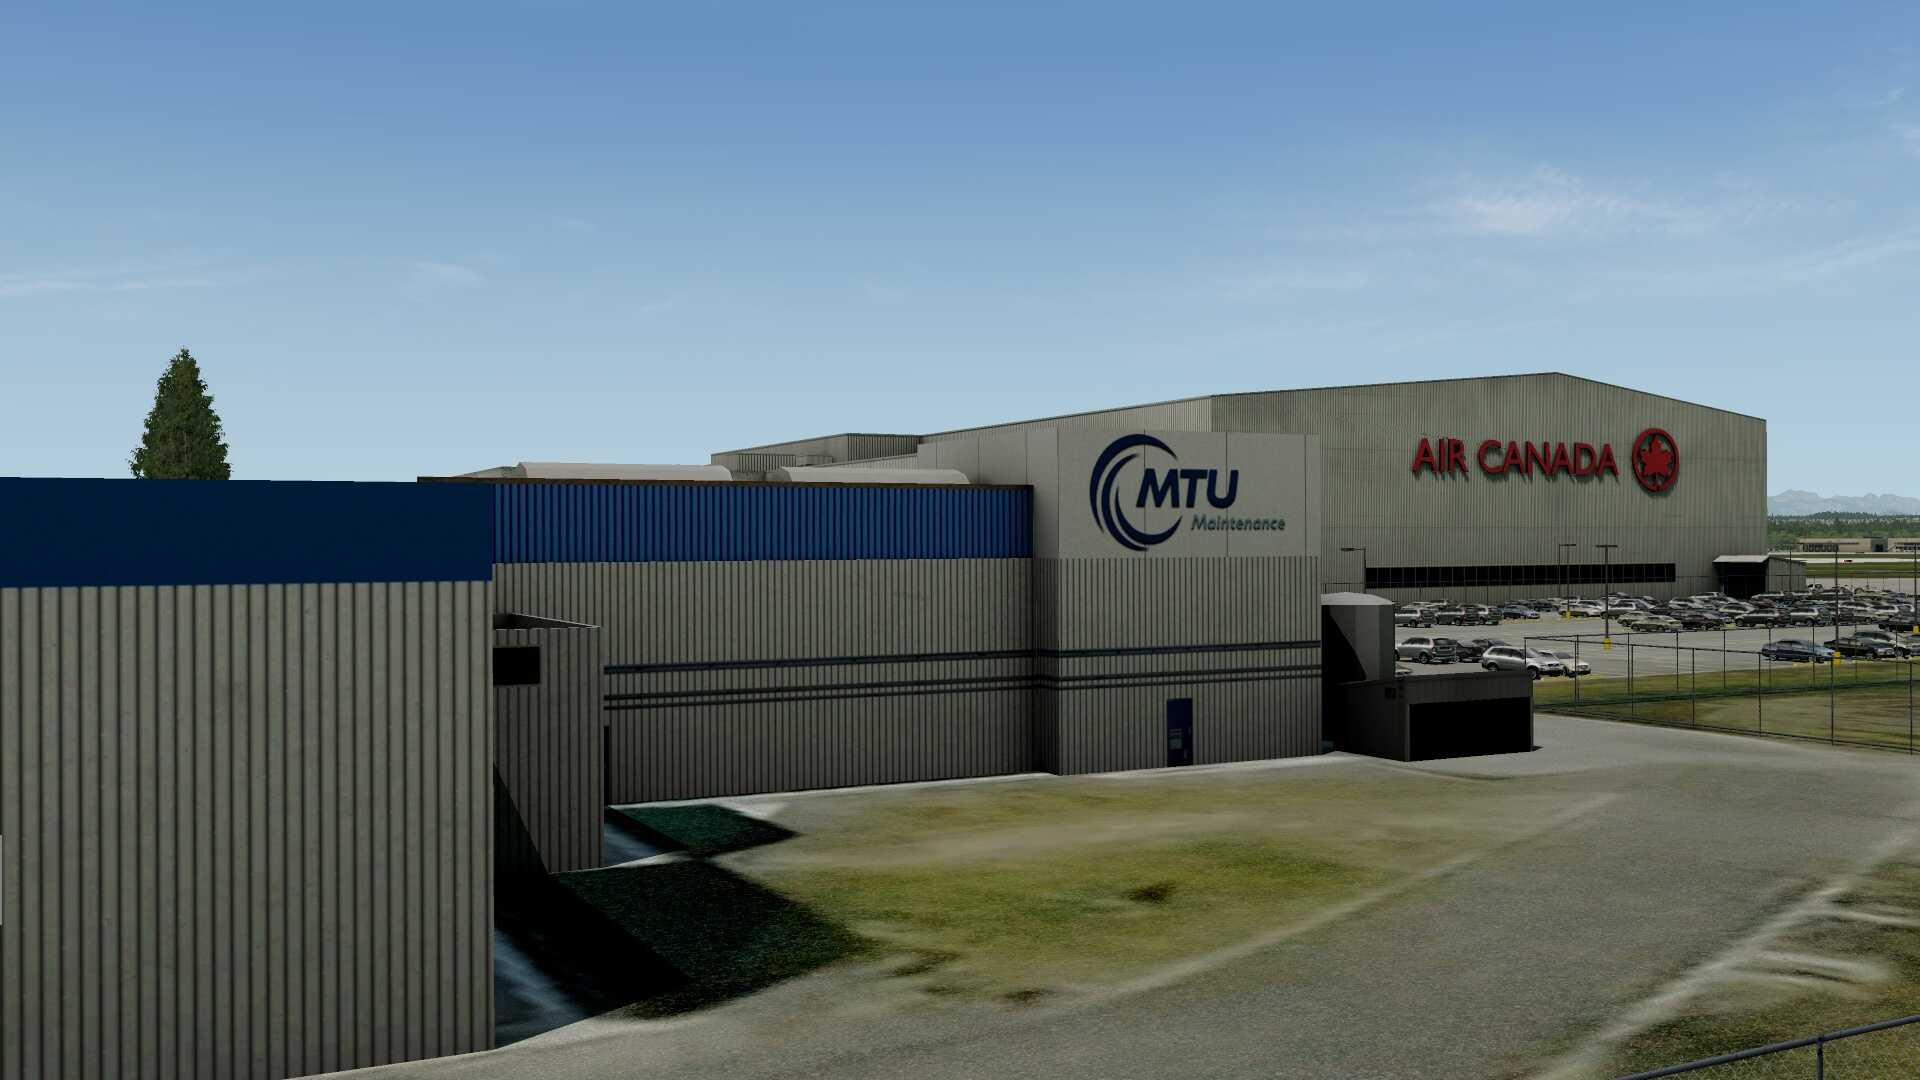
The Air Canada hangar on the runway 26L side is big, but not as big as the other Air Canada hangar near runway 26R. Both Air Canada hangars are well modeled, the aprons in front of them or whenever applicable behind them is filled with typical maintenance objects like stairs, tow bars, towing trucks etc. The older Air Canada hangar (near runway 26R) is huge, really, huge. It may be an older hangar which can easily be seen because of the design. Nearby this hangar the area includes additional buildings from e.g. MTU, or just offices, car parking areas, fences and so on. Too much to highlight them all.


What makes me happy is to see the accuracy the CFXP team has taken into account and to create a beautiful replica of the real CYVR keeping in mind that the frame rates should be high enough to have a real sensation when visiting this large airport. Although the frame rates are on macOS lower then with the same settings on Windows 10, I’m very happy with the overall outcome, but time to move on, time to visit the public area.
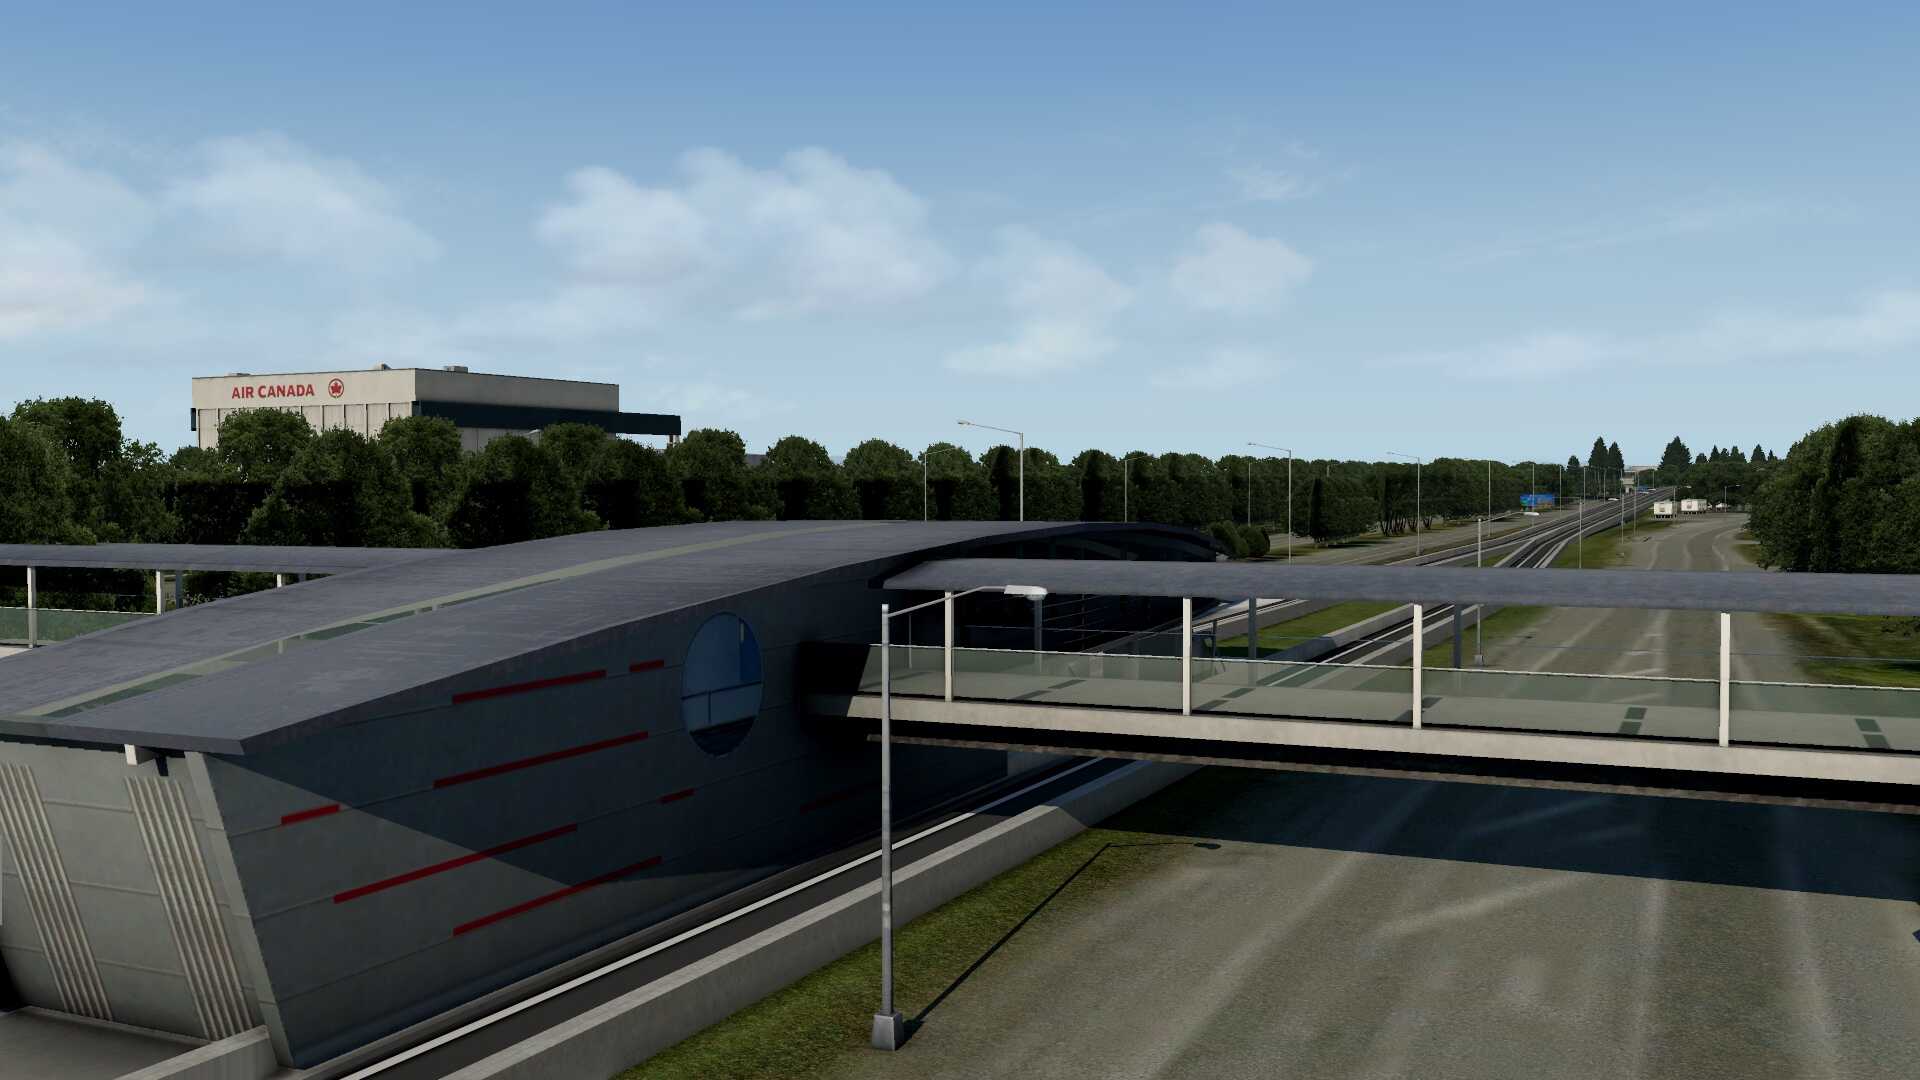
The Public Area
I promised this myself and you too to have a look to the public area. Basically that’s every thing, starting by following the entrance roads, Fairmont hotel, arrival and departures levels, trees, bridges, train stations and other unique and well modeled buildings and/or objects.
While approaching the airport by car with on my right-hand side the railway, I’m impressed by seeing the way is put together. That means the roads, the trees, the railway system, the fences, the signs and much more. Perhaps you won’t explore this often which is, when you think about it, a shame. Not only Patrick from CFXP has put a lot of time and effort into modeling the public side of the airport as well as the interior of the terminals, other developers do the same and hardly any simmer will check this out. Perhaps I’ve triggered you to check this out when you bought this already or when you decide to buy it. Ok, let’s go a bit deeper and check out what I’d seen and how happy I am with this.
As far as I can see, the modeled public area starts the moment you enter Sea Island. It’s a mess of roads with near the bridges I think a hotel. I couldn’t find a sign, but neither less, it’s dedicated modeled by the team. Driving in the direction of the airport the road signs are all good and readable. Weird to write “good” since mostly they aren’t readable, but these signs are. I can clearly read what’s on it and this means that the used textures are sharp which isn’t always the case.


What I wrote before, on my right-hand the railway is passing, with a station and then it continues to the airport with at the opposite of the international terminal the railway end station. Although the end station building looks gorgeous, it’s also the same for the in-between railway station. The railway stations in general are well modeled and worth for me to stop by, but what said, the end station near the Fairmont Hotel is really an eye catcher.
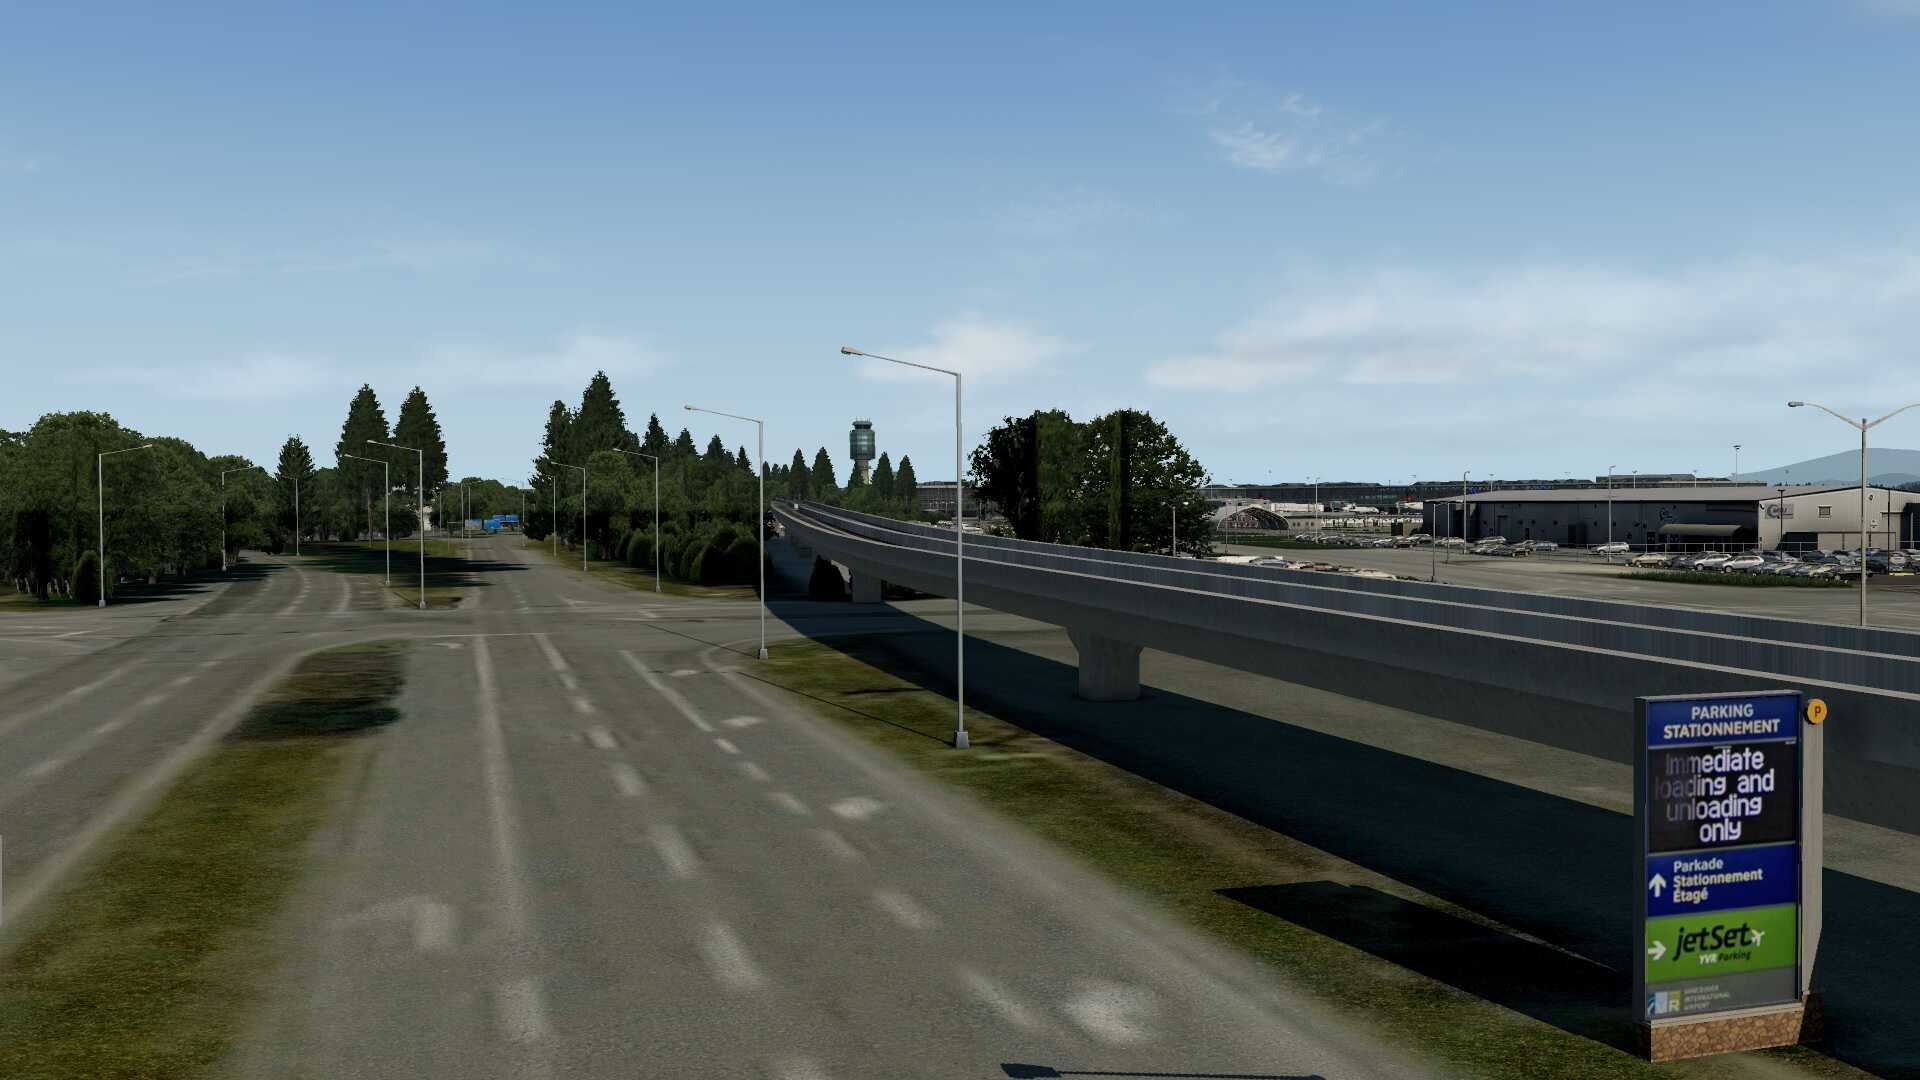
While following the road along the departures, arrivals and the Fairmont hotel, I see lots of different trees, mostly they are correctly positioned, but one trees has been planted a bit too close to the road. All OK till so far, however, the road ground textures aren’t suburb which is by the way, not the case with the road texture quality at and near the actual airport. Logically, all the road signs are in English and French, even the indications that guide you to the construction area which lies adjacent to the large car parking garage, is in French and English.
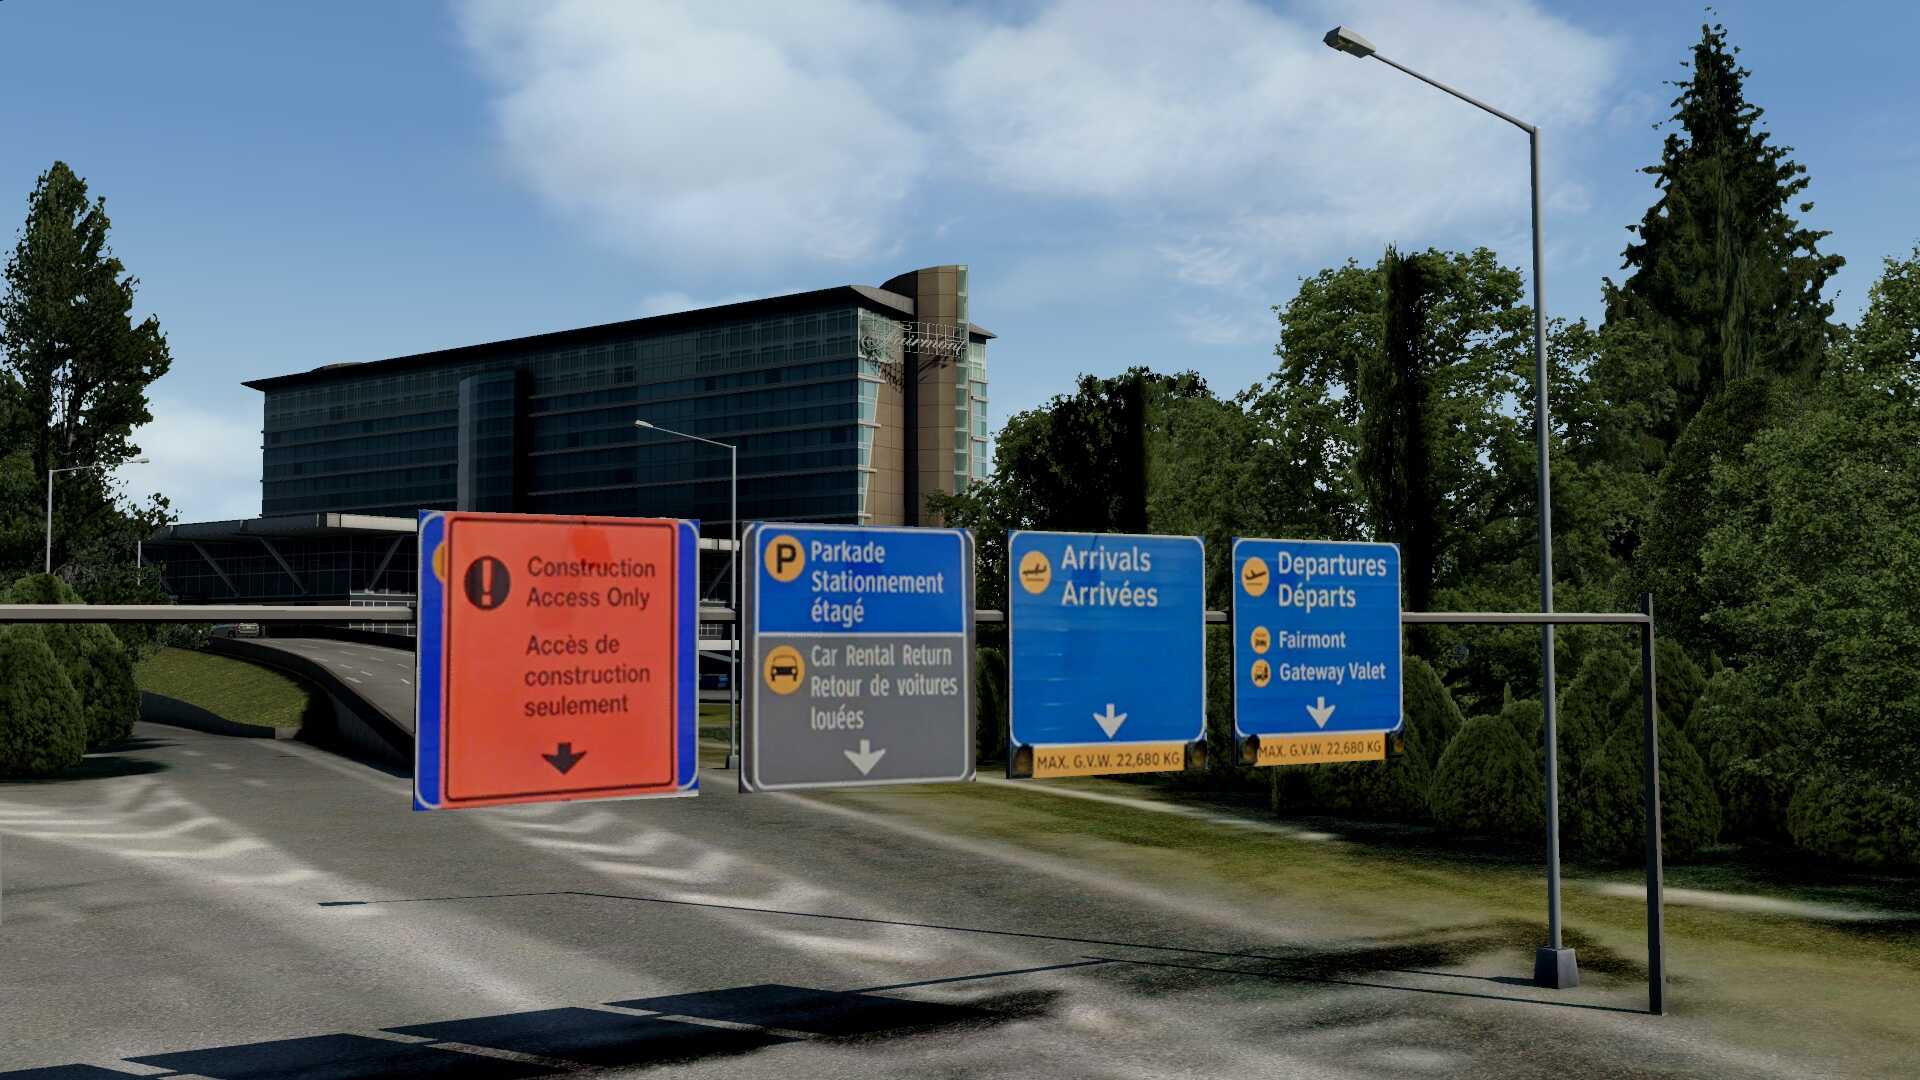


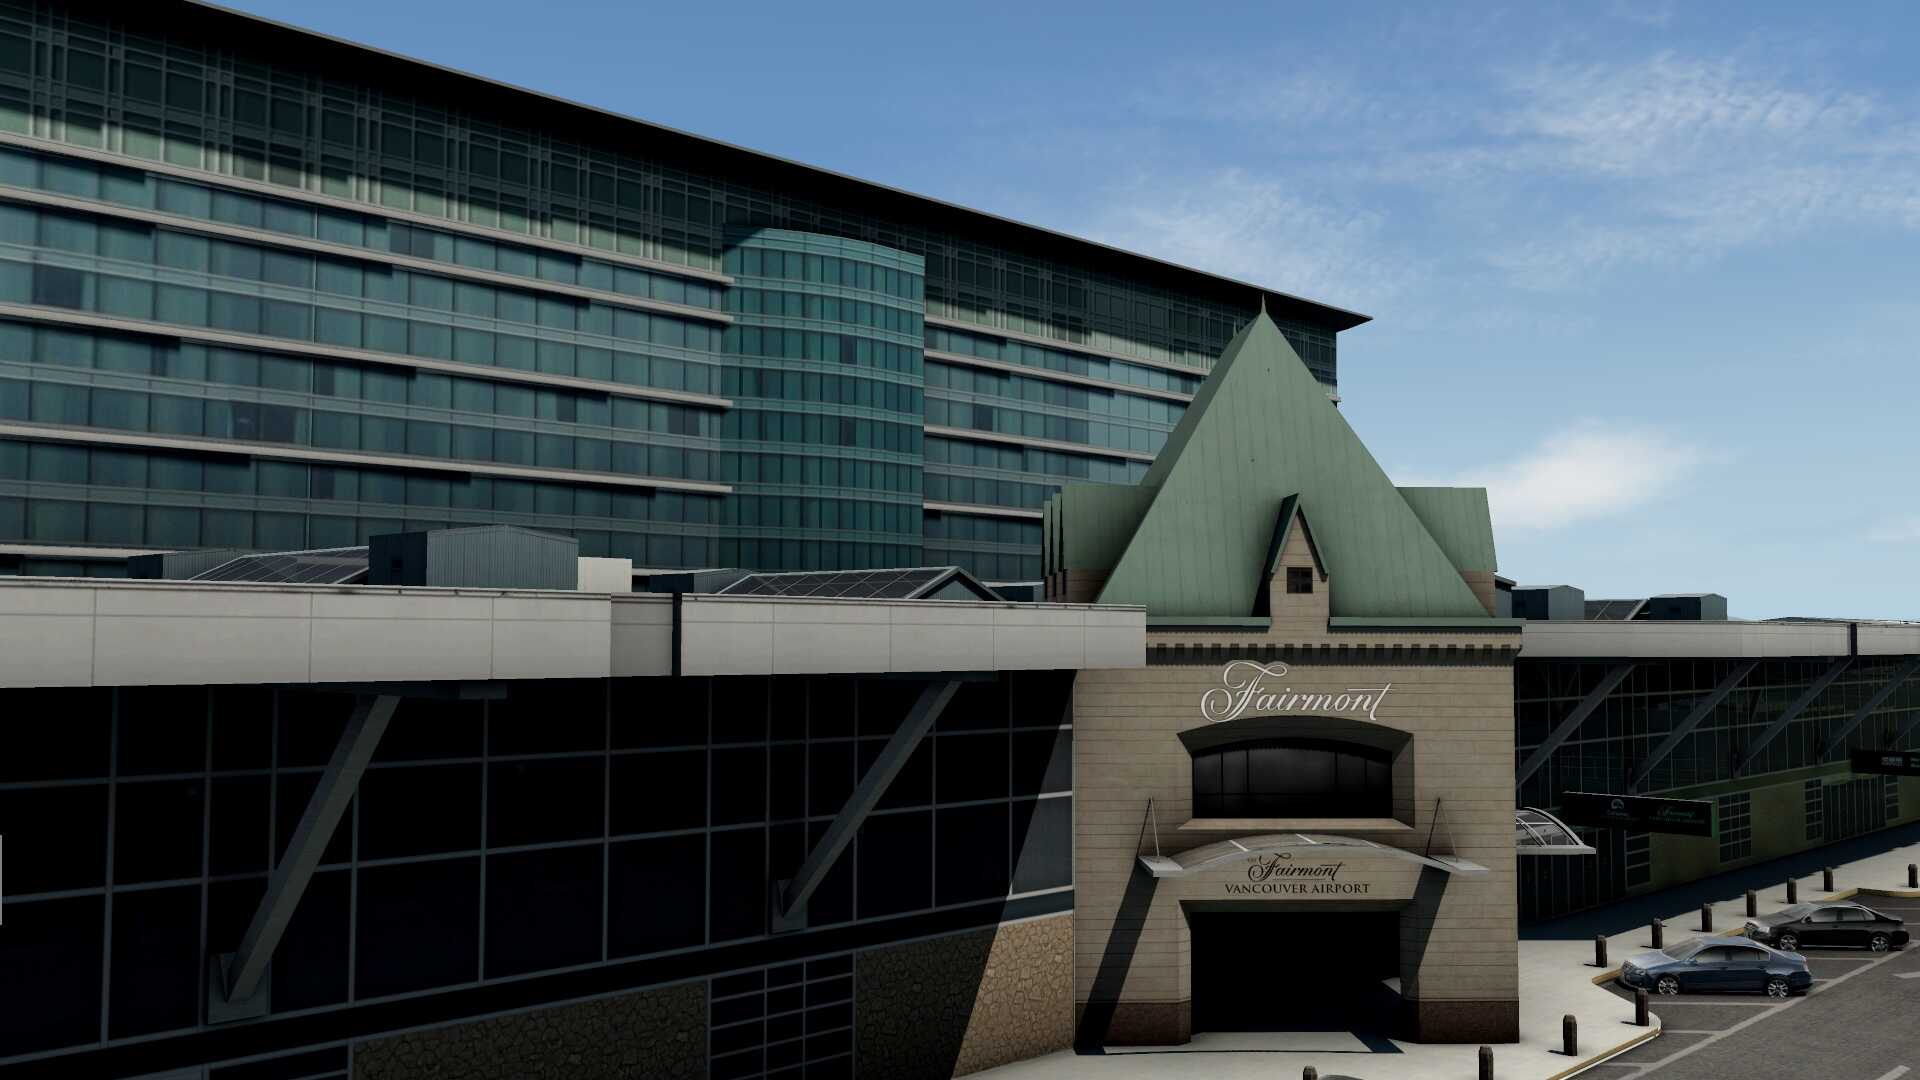
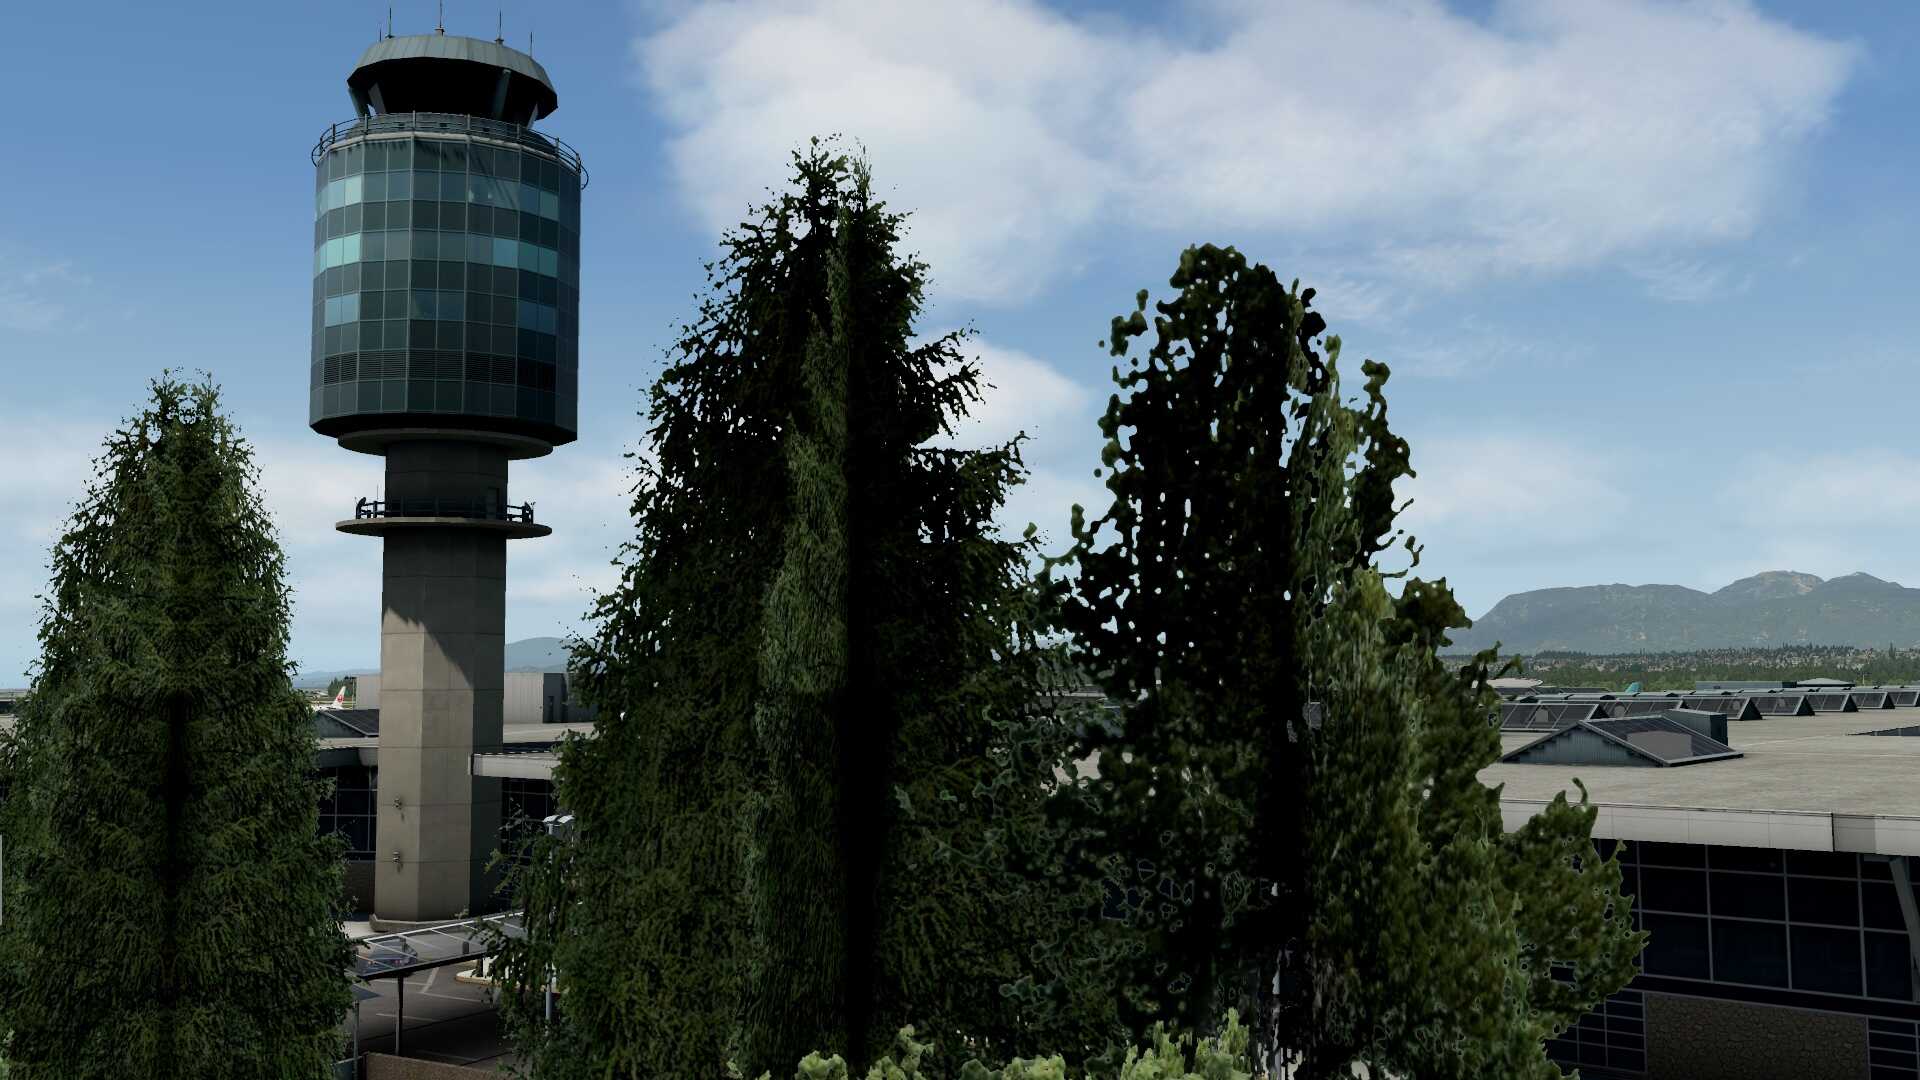
The moment where I drive underneath the railway and heading for the arrivals or departures, I see on my left-hand side the construction area. Although it’s just an open area, it does come with lots of construction objects. Driving to the 1st deck and thus the departures and the entrance of the Fairmont hotel, I’m impressed by what I see. On my right-hand side the terminal with the Fairmont entrance, and although the walls are in real made of stones that make together a wall, her in the modeled version it’s just a picture that gives it that look. What you can’t miss is the control tower, so well modeled, worth to stop the car and check it out. Awesome!
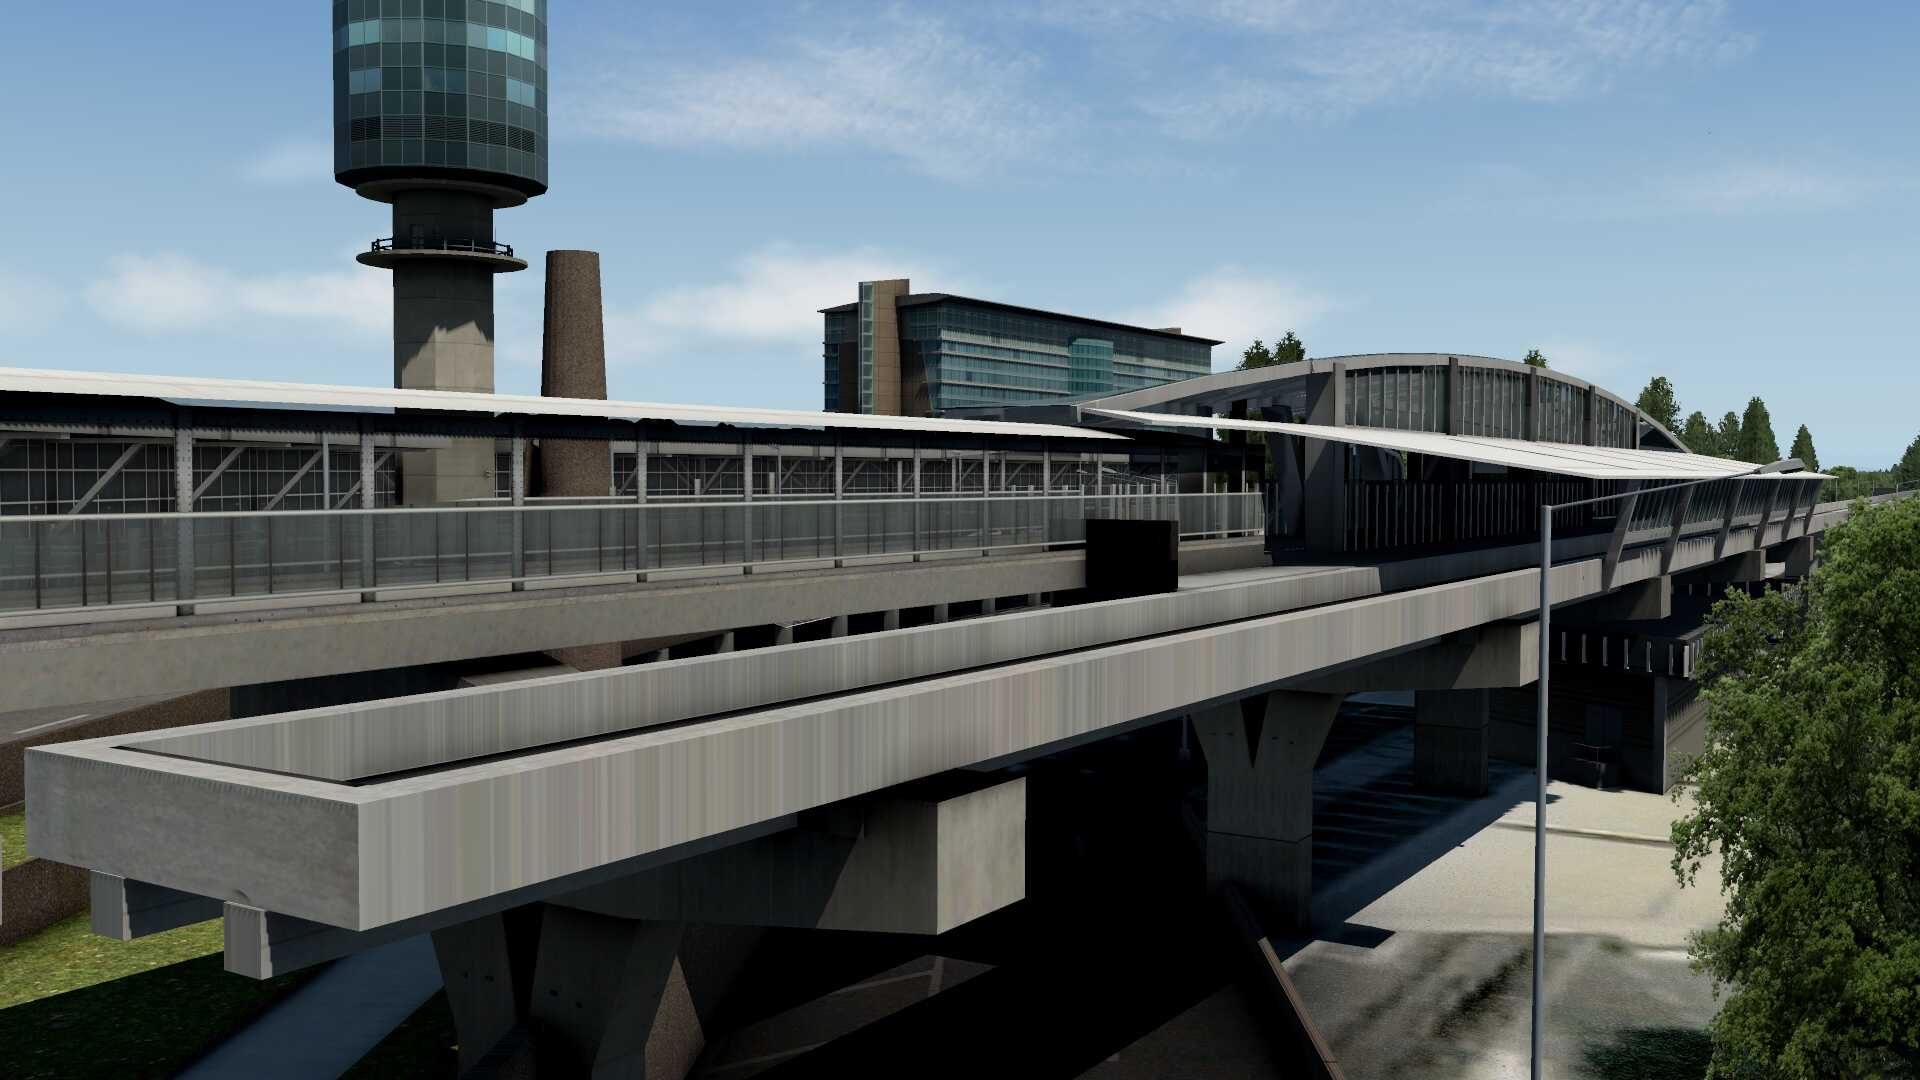


I mentioned it before, the road texture quality is near the terminal of a very high quality as well as, I mentioned that before too, the end railway station on your left. It must be in real already a beautiful building, but this modeled replica looks great too. When you think about it while looking from the domestic departure to the end railway station, and the Fairmont hotel and not to forget the control tower, it must have been a tremendous job to create all of this.
I follow the road along the domestic terminal, drive down, turn around to check out the arrival section and then back to where I came from. The same as I faced at the security area, there’s so much to see, so much to enjoy and for sure I’ve forgotten to highlight specific areas. On the other hand, I leave some “hidden spots” over for you to find these out yourself.
Seasons
Yes, having different seasons is another story, but hold on, did I cover every corner of this well modeled airport? Oh no, I can tell you right away ….. I’ve definitively missed certain areas, but most sections I’ve covered in this review.
Ok, having different seasons.
It is mentioned in the feature list, but is it really so easy to change the seasons to whatever you want and is it worth it? I can tell you, the answer is YES! It is really easy and changed on-the-fly and above all, worth it when you like Winter or deep Winter or perhaps Spring.
First you need to download and install the free SAM Suite package. As of this writing – March 2021 – you can grab your free SAM Suite version 1.4.3 via this X-Plane.Org link or via our own X-Plained.com dedicated SAM Suite link. When you download it from X-Plane.Org then check out that you download the right OS version, so either for Windows, macOS or Linux. When you use the X-Plained.Com download link then the ZIP package includes all the OS. Next, install the package and start up the exe file or for macOS, the app.
When you’re not familiar with SAM Suite, it’s a program that’s installed outside X-Plane so to configure it, you don’t need X-Plane to run. Once started, you most likely need to update the “base package” which is free. You’ll see that when you open SAM Suite. When you look in the list of add-ons, some are free and some are “unlicensed” which means you using these “unlicensed” add-ons, you need to buy them from either Aerosoft or X-Plane.Org. Since I need for CYVR only the freeware “Seasons”, I continue with that. Click the “Seasons” download button, the package will be downloaded and installed. When the button chances to green “Installed”, you ready to start X-Plane.
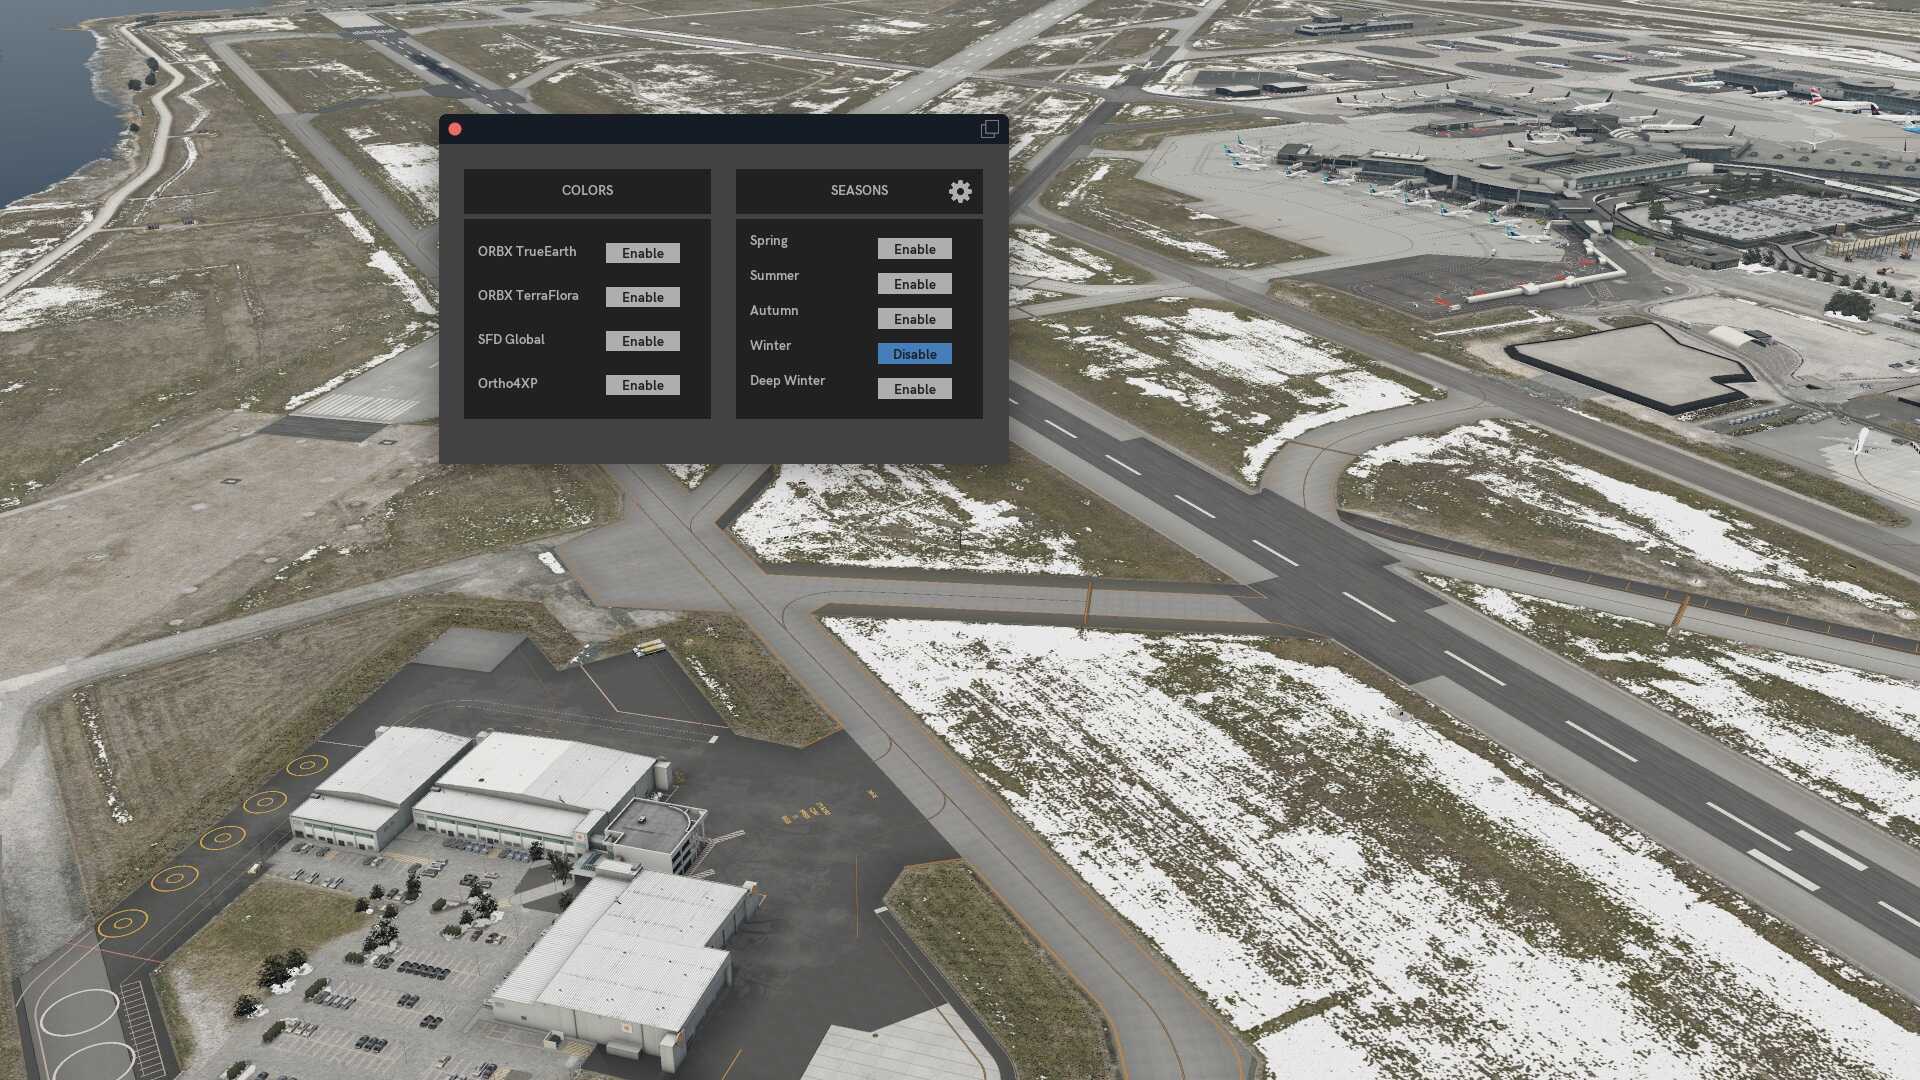
From the X-Plane plugins menu select SAM – Colors and Seasons. While we’re approaching the end of the review, you’ve noticed in the previous screenshots that the airport grass textures are a nice mixture of different greens, right? In the right-hand side of the popup window you see the different seasons you can get, starting with Spring, Summer, Autumn, Winter and Deep Winter. The screenshot above represents Winter and honestly, I like it. It is so easy. You click the season you prefer, X-Plane will do the necessary work for you, wait a while, and plop, your new season is implemented at the modeled airport as well as away from the airport.
Vancouver City and Textures
In consult with Patrick from Canada4XPlane I’ve decided to briefly highlight the free Vancouver City package. No, you won’t see any screenshots … ok, a few then, you won’t see any detailed info about downtown Vancouver. What I will discuss and you’d seen that in the beginning of my review too, that the Vancouver City package comes also with ortho ground textures and that’s what I find interesting.
First, you can download CFXP Vancouver City from X-Plane.Org via this link or via Threshold. Second, follow the instructions how to install it and double check the right order in the scenery_pack.ini file, found in the Custom Scenery folder.


What I said, and highlighted to me by Patrick, the Vancouver City package comes with a complete set of ortho ground textures that range from downtown Vancouver till the border with Sea Island. And that’s cool since the airport blends then perfectly with the northern part of Vancouver. Curious how this looks like? Then check it out at the dedicated X-Plane.Org Vancouver city forum page.
Taxiways, runways, signs etc.
This will be fun since I’m deeply impressed with the overall quality of the ground textures that simulate the grass areas or whenever applicable, the ground graphics for the taxiways, the runways, the signs and other ground related objects. That the grass around the airport is so green gives the overall airport a refreshing look and feel. When you check this “green” versus Bing Maps or Google Maps you would think it’s not correct , but when you check it versus real photos which is of course the best, it is possible that during Summer time these grass areas are as green as modeled.
Initially I’d had my thoughts about the concrete “block structure” you see at the aprons and the taxiways, but after checking this “concrete block structure” on Google- or Bing Maps I came to the conclusion that what is modeled is as real as it is. And I shouldn’t forget the 3D grass. It’s clearly visible that the green grass areas are covered with grass, but in a way that this hardly influences the FPS.
What said before, there’s a difference in performance between using the CFXP CYVR with Windows 10 or with macOS. Since I have connected and configured to my iMac Pro also a native Windows 10 drive, I can confirm that the frame rates are high while on macOS Big Sur it’s lower. More important is that CFXP says that this is a frame rates friendly international airport and yes, I can confirm that. I don’t know how they did this, but you easily can get with Windows 35 to 50 FPS or higher while on macOS I got on average 30 – 35 FPS.


Summary
This CFXP CYVR review has become a bit longer then planned although it was fun exploring every detail and yes, I did find a couple of things, but these small issues I found, are hopefully checked and corrected by Patrick.
I enjoyed the way the airport is modeled and that the CFXP team tried to cover every corner, even at places you’d probably won’t visit or perhaps you will visit them now after reading this review. This review covers airport version 1.0 which, as I mentioned before, is the whole Sea Island including ortho textures while when you’re interested in it and highly recommended, you can download for free the CFXP Vancouver City which not only includes Vancouver downtown, but also a large area around it as well as all the ortho textures from downtown Vancouver till Sea Island and believe me, that’s awesome.
That not all the edges or borders of Sea Island are well covered with ortho textures and thus you see the default Laminar Research X-Plane textures is something that hopefully will be solved with the next update.
What I like about the modeled airport is that it offers for every simmer something. When you like the big jets or the smaller commercial aircraft, you can use the International – or domestic terminals/gates, but you can also decide to use commuter or GA aircraft and arrive and depart from the South Terminal or even approach and heading for the Harbor Air docking places.
For those who want to use the official charts like using a SID or STAR, making ILS approaches and so on, no charts are included, but even worse, they are difficult to find, at least, relatively recent ones unless you’ve got an account with Navigraph or Aerosoft who offer also charts.
Finally, you can buy your copy of Canada4XPlane CYVR via the dedicated X-Plane.Org store page and via the dedicated OrbxDirect store page. As of this writing the modeled airport including all what can be found at Sea Island 24.00 USD. Last but not least, I would like to thank Patrick from Canada4XPlane for his help and time to answer my questions.
And last but not least, was it worth my time to review this airport and is it worth your money to buy it? The answer is simple; yes, I enjoyed every minute exploring each corner of the airport and yes, I have full faith in the fact that Patrick will try to solve the issues I told him and his beta team and let’s not forget that you can download for free his Vancouver City package too.
Feel free to contact me if you’ve got additional questions related to this impression. You can reach me via email Angelique.van.Campen@gmail.com or to Angelique@X-Plained.com.
With Greetings,
Angelique van Campen
| Add-on: | Payware Canada4XPlane Vancouver International Airport |
|---|---|
| Publisher | Developer: | X-Plane.Org / Orbx | Canada4XPlane |
| Description: | Realistic rendition of Vancouver International Airport (CYVR) |
| Software Source / Size: | Download / Approximately 7.36GB (unzipped) |
| Reviewed by: | Angelique van Campen |
| Published: | March 24th 2021 |
| Hardware specifications: | - iMac Pro - Intel 3GHz Intel Xeon W / 4.5Ghz - Radeon Pro Vega 64 16368 MB - 64 GB 2666 MHz DDR4 - 1 internal shared 1TB SSD (Big Sur 11.x) - 1 internal shared 1TB SSD (Bootcamp Windows 10) - 1 external 2TB LaCie Rugged Pro SSD (Big Sur 11.x) - Saitek Pro Flight System X-52 Pro and X-56 Rhino - Honeycomb Alpha Flight Controls - Honeycomb Bravo Throttle Quadrant |
| Software specifications: | - macOS Big Sur (10.15.x) - X-Plane 11.5x |
0 Comments