Approaching Tenerife Sur
Is it worth to review Digital Design Tenerife?
That will be an easy answer; yes, it is!
Ok, it is a relatively small airport, not one with complex terminals, and it also hasn’t got a complex taxiway system or many runways. Neither less, it’s big enough to have a virtual look.
But first, lets have a look what GCTS actually is for kind of airport; “Tenerife South Airport (GCTS), previously known as Tenerife South–Reina Sofia Airport, is the larger of the two international airports located on the island of Tenerife (the other being Tenerife North Airport) and the second busiest in the Canary Islands (after Gran Canaria Airport). It is located in the municipality of Granadilla de Abona and handled over 10.4 million passengers in 2016.”
“In the late 1960s, the island authorities of Tenerife found the need for a new airport at a new location, because the existing airport did not meet technical requirements due to adverse weather conditions. The airport was under construction when the Tenerife airport disaster occurred at Tenerife North Airport on 27 March 1977. The new airport was inaugurated on 6 November 1978, by Queen Sofía of Spain, to whom the airport is dedicated. The first flight was Iberia flight IB187 from Lanzarote, which was operated by a McDonnell Douglas DC-9 landing at 10:17. By the end of its first year, 1 million passengers had passed through its doors.” (Courtesy of Wikipedia)
What does Digital Design GCTS (JustSim) Offer?
Before making my approach to GCTS, let me have a look what this airport and surrounding scenery offers. According to X-Plane.Org; “Tenerife South–Reina Sofia Airport (GCTS) , is the larger of the two international airports located on the island of Tenerife.”
“This detailed scenery recreated to the smallest details will allow you to immerse yourself in the atmosphere of Tenerife-South Airport.
Welcome to the island of eternal spring! The package comes with the following features:
- Detailed airport objects and vehicles
- Custom textured taxiways, runways and apron
- Custom surroundings
- Custom airport lights
- Compatible with X-Plane 11 features
- Animated ground vehicles
- Shading and occlusion (texture baking) effects on terminal and other airport buildings
- High resolution ground textures / Custom runway textures
- High resolution building textures
- Excellent night effects
- Realistic reflections on glass
- World Traffic compatible
- X-Life traffic compatible
- Optimized for excellent performance”
Looking to the list of features, I think there’s nothing to complain, but perhaps there’s one thing you could add to this airport scenery and it’s even free of charge; SpainUHD.es ortho-texture package Canarias: Tenerife. You can download this free photoreal scenery copy via this link. Although the airport package comes with a relatively large the surrounding scenery and even with some villages, the whole island is not included. I could say “that’s a pity” but on the other hand, the free package from SpainUHD.es is of a very good quality and a worthy companion with Digital Design Tenerife South.
But there’s a but! In the installation text file is written that this package isn’t compatible yet with Ortho4XP packages. For more information, check out our review section “Surrounding Modeling”.
Location
For those who have really no idea where the Canary Islands are of which Tenerife is one of them, let me give you a quick view. Although the islands belong to Spain, they don’t lie close to Spain. In the contrarily, they are situated near the southwest coast of Marocco, very close near Western Sahara. Actually, Western Sahara is a disputed territory in the Maghreb region of North Africa, partially controlled by the self-proclaimed Sahrawi Arab Democratic Republic and partially Moroccan-occupied.
Confused?
Check out the following Google Earth screenshots.


New to Canary Islands?
Tenerife has got two airports. One in the north, and one in the south. And although the south looks from a distance a small airport because it only has one runway, the apron can offer lots of parking spots for all different kind of aircraft, ranging from very small to large although I’m not sure if the Airbus A380 can land here. I’ve seen one photo of a Boeing 747 at GCTS, so it seems that’s possible.
Anyway, on the airport diagram below you see the runway, a simple and straight forward taxiway to each side of the runway with in the middle a huge apron, a terminal building, with a couple of jetways and that’s it basically. Ok, I almost forgot the control tower and a small section on the West side of the airport dedicated to General Aviation.

As far as I’ve seen and double checked with real photos, I think that the airport itself is well made and not only the security side of the airport with aprons and many objects, but also the public side is well modelled, but there’s so much more. The airport package comes with ortho textures, but as often seen with many other scenery developers, that’s only in the vicinity of the airport.
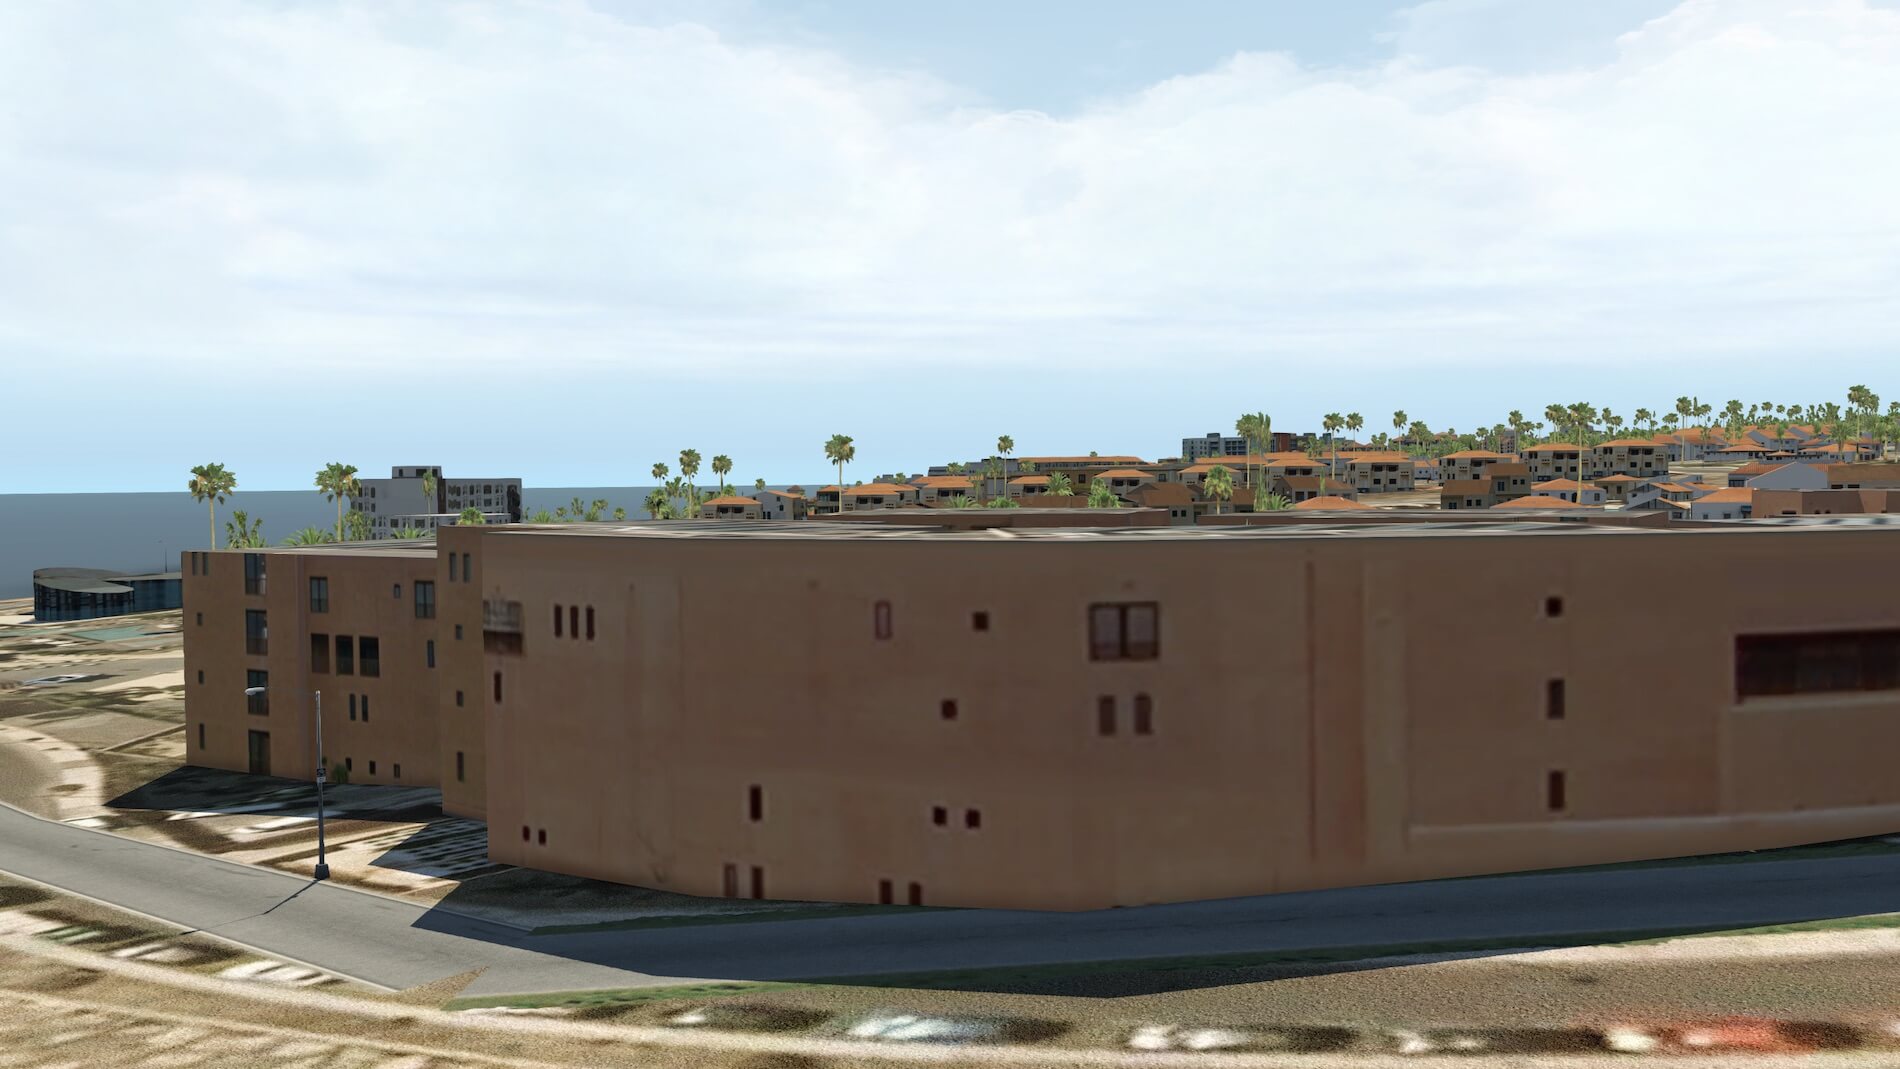
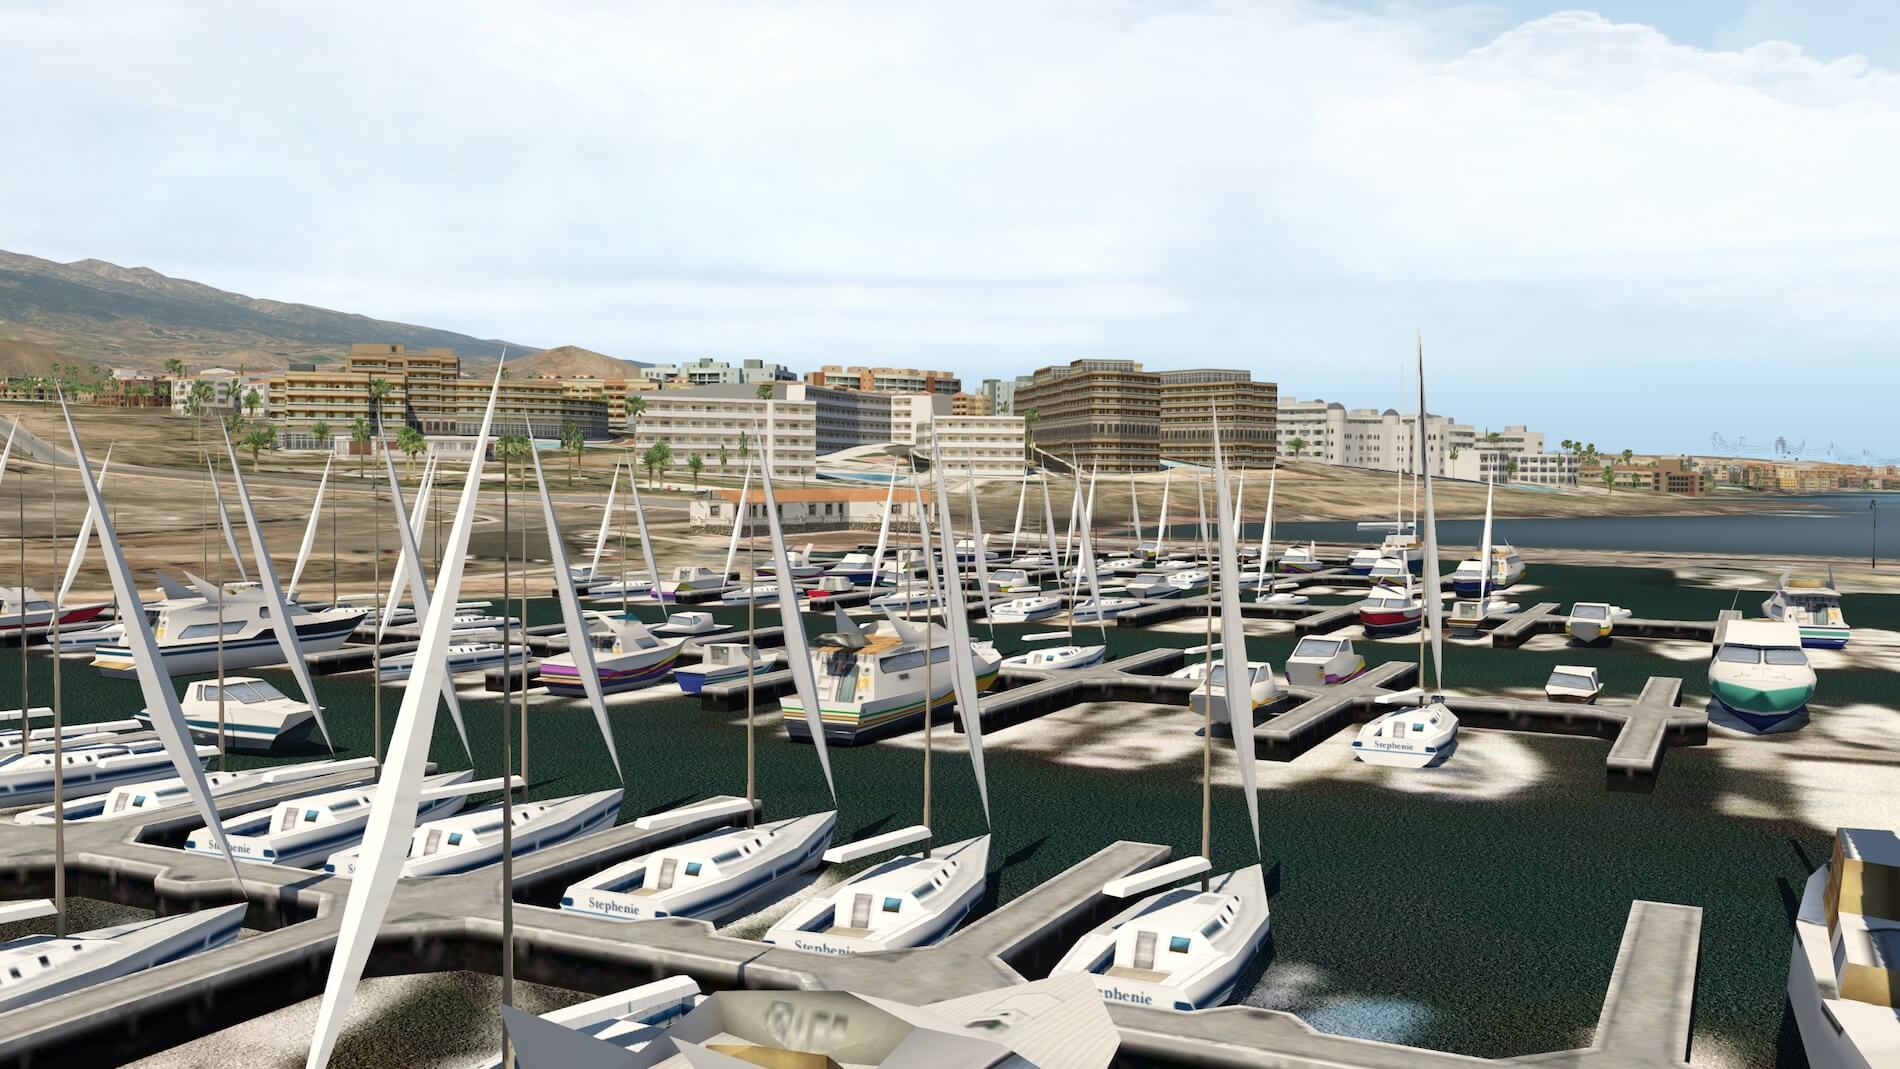
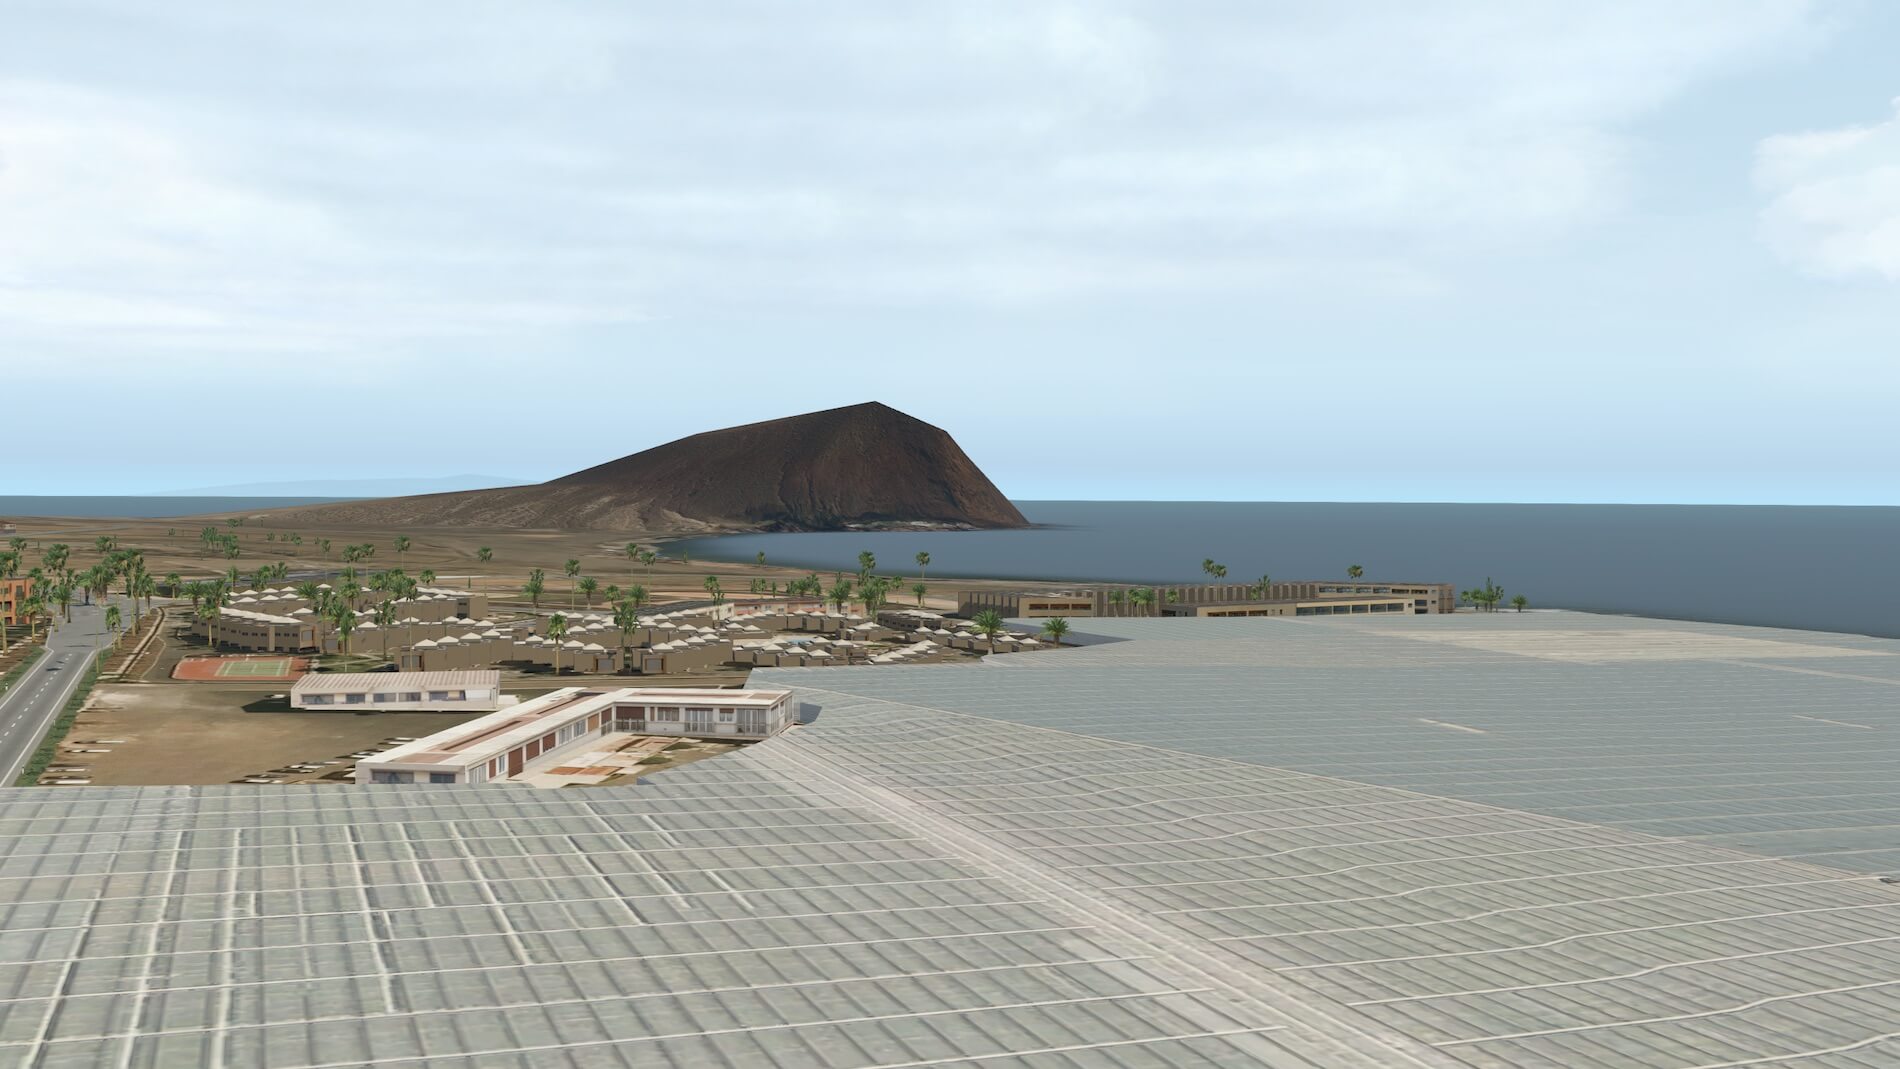
But what said, there’s more then just the airport and ortho textures. The guys of Digital Design also modeled the cities or resorts of Oasis del Sur, Golf del Sur, Amarilla Golf, El Guincho, but also south of the runway Los Abrigos, La Mareta, La Tejita and a bit further north El Medano and Arenas del Mar and perhaps I missed a few other places. My suggestion is, when you like this airport package, to add, as said before, the photoreal scenery from SpainUHD.es to it. Then Tenerife will be complete! For more information about this; check out our section “Surrounding Modeling” in respect to the Ortho4XP compatibility.
Airport Walk-Around
Do you join me on my walk-around trip at the security side of the airport?
Oops, first on other thing. This review is based on JustSim/Digital Design GCTS version 1.1 although the mesh package is still version 1.0. I tested the product on a Mac, running Majove 10.14.2 and X-Plane 10.30r3.
I mentioned before that the airport is relatively small and not complex. There’s one large terminal with a couple of jetways and a huge apron where aircraft must park when the jetway positions are occupied. Neither less, it’s during the whole year, exceptional periods not included, a quite busy airport. I checked many photos and was surprised about all the different airliners that fly at GCTS. Amazing when you think about it.
Ok, the Canary Islands are hot but I didn’t expect so many airliners from literally every where! Anyway, a walk along the terminal building, starting at the control tower area tells me that the developers had more then enough eye for all the tiny details. The overall of the main building with jetways, apron concrete tiles, ground equipment and so on, gives the overall airport a realistic impression.
Add to this real traffic with the help of either World Traffic 3 or JARDesign X-Life, and the realistic factor becomes as-real-as-it-gets! A remark to this is that the World Traffic 3 GCTS package is included with this airport, but I haven’t seen the X-Life GCTS file.
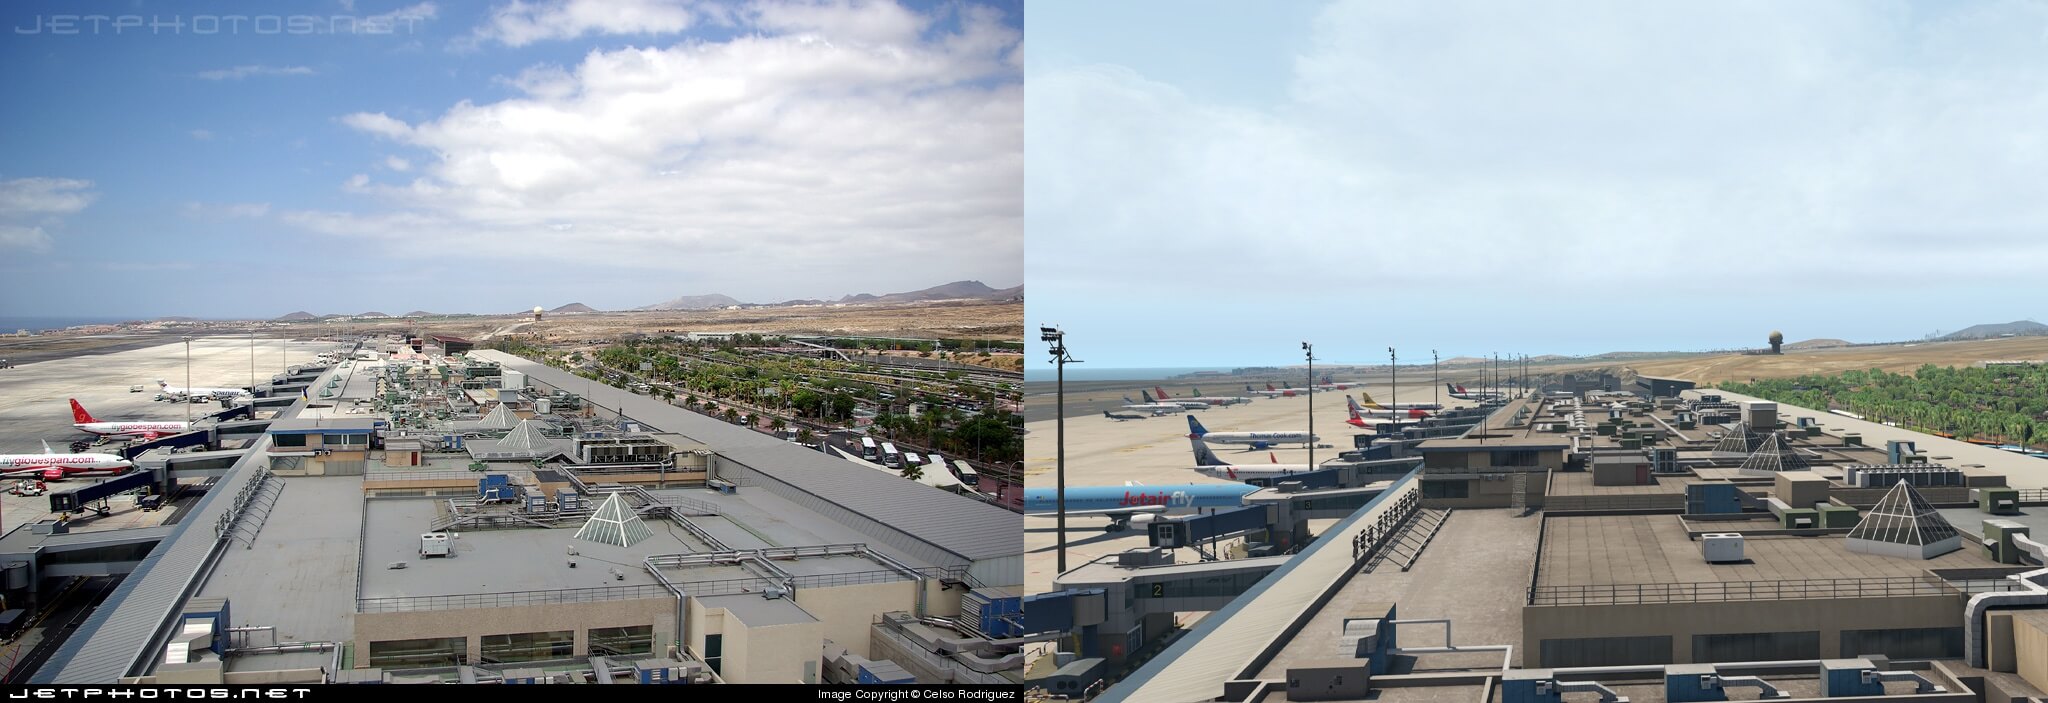
The following screenshots are compilations that show you the real and modeled GCTS. Feel free to comment, but as you can see, impressive. In case you’re confused; the left-hand photo is the real GCTS. The right-hand is the modeled Digital Design GCTS, but I doubt that you haven’t seen that!

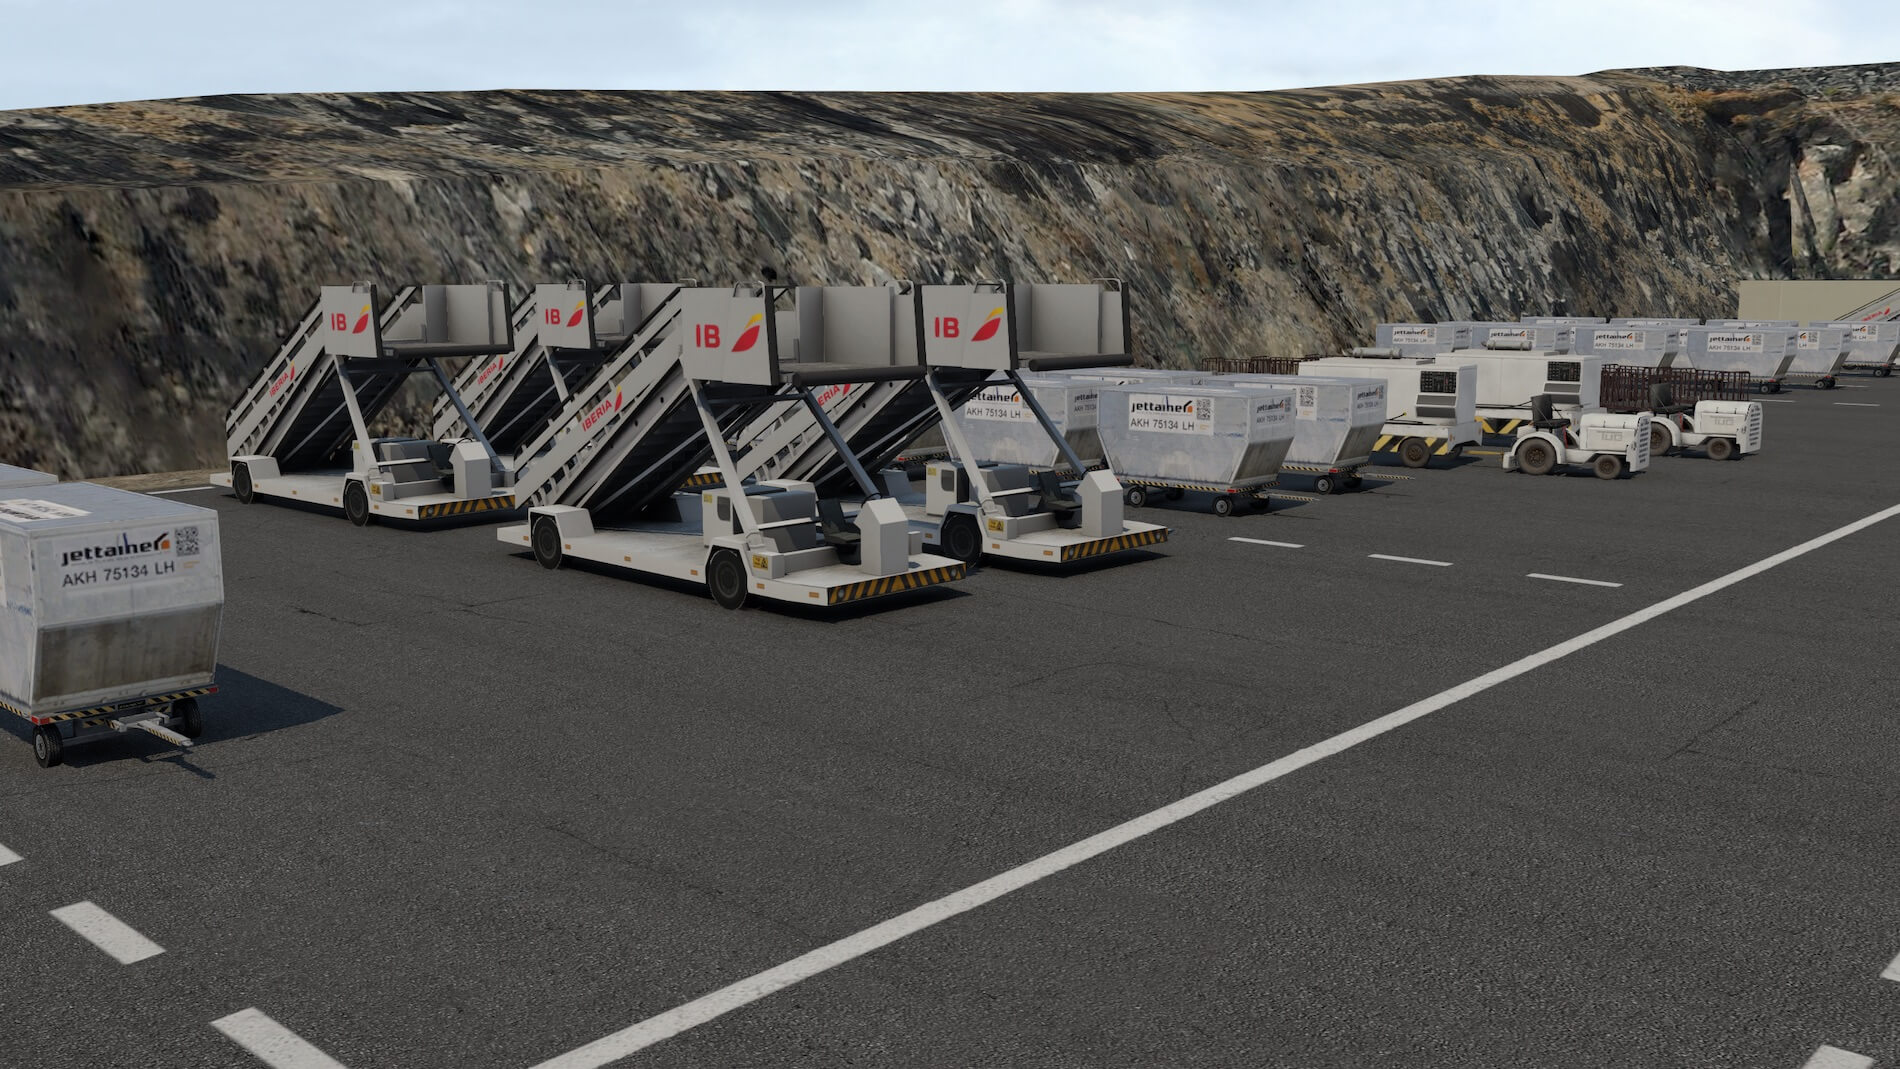
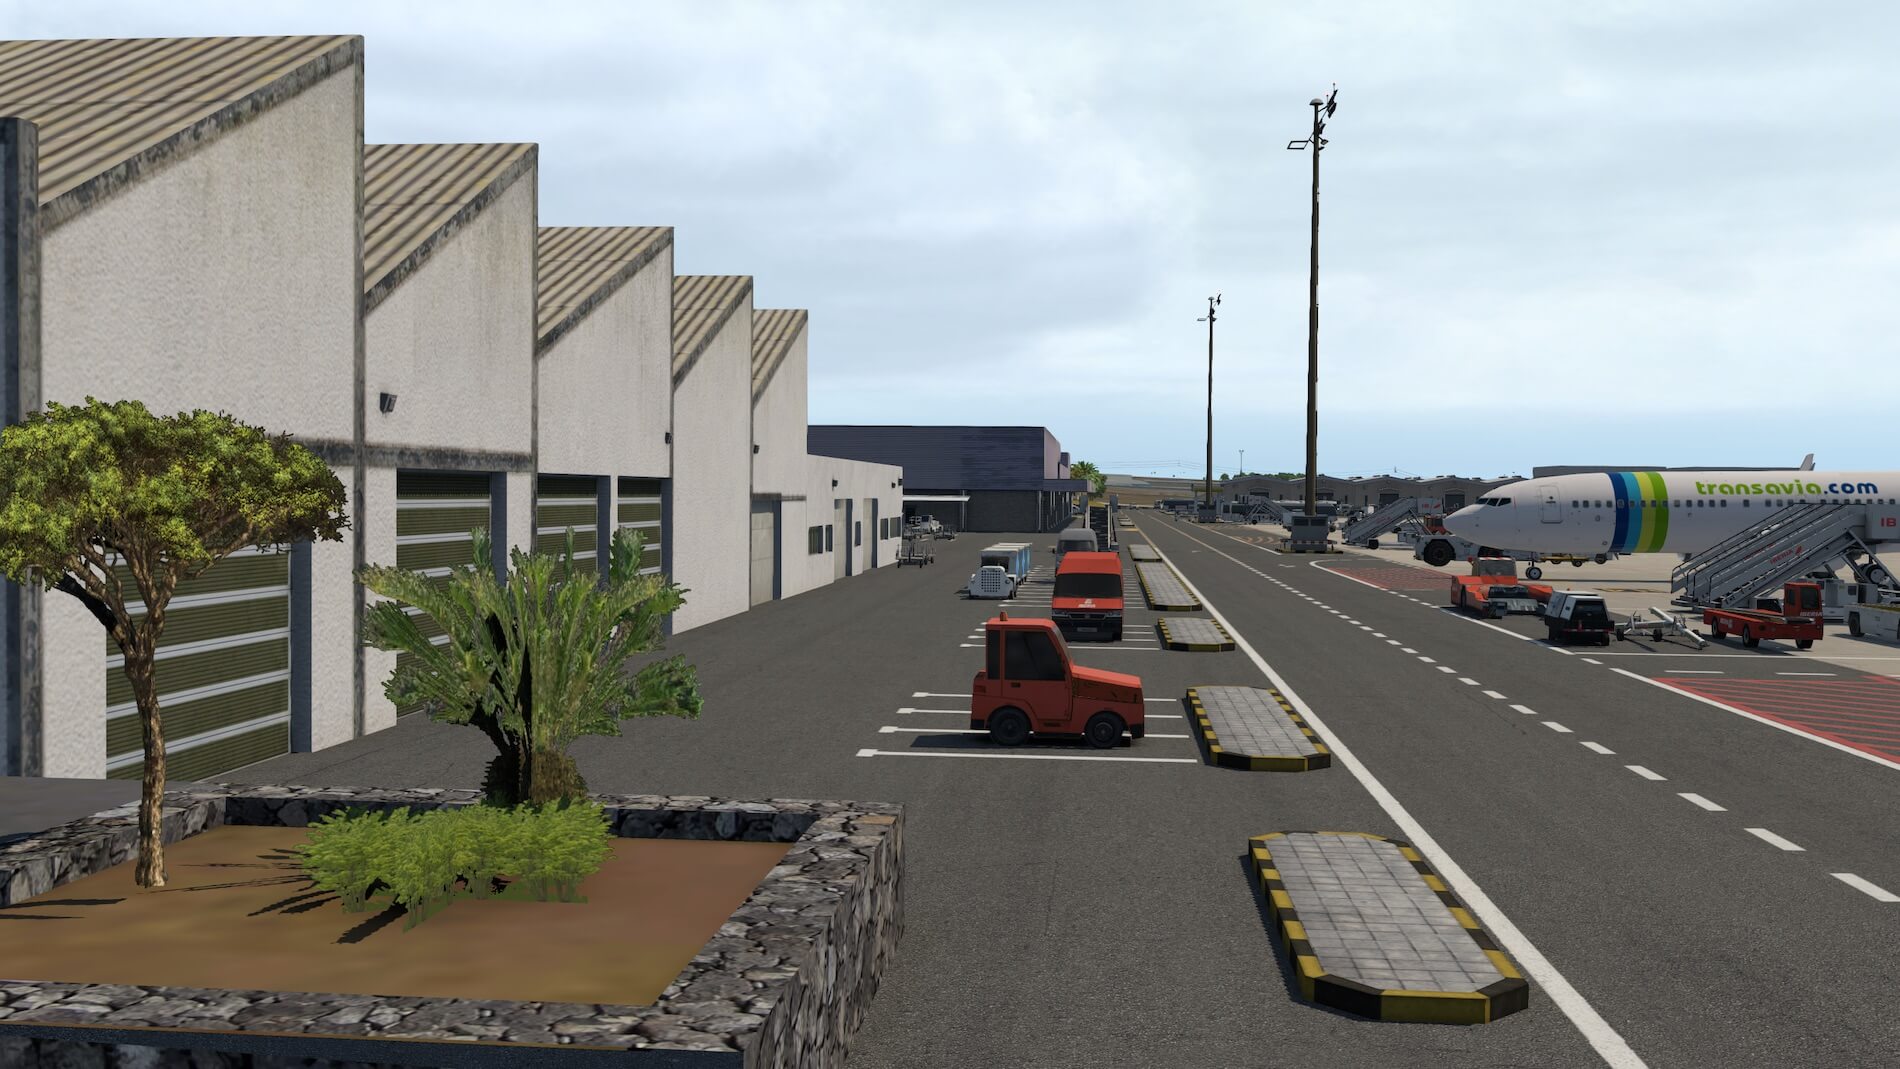
My walk starts at the far end of the apron. The place where all the ground equipment is parked. It is a mesh out there. Although the static ground equipment is parked at the designated places, it won’t be easy to get a stair or truck out of these places because it is modeled as it is in real. While carefully looking to all kind of objects, I do see animated objects, but the majority of the parked ground equipment won’t move. And sometimes I even see baggage carts driving into other carts so a slight misalignment of movable objects.
A bit further towards the terminal building, I spot the GA (General Aviation) hangars. There’s no static aircraft inside the hangars or in front of them and this is by the way the same for the whole airport. That said, when you want a bit more real look and feel, a bit more exiting airport, you need either World Traffic 3 or JARDesign X-Life. Adding default static aircraft is as we all know possible via X-Plane, but that’s not where we’re looking for. It gives much more fun when we see animated aircraft coming and going according to a real timetable.


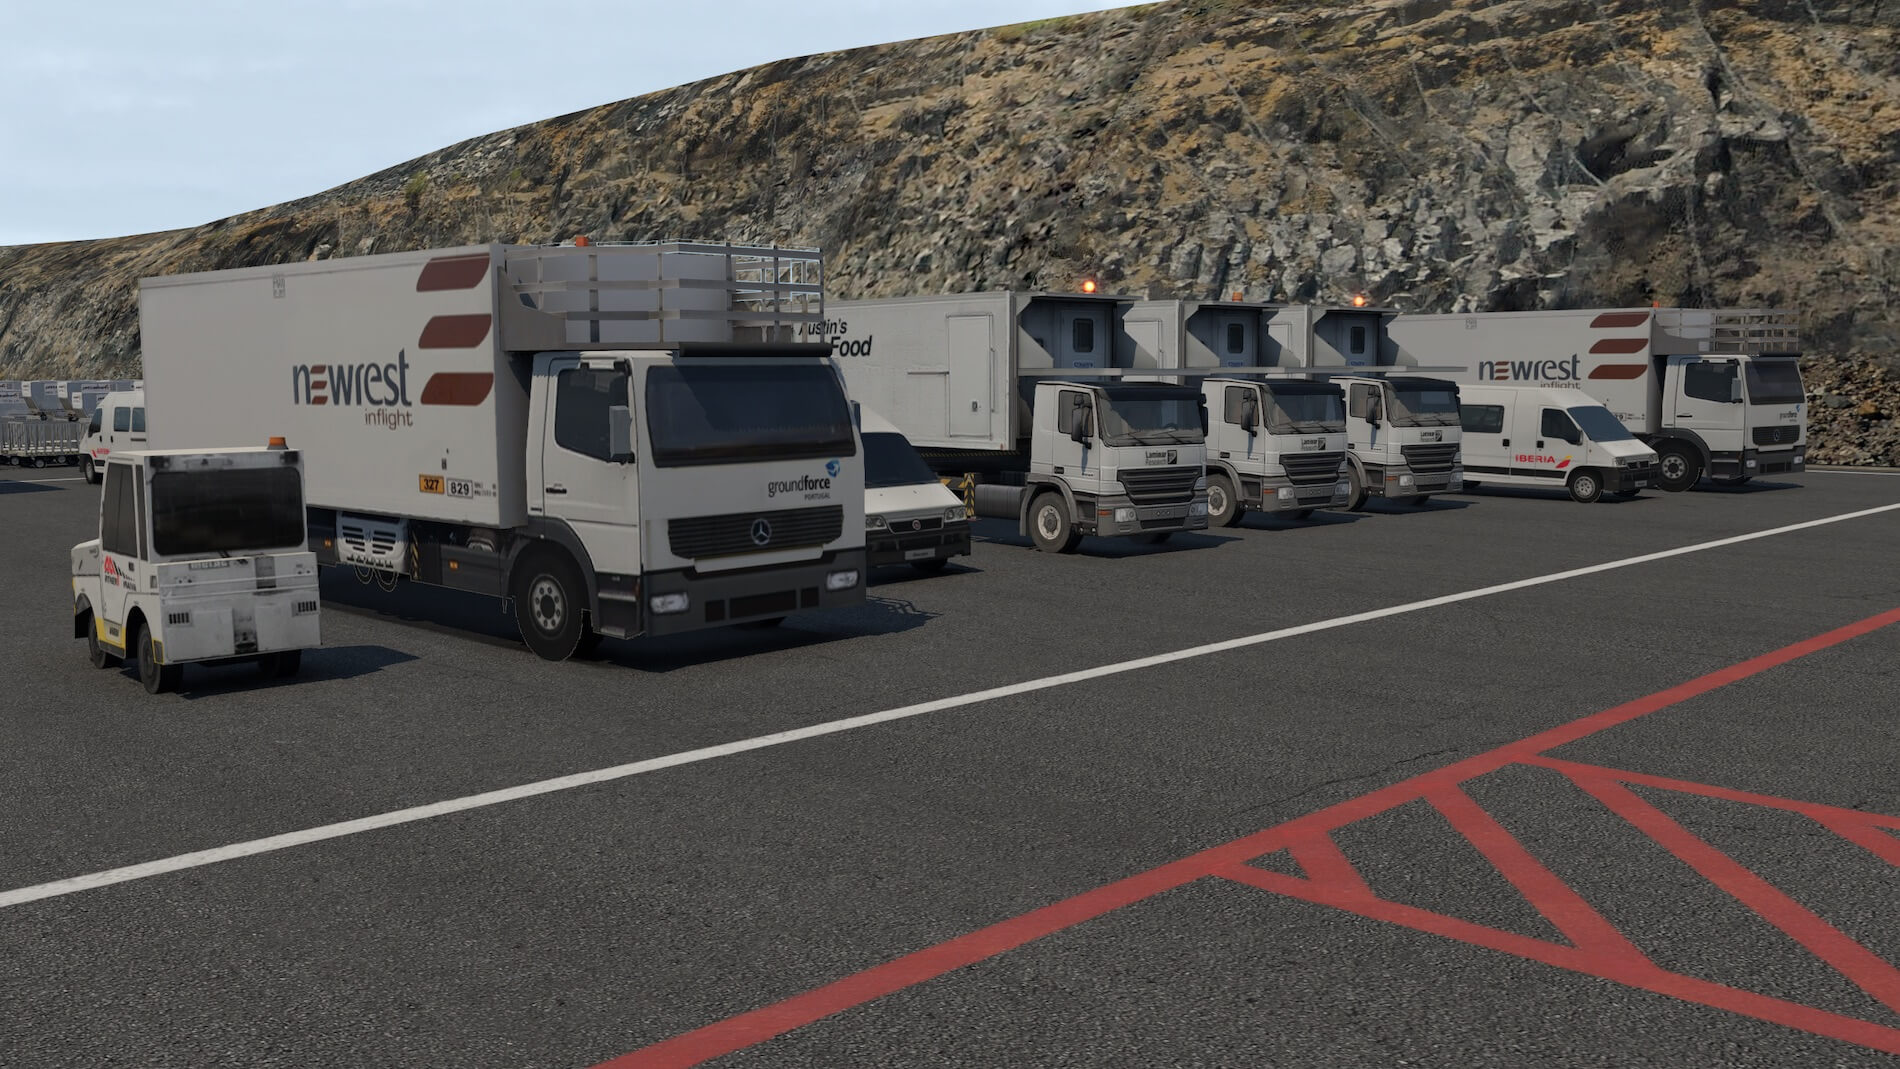


I’ve almost reached the terminal building and past many many static ground equipment objects. On the road that leads to the terminal and running out to the other side, I see animated baggage carts, belts and so on. That most of the ground equipment is static is OK. I don’t have any problem with that. It is as real as it gets even though I’ve never been at GCTS, I know how it is on other medium size airports.
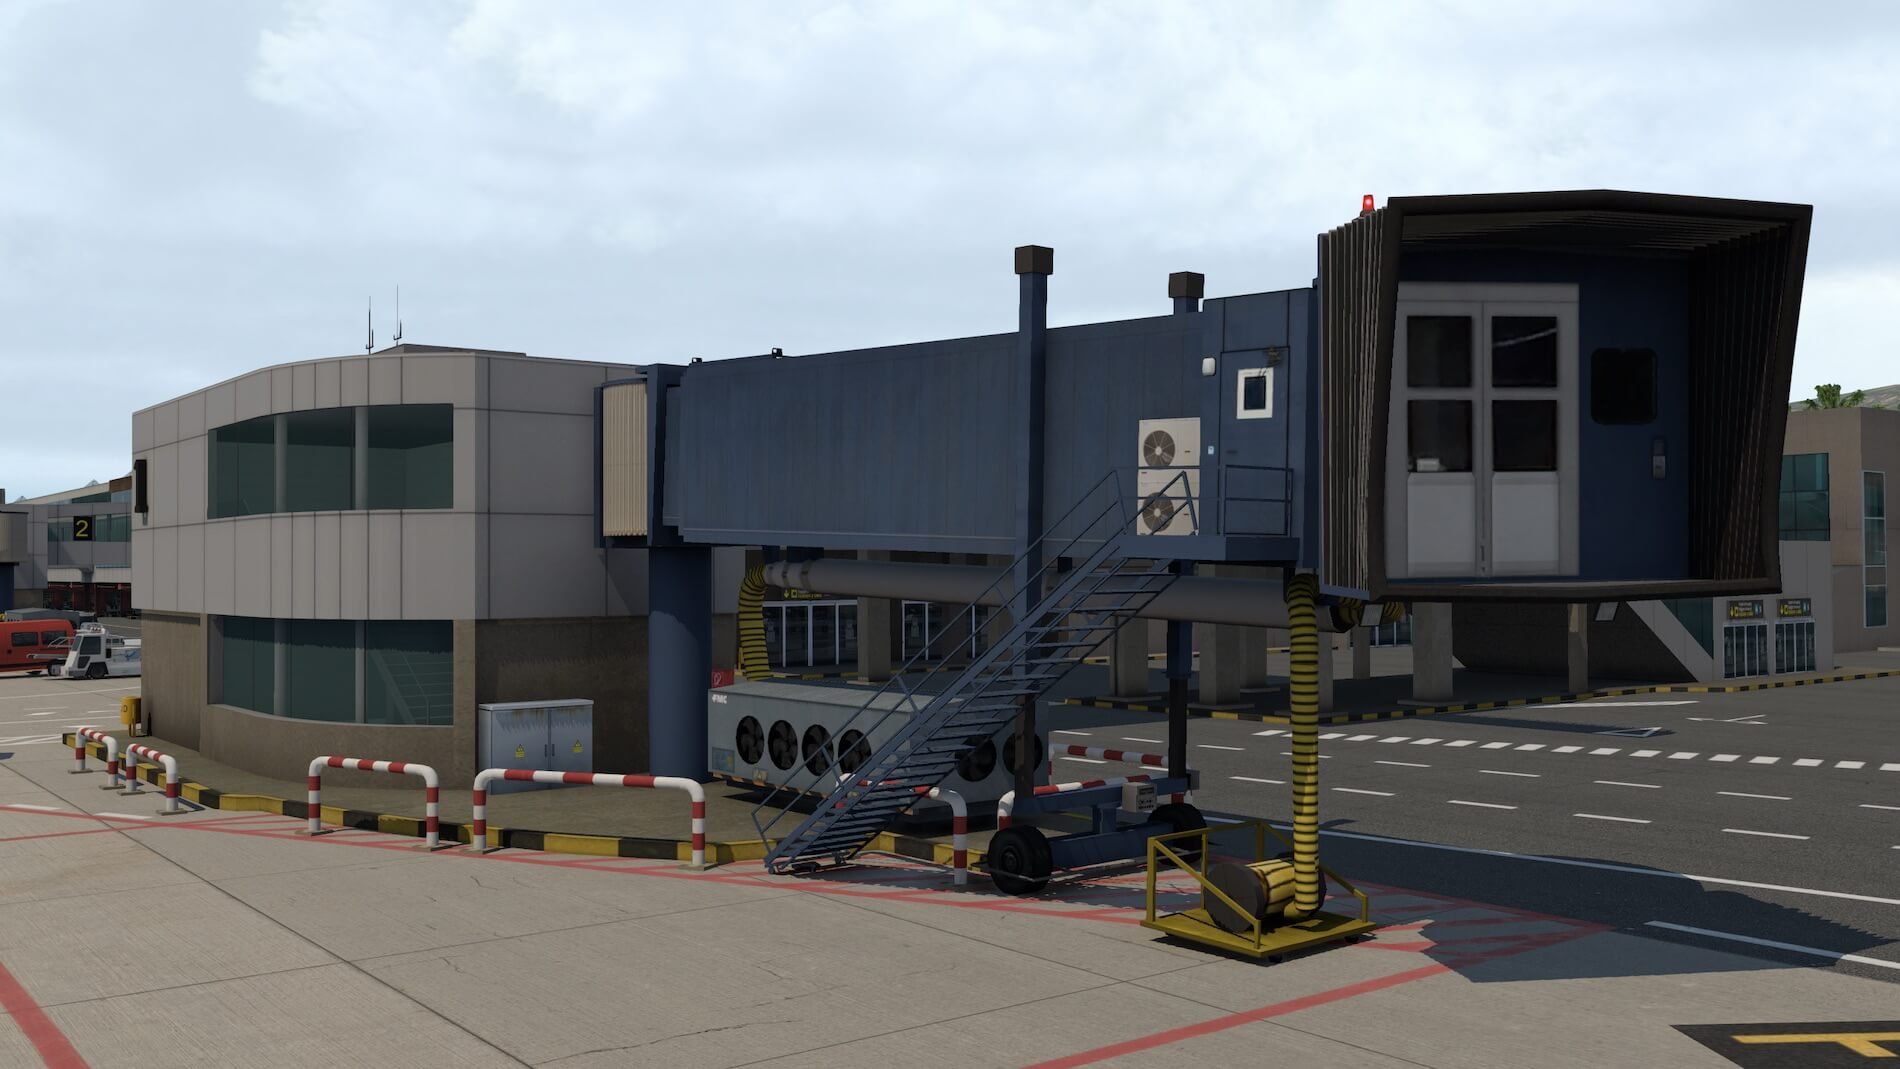
While walking on, I pass the jetways. A fixed concrete construction from the terminal building and a blue movable part that goes to the aircraft front door. The only thing that surprises me is that it all looks new. No dirt on these concrete constructions as well as no weathering added. I’m not sure if this airport will get another update, but a bit more weathering to the concrete buildings would give it a bit more of that real look and feel.
Each individual jetway is done with a lot of passion. Ok, I also know that all the jetways have one master and all others are copied, but neither less, it’s made with great precision, including all tiny details like the airco units, cold air hoses, the blue stair (oops, a couple of parts on the top aren’t connected to each other), the driving unit, the control box and so on. It’s pity that the airport authorities have decided that the terminal building only has 8 jetways. For the rest, aircrafts are parked on the 2nd section of the apron. During high season it will be quite busy on that apron.
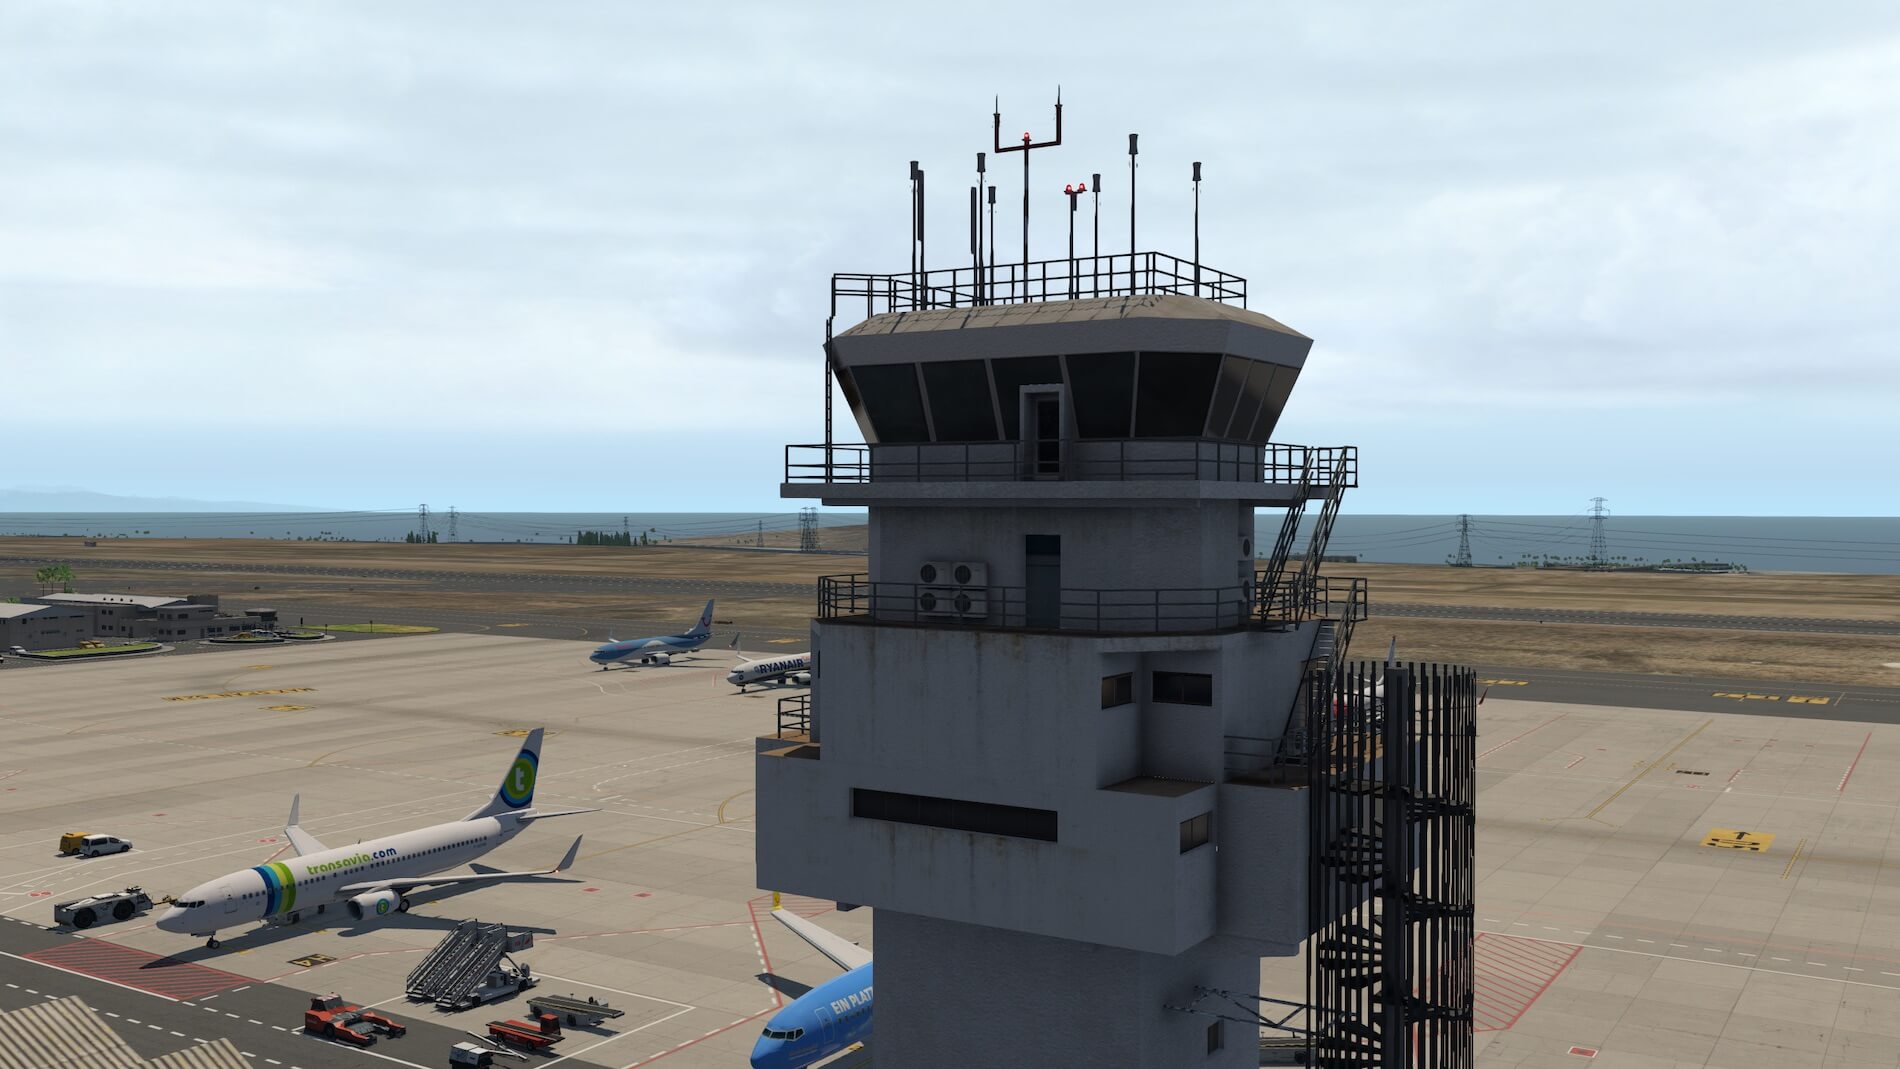
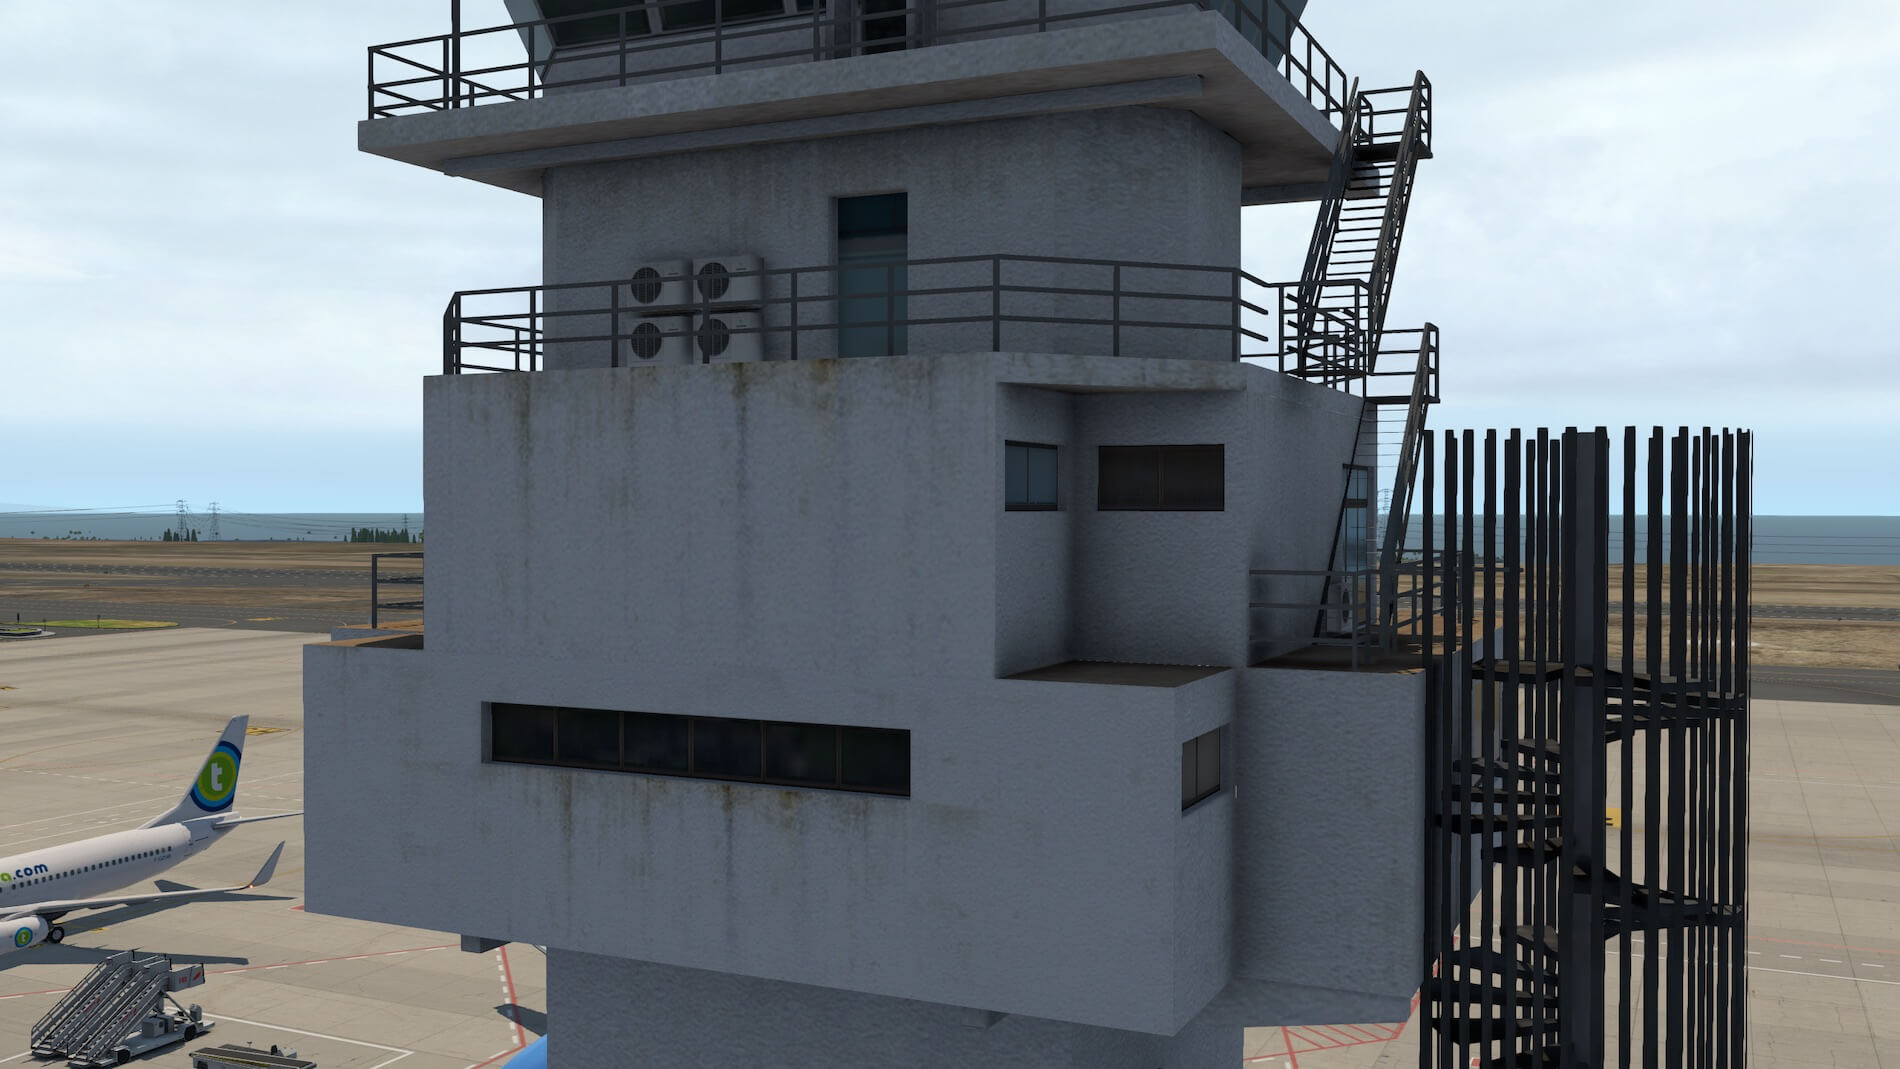
But at the same time, lets be honest, I’m happy with what I see and with World Traffic 3 or X-Life included, it gives GCTS an as real as it gets look. I’m approaching the end of the terminal building, reaching out for the well modelled, full with tiny details control tower. The real control tower is a complex construction with a huge external stair, a lot of antennas and not a smooth and elegant construction.
Try to make a replica of that one in X-Plane? Digital Design has done that with great job. No, it doesn’t have the amount of antennas on the roof, and perhaps the external modeled stair is slightly different then the real one, but from a distance, it looks gorgeous.


When I look to the control tower base, it’s filled with, as in real too, trees and flowers and it does have some weathering, so not sure why this is missing on each jetway? Good, let me continue. The same look and feel can be found with the adjacent buildings of which the second was probably in the past red, but due to the sun it’s a bit bleached. This is also the case, I’ve now reached the end of the apron, with the CEPSA signs. At the far end you’ll find the fuelling station, offices and the fire department.


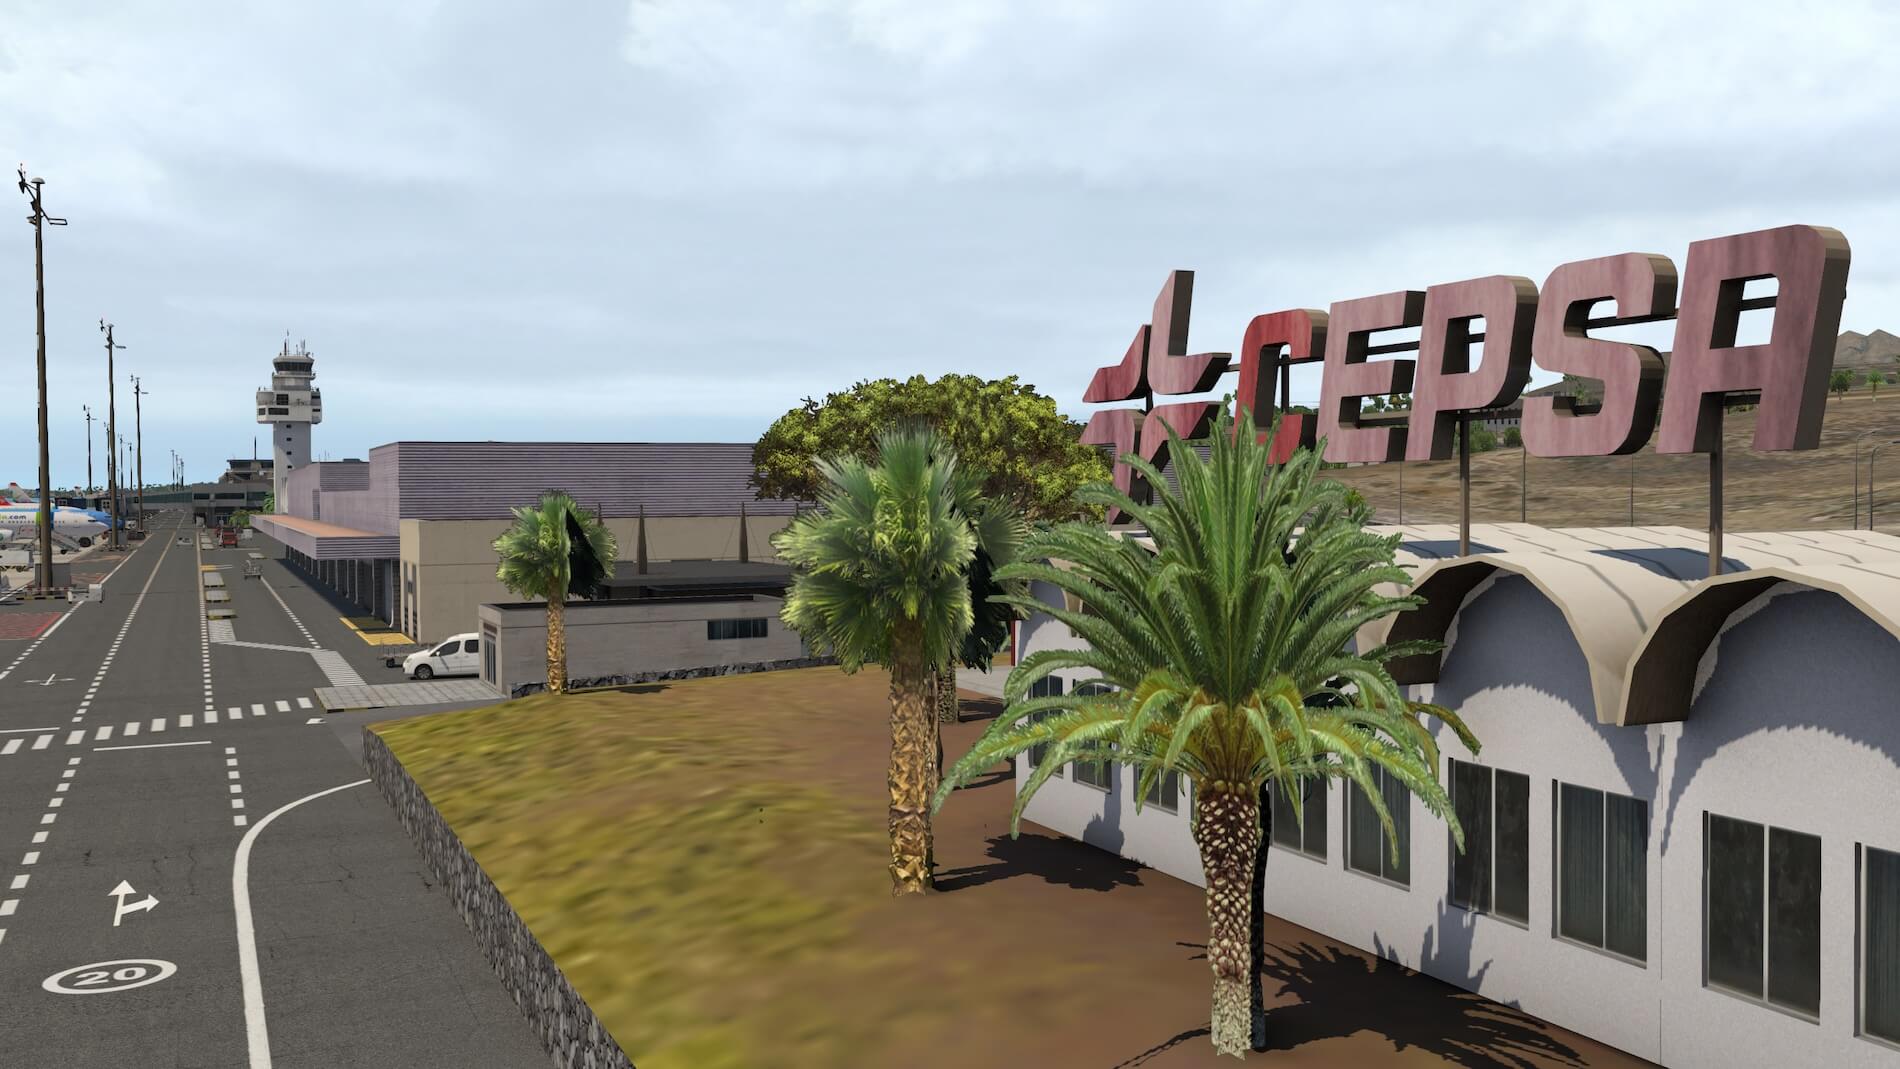
Although this may be the end of the apron, I continue to walk towards the beginning of runway 25. Halfway this walk from the fire department to the runway threshold, I spot the hangar belonging to the Salvamento Maritimo. There are some offices, a hangar, a heli spot and lots of palms. Nicely and subtile!
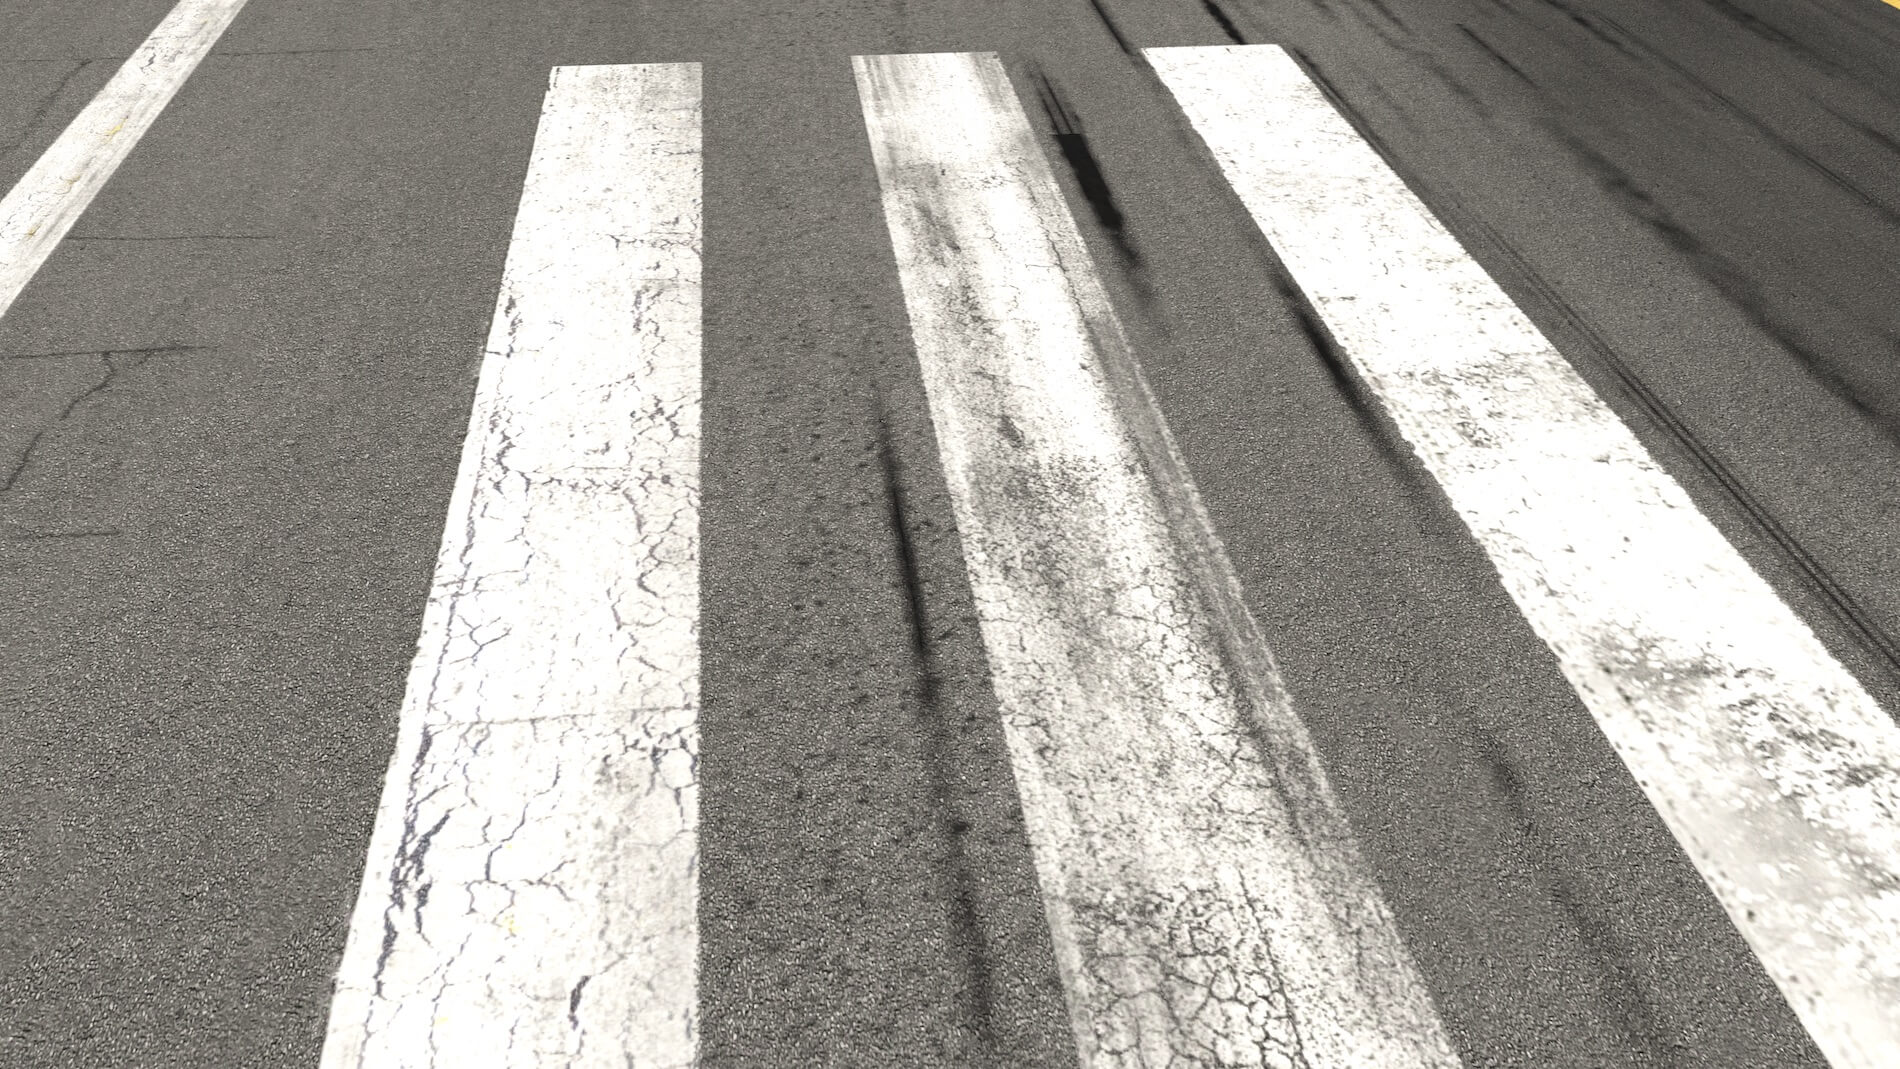
Apron, taxiways and runway
Let me have a look while walking around at the airport apron, taxiways and the runway to the overall ground texture quality. How realistic are the concrete textures and how real does the runway look like and not to forget, the grass and sand areas. For an overview of the apron, and parts of the taxiways and runway, I decided to make a screenshot with Google Earth – I know, not of the best quality – and I do the same in the simulator. The outcome is … judge yourself.
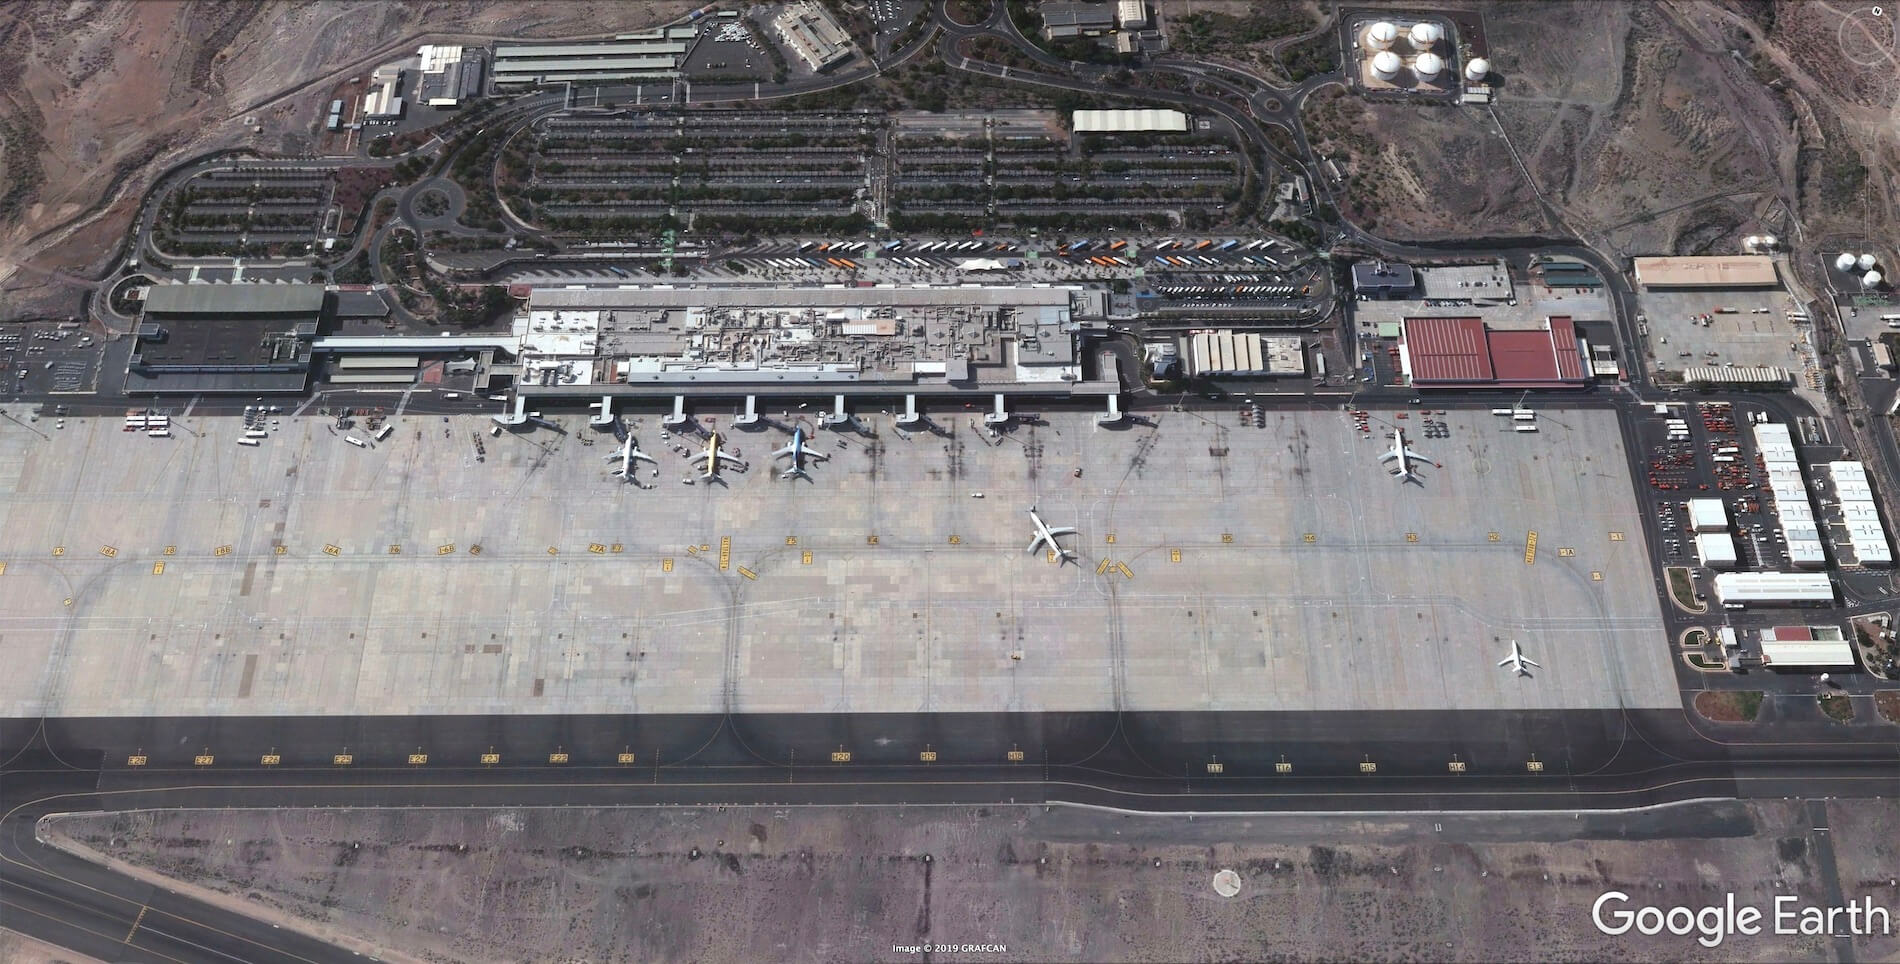

Honestly, I’m quite impressed. Ok, the overall quality of the Google Earth pictures isn’t good, and besides that, it’s too dark. When I compare the real photo with how Digital Design has made their apron, taxiways, runway and other ground textures, then there’s perhaps one thing missing on the modeled airport and that are near all the jetways, dirt, oil drips, and weathered ground textures. Besides that, nice to see a comparison between real and modeled.
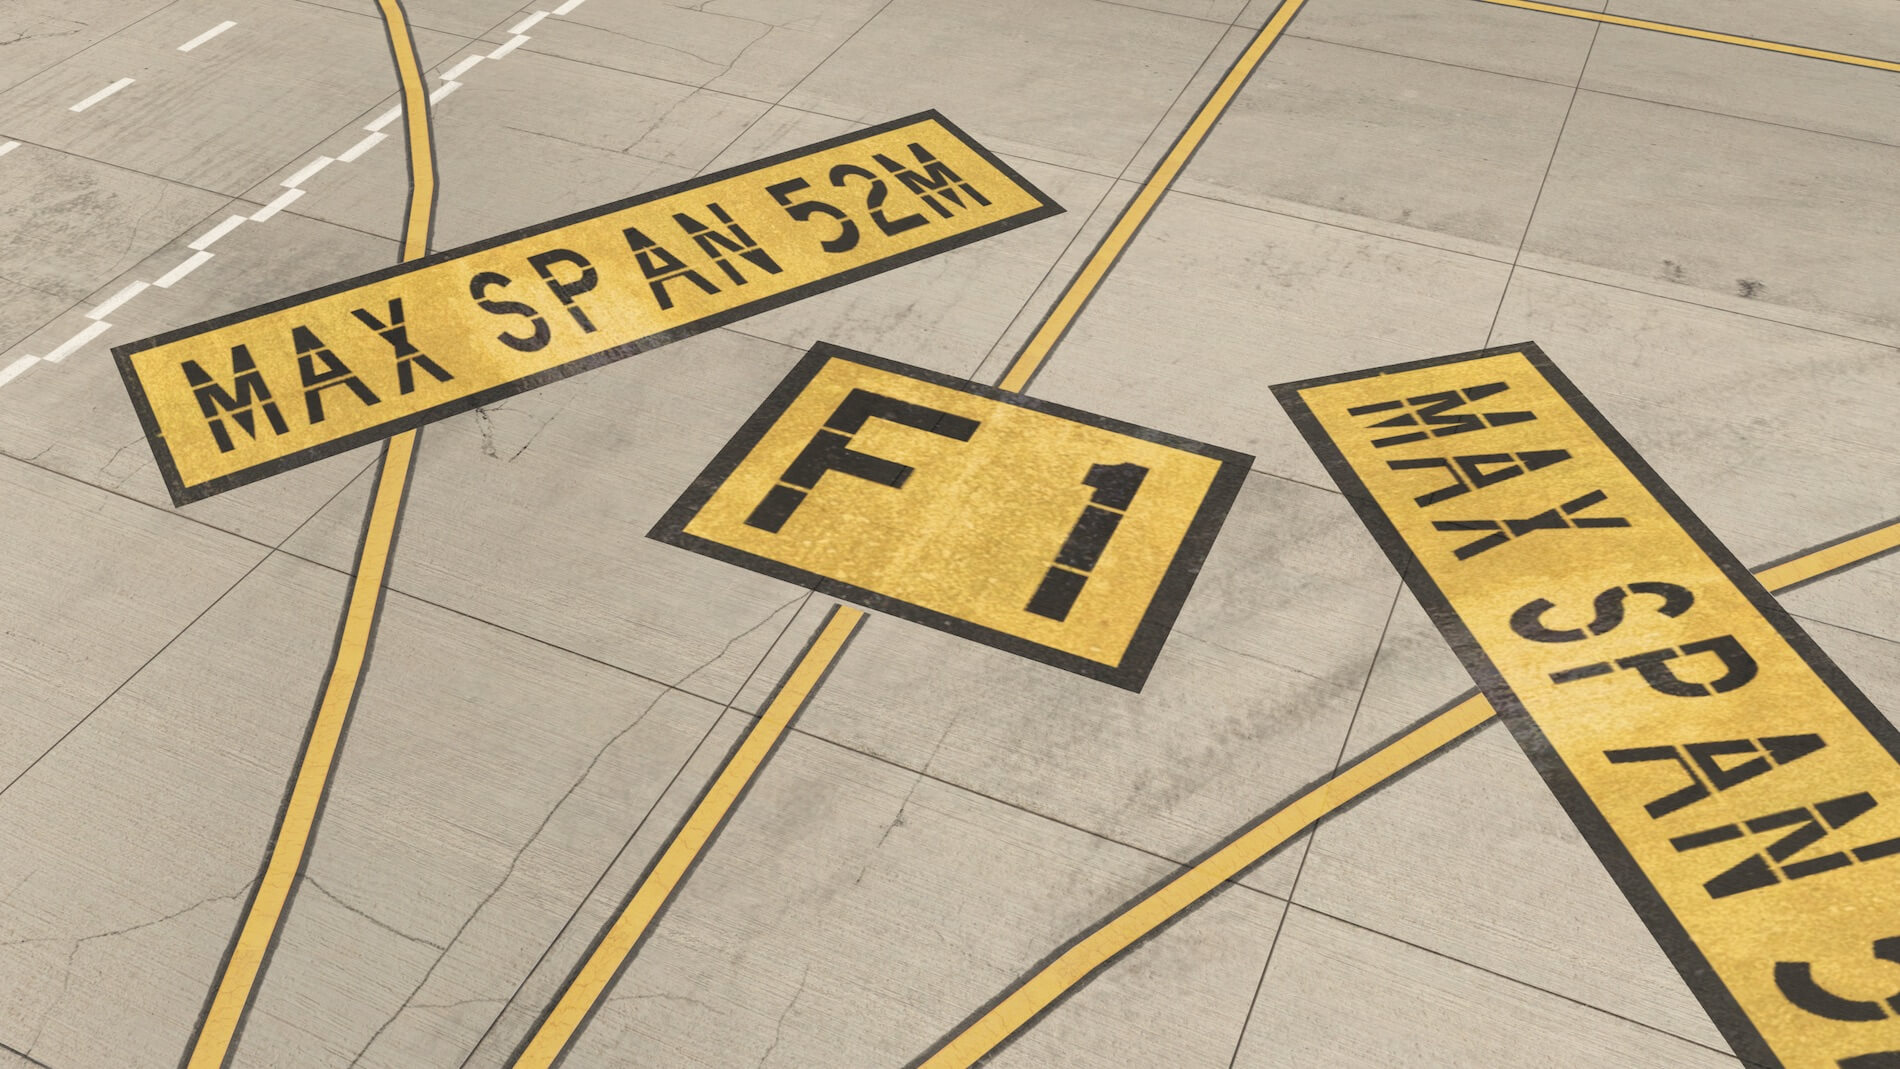
No worry, there’s more coming. I haven’t finished my ground walk where I also check the overall quality of the tarmac, concrete, signs, lines and other ground textures. I noticed that a couple of taxi spots, taxi directions signs on the concrete aren’t at the Google photo, but who tells me how old that Google Earth photo is and what is changed since then. I’m satisfied with what I see at signs on the concrete apron and who normally will check the apron from 1000 feet height … perhaps nobody?
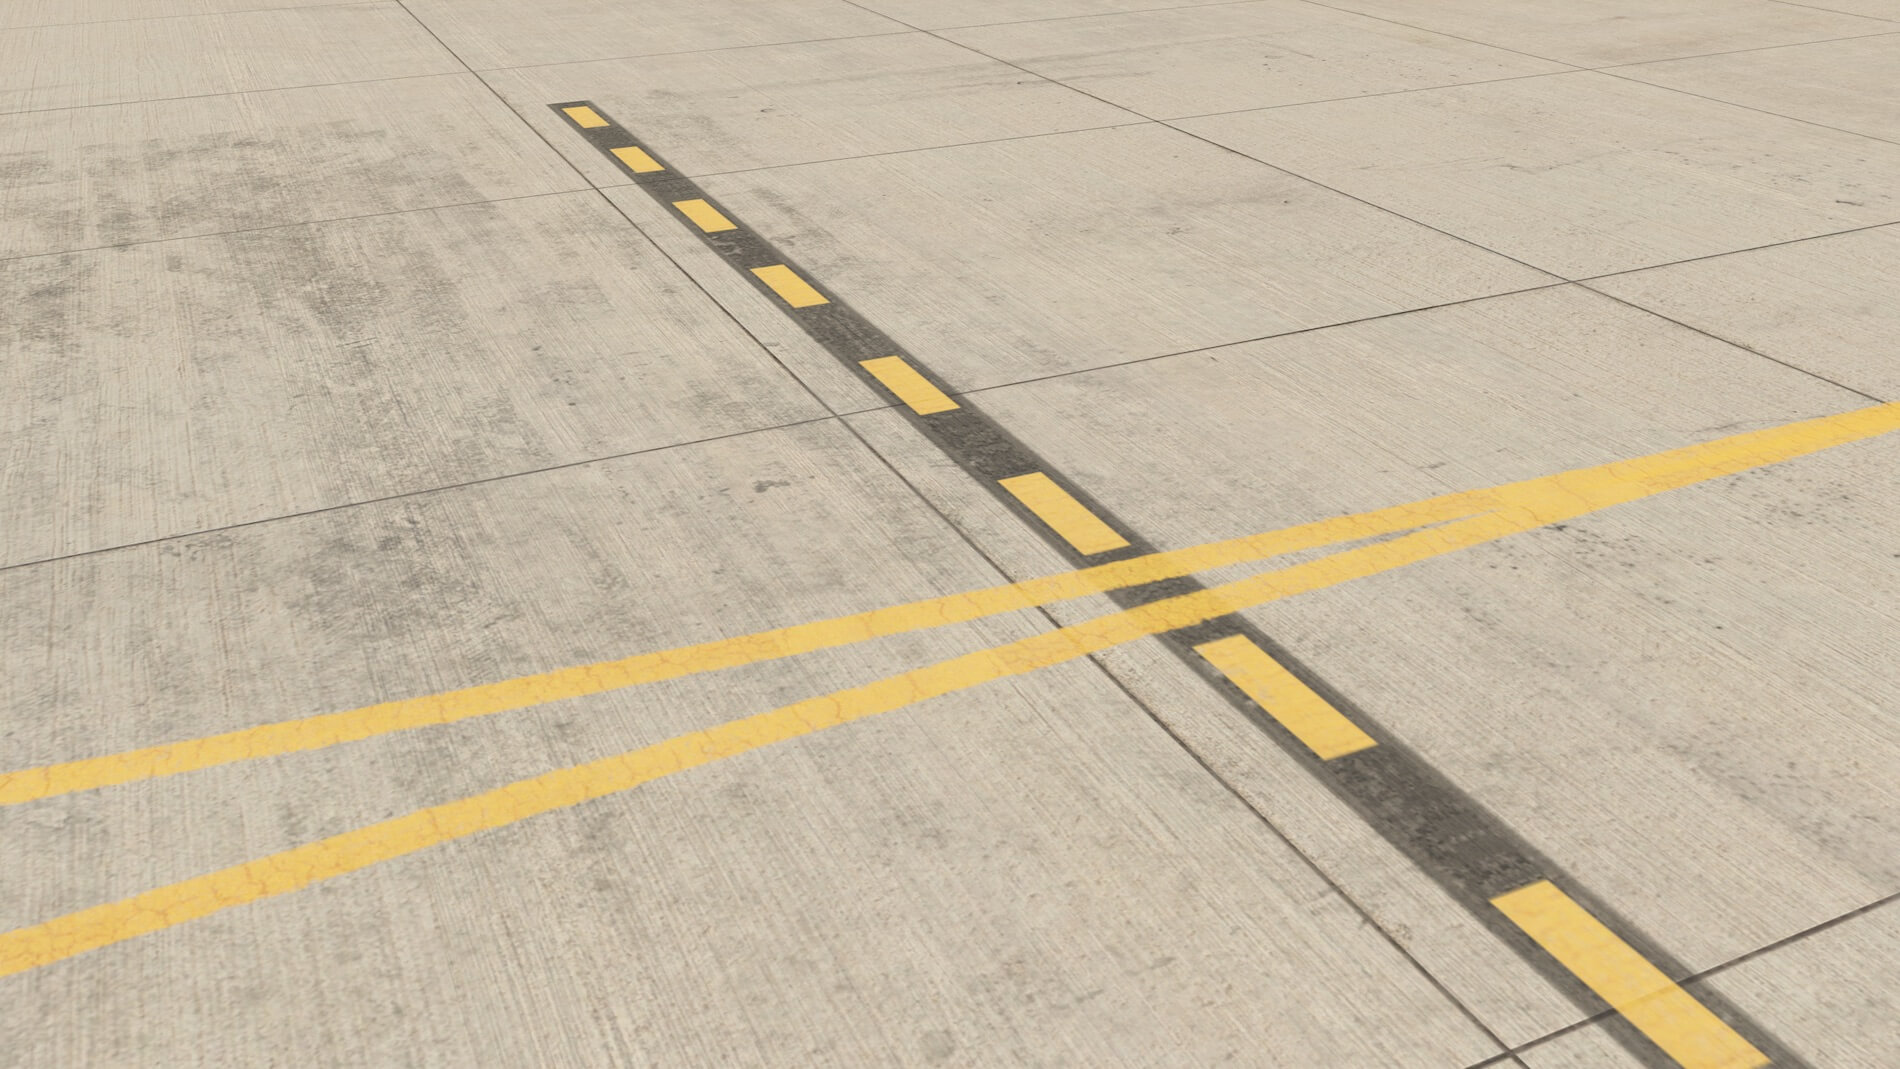
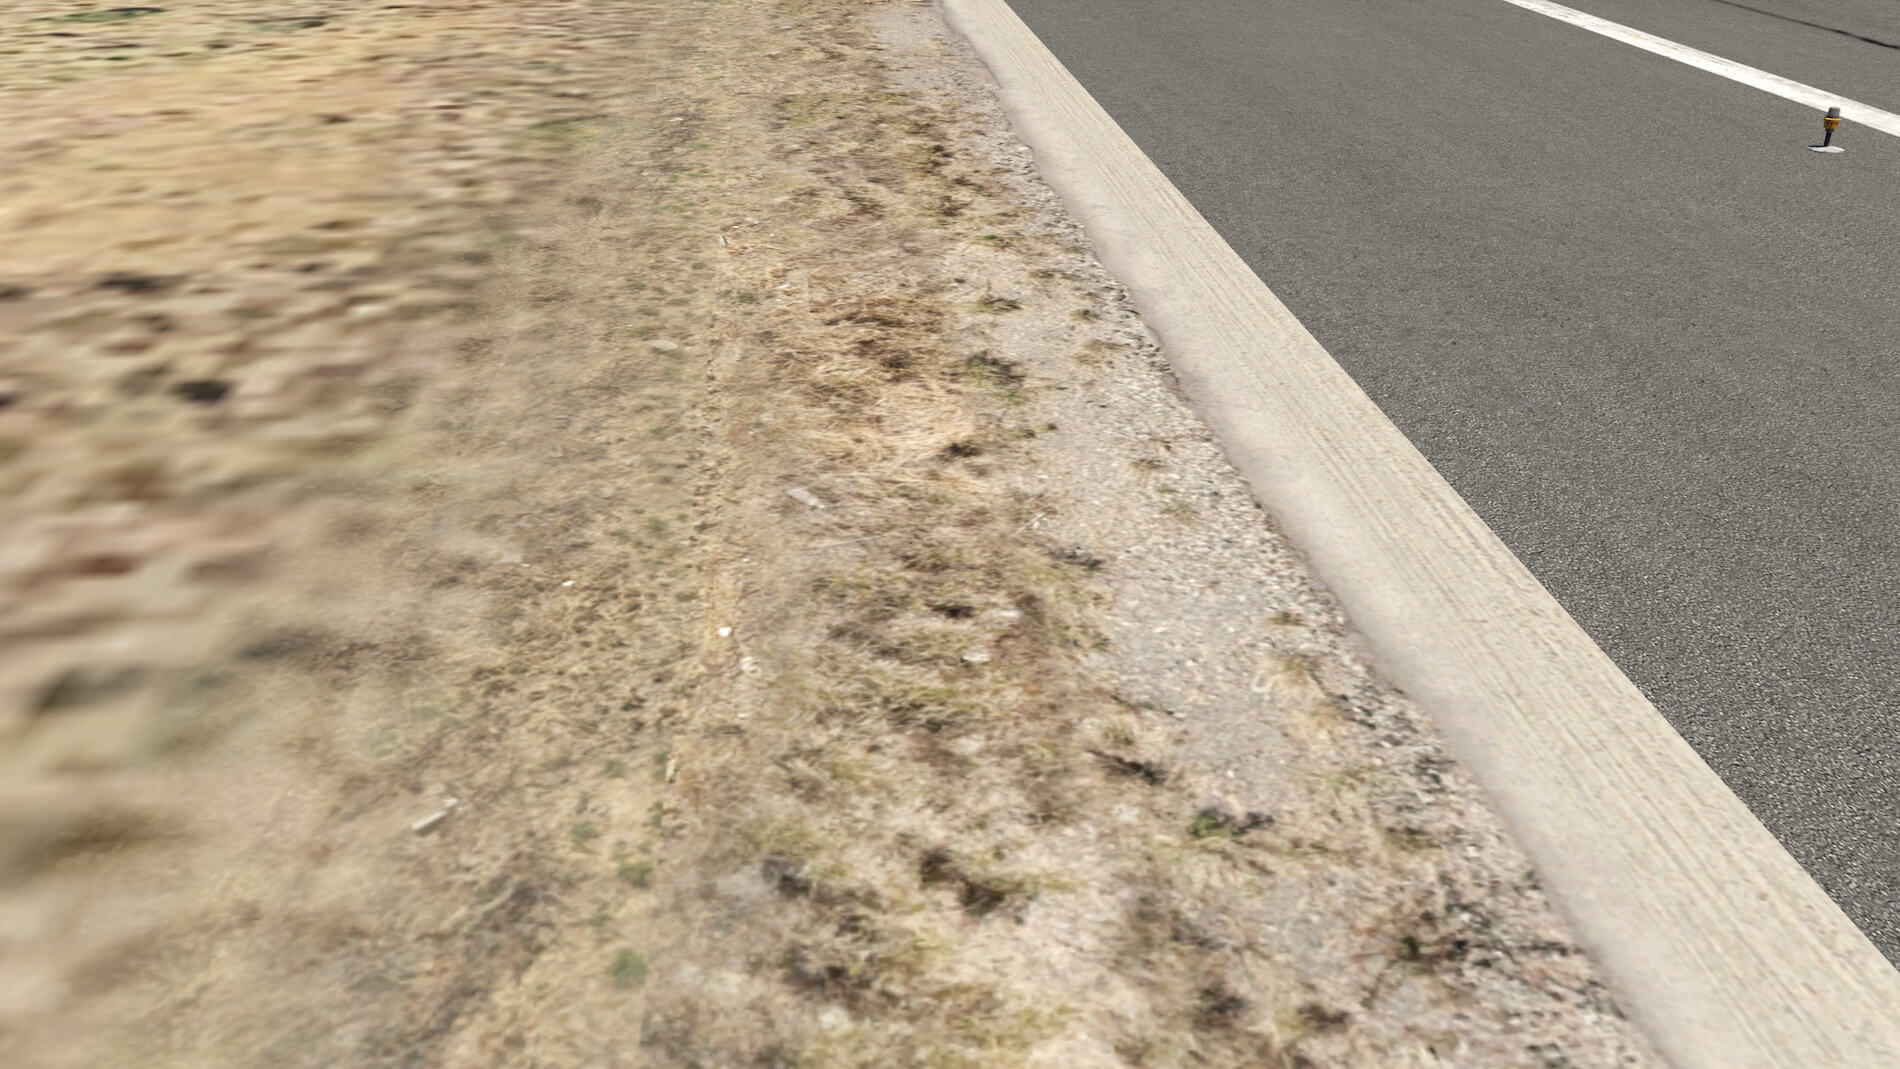
As far as I’ve seen; all the painted signs on the tarmac or concrete parts of the airport are slightly weathered which is good news. The concrete at the apron has also a lot of virtual small and larger cracks which is even better news since it represents the real. The earth ground textures around the runway, in-between the taxiways are at the edge with the runway sharp, but the overall is a bit blurry. I had expected a bit sharper earth ground textures, also because it’s the airport area.


You’re still with me? If so, then I think it’s now time to visit the public side of the airport, so let’s move on and drive with out rented car from the highway to the airport.
Public Airport Drive
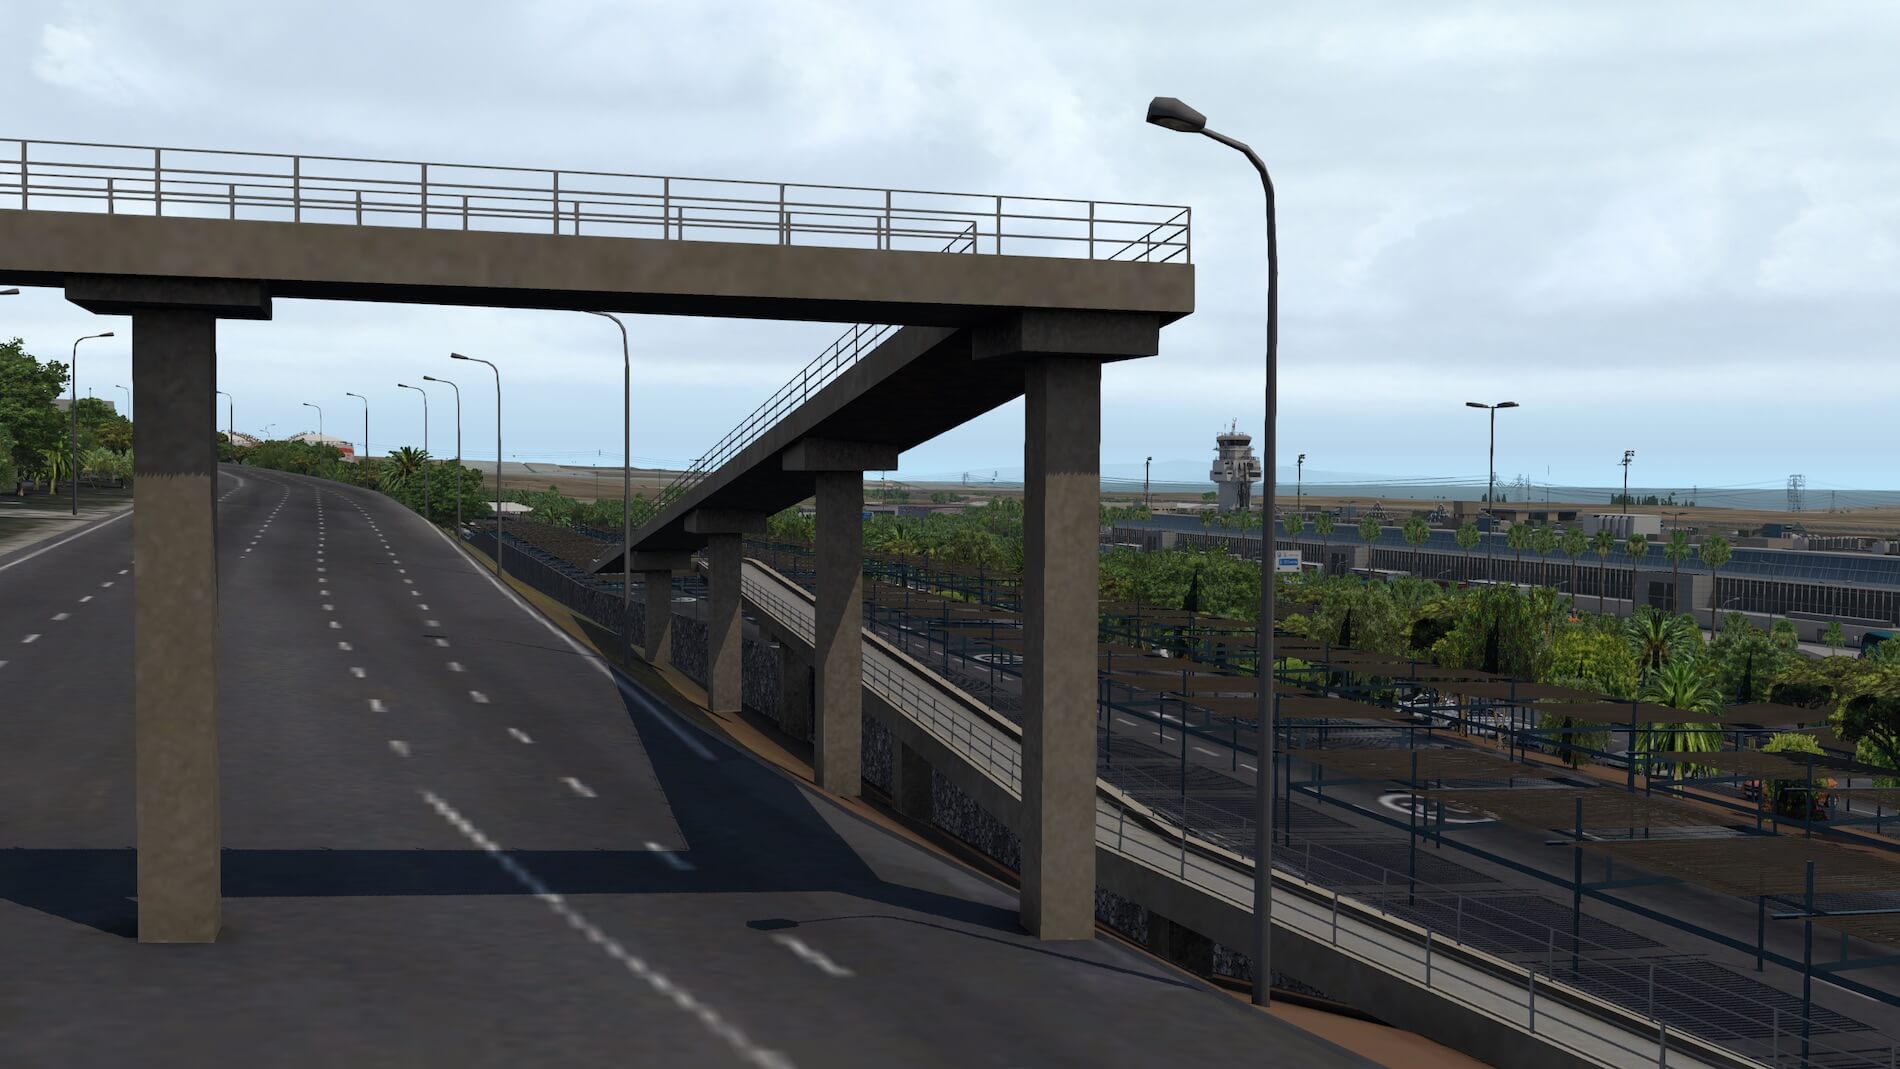
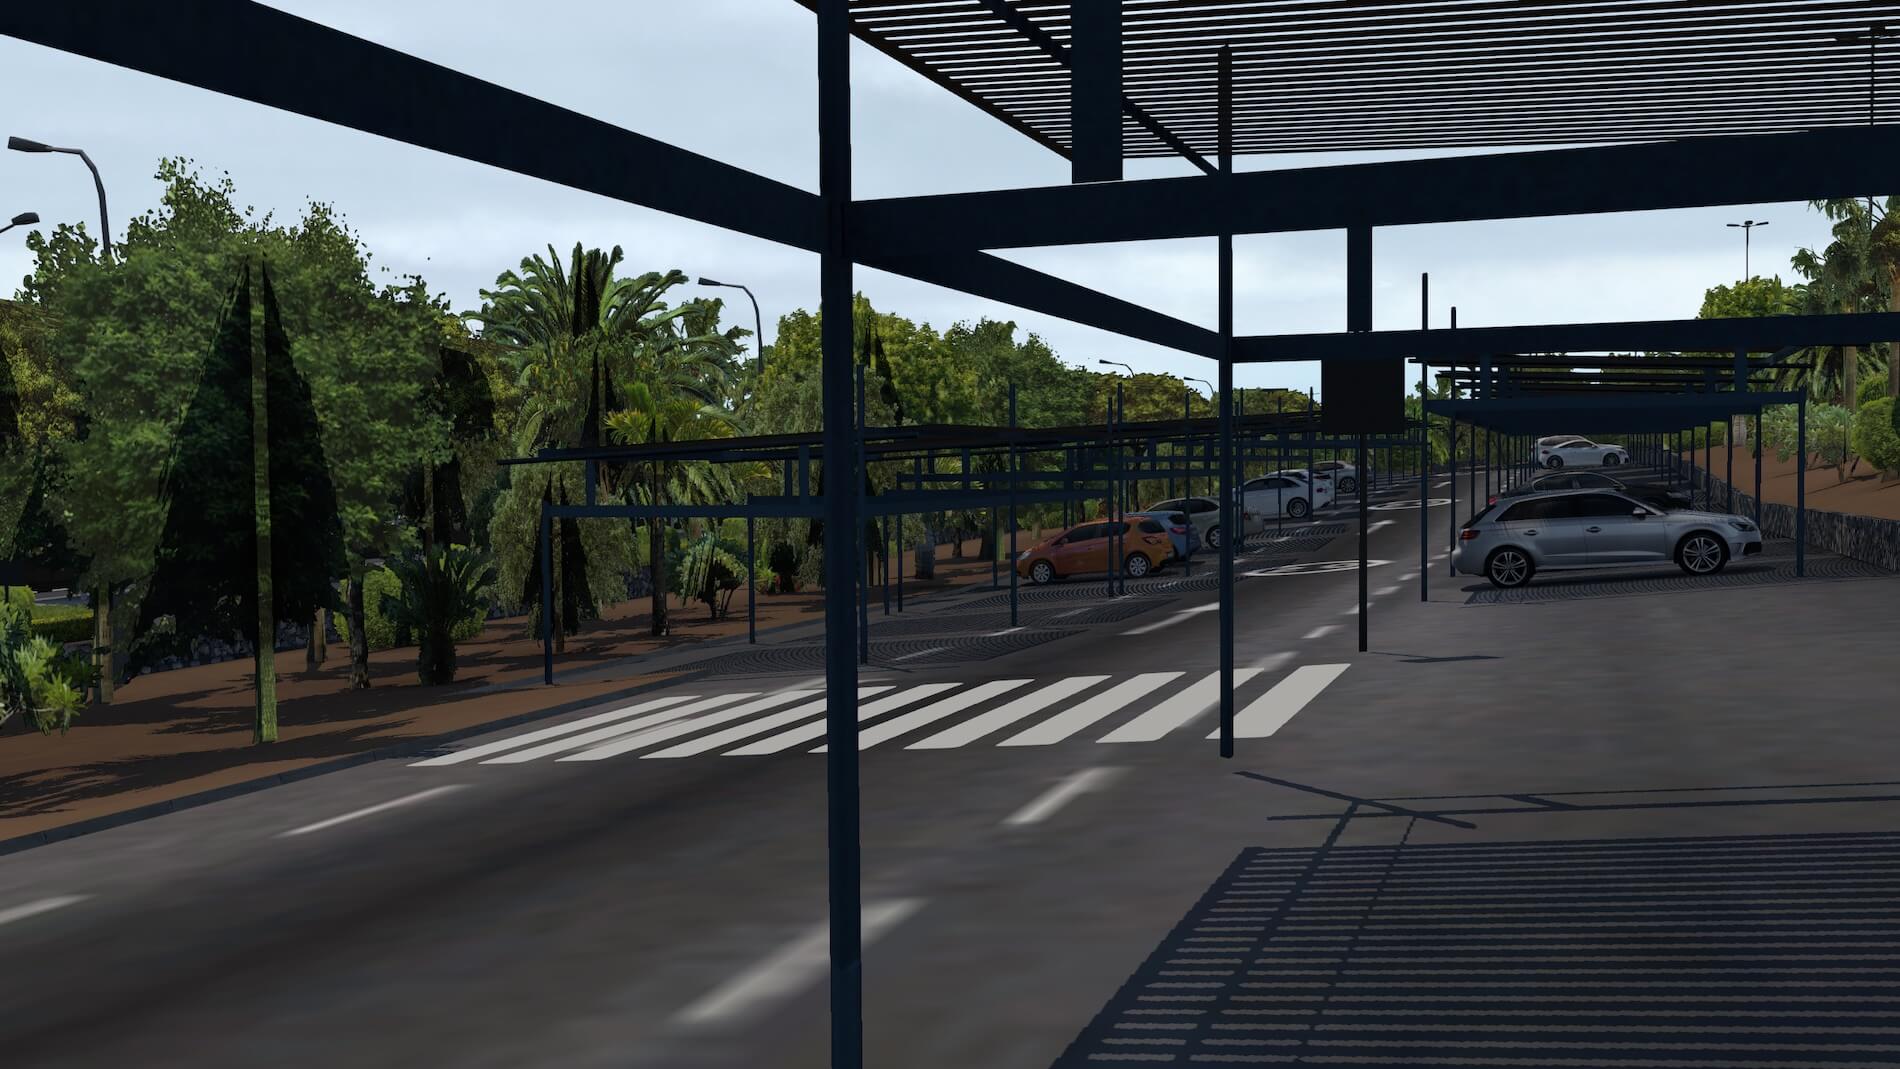
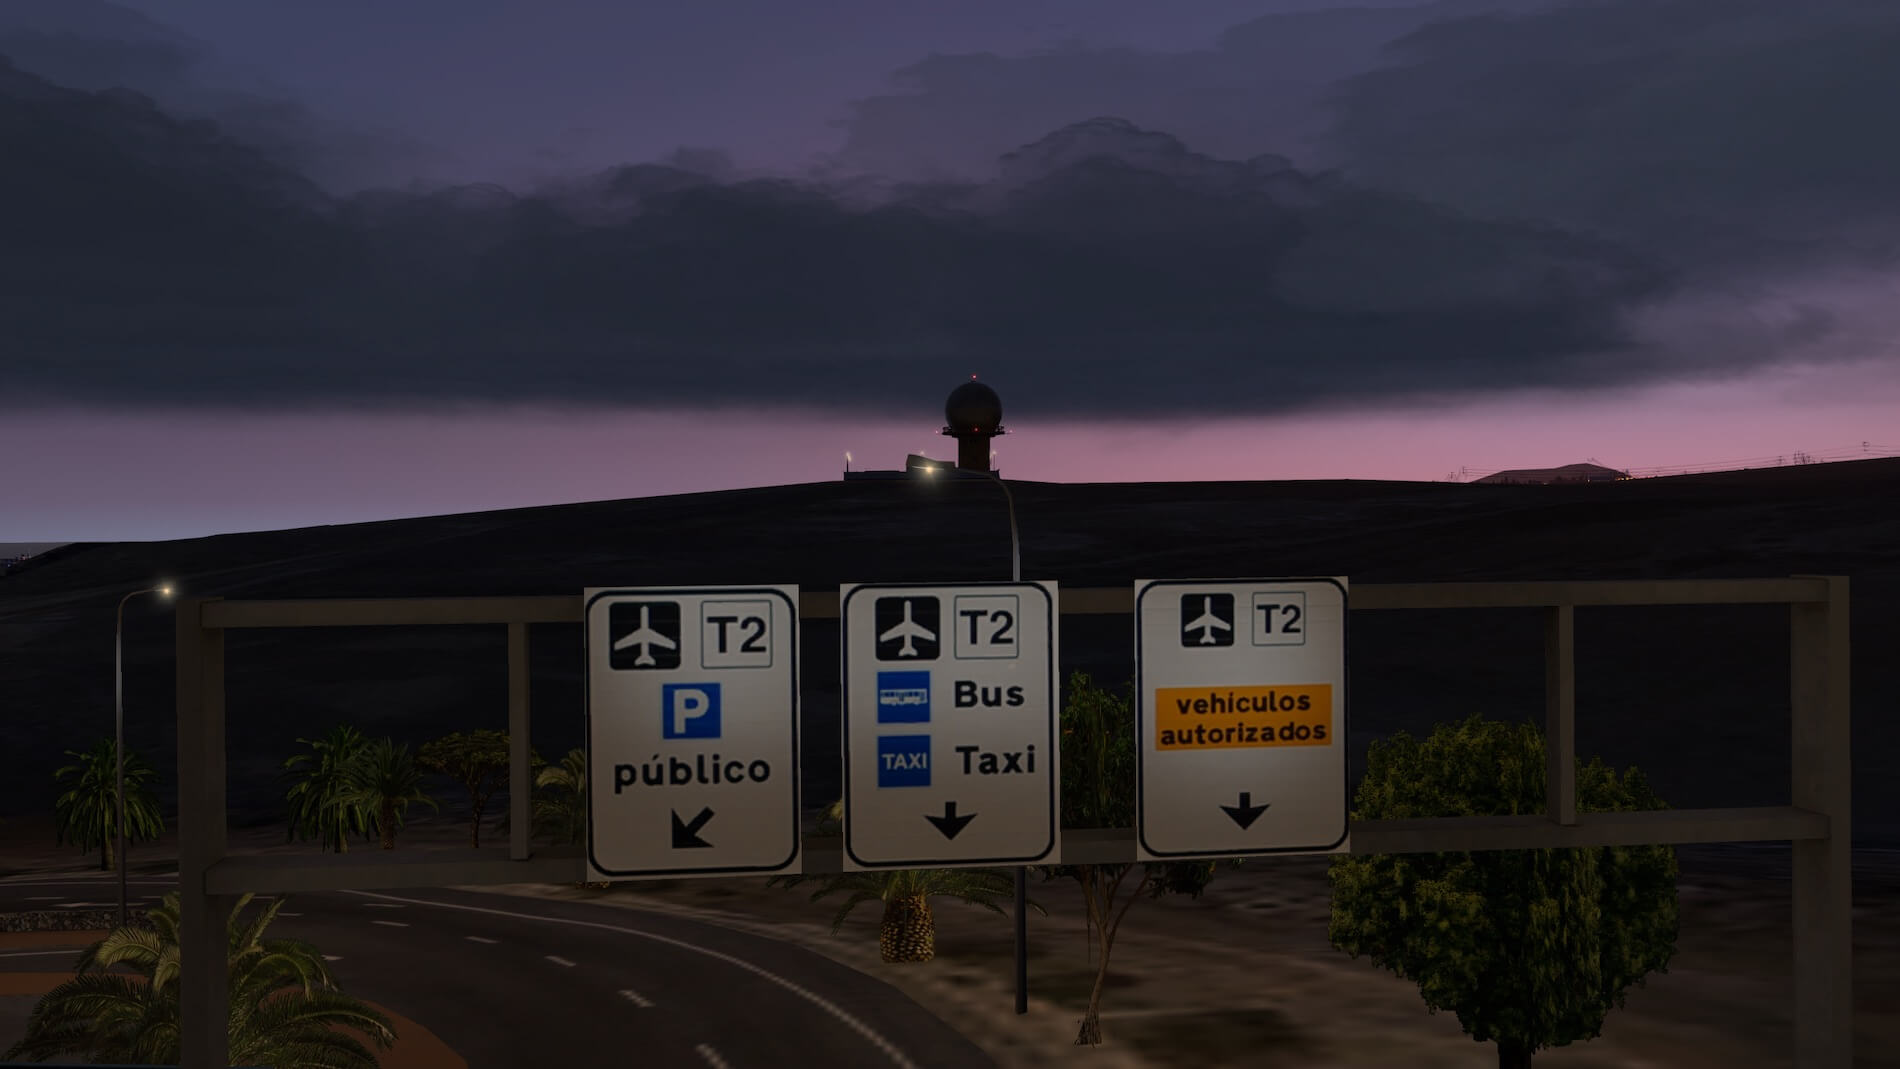
What said, driving on the default X-Plane TF-1 highway or also known as the Autopista del Sur, I take the exit to Tenerife Sud airport. It’s looks a bit weird since what I see at this road exit is a mixture of Digital Design ground textures, palm trees, but also default X-Plane roads and even default tower power line objects of which one is in the middle of a road. Not sure if a developer can change these objects or remove them. Anyway, the road towards the airport has on both sides palms which I can confirm with real photos.
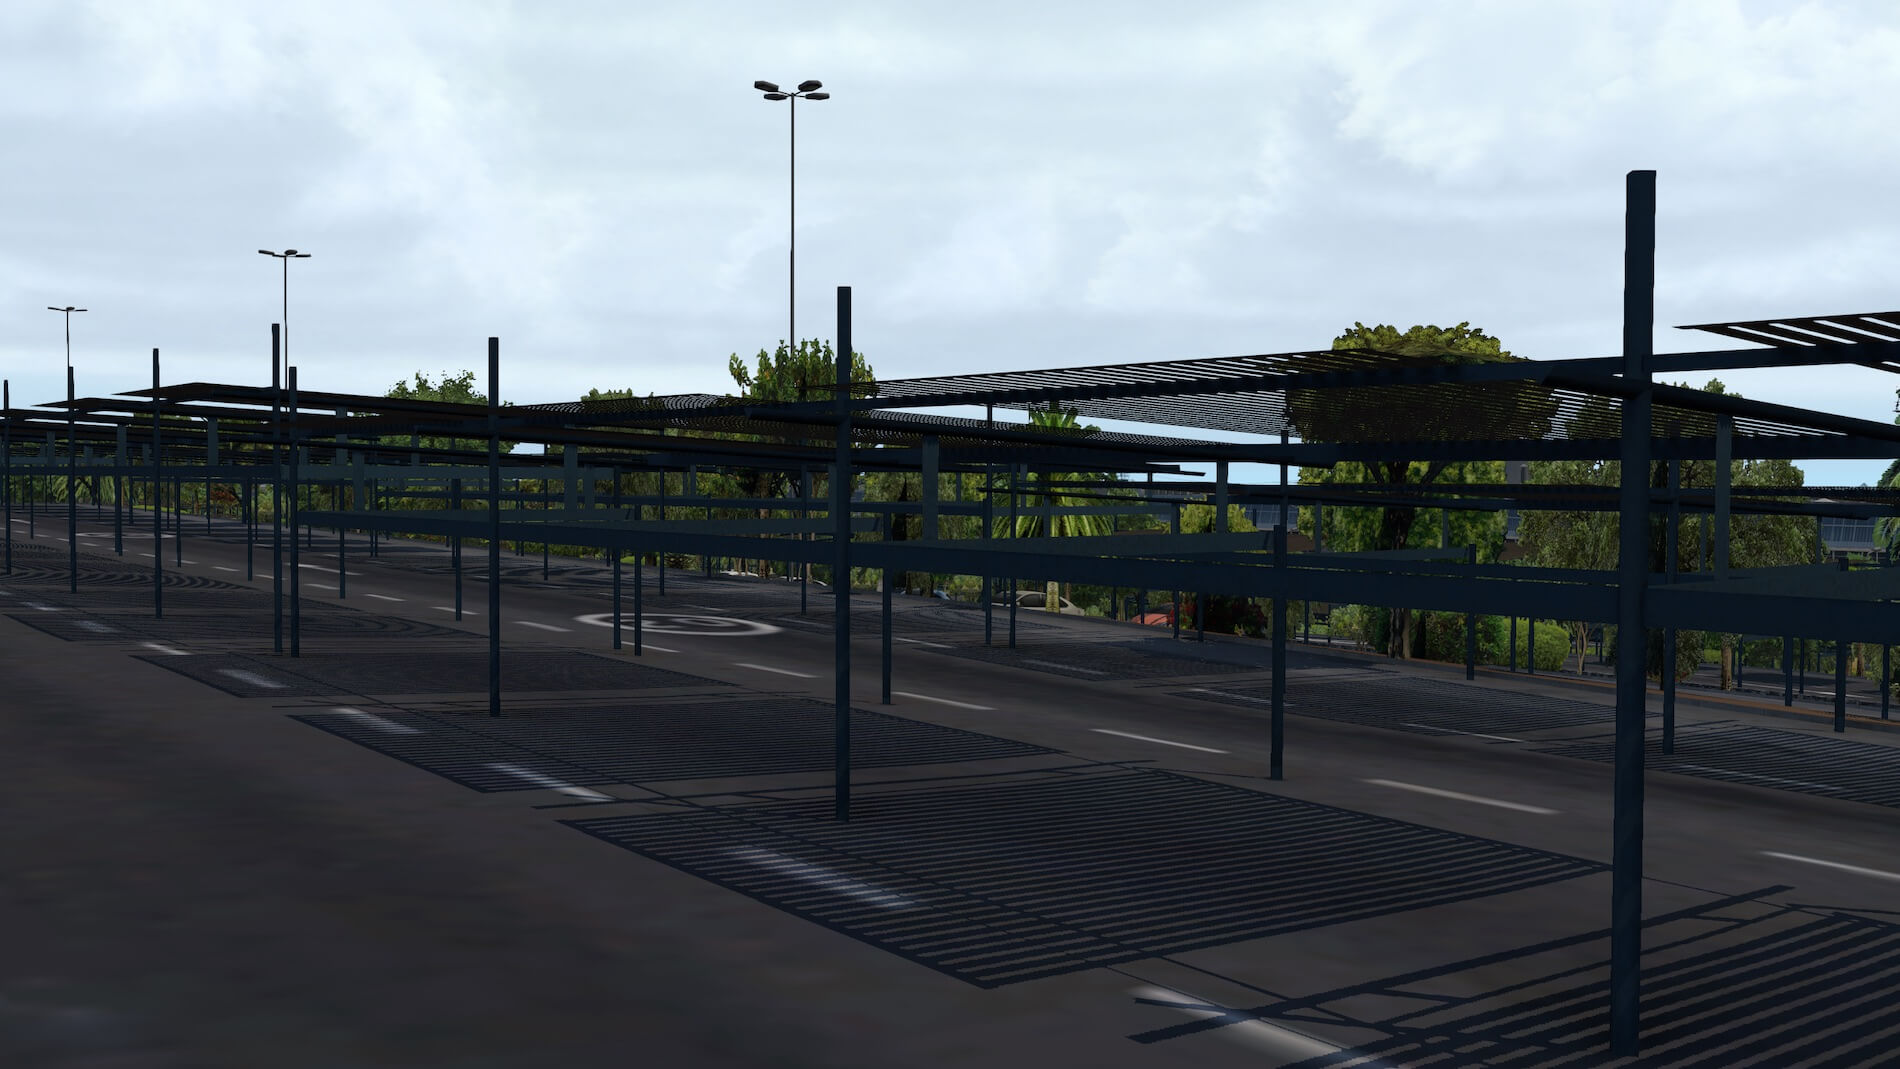
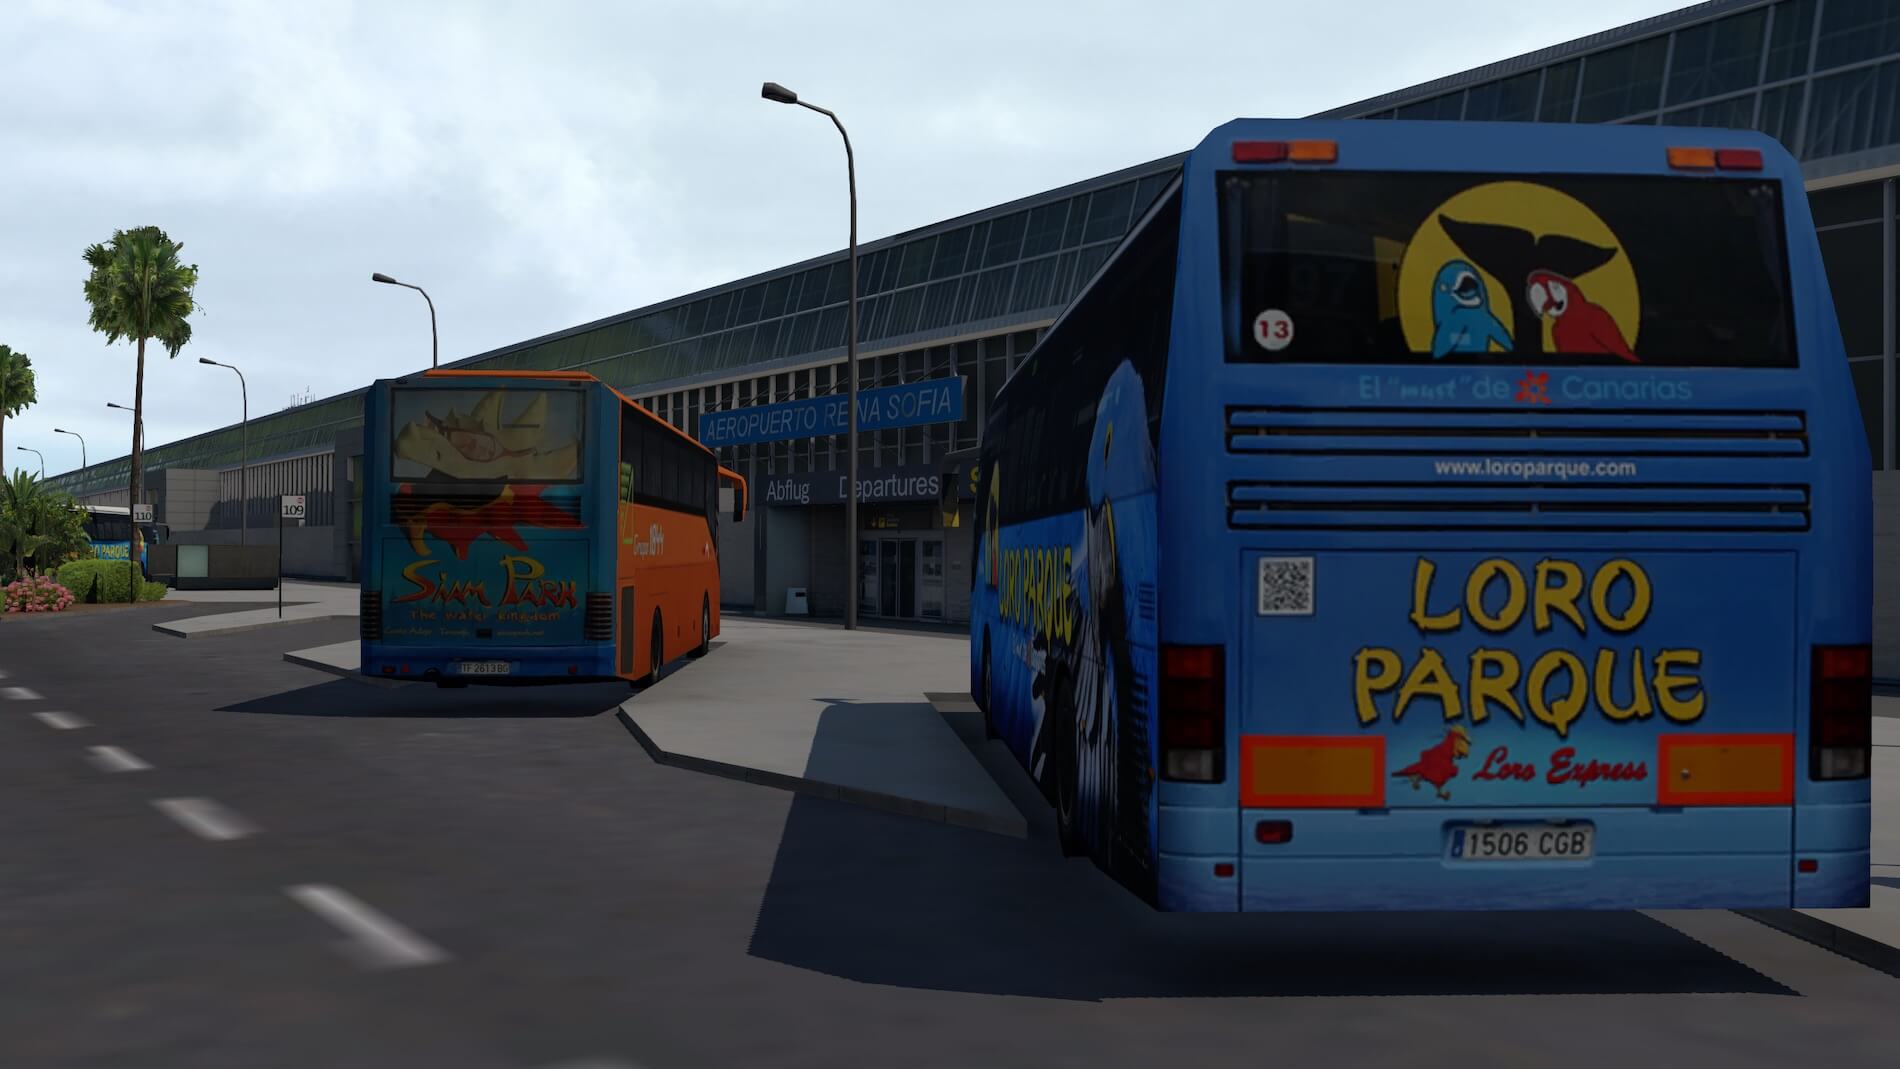
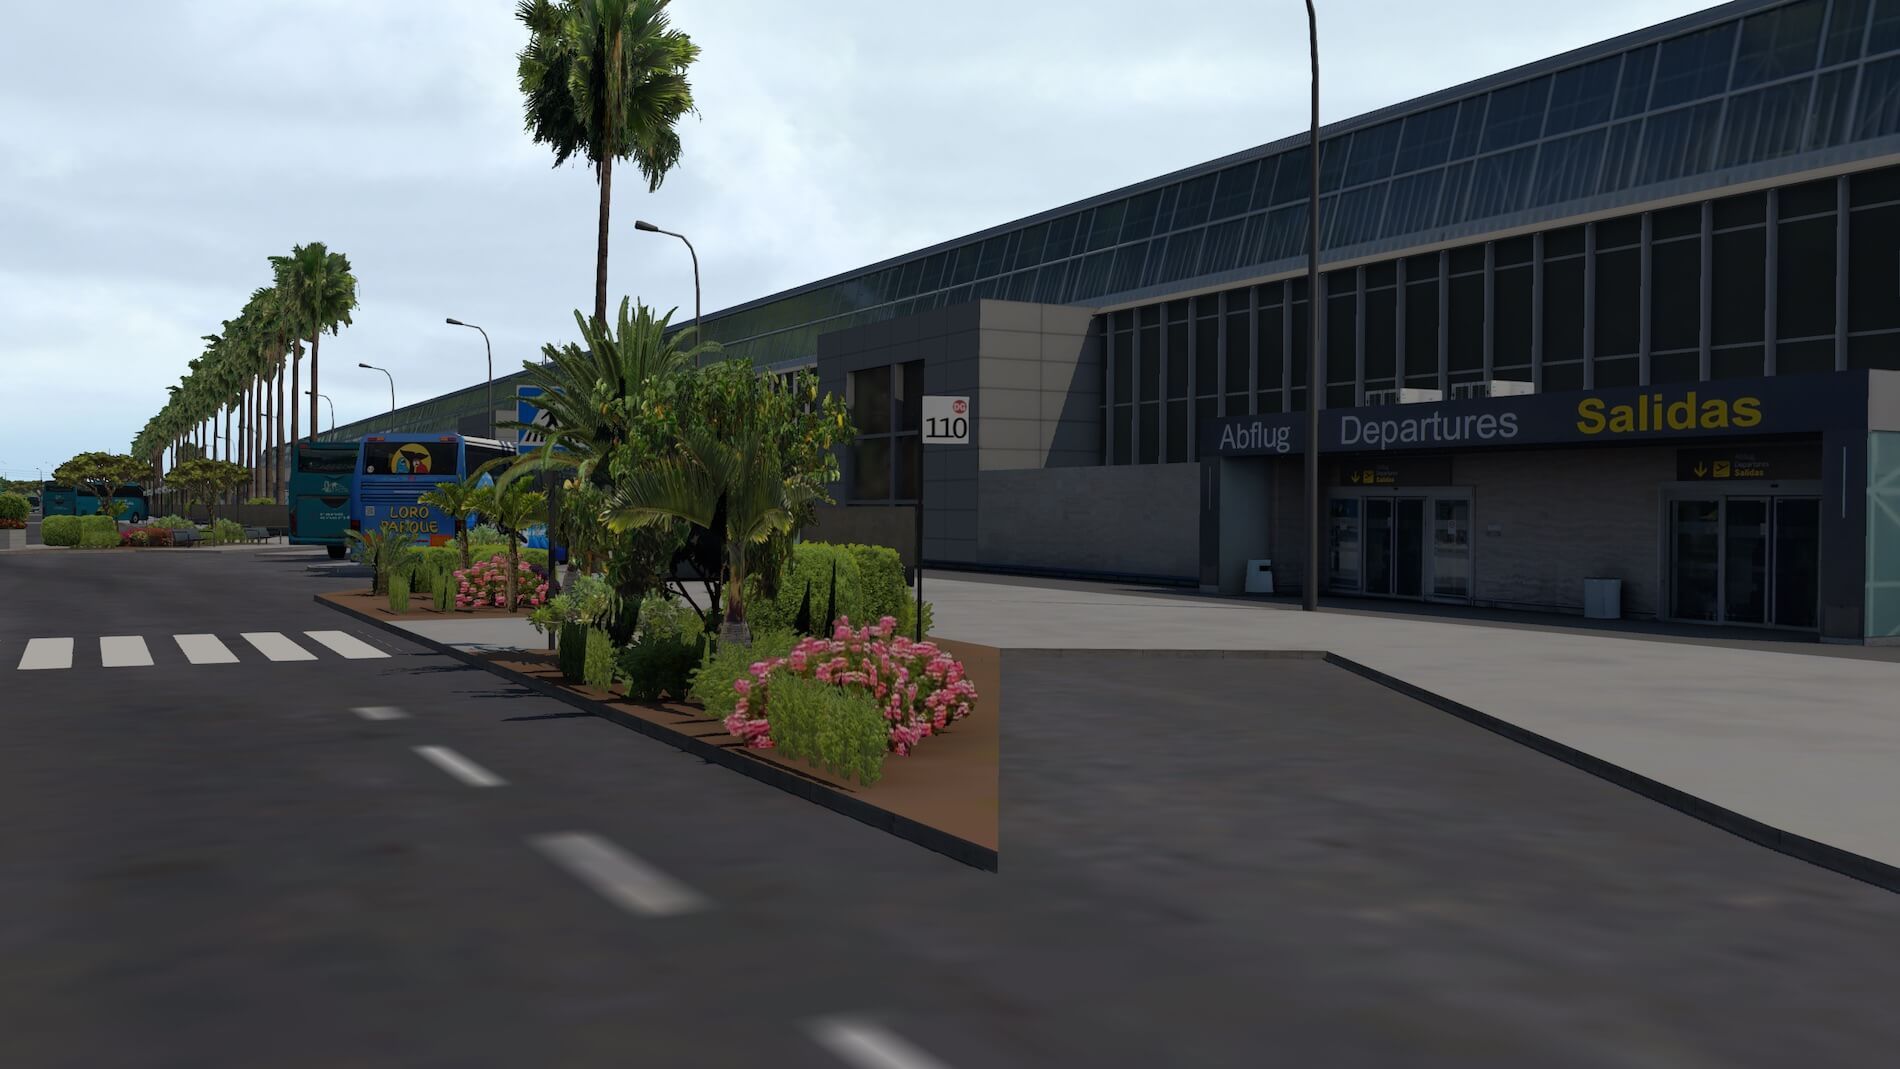
The terminal entrance, the parking lots, parking lots for rentals, the palms and flowers; it’s all there. Besides the presence of a couple of roundabouts, there is one road that enters the terminal via the right, and back to the TF-1 via the left side. In-between the sunshade covered parking lots and the terminal building you’ll find the tourist and local bus places. And if this is not enough, many palms and flowers. It gives the overall a cosy and realistic atmosphere.
The quality of the ground textures are OK although I always would like to see that they are a bit sharper, but at the same time, it depends where you look. Some places like the access road do have razor sharp tarmac textures, while at other places it’s a bit blurry like the roads towards the terminal after I’ve passed the roundabout. Besides that, I see so many objects that it’s even hard for me to study them all. I like the way Digital Design has made the car parking but we shouldn’t forget the bus area. It’s not only full with mostly static buses, but many other objects are modeled too.


As said before, after I parked my car in one of the designated places, I walk along the bus area to the other side of the terminal building. The quality of the textures are nice, half way there’s also a small restaurant which is modeled with great detail. Besides that, I see many flowers, sitting facilities and worth to mention, around the palms brown areas. I think this supposed to be sand or earth and although I had expected a bit more “depth” in it, I feel what the developer had in mind.
At the far end of the terminal where you also have the control tower construction, I see the taxi parking places. Ok, right now there’s no taxi at designated places, but OK.
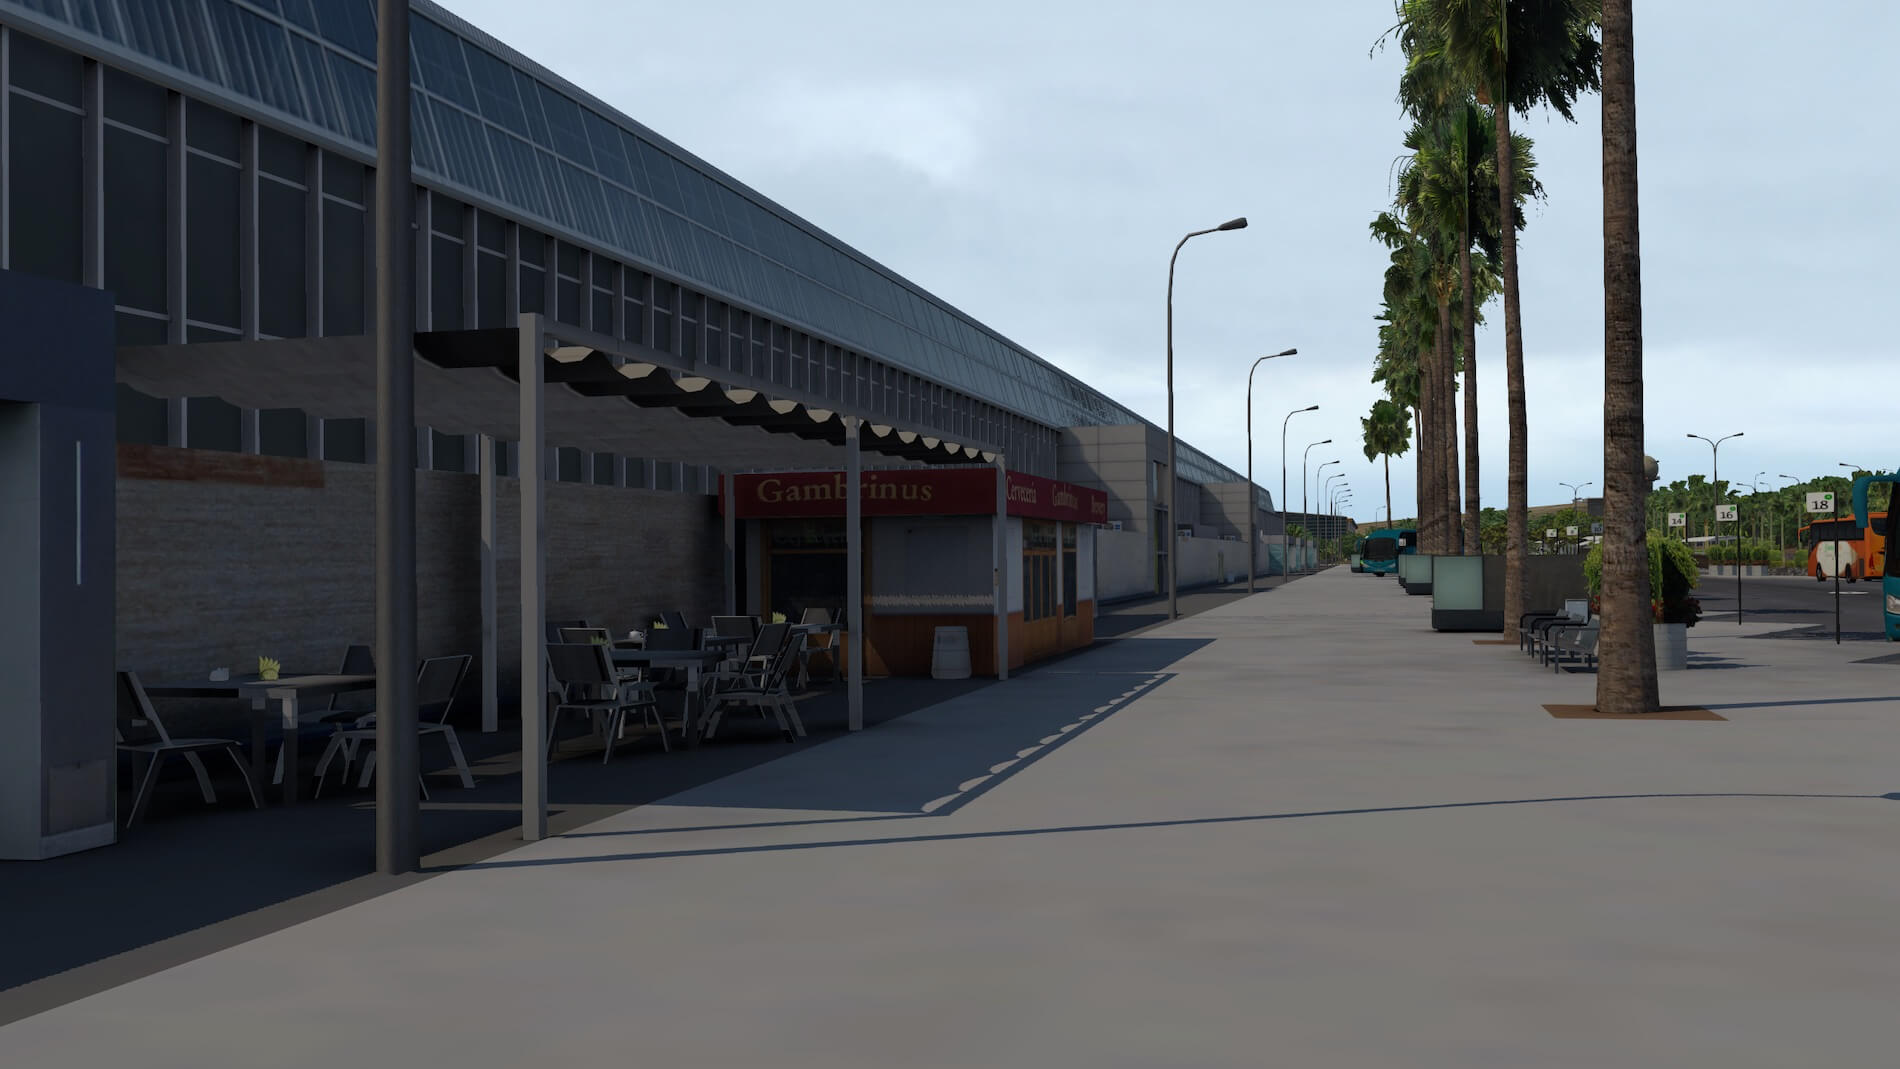


Nearby this area and on the way out of the airport, I see the Disa petrol station and just outside the road area the fuel supply storage tanks. Overall, a nice place to have a quick visit although I prefer to be at the security side of the airport.
Surrounding Modeling
Villages, Golf Resorts and much more
What else can we found to complete the GCTS airport area? I mentioned before in my introduction that Digital Design also modeled the villages of Oasis del Sur, Golf del Sur, Amarilla Golf, El Guincho, but also the terrain area south of the runway with the resorts Los Abrigos, La Mareta, La Tejita and a bit further north El Medano and Arenas del Mar are not forgotten. And it could be that I missed a few other places, but i think this is it. I also made a suggestion since it’s free of charge and worth to download and install it; Tenerife ortho texture from SpainUHD.es. Then Tenerife island and Digital Design GCTS are complete!
A lot of time and effort is put into the creation of these villages, golf resorts, and small harbours. There’s one thing I found and I think I need to get in contact with the developer and that is that at certain locations in the nearby modeled villages, golf resorts and so on, houses are partly floating about the ground. I did several tests with a clean 11.30r3 install, ticked and unticked (just to be sure if it matters) “runways follow terrain contours” and that I had the correct sequence in the scenery_pack.ini file. Neither less, how to pick this up?
I got the following reply from Digital Design “This is a known problem for all developers. Unfortunately there is still no free developers access tool to create, edit or modify mesh. And it causes similar problems. We can not create a scenery mesh that will work perfectly for both the default mesh and own mesh.”
So don’t be surprised when you see floating houses like I did during my coastline walk. There’s a small note I would like to add to the above paragraph. I’m not a scenery developer, but my good friend Marc Leydecker is and according to him it’s possible to solve this problem in different ways. For that, find our Mesh Scenery and X-Plane article at X-Plained.Com, exclusively written by Marc Leydecker.


Other mesh or Ortho4XP packs
In the mean time, let’s find out what else can be found in the surrounding area of GCTS. Since there’s no manual included except for a short text file, it’s basically an easy installation. There are two packages that need to be installed in the custom Scenery folder. The airport package has to be above the mesh package.
Read the installation text carefully because there’s an important sentence included; This scenery is only compatible with X-Plane 11, and NOT compatible with Ortho4XP scenery and 3rd party meshes, but we’re working on it.
This means that ortho scenery packages like the one I suggested from SpainUHD.es could give problems, the same for the AlpilotX.net mesh HD v4 package. Since I like challenges, I like to figure out what happens when I install the SpainUHD.es Tenerife ortho package and the HD v4 AlpilotX mesh. Perhaps not for new simmers, but those who are using X-Plane already for a while do have installed/do use the AlpilotX mesh package(s).
Digital Design Texture Look and Feel ENABLE/DISABLED
This is a interesting and funny part since it shows that a large area and when I say large I mean large, with ortho ground textures are included, besides the airport itself in this Digital Design GCTS. When you have no idea what the Digital Design GCTS all includes, just disable the line in the scenery_pack.ini file for a moment by using the DISABLED command. That said, the specific SCENERY_PACK line in the scenery_pack.ini file will become SCENERY_PACK_DISABLED.
Although it’s also mentioned in the installation text file, the correct order for the Digital Design/JustSim GCTS packages in the scenery_pack.ini file are:
SCENERY_PACK Custom Scenery/GCTS_DigitalDesign_v1.1/
SCENERY_PACK Custom Scenery/GCTS_Mesh_DigitalDesign_v1.0/
In case you have the mesh forgotten, you’ll notice that for example the buses in from of the terminal are almost covered in the ground (only the roofs are visible). Suppose you have the GCTS mesh above the airport package, you won’t see the modeled DD/JustSim airport. So actually, the mesh is loaded first and after that, the airport package is loaded. In other words, everything entry in the scenery_pack.ini file is loaded starting at the frist entry at the bottom, then the entry above till and including the top entry.
Restart X-Plane and you see for yourself what is missing (ground textures and airport) when you have disabled the GCTS_DigitalDesign_v1.1 line which includes the airport itself, all objects, ortho textures, villages, golf resorts, flats, windmills, agriculture areas and so on.
Check out the following comparison screenshots. Not much work to compile them for you, but the outcome is amazing. From the complied screenshots below you see on the left-hand screenshot the Digital Design GCTS scenery pack area – amazing isn’t it – while the right-hand screenshot shows the same spot, but from the default X-Plane Tenerife.


Clearly visible with the northern situated screenshot (s) thus north of the airport, is that this is also the area where the Digital Design ortho textures stops. It is possible to add the SpainUHD.es Tenerife ortho texture pack in the Custom Scenery. I tried it and could not see any problems, but suppose you do that, you’re warned by Digital Design that they are working on a solution.
In other words, you and I need to wait for an official update where it’s no longer a problem to use Ortho4XP and AlpilotX mesh packages, but what said before, feel free to try it out yourself. I tried it and couldn’t find a problem with either the ortho package or the mesh.
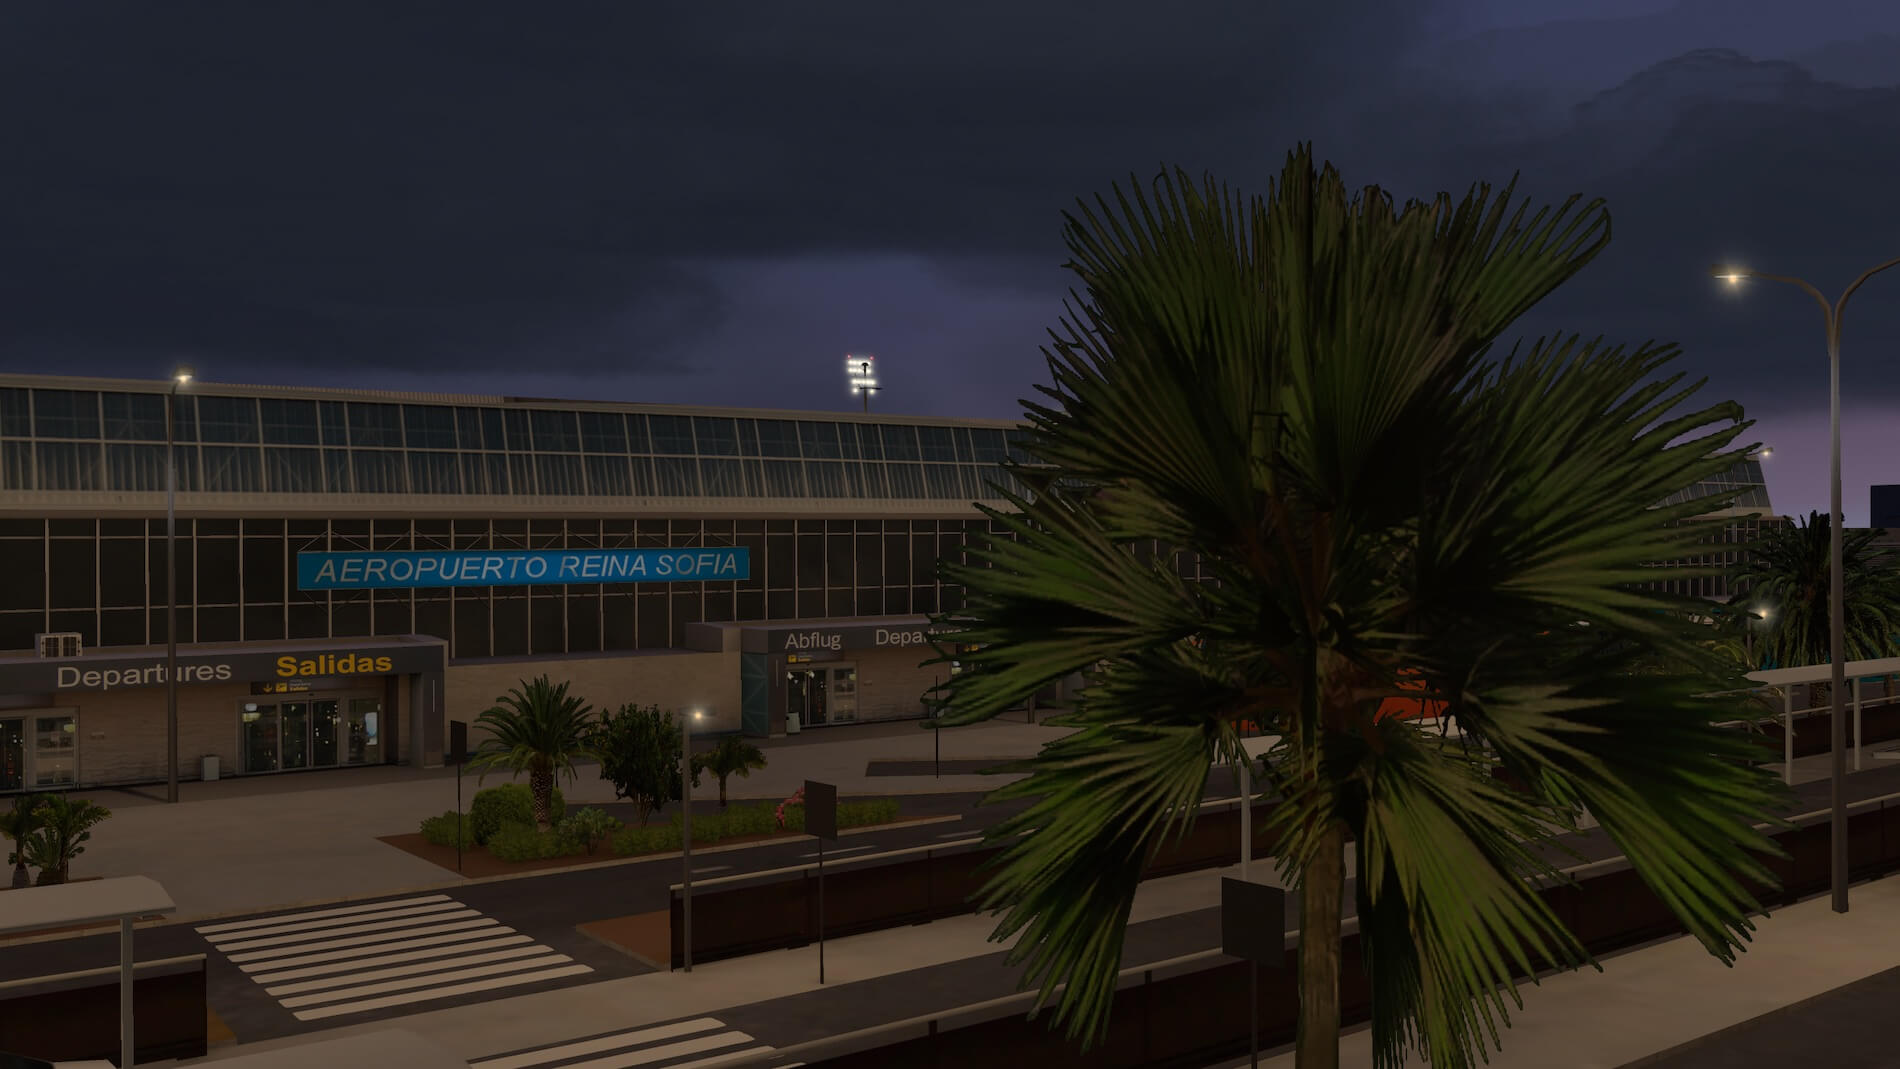
Evening Approach
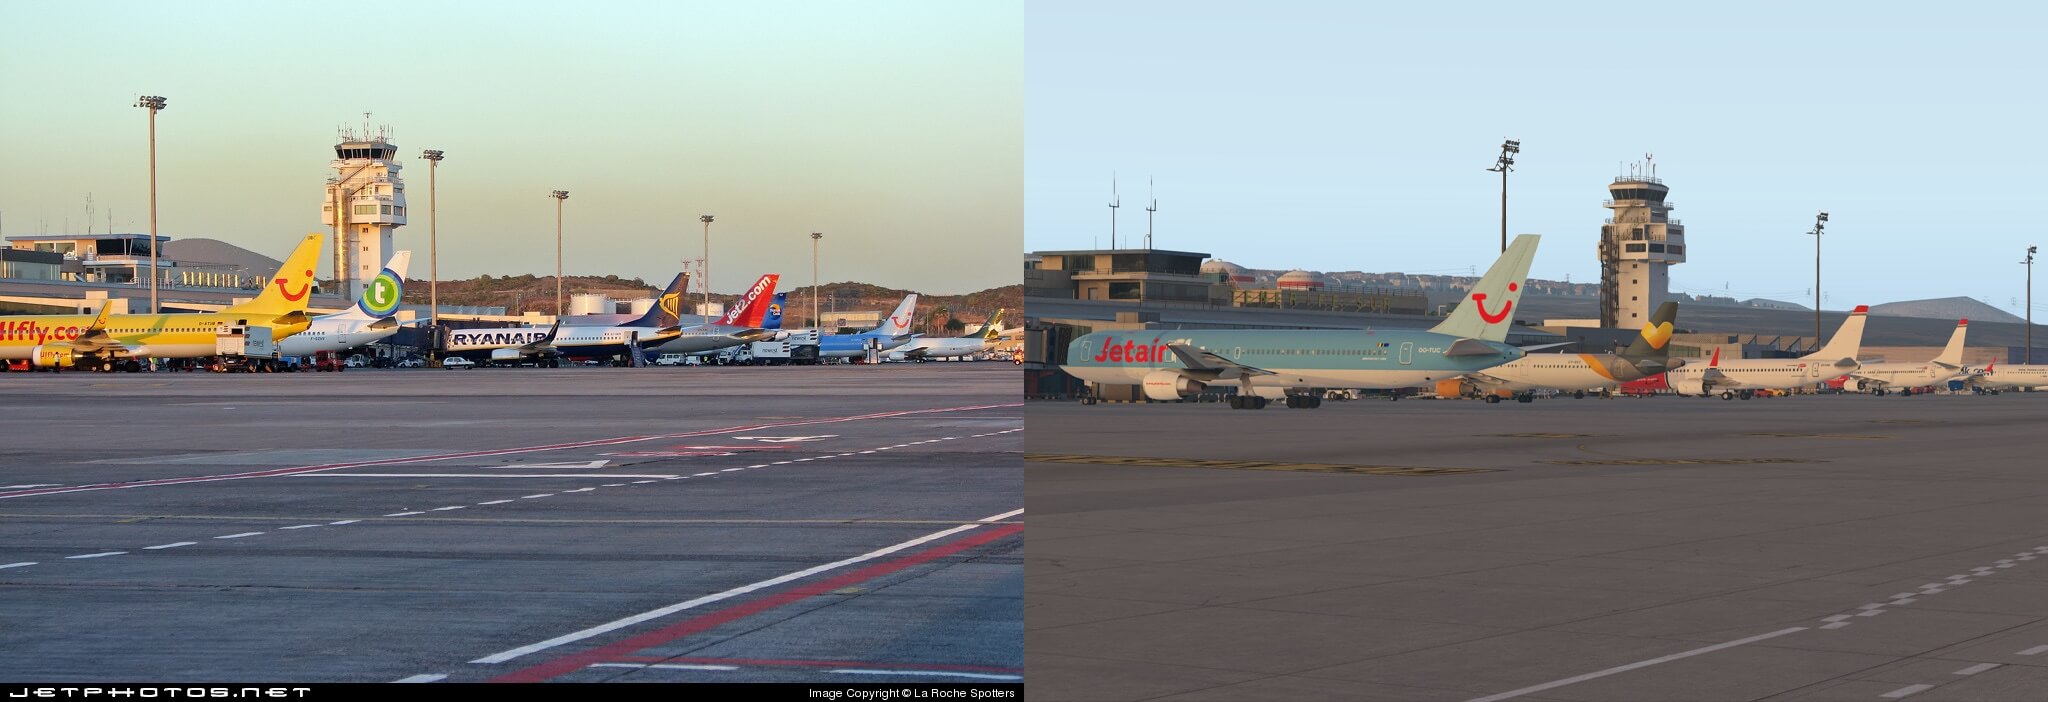
During the many hours I’ve flown to and from GCTS, I’ve seen the airport in the early morning, during daytime and during sunset. Whatever time of the day it was, I liked the sunset and sunrise moments a lot. Not because of the surrounding illumination, but also the way the airport apron is illuminated as well as the public area.
Perhaps it’s not a difficult job for a developer which and how to illuminate objects, but comparing the real illumination with the Digital Design lighting tells me that it’s quite realistic. Want to see it with your own eyes? Check out the following screenshots.


Summary
Did I cover everything of Digital Design’s GCTS? I hope so because the more I look around, the more I see and sometimes I think; “I haven’t seen that before?” and then I think “It’s a much bigger area then initially thought” and so on.
I found it worth my time to review this airport. Ok, I’ve seen a couple of small glitches, but I assume Digital Design/JustSim comes with an update that solved this. The airport itself is well-modeled with eye for details and we should not forget that a huge area around the airport is modeled too. Not only with the use of ortho ground textures, but also many villages, resorts, vegetation, modern wind mills and so on. I’ve seen and reviewed many airports, but I have to be honest that Digital Design GCTS did a great job.
As said before, the review is based on Digital Design GCTS package version 1.1 (mesh 1.0). I used X-Plane 11.26r2, but moved later to X-Plane 11.30r3. All the screenshots you see in this review unless specifically noted, are made without the ortho textures from SpainUHD.es Tenerife and also without the AlpilotX v4 mesh package.
Digital Design doesn’t have a website, but they have a Facebook page, but I would suggest that you move directly to the dedicated Digital Design GCTS X-Plane.Org store page that offers you additional background information as well as screenshots. As of this writing, January 24th 2019, Digital Design GCTS cost you 21.50 USD which is a nice price for what you get. I’m looking forward to another update that solves a couple of issues and then, I’m very happy.
Regarding a possible update I had a Skype chat with Andrey. I asked Andrey if we can expect an update of the package and the compatibility with Ortho4XP and AlpilotX packages. Andrey replied as follows; “While there is no official tool from Ben and Steve to edit the mesh, we can not guarantee the compatibility of our product with third-party add-ons.”
I also asked Andrey who is from JustSim about how we have to see Digital Design (DD) versus JustSim. Andrey came up with the following; “Eugene from DD is the developer of the 3D modeling (objects) and we (JustySim) make the adaptation and porting of these models/objects compatible for X-Plane 11. We also create all ground polygons, markings, concrete asphalt, etc. We are also able to fix the mesh if possible, so that you can correctly position the objects as it supposed to be.”
In case you’re looking for all the necessary charts unless you have a full account with Navigraph, else you can download them via this link.
Feel free to contact me if you’ve got additional questions related to this impression. You can reach me via email Angelique.van.Campen@gmail.com or to Angelique@X-Plained.com.
With Greetings,
Angelique van Campen
| Add-on: | Payware Digital Design/JustSim |
|---|---|
| Publisher | Developer: | X-Plane.Org | Digital Design/JustSim |
| Description: | Realistic rendition of Tenerife Sur Airport (GCTS) |
| Software Source / Size: | Download / Approximately 1.6GB (unzipped) |
| Reviewed by: | Angelique van Campen |
| Published: | January 27th 2019 |
| Hardware specifications: | - iMac Pro - Intel 3GHz Intel Xeon W / 4.5Ghz - Radeon Pro Vega 64 16368 MB - 64 GB 2666 MHz DDR4 - 1 internal shared 1TB SSD (Big Sur 11.x) - 1 internal shared 1TB SSD (Bootcamp Windows 10) - 1 external 2TB LaCie Rugged Pro SSD (Big Sur 11.x) - Saitek Pro Flight System X-52 Pro and X-56 Rhino - Honeycomb Alpha Flight Controls - Honeycomb Bravo Throttle Quadrant |
| Software specifications: | - macOS Big Sur (10.15.x) - X-Plane 11.5x |
2 Comments
Submit a Comment
You must be logged in to post a comment.
Amazingly detailed review as always Angelique, appreciate the time taken to show the details of the package. This must have been a massive project to get all the detailed modeling done so well. Cheers – Jon
This looks really good and your review is excellent as always.