 At X-Plained.com we’re pleased to offer you part 2 of Marc Leydecker (Belga12345) his Saitek FIP (Flight Instrument Panel) adventure.
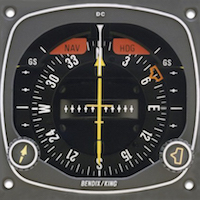
This time Marc. Starts with “A picture tells a thousand words …. The screenshots used in this part2 tutorial are of a Bendix King KI-525A flight instrument. The whole idea of this picture and the tutorial is to cut it into pieces to create the moving parts for our FIP gauge.”
And Marc continues “The gauge housing. The 2 knobs have been removed and using several masking techniques, the area has been cloned. Note that 100% black will become transparent.”
You can download, only for registered X-Plained members, tutorial part 2, right here. As mentioned before in this post and in previous related Saitek FIP posts from Marc, part 2 deals with the instrument and how to handle all the individual parts, but there’s more to come … the programming! Fro now … enjoy this tutorial!


