Welcome On-board the Carenado Beechcraft B1900D
Please Fasten Your Seatbelt
Ladies and Gentleman, welcome on-board our brand new Beechcraft B1900D. We’re pleased to inform you that this brand new aircraft is developed and produced by the Carenado team. We hope you have a pleasant flight with us. We will keep you informed about any issues on this flight and our expected landing time at Auckland International Airport.
As virtual B1900D co-pilot I’m pleased to offer you all the information about this Carenado aircraft. Although you just jumped in this review while I’m flying somewhere along the route from NZCH (Christchurch International Airport) to NZAA (Auckland International Airport), you will get all the relevant information about this high quality Beechcraft B1900D.

Yes, you’re right … this time a total different approach in starting a review of a complex GA aircraft. The review is based on version 3.2. I would say, please take a seat in the well-modeled virtual cabin and join me on my and your virtual NZ adventure. I could start telling you that the Carenado B1900D looks awesome, gorgeous, but that doesn’t help you to understand what I have seen, so let’s go a little deeper into the necessary details.
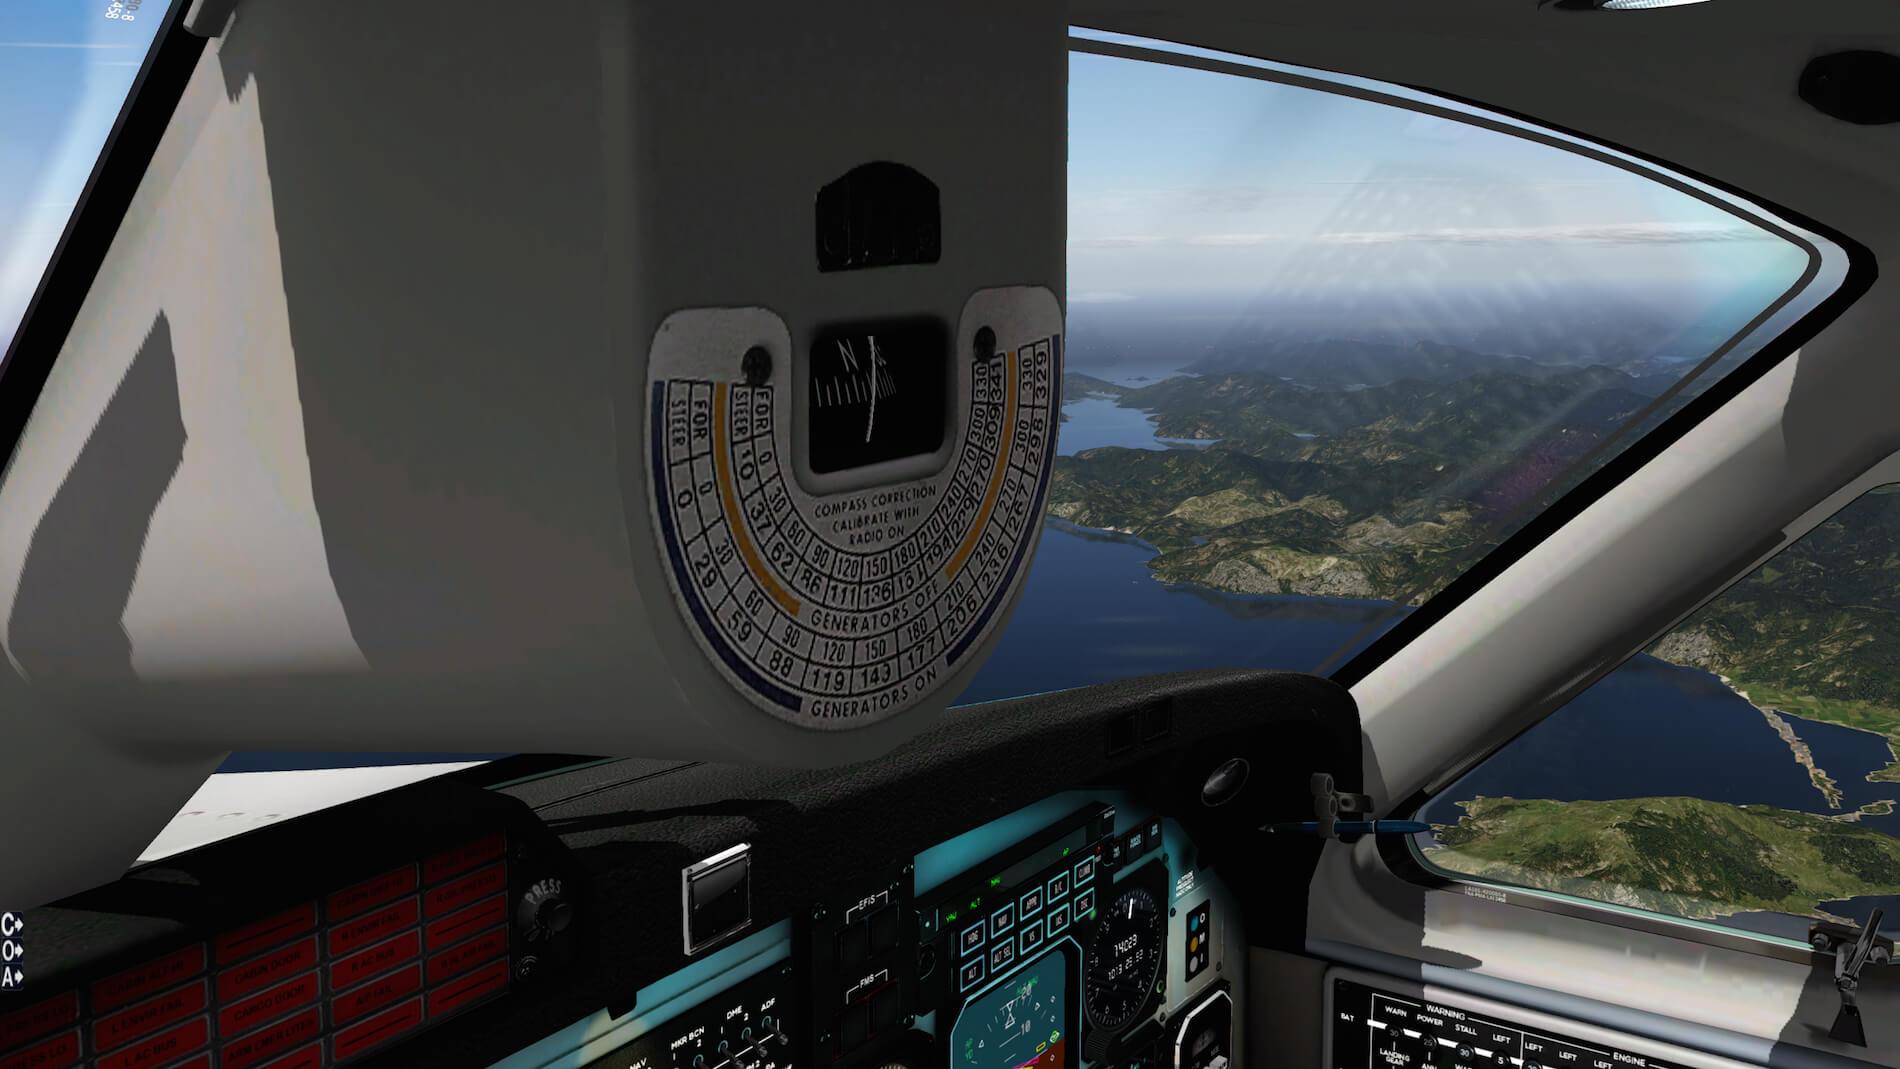
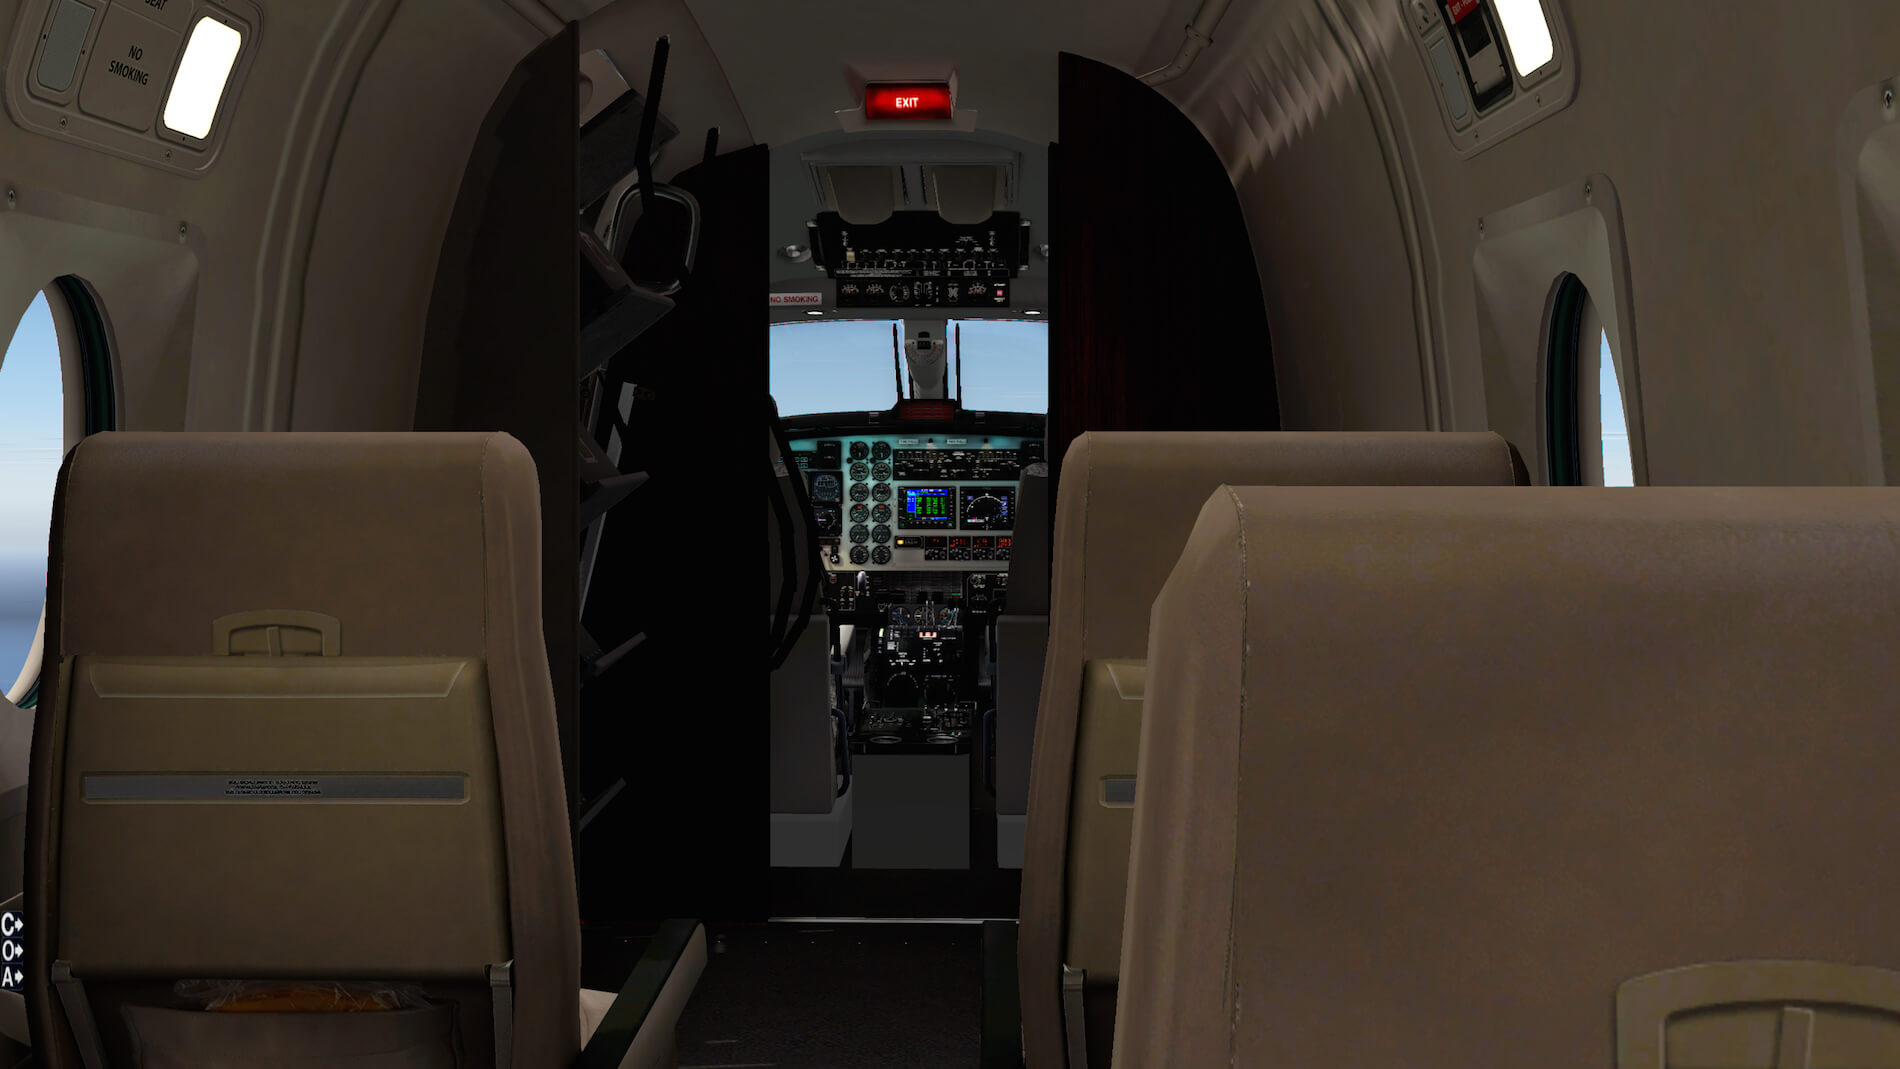
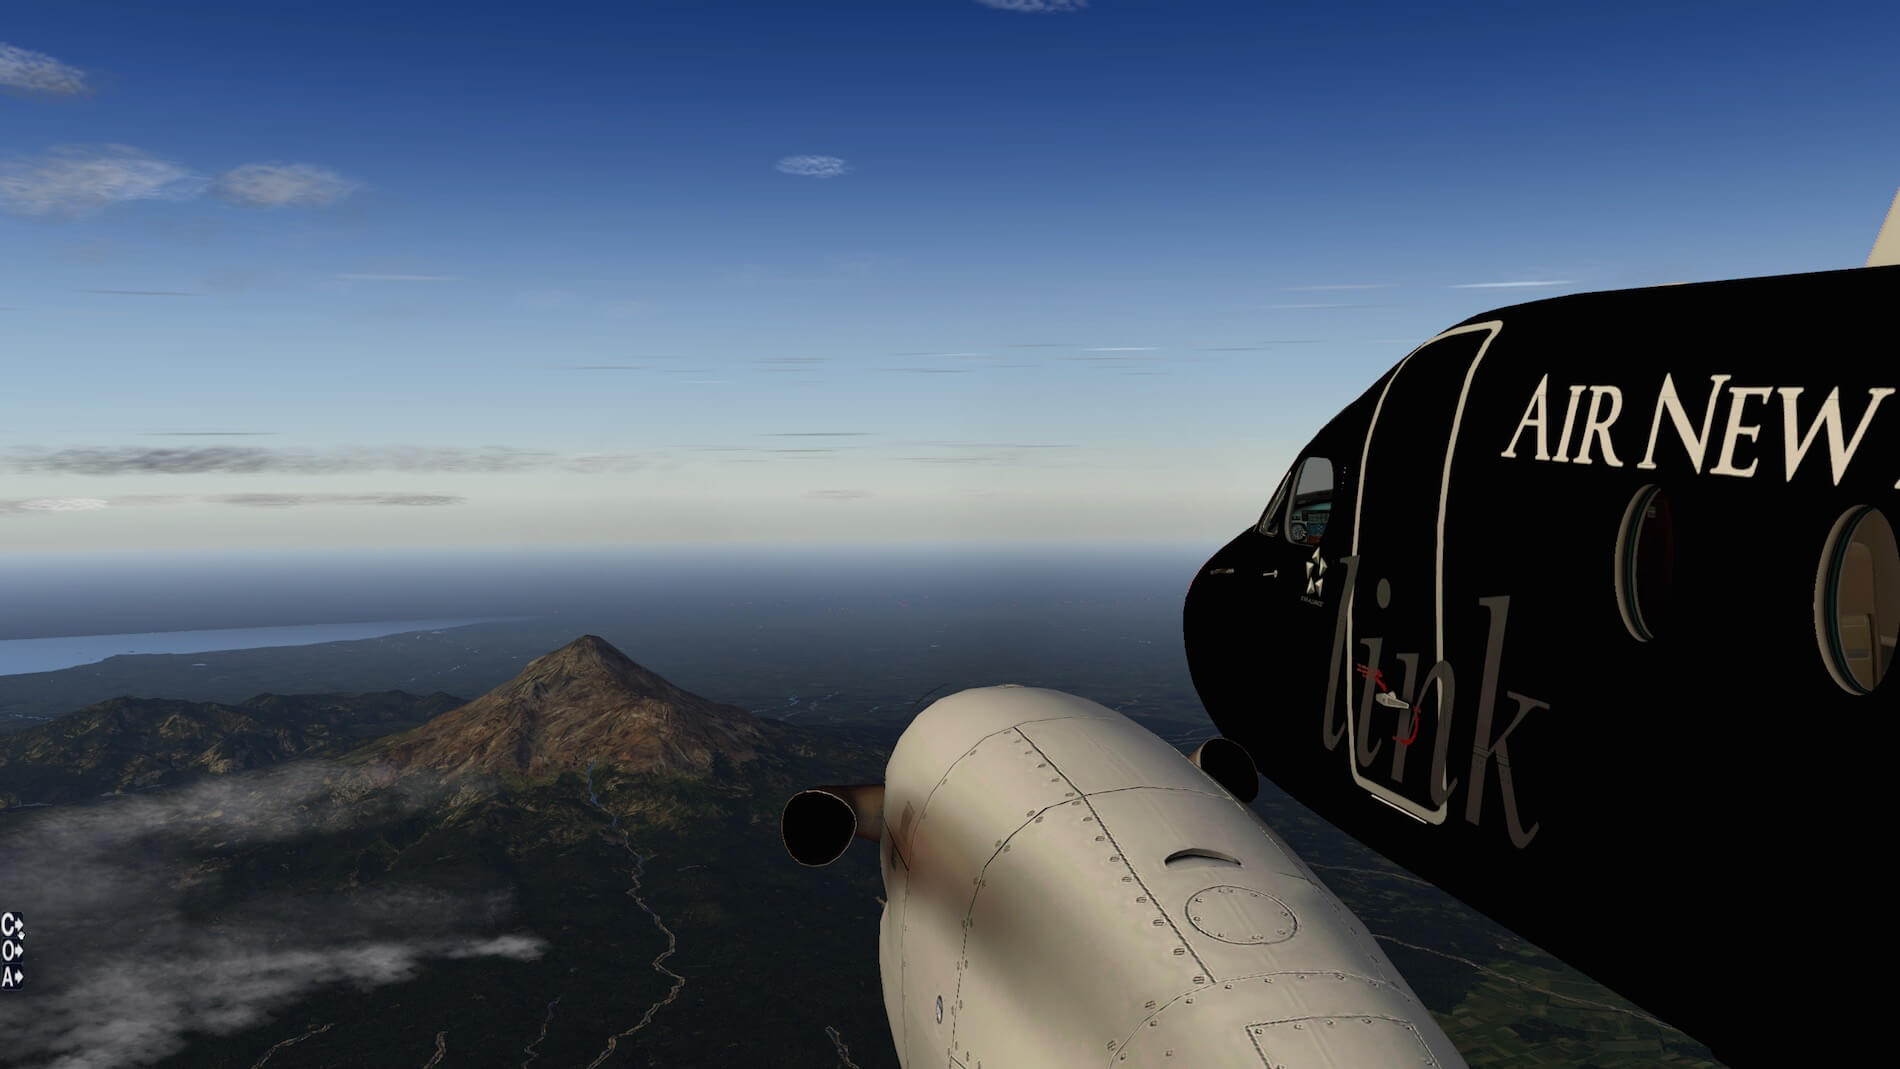
Sitting in the virtual cabin and enjoying the outside view is fun. Of course, it depends a little bit where you sit, but overall, you’ve got a good view of what’s out there and how the cabin is modeled. The cabin is modeled with an eye for many details ranging from the seats, the carpet, your life vest, the cabin lighting, the “no-smoking” and “fasten seat belt” signs, the ceiling and others.
As I already said, the external view via the cabin windows is great unless you’re sitting on top of the wing. On the other hand, it’s not a huge wing that blocks all the external view from you, so even in this location, you can still see something from the ground. At the forward end of the virtual cabin you’ll find on your left hand side the passenger door with built-in stair and via the cabin/cockpit sliding doors, you enter the well-modeled cockpit, but more about that later.
There is, at the far end of the virtual cabin hidden behind a wall, but not reachable right now in flight, the baggage area. This area is only accessible via the left hand cargo door and thus only during ground operations.
NZCH – NZAA Flight Impression – Part I
Introduction
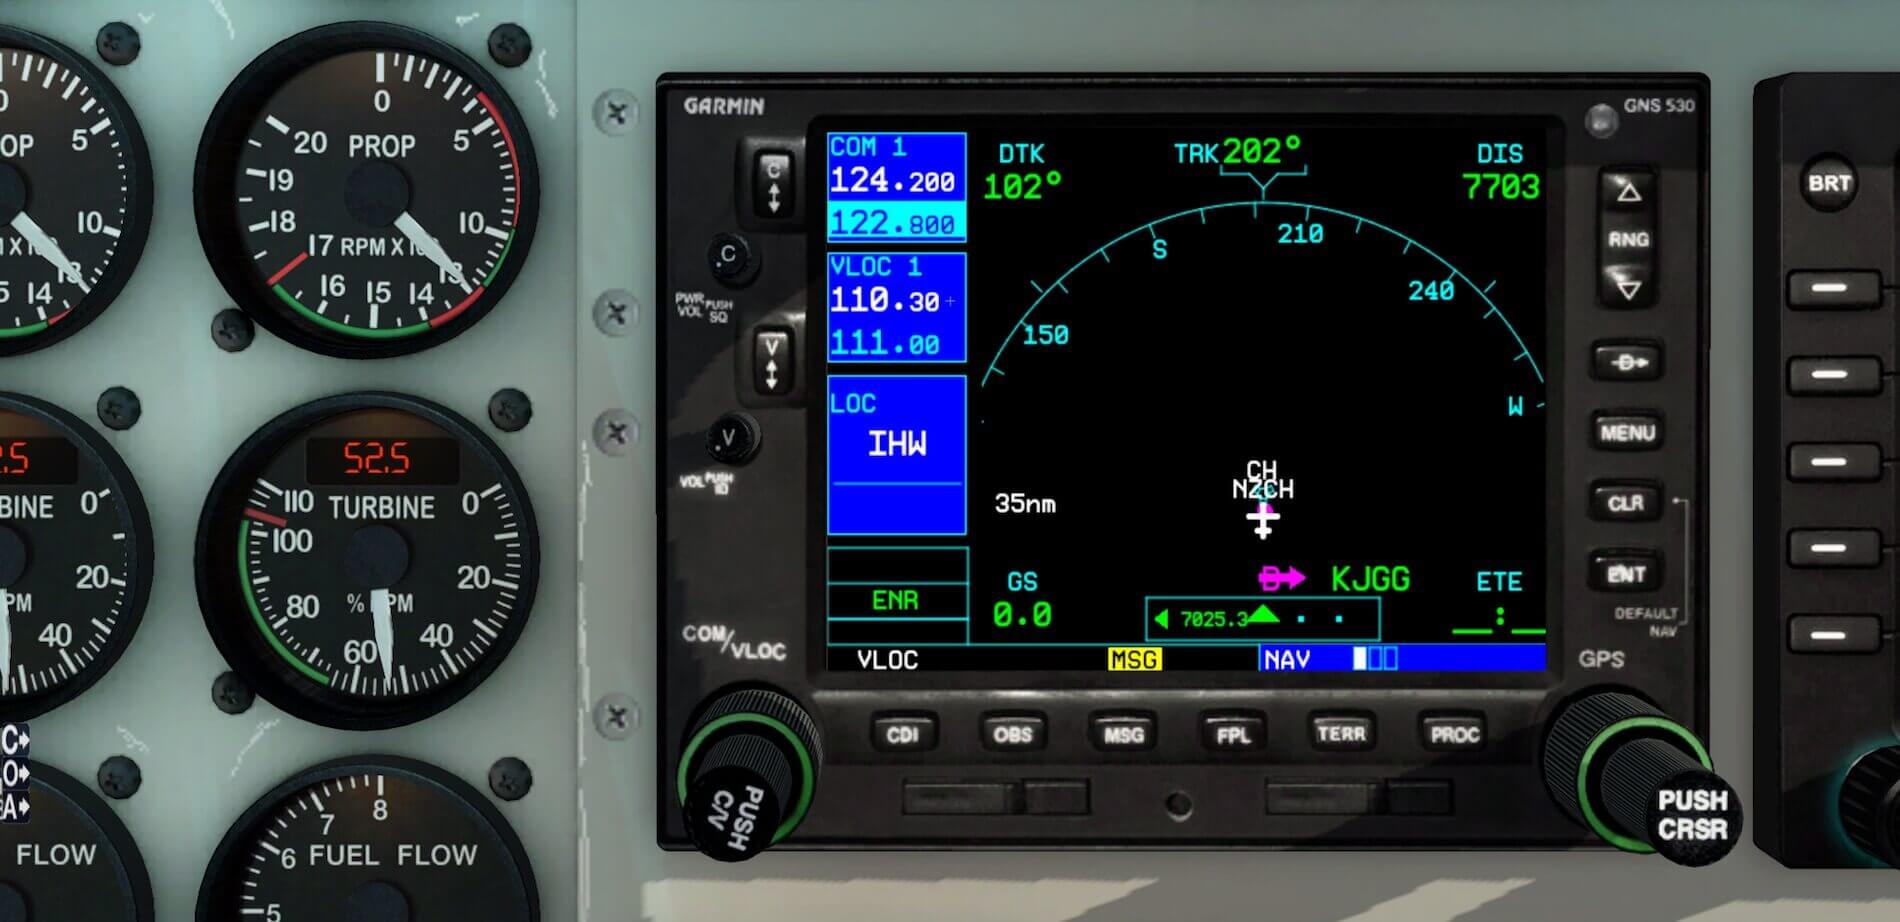
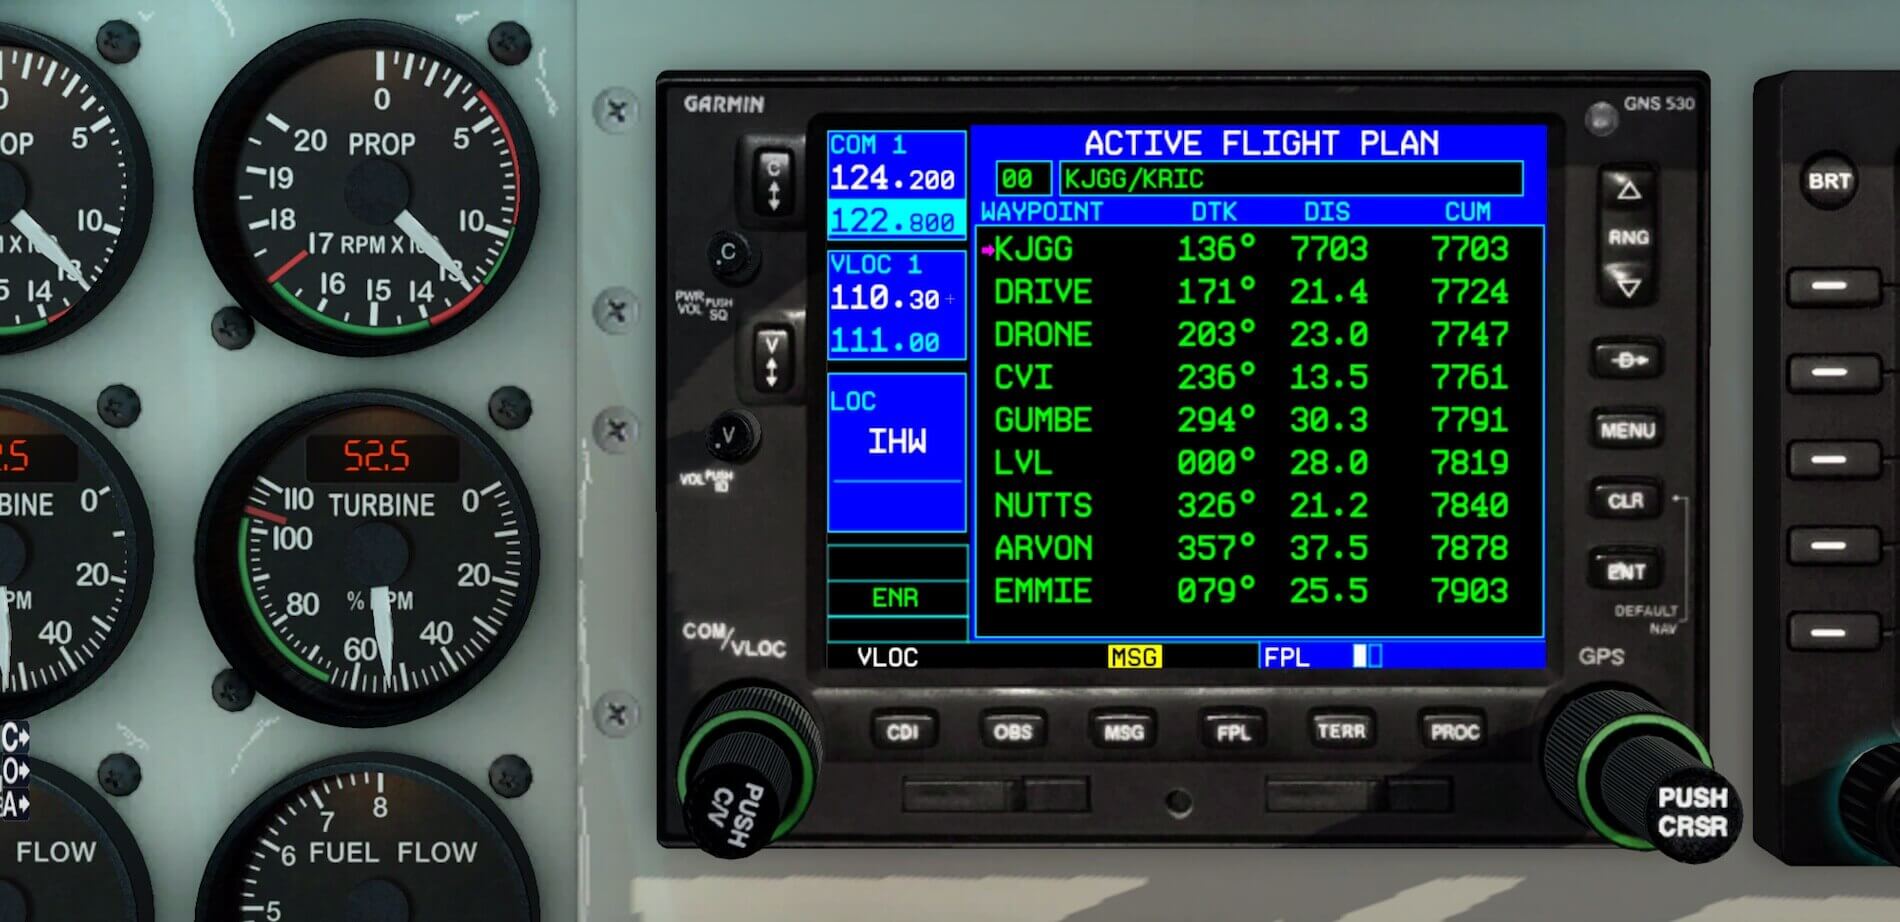
As said before, I’ve invited you on this NZ continental flight with the idea of offering you a thorough view of the Carenado B1900D. Although the modeled B1900D cockpit isn’t the most modern cockpit with large TFTs or old-fashioned CRT DUs (Display Unit), this B1900D still offers EFIS (Electronic Flight Instrument System) indicators namely the EHSI (Electronic Horizontal Indicator) and the EADI (Electronic Attitude Director Indicator). In addition there is a relatively basic Autopilot, an EVSI (Electronic Vertical Speed Indicator with TCAS), a Garmin GNS 530 and a FlightMax Avidyne DU.
That said, the B1900D doesn’t come with a FMS CDU (Flight Management System Control Display Unit) as in, for example, Boeing and Airbus aircraft. Instead, it uses for navigation the default X-Plane Garmin GNS 530 which is, after it was upgraded by Laminar Research, a great and useful add-on – however, a good manual would be welcome for some of us. Talking about the supplied Carenado manuals …….
Manuals
In the B1900D aircraft folder you’ll find a sub folder named “DOCUMENTATION” with the following Acrobat manuals:
– B1900 EFIS
– B1900D Emergency Procedures
– B1900D Normal Procedures
– B1900D Performance Tables
– Credits
– Electronic VSI and TCAS
– Recommended Settings
– Version history text document.
Ok, let’s highlight some of the included manuals. The two procedure manuals (emergency and normal) and the performance tables don’t need any further explanation. These are the minimum needed to understand and to be able to fly the B1900D. The credits manual is self-explanatory as well as the “recommended settings” document although this doesn’t offer the overview of X-Plane 10.51, but from a previous version.
Attention goes then to the EFIS and electronic VSI with TCAS indicators manuals. Although both manuals aren’t thick study books, they offer all the necessary information needed to use EFIS and the Auto Pilot as well as to understand the EVSI. By the way, the B1900 has been updated to version 3.2. This product version only works with X-Plane 10.51 and not with X-Plane 11. You can give it a try to see what happens with X-Plane 11, but Carenado and I don’t guarantee anything.
But what about the FlightMax Avidyne DU manual? It must be noted that not all functions are operational. For those indications, settings, selections that aren’t explained, although the DU is partly self-explanatory, it was a good idea to include a small manual. I’m aware this is my personal opinion, but that’s also the idea of reviewing a product.
This is, in some way, also applicable for the Garmin GNS 530, but let’s be honest, this is not the responsibility of Carenado. The Garmin GNS 530 is designed by Laminar Research and developers can use it freely in their aircraft as additional navigation tool.
What I personally miss, and in particular for those who aren’t familiar with the B1900D, is a kind of overview manual of all the instrument and switching panels with their name and if possible, their function. The normal procedure manual is nice, but it’s so much text and not always easy to find the location of a switch, knob or pushbutton. In case you’re looking for the “NO SMOKING” and “FASTEN SEAT BELT” switches, no need to look any further. It isn’t modeled. Hopefully this issue and perhaps other fixes and/or improvements I haven’t noticed, will be added later with a service pack or patch.
The Flight Plan
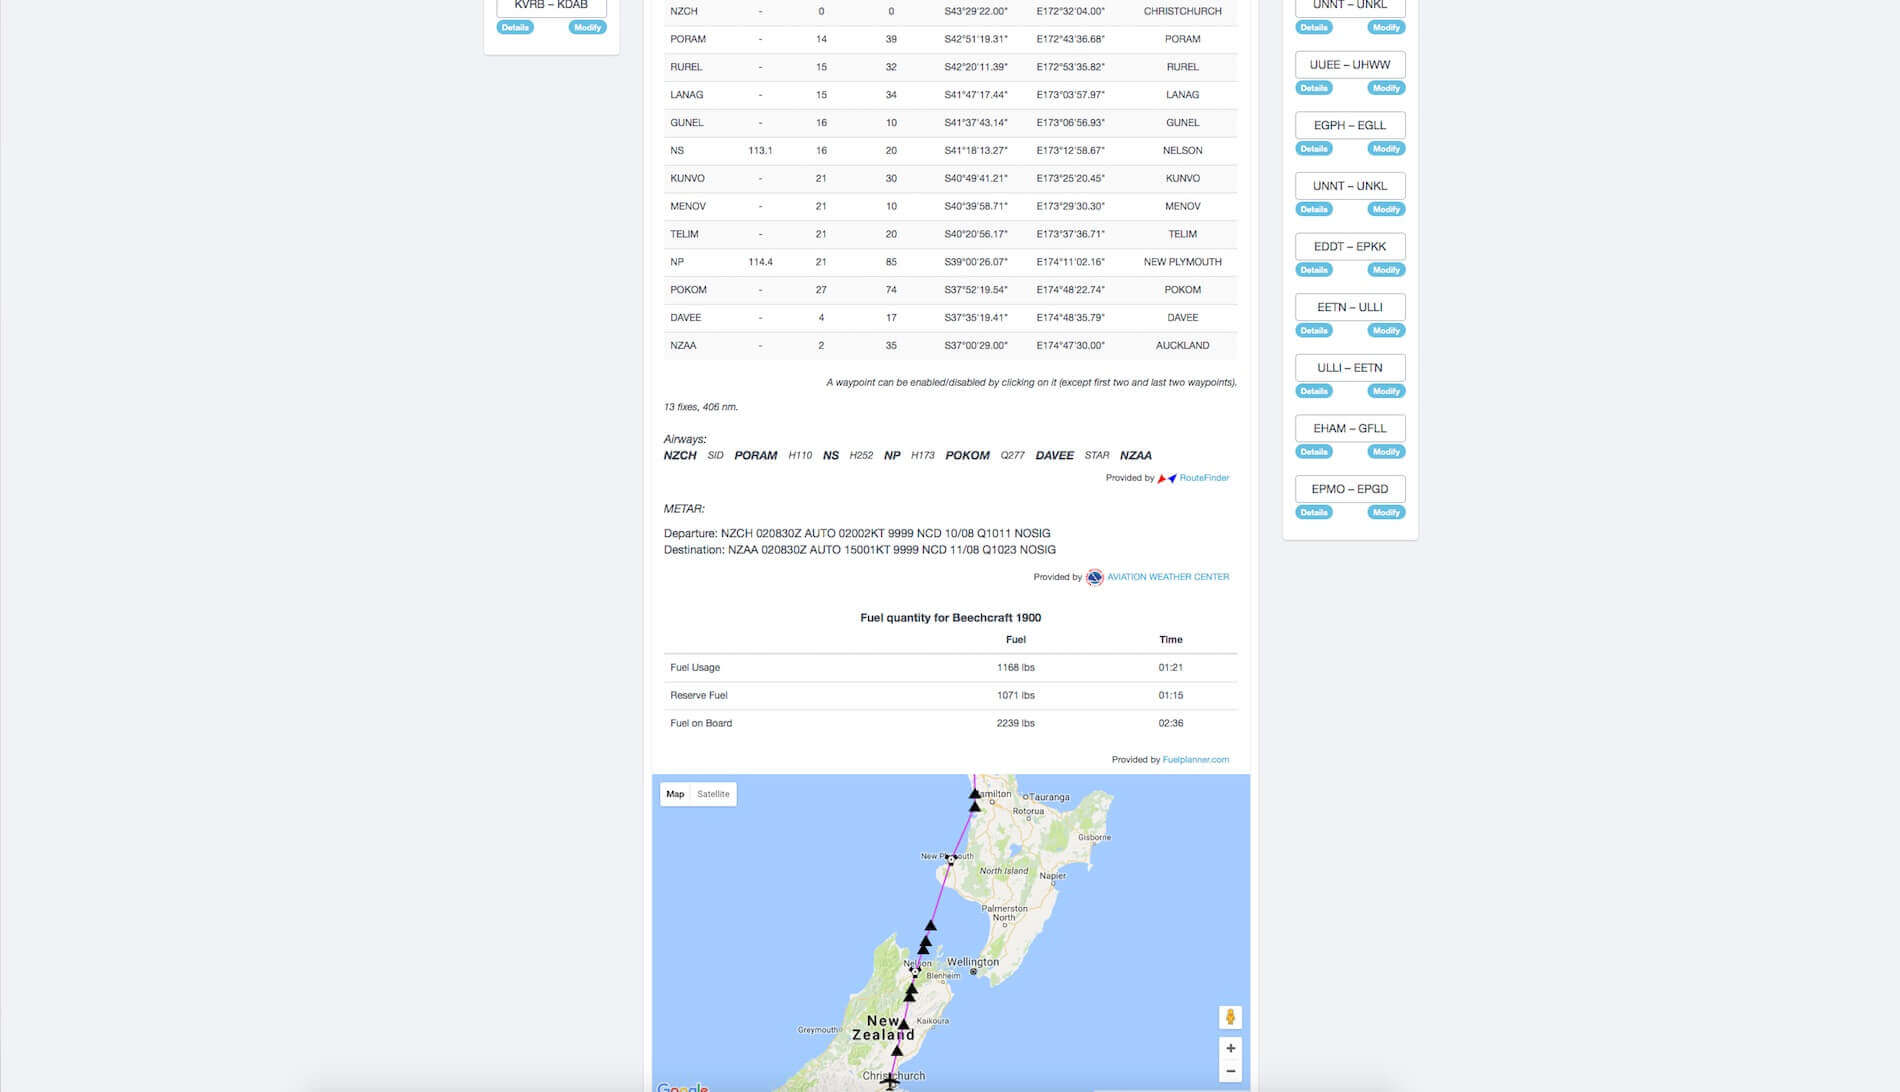
Although this may be a short flight of a little more then 300 nm, it’s always a good idea to create a flight plan (fms format is a requirement), and moreover to play around with the Garmin GNS 530 during the flight. Therefore, I would like to tell you how I created this “fms” format flight plan.
To create a flight plan you could use many programs, but let me highlight a couple of freeware possibilities. Let me start with Routefinder which offers you quickly a flight plan, but this is not in “X-Plane fms” format. If you don’t like Routefinder, you could check out FlightAware, but again, this doesn’t allow you to export it to an fms file format; however, it offers real flight plans. Another very interesting website is simBrief. Register for free and a wealth of flight planning information becomes available.
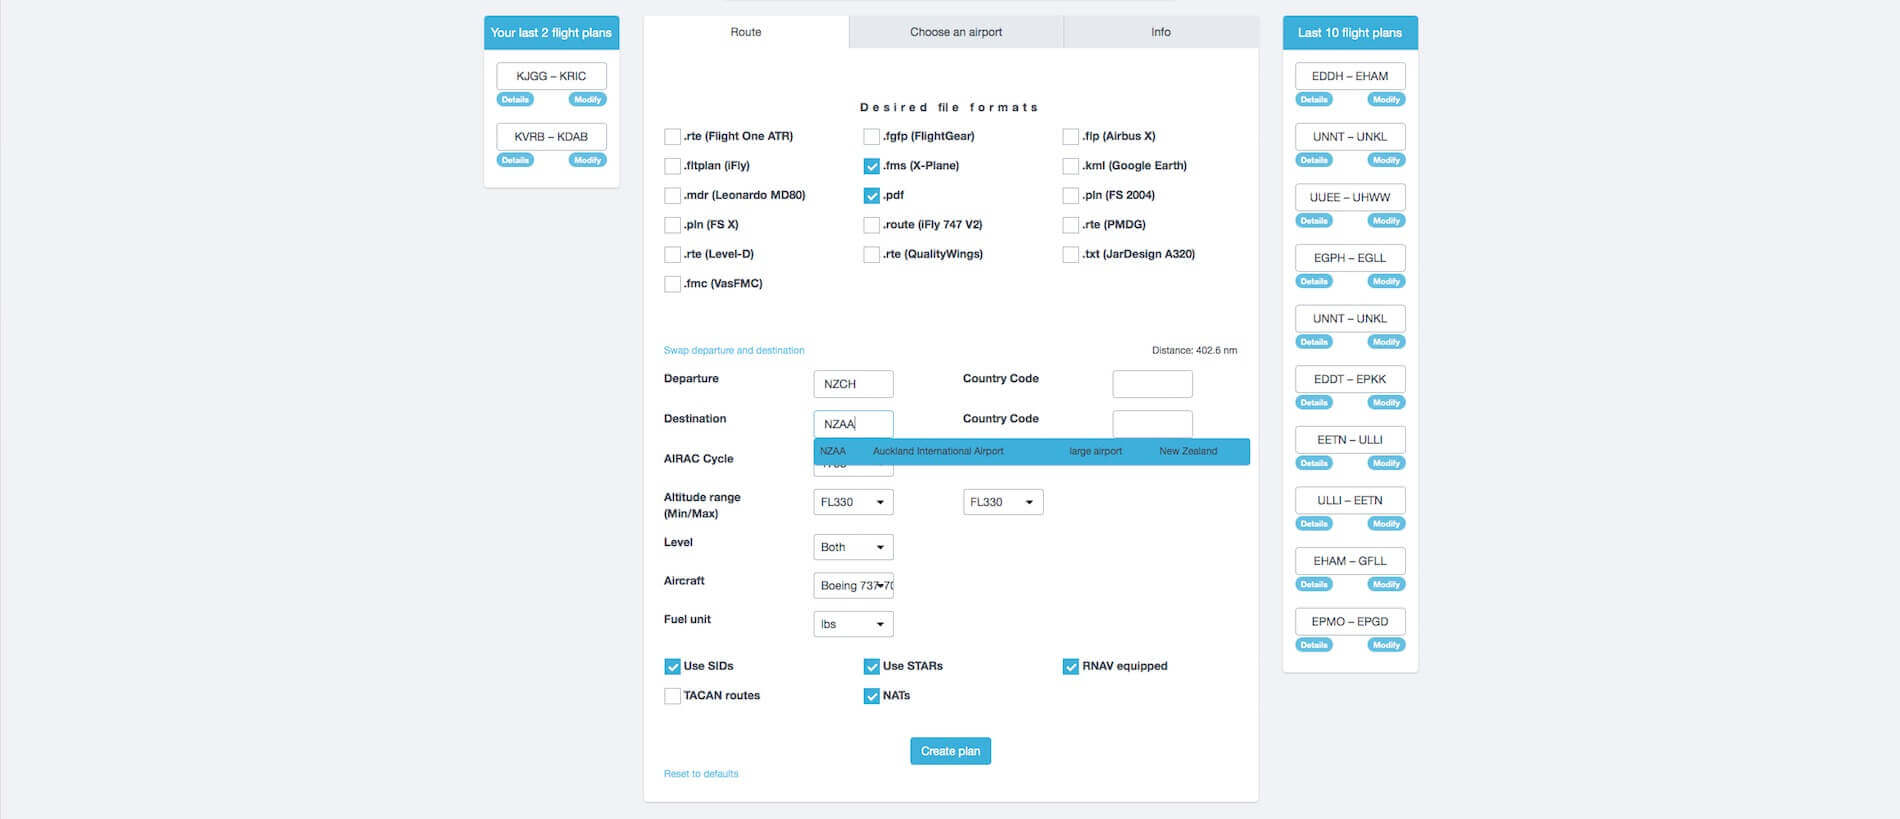
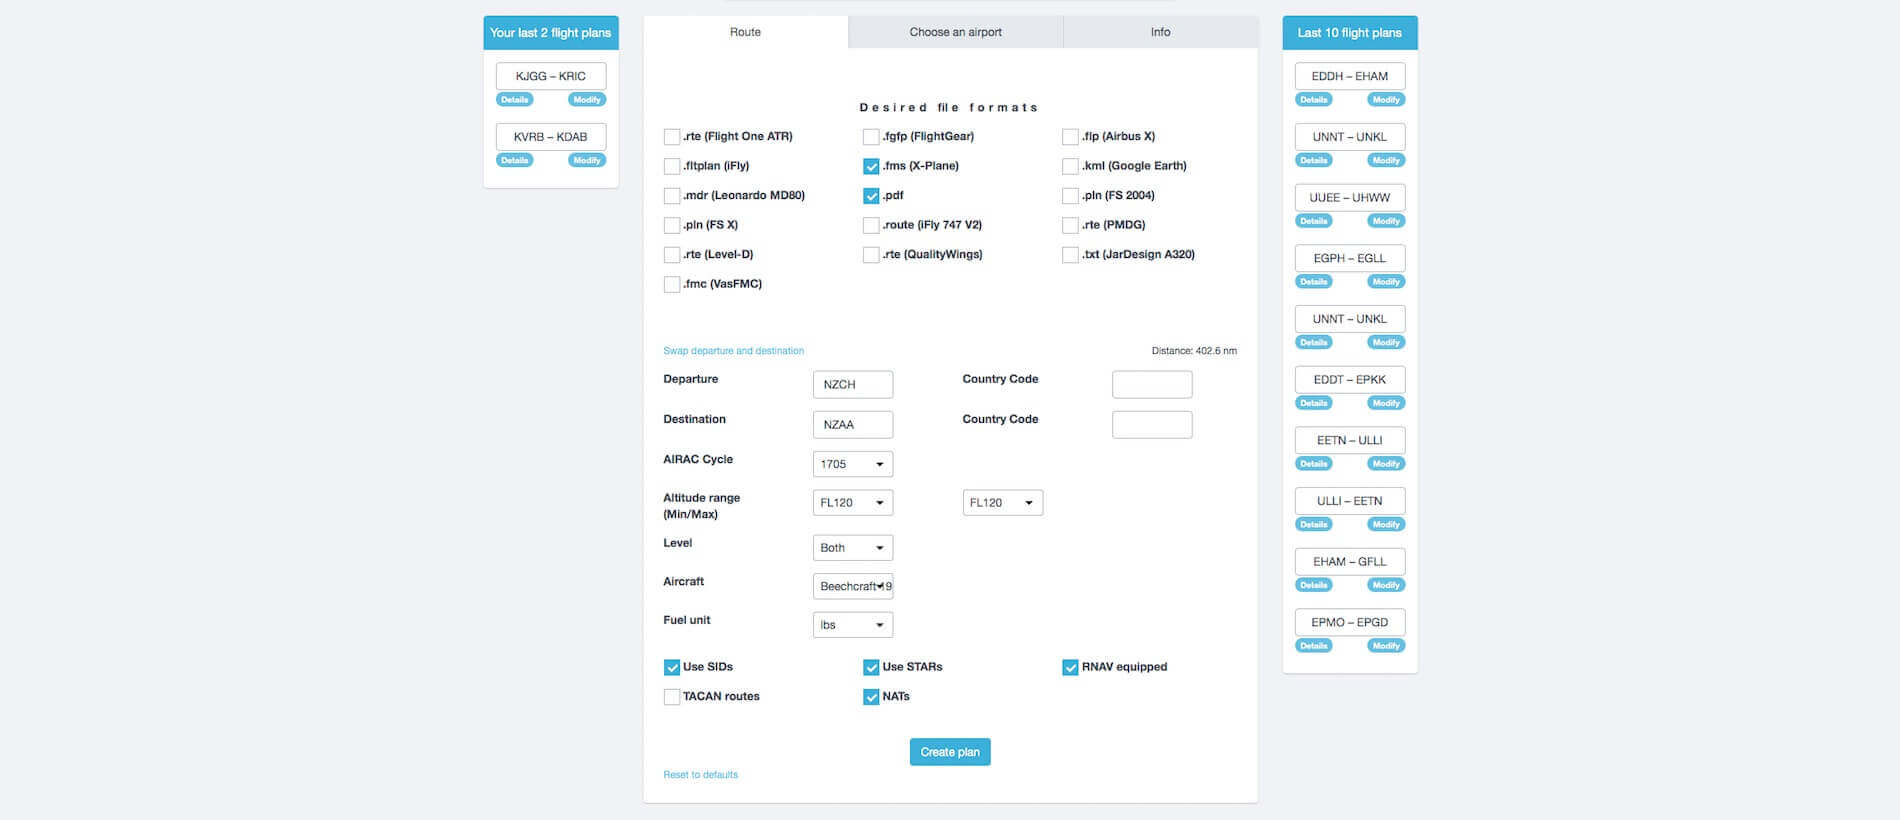
Then there’s the browser-based Online Flight Planner which seems to be a good one although I’m not 100 percent sure if the generated flight plans are as real as they should be. The good news is that it seems to do the same as RouteFinder, but with several export options, of which one is “X-Plane fms”. You can also enter the aircraft type B1900D so everything is fine and ready to safe your “fms” file for use with the Garmin GNS 530 and I advise you to request also a PDF format of your flight plan. Just print it out and you’ve got something on paper besides the GNS 530.
One more option but that requires two steps is using SkyVector and X-PlaneTools. We all know SkyVector, but SkyVector saves your flight plan in fpl format which in turn can be converted to fms with X-PlaneTools. By the way, when you insist on using RouteFinder or FlightAware, you can use the same X-PlaneTools website also for converting these flight plan extension to a “fms” extension.


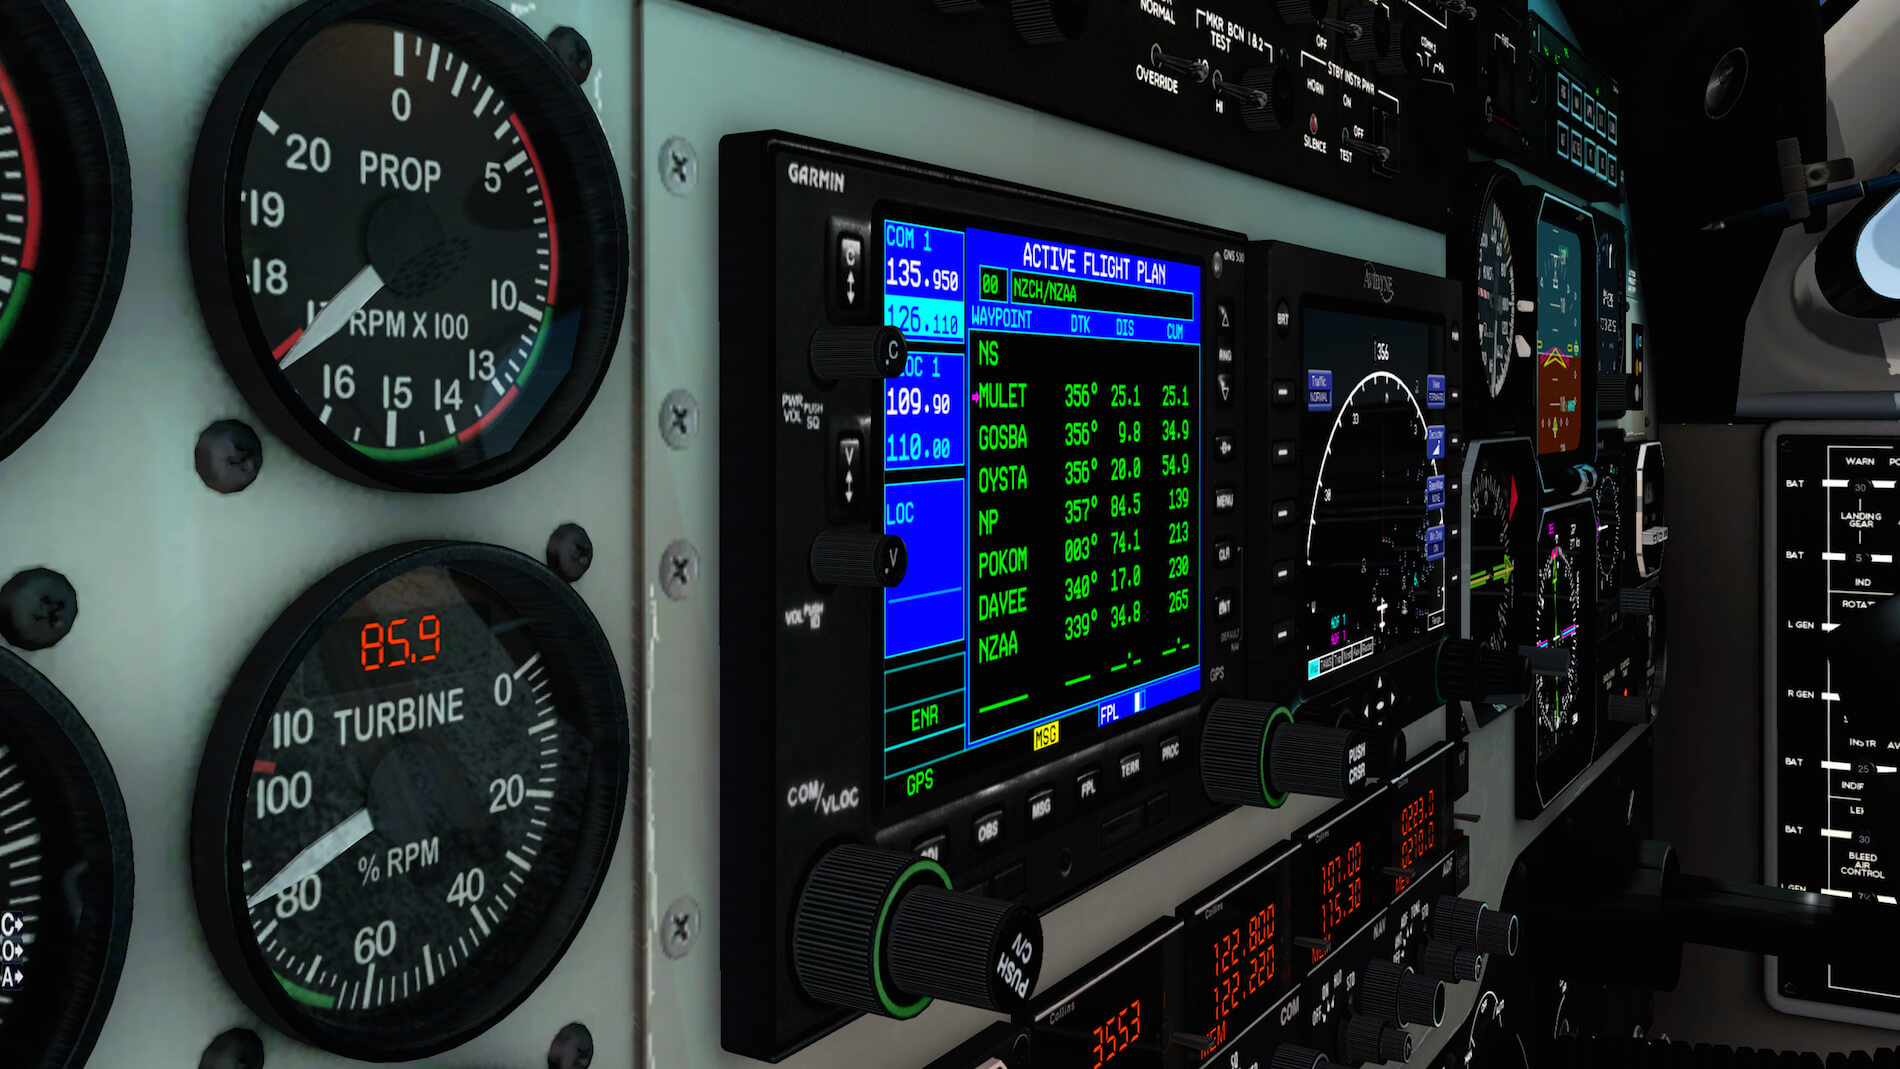
Anyway, copy the created fms file into the X-Plane root folder Output/FMS plans. With the fms file in this folder, you’re able to load the flight plan into the Garmin GNS 530. Oops, that is easier said than done. Let me help you out with loading a ready to use flight plan.
Insert Flight Plan into GNS530
Copy the NZCHNZAA.fms file into the X-Plane root folder Output/FMS plans. With the fms file in this folder, you’re able to load the flight plan into the Garmin GNS 530.


NZCH – NZAA Flight Impression – Part II
The Cockpit
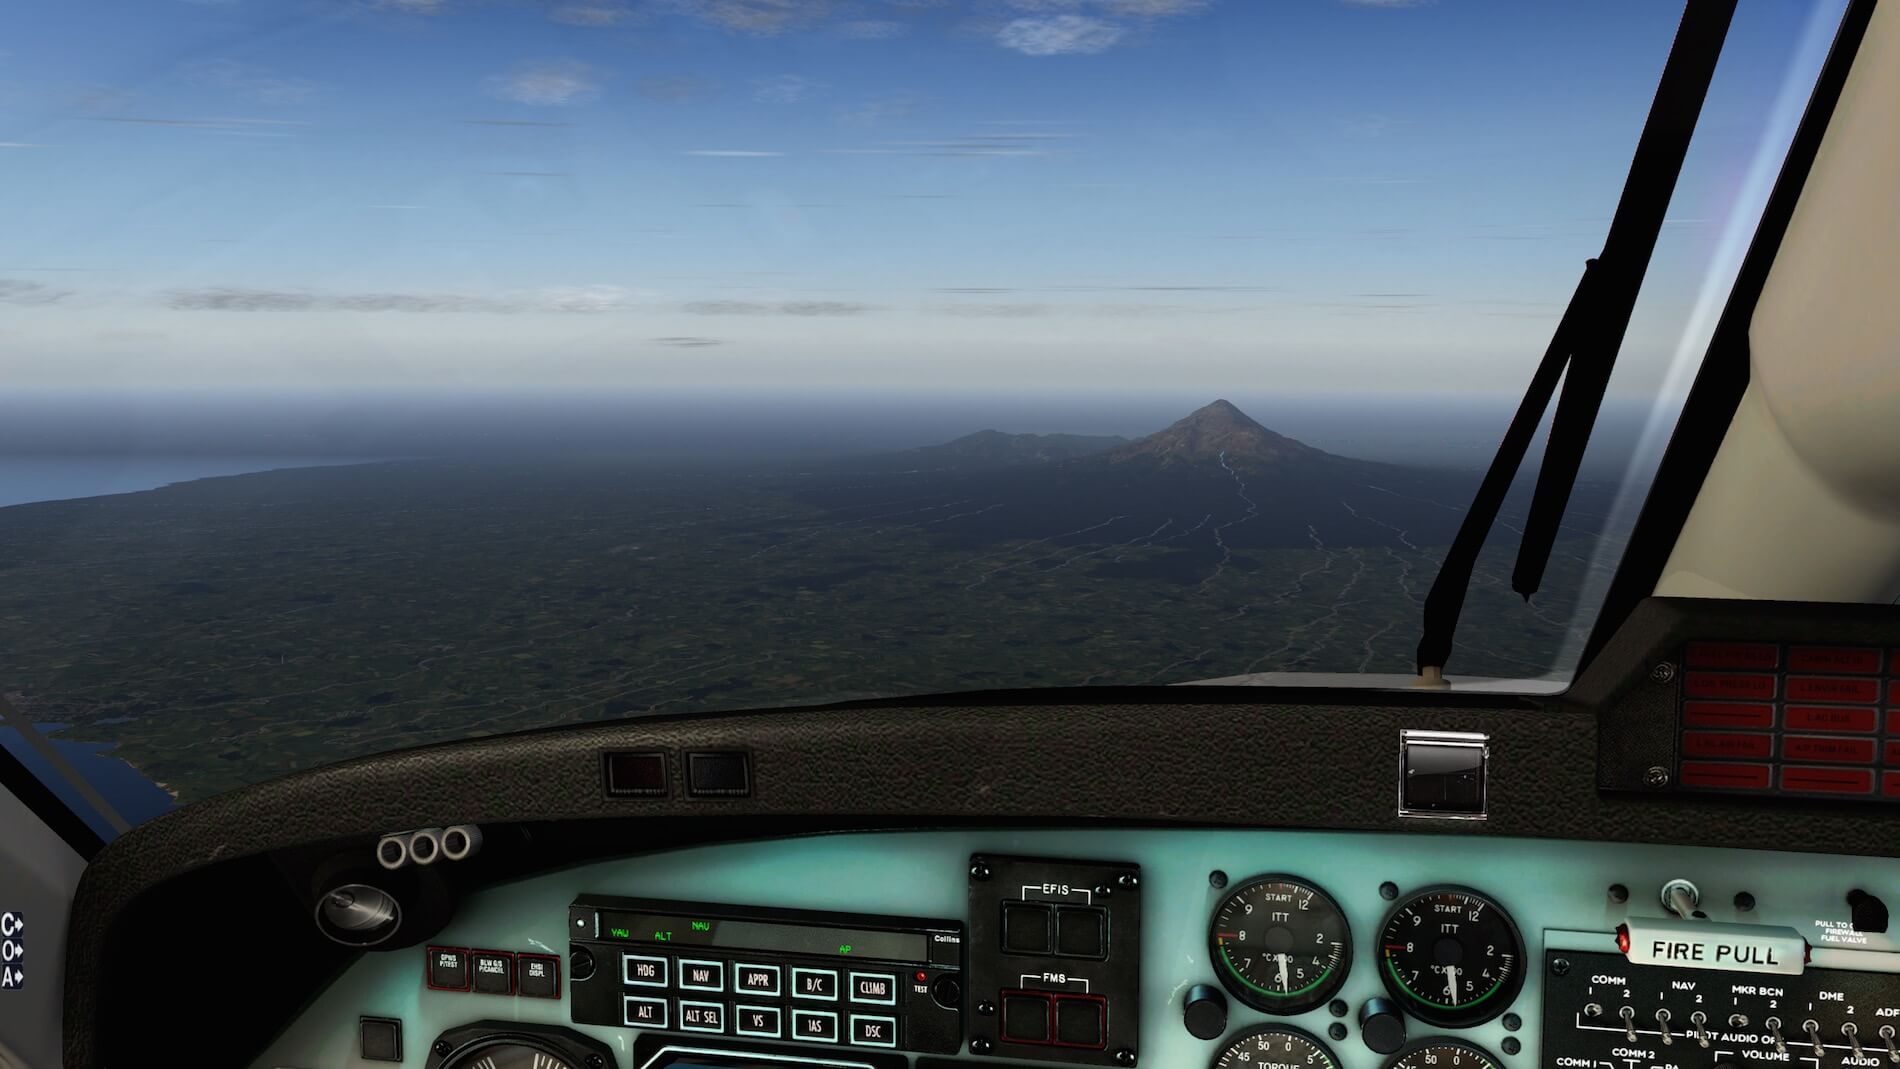
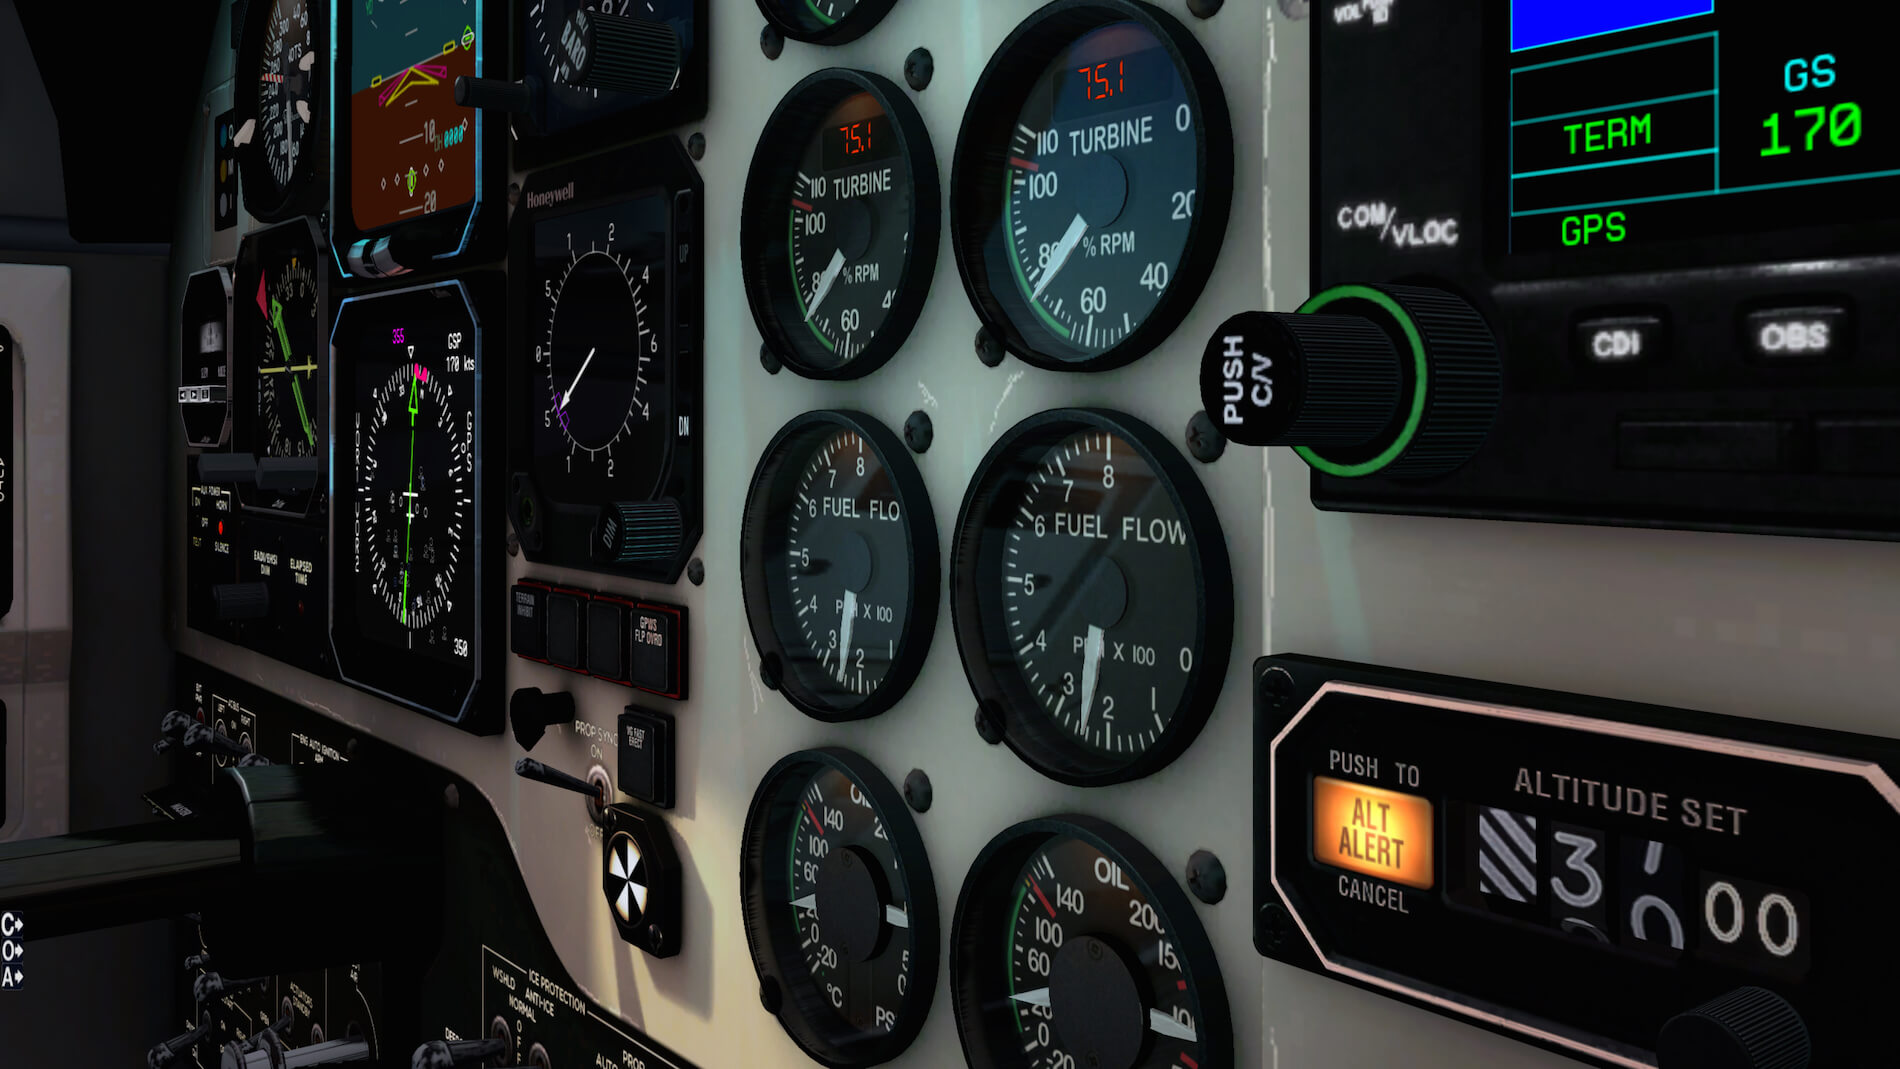
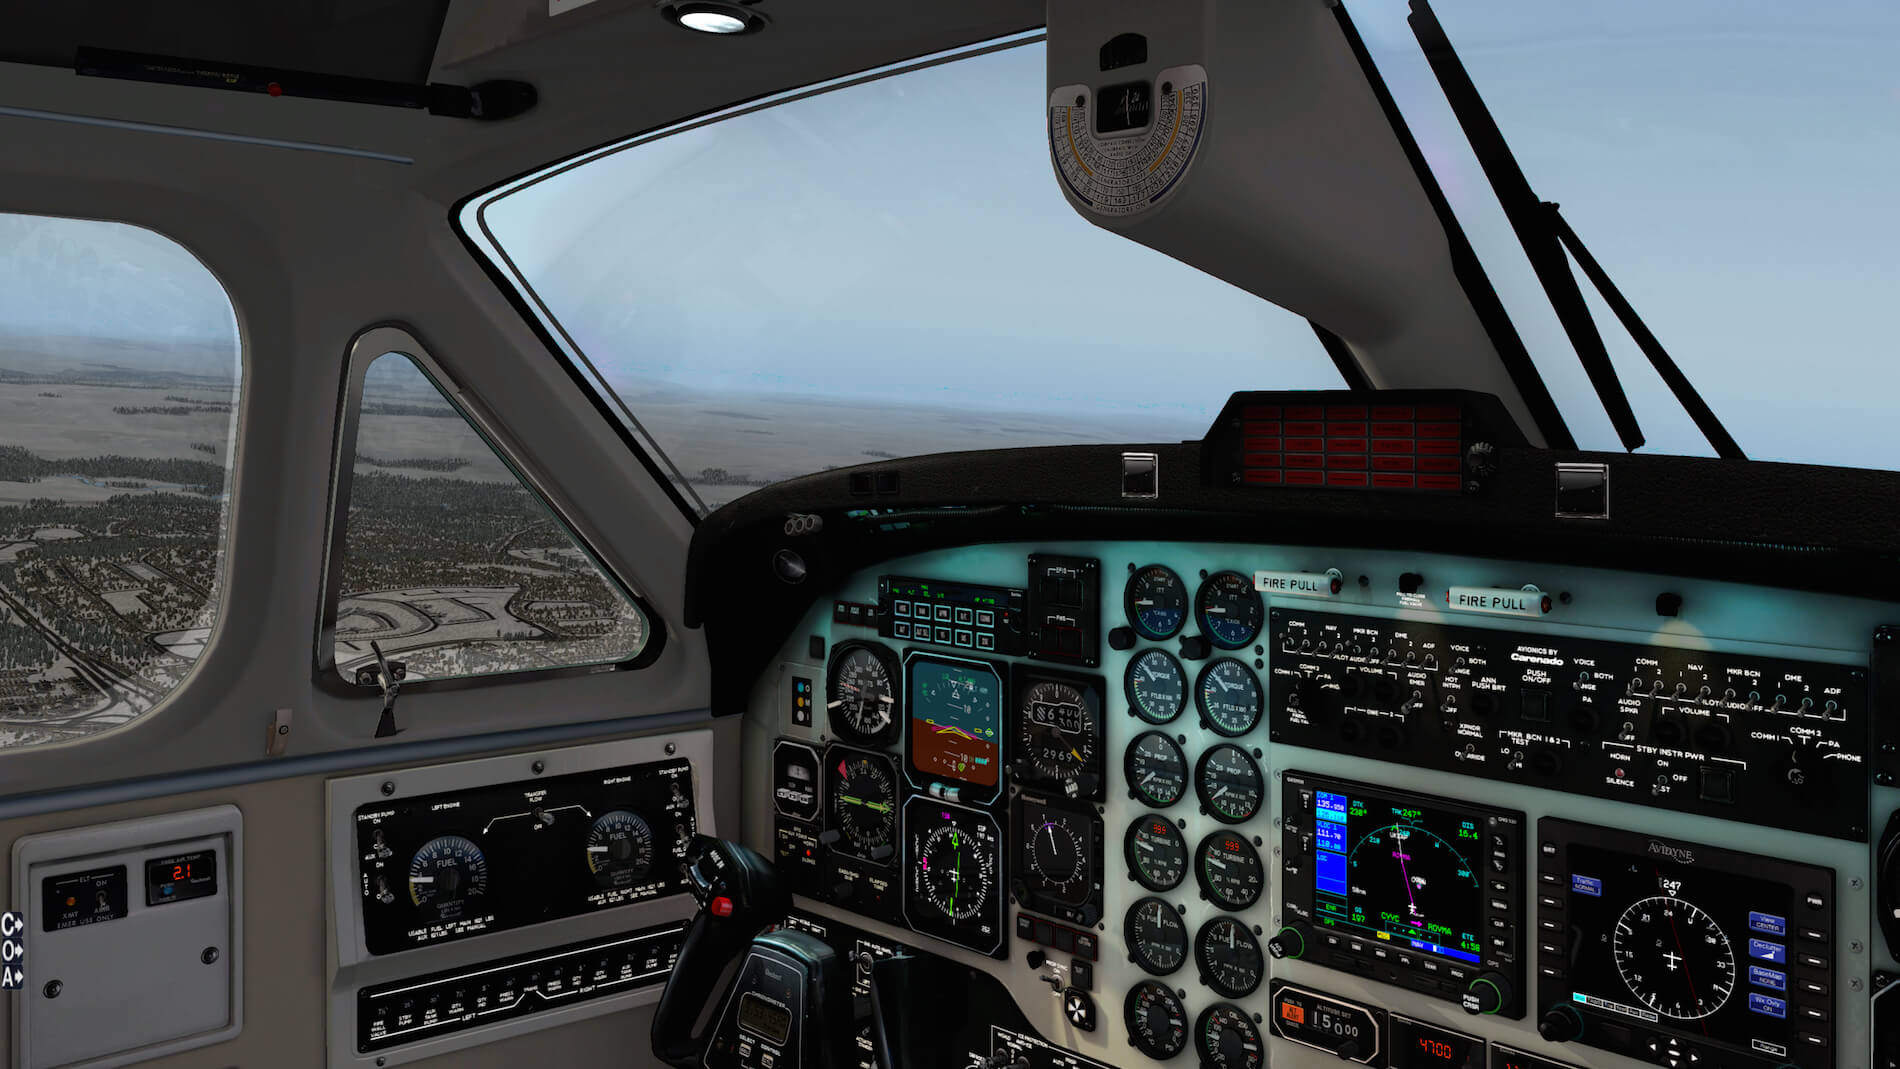
Via the sliding cabin/cockpit doors, I have the opportunity to do a visual 3D cockpit check and see with my own eyes how this is modeled. I can tell you, it’s gorgeous. Ok, we all know that Carenado and Alabeo aircraft are known for their high quality modeling, but it seems that with every new model new challenges are overcome to improve their GA aircraft. Looking to this B1900D I’m quite impressed by the unbelievable sharpness of the old-fashioned instruments. It’s not only the sharpness that makes then unique when you zoom in.
No, it feels that the jigsaw is complete. It’s the instrument reflection, the needles, the knobs, the pushbuttons, the indicator scales, and said before, the sharpness of the indications. And although I wrote “old-fashioned instruments”, even the modern DUs are razor sharp. When you’re flying around you won’t probably zoom in that close as I did, but it tells me that much care is put into the creation of this B1900D 3D cockpit.
And it doesn’t end with this! The main instrument panel, the pedestal, the side panels, the overhead panel and not to forget the overall 3D modeling of the walls make up together the gorgeous 3D cockpit. In other words, a pleasure to see, to fly with or just to relax during your flight!


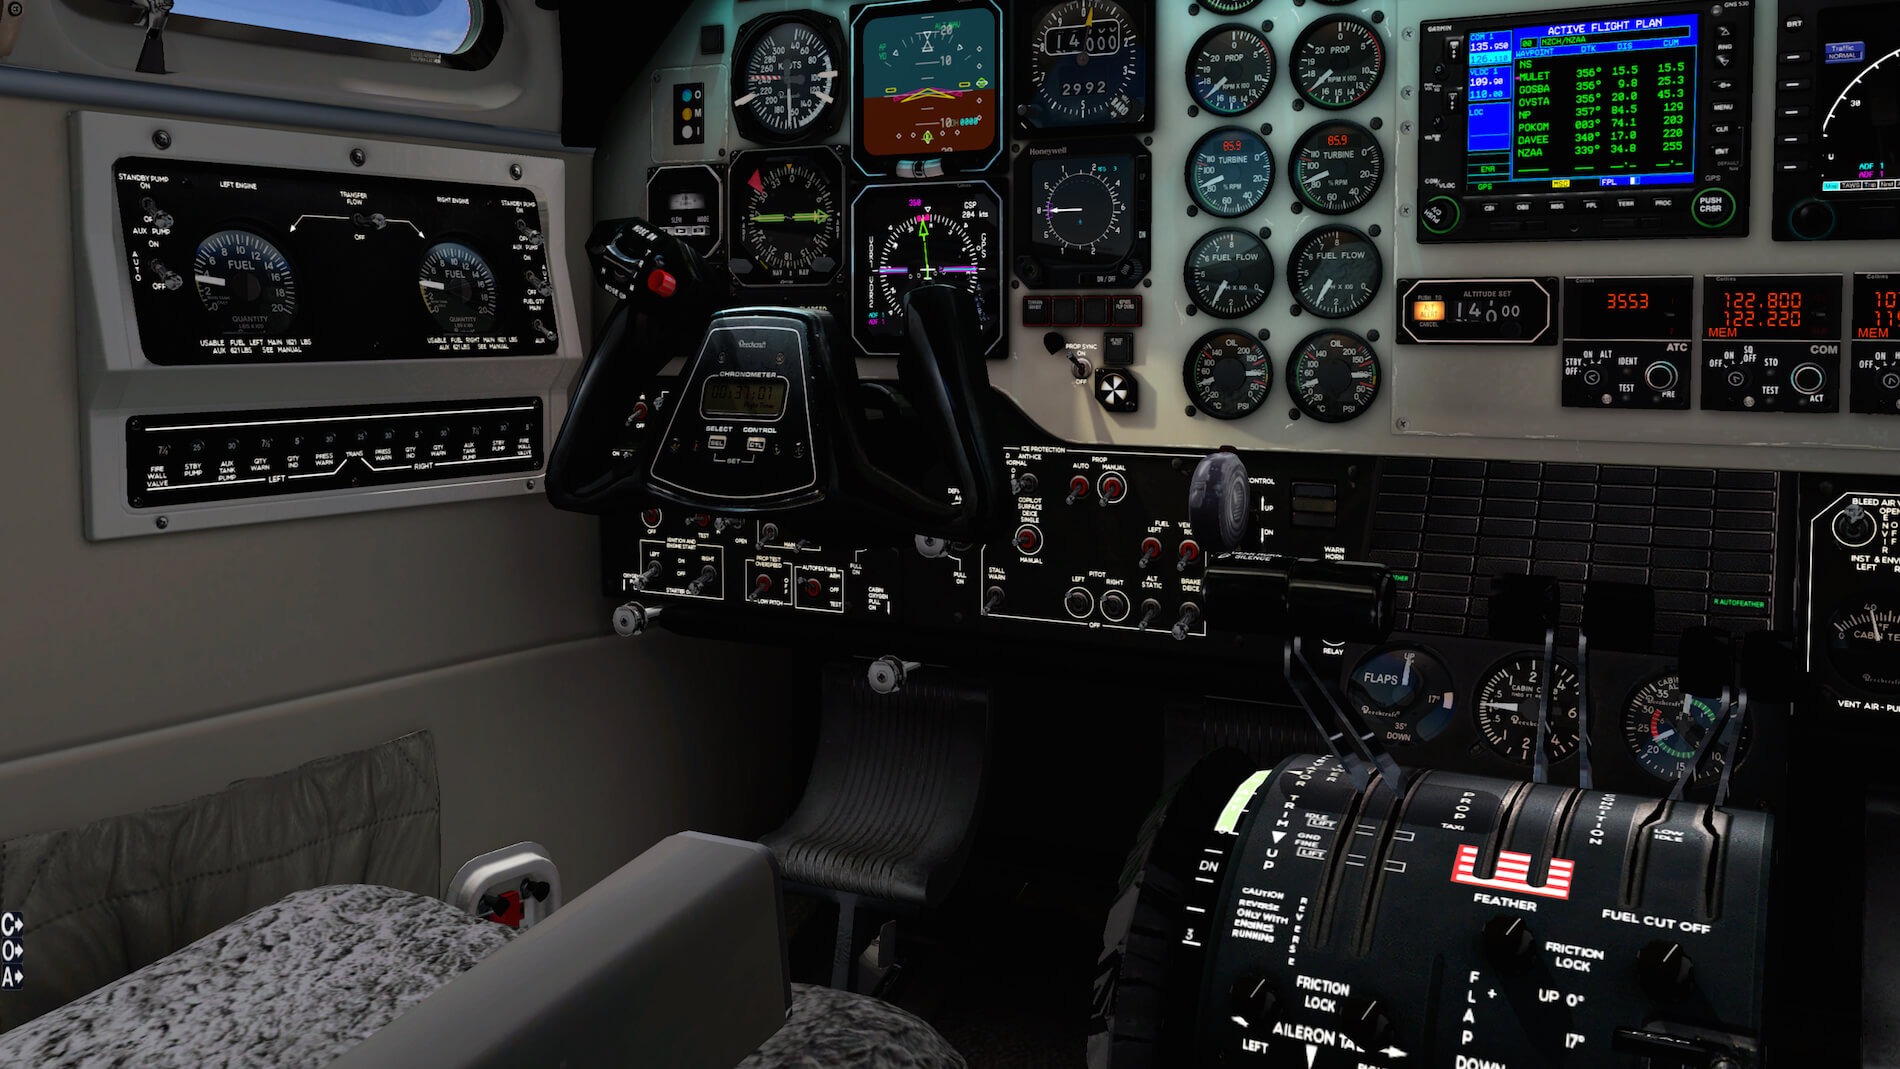

As far as I could check, many switches and/or knobs are modeled. Just to clarify this … modeled means that the switch or knob is simulated, however I can’t always confirm whether the output is doing what you may expect from that particular system.
2D Popup Windows
The B1900D comes with three 2D popup windows, many of them known; A (Auto Pilot), O (Options) and C (Views/Volume). The options and views/volume popup windows offer settings that can’t be found anywhere else, but the Auto Pilot panel can be found as alternative on the pedestal. It also depends whether your PC or Mac can handle all the features implemented in this B1900D.
Frame rate eating features like “window reflections” and “instrument reflections” can be switched ON/OFF. By default “mouse scroll” is always ON. Some like it and some not. In case you haven’t heard of it; mouse scroll allows you to rotate knobs with the middle mouse button or, in case of a Mac mouse, sliding your finger vertically over the middle area of the mouse.
Another interesting feature linked to this mouse scroll is the illumination of the knob you want to rotate. Depending on the mouse position in relation to the knob you want to adjust, for example the outer or inner ring, it will illuminate with a sea blue colour, indicating which ring is active.


When you disable this mouse scroll function, rotating a knob is done in the old-fashioned way that you’re used to, and no knob or ring is illuminated.
Flying Yourself or ….?
You could of course decide to let the Autopilot (AP) fly the aircraft, but why not fly the B1900D yourself? I can tell you that the aircraft is an easy aircraft to trim and when the weather is not too bumpy, it flies stably after being trimmed. Unless you’ve got lots of B900D experience, I suggest that you read the manual first before using the Autopilot.
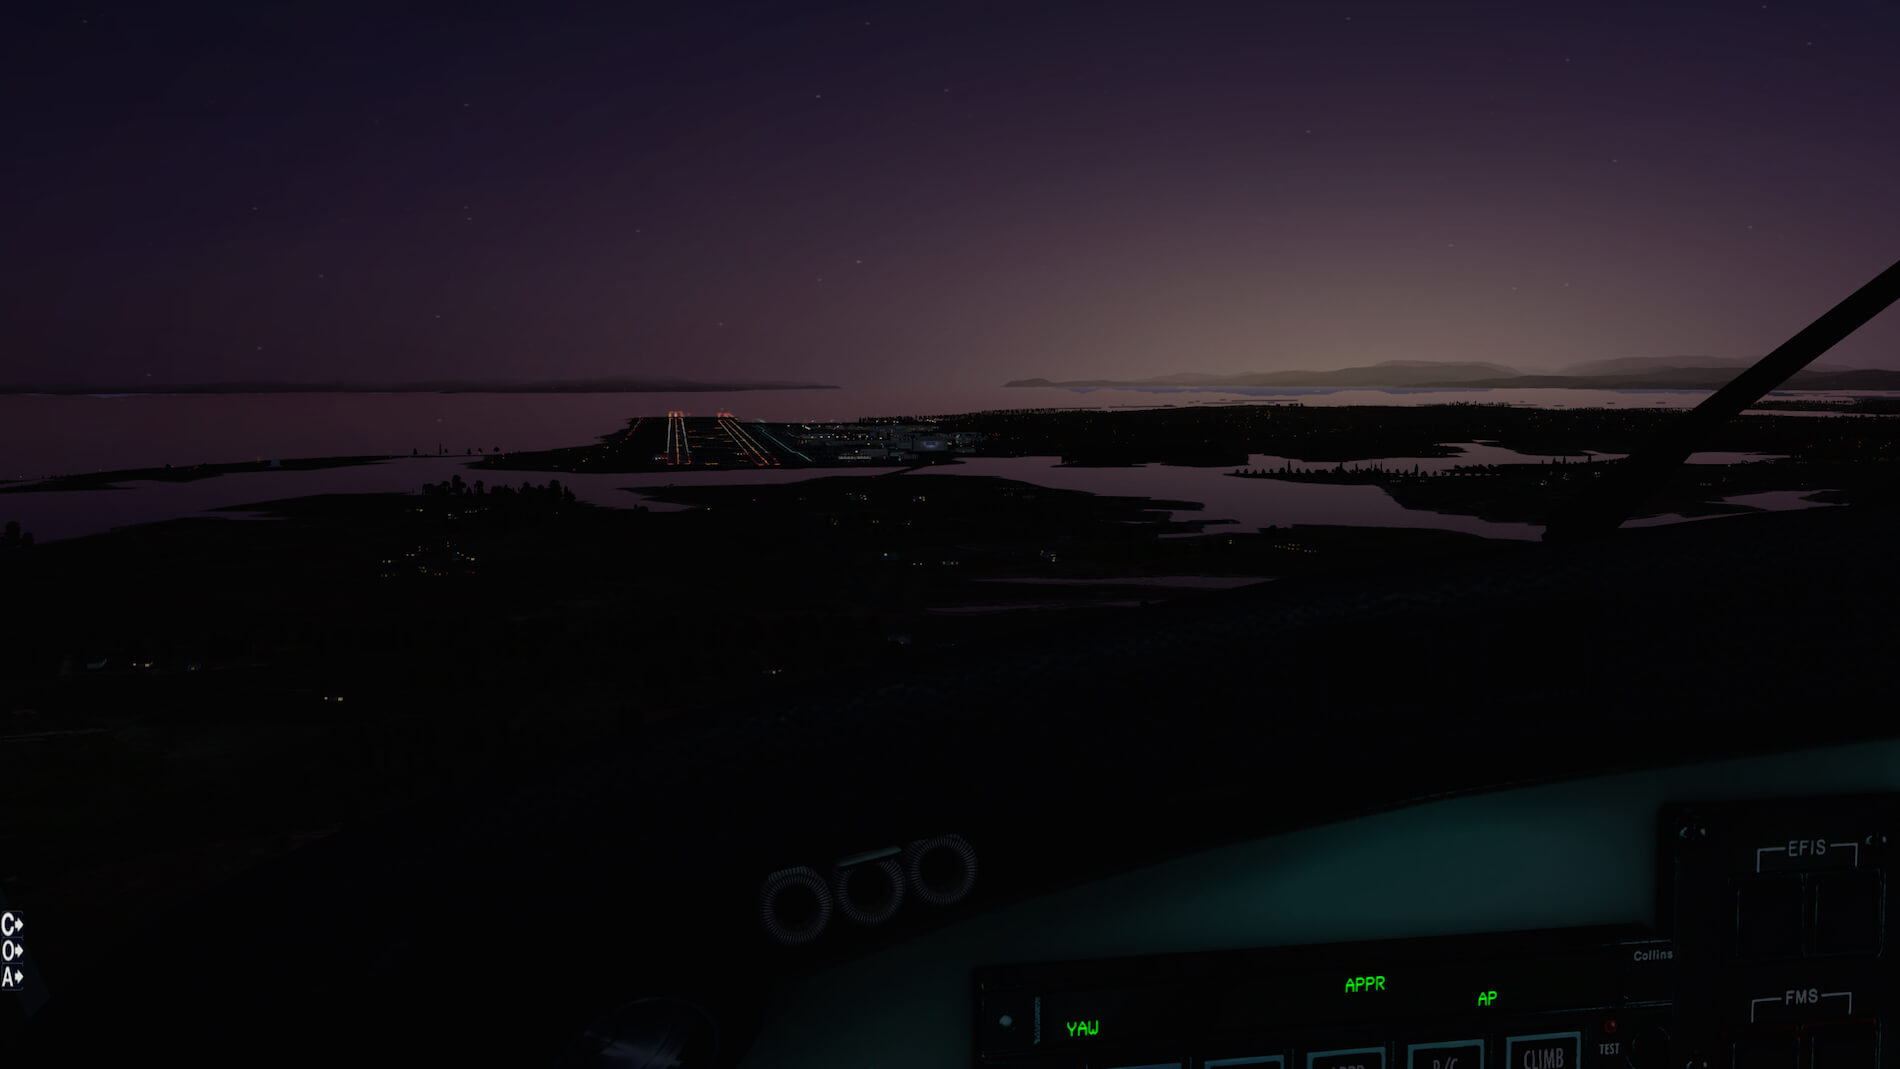
It explains basically everything. Playing around with the AP during this NZ continental flight is OK. There’s enough time to check the implemented functions as well as the APP (APPROACH) function. On the other hand, I made several visual landings using the runway PAPI system and it’s really easy to control this aircraft during the approach flight path.
The flight from Christchurch to Auckland more or less follows a straight line and therefore flying the B1900D yourself isn’t really a problem, especially when you have reached cruising altitude, which I have chosen to be at FL120. The mountains aren’t high enough to give you any trouble while crossing them, but feel free to enter some additional waypoints in your flight plan or switch to the HDG mode.
I can imagine that when you fly the B1900D for the first time, you prefer that the AP flies the aircraft. When you’re airborne, try to maintain a vertical speed of approximately 1200 feet/min, closely check the GNS 530 flight plan map and see in which direction you need to steer to catch the flight plan track to MUPAN. Don’t forget to retract your gear and flaps when at a safe altitude.


Click the “A” for the Auto Pilot popup window. Select the NAV button, set an altitude of 12000 or close to it on the main instrument panel, and then click the ALT SEL button on the AP panel, followed by the VS button, and set a vertical speed of approximately 1200 feet/min. When you’ve done all this presetting, click the AP ENG and YAW ENG buttons. The YAW DAMPER will be engaged but more importantly, the AP is engaged and flying the aircraft. Since we climb without a fixed IAS, you need to monitor the actual aircraft speeds on the ISA indicator. Once you’re at cruising altitude, you can, if you want, switch to IAS, but keep in mind that when you do this, the ALT mode is lost.
When you’re flying at cruising altitude, just give it a try … I mentioned it before … … disconnect the AP. Together with aileron and pitch trim, it’s not difficult to fly the aircraft. Keep only in mind that you need to make small trim corrections. When you’re sick of it flying by yourself, just click the AP ENG button and the aircraft AP takes over. And then, while the AP is flying the B1900D, you’re able to relax and check out the very detailed cockpit or take a seat in the virtual cabin.


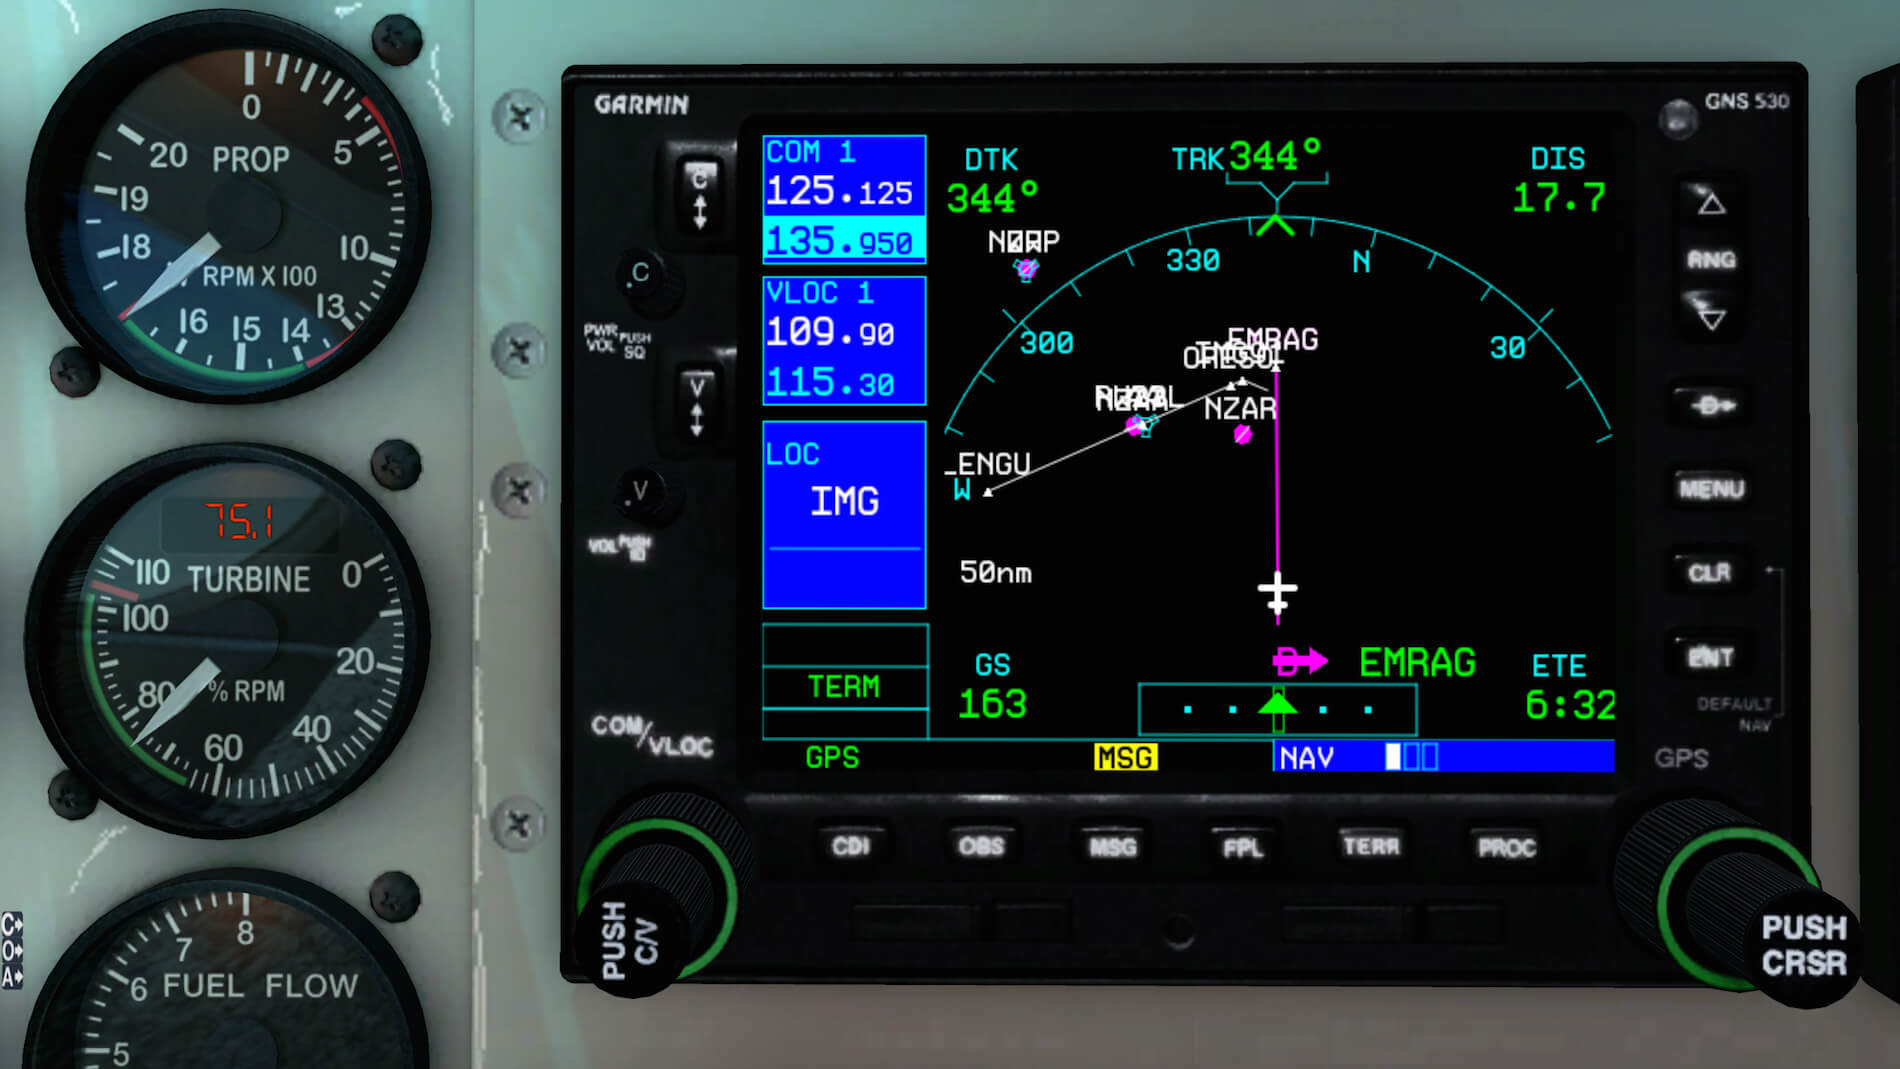
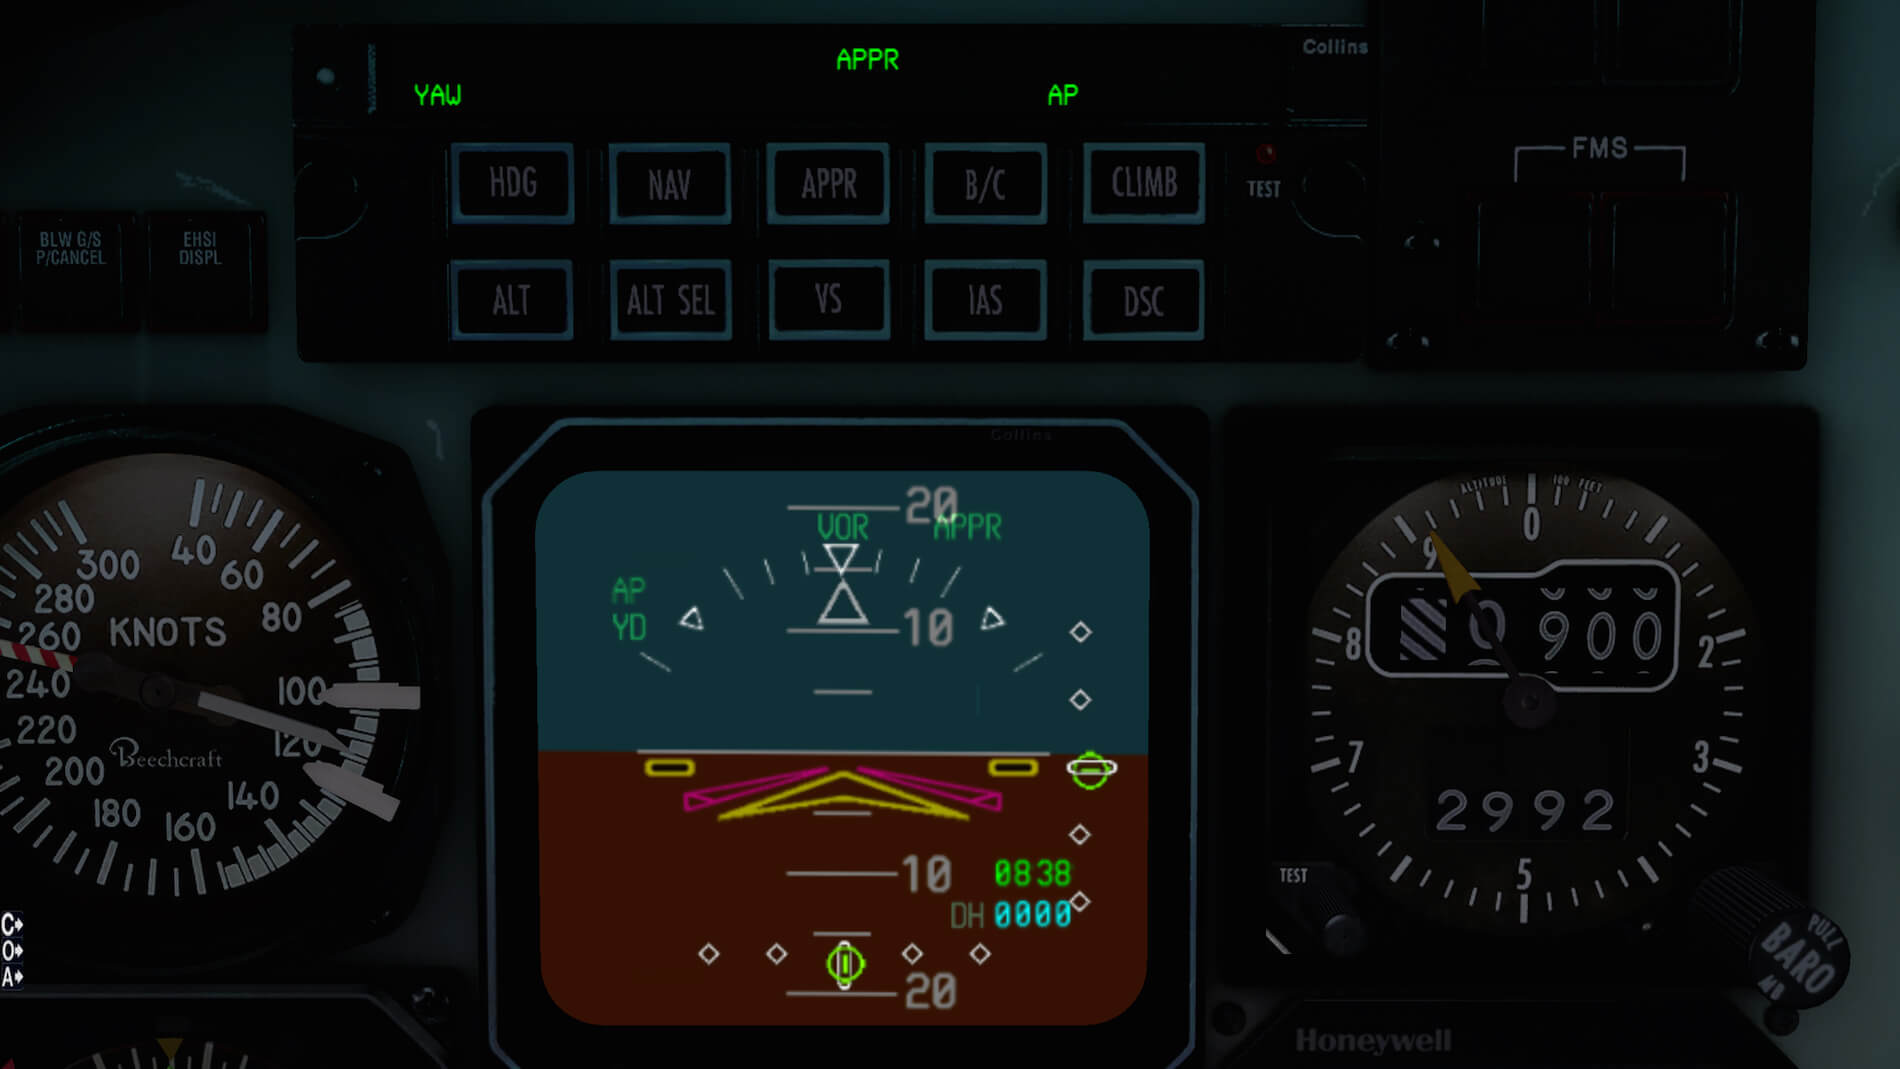
But this flight is not endless. Our approach and landing at NZAA will be runway 23L which is a CAT III runway. This CAT III is way too much under good environmental conditions, but what the heck difference does it make? You can keep the AP connected for your landing at Auckland. You can even, if you feel comfortable with it, select the required approach via the GNS 530. You know that you need runway 23L and the approach will be via EMRAG. Note that the selected GNS 530 approach will make the actual autoland for you, therefore you need to click the APPR button on the AP panel.
On the ADI you’ll see your aircraft position relative to the localizer and glideslope, while on the HSI you can spot, in the left hand upper corner, all relevant information about ILS “IMG” with the distance to fly to the LOC. While the AP is guiding the B1900D along the localizer and glide slope, there’s a need to monitor the IAS and when you’re close enough, the PAPI tells you also if you’re at the right glide slope angle.


In case you would like to fly this stretch too, find below the complete contents of the flight plan. Use an empty text file and name it for example NZCHNZAA and give it an extension “fms”. When you’ve done that, the file should be then named as NZCHNZAA.fms. Or perhaps easier and faster ….. download this X-Plained.Com NZCH-NZAA package with the necessary charts and the fms flight plan file.
I
3 version
0
13
1 NZCH 0 -43.489400 172.534400
11 MUPAN 0 -42.855900 172.728300
11 SANDY 0 -42.337000 172.896100
11 RANBO 0 -41.788900 173.070300
11 BIRIN 0 -41.626400 173.121300
11 NS 0 -41.301700 173.222500
11 MULET 0 -40.823100 173.428700
11 GOSBA 0 -40.667200 173.495200
11 OYSTA 0 -40.349600 173.629700
11 NP 0 -39.007200 174.183900
11 POKOM 0 -37.872100 174.806300
11 DAVEE 0 -37.588700 174.809900
1 NZAA 0 -37.008100 174.791700
Ready for another flight?
Let’s go for a mountain flight somewhere in Canada.
The Canadian CYYC – CYQQ Adventure
Introduction
Perhaps you’re aware of CYYC, yes, indeed, Calgary International Airport, but what is CYQQ? CYQQ is Comox Valley Airport on Vancouver Island. The real CYQQ offers daily non-stop flights to/from Calgary, Edmonton and Vancouver, plus a seasonal service to Mexico. Perhaps this Wikipedia information about CYQQ is interesting too …. Canadian Forces Base Comox, commonly referred to as CFB Comox, is a Canadian Forces Base located 2.5 nm north northeast of Comox, British Columbia.
It is primarily operated as an air force base by the Royal Canadian Air Force and is one of two bases in the country using the CP-140 Aurora anti-submarine/maritime patrol and surveillance aircraft. Its primary RCAF lodger unit is 19 Wing, commonly referred to as 19 Wing Comox.
CFB Comox’s airfield is also used by civilian aircraft. The civilian passenger terminal building operations are referred to as the Comox Valley Airport operated by the Comox Valley Airport Commission.
The flight is just over 400 nm when flying in a straight line, but since we need to cross the Canadian Rockies, it will most likely be 450 to 500 nm. It would be great if I could find some freeware airport sceneries for this flight. I found CYYC made by X-Plane.org user AndrooC and I also found via X-Plane.Com CYQQ.
The Flight Plan
You could create this flight plan by yourself with web browser-based Online Flight Planner. But let me help you. Find below the complete flight plan and remember …. use an empty text file and name it for example CYYCCYQQ and give it the extension “fms”. Copy and paste it in the X-Plane route folder Output/FMS plans. Even better, I made another package for you with the fms flight plan file and some charts. You can download is via this dedicated X-Plained.Com link. Still worth to see below that to expect on your flight from CYYC to CYQQ.
I
3 version
0
21
1 CYYC 0 51.122600 -114.013300
11 ROVMA 0 50.975000 -114.557800
11 UKSAP 0 50.945300 -114.748600
11 OTVAD 0 50.912800 -114.952900
11 ITRIT 0 50.850800 -115.335100
11 NOVAR 0 50.672500 -116.390300
11 BOOTH 0 49.522400 -122.045100
11 VITEV 0 49.470800 -122.173500
11 STAVE 0 49.401500 -122.348000
11 SHARD 0 49.323300 -122.543700
11 LANNE 0 49.279700 -122.652200
11 FRASE 0 49.225100 -122.786700
11 MILLS 0 49.239500 -122.901000
11 BASRA 0 49.252700 -123.006600
11 VARSY 0 49.287000 -123.285200
11 BAJOL 0 49.309300 -123.469200
11 NUTBE 0 49.325900 -123.607800
11 TREEL 0 49.356400 -123.865600
11 MACAR 0 49.475900 -124.178600
11 JAINE 0 49.518200 -124.288500
1 CYQQ 0 49.710800 -124.886700
Ok, ready to go?
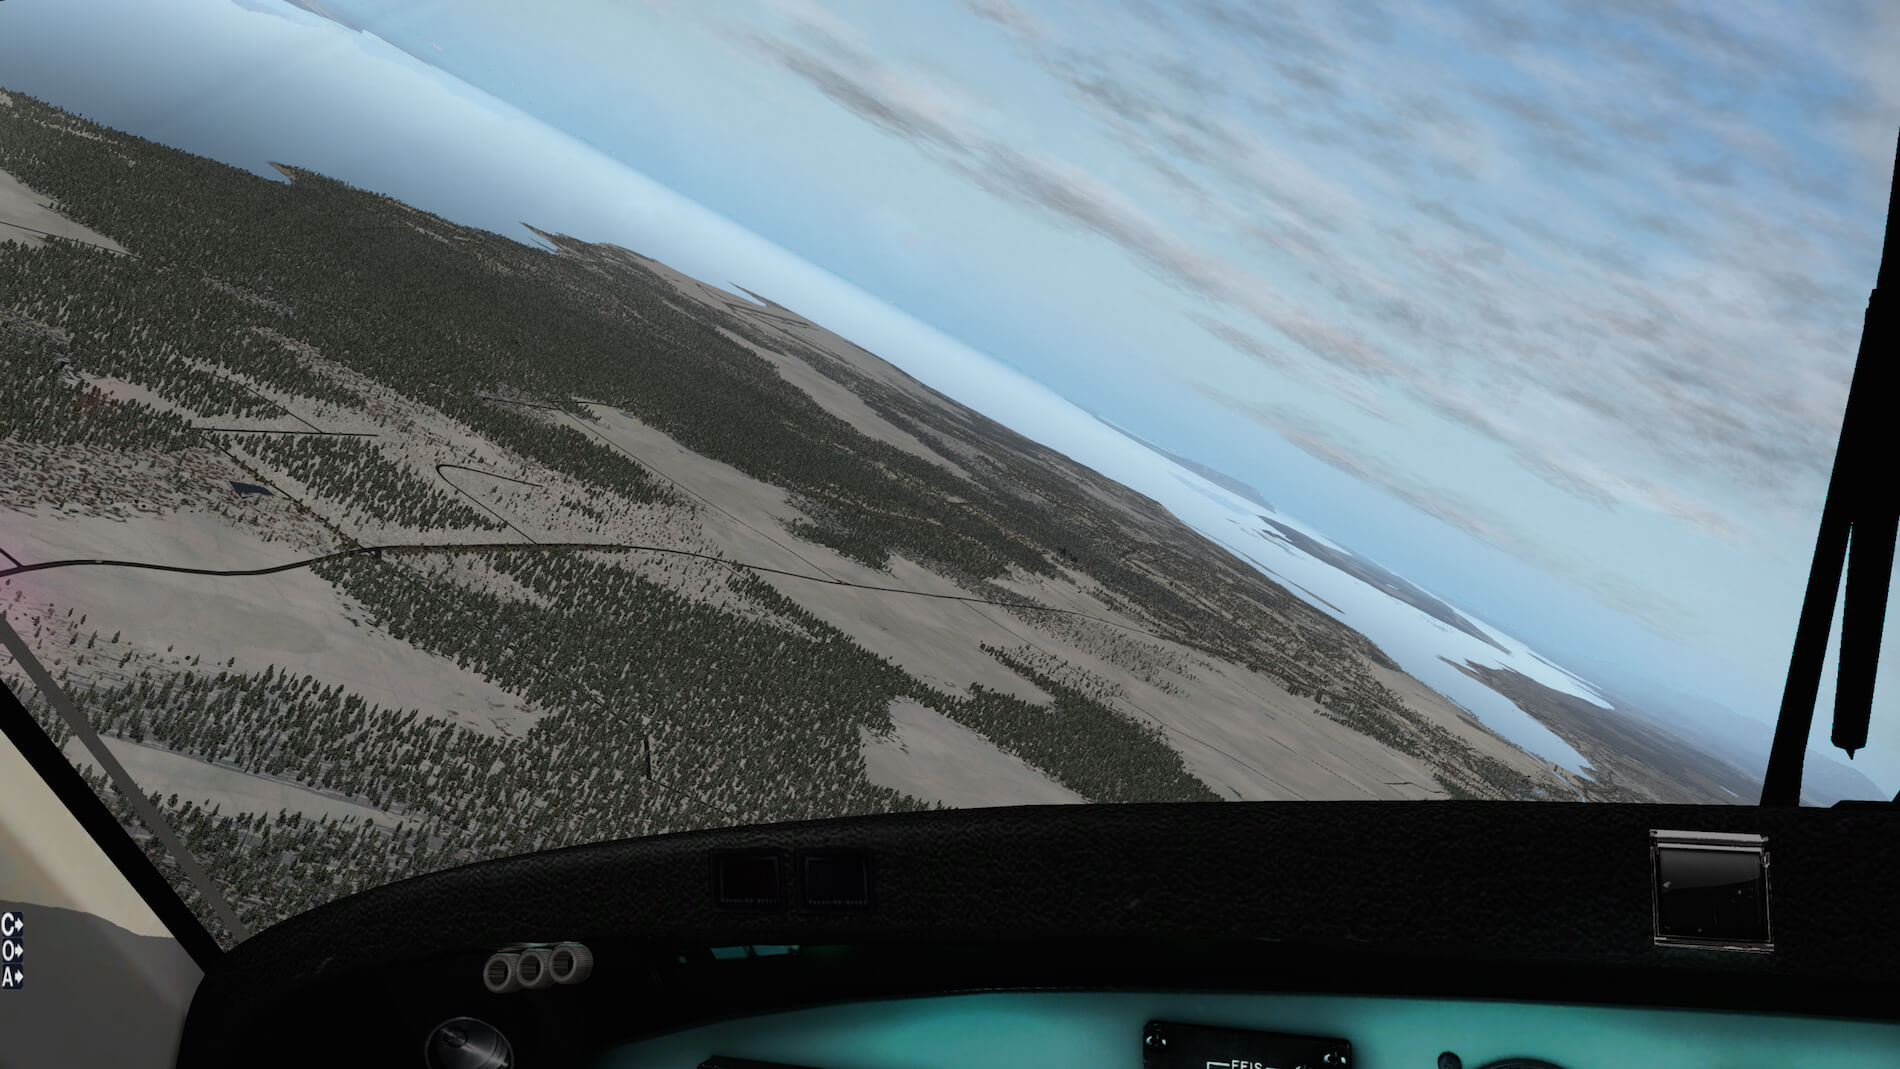
Crossing the Canadian Rockies
Taking off from CYYC in a western direction leads you directly to the Rockies, but before that, we’ll first need to climb to at least a safe altitude of FL150. Anyway, that’s all for later, first the airport.
With the downloaded and installed CYYC, I’ve parked my B1900D with Air Canada Express livery at concourse A. Perhaps not the best place, but better then being parked somewhere by the General Aviation hangar. There’s a planned takeoff from runway 16 and this means that after takeoff we need to steer right to approximately a heading of 270 where we can pickup our flight plan track.
Although the modeled Calgary International Airport isn’t as accurate as I would like, it must be said that it’s much better then the default CYYC. As I said before, once we’re on runway 16 we’ll climb out following runway heading to 6000 feet. Then we’ll connect the Auto Pilot in NAV mode and VS with a pre-selection for a cruising altitude of FL150. When we’ve done that, we only need to monitor the IAS and the engines parameters while the B1900D is climbing to FL150. Since the B1900D is flown by the Auto Pilot, you can also have a look outside with keyboard combinations “Shift + 4” or “Shift+6”, but I’m quite sure you’re aware of this. It’s a short trip, but there’s still enough time to look around and to explore some more features in the 3D cockpit or you take a rest in the virtual cabin. Don’t worry, I’ll wake you up when needed!


This Canadian flight follows many waypoints, but it is more or less following a straight line from Calgary to Vancouver Island. Is it fun? Yes, it’s fun even when it’s a second flight to write about. Every time I write I see different things, thus different things to write about and to explore. Not only for myself, but also for the interested flight simmer.
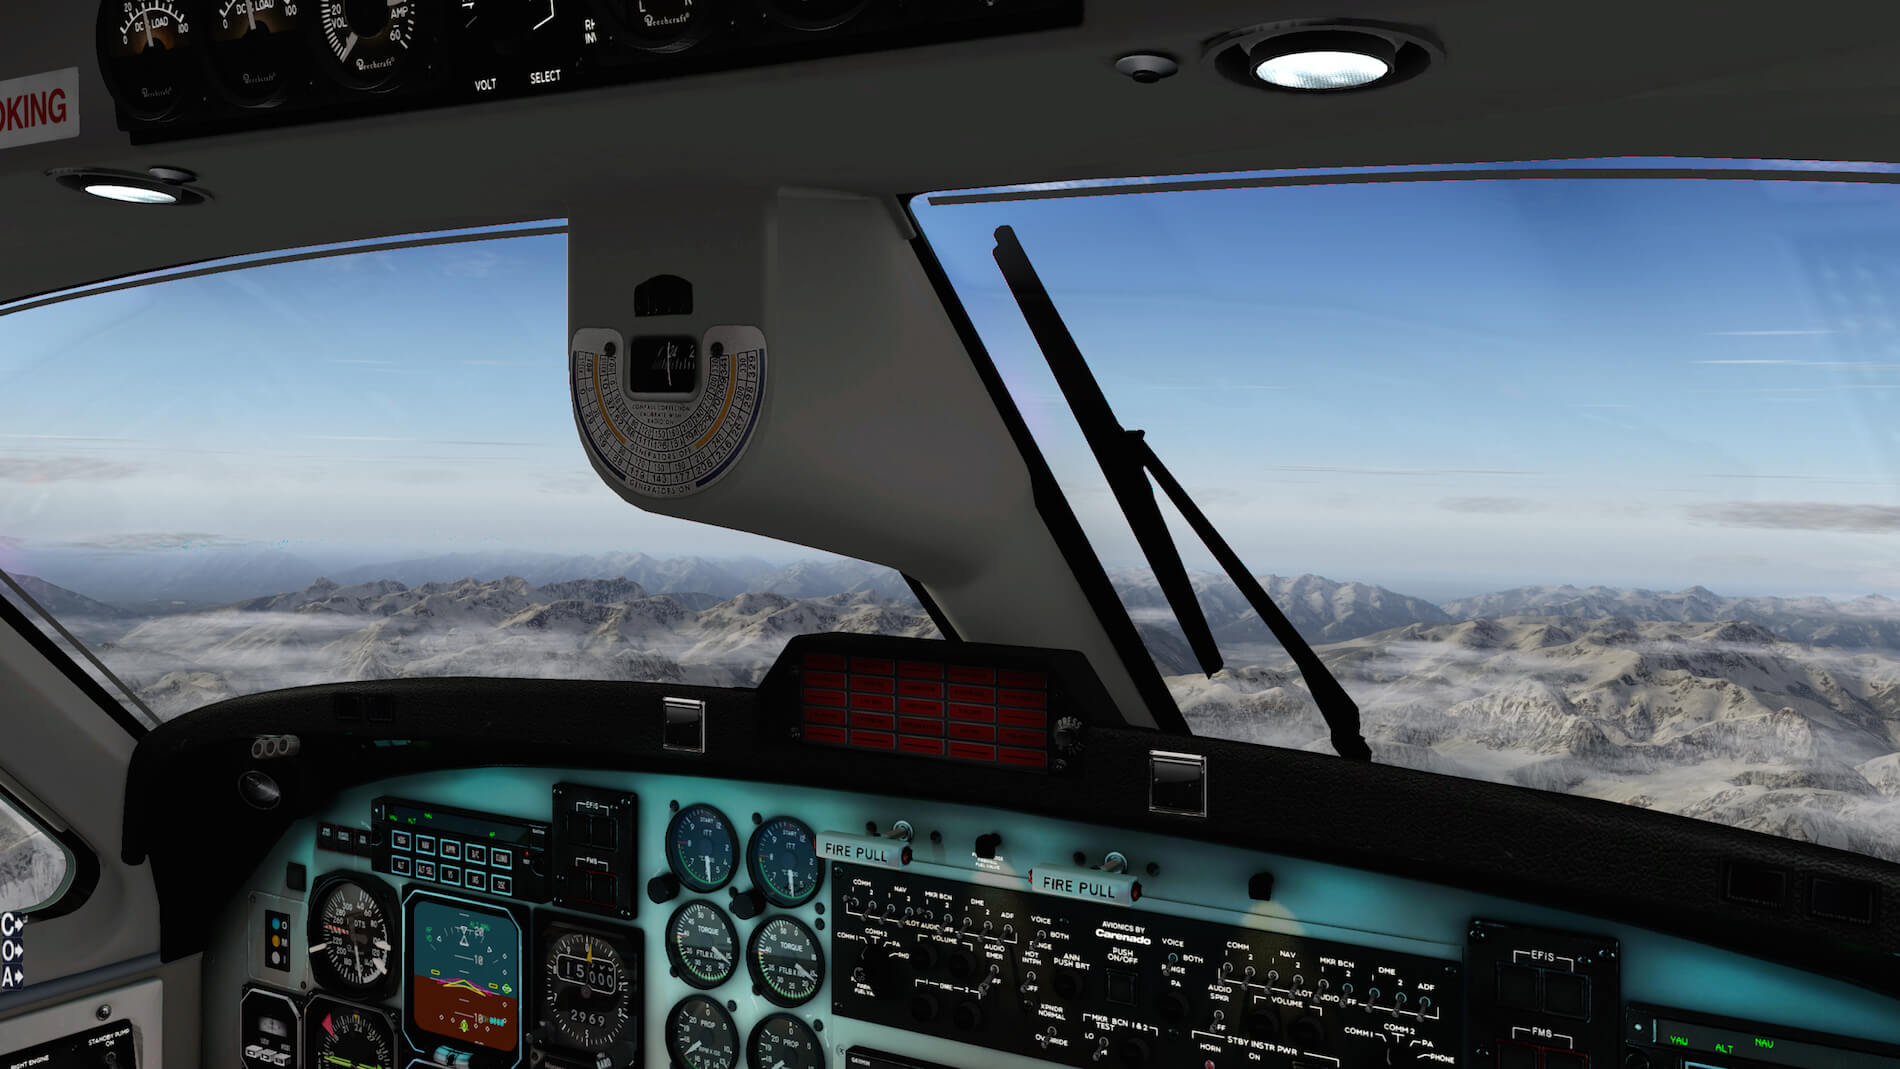
When we’ve passed nearby located ENDERBY VOR, we’re approaching a mountain area that’s not really dominated by high peaks. I won’t say it’s flat, but easier to fly in this area and not having the feeling that I’m constantly scraping mountain peaks. I’m aware that flying at a cruising altitude of FL150 isn’t height, but height enough to cross these Rockies.


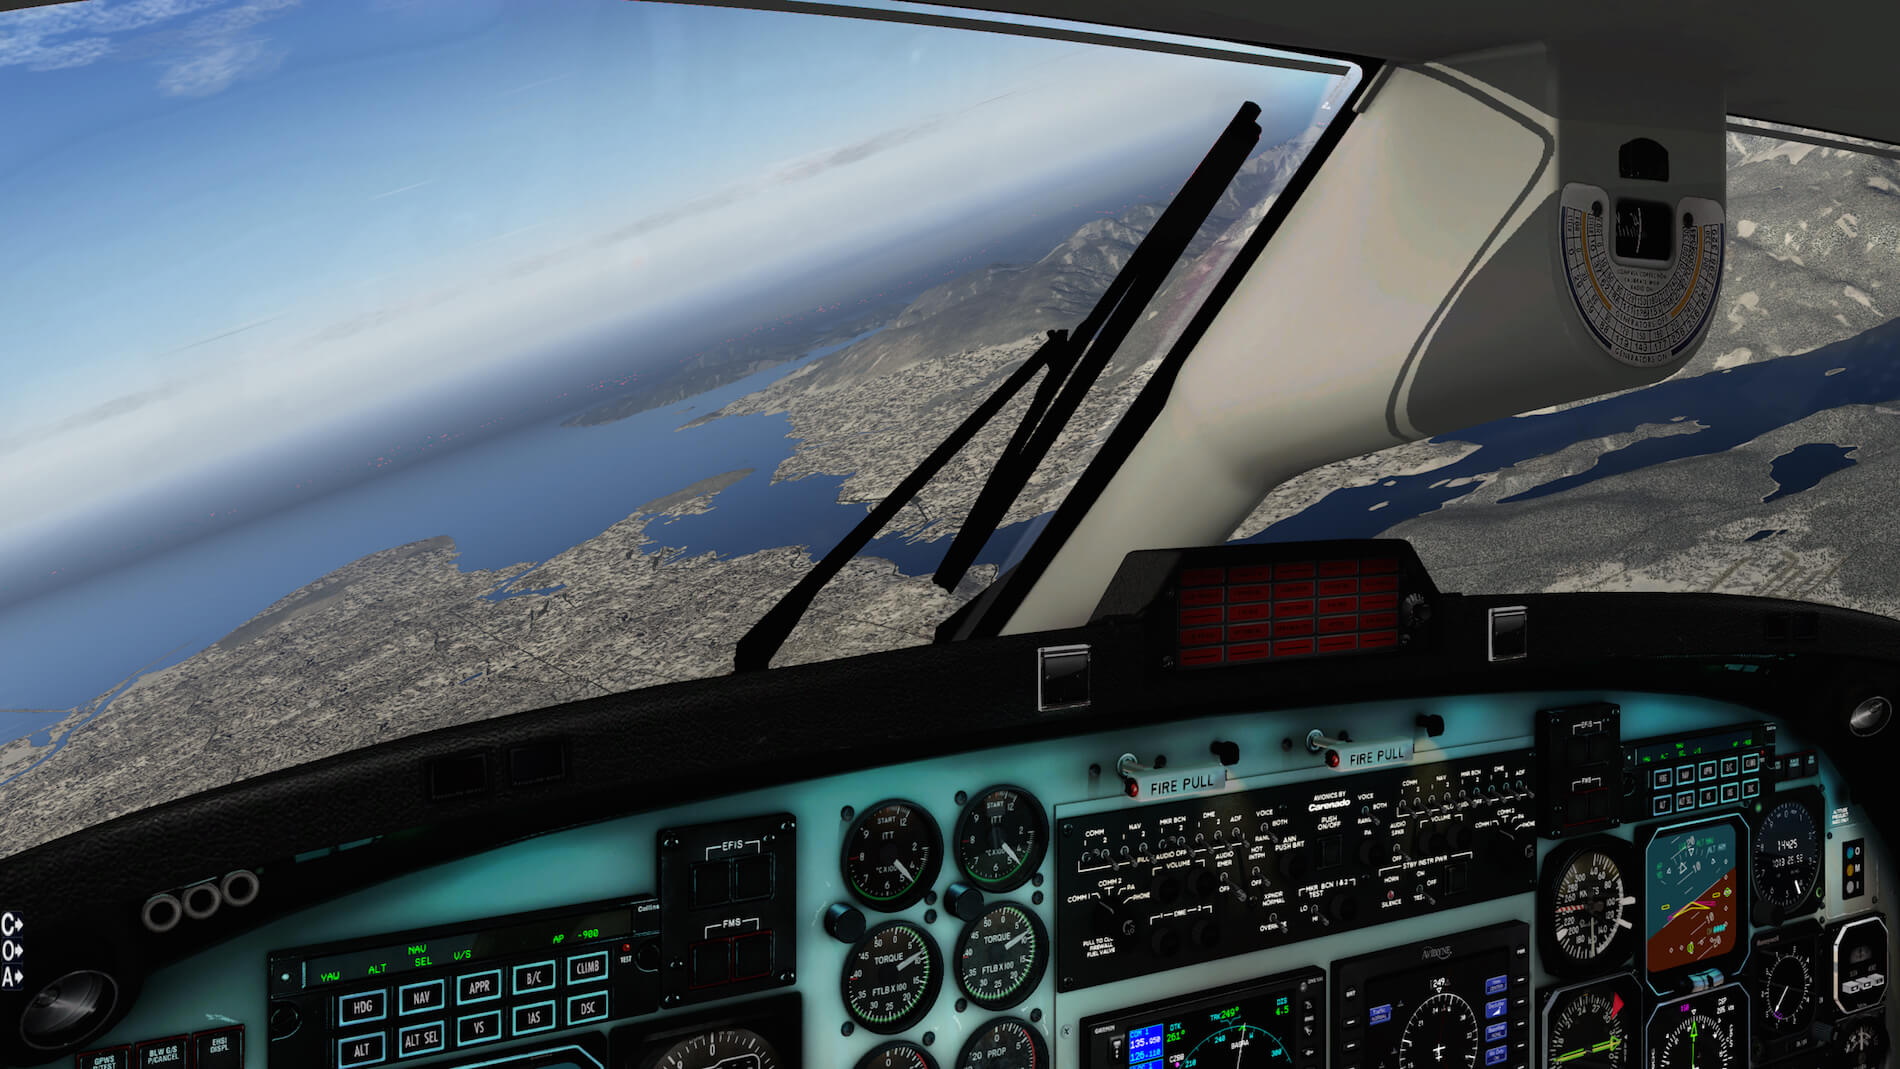
At the end of this flight, I’ll pass Texada Island and the Strait of Georgia which divides the mainland from Vancouver Island. And there’s always that difficult question …. what about the Carenado B1900D’s frame rates? With my iMac specifications it isn’t a problem, and it doesn’t make any difference whether I fly the aircraft with El Capitan or Sierra. That said, I can’t judge how the aircraft behaves under Windows 7, 8.1 or 10. However, the frame rates are OK, but does it really help you? Not much, I think! And that’s also the problem I’m facing.
With my current settings I can reach 19.9 FPS which is low, right? But this is with extreme high rendering settings. When I bring the rendering settings slightly back to normal, it’s no big deal for me to have 30-40 frames or even more. Another issue that reduces the frame rates is also the screen size of X-Plane. When I reduce the maximum size of my monitor which is by default 2560×1440 pixels, frame rates go up as well without reducing my rendering settings. All that together makes it difficult to say anything more about the actual frame rates you can experience.
Approaching Vancouver Island or to be exact CYQQ is easy. Close to the airport is an NBD beacon (COMOX with frequency 400) that you can use or you can use TACAN station COMOX which will give you DME information to the airport. Runway 12/30 is equipped with an ILS although I must add something to this. Runway 12 has a full CAT-I ILS (IQQ 111.7 / entry level 2600 feet) while runway 30 has a BC (Back Course). When you decide, just as I did, to land on runway 12, the approach altitude to the ILS is 2600 feet. Select APPR on the AP panel and you’re done, but keep on monitoring what the aircraft will do.
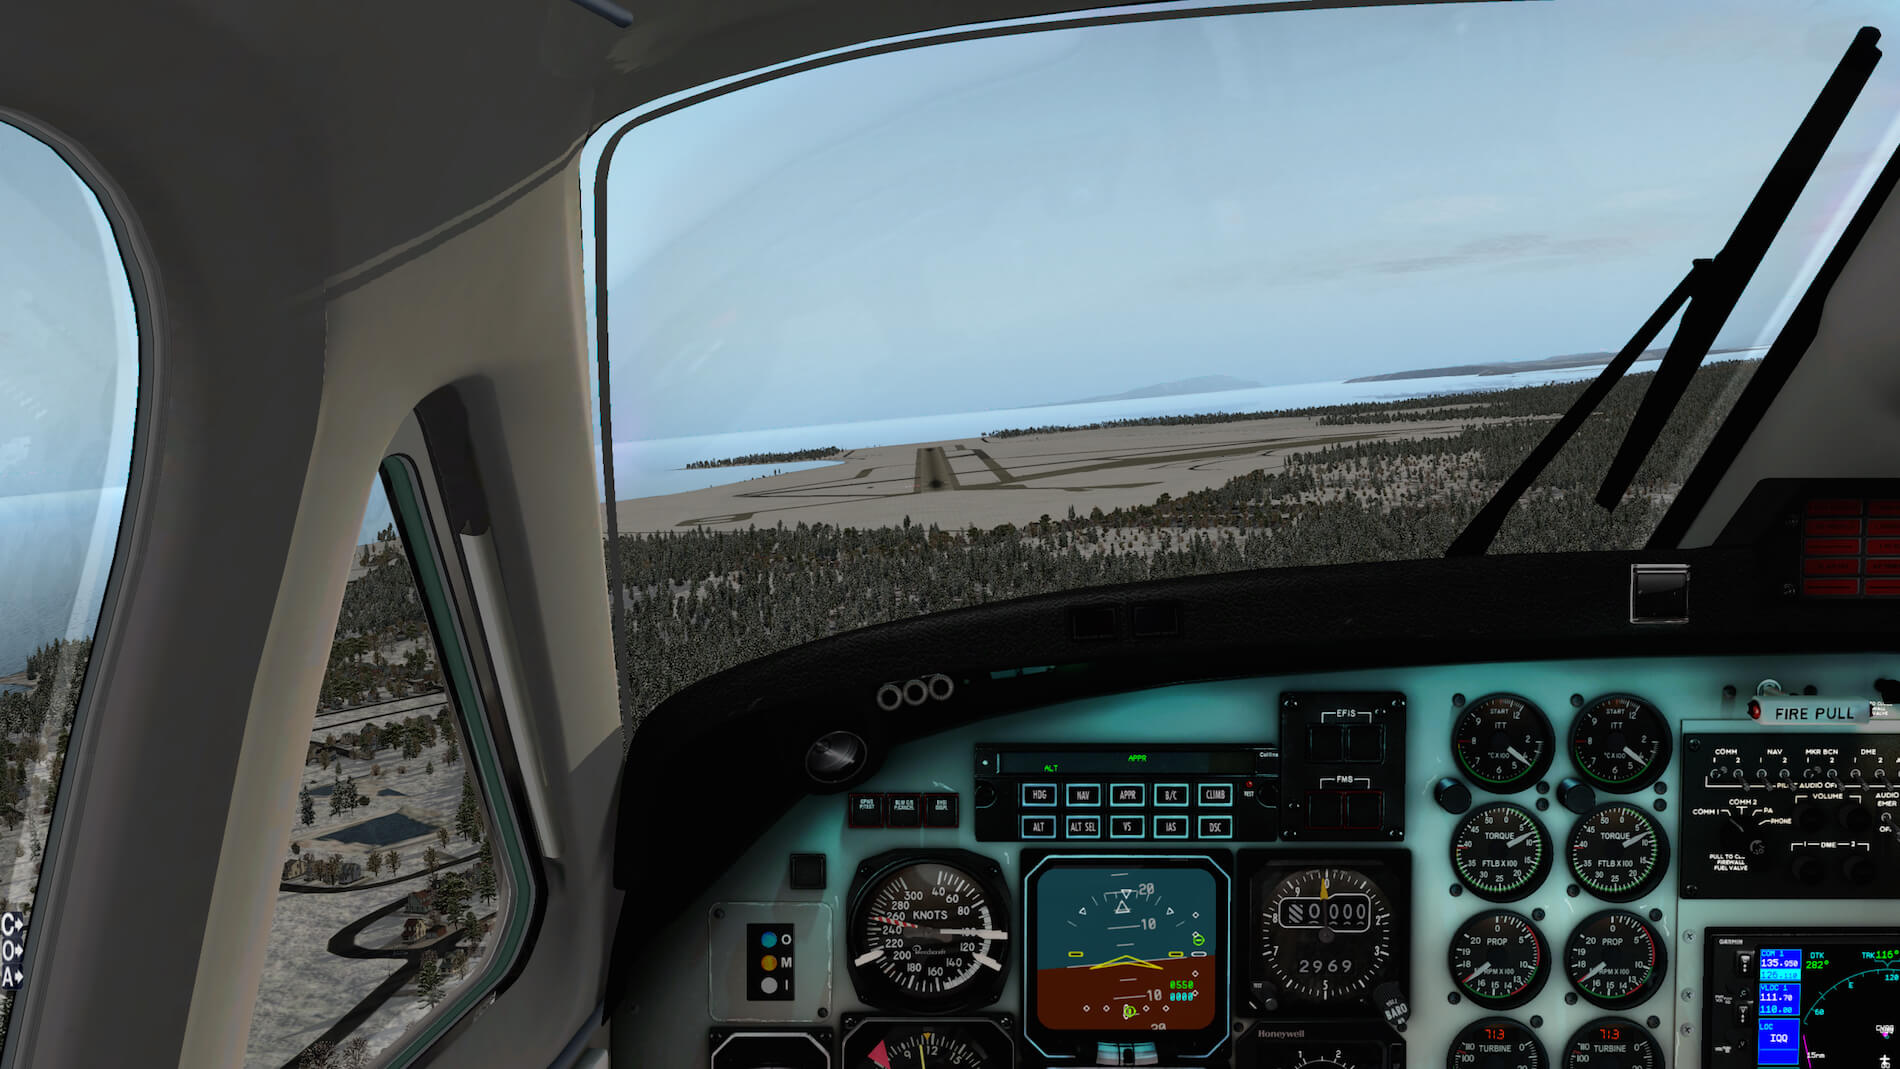

It should pick up the localizer signal at some distance and when the glide slope signal is detected too, you’ll descent along the glide slope to the runway or, more correctly, the AP is doing this for you. After a successful landing, and I warned you already about this, there’s no building or any other object at the airport, but for doing my walk-around check this doesn’t matter.
CYQQ Walk-Around Check
I finally have the time to do my walk-around check. Normally I should do this before every flight, but that wasn’t possible. Therefore, join me on my virtual inspection and let see what the Carenado B1900D has to offer. As you noticed, I was quite impressed by the 3D cockpit as well as the virtual cabin, but what about the external model and built-in features?
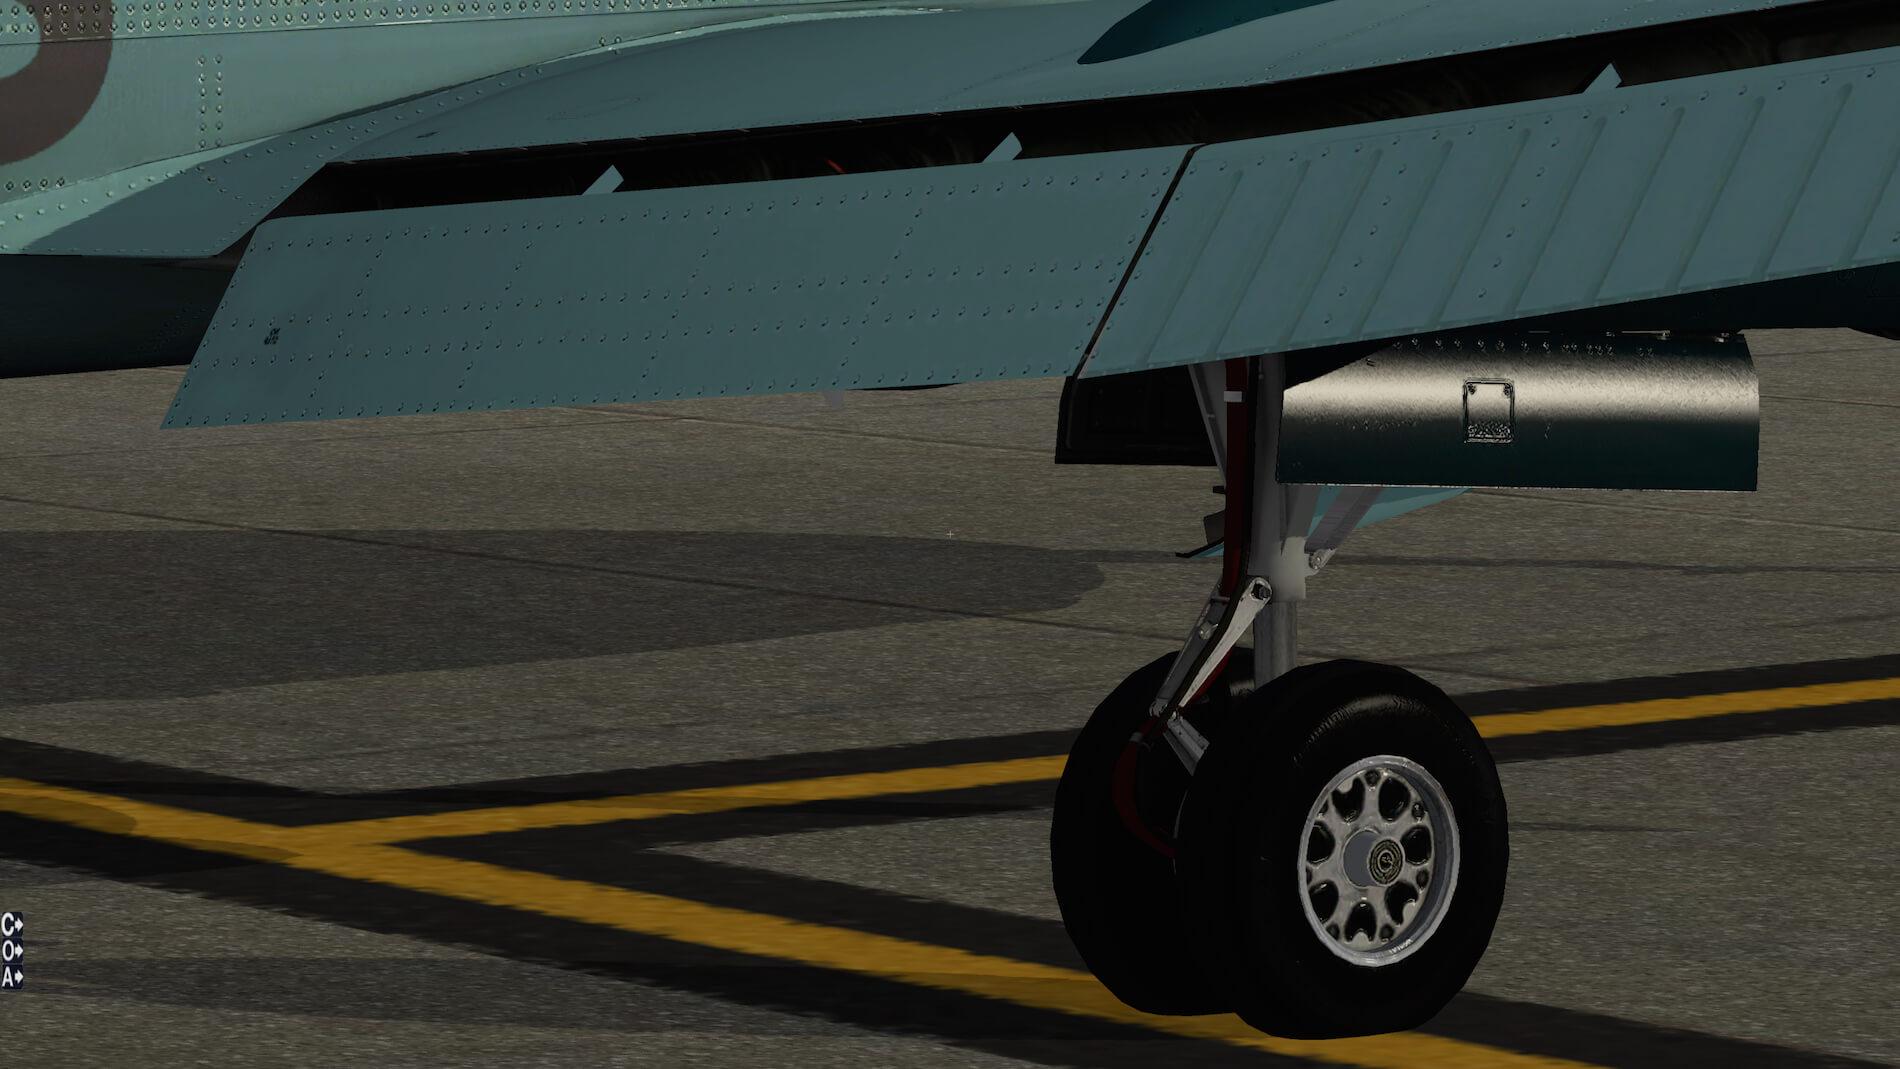
Although the real Beechcraft B1900 isn’t the most beautiful aircraft, it is well modeled with an eye for detail by the Carenado team. The NLG (Nose Landing Gear) and MLGs (Main Landing Gear) are always an example of high quality 3D modeling as well as the “almost” perfect use of photo real material. That combination guarantees high quality modeling. I’m always impressed by the tiny details these gears have; the shock absorber that looks so real (due to the photo real material), the decals on the strut, the torque links, the gear UP-lock bracket, the shimmy damper, the weathered look on the fixed gear strut, the wheel rim, the fixed small FWD gear door with integrated taxi light and many more.
What I just wrote about the NLG, is also applicable to the MLGs except that the MLG has additionally the hydraulic hoses for the wheel brake assembly and a conduit or wire bundle. The main wheel rims are much more impressive then the NLG, but that’s only because of the way they are designed.
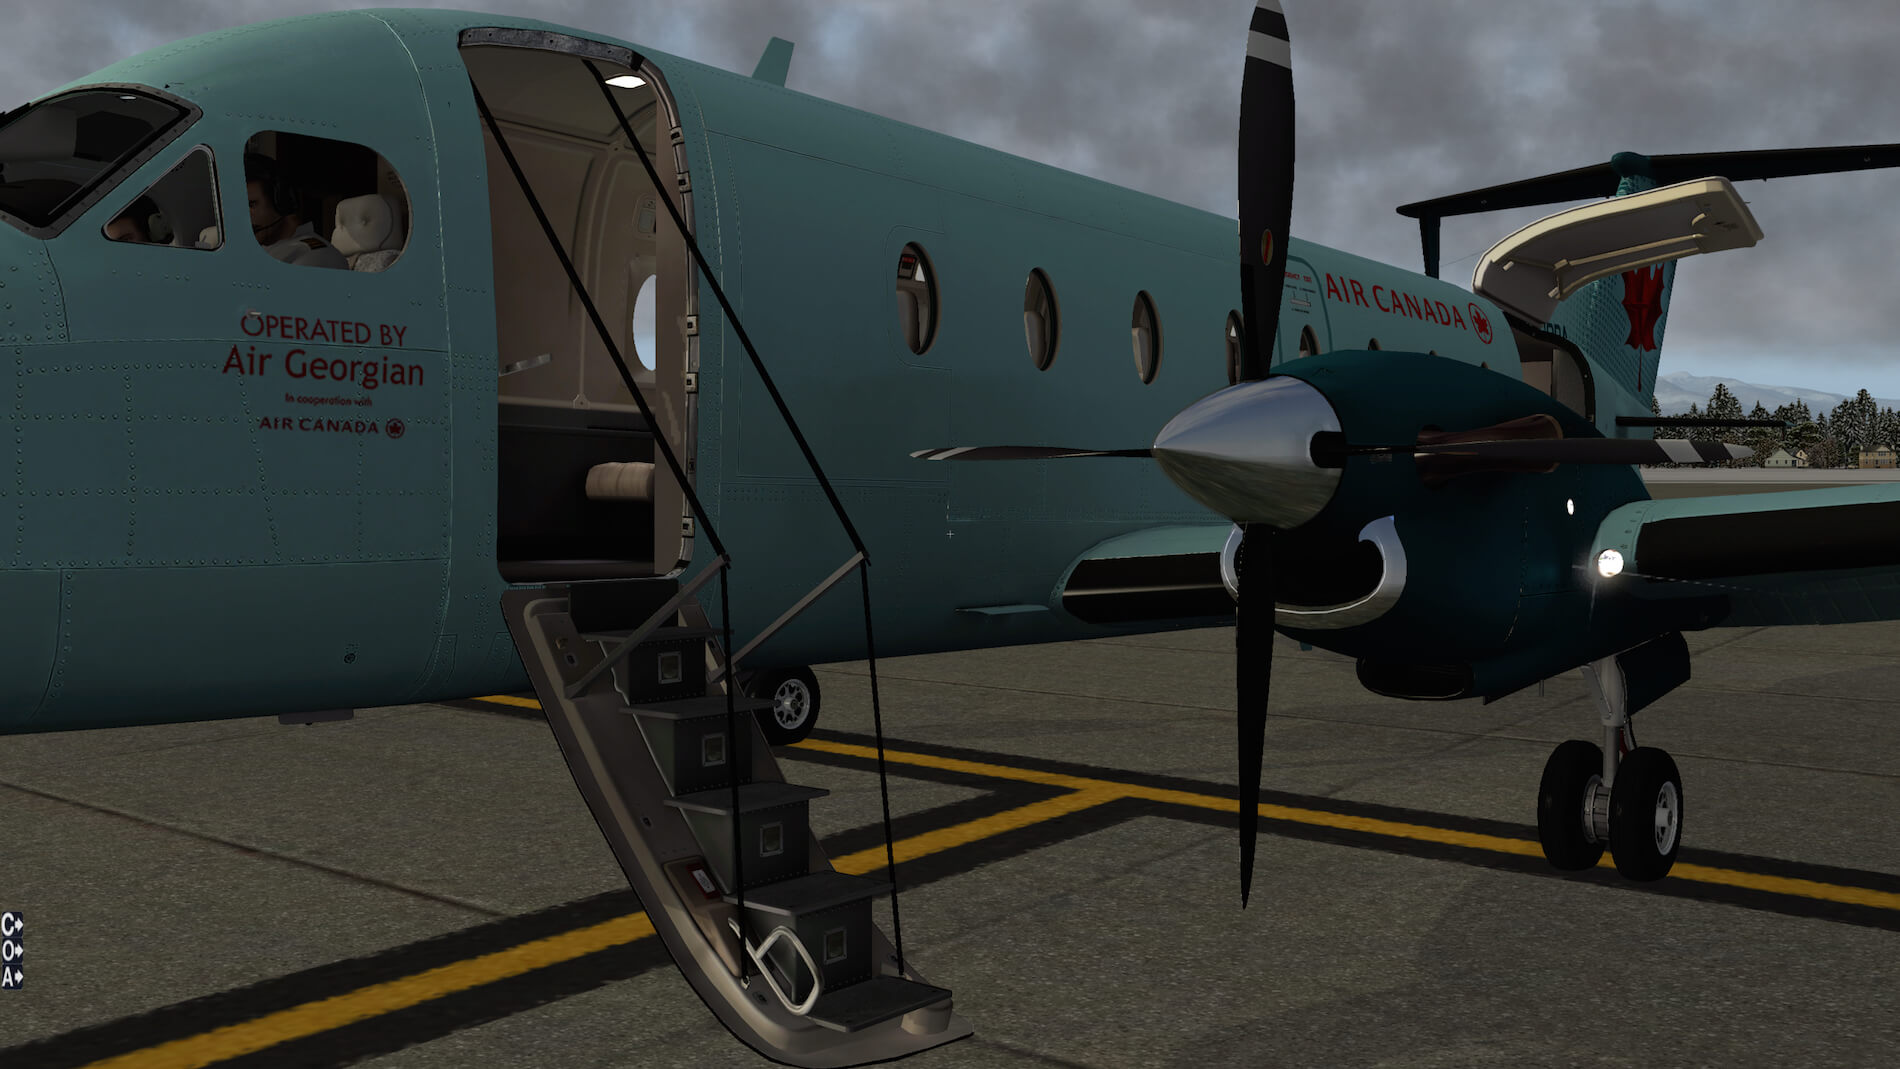
I had hoped I could open/close the passenger door from the outside, but this feature isn’t installed unless I did something wrong. Instead, opening and closing of the passenger door happens via the “Options” popup window where you can not only control the passenger door, but also the baggage door. Besides this, you can select external static elements and the cabin/cockpit door. The interior of the passenger door itself may be simple, it’s just a hinge, steel cables or hold-open cables and some steps, but it is very well made and quite accurate, to be honest.
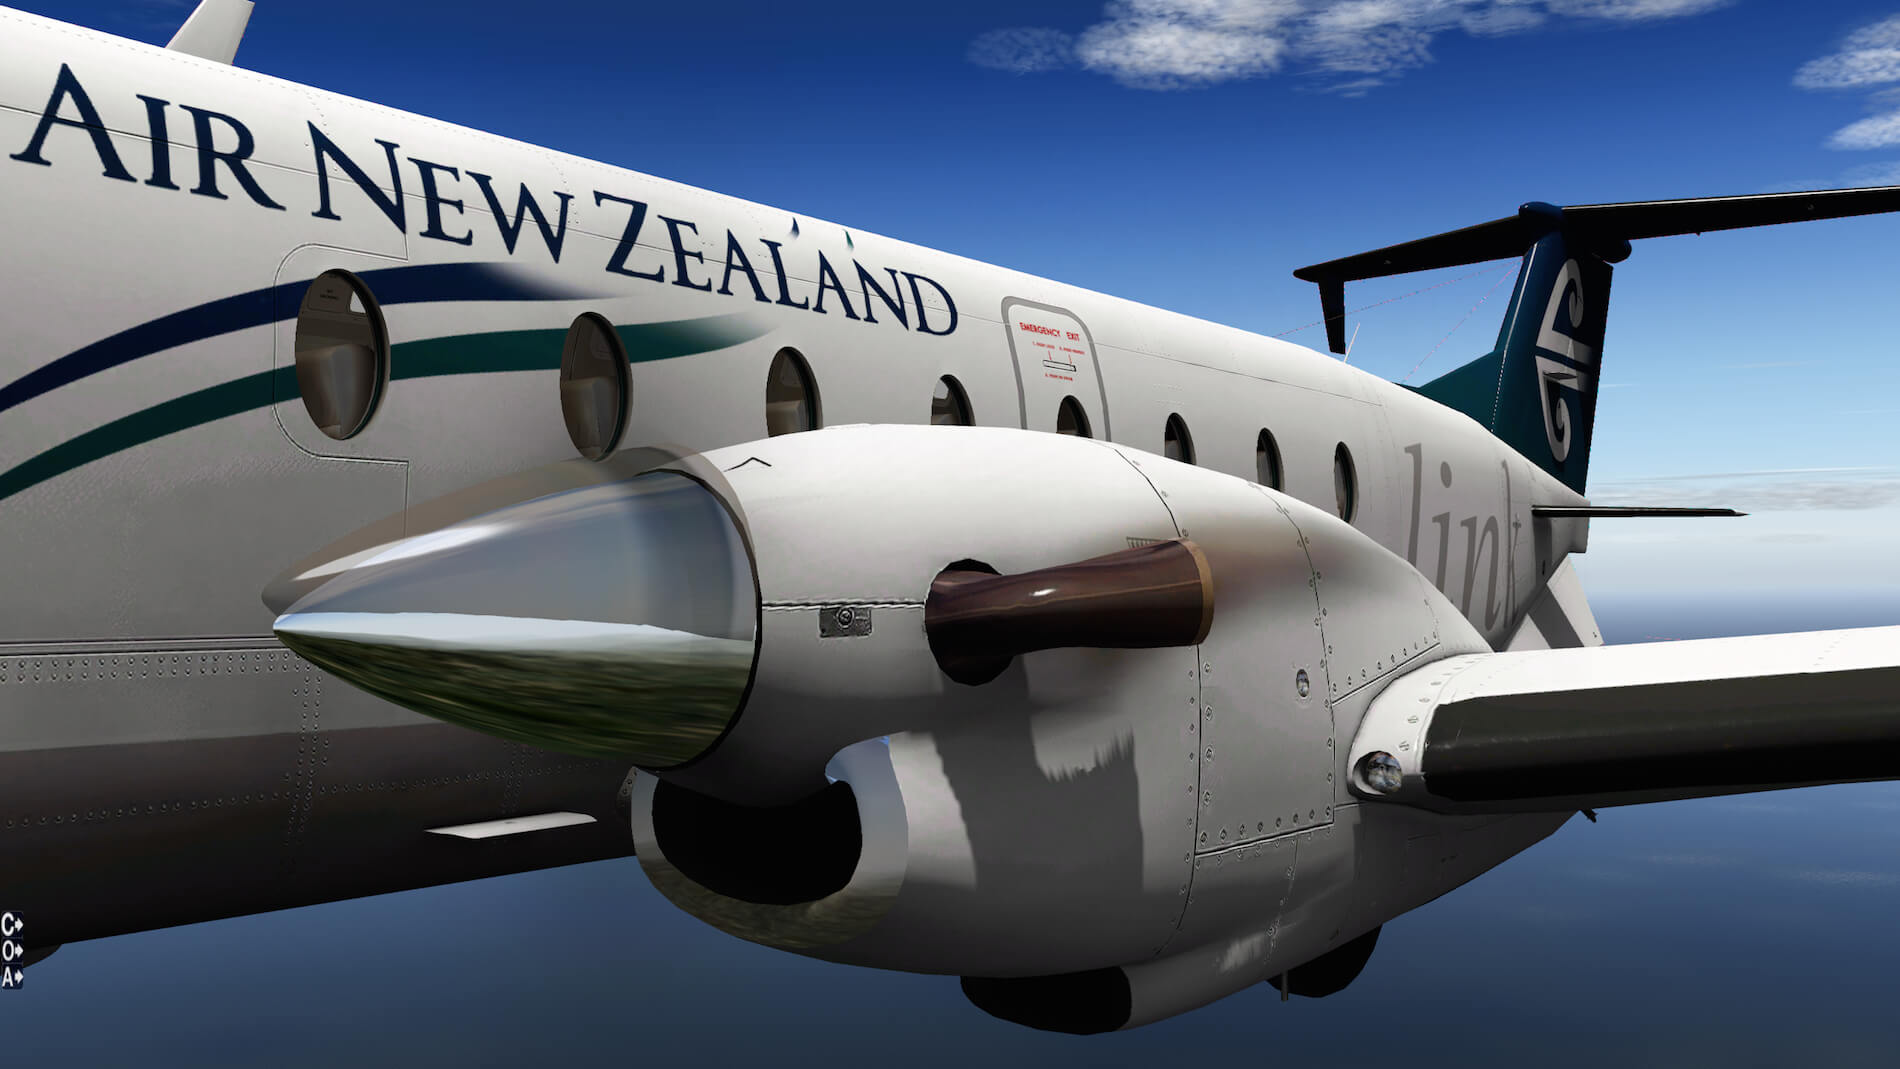
The same is applicable for the engine cowling and four-blade propeller. The only small criticism I have relates to the decals on the propeller blades. I can’t read them and thus I’ve got no idea who’s the vendor. Is it a problem? No, not at all. Zooming in that close on a propeller blade to see a decal is perhaps a bit too much and not worth all the artist effort. Although this could be seen as a critical note, the glossy spinner cone on the other hand is very nice which is also true of the polished engine air inlet.


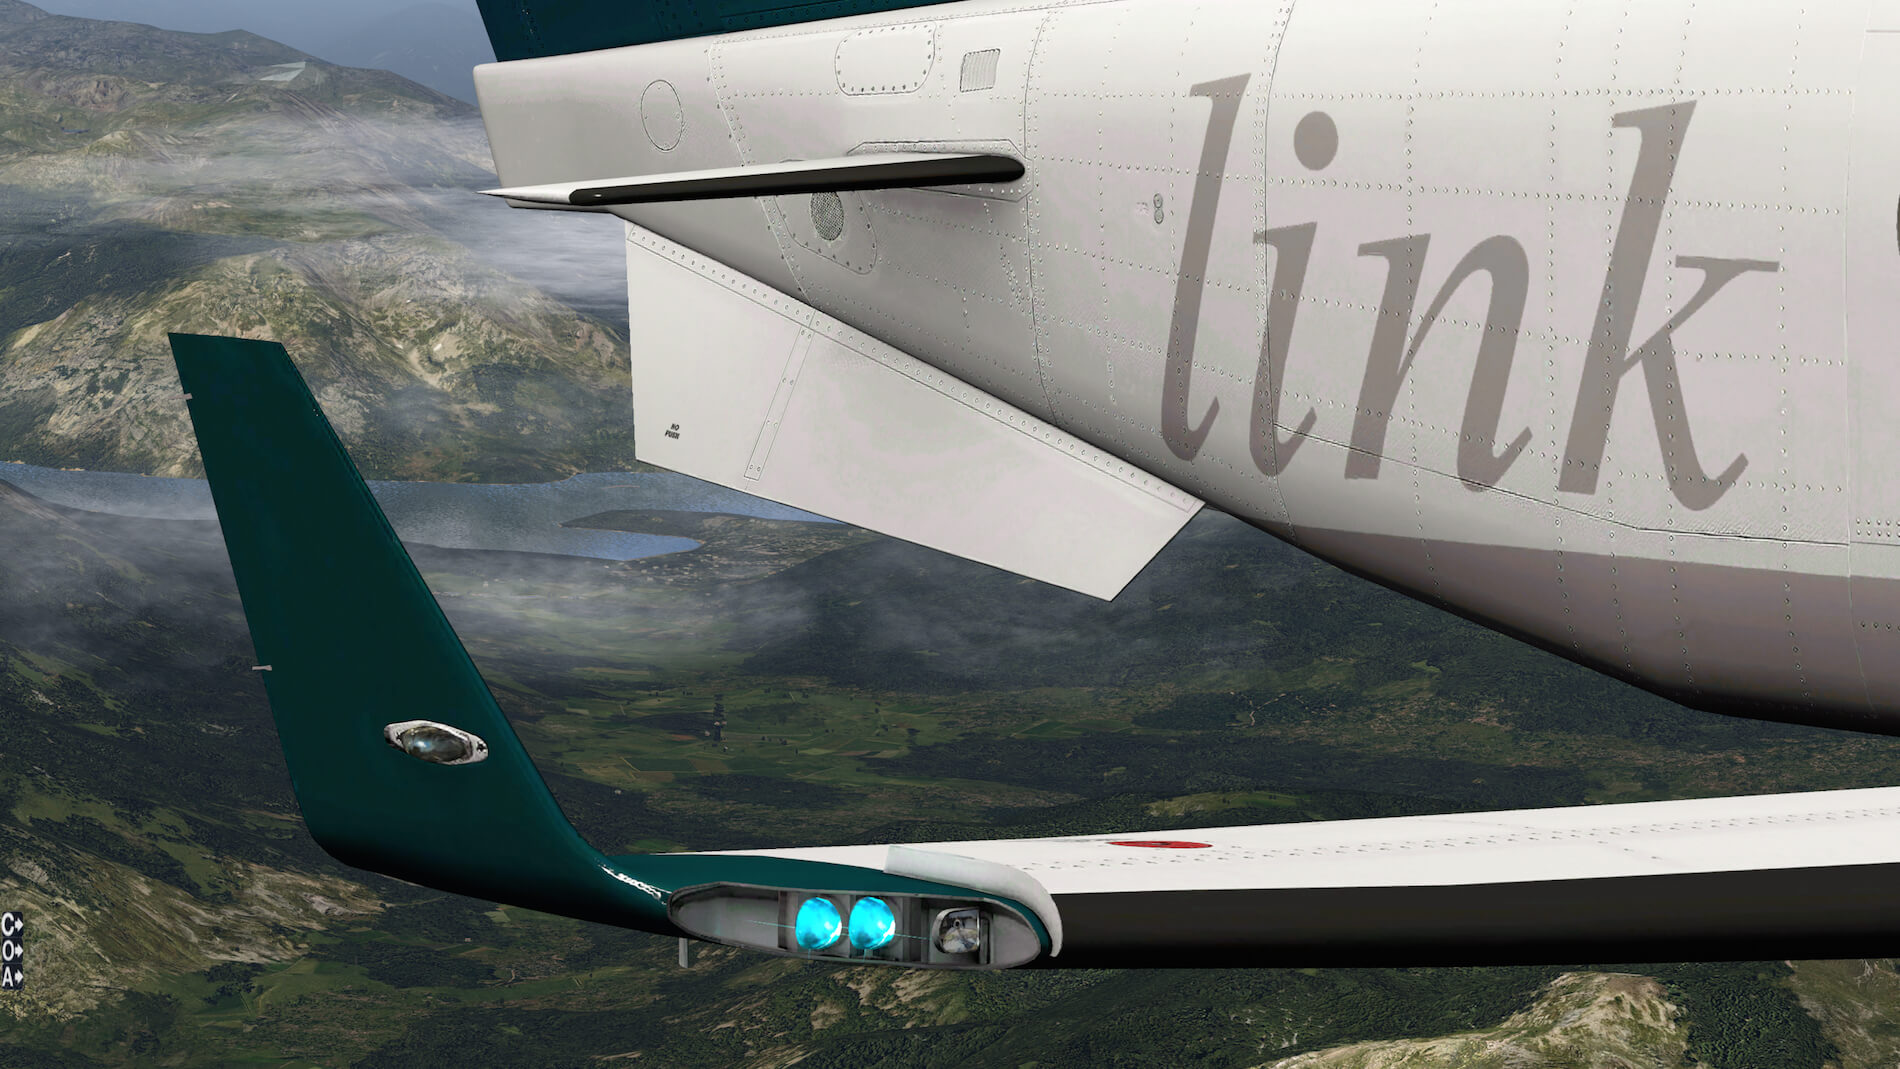
Walking along the leading edge of the left-hand wing, I reach the fancy but gorgeous looking wing tip. By the way, for those who have no idea; when I write left hand or right hand side of the aircraft, keep in mind this is always looking from the tail of the aircraft in a forward direction.
Via the trailing edge I notice the presence of several static dischargers, panels, the fuel filler gap, a decal near the fuel filler cap which is not readable at all, and the flap. Via the opened baggage door I face the weird looking tail. I’m not 100 percent sure what the almost vertical fins are at the end of the bottom of the fuselage, but I think they are stabilizing fins. I also like the appearance of the fuselage skin. I won’t say it has a weathered look but it gives the impression of really looking at an aluminum skin which is never perfect. That I highlight this now is not fair, simply because many previous Carenado and Alabeo models have this too! It gives the overall skin of fuselage, tail, wings and doors a very realistic look.

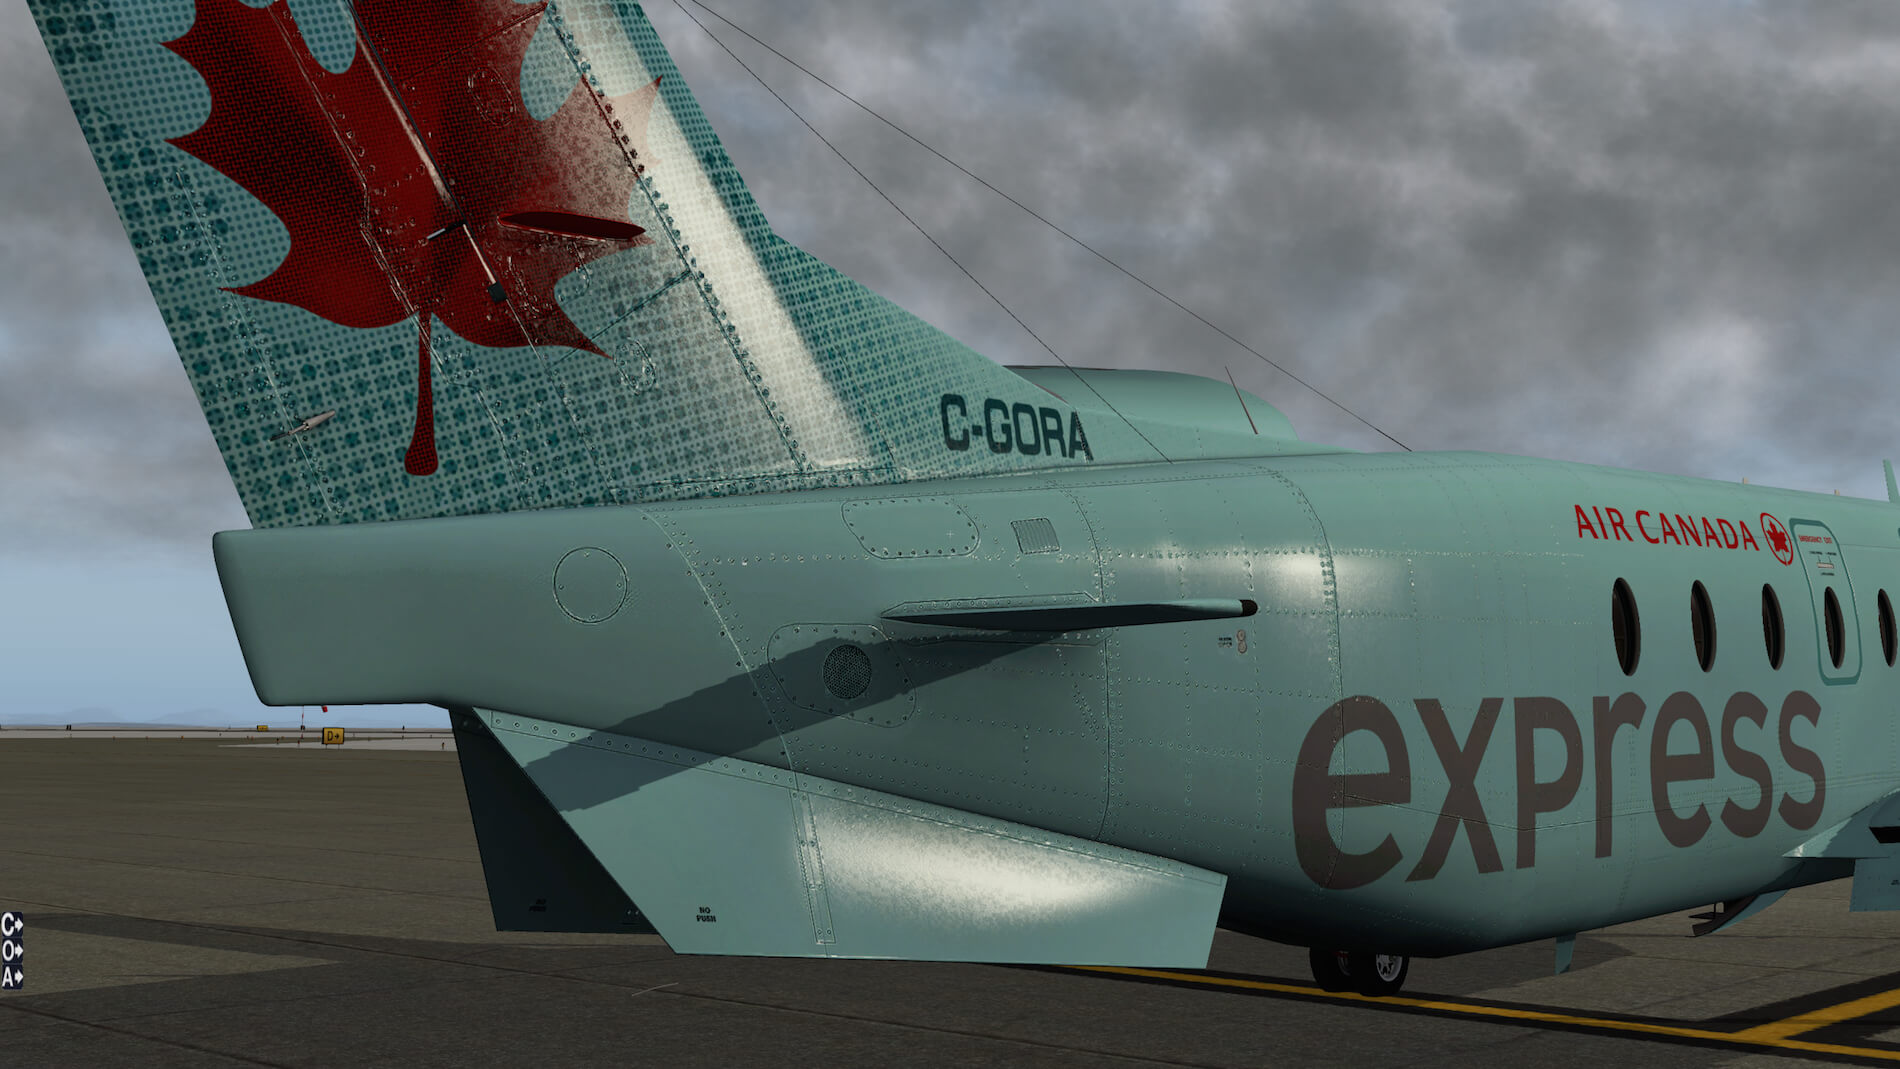


I haven’t checked all liveries, but what I’ve seen from the Air Canada Express and the two Air New Zealand paintings, I can tell you that I’m very happy with the overall quality. And I must mention this; not all decals on the fuselage or wings are readable. Perhaps Carenado can try to improve this with a future update. Overall a very nice model with again …. the famous “Carenado” quality!
Summary
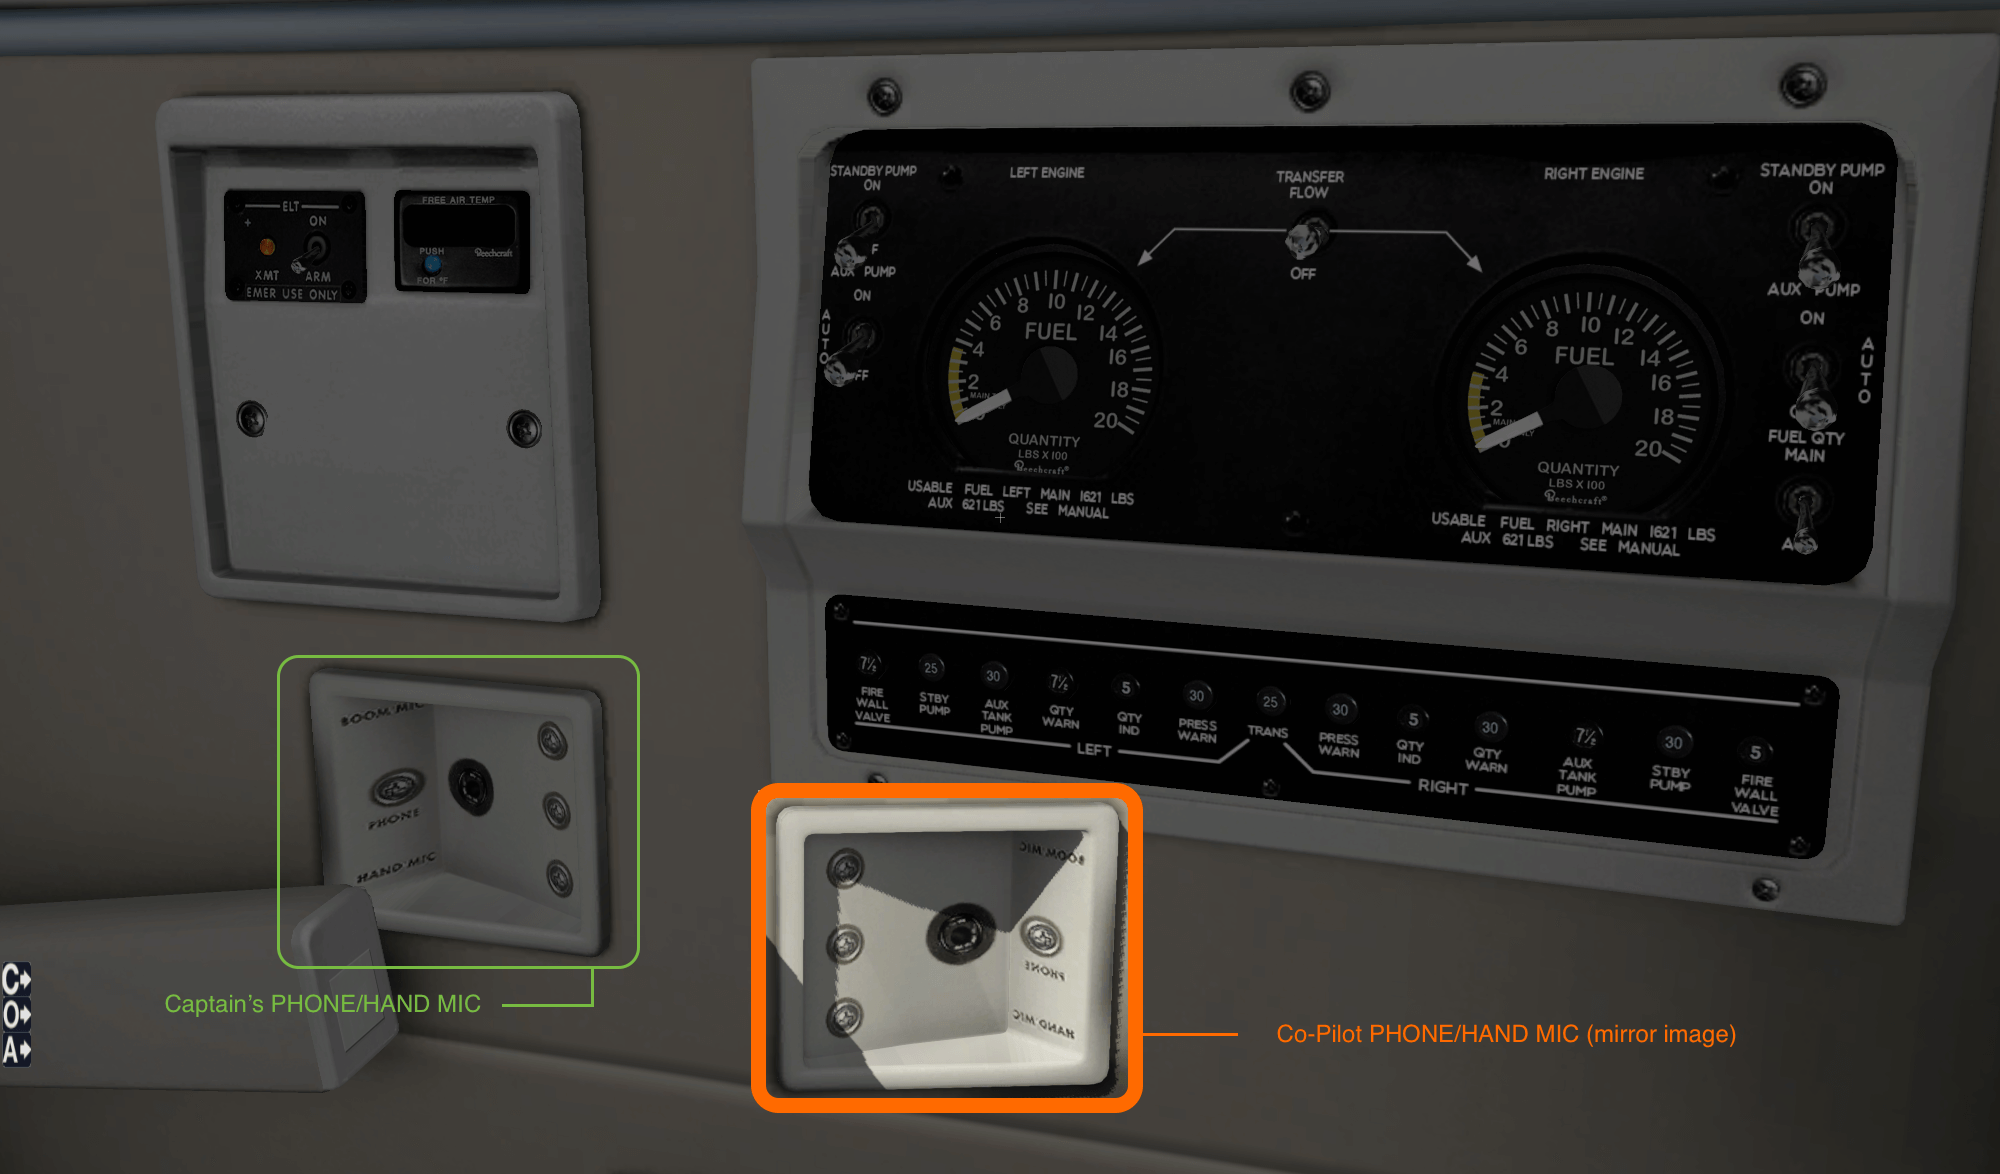
Quite a large GA aircraft with, I would say, a lot of potential. It looks great, comes with more liveries then normal and it offers a very nice modeled virtual cabin as well as a high-quality 3D cockpit. That I couldn’t find the NO SMOKING and FASTEN YOUR SETA BELTS switches or knobs isn’t really a problem. At the end of my B1900 exploration, I found one small mirror-image issue. Not sure if this will be solved with a future update, but in case you haven’t seen it, look to the following screenshot.
In case you prefer an on-screen interactive checklist, you should look for the XChecklist version 1.22 freeware add-on and of course, the B1900D checklist version 1.1. Install the XChecklist plugin in Resources/plugins folder and copy and paste the B1900D clist.txt file in the root of the Carenado B1900D folder. At start-up of the B1900D, the checklist will be loaded automatically with a semi-transparent display. For more details, check the XChecklist Acrobat document.
As mentioned earlier, the B1900D comes with some liveries including the 6 free liveries as indicated on their website and when you look closely, you’ll find many additional liveries at X-Plane.Org. Just search for the “Carenado B1900D”.
With all those liveries and the very well modeled GA aircraft, I’m a happy simmer. That said, the Carenado B1900D has a permanent place in my hanger and hopefully it will also get a nice place in your hanger too.
And did I cover everything?
I think I covered most of the Carenado B1900D version 3.2, but as you know, it’s always possible I’ve forgotten something. In case you’ve a different experience or want to share issues or thoughts with me, feel free to contact me. You can reach me via email Angelique.van.Campen@gmail.com or to Angelique@X-Plained.com.
Attention … attention … some words about X-Plane 11.
Although I didn’t mentioned this before in this review, the aircraft is officially according Carenado only for X-Plane 10.51, but that doesn’t mean you can’t fly it with X-Plane 11. Oh yes, you can and as far as I’ve seen, most of the things in the cockpit work (excuse me when I’ve missed a couple of things) as well as the aircraft behavior. However, all the special features X-Plane 11 offers like for example the glossy external look, that’s something you can forget. So, even your favourite Beechcraft B1900D can be flown in X-Plane 11.
More information about the Carenado B1900D as well as buying details can be found at the dedicated Carenado web page.
For this review I used several add-on freeware add-ons, besides of course the Carenado B1900D. The used add-ons are:
– Freeware | Carenado B1900 Livery Pack
– Freeware | Alpilotx.net New Zealand Pro
– Freeware | ISDG Christchurch International Airport (NZCH)
– Freeware | ISDG Auckland International Airport (NZAA)
– Charts AIP New Zealand | NZCH / NZAA
– Freeware | XChecklist v1.22
– Freeware | clist.txt version 1.1 for the B1900D
– Freeware | CYYC Calgary International Airport v1.2 from AndrooC
– Freeware | Comox Scenery Airport X-Plane.Com
– Freeware | NAV Canada Airport Diagram
– Freeware | Winter Pack version 1.1 from xflyer
– Freeware | Winter Pack Addition from ShePooley
With Greetings,
Angelique van Campen
| Add-on: | Payware Beechcraft B1900D |
|---|---|
| Publisher | Developer: | X-Plane.Org | Aerosoft | Carenado |
| Description: | Realistic rendition of Beechcraft B1900D |
| Software Source / Size: | Download / Approximately 1.2GB (unzipped) |
| Reviewed by: | Angelique van Campen |
| Published: | May 8th 2017 |
| Hardware specifications: | - iMac 27″ 4.2Ghz Late 2015 | iMac 27″ 3.9Ghz Late 2013 - Intel i7 4.0Ghz / 4.2Ghz during Boost Mode | Intel i7 3.5Ghz / 3.9Ghz - AMD Radeon R9 M395X 4GB GDDR5 | NVIDIA GeForce GTX 780M 4GB - OWC 64GB 1867MHz DDR3 | 32GB 1600MHz DDR3 - 1 internal 1TB SSD (Sierra 10.12.4) | 1 internal 1TB SSD (Windows 10 Pro) - 1 external 1TB SSD | 1 external 1TB SSD - Saitek Pro Flight System X-52 Pro and X-56 Rhino |
| Software specifications: | - Sierra (10.12.4) | El Capitan (10.11.6) - Windows 10 Professional - X-Plane 10.51c | X-Plane 10.51m | X-Plane 11.00r1 |
8 Comments
Leave a Reply to David Cancel reply
You must be logged in to post a comment.
Very good review. I like this aircraft but as Carenado model I am missing the renew versions with a modern glass cockpit and without the awful AP panel..
Hi Angelique,
Thanks again for this comprehensive review and tutorial. Are you using the latest X-plane 11 version or do you wait for some time to be sure that it is a stable version?
Kind regards,
Arthur
Hi Arthur, back from the short vacation or was it for business?
I’m using the current version of X-Plane 11 although a very good friend of mine, Leen de Jager (FlyBike), always told me … when a new X-plane version comes out, just wait for a while before using it. Let it first stabilise! So, although I’m using it ones and a while and a new upcoming Alabeo review is entirely using X-Plane 11, I still mix my reviews with XP10 and XP11. What matter to me is that the reviewed aircraft or airport works OK with the platform. Using only XP11 because others are using it and problems arise only because I need to follow the others, is something I won’t do.
Angelique, I don’t quite understand the phrase on the main page of this newsletter that this is a brand new plane by Carenado. I bought ver 3.2 about 6 months ago.
Hi David,
It could be (my fault, I know) that I used this posting which was indeed not from recent, but to which model you’re referring since the Phenom is released, I believe, end of February, beginning of March and the Seminole is just a week old or do you refer to something else?
I am referring to your review of the B1900D. I bought ver 3.2 on 02-Jun-16 (nearly a year ago) yet two times on the main page the writer of your news letter says “brand new.”
Hi David,
Understand your confusion, but that twice mentioned “brand new” in the first paragraph of the rev new is referring to the brand new aircraft of the so called virtual airline I was flying with. Like explaining something and being welcome while they are happy to show your new product. So it has nothing to do with the time of official release of the Carenado model.
I love reading your reviews. You have a very easy and enjoyable style. Carenado and Alabeo should give you a commission because I always want to immediately buy what you review!