The Ultimate Pro Flight X-56 Rhino HOTAS
Introduction
The only reason for this introduction is to start with a table of contents. When I started with this review I didn’t know how much I planned to write about the Saitek X-56 Rhino H.O.T.A.S. It turned out to be a comprehensive review. Since it’s turned into an in-depth review, I decided I’d better add a table of contents, so here we go! One more thing before I’ll offer you the table of contents; this review is written for X-Plained.com which is a Laminar Research X-Plane related flight simulator website. That said, the X-56 is tested on both Windows and Mac OS.
UPDATE: Logitech sales Saitek products. Logitech is now the proud owner of Saitek equipment. Wherever you read in this review “Saitek”, you should replace it by Logitech. So, you could ask yourself the question … why can I not replace the word Saitek by Logitech, right? The answer is, of this writing April 2017, easy. The Logitech website still doesn’t offer any ex-Saitek products while the Saitek website is still offering all their products although now from Logitech.
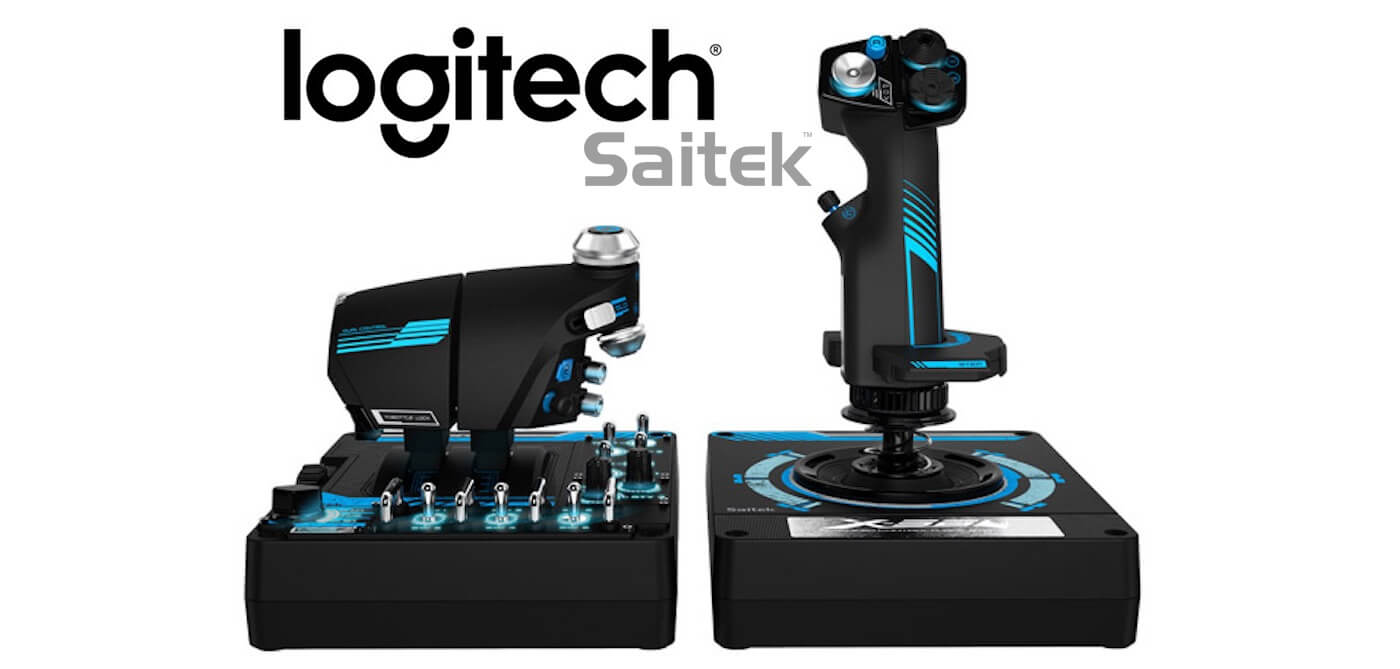
The Ultimate H.O.T.A.S.
– Intro
– What has Saitek to say?
– Unpacking the X-56 Rhino H.O.T.A.S.
– Component 1 | Leaflet
– Component 2 | Throttle Unit
– Component 3 | Joystick, Spring and Joystick Base
– Component 4 | Change the joystick spring?
– Component 5 | Software
Preparing For Use
– Step 1 | Spring Choice
– Step 2 | Positioning the Base Units
– Step 3 | Installing Driver and Programming Software
Close-Up Inspection
– X-56 Rhino Joystick
– X-56 Rhino Throttle Unit
Assigning X-56 Rhino with ….
– Windows 10 Professional “X-Plane 10”
– Windows 10 Professional X-Plane 11.00r1
– macOS Sierra 10.12.3 X-Plane 10.51
– macOS Sierra 10.12.3 X-Plane 11.00r1
And how does it feel?
Summary
The Ultimate H.O.T.A.S.
Intro
Can things get better or is this the ultimate H.O.T.A.S (Hands On Throttle-And-Stick) from Saitek? Now, this is the ultimate combination, but you never know what will happen in the future.
Back in the good old days, Saitek had developed the X-52 and the X-52 Pro. Besides these great products, Saitek had also developed the X-65F. The X-65F was a revolutionary design. What made it unique was that the X-65F stick was equipped with sensors. Sensors could feel the force you applied to the stick and accordingly the sensors produced an output. That’s the same way the real flight stick works in the General Dynamics F-16 Fighting Falcon. Also, the throttle unit was unique at that time, since it offered two throttle levers and the complete unit was made of casting components.
Now we have the X-56 Rhino H.O.T.A.S. and Madcatz, the developer behind this new product, has done it again. Yes, they did it again since the X-56 can provide difference force feedback depending on the spring you install. Yes, you read it right! You can change the force to move the stick by changing the internal springs or you can even decide not to install any spring. The throttle unit looks quite similar to that of the X-65F, but the base and used material is different.
So now, let’s investigate the X-56 Rhino!
What has Saitek to say?
Let’s check what Saitek has to say about the X-56 Rhino. According to the Saitek website, “Designed to meet the needs of the re-emerging space simulation genre, Saitek introduces the new X-56 Rhino H.O.T.A.S. System. Built to the same exacting standards of Saitek’s award-winning Pro Flight accessories range, the X-56 Rhino delivers a multitude of customizable options. In modern space sims control is becoming more complex than in traditional atmosphere-based flight simulations, with many more inputs required to achieve true control of the space craft. Pitch, roll, yaw, backwards, forwards, up, down, left and right (the titular 6DoF) all need to be accounted for.”
“Many PC peripherals now feature RGB backlighting and now the X-56 is no exception. Use the software to set the colour of the lighting to match the rest of your gaming rig. Piloting whilst using VR is a great experience but can prove difficult because you can’t see your own hands, which can make finding the controls you need problematic. The X-56 places controls perfectly under your fingers where subtle distinctions in button feel and shape help you navigate the control set with ease. Even the switches on the base of the throttle are staggered or separated so telling them apart from feel alone is possible, leaving you free to concentrate on the immersive VR experience.”
“The X-56 Rhino’s control surfaces are incredibly accurate, courtesy of a 16-bit aileron and elevator axis, each employing hall-effect sensors. Developed from the ground up, Saitek’s 16-bit axis solution enables extremely precise flight. A ground-breaking, adjustable stick spring system allows pilots to alter the force required to move the stick. Four springs of varying resistance are included to provide a total of five different options. Choose the spring – or no spring at all – which best accommodates your style of flying.”
“The X-56 Rhino boasts twin throttles – ideal for situations in which your primary engine is disabled and you’re down to one – and also provides the option to adjust the friction required to move them. And if your aircraft of choice is single-engine, a handy throttle lock effectively converts the twin throttles into a single unit. Saitek’s software provides the ability to completely customize all of the X-56 Rhino’s axes and buttons. You can adjust deadbands and response curves to fine-tune axes to respond as you wish; all buttons can assign any number of in-sim commands, such as afterburner.”
“Compatible with Most Flight Simulation, Combat Simulation, and Space Simulation Software including:
– Elite: Dangerous
– Star Citizen
– Flight Simulator X
– Flight Simulator 2004
– X-Plane 10
– X-Plane 9
– DCS World
– DCS: A-10C Warthog
– DCS: Black Shark 2
– DCS: UH-1H Huey
– Lock On: Modern Air Combat (LOMAC)
– Lock On: Flaming Cliffs 3
– Lock On: Flaming Cliffs 2
– Lock On: Flaming Cliffs
– aerofly FS
– Take On Helicopters (TKOH)
– Rise of Flight
– Arma 3
– Falcon 4.0: Allied Force
– Falcon BMS 4.32
– World of Warplanes
– War Thunder”
This is great news!
Particularly to me since I own X-Plane 9.70, X-Plane 10 and X-Plane 11 although I’m also aware that X-Plane 11 isn’t yet on the list. Obviously, the description above is from Saitek and for that reason this review is to checkout if my personal feeling and experience by using the X-56 Rhino, is the same as what Saitek says. I can’t wait to get the unit out of the box to begin testing.
Ready? Let’s go!
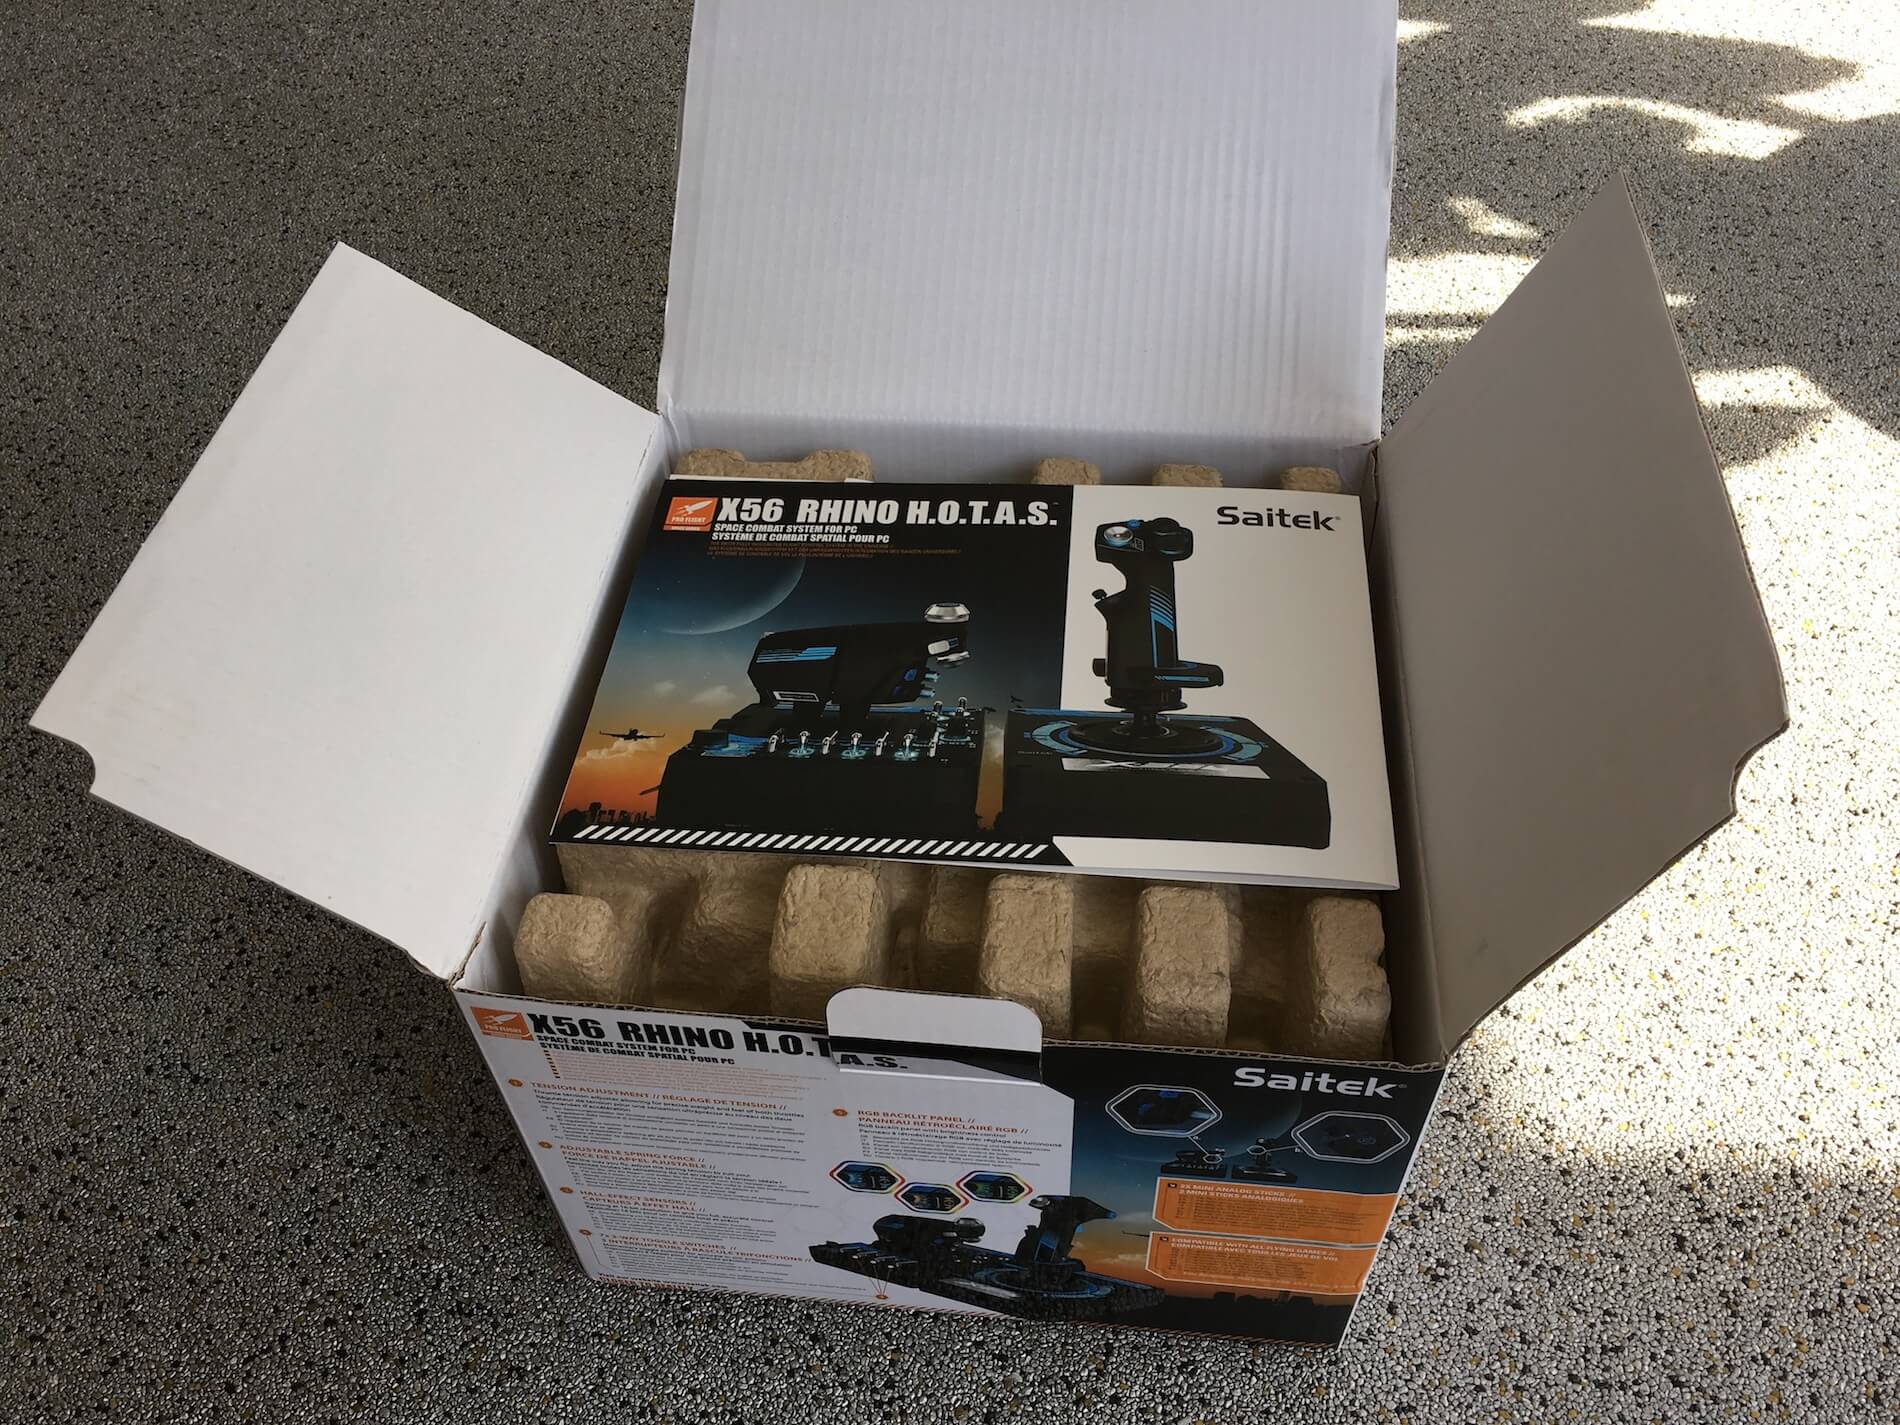
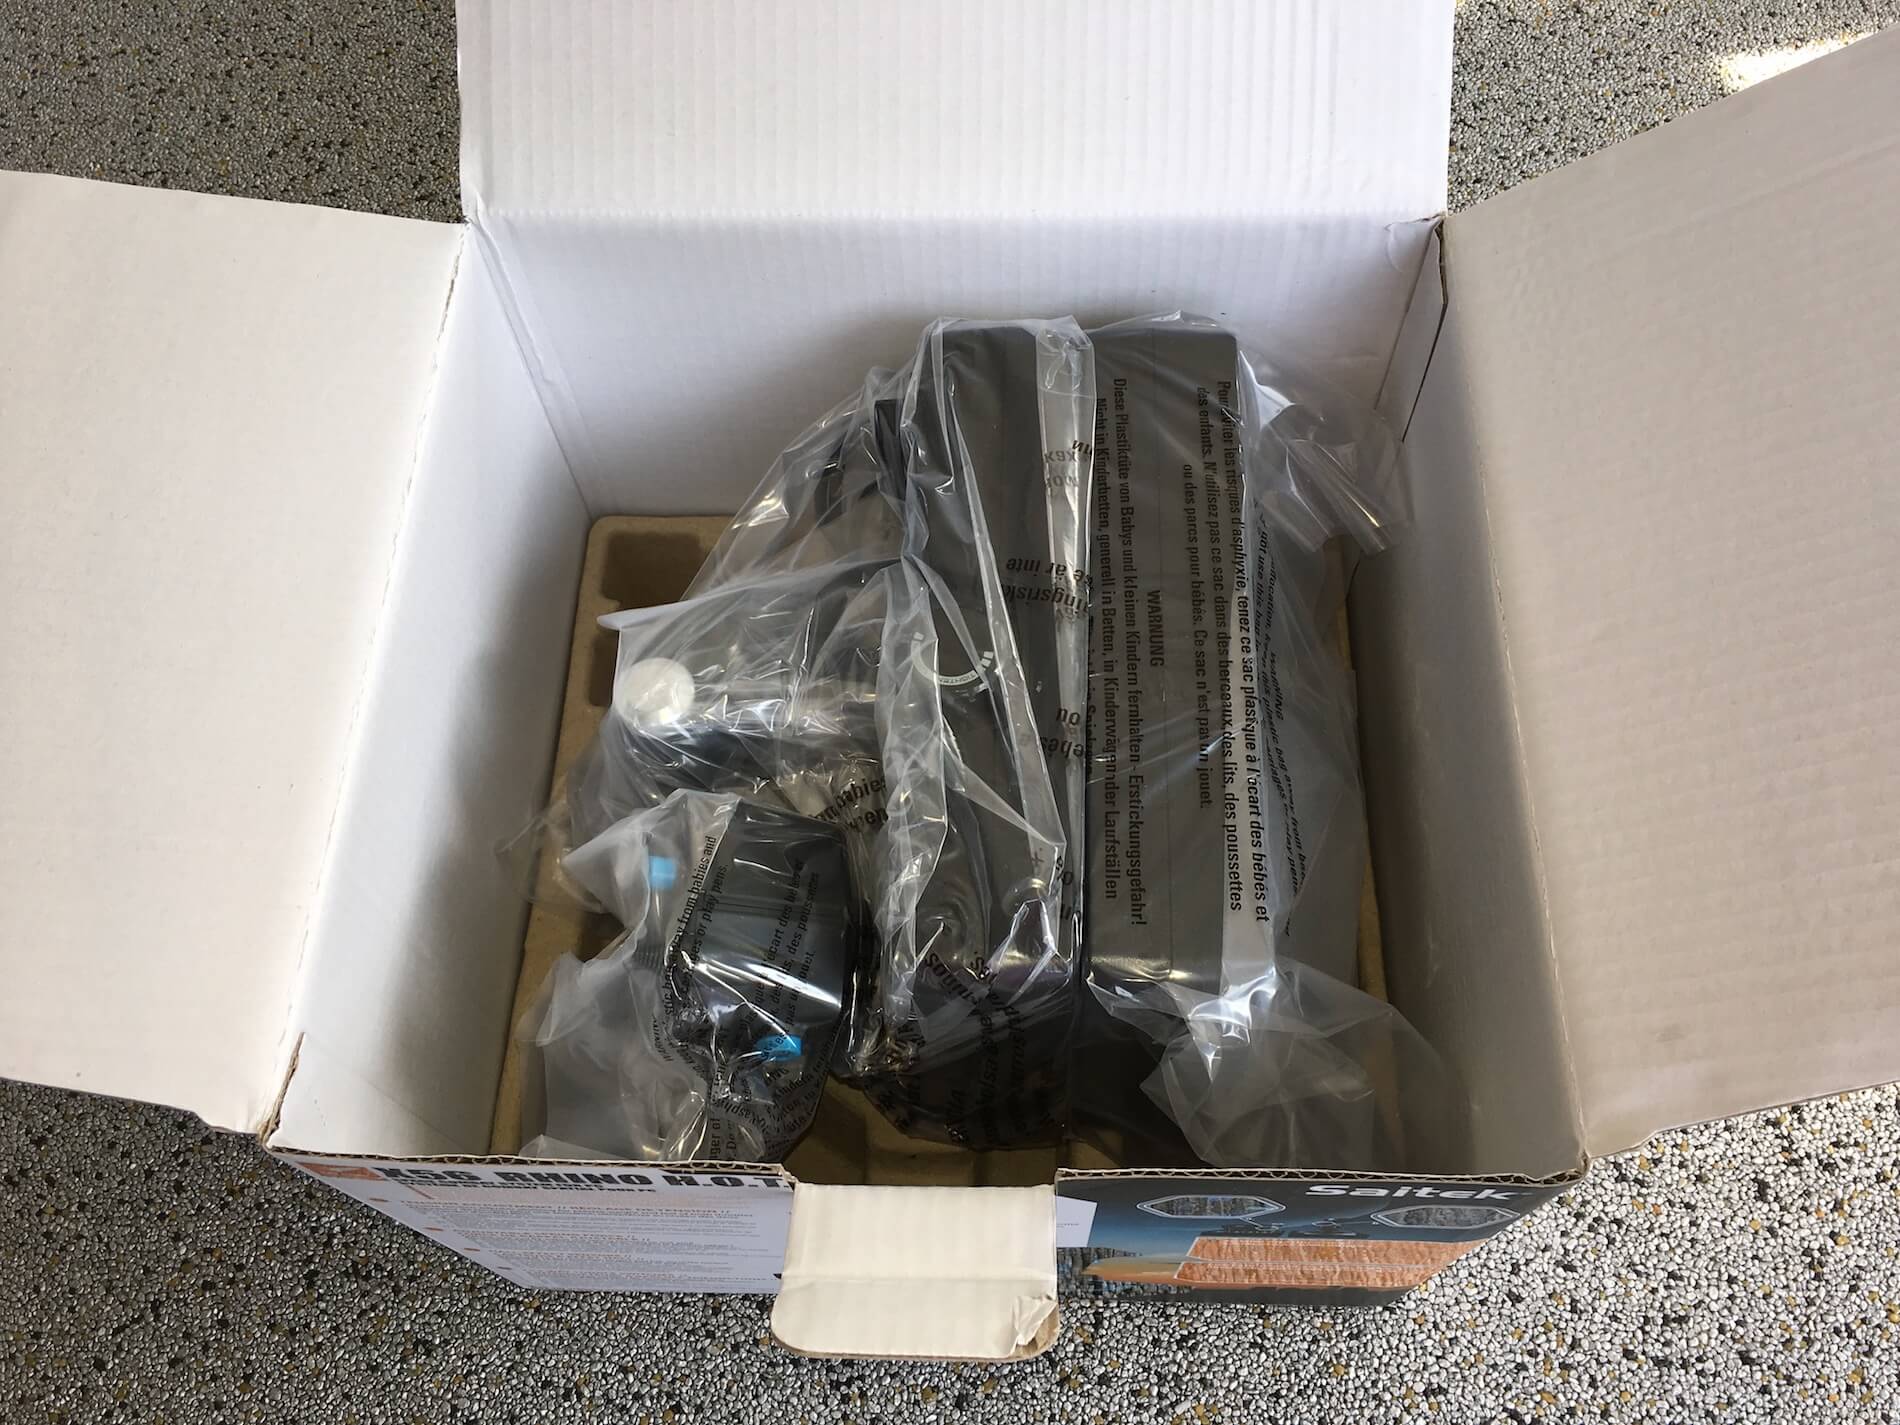
Unpacking the X-56 Rhino H.O.T.A.S.
As of this writing it’s the end of March 2017, I can tell you, that was a great day. Not because it was warm for the time of the year, or that the sun was shining. None of that could compete with the UPS arrival of my Saitek X-56 Rhino package. On the airway bill I could read that the overall package weight was roughly 4.4 kilograms. Let’s find out what’s in the box.
Component 1 | Leaflet
The first product, ok, it’s not really a hardware product, but more a piece of paper. So, the first thing you see when you open the box is a large colored leaflet with information about the box contents, a quick installation guide and a product overview. Don’t worry about the installation procedure yet.
One thing that’s worth to highlight; if you’re familiar with other Saitek joysticks, this stick is removable and needs to be connected to the stick base. Perhaps you know this from the previous X-55 who had the same structure/design. Same as with the X-55, this X-56 has for each unit its own USB cable to be connected to the PC, Mac or USB hub. As with every item on the leaflet, it’s written in nine different languages. To be exact: EN (English), FR (French), DE (German), IT (Italy), ES (Spain), DA (Denmark), SV (Sweden), PT (Portugal) and RU (Russia).
Although the following comments aren’t mentioned in the box contents, I would suggest that you download the Saitek X-56 Rhino HOTAS manual from Saitek. Get your comprehensive copy by using this link. This manual offers a lot more basic and advanced information about the hardware, how to install the drivers and the Windows programming software and how to configure your X-56. That said, a separate piece of paper informs the customer that no CD-ROM or DVD has been included since it’s better to download the latest software, drivers and profile files directly from Saitek. Once more, although Saitek is taken over by Logitech, all the necessary software and drivers are still available via the Saitek website.
Component 2 | Throttle Unit
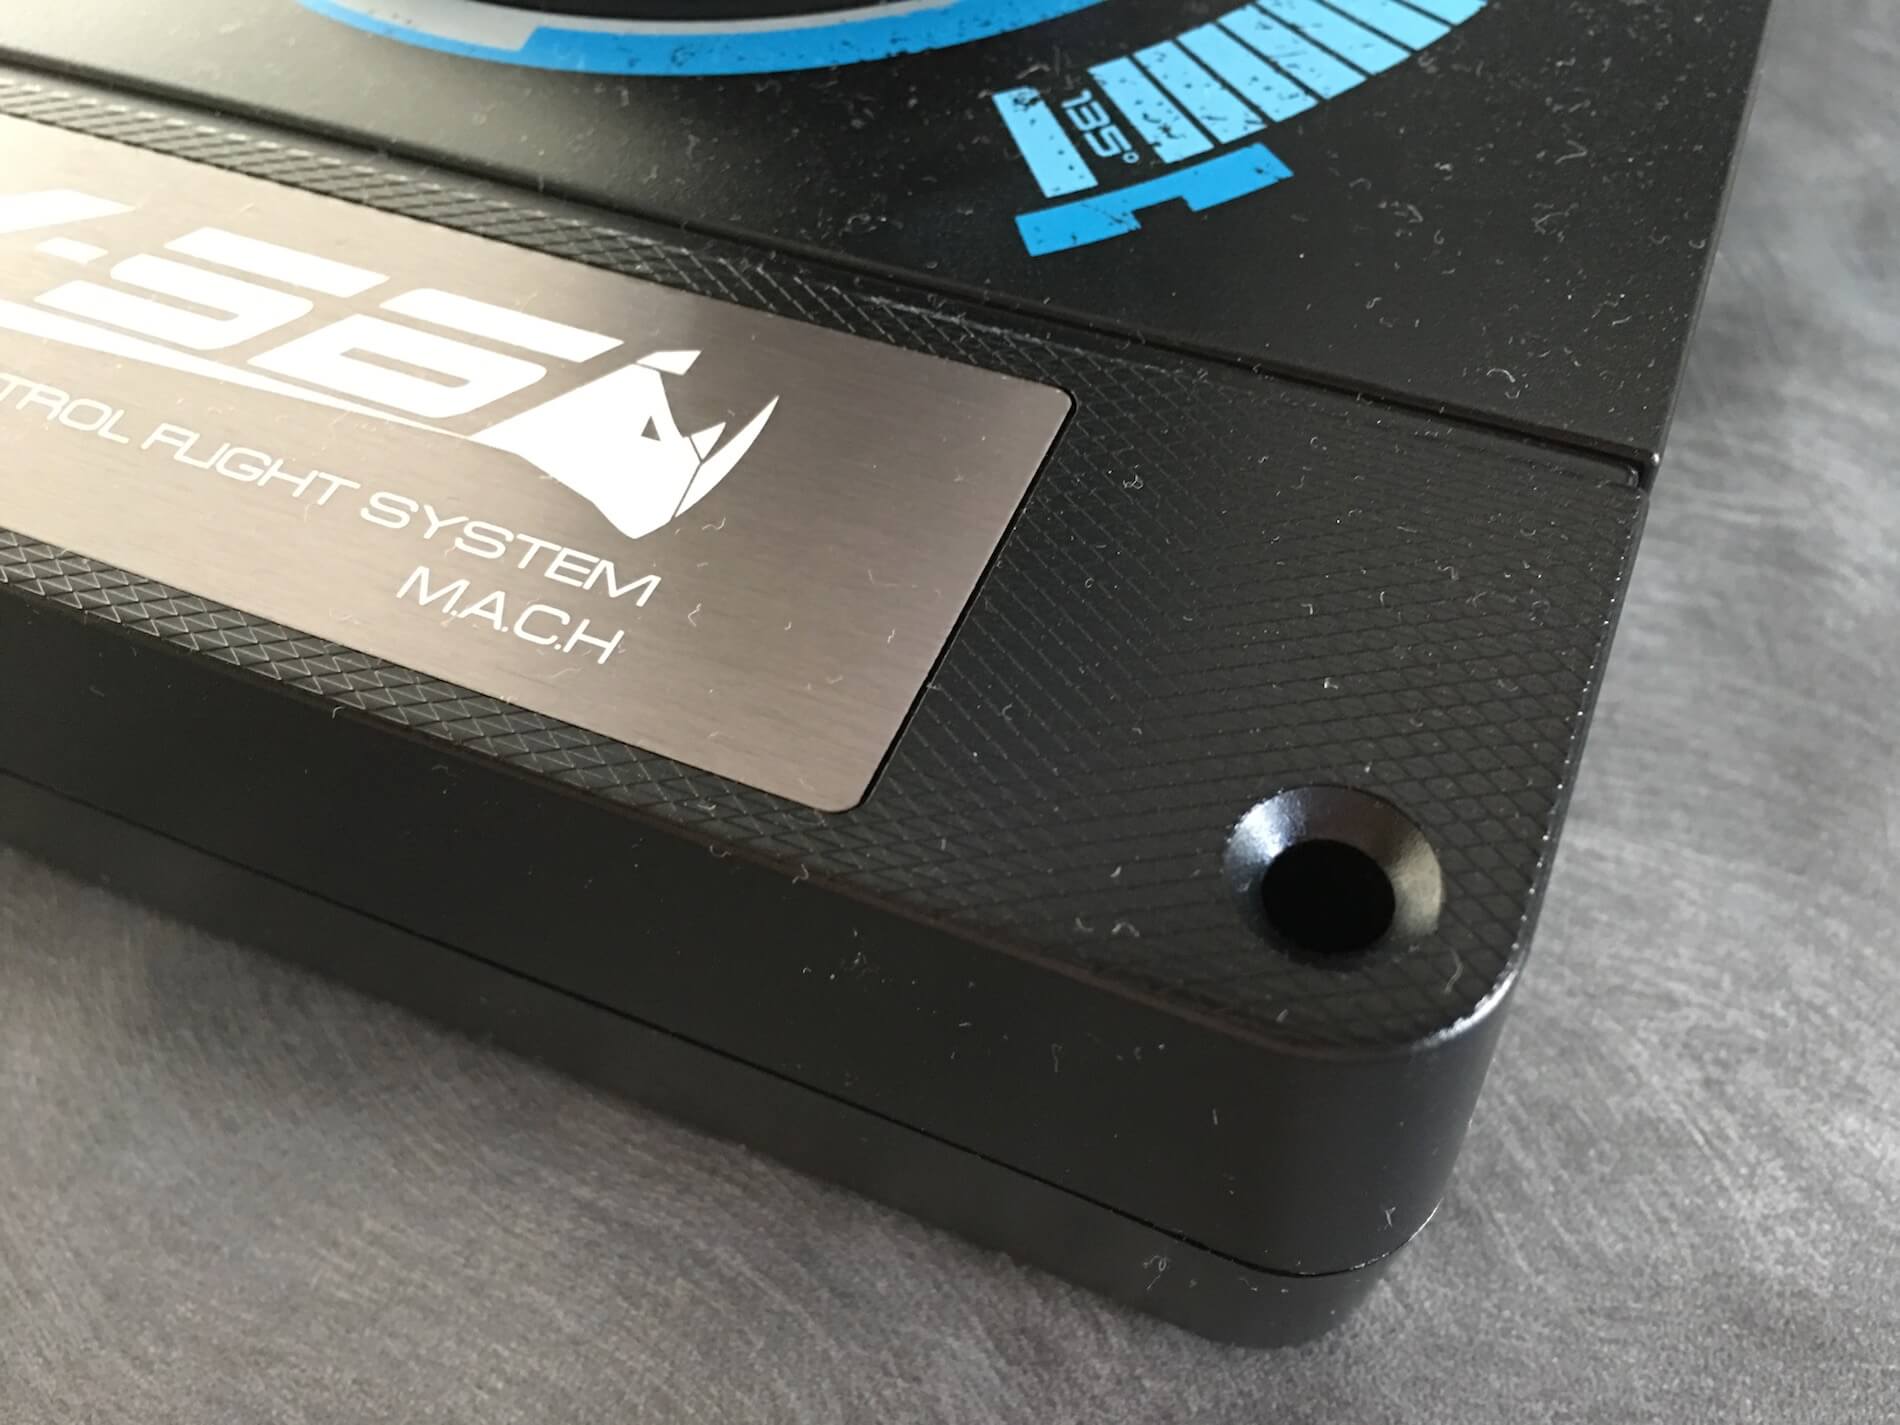
The X-56 throttle unit is a complete unit. Uhhhh, what’s that? It means that there’s no need to connect things to it, whatever things are. It is made of high durable plastic while the throttles have a kind of anti-slip rubber type on it, or possibly it’s the way the plastic is produced. At each corner, you have holes to mount it directly to your flight simulator table. In that case, nothing will happen when you move the throttles. That said, the units stay always at its place, but out of experience after several weeks using this X-56, I can tell you that under normal circumstances the unit stay on the table even without mounting it to my table.
As a comparison; although the Saitek X-52 Pro does have rubber cups at each corner, even with those cups, it’s still possible to pull away the joystick unit from the table when you move the joystick too far from the center.
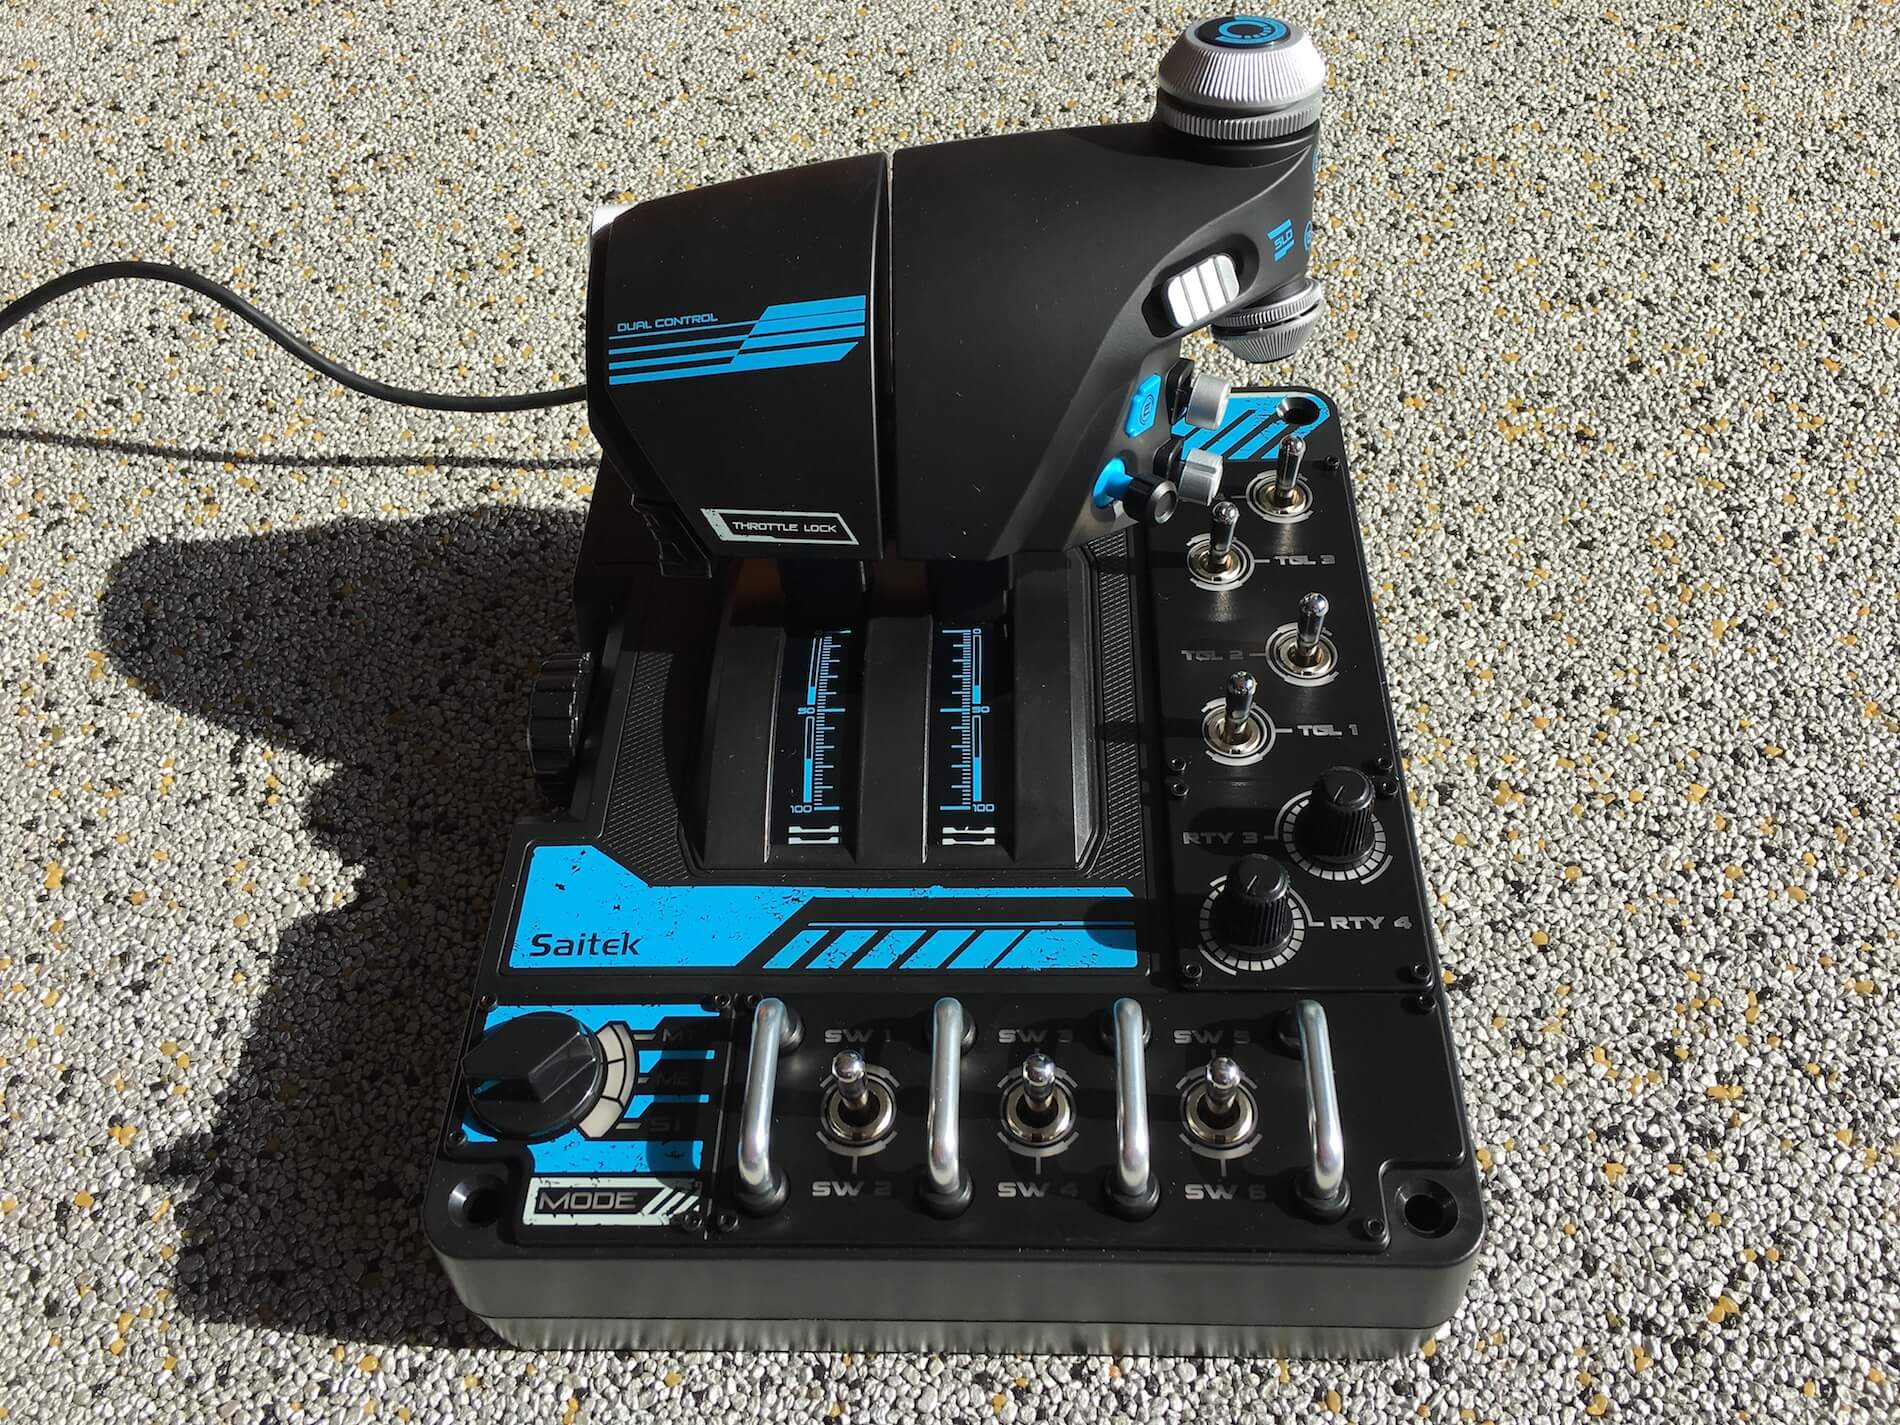
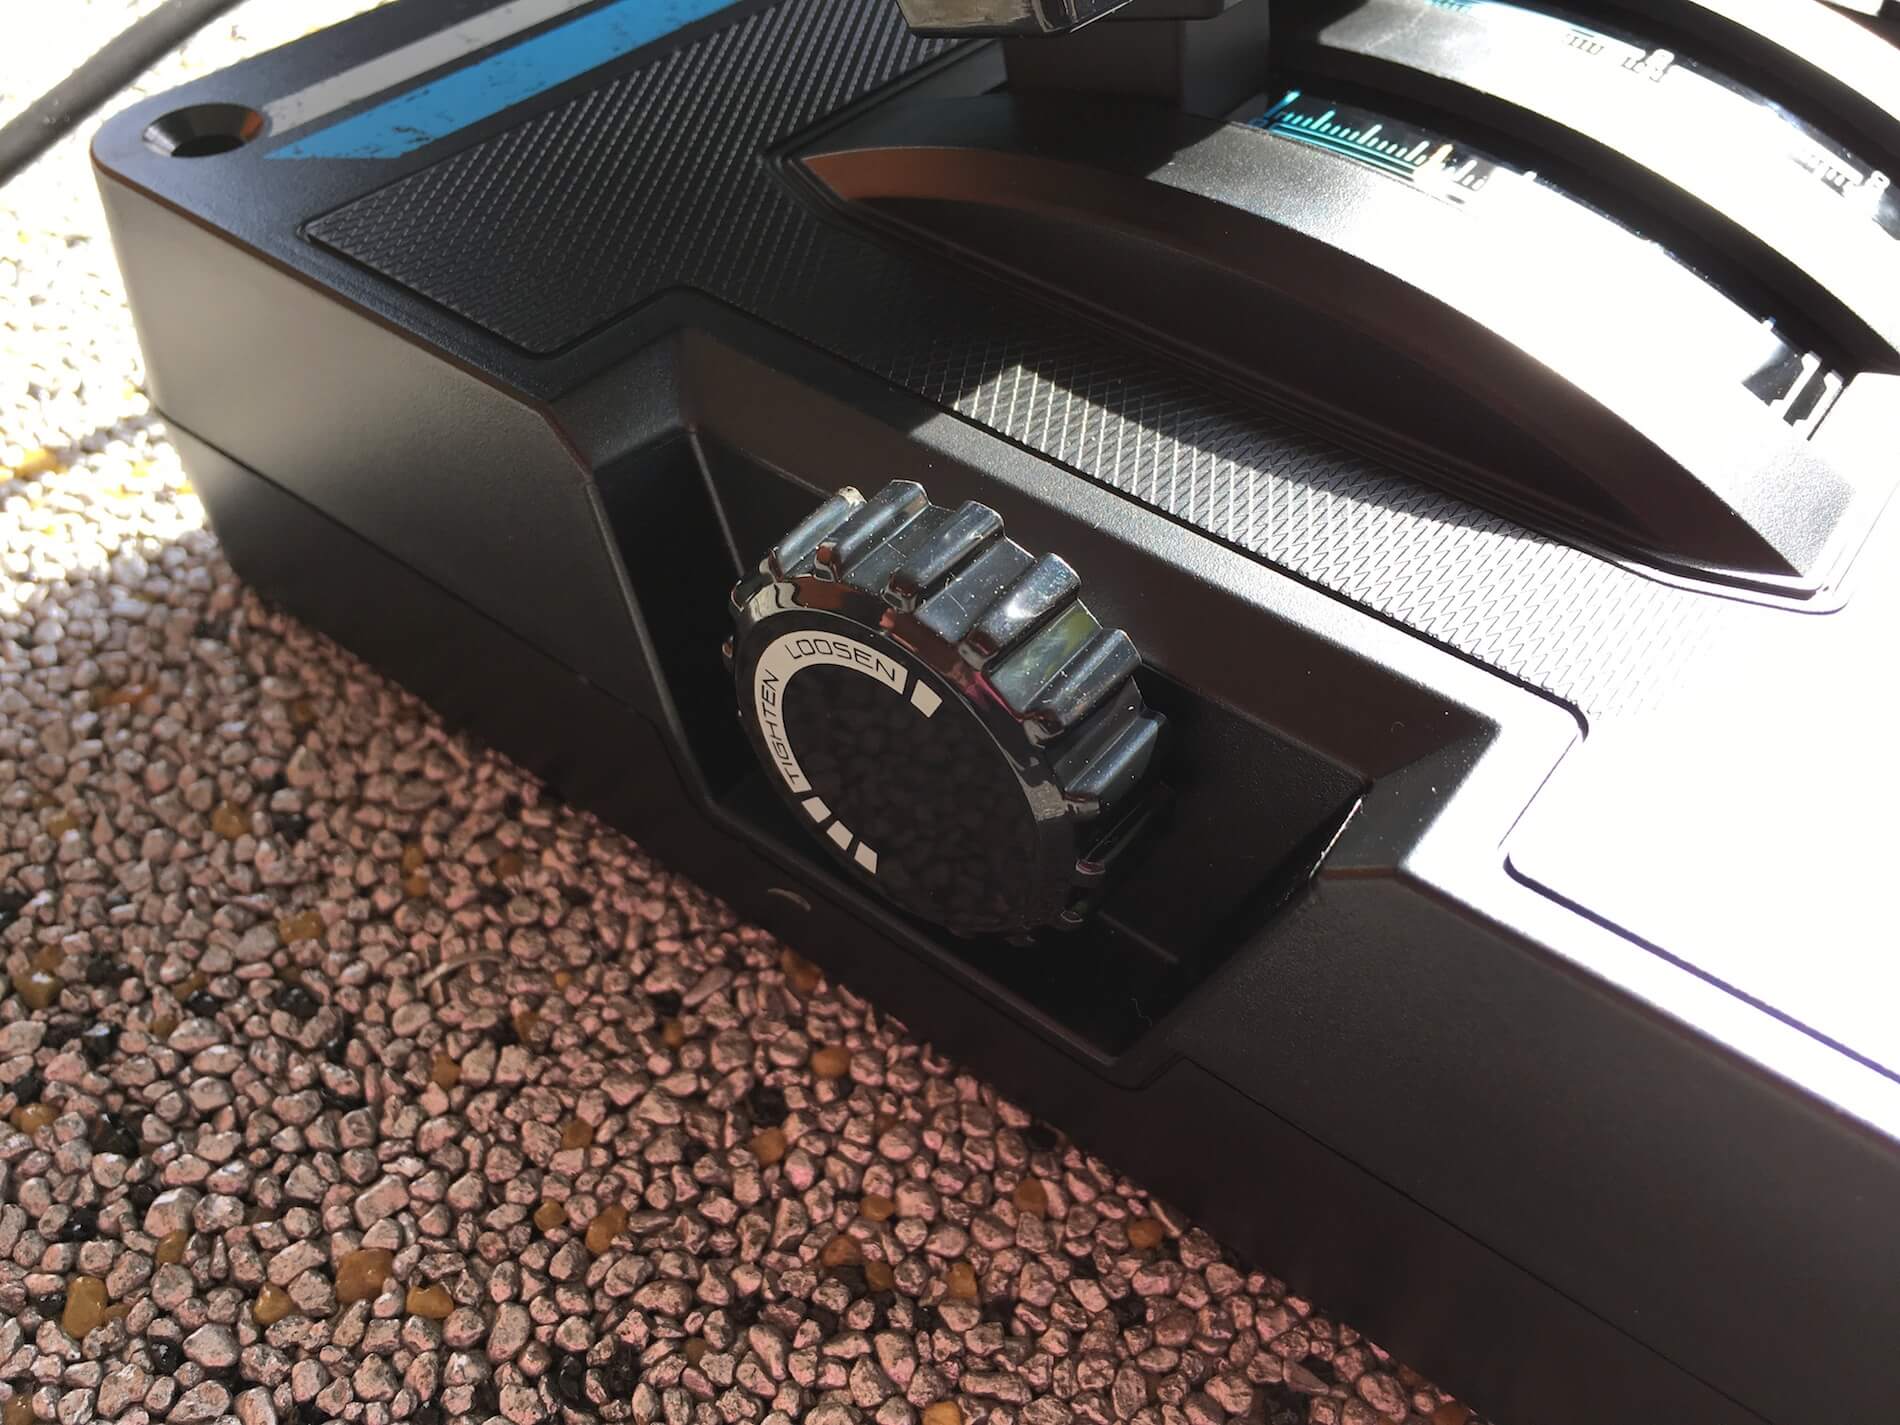
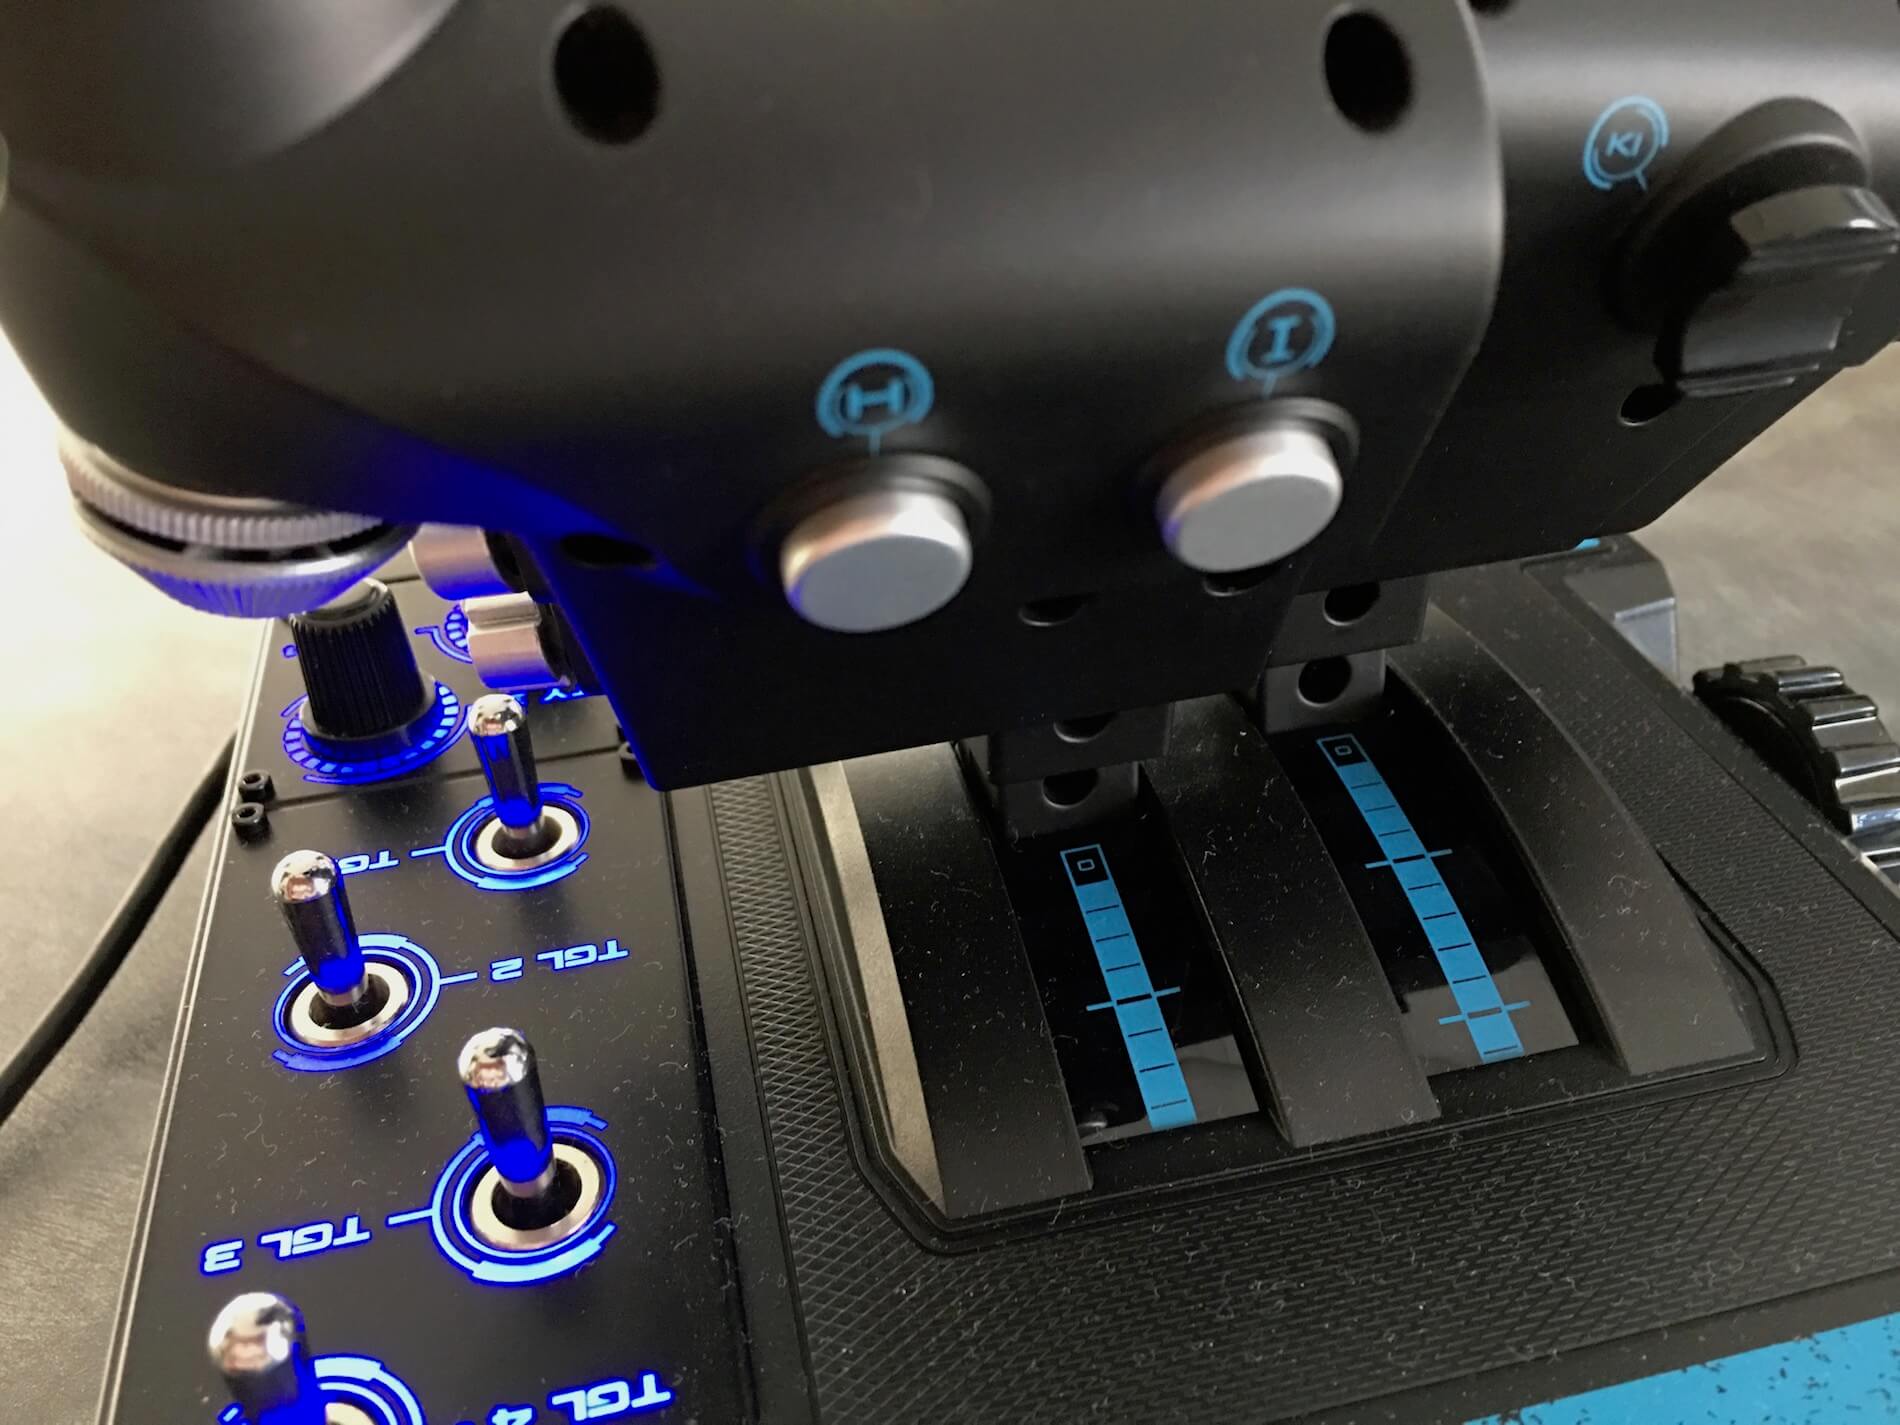
Each X-56 throttle offers many configurable switches and/or HAT switches. Like the X-65F throttle levers, the X-56 throttles can be connected or disconnected from each other. In other words, you can use the throttle levers individually or as one throttle device. Also, taken from, for example, the X-52 Pro and X-65F, is the throttle stiffness control. On the left-hand side of the throttle unit you’ll find a large black knob that allows you to increase or decrease the force to move the throttle(s). No worries, it tells you how to increase/decrease the stiffness.
On the throttle unit base, you’ll find a lot of switches. You might be overwhelmed, but there’s a good reason for all the switches. The X-52, X-52 Pro and X-65F all have some switches on the joystick unit. The X-56 Rhino doesn’t have any switches on the joystick base, except for the switches on the stick itself. Because of the different design, the throttle base unit has its own switches and a couple of extra switches. The throttle base comes with a fixed USB cable with a length of approximately 2 meters.
Components 3 | Joystick and Base
Now let’s look at the revolutionary X-56 removable joystick which is not completely new since the X-55 Rhino had it too.
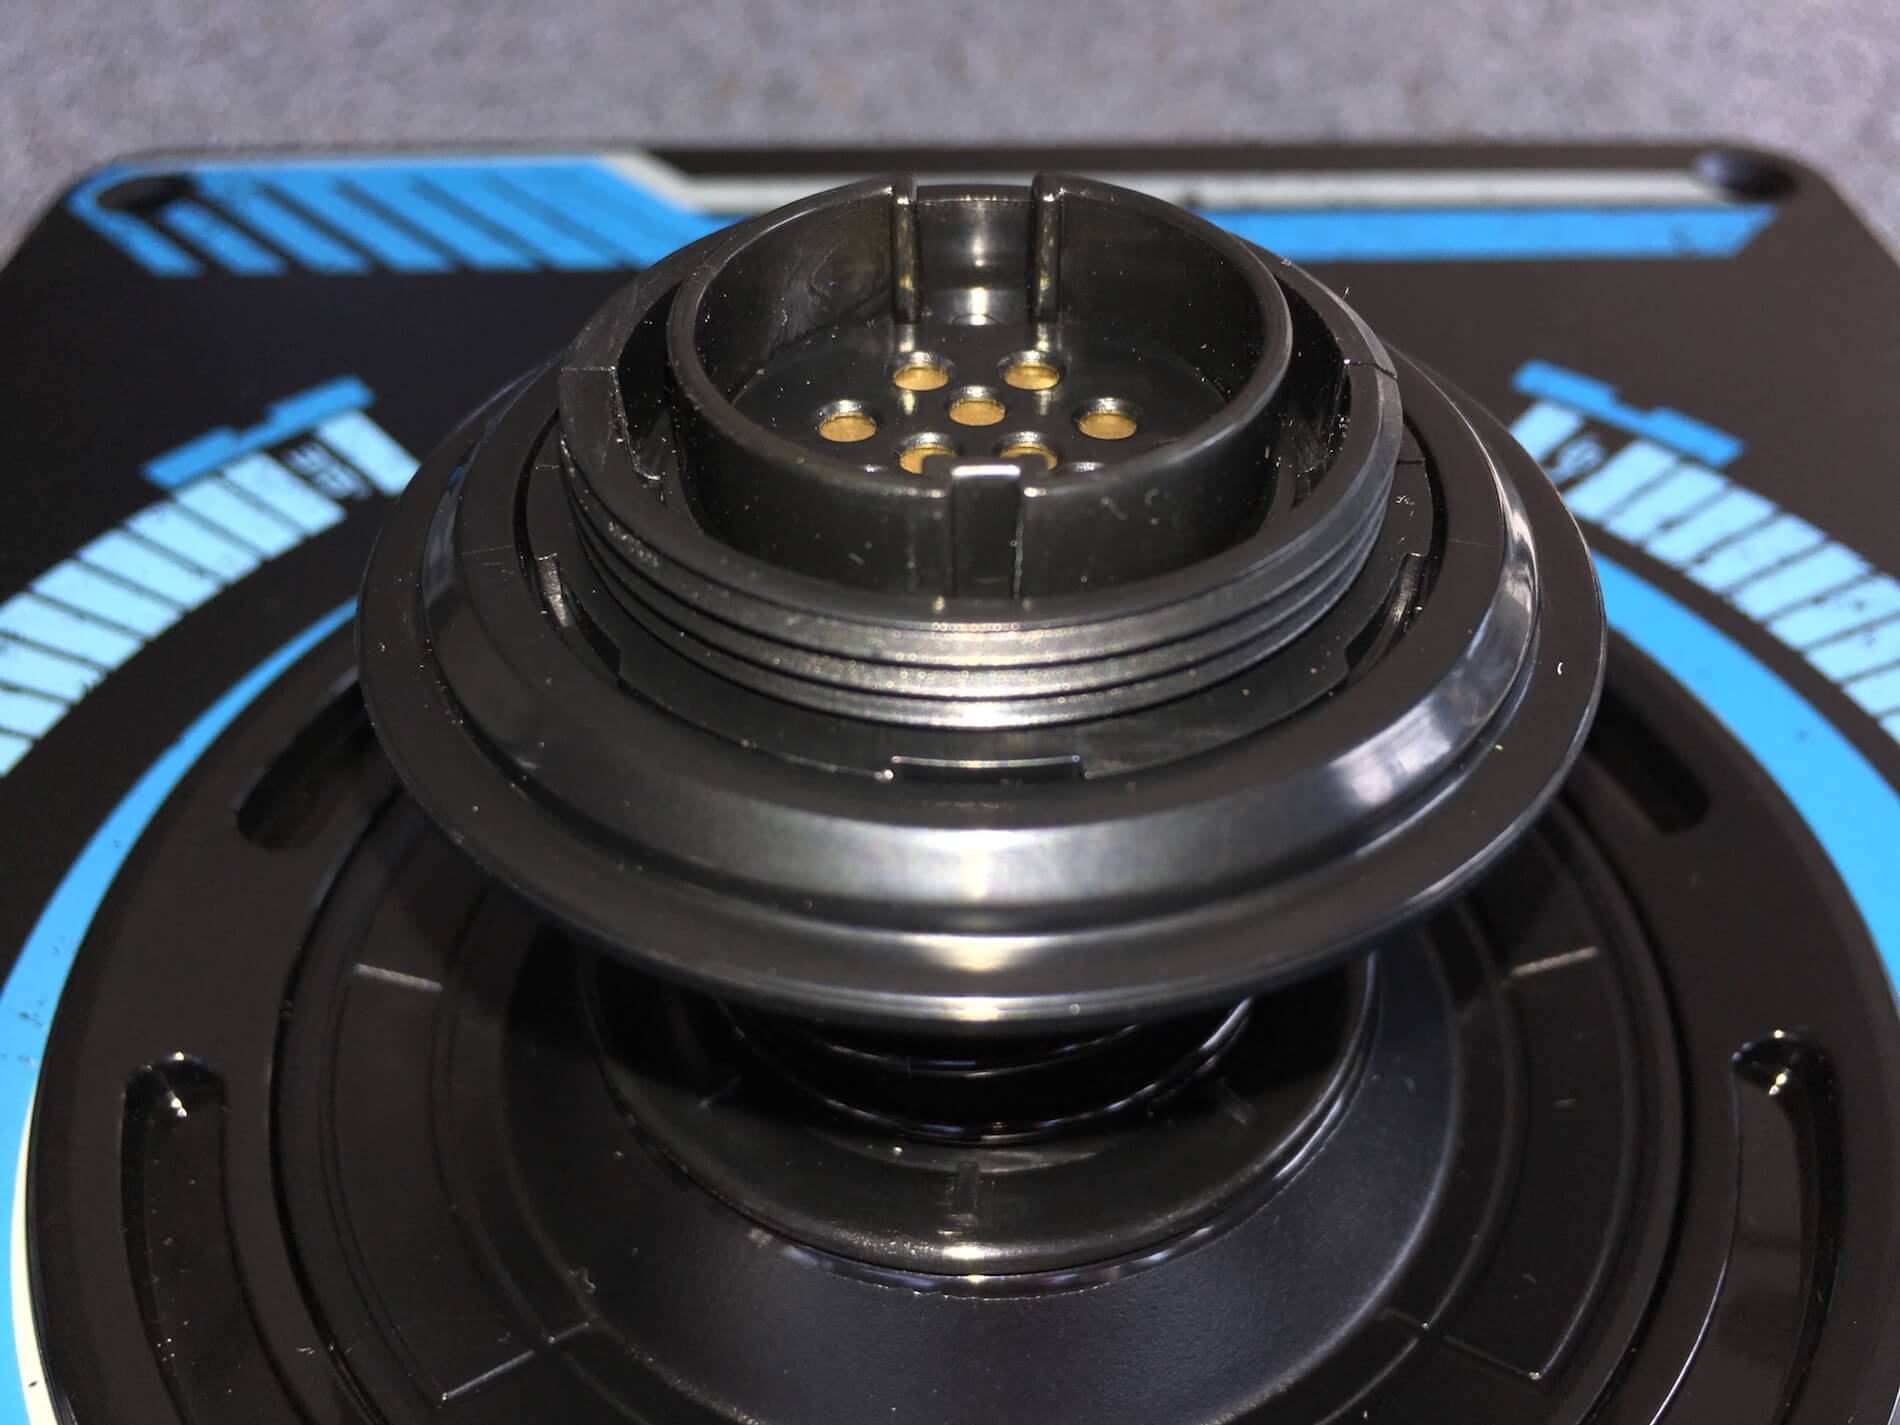
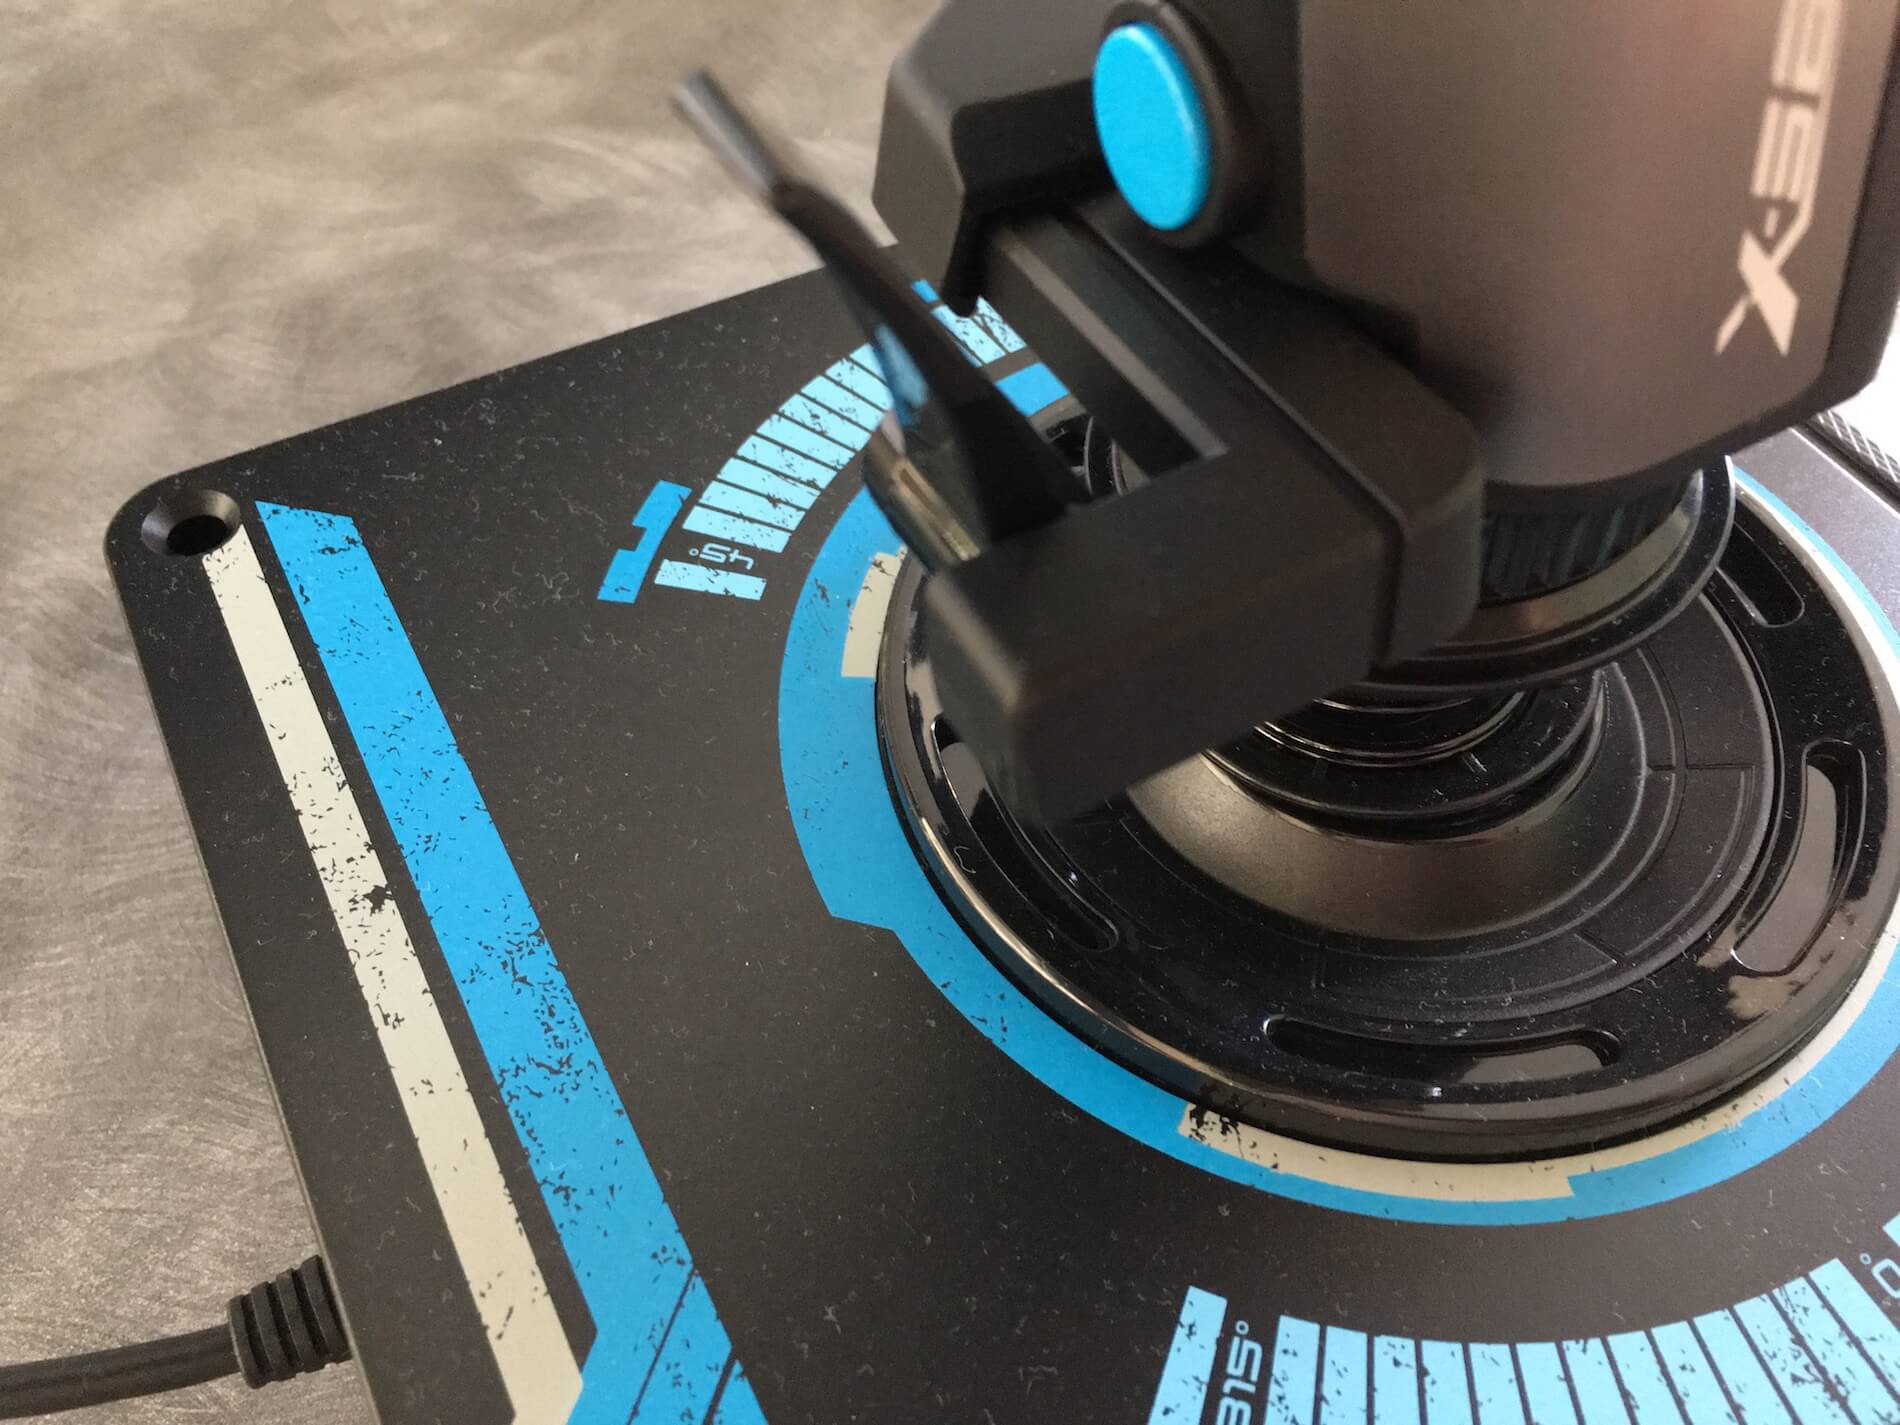
This is so weird when you’ve opened the box and found a joystick base plate, some additional springs and a separately packed joystick. Weird or not, it looks awesome. The base of the joystick may look simple and straightforward, but the real “brain” is inside the base. You can see one thing that normally we never see. That’s the base of the stick and that of the joystick itself with the electric contacts that link the stick switches/functions to the base and from here via the USB to the computer. By the way, also this fixed USB cable has a length of approximately 2 meters and it doesn’t go to the throttle unit as with the X-52 Pro and X-65F. Each base unit needs its own USB receptacle.
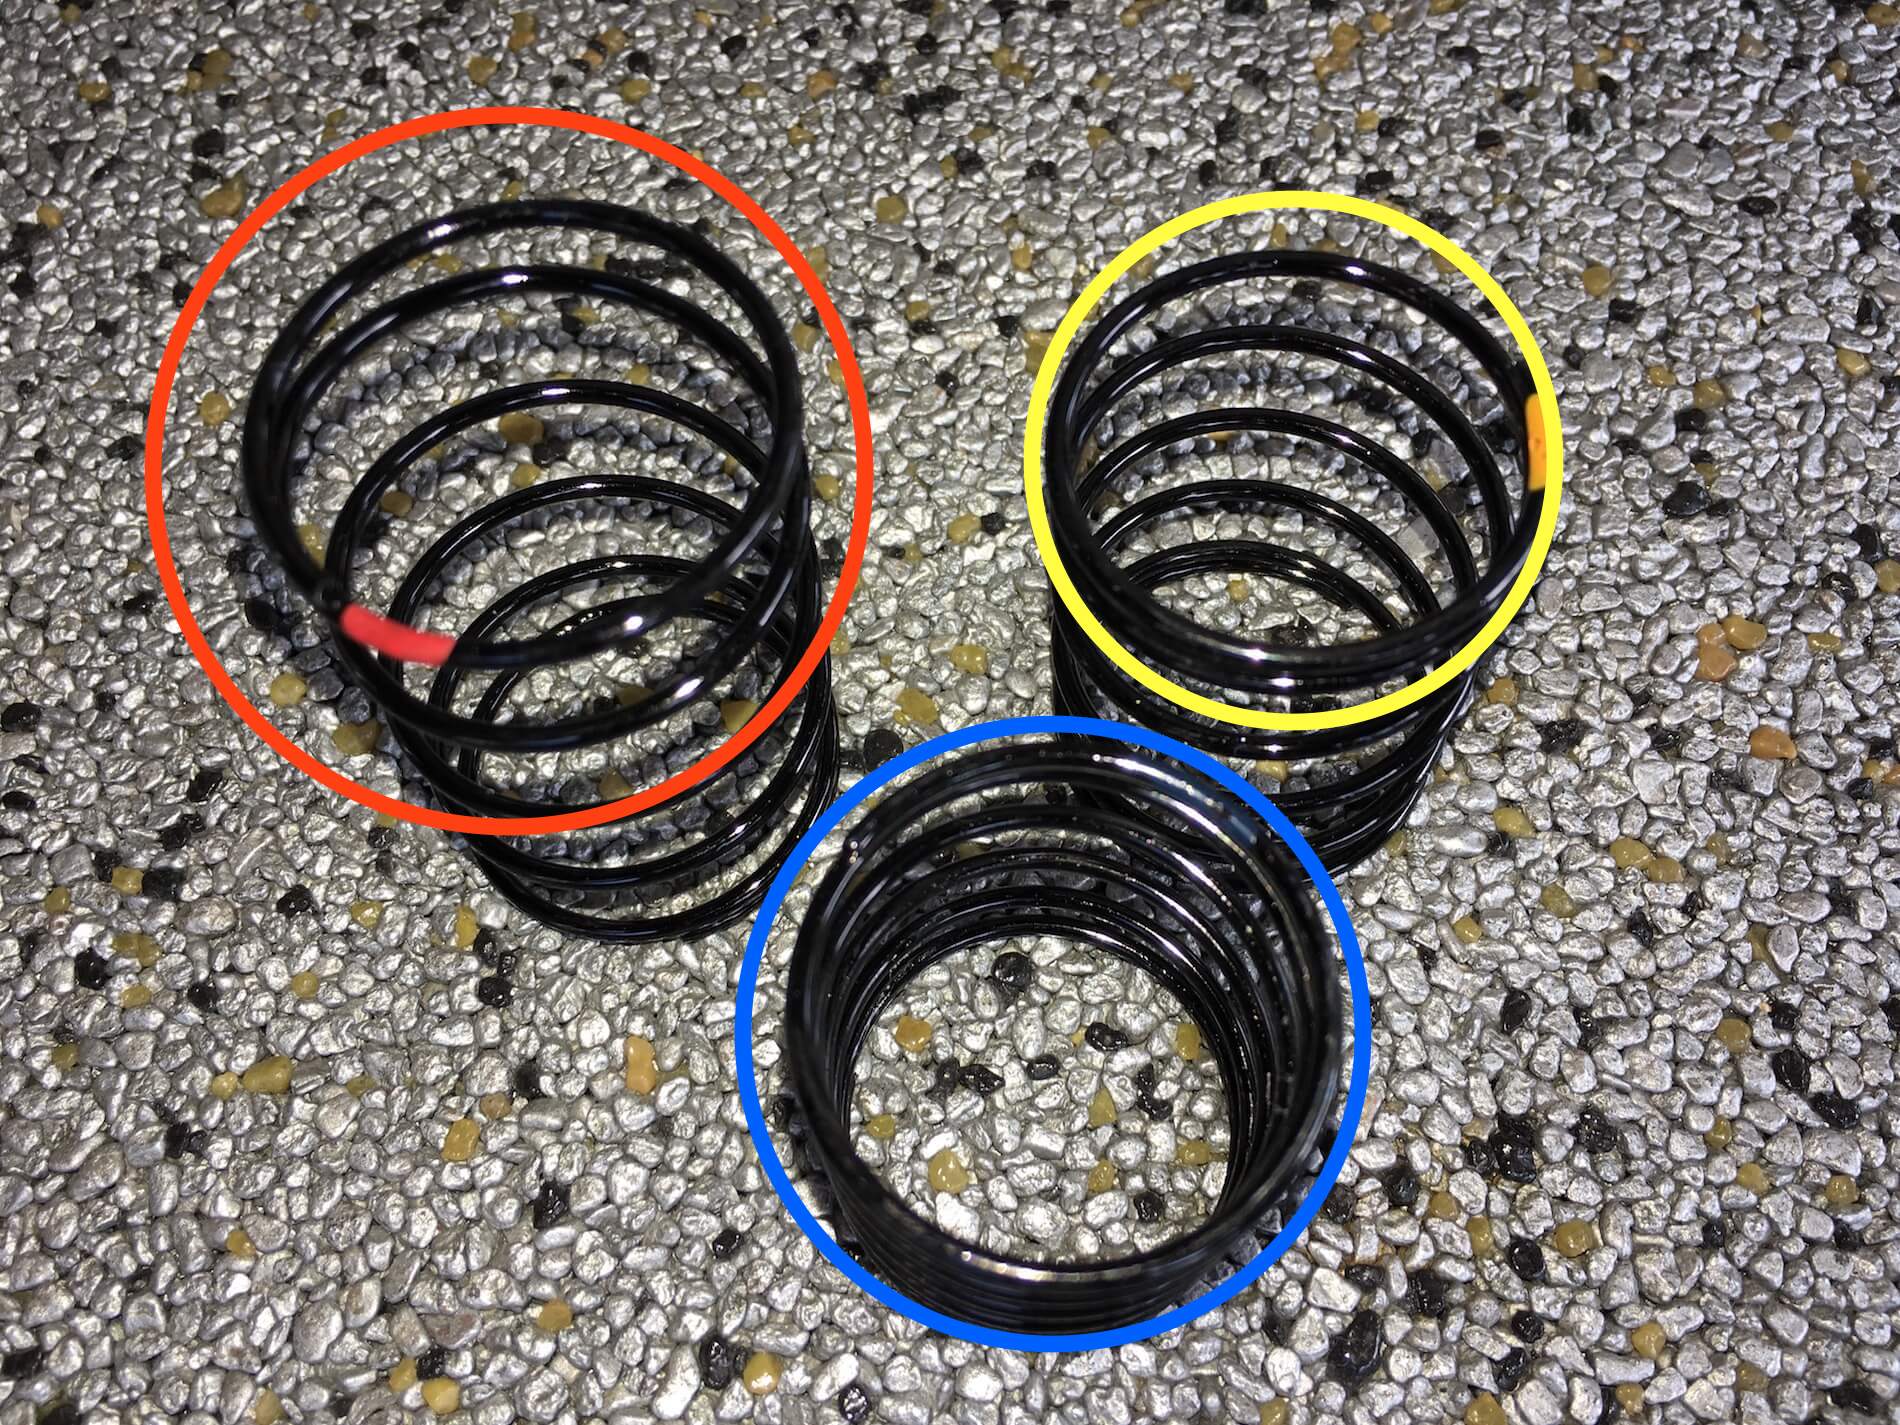
By default, the joystick base has the green spring installed, I’ll discuss that later in more detail. The green spring, the spring with a green marking on it, is the highest spring model and has the highest spring force to move the joystick. Also, packed in the box are three additional springs marked with a blue, yellow and red stripe.
The red marked spring is the shortest and has the minimum resistance when the joystick is moved and the same with the yellow (a little more resistance) and the blue (again a little more resistance). You can also decide to not install any spring. In that case, there’s no resistance at all felt when you move the joystick. I tried that, but I really didn’t like the way the stick moves. So, I’d say, always install a spring!
Components 4 | Change the joystick spring?
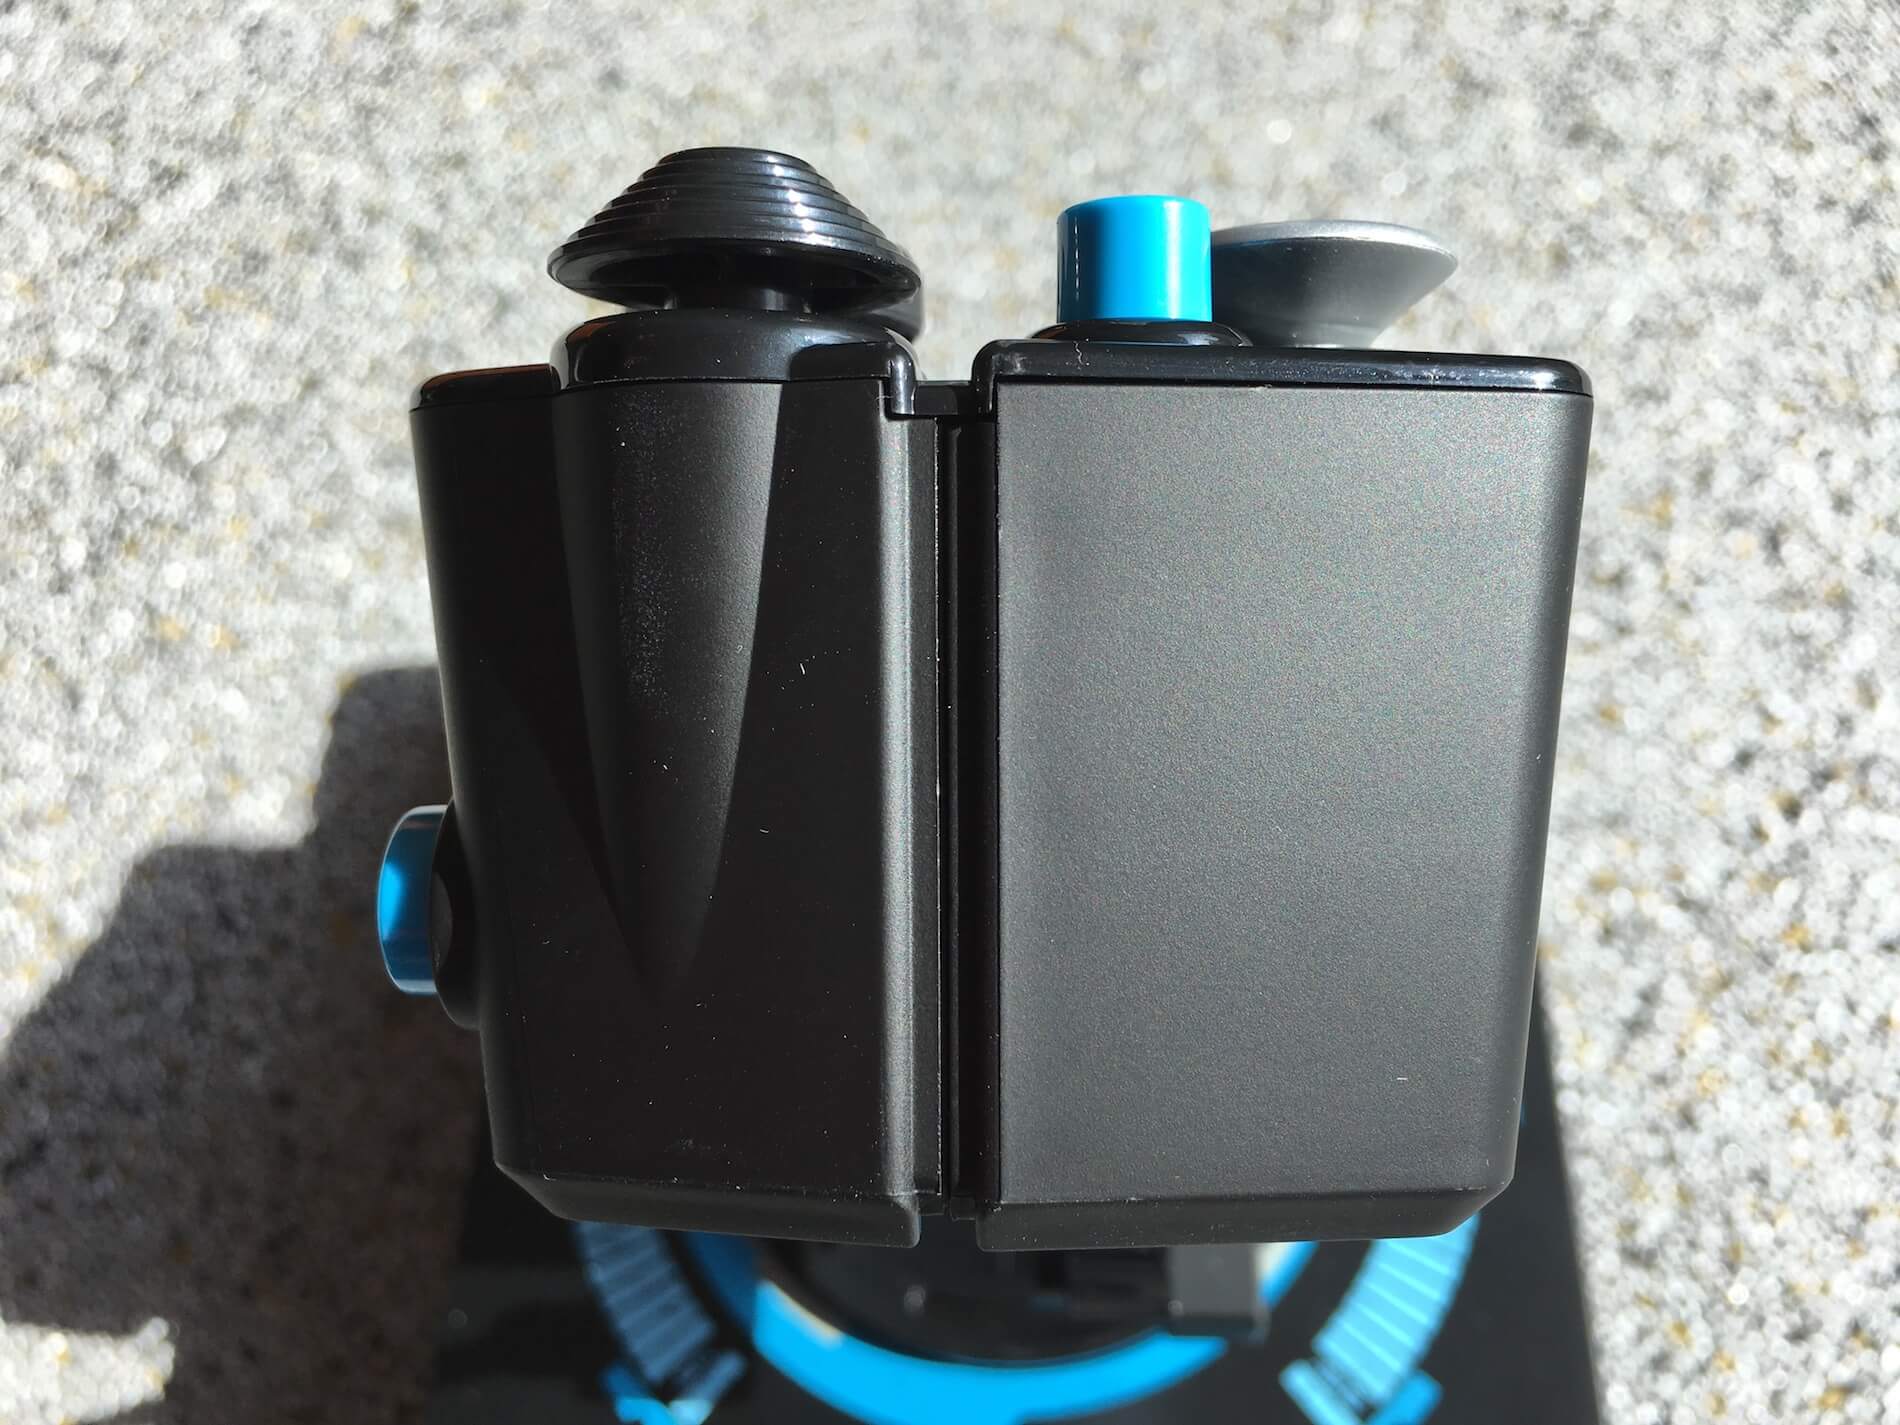
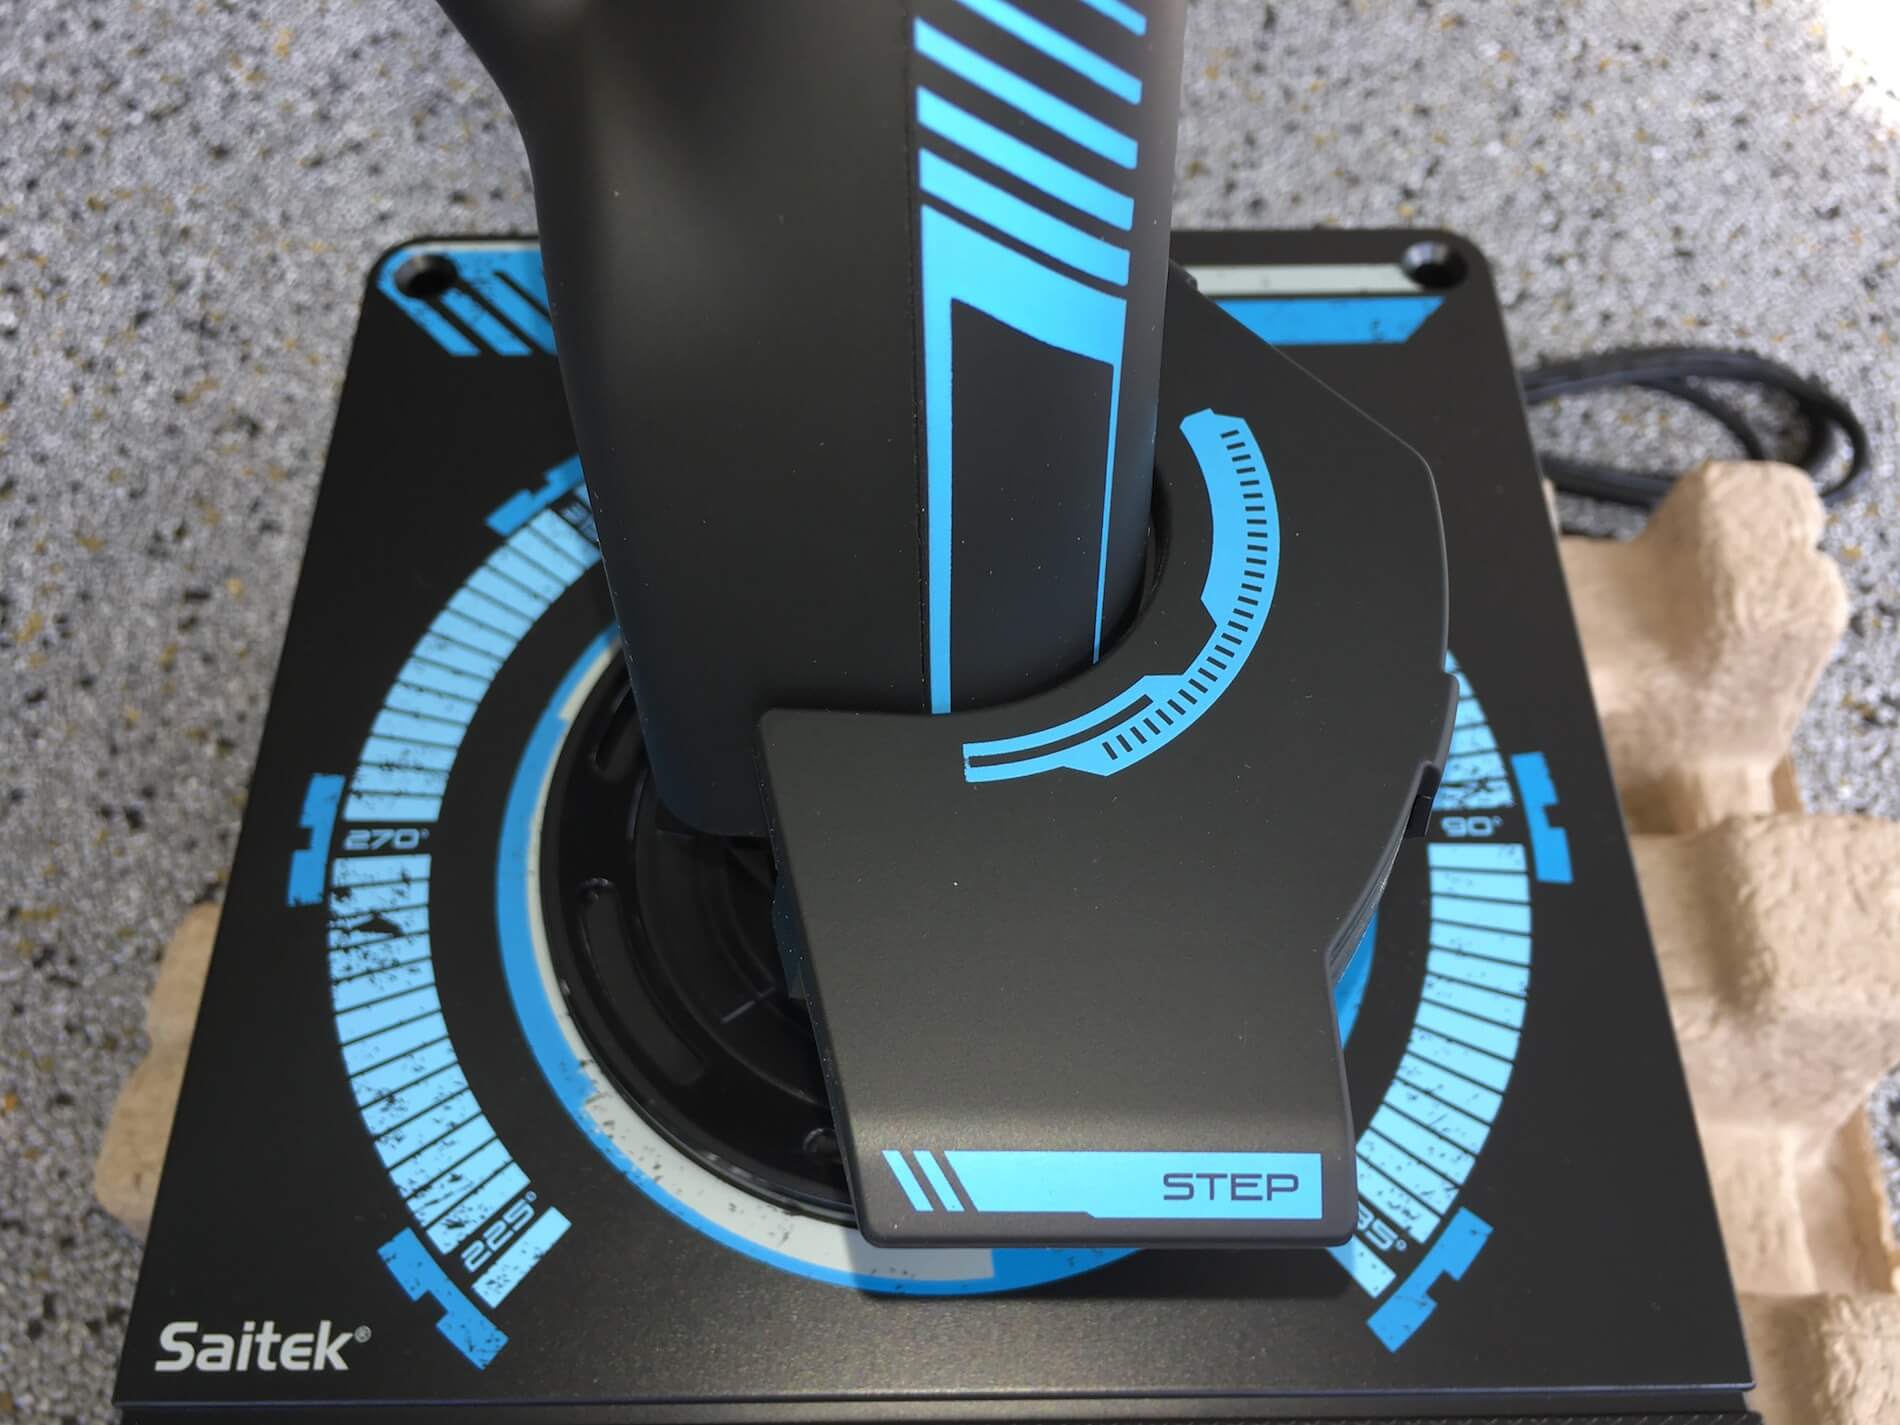
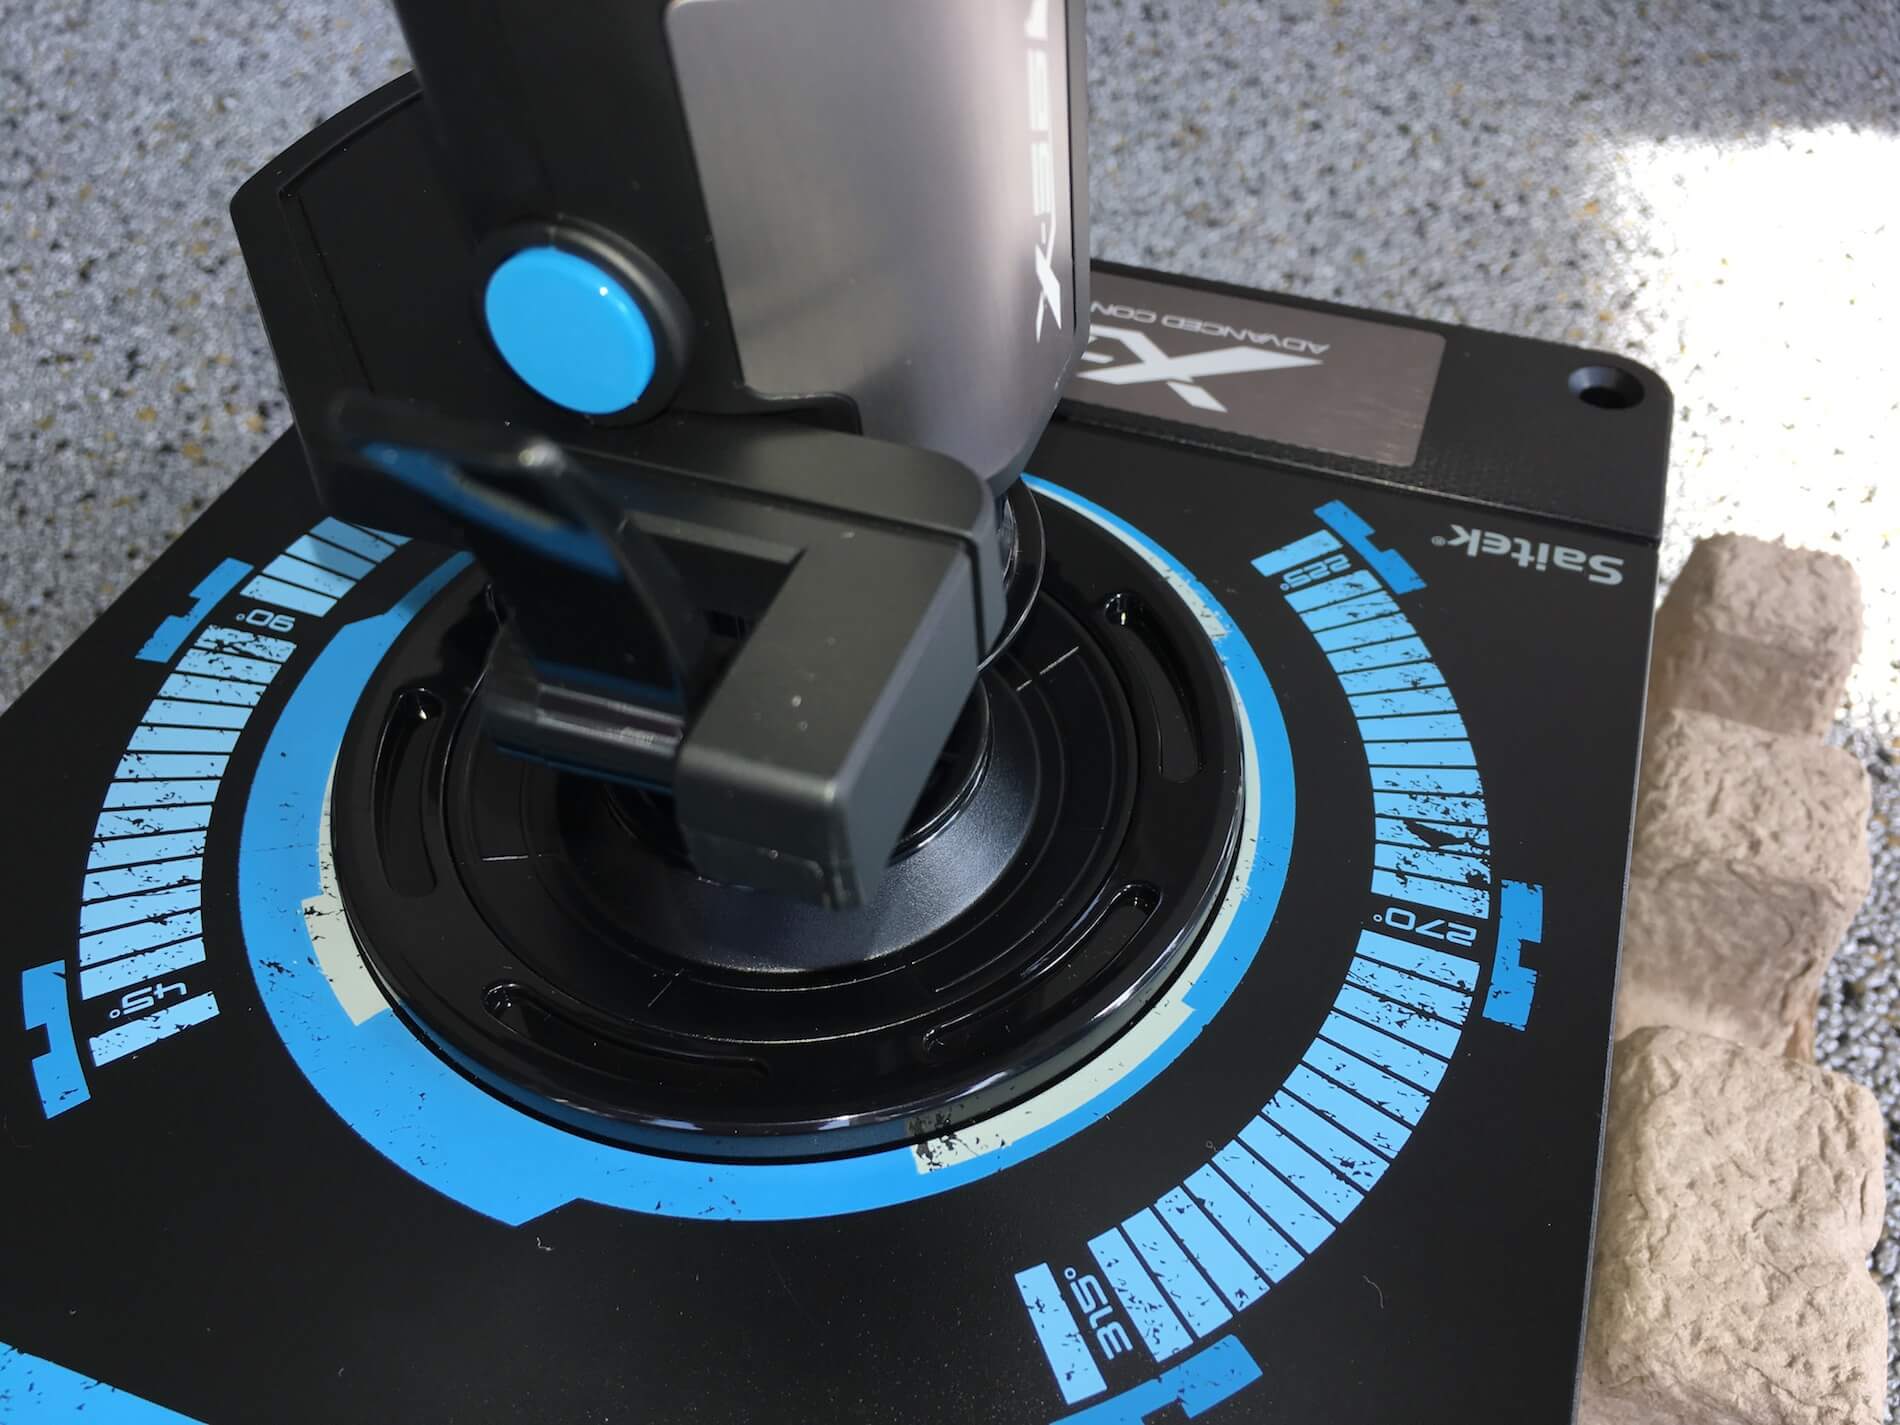
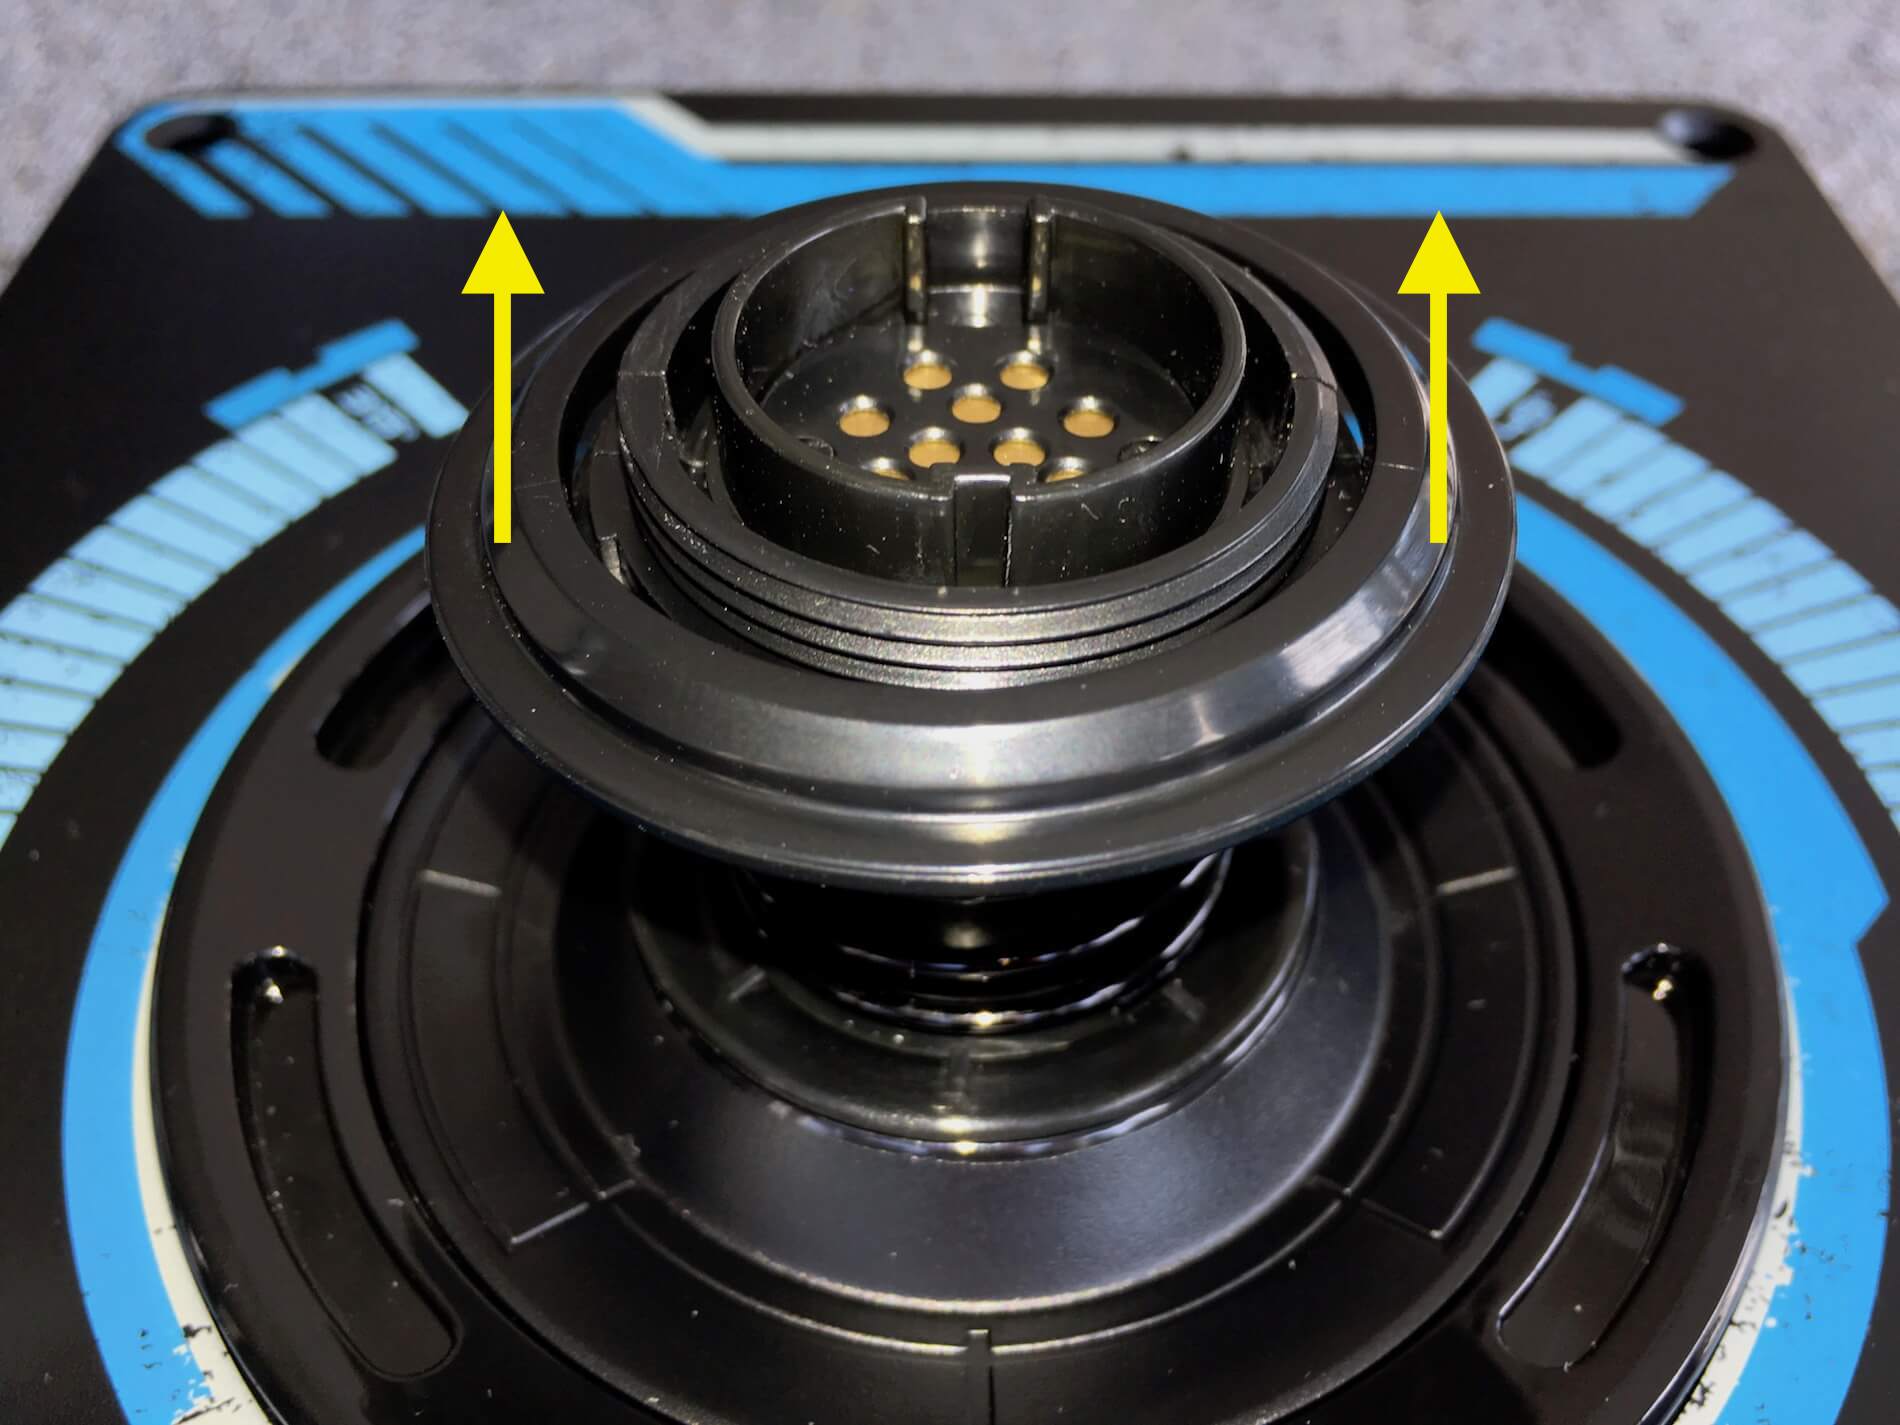
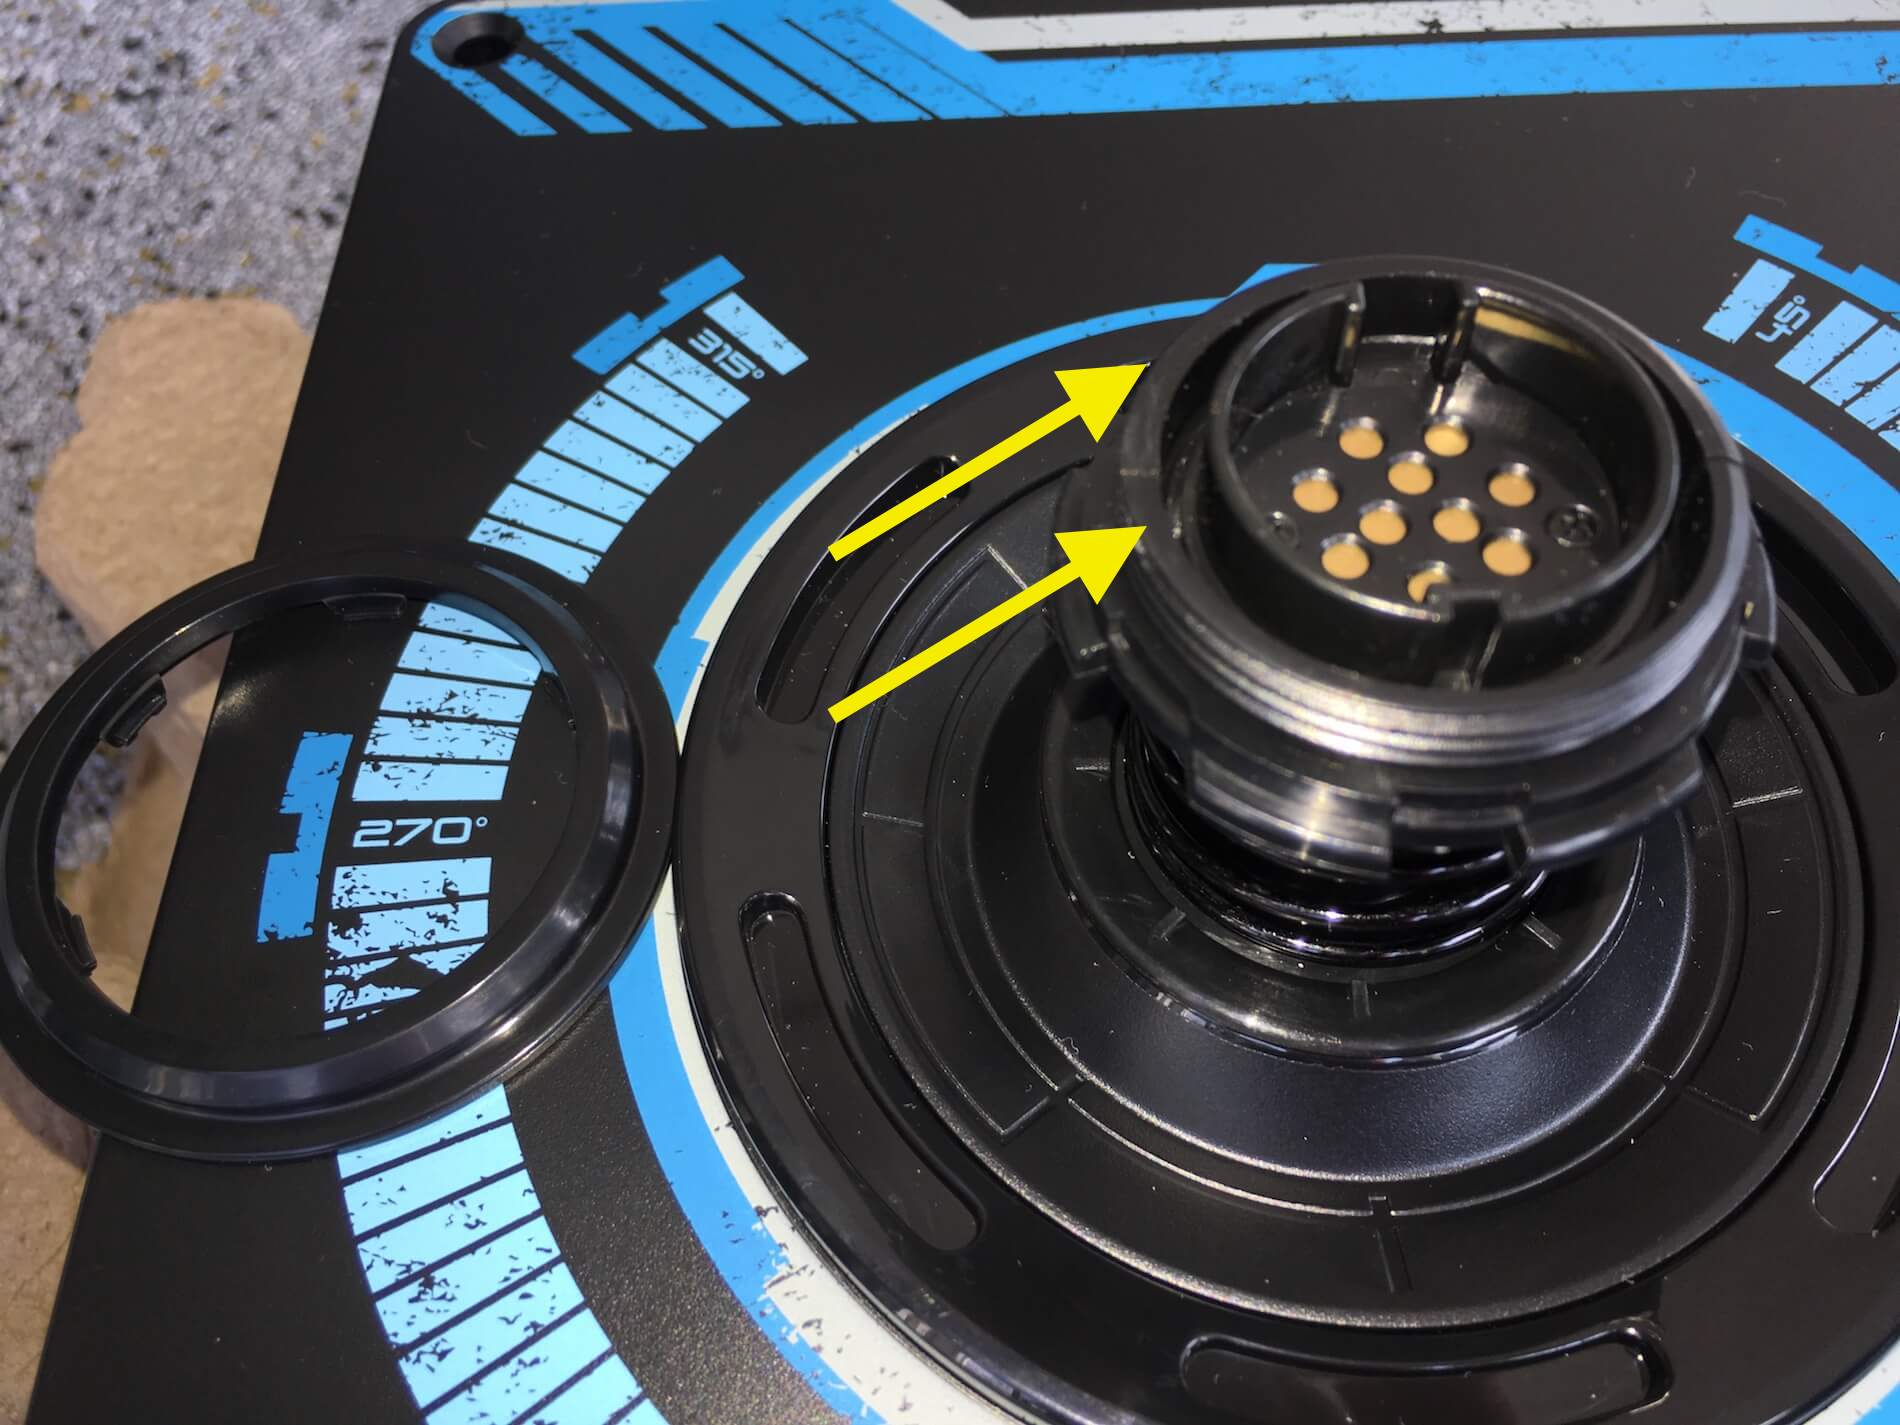
The leaflet doesn’t mention anything about this, so what to do? Since the movie which was available at the Madcatz website is gone, I have no other option then trying to explain. Believe me, it’s not a difficult job once you understand the logic how it’s fitted together. I want to show you some of my own close-up photos of how to remove a spring, where to look for possible problems and how to re-install and make sure that it fits.
Here’s a mini-summary.
The above photos show you different phases of the spring removal and installation procedure. It looks OK, but viewing things is helpful when something is not explained or warned about, in case you decide to replace the spring.
If you do decide to replace the spring, remember that the green marked spring is compressed as long as it’s locked up. The moment you remove the bezel ring and the two halves, the spring is released and jumps out like a champagne cork.
And, if you want to install the blue or yellow marked spring, you need to compress it manually, otherwise you can’t install the two halves. Whoa! That was one step too fast!
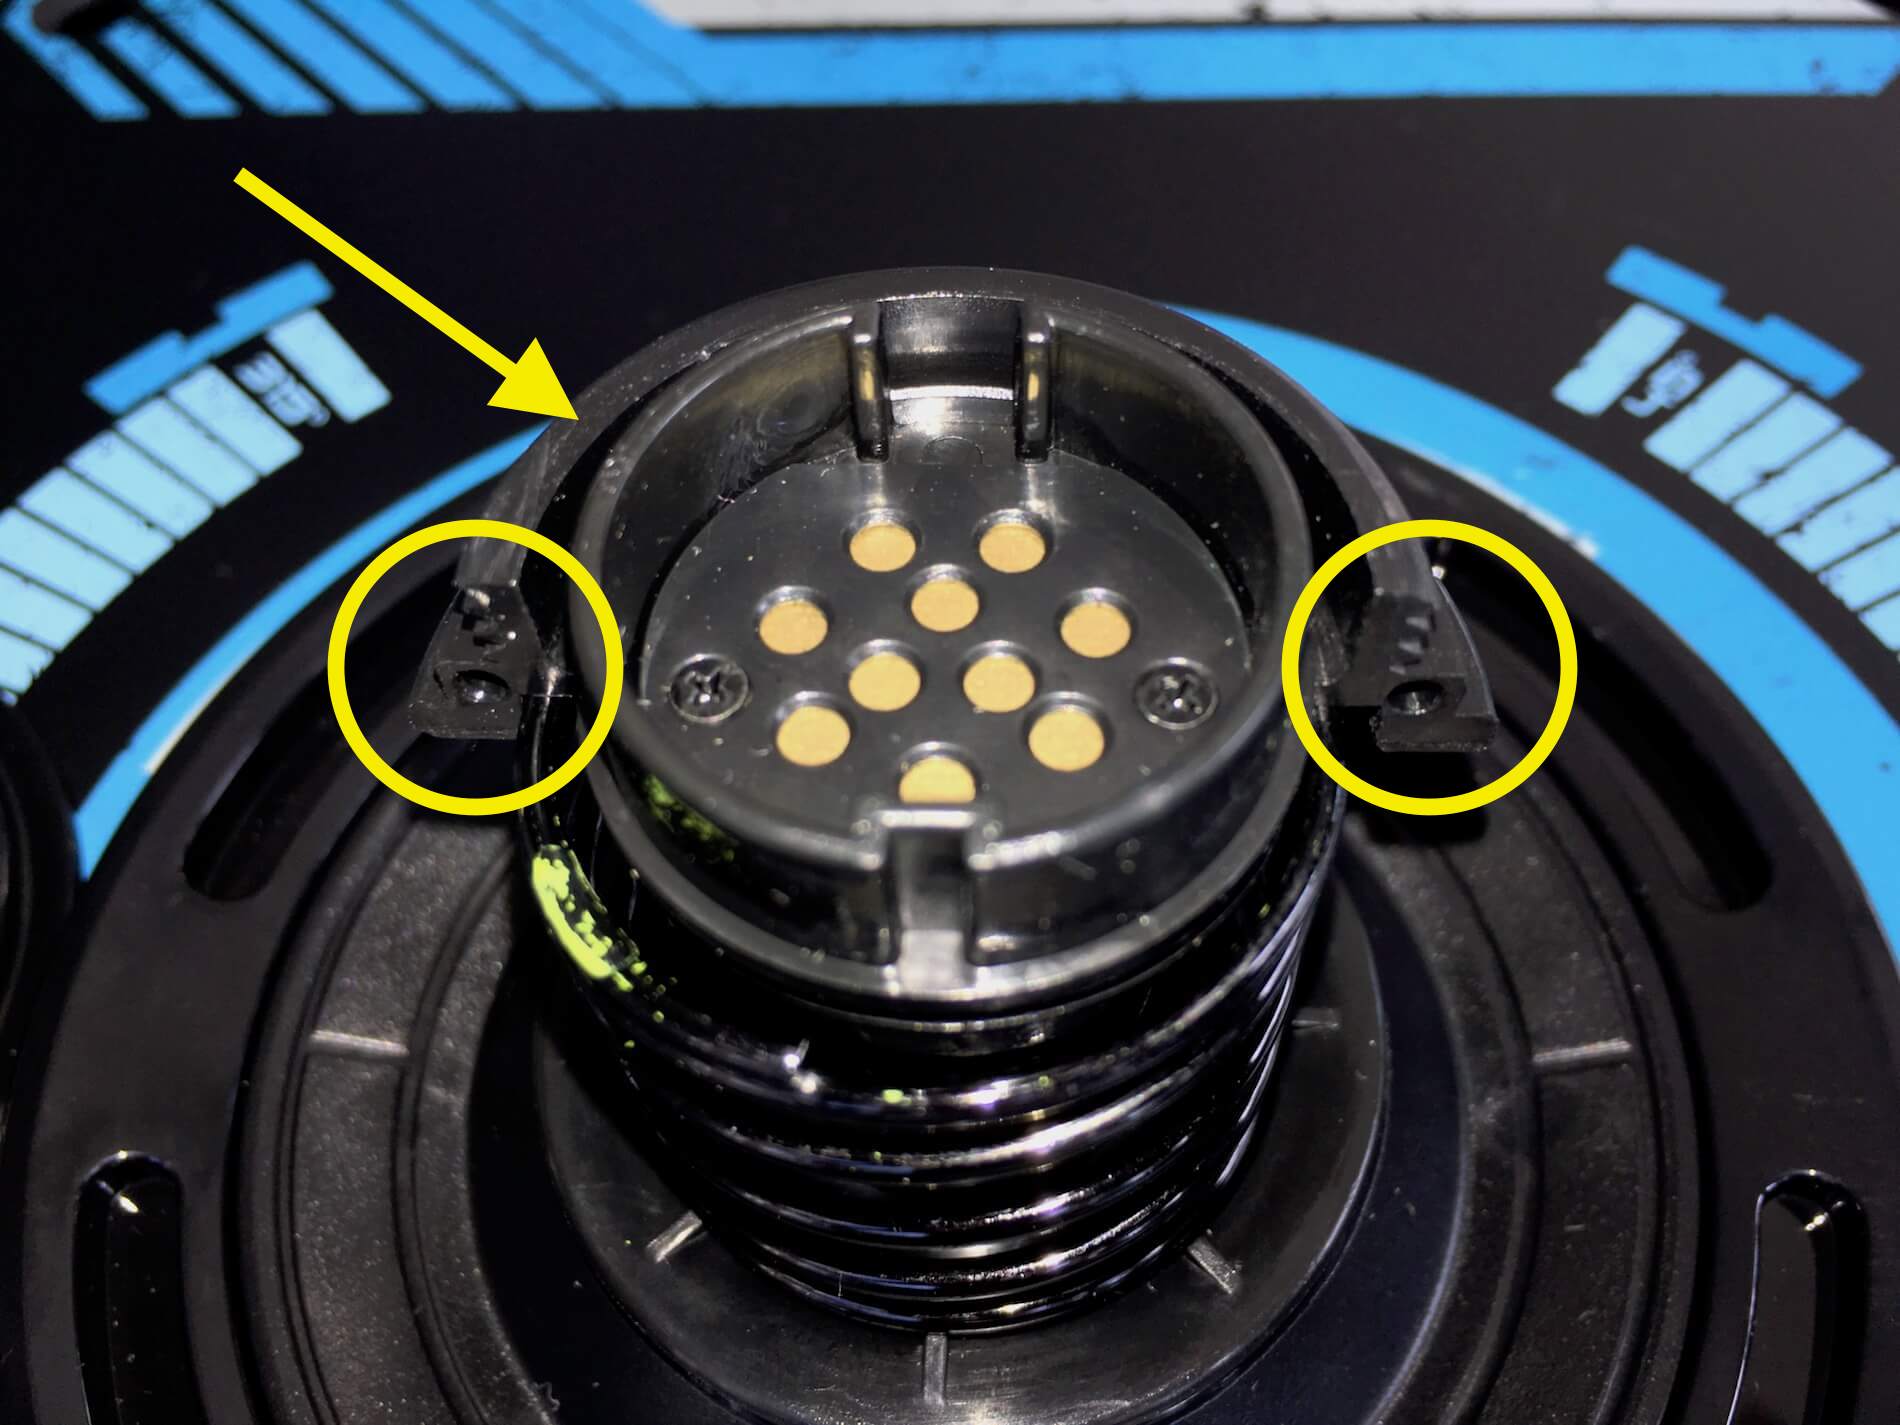
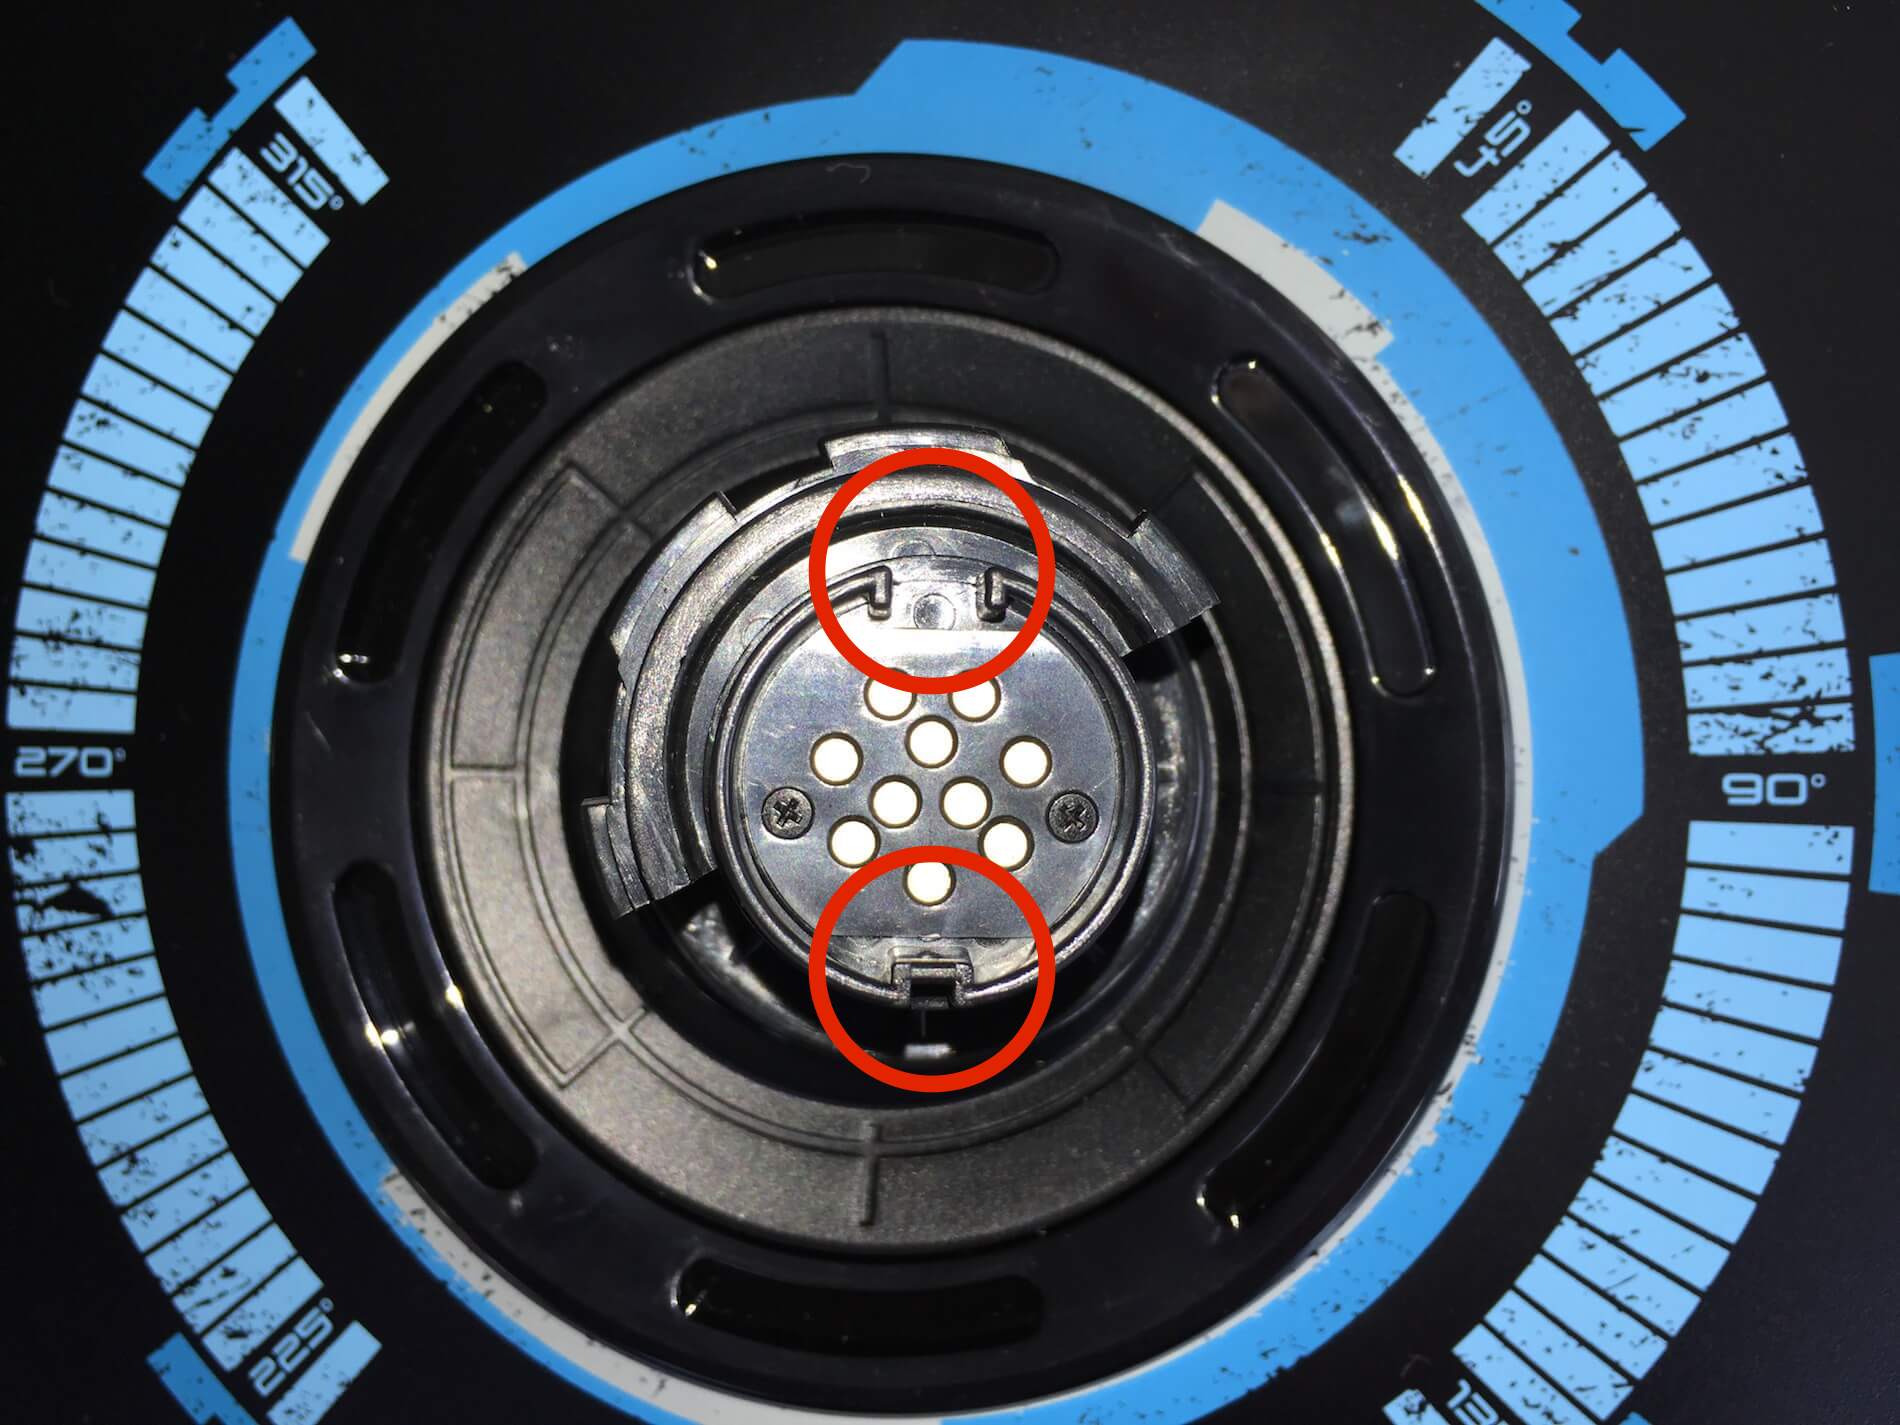
Before you install the new spring, first, verify how and where to install the two black halves. When they are in the correct position, they’ll fit together nicely as one ring. When they are not in the right position, there’s a gap between them. As long there’s a gap, you can never install the bezel ring! The two black halves are in the correct position when horizontally aligned with the base unit positioned in front of you with the Saitek plate towards you.
Keeping that position in mind, you place the spring in position, install one black half first and then the other. Slide them together till they form a black closed circle. Then you can press the bezel ring over it, but only when you’ve aligned the slots correctly. I know, that sounds complicated, but, together with the screen shots, it isn’t difficult.
And finally, you need to align and tighten the joystick. As I mentioned before, the electrical contacts should align correctly with the stick and base. As a result, the joystick can only be mounted and tightened when the large and small slotted holes are in the right position. Even this is very easy once you’ve got this information. Otherwise, if the slotted holes aren’t aligned, you can’t tighten the stick. A small tip – hold the joystick while tightening the gray ring. If the joystick isn’t correctly tightened, it can easily fall to the ground or table!
Another thing that pops-up is the base weight. Compared to the X-52 Pro, the base is quite large and heavy. On the X-52 Pro you had four suction cups to keep it on the table when you used the joystick, but due to the X-56 base dimensions and weight, no suction cups are needed and therefore not supplied.
As you can see on the photos, the X-56 joystick looks very similar to the X-65F stick and not much like the X-52 Pro. Basically, they all have the same grip, but the X-52 Pro base plate for your hand is adjustable, just to give you an example. Anyway, when you see the X-56 stick, you see a 90 percent X-65F joystick with one big difference. The X-65F was made of metal, this X-56 is made of highly durable plastic. At the base of the X-56 joystick there’s a locking bezel to connect or disconnect the joystick from the base and 10 electrical contact pins.
Component 5 | Software
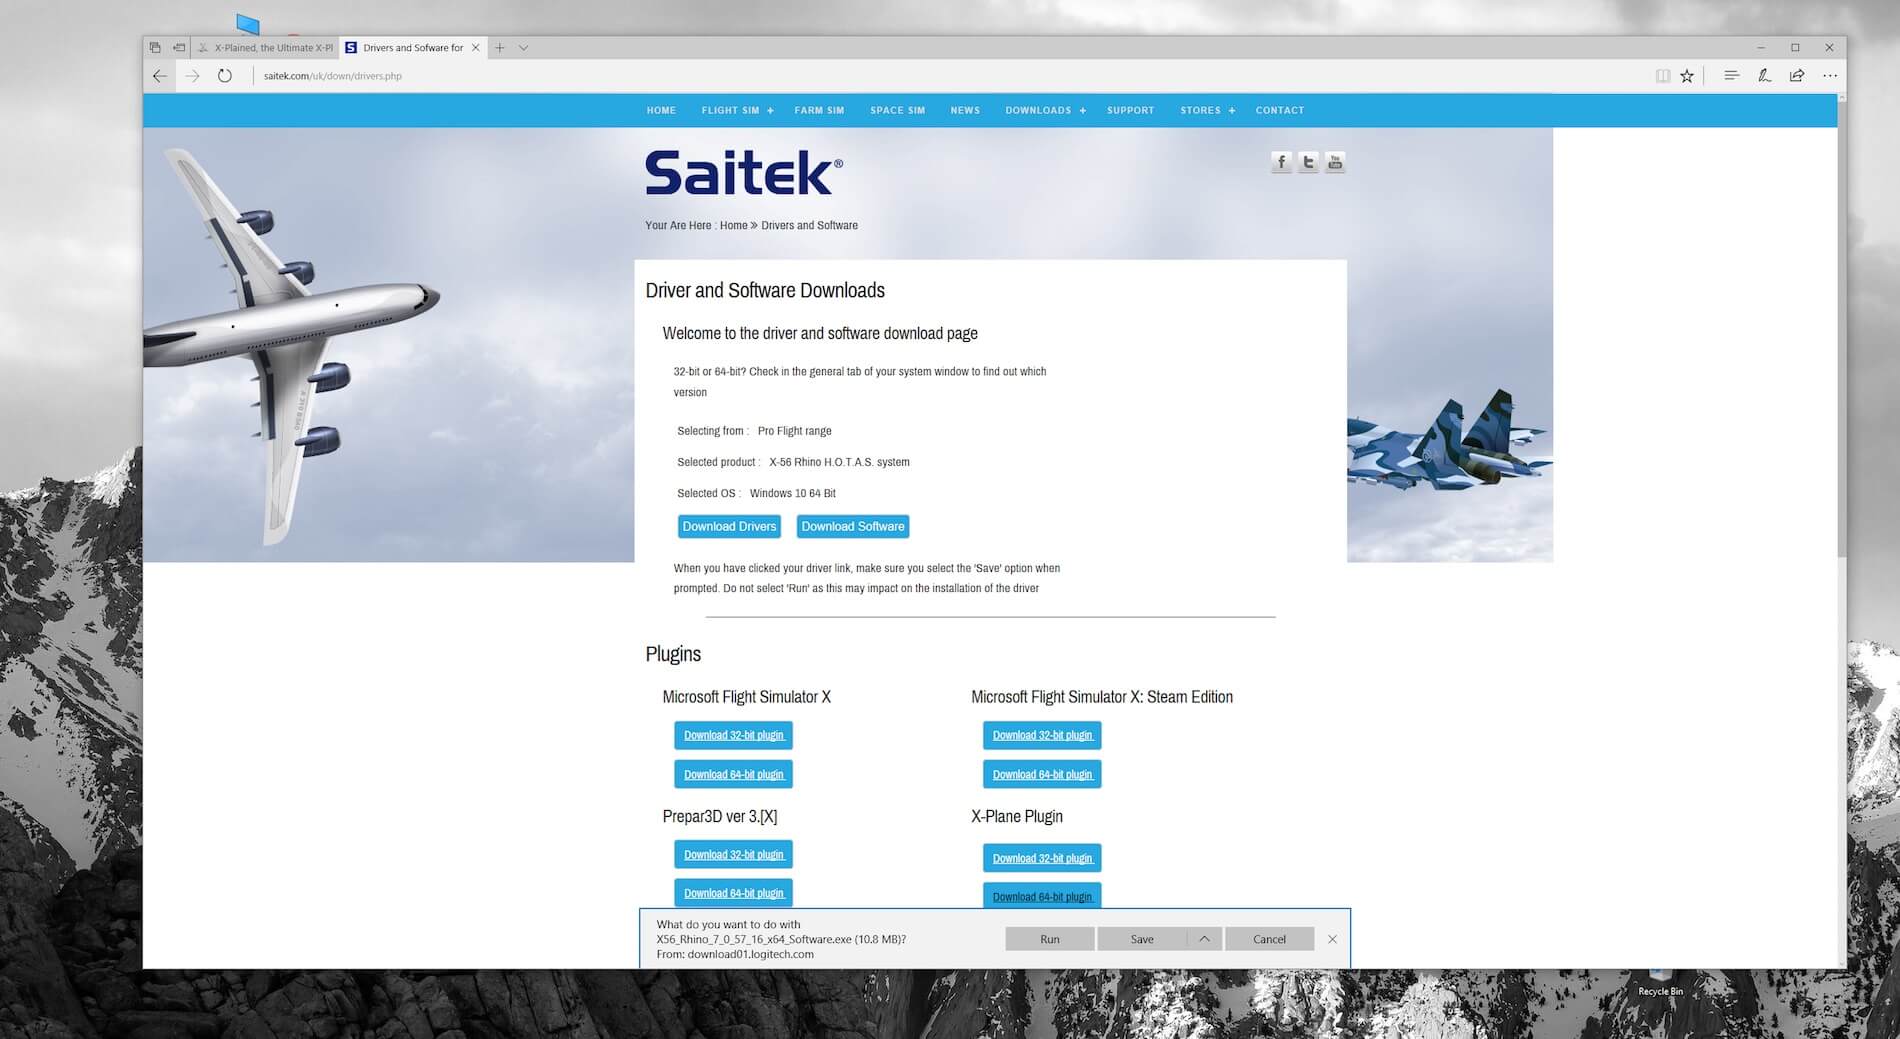
First, we need to download the Windows only software. We can do this via the dedicated Saitek download section. As of this writing, April 2017, these are the current versions of the downloaded files for Windows 10, but older Windows versions are still supported like Windows 8.1, 8, 7 and even Vista. I go for Windows 10 64 bits and download the following packages:
– X56_Rhino_7_0_56_6_x64_Drivers.exe
– X56_Rhino_7_0_57_16_x64_Software.exe
Unfortunately, these files are not for Mac OS X, but only for the Windows OS. Since this review is written for X-Plained.Com which is intended for X-Plane simmers, there’s a reason to bring this up.
X-Plane is also available for Mac OS X and Linux and I doubt if there will be any specific software packages for these OS in the future. I don’t own or having not installed Linux, but for Mac I can say that the Saitek hardware is directly recognized by X-Plane as well as completely configurable.
Preparing For Use
Step 1 | Spring Choice
What kind of preparations are needed before you can use the X-56 Rhino?
First, you have decided which spring tension you want. Since you’ve probably got no idea which spring could be OK for you, I suggest that you leave the green marked spring installed and find out if this is the spring force you like. Then you need to install the joystick onto the base. This procedure is described in the above paragraph including a small tip.
Step 2 | Positioning the Base Units
Since the base units do not offer suction cups to mount it to the table, you can always decide to screw each unit to the table. Needless to say, that’s not the most elegant way, but if you have a permanent FS rig, each base unit corner has holes for screw mounting. Once the two X-56 Rhino units are situated on your flight control table, they suddenly seem to have a solid and anti-slip protection to prevent any movement on the table when using them. This is partly the result of the large base size, their weight and rubber anti-slips at each corner. So even without the suction cups, which I know from the X-52 Pro, the units stay stable on the FS table. Try it first without anything, and when you don’t feel comfortable, you can always decide to mount them to the table.
Step 3 | Installing Driver and Programming Software
Depending on your Windows OS, first, you follow the steps that lead to the installation of the drivers. I need the Windows 10 64-bit driver installer. When you start the “driver installer” software, one of the first steps is to remove the X-56 USB cables from your PC or Mac if you’ve already connected them. As you can see on the following screenshots, the steps to follow are easy and self-explanatory.
At a certain point, the installer will ask you to connect both the joystick and throttle units. The arrow on the window is now pointed towards your PC. We already know that each X-56 unit has its own USB cable with USB connector. Remember, you need two USB receptacles to connect each X-56 unit to your PC or Mac. You can also connect the USB cables to a powered USB hub if you prefer that method. When the drivers are installed, the hardware is connected and the devices are detected, the installer has done a good job.
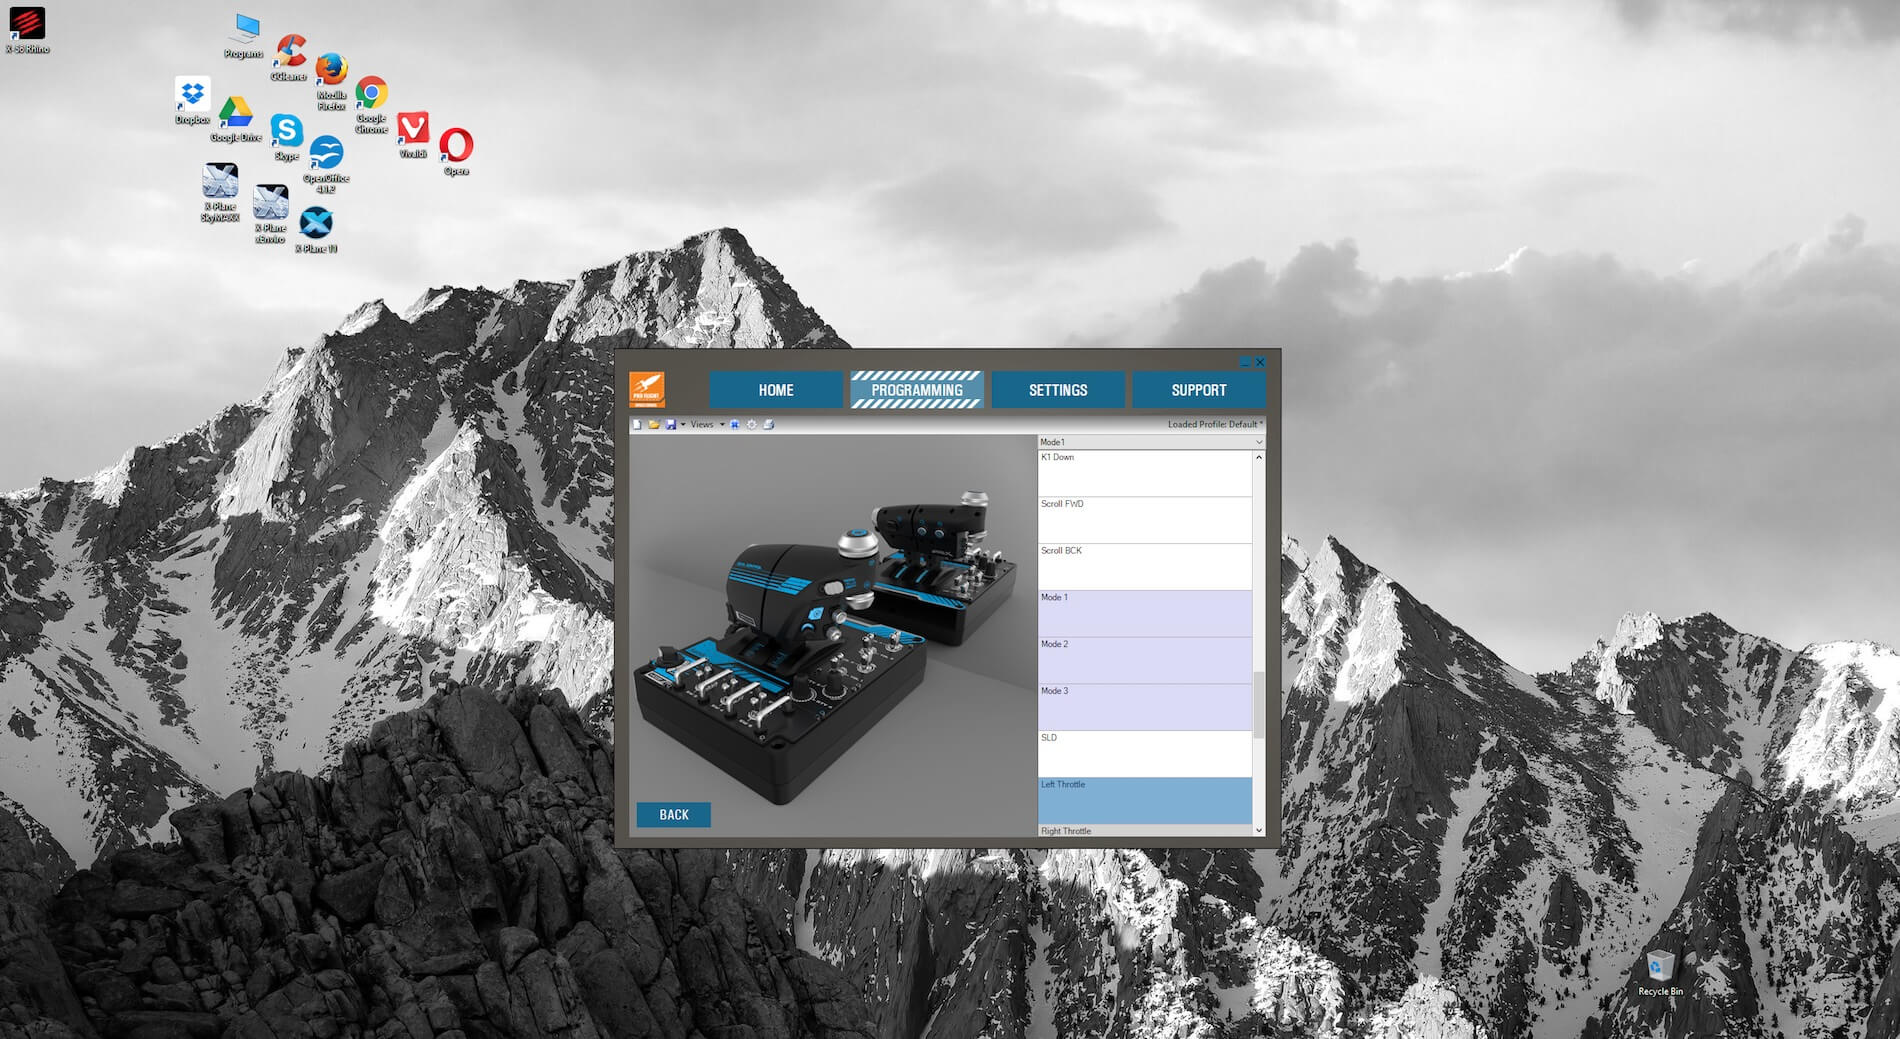
The next step is the installation of the Saitek software which is, once more, only available for Windows. Surprisingly, after you’ve started the installer, within no time the installer is finished. On your desktop you’ll find a Madcatz icon. The icon leads to a pop-up window. The first time you start, you need to select your language. Once you’ve done this, you’ve got four tabs: Home, Programming, Settings and Support.
Let me make one thing clear. You can calibrate, assign and use the X-56 Rhino without the Saitek programming software if you choose not to use the software. The programming or assignment of the joystick and throttle base functions can also be done extensively within X-Plane 10 and X-Plane 11. You only miss a few options to assign (e.g. mouse nipple on the throttle base) and the MODE selector M1, M2 and M3. Basically, all functions you assign are always by way of using MODE selection M1. Another pair of M2 and M3 functions can only be assigned with the help of the Saitek programming software.
The Programming tab. On this page, you can either select the joystick or the throttle unit. Each lead to the assigning page, which helps in assigning the buttons, switches, HAT switches etc. from the joystick or throttle unit. For those who are familiar with this type of function, you could also load a “profile”.
You might wonder if the Saitek programming software is really needed? To answer that, I decided to check the difficulty in making my own profile. In the Saitek manual starting on page 12, you’ll find a clear and step-by-step description how to create your own profile and, as an example, how to assign the “G” keyboard command to a button on the joystick. In other words, when you click the assigned button on the joystick, the landing gear will be retracted or extended. It may be a simple example and perhaps not useful for you, but it shows how easy it is to create your own profile file.
You can also decide to download the profile package from Saitek that’s including the one for the X-56 Rhino and install this dedicated Xplane_v2_x5x.pr0 profile file into the following Windows folder /Users/Public/Public Documents/Mad Catz/X-56 Rhino. On purpose, I write “Windows folder” since these profile files only work in combination with the Saitek programming software and that’s only available for Windows.
When you look into this folder, you’ll see already a default.pr0 profile file. That’s the one that’s used by default. The X-Plane dedicated profile is made for you by Saitek, but as indicated above, you can always create your own profile file.
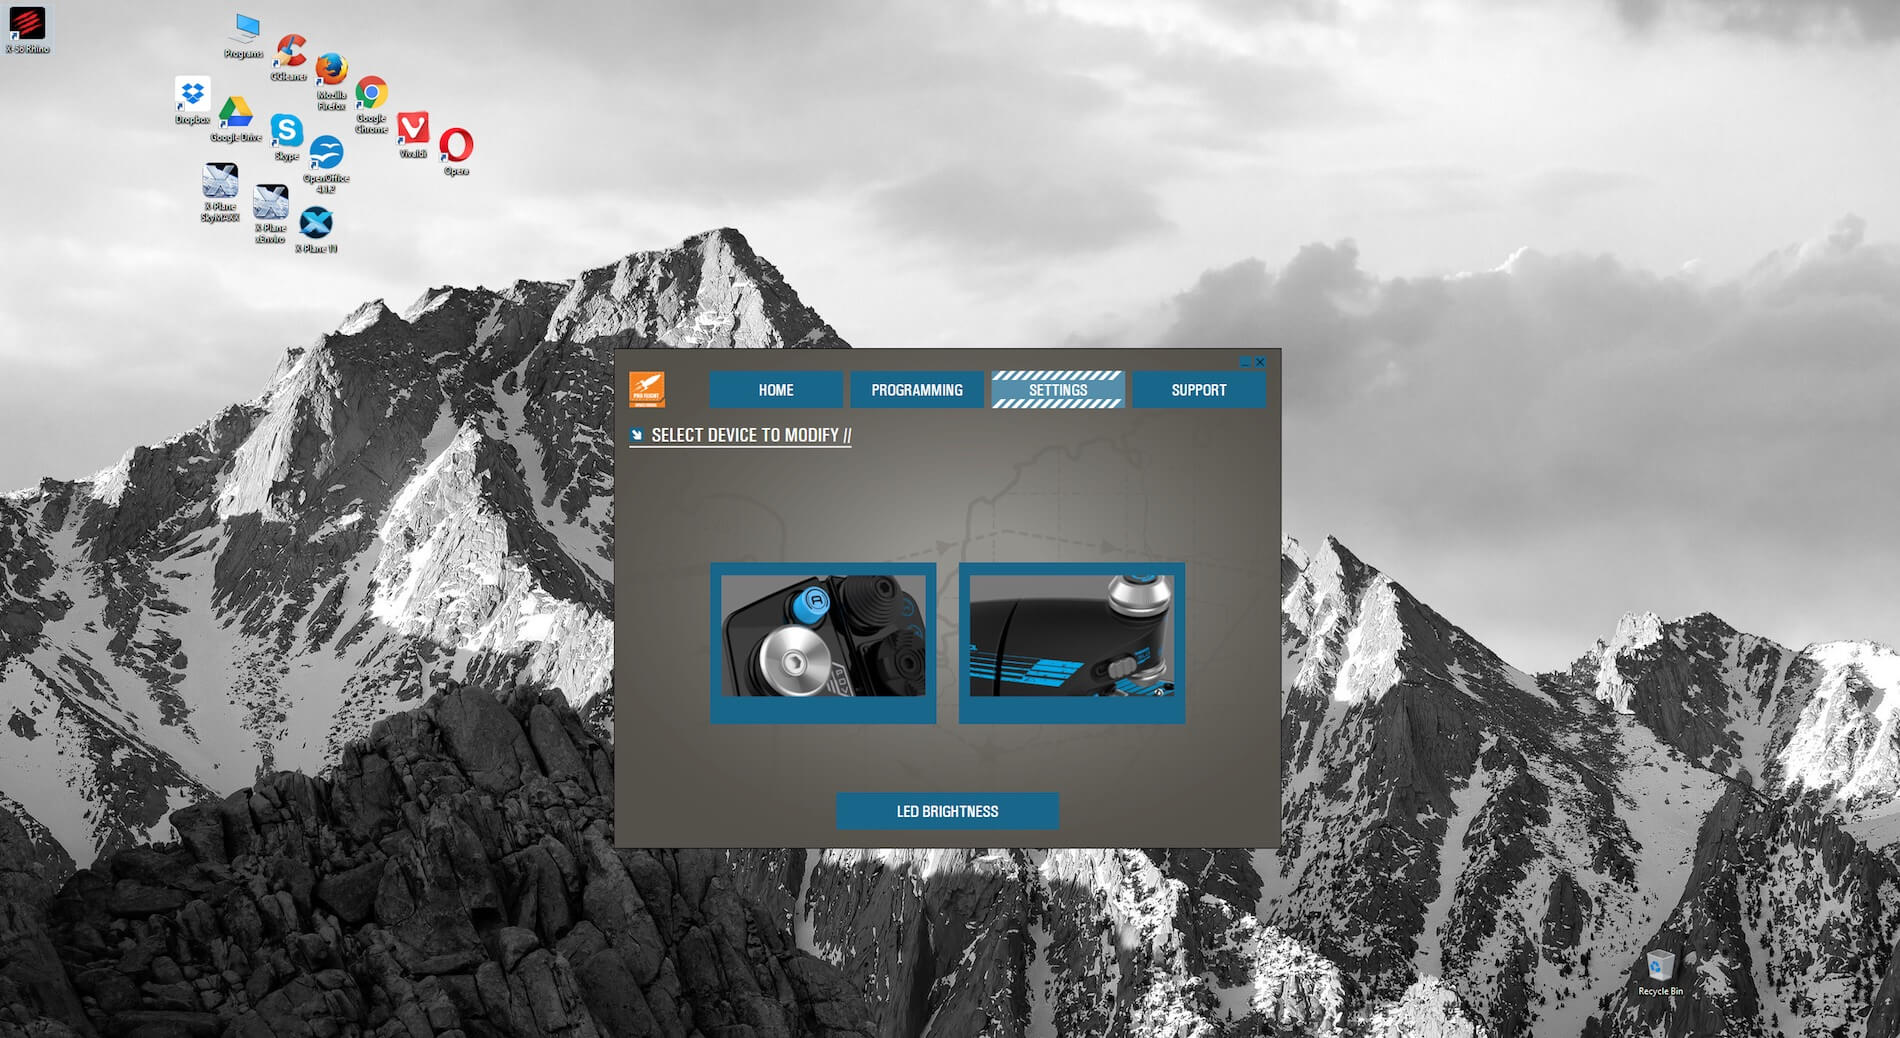
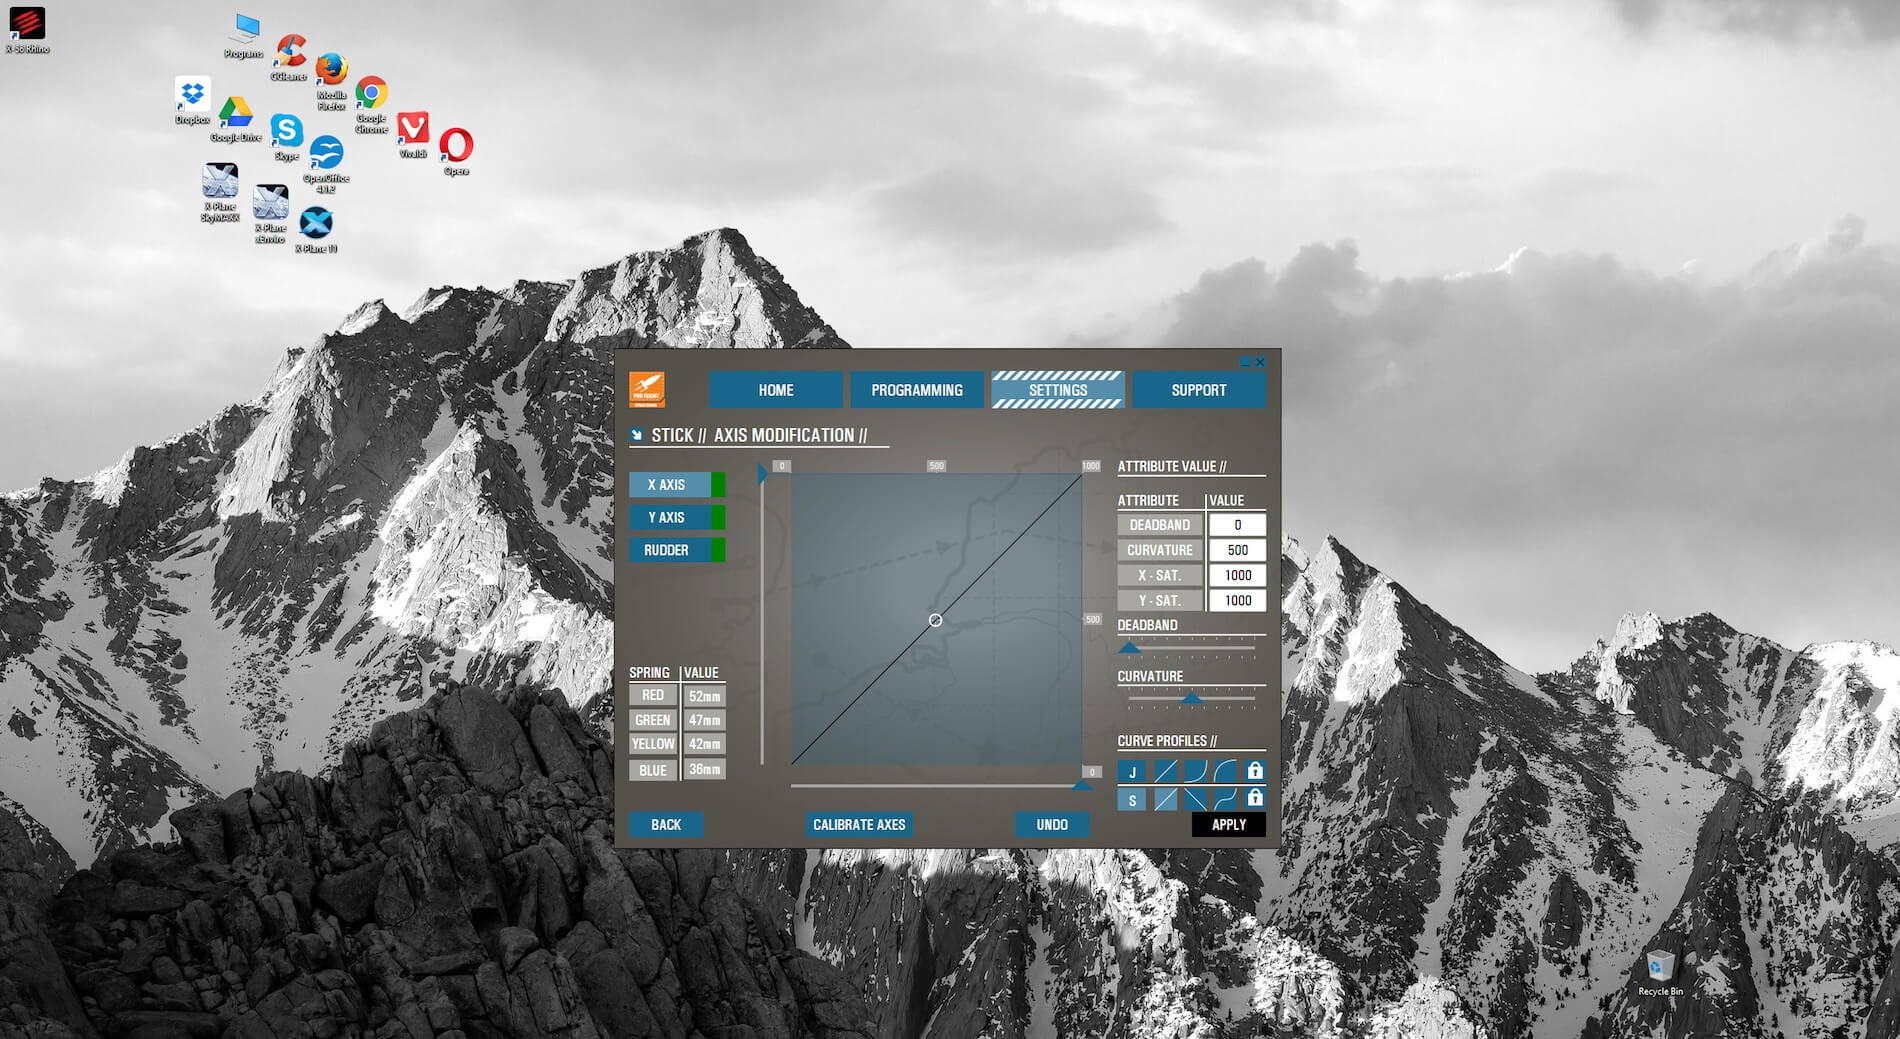
The Settings tab allows you to modify either the joystick or the throttle unit. Just click the device you want to check or to change. Let’s choose the joystick. First, you can check the behavior of the three-joystick axis – X, Y and Z or rudder. But you can do much more. You can change the curve profiles, the curvature, the dead band and the curve itself using the two X and Y sliders. The changes you’ve made in the dead band, curvature and curve profiles are visible in the attribute value window. By the way, selecting one of the curve profiles has nothing to do with the previously mentioned “profile files”. Just in case you’re becoming confused!
Any changes you make in this “joystick” or “throttle” settings tab should be confirmed by the APPLY button. The throttle axis modification settings windows work in the same way however, on the left-hand side you have items related to “throttle 1”, “throttle 2”, “rotary 1 (2/3/4)”. Still with me?
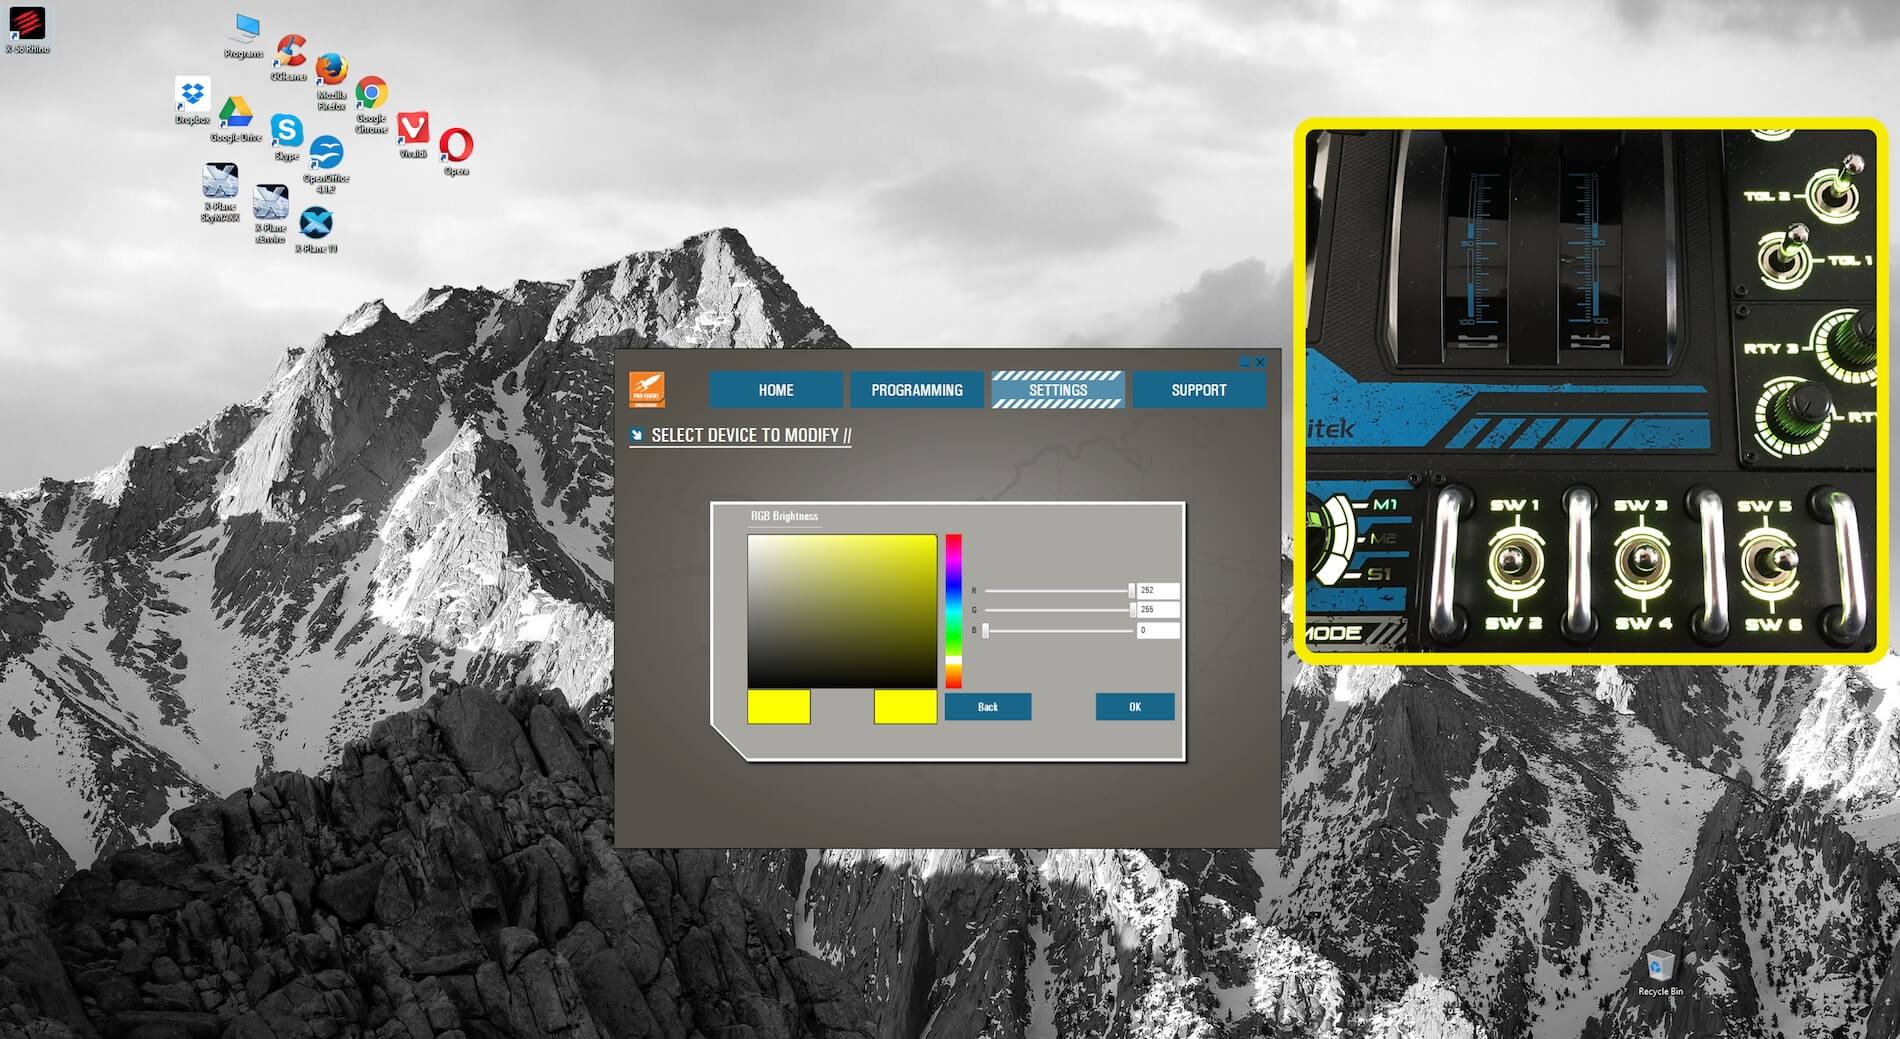
Another interesting feature – it’s fun, I know – is the LED brightness control. Although I would call it “color” control, it’s nice to be able to adjust the LED integral lighting of the throttle and joystick units. You can choose from 100, no 1000, no 10.000, no …… an unlimited amount of integral lights, but the only light that will never change are the green M1, M2 and M3 on the throttle unit. And, guess what …. when you have a Mac computer, and a Windows bootcamp drive, you can adjust the LED colors/brightness, restart in Mac when that’s your primary X-Plane OS, and the colors you programmed stay that what you had assigned them to, even when you remove and reinstall the X-56 units. That you can’t adjust the LED brightness control under macOS is because the Saitek programming software doesn’t work with macOS. Sorry!
The last tab Support is self-explanatory. On the left-hand side, you’ve got the “Read Programming Manual”. This leads you directly to the Saitek X-56 Rhino manual which I’ve already highlighted. Below that, you see the “Quick Start Guide”. This link brings up the same leaflet as you have in the box. On the right-hand side of the window, you’ll see a couple of hyperlinks that don’t need any further explanation except for the “Intelligence” button. This button goes to the Saitek blog page.
This concludes all the steps you need before using the X-56 Rhino. Have I forgotten anything? I think I’ve covered all the preparation steps needed to successfully operate this system.
Close-Up Inspection
X-56 Rhino Joystick
The dimensions of the X56 joystick base are approximately 18 x 22 x 4.5 centimeters. Due to the dimensions and the rubber anti-slip at the bottom, it offers a solid base for joystick movements, even with the green marked spring installed. As with every other Saitek stick, it has a hand palm support, which I suspect is primarily for right-handed people. At the front end of the hand palm you find a trigger.
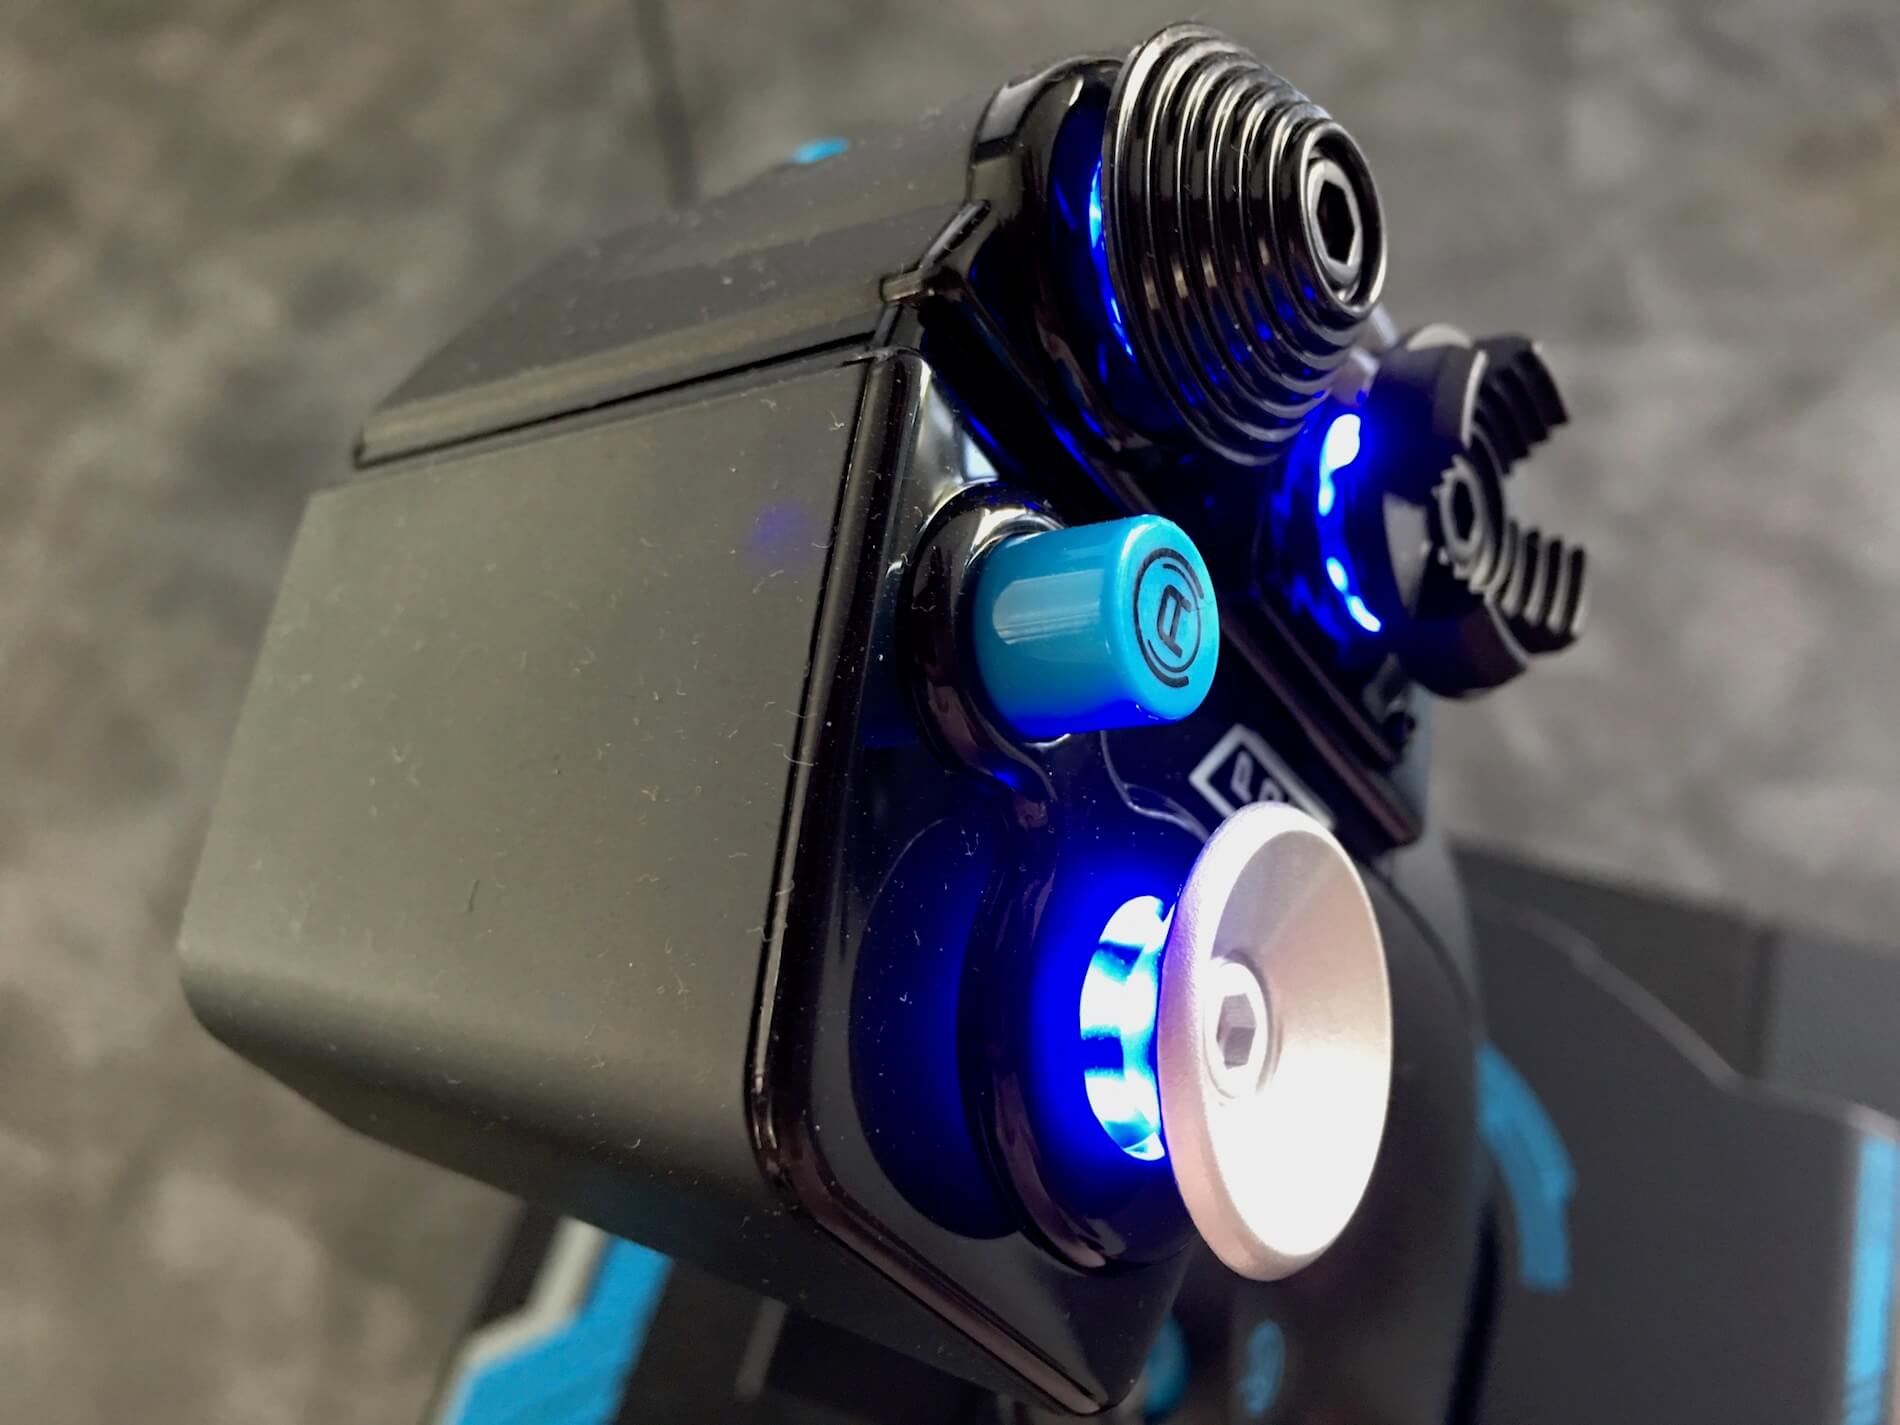
Although I’m not right handed, the hand palm feels good, and it feels like it’s covered with an anti-slip material. Moving up, you’ll pass another red trigger and a gray plastic switch. At the top of the joystick I found a POV (Point Of View) HAT switch, and to the right of it, the H1 and H2 switches. These H1 and H2 switches have, as with other Saitek joysticks, four activation points. And finally, at the head of the joystick, there are two red buttons – R and B. The POV, H1 and H2 have green backlight which gives them a mystical view.
But how does it feel?
It feels great. You have a good grip on the stick and it’s not difficult to reach all switches. The neutral position with the green marked spring installed, is well felt and moving the stick from this neutral point with the strongest spring installed, feels solid. I’ve already mentioned that the X-56 stick looks very similar to the X-65F, with the big difference that the X-65F stick can’t be moved since sensors detect a yaw (Z), roll (Y) or pitch (X). Additionally, the X-65F was made of metal, which is perhaps a too costly process. The fact that the X-56 is of high durable plastic doesn’t make it less interesting. It’s still a high-quality joystick and, of course, it’s not only what you see on the outside, it’s also the electrical parts on the inside and the option to replace the tension springs.
X-56 Rhino Throttle Unit
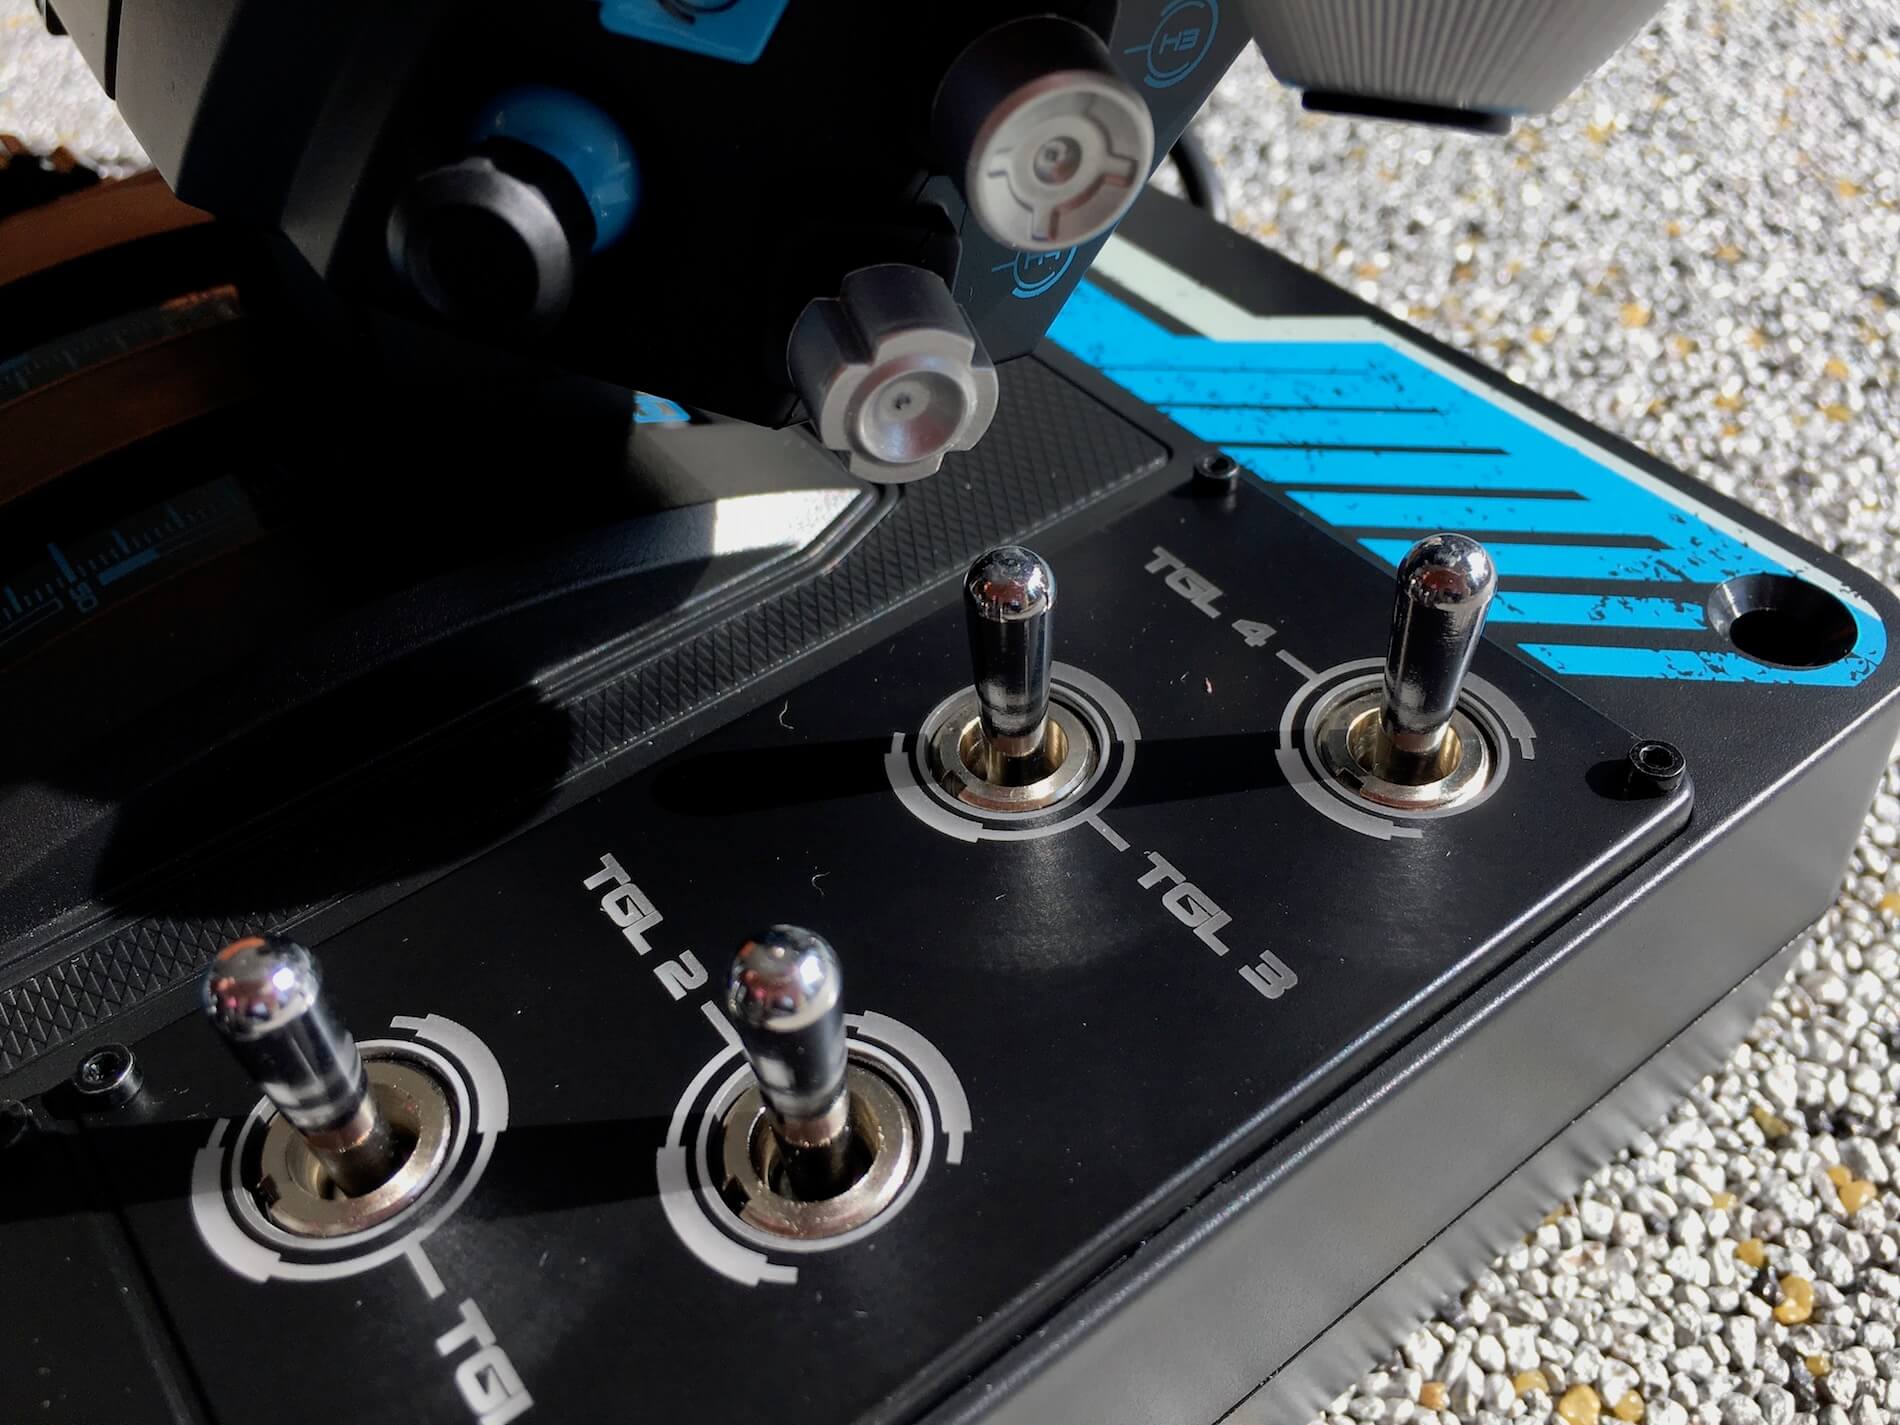
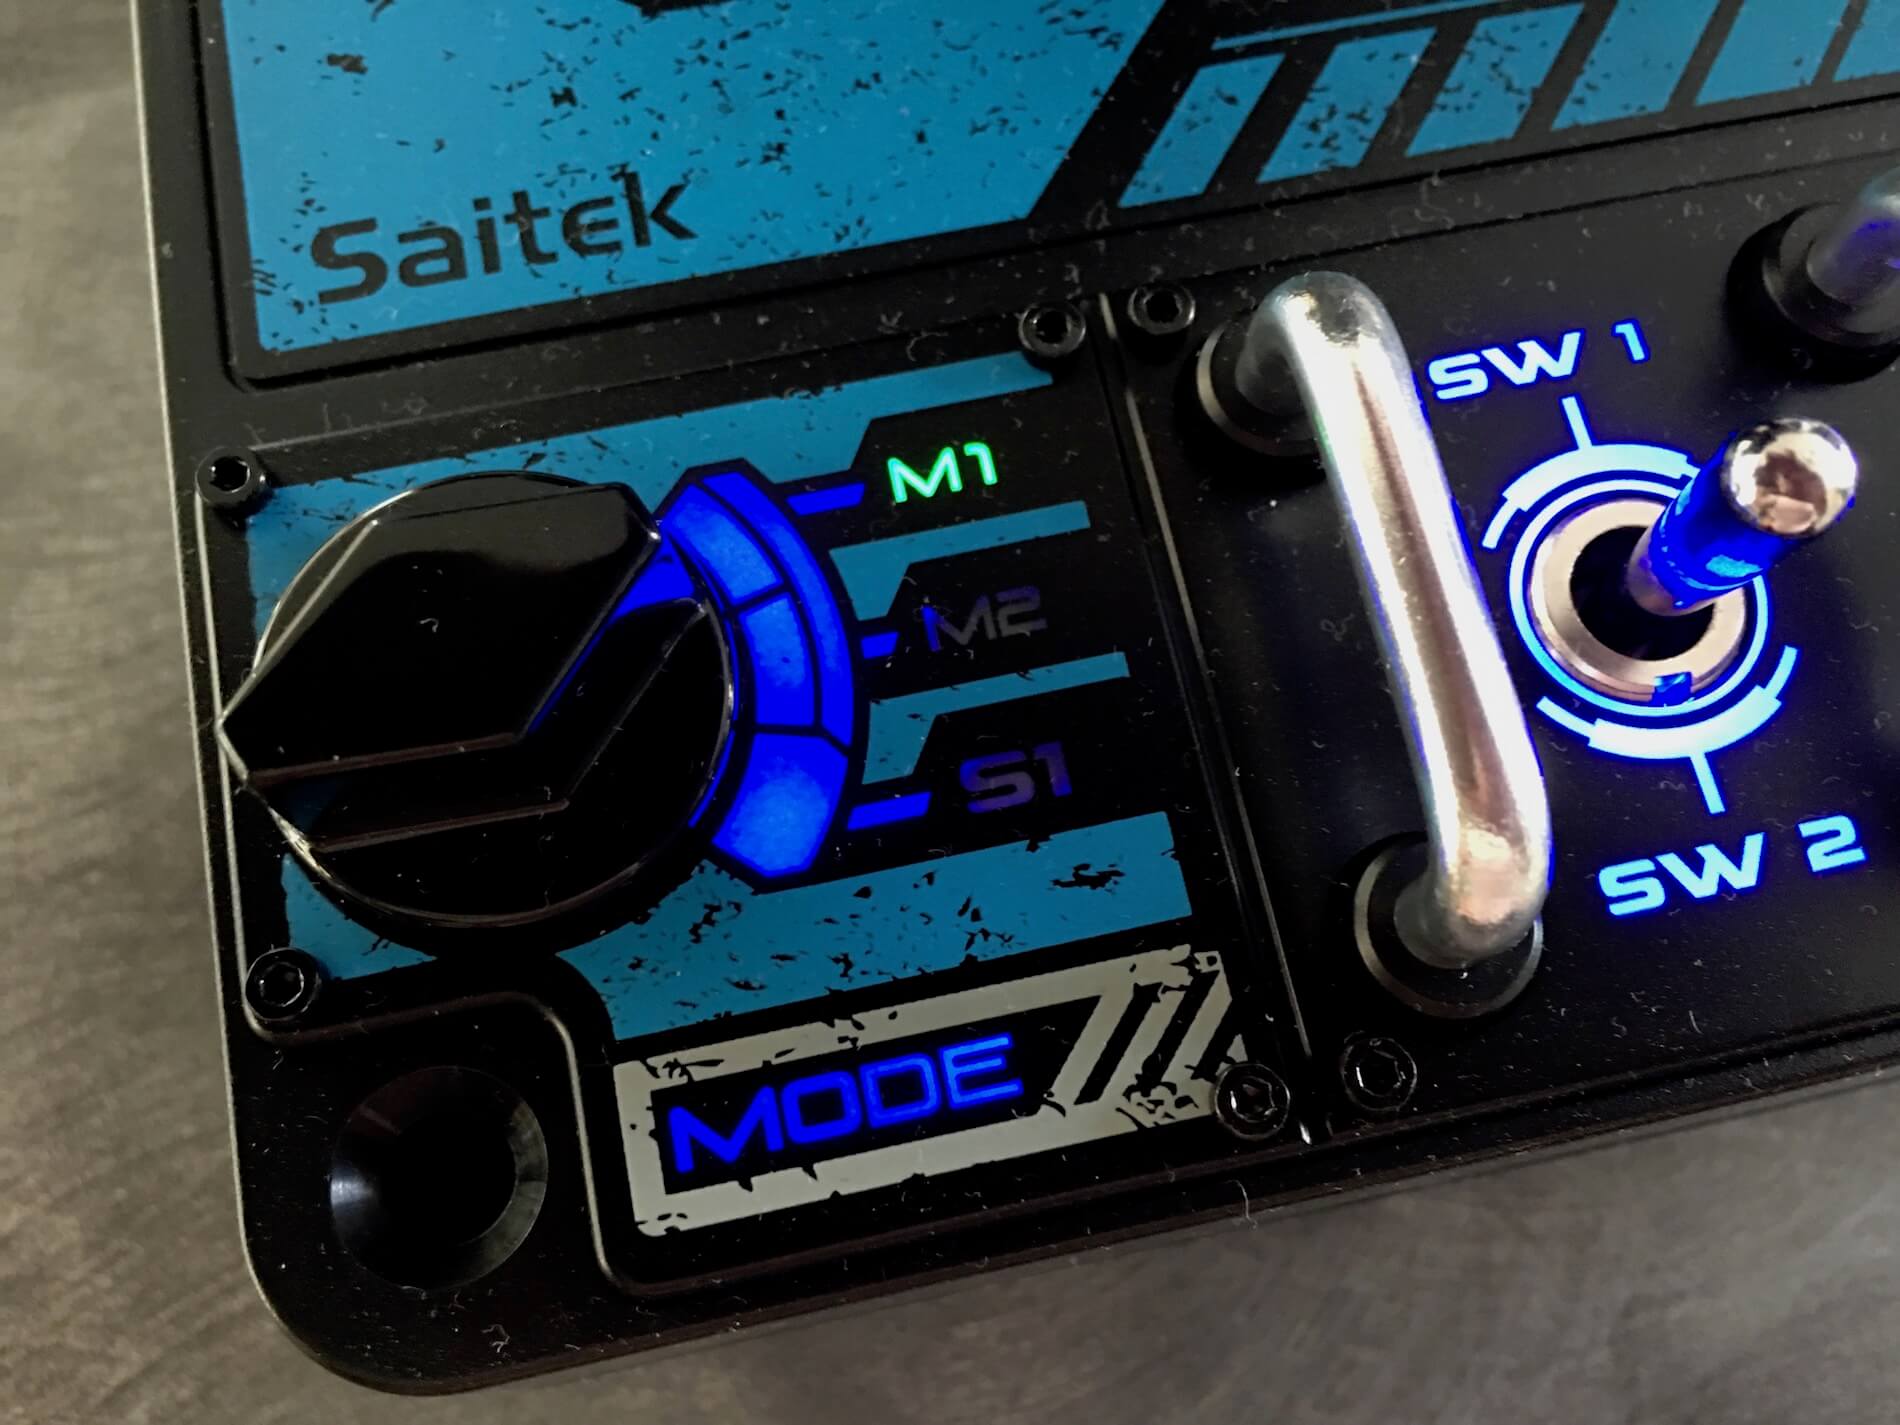
The base of the throttle unit has the same dimensions as the joystick unit. Around the throttle levers, the base is covered with metal switches, gray plastic rotary knobs and the well-known Mode M1/M2/M3 rotary switch. I say well known since this is the same switch that you’ll find on the X-52 Pro joystick. On the left-hand side of the throttle base, in line with the throttle levers, there’s the friction rotary knob. Moving the friction knob from FULL STIFFNESS to MINIMUM STIFNESS works flawlessly. It’s your choice as to which friction you prefer. The MODE M1/M2/M3 switch allows you to add triple functions to all switches and knobs. However, that’s only when used in combination with the Saitek programming software.
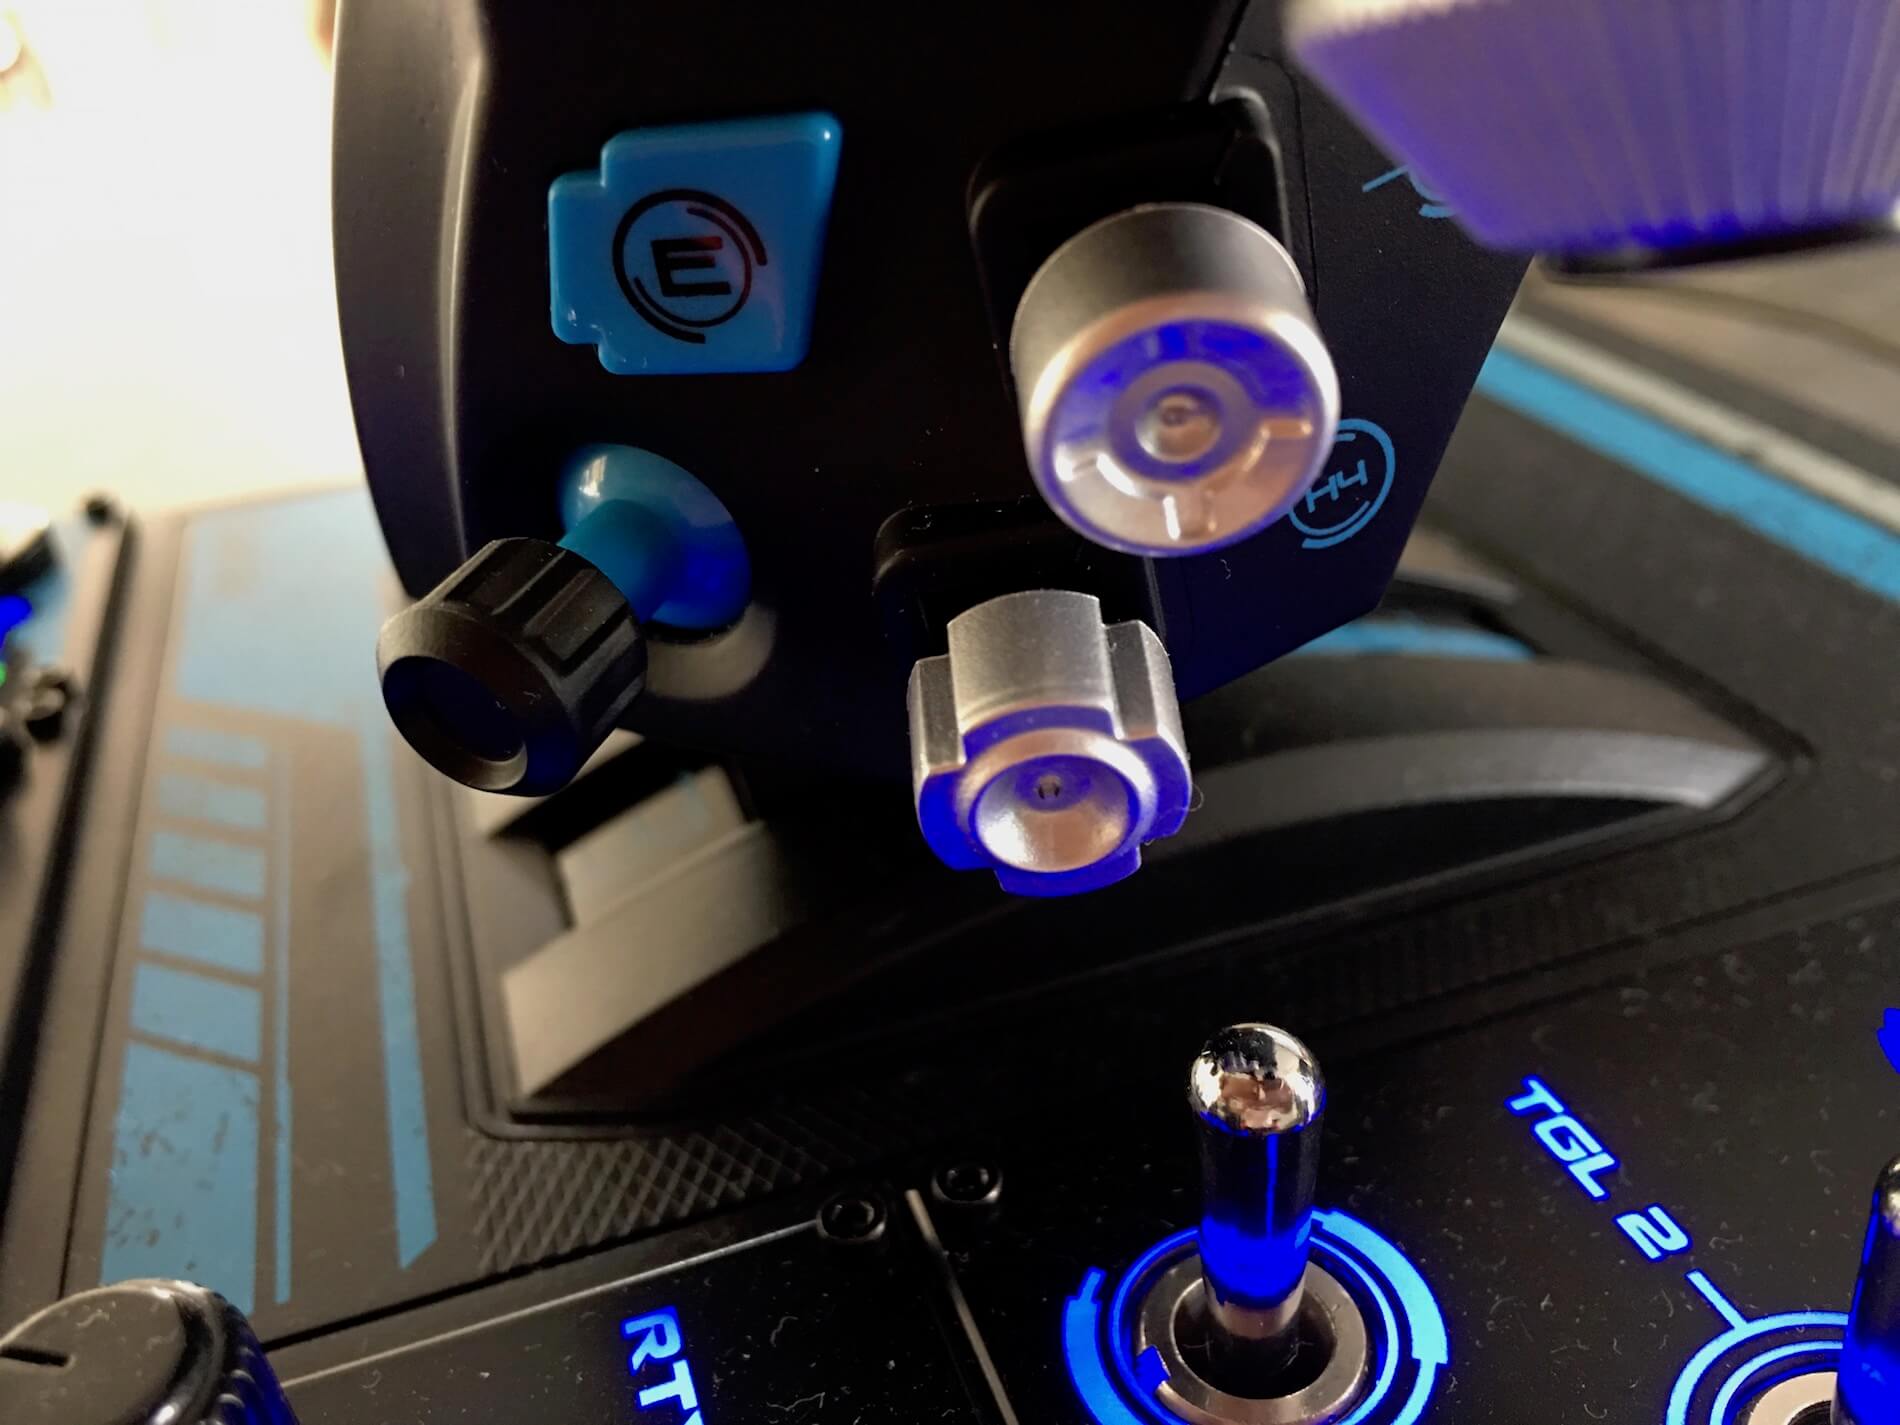
Depending on your needs, you can leave the two throttle levers connected. That way, they act as one throttle lever or you can disconnect them. The throttle disconnect lever can be found at the lower left hand side of the left-hand throttle. The left-hand throttle is equipped with switch K1 (UP-DOWN) and an Aluminum rotary switch. The right-hand throttle has a lot more switches, sliders or buttons. All are programmable with the help of the Saitek software, while some of these switches and knobs are also recognized by X-Plane.
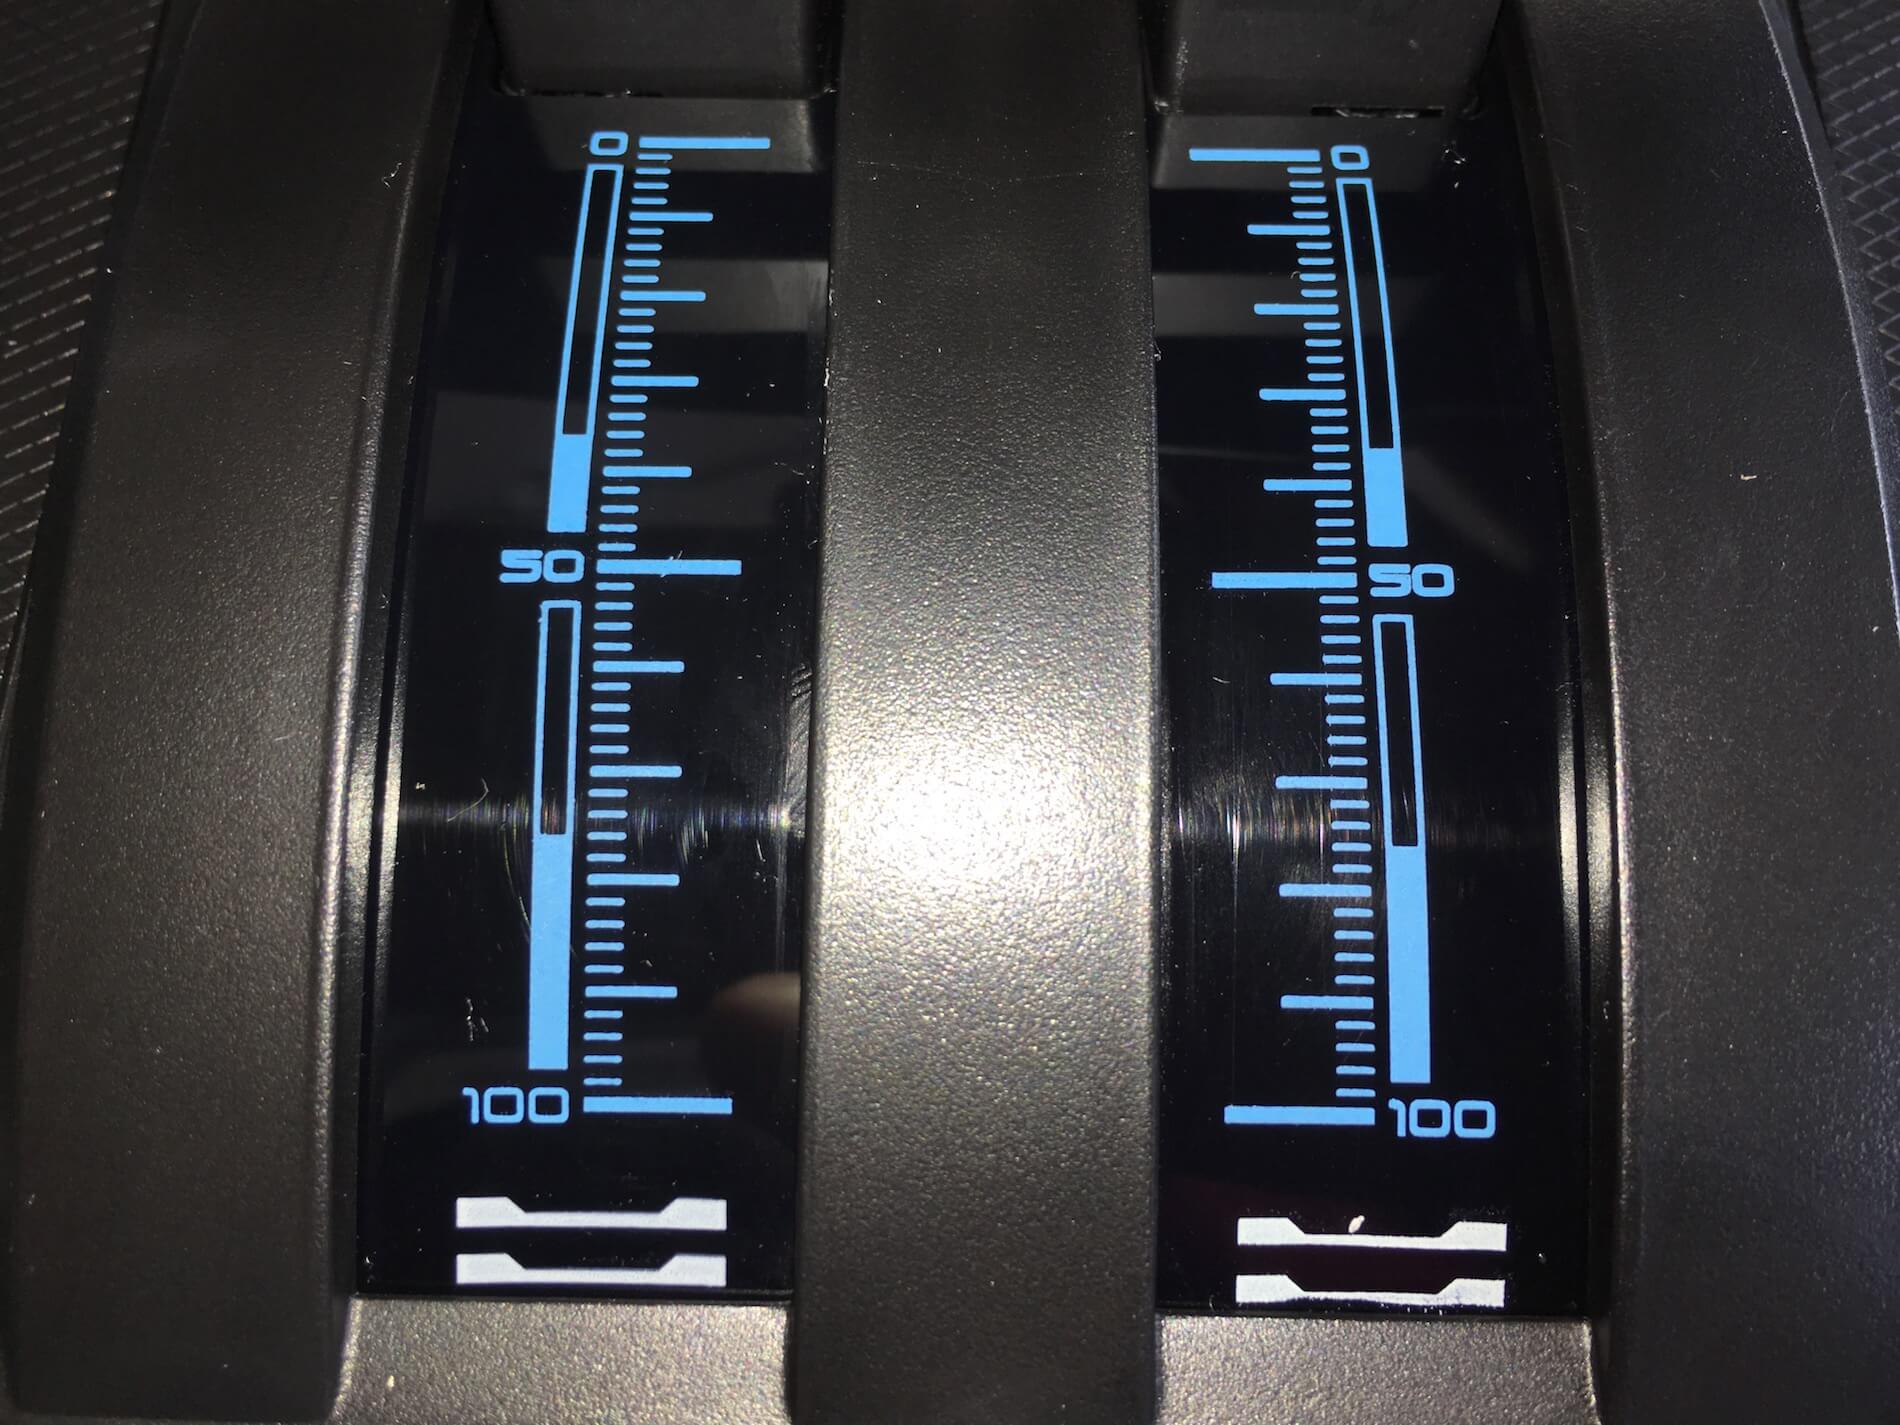
With so many switches, knobs, sliders etc. mounted on the X-56 unit, it’s 100 percent in line with the one I remember from the X-65F throttle unit. One big difference with the X-65F throttle levers is that they are made of metal while the X-56 Rhino throttle levers are made of highly durable plastic with a kind of anti-slip on it. The same as the X-65F, each throttle lever is fitted with a non-illuminated scale, but it allows you to apply the requested thrust or power very precisely.
And how does it feel?
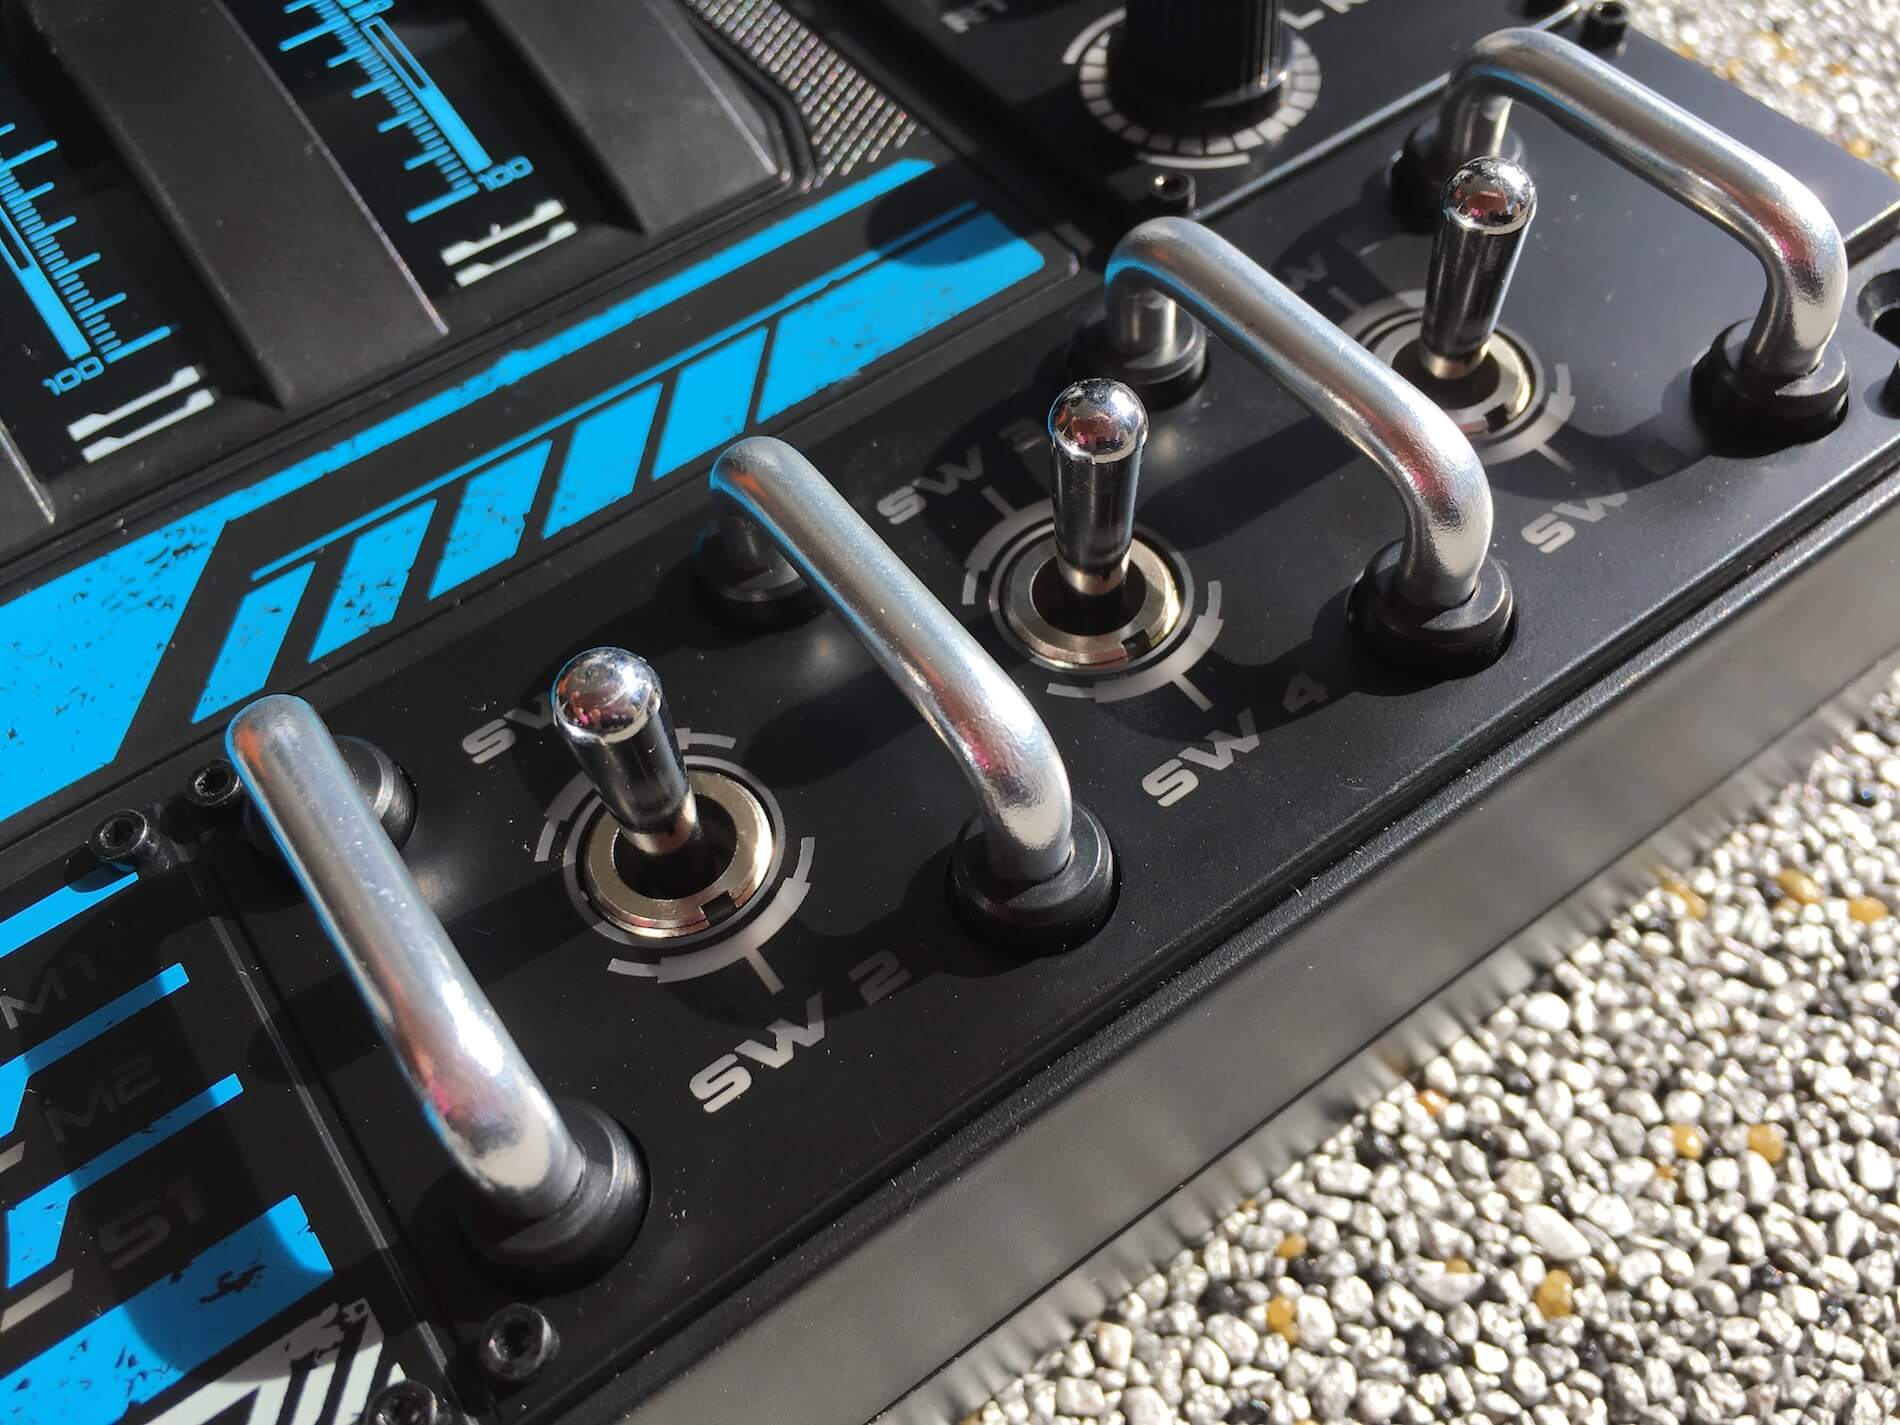
A close-up view of the base tells me that the developers succeeded in rearranging all the switches and rotary selectors in a positive way. If you’re familiar with the X52 Pro, you’ll find the three switches of that stick, back as switches SW1/SW2, SW3/SW4 and SW5/SW6. They are divided from each other with brackets to prevent operating other switches. Actually, the brackets aren’t really needed! The brackets in-between these three switches are just to give a more realistic military look. Completely on the left you find the MODE selector with switch positions M1, M2 and M3. Position M1 is the default switch position. The positions M2 and M3 only become operative the moment you program them with the Saitek programming software.
The friction knob on the left-hand side of the base is used to increase or decrease the throttle friction. A large black knob is used to adjust the friction that you prefer. It’s easily accessible and easy to use. The left and right hand throttle levers are filled with switches, knobs, a slider, a HAT switch and a mouse nipple. The grips of the throttles feel like rubber and that’s OK. I found the X-56 throttle unit to be nicely modeled and pleasant to use. The actual feeling and ins and outs can be read in the section “And how does it feel?”.
Assigning X-56 Rhino with ….
Windows 10 Professional X-Plane 10
Saitek officially supports X-Plane 9 (I haven’t tested this), X-Plane 10 and X-Plane 11 under Windows OS. This means dedicated drivers are supporting XP as well as the programming software. I would say, let’s find it out using X-Plane 10.
I connect the X-56 hardware to my iMac, which has macOS 10.12.4 installed in combination with X-Plane 10.51 64 bit. I need two free USB receptacles or a powered USB hub to connect both X-56 USB cables to it. The best and fastest way is to connect the X-56 cables to my Mac (or your PC) before starting XP10.
The following paragraphs are based on that you have or haven’t installed the Saitek programming software, but not using it. That said, I leave that software as it is for the moment, and the first time you connect the X-56, X-Plane will ask you to calibrate the units. The screen tells you to move the stick in all three directions – pitch, roll and yaw – and move the throttle forward and back several times. Pressing switches, buttons or knobs on either the joystick or throttle unit is not needed. That will be assigned later. Once you’ve done this, click the “Continue” button, followed by the “OK” button. For this procedure, see the three X-Plane calibration screenshots below.
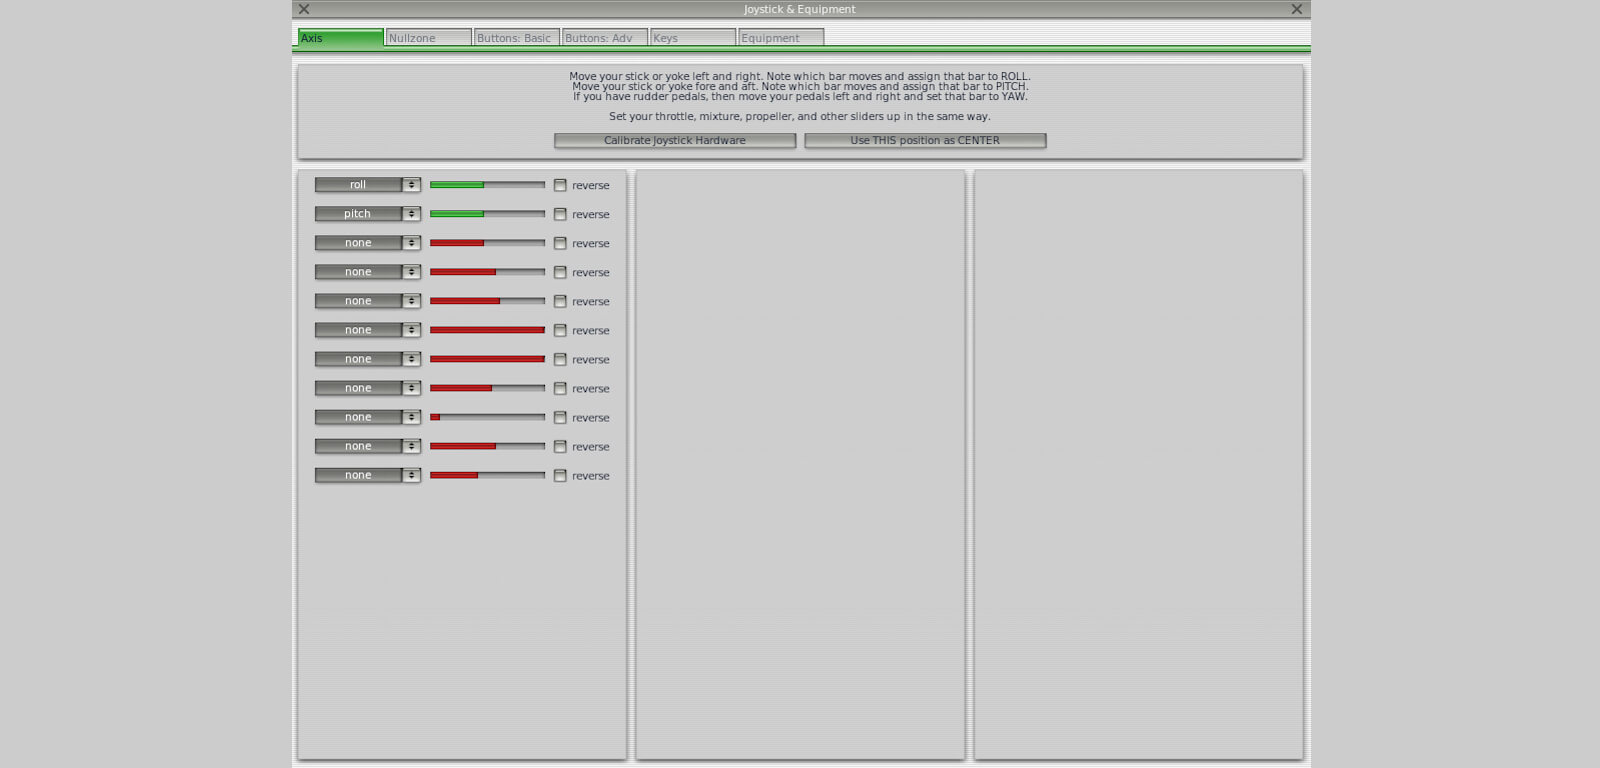
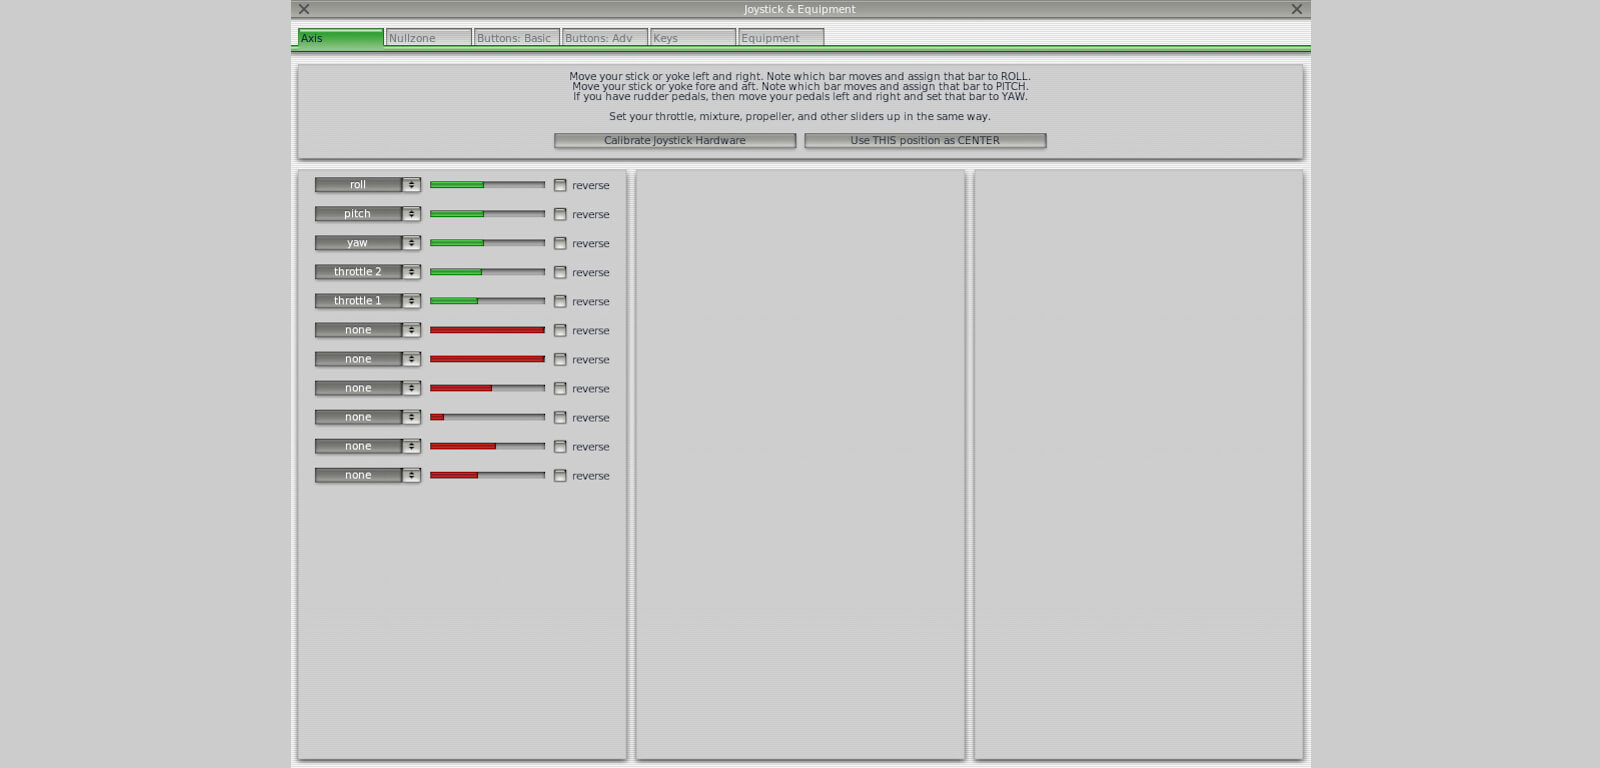
Once X-Plane 10 is up and running and you’ve selected the “Joystick and Equipment” menu, you’ll notice on the “Axis” tab that only the ROLL and PITCH channel are detected. That doesn’t mean that the YAW and throttles aren’t working. They are not detected, which happened to me the first time I connected the Saitek X-52 Pro. In that respect, there’s nothing strange about this. Just twist the joystick and you’ll notice that the YAW channel is detected in the window. Then, assign YAW from the drop-down box. Do the same for throttle 1 and throttle 2 and you’re done with these assignments.
But there’s something interesting when it comes to the mouse nipple, the throttle rotaries with inset buttons and the rotary knobs “RTY 3” and “RTY 4”. These are detected when you rotate them and that’s good news. Let me give you an example. You could decide to assign to rotary selector RTY 4 the “SPEEDBRAKES” and to rotary selector RTY 3 “NOSEWHEEL TILLER”. See this on the following screen shots.
Further on, under “Joystick and Equipment” you’ll find a total of six tabs. Those that are important right now are the “Axis”, “Buttons: Basic” and “Buttons: Adv”.
There’s not really a need for me to go into each possible step as to how you assign a button or switch to the joystick or throttle unit since the X-Plane manual covers this in much detail. But for those who are new to X-Plane, it‘s worth highlighting that under tabs Buttons: Basic and Adv, there’s a lot more to assign. Just press the button or control the switch you want to assign and select the function you want to link to it.
It’s interesting to note that if you’ve shutdown XP10 (or XP9), and restart it later with the Saitek X-56 Rhino still connected to your PC or Mac, the assigned controls are still available in X-Plane. So, there’s no need to calibrate, assign them again or to reconnect the cables.
What have I learned so far?
Windows 10 in combination with X-Plane 10 and X-56 Rhino hardware works great! Without the Saitek programming software, at least 90 percent and perhaps even more of the switches, buttons, sliders, rotary knobs etc. are detected and can be assigned to a function. If you want to have the full benefit of your X-56 Rhino in combination with X-Plane, then you should use the Saitek programming software and make your own profiles. If you do that, you’re able to use the MODE selector M1, M2 and M3 completely as it was designed.
Windows 10 Professional X-Plane 11.00r1
When you start X-Plane 11.00r1 it will detect right away that it’s dealing with the Saitek X-56 Rhino even though the hardware isn’t yet calibrated. But with this X-Plane 11.00rc1 version, there’s not yet an X-56 picture shown of the X-56 throttle and joystick units. This is, just to give you an idea, different then with the X-52 Pro. When you use the X-52 Pro with X-Plane 11, an interactive picture is shown and allows you to see where and what each switch, button, selector etc. is versus X-Plane 11.
Let’s assume that such an “interactive picture feature” will come later with X-Plane 11 updates. Assignment of basic functions and additional function to the X-56 is basically the same as I was used with X-Plane 10.51. It all looks slightly different, but the overall idea is the same. And, perhaps even more important, I didn’t face any problems. The following screenshots should give you an idea how it looks like with Windows 10 and X-Plane 11.00rc1.
macOS Sierra X-Plane 10
Although Saitek doesn’t offer any drivers or software for the X-56 Rhino to work under macOS Sierra or previous Mac OSX versions, that doesn’t mean the X-56 Rhino can’t be used with Sierra or version 10.12.4.
This section is very similar to the Windows 10 versus X-Plane, but there are a few differences. I’ll highlight them.
Connecting the Saitek X-56 USB cable to your Mac is the same as is the initial calibration procedure and the assigning of functions using the tabs “Axis”, “Buttons: Basic” and “Buttons: Adv”.
After the initial calibration process at startup of X-Plane, in my case, neither of the joystick and throttle channels were detected. That means, the basic movements of the joystick – pitch, roll, yaw – and of the throttle base unit – throttle lever movements – were not detected by X-Plane. Does this mean that the X-56 can’t be used with XP10 under macOS or previous Mac OSX versions? No. It only means that during this initial detecting process, X-Plane 10 couldn’t recognize the channels.
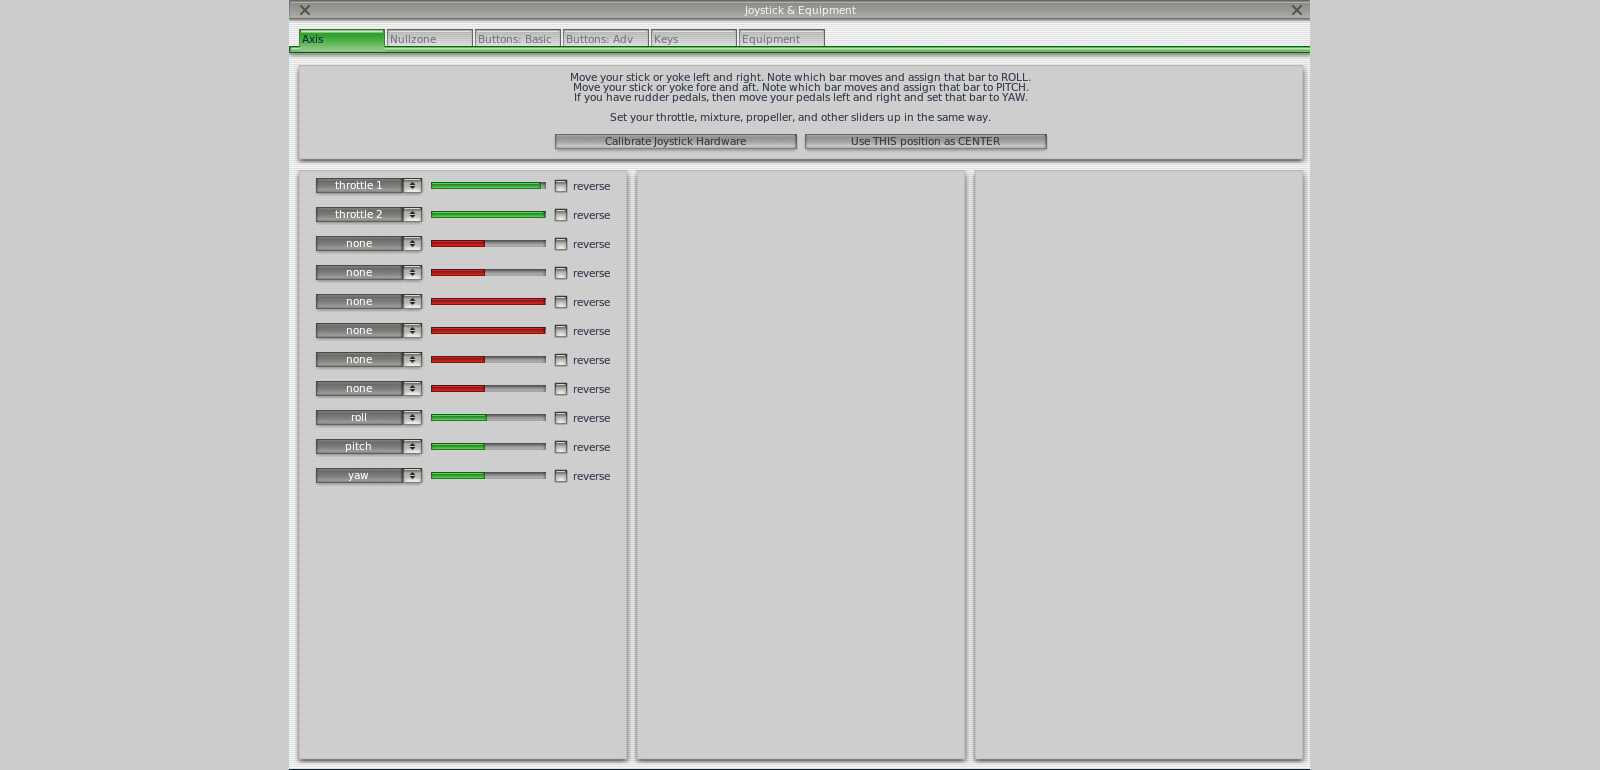
The next step is moving the joystick into a pitch direction and by checking on the “Axis” tab which red slider is moving. From that slider, you select the drop-down box PITCH. You do the same for the ROLL and YAW channels of the joystick. Finally, you do the same for throttle 1 and throttle 2. But wait! Before assigning the throttles, you can disconnect them from each other. If you do that, you have now a throttle 1 lever and a throttle 2 lever and then, you can assign each throttle lever individually.
macOS X-Plane does behave as far as I can see, the same as under Windows. That said, when you quite X-Plane, but leave the X-56 cables in your Mac, at the next X-Plane restart, all settings are still recognized, as expected I would say. The same implies when you had removed the X-56 cables from your Mac, connect them at a later moment, and restart X-Plane. Also in this case, all joystick and throttle settings are still stored.
What else can I add to this?
It turns out that except for the throttle base “mouse nipple” every switch, button, lever, rotary knobs etc. are detected by X-Plane and even the MODE selector switch M1, M2 and M3 is detected. Not that you can do much more then assigning a function to it. It just doesn’t do what the MODE switch was intended for which was the case under Windows with the Saitek programming software installed. So, this is a function we miss with macOS. But this is not new to me, since the X-65F and the X-52 Pro do have the same issues with the MODE selector under Windows versus Mac.
Conclusion?
It’s a shame Saitek doesn’t provide the programming software for macOS, but on the other hand, 90 percent or more of the switches, knobs, levers, rotary knobs and others are detected by macOS X-Plane and I’m very pleased with that!
macOS Sierra 10.12.4 X-Plane 11.00r1
This is fun. Wow, X-Plane 11.00r1 detected right away that it’s dealing with the Saitek X-56 Rhino even though the hardware isn’t yet calibrated. I could write down another interesting story how the X-56 behaves under macOS, but the story would be the same as with Windows 10 and X-Plane 11.00rc1. That said, no reason to write down the same conclusion as under Windows 10 with X-Plane 11.00rc1, Ok?
And how does it feel?
“How does it feel?” or better to say that it’s also a matter of “how does it feel and fly?”. Remember, I still have the green marked spring installed. The green marked spring gives the highest tension/feedback when moving the joystick.
Now it’s time to test the X-56 Rhino in flight.
The first thing I face, partly my own fault, is the resistance I feel from the green marked spring. I know, it was my decision and I told you to leave the spring mounted and first check out how you feel about it. So, what’s the issue?
Moving the joystick for PITCH isn’t a problem at all although you feel the spring resistance quite well when you move the joystick away from the center position. But due to the large “length” of the base, the base stays firmly on the table.
Twisting (YAW) the joystick isn’t a problem at all and the twisting force is always the same regardless of which spring is installed (green, blue, red or yellow). This twisting resistance is something that comes from inside the stick/base fitting. During the many flights I made, with the green marked spring installed, I faced the problem that the base started to tilt the moment I moved the joystick either to the left or right thus for ROLL.
This is partly the result of the smaller joystick base compared to PITCH inputs (forces divided over the long sides of the base) and the too high spring tension. I’m aware that this ROLL tilting (left and right joystick movement) appears only from the moment you move it out if the center position. In other words, the spring braking force is at that moment higher than once it’s out of the center position.
Disappointed?
Not at all!
Either I didn’t firmly put my hand palm on the supporting bracket that gives some counter weight the moment I move the joystick left or right or I could simply install a lower tension spring. As a result, I decided to install the blue marked spring. After I’ve replaced the green spring with the blue spring, I have a tip. Don’t tighten the joystick black ring too much. Just tighten it normally and don’t use your muscles too much! I tried different aircraft with X-Plane and although the spring has not much to do with which aircraft I fly, I still found the blue marked spring to heavy. To make a long story short, I finally ended with the red spring installed and to me it felt the same as the resistance of the X52 Pro.
I liked it, but remember, it’s for my personal use. Anyway, what does it matter? If you don’t like the minimum red spring tension, you still have three other springs that offer more resistance. And one more item which I discussed earlier. Never, never use the joystick without a spring installed. Not that you’ll damage the joystick, but without any spring tension or artificial feel there’s no longer a neutral position in the joystick. The spring not only gives you an artificial feel, but brings the joystick back to the center position.
So, with the red marked spring installed, I’m comfortable with the way I use the joystick. Is there anything else that needs to be highlighted besides the spring? No, not really! All buttons, levers or HAT switches are directly reachable, but the joystick is made for right handed people. This isn’t different than the 52 Pro and the X-65F. That’s perhaps the only issue that would prevent some people (left handers) from acquiring this system. Why not a joystick that’s made for left handed people or a hand palm rest that covers both sides of the joystick.
And how does the X-56 throttle unit feel?
Without the use of the Saitek programming software, you miss the MODE selector switch positions M2 and M3. Remember, M1 is used by default. The number of switches, knobs, rotary knobs are, I think, more than enough. When you use Windows as your platform, then you’re lucky to be able to use the special Saitek programming software.
If you’re a Mac user, then there’s no Saitek programming software, so there’s no other choice other than the M1 MODE selector switch position. Personally, I didn’t miss the Saitek programming software since the number of switches and others on both the joystick and the throttle unit are more than enough.
The switches, knobs etc. on the right-hand side of the right-hand throttle level are a little bit too close to each other. It can happen that you operate one switch or knob and incidentally hit the other. Although you have two throttle levers, remember when you use an aircraft that has four engines, only the engines 1 and 2 respond to throttle movement. In other words, you need to reconfigure the throttle assignment.
Either the left or right hand throttle must be assigned to the drop-down box “throttle”. This means that the lever you have assigned will control all engines no matter how many are installed. On my X-56 throttle unit I had the throttle friction set at the minimum value, which I found comfortable, but naturally enough, this is a personal matter. Let’s put it this way. The friction knob is large enough and easy to rotate. Just try out what’s comfortable for you. The throttle friction range should be more then enough to suit everybody’s need.
Is there a big difference – look and feel – between the X52 Pro throttle lever and the X-56 levers?
The X52 Pro only has one throttle lever while the X-56 Rhino has two. The X52 Pro throttle lever grip is totally different than that of the X-56. But honestly, both have their own unique grip. Perhaps the X-56 right hand throttle has a few more buttons, switches etc. than the X52 Pro lever. Due to the X52 Pro shape, these buttons and switches have a little more space between them.
The X52 Pro throttle lever has hard detents just out of 0 degrees and just before the end of travel. The X-56 doesn’t have this. I personally like to have no detents, but again, that’s a personal preference. That the X-56 doesn’t have an LCD screen isn’t a problem to me and honestly, I don’t miss it. The same as with the X-52 Pro, the X-56 throttle design is well designed for myself as left-handed person.
The reason that I bring this up is because of the right-hand throttle lever. It has many switches and rheostats on that side and it feels comfortable to control these with my thumb. Perhaps right-handed simmers have experienced that same for them. The same is with the joystick. Although the joystick is not 100 percent symmetrical, but the palm rest is situated on the right-hand side. You can lift the height of it with a plate although I got the impression that the plate is more for fun then that it really helps.
I mentioned this before; the total number of switches, knobs, rotary selectors, HAT switches etc. are, even without the use of the Saitek programming software, more then enough. Do I miss the switches from the X52 Pro on the joystick? No, because you can find them back at the throttle base. Overall solid devices with lots of flying pleasure.
Summary
Normally a summary should contain the highlights of the product being reviewed and we’ll do that knowing that this review is already by itself long!
As far as my knowledge goes, the Saitek X-56 Rhino H.O.T.A.S. is their latest product and I’ve got no idea what happens since Logitech is now the official owner of Saitek products. Ok, back to the product. The throttle unit has now control switches (T1/T2, T3/T4 and T5/T6 versus SW1/SW2, SW3/SW4 and SW5/SW6) which are mounted on the X52 Pro joystick base and it has two throttle levers, the same as can be found at the X-65F. On the other hand, the X52 Pro had a LCD display which isn’t on the X-56 throttle base.
For those who aren’t familiar with the X52 Pro LCD, this was not only a LCD display. It had many functions (display time/date, select COMM 1(2) and NAV 1(2) frequencies) that’s no longer available on the X-56 throttle base. There are also no red/green lights available on the thrust scale as was applicable on the X52 Pro scale. Are any of those differences an issue? Not at all! I’m more interested in the compatibility of the hardware version simulators.
The X-56 Rhino H.O.T.A.S. comes with Windows drivers (10, 8.1, 8, 7 and Vista) and Windows programming software. You can do many things with this software such as adjusting the output signals of the joystick and throttle units. It also allows you to program your hardware for better integrations with flight simulators with the help of creating profiles.
As of this writing, April 2017, Saitek does offer dedicated X-56 profiles. I’m impressed about the integration of the X-56 Rhino hardware with Laminar Research X-Plane for Windows 10 Professional and macOS Sierra. And yes, the X-56 works quite well with X-Plane on a Mac although there’s no Saitek software available for this OS.
The box content is OK, the hardware is well packed and luckily, there’s no longer a mini-CD or CD added to it. On this day and age adding a mini-CD or CD with driver and H.U.D. software is not worth doing since 99.9 percent of the flight simmers have an Internet connection. It’s always better to download the latest drivers and software from Saitek rather than including a CD with software and drivers that are probably no longer updated. Anyway, good choice and it most likely saves production costs and money!
Looking to the X52 Pro that had suction caps to mount it to the table, the X-56 doesn’t have this, but on the other hand, at each corner it has a rubber ring for anti-slip and the base is much larger. You’ve also seen that on the photos. Which joystick tension spring you like is your choice. I tried the joystick tests first with the default installed green marked spring, but later decided to install the blue marked spring for more pitch and roll control.
I’m fully aware that this is always a personal choice. The fact that you can change the tension is impressive! One thing I know for sure is to never try to fly with no spring installed. The only resistance or tension you feel is the plastic components sliding over each other and that’s way too light. You could question if the joystick mounting construction is durable enough for many removals and installations to the joystick base?
Looking at the way the mounting ring is made and the size and lay-out of the contact pins on the stick itself and base, I think it’s made for a lot of removals and installations. The first time you replace a tension spring, it will take a couple of minutes, but after that, you get the idea of how it works and it will go much faster.
At the Saitek UK store, guided to the Amazon store, the X-56 Rhino H.O.T.A.S. cost you 269.95 USD. Last, but not least, I’d like to thank Kai Bösch (Business Specialist Gaming DACH Logitech) and Julien Harbers from whizpr for providing me with this X-56 Rhino H.O.T.A.S review sample. It was my pleasure to test and review this great piece of hardware!
Did I miss anything?
Perhaps I missed something that needed to be explained, but I think I covered most of the X-56 Rhino H.O.T.A.S. More information can be found at the dedicated Saitek UK web page.
Thank you for reading this review and if you’ve any questions or comments, please feel free to contact me at this email address ……
Feel free to contact me if you’ve got additional questions related to this impression. You can reach me via email Angelique.van.Campen@gmail.com or to Angelique@X-Plained.com.
With Greetings,
Angelique van Campen
| Add-on: | Payware Saitek X-56 Rhino HOTAS |
|---|---|
| Publisher | Developer: | Logitech | Aerosoft |
| Description: | Realistic Flight Sim equipment |
| Software Source / Size: | N.A. / N.A. |
| Reviewed by: | Angelique van Campen |
| Published: | April 13th 2017 |
| Hardware specifications: | - iMac 27″ 3.5Ghz Late 2013 - Intel i7 3.5Ghz / 3.9Ghz during Boost Mode - NVIDIA GeForce GTX 780M 4096 MB - 32 GB 1600 MHz DDR3 - 1 internal 1TB SSD (Sierra 10.12.4) - 2 external 1TB SSDs - Saitek Pro Flight System |
| Software specifications: | - Sierra (10.12.4) | El Capitan (10.11.6) - Windows 10 Professional - X-Plane 10.51c | X-Plane 10.51m | X-Plane 11.00r1 |
7 Comments
Submit a Comment
You must be logged in to post a comment.






















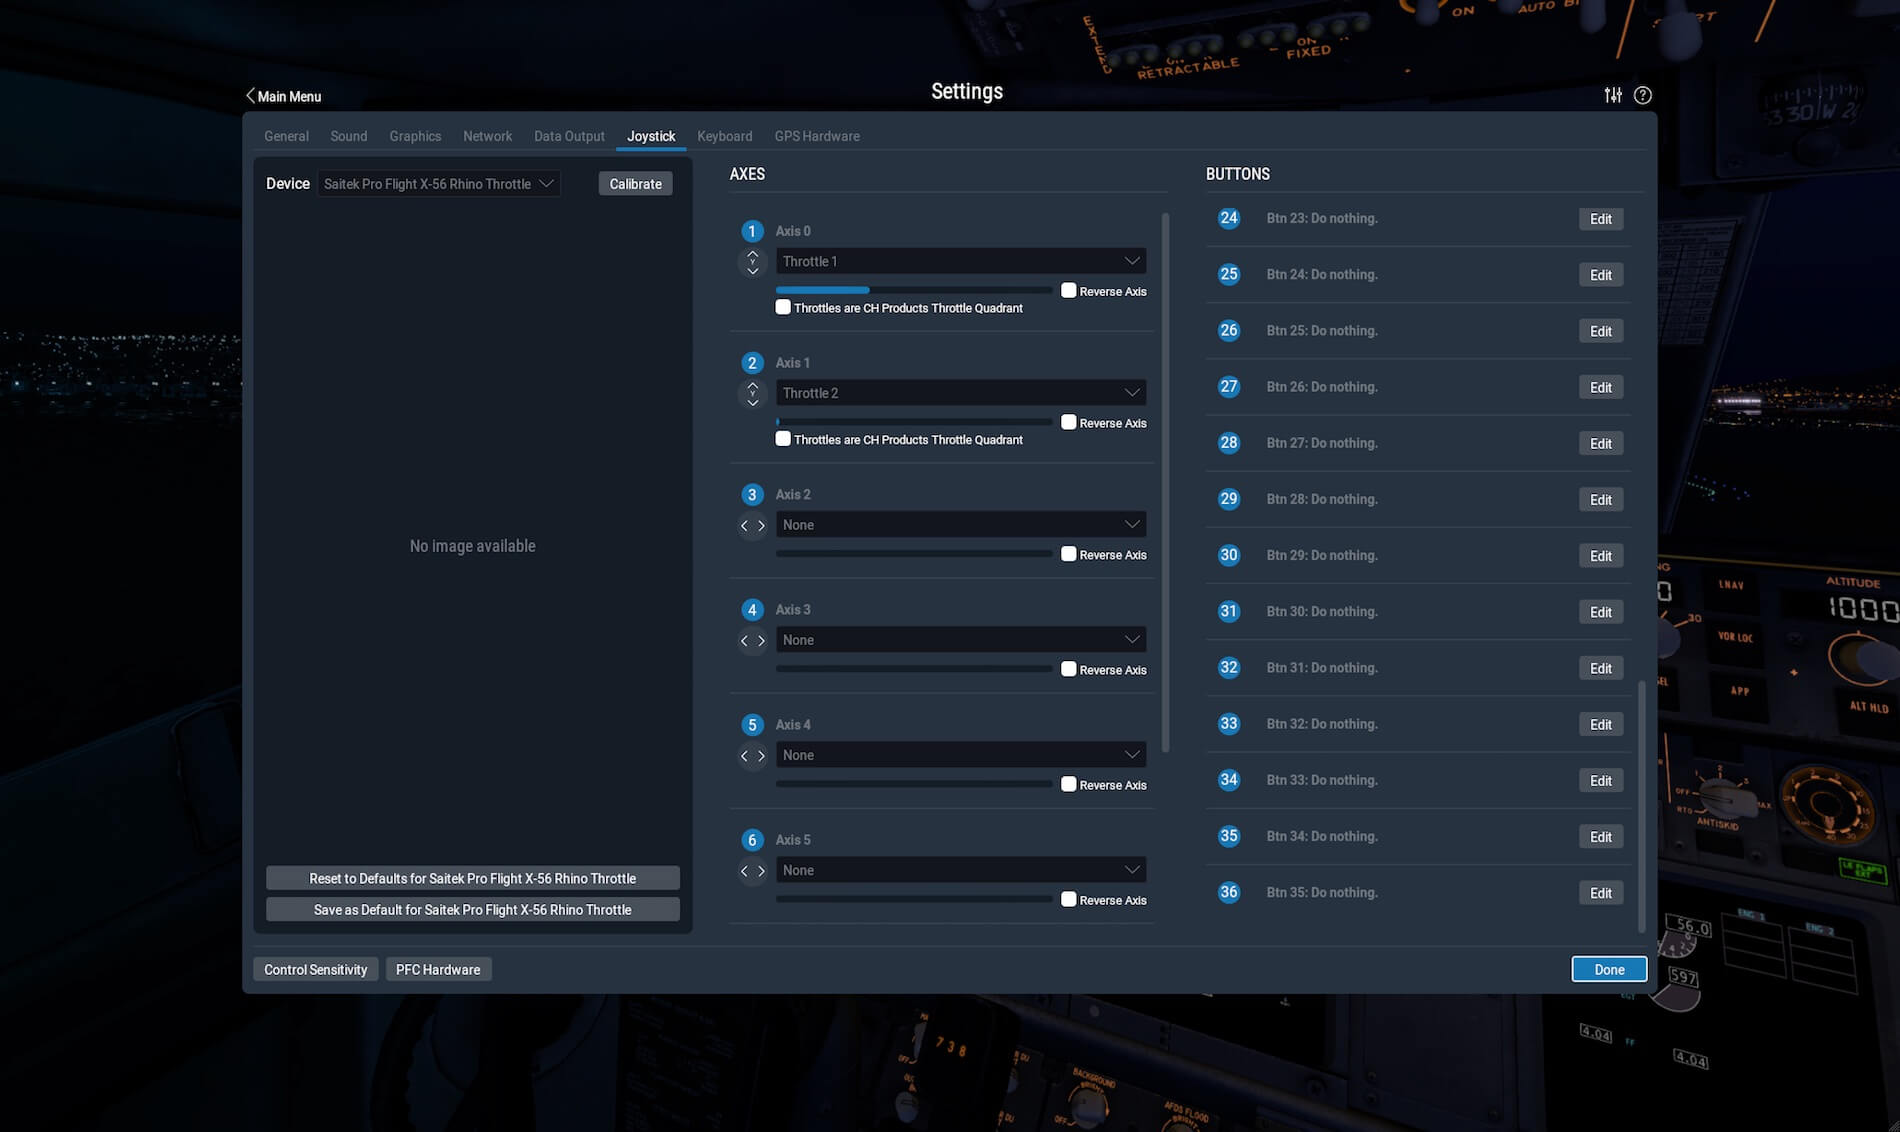
Sorry if this sounds like a dumb question, but what is the purpose of the slider? It doesn’t show up as a button under Game Controllers. I can’t seem to get it to do anything other than to test it while using the programming software.
Frank,
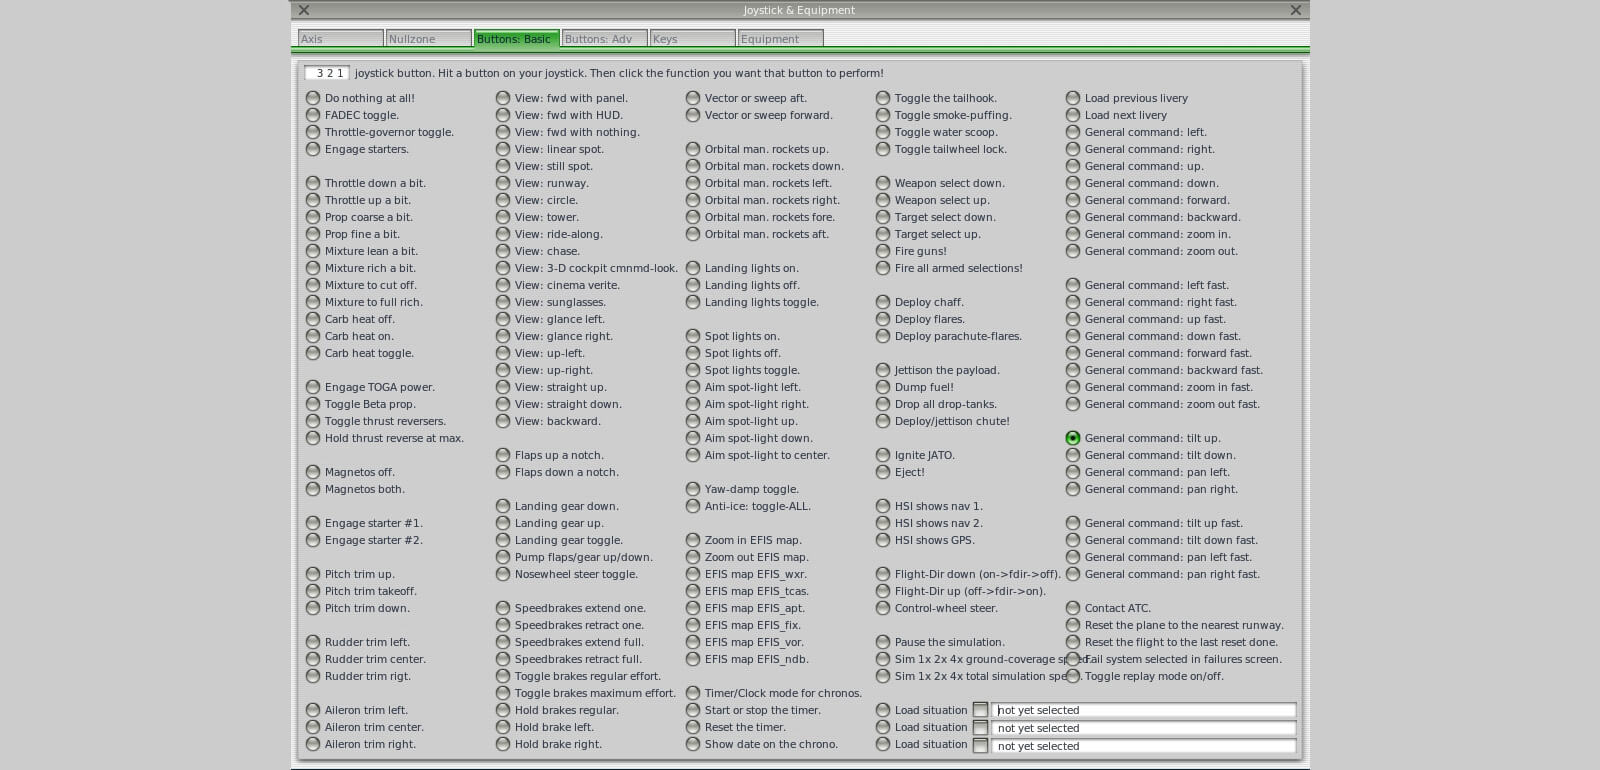
See the attached photo with the marked amber square? Are you referring to this “slider”? According to XP11 is seems to my not a slider, but a button, number 33.
Angelique,
Nicely done!
Reading the manual often results in “BSL” (big stupid look) for me. You logical presentation of the configuration under X-Plane 10 and 11 cleared a number of fuzzy spots. “X-Plained” if you will.
Look forward to many more articles as my experience expands into the new version with my new X-56 Rhino.
Hi Brewer,
Many thanks for these nice words. It’s much appreciated. AS you know, I do it – writing reviews – with a lot of fun and try on doing this. I owned the X-65F and even for a short time the X-55. The X-55 is basically the same as the X-56 besides the colors on the units, and perhaps some additional funny stuff that’s included in the X-56. The X-65F was I think, looking backward from X-56, X-55 and X-65F, their prototype. The big difference was that the joystick wasn’t removable but had sensors inside that felt the force you applied. And the throttle units and housing ware made of metal. I think, this lastly produced Saitek/Madcatz product is a good one. Perhaps a Thrustmaster can compete with this one, but I have no experience since Thrustmaster doesn’t respond on my press review request.
Great comprehensive review Angelique. Two quick questions, are the switches at the bottom of the throttle (the ones ‘from the x52 stick’) momentary like the x52 stick switches, and also are the rotary knobs on the throttle usable? The ones on my x52 when used with zoom, or trim, or anything actually are constantly ‘hunting’ so any assignment is jittery and never settles down.
Thanks!
I really enjoyed your article, even as a dummy.
You really applied your mind, thank you.
Regards,
Salmon Oosthuizen, South Africa
Thank you Salmon. It was my pleasure!