Exploring Norway Part I
Checking Out Honningsvag Valan with MeshXP Norway
Writing aircraft, airport, scenery or utility reviews is fun but above all, it gives you a good idea what to expect from that particular payware product or sometimes even freeware add-ons. A while ago I wrote two Hawaiian Hopping articles and it may be a long time ago, that was fun and although it was based on freeware products, I liked it, but moreover, I liked the idea. With that in mind, I would like to present to you “Norwegian Adventure I”.
The idea of this Norwegian adventure is to fly from airport A, to B and finally to airport C or perhaps I’ll add another airport to it. Or to be more precise …. this Norwegian adventure starts at Honningsvag Airport (ENHV) from Hard Landing Studios. To give the scenery mesh the best look and feel I have installed besides AlpilotX.net HD Mesh packages also MeshXP Norway from Taburet. And if you want, you can even add to this ortho textures from ZonesPhoto, but keep in mind that not all parts of Norway are covered with photoreal textures. Said that, it could be that whenever ZonesPhoto has an ortho package for that specific area, it could conflict with the included photoreal texture from the provided HLS package.
I’m not sure when, but I promise you that after this adventure, I’ll continue with my Norwegian adventure which will be part II where I have a closer look at two freeware Orbx Norwegian airports and hopefully, I find some more interesting airports to write even a part III. As a side note; Orbx recently released a FTX Central control panel which is compatible with Windows, macOS and Linux. That said, all X-Plane 11 Orbx products are now via this control panel easily to download and to install.
Background Information
The airport that I used in this Norwegian adventure is from Hard Landing Studio (HLS) Honningsvag Airport (ENHV), an airport developed from scratch to be fully compatible with X-Plane 11. According to HLS “This is our first scene featuring the airport of Honningsvåg (ENHV)! This airport deserves the small community of Honningsvåg a small town of 2600 people! The airport has one of the most difficult approaches of Norway because of the surrounding mountains.”
Want to know more about it or want to buy it? Check it out at the dedicated Org store page, but read first this review, right? (https://store.x-plane.org/ENHV–Honningsvag-Airport_p_999.html)
And last but not least, not really an airport, but actually a mesh, is the package from Taburet, MeshXP Norway. According to Taburet “This is a High- Resolution Mesh for Norway and comes with a 5m resolution data. The MeshXP function is to add elevations points to the terrain to further increase precision; shaping valleys and mountains as real as it gets. This mesh can be used on its own or underneath photorealistic scenery. It use XP 11 default vectors ie roads, landclass. Hydrology is extracted from from the latest osm data.”
Installation and Documentation
Hard Landing Studio Honningsvag
HLS Honningsvag Airport is from a relatively new developers group and therefore I’m also a bit curious how it is modeled. It’s not covering the Norwegian Nordkapp, it just one peninsula to the East. The package comes with 2 folders named Hard Landing_ENHV Honningsvag and Hard Landing _ ENHV MESH. One for the airport, nearby village and photo real textures for the peninsula while the other package is a mesh folder what you see more and more with add-on airport liveries. Installing these two folders is easy; just drag (or copy) and drop them into your X-Plane 11 Custom Scenery folder or make an alias/shortcut from another location to the Custom Scenery folder. This way – using alias or shortcut – saves you a lot of space on the X-Plane hard-disk or SSD.
What I normally do is deleting the scenery_pack.ini file, start X-Plane and X-Plane will then automatically create a new ini file with, as it should be, all the entries in the right order. While I wrote this down, I know now already that this isn’t always working and therefore I add alphabetic letters in front of each folder to re-order them in such a way that the scenery_pack,.ini file does have the right order during loading.
Double check that the HLS ENHV mesh package is below the ENHV airport package. This is important else there’s no HLS airport as all, no ortho textures and so on!
Since the HLS airport package comes with ortho files for a photo realistic sensation of the peninsula, I expected also some overlay files to show you for example the roads and other objects, but after I installed the ENHV packages, I didn’t see any road and so on. In other words, the HLS ENHV doesn’t have overlay files, but perhaps there’s a good reason for. Time to contact the HLS group and see why they haven’t included overlay files. According to HLS “The main reason for this is because at the start we planned to release the package with a higher resolution mesh and with a photo real on the entire region but then I realise the package was too big namely 25GB. So I start to cut the area to have a much more smaller package. Since the first file – overlay – was made to work with the first mesh I have to remake one that will be available in the 1.1 update.”
Taburet MeshXP Norway
The other package I’ve included in this Norwegian adventure is just a mesh and overlay package from Taburet, named MeshXP Norway. It consist out of the folders z_MeshXP_Norway and z_MeshXP_Norway_Overlays. These should be placed at the bottom of your scenery_pack.ini file, and the overlay should be above the mesh and let me make clear that these are not compatible with the AlpilotX mesh packages. I’m not sure if you have AlpilotX packages installed or shortcut or aliases, but you can easily disable lines in the scenery_pack.ini file by changing SCENERY_PACK line into SCENERY_PACK_DISABLED.
In fact, I double checked this with Ray Taburet “Remember; in X-Plane it is not possible that if you have 2 mesh package of the same area installed installed they will clash. X-Plane will always and only use one mesh tile of that particular area and the tile that will be loaded into the sim is the mesh above the other in the scenery.pack.ini. Assume that we have in scenery pack ini as follow:
– mesh2
– mesh1
and suppose that those two mesh packages cover the same area, only mesh2 that will be loaded/displayed as it is above mesh number one.
Since MeshXP Norway is compiled using 5 meter resolution elevation models, I got the idea that the 5 meter is higher then the AlpilotX mesh package version 4.0 for X-Plane 11. In the provided MeshXP Norway manual there’s also a note about the need to deactivate the function “runway follow terrain contours”. As written in the manual “In X-Plane 11 you must deactivate the function airports follow terrain (the switch is in the settings general panel of xp11); this is to flatten terrain around airports; xplane draw mesh using triangles and this can cause sudden and acute steps because of the high resolution data used to produce the mesh; adding lots and lots more elevation points.”
Honestly, I have my doubts. One thing I know for sure; it isn’t correct when you want to use MeshXP Norway and HLS ENHV. When you untick (deactivate) “runways follow terrain contours” you get the following.
Although I highlighted in the previous section this typical issue related to the reviewed airport, later I will come back to this runway follow terrain contours option in the X-Plane settings.
Installed both HLS Honningsvag and MeshXP Norway
I double checked this with the guys from HLS and they confirmed that the runway follow terrain contour should be activated/ticked. If not ticked which is of course possible, then it’s also OK however, the landscape won’t look as it is in real. How unrealistic it looks then, that’s what you’ve seen in the previous paragraph.
Further on, I can confirm after email contact with Ray Taburet and HLS that when you own both packages – HLS Honningsvag and MeshXP Norway that it’s better to deactivate the provided HLS mesh package and use instead the mesh from MeshXP Norway. If you don’t own MeshXP Norway from Taburet then you must use the provided HLS mesh package. Clear?
One note related to the previous mentioned overlay files that are not included in the HLS ENHV package and the once that are included in the MeshXP Norway. The overlay files from MeshXP Norway could do the that job too, so you could say “no problem that they are not overlays included in the HLS ENHV package, right?
But when you place the MeshXP Norway overlay files at the position indicated by the Taburet, and you use the mesh package from HLS, then you won’t see the overlay effect from MeshXP Norway. This is because on top of the scenery pack ini file is another mesh that disabled/overrides the lower positioned overlay files.
There’s an easy solution for this and that is positioning the MeshXP Norway overlay package above the HLS NHV mesh package, but that’s not really what we wanted. It’s better that the HLS ENHV comes with his own overlay package unless HLS doesn’t want to include overlay files for the peninsula. The answer from Hard Landing Studio is “The main reason for this is because at the start of ENHV we planned to release the package with a higher resolution mesh and with a photo real package for the entire region, but then we realised that the package was too big namely 25GB. So we started to cut the area to have a much more smaller package. Since the first file was made to work with the first mesh we have to remake one that will be available in the upcoming update version 1.1.”
So it turns out that the Hard Landing Studio team will include overlay files at a later moment.
Wintertime
Honningsvag is together with the nearby located Nordkapp one of the most northerly locations of Europe. This means, during wintertime the landscape is fully loaded with snow, so it is white, right? And that’s, as far as my knowledge goes, a problem when using ortho textures. Ortho textures are representing Summer season, but changing the Summer season textures to Winter textures isn’t possible. But there’s a solution for this although I don’t know yet if it works with the ortho textures included in the HLS Honningsvag package. SimTiles is probably the solution for this which is developed by Simultools (http://simultools.com/simtiles). I contacted Luca from Simultools but as of his writing he’s on vacation so I wasn’t able to get the right answer yet! When we know something more, we’ll add that as a comments to this review and news post.
When you think that TerraMAXX could do the trick …. sorry! As stated on the TerraMAXX website “TerraMaxx only affects default scenery and gateway airports. It will not affect the representation of any custom scenery or orthophoto packages you have installed, unless that custom scenery package was designed for compatibility with TerraMaxx.”
Is there perhaps another option besides the previous mentioned SimTiles from Simultools? The answer is no! Just in case you think that the Winter and Autumn packages from X-Plane.Org user madmaxland could do the trick, I can tell you that these packages with textures is only and only related to the default X-Plane textures and not effecting ortho textures.
I’m aware that not all of the above is what you expected, but for me it’s important that you get the correct information and that you know what to expect in case you decide to buy both products. You’re always free to contact me via the email for additional information.
Welcome at Honningsvåg Valan Airport
Charts and Approaches
I always wanted to visit the Nordkapp, but till now I’ve reached by car and our English caravan the city of Leksand. Oops, that not even halfway Sweden. Anyway, the modeled airport from HLS does not only cover the tiny and basic airport ENHV, it also offers the city of Honningsvag and several remote located objects as well as ortho textures of that peninsula. Unfortunately for me, the Nordkapp monument is located on another part of the peninsula, so this doesn’t belong to the scenery pack.
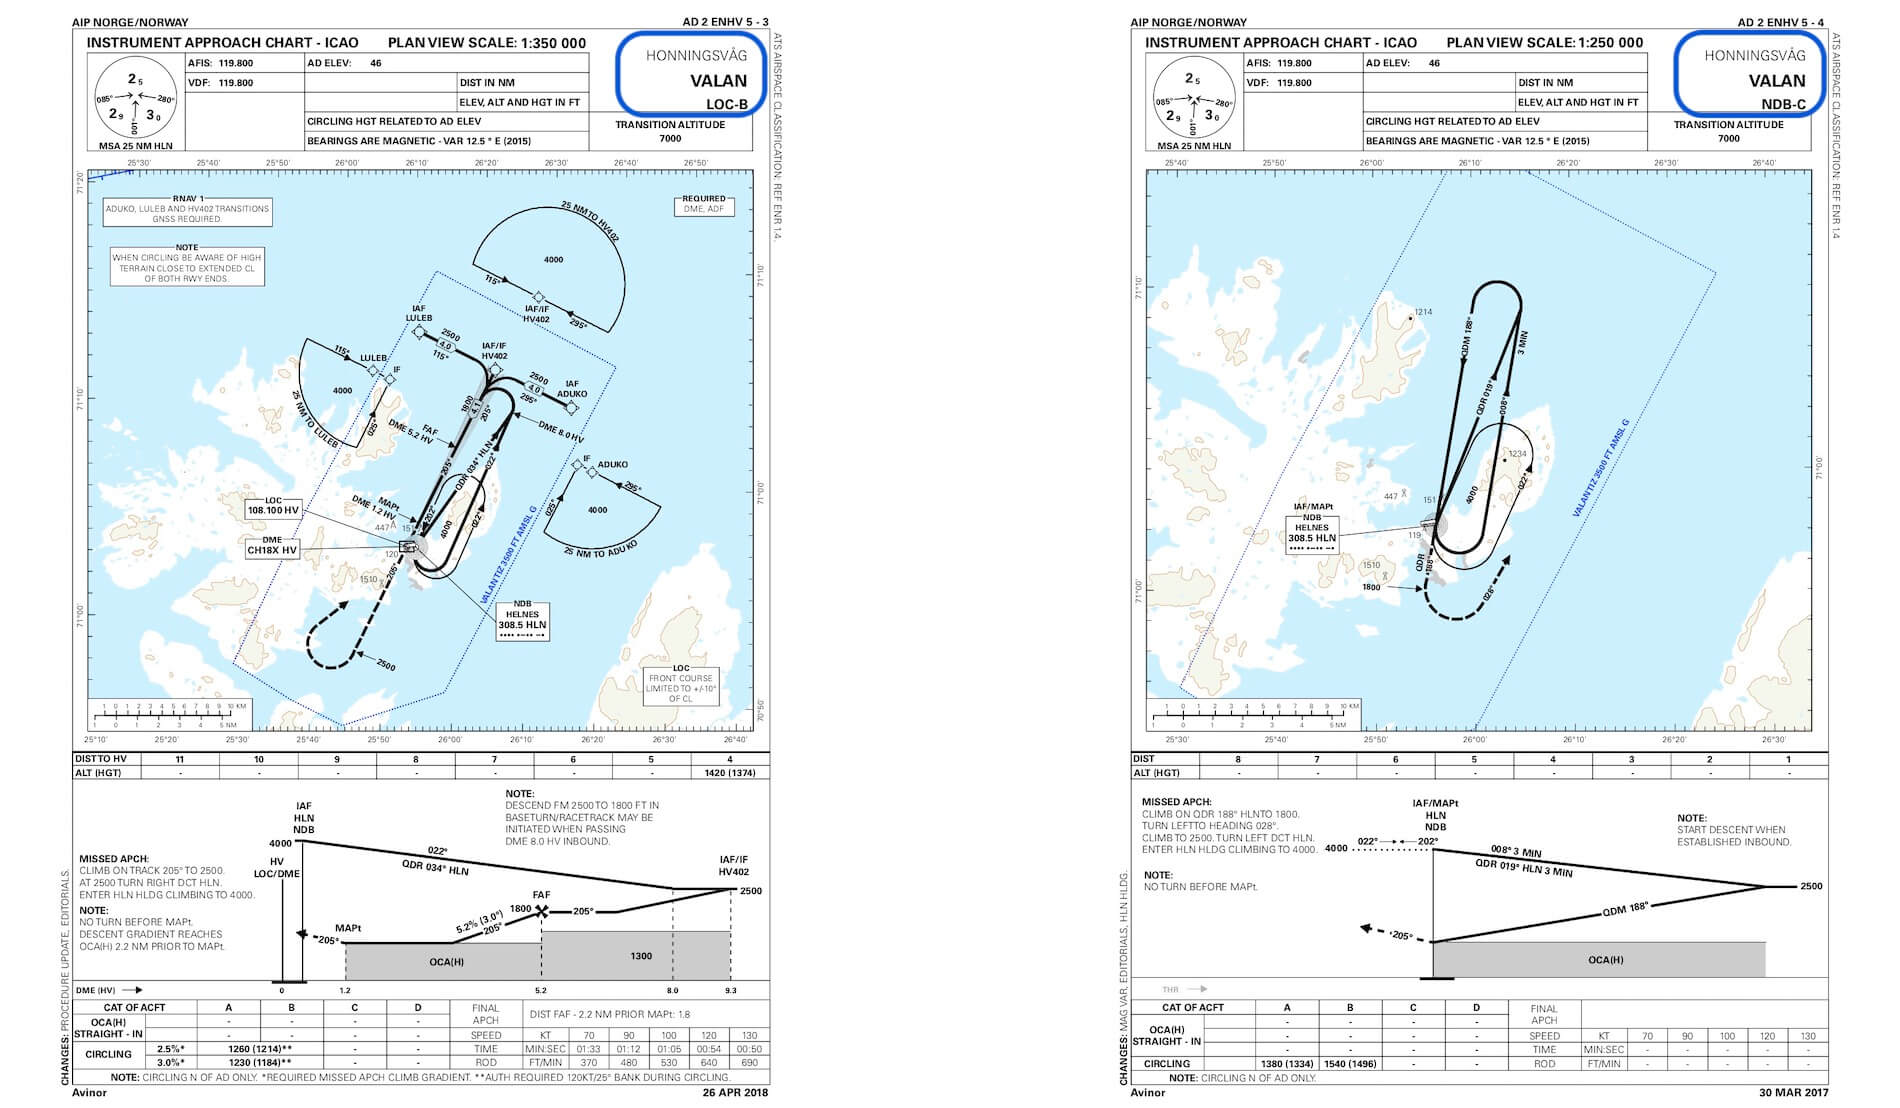
Before I continue, it’s perhaps worth to offer you the official Norwegian AIP URL. Not that ENHV has many complex arrival and departure routes, approaching the airport is not straight forward, but many obstacles must be avoided. I’m quite sure many movies of ENHV approaches can be found, but I found this a good one on Youtube. It’s the approach including the landing for runway 08 which is, just in case you’re asking me, not a LOC (localiser) approach.
By the way, when you check out this Youtube movie, you should take a minute to read the additional text included; “One of the trickiest airports in Norway due to the proximity to steep mountains and wind conditions. Notice the dark blue areas on the sea near final on both runway ends due to downdraft from the mountains. Imagine flying the same route in a snow blizz in the dark and with a tail wind.”
For an LOC approach you need to aim for runway 26. I must admit that this runway 26 Youtube approach and landing is not done using the LOC, but completely visual neither less, the approach starts far away from ENHV. When you read the additional text, you’ll find out that this is an flight from the Nordkapp to ENHV. A beautiful movie worth to look and to test your flying skills too.
Although the following Youtube link isn’t a landing for runway 26, it’s a beautiful takeoff from runway 08 on a sunny day. The reason I’ve added this movie is to show you the surrounding landscape textures versus the ortho textures included in the HLS ENHV package.
First …. The modeled airport
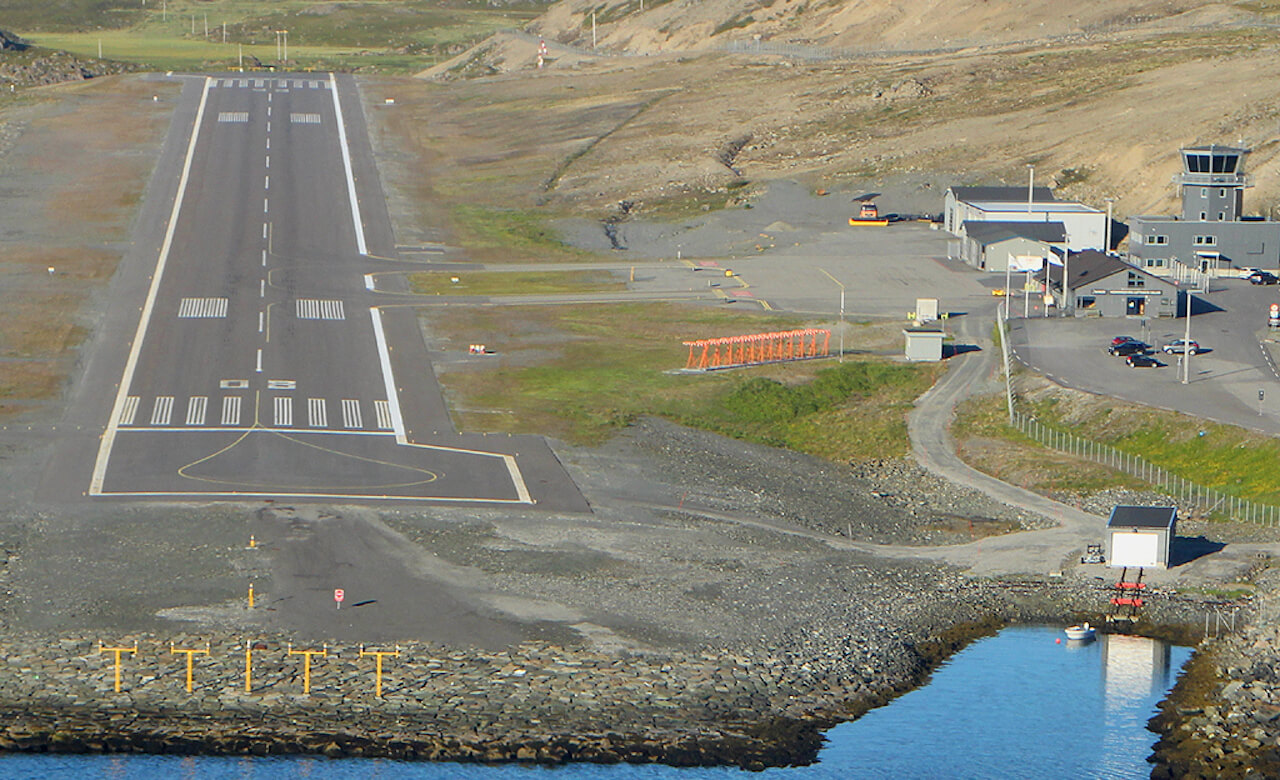
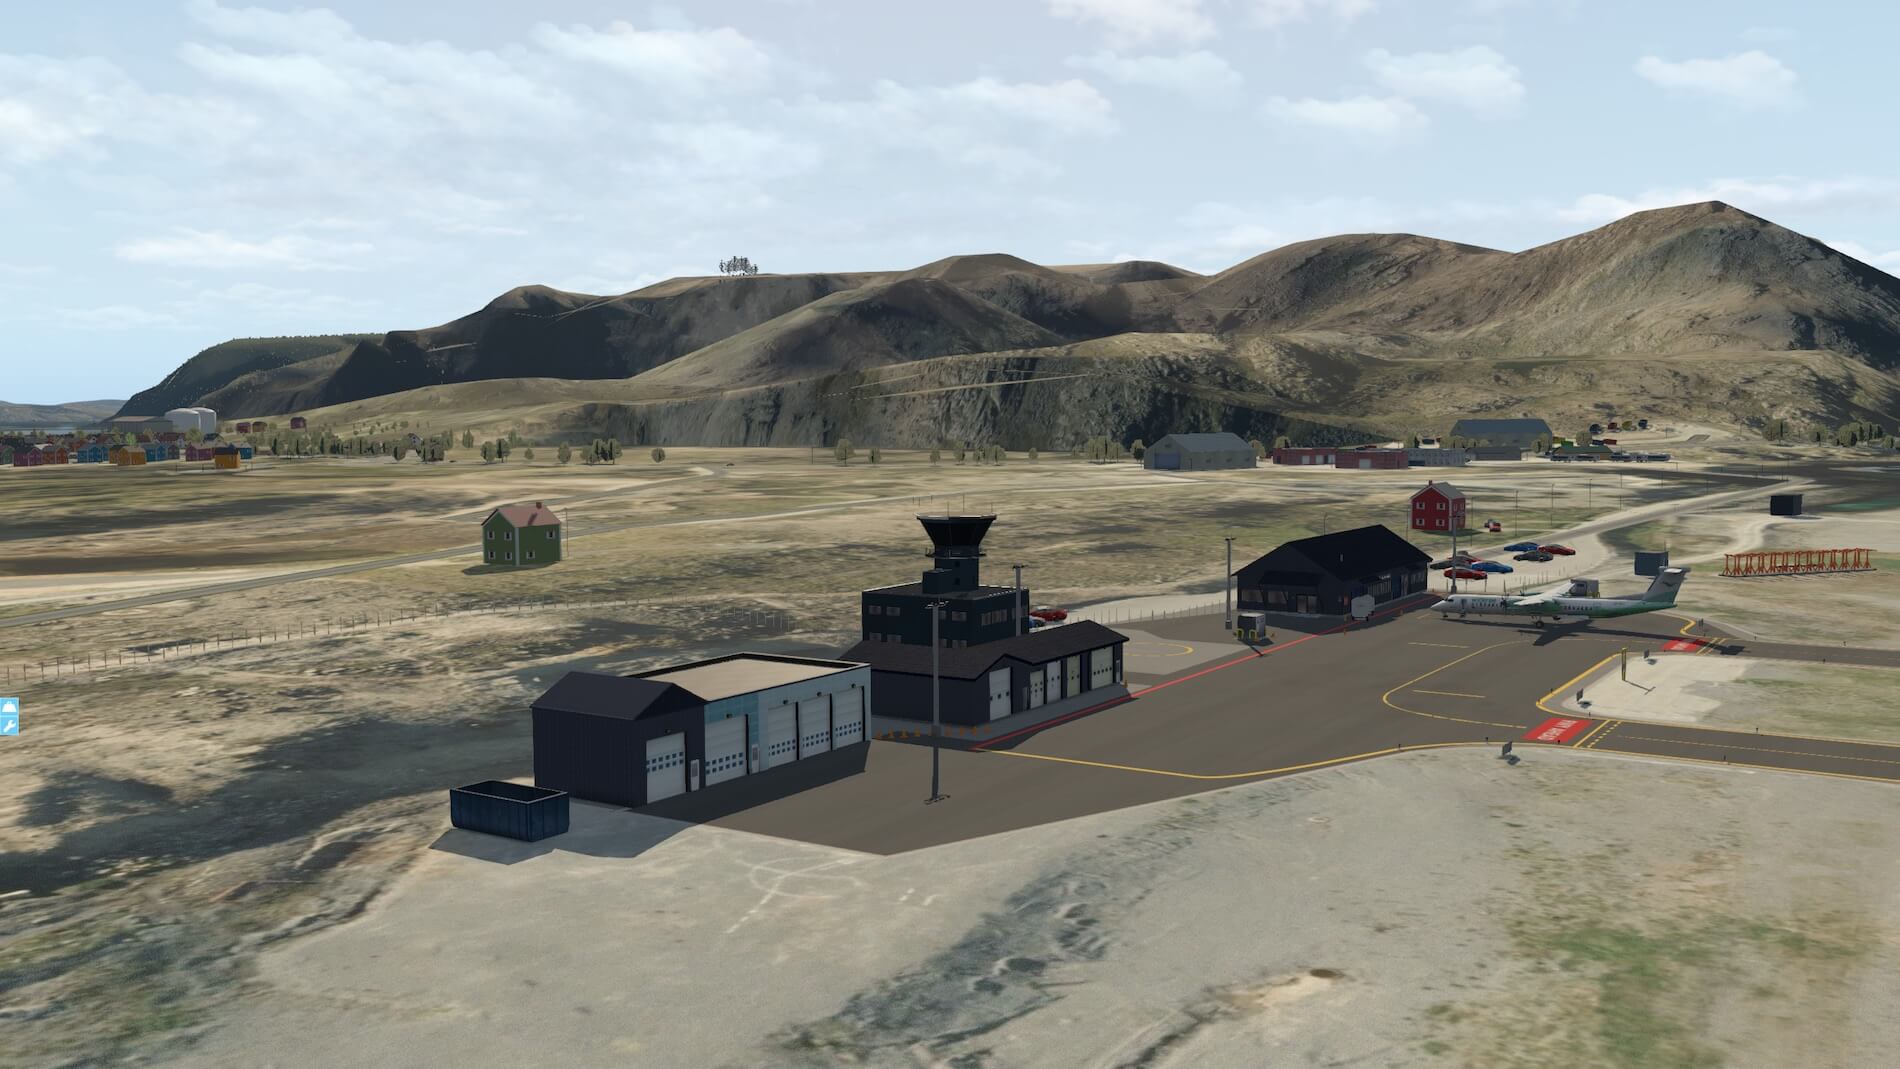
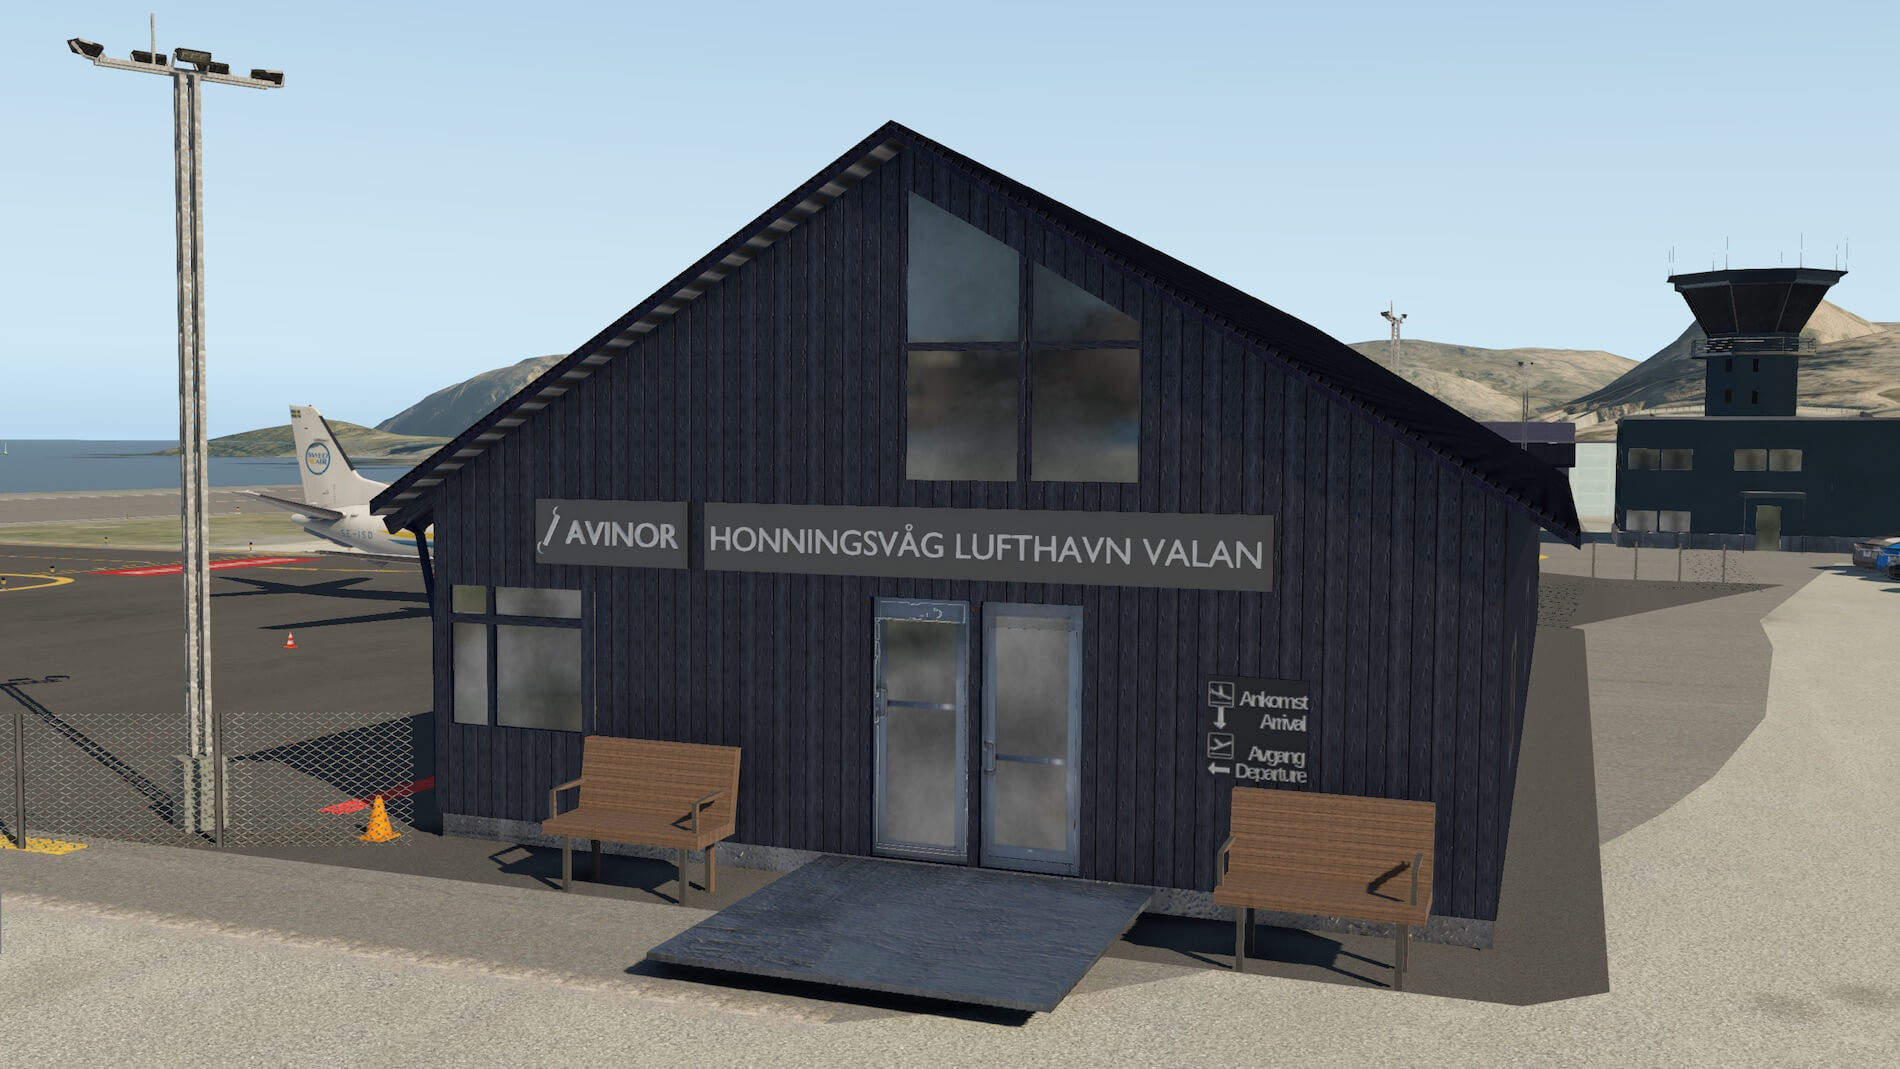
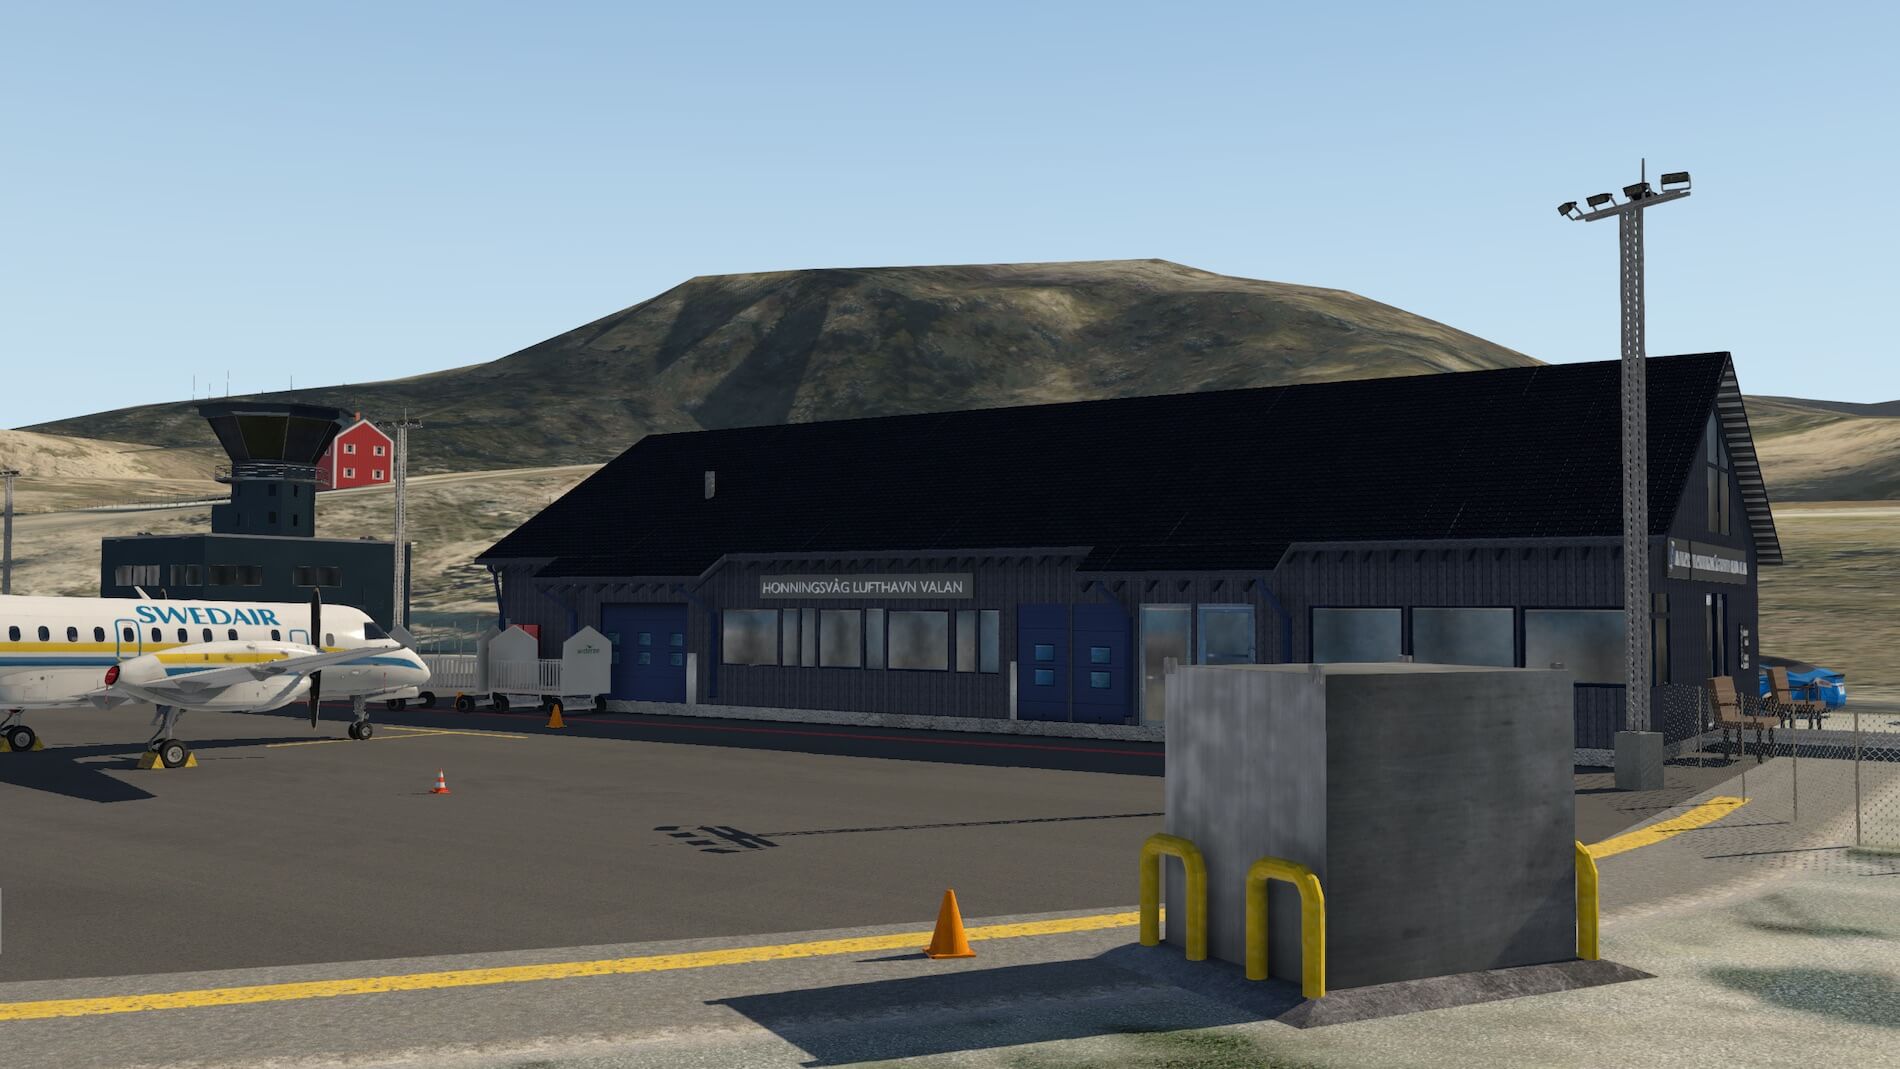
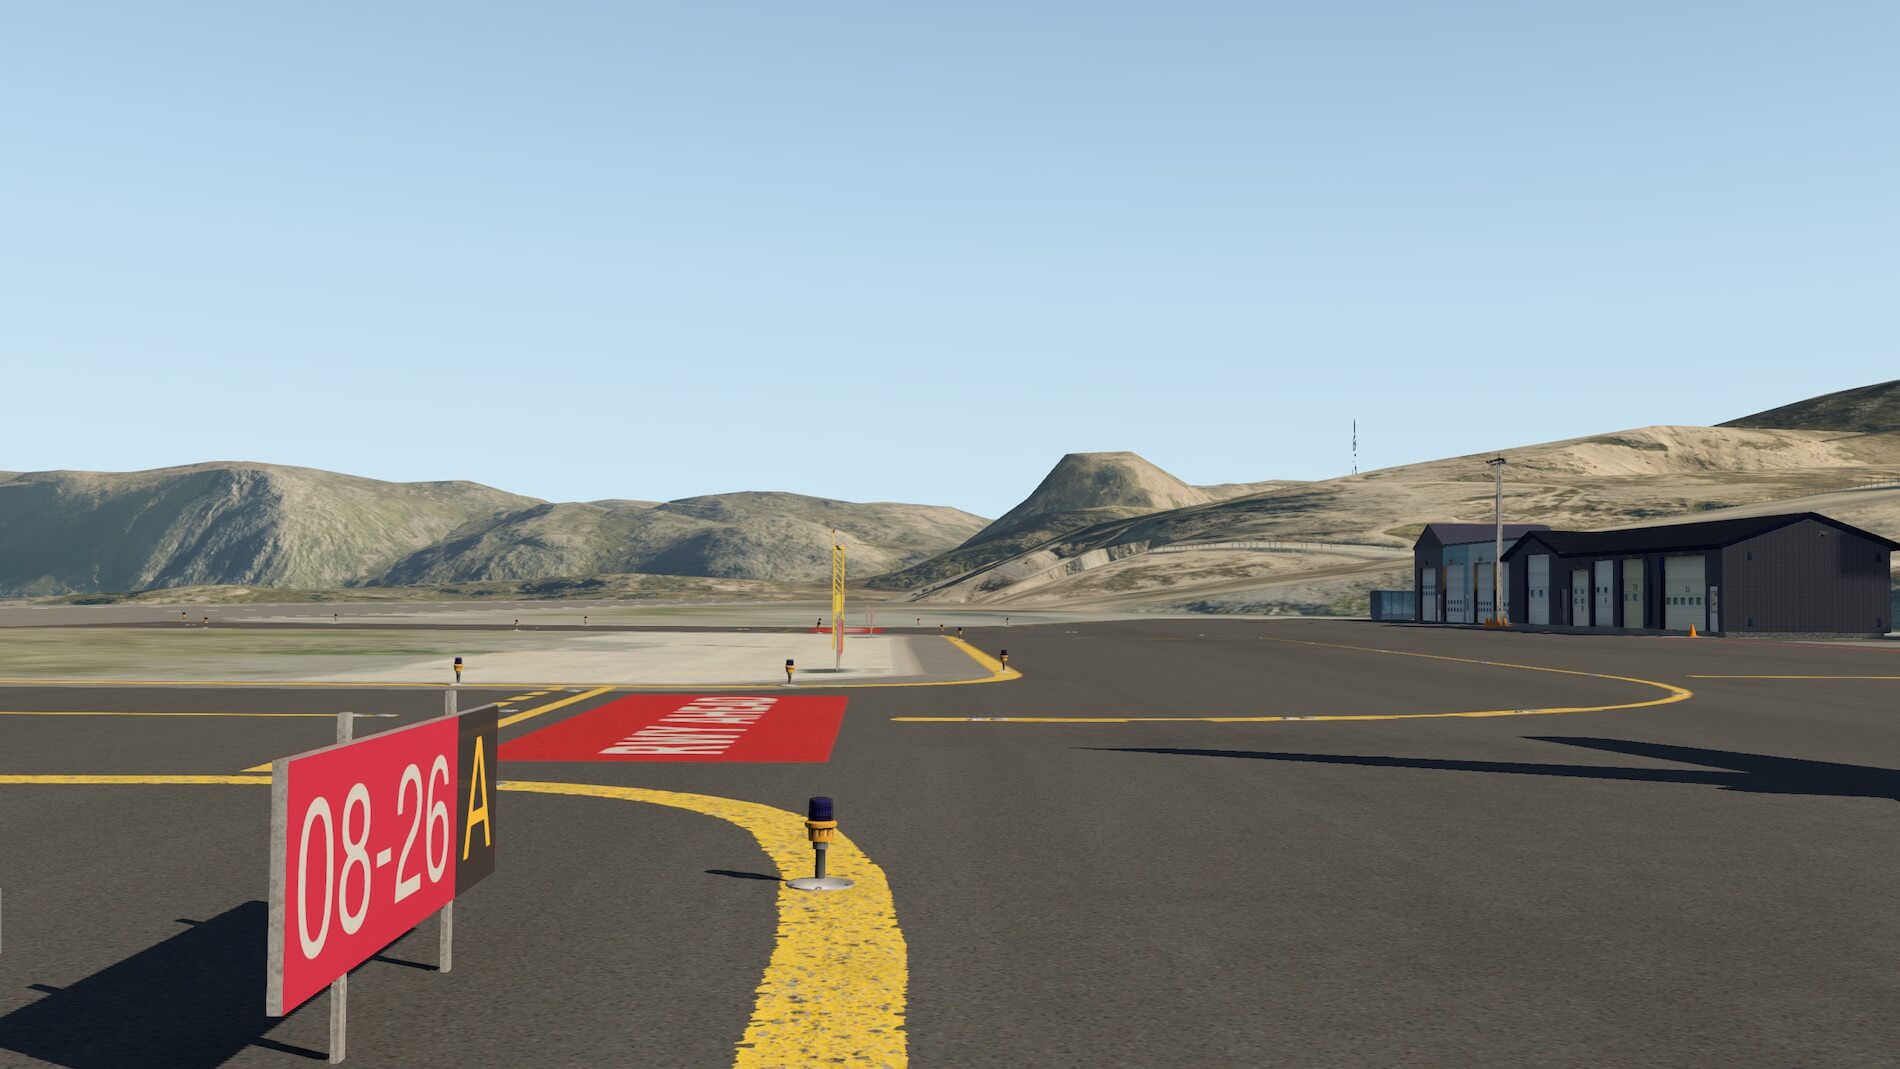
Some will say that this is a basic airport, so modeling isn’t difficult. That’s it! Oh yes, I must agree that it’s a basic airport, there is no complex taxiway system, no complex terminal building, no complex gate system with jetways. Besides that, you won’t find many airport related objects like baggage carts, stairs, fuel trucks, authority cars, or complex X-Life or WT3 implementation and so on. Yes, I do agree with all of that, but you can say that the airport as it is modeled, how basic it may be, is well modeled with eye for details. Buildings and other objects are made with great precision and compared to real photos, I must say that they did a great job. Check out these.
Since it’s not easy to find a bunch of real and accurate photos, I must accept the way it looks like including the used building colours of the. That you and I see differences on the photos like for example the runway threshold markings, is something I can’t confirm. Basically they are more or less the same except that the colours aren’t the same. Is that a problem? Not really as long as there’s a kind of similarity.
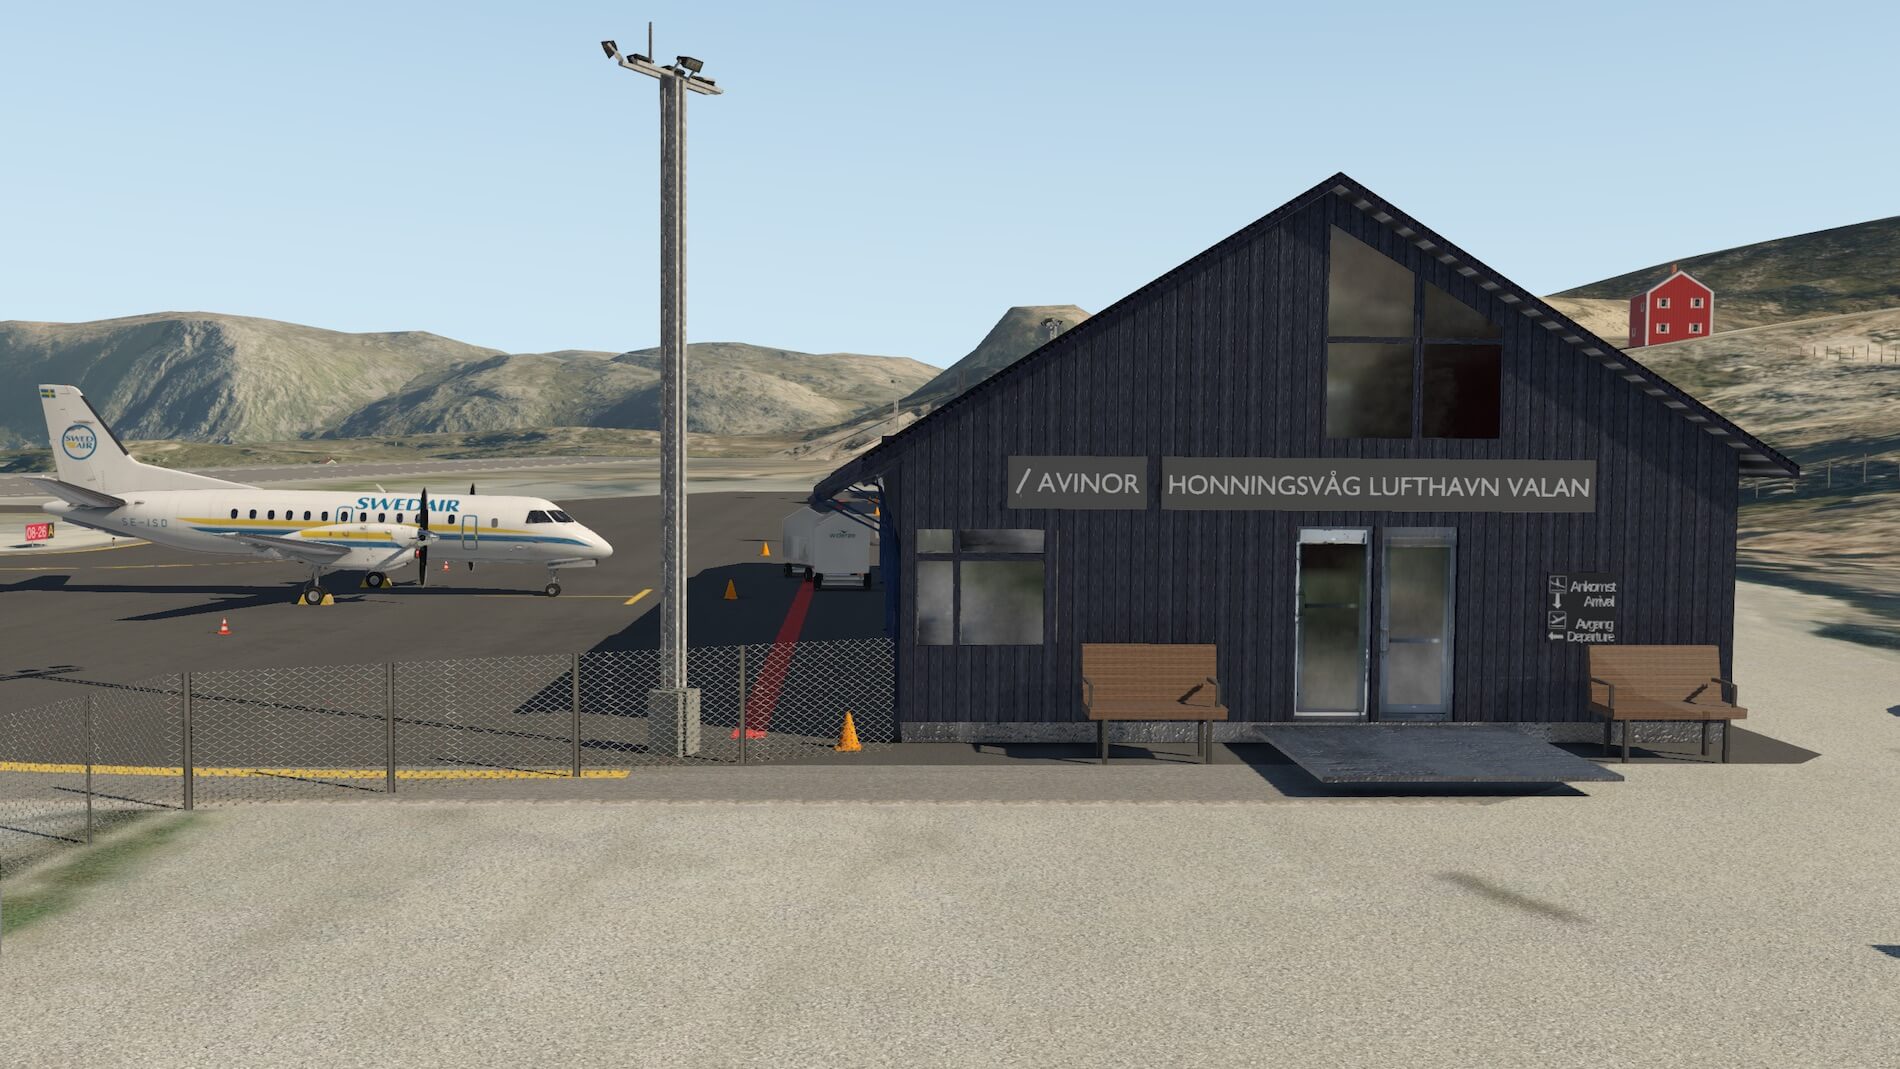
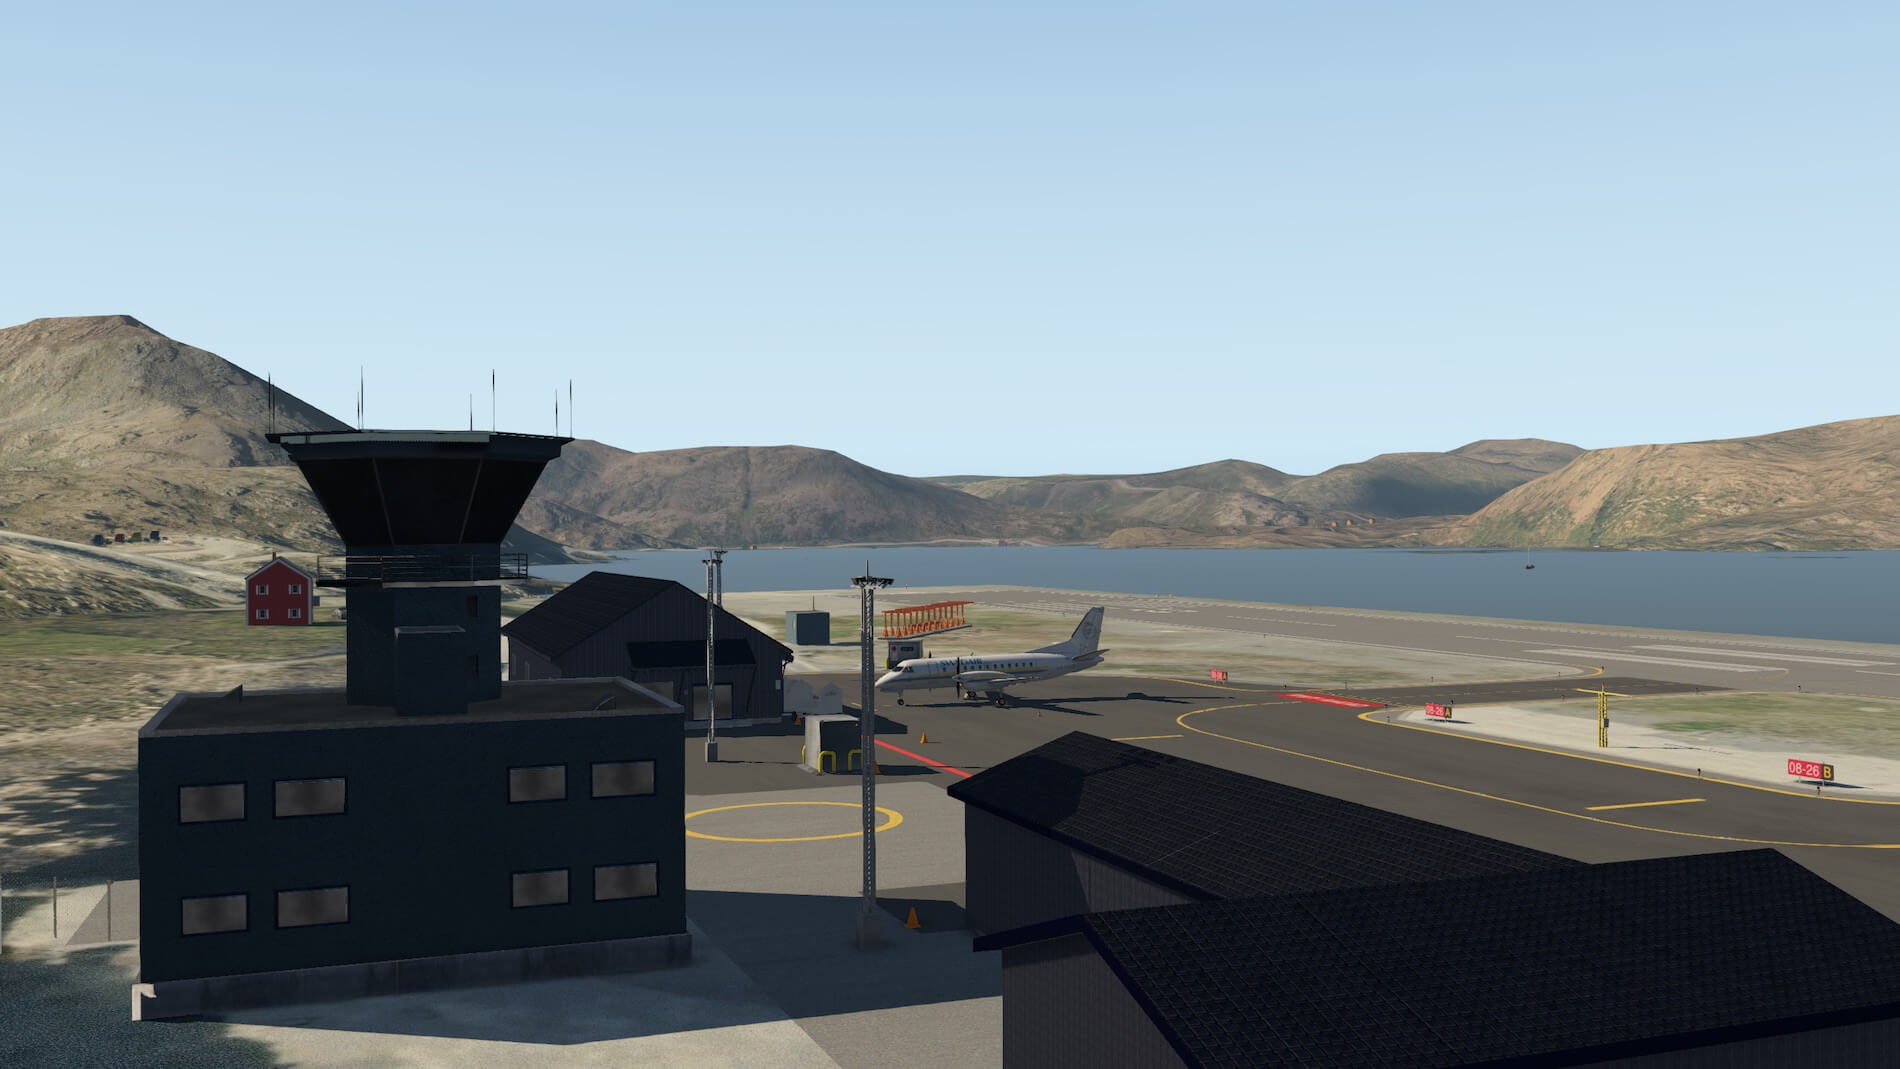
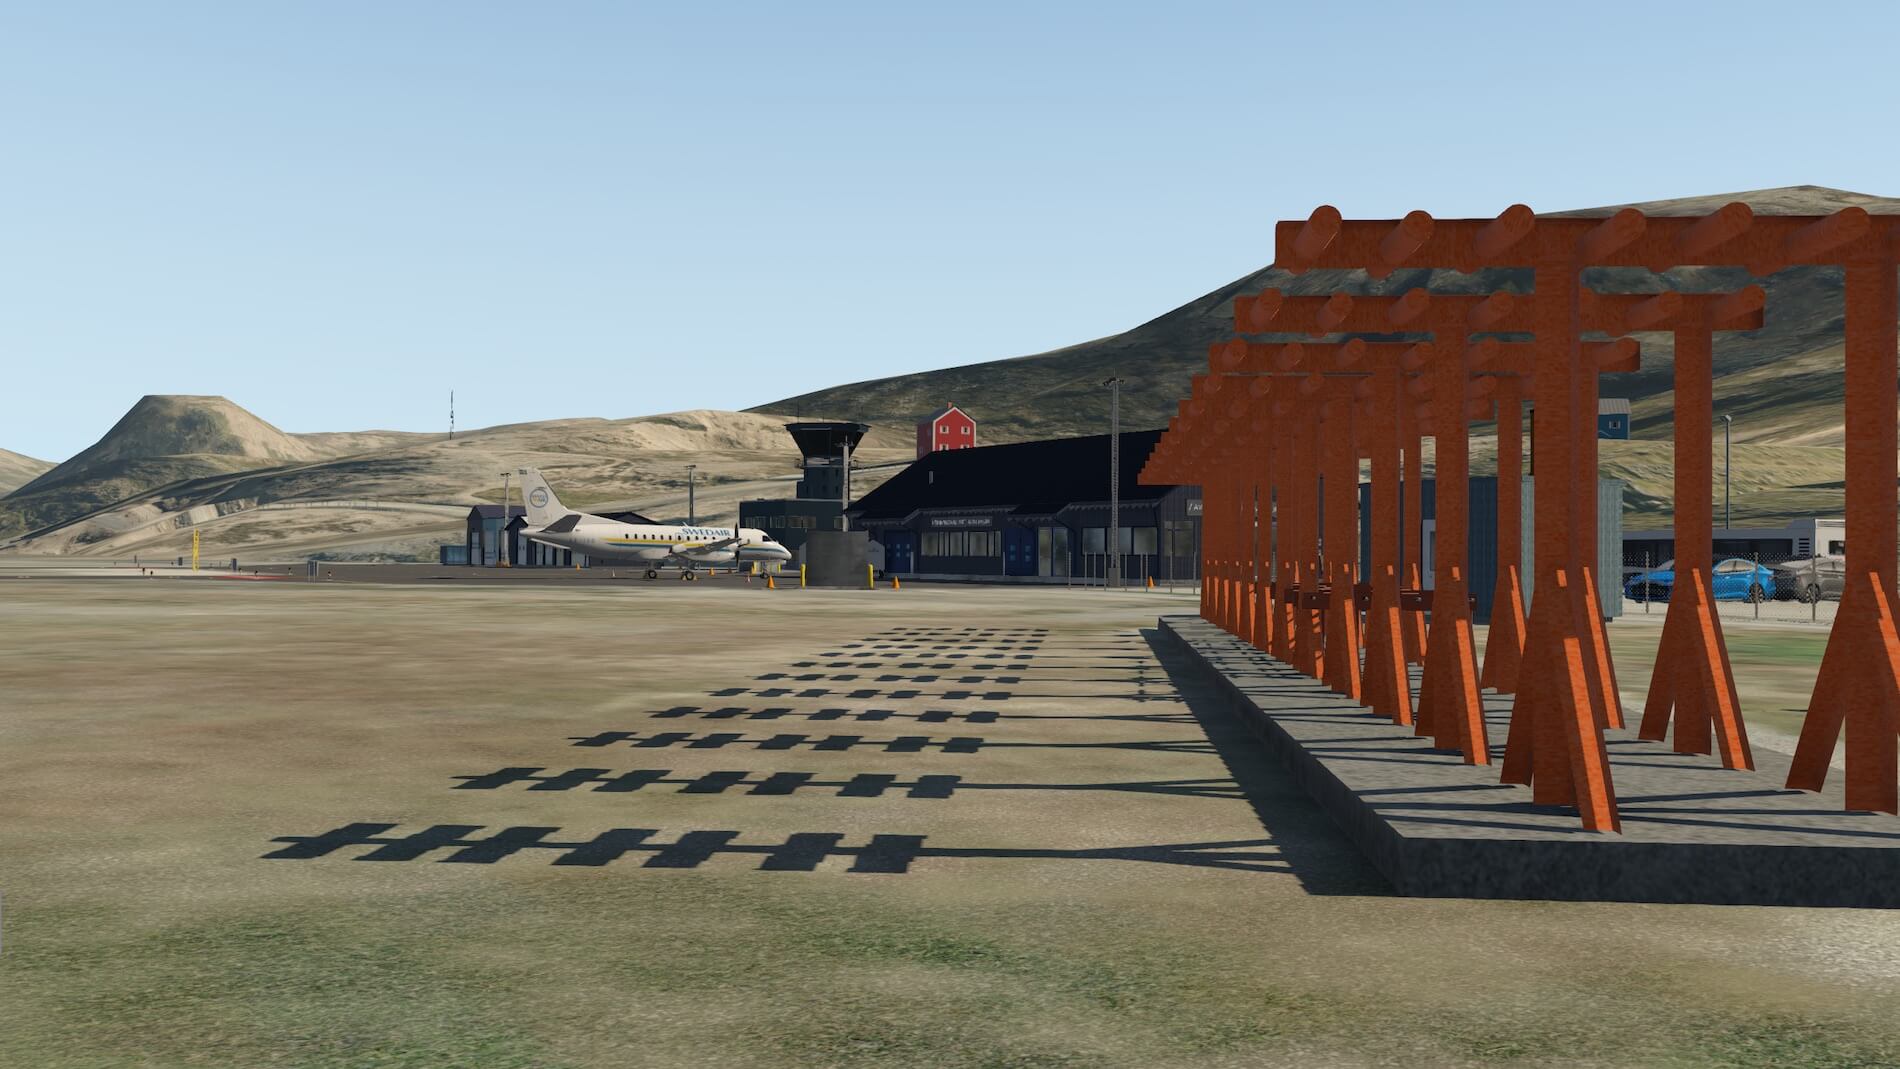
While walking at the apron, I have a good look at the passenger building or should I say terminal building? No terminal is a bit too much for this, but for sure it looks nice as well as the mini control tower. Although the buildings you see at the fence area or behind the fences, they look basic, but all are dedicated made for this add-on airport. When I look to some real photos and Youtube movies. I got the impression that the wooden walls of all the buildings are much darker then in real.
On this YouTube movie they look to me more light grey then dark blue! And of course, I could be wrong since I’ve never been here. That said, I would love to see that the HLS developers group will recheck the building colours and when they are also convinced about that it’s all too dark, that they modify this to the lighter grey.
At the public side of the airport as I may say so, I spot a lot of cars and as far as I can see, only Tesla Model S. I’m not sure how rich the people are who live here, but I think that’s a bit too much. Actually, the car model doesn’t interest me much, it’s more the overall quality that could be in my humble opinion better. I’m aware that using too many polygons for cars isn’t good, but the amount of polygons for these Tesla Model S is too low. And because of the less polygons, they don’t really look good. By the way, I checked a couple of Youtube movies from downtown Honningsvag and there I see much more SUVs driving around or small compact cars then Tesla’s!
Back to the airport behind the fence.
During my walk from the passenger building via the mini tower and some hangars I think by myself “this is quite a relaxed airport, not too many ground equipment included, no stairs, no cars, and so on. The reality is that the real ENHV airport comes with a small amount of ground equipment scattered around at the apron. Ok, on the modeled ENHV I spot some baggage carts, but that’s it.
It would be good when the developers could add a bit more ground equipment, to reflect a bit more the reality. Hopefully this can be included with the next update. Some words about the mini control tower. It does represent the real control tower, but a bit more detail and then in particular more detail to the antenna’s would be welcome. I know, yes I know, that this means more polygons and perhaps less available frame rates, but as it is now, the airport is already frame rate friendly.
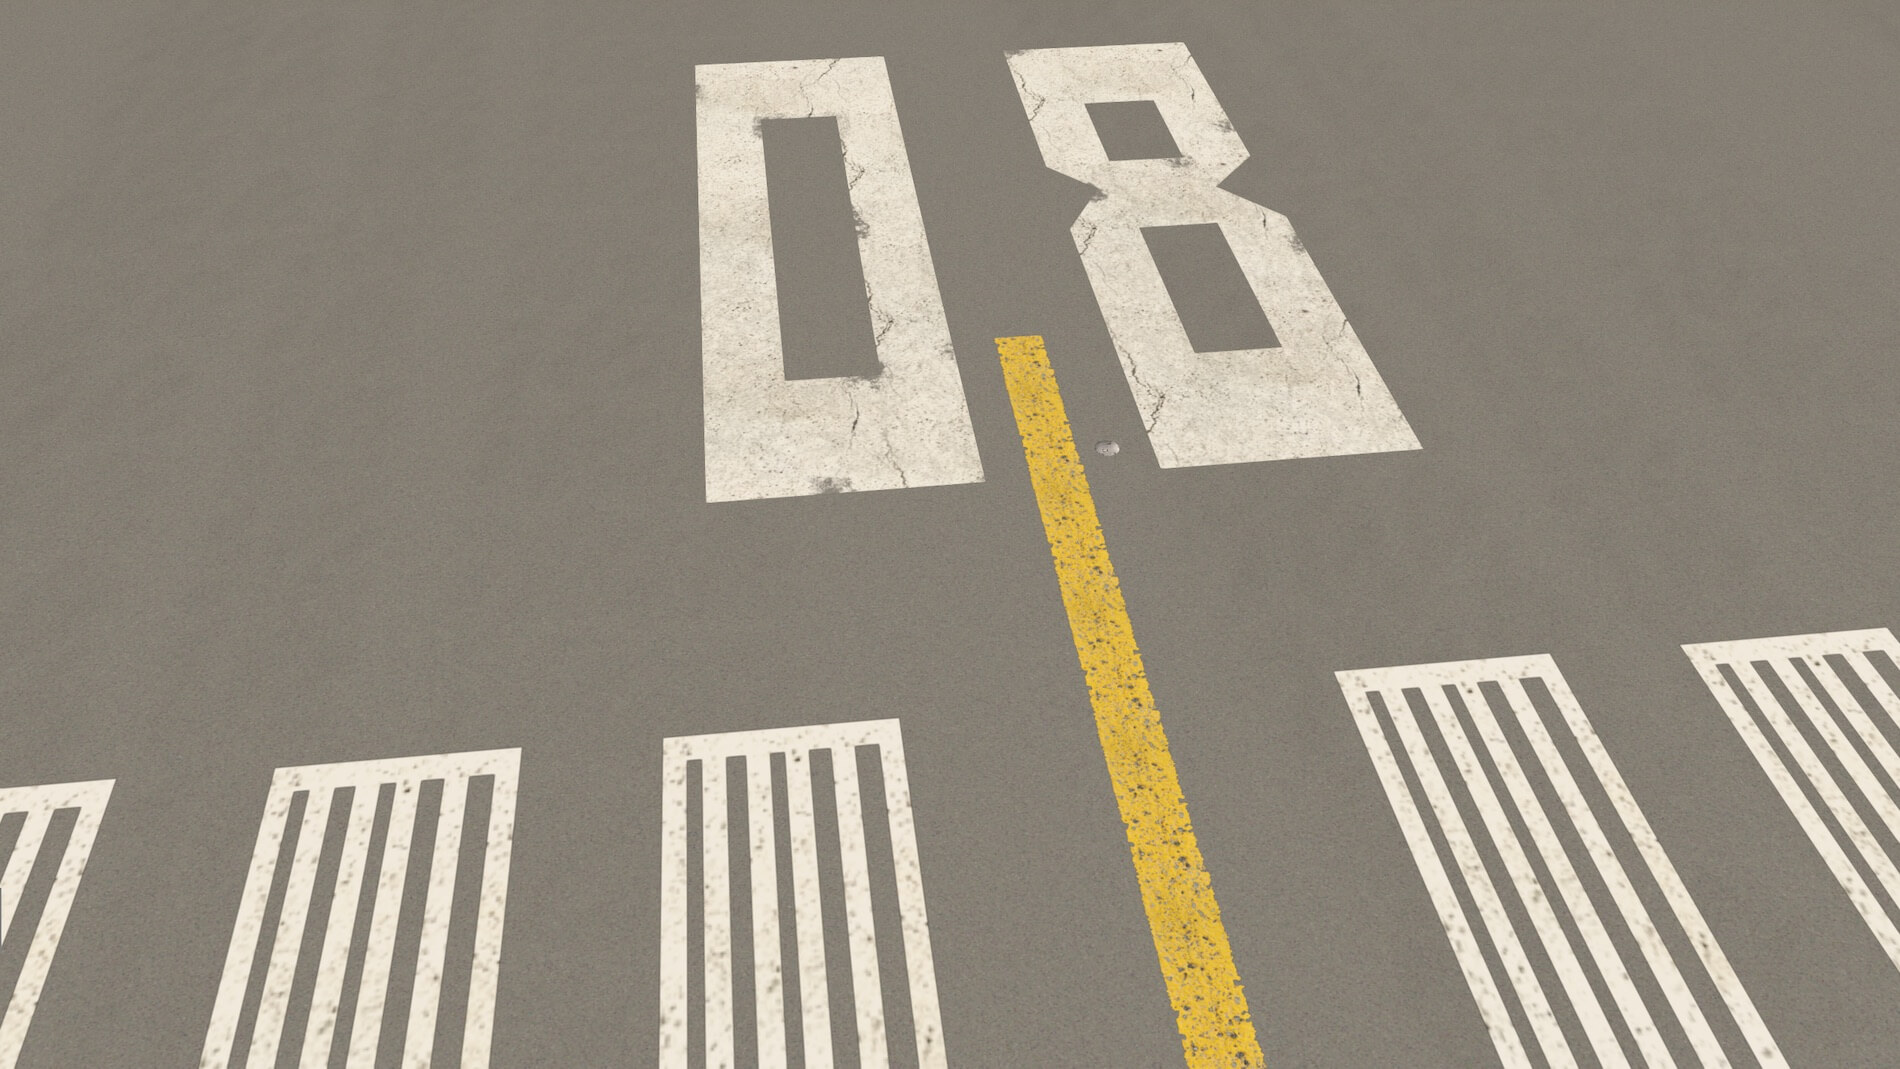
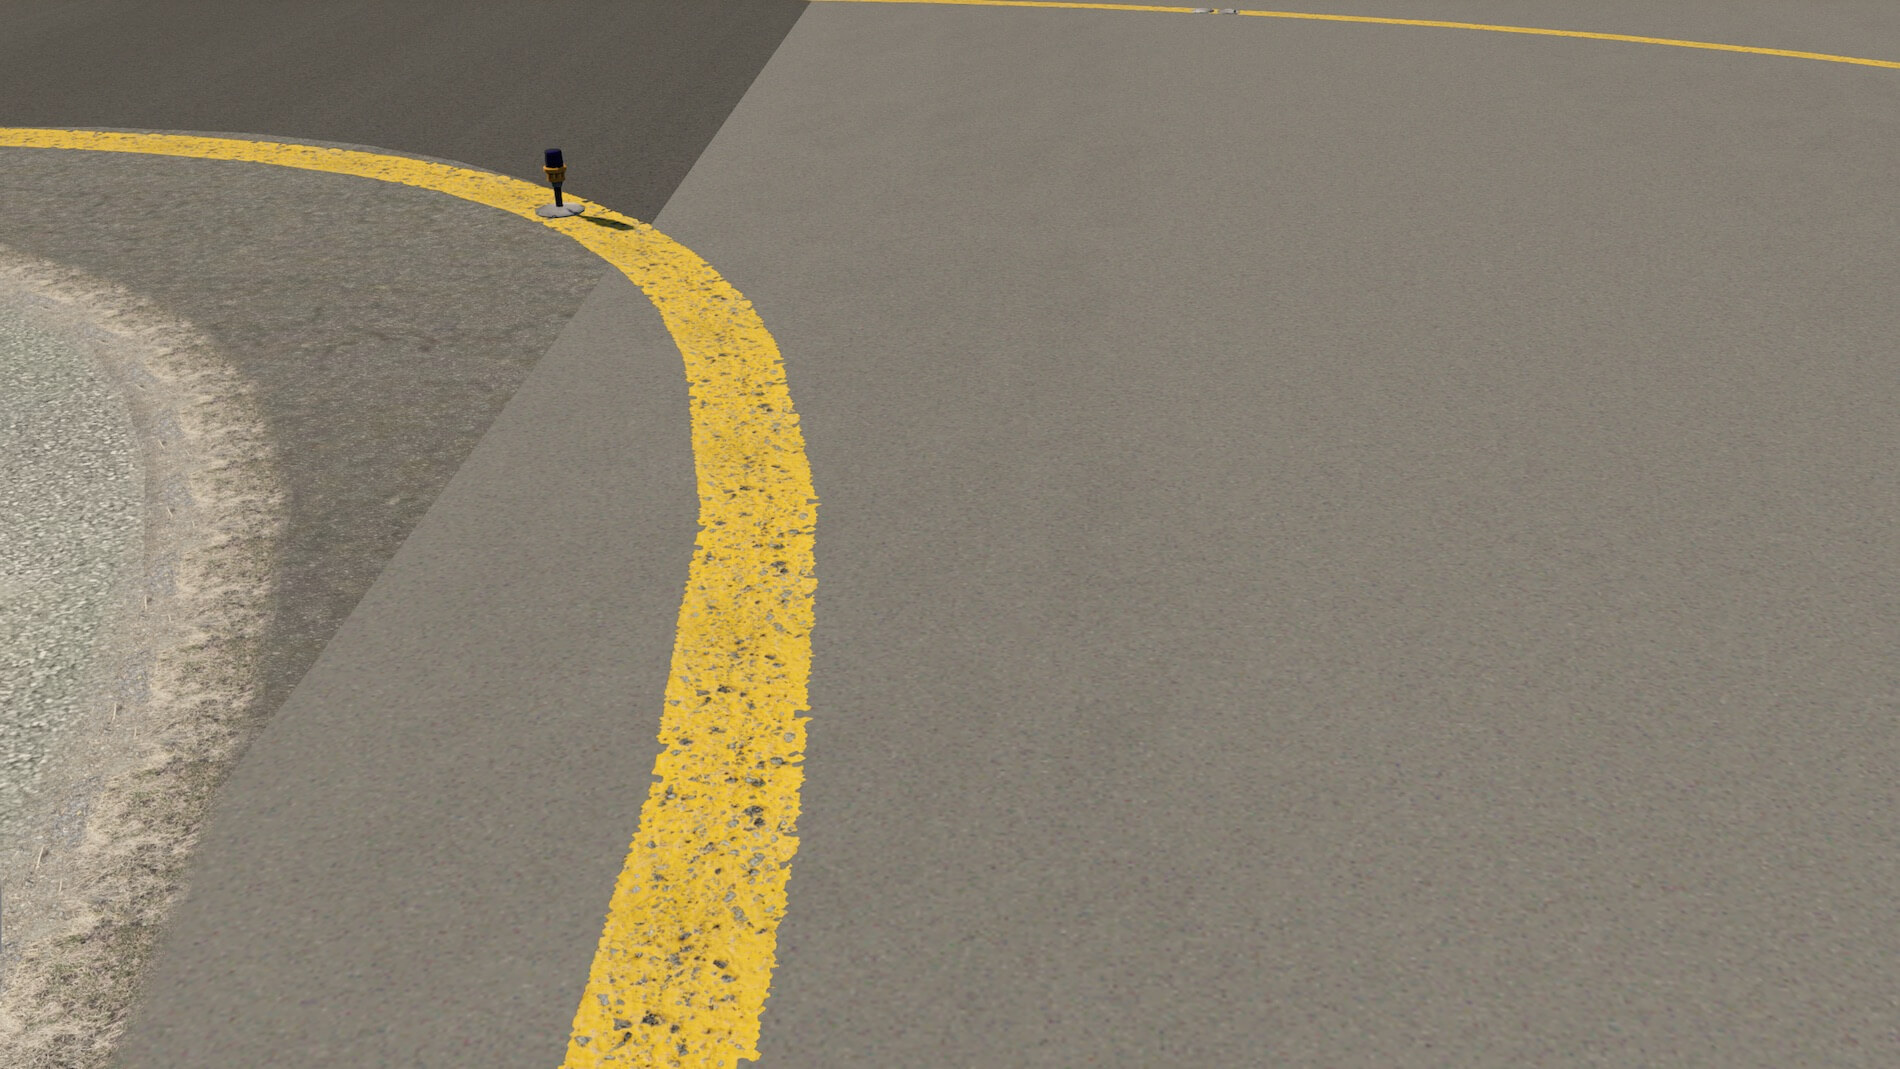
Some words about the ground textures like those of the apron textures, lines, markings, signs, runway textures and so on. It does reflect the real “cracked lines”, but what I personally miss is the touchdown wheel marks at the touchdown zones of the runways. What I do see at the beginning of each runway is a realistic presentation of the runway numbers with markings. And lets be honest, the cracked lines are awesome. Together with the ortho ground textures adjacent to the apron and runway, it gives a realistic look and feel.
One comment, but perhaps that’s already solved when I’ve finished the review, is the slope along the offside of runway 08/26. The HLS team is aware of this and does take corrective active soon and they promised that this will be solved with the next update.
Another thing I noticed is that the apron is too clean. Oops, what does that means, too clean? An apron, whatever the colour for the concrete or tarmac is, or whatever how it looks like, the created ENHV apron is too clean, no dirt at all, no weathered textures, it’s just too clean. It shouldn’t be a problem for the developers to add a bit more realism to it.
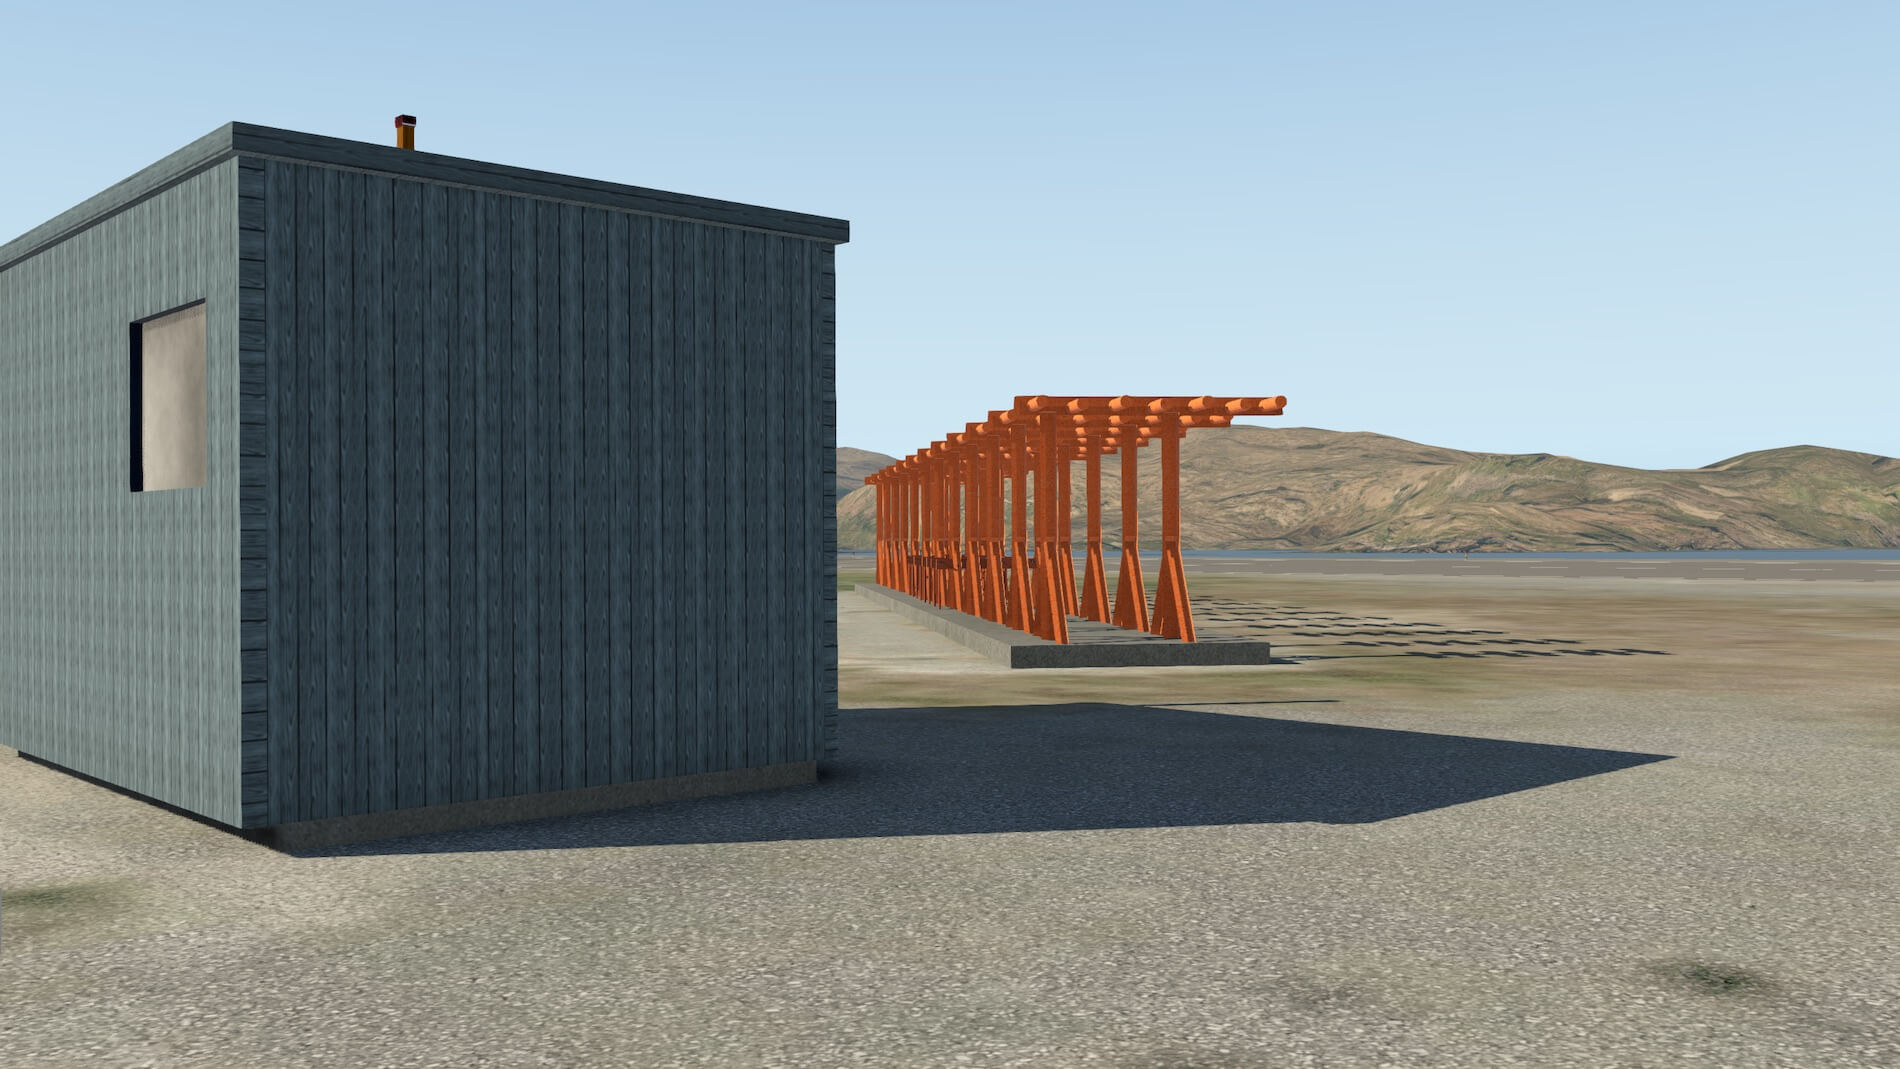
While walking further at the airport I spot the LOC equipment with nearby several small buildings. The LOC equipment is well modeled, but it would be great when the developers could add a bit of weathering on the orange construction. Now it looks to me too clean, too new. I’ve got no idea how many airlines come and go on a daily base, but that’s easy to find out when you own for example World Traffic 3 or JASRDesign’s X-Life. I created a WT3 file for ENHV, but it turned out that this is indeed a remote airport and that there’s hardly any other traffic.
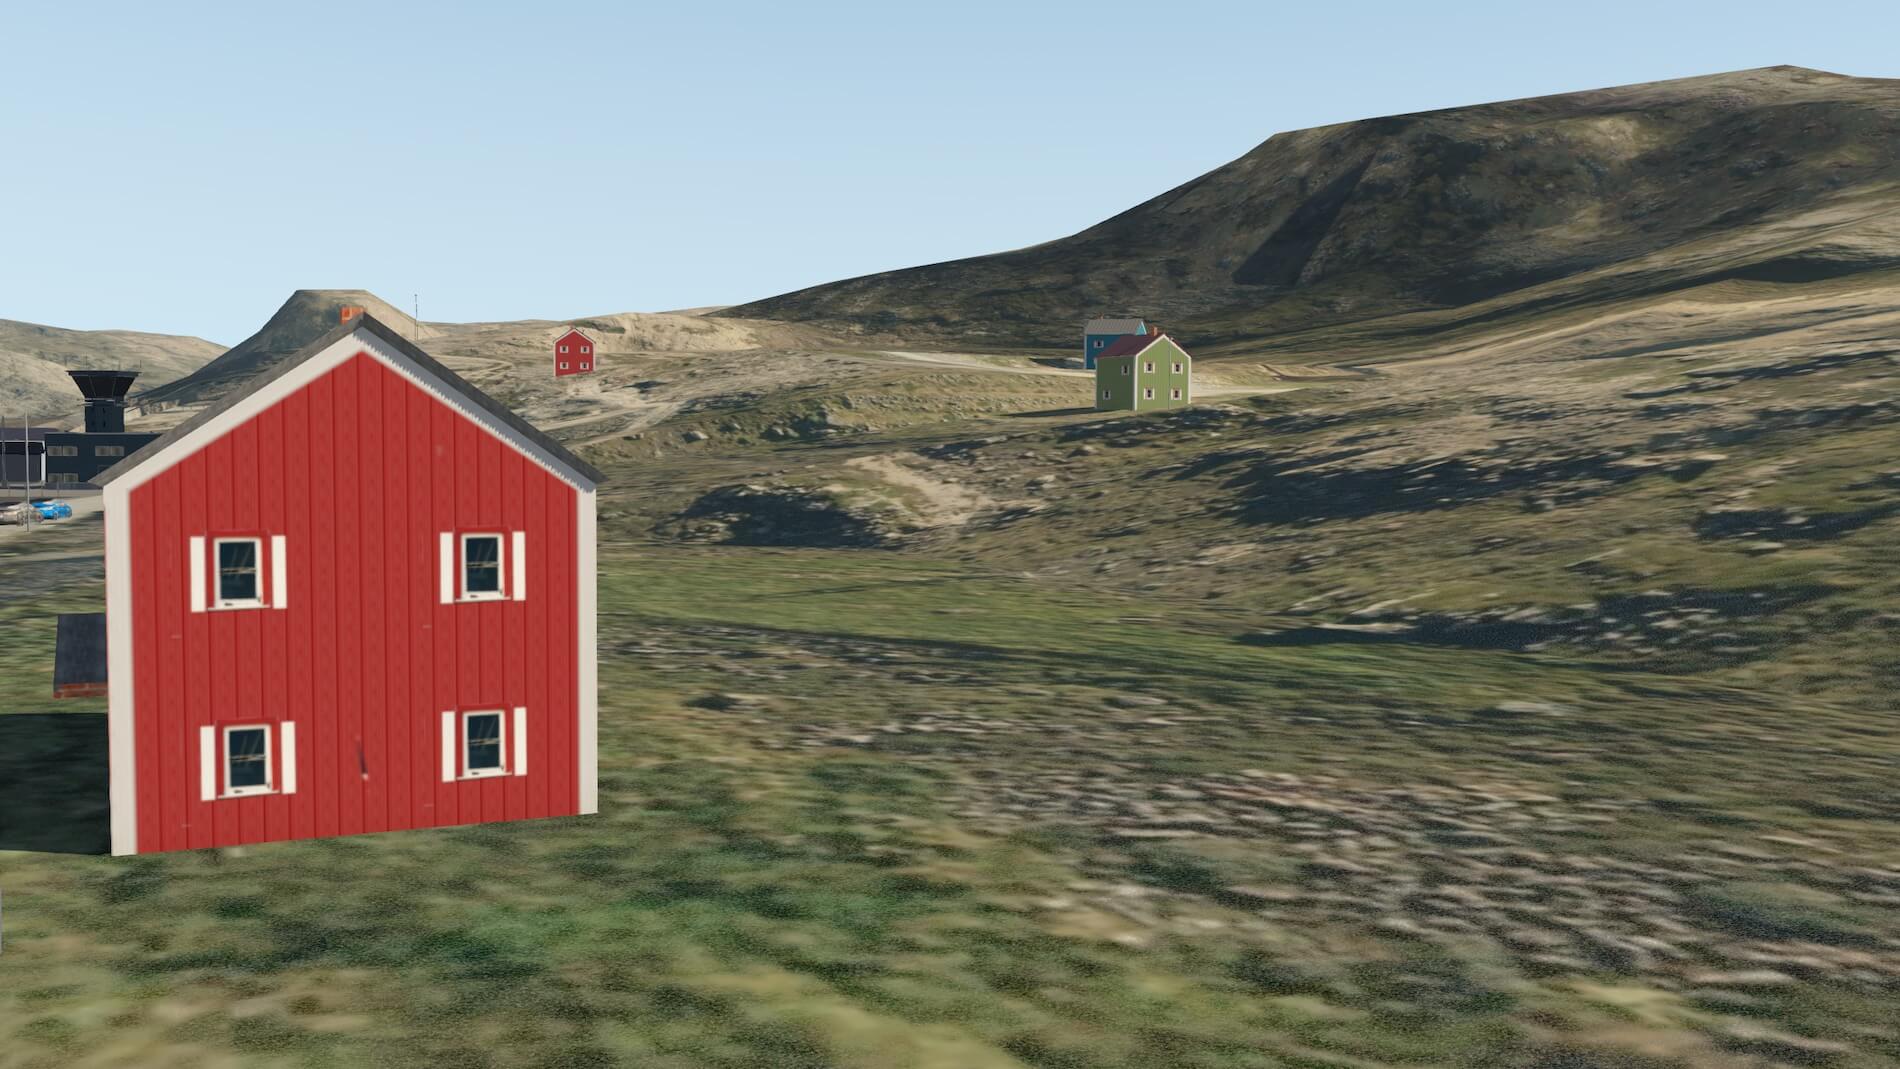
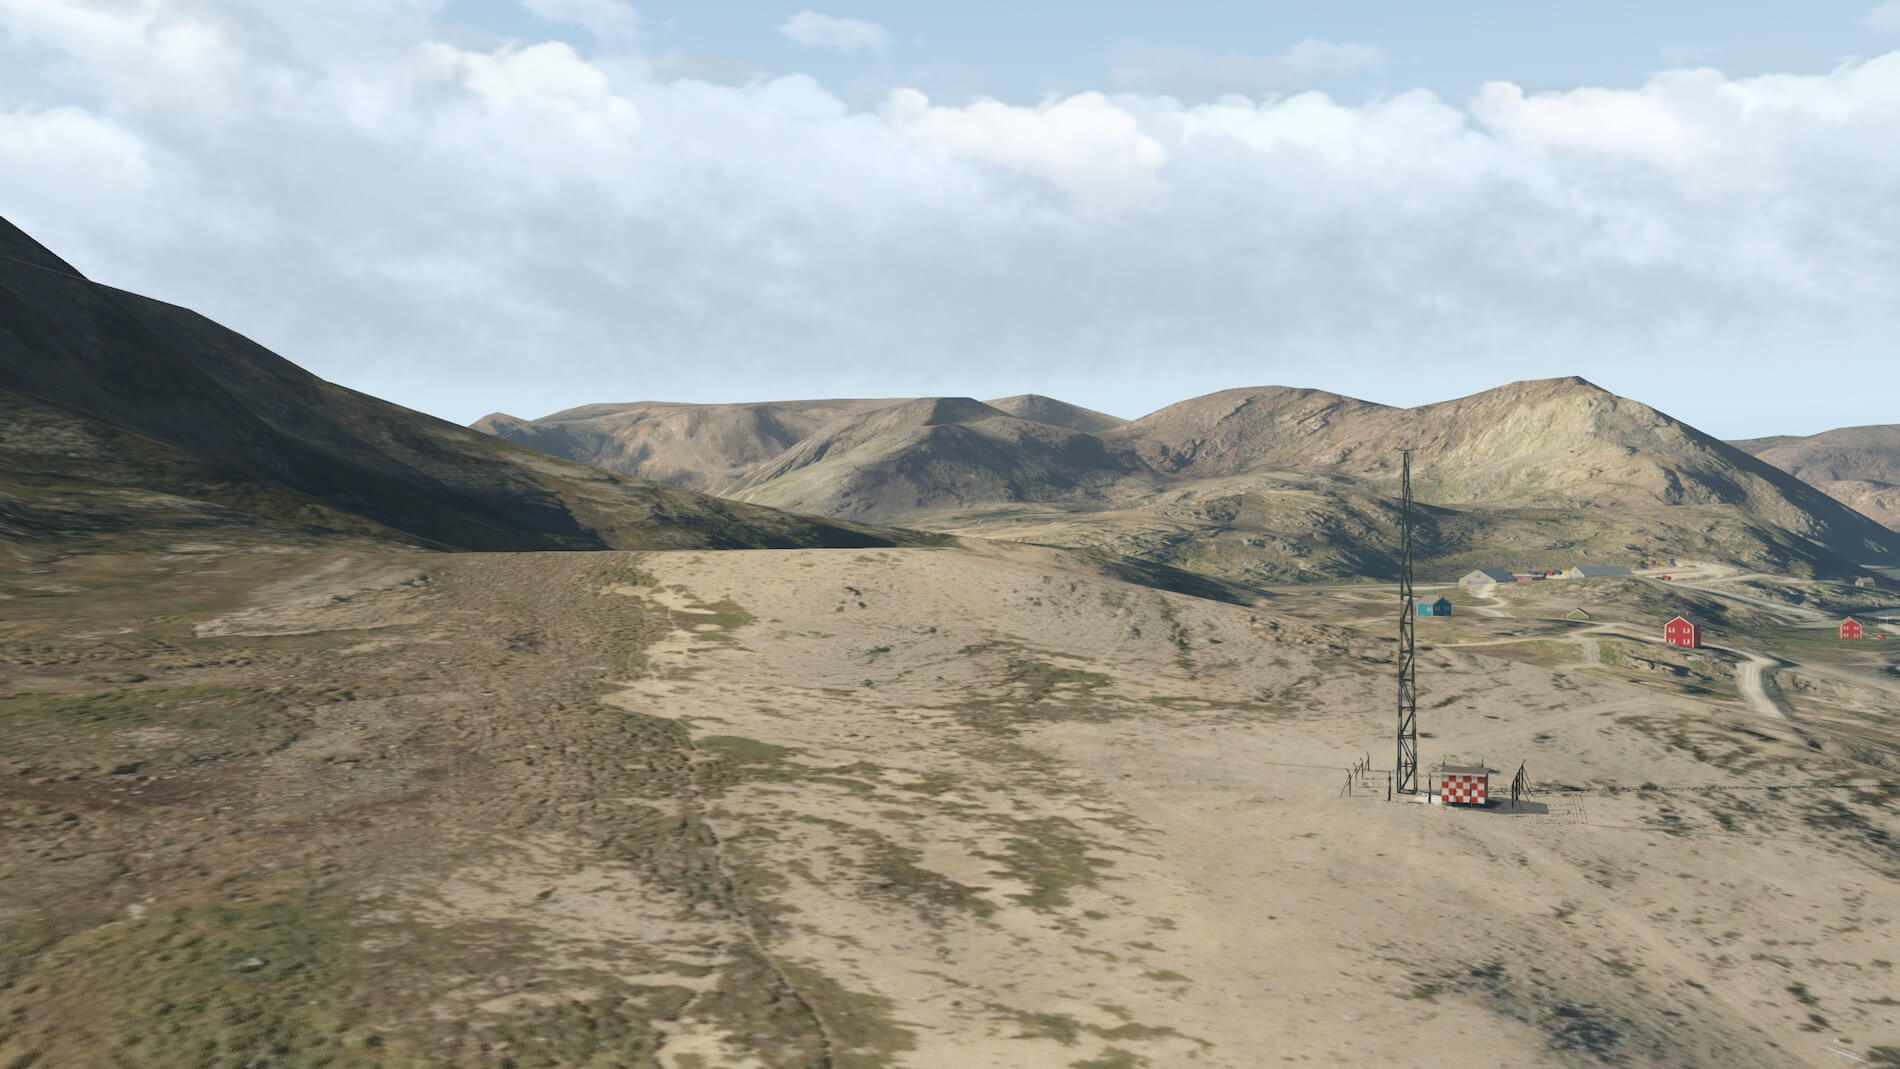
Just outside the fence you’ll find some typical Norwegian houses of which the red model nearby is very close to a real house I saw on photos. As you often see with airport sceneries and objects in the surrounding area, all houses near the airport and the ones included in Honningsvag community, are basically the same with some slight differences. That said, nearby the airport on the hills you find a red, oops another red model, a green and blue house.
This brings me for the moment at the end of my virtual airport walk. Time to take a taxi to the Honningsvag community. You’re ready too?
Second …. Community of Honningsvag
How and with what shall I start?
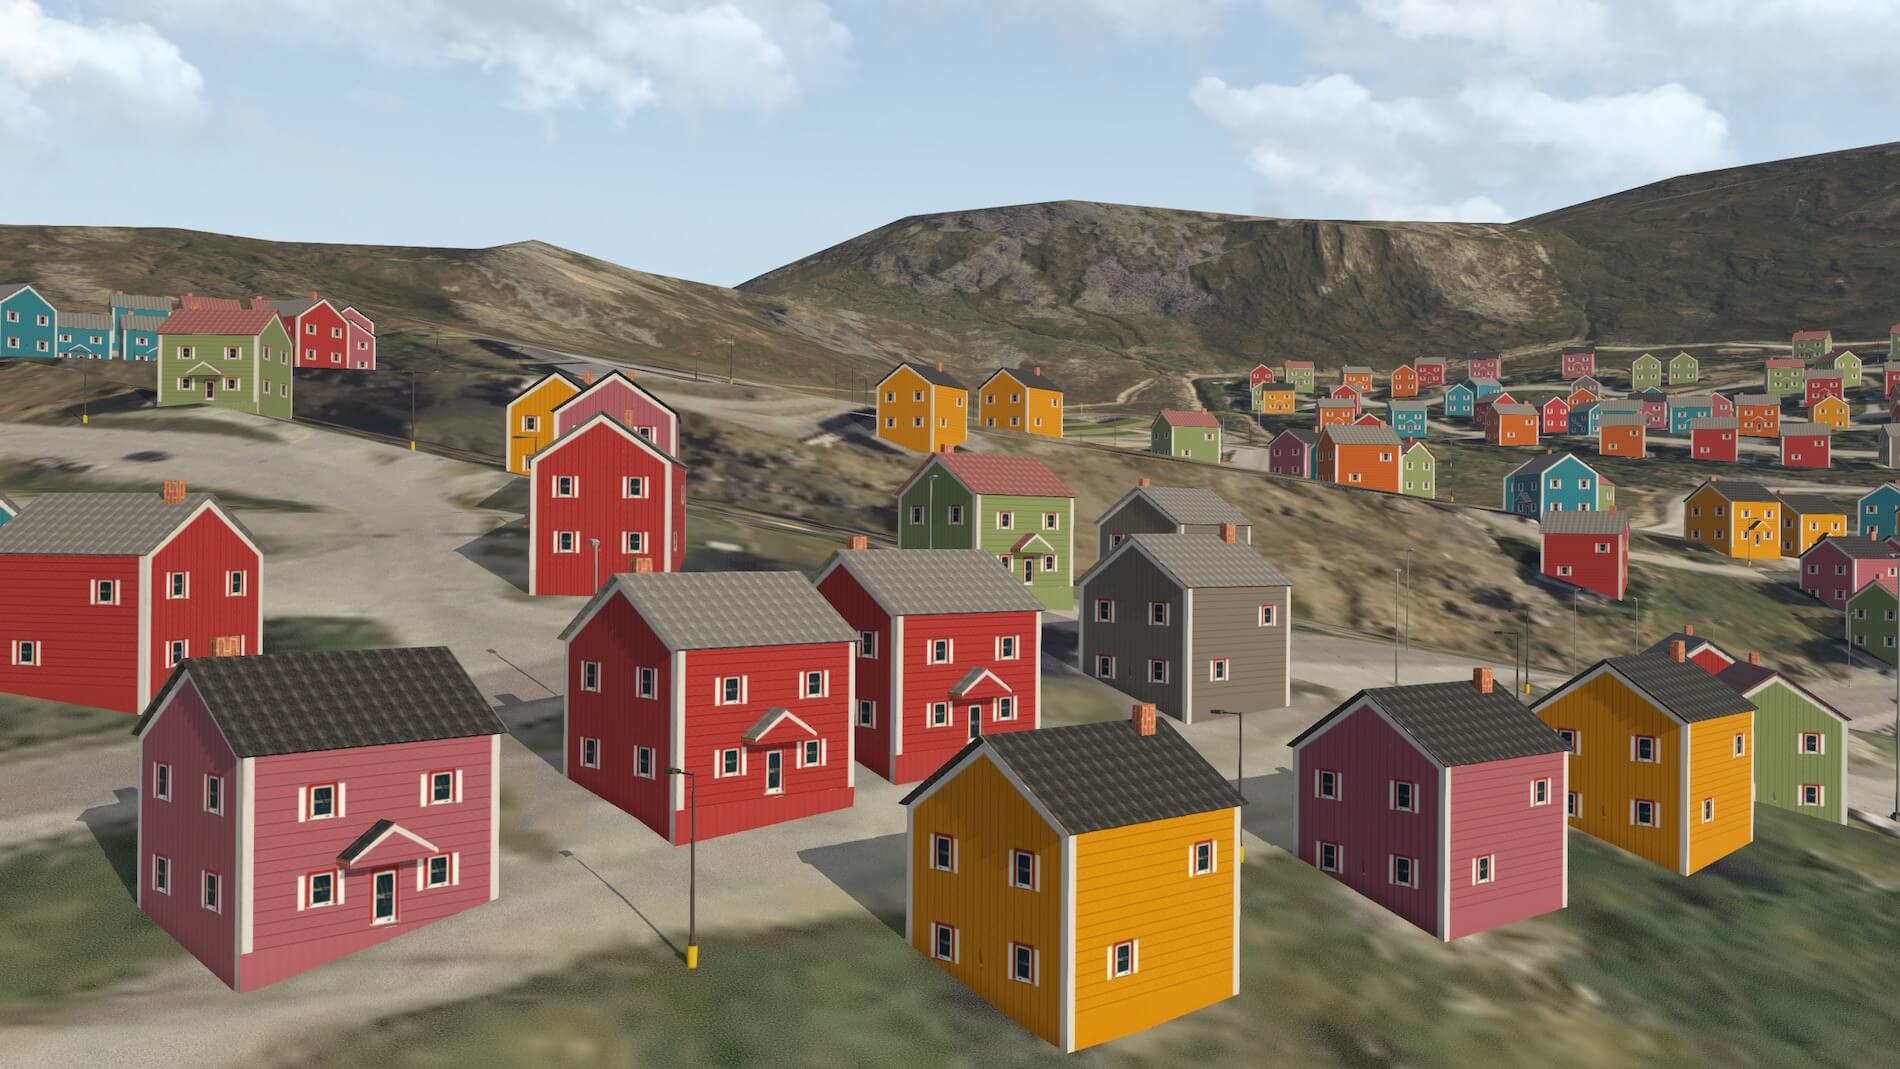
The addition of the communities, and that’s not only what you see on these screenshots is nice, but I think it was better not making too many of the same look alike houses, but that Honningsvag downtown was a bit more modeled versus the reality. On the following screenshot you will see what I mean. Downtown you see many white houses, the harbor, the piers, other kind of objects and so on.
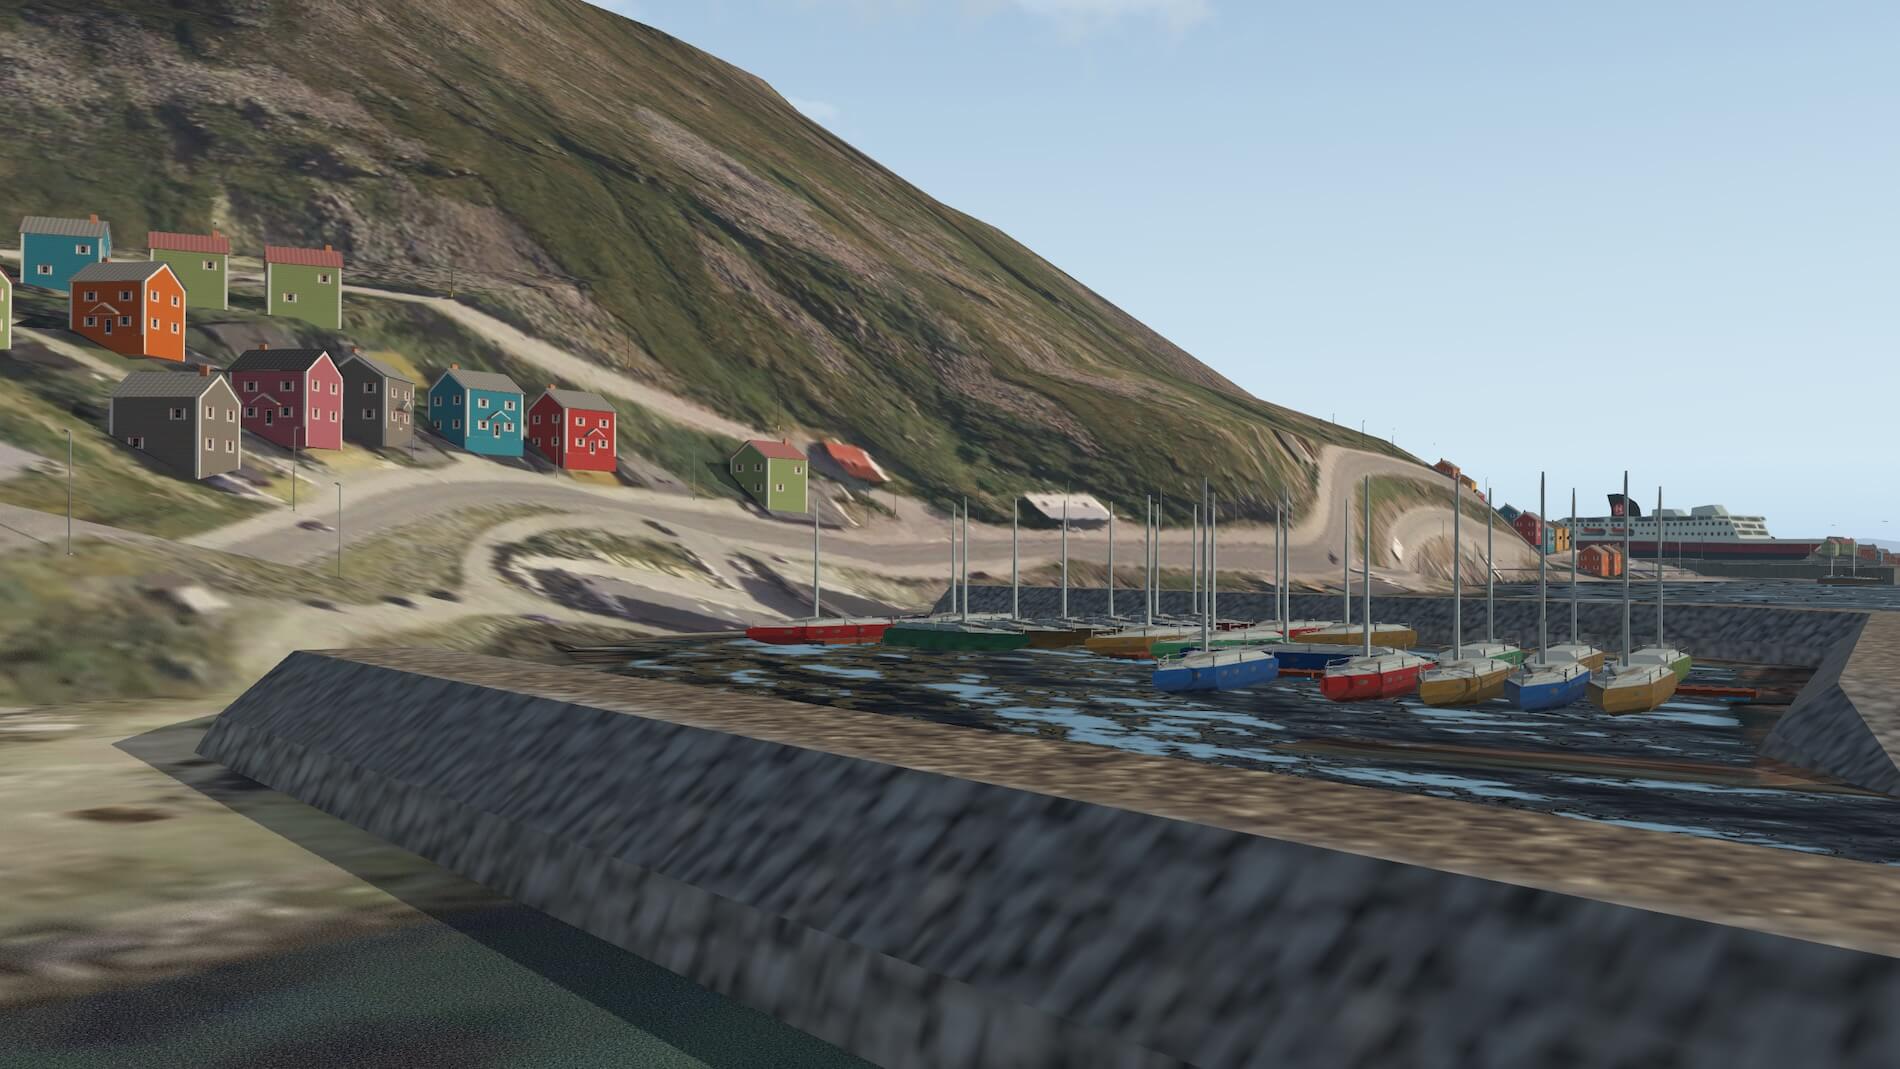
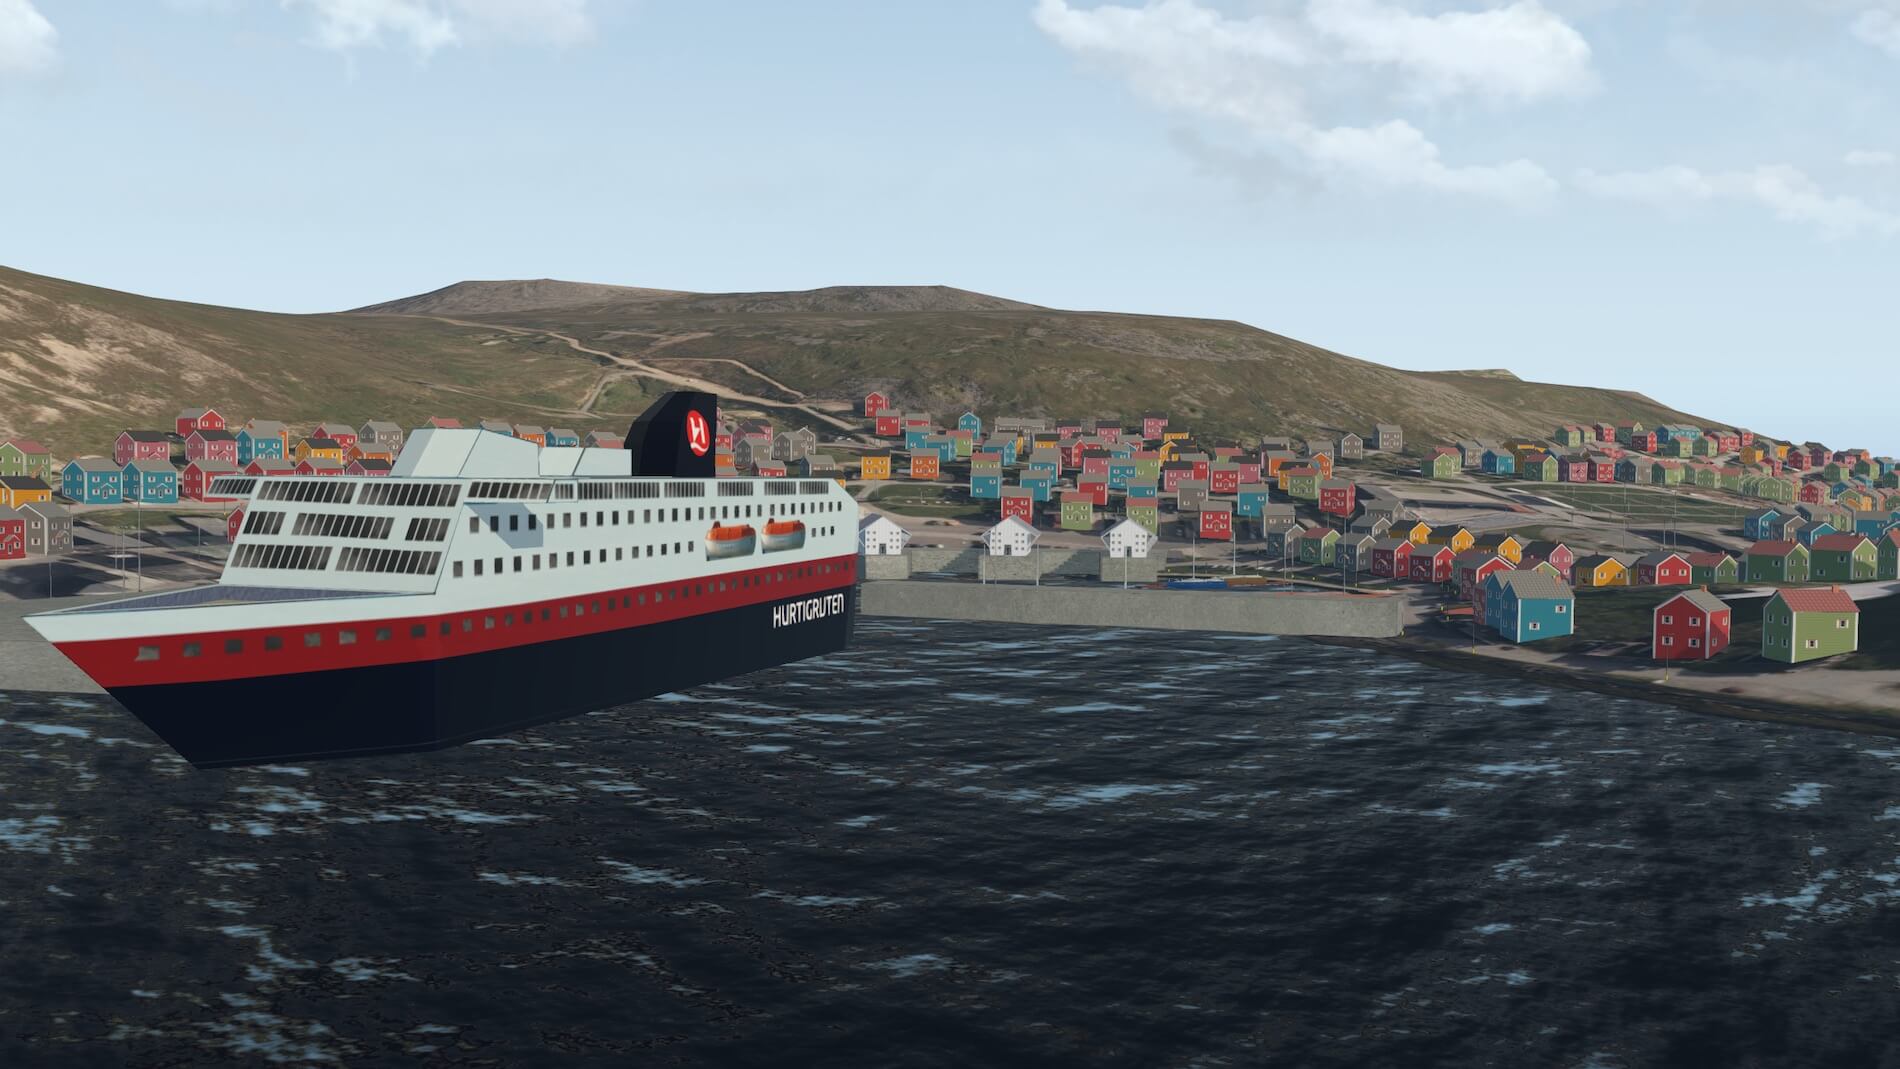
Some other objects are nicely modeled, but the ferry boat looks a bit “cartoonish”. The piers I see are not all well modeled. Either they are too big or not always well aligned with the main land or too massive. I understand that placing too many objects in the Honningsvag community cost you most likely frame rates, so yes, there should always be a balance between the real look and feel of downdown Honningsvag and what is modeled. But I think the comparison screenshot shows enough. I sincerely hope that HLS can or will update ENHV downtown even though that the overall price of HLS RNHV is only 14.99 USD so you can’t expect it all.
The coloured houses can be found on the way from the airport, down to Honningsvag downtown. While following this “road” I also noticed that some of the ortho road – remember there’s no overlay added to the package – along the mountain is a bit weird … it runs vertical instead of horizontal. Arriving downtown it may look nice at first, but since all houses are basically of the same model, it’s also a bit unrealistic and due to all the different colours they have, not as real as it gets.
Third ….. Ortho Textures Peninsula
There’s not really a need to show you how the peninsula looks like with default X-Plane ground textures. You know and have seen that and I can only say about that … it doesn’t look realistic at all. We all know that the only solution to get a realistic look of the ground is adding ortho textures. That’s why the HLS team decided to implement ortho textures to this package. Ho ho, hold on. Although it’s clear to me that ortho textures are a great addition versus the default ground textures, it’s perhaps for new simmers not always that clear, so therefore, please check out the following comparison screenshots. On the left of the screenshot you find the HLS ENHV package while the right-hand screenshot represents the default X-Plane 11 ground textures with gateway airport ENHV.
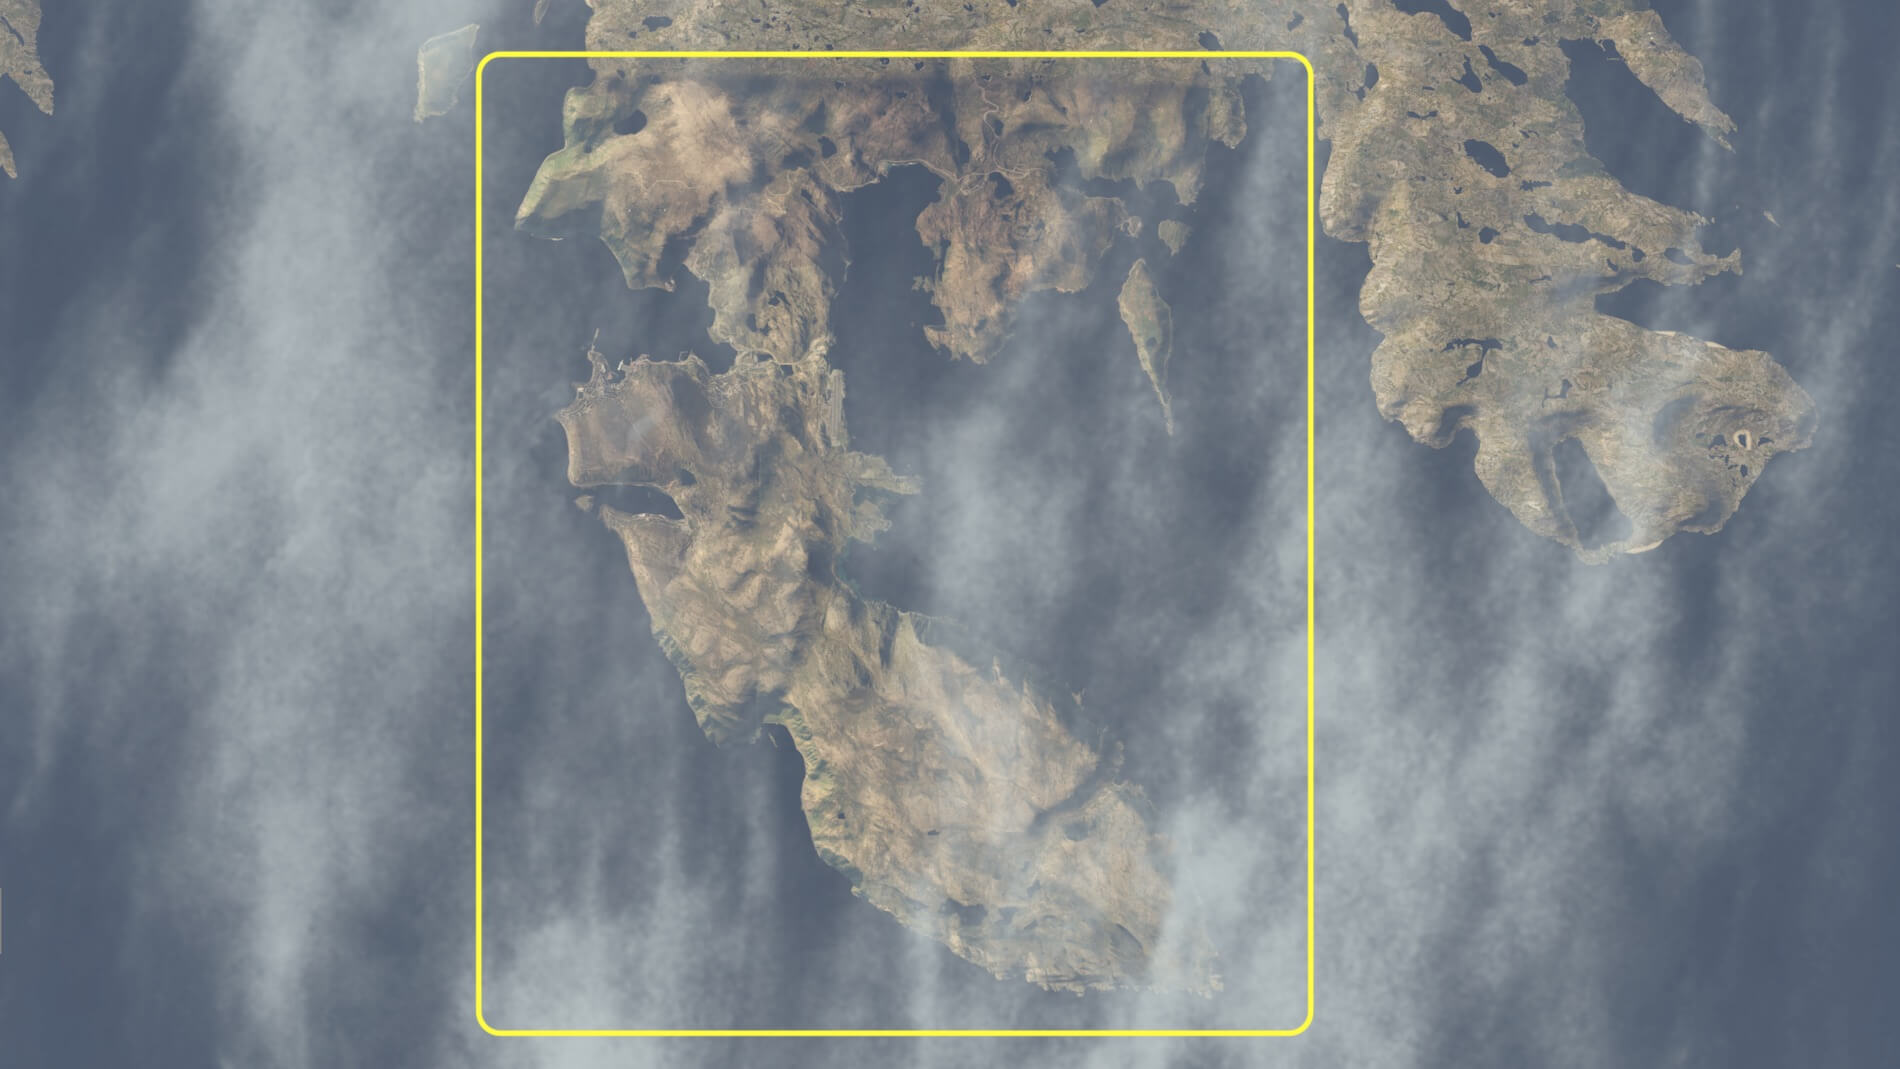
I don’t know yet the overall quality of the ortho textures, but I assume it’s ZL (Zoom Level) 16 which is quite common for ortho textures. ZL17 and higher means immediately much bigger files thus much bigger packages and not ideal to distribute. The following screenshot shows you the overall peninsula from the air – the area within the yellow square – that is covered with HLS ortho material included in the package. I contacted Hard Landing Studio for this and they told me that the ortho textures near or at the airport are ZL18 while the peninsula is ZL16. The reason to highlight this is that I find the peninsula texture quality a bit low although what I mentioned before, ZL16 is quite common is to be used for large areas like you can see and download from ZonesPhoto.
Actually, the Honningsvag Valan area as covered by HLS, is only a part of the large peninsula which is connected with a bridge to the main land. What previously said, the famous Nordkap is not on this part of the large peninsula. Neither less, it’s nice to have this area fully covered with ortho textures and yes, the disadvantage of this is that you only have Summer textures while during Winter it should be Wonder Winter land.
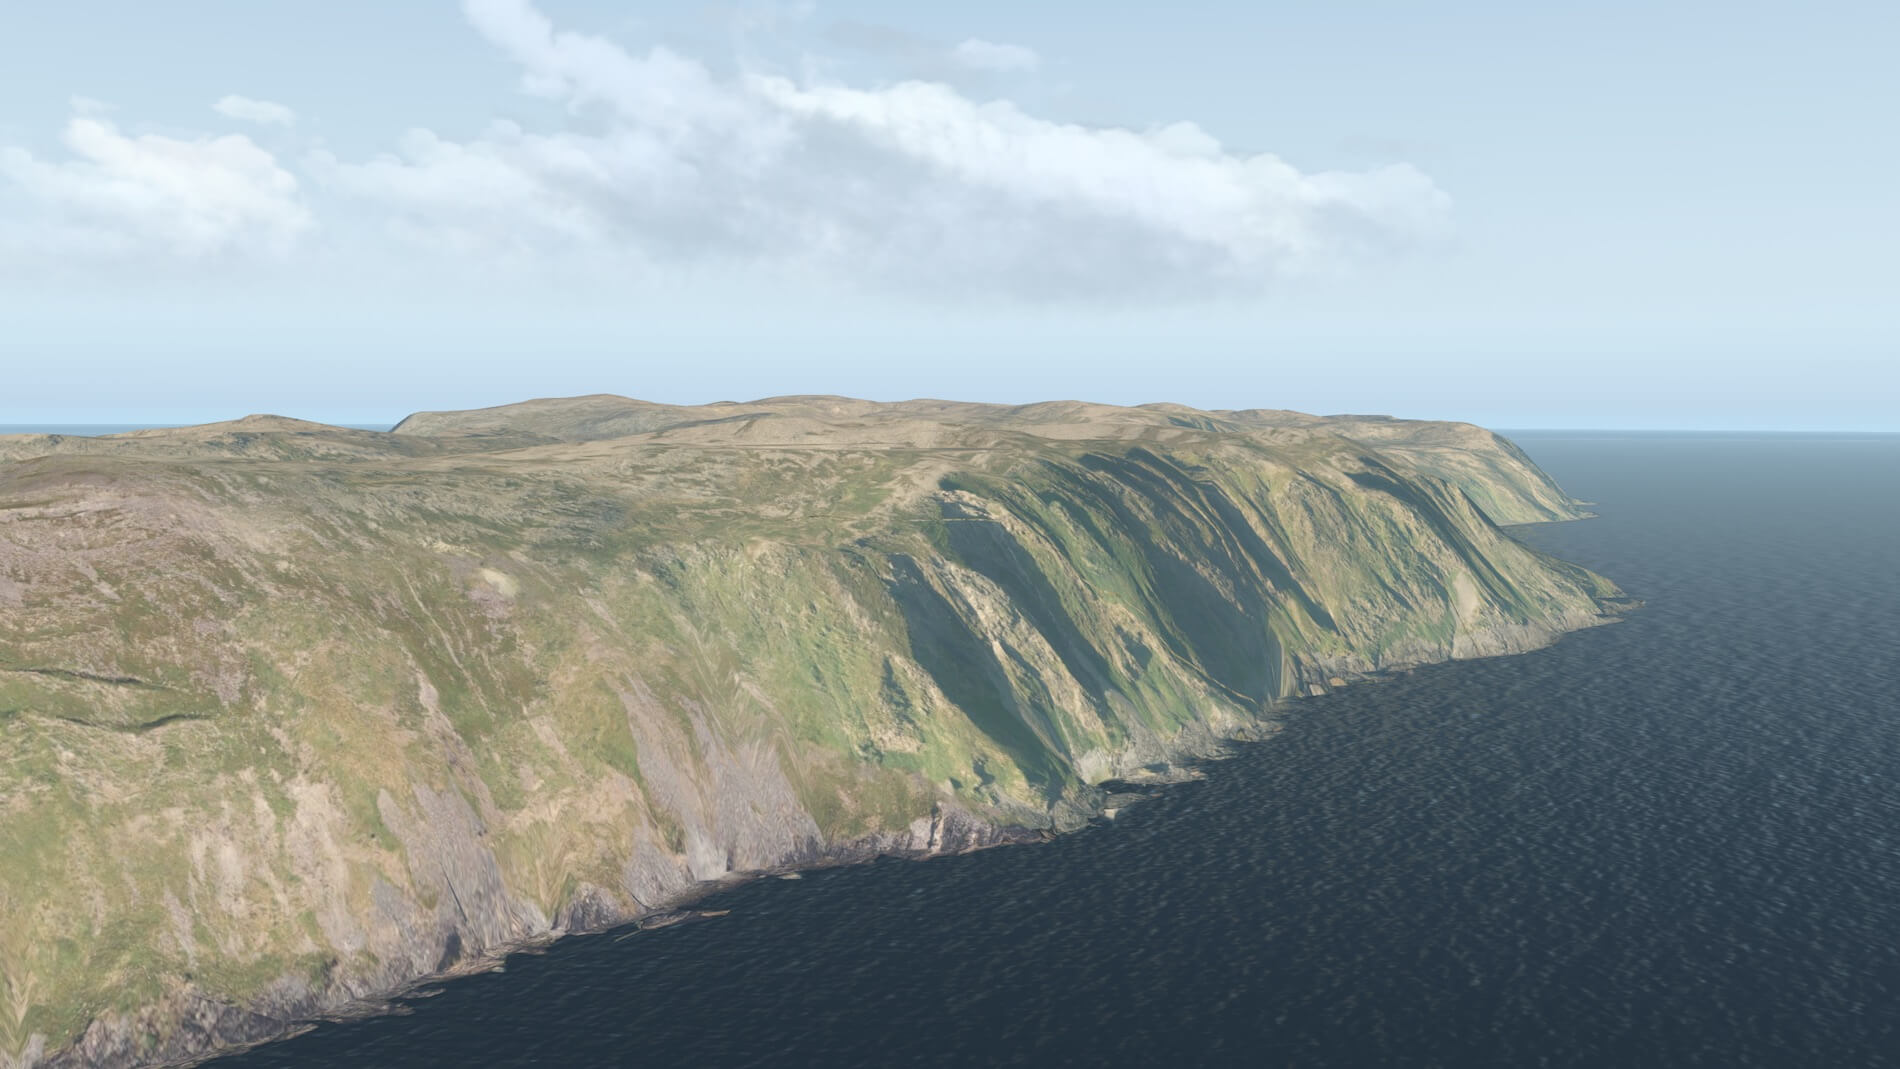
Anyway, I did a short flight around the peninsula and came up with the following screenshots. Now that I know that these ortho textures are of a ZL16 quality, I understand a bit why the Hard Landing Studio team haven’t chosen for ZL17 or even ZL18 ortho textures although ZL17 would have been possible too. And yes, I’m aware that the package size will be much bigger. Initially the Hard Landing Studio team wanted to offer a package that had a size of roughly 25GB which was a result of the intended higher ortho quality, but that was too big they found. Fully understandable!
Taburet MeshXP Norway
I wrote somewhere in the beginning of this review already what kind of product MeshXP Norway is as well as how to install it and what settings are needed. That you need to untick/deactivate “runway follow terrain contours” worried me a bit in the beginning since most add-on airports in the Norwegian region need this setting to be active. Of course, when you only have MeshXP Norway installed, and no Norwegian add-on airports that normally needs to have “runway follow terrain contours” ticked, then there’s no problem.
Then you can untick/deactivate this option, but when you have airports installed that need this being active like HLS ENHV, then you run into problems.The only reason to highlight this is to bring the “runway follow terrain contours” ticked or unticked issue to your attention. On the other hand, later in this section, you can read that I’ve seen with my own eyes that unticking this option is needed when no add-on airports are installed. When you leave it ON, runways are no longer flat!
But how does it look when installed and flying over Norway?
Keep in mind that MeshXP Norway version 2.0 isn’t a scenery, it isn’t ortho (photo realistic textures) material too. Actually, Taburet MeshXP Norway is a high-resolution mesh package for Norway and comes with a 5m resolution data. The MeshXP function is to add elevations points to the terrain to further increase precision (the look and feel of for example a mountain); shaping valleys and mountains as real as it gets.
In other words, it should look all much better then it was before, but what do I mean with this? The default X-Plane ground textures aren’t changed. That’s still the same when you have MeshXP Norway installed, but the underlaying shapes of mountains, valleys, cliffs and what else you can think of, will be much more accurate and gives for example the mountains a more realistic look and feel as how it is in real.
Time for a flight I would say …..
But first one word about the “runway follow terrain contours” setting in the X-Plane rendering menu. According to the Taburet manual this has to be deactivated or unticked. I mentioned previously that this causes problems with ENHV Honningsvag Valan, but while making many comparison screenshots all around Norway for this Taburet section, I saw the there’s absolutely a need to deactivate this option. For this section I started my screenshot sessions at the airports of Trondheim, Narvik, Hammerfest, Honningsvag and Solvear. In all cases I noticed that the runways followed the contours of the new MeshXP terrain which was not showing a realistic flat runway and yes, then I understood why it has to be deactivated.
Anyway, the following comparison screenshots speak for themselves. On the left-hand you see the modified landscape with MeshXP Norway from Taburet while the right-hand screenshot is showing you the X-Plane default mesh.
In case you wonder why you should buy Taburet MeshXP Norway versus keeping in your Custom Scenery folder AlpilotX UHD package that includes also UHD Norway, is as follows; the AlpilotX UHD comes with a resolution of 30m DEM while the MeshXP Norway is 5m, so a lot more accurate. Then you could ask yourself the question if it is worth to buy it since AlpilotX is free. That answer is based on the difference between 30m versus 5m accuracy simple, yes! Keeping that in mind and looking to the price, then the 19.99 USD is worth the price and the higher accuracy which in turn can be seen when you make comparison screenshots between MeshXP Norway and AlpilotX UHD.
Some additional comparison screenshots that shows you the effect of the MeshXP Norway overlay folder. What previously said, it depends a bit wehere you fly and therefore if you see the effect. Believe me, it works flawless and that’s why I made some additional Oslo and Hammerfest screenshots.
Summary
It took me a bit longer to give the review the “look and feel” I wanted. Reviewing an airport scenery isn’t difficult. It’s simple; what you see is what you get, but for a mesh package it is a bit different. It changes the mesh, ok, we know now what that means, and because the mesh is changed it changes the look and feel of how mountains, valleys, cliffs or whatever you can think of. That said, explaining a mesh product as the one from Taburet MeshXP Norway is much more difficult then just an airport or aircraft. By the way, I used for this review Hard Landing Studio ENHV version 1.0 and Taburet MeshXP Norway version 2.0.
At the end, I’m pleased I did it. Even with many years of reviewing experience I still face issues or problems that need to be solved. That said, while you read these summary lines I hope you enjoyed the reviewed products in the same way as I did. I enjoyed reviewing ENHV from Hard Landing Studio and keeping the price – as of this writing August 2019 14.99 USD – in mind, it’s a nice product although a couple of things need to be updated. That the developer had chosen for ortho textures and therefore not the possibility had to create a Winter landscape is up to the developer.
The modeled Hard Landing Studio Honningsvag community looks nice, but the real community looks in many ways different, in particular the houses. Here the developer has chosen for more or less the same type of houses, using different colours except white. On real photos is seems that the real Honningsvag has much more white coloured houses and red, green, orange, bluet and so on.
The other reviewed product is from Taburet with their “MeshXP Norway” that adds a 5 meter resolution to the complete Norwegian landscape. In August 2019 this mesh package cost 19.99 USD and since there’s no other competitive product on the market, so it’s worth what it offers. I mentioned this before, but I would like to highlight it again; it gives mountains, valleys, cliffs, the overall landscape a realistic look and feel by adding a much higher mesh resolution to Norway, but let me mentioned this once more, it doesn’t change the ground textures that gives the landscape their characteristic and realistic colours although the overlay package can and will influence that a bit by rearranging ground textures whenever applicable, but still using the default ground textures.
When you want to change the look of the landscape to something like “as real as it is”, you should/could go for ortho textures from ZonesPhoto, however, ZonesPhoto doesn’t cover the whole Norwegian country. When you really want this, you could make yourself ortho textures with Ortho4XP.
More information can be found at the dedicated X-Plane.Org store pages. Respectively for MeshXP Norway via this link and for HardLanding Studio via this URL.
Feel free to contact me if you’ve got additional questions related to this impression. You can reach me via email Angelique.van.Campen@gmail.com or to Angelique@X-Plained.com.
With Greetings,
Angelique van Campen
| Add-on: | Payware HLS ENHV and MeshXP Norway |
|---|---|
| Publisher | Developer: | X-Plane.Org | Hard Landing Studio | Taburet |
| Description: | Rendition of Honningsvag Valan and mesh Norway |
| Software Source / Size: | Download HLS | Taburet / Approximately 1.0GB | 2.55GB (unzipped) |
| Reviewed by: | Angelique van Campen |
| Published: | August 7th 2019 |
| Hardware specifications: | - iMac Pro - Intel 3GHz Intel Xeon W / 4.5Ghz - Radeon Pro Vega 64 16368 MB - 64 GB 2666 MHz DDR4 - 1 internal shared 1TB SSD (Big Sur 11.x) - 1 internal shared 1TB SSD (Bootcamp Windows 10) - 1 external 2TB LaCie Rugged Pro SSD (Big Sur 11.x) - Saitek Pro Flight System X-52 Pro and X-56 Rhino - Honeycomb Alpha Flight Controls - Honeycomb Bravo Throttle Quadrant |
| Software specifications: | - macOS Big Sur (10.15.x) - X-Plane 11.5x |
3 Comments
Submit a Comment
You must be logged in to post a comment.




















I just happen to be focusing on “building” up my Norway and Sweden areas. Pulling down the available orthos already available.
I enjoyed both this and Norway II reviews.
I would highly recommend for folks to download and install every one of these freeware airports. They give flying Norway a full flying experience.
https://www.google.com/maps/d/viewer?ll=65.74522878210058%2C20.967597810574944&z=5&mid=1654enW4xIxVqUdrMGHdAij4n-FY
I always enjoy your reviews. You are so adept at describing the various aspects of whatever you review. I just want to say one thing. It has noting to do with your amazing review, but a feeling I have about all scenery.
In XPlane 9 I was going to download a Airport from X-Plane’s many free airports done by a user. One comment in the mini reviews caught my eye. He said.. Nice modelling, but it looks cold and lonely…
I realized he was absolutely right. In fact the majority of scenery I have ever seen was well done, but it looked cold and lonely. Whenever I modify an airport now I always put some people in it. Either from Peep Library or 3d people library. Somehow.. just having an Air Marshal watching as I start up and prepare to leave makes me feel as if I am in a place that at least looks a bit like humans use it.
Hi Donald, I know what you mean and what you feel. It depends of course a bit which airport scenery dev it is, but in general you’re right. On the other hand we need to keep in mind that adding too many static objects or animated objects can and will reduce your frame rates. Neither less, sometimes even payware airports these days are lonely as you describe. This is for example also with Honningsvag but at the same time I add to this … it’s a very remote airport and hardly any flight come and go, so there it is more or less justified. You could with X-Life or WT3 add real aircraft/airliner movements to an airport which is good news but it could be also that for some simmers its’ too much and frame rates drops too much. In general, I know and feel sometimes exactly the same. Thank you for your thoughts and time to write this comment.